
Fine line tattoos dominate feeds right now but a lot of that fresh photo gloss does not last. The tiniest designs are the ones that either settle into a crisp signature or blur into an indistinct smudge, and where they land depends on placement, line weight, and whether you plan for touch-ups. Read the list below and you will get specific looks and what to ask for at the consultation so your mini holds up.
1. Salvador Dali Melting Watch on the Inner Wrist

Start with a realistic detail lead. The inner wrist is forgiving for a 1-2 inch micro-realism piece as long as the artist spaces the numerals and keeps contrast high. Tell your artist you want bold contrast between shadow and highlights so the small hands do not vanish after healing. Most mistakes here come from trying to cram too much tiny detail into a one-inch area. Expect a 45 to 75 minute session and plan for a touch-up at about year two if you wear watches or bracelets. For showing this off try a slim leather cord bracelet on the opposite wrist and roll shirt cuffs once to frame it.
2. Mini Spider Cluster on the Side Finger

Fair warning about finger placements. The skin there moves constantly which speeds fading and increases blowout risk. The spider cluster works best as slightly bolder single-needle outlines with tiny stipple shading rather than feather-thin hairlines. Ask for deeper line weight and avoid single-needle fine line if you want longevity. Session time is short, often under 30 minutes, but plan touch-ups at 12 to 18 months. Pair this with a thin matte ring men on a non-tattooed finger to balance the hand without crowding the design.
3. Intricate Cross with Decorative Flair on the Collarbone
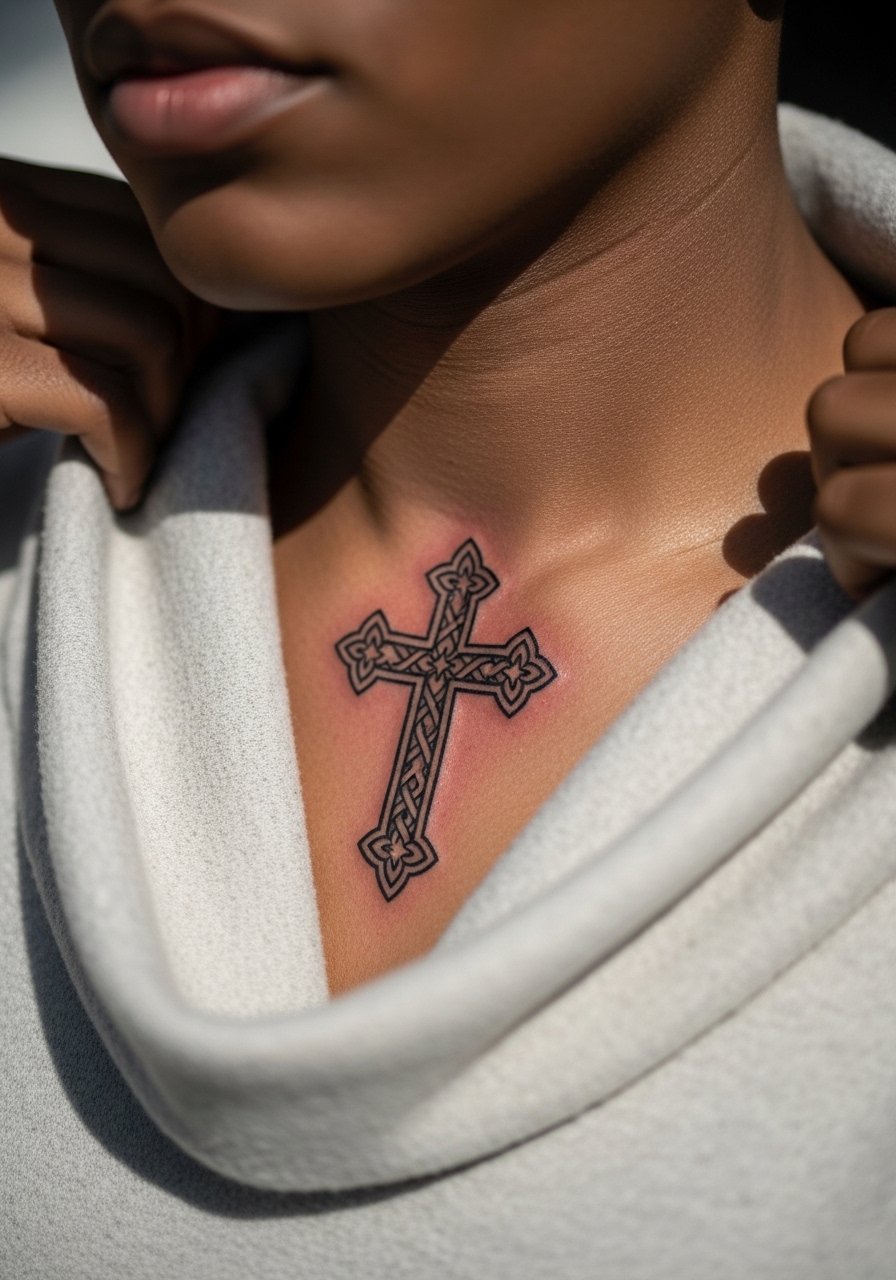
The collarbone lets ornate crosses sit where clothing choices frame them. I recommend selective color accents limited to small dots or a single halo to avoid saturation muddiness in tight elements. A common mistake is packing filigree too small. Ask for an increased negative space around the cross so details do not merge over time. This piece usually takes one to two sessions depending on shading. For show-off styling, an open collar henley or a v neck polo shirt frames the area without covering the lines. Mention career concerns if you work somewhere conservative.
4. Shaded Skull Outline on the Calf

There is a rugged payoff with tiny skulls on lower legs. The calf offers low friction so shading retains texture for years. The trick is to use confident blackwork outlines and soft gray fills rather than ultra-fine dot work that can soften into gray patches. Expect a 30 to 60 minute session and a touch-up only if you change footwear or have heavy abrasion. For summer styling, wear tailored athletic shorts or rolled joggers to keep the calf visible without overexposure to constant rubbing.
5. Abstract Star Formation on the Shoulder
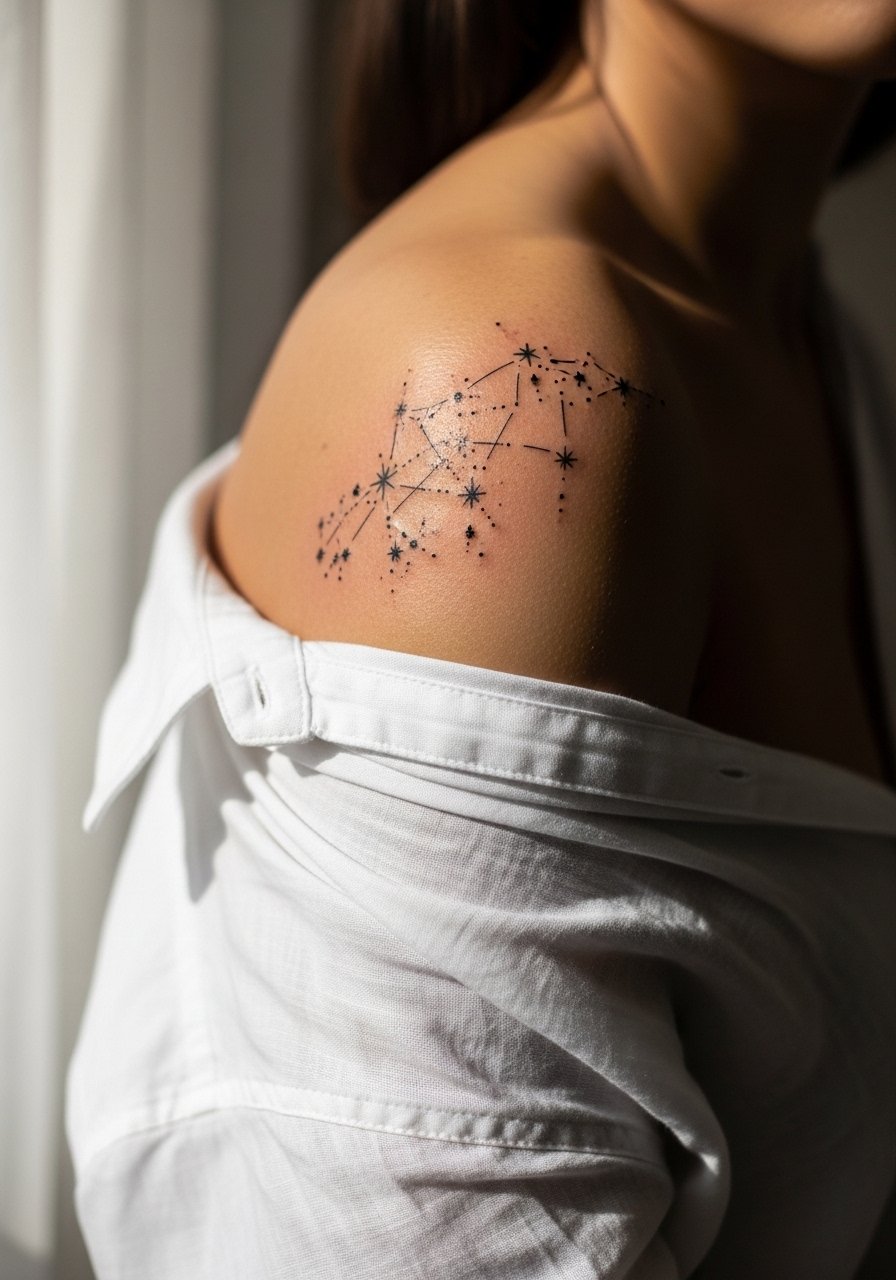
A shoulder cluster lets geometric exploration breathe. The shoulder tolerates slightly denser layouts than ribs or wrists because it moves less under thin shirts. When getting clustered stars, request spacing that gives each star a dot work or tiny halo rather than stacking them into one shape. Pain is low and sessions are short. To frame the shoulder try an olive green fitted tee with sleeves pushed up, which highlights the cluster without competing with the skin tone.
6. Cyber Sigilism Graphic on the Inner Forearm

Trend-versus-reality moment here. Cyber sigils look sharp small, and they function well as seed pieces for larger cyberpunk sleeves because their clean lines read even after some fading. Tell your artist you want a single-session piece with crisp linework and a slight glitch effect rather than blurred shading. Expect low to moderate pain and a session of 45 minutes. These tiny graphics can need touch-ups at year two if placed on the outer forearm where sun exposure is heavy. For casual display, pair this with a thin silver chain bracelet and push-up sleeves so the forearm sits visible.
Pack Smart
The wrist and inner forearm pieces above heal differently from larger work, so a few small items smooth out the session and the first week.
-
Stencil transfer paper kit. Lets you preview the linework on skin before committing, which is useful for micro-realism and sigil pieces in the earlier ideas.
-
Topical numbing cream. Applied about 30 to 45 minutes before can take the edge off wrist sensitivity while still letting the artist work accurately.
-
Thin protective film roll. Ideal for finger and ankle pieces that face constant friction and moisture during the first week.
-
Fragrance free gentle body wash. Cleanses healing areas without irritating fine line work or tight single-needle lines.
-
Aquaphor healing ointment. A thin layer can lock in moisture for tiny blackwork pieces without clogging the surface, especially useful for small wrist or finger pieces.
7. Minimalist Matchstick Flame on the Wrist
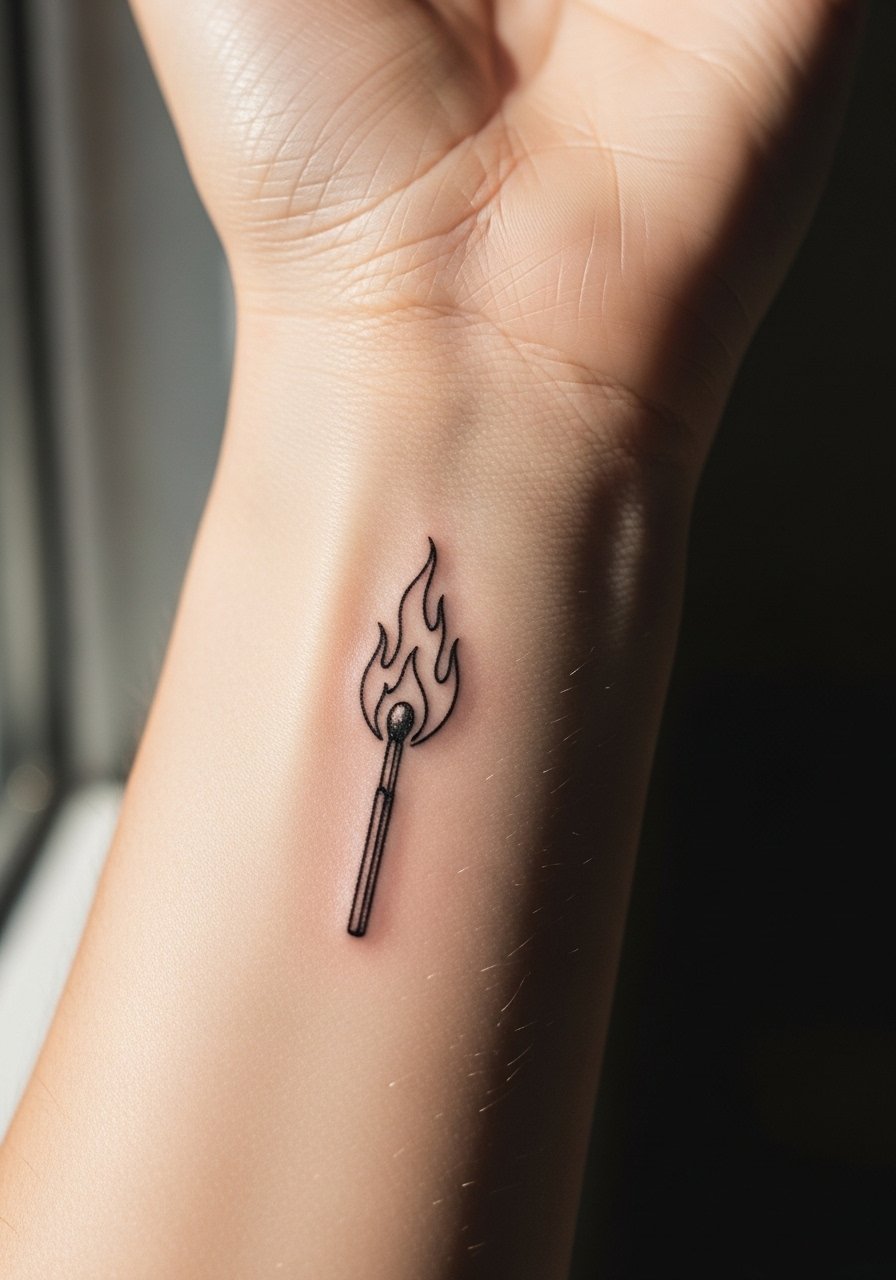
This tiny emblem hits a clear visual note and it is forgiving when kept simple. The wrist will show movement, so use a single confident outline and a tiny solid fill for the flame rather than feathered shading. The session is short and pain is low. A common mistake is requesting ornate shading in a 0.75 inch space which then softens into a dark blob. For the appointment, wear a minimalist leather bracelet on the opposite wrist to create balance and remove wrist accessories from the tattooed side during the session.
8. Mini Face Portrait at the Fingertip
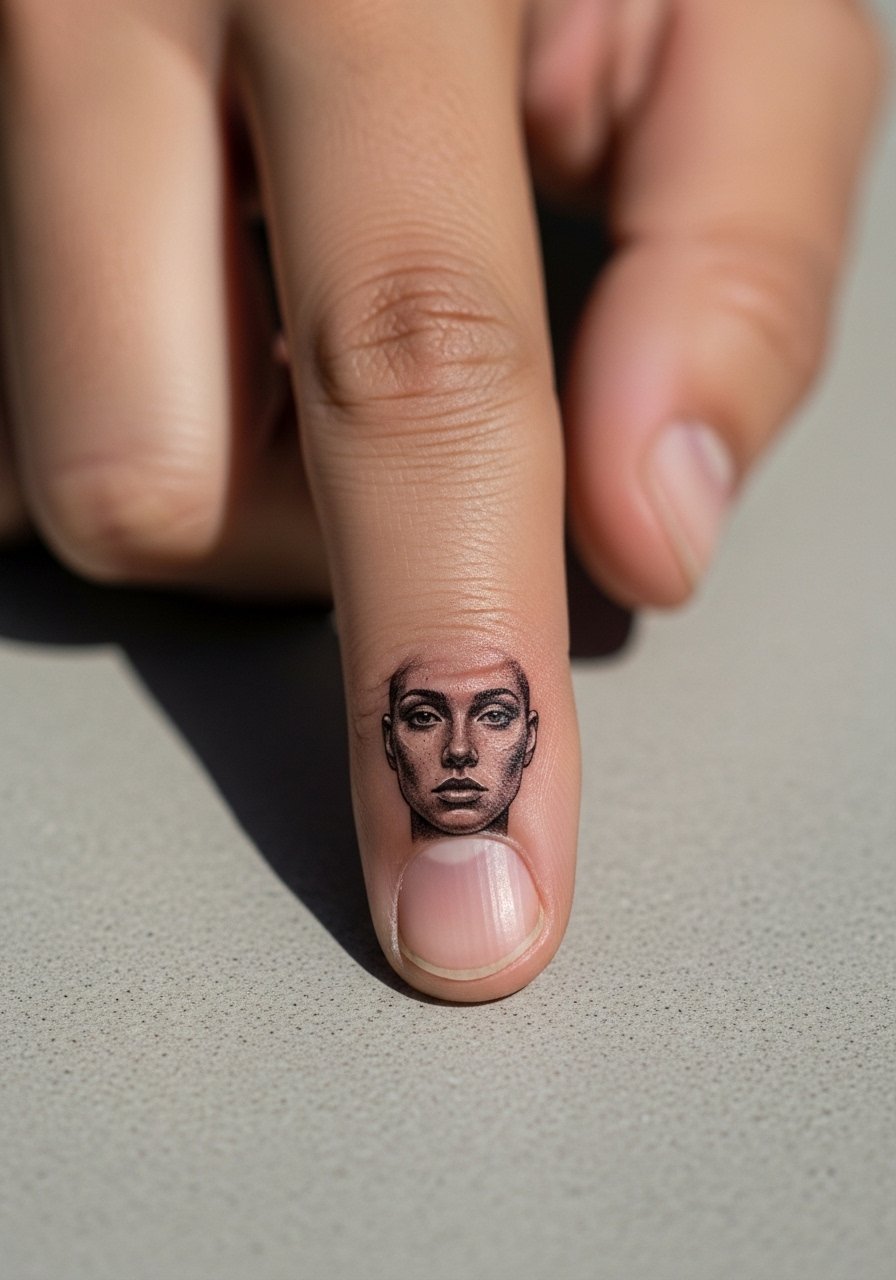
Tiny portraits at the fingertip are a niche that reads as little jokes or personal nods. Be honest with the artist about expectations. Micro faces this small require an artist who shows healed micro-realism in portfolios. The common failure is using too much detail in too little space. Expect a fast but very precise session and likely a follow-up touch-up because fingertips take ink differently. For styling, keep rings minimal and use a stackable thin ring on an adjacent finger so the portrait remains focal.
9. Twinkling Star Cluster Around the Ankle
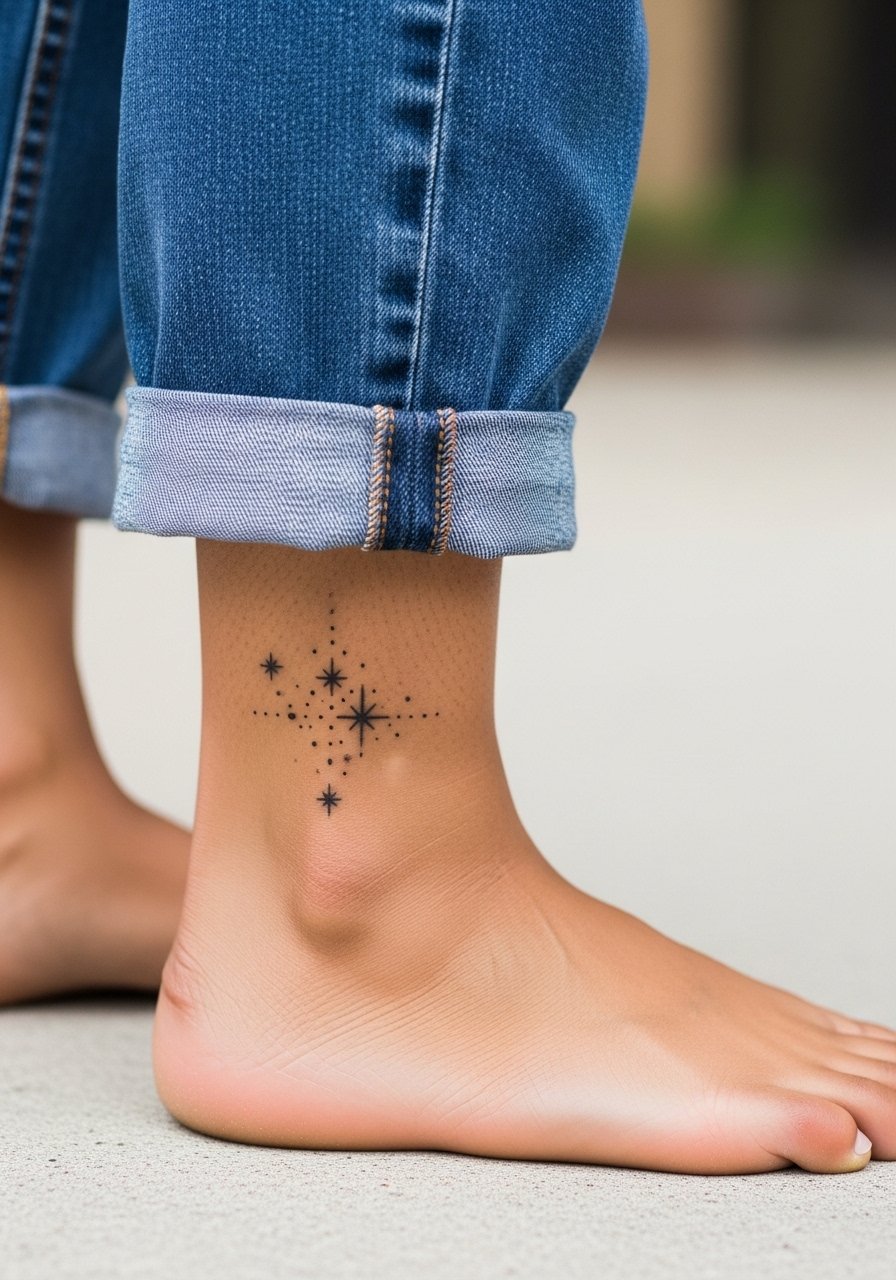
Ankles are great for tiny constellation-style clusters because they avoid the constant sun exposure of forearms. When adding twinkles, ask the artist for varied dot sizes and tiny contrast points so the pattern keeps dimension as it heals. A common mistake is placing stars too close to socks lines which can abrade fresh ink. For summer show-off, try cuffed slim chinos and low crew socks. Link the look with cuffed slim chinos to frame the ankle tattoo without covering it.
10. Small Heart Outline on the Inner Bicep
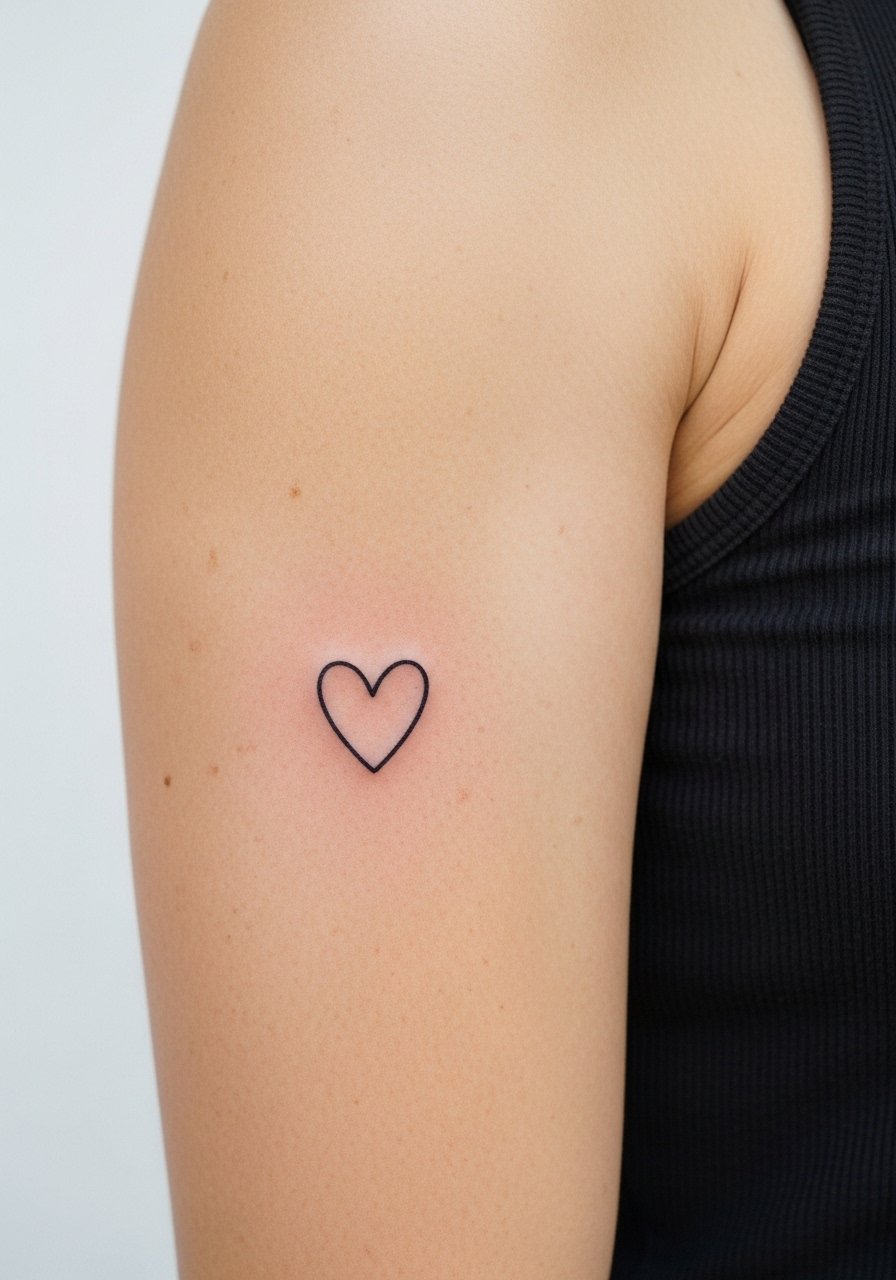
Inner biceps hide tiny pieces well when you want privacy. The heart outline works here with simple clean linework and a little negative space so it keeps form while the arm flexes. Pain is moderate when the arm is pressed against the chair. Tell the artist you want slightly stronger line weight to compensate for skin stretch. Session time is short and a touch-up is often unnecessary unless the piece is overly fine. For the session, wear a loose tank top so the artist can access the area without rubbing fabric against the fresh ink.
11. Small Dog Paw Print on the Forearm

Pet memorials are common and the paw print is a compact way to keep a pet close. For longevity, opt for a slightly bolder outline and a tiny dot of shadow rather than single-needle hairlines that fade on active skin. Mention to your artist you want a clear negative space between pads so the print reads after six months. Most sessions are quick and need little touch-up if done with confident linework. Pair the piece with a thin silver chain bracelet on the opposite wrist for subtle symmetry.
12. Small Mandala Core on the Shoulder Cap
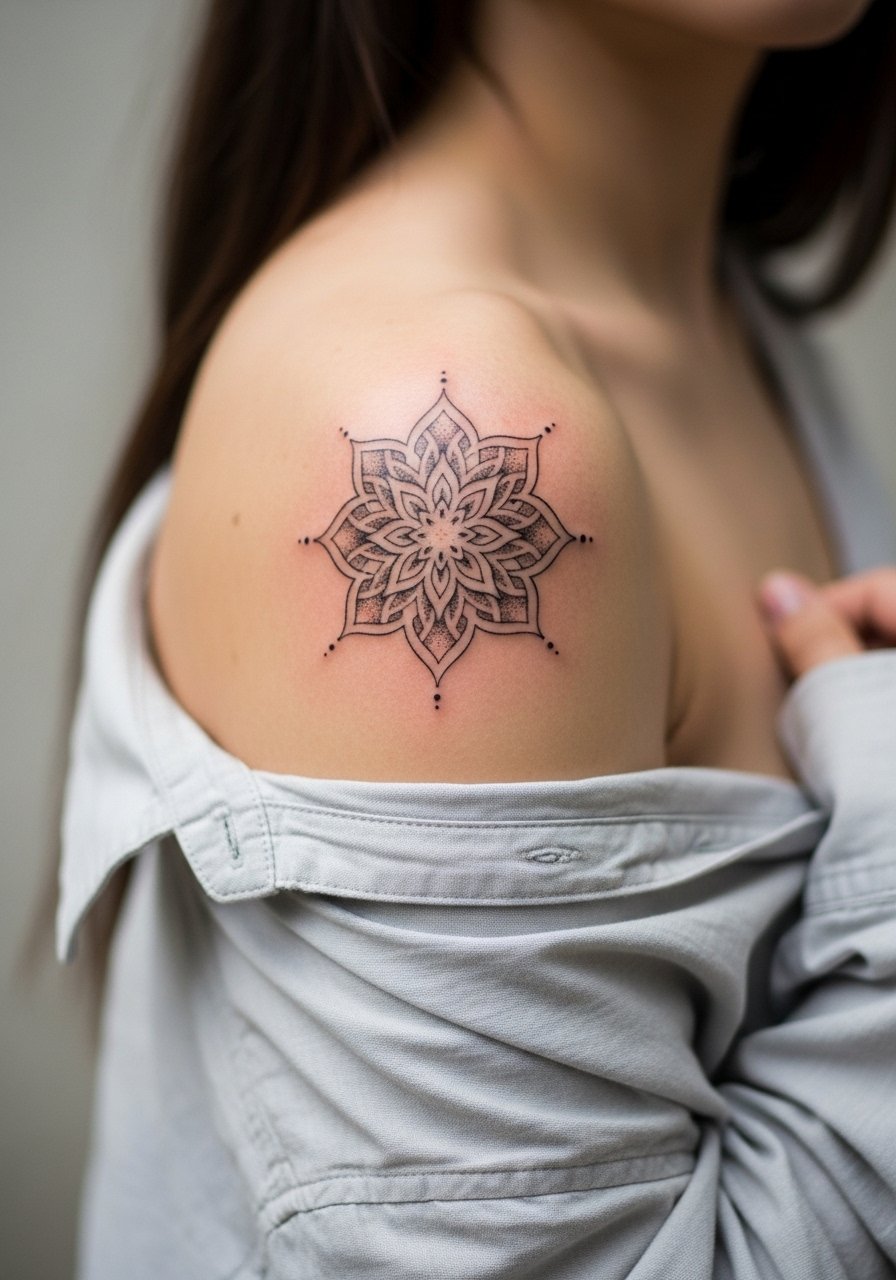
Mandala cores are popular as sleeve starters and for good reason. The controversy here is explicit. One camp says dense mandala detail too small will blur on the ribs and inner wrist. The other camp argues that when spaced correctly and executed with stipple shading it can settle well on shoulders and upper arms. For a small shoulder mandala ask for increased spacing between petals and ask specifically for stipple shading rather than heavy color fills. This placement handles detail better than ribs and usually needs only one touch-up session. If you want a wardrobe pairing, an open collar henley frames the symmetry without hiding it.
13. Anime Character Snippet on the Calf
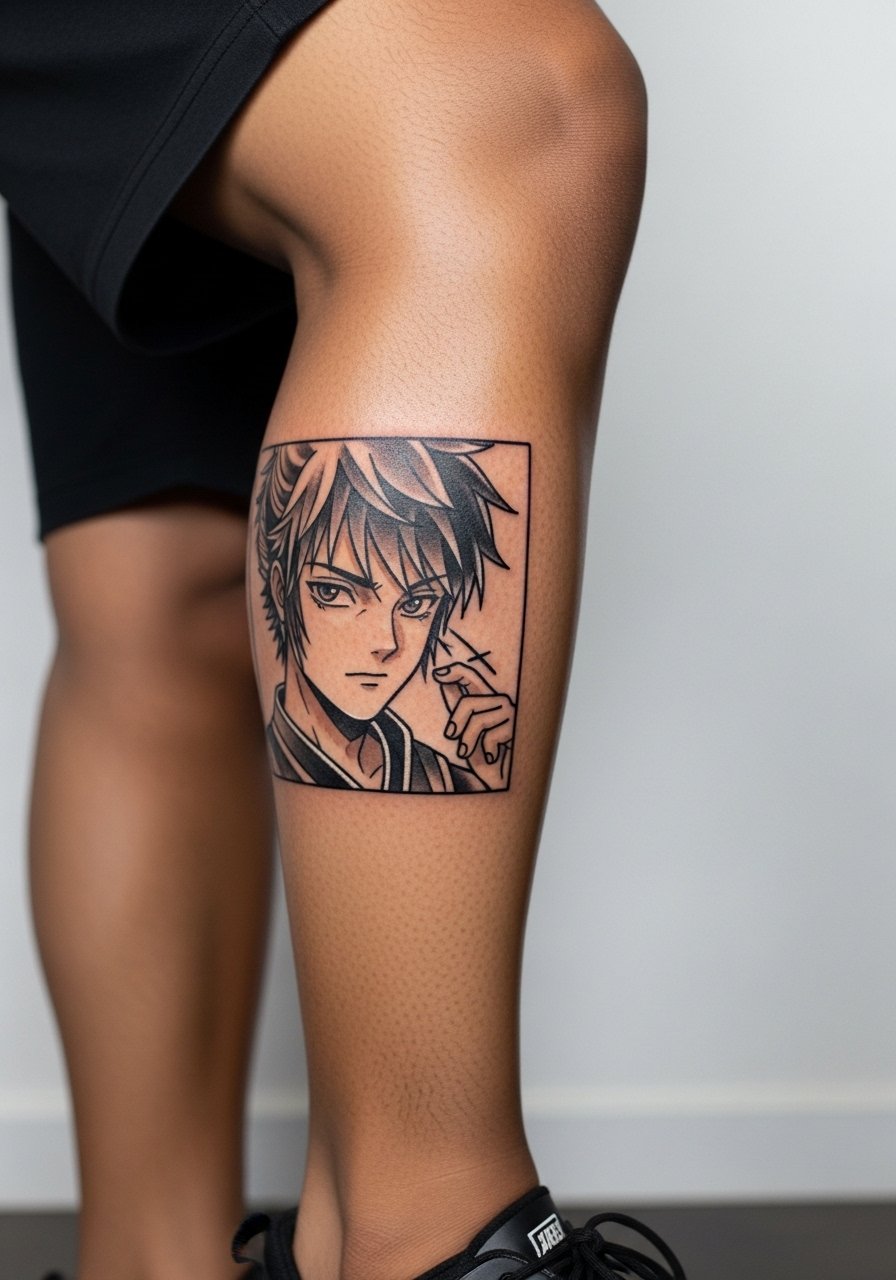
Anime snippets translate well to the calf where there is room for small facial detail and dynamic lines. Choose black and gray if you want longer longevity because full color on micro elements can muddy. The biggest mistake is shrinking a complex character into an illegible badge. Ask your artist to simplify facial lines and retain signature shapes. Sessions vary from 45 minutes to an hour depending on saturation. To display this in warm months, pair with solid color sneakers and tailored shorts to keep attention on the scene.
14. Tiny Compass at the Wrist
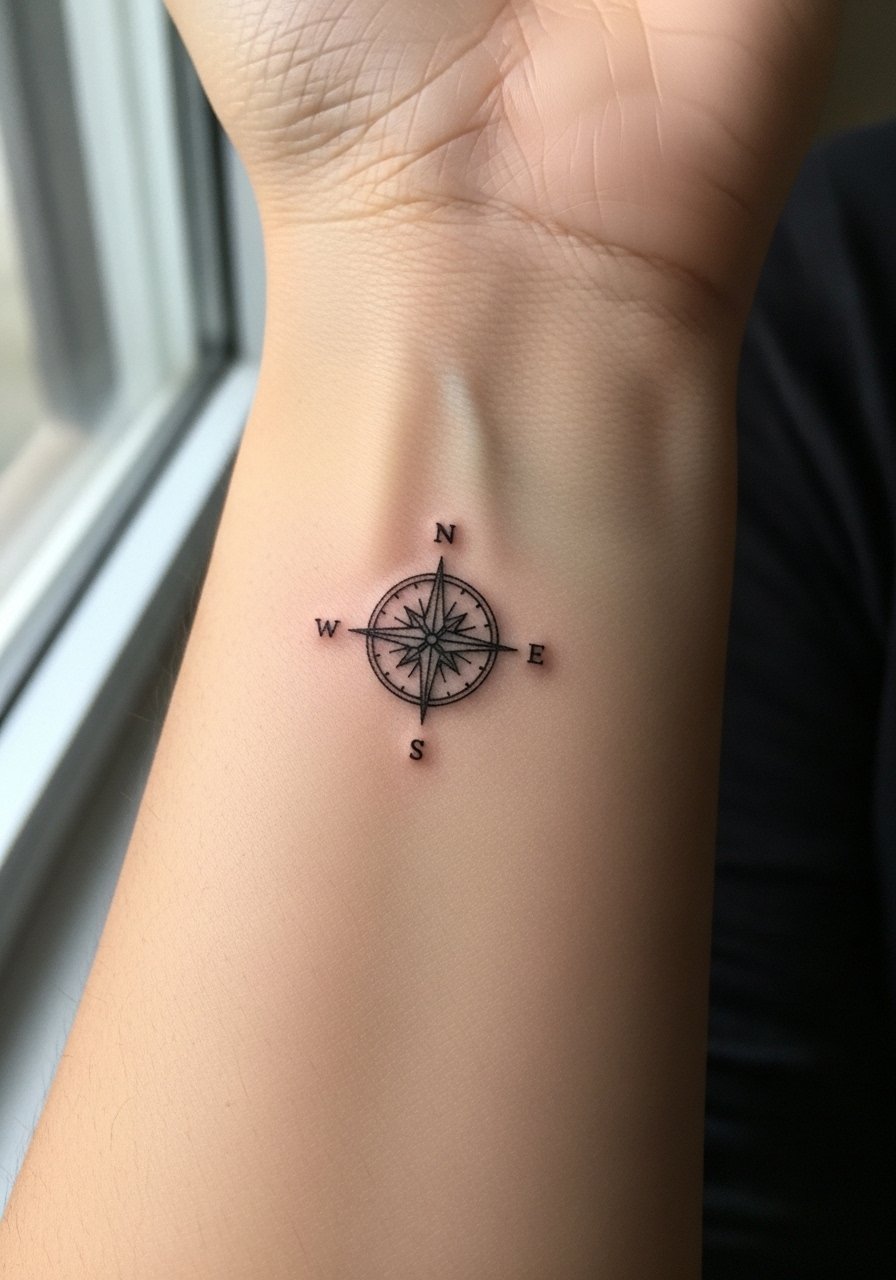
Compasses are crisp little symbols for travel or direction. Keep the cardinal points subtle and avoid excess tiny arrows which lose clarity. A clean circle with four stronger markers reads best at 1 inch. Mention to the artist you want slightly heavier linework on the outer rim to prevent early blurring. Sessions are quick and pain is mild. For a casual outfit pairing try a minimalist leather bracelet on the opposite wrist to balance the look.
15. Tiny Lock and Key Behind the Ear
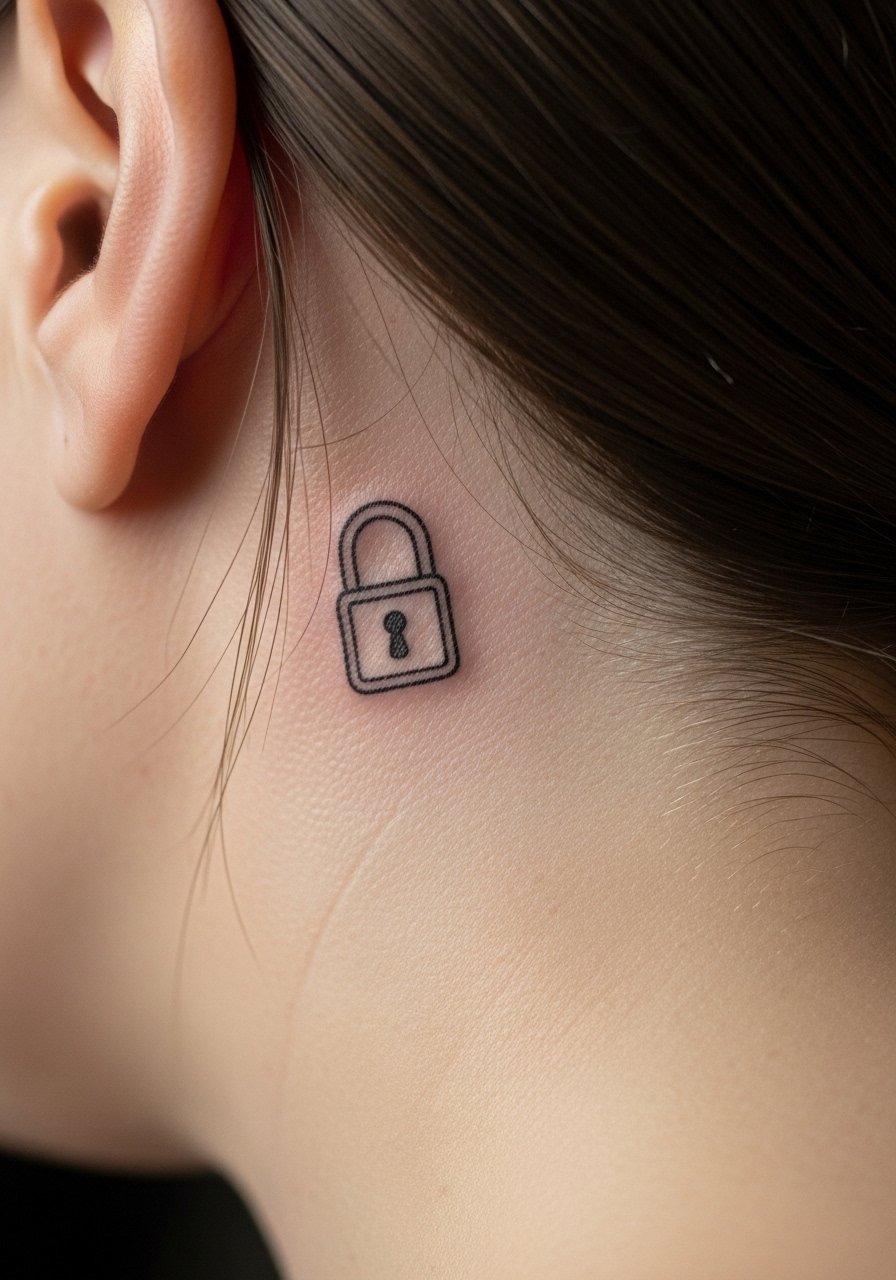
Behind the ear pieces need cautious planning. The skin is thin and the spot demands an artist experienced with micro placements. A lock symbol should be simplified to bold silhouettes with minimal interior detail. The session feels quick but the area is sensitive. Note that behind the ear still requires discreet placement and in some workplaces it may show when hair is tucked. The piece pairs with minimal hairstyles and is best previewed with a temporary stencil.
16. Micro Mountain Range on the Forearm
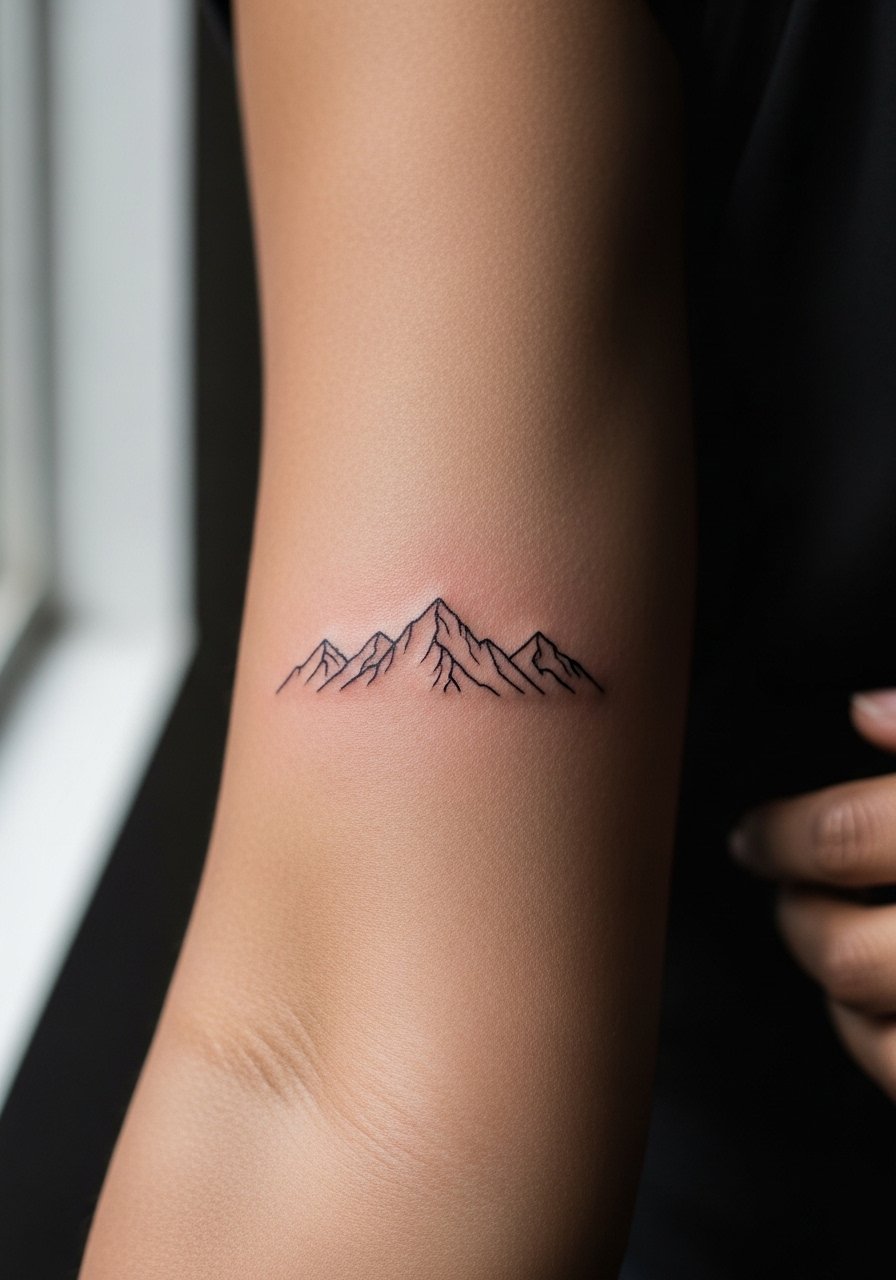
Mountains in a tiny band work well along the forearm because the long shape follows muscle lines. Tell your artist you want a simplified silhouette, not intricate ridge detail, so the horizon remains legible after a year. Sessions are short and pain is low. A common error is asking for too many peaks. For casual styling, roll sleeves or wear an olive green fitted tee to help the design look intentional rather than accidental.
17. Tiny Wave on the Wrist

A single-line wave is a good first tattoo because its form reads well small and holds up when kept bold. Ask the artist for one to two millimeters of extra line weight instead of feather-thin strokes so the curl retains shape as it heals. Expect a 30 minute session. A common mistake is adding tiny water droplets that disappear. For display, try a minimalist leather bracelet on the opposing wrist so the wrists do not compete visually.
18. Barcode or Coordinates on the Side of the Neck
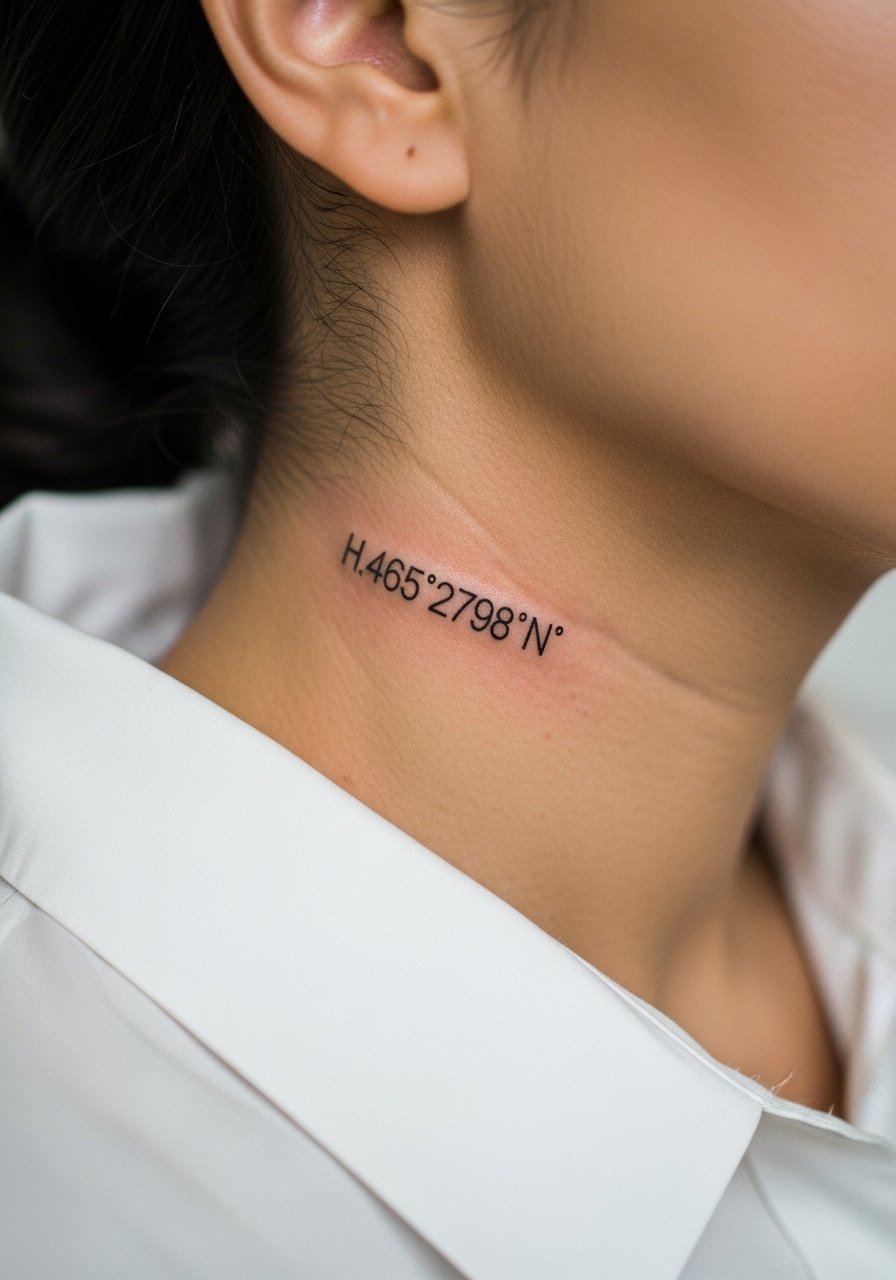
Neck pieces are visible and have career implications. Barcodes or discrete coordinates read as crisp black lines when spaced properly. The main mistake is packing digits too tight which leads to smudging. The session feels more intense due to proximity to bone. Ask for bolder linework and expect touch-ups at two to three years if regularly exposed. For a subtle look, wear a wide-neck shirt to show or hide the area as needed.
19. Single Tiny Dagger on the Finger Side
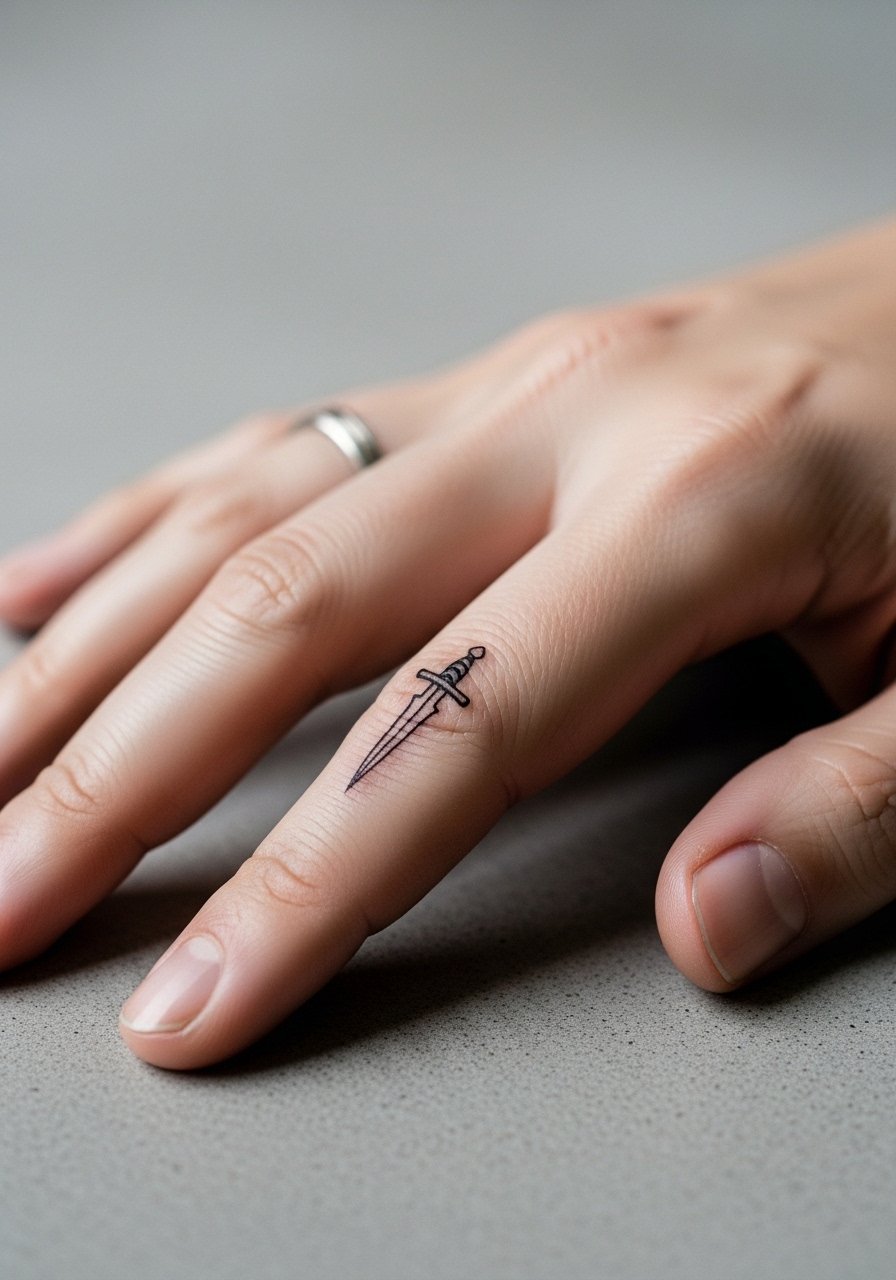
Tiny daggers read sharp when the line weight is honest. Fingers again pose longevity challenges so request a thicker outline and minimal interior shading. Expect a short session and plan touch-ups at the one-year mark. A common error is wanting full shaded handles at this scale which become a patch of gray. For styling, add a thin matte ring men on a non-dagger finger to complement the edge without bruising the composition.
20. Tiny Planet with Rings on the Ankle
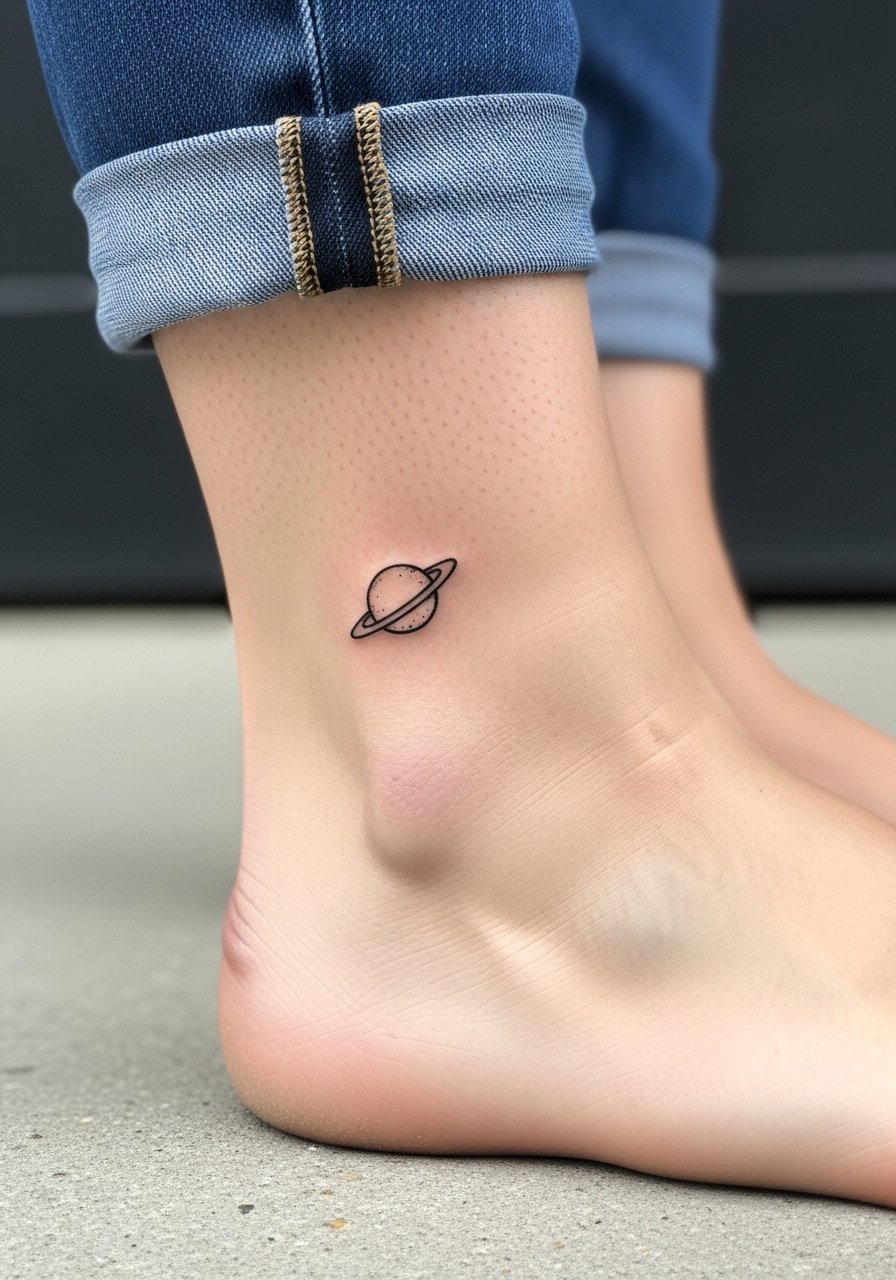
Celestial miniatures work well on ankles because they are easy to show and hide. Ask for clean negative space between the planet and rings so the two elements do not merge during healing. The session is short and pain is low. Avoid tiny stars clustered too near the shoe line. For a summer-ready look, cuff pants or wear boat shoes men so the ankle stays visible and protected.
21. Tiny Script Word on the Inner Wrist
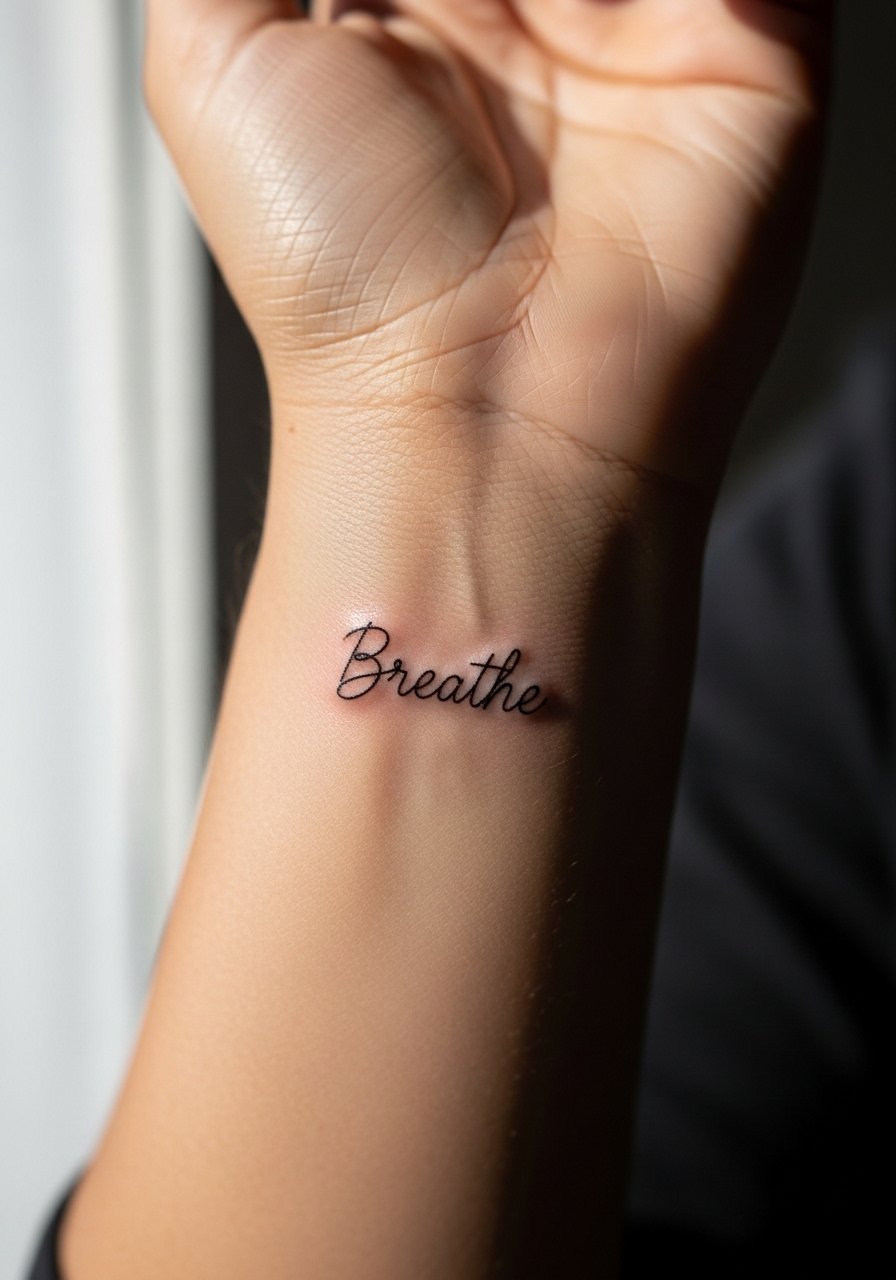
Text needs precise scale control. For a wrist script pick slightly thicker strokes and a simple font to avoid letters filling in. Ask your artist to stencil the exact word and position so you can confirm before inking. Sessions run 30 to 45 minutes depending on length. If you want a wardrobe tie-in, a slim leather cord bracelet on the opposite wrist keeps attention balanced.
22. Pottery Doodle on the Earlobe Area
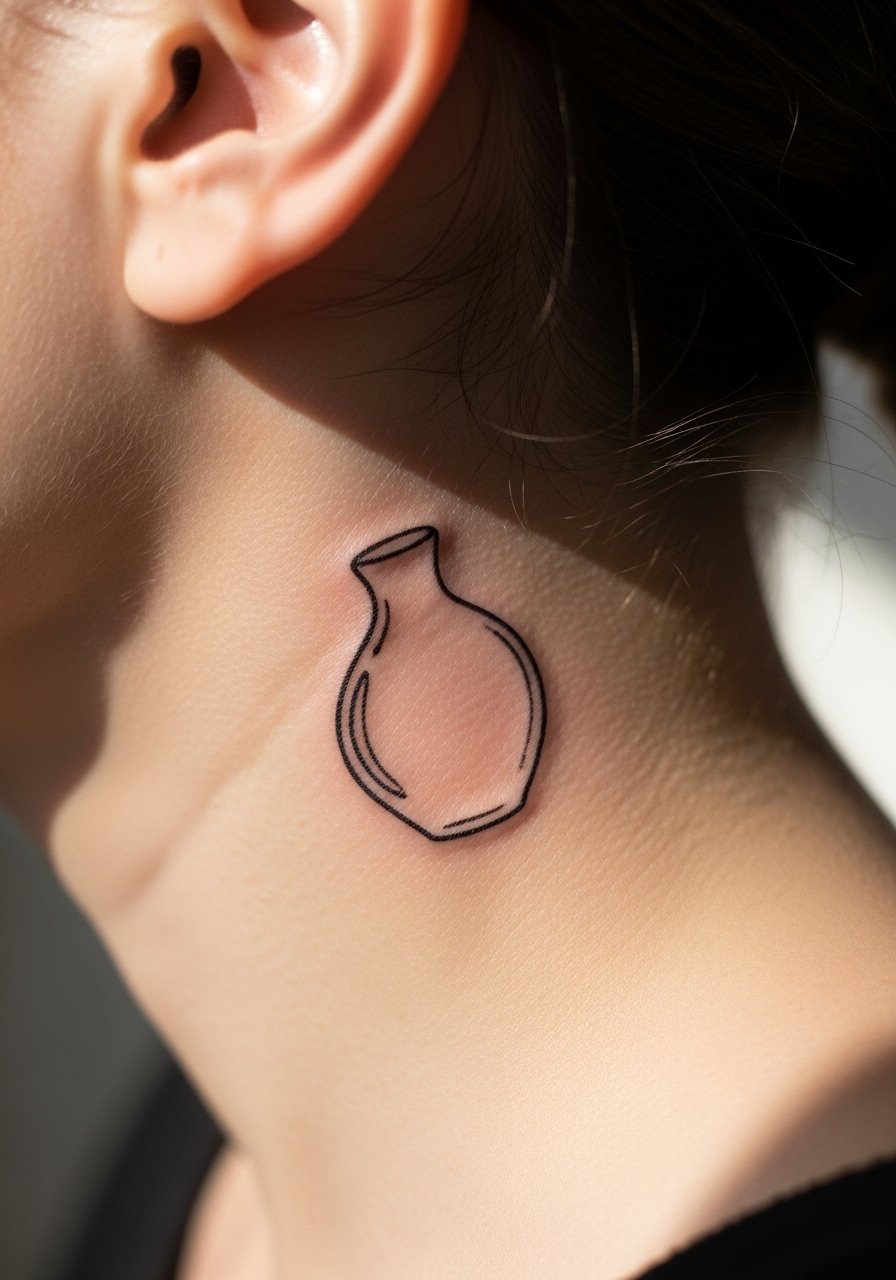
Pottery doodles are an under-covered tiny trend that sits nicely behind the ear. Because of the thin skin and tight placement request simplified curves and avoid interior texture. The session is short and you may need a touch-up due to movement from hair and washing. This area benefits from delicate stencils and a skilled micro artist. Wear hair back or a short cut to show the piece selectively.
23. Tiny Crescent Moon on the Collarbone
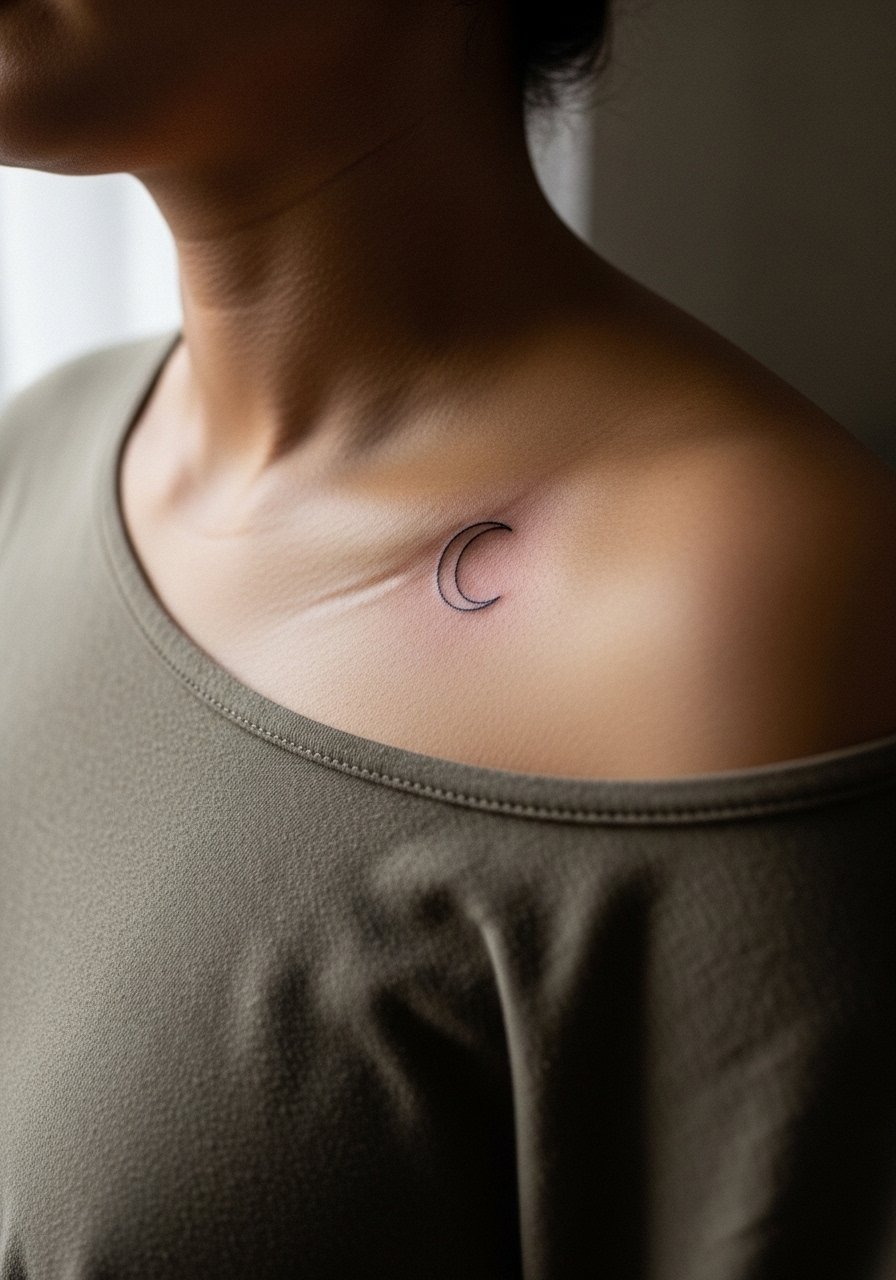
The collarbone works for small, elegant crescents. Ask for a bold outer curve and a thinner inner edge so the crescent reads from across a room and still looks intentional close up. Sessions are short and healing is straightforward. Pair with an open collar henley or a v neck polo shirt to show it off without revealing too much skin.
24. Tiny Whip-Shaded Dot Work Sun on the Shoulder Blade
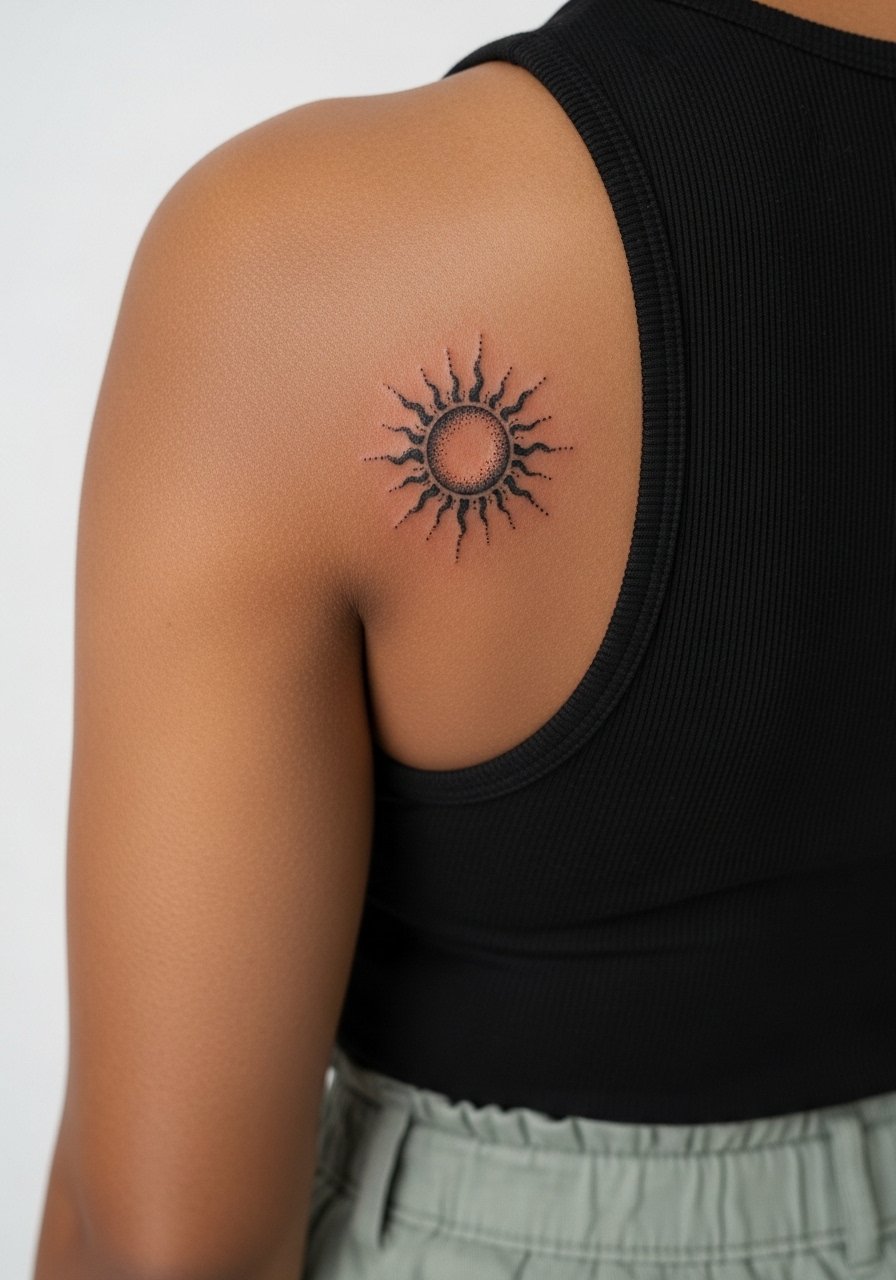
Shoulder blades tolerate dot work and whip shading because they do not get constant abrasion. For this sun, request stipple highlights rather than solid black fills which can flatten. The session is short to moderate. Be careful with placement relative to bras and straps which can rub during healing. A tank top with high-waisted bottoms gives the artist access and reduces irritation during the first week.
25. Tiny Rosebud on the Thumb Web
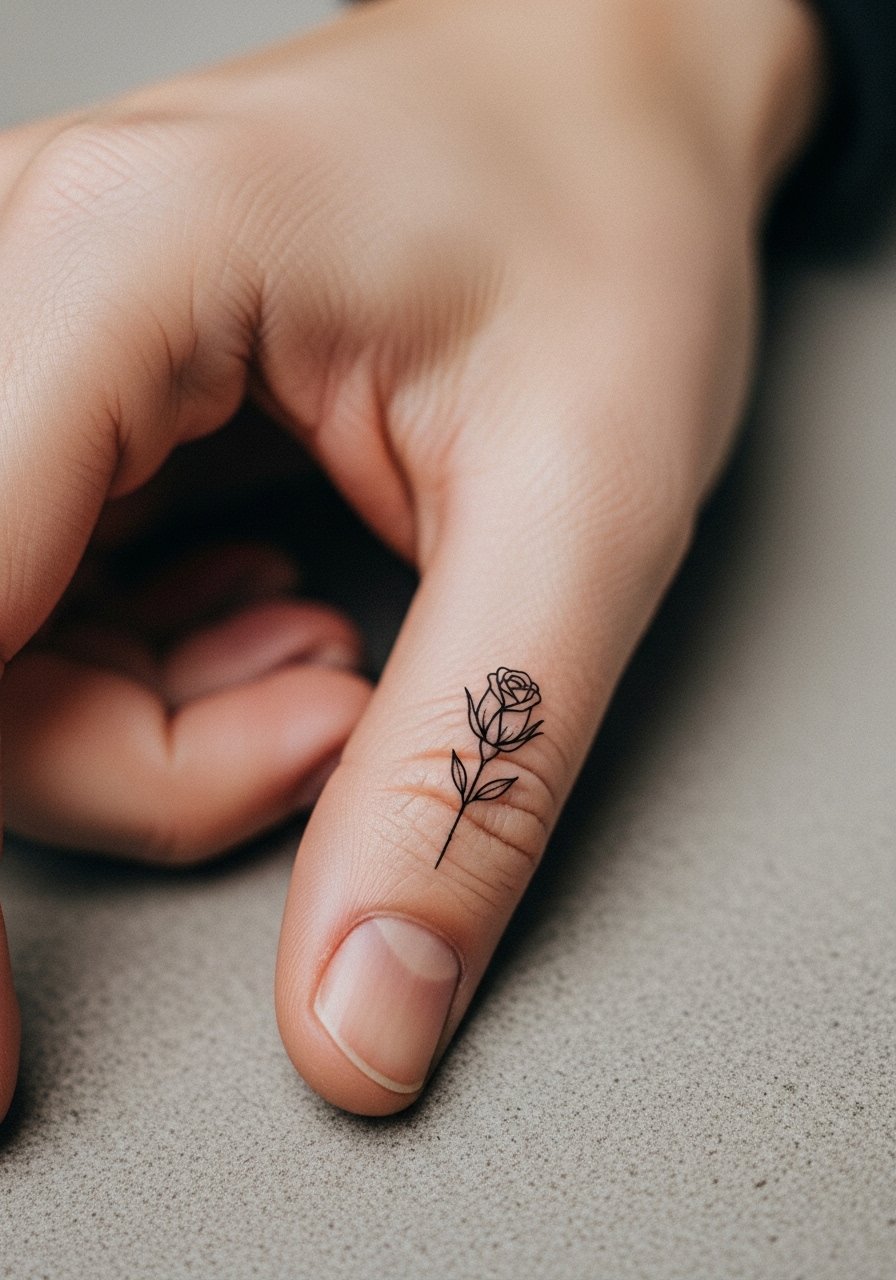
Thumb webs are playful but tough for longevity due to constant motion. Choose a simple bud silhouette with a strong outline. The common mistake is requesting leaves and stem frills at this scale. Expect the piece to need touch-ups more often than forearm work. Keep rings off the adjacent fingers during healing to avoid scuffing.
26. Ice Cube Melting Motif on the Inner Forearm
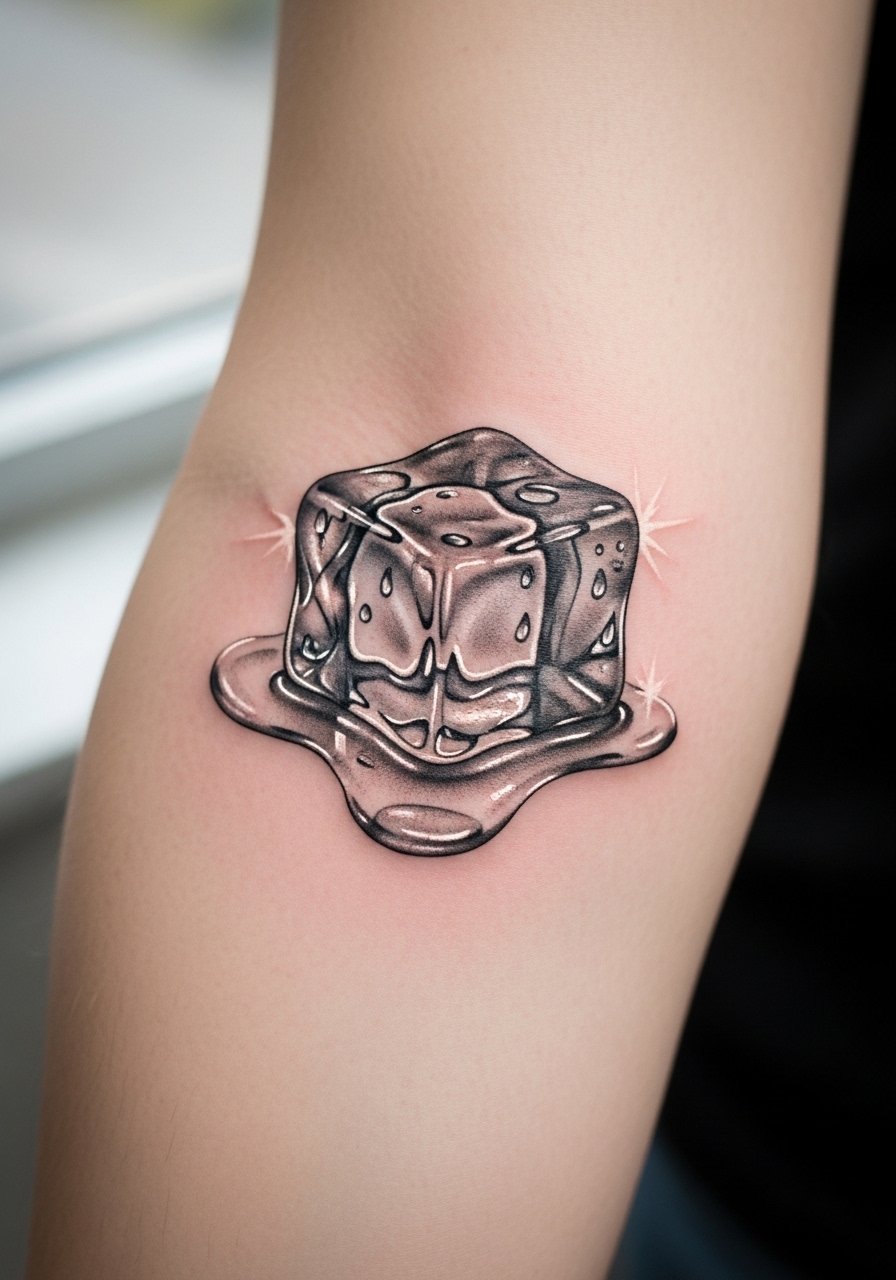
Pairing ice cube motifs with a Dali watch creates a playful surreal echo. Inner forearm placement gives this micro-realism room to breathe and reduces friction. Ask for strong highlights and clear edges so the melting effect reads even after six months. The session is moderate and may need a light touch-up depending on your daily exposure. For the session wear a push up sleeve shirt or tank so the artist has clean access without fabric bunching.
27. Tiny Twinkle Star Enhancer for Existing Ink
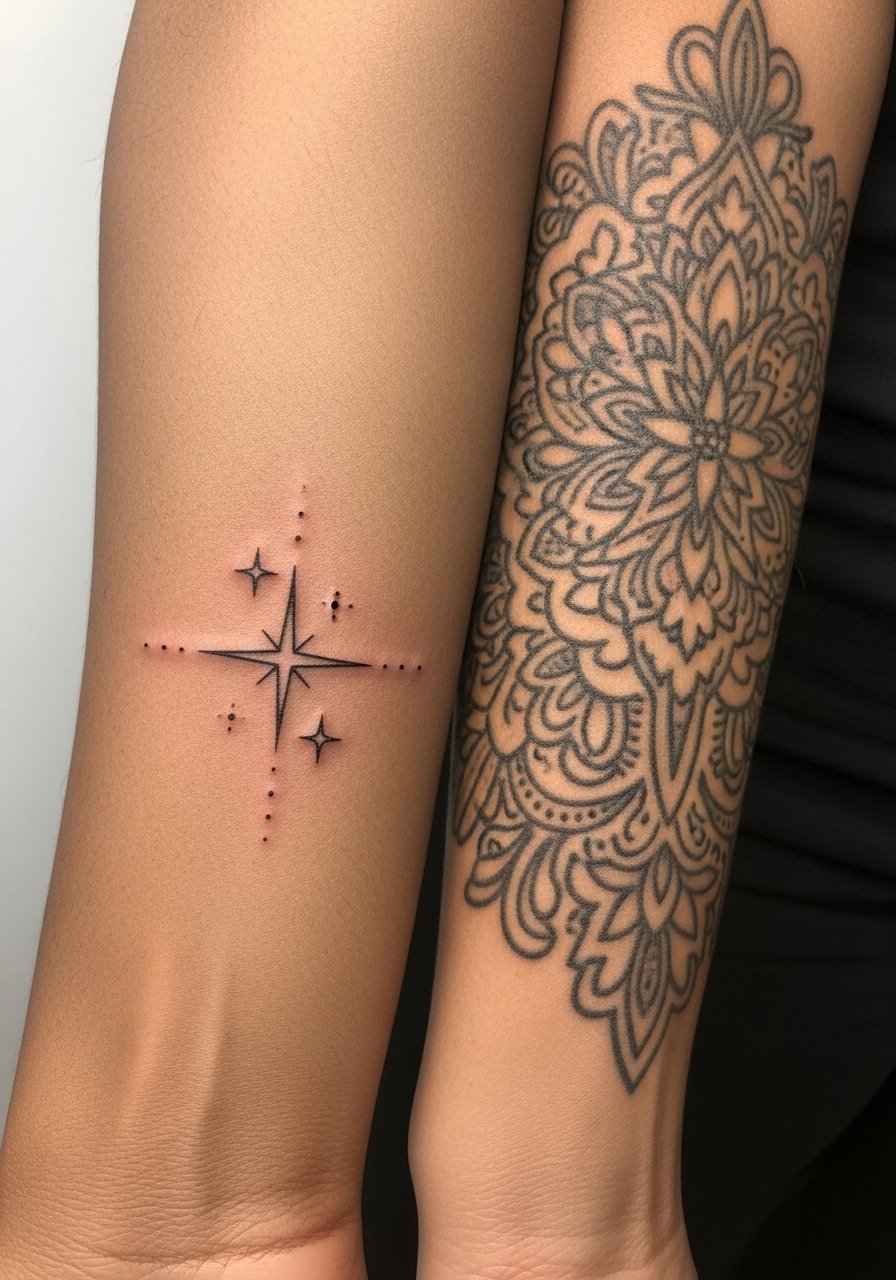
This is a utility mini you add around faded pieces to create motion and continuity. Small twinkles are low cost and low risk, but tell your artist where healed lines are thinnest so the new stars do not sit over compromised ink. The session is very short and often done as a walk-in. This approach is an easy way to refresh sleeves or chest pieces without committing to large cover work.
Frequently Asked Questions
Q: Do fine line tattoos on fingers or wrists need more touch-ups than other placements?
A: Yes they do. From what I have seen fine line work on fingers and wrists faces more friction and sun exposure, and that usually means a touch-up at 12 to 24 months. If you want longer lasting results, ask for slightly bolder line weight or a tiny area of soft shading to reinforce the outline.
Q: Can micro-realism pieces like tiny portraits or Dali watches really look good after a few years?
A: They can if they are scaled for the canvas and executed by someone experienced with healed small work. The trick is contrast and spacing. Tiny portraits packed with hairline detail often soften. A good artist will test scale with a stencil and suggest what to simplify.
Q: Are there styles to avoid on dark skin tones?
A: Not avoid but adapt. High-contrast blackwork and bold outlines tend to read better on darker tones than ultra-thin single-needle lines. Ask to see healed examples on a range of tones. Also discuss touch-up plans up front.
Q: Is numbing cream okay for a short wrist session?
A: It depends on who you ask. Some artists dislike numbing because it can change needle feel and slightly affect saturation. Others use it for anxious clients. If you want numbing, mention it during booking and follow the application timing your artist prefers.
Q: How should I dress for a collarbone or shoulder tattoo session?
A: Wear a loose button-down shirt or a tank so the artist can expose the area without shaving or repositioning you repeatedly. Comfort helps the session go smoother and keeps fabric from rubbing the fresh ink.
Q: What do artists mean when they say a design needs "room to breathe"?
A: They mean adding negative space around details so lines do not merge as the tattoo settles. For micro work that advice is critical. If your design looks cramped in the stencil stage, scale it up or simplify details.
