
Fine line patchwork is everywhere on saved boards, and the truth is the pieces that still read crisp at year five are usually the ones planned around what real skin does over time, not what looks best on an iPhone. These ideas focus on spacing, needle-friendly linework, and small wardrobe moves that make the work readable now and later, starting with a look that keeps fresh detail without overwhelming a small canvas.
1. Fine Line Floral Patchwork on Inner Forearm
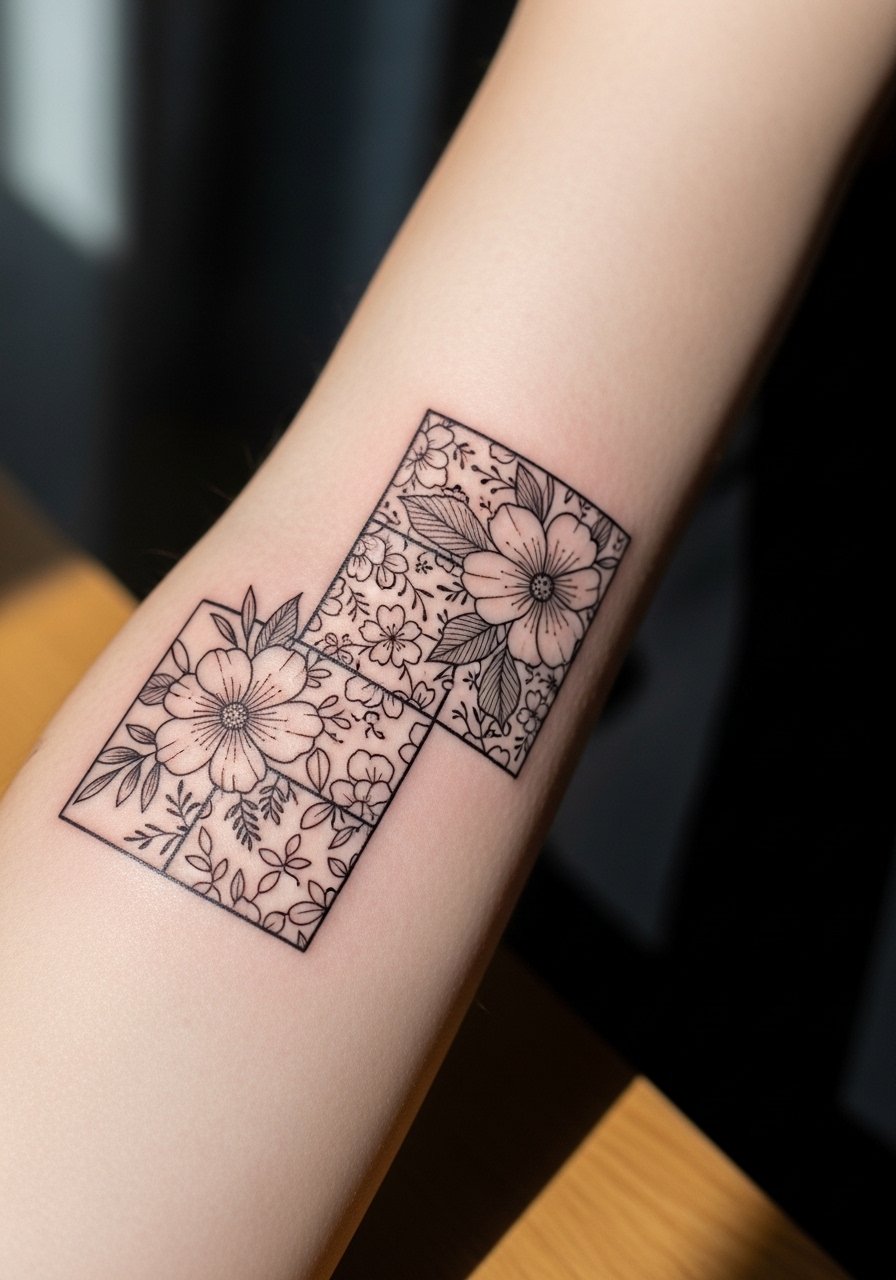
I recommend this when you want a quiet collage that reads at arm length and grows over multiple sessions. Tell your artist you want 2–3 millimeter spacing between petals and stems so the pieces do not merge as the ink settles. Fair warning, the inner forearm is forgiving for fine line but sun exposure speeds fading, so expect a touch-up around year three if you wear short sleeves a lot. A common mistake is asking for everything at one sitting and crowding the patches. For showing it off, roll up sleeves and pair with rolled-up linen shirts so the forearm reads clean without fabric competing.
2. Geometric and Floral Patchwork Sleeve
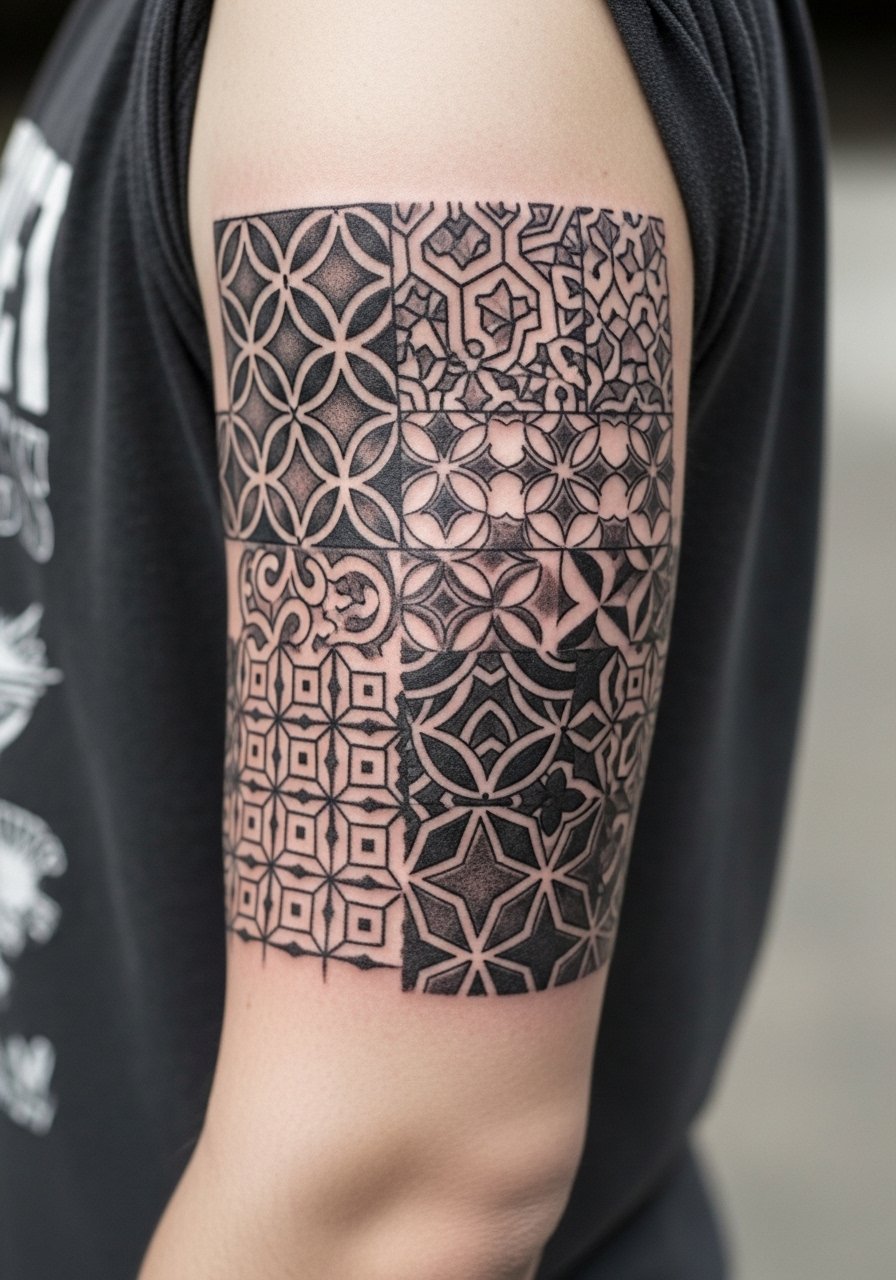
I've seen clients choose this when they want a sleeve that tells a story without heavy color. Ask your artist to plan negative space corridors between geometric blocks so each motif keeps clarity over time. This placement can take multiple sessions, usually two to four, and feels like calm vibration more than sharp pain. The common aging issue is crowding dense geometry into a small band, which leads to soft lines after a few years. For session comfort and later showing, a loose button-down shirt lets the artist expose the upper arm without tugging at fabric.
3. Dotwork Universe Patchwork on Outer Thigh
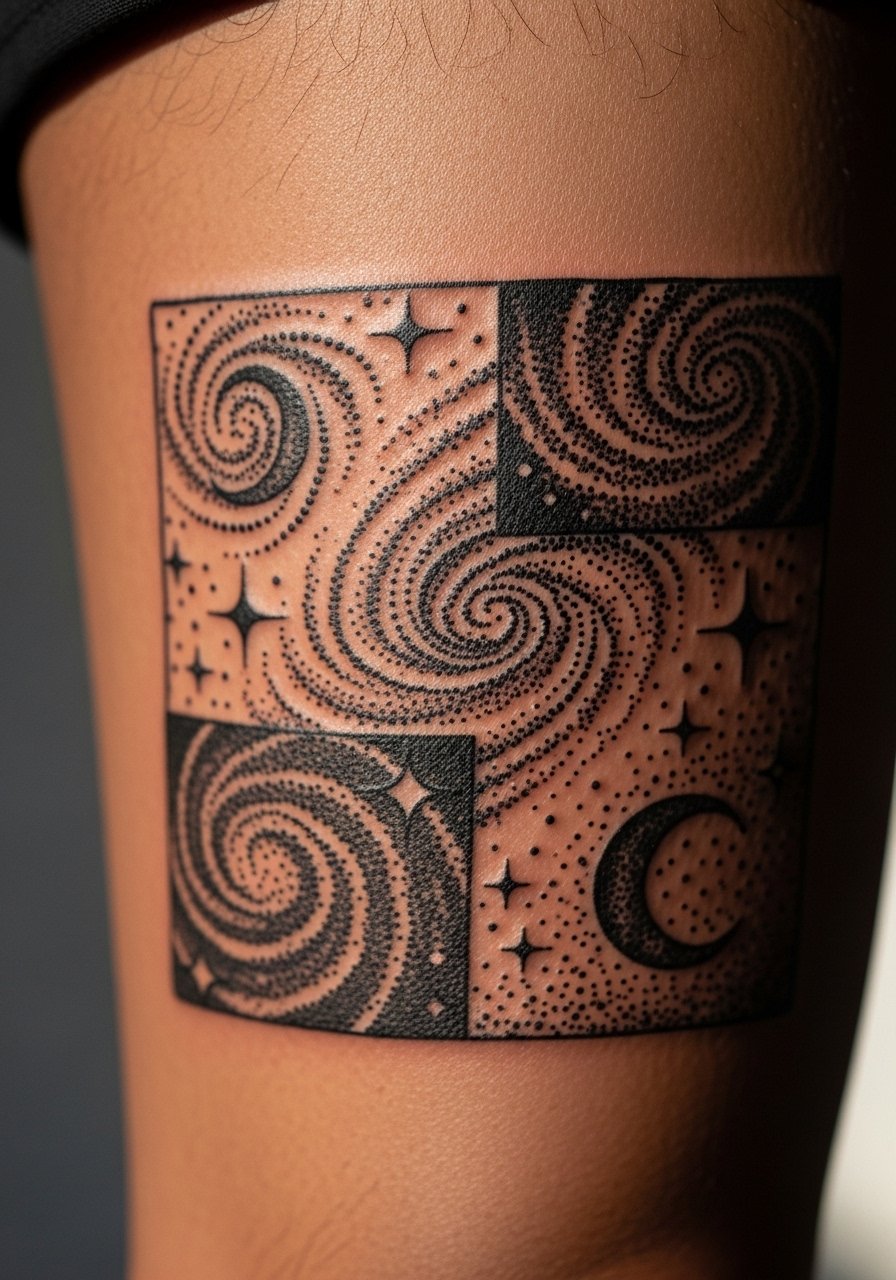
This is for anyone who likes minimal cosmic motifs that still feel substantial at a distance. Tell your artist you want dot density gradients rather than heavy solid black, that keeps the stipple readable as the skin ages. Outer thigh tolerates heavier sessions and usually requires two appointments for several patches. The session feels like long steady work rather than sharp jolts, and blowout risk is low here compared with the inner thigh. A common misstep is requesting micro dots too close together, which can compress into a gray patch. For the appointment wear loose bottoms or bring shorts so the artist can access the area without pressure.
4. Butterfly Honeycomb Patchwork on Upper Arm
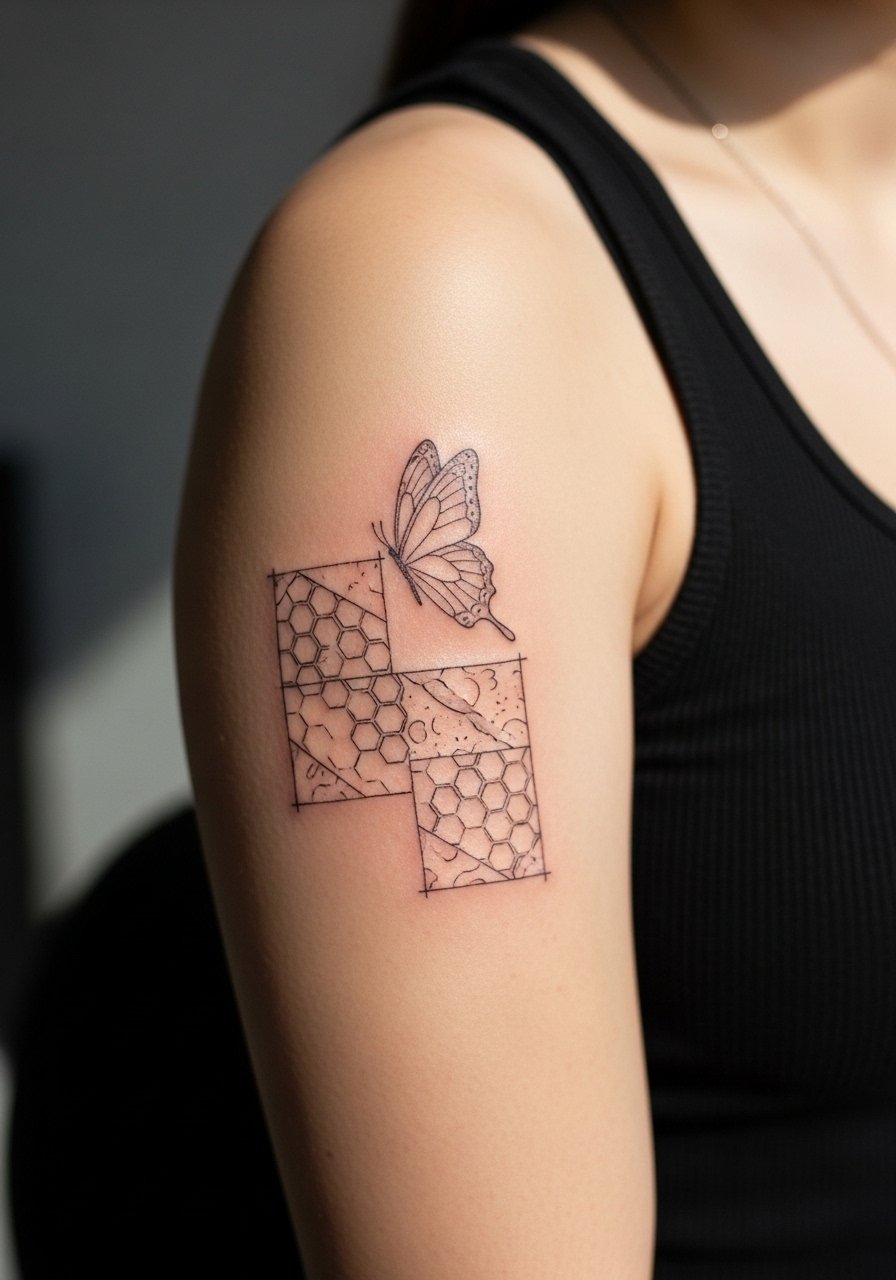
There is a playful scale to this concept that works well on the upper arm when someone wants life-size insect details without heavy saturation. In consultation, point to exact wing sizes and ask for soft stipple rather than full fill inside the wings so the butterflies remain airy. Expect moderate pain, with sessions running 60 to 120 minutes per patch depending on detail. A mistake is insisting every butterfly be identical; slight size variation makes the collage easier to read later. For evenings out, pair it with a racerback tank to show the winged cluster without high contrast from clothing.
5. Minimalist Honeybee Patchwork for Wrist and Hand
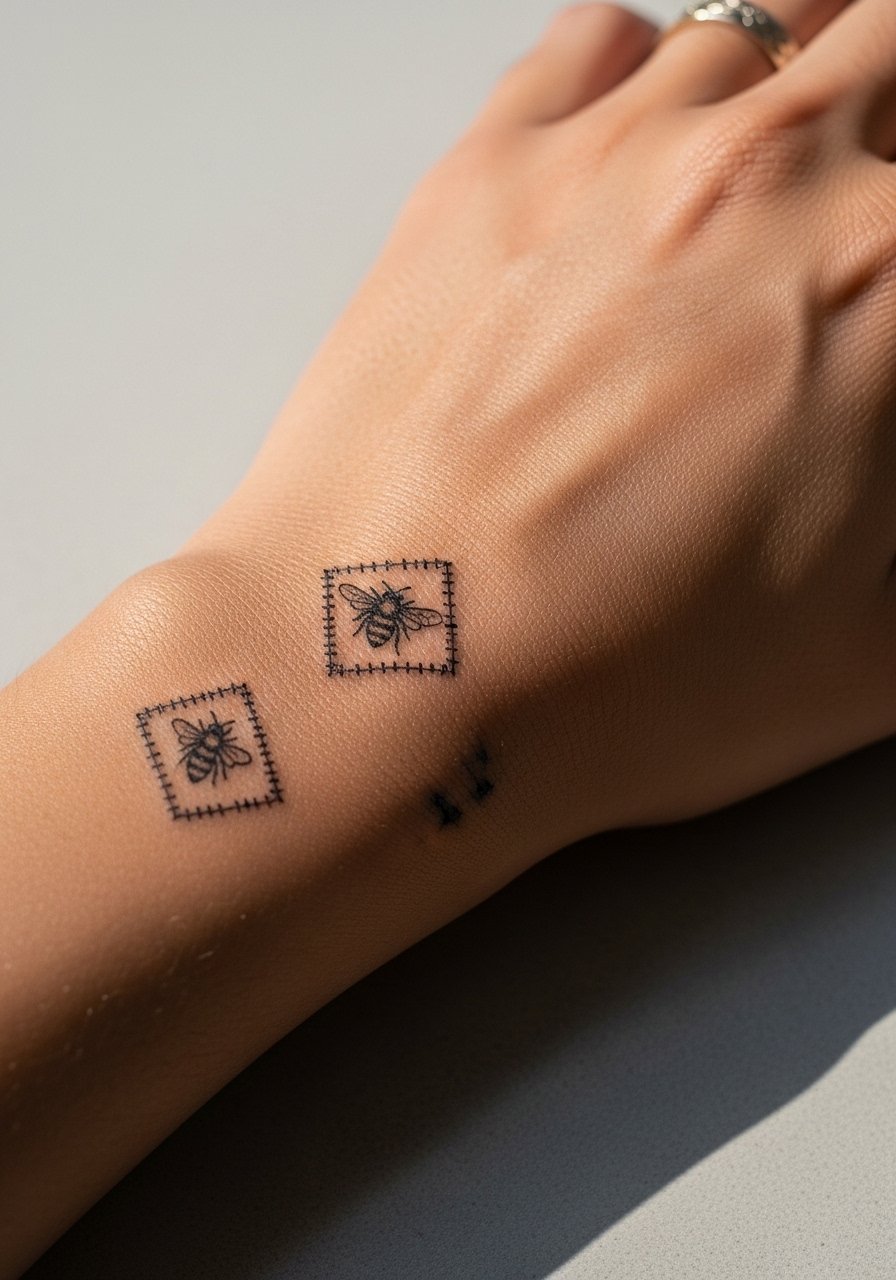
Small honeybee patches across wrist and hand make a cohesive statement if done with confident linework and spacing. Be explicit in the consult that you want the bees scaled to finger width and that the artist avoid heavy fill near joints to reduce early blurring. Hand and wrist tattoos face higher friction and faster fading, so expect touch-ups sooner than forearm pieces. The session will be short but sharp because the skin here is thin. For styling, stacked thin bracelets can frame the wrist without obscuring the linework, try a dainty bracelet set when showing it off.
6. Micro-Realism Botanical Patchwork on the Collarbone
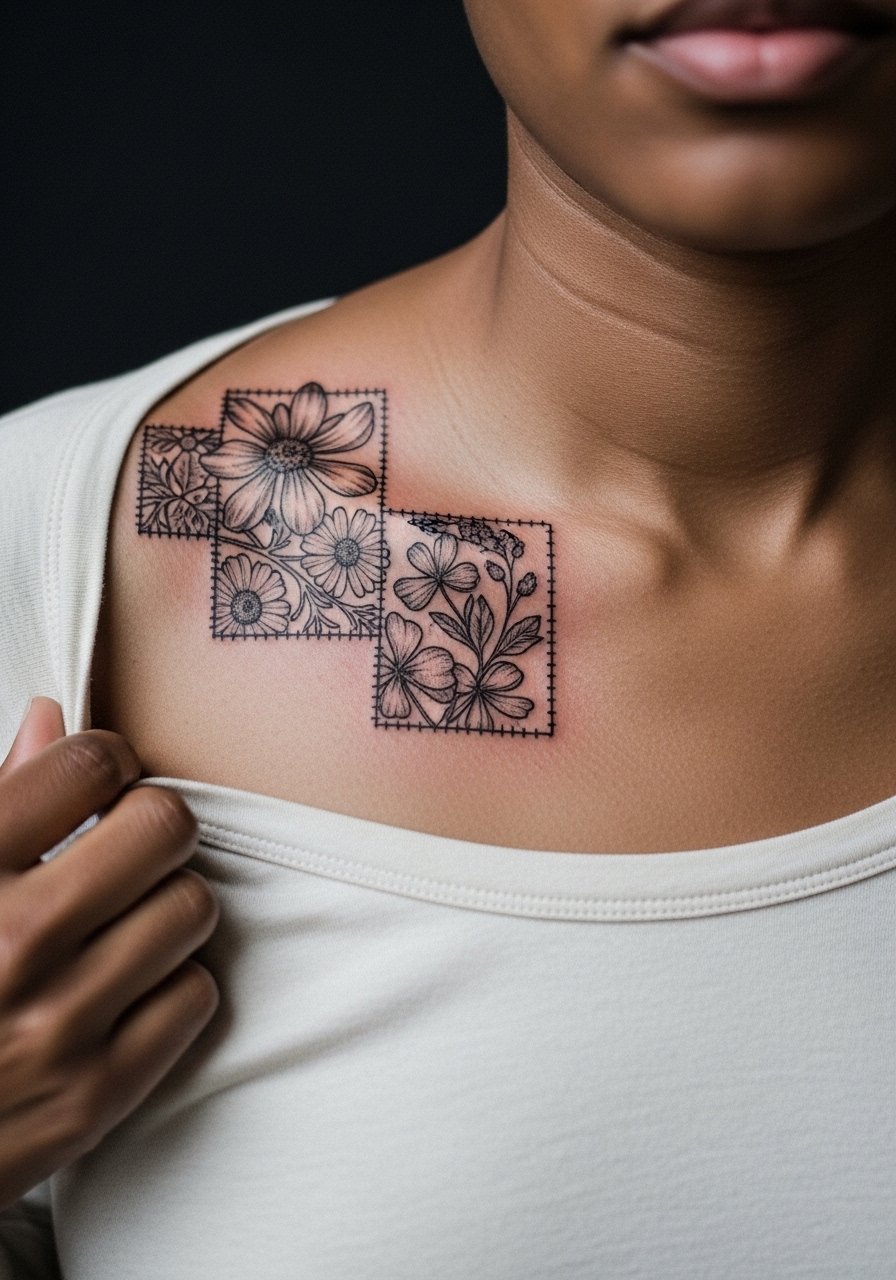
Fair warning: collarbone skin moves and shifts, so I usually suggest slightly bolder linework than you might want at first to keep detail visible after healing. During the consultation, ask for a few millimeters of clear skin between patches and tell the artist you want minimal shading, mostly contour and tiny stipple. This placement is visible and reads beautifully with necklaces, but it will hurt more than an outer arm session. A common mistake is placing dense floral detail right over the bone, which can blur and feel harsh during healing. For evenings, a thin chain pendant necklace sits above the botanical work without crowding it. Note that collarbone tattoos can be visible in professional settings, so think about placement if you need discretion.
Studio Day Picks
The forearm, wrist, and collarbone pieces above ask for different session prep than rib or thigh work, and a few focused items make the chair day smoother.
-
Stencil transfer paper kit. Lets you preview line placement on skin, which is crucial for small patches that live next to each other.
-
Topical numbing cream. Applied per instructions 45 minutes before a sensitive wrist or collarbone session eases discomfort without affecting linework.
-
Thin protective film roll. Keeps hand and wrist tattoos cleaner through the first week of frequent washing and friction.
-
Fragrance-free body wash. Gentle cleansing prevents irritation around delicate fine line patches during showers.
-
Aquaphor healing ointment. A thin layer in the first few days helps retain moisture around tight line work without clogging the area.
7. Stipple Shaded Crescent Moon on Inner Wrist
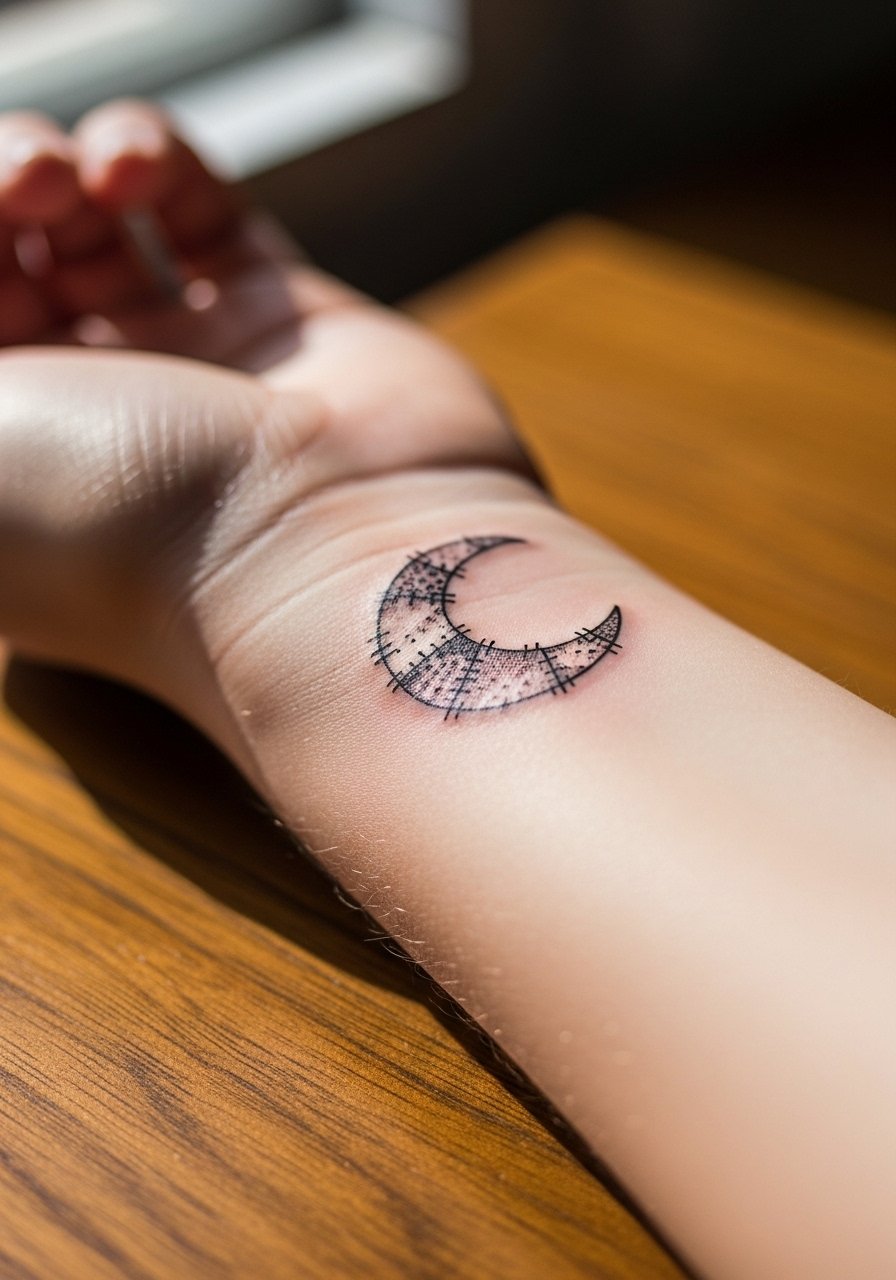
Most people choose the inner wrist for small motifs they want to glance at. I tell clients to request gradual dot density rather than solid fill so the crescent keeps a soft edge after a year. The inner wrist is sensitive and sessions are short but memorable, often under an hour for a single patch. A common mistake is making the moon too small and too dense, which will muddle into a blob as the ink spreads. Expect a touch-up window around year two for crisp edges. For low-key styling, a slim minimalist watch worn just above the tattoo frames the area without covering the crescent.
8. Tiny Architectural Patchwork on the Ankle
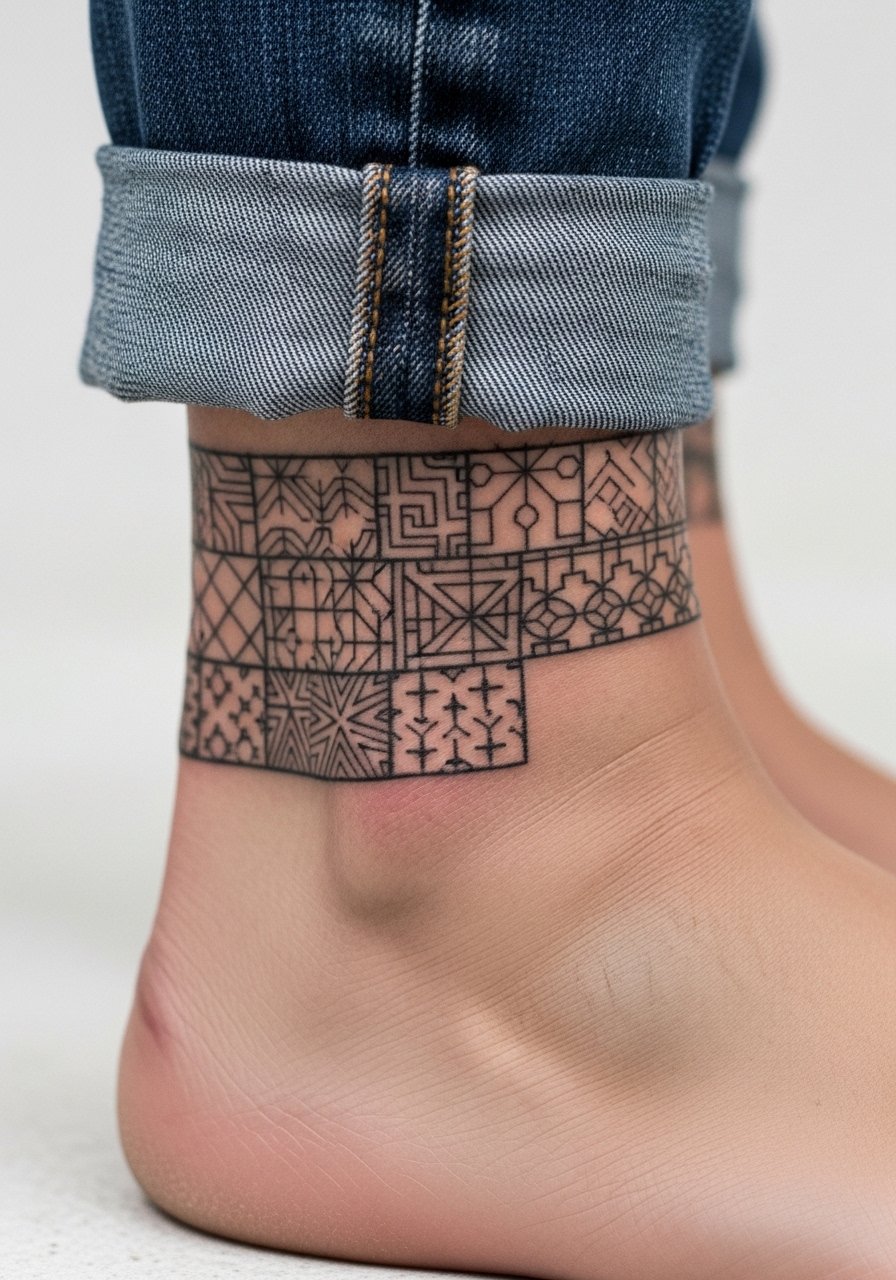
This works if you like small, structured shapes that peek out from shoes or skirts. Tell the artist you want crisp linework and slightly larger negative space around door and arch motifs to prevent blending from frequent movement. Ankle sessions can be prickly because the skin is thin and near bone, so expect short bursts of discomfort and a session length under 90 minutes. The biggest mistake is over-detailing at a tiny scale. For showing it off, roll up jeans or slip into strappy sandals so the architectural lines read without distraction.
9. Delicate Script Patchwork Along the Side Ribcage
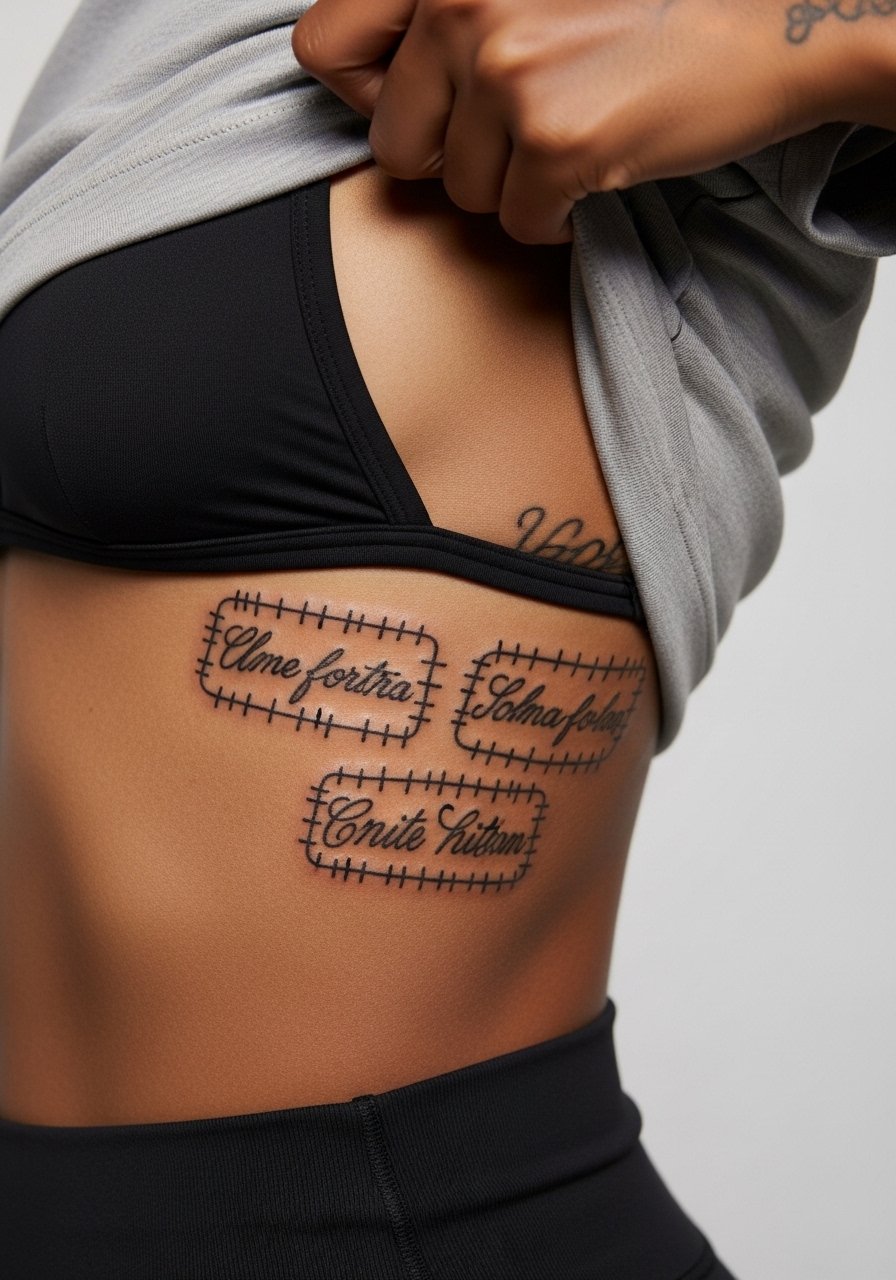
Artists split on fine line on ribs. One camp says the skin there stretches and blurs lines within two years. The other camp argues that with careful needle depth and spacing the lines settle fine. If you lean this way, ask the artist about their ribcage fine line examples and whether they plan a shallow but deliberate depth. The rib is a high-pain area and sessions are often shorter with breaks. Expect faster fading in comparison to forearm work and plan for touch-ups. Also avoid asking for tiny dense script over the bone, that is the version most likely to age poorly.
10. Chain-Link Botanical Across Fingers
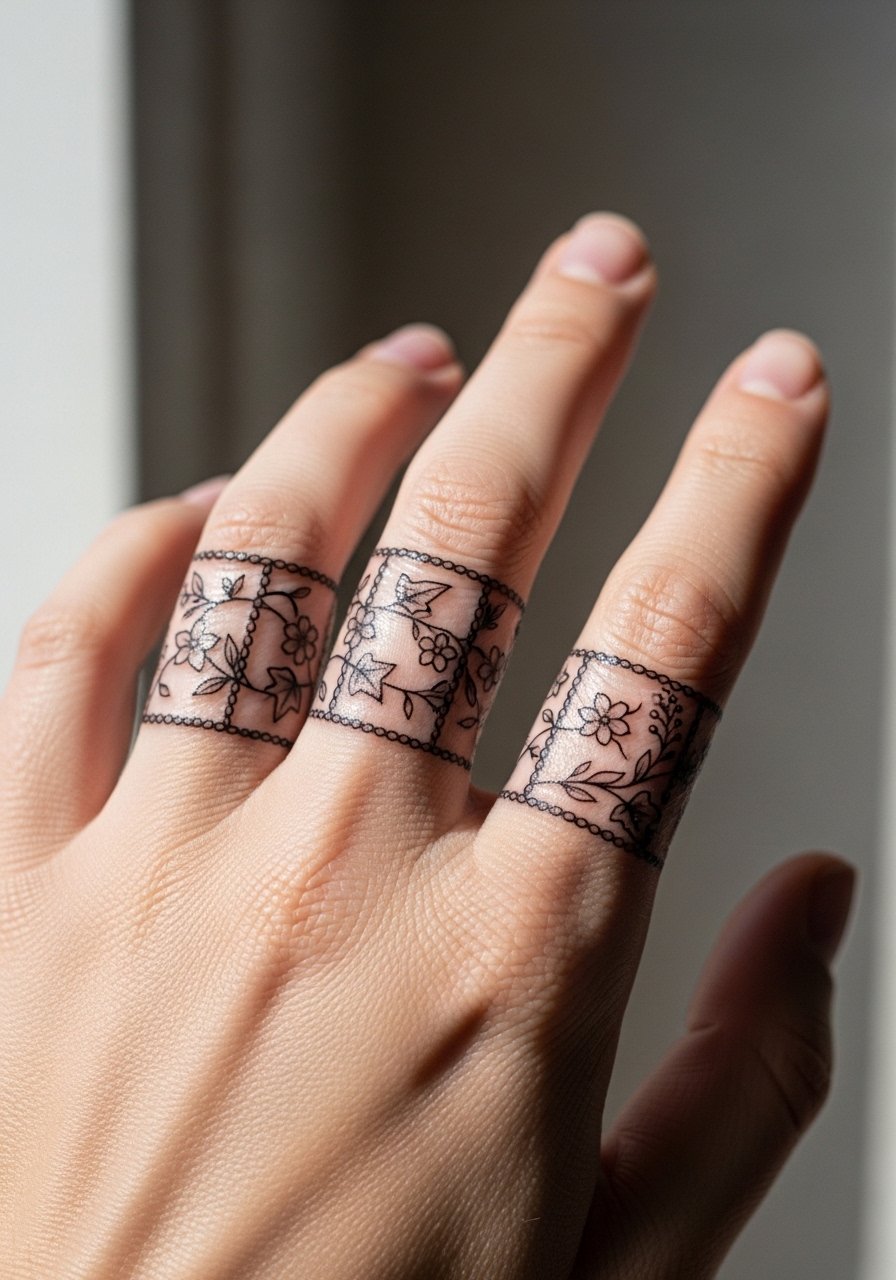
Finger work ages differently because of constant washing and movement, but small linked botanical motifs can hold if kept simple. Tell your artist you want clean single-pass linework and to avoid heavy shading near joints. The session feels sharp and short, and healing is hands-on in both senses. A common mistake is packing too much detail into knuckles or finger sides, which softens quickly. For a polished look, try stacking a dainty ring set that leaves space between rings and tattoo so both read clearly. Remember finger tattoos can affect some job paths, so think ahead.
11. Geometric Compass Patchwork on the Back of Neck
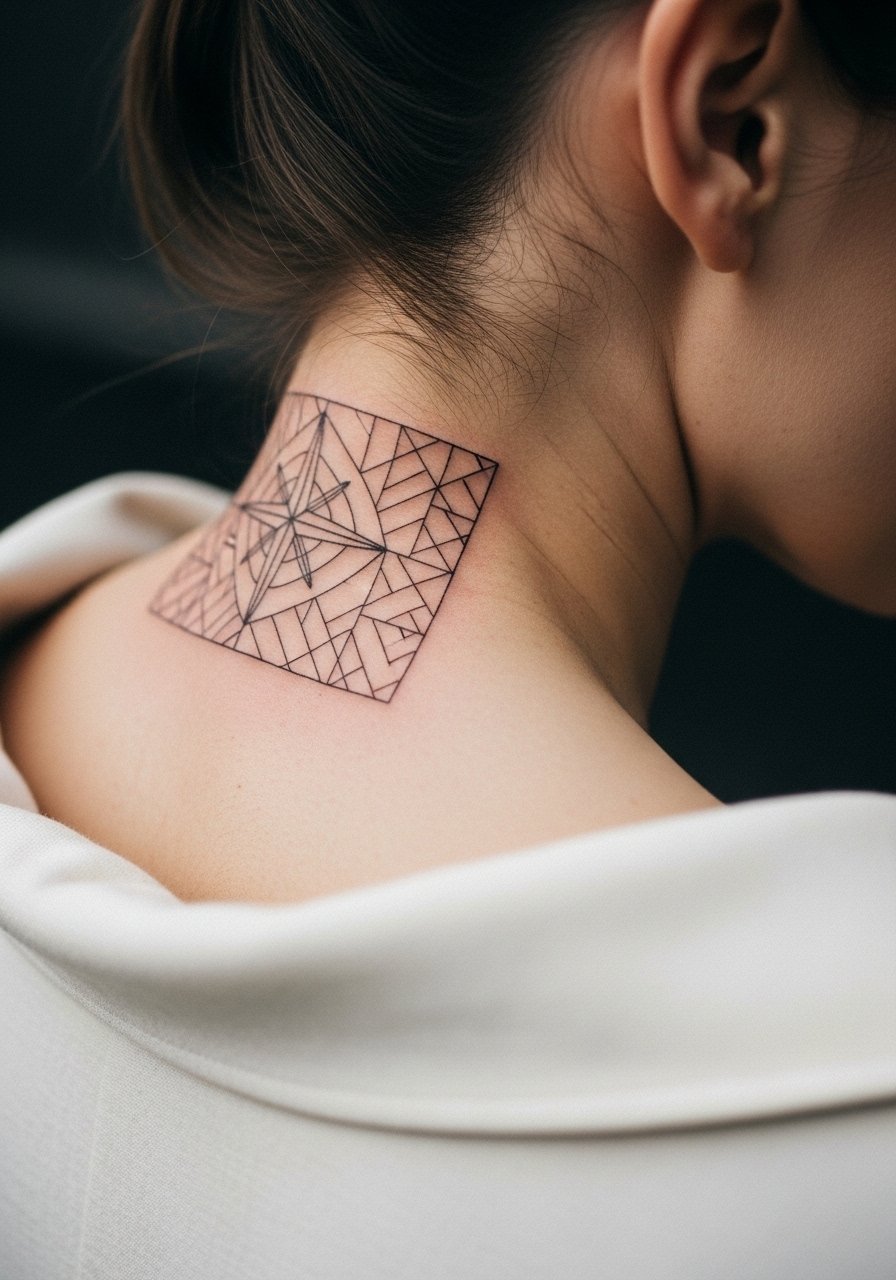
When you want a small statement that sits just below the hairline, this placement is tidy and easy to hide with collars. Ask for mid-weight linework rather than hairline detail so the compass holds up when the hair rubs the area. Neck sessions can sting more than arm work and often need strategic breaks. A typical error is choosing ultra-fine radial lines that merge after healing. For a subtle reveal, a wide-neck shirt pulled aside in photos keeps the tattoo visible without full exposure, and it helps the artist during placement checks.
12. Watercolor Patchwork Bloom on Outer Calf
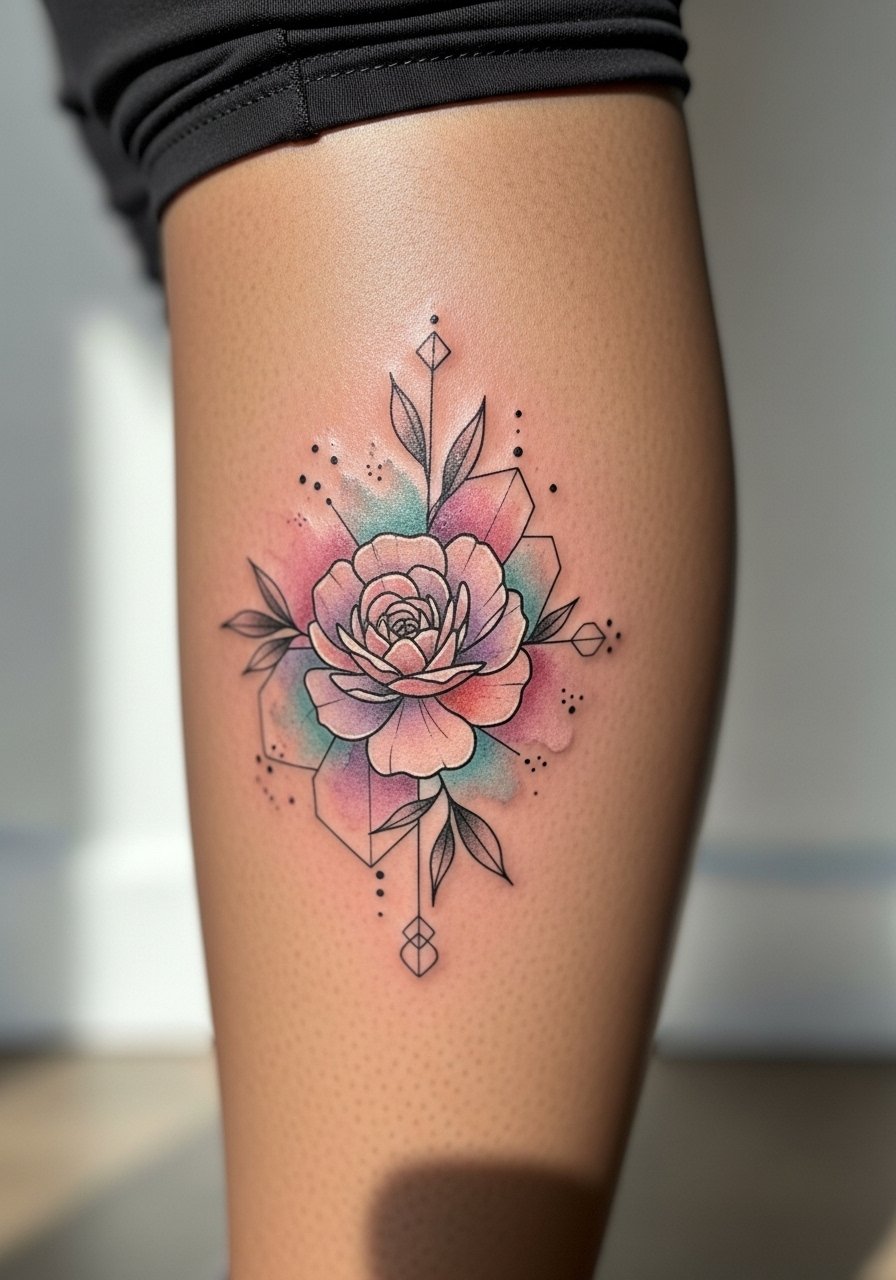
Calf placements allow bolder patches without losing the delicacy of watercolor edges. When you consult, ask the artist to anchor the blooms with fine line outlines so the washes stay contained as the color fades. Sessions here are comfortable for most and can be longer, often two to three hours for several patches. A mistake is asking for saturated watercolor without outline, which tends to blur into muddy color after a few years. For warm-weather showing, a flowy midi skirt with a side slit frames the calf bloom without cutting into the composition.
13. Lace Doily Patchwork on Lower Back
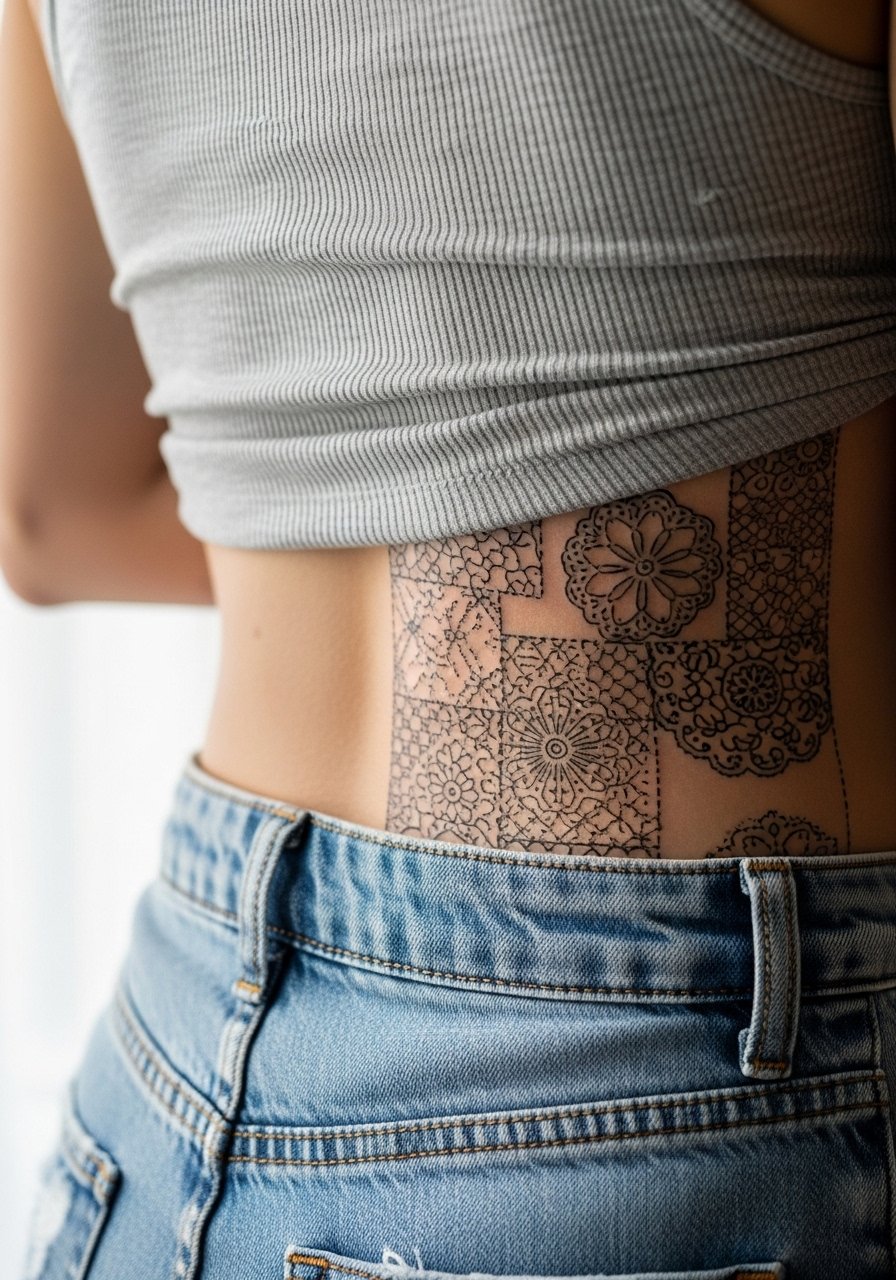
Lower back patchwork reads like a built-in accessory when placed just above the pant line. In the consult, request balanced negative space so the lace pattern breathes and does not rely on tiny hairline filigree. Sessions on the lower back are tolerable and often done in a single two-hour sitting for a moderate patch. A common error is forcing ultra-dense patterning that loses clarity with movement and sitting. For session comfort wear a tank top you can easily lift or adjust so the artist has full access.
14. Tiny Planetary Patchwork Behind the Ear
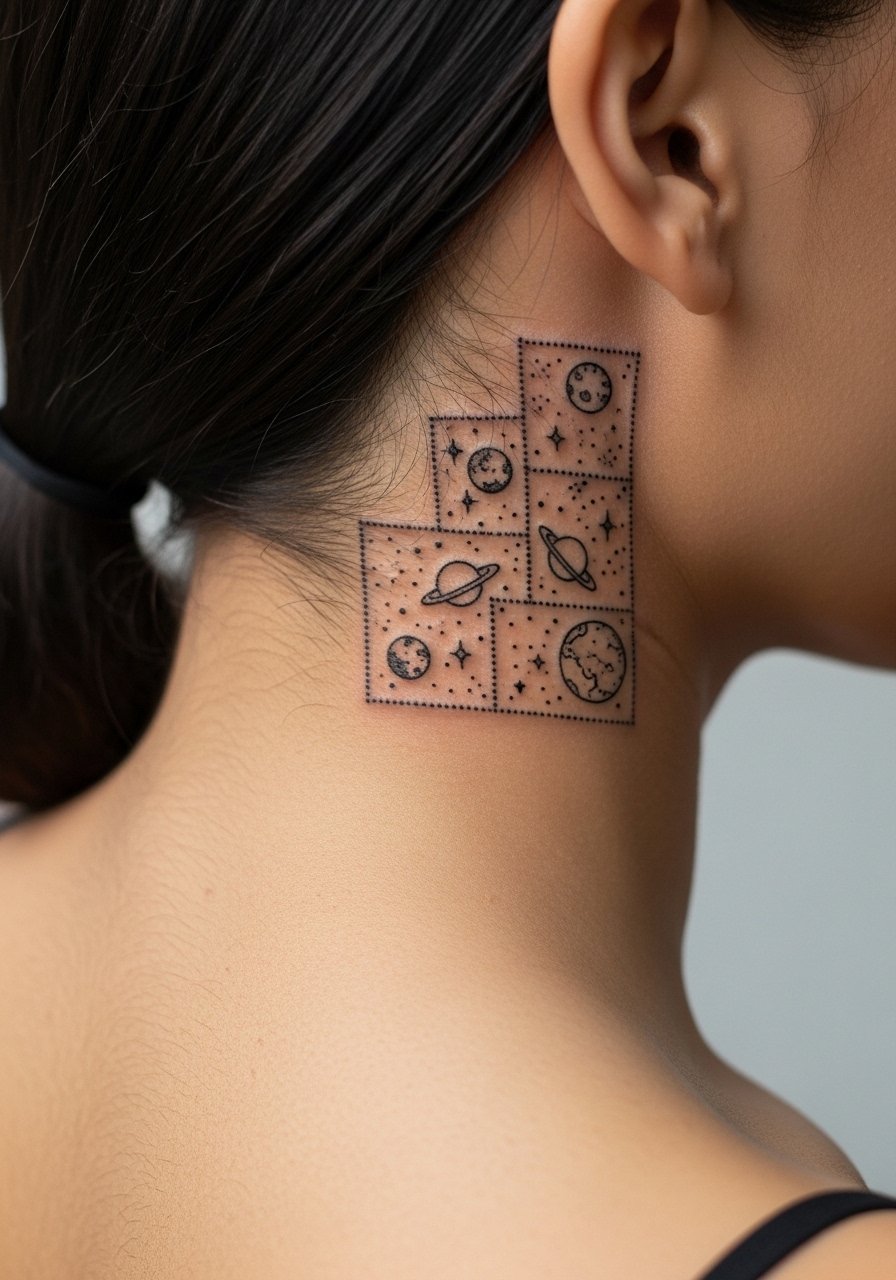
Behind-the-ear patches are discreet and feel crisp when kept micro and spaced. Ask your artist to place the stencil below the hairline so the hair frames the motif rather than covers it. Sessions here are very short and sharp because of thin skin and proximity to bone. One mistake is requesting dense dotwork in a penny-sized space. If you want it for a subtle reveal, a short haircut or pulled-back style will show it off without overexposure.
15. Ornamental Mandala Patchwork on the Sternum
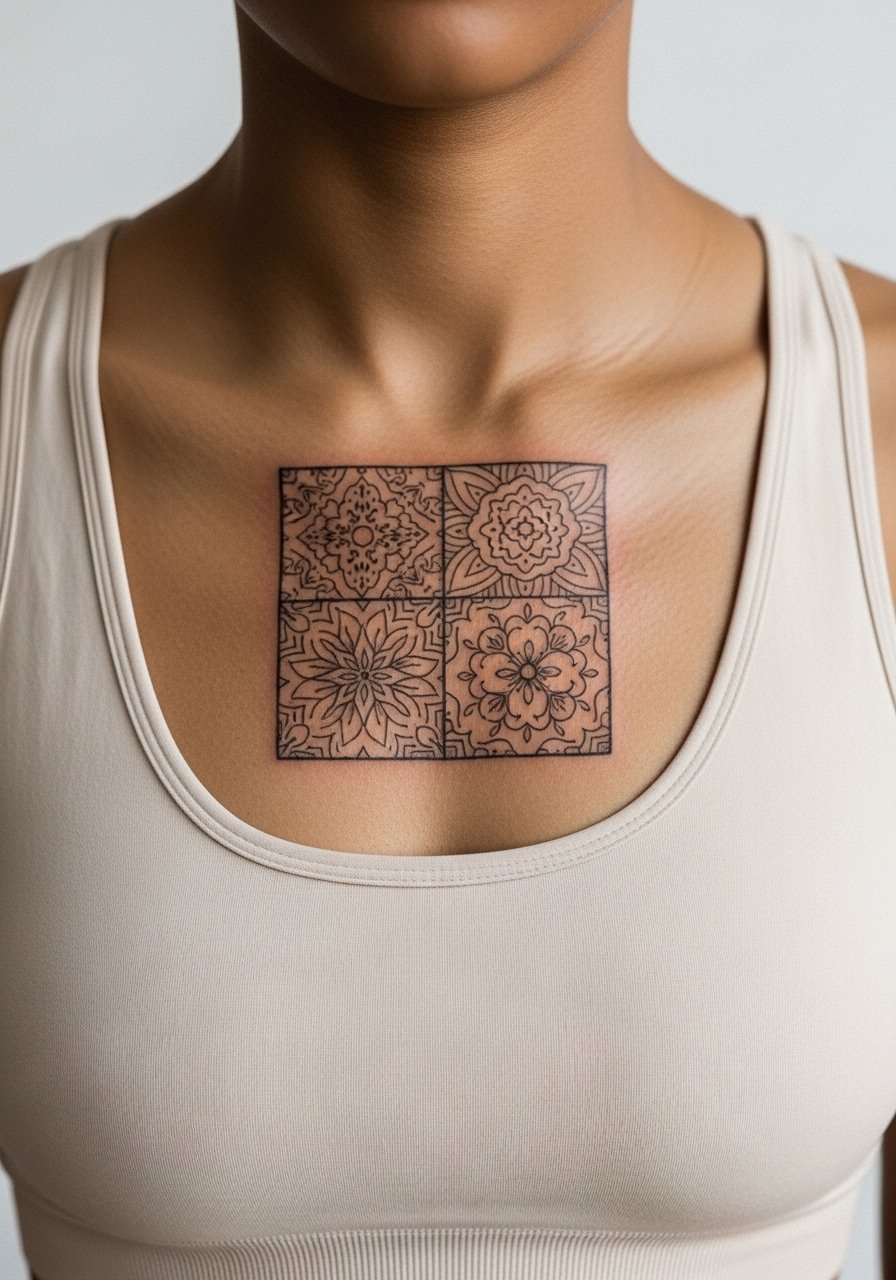
Mandala patterns carry cultural roots and people split on direct replicas. One camp treats these patterns as stylistic ornamentation, while another warns against copying sacred designs without context or permission. If you choose a mandala, tell your artist you want a personal motif inspired by mandala geometry rather than a direct religious symbol. Sternum placement is sensitive and the session tends to be more intense with multiple short breaks. Expect possible faster fading along the sternum crease and plan for a touch-up if you wear chest-hugging clothing that rubs the area.
16. Minimalist Mountain Range on Side Forearm
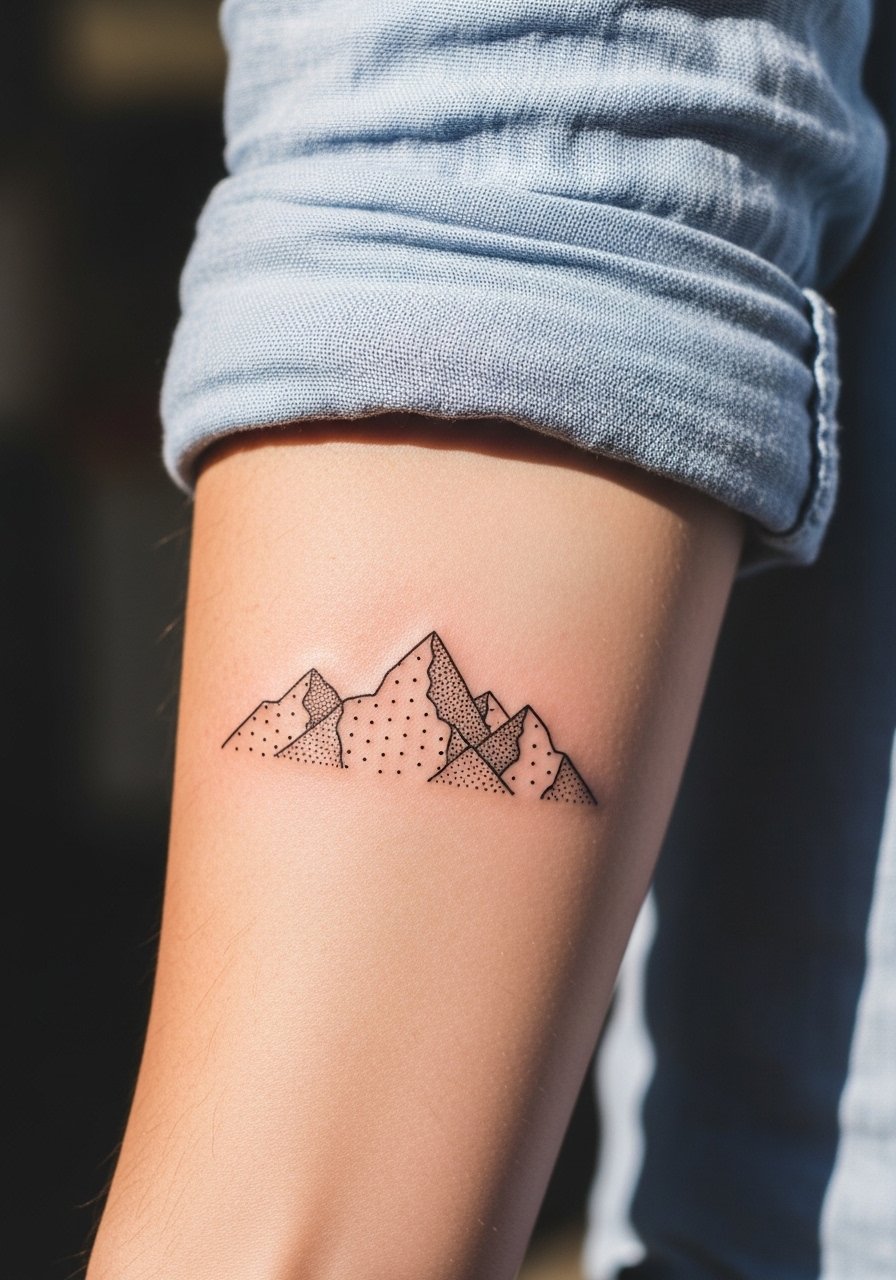
This is a good pick if you want narrative patches that read horizontally when your arm is at rest. Ask for slightly bolder contour lines on the peaks and minimal inner detail to keep the silhouette legible years in. Side forearm sessions are moderate in pain and usually done in one hour for a small band. The classic error is packing fine topo lines too close together. For wardrobe pairing, a rolled-up cuff shirt frames the range and keeps attention on the linework.
17. Floral Patchwork Thigh Garters
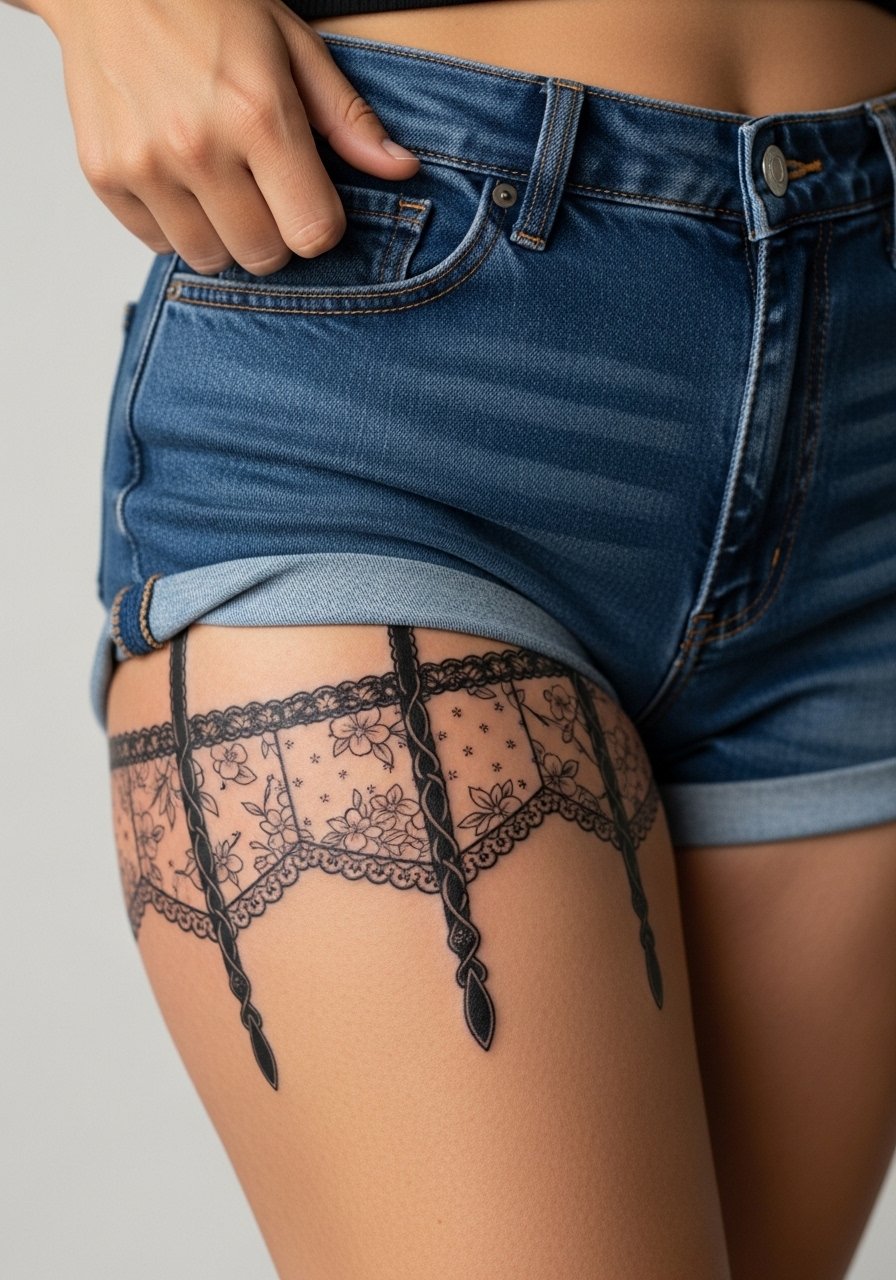
Thigh garters are great when you want something hidden most days but showable in summer. For these choose mostly contour lines with sparse shading so the design ages without heavy diffusion. Inner and upper thigh can be tender and sessions may be paused for comfort. A common mistake is over-detailing too close to the groin where friction and sweat accelerate fading. For session wear bring loose shorts or a wrap so the artist can access the area without pinching fabric.
18. Spiral Dotwork Nape of Neck
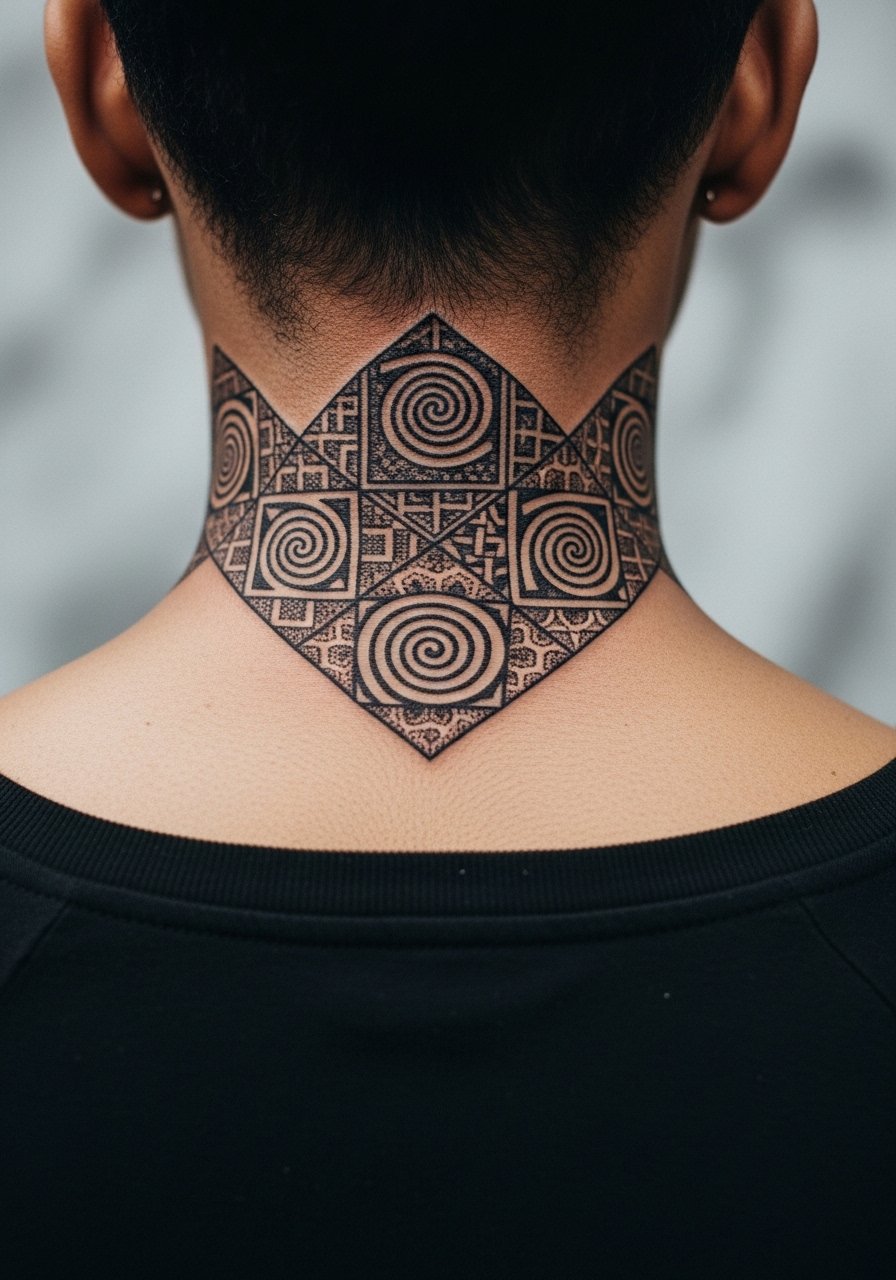
A nape spiral reads like a small focal point at the hairline and can be hidden with hair down or shown with a ponytail. Tell the artist you want dotwork density fading outward, not a solid black center, to prevent a heavy look as it ages. Sessions are short but can feel sensitive because of the thin skin. The mistake people make is asking for too many concentric rings in too little space, which compresses over time. For placement checks wear a wide-neck shirt you can shift slightly so the artist sees the exact hairline.
19. Miniature Wildlife Patchwork on Outer Bicep
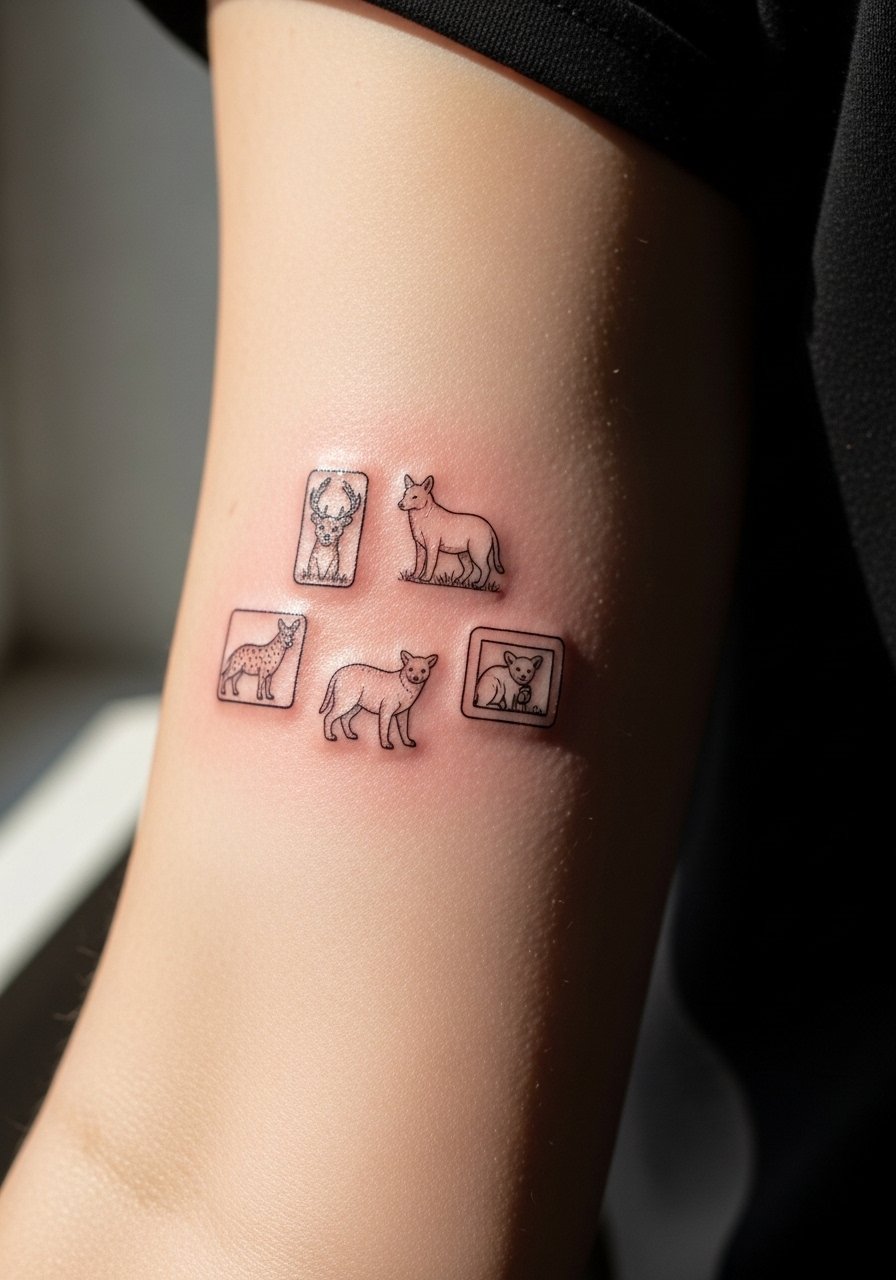
Small wildlife patches on the outer bicep make a quiet collection that travels well under sleeves. In the consult, specify subject scale and negative space so eyes and fur textures are suggested rather than detailed. Bicep sessions feel like steady vibration and are forgiving for touch-ups. A common mistake is asking for hyper-real detail at a tiny size, which loses clarity as the skin shifts. Pair this placement with a loose button-down shirt that you can roll to reveal the patch without tugging the skin.
20. Crescent Honeycomb on the Outer Elbow

Outer elbow patterns have movement built into them, so I recommend keeping motifs slightly larger and avoiding ultra-fine cross-hatching. Tell your artist to allow breathing space where the crease folds. Elbow work can be painful and may need short sessions. The typical mistake is compressing intricate textures into the crease zone where motion will blur them. Because the elbow rubs clothing, expect earlier touch-ups than for arm patches.
21. Botanical Badge Patchwork on Upper Thigh
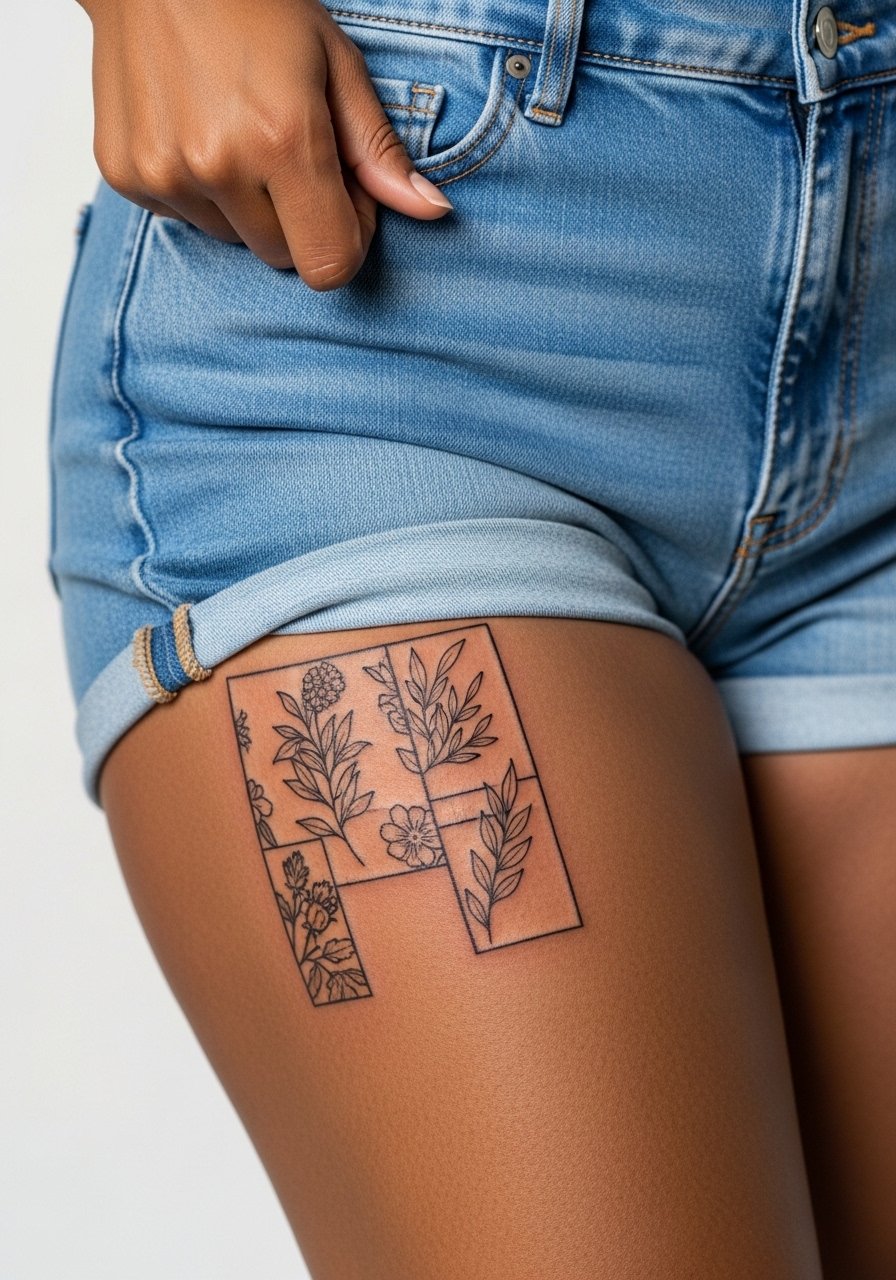
A badge-style patch on the upper thigh is a contained design that reads when revealed and stays private otherwise. Ask for clear border spacing so the badge keeps definition even if surrounding patches are added later. Sessions here are comfortable for most, with longer single sittings possible. People sometimes request excessive inner detail that loses precision with friction from clothing. For session wear bring loose shorts and avoid tight waistbands that rub directly over the area.
22. Tiny Constellation Patchwork on Ankle
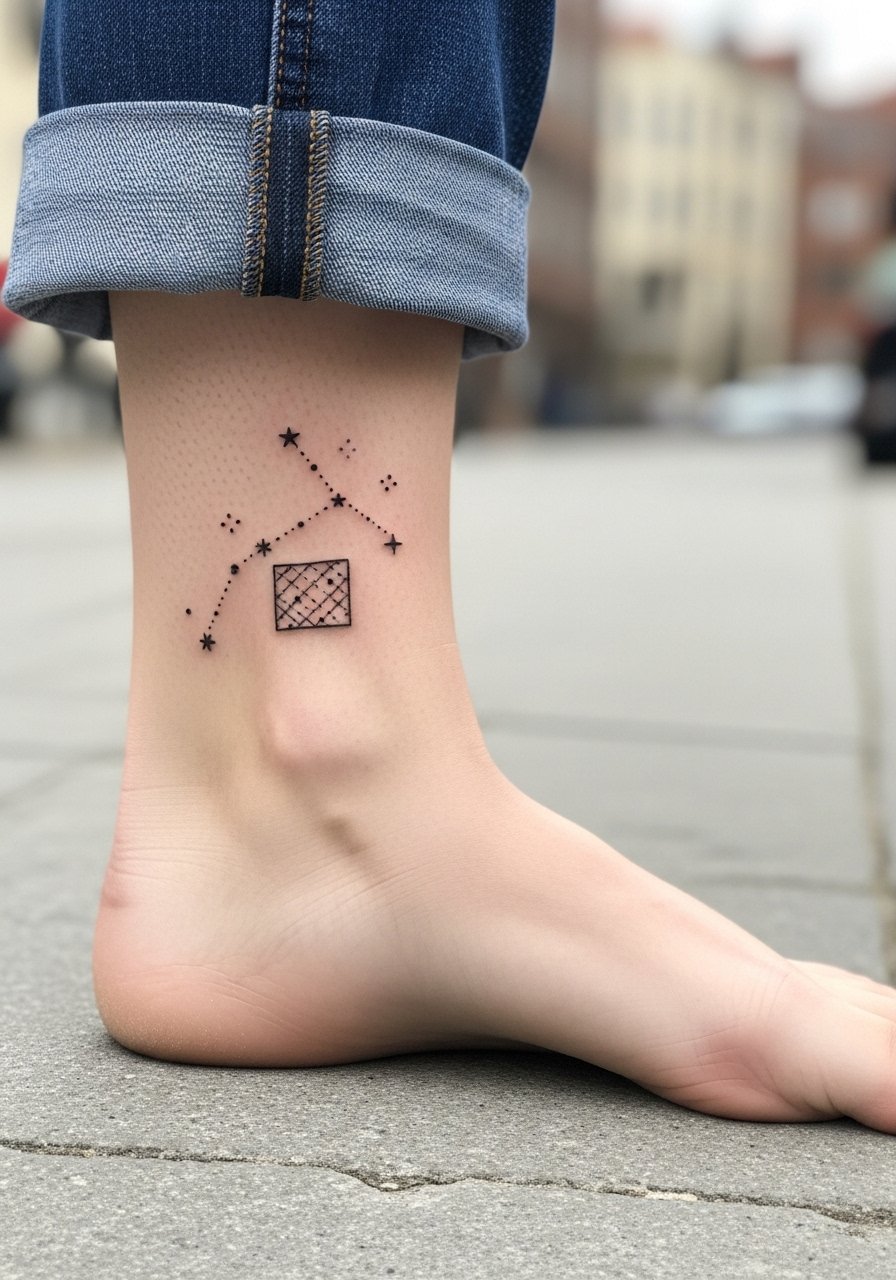
Ankle constellations make great small clusters that are easy to show and hide. Tell the artist you want slightly spaced stars and light dot connectors rather than heavy lines so the pattern stays airy. The ankle can sting near the bone and usually heals faster if you limit friction from socks and shoes. Common mistakes include requesting heavy black connectors that spread into a single line. For a summer reveal, roll jeans and pair with sandals or sneakers.
23. Minimal Script Patchwork Along the Spine
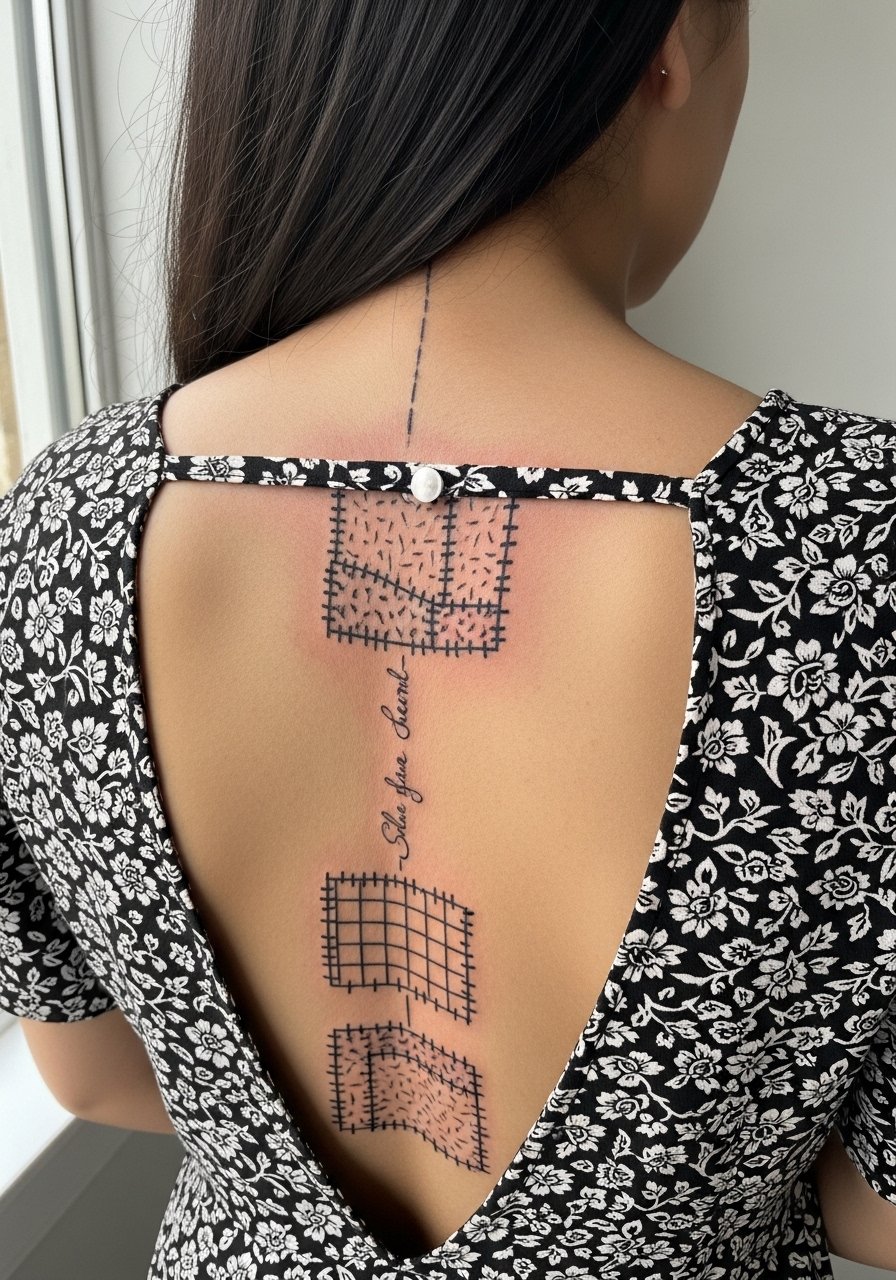
Spine pieces look elegant centered along the back when spacing is considered for movement. Ask for slightly larger letter spacing than you think you need because skin stretch can compress close characters. Spine sessions can be intense, so expect breaks and a longer timeline for multi-patch compositions. The common mistake is stacking many tiny words in a narrow column. For showing it off pair with an open-back midi dress that frames the line without interrupting the script.
24. Abstract Line Patchwork on Outer Shoulder
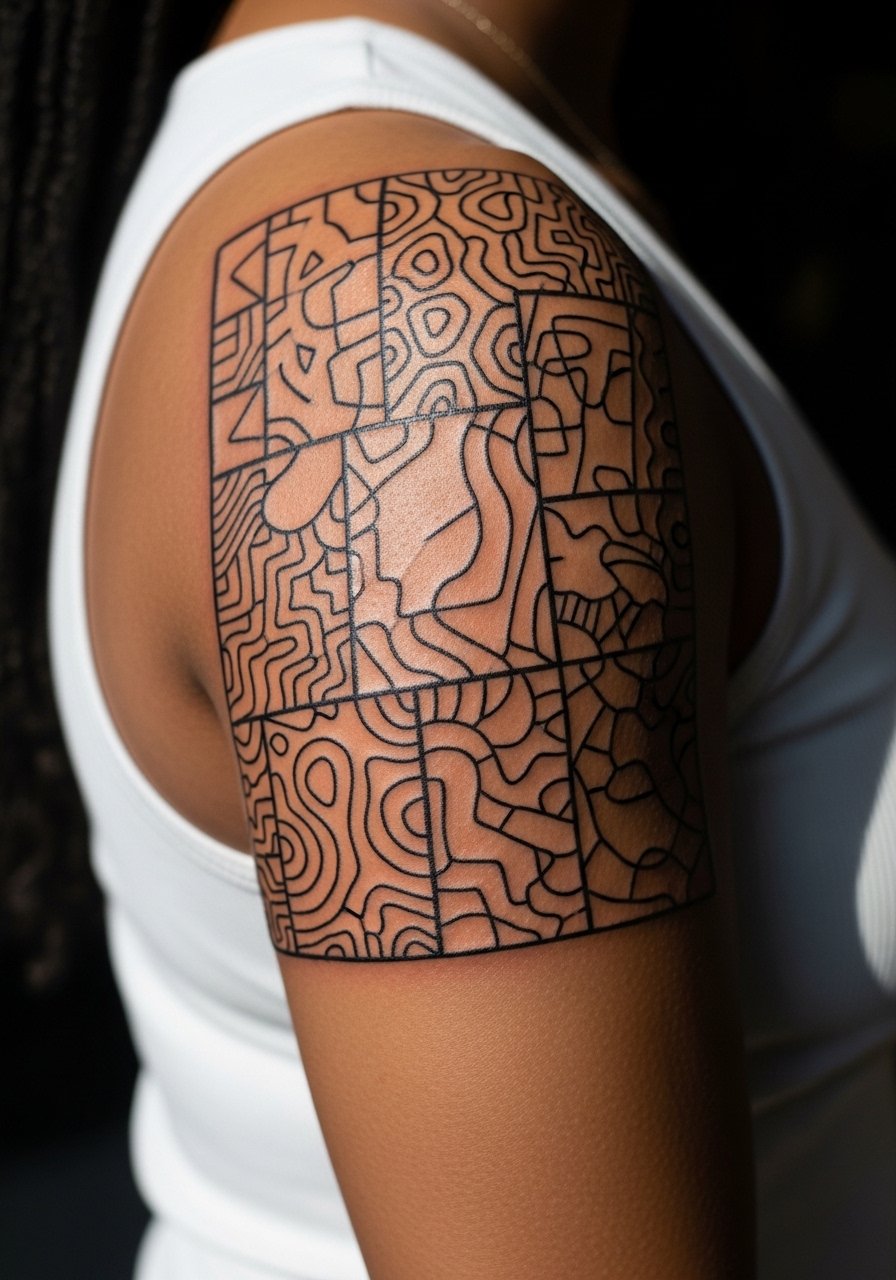
Outer shoulder is forgiving and great for abstract line experiments that play with negative space. In the consult, ask for confident single-pass strokes instead of tentative hairlines, that keeps the pattern legible. Sessions are comfortable and often done in one sitting for a small cluster. A mistake is overcomplicating the flow so the lines fight each other. For an easy reveal, wear a loose tank top you can pull aside without stressing the skin.
25. Stippled Rose Cluster on Inner Bicep
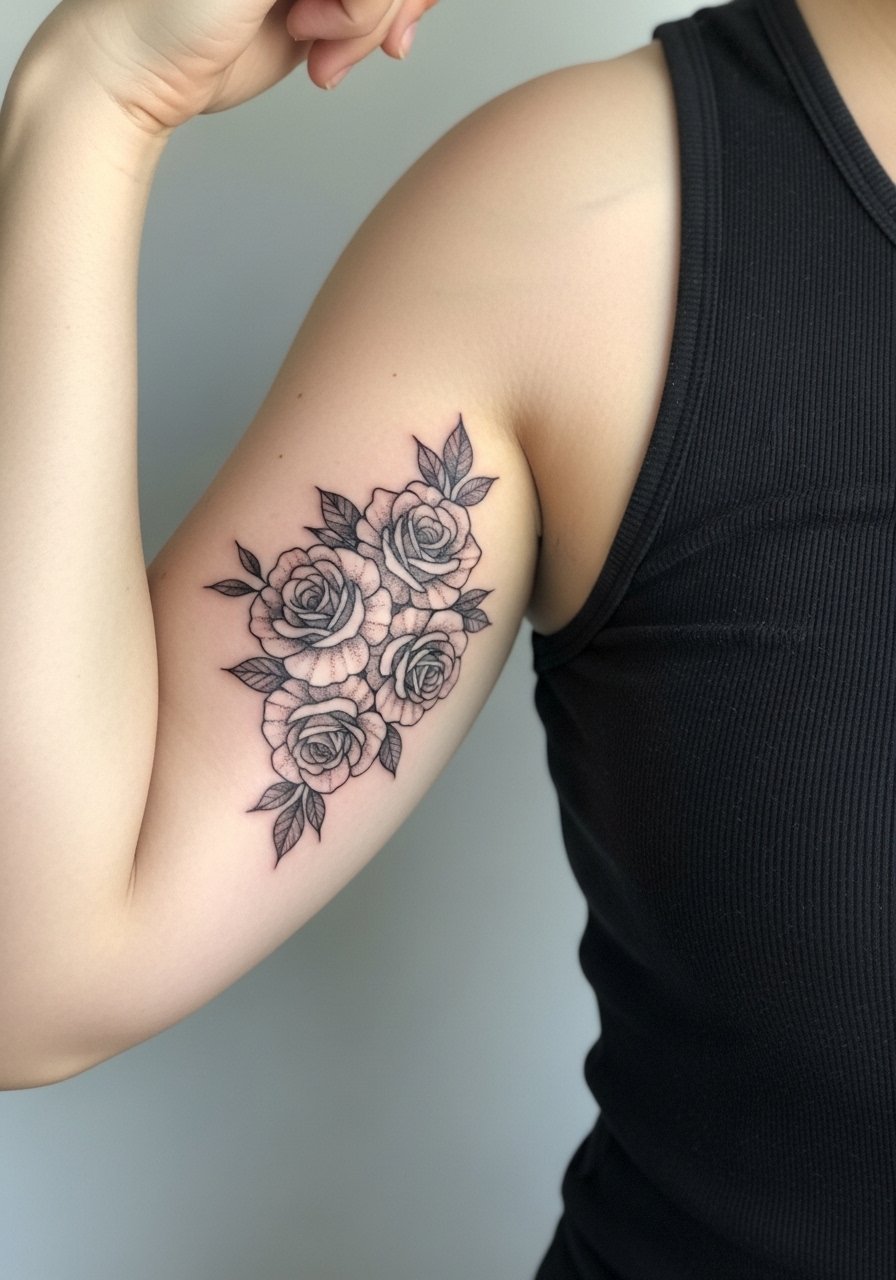
Inner bicep pieces can look intimate and soft when stipple shading is used as the main texture. Tell your artist to favor subtle dot gradients and keep solid black away from tight folds. This area can be sensitive and the session often requires breaks for comfort. A common mistake is dense black fill right where the skin creases, which tends to blur. For session wear, a tank top with room in the armhole makes access easier and keeps the artist from pinching fabric.
26. Tiny Floral Patchwork Behind the Knee
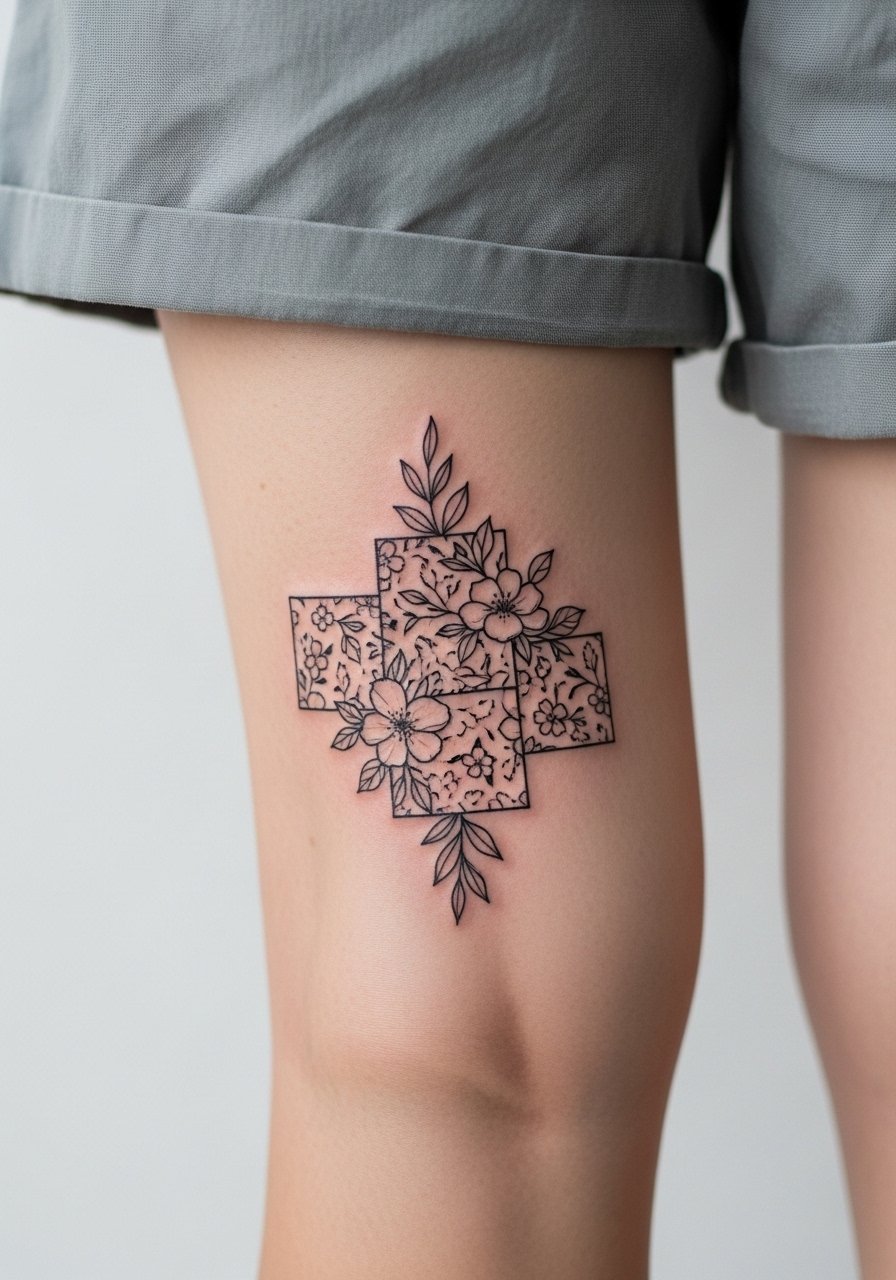
Behind-knee patches are playful and hidden until you sit or bend in a certain way. Ask for modest scale and open gaps between petals so movement does not compress the pattern. Sessions here are unusual because the skin folds a lot and you may change leg positions, so expect a mix of pressure and stillness. A frequent error is over-detailing tiny petal veins that vanish after healing. For the appointment wear loose shorts so the artist can access the area without stretching fabric.
27. Geometric Band Patchwork Around the Wrist
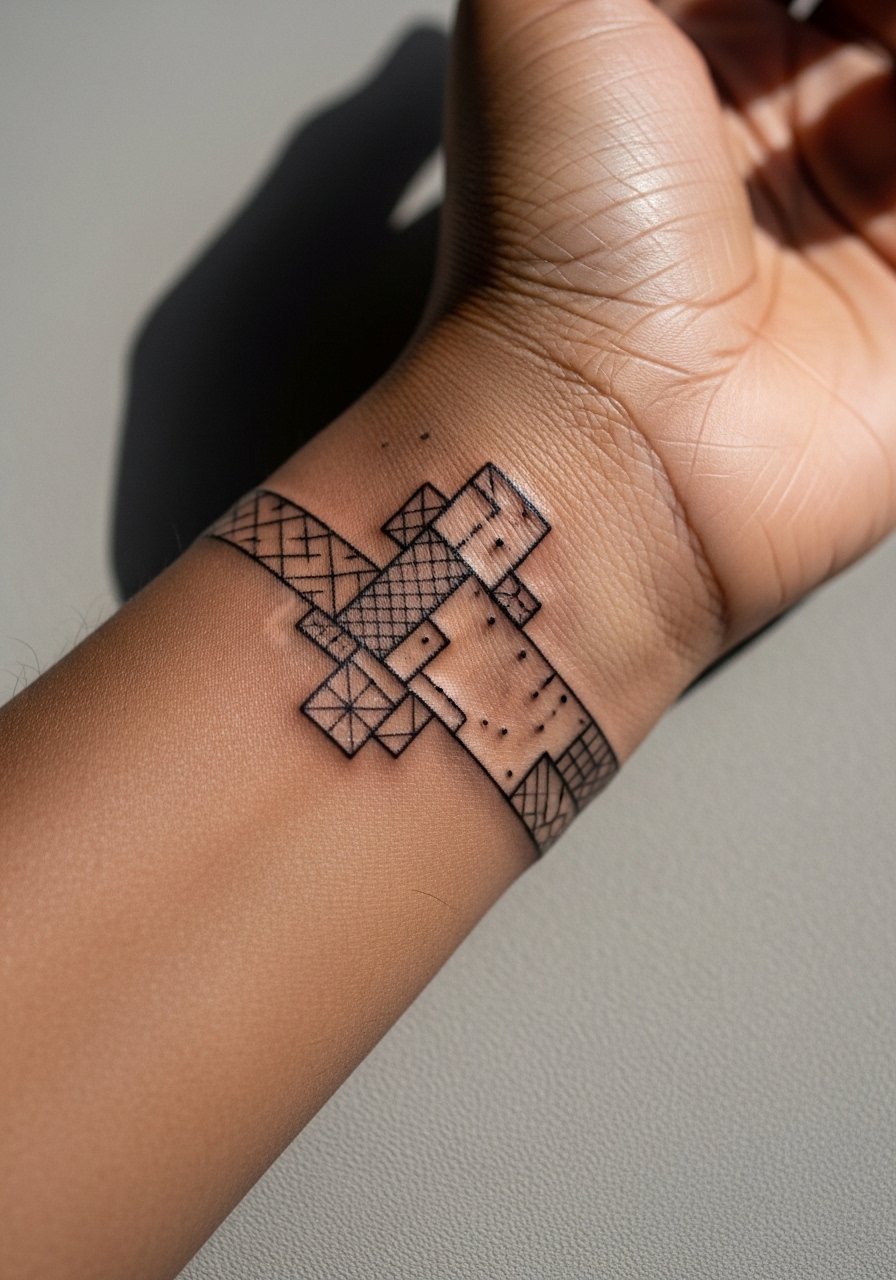
A wrist band that reads as patchwork benefits from consistent line weight and deliberate gaps between shapes. Tell your artist to map the band while your wrist is in its relaxed position so the pattern sits naturally. Wrist bands can be sensitive and heal faster if you avoid tight jewelry during the first two weeks. The common mistake is trying to cram high detail into a narrow band, which softens quickly. For a subtle, everyday look, wear a simple minimalist watch above the band so both elements breathe.
Frequently Asked Questions
Q: Will fine line patchwork blur together if I get multiple small patches close on the same limb?
A: It depends on spacing and needle depth. Ask your artist to leave a few millimeters of clear skin between patches and to plan negative space corridors. Overcrowding is the main culprit when small patches lose definition, and a staged approach over several sessions usually gives the best long-term clarity.
Q: How should I prepare clothing and accessories for a collarbone, sternum, or ribcage session?
A: Wear easy-to-shift garments like a wide-neck shirt, fitted sports bra, or cropped top so the artist can work without tugging fabric. Bring layers you can remove or adjust quickly for breaks. Comfortable, loose bottoms help with longer torso sessions.
Q: Do dotwork and stipple techniques age differently from fine line work?
A: From what I've seen, dotwork that uses gradual density tends to hold its texture longer than ultra-fine hairlines, because the dots create micro-structure that resists early merging. Fine line ages well on low-motion, low-friction areas, but in high-movement zones expect touch-ups sooner.
Q: Are there placements you should avoid for delicate patchwork if I want lower maintenance?
A: Yes. Hands, fingers, and the ribs usually demand more maintenance because of washing, friction, and skin stretch. Forearms, outer shoulders, and calves are easier on delicate work if you want lower touch-up frequency.
Q: How do I talk to an artist about cultural motifs like mandalas without causing offense?
A: Be upfront that you want an inspired piece rather than a direct sacred replica, and ask the artist about their experience with such patterns. Many clients choose personal motifs that borrow geometry while avoiding religious symbols tied to specific cultures.
