
Fine line spider web tattoos are flooding feeds, and what looks perfect on a phone often reads differently on skin after a year. Trends push tiny, intricate webs into small spots that swell with time. The pieces that actually keep their shape balance spacing, line weight, and placement more than they chase maximum detail. Below are 27 spider web directions that consider aging, session comfort, and wardrobe so you know what will still look intentional after a few touch-ups.
1. Fine Line Web on Inner Forearm
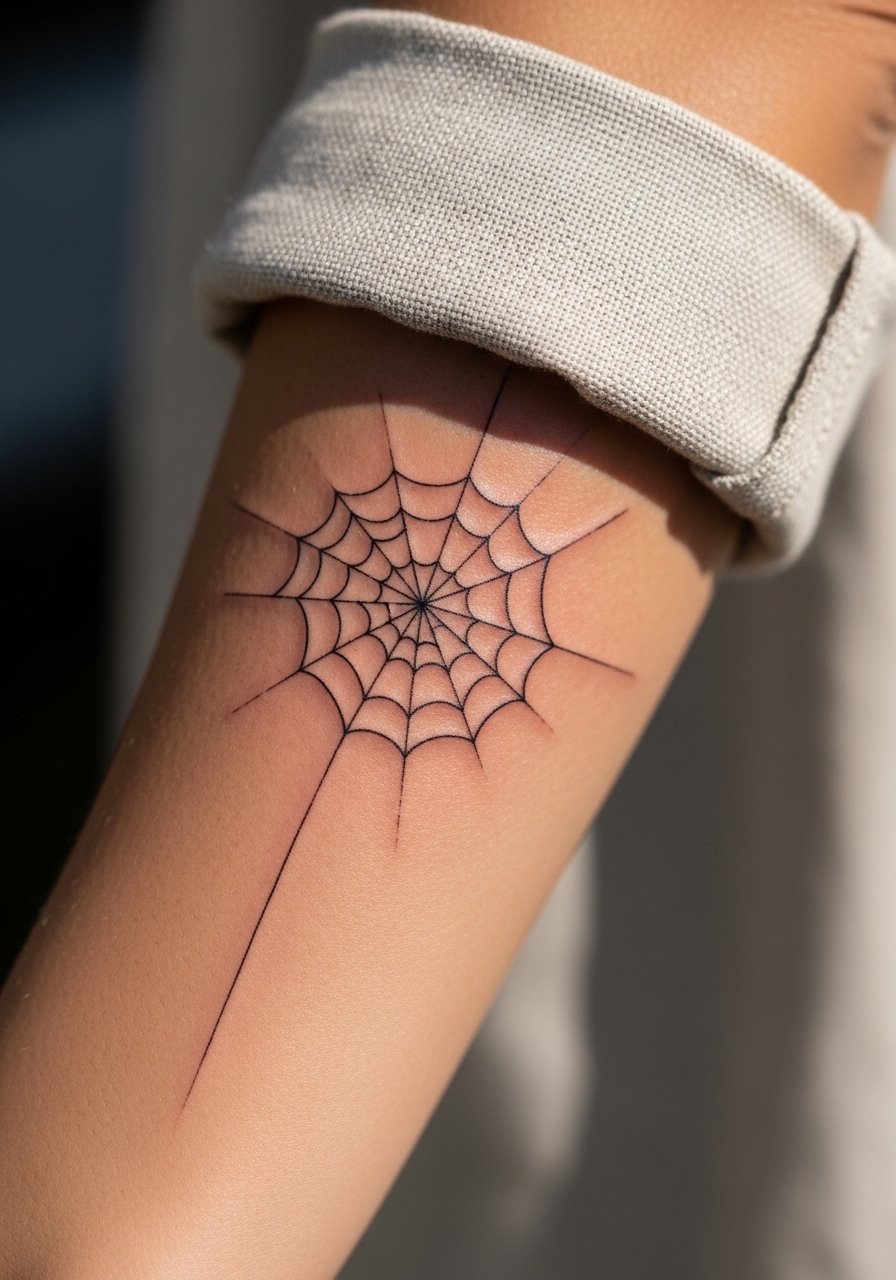
When you sit with your artist for this one, bring reference photos that show exact line weight and spacing. The inner forearm holds linework well but the mistake is asking for threads too close together. Ask for slightly heavier anchor lines and airy radial lines so the web keeps definition at year three. Session feels moderate, expect small areas of sting near the wrist crease. For showing it off, cuff your sleeves or wear a rolled linen shirt to frame the piece without covering the lines.
2. Micro Web Around the Wrist
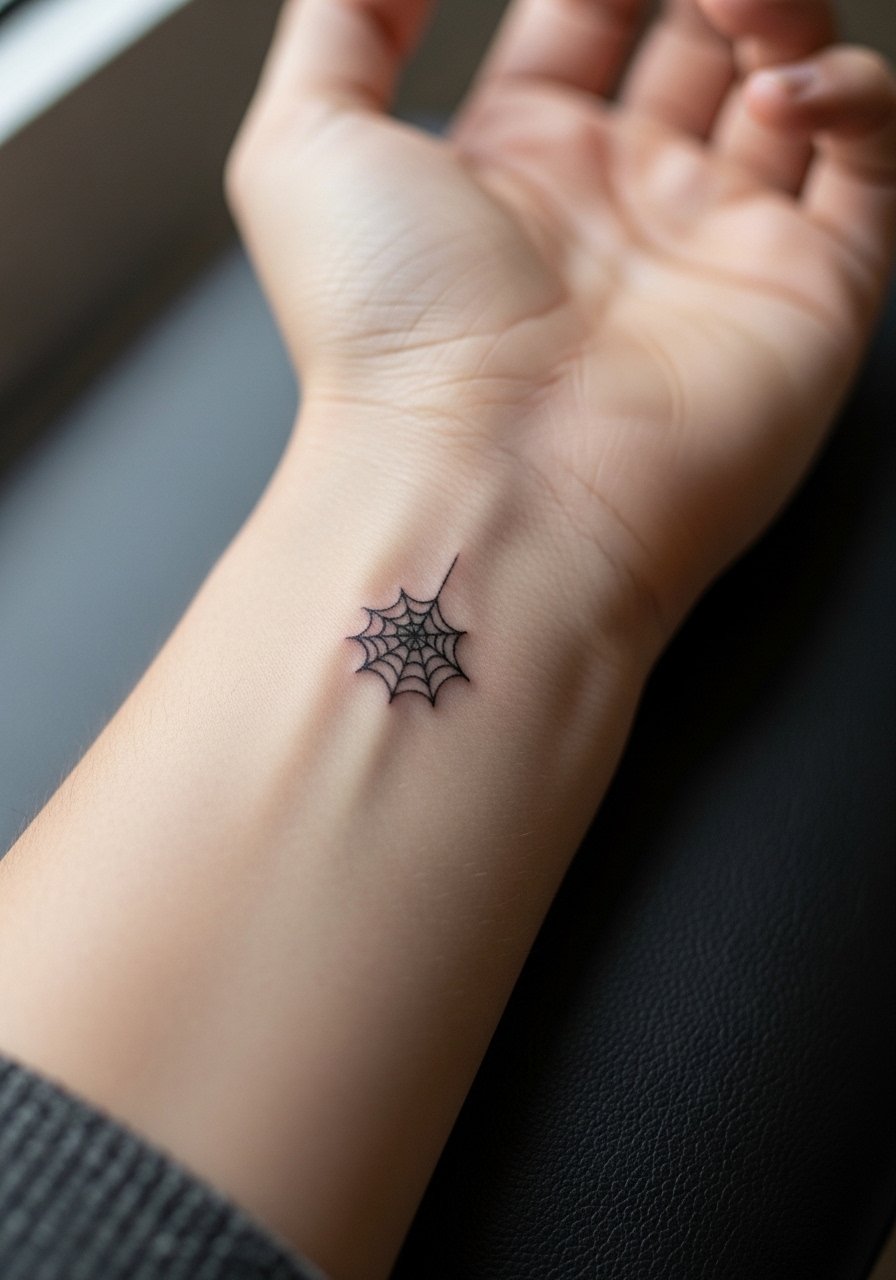
I’ve seen tiny wrist webs hold surprisingly well when artists leave a touch more space between spokes. Fair warning about friction from watches and bracelets that speed fading. A common mistake is compressing too much detail into the circumference. The session is quick but the wrist is sensitive, so expect a sharp sting near the bone. To protect and show the design, pair it with a minimalist watch or stack thin bracelets. Try a thin chain bracelet that sits beside the ink without rubbing it every day.
3. Blackwork Shoulder Panel
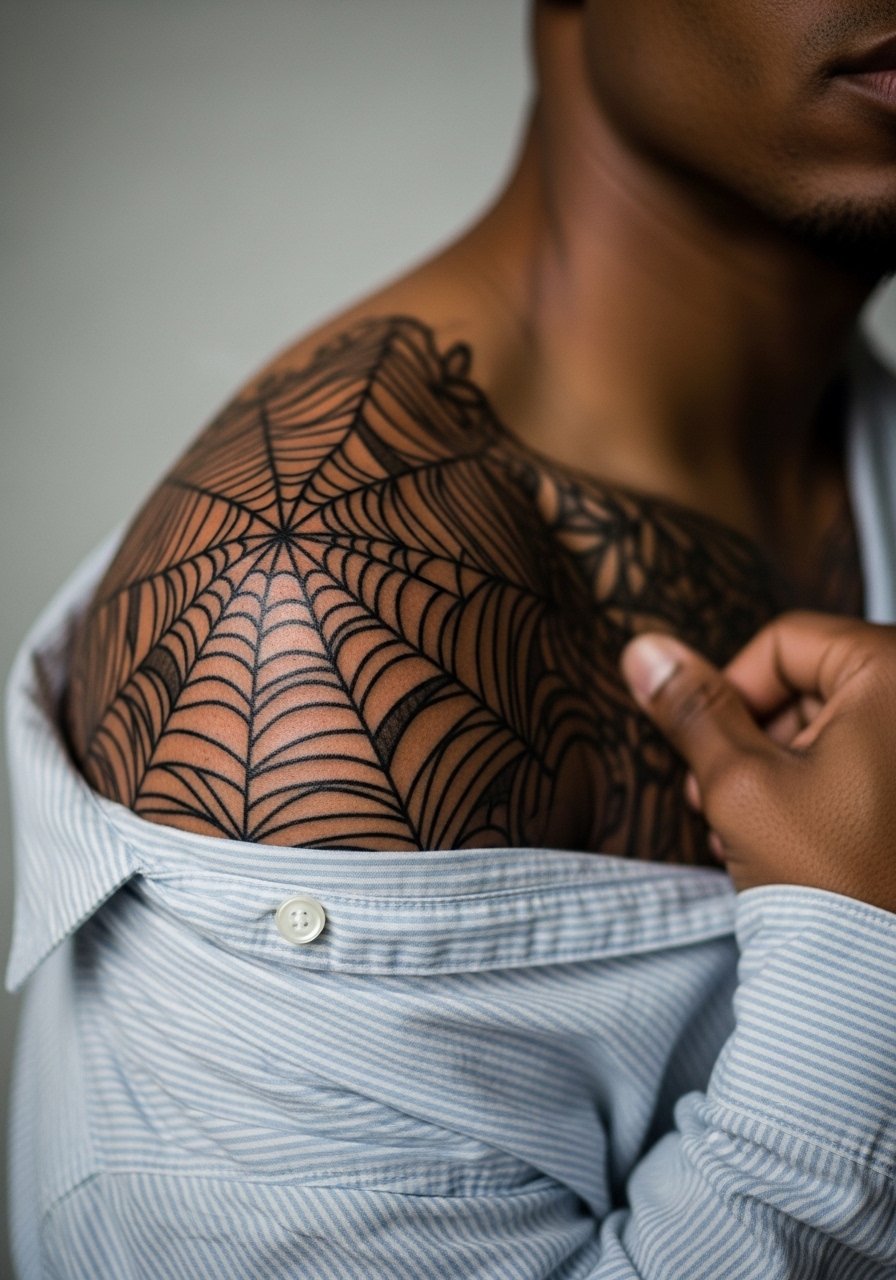
There is something about saturated blackwork that reads from across a room. The shoulder takes bold saturation well and ages into a striking silhouette. The main mistake is making the web too tight against muscle curves. Tell your artist you want bold anchor lines and gradual fade toward the edges so the shape holds when your arm moves. Session is longer than a wrist piece and the shoulder is mid-range on pain. For session access, wear a loose button-down shirt you can slide off one shoulder.
4. Geometric Web on the Ribcage
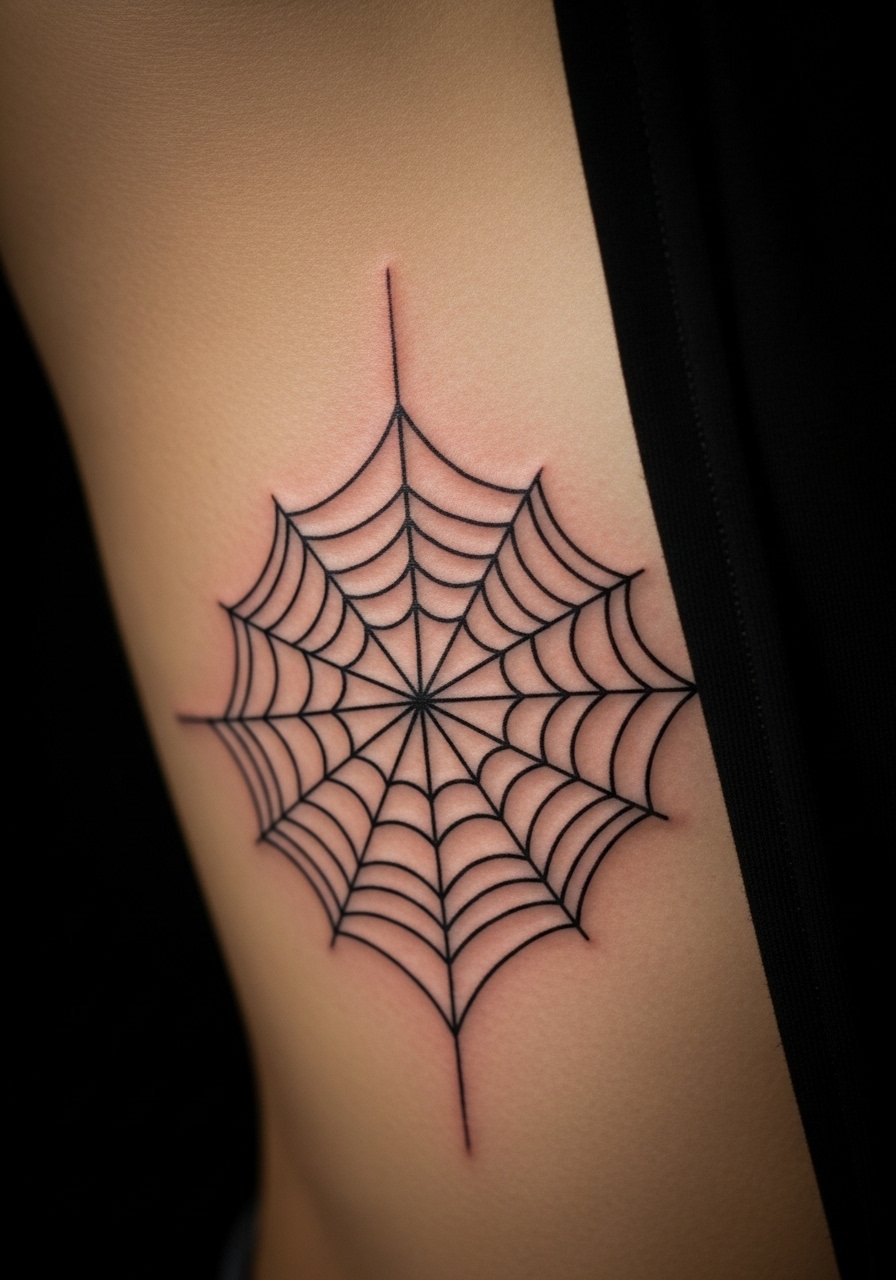
Artists split on fine line on the ribs. One camp says the skin stretch blurs lines within two years. The other camp argues that with controlled needle depth and spacing fine line settles fine on the ribs. My take is to plan more spacing and slightly thicker radial lines if you want longevity. Pain is high on the ribs and sessions may need breaks. For the appointment, a cropped top makes access easy and keeps you comfortable during long sits, so bring a cropped athletic top you can adjust without fully undressing.
5. Dotwork Web Around the Ankle
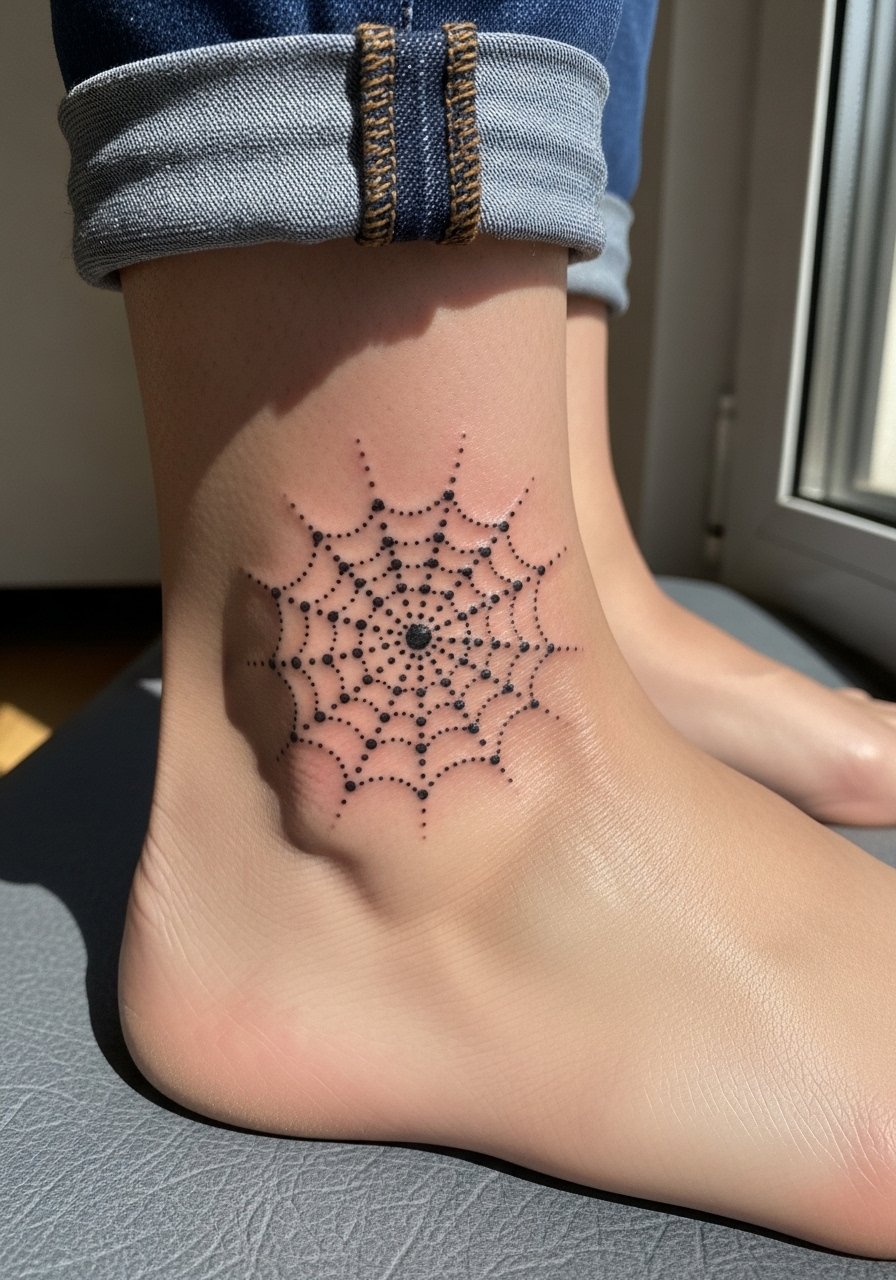
The biggest mistake with ankle work is underestimating footwear friction. Dotwork holds nicely on the ankle when the artist spaces dots to avoid muddying. Expect modest pain near the bone and watch for swelling that alters banded designs in the first week. For showing the piece, sandals or rolled jeans help the web sit in view. A pair of neutral sandals keeps the area visible without rubbing the fresh lines.
6. Micro-Realism Spider Hanging on the Bicep
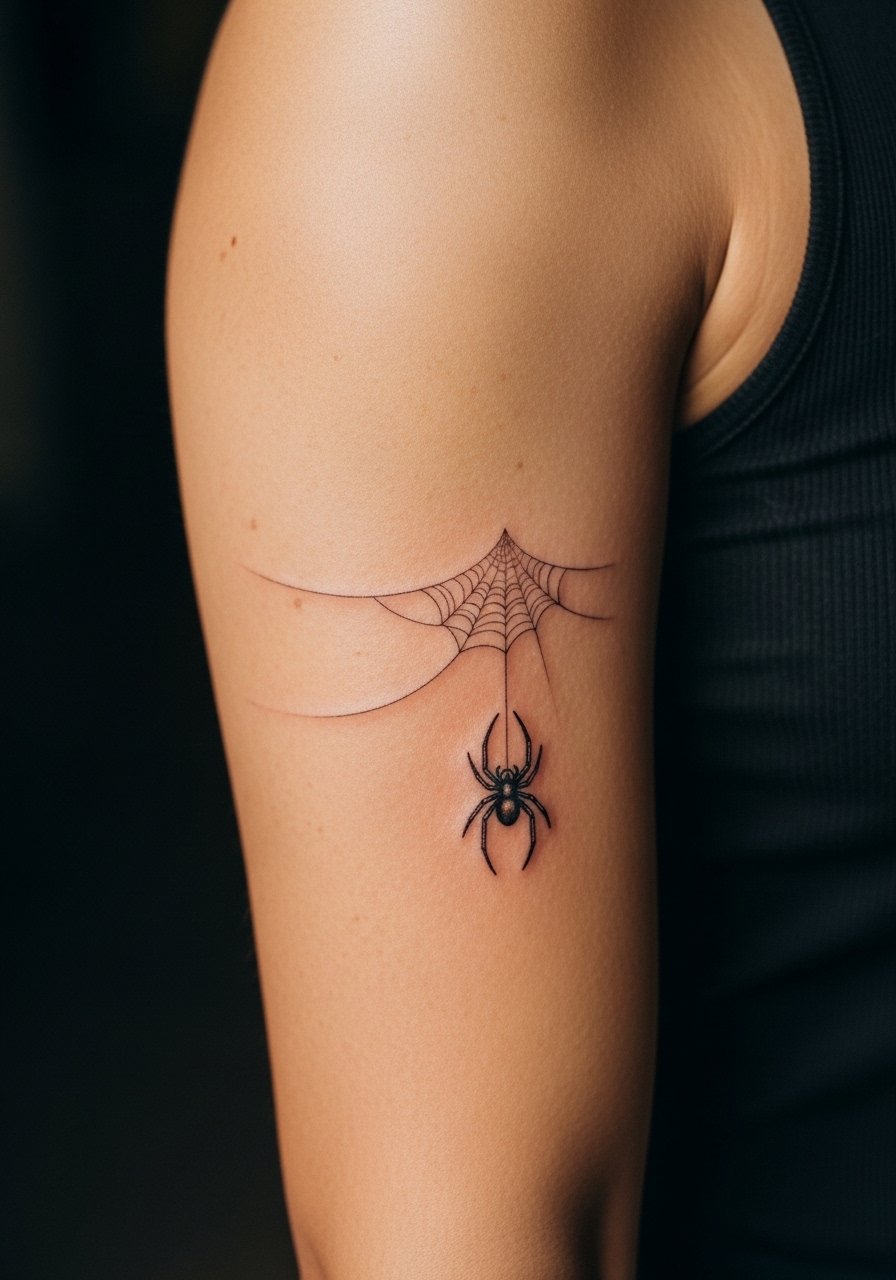
Most micro-realism pieces start crisp and then breathe out over time. The fix is dialing back contrast in the initial stencil and asking for spotty highlight areas instead of pure black. Expect a longer session because of micro shading and fussier needlework. The bicep is forgiving for detail but heavy saturation near hair follicles may itch during healing. For session comfort, wear a racerback tank that gives the artist clean access and stays off the area while you move.
Studio Day Picks
The inner forearm, wrist, and bicep pieces above have different prep needs, so a few targeted items smooth the session and the early healing window.
-
Stencil transfer paper kit. Lets you preview placement on curved areas like the bicep or wrist before committing to the final stencil.
-
Topical numbing cream. Applied about 45 minutes before helps wrists and ribs without affecting linework when used correctly.
-
Thin protective film roll. Keeps ankle and wrist tattoos from catching on socks or bracelets during the first few days.
-
Fragrance-free gentle body wash. Cleans the healing area without stripping moisture that fine line pieces rely on.
-
Aquaphor healing ointment. Thin application in the initial days locks in moisture for delicate linework without clogging.
7. Negative Space Web Back Piece
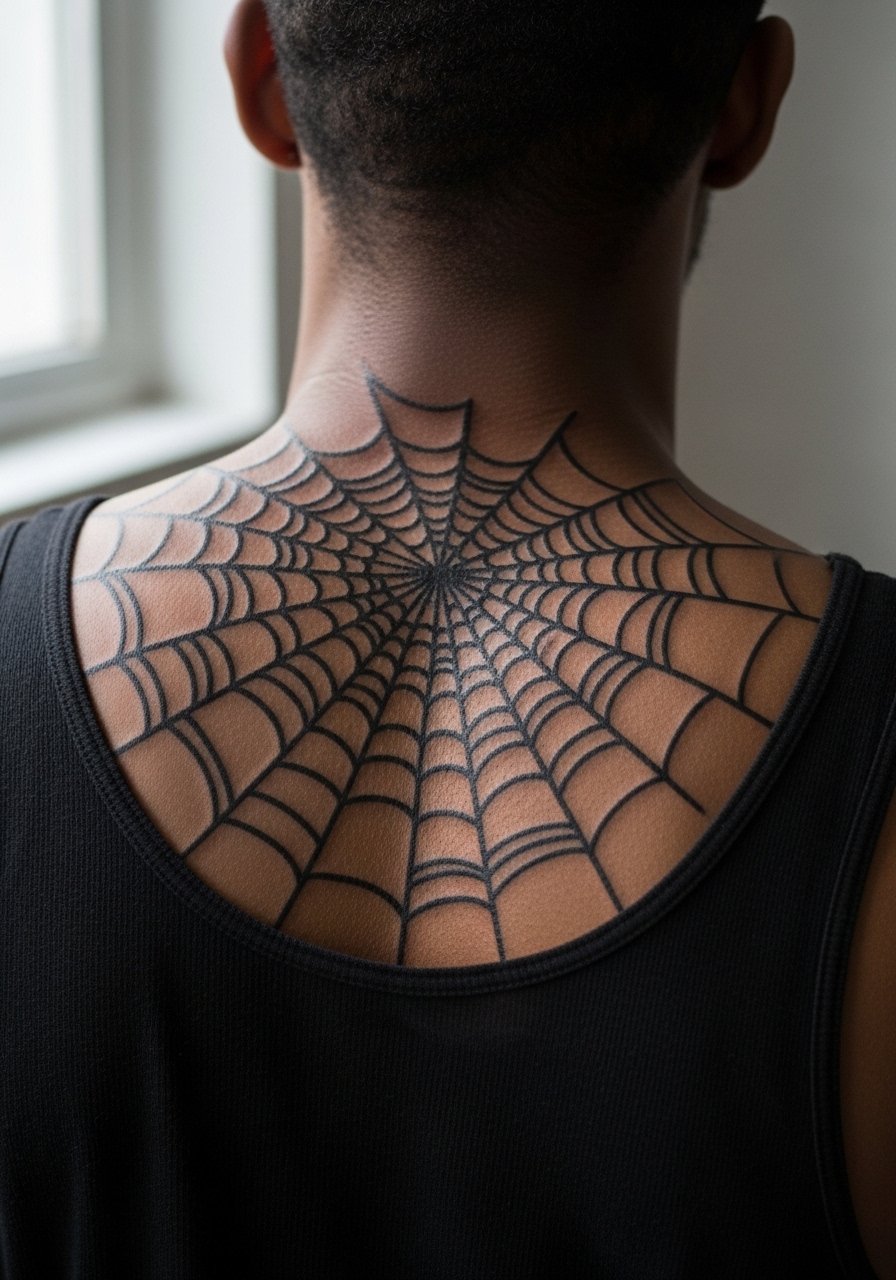
Fair warning, large back pieces need planning across multiple sessions. The visual impact of negative space webs comes from bold black panels that let the untouched skin form the web. A common mistake is trying to cram too much small detail into the space instead of using contrast. Sessions can be long and you will lie face down for stretches. For show-off looks after healing, open-back tops work well so consider a few styles like open-back midi dresses for evenings.
8. Mini Web Behind the Ear
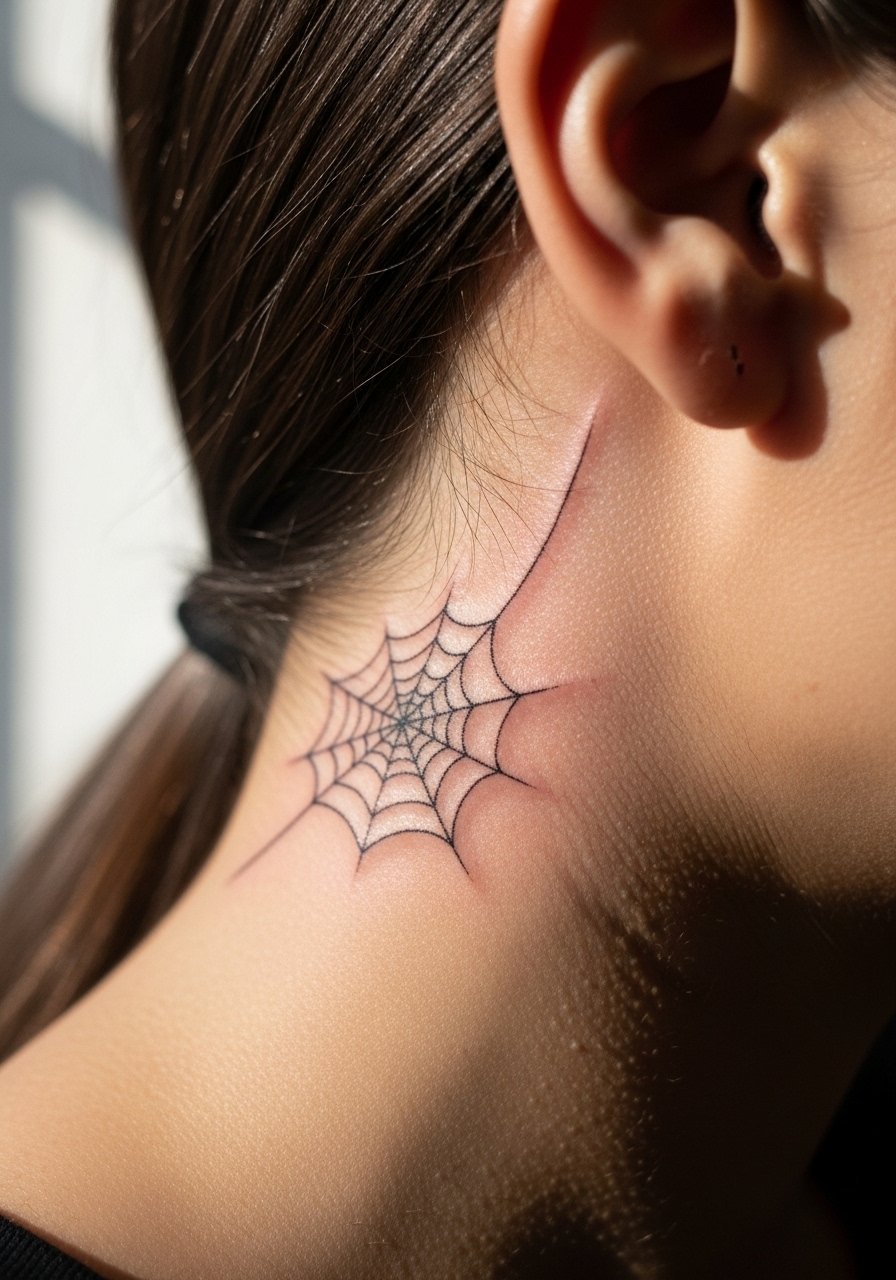
When you sit down with your artist for a behind-ear piece, clarify how visible you want the web to be under hair. The area trades size for subtlety and is easy to hide. The skin there can be thin so the needle depth matters for preventing blowout. Sessions are quick but the spot is sensitive. Because the tattoo is small and often hidden by hair, the styling note is simple, but you can highlight it with delicate hoop earrings that draw the eye toward the neck.
9. Sleeve-Integrated Web with Floral Elements
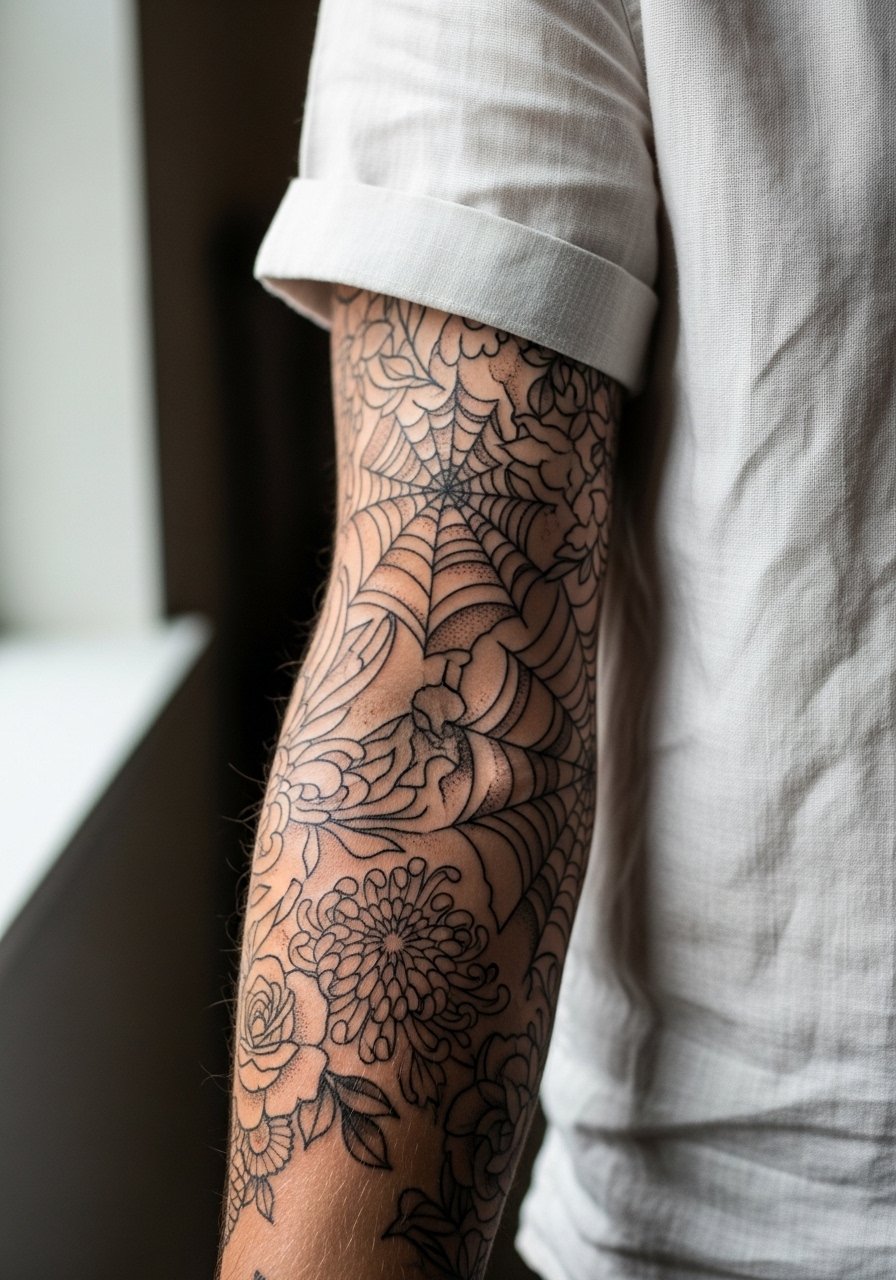
This placement looks its best paired with rolled sleeves and linen textures that let the detailed work breathe. The biggest mistake is trying to force a web over existing dense color without reworking negative space. Tell your artist you want the web to sit between florals and not sit on top of solid pieces. Expect multiple sessions and a mid-level pain for long coverage. For casual wear that frames the sleeve, try a short-sleeve linen shirt you can roll without creasing the area.
10. Mandala Web Sternum Accent
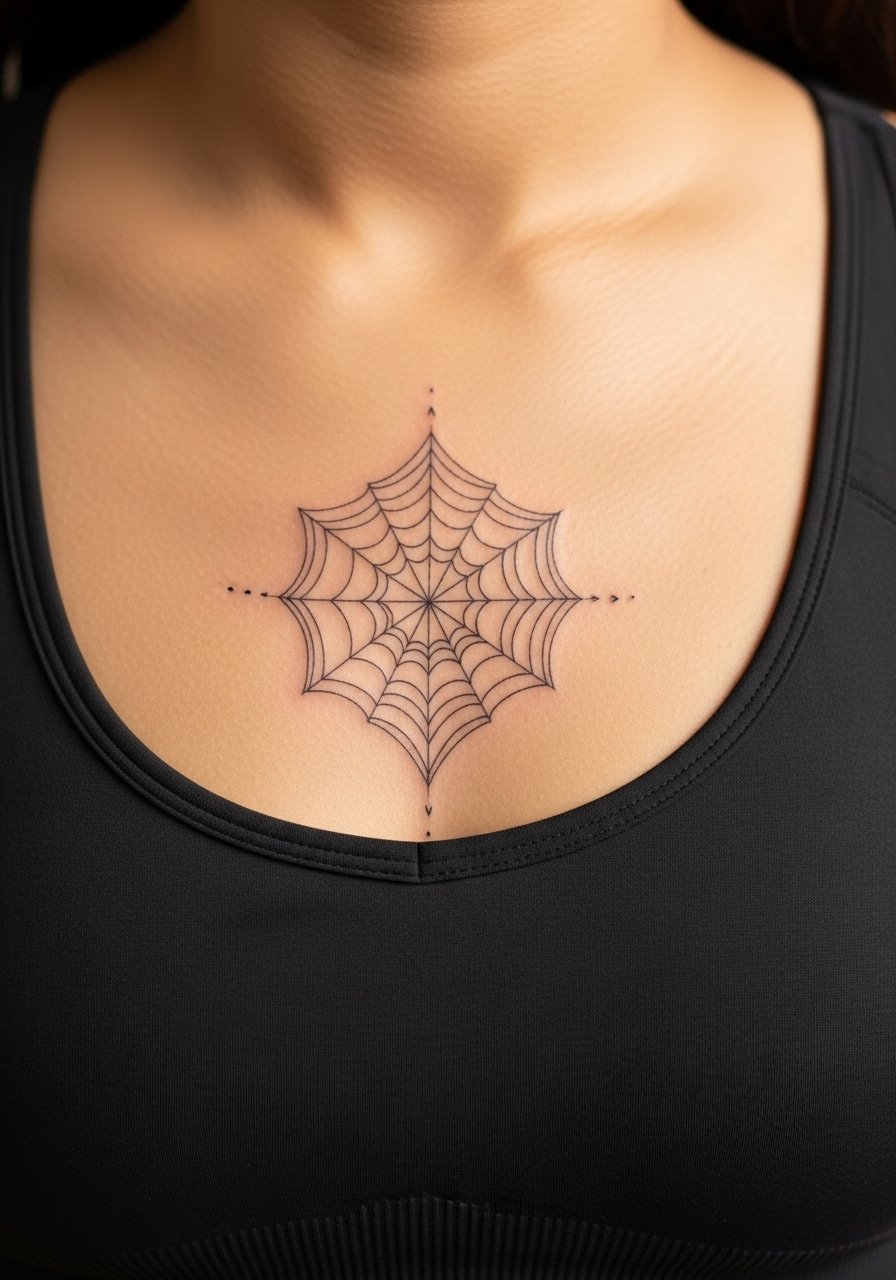
Most sternum pieces need careful sizing to avoid losing interior detail as skin stretches. The visual impact lead applies here because bold anchors and open negative space help mandala patterns stay readable. The sternum is sensitive, so the session will be painful for many. For the appointment, wear a fitted sports bra that you can pull down slightly during the sit. After healing, open necklines or bandeau tops frame the design well so consider a bandeau top for showing it off.
11. Web and Spider on the Hand
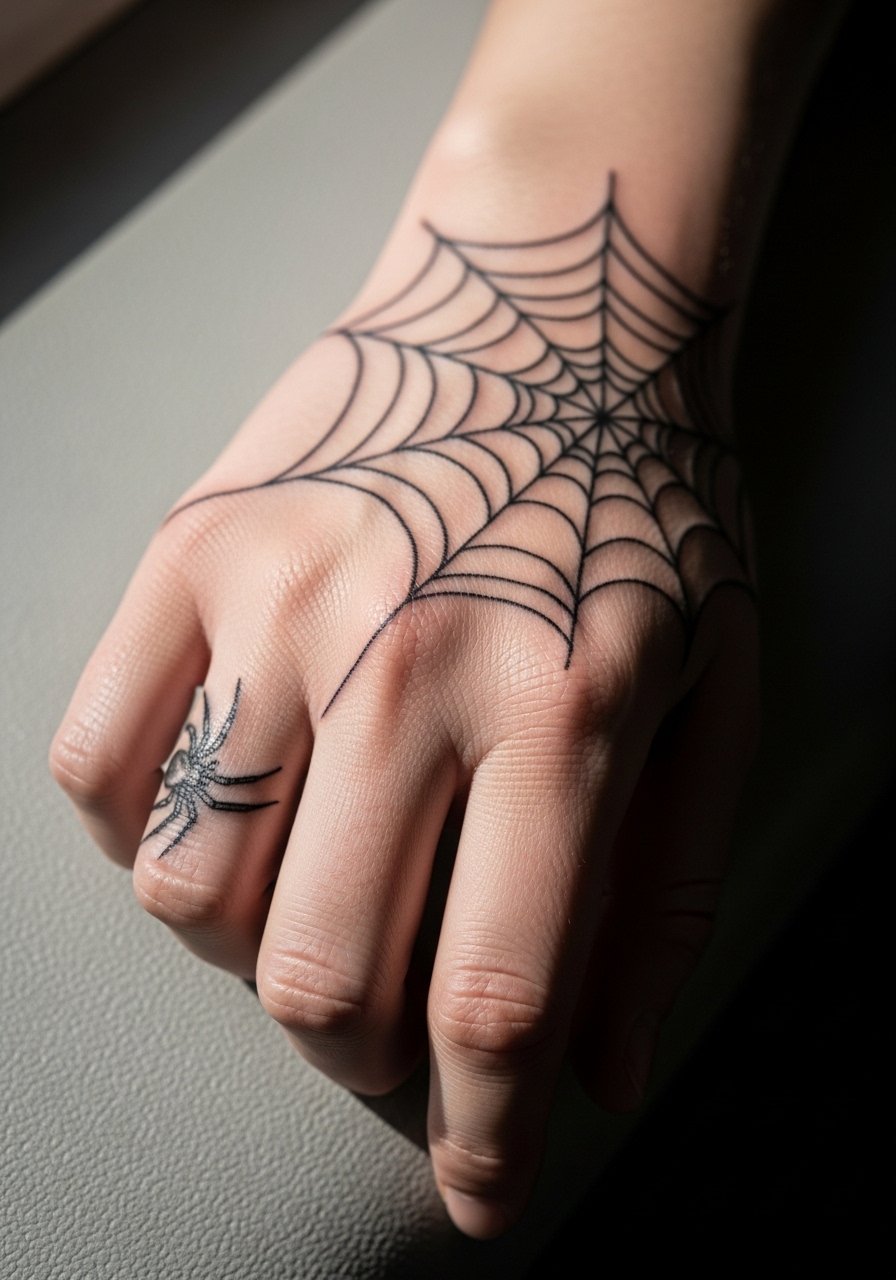
Hand tattoos remain controversial for employment reasons. One camp says hands are a personal canvas that should not limit life choices. The other camp warns they still influence hiring in some industries. Be explicit with your artist about visibility. Hand skin changes quickly and blowout risk is higher. Sessions are painful and touch-ups are common. For styling, pair the hand web with subtle rings that do not rub the piece while it heals. A thin stacking ring set works without constant friction.
12. Calf Web with Stipple Shading
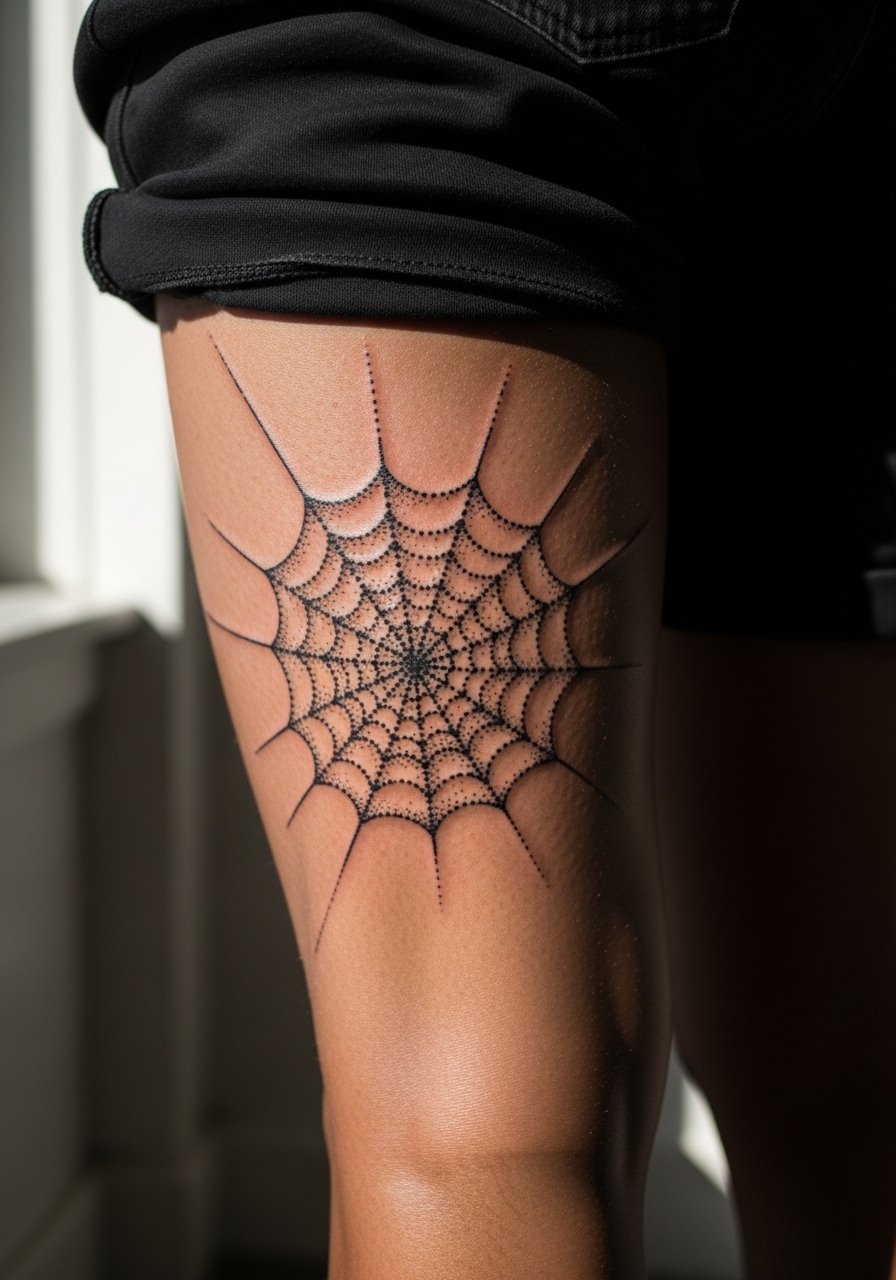
There is a visual payoff when a web uses stipple shading to create depth and motion. The calf is forgiving for detail and ages predictably. Beware of asking for too-dense dot fields because they can merge over time. The session feels like steady scratching but is manageable for most. For showing the calf, choose skirts or shorts that stop above the knee. A pair of high-waisted shorts frames the piece without covering it.
13. Web on the Side of the Neck
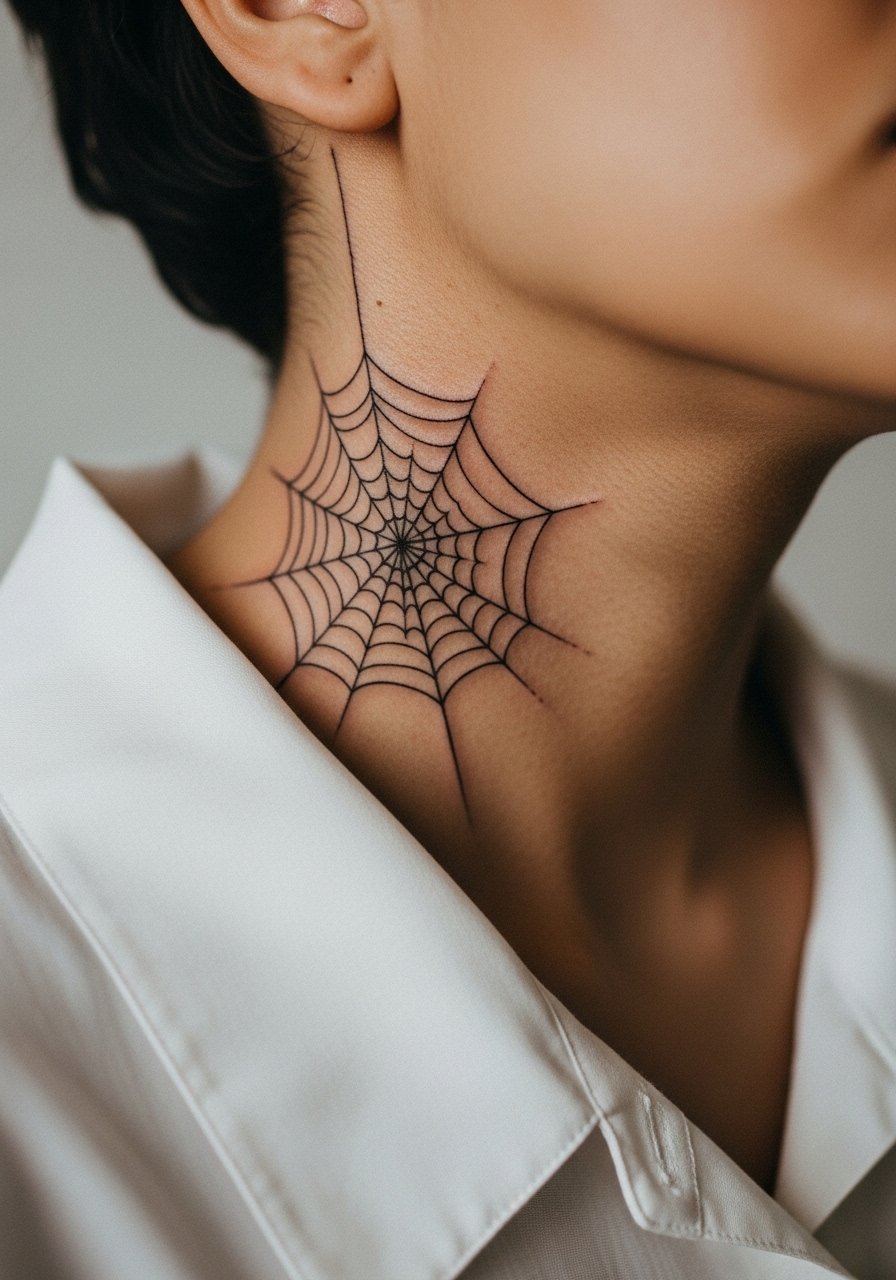
The neck is a statement spot and one to plan carefully. The controversy around neck work is about visibility and career impact. One side argues for personal expression. The other side recommends discrete placement because neck tattoos are hard to hide. From a technical view, fine line can blur on the neck unless spacing is generous. The session is painful and requires trust with your artist. For session comfort, wear a wide-neck shirt you can pull aside and still stay covered.
14. Hip Web Peeking from Swimwear
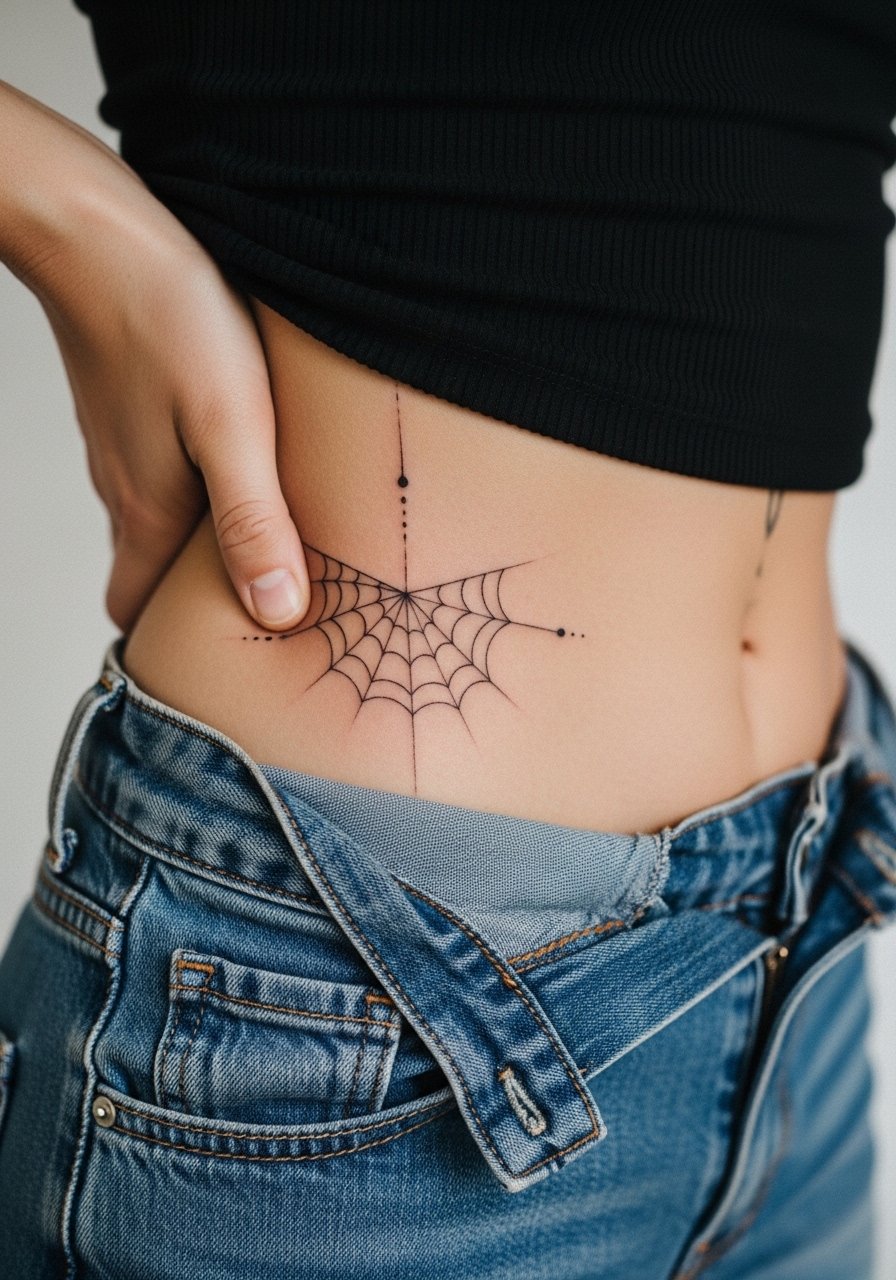
There is a common mistake of placing hip webs too close to stretch zones where clothing rubs. A little offset from the waistband keeps the design visible and reduces friction. The hip is lower on pain for short sessions. For showing off poolside, high-waisted swim bottoms that reveal the top of the piece work best. Consider a high-waisted swimsuit bottom so the web peeks just above the fabric line.
15. Inner Thigh Web with Floral Fringe
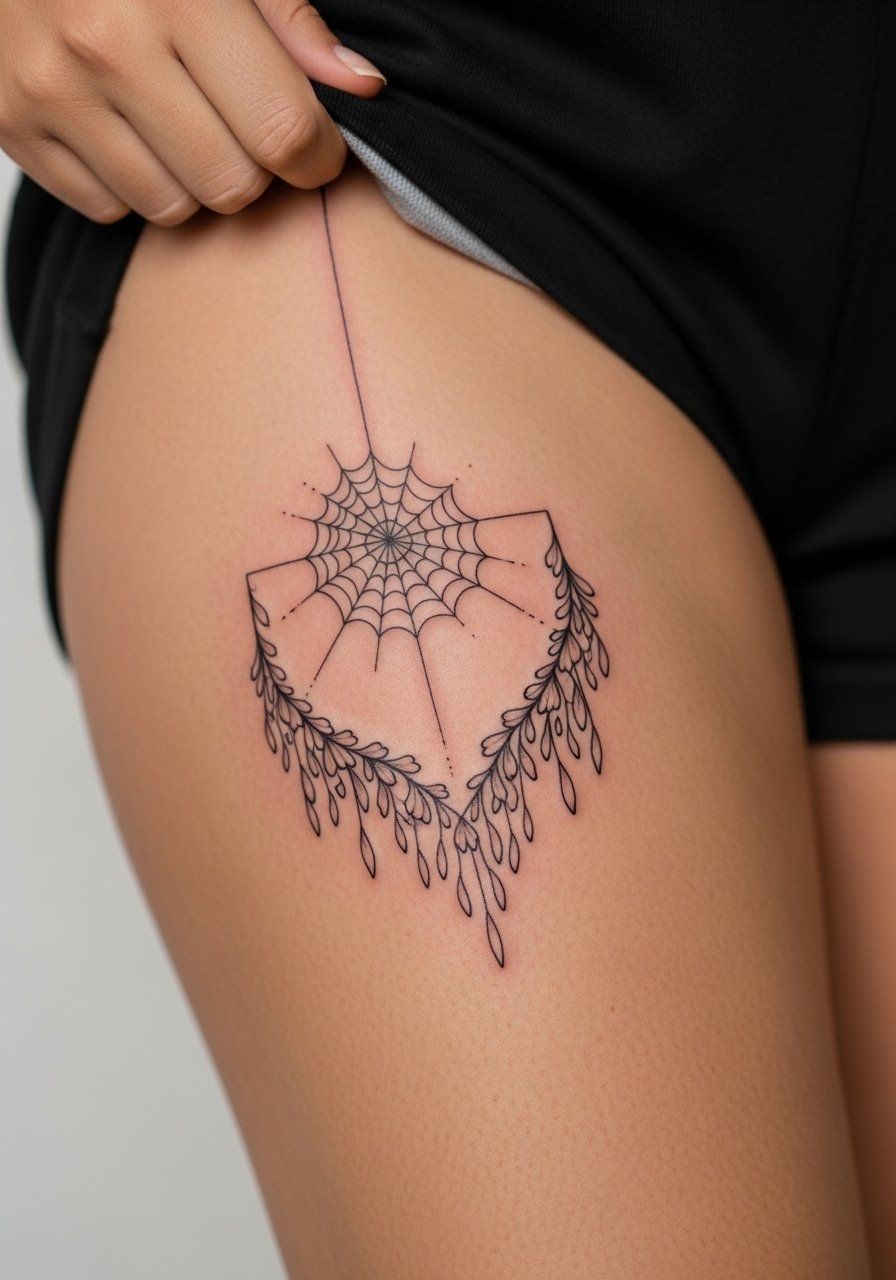
When you consult on an inner thigh piece, be clear about how much the design will be hidden or revealed. The biggest mistake is using tiny detail that will blur against the softer skin there. Expect higher pain and consider splitting long sessions. For the appointment, shorts you can slide without feeling exposed are key. A pair of loose drawstring shorts helps the artist access the area while keeping you comfortable.
16. Mini Web on a Finger
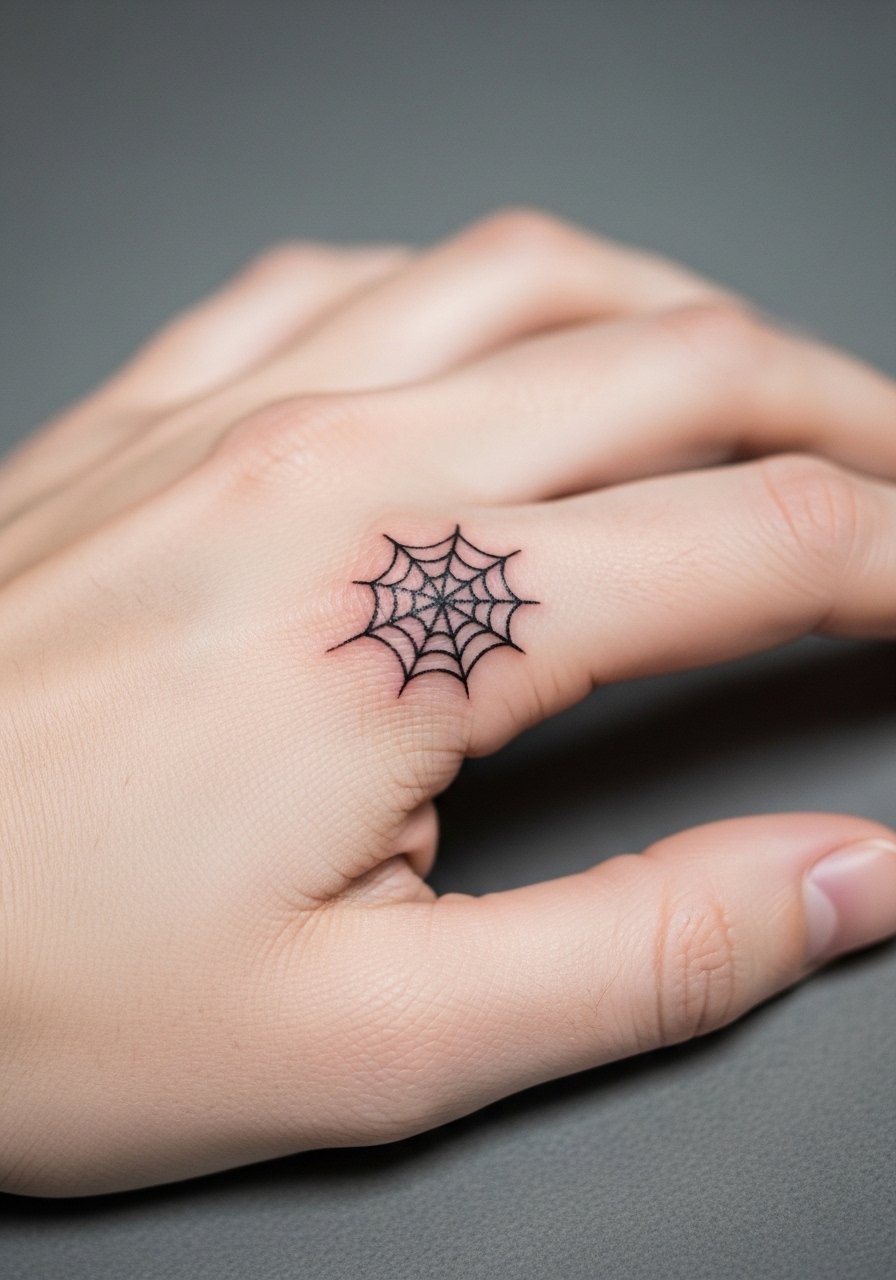
Finger tattoos blur faster than many expect because of constant washing and skin turnover. The pain is sharp and sessions are brief but may need early touch-ups. A common mistake is asking for closed shapes that will fade into a blob. Ask for open, airy lines and accept that touch-ups can be part of the plan. For showing the finger web subtly, pair it with a thin minimalist ring that complements rather than covers the ink.
17. Web Encircling the Calf with Negative Space Spider
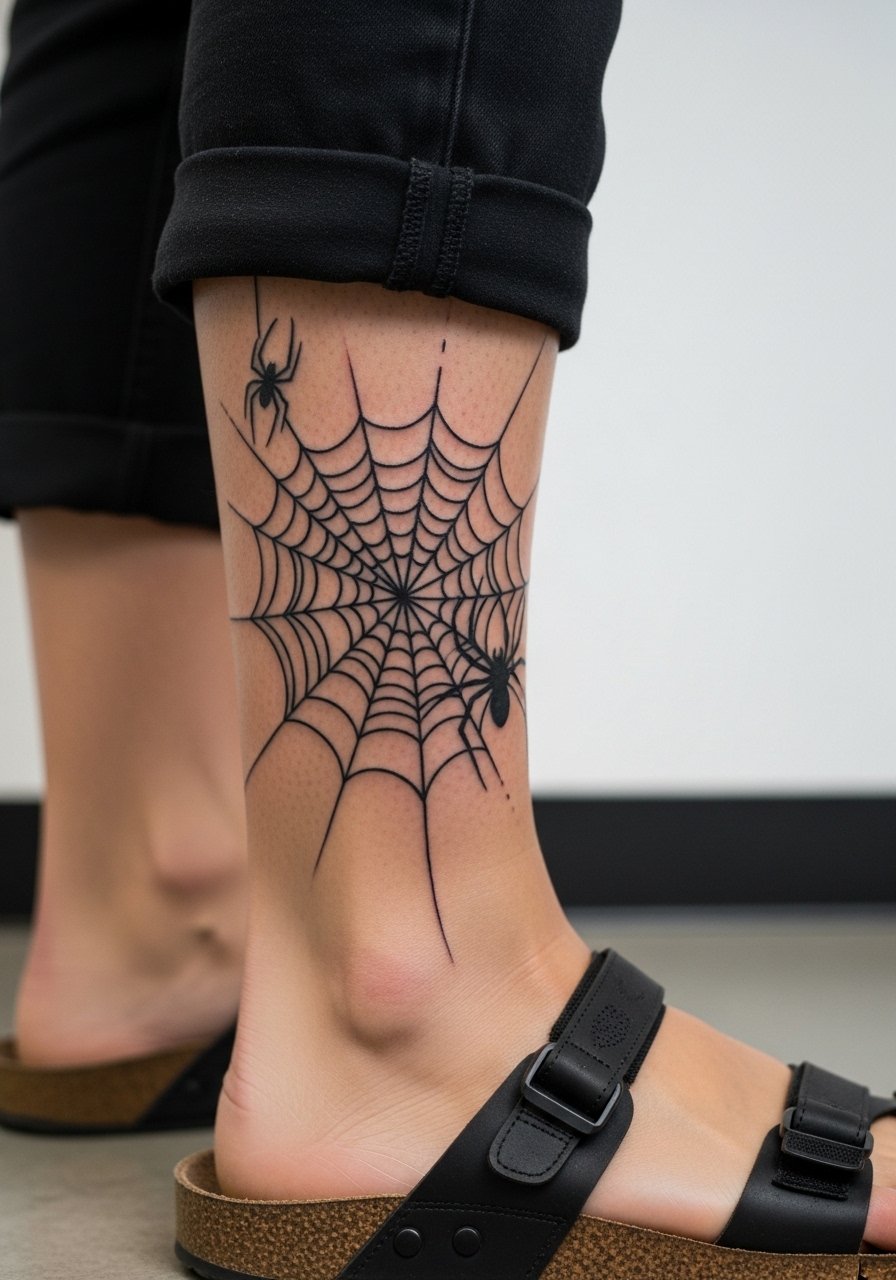
This placement looks great with footwear that keeps the area visible and stops constant rubbing. The main mistake is wrapping too tightly toward the Achilles where shoes can irritate. Pain is moderate and sessions are straightforward. Tell your artist which side of the calf you prefer for visibility. For showing this wrap, sandals or cropped pants work best so try a pair of casual sandals that keep the design in view.
18. Small Web Near the Collarbone
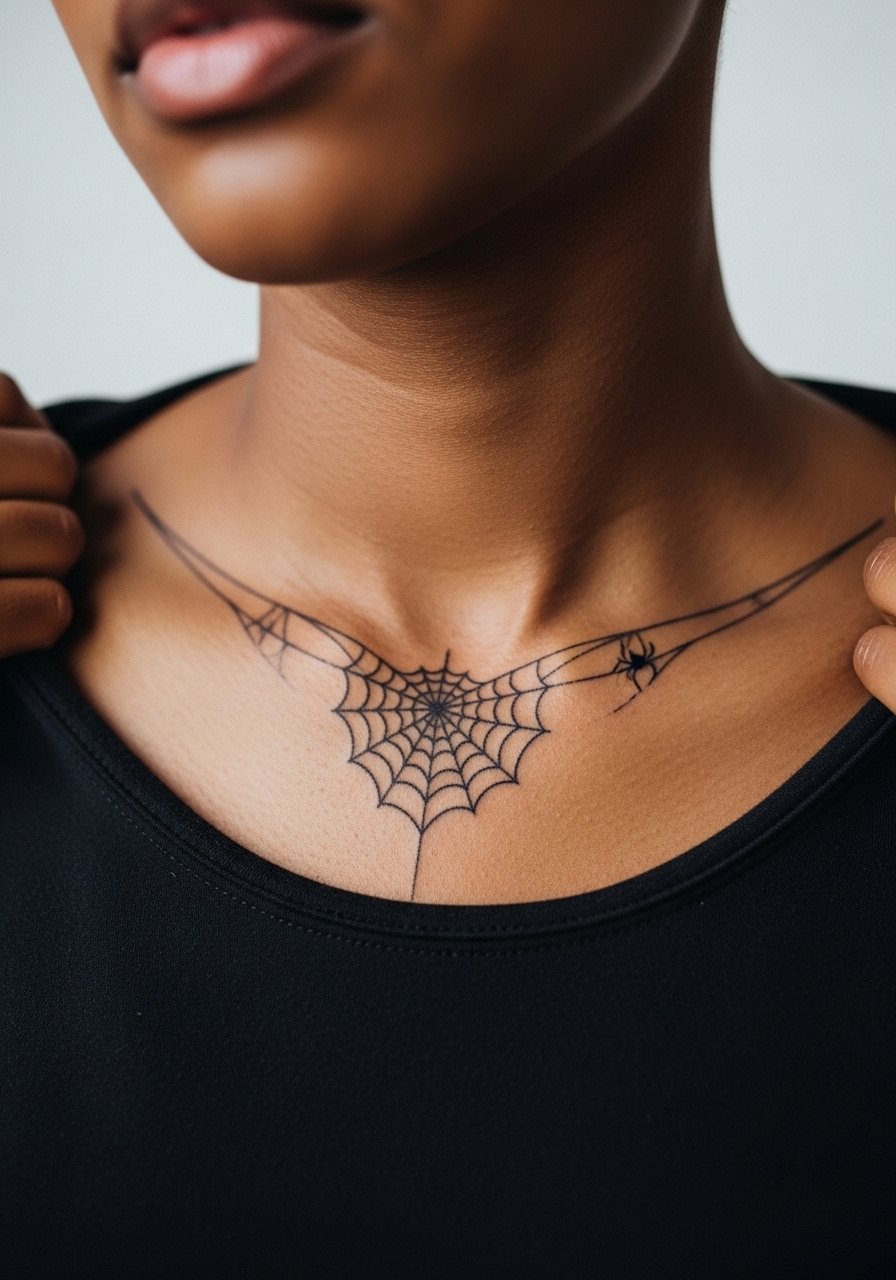
I've seen collarbone placements hold shape well when artists use a mix of thin and slightly stronger anchor lines. The area can be sensitive if the bone is close to skin. Most of the aging risk comes from sun exposure because collarbones sit high on the chest. For showing the design, open and wide-neck shirts frame it. A wide-neck blouse keeps attention on the ink without exposing more than you want.
19. Web Under the Breast as an Underbust Accent
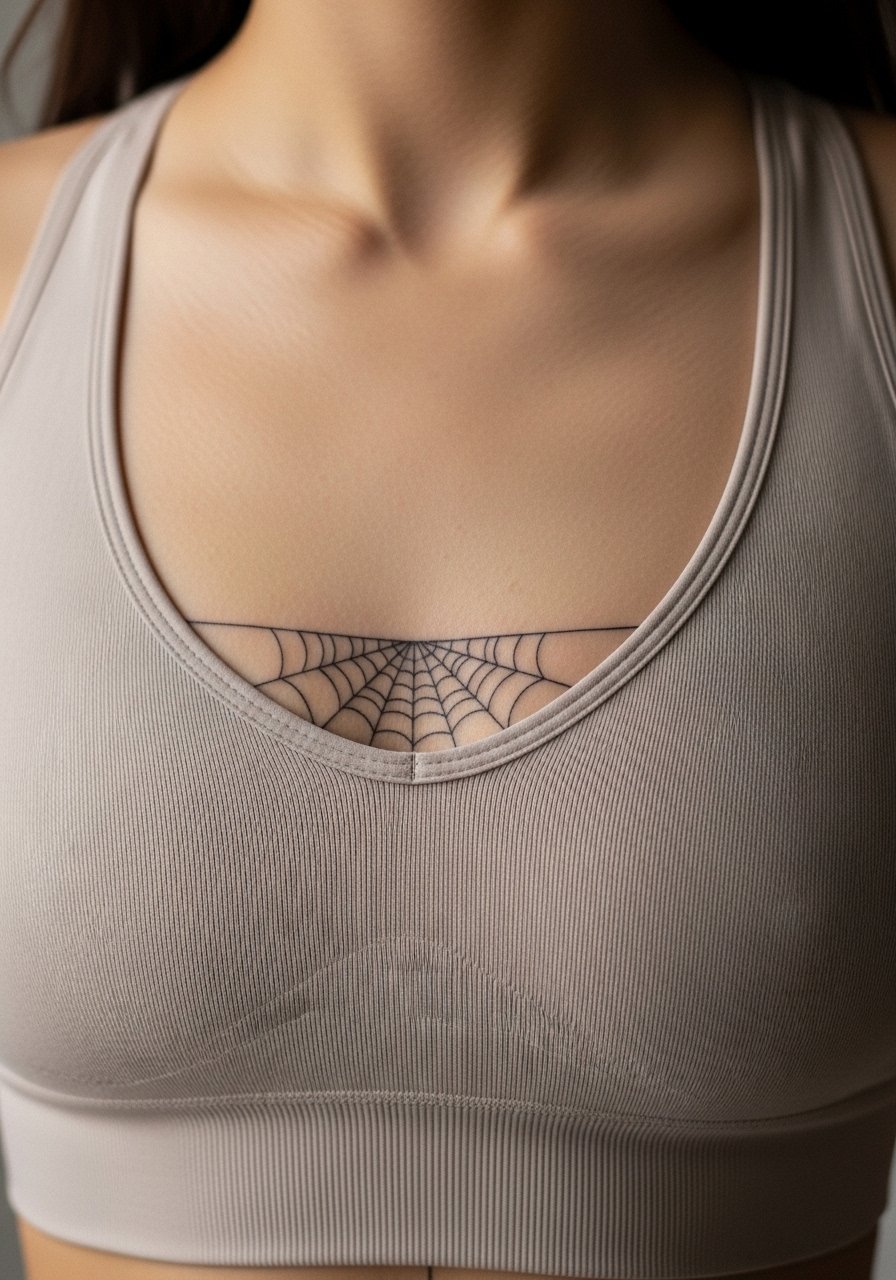
Artists divide on underbust work around stretch and movement. One camp says the area handles fine line if placed under the curve. The other camp points out that constant movement and bra straps can distort detail. The honest path is designing slightly larger elements with supportive negative space. Sessions can be painful and require careful positioning. For the appointment, wear a fitted sports bra you can adjust without full undressing, such as a fitted sports bra.
20. Deco Web Over the Shoulder Blade
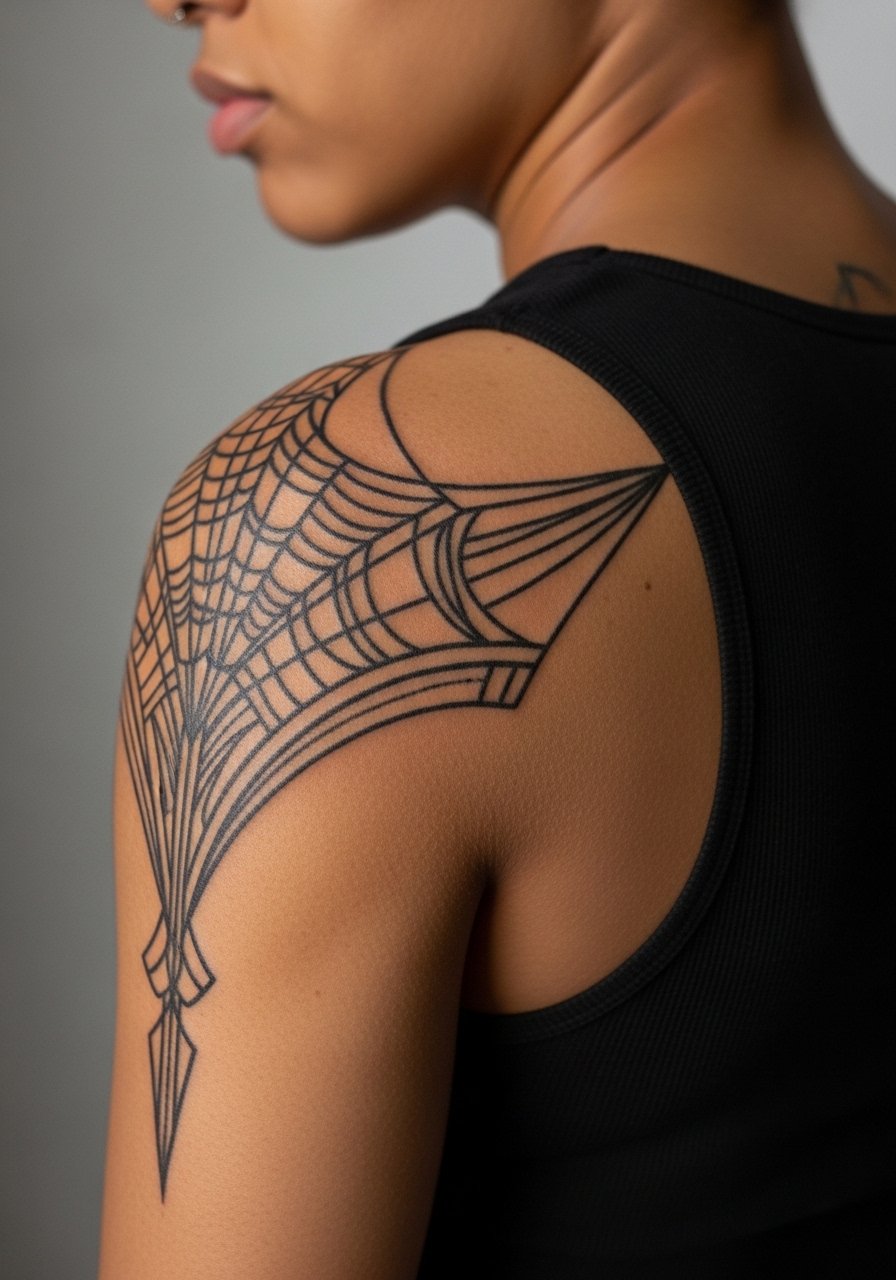
There is a visual payoff when shoulder blade pieces use angular lines to match movement. The blade is forgiving and stays visible in open-back garments. A common mistake is making the web too small for the large canvas. Sessions may be mid-length and you will lie on your front for stretches. For showing the piece, open-back tops are ideal and a halter top flatters the area without covering the lines.
21. Small Web on the Side Wrist with Bracelet Pairing
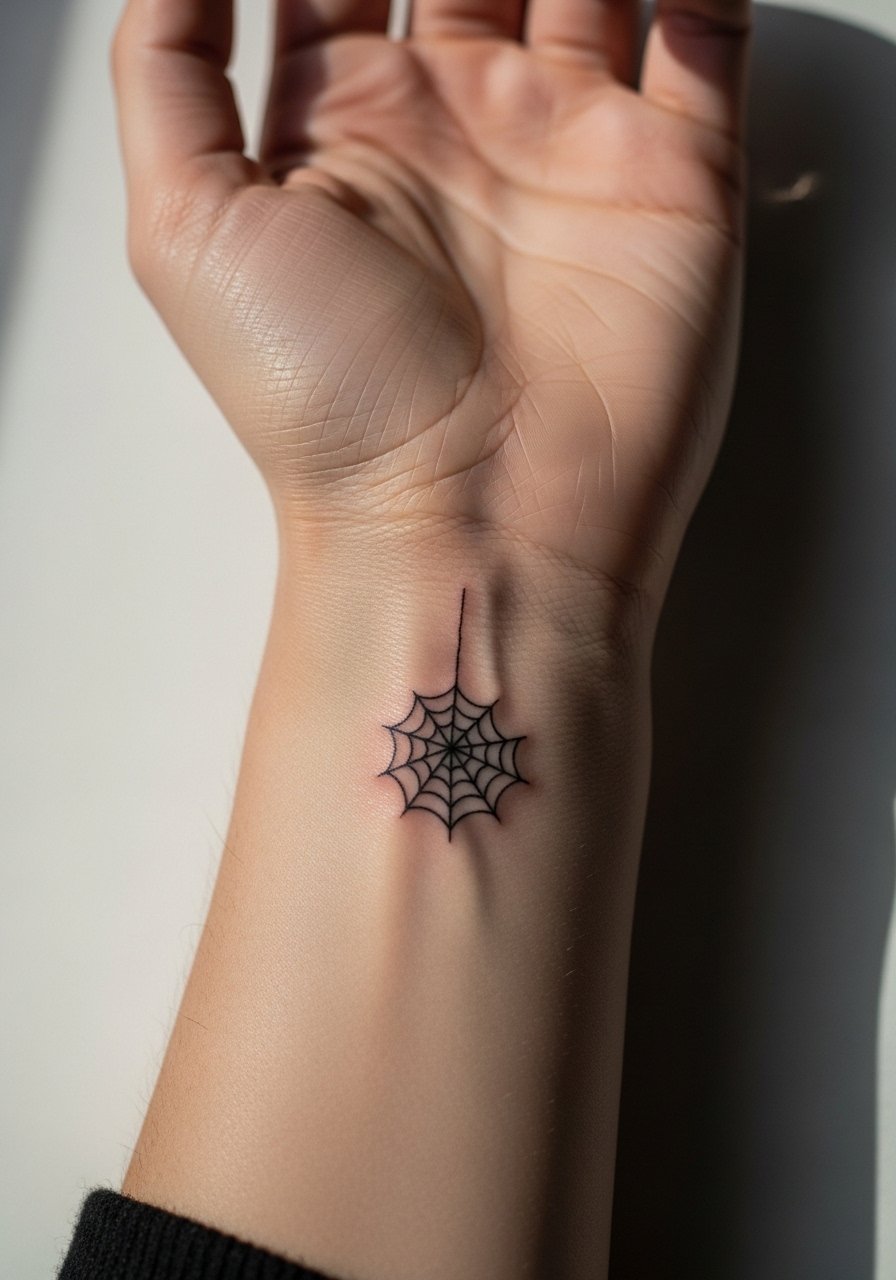
The side wrist reads differently depending on bracelet placement. The mistake is squeezing the web under a bracelet band that will rub during healing. Pain is moderate and the area is exposed to water and soap often, so expect earlier fading. For showing and protecting the piece, pick bracelets that sit either above or below the tattoo. A minimal cuff bracelet that avoids direct contact helps keep the ink intact.
22. Single Line Web Across the Rib Side
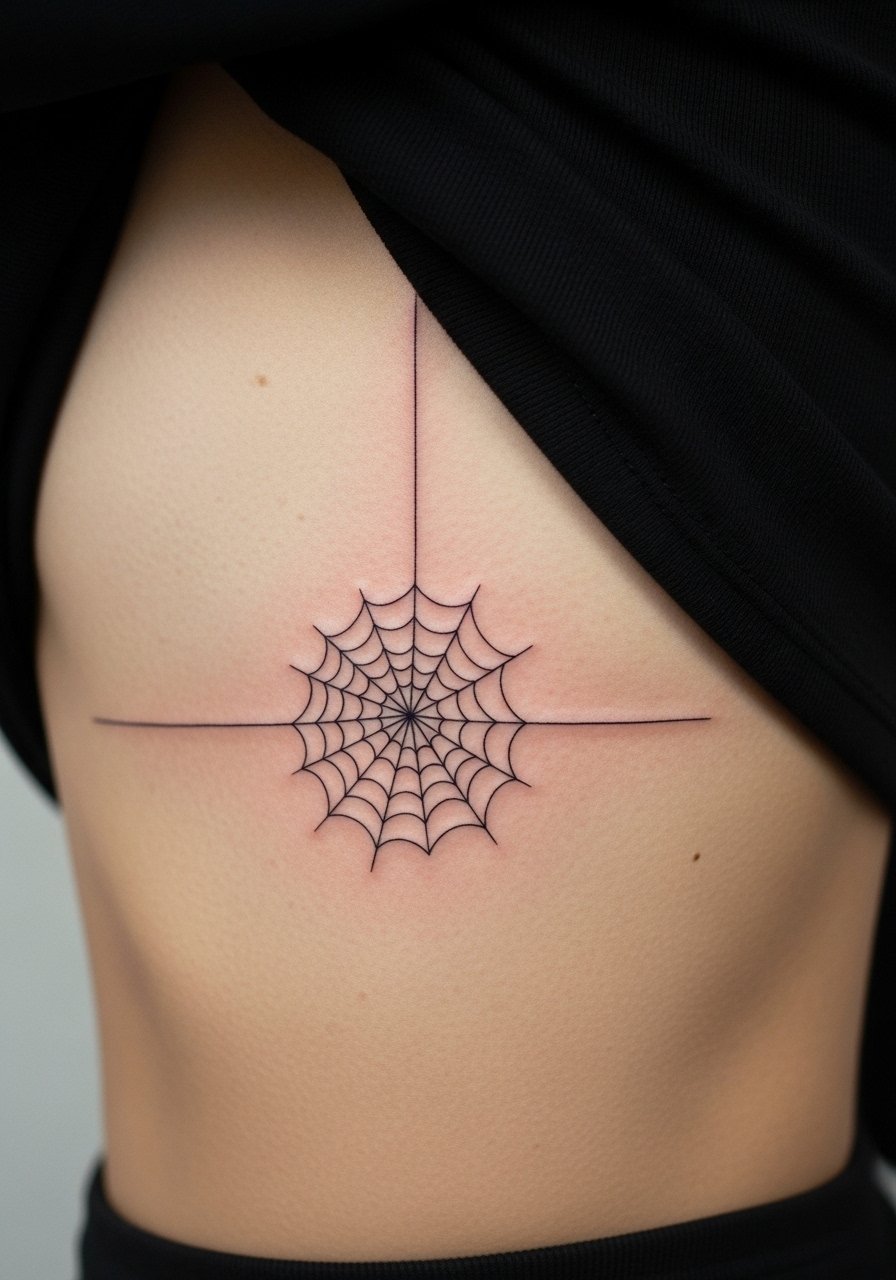
When you consult on a minimal rib web, say exactly how dense you want the spokes because small changes magnify once healed. The rib is painful and sessions may be split. The aging issue is skin stretch from weight changes or movement. Plan for touch-ups and accept that tiny single-line work may need a follow-up at year two. For the sit, a cropped tee that you can lift without undressing is a practical choice.
23. Web with Script Integration on the Sternum
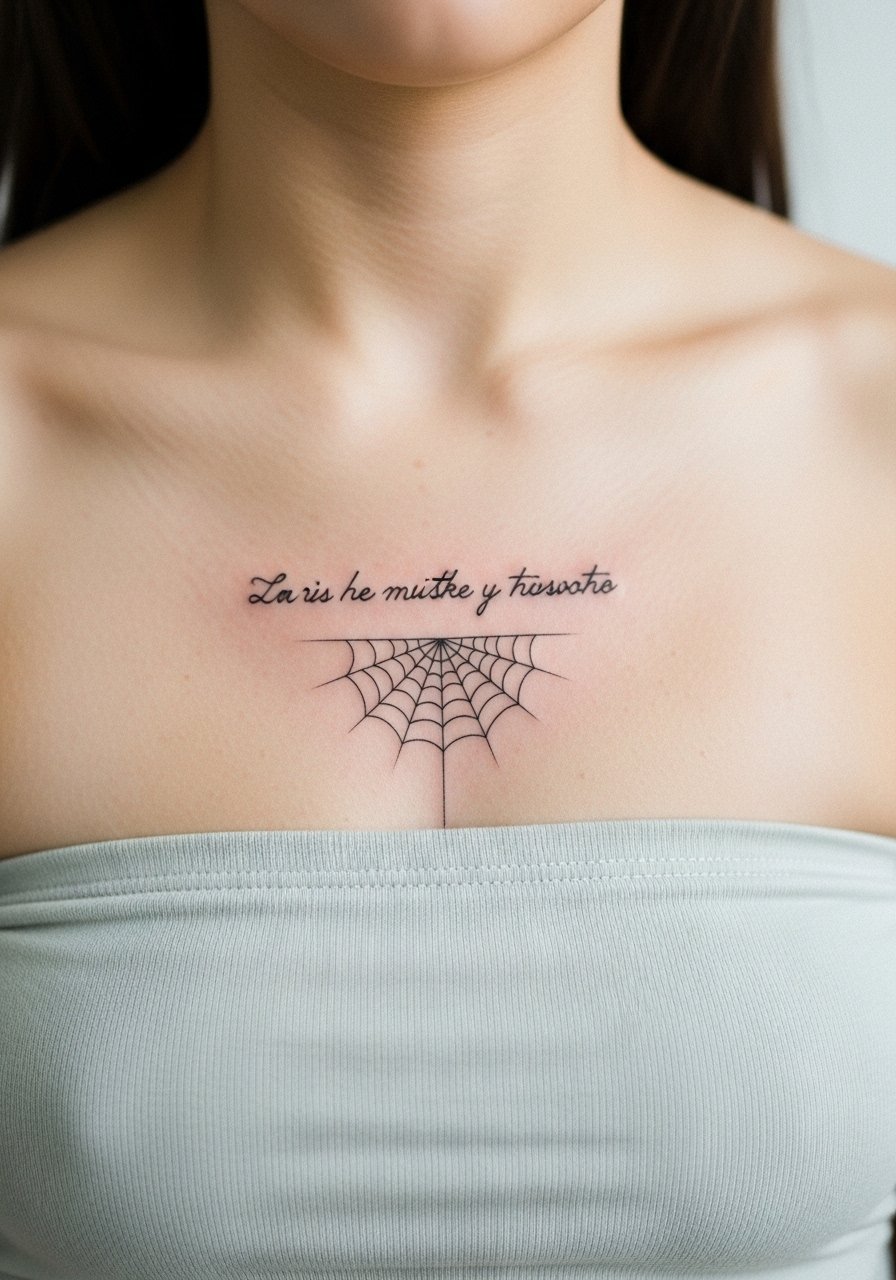
Most tattooers caution that script near the sternum must be sized for long-term legibility. There are two camps about combining script and fine webbing. One says combine them carefully with space. The other says text will blur unless bolded. The safest route is slightly larger lettering and open spacing between script and web. Sessions are sensitive and you should expect touch-ups for crisp script lines. For session comfort, a bandeau top keeps the area accessible.
24. Web Between Shoulder and Neck
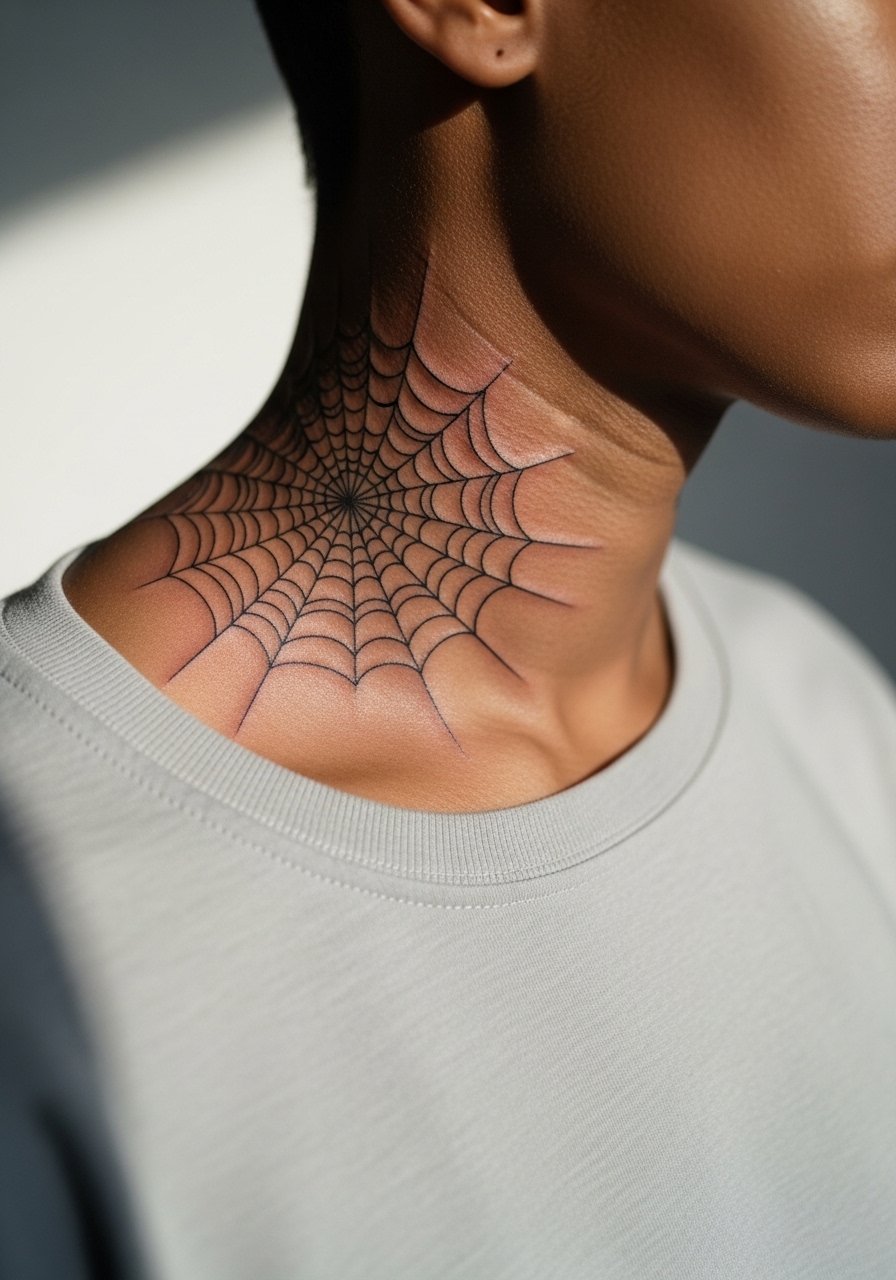
I’ve noticed that transition pieces between neck and shoulder age differently depending on exposure. If you want the web to read as a connected element, ask for slightly bolder border spokes near the neck. The area can be sensitive when near thin skin, and sessions require careful positioning. For showing the connection between neck and shoulder, pick tops with asymmetric collars. A wide-neck sweater frames the tattoo without covering it.
25. Web Around a Small Scar as Camouflage
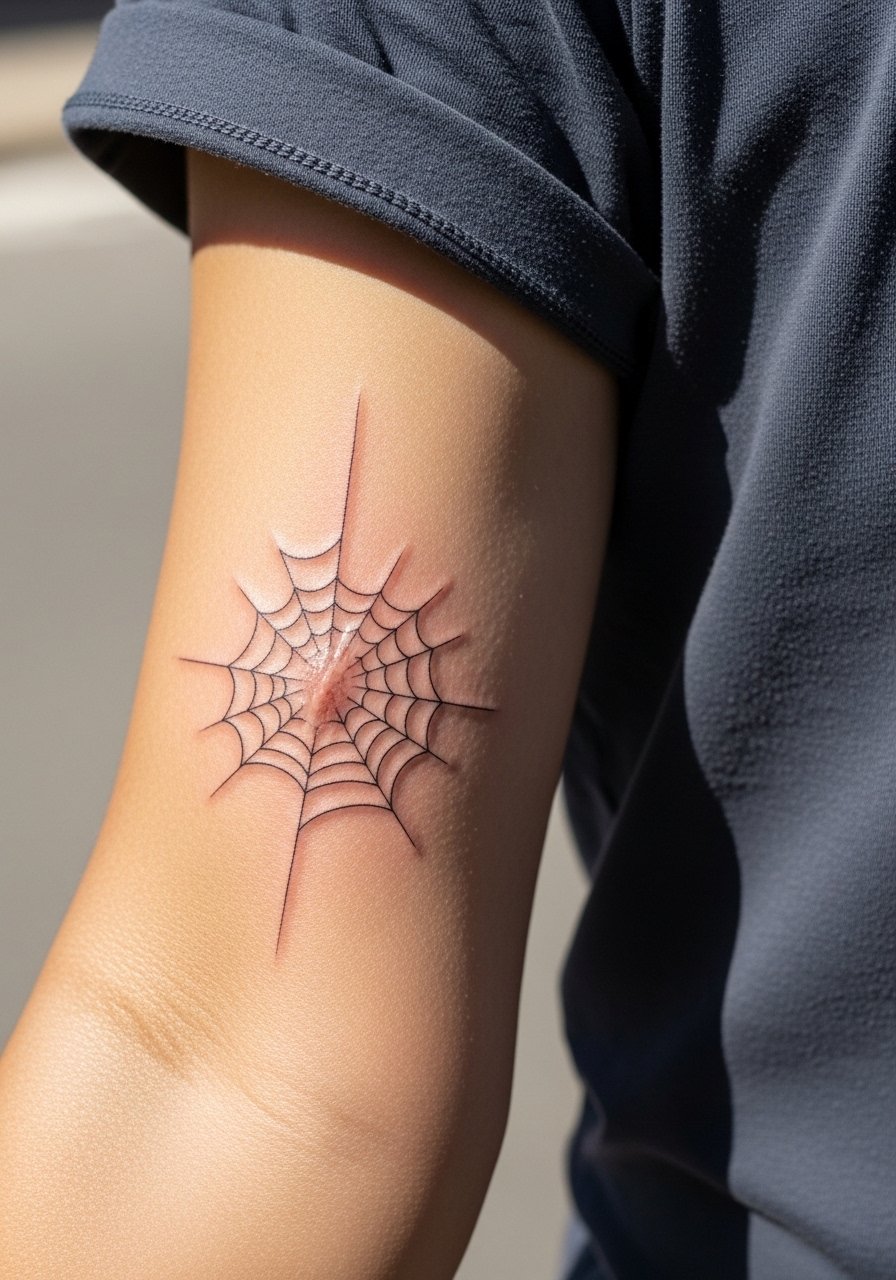
Designing a web to flow around a scar can be a smart way to camouflage texture. When you bring this to a consult, ask the artist to work with the scar lines instead of over them. The mistake is trying to force heavy saturation over sensitive scar tissue. Sessions are often slower and require an experienced hand for even saturation. For comfortable access and to show results afterward, wear a short-sleeve tee that you can roll without stretching the skin.
26. Tiny Web at the Nape of the Neck
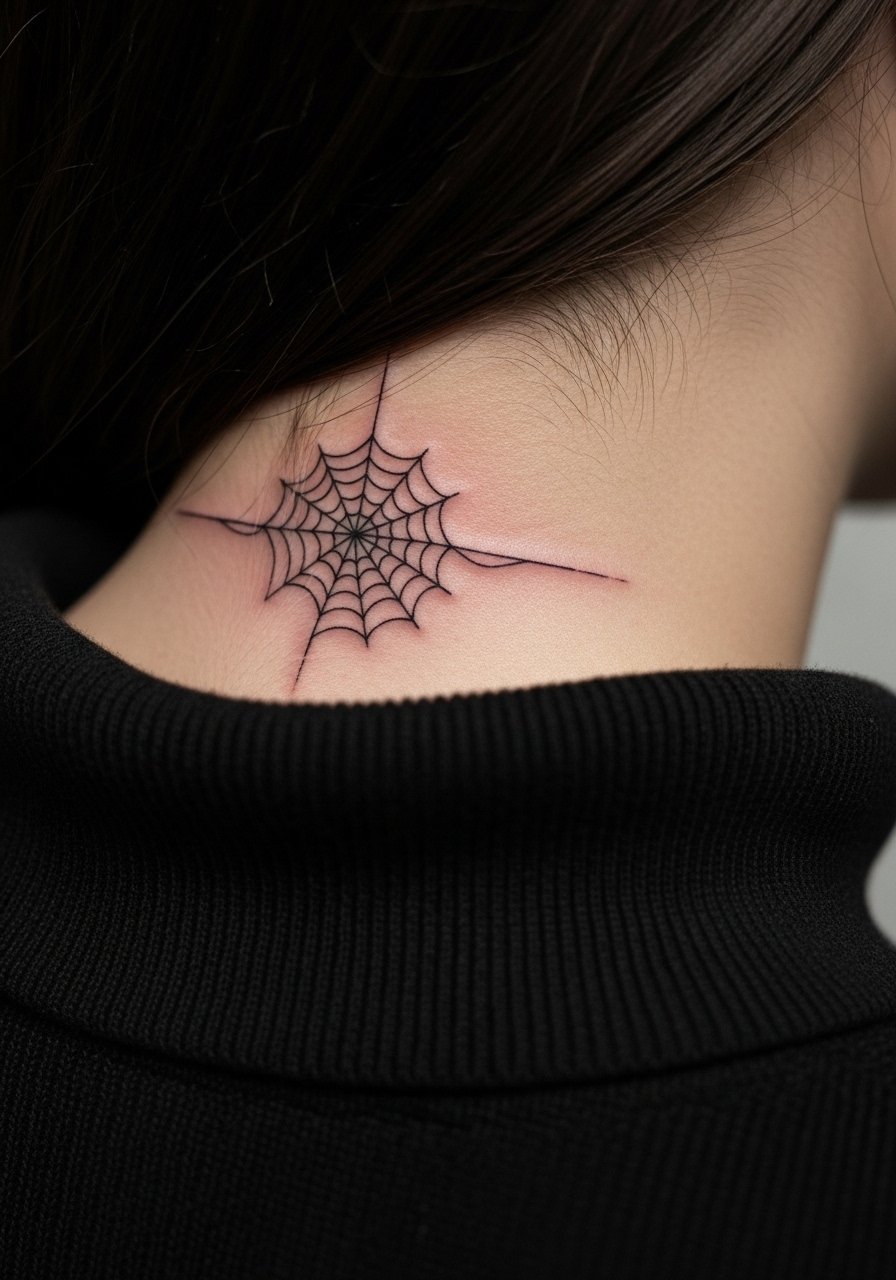
There is visual subtlety to nape placements since hair often hides them. The area tolerates fine line if the design is not too dense. The pain is moderate and the session is usually quick. Plan for occasional touch-ups if your hair rubs the area frequently. For the appointment, a turtleneck you can pull down slightly helps keep you covered while giving the artist access, so bring a turtleneck sweater.
27. Web Accent with Metallic Ink Highlights on the Chest
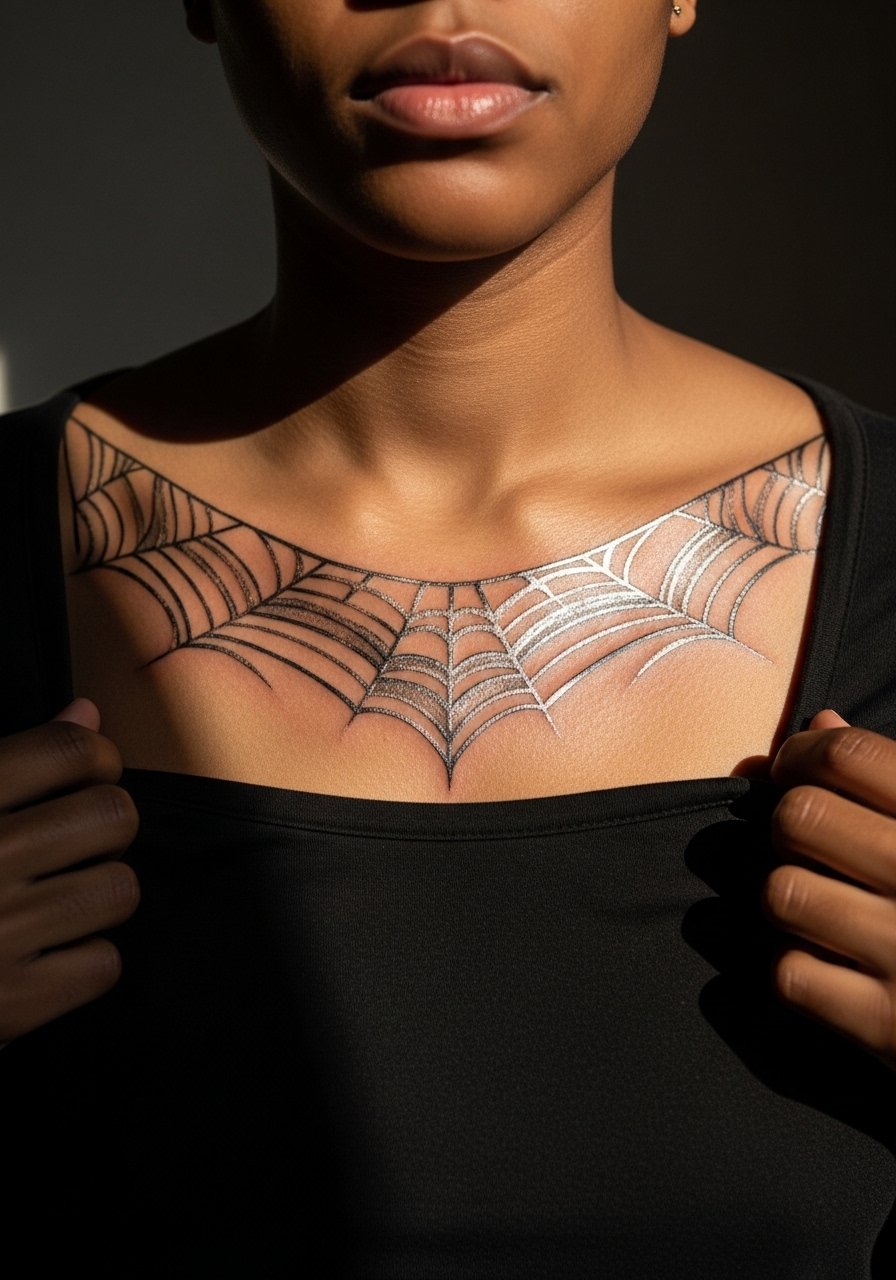
When you ask for metallic or colored highlights over black webs, the artists split on whether those additions hold long term. One group says subtle metallics can oxidize and fade faster than black. The other group will boost saturation and plan touch-ups. If you want sparkle, keep highlights minimal and accept a touch-up plan at year two. The chest is high on sun exposure so sunscreen matters after healing. For session comfort and access, wear a wide-neck shirt that you can shift without exposing more than the artist needs.
Frequently Asked Questions
Q: Will a fine line web on my forearm need a touch-up sooner than a bold blackwork piece?
A: In my experience fine line tends to soften earlier than bold blackwork. Expect possible touch-ups around year two to three for very thin threads. Tell your artist you want slightly more spacing and stronger anchor lines if you prefer fewer touch-ups.
Q: Can a ribcage web be made to last without heavy blowout risk?
A: It depends on placement and needle depth. Ask the artist how they handle rib skin and whether they recommend slightly thicker lines. Many artists split sessions so the skin can recover and so they can monitor how lines settle.
Q: How should I dress to a sternum or underbust session to stay comfortable and maintain modesty?
A: Wear a fitted sports bra or bandeau that you can adjust, so the artist has access without you disrobing fully. A fitted piece keeps everything in place during longer sits and helps with positioning.
Q: Are hand and finger webs worth it if I work in a conservative office?
A: Hand work is still visible and can affect some hiring decisions. If you need discretion, place the web on a less exposed spot or ask the artist for a variant that sits on the side of a finger that hides when your hands are at rest.
Q: Do metallic highlights or colored accents on a black web require special aftercare?
A: Colored and metallic inks often need closer monitoring because they fade faster than saturated black. The general care is the same but plan for an earlier touch-up and avoid heavy sun exposure on those areas.
Q: How do I find an artist who understands how spider web designs age?
A: Look through local portfolios on directories and hashtag searches, check convention guest lists, and read forum threads for healing notes. Ask to see healed photos rather than only fresh work so you can judge how lines and spacing settled over time.
