
Fine line tattoos are everywhere on saved boards right now, but what shows up as delicate on your screen can blur into a smudge on arm skin if spacing and placement are wrong. Expect sleeve work to run roughly 1,500 to 4,000 for a full project, and plan touch-ups into the budget. Read the next idea first if you want a floral sleeve that still looks crisp a few years down the line.
1. Floral Mandala Full Sleeve for Flowing Coverage
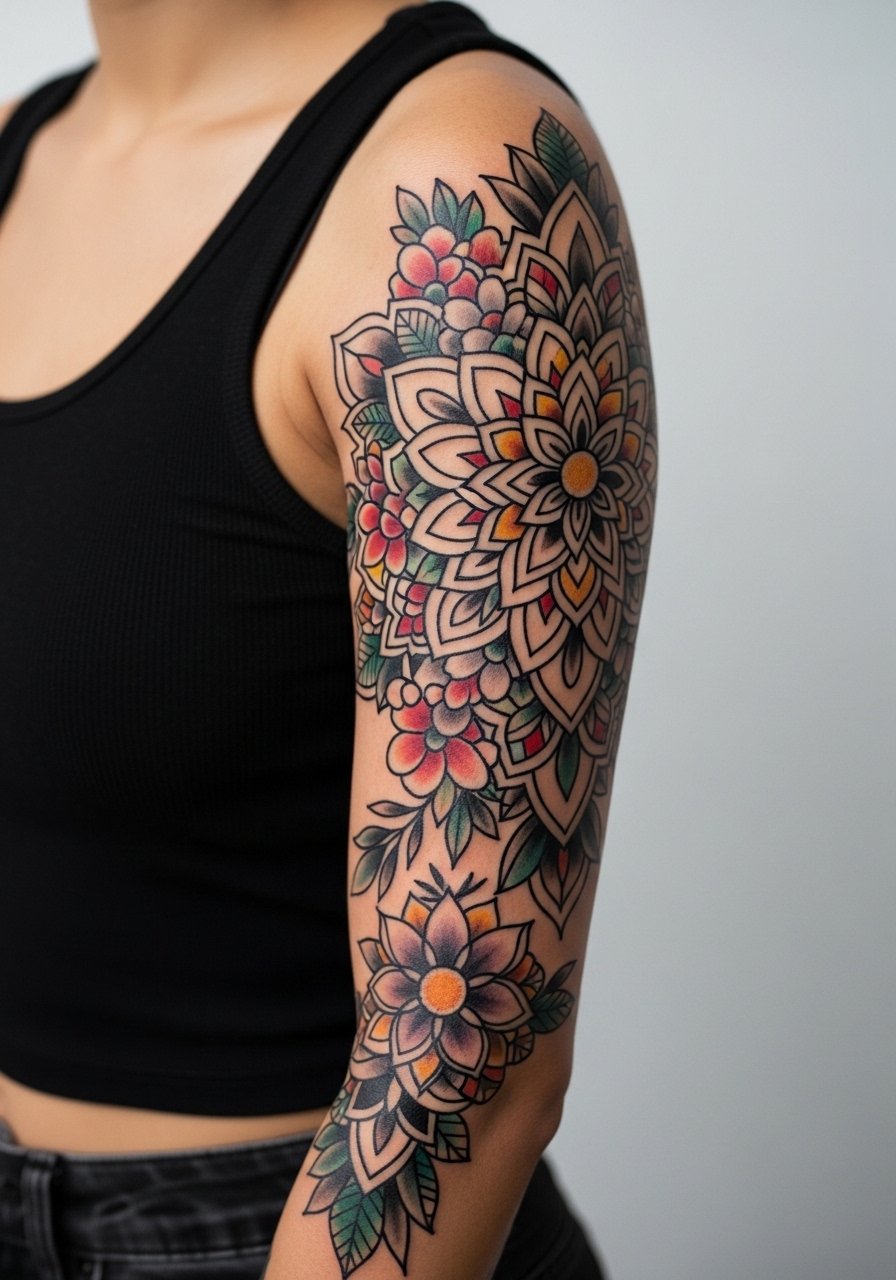
Neo-traditional mandala florals work for people who want symmetry across the arm and coverage that ages predictably. In consultation, ask for slightly thicker outline weight in dense mandala areas so petals do not merge as the piece heals and stretches over time. The common mistake is asking for ultra-fine mandala filigree with no breathing room. That looks exquisite the first year and then softens into visual mud in high-density zones. Expect sessions to run long, often split into 4 to 6 visits, and expect the shoulder and outer arm to feel easier than the inner bicep. For showing it off, a sleeveless maxi dress in neutral tones frames the sleeve without clashing during summer evenings.
2. Realistic Nature Landscape on Outer Arm

Pick realism if you want a narrative sleeve that reads like a scene when your arm moves. Tell your artist you want reference photos with the exact tree types and horizon line you want kept, and mark where you want negative space to prevent the composition from becoming a single dark block. Realism needs saturation and careful layering, so expect longer sessions and a staged approach over 5 to 8 sittings. A common aging issue is color banding when artists pack gradients too shallowly, so ask about saturation strategy and touch-up timing. For day-of comfort, roll up a half-zip hoodie so the arm is easy to work on without bunching fabric.
3. Geometric Abstract Pattern Half Sleeve
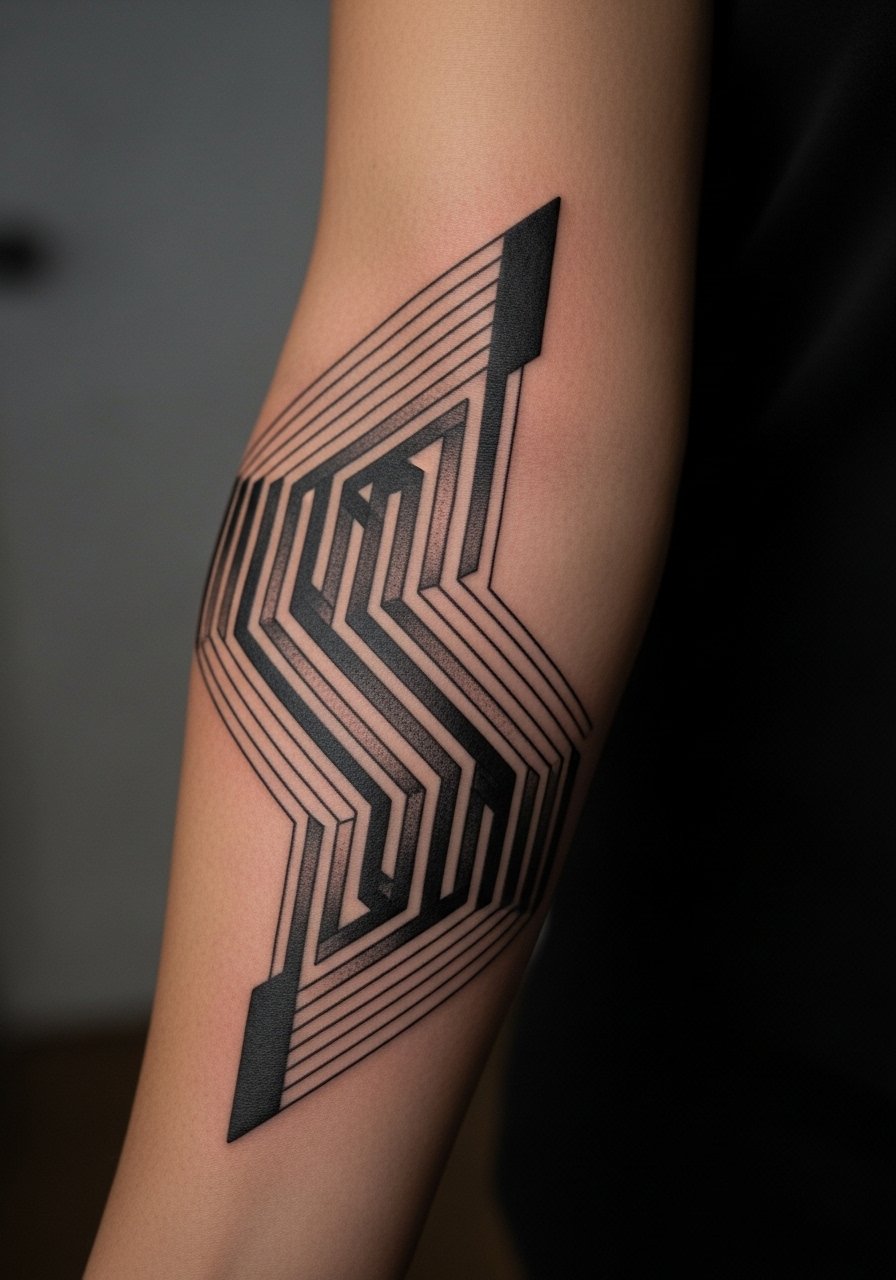
Geometric sleeves look modern when lines have room to breathe. The biggest mistake is going too small with tight repetitive motifs. Ask for larger negative-space buffers in dense zones so shapes remain distinct as skin moves. Forearm placements heal well and photograph cleanly, though wrist and elbow crossings raise blowout risk if lines sit too shallow. Sessions are often shorter, three to five sittings, and pain is manageable for most people. Blackwork holds up well after gym time if you avoid tight sleeves that rub the fresh ink during the first two weeks. Pair this outer-arm look with a fitted black tee for high contrast that emphasizes the geometry.
4. Celestial Moon and Stars Watercolor Half Sleeve
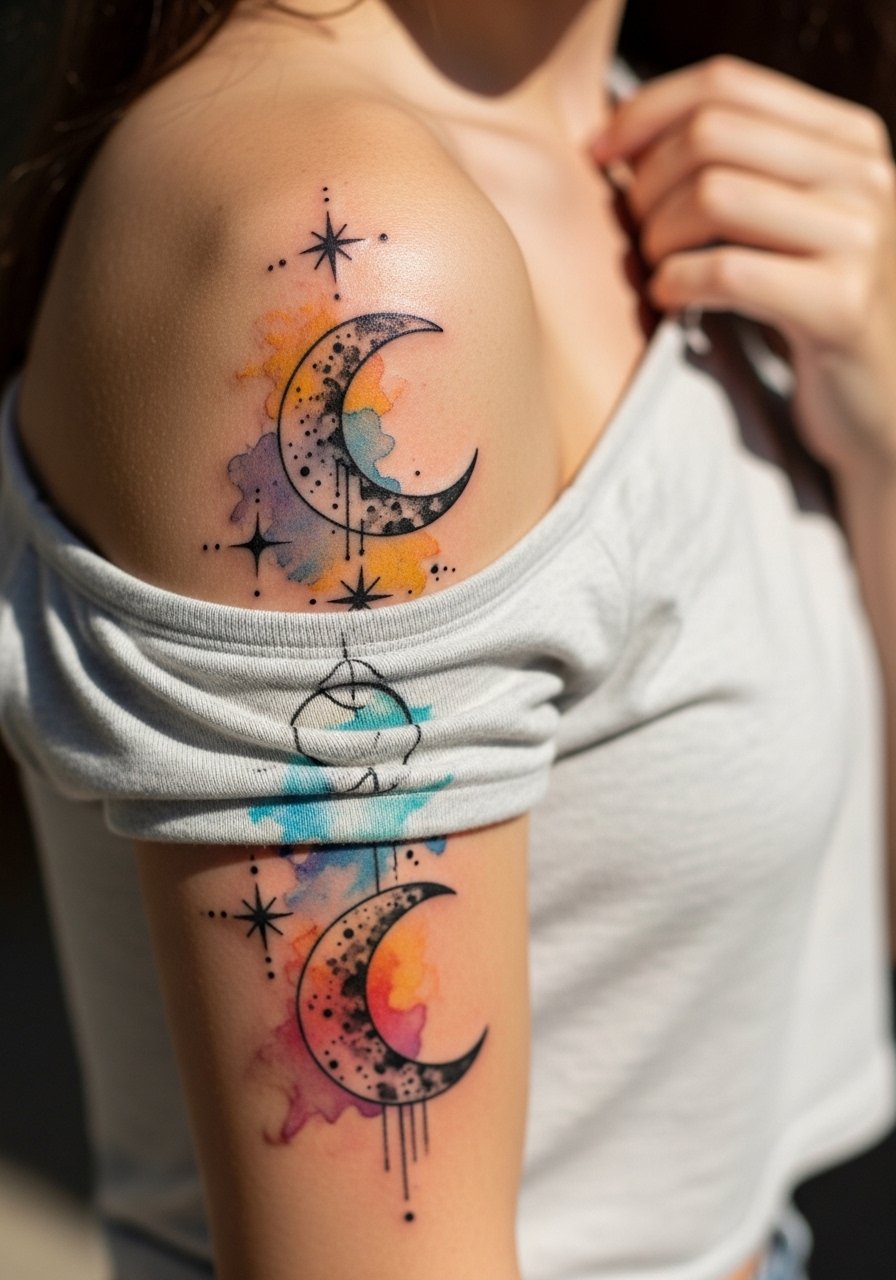
Watercolor blends are ethereal at first but can be the most controversial on longevity. Artists are split on whether watercolor is a good sleeve option. One camp argues watercolor fades faster and needs frequent touch-ups. The other camp says careful placement away from high-friction areas and strategic black anchors make the washes last. If you still want the look, ask for black or dark anchors around the washes to protect edges and expect touch-ups earlier than solid color work. Upper arm to elbow placement reduces abrasion, and wearing an off-shoulder top highlights the faded washes when they mature.
5. Rose and Lily Wrapped Sleeve
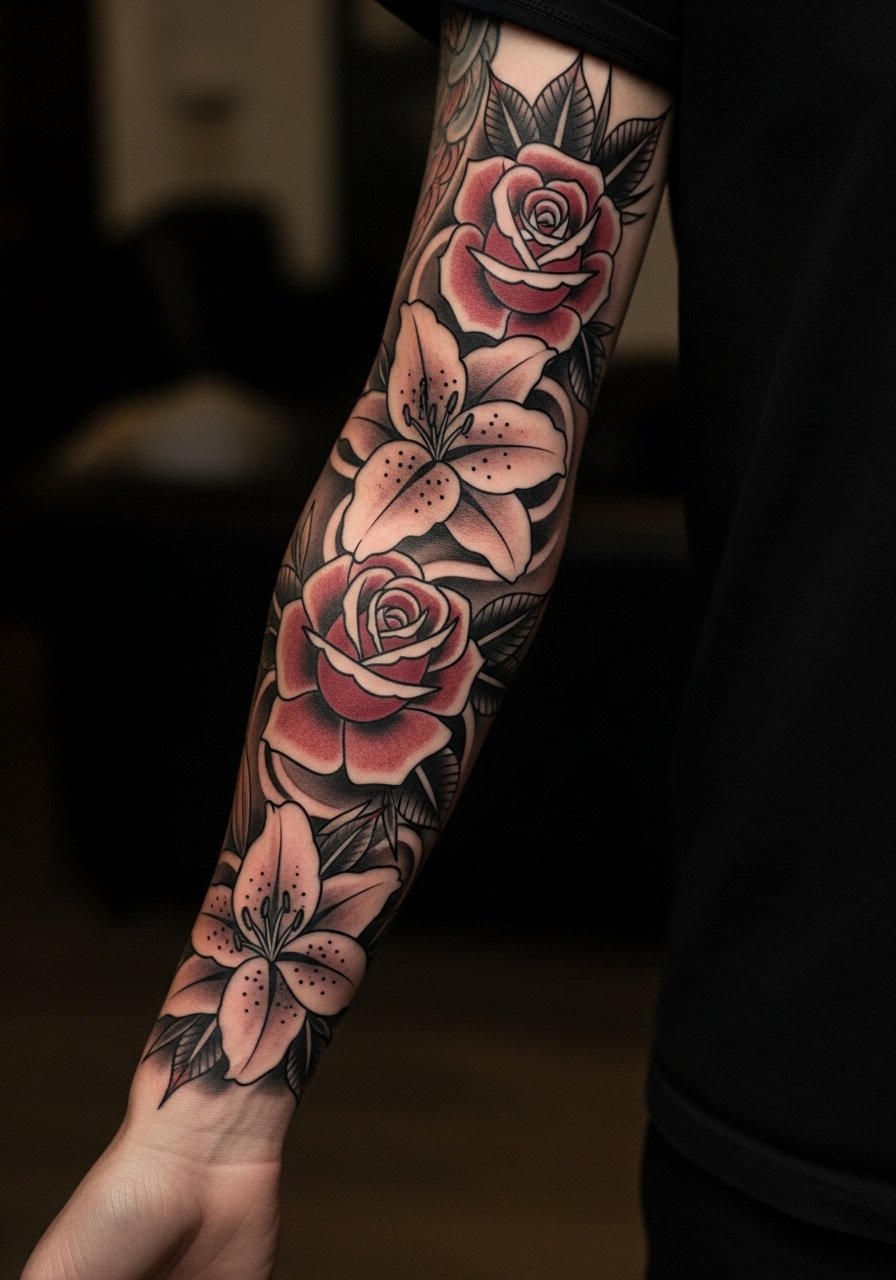
Classic florals last when proportions are planned for the arm’s curves. Tell your artist to design stems that follow the muscle flow to avoid distortion if your body shape changes. A frequent error is compacting large blooms into a narrow forearm band, which blurs over time. This style typically needs 4 to 6 sessions and holds better with strong saturation and linework. If you want photos that translate across skin tones, ask for contrast planning so reds and shadows read on darker skin. For evenings out, a cropped leather jacket offsets the floral palette and keeps the arm visible without too much pattern clash.
6. Cherry Blossom Branch, Upper Arm to Wrist
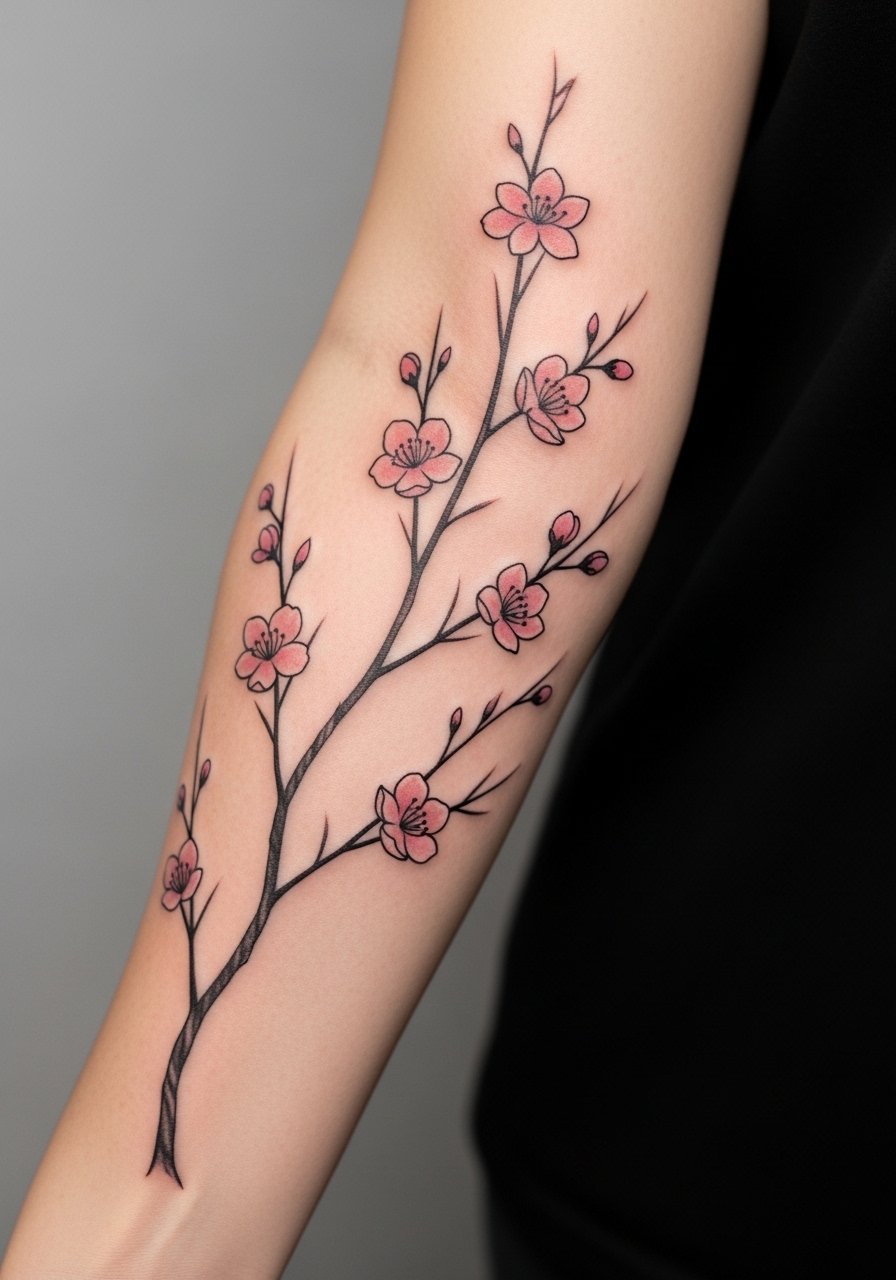
Cherry blossom branches give a delicate rhythm down the arm, but fine line fans will tell you honesty about fading is needed. The real mistake is insisting on ultra-fine single-needle branches without bold anchors on darker or sun-exposed skin. For longevity, request slightly bolder stems with thin petal detail so the blossoms keep definition in years two through five. Upper arm placement is less painful and avoids elbow flexion zones, while inner forearm runs the risk of friction from sleeves. For session comfort bring a linen button down shirt you can roll to expose the area without pinching the skin during work.
Before You Book
The first six sleeve ideas above range from delicate cherry branches to saturated florals, and a few of them ask for different prep and protective choices. These picks smooth session logistics and help the delicate areas hold up.
-
Kelo-cote silicone gel. Helps reduce raised scarring risks on large floral fills and supports smoother healed texture around dense petals.
-
Kintsugi healing balm. Thin, non-greasy option ideal in humid climates when you have watercolor washes that need moisture without clogging.
-
Kure tattoo oil. Fast-absorbing oil that artists mention for retaining vibrancy in saturated landscapes and red accents.
-
Klean tattoo spray. Alcohol-free antiseptic spray useful for summer sessions to reduce infection risk in sweat-prone zones.
-
Second Skin protective film. Flexible protective film that conforms to arm movement and reduces early peeling on full sleeves.
7. Tribal Mandala Fusion on Outer Forearm
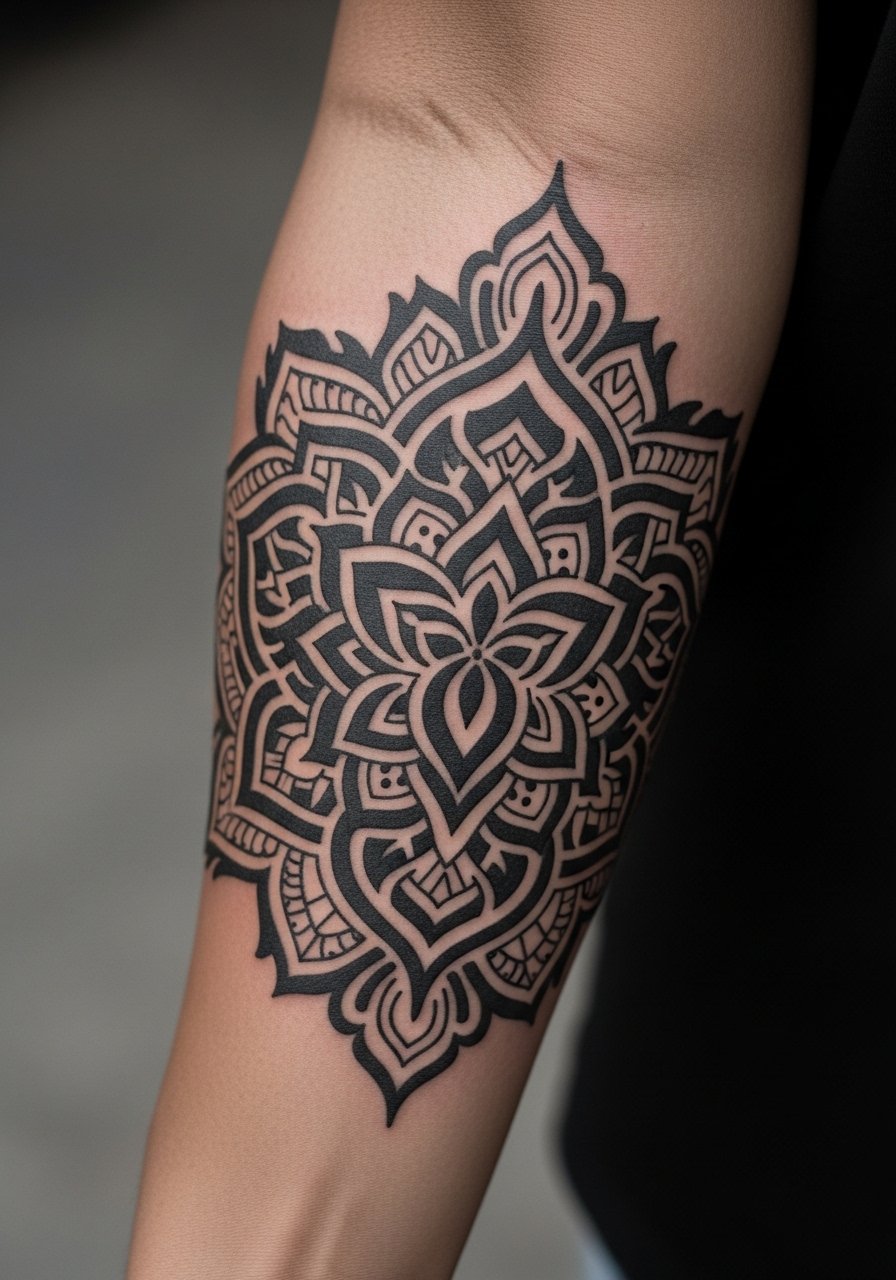
Tribal mandala fusion uses bold blackwork that ages reliably because thick lines resist blur. Tell the artist you want clear negative spaces between motifs, and avoid overlapping thin details. The outer forearm placement reduces blowout chances compared to inner forearm. A common client regret is asking for too many tiny fills that look great fresh and then merge. Sessions are often shorter and fewer, and healing tolerates gym time sooner if you avoid rubbing. For styling, a denim vest or fitted black tee frames the patterns without competing for attention.
8. Mythical Phoenix Rising Shoulder to Elbow
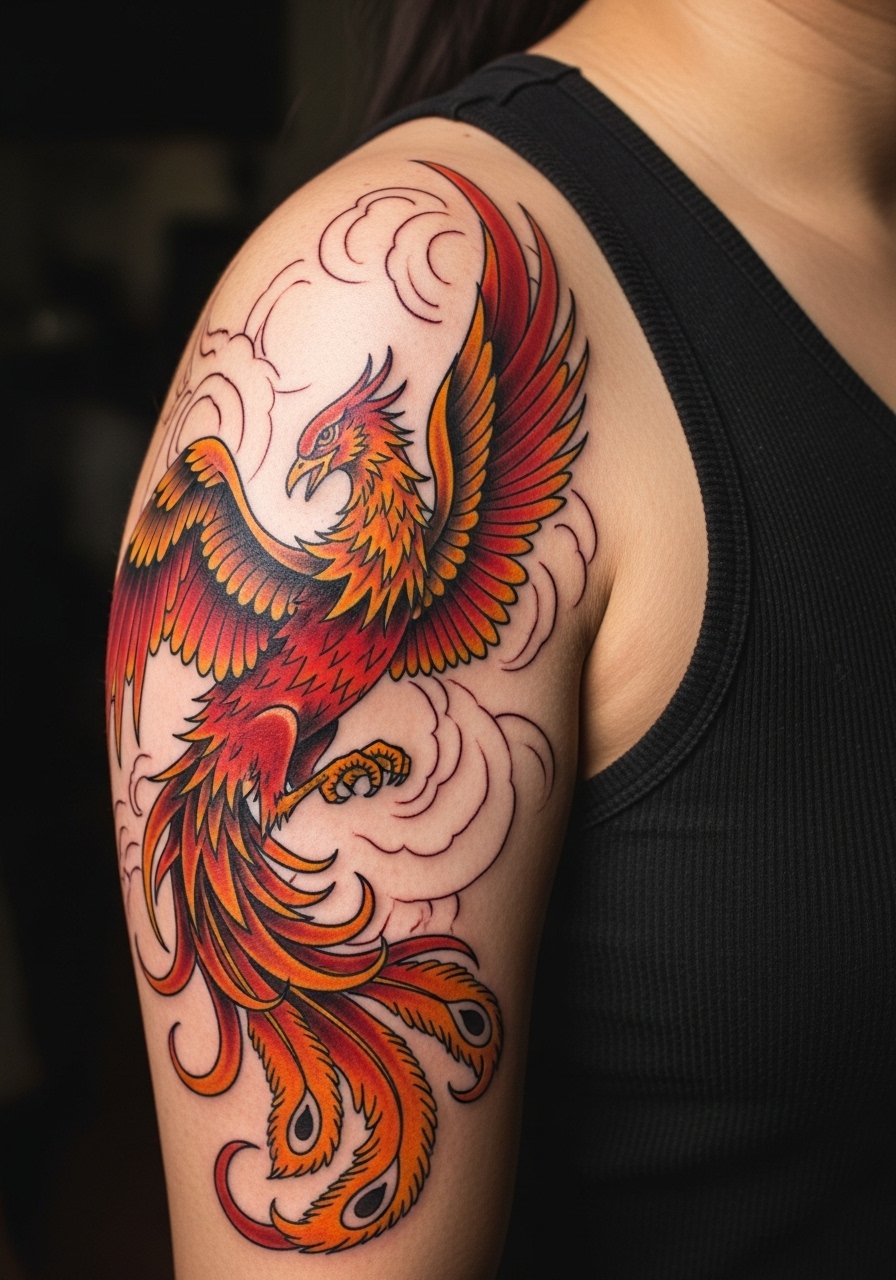
A phoenix sleeve is narrative heavy and benefits from a clear focal point on the shoulder. Ask your artist to anchor the head around the shoulder cap so the wing flow reads when you move. The inner bicep and armpit are higher pain zones if you extend the design there, so plan sessions accordingly. Avoid insisting on tiny micro-feathers in high-motion zones because those detail lines tend to feather over time. Expect five to seven sessions for color gradients, and plan a touch-up at year one to reset saturation if you spend a lot of time outdoors. For session wear, a loose tank top gives the artist unobstructed access.
9. Watercolor Abstract Inner Arm Half Sleeve
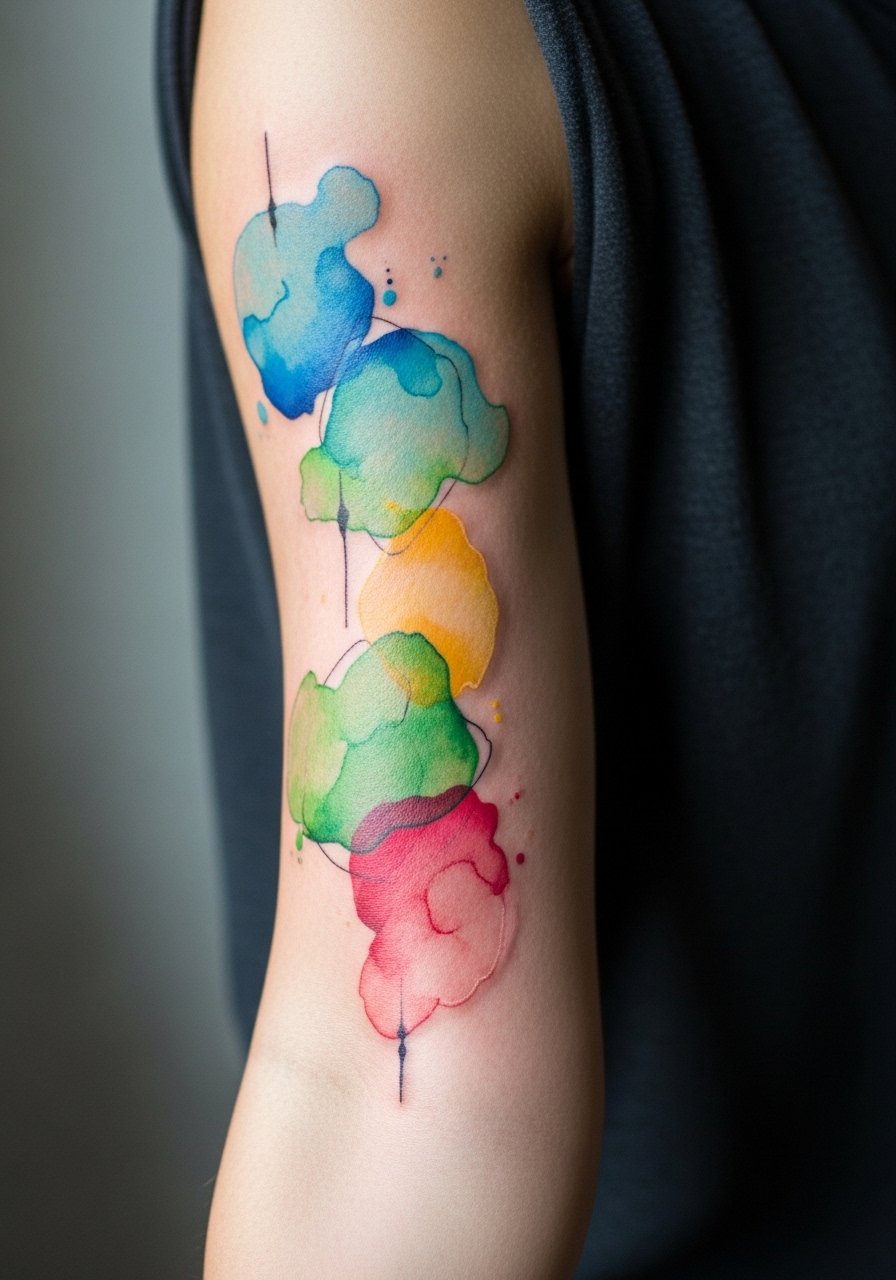
Watercolor on the inner arm creates painterly movement, but beware of heavy sweating and friction from daily activities that can strip pigment during early healing. The common mistake is asking for no black anchors at all. A few dark touchpoints protect washes and keep edges from diffusing. Inner arm sessions are more painful than outer forearm and may need shorter sittings. For wear during the session, bring an open button-down you can pull aside, which keeps fabric off the healing area and the artist comfortable.
10. Inspirational Script Wrapped with Florals on Forearm
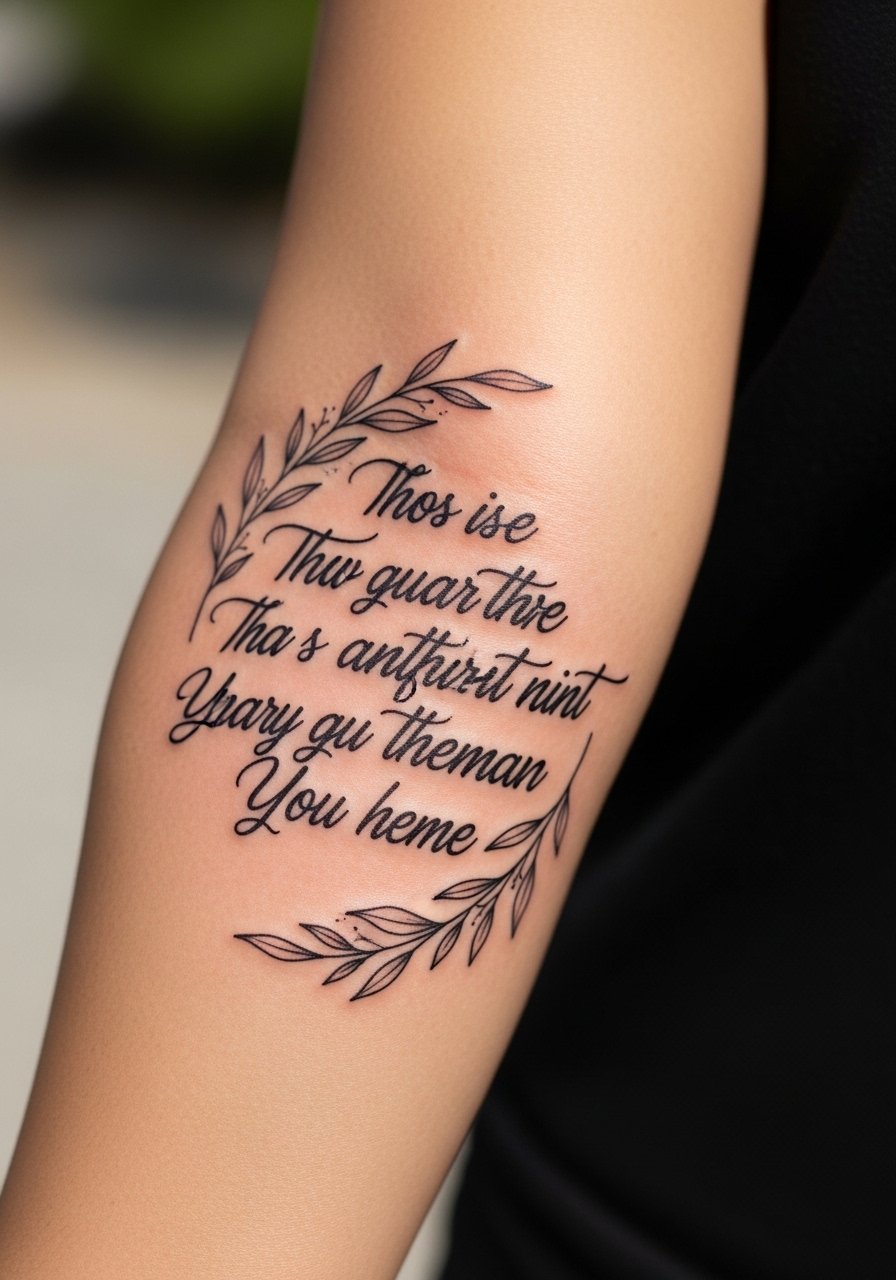
Script sleeves combine lettering with botanical elements for a wearable sentence that wraps the arm. When requesting text, specify exact wording and font weight so the artist avoids cramped letters that merge. A common error is picking a dense script without testing scale on the actual arm. Forearm script is readable and photographs well, but expect touch-ups in two to three years if the letters are tiny. During the session, remove watches and bracelets to avoid pressure scars. For showing it off, a thin silver cuff bracelet on the opposite wrist balances the arm without crowding the script.
11. Portrait Butterfly Micro-Realism on Upper Arm
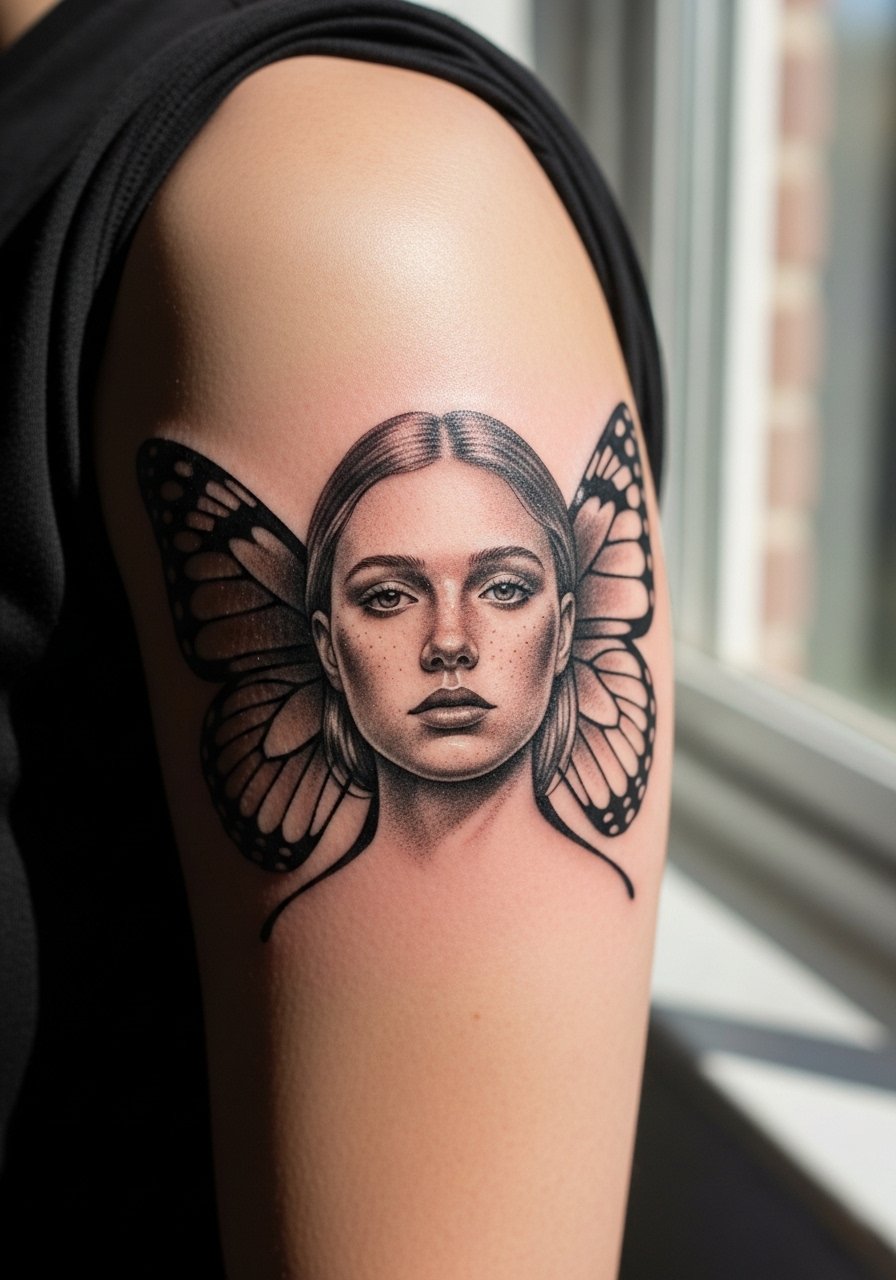
Micro-realism portraits in sleeves require extreme planning and multiple long sessions. Ask for a hyper-local reference photo and discuss how facial highlights will be translated into dot work or soft stipple shading. The common regret is wanting a photo-real face but getting stylized renderings because the artist did not use enough sessions. Upper arm placement tolerates long sittings better than inner arm, though expect painful spots if the design dips toward the armpit. Budget time and touch-ups; micro-realism often needs revisit sessions at year two to maintain tonal subtlety.
12. Ornamental Vine Around the Elbow Ditch
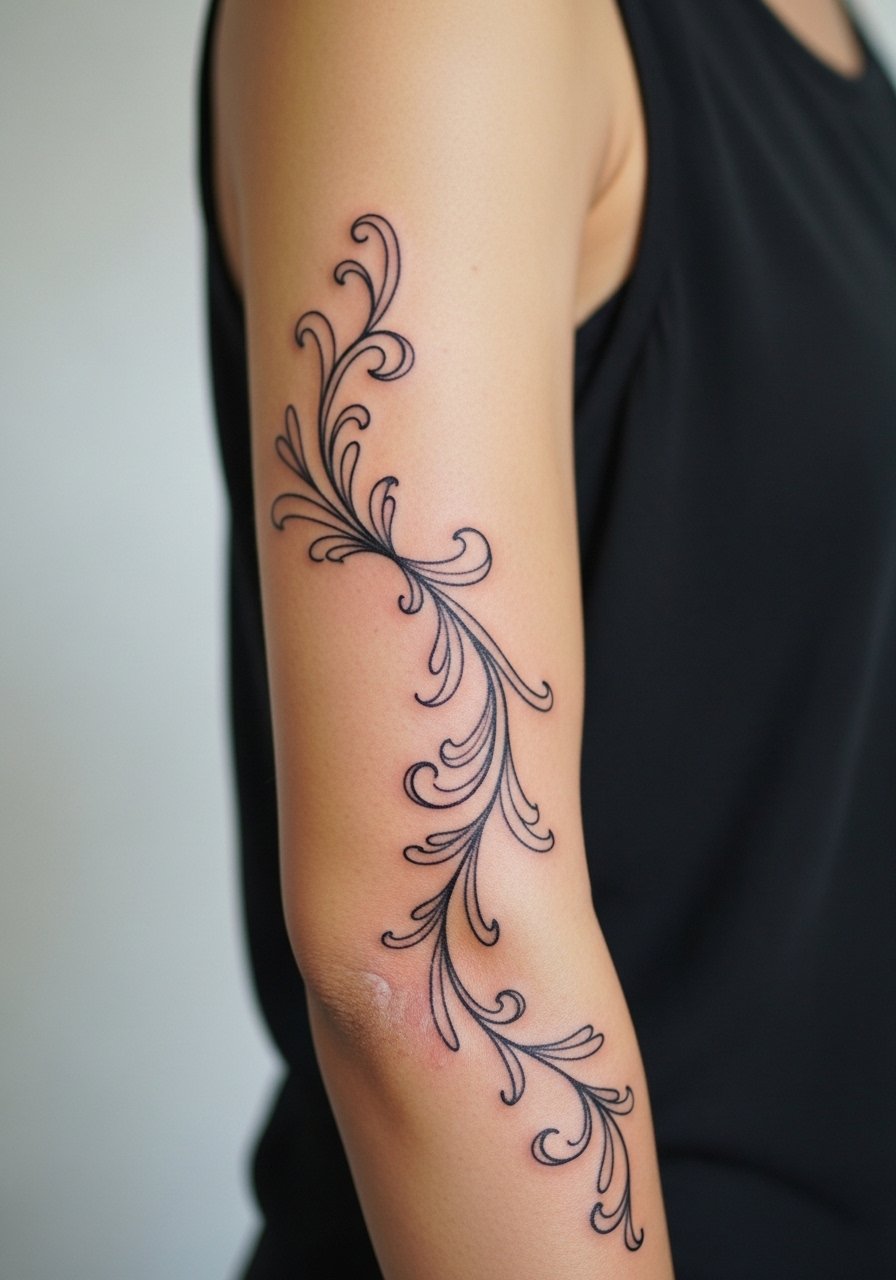
Elbow ditch ornamentals can flow with the arm rather than across a crease, which reduces distortion when you bend. A frequent mistake is centering heavy detail directly over the elbow crease. Ask that the busiest elements sit above and below the ditch and that connecting vines cross the crease with open negative space. Pain spikes at the inner elbow make short sittings sensible. Styling-wise, elbow-length gloves or sheer kimono sleeves can reveal the vine elegantly while protecting it in cool weather, and a sheer kimono sleeve works well for layered looks.
13. Patchwork Floral Sleeve Built Over Years
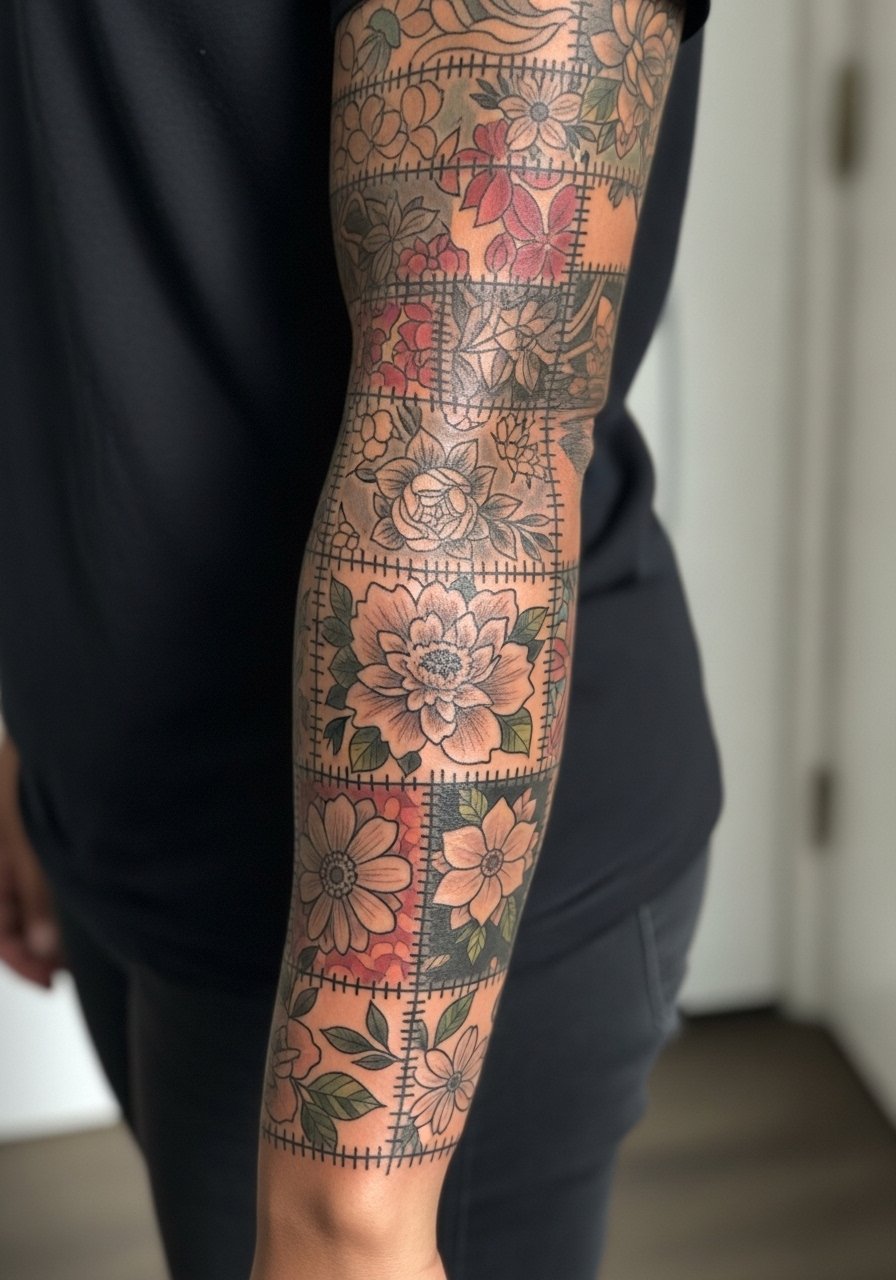
Patchwork sleeves let you add pieces from guest spots and travel without committing to a single hand. The design trick is to plan connecting backgrounds or negative-space borders now so future work sits cohesively. A common regret is starting random flash pieces with no plan for flow, which makes later integration awkward. This route is great for collectors who travel for guest artists, and it reduces the pressure to finish a cohesive full in one booking. For planning, search hashtags like #patchworksleeve plus your city and use vetted apps for booking guest spots.
14. Negative-Space Hybrid Fine Line with Dotwork
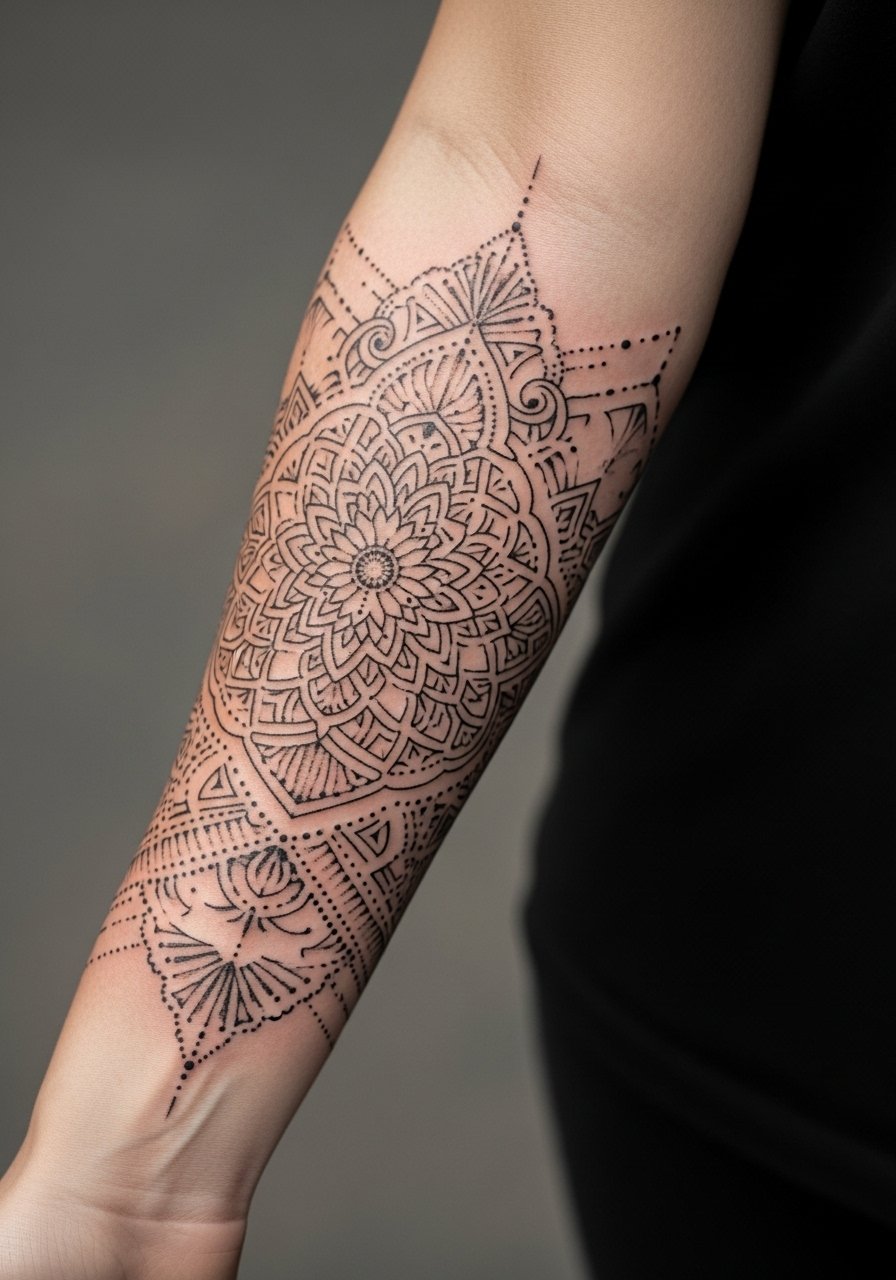
Negative-space sleeves use skin gaps as visual highlights, which helps future expansions and prevents overcrowding. Tell your artist where you want blank corridors for later elements so nothing gets accidentally filled. A mistake is letting dense dotwork run into tiny negative pockets, which ages into uneven texture. Dotwork provides texture on curvy arms without heavy saturation, and touch-up needs are usually modest if spacing is respected. For session wear, a short-sleeve athletic tee lets the forearm sit free and avoids fabric pressure.
15. UV-Reactive Accents in Floral Sleeves
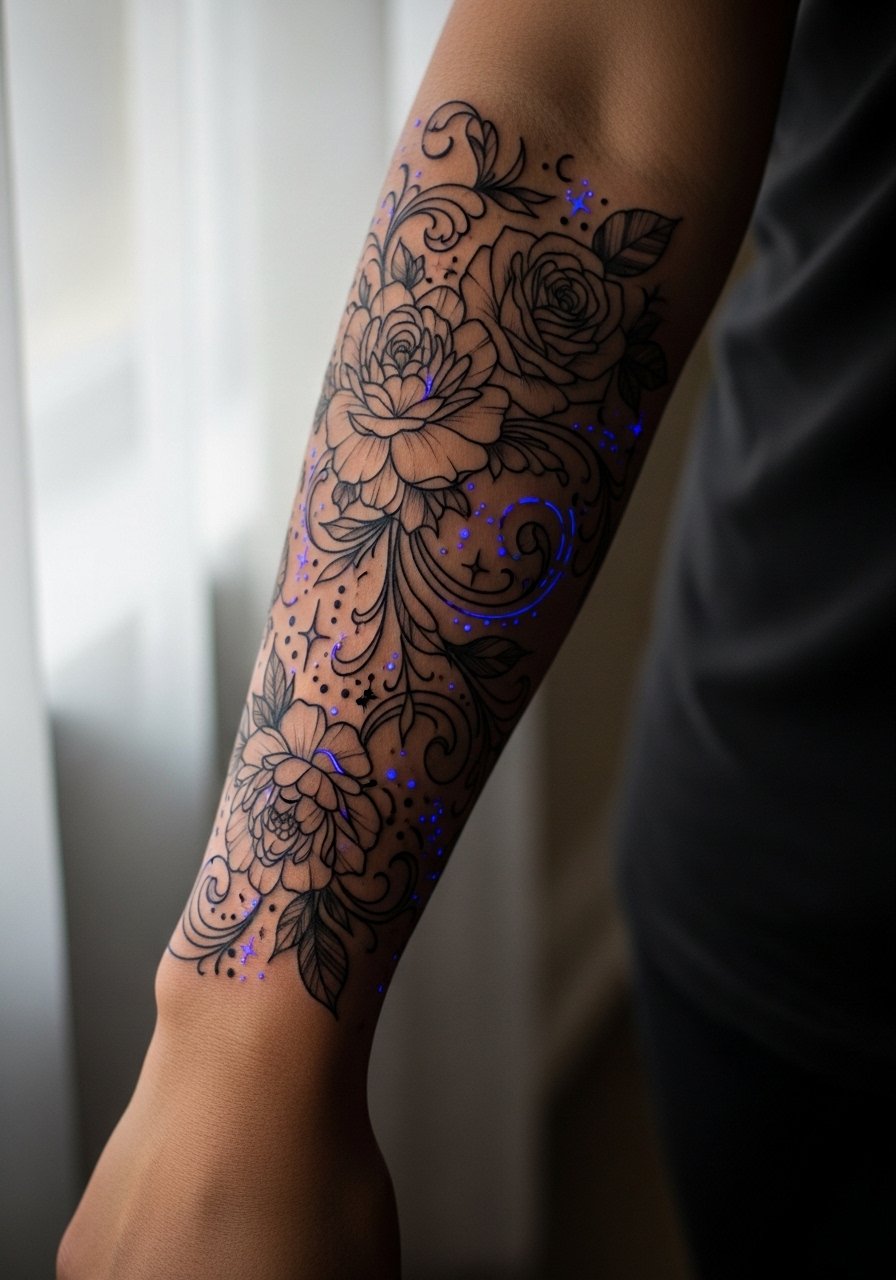
UV-reactive ink adds a secret layer to a floral sleeve for evening looks, but it requires a technical conversation. Some shops use UV sparingly and others avoid it completely, so ask about ink safety and how it interacts with existing color. UV accents can be tiny highlights in petals so daytime photos stay classic and night settings reveal the glow. Expect a specialized touch-up schedule because UV pigments can fade differently than standard inks. Pair subtle UV work with neutral clothing for daytime, and let nightlife lighting do the rest.
16. Half Sleeve Mountain Range That Ages Well
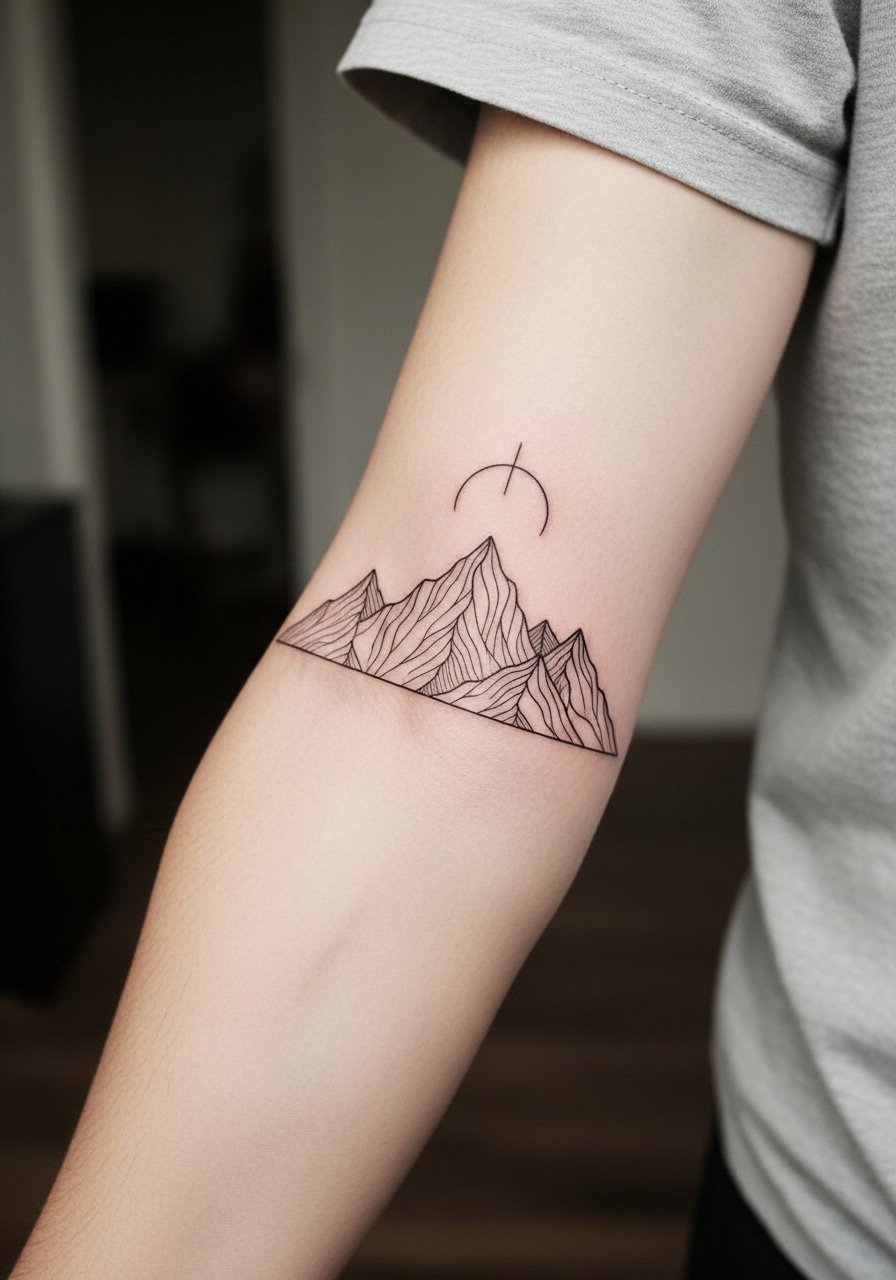
Minimalist mountain ranges hold up when lines are scaled to the arm and when peaks are spaced. The typical mistake is compressing a long line of peaks into a narrow wrist band. Spread the peaks across the forearm so the composition breathes. Outer-arm placements tolerate the single-needle look better than inner arm. Expect 2 to 3 mid-length sessions, and plan a touch-up if you spend lots of time outdoors. For showing it off casually, roll the cuffs of a bracelet sleeve shirt so the line reads when your arm is at rest.
17. Ornate Sleeve with Cultural Motifs, Respectfully Adapted
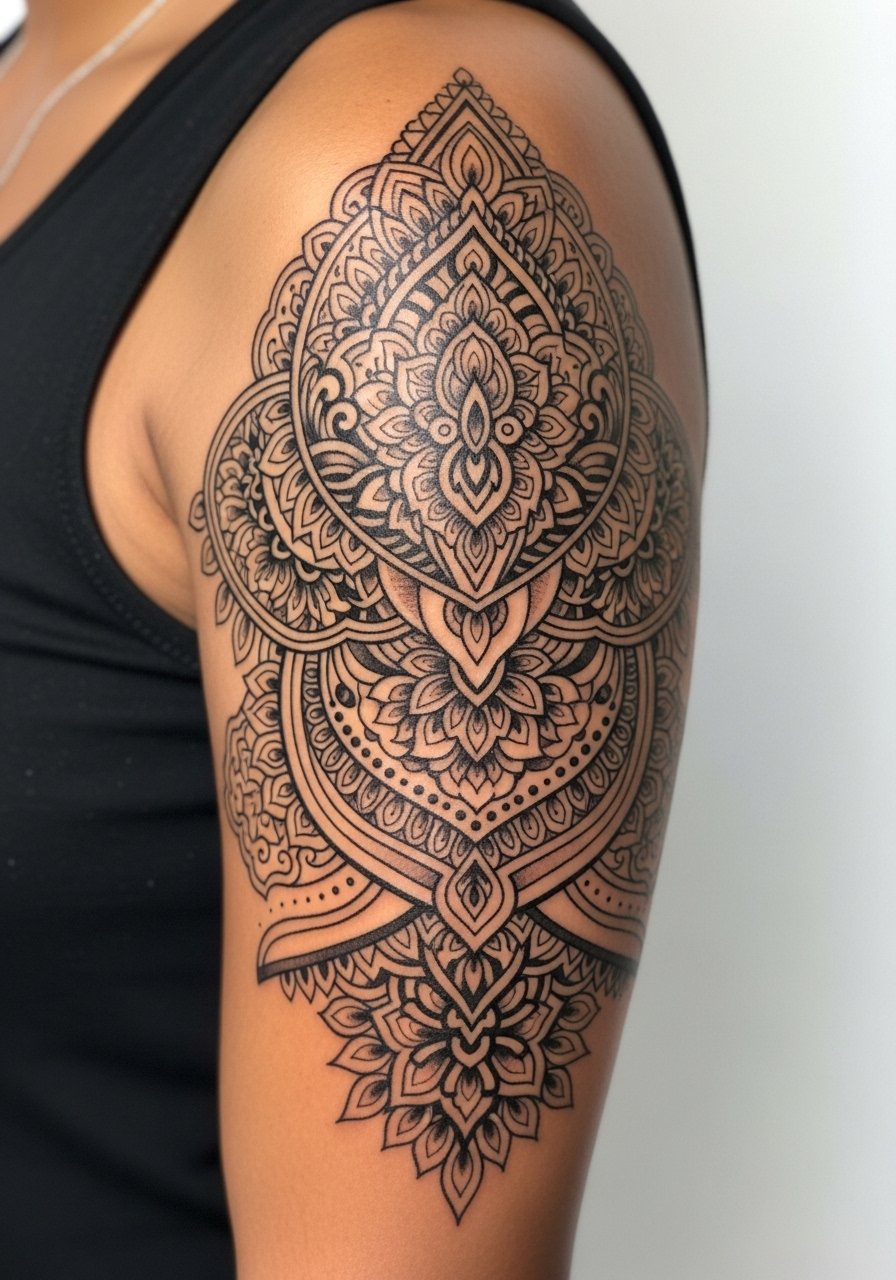
When a design draws on cultural motifs, state that you want an inspired adaptation rather than a direct replica. Many clients regret copying sacred symbols without context. A respectful path is to ask the artist to incorporate original elements that nod to the tradition while avoiding iconography that carries religious or cultural restrictions. This avoids appropriation concerns and still yields the hypnotic patterns people want. For placement, outer arm motifs age reliably because thick ornamental lines hold, and a fitted black tee puts the details on display.
18. Ribcage Floral Panel with Negative Space
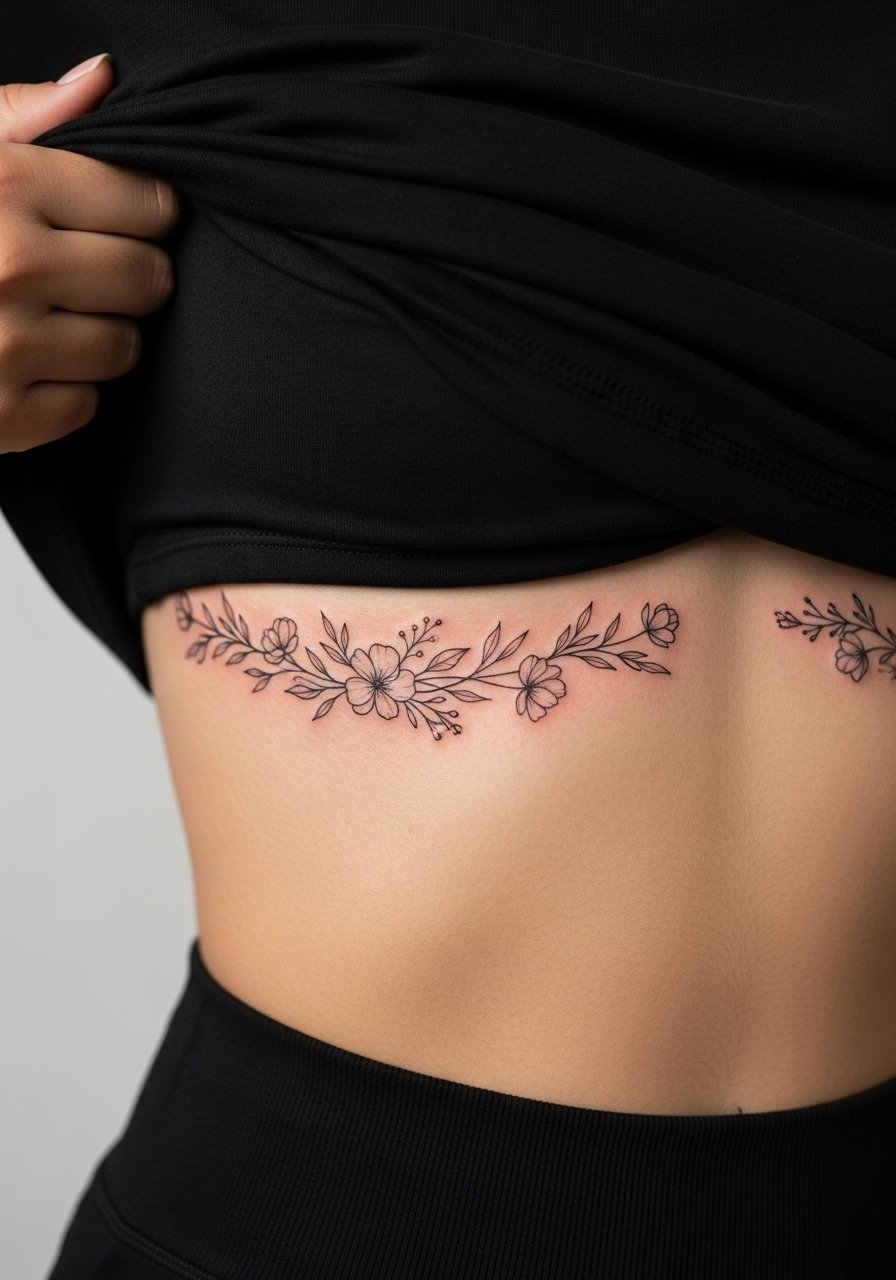
Ribcage panels look stunning when laid out with breathing room, but the area is notorious for pain and shifting. Artists disagree on fine line on ribs. One camp says the skin stretch and movement blur fine line within two years. The other camp says careful depth and spacing lets fine line settle fine. If you want ribs, plan for slightly bolder stems and negative-space gaps so the pattern reads if touch-ups are needed. For the session, wear a strapless bralette or a cropped top you can lift, and expect shorter sittings to manage discomfort.
19. Ankle Constellation Wrap
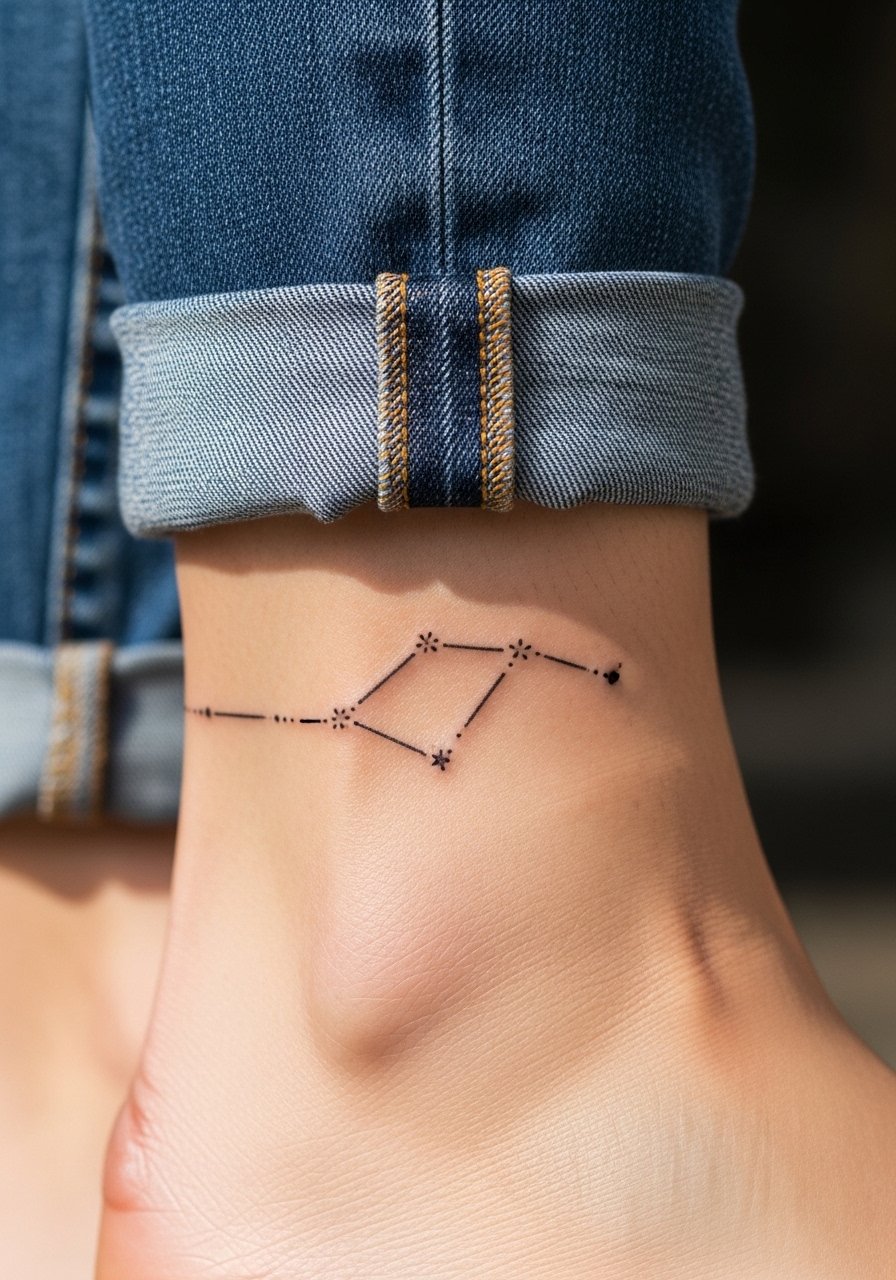
Tiny ankle constellations are charming, but small stellar dots and connecting lines can fade faster than larger work because of constant shoe rubbing. Ask for slightly stronger node dots and protective spacing from the start so the pattern reads in photos. Healing is straightforward but watch abrasion from socks and shoes for the first two weeks. This placement shows best with sandals or rolled jeans, and a jeans rolled up to reveal ankle look keeps the constellations visible.
20. Inner Bicep Micro-Botanical Panel

Inner bicep botanicals are intimate and photograph beautifully, but pain is higher than on the outer arm. The frequent mistake is packing many small motifs into the tight inner arm area. Instead, space elements and use dotwork to create texture without over-inking. Healing here can be slower because of sweat and friction from close clothing. For session wear bring a loose tank top and avoid tight straps. Expect to revisit the area for a touch-up at 6 to 12 months if any fainting of lines occurs.
21. Ornamental Sleeve That Respects Gym and Body Changes

If you spend time lifting, plan ornamentals to run with the muscles rather than across flex points to avoid distortion from size changes. A common regret is placing heavy continuous linework across areas that expand and compress, which can warp patterns after weight fluctuations. Discuss your training routines and any planned body changes with the artist so they can place motifs on stretch-resistant zones like the outer arm. This approach reduces future distortion and keeps lines crisp longer. For session convenience, wear a loose long sleeve shirt that rolls up easily so the artist can expose the area without fabric pressure.
Frequently Asked Questions
Q: Will fine line sleeves blur into each other if I get a full sleeve done?
A: It depends on spacing, placement, and skin type. Fine line can be kept readable if the artist leaves breathing room between dense areas and uses slightly stronger anchors in high-motion zones. Expect touch-ups earlier than heavy blackwork, and plan the design so negative space helps preserve definition.
Q: Do watercolor-style sleeves need different aftercare than traditional ones?
A: Watercolor washes benefit from careful early protection because the pigment sits less densely. That means following the studio's film or dressing guidance and avoiding heavy rubbing for the first two weeks. If you plan frequent summer swimming, consider a placement away from constant sun exposure to protect color.
Q: How should I plan clothing for a shoulder-to-elbow session?
A: Wear something with easy shoulder access like a loose tank or an open button-down you can pull to the side. A strapless bralette under an open shirt helps keep modesty while letting the artist work without fabric interference.
Q: Is Saniderm better than dry healing for full sleeves?
A: People divide into two camps on this. One group argues dressings like Saniderm reduce scabbing and keep contaminants out. The other group prefers air exposure after initial cleans to avoid trapping moisture. Talk to your artist about their preferred protocol and follow the exact timeline they give for the best result.
Q: How many sessions does a full sleeve usually take?
A: This varies with detail and color. For most full sleeves expect multiple sessions often between four and eight, sometimes more for micro-realism. Plan sessions in 3 to 6 hour blocks if you want to manage pain and let healing catch up between visits.
