
Fine line tattoos are all over boards and reels, but they do not always behave the way the trend photos suggest. Bold blackwork and well-spaced geometry tend to hold contrast longer, and placement matters more than most first-timers realize. Read on for specific abstract directions that age better, what to say in consults, and how to dress for the reveal.
1. High-Contrast Blackwork Geometry on Outer Forearm
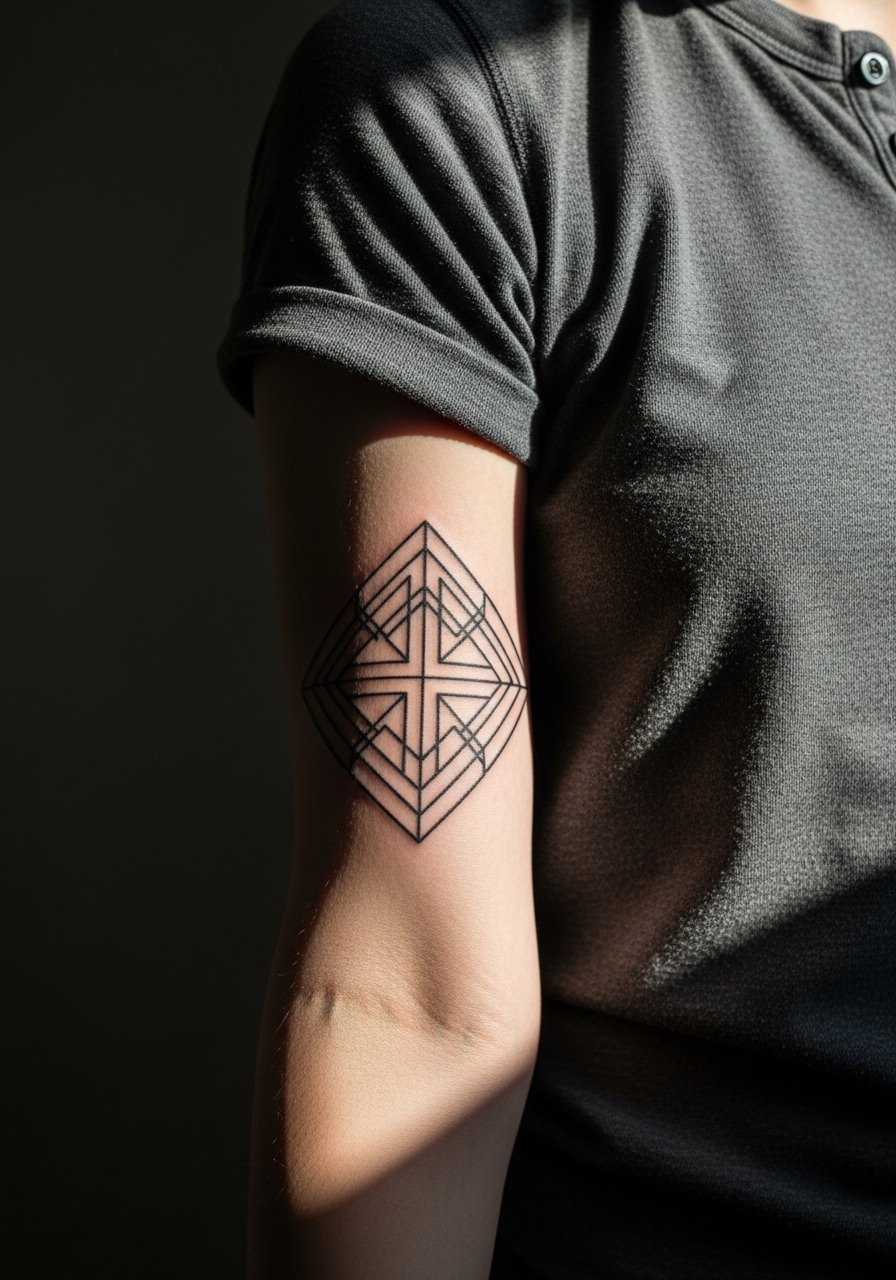
I recommend this one if you want lines that still read after years of sun and sleeves. Say to your artist that you want room between shapes and deliberate negative space so dense areas do not merge over time. The session feels steady and tolerable on the forearm, usually one to two hours depending on coverage. Common mistake is shrinking the pattern too small, which causes the circles and triangles to blur after a few years. For showing it off, pair with a fitted black henley or roll sleeves on a loose tank.
2. Flowing Single-Line Sleeve That Breathes

Fair warning, fine line sleeves split artists into camps. One group says the thin work can blur on high-movement arms within a few years. The other group says careful spacing and depth let single lines hold if the arm is large enough. Book long sessions and expect the sleeve to be built across four to six visits. Tell your artist you want single continuous lines with occasional anchors, not dense clusters. The biggest mistake is trying to cram too much detail into a small arm. For session comfort, wear a loose button-down shirt so the arm can be moved easily.
3. Minimalist Single Mark for Wrist or Ankle

This micro mark reads like a punctuation mark. It is a strong first-tattoo option if you want something low-commitment that still invites interpretation. Expect a short one-session visit and light pain on the wrist or ankle. The common error is asking for needle-thin strokes on high-friction zones, which fades quickly. Ask for slightly stronger line weight and plan a touch-up around year two for friction areas. For the session, remove bracelets and wear a sleeveless muscle tee so the artist has clean access.
4. Geometric Heart Across the Collarbone
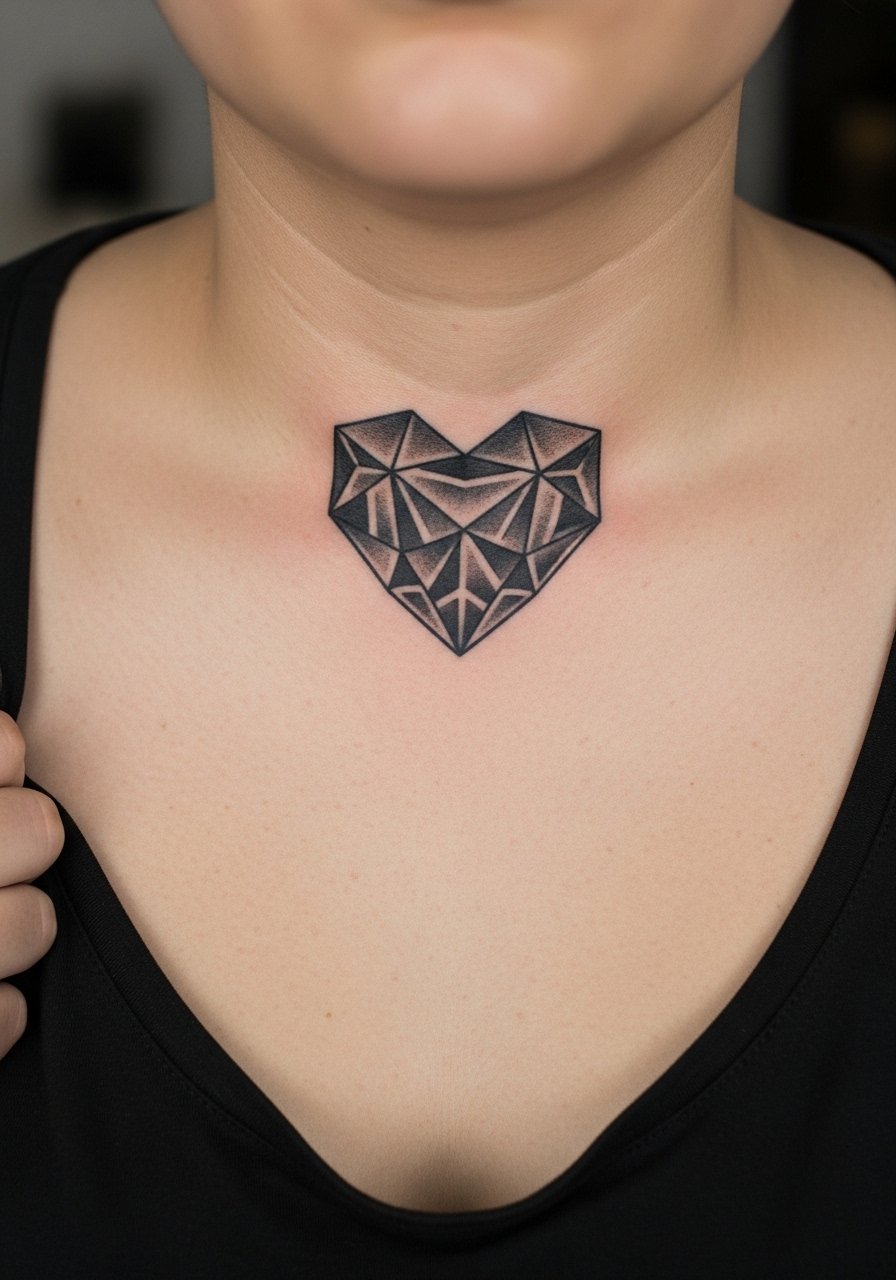
Collarbone pieces sit between visible and private, and the geometry gives an emotional anchor without literal imagery. Tell your artist that you want the main angles to align with the clavicle so movement looks intentional. Pain at the collarbone is higher than the forearm, and sessions are often one to two hours. A frequent mistake is placing dense geometry too close to the bone, where healed contrast weakens. For evening reveals, try a deep scoop neck tee or layer with a layered chain necklace to draw vertical lines above the shape.
5. Negative-Space Minimalism on the Inner Wrist

This one uses the skin as part of the design so the shapes breathe instead of crowding. Inner wrist work is prone to fading thanks to sun and washing, so ask for bold edges and clear spacing. Touch-up timelines are realistic at every 1 to 3 years for daily-exposed wrists. A common mistake is copying tiny fine-line templates from a screen, which rarely hold up on hands. For the appointment, keep bracelets off and consider a minimalist field watch on the opposite wrist to frame without competing.
6. Nature Flow Around a Bird Centerpiece on the Shoulder
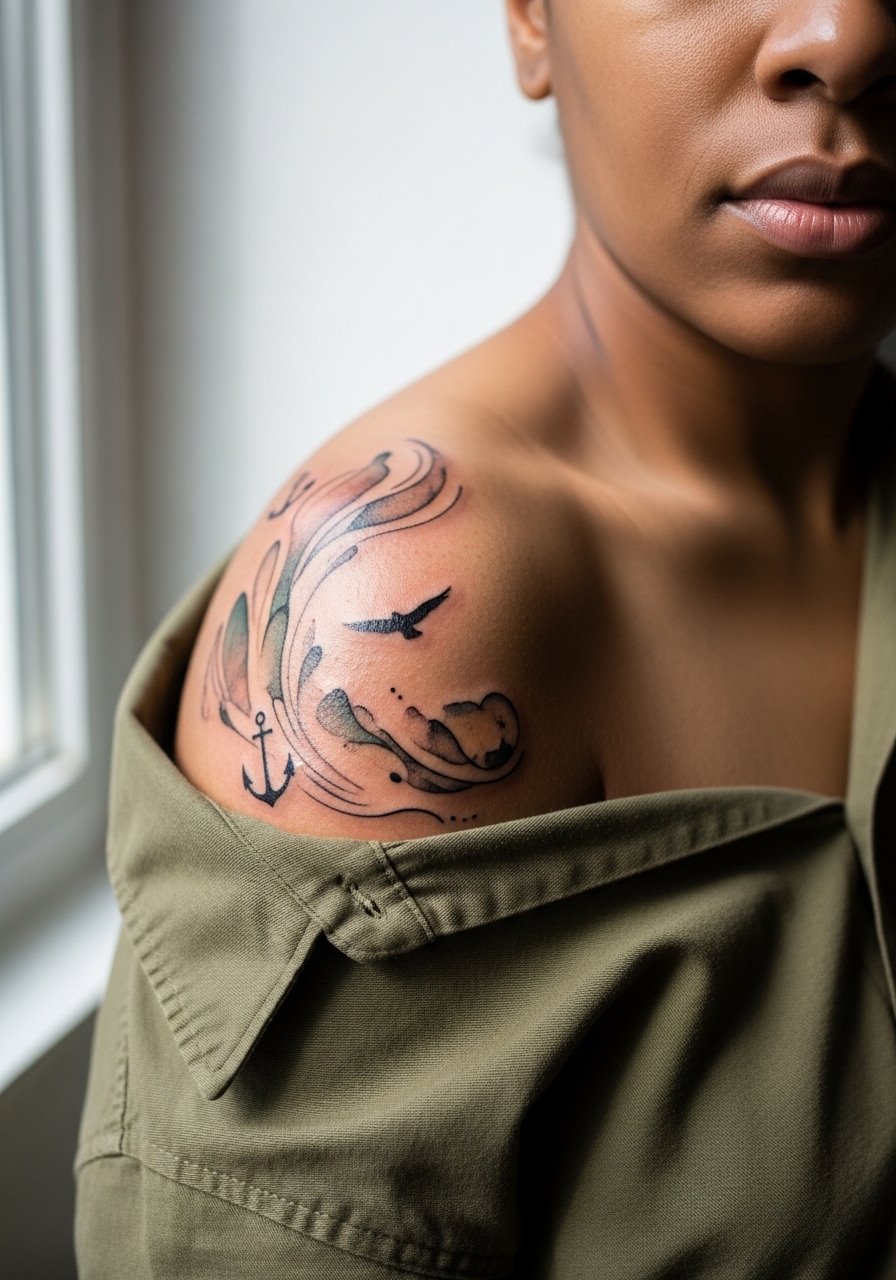
Shoulder and upper-arm anatomy is forgiving for flowy, outline-free designs that sit with muscle shape. This style feels organic during the session and usually heals into soft edges that meld well with clothing. If your body has seasonal weight changes, favor flowing lines rather than tight geometric repetition so the piece adapts without obvious distortion. Mistakes happen when artists attempt rigid symmetry on a rounded shoulder, which can look warped after healing. For show-off looks, pair the piece with an olive camp collar shirt or a tank so the shoulder reads clearly.
7. Layered Geometry for Forearm Optical Depth
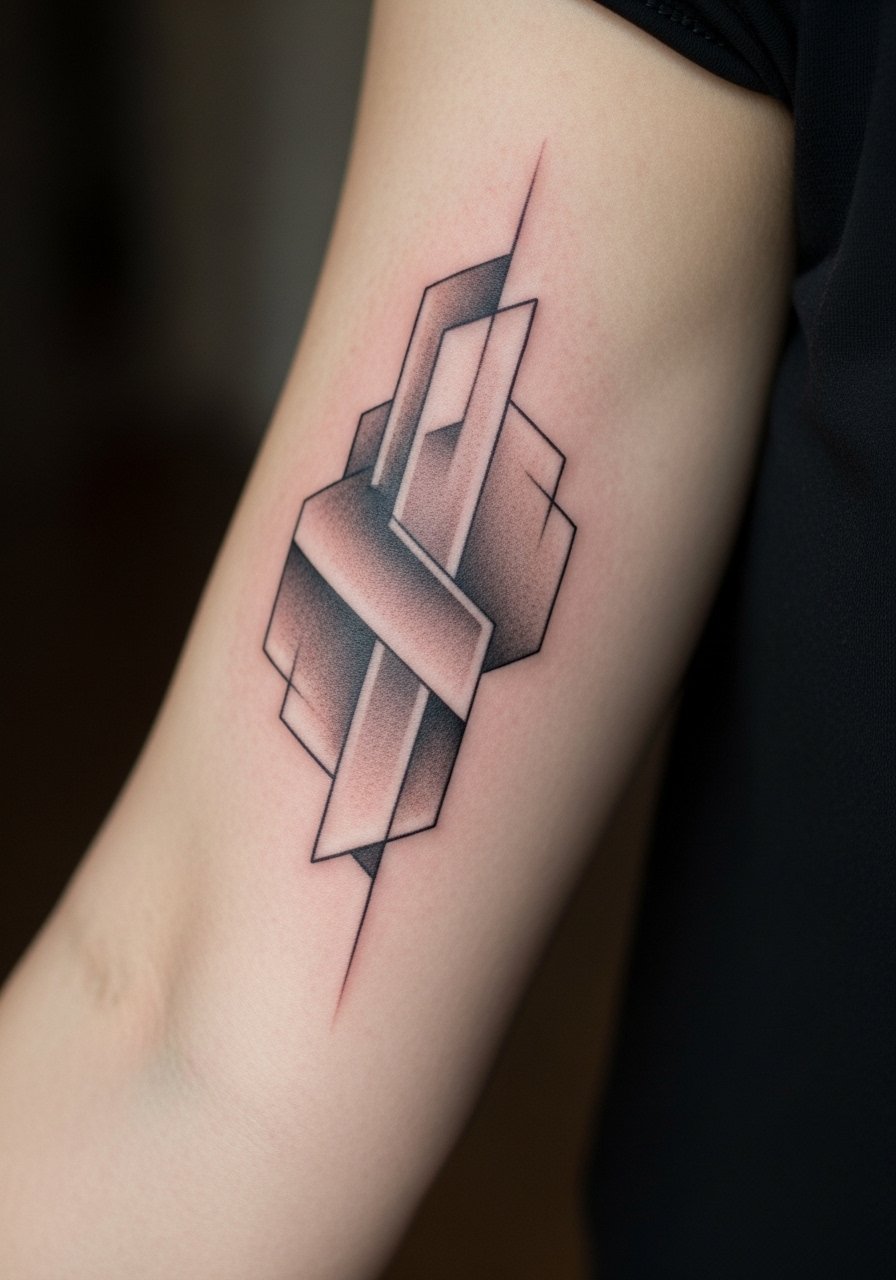
This is for people who like optical depth without color. The trick is to space layers so they do not merge as saturation settles. Tell your artist you want gradual shading and clear edges between levels. The forearm placement reduces blowout risk compared with fingers or the inner wrist. A common mistake is asking for extremely tight layering in a small area, which loses definition as the piece ages. Plan on two sessions if the design is medium-large. For wearing, rolled sleeves and a slim silver chain on the opposite arm keep attention on the geometry.
8. Textured Stroke Abstract on Upper Arm or Ribcage

Textured stroke tattoos create a painted feel using stipple and whip shading. Ribcage versions are dramatic but demand longer healing and higher pain tolerance. There is a healing debate around protective films versus dry healing for textured blackwork. One camp favors protective film to keep strokes clean during early days. The other camp argues that dry healing encourages better scab formation for ink retention. Ask your artist which method they prefer and follow their lead. Avoid requesting dense texture too close to the bone, where shading can gray out. For session wear, use a muscle tank sleeveless you can lift or loosen.
9. Asymmetrical Butterfly Fade at the Collarbone or Ankle

Asymmetry plays well for transformation themes without being literal. The design reads differently based on placement; collarbone makes it intimate and high-visibility, ankle gives it a subtle reveal. Avoid overly literal wing detailing if you want the fade effect to look conceptual as it heals. Sessions are short for ankle pieces and moderate for collarbone work. For showing the collarbone version, a v neck polo frames the geometry without competing.
10. Bold Blackwork Sleeve of Abstract Shapes
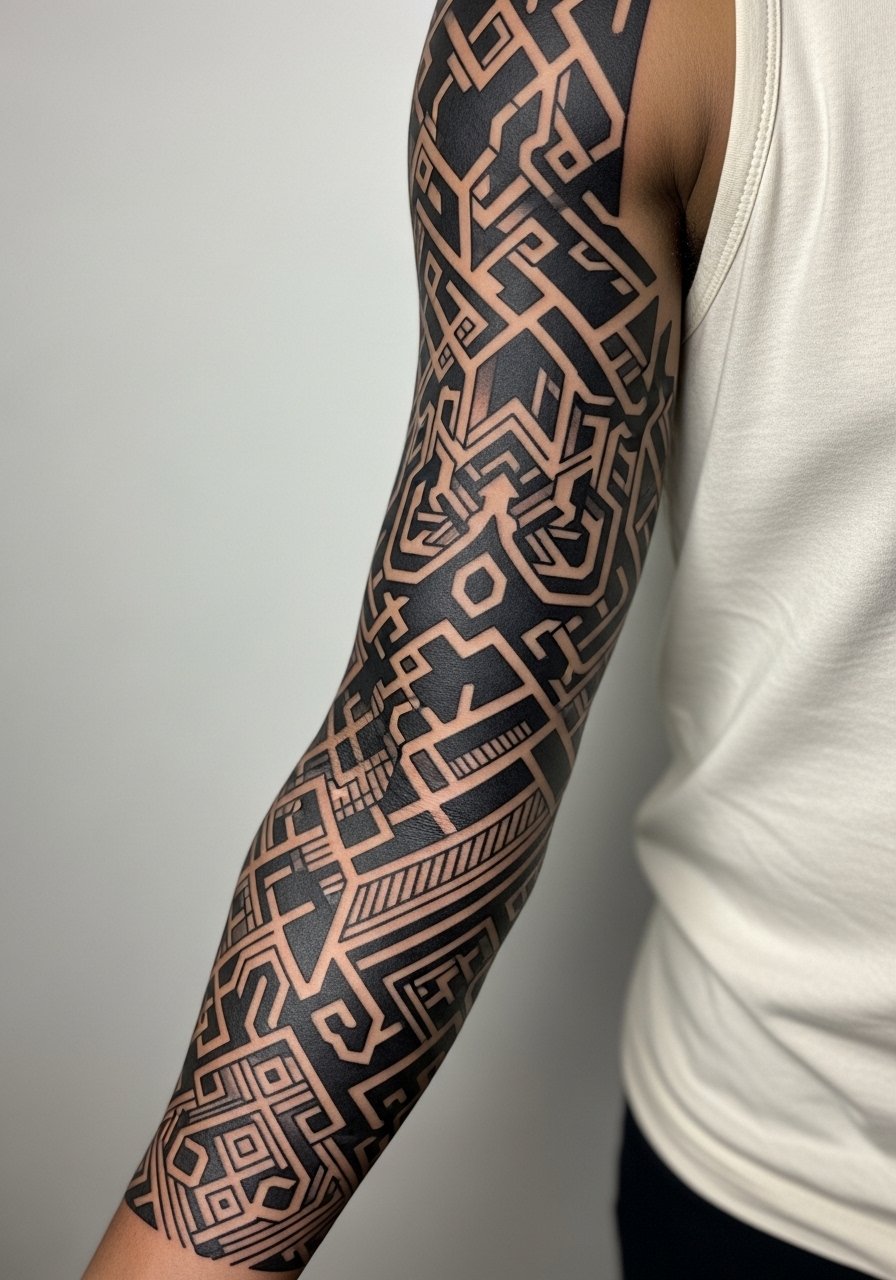
A full blackwork sleeve demands commitment and multiple sessions. Expect four to eight appointments depending on saturation and size. The advantage is longevity; thick black areas and strong negative space often age into a cohesive statement. Common mistakes include trying to mix too many styles in one sleeve, which looks patchy when sections age differently. Discuss session pacing and cohesion in your consult. For comfort, wear a loose button-down shirt you can slide your arm out of during long sittings.
11. Hand-Painted Stroke Texture on the Ribcage

This aims to mimic brushwork, using varied needle pressure and layered stipple. Ribcage sessions hurt more and require patience, but the resulting depth is unique among abstracts. The mistake is asking for too much dense texture in a single pass, which can scar or compact. Plan multiple passes spaced across sessions so each layer heals before the next. Ribcage tattoos also show a clear difference between fresh and healed; the texture softens but keeps dimension when spaced correctly. For the session, wear a fitted sports bra so the area is accessible.
12. Single-Wing Asymmetry on Shoulder Blade
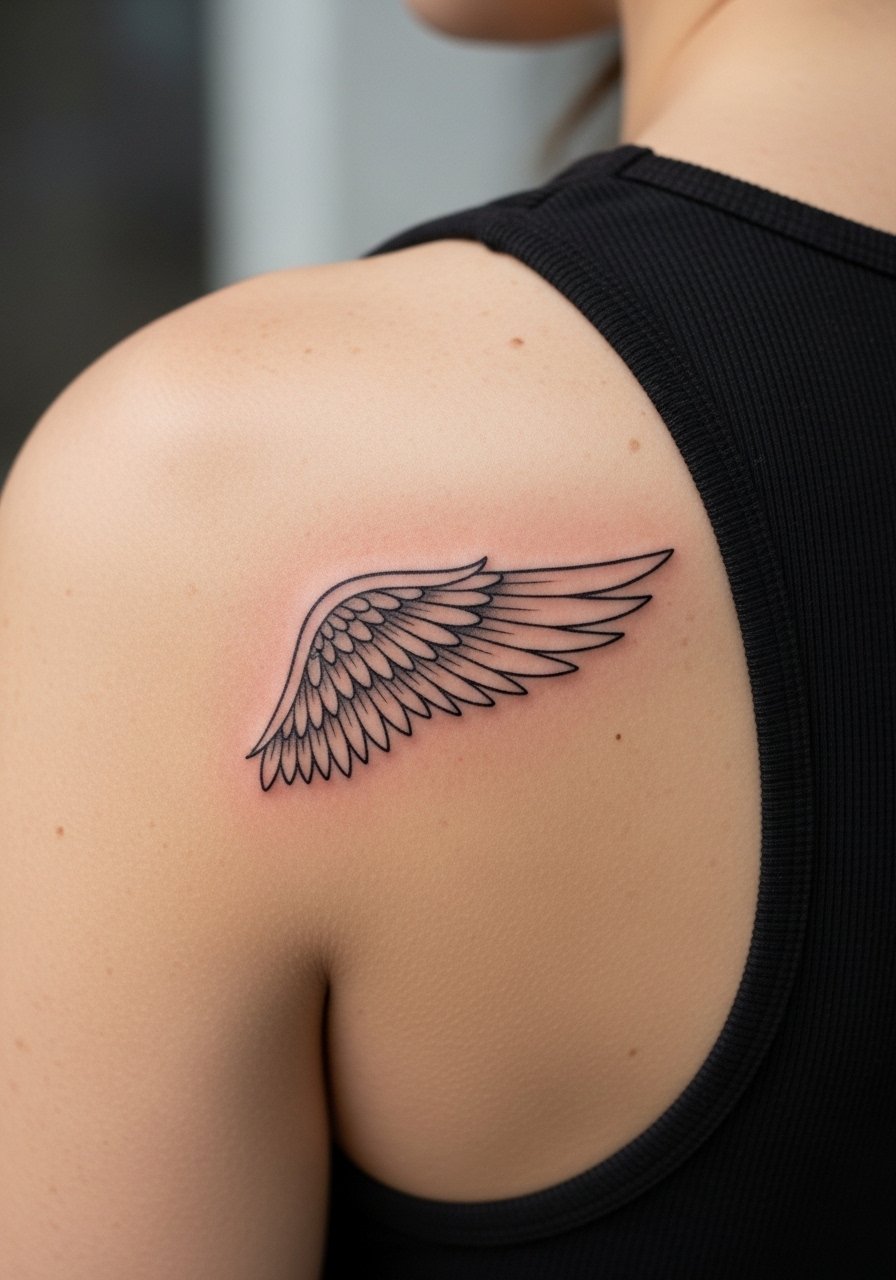
This masculine-leaning asymmetry reads strong with simple shapes and a negative-space fade. The shoulder blade is forgiving and low-risk for blowout. Tell your artist you want the wing angled to match shoulder slope so motion reads intentional. A common error is mirroring a wing that should sit naturally with the body. Pain is moderate and sessions are usually under two hours. For shows, a backless tank highlights the asymmetry without overexposing.
13. Layered Mandala Illusion Along the Spine
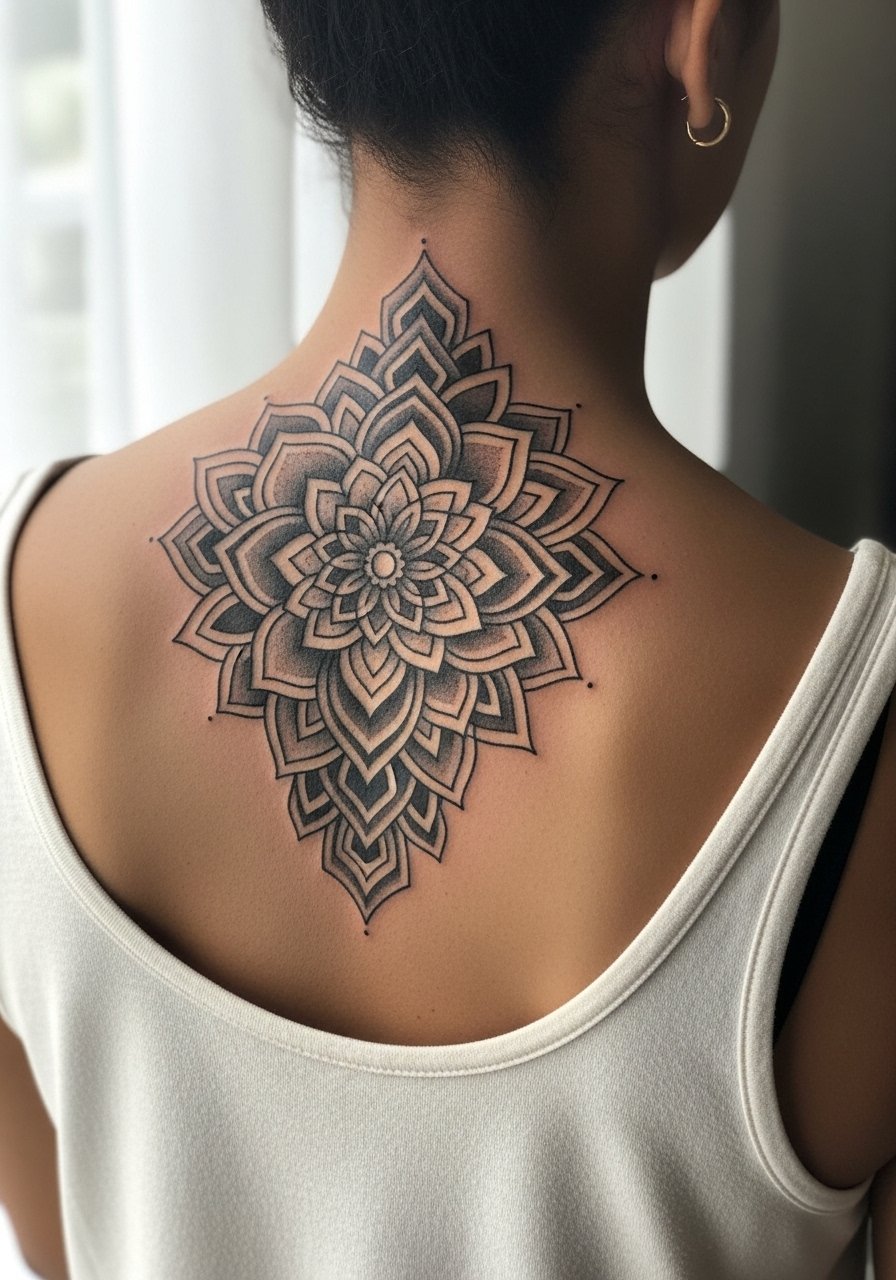
Spine work demands careful spacing so concentric shapes do not compress over time. The trick is larger negative bands between rings and deliberate centers that breathe. Expect a multi-session plan and honest talk about pain near the spine. The frequent mistake is shrinking mandalas too small when the center needs room to hold. For a reveal, a backless tank top displays the vertical flow cleanly.
14. Minimal Dot Cluster on the Ankle

Small dot clusters read delicate and intentional when spaced correctly. Ankle work faces friction from socks and shoes, so ask for slightly bolder dots than you might choose for stationary areas. Expect a short session and possible quick touch-up if footwear rubs the zone. Common mistake is placing micro dots too close together, which can blur into a gray patch over time. For showing the piece, cuffed chinos or tapered joggers frame the ankle without hiding the work.
15. Outline-Free Nature Flow on Outer Thigh
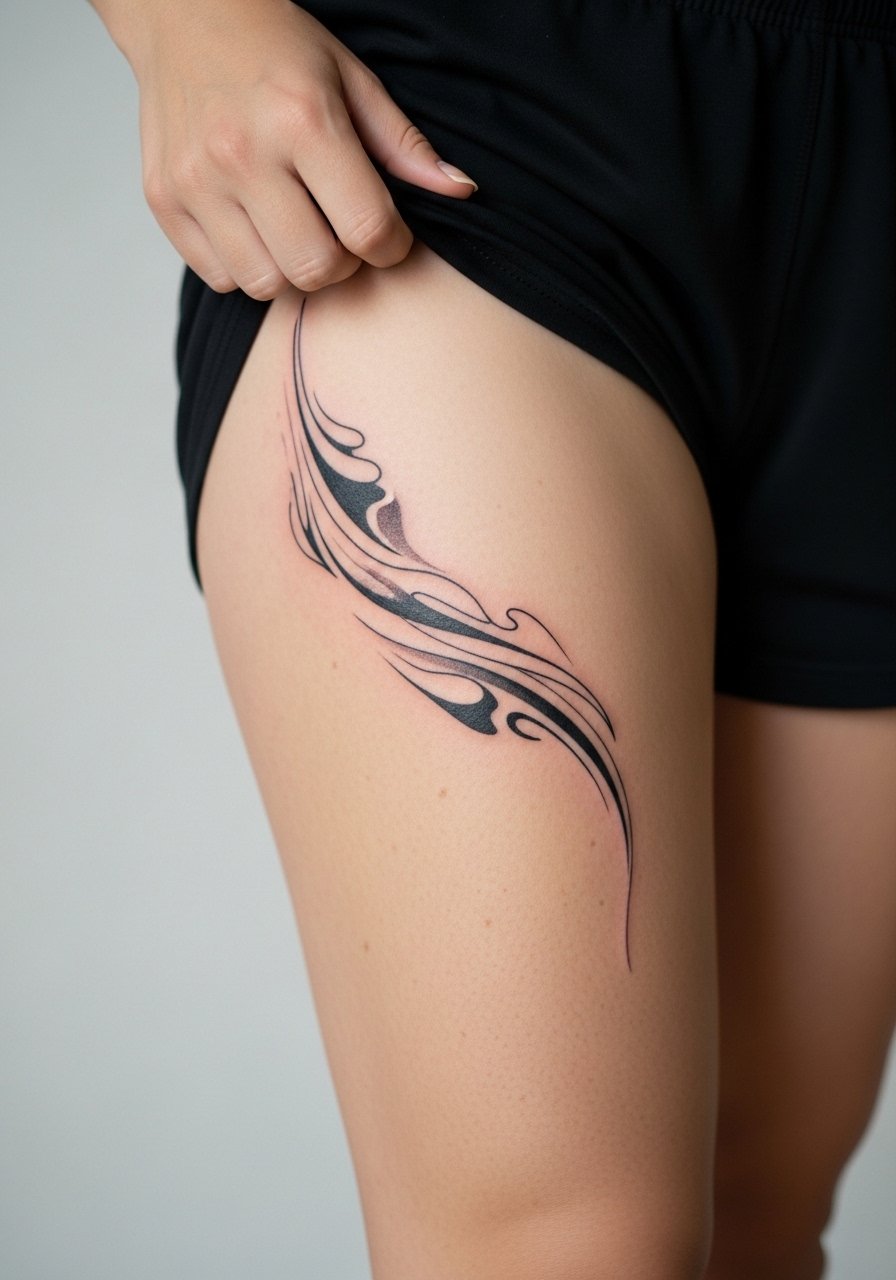
Outer-thigh canvases handle flowing, organic abstracts that change with movement. This placement tolerates larger compositions and looks great in summer when paired with shorts. A common problem is choosing a rigid geometric approach on the thigh that stretches oddly with weight fluctuations. Opt for looser linework and suggest multiple anchor points to your artist so the piece flexes with the leg. For the session, wear slim athletic shorts so the leg is easy to access without contorting.
16. Stipple-Shaded Inner Bicep Cluster
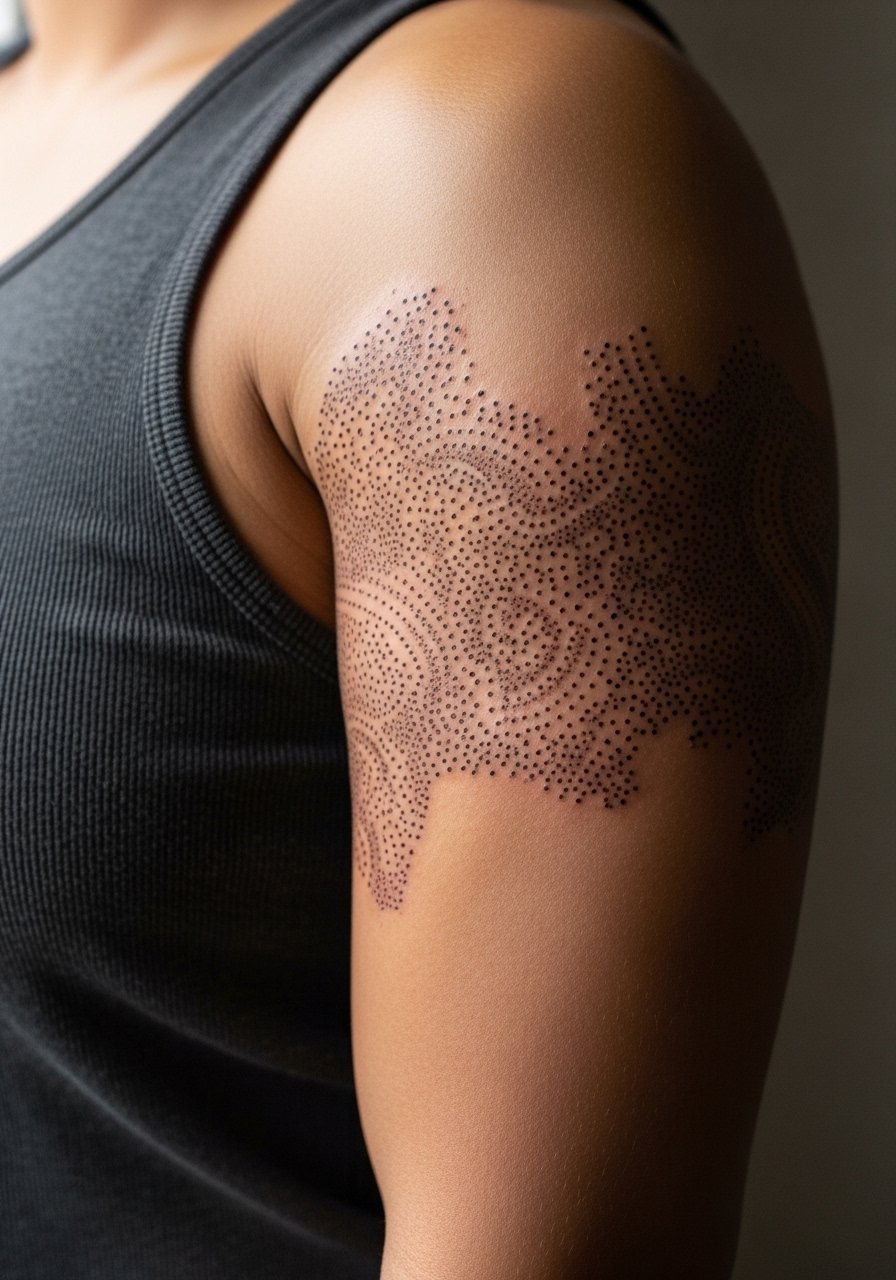
Inner bicep offers a slightly more private spot with great contrast when done in stipple. Pain is higher than the outer arm but still manageable for most. The error is using heavy solid fills near the underarm, which sweat and friction can degrade. Plan for one to two sessions depending on density. Tell your artist you want airy gradation, not compacted black, and request a touch-up timeline if you expect heavy workouts that stress the area.
17. Optical Calf Geometry with Negative-Space Bands

Calf placements let optical geometry sit tall and read from distance. The calf tolerates larger scale and layered shading without common compression issues that affect smaller limbs. A mistake is trying to force very tight repeating lines around the curve, which can look wavy when the muscle relaxes. Sessions are usually one to two for a medium-sized piece. For casual display, cuffed tapered joggers or leather boat shoes help reveal the lower leg pattern.
Studio Day Picks
The forearm, wrist, collarbone, shoulder, and ribcage pieces above ask for different prep. These picks smooth the session and address friction, fine-line protection, and textured blackwork.
-
Indie texture balm for tattoos. A thinner finishing balm preferred by collectors with textured blackwork because it does not clog textured strokes, which helps the hand-painted stroke pieces keep their depth.
-
Breathable tattoo protective film. Lighter than heavy occlusive wraps, it is handy for fine-line wrist jobs to reduce friction from early washes and activity.
-
Ink-lock ointment style balm. Useful in humid climates to help saturated black areas remain bold while still allowing the skin to breathe, which matters for chest and forearm blackwork.
-
Rice-based lightweight moisturizer. Ideal for minimalist ankle and wrist pieces and for darker skin tones where heavy ointments can look overly shiny in photos.
-
Saniderm protective dressing. For long sessions on ribcage or full sleeves, a short-term single-application film can reduce contaminant exposure in the first 24 to 72 hours, which some artists prefer.
Frequently Asked Questions
Q: Will fine line abstract sleeves blur faster than blackwork?
A: Fine line sleeves carry higher blur risk on high-movement areas because thin strokes have less ink mass. Blackwork and bold geometry tend to hold contrast longer. If you want a sleeve in fine line, ask your artist for slightly heavier line weight in anchor areas and plan touch-ups in year two to four depending on exposure.
Q: How should I choose between Saniderm and dry healing for an abstract wrist piece?
A: Artists split on this. Some use Saniderm to keep fine lines protected during the first days, others prefer dry healing to encourage natural scab formation. Ask your artist which method they use most and why, then follow their protocol so the technique matches their workflow.
Q: Do textured stroke abstracts need special aftercare compared with geometry?
A: Textured strokes can collect more surface debris during early healing because of uneven saturation, so lighter, breathable balms and gentle washing help. Avoid heavy occlusives on deeply stippled areas unless your artist specifically recommends them.
Q: Will an abstract geometric mandala on my ribcage distort if I gain weight?
A: The ribcage can show changes with body composition, especially in very tight geometry. If you expect fluctuations, pick flowing spacing and larger negative bands so the design flexes rather than compresses.
Q: What should I wear to a shoulder or upper-arm session to stay comfortable and give the artist access?
A: A loose button-down or a tank you can slide aside works best. For upper-arm pieces try a muscle tank sleeveless so the artist can position the arm without tugging at fabric.
