
Fine line guardian angel trends are everywhere online, but what holds up is often different from what gets the most reposts. I watch designs go from crisp to soft in a few years when placement, spacing, and technique are treated like afterthoughts. Read these 27 aesthetic guardian angel tattoo directions with practical notes on consultation, aging, session feel, and how to dress for the day so your piece still reads as intended later.
1. Black-and-Gray Winged Angel on Inner Forearm
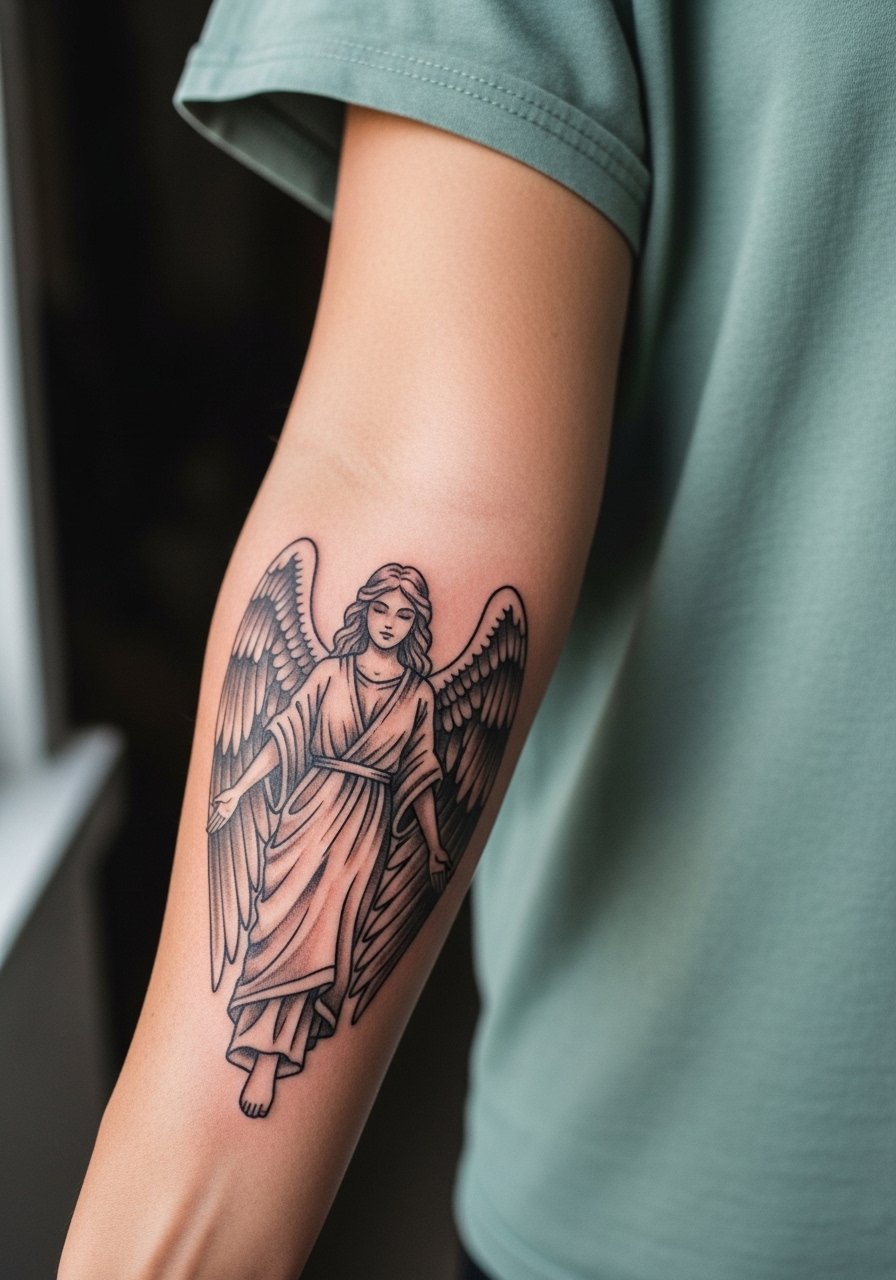
I recommend this when you want a daily-visible reminder without huge commitment. Tell your artist to keep the wing feathering open with negative space so the stipple shading ages into texture rather than a mud patch. Common mistake is requesting ultra-fine contour lines at tiny scale. That looks great fresh and then softens into a gray wash by year three. Expect one session around 60 to 90 minutes and a possible touch-up at year two. For the session wear, bring a loose short sleeve tee you can lift without constraining the arm.
2. Neo-Traditional Bold Wings Across the Upper Back
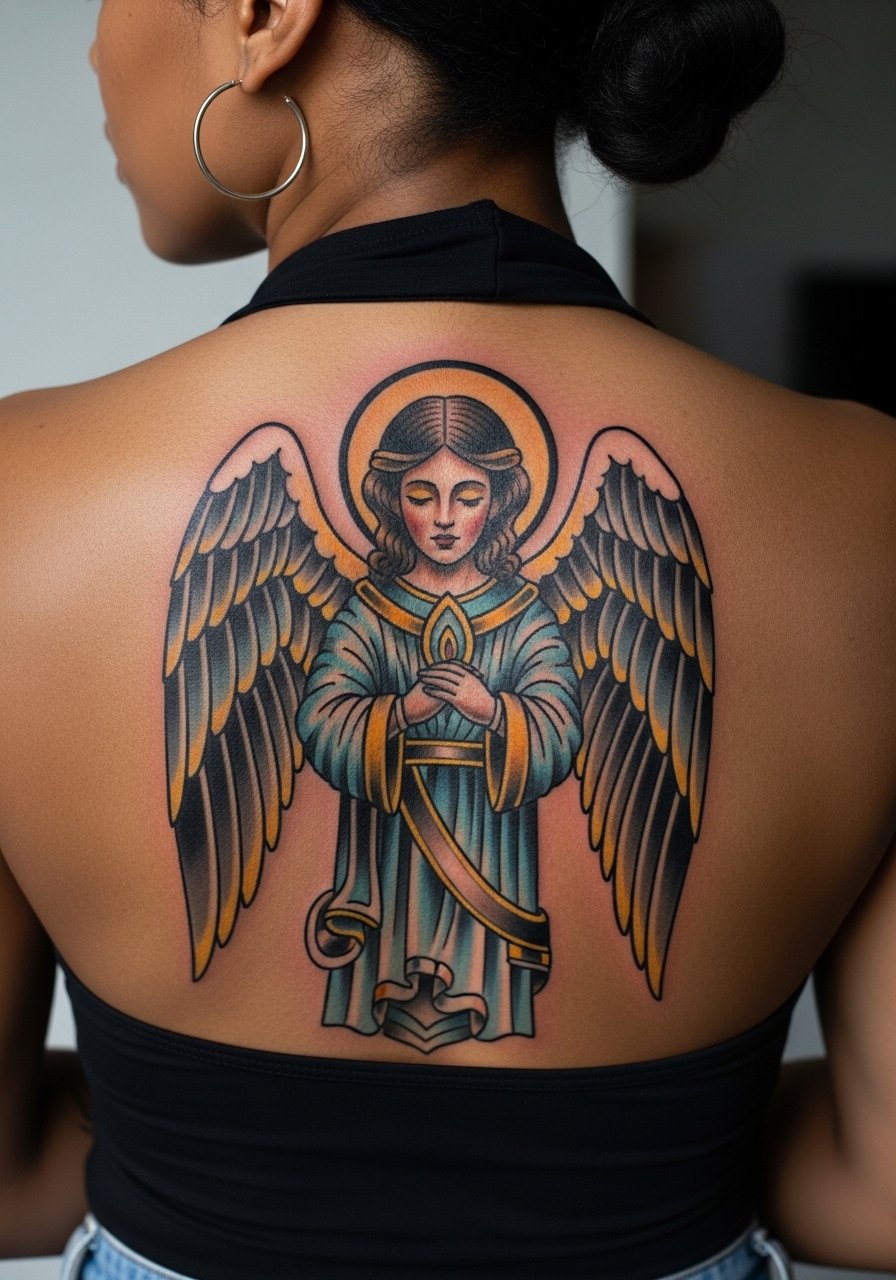
This style reads from across a room, so it is a good pick if you want scale and color intensity. During consultation ask for heavier outline contrast and saturated fills in the primary feathers, and plan for two sessions so pigment settles evenly. The main error is compressing too much detail into a single sitting. That leads to overworking and slower healing. Expect moderate pain under the shoulder blades and a durable result if the artist spaces the feathers. For showing it off, pair with a low back crop top or a sheer shawl for evening looks.
3. Full-Body Realism Angel on the Chest
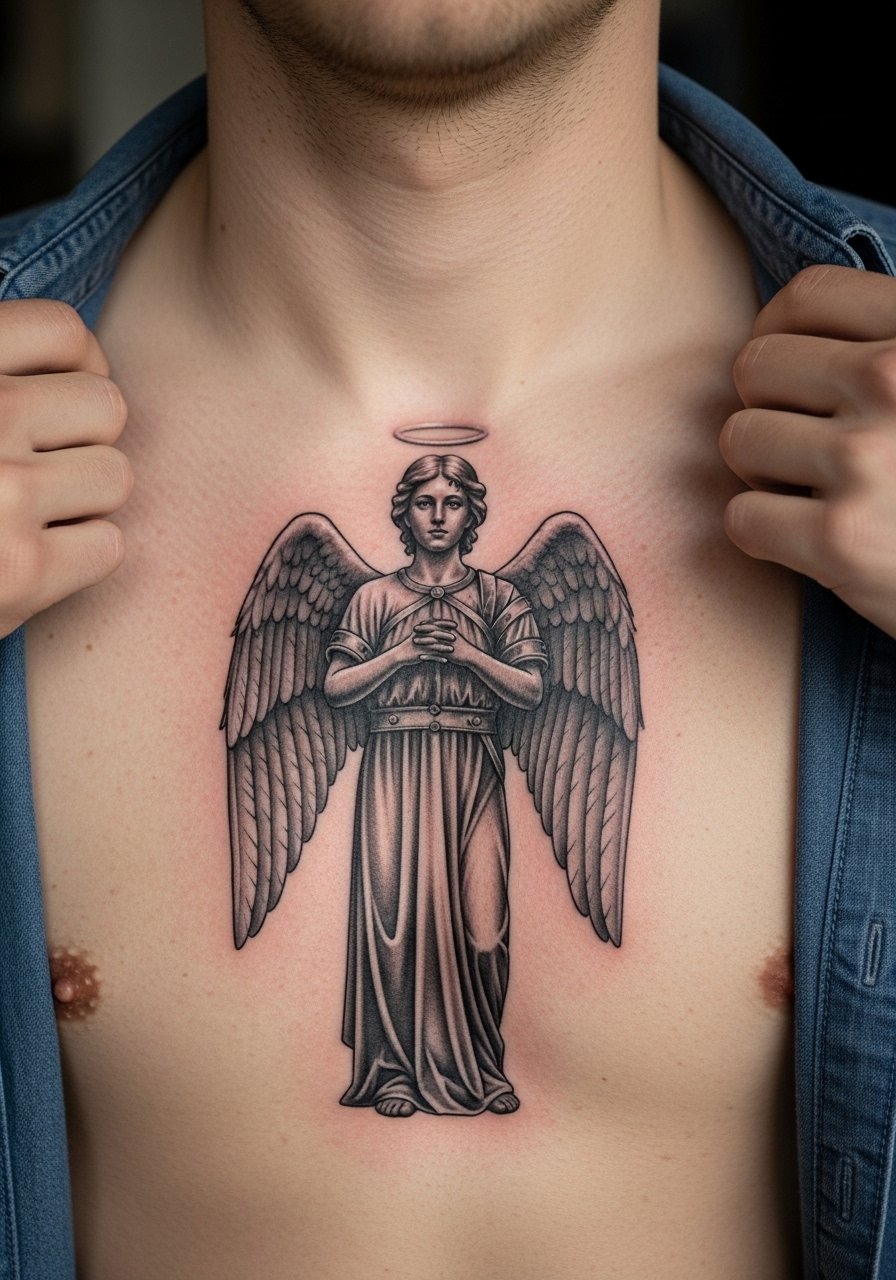
If you want a lifelike protector over the heart area, realism on the chest is unmatched for emotional presence. Plan for multiple sessions and clear reference images that show the face lighting you prefer. A common mistake is asking for portrait-level facial detail at too small a scale. That blurs and loses expression. Expect chest sessions to feel more intense than arm work. One touch-up within two to three years is common for shading adjustments. For session access, wear a button-front shirt that you can open to expose only the area being tattooed.
4. Minimalist Angel Wings Outline on the Wrist

Fine line wings on the wrist look delicate and discreet at first glance, and they are ideal for people who want understated daily visibility. The controversy is real about fine line longevity on the hands and wrists. One camp argues fine line fades and the lines merge within two years on high-movement skin. The other camp says with correct needle depth and spacing it can last longer. Ask the artist where they stand and expect touch-ups sooner than forearm pieces. Session time is short, but avoid tight bracelets while healing. Pair the finished piece with a thin chain bracelet on the opposite wrist to frame without crowding.
5. Watercolor Guardian Angel on the Shoulder
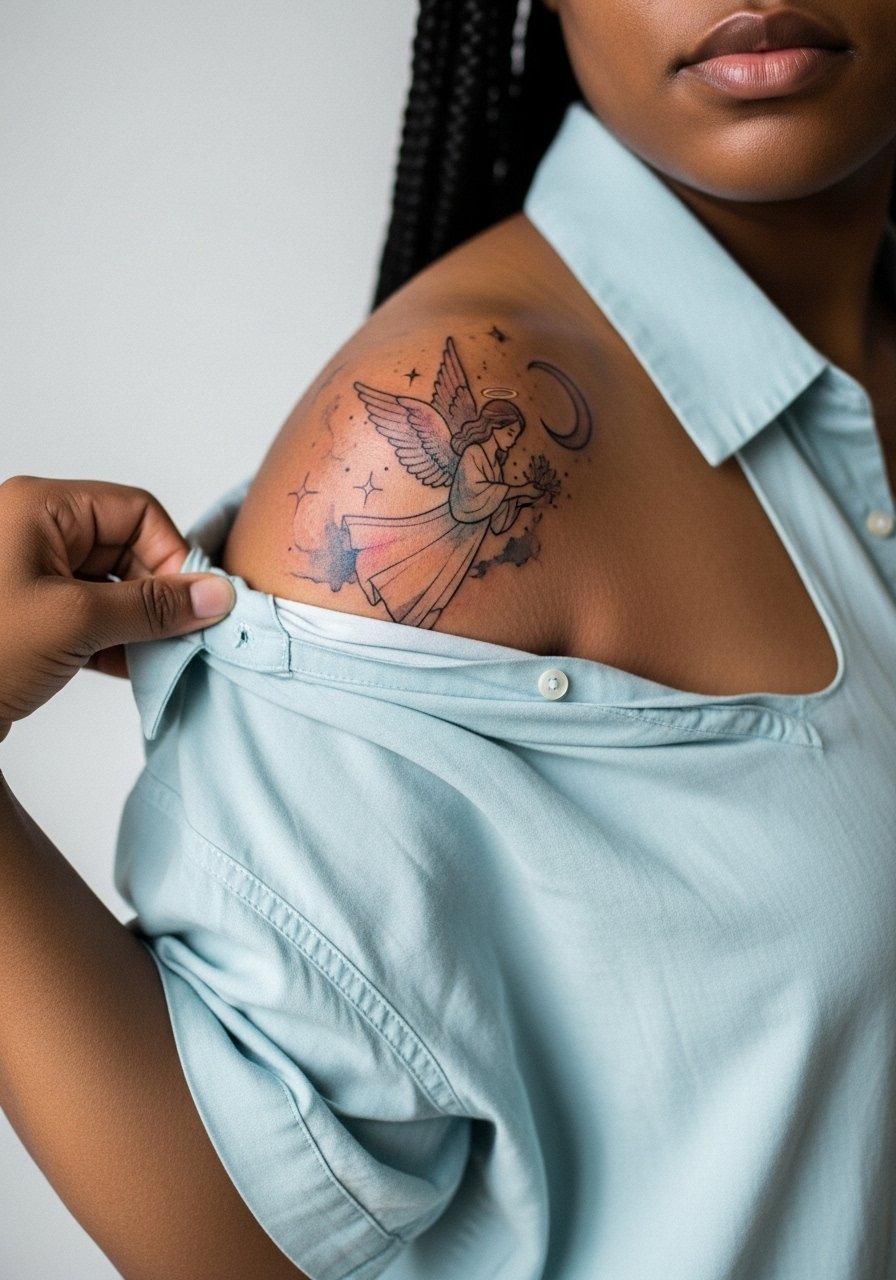
Watercolor gives an ethereal haze that suits celestial motifs, but it ages differently than saturated work. The debate is straightforward. One group warns watercolor blurs and fades faster, turning into a soft bruise over time. The other group treats watercolor as an artistic evolution that embraces gentle diffusion. If you want the watercolor look to hold, ask for subtle anchor lines or low-saturation color pools and plan for a two-session approach. The shoulder is friendly for mid-length sleeves during sessions, so wear a loose short-sleeve button-up you can shift easily.
6. Protective Stance Angel on the Shoulder Blade
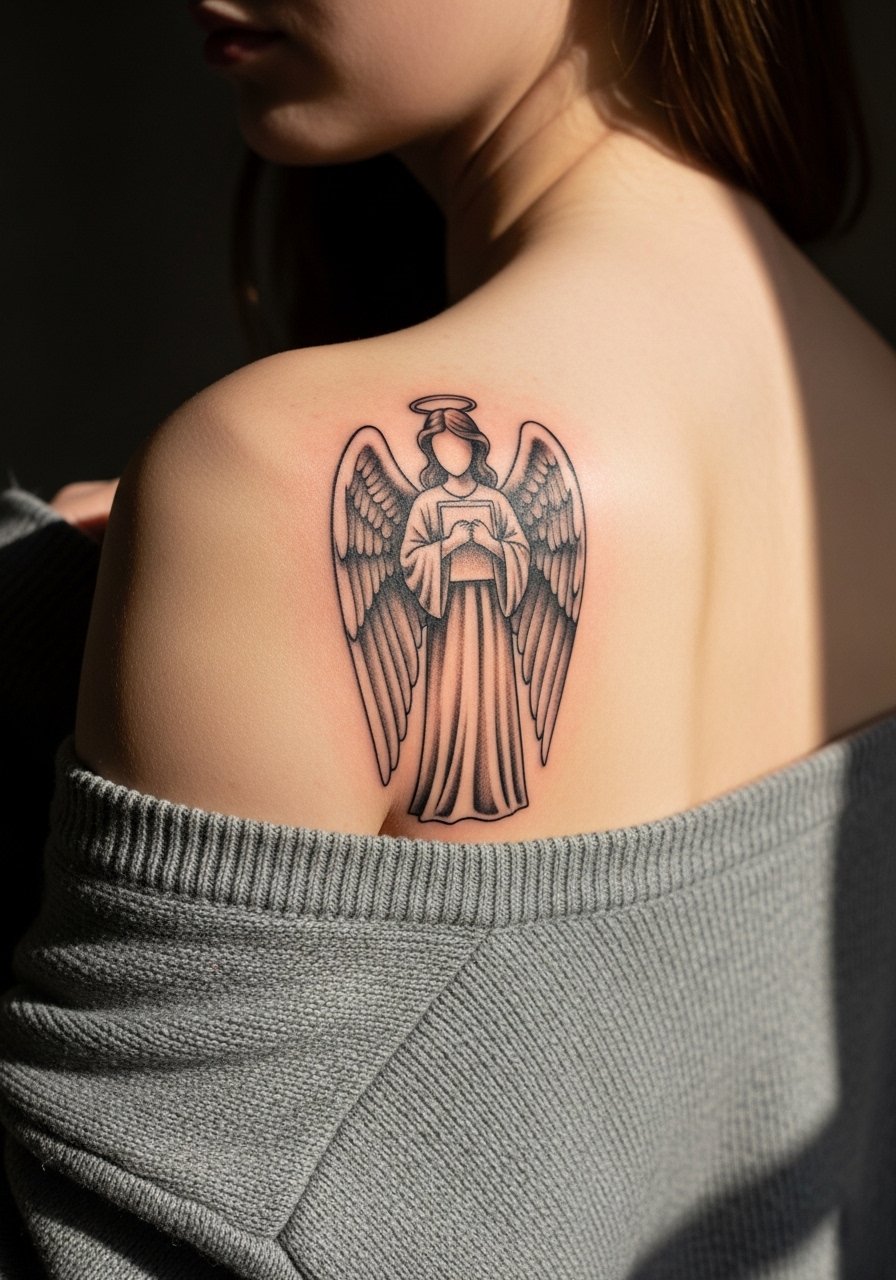
Shoulder blade placements feel private and watchful, and they work well for a protective stance figure that reads when revealed. Tell your artist you want the face angled slightly toward the spine so it reads when you turn. Common mistakes include overly fine facial detail at small scale, which loses expression after healing. Expect two sessions and moderate discomfort when lying on the opposite side. For casual reveal, an off-shoulder sweater frames the piece without overexposing it.
Pre-Session Essentials
The wrist, chest, and shoulder pieces above each ask for different prep, so small kit items can smooth the session and the first week.
-
Stencil transfer paper kit. Helps you preview line placement on skin before needle hits, especially useful for precise forearm and chest layouts.
-
Topical numbing cream. Applied per instructions before a sensitive wrist or sternum session to reduce pain without affecting the linework.
-
Thin protective film roll. Useful for finger and wrist pieces that face friction during daily tasks in the first week.
-
Fragrance-free body wash. Cleanses healing areas like the shoulder blade or chest without irritating delicate lines.
-
Aquaphor healing ointment. A thin layer during the first few days locks in moisture for fine work without suffocating the skin.
7. Virgin Mary with Guardian Angel on Upper Chest

This ornamental pairing reads as maternal guardianship and suits mid-sized chest pieces. Ask the artist for subtle gold tone accents rather than heavy metallic fills to avoid color migration. A frequent mistake is cramming too many small ornamental elements into one sitting. That can extend healing and blur fine details. Plan for two sessions and expect the sternum edge to be more sensitive. For session comfort wear a wide-neck shirt you can shift without removing completely.
8. Guardian Angel and Cross Combo on the Arm

Combining an angel and a cross layers faith motifs without clutter when scaled properly. During consultation specify which element is foreground so the shading supports it. The mistake is giving both pieces equal visual weight at small sizes. That flattens the hierarchy after healing. This usually fits a single session and ages predictably if outlines are balanced with saturation. For showing it off, roll up a rolled cuff shirt to frame the upper arm.
9. Tiny Haloed Angel on the Ankle
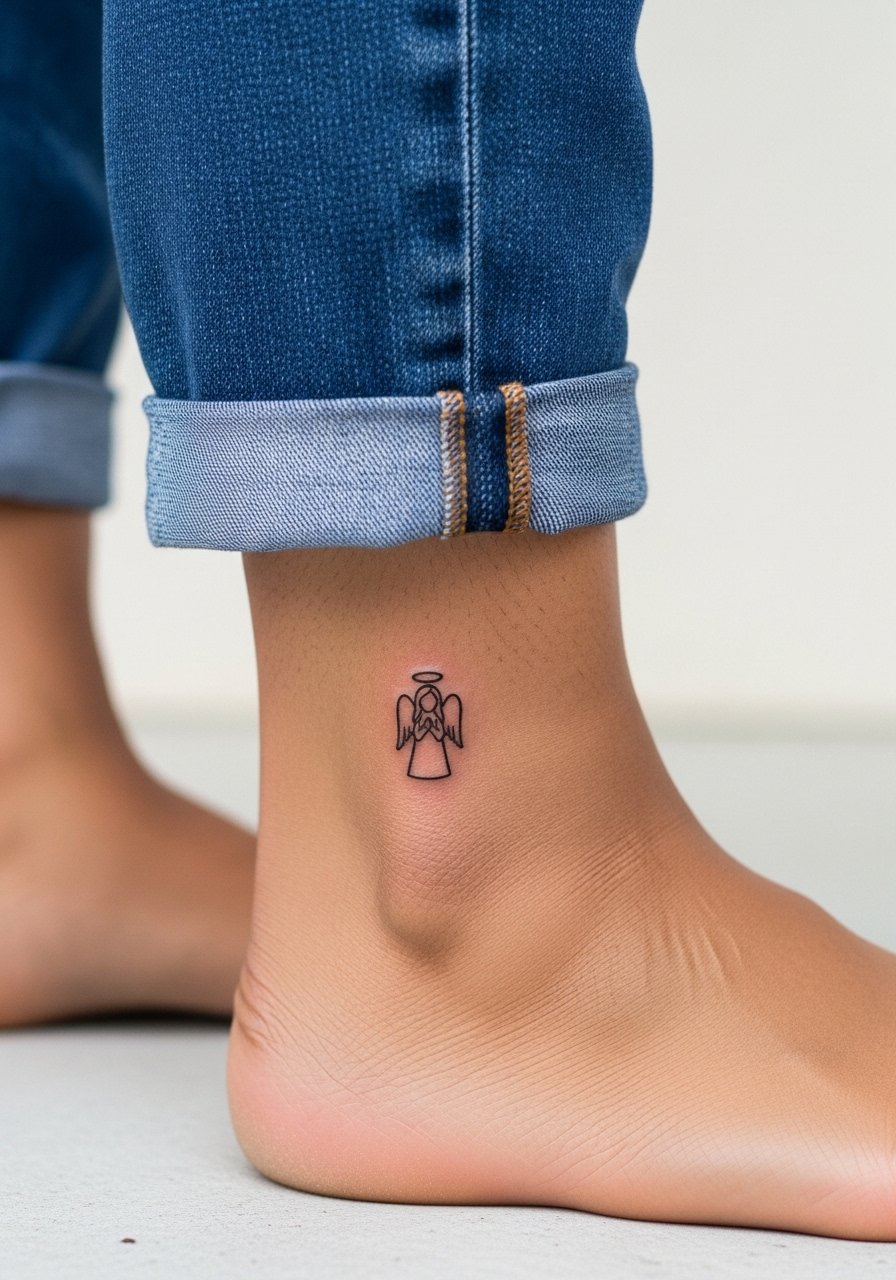
Small ankle icons are discreet and fit those who prefer minimal visibility. Expect higher friction from socks and shoes, which can fade tiny lines quickly. A common mistake is choosing hairline strokes at a micro scale on a high-friction spot. Ask for slightly bolder line weight and plan to avoid tight shoes while it heals. Session time is short. For after-recovery looks, sandals or jeans rolled above the ankle keep attention on the piece.
10. Guardian Angel Battling Snake Full Sleeve Narrative
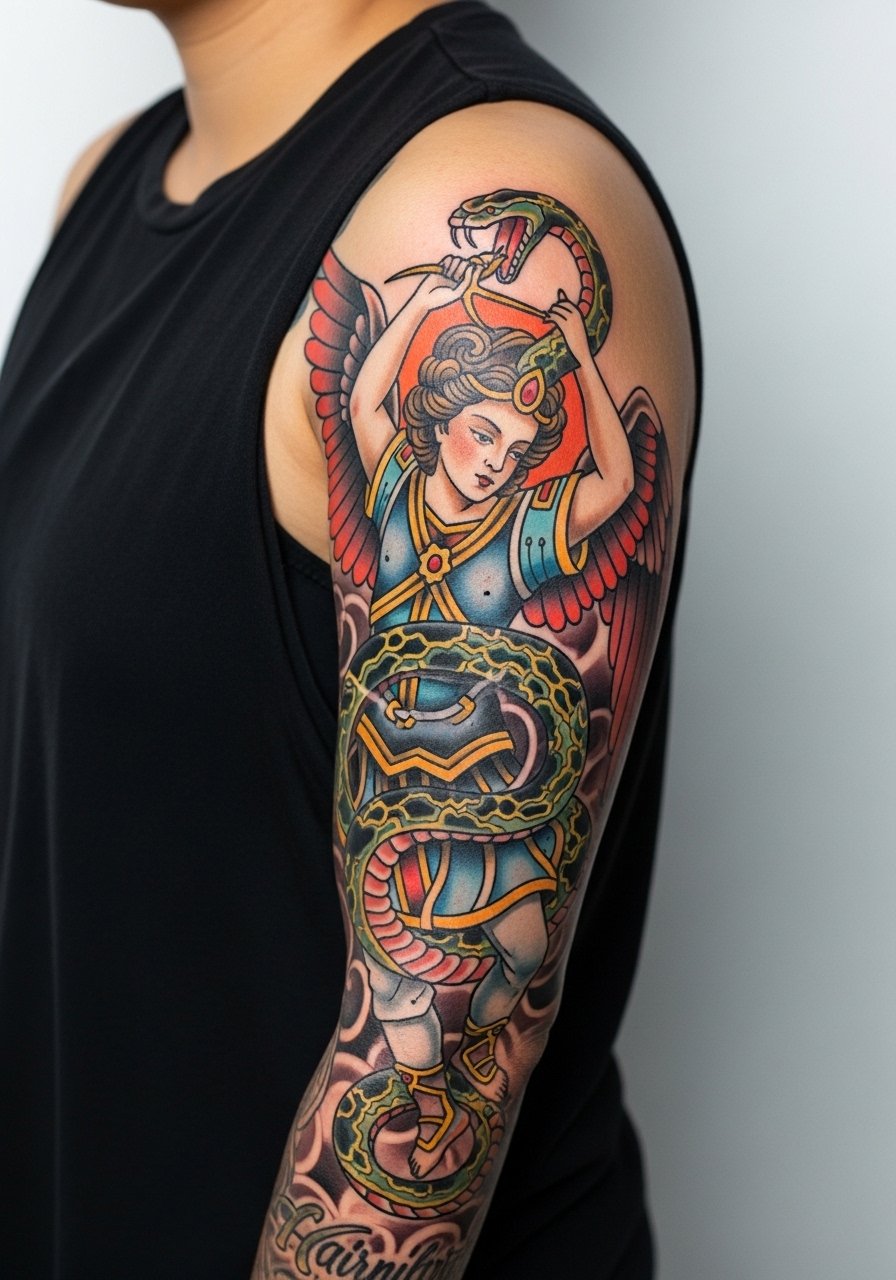
This is for someone ready to commit to an extended story in multiple sessions. Bring narrative reference images and decide where chapter breaks should sit between sessions. Mistakes include trying to cram too many secondary motifs into the first pass, which makes later continuity harder. Expect four to five sessions and touch-ups over the first year as the narrative settles. Pair with a fitted black tee for nights out to show off the wrap.
11. Delicate Script Angel Quote on the Shoulder Blade

Pairing a guardian figure with a short line of script personalizes the piece. Ask for the exact font size and capitalization in your stencil preview so you can read it at arm's length. The usual mistake is requesting a long quote at too small a scale. That blurs and becomes illegible. Expect one session for moderate-sized work and a touch-up if letters soften. For sitting comfortably bring a strapless crop top so the artist has unobstructed access.
12. Small Blackwork Angel Figure on the Inner Arm
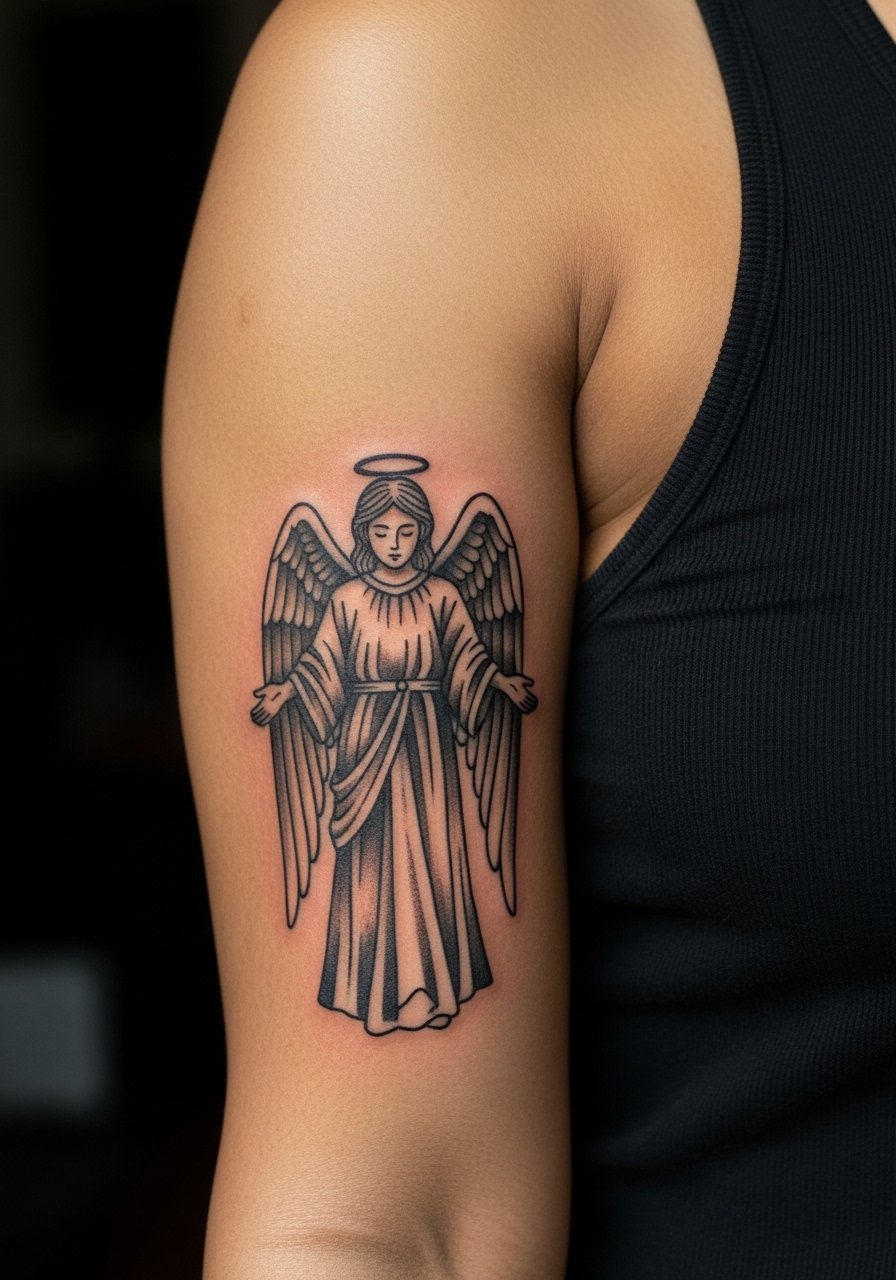
Blackwork simplifies the palette and keeps contrast high on medium to dark skin tones. Request bold negative space around key features to stop fills from merging. The common error is too-small silhouettes without enough breathing room. That can become a gray block after a couple of years. Expect one to two sessions depending on size and moderate pain on the inner arm. For the appointment wear a tank top so the artist can raise your arm easily.
13. Serene Angel with Stars and Hearts on the Inner Forearm
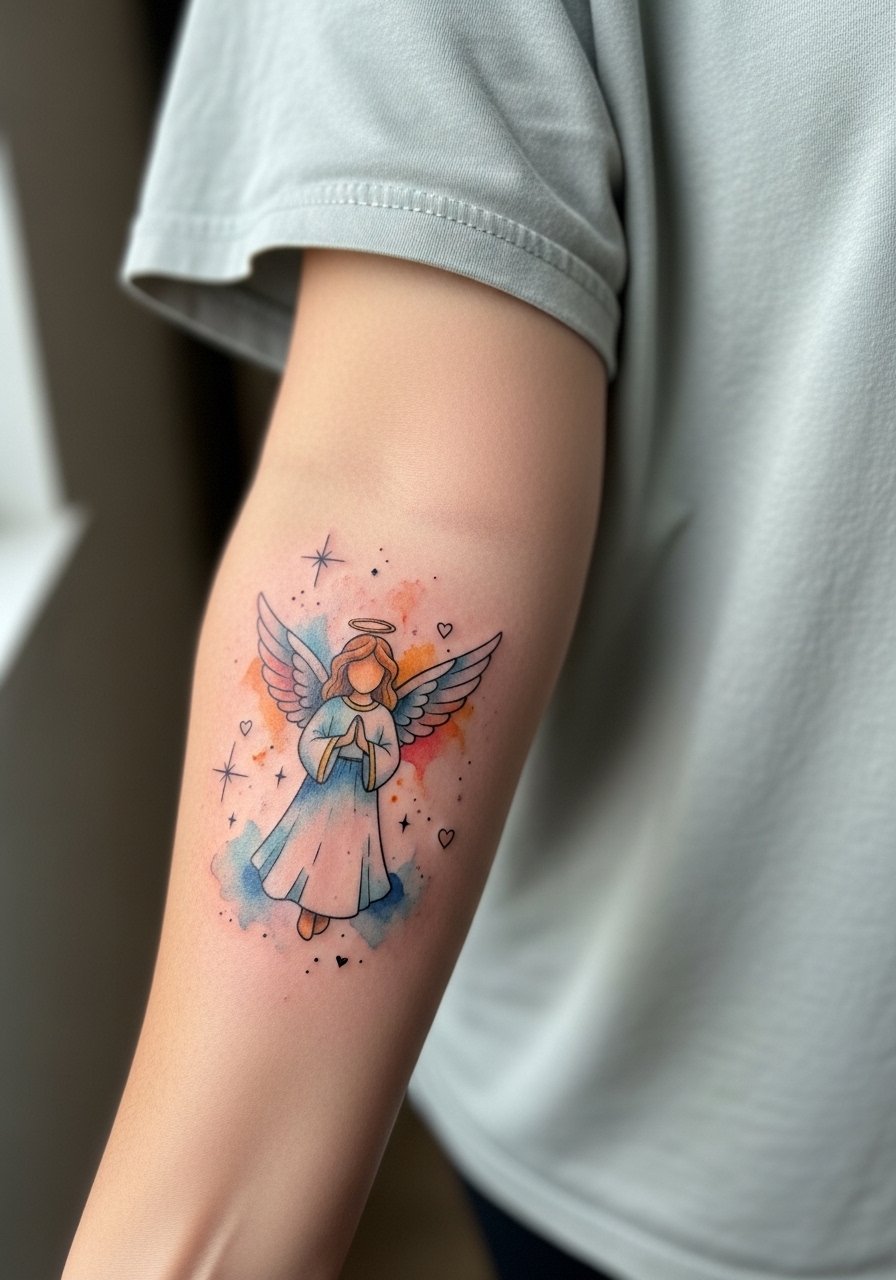
This pairing softens spiritual imagery with playful celestial details. For longevity, ask for subtle outline anchors around small motifs so they do not float away in pigment migration. A mistake is relying on saturated watercolor alone for tiny elements. That often requires touch-ups sooner. Inner forearm is low-risk for blowout but gets sun exposure. During the session bring a loose short sleeve tee for easy access.
14. Tiny Guardian Angel Behind the Ear Variation

Behind-the-ear placements read as secretive and intimate. Because the skin there is thin, ask for slightly bolder contouring to avoid early loss of detail. A usual mistake is pushing micro detail into a tiny zone. That will fade or blur with hair growth and daily shampooing. Keep in mind the area sits under hairline friction. This is a short session and requires careful aftercare.
15. Retro Renaissance Pose Angel on the Ribcage
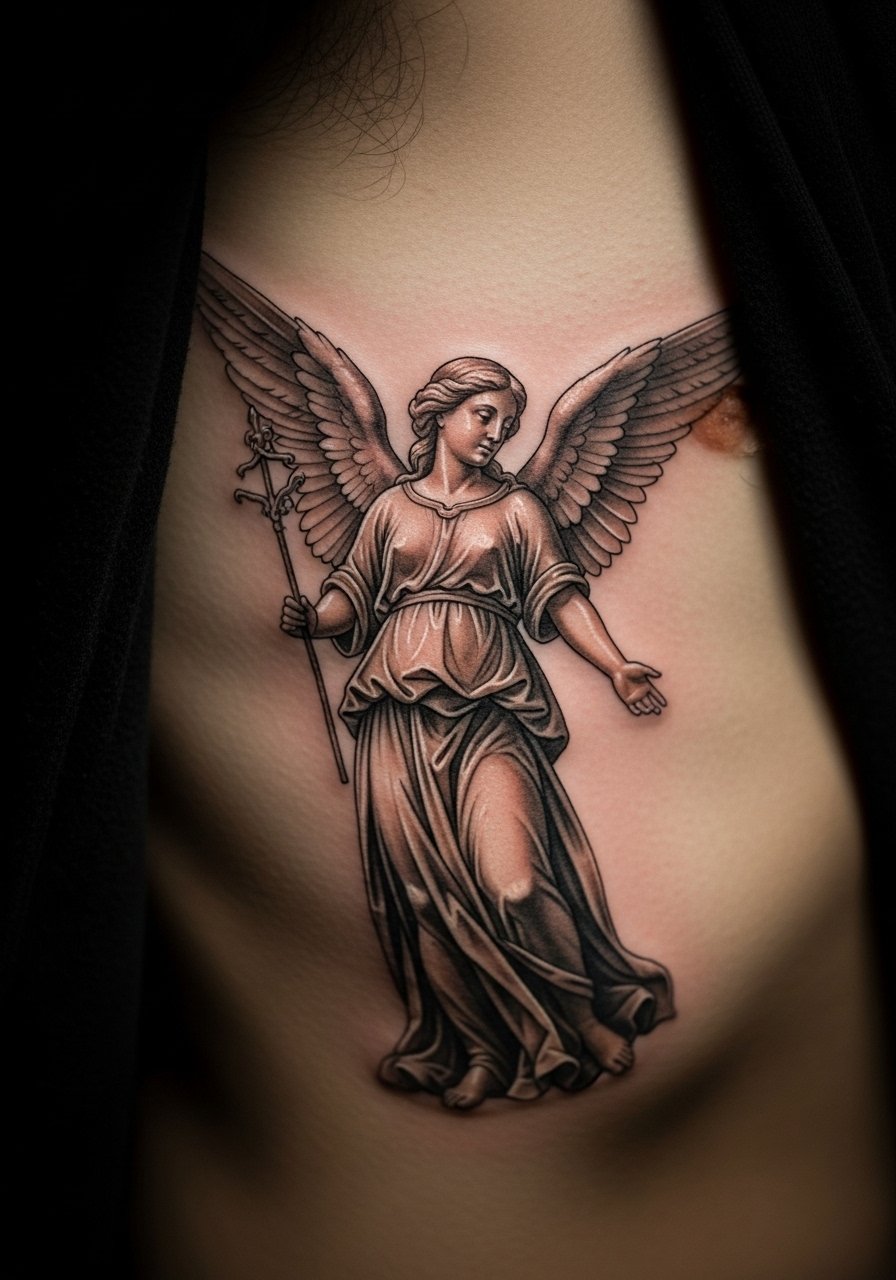
A Michelangelo-inspired pose brings art history into tattoo form. This is one of the under-covered directions that looks unique when proportioned to the torso. Fair warning about ribs. The area rates higher on most pain charts, but the long, elegant result is often worth it. Avoid compressing too much facial or drapery detail into a single pass. That strains healing. Plan two sessions and discuss placement precisely so natural body curves do not distort the pose over time.
16. Small Guardian Angel on the Hand Side

Hand tattoos come with high visibility and faster fading from constant washing and sun. If you choose this, request bold, simplified silhouettes rather than tiny filigree. A common mistake is treating the hand like forearm skin. It is not. Expect earlier touch-ups and consider work only on the outer hand rather than fingers for longevity. Bring a clean surface to rest your hand on during the session and plan for a short appointment.
17. Full Guardian Angel Sleeve in Black-and-Gray Realism
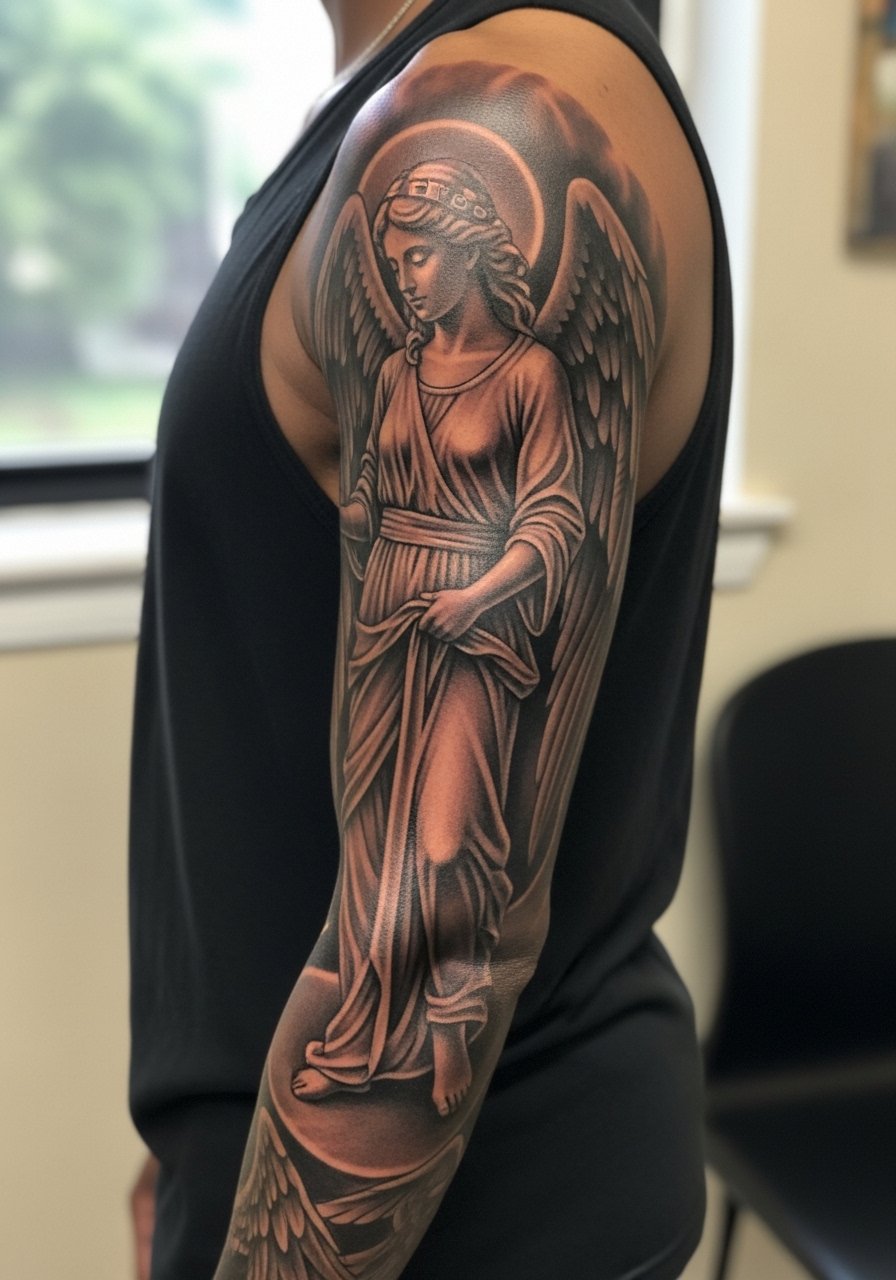
Sleeve narratives are a long-term collaboration. Decide the story arcs and main focal points before the first session to avoid reworking. The mistake is building a sleeve by stitching unrelated flashes together. That creates a patchwork look that ages unevenly. Expect five or more sessions and staggered touch-ups as shading densifies. For comfort select a sleeveless top that keeps the shoulder free for rotation between sessions.
18. Minimal Guardian Angle Outline on the Collarbone
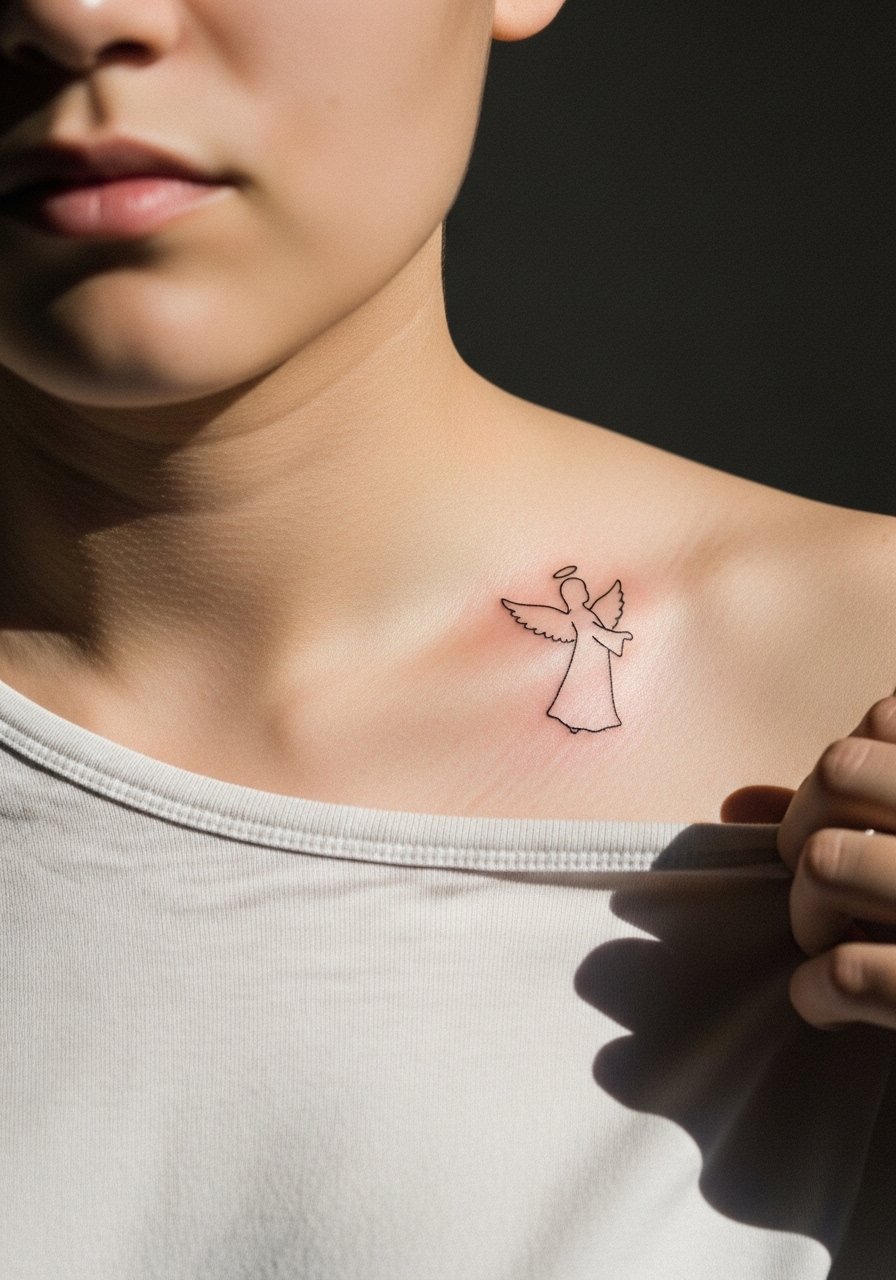
Collarbone tattoos sit at a visible edge and frame necklaces nicely. Ask for slightly bolder spacing in the outline so movement in the skin does not collapse the silhouette over time. Many people underestimate the sun exposure there, which fades delicate ink quickly. Plan for at least a year one touch-up for maintenance. For the session wear a wide-neck shirt you can shift to reveal only the area.
19. Guardian Angel Figure with Quote on the Shoulder
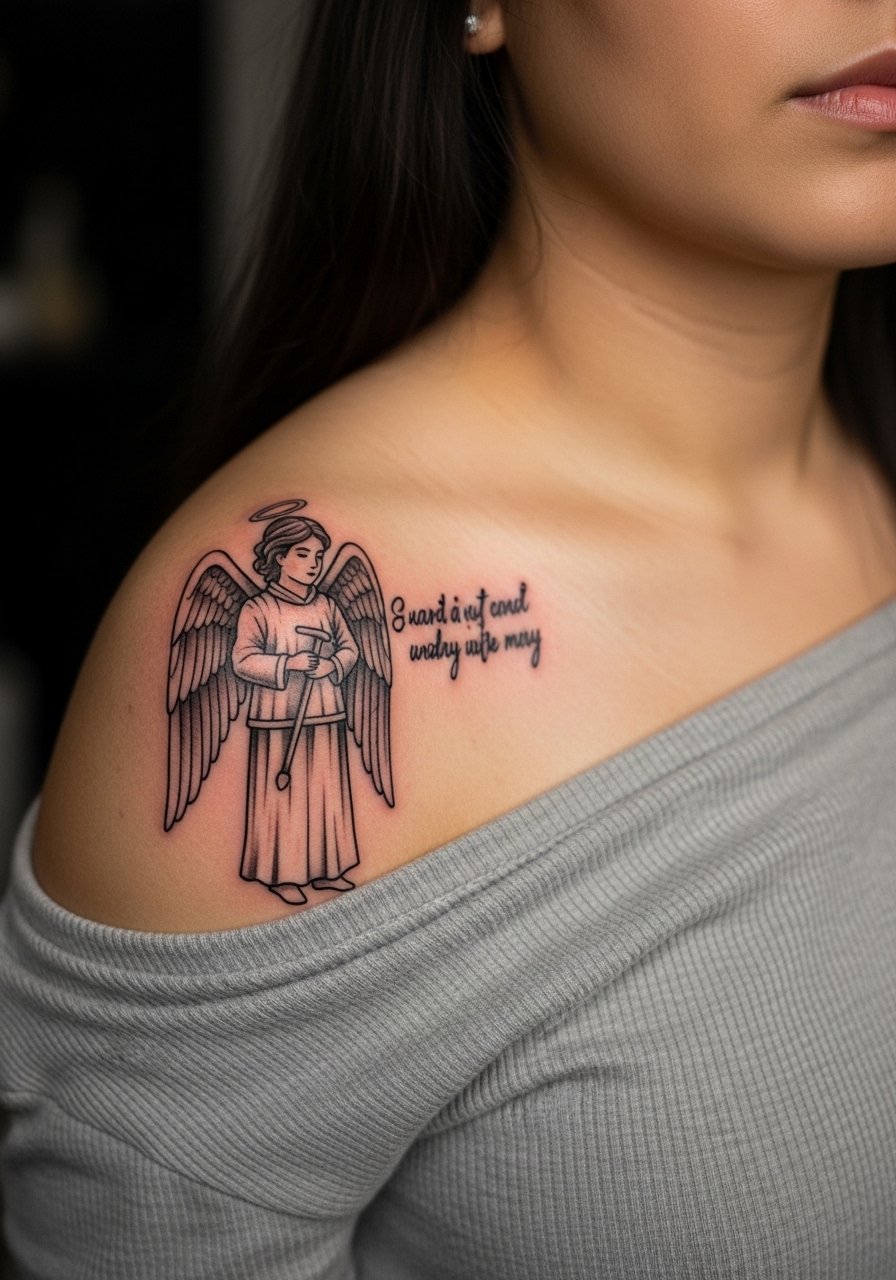
This is a classic way to merge symbol and phrase. During consultation bring the exact quote text and font sample so the artist can test legibility at the chosen size. The common error is long text at small scale. That becomes unreadable after a few years. Sessions are usually one to two hours. For showing off, a boat-neck top sits well with shoulder artwork.
20. Tiny Constellation Angel on the Ankle
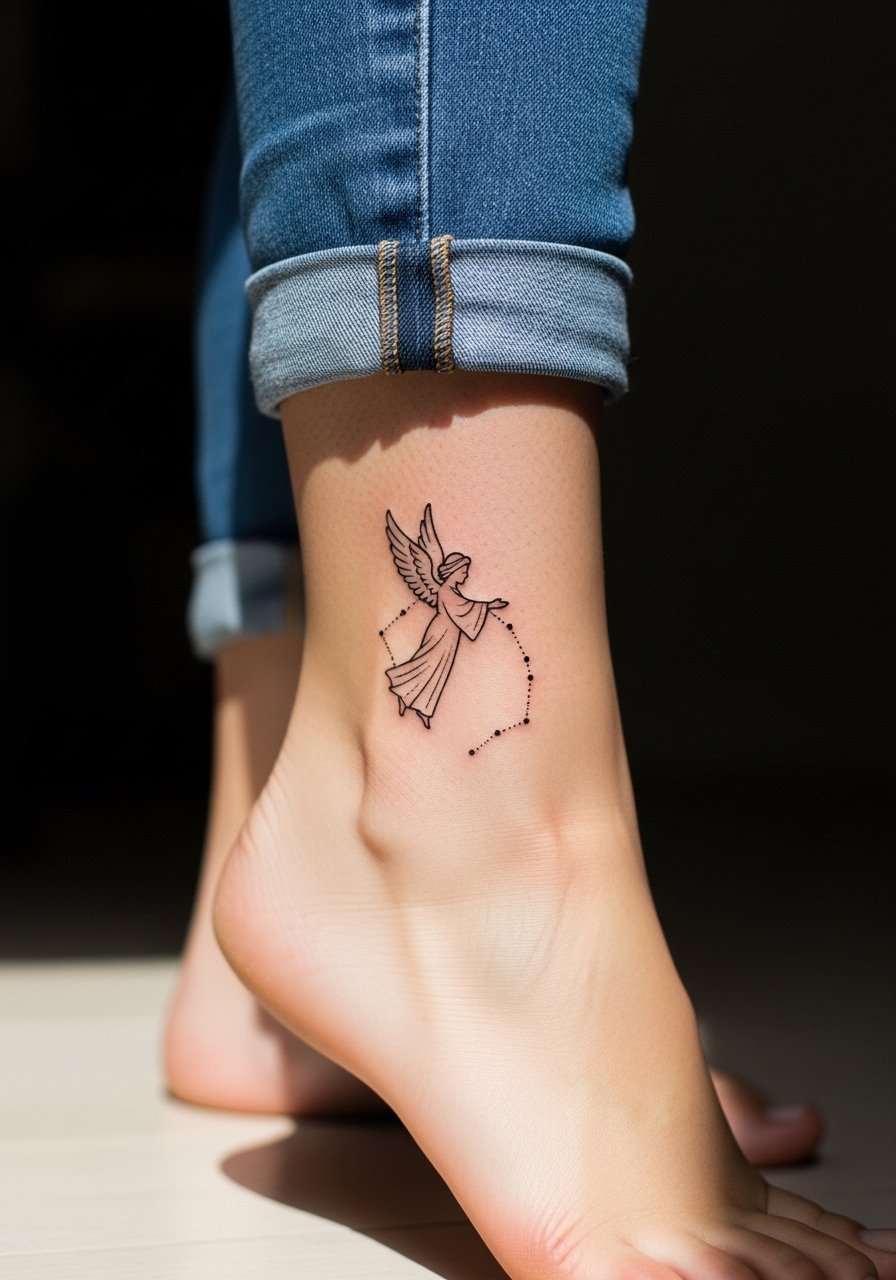
Constellation motifs translate well to tiny placements like the ankle. The risk is dot density too close together, which can merge into a gray spot in a few years. Ask for slightly more spacing between dots and expect some softening over time. The session will be quick and relatively low pain. Wear shoes that are easy to remove and avoid tight socks while healing.
21. Guardian Angel with Jesus Cross Background on the Back
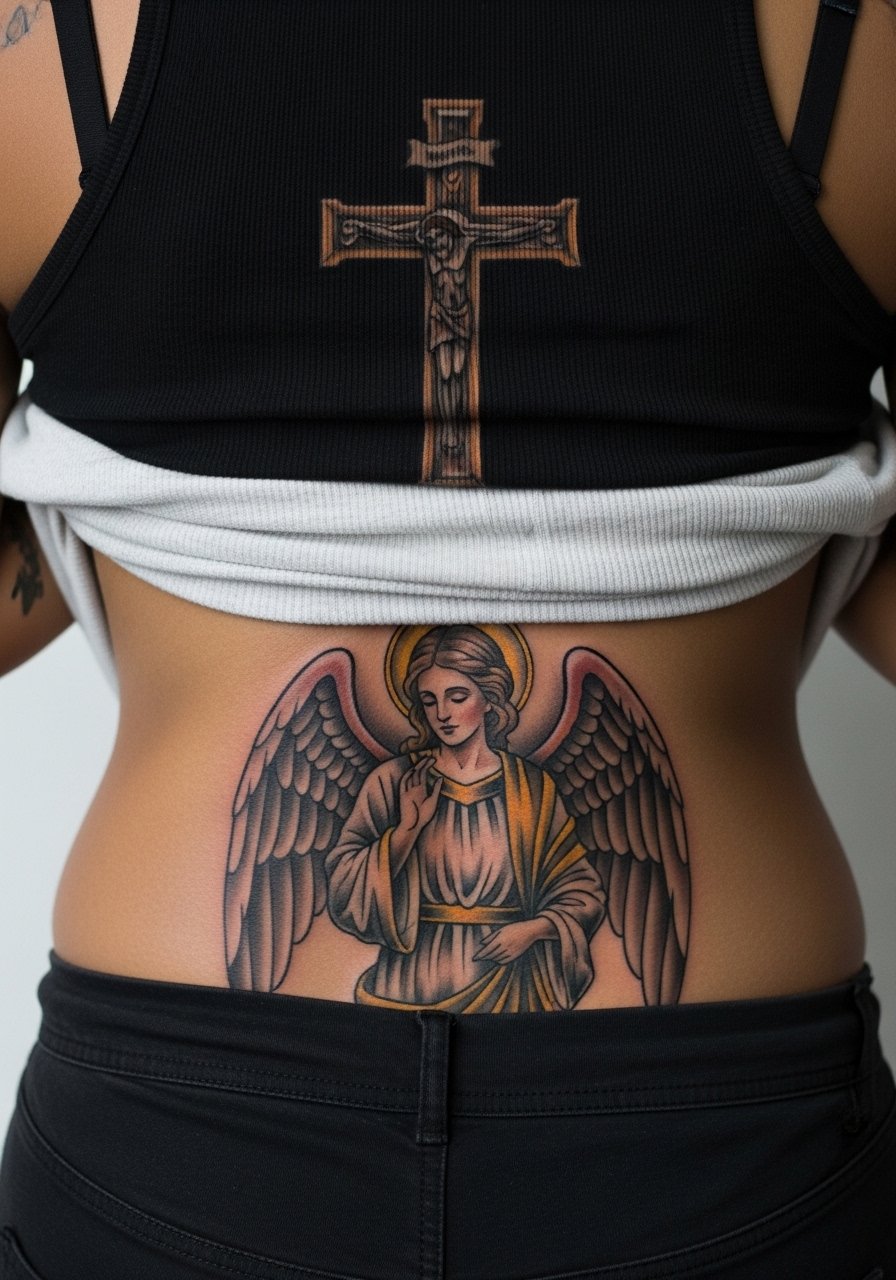
Large back pieces let you combine multiple heavy symbols without crowding. Specify which element sits in the foreground so the contrast hierarchy remains clear after healing. Crowding too many dark areas together is a common error that turns into a visual blob later. Expect multiple sessions and plan sleeping positions accordingly. For the session wear a tank top that you can shift to expose the work area only.
22. Micro-Realism Angel Portrait on the Sternum
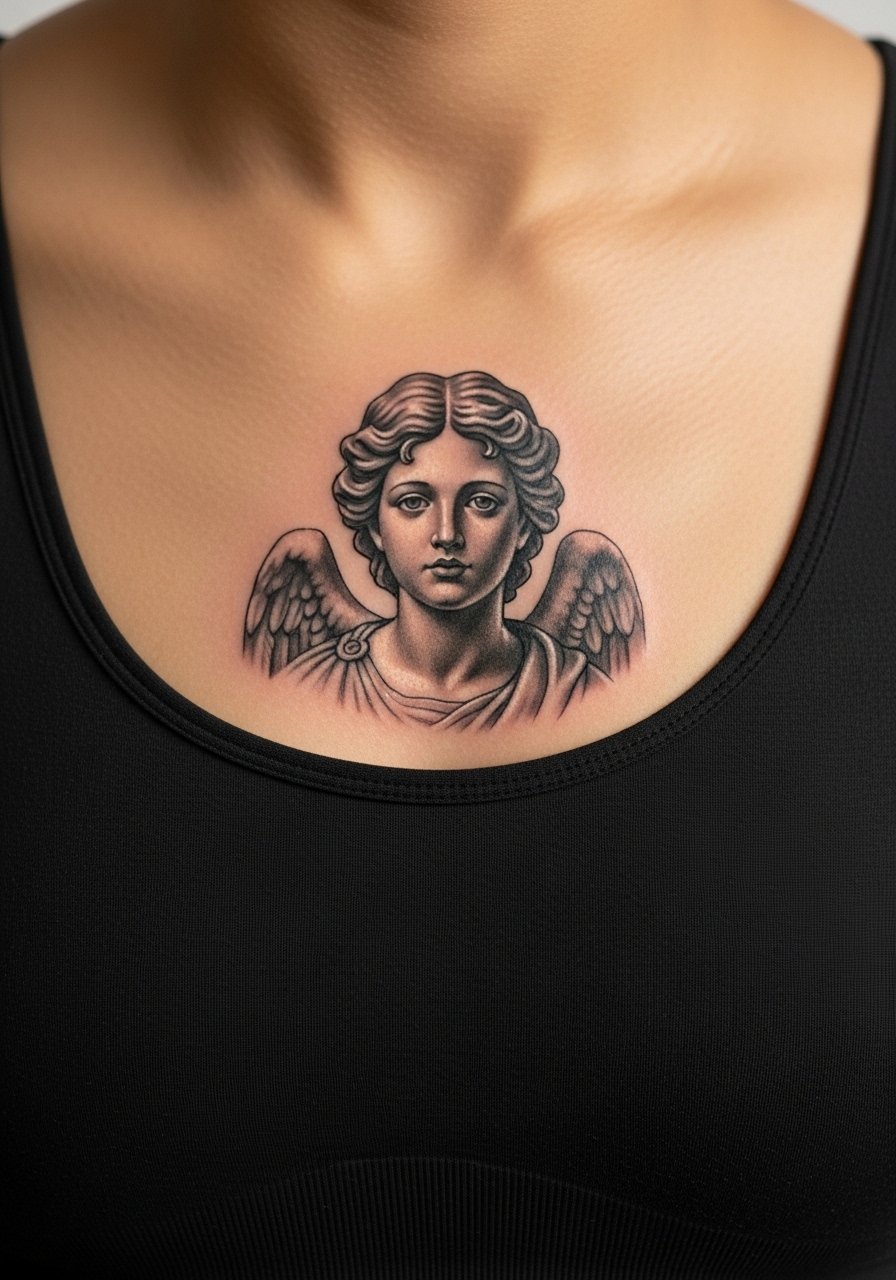
Sternum portraits are intimate and require a steady artist hand. The skin there is sensitive and the area moves with breathing, so expect longer sessions and careful spacing in the reference. A common mistake is asking for ultra-fine portrait detail too small for the sternum area. That can lose fidelity. Bring a fitted sports bra that keeps the area discreet yet reachable for the artist.
23. Guardian Angel Pocket-Size on the Ribcage

Pocket-size ribcage pieces are surprisingly intimate and portable in terms of visibility. The trade-off is higher pain during the session and more movement while breathing. Artists disagree about fine line on ribs. One camp insists fine line blurs quickly on the stretch-prone skin. The other says careful depth control keeps lines intact. Decide which camp your artist follows and plan for touch-ups. Wear a cropped tee you can lift without fuss.
24. Guardian Angel with Stars on the Inner Thigh
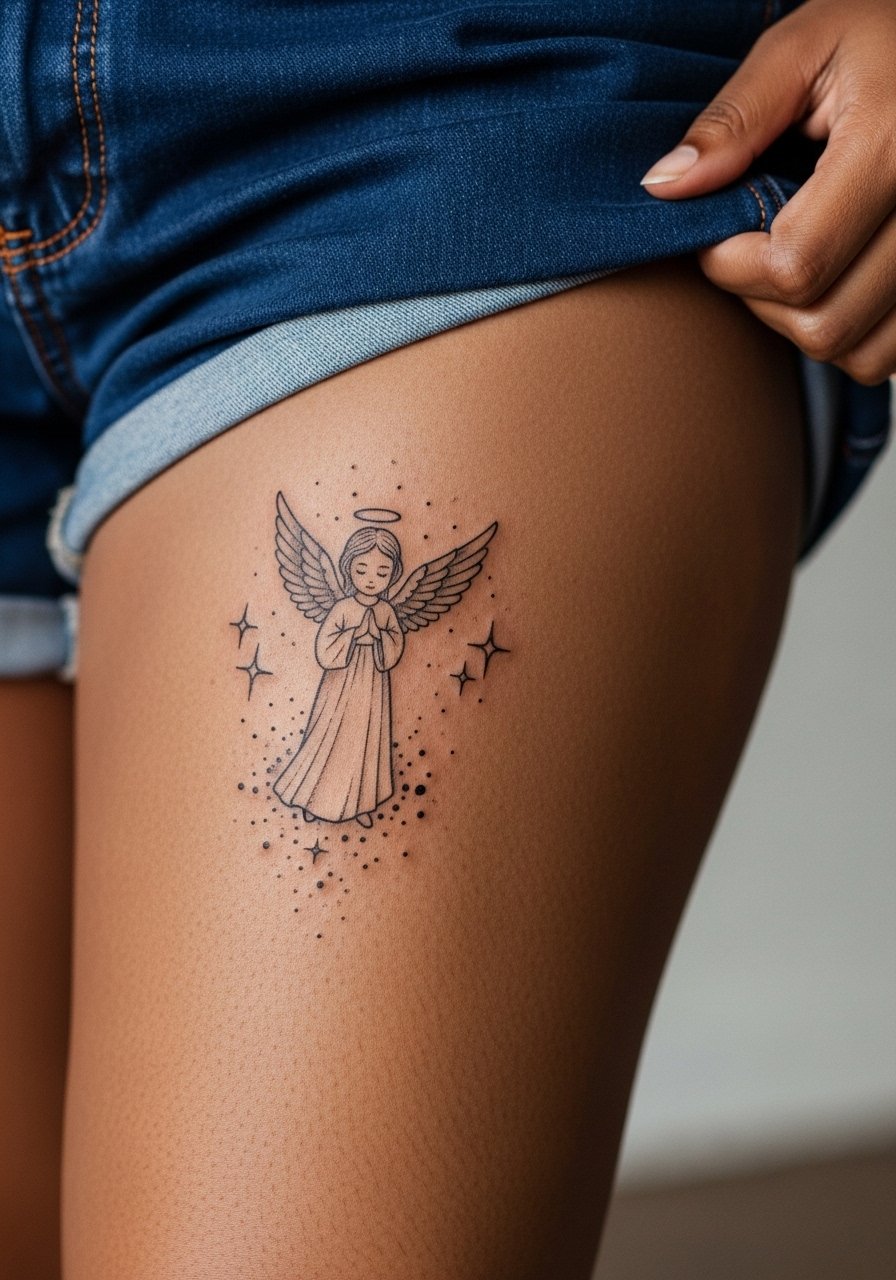
Inner thigh placements are private and sit well for personal narratives. The skin there is softer and experiences less UV, which helps small details hold up. Mistakes include choosing too firm a contrast that can feel heavy in a private spot. Expect moderate pain and schedule sessions when you can avoid tight pants for a week. Bring shorts you can shift easily during the appointment.
25. Guardian Angel Halo on the Wrist Edge

Edge-of-wrist placements catch attention while staying compact. Ask for slightly heavier main strokes and open feather space so the halo reads as a silhouette over time. The main mistake is hairline strokes that dissolve under constant hand washing and bracelets. Plan for an early touch-up if you want the halo to stay crisp. For the session avoid wearing constricting bracelets.
26. Guardian Angel in Negative Space on the Lower Back
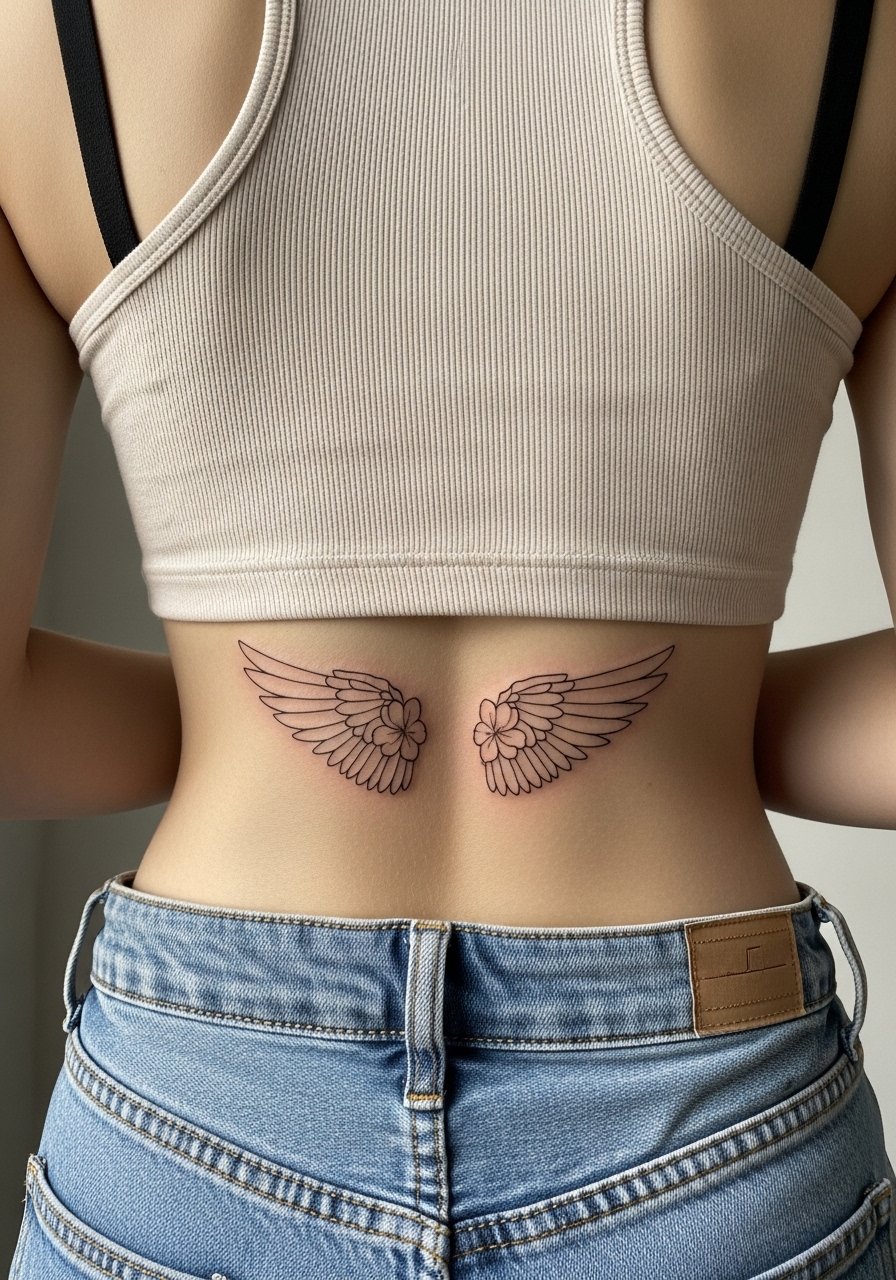
Negative space lets the skin become part of the composition and can look refined on the lower back. Avoid tiny negative elements that read as noise after healing. The lower back sees less direct sun but more friction from clothing, so plan placement just above waistlines. For the appointment wear a tank top with high-waisted bottoms you can shift easily.
27. Guardian Angel Outline over the Heart on the Left Chest

Left-chest outlines sit close to the heart and carry personal weight. Keep the lines spaced and avoid tiny internal detailing that will fade faster on this dynamic skin. A common mistake is choosing delicate filigree at a scale that becomes a blur later. Expect moderate pain and one touch-up in the first two years for line consistency. Wear an open collar shirt that provides access while keeping you covered.
Frequently Asked Questions
Q: Will fine line guardian angel tattoos blur faster than bold neo-traditional pieces?
A: In my experience fine line does tend to soften sooner, especially on high-movement spots like wrists and ribs. Bold neo-traditional work usually holds contrast longer. The real factor is placement, spacing, and how the artist spaces negative areas, so ask about long-term touch-up plans during consultation.
Q: Do watercolor guardian angels need different aftercare than black-and-gray realism?
A: The healing process is similar, but watercolor relies more on soft pigment pools, so avoid abrasive scrubbing and heavy friction while it sets. Use gentle cleansing and keep sun exposure low until fully healed. For sun protection later, a broad-brim hat and shade help preserve color.
Q: How should I prep wardrobe for a chest or sternum session?
A: Wear a front-open or wide-neck top you can shift to expose only the work zone, like an open collar shirt. That keeps the rest of your clothes clean and gives the artist clear access.
Q: Are shoulder blade guardian angels easy to hide for work?
A: Yes, shoulder blade pieces are simple to conceal under standard shirts and sweaters. Consider placement slightly toward the spine if you want maximum privacy. Keep in mind sleeveless tops will reveal the area.
Q: How do I find artists who show healed work on darker skin tones?
A: Search hashtags like #GuardianAngelTattoo and city-specific neo-traditional tags on social platforms. Also check studio directories for artists whose portfolios include a range of skin tones. Ask to see healed photos during consultation.
Q: If I want a sleeve narrative about good versus evil, how do I plan the sessions?
A: Treat it like chapters. Start with a clear focal scene, then map secondary elements to side panels for future sessions. Expect multiple visits and discuss pacing with the artist so each session heals into the next without overworking the same area.
