
Fine line koi tattoos are everywhere on saved boards, and the reality is that what looks delicate and crisp right after the session can blur faster than people expect if placement and line weight are off. I prefer designs that plan for aging from the start, with thoughtful spacing and saturation choices. Below are 27 koi ideas that balance how they look fresh and how they behave after one, three, and five years healed.
1. Fine Line Single Koi on Inner Forearm

I see the inner forearm more than any other spot. Fine line here reads elegant but it also takes daily friction and sun. Request slightly heavier single-needle work than what shows on Pinterest to avoid early blur. For the session wear, roll a short sleeve or wear a loose short sleeve tee you can pull up easily. For showing it off later, a rolled sleeve chambray shirt frames the color without stealing attention. Expect a one-hour session, mild pain, and a likely touch-up at month six for the finest details.
2. Micro Koi Silhouette Behind the Wrist

Micro silhouettes are great first tattoos because they are low commitment. On the wrist the skin is thin and heal time is fast but so is fading. Ask your artist to place the silhouette where the wrist creases avoid direct wear. For session day wear a sleeveless tank so the artist has full access and no jewelry gets in the way. Stack a thin silver bangle set on the opposite wrist to balance attention without crowding the tattoo. Expect about 30 to 45 minutes in the chair and easy aftercare.
3. Traditional Koi with Cherry Blossoms on Outer Calf
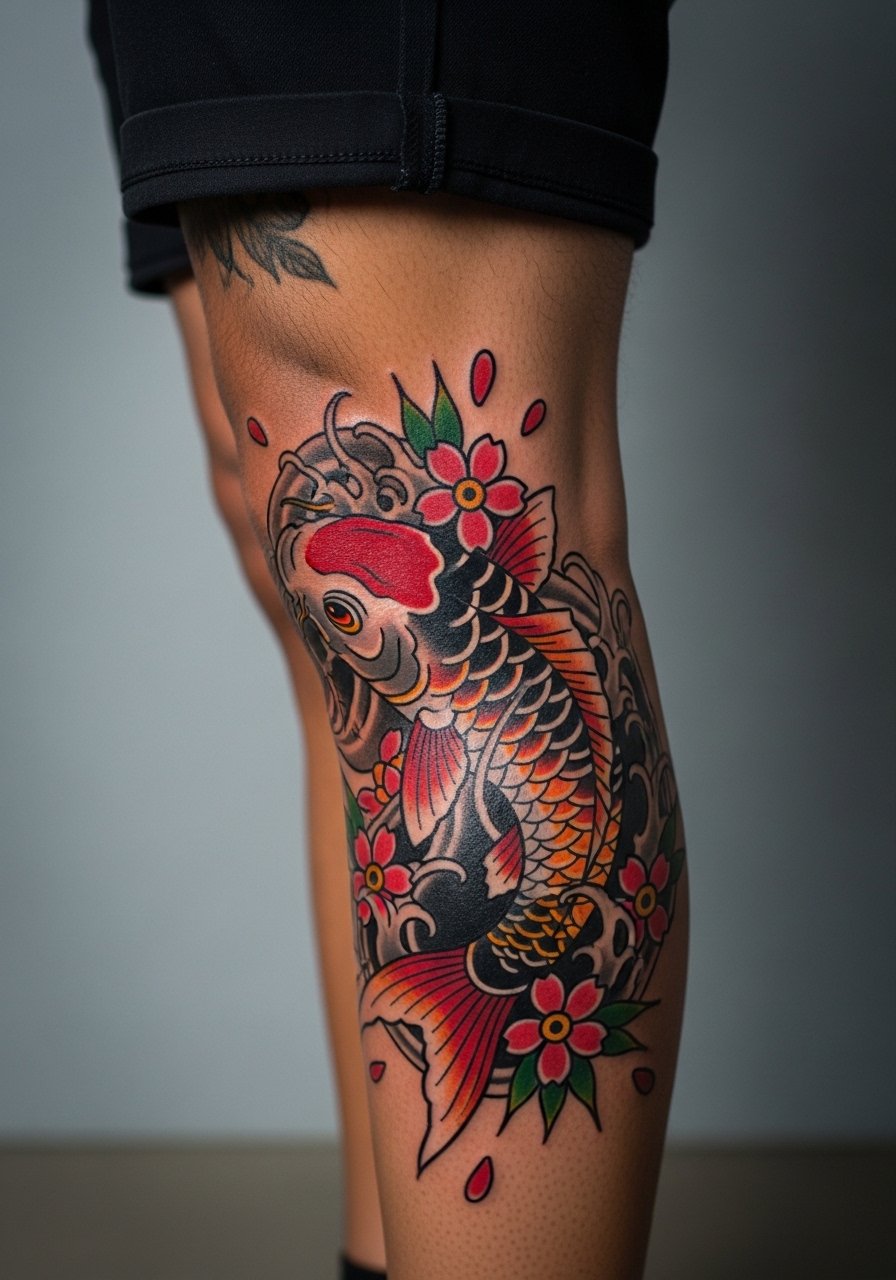
There is a reason classic koi and blossoms keep showing up on calves. The flesh provides room for motion and saturation that ages into a solid piece. Tell your artist to prioritize bold linework around the fins to prevent early bleed into the petals. For the appointment wear athletic shorts loose so the leg can be adjusted without pressure. Calf sessions sit around two hours and hurt like a steady three on most pain charts. Avoid too many tiny petal details that look great fresh but soften within two years.
4. Yin Yang Koi on the Shoulder Cap
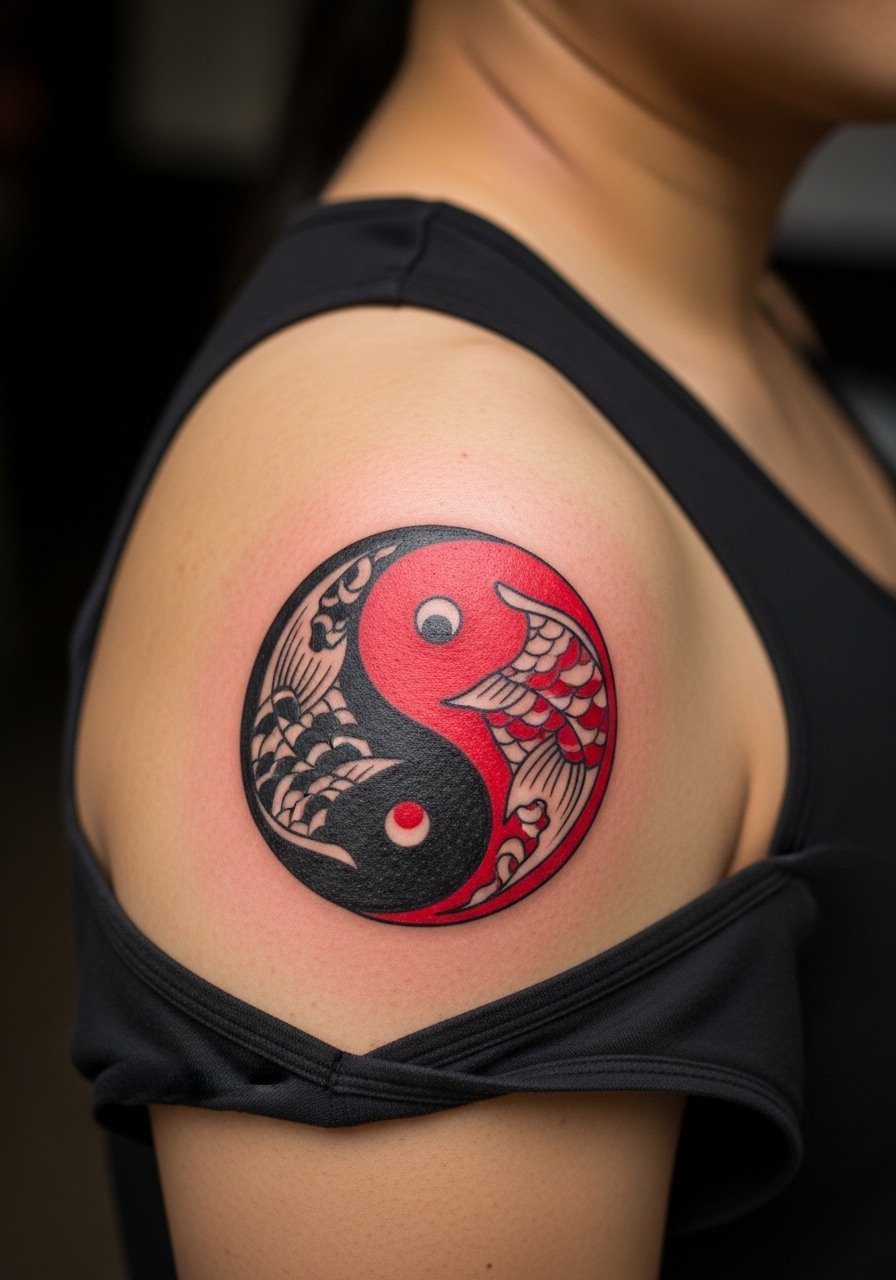
The shoulder is ideal for a circular yin yang layout because it reads well with muscle curves. Ask for contrast rather than micro texture so the two fish remain legible at a distance. Pain is moderate and sessions are usually one to two hours. Pair the finished piece with an off shoulder blouse when you want to show the silhouette, and wear a loose button-down shirt to the appointment for easy access. Shoulder work rarely needs early touch-ups if saturation is strong.
5. Serene Koi Pond Scene on the Upper Thigh

Large pond scenes on the thigh let color breathe and tell a story without cramped detail. These pieces age beautifully if the artist avoids tiny stipple details within large watercolor washes. For comfort wear high waisted shorts to the session so the artist can shift fabric and keep the area exposed only where needed. Sessions are long, often multiple sittings over several hours, and pain is mild to moderate. Plan for four-plus sessions if you want layered gradients and realistic reflections.
6. Blackwork Koi Wave Across the Upper Arm
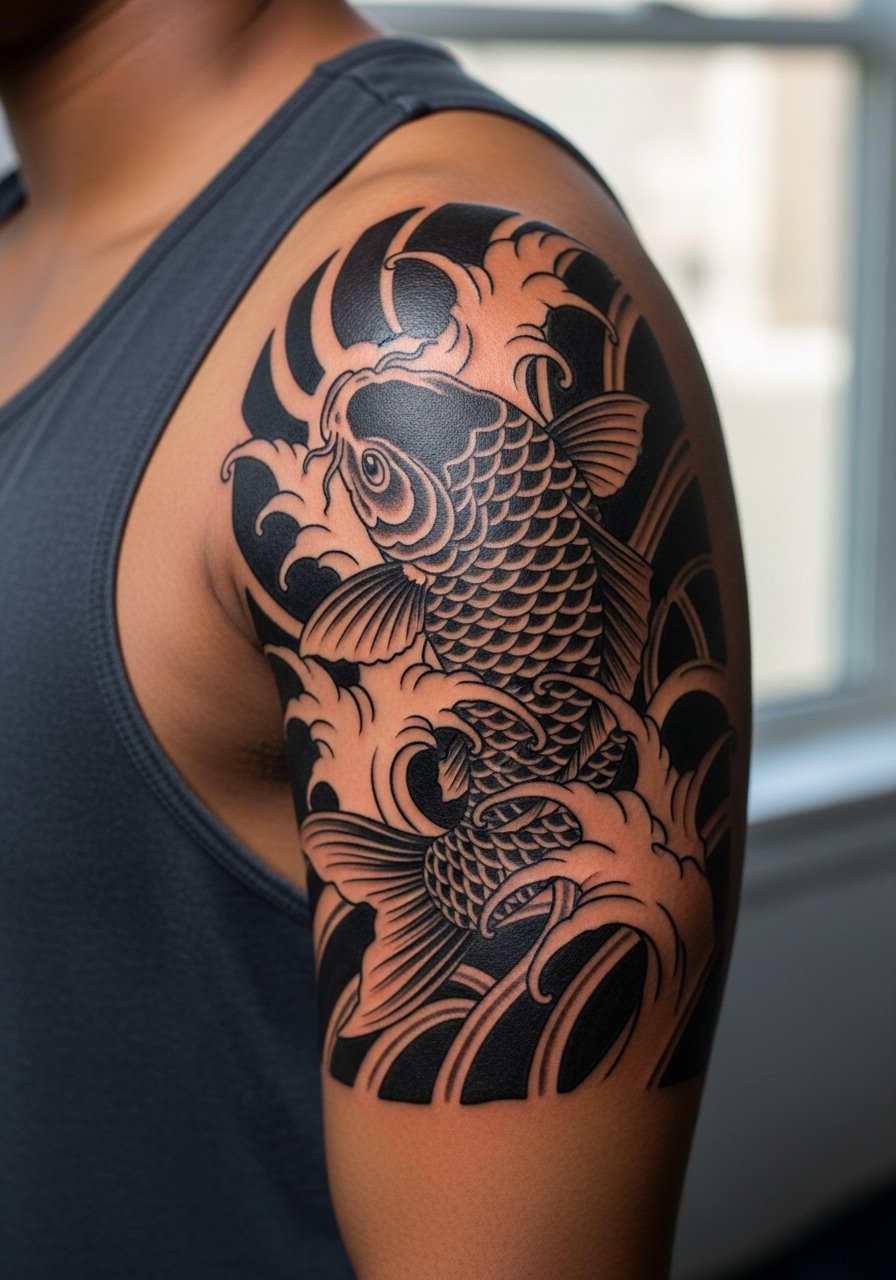
Blackwork holds up in places that see a lot of sun or friction because saturation reads cleaner over time. For this piece ask for strong negative space around the fish so the shapes stay readable as skin shifts. The session is heavy on shading and can take three hours or more. For showing the tattoo, pair it with high waisted shorts for a monochrome look that complements the ink. For the appointment wear a loose tank top you can move freely. Blackwork can age remarkably well if the linework is bold and saturation consistent.
7. Dual Koi Swimming Toward a Moon on the Ribcage
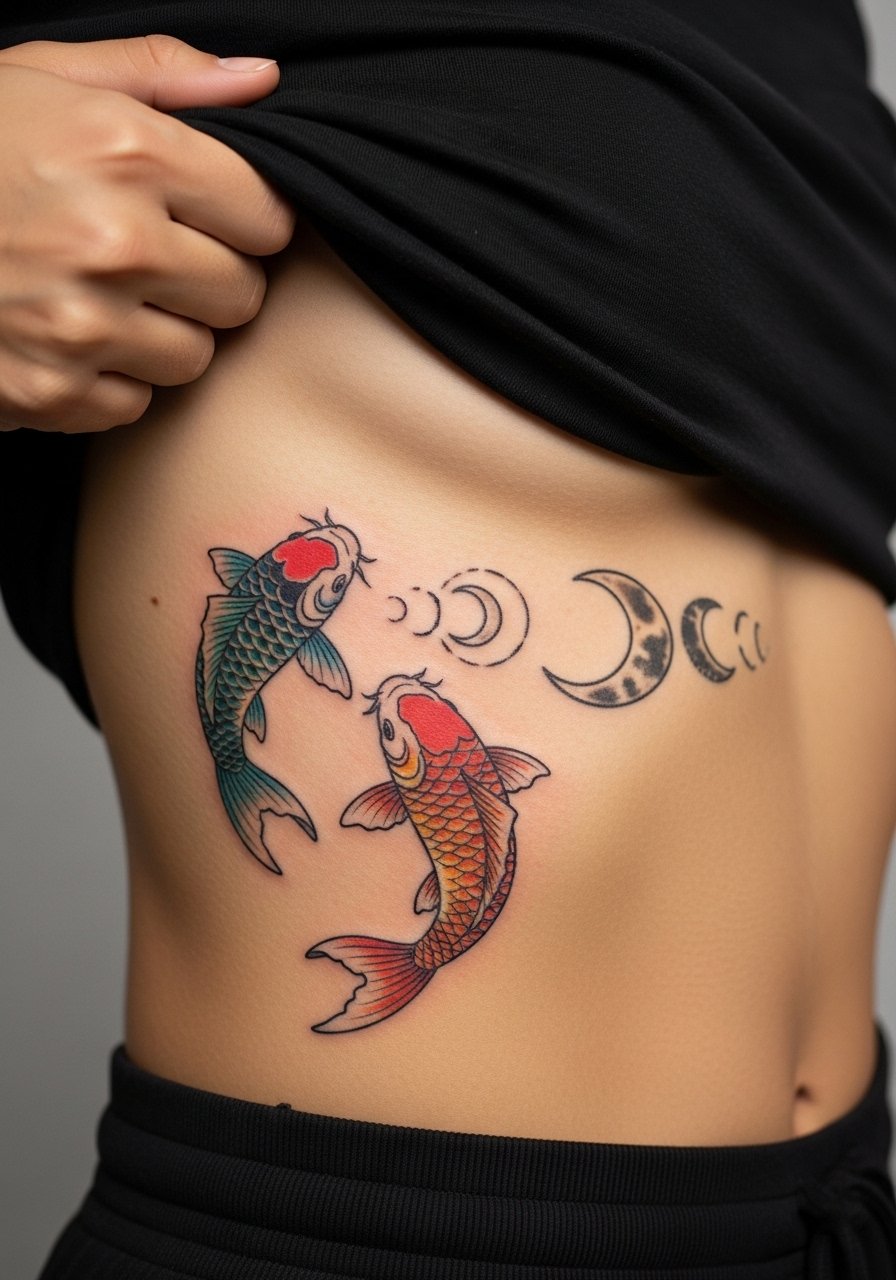
Fair warning the ribcage is a high-pain area, often a seven or eight on subjective scales, but the curvature makes dual koi compositions feel cinematic. Ask the artist to space linework and avoid extremely fine cross-hatching that will merge as the skin stretches. For session wear a cropped athletic top so only the area in work is exposed. Expect long sessions and the possibility of splitting the piece over multiple days. If you work in a setting with strict dress codes, consider how visible the healed piece will be when choosing scale.
8. Vintage Koi Outline at the Ankle
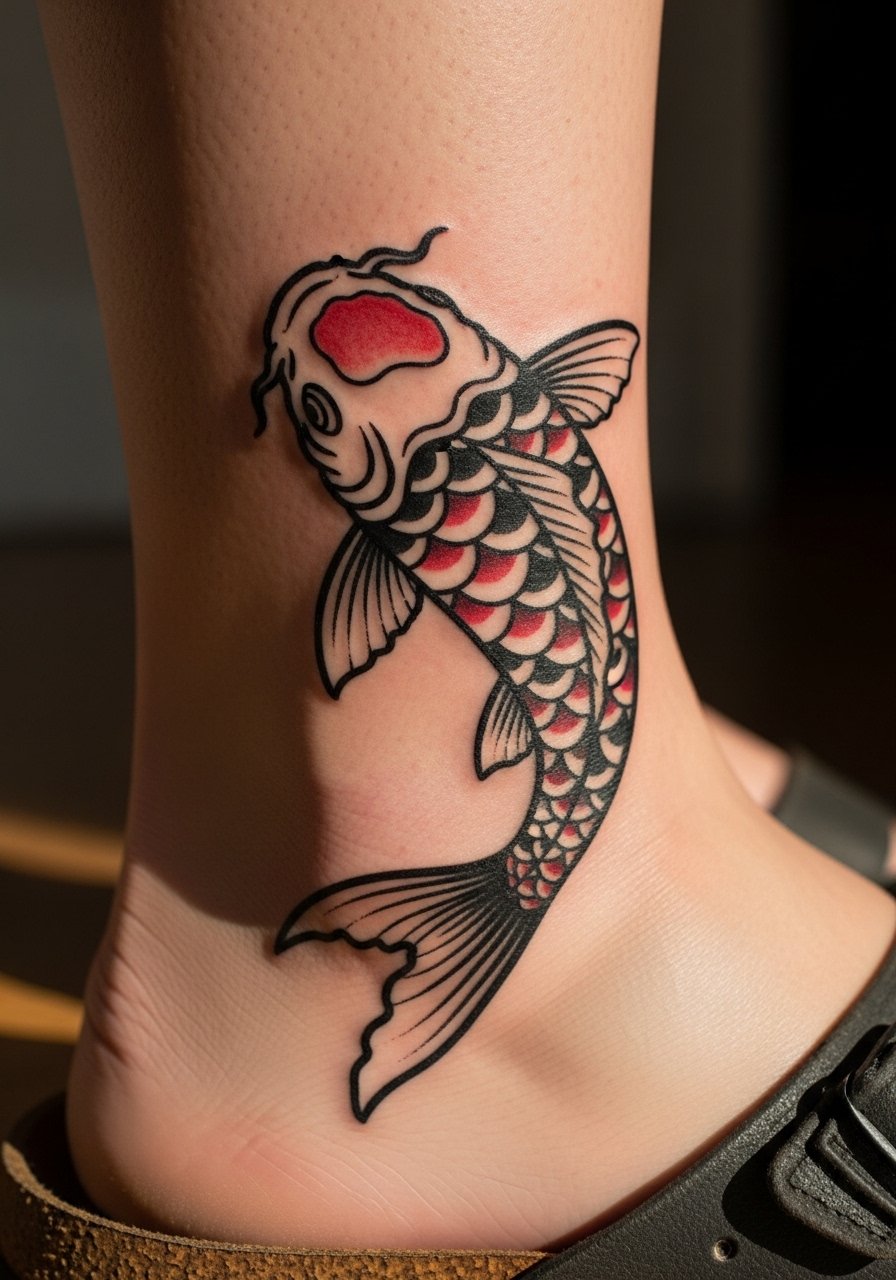
Ankle placements show off retro outline work well because the shapes are compact and stand against movement. The common mistake is making the fish too small. Go at least four inches if you want clear linework five years from now. For the session roll pants up or wear a skirt so your ankle is unobstructed and bring slip-on shoes. The piece usually takes under an hour and the pain is sharp but short. Ankle tattoos are subject to friction from socks and shoes, so protect the area during the first two weeks.
9. Koi with Lotus Integration on the Shoulder Blade
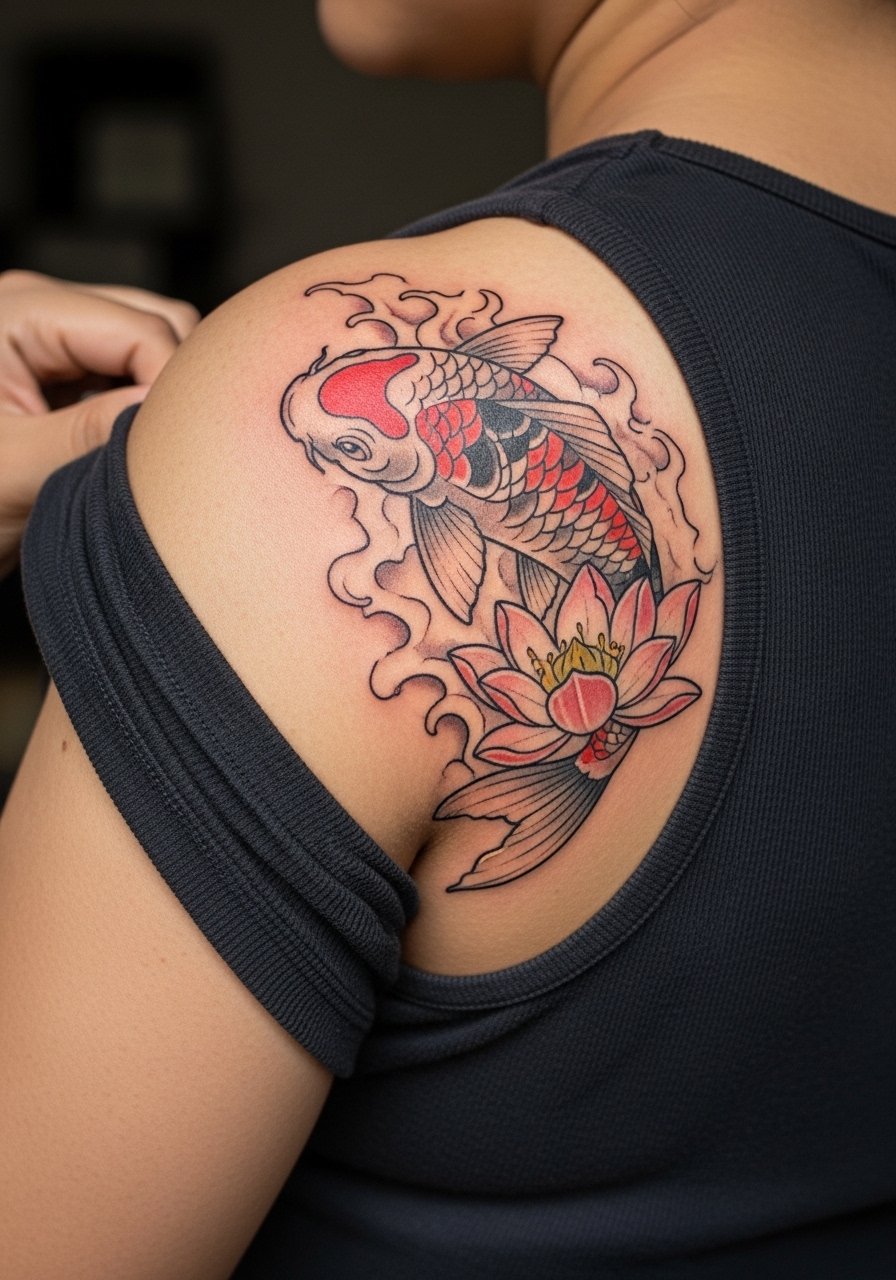
Shoulder blades give a canvas for layered imagery where a lotus can echo the fish's upward motion. Ask your artist to keep petals larger and shading softer so the lotus does not compete with the koi's scales. For showing the piece, an off shoulder blouse makes the flow visible. For the appointment wear something with buttons or a loose tank to allow access without rubbing the healing area. Sessions are moderate, often two hours, and touch-ups are uncommon if the color and linework are balanced.
10. Minimalist Koi Collarbone Silhouette
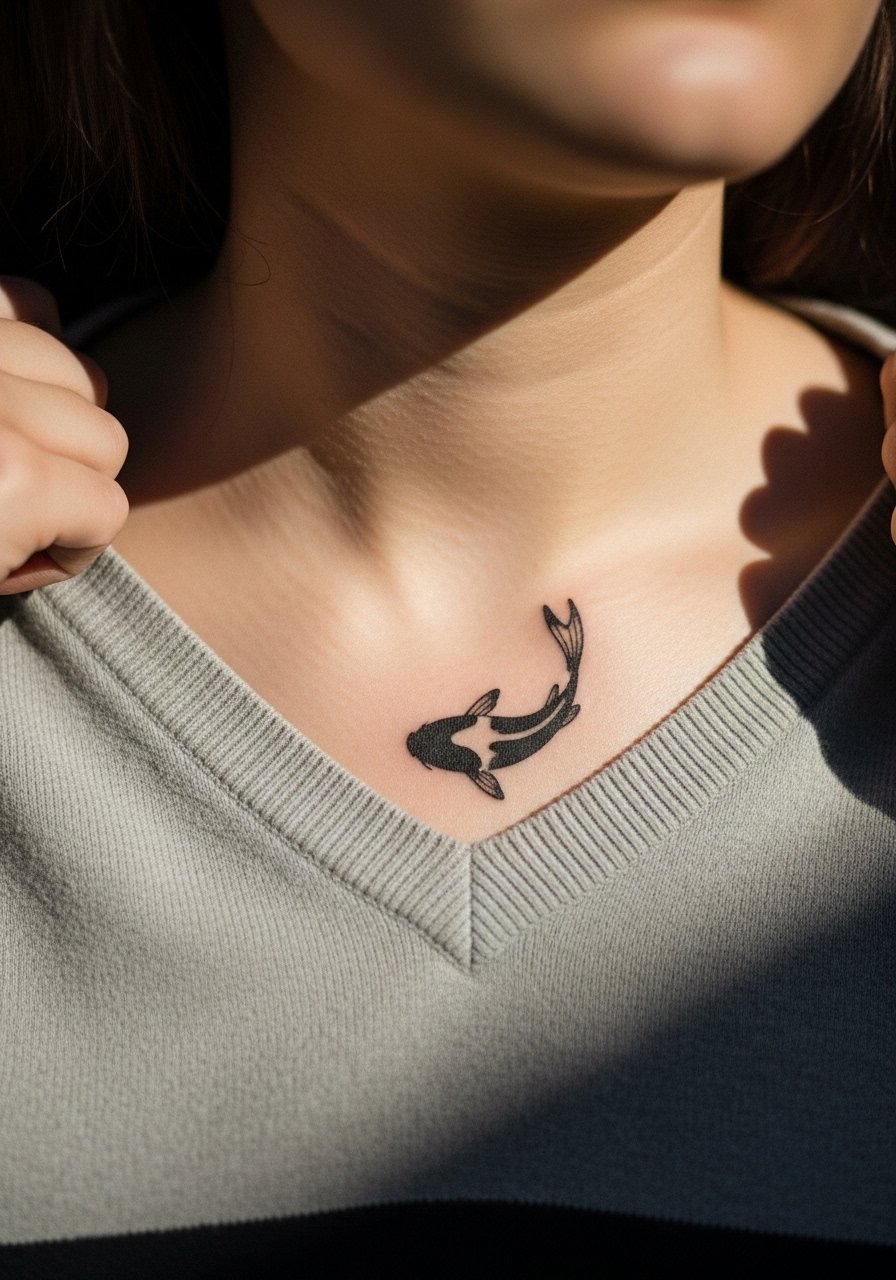
Collarbone placements require careful scale so the ink aligns with the bone. Small silhouettes here read delicate but can fade if placed directly over the bone surface. Ask for slightly denser fill and give the line room to breathe. Pair the healed piece with a v neck sweater so the silhouette sits within the neckline. For the appointment a strapless piece or wide-neck top works best. Pain is usually sharp for short bursts and sessions are brief.
11. Colorful Koi Swarm Full Sleeve
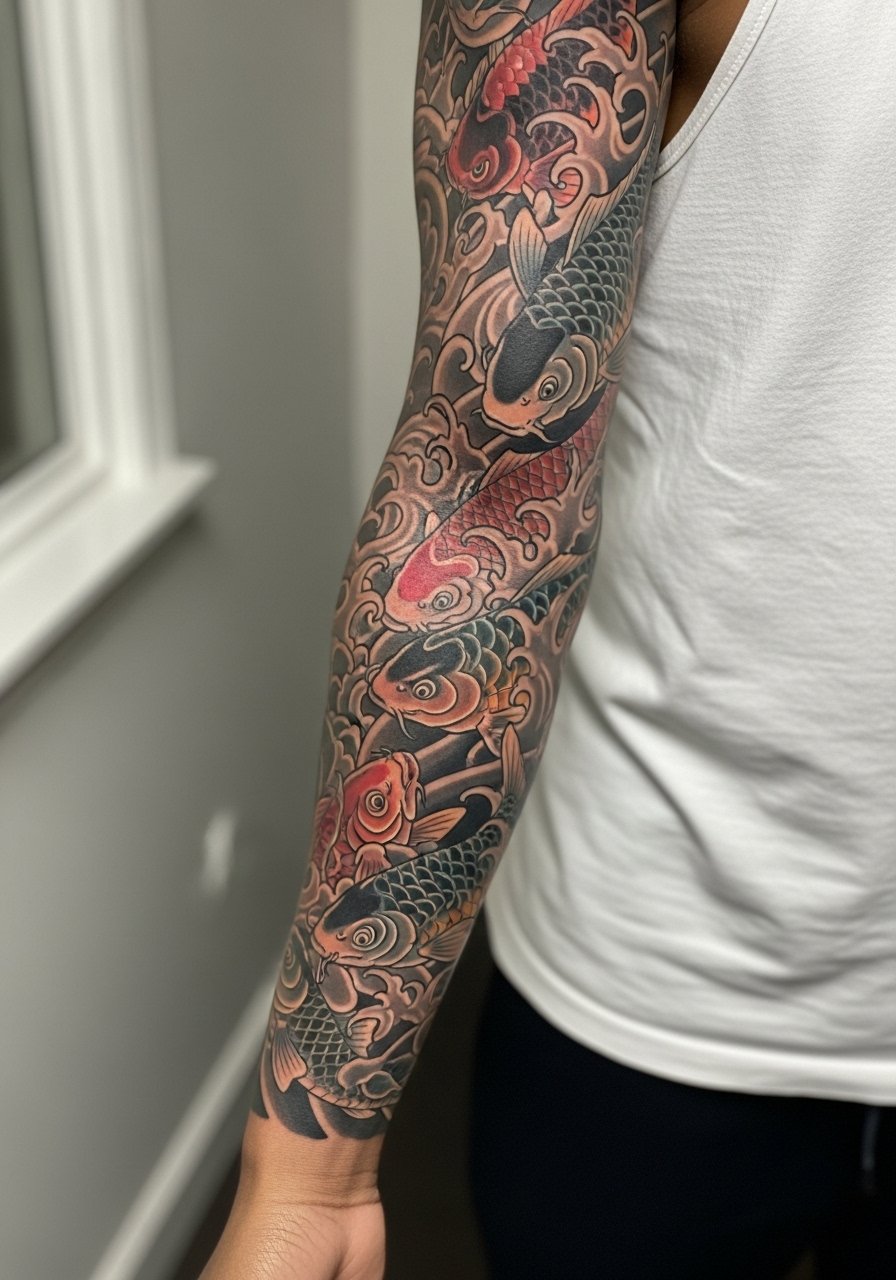
Sleeve-sized koi swarms let multiple colors and fish personalities interact. The big mistake is cramming too many tiny elements into the same vertical space. Prioritize motion and a few bold shapes so each koi has room. Expect multiple sessions over months and a longer recovery schedule. Sleeves age differently by zone so plan for periodic touch-ups and keep high-SPF on color sections. Because this is a heavy commitment, use discovery pathways like hashtag searches and booking apps to find artists who publish full-sleeve healed photos.
12. Micro-Realism Koi on the Back of the Hand
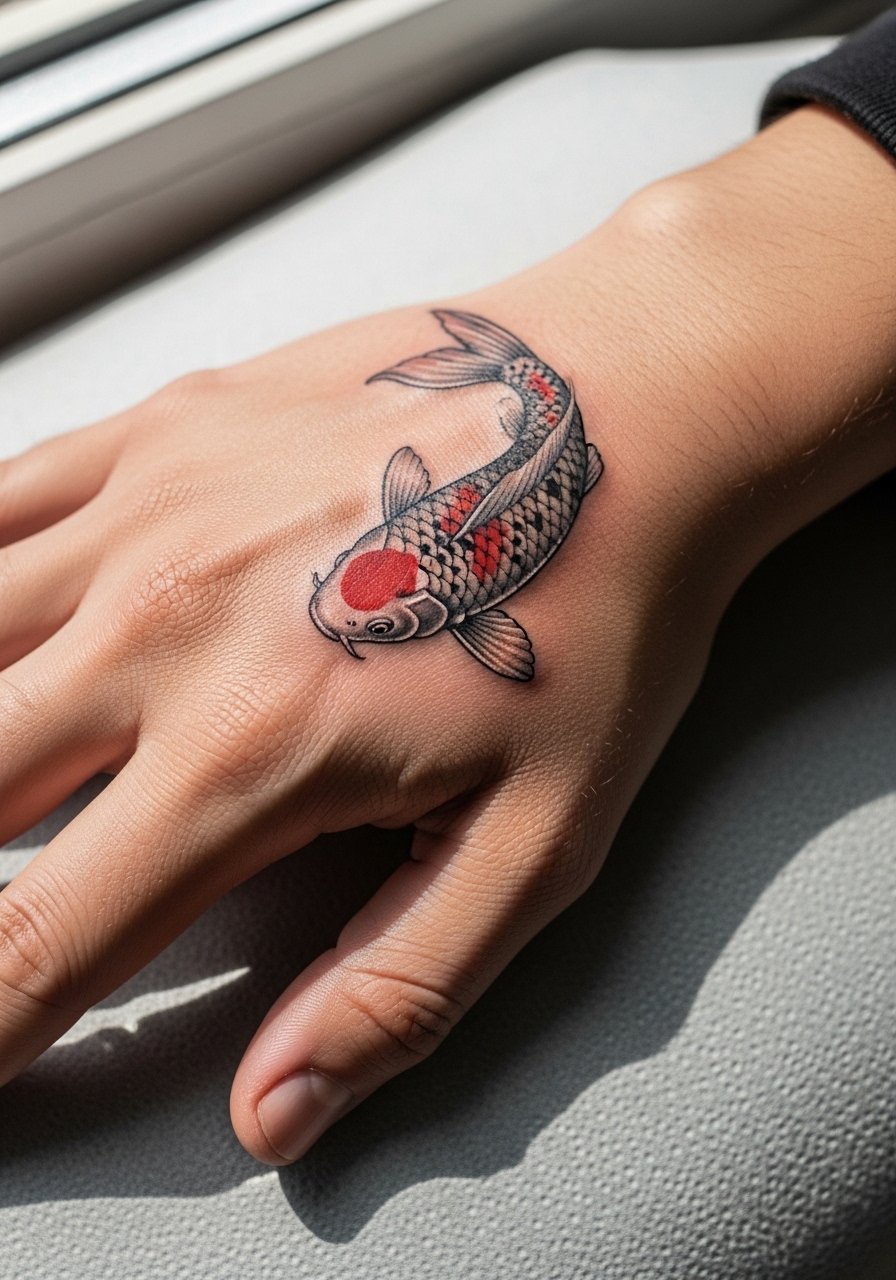
Hand tattoos are high-contact and tend to fade faster than torso work. Micro-realism on the hand demands heavier contrast to survive daily washing and rubbing. Plan for annual touch-ups and avoid tiny gradients that vanish quickly. For the session, keep jewelry off and your hand rested on a flat surface. A slim band or minimalist ring on the opposite hand keeps focus on the piece without crowding. Be aware that hand pieces are still treated differently by employers in some industries.
13. Reflective Pond Effect Using Negative Space on the Back
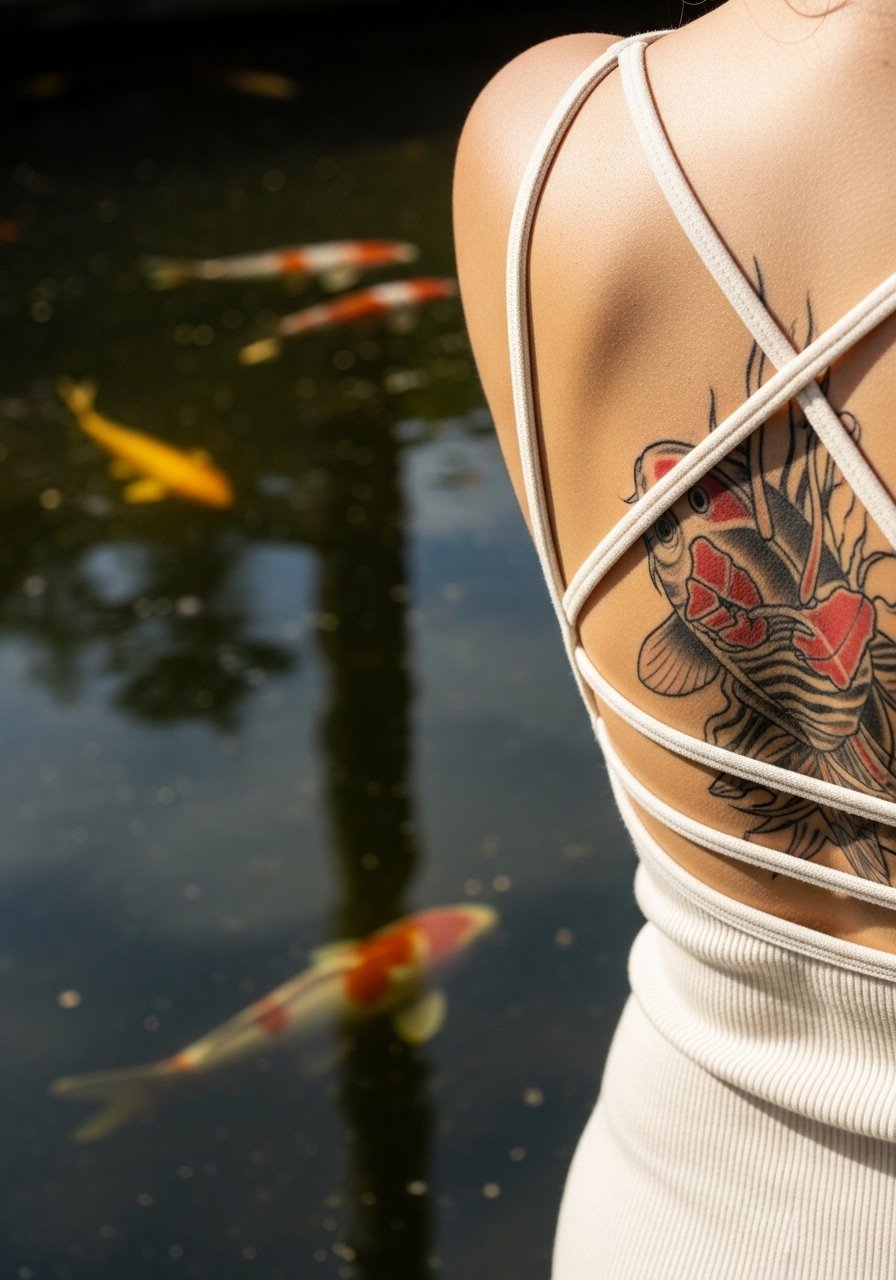
Negative space can create convincing reflections without adding more ink, and it works especially well on curved backs. The under-covered idea is to let the skin be part of the water. During consultation ask for mockups that show how light and shadow will behave across your shoulder blades. Sessions are long and usually done prone, so bring comfy layers and expect a few sittings. If you want to show the finished piece, a backless crop top highlights the flow.
14. Fine Line Wrist Wrap That Ages Intentionally
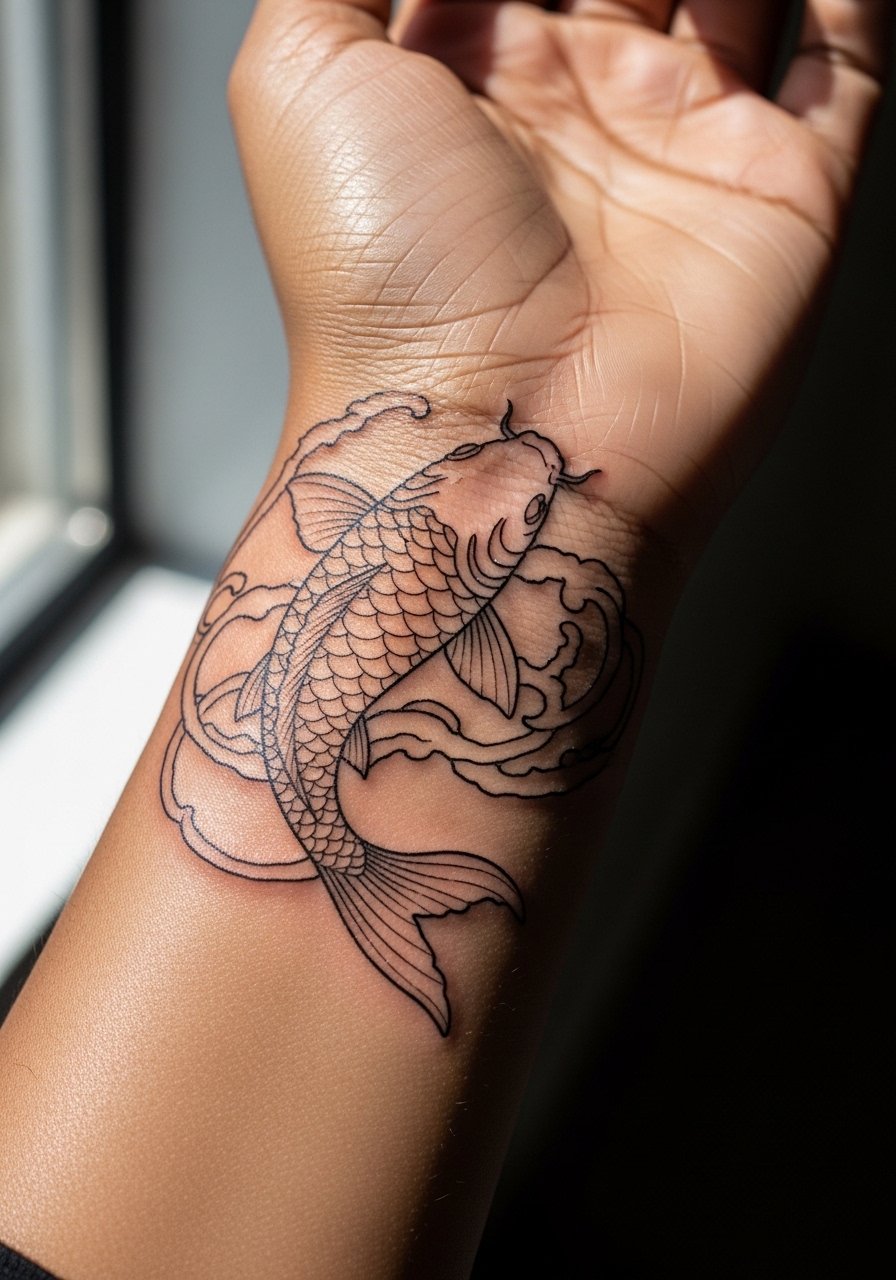
Fine line on the wrist is popular and controversial. One camp argues fine line holds up if needle depth and spacing are precise. The other camp warns that wrist skin and constant motion blur the lines within two years. Tell your artist you want slightly denser linework and a simple silhouette to improve longevity. For the session remove all bracelets and wear a beige linen shirt with sleeves you can roll up. Expect a short session and plan a touch-up within the first year if needed.
15. Circuit Pattern Koi for Tech Enthusiasts on the Forearm
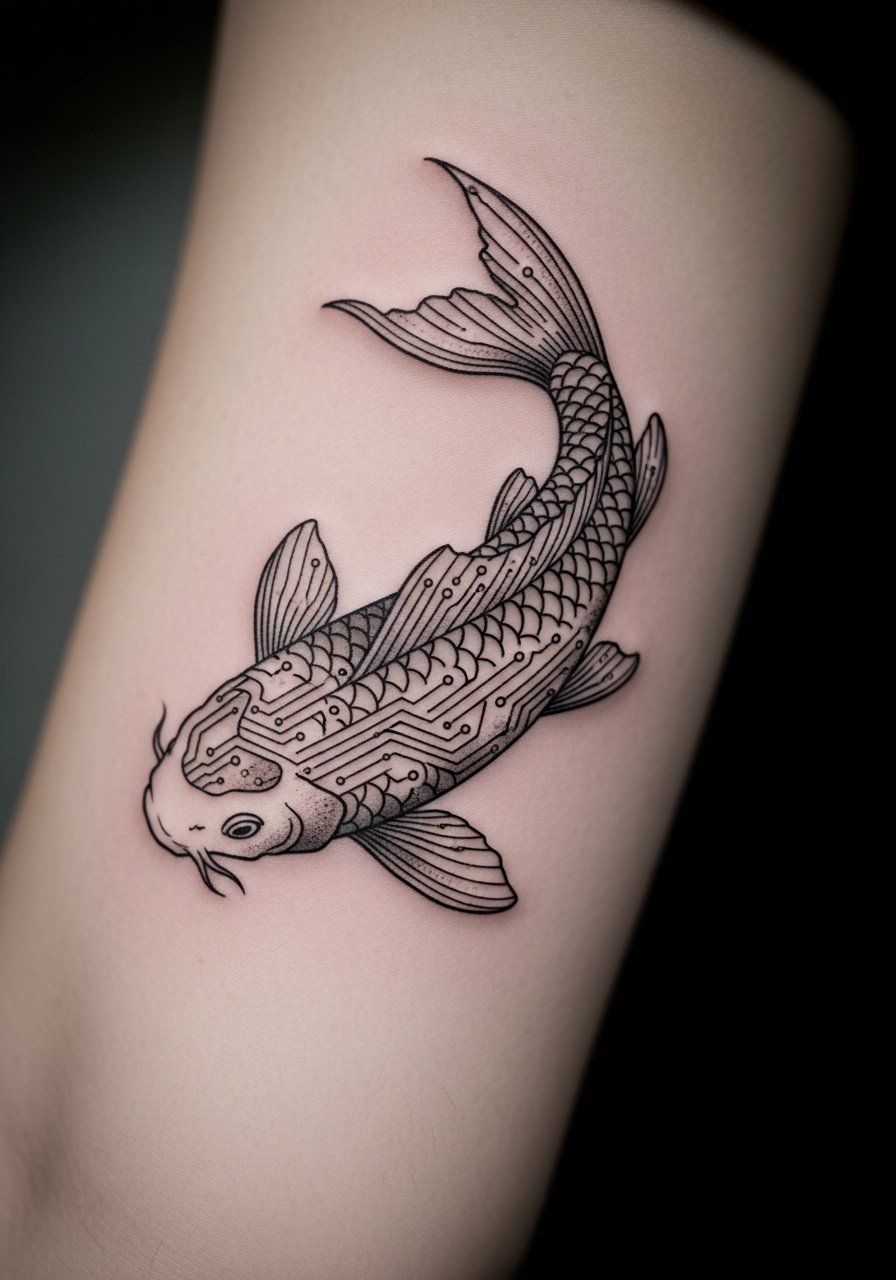
Pairing koi with modern elements like circuit motifs is a fresh angle that blends tradition and personal interest. When consulting, bring reference for the geometric pattern scale so it does not compete with the fish's natural curves. For the session wear a loose short sleeve tee so the forearm is easy to access. The style fits people who want a nod to both the organic and the technological and usually stitches together well across a few sessions.
16. Two Koi Orbiting a Small Moon on the Collarbone
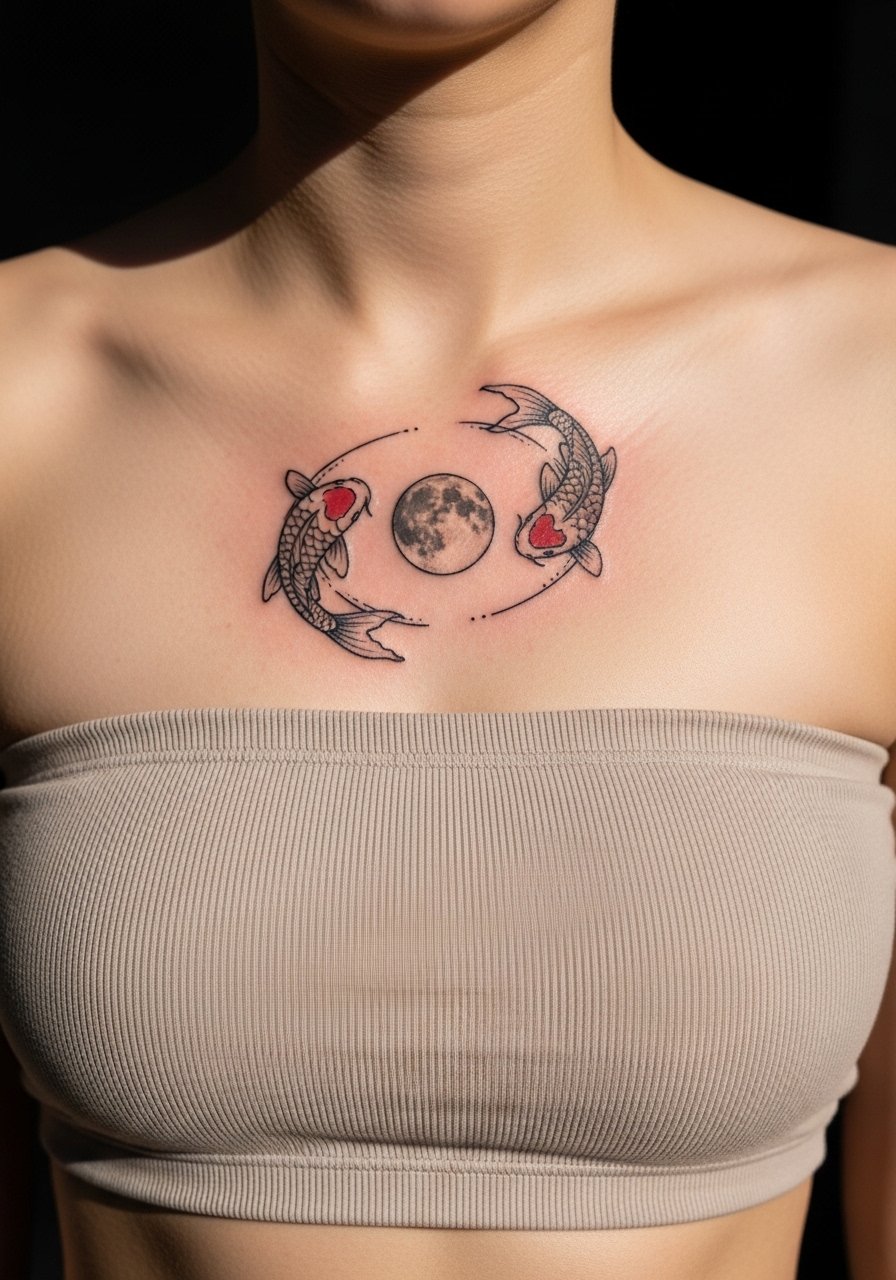
Collarbone compositions need symmetry to read like orbit rather than scattered shapes. Ask the artist to center the moon with enough spacing so the two koi move visually without crowding. Wear a strapless bralette to the appointment to keep clothing from rubbing the area during healing. Sessions are moderately painful and often done in one sitting for small-to-medium pieces. Expect the piece to age best with sun protection and steady touch-ups if you want pristine edges.
17. Minimalist Koi Finger Link
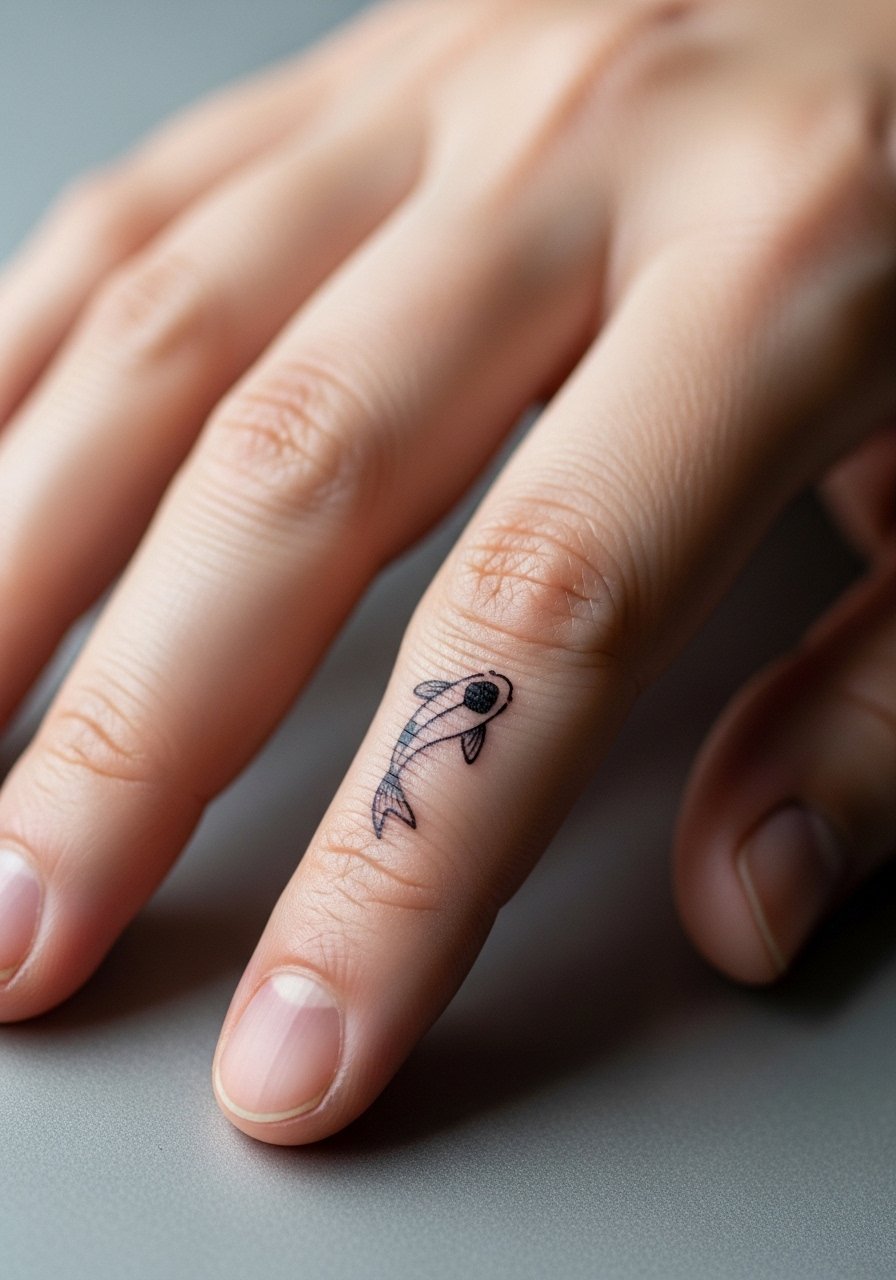
Finger placements are bold choices because they show constantly and face constant wear. A minimalist single koi link is subtle and symbolic but expect the highest touch-up rate. Request deeper, denser black for the outline and avoid tiny internal details. Appointment time is short but the long-term upkeep is real. Skip the ring on that finger during the first month and be prepared for potential yearly refreshes if you want a crisp look.
18. Illustrative Koi Swimming to a Lunar Glow on the Side Torso

Side torso placements let a moon motif and two koi tell a dramatic story, but this is another area where pain and skin movement are significant factors. Many artists split such pieces into two or more sessions to manage both client stamina and pigment saturation. Ask for mockups that show how the composition stretches with breath and movement. Wear a loose top you can lift slightly for appointments. Expect the piece to change appearance with fluctuations in body shape.
19. Healed Watercolor Koi on the Lower Back
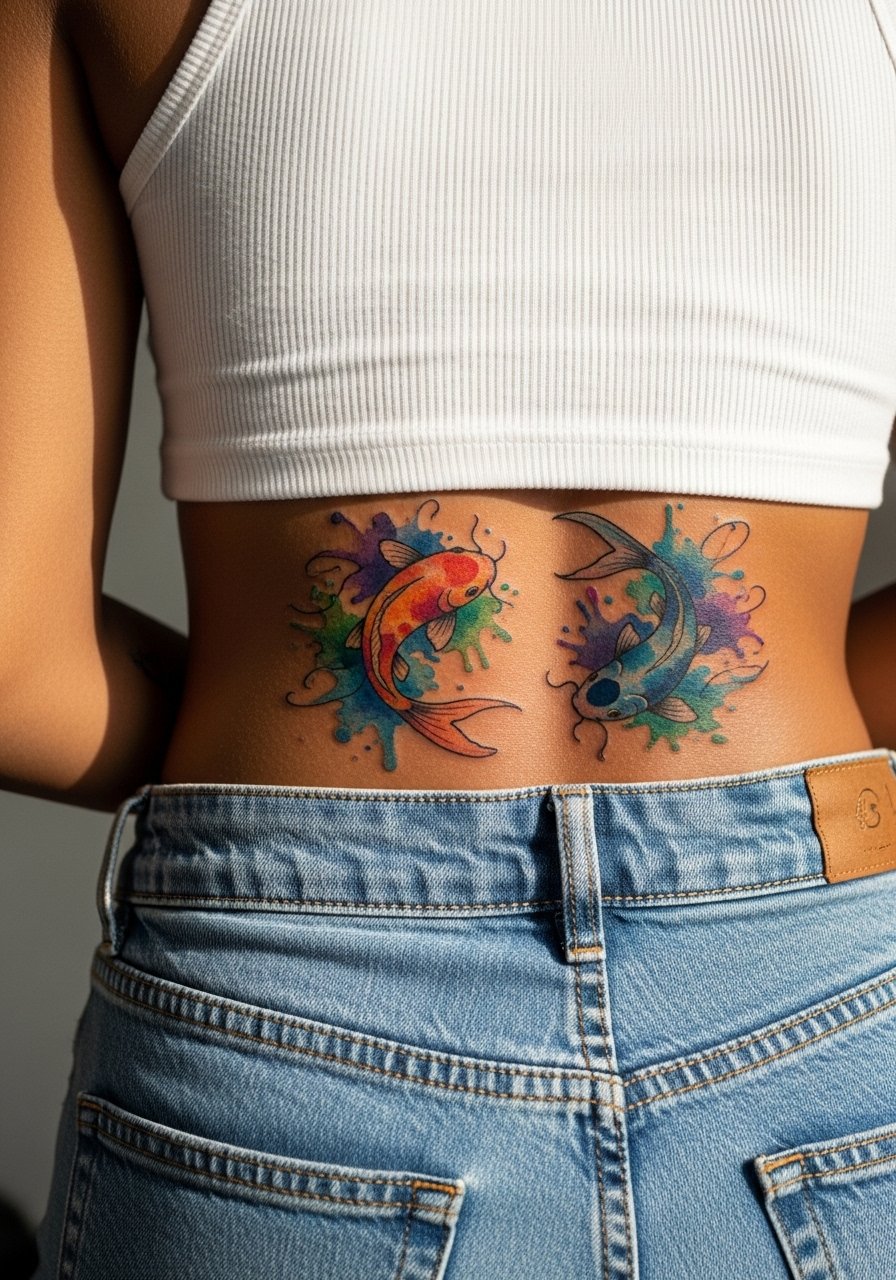
Lower back canvases allow expansive watercolor approaches and sweeping fins. The key is to avoid tiny washed-out washes next to heavy saturation. Watercolor pieces also stimulate a big debate about healing methods. One side prefers protective film for faster recovery. The other side favors dry healing or gentle balm to let scabs form naturally. Tell your artist which camp they prefer and ask for a tailored aftercare plan. For showing off, a strappy tank highlights the flow.
20. Vintage Outline with Minimal Red Accent on the Outer Calf
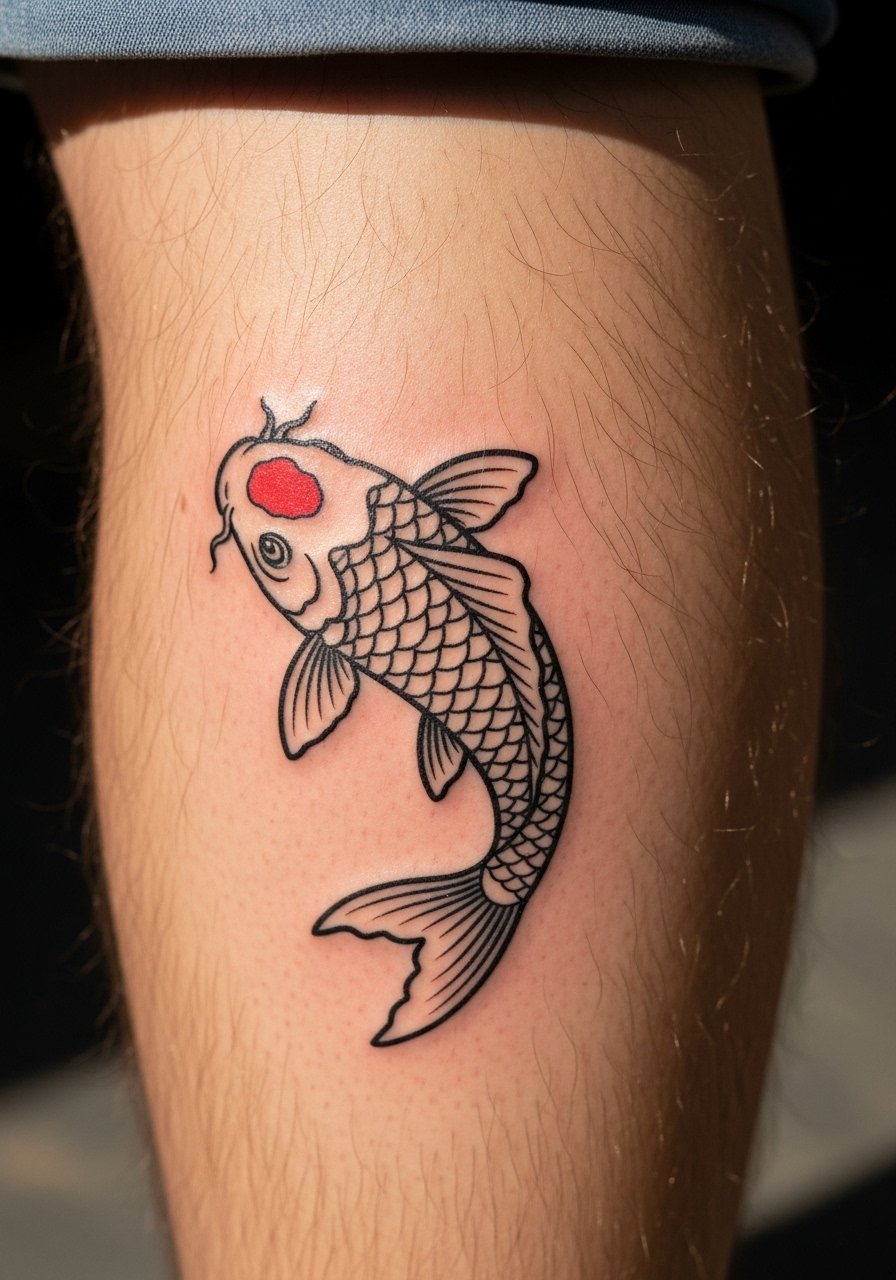
Vintage outlines thrive when linework is strong and uncomplicated. The common error is over-detailing within an old flash aesthetic. Keep it bold and use the red sparingly to draw the eye to the head or fin. For the session wear shorts you can adjust easily and bring a loose pair of pants for aftercare steps. The piece usually sits around one hour and ages reliably if the black stays saturated.
21. Neo-Traditional Koi with Wave Patterns on the Chest
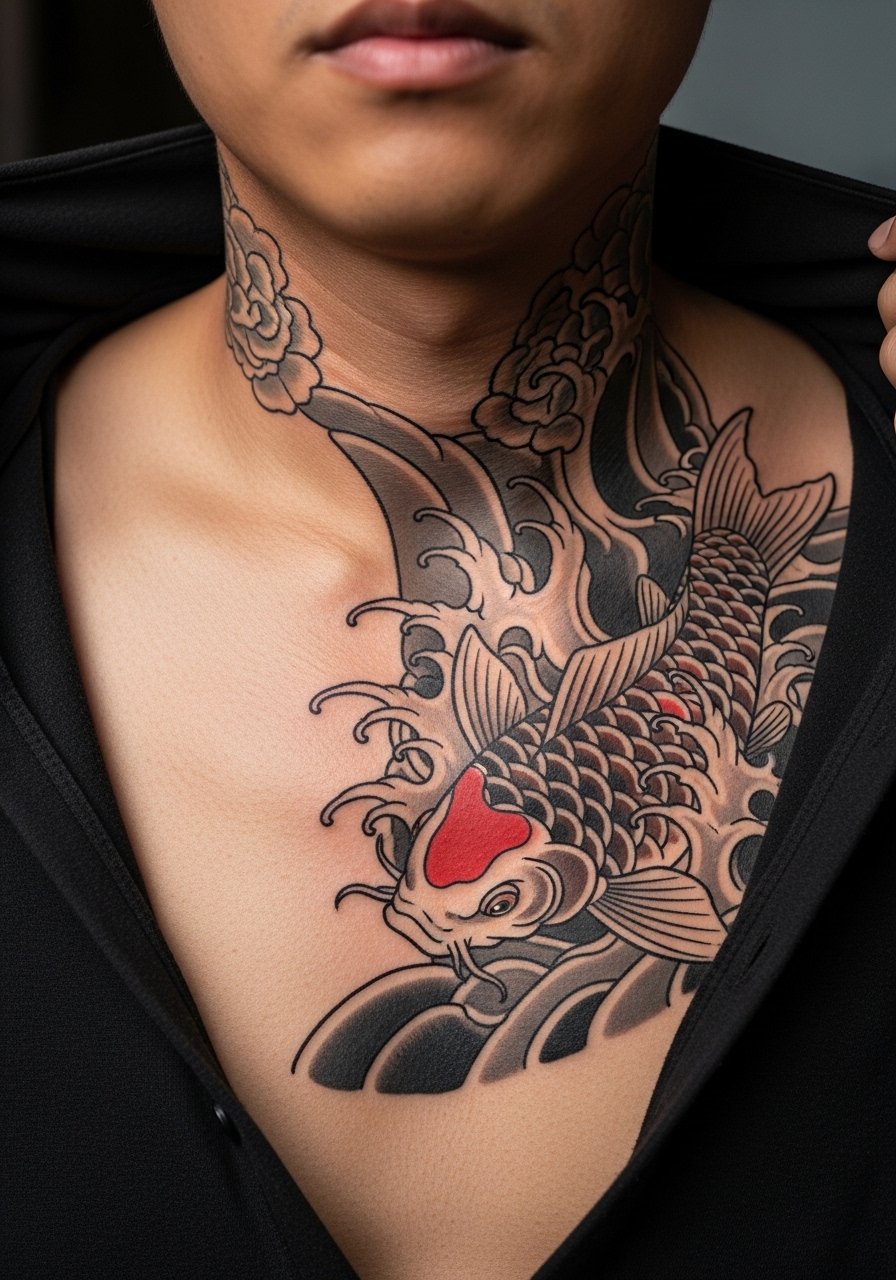
Chest work pairs well with bold waves that give koi movement. The chest stretches in ways some clients do not expect. Ask the artist how the piece will sit when you are standing, sitting, and leaning forward. For the appointment wear a wide-neck shirt you can pull aside. Sessions can be long and sensitivity varies from person to person. Consider how the composition will look when you wear different necklines.
22. Black and Gray Koi for Darker Skin on the Shoulder
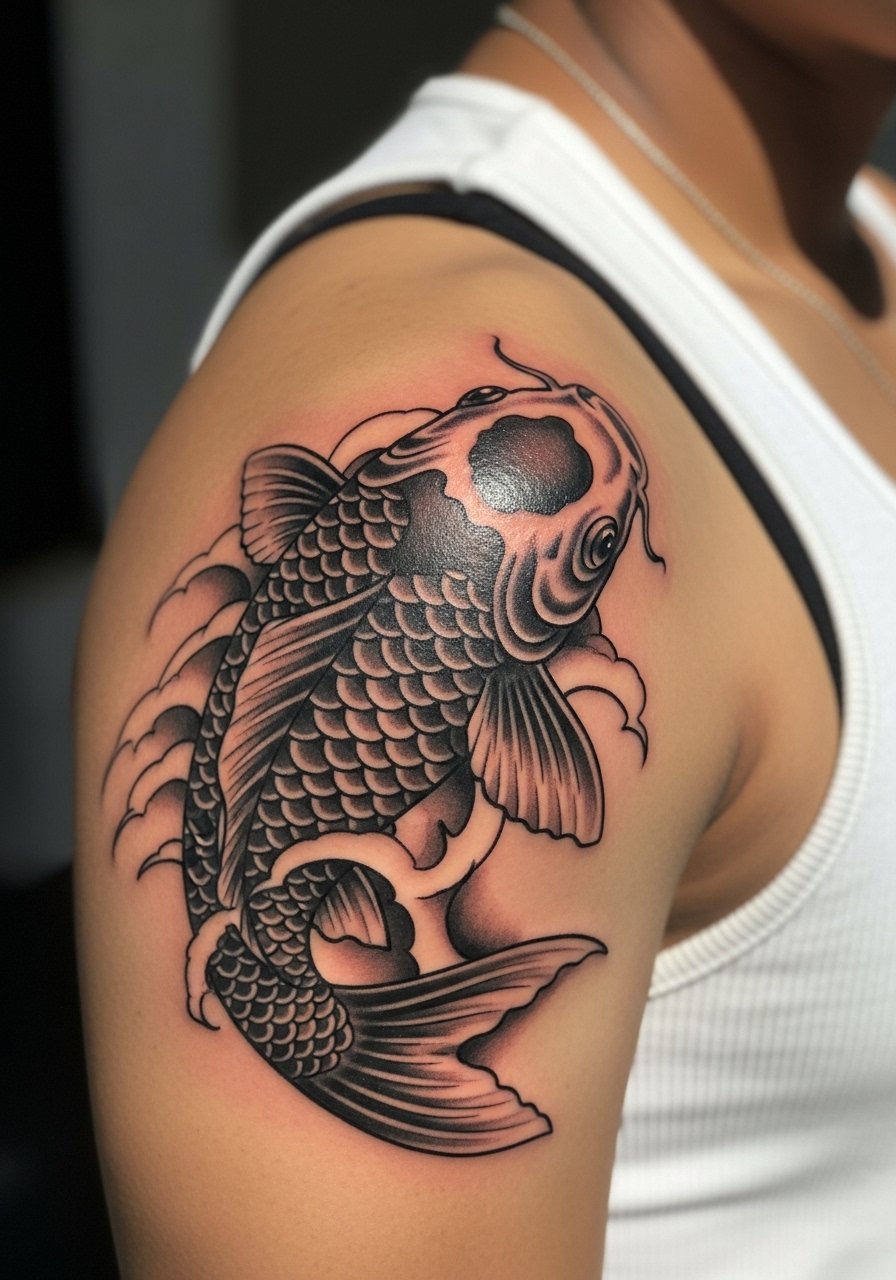
Black and gray choices can help koi pop on darker tones when artists focus on higher contrast and isolated highlights. Ask for bold silhouettes and avoid mid-tone-only shading that can look muddy in photographs. For showing the piece, an off shoulder blouse frames the shoulder and keeps the composition visible. Session length is moderate and touch-ups may be necessary to maintain crisp highlights.
23. Finger-Edge Micro Koi for Daily Reminder
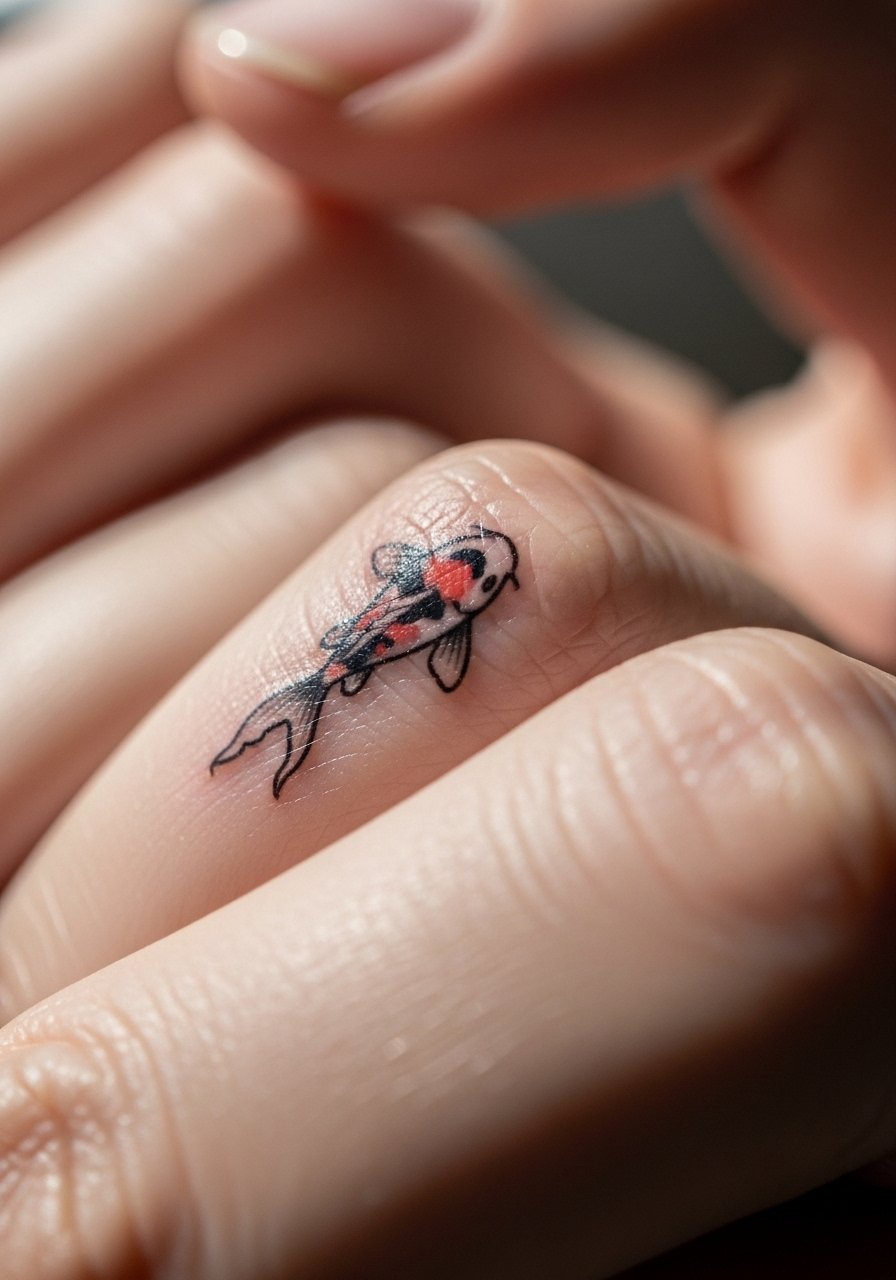
Edge-of-finger placements are subtle and symbolic but take a beating from daily tasks. Choose bold silhouette lines and accept that yearly touch-ups are more likely than for torso work. For the session avoid hand lotions immediately prior and keep the area covered from abrasive contact for the first two weeks. This placement is ideal if you want a discreet sign of perseverance that you see with a quick glance.
24. Koi and Lotus Thigh Panel with High Contrast
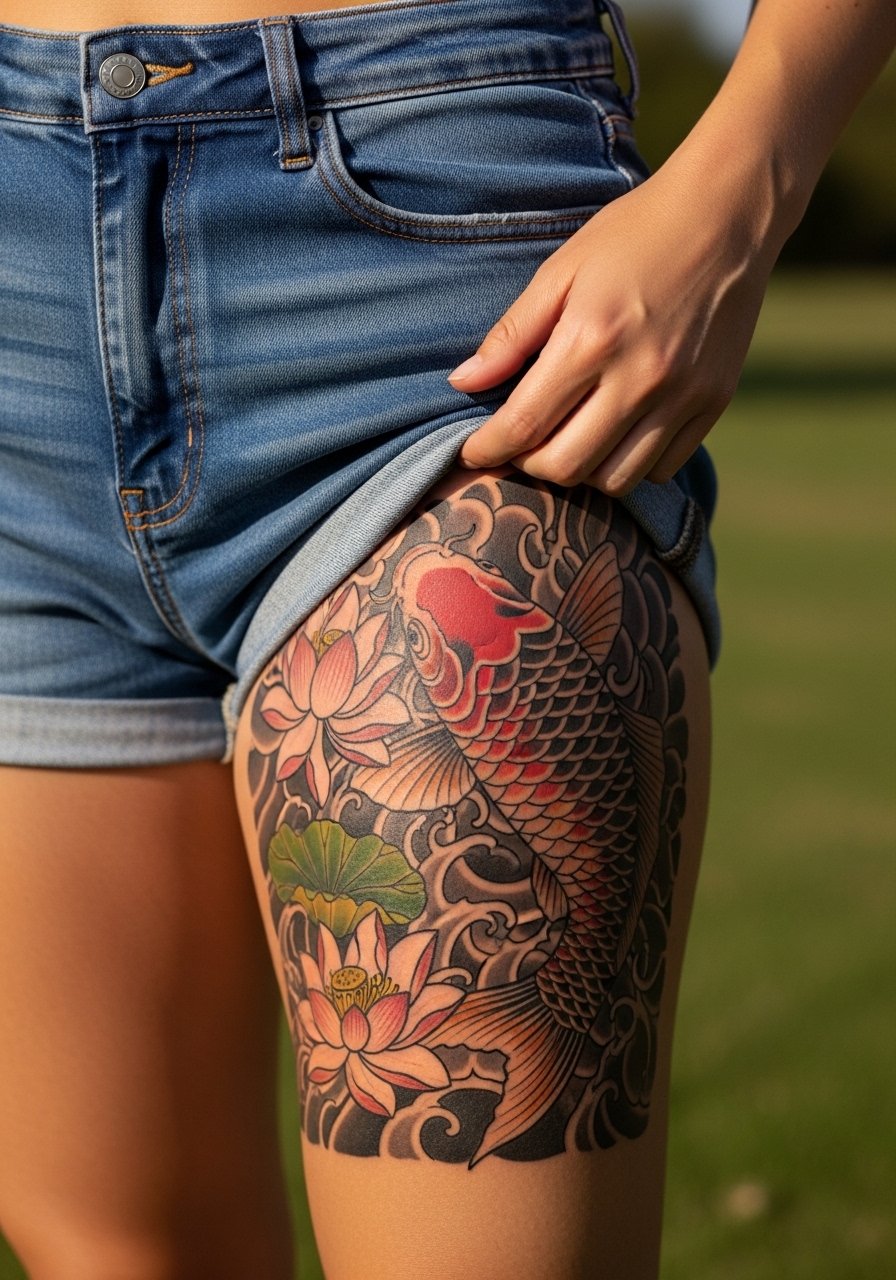
Thigh panels let you balance bold blackwork with color and have room to age gracefully. Ask the artist for larger petal shapes and strong outlines so elements do not merge with body changes. For the appointment wear high waisted shorts so the area is easy to expose and recover. Pain is manageable and sessions can be long depending on how much background work you want.
25. Small Koi on the Ankle with Sandal-Friendly Framing

Ankle placements are charming but face friction from socks and shoes. Keep the design slightly larger than you might at first want so linework avoids early fading. For showing it off, sandals or rolled jeans frame the tattoo perfectly. During the session wear slip-on footwear to avoid pressure on the spot. Touch-ups are common but the location reads well in summer.
26. Ornamental Koi Sleeve Accent with Fishnet Contrast for Nights Out
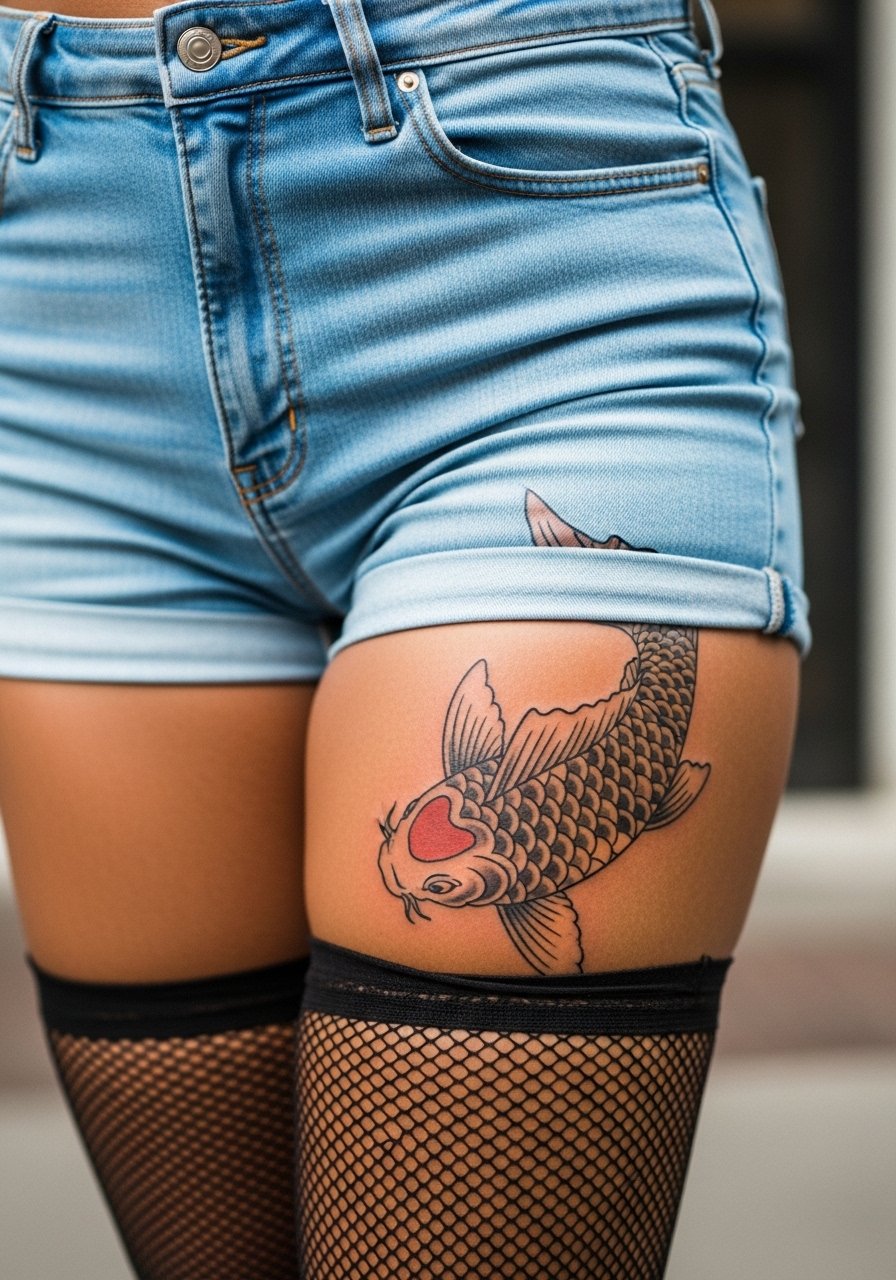
An ornamental koi accent pairs well with textural clothing choices for nights out. If you want the piece to work with fishnets or hosiery, tell your artist to keep the main lines bold and the ornamental details larger so they remain visible through pattern overlays. For the session wear high waisted shorts to protect the design until healed. Sessions vary by size but this accent usually needs one or two sittings.
27. Koi Sleeve Tail Flowing onto the Calf

Extending a sleeve piece onto the calf creates a continuous flow that feels intentional rather than compartmentalized. Plan the path of the fins across body seams during the consultation so the visual line reads uninterrupted. For the appointment wear clothing that lets both arm and leg be adjusted easily. Expect multiple sessions and coordinate session days so the healing windows do not overlap inconveniently.
Studio Day Picks
The first six ideas above include a mix of wrist, forearm, calf, shoulder, thigh, and back work, so these small items smooth the appointment and first-week healing for those placements.
-
Frida Aftercare Spray. A light mist that keeps color koi areas hydrated without heavy greasiness, useful in humid climates where ointments can feel sticky.
-
Australian Tattoo Goo. Thin formula that helps fine line work avoid crusting in dry conditions while keeping the surface breathable for early detail retention.
-
UK Ink Fix Balm. A low-shine balm for color spots that soothes without leaving a glossy finish, handy for lotus and pond washes.
-
Japanese Hada Labo Lotion. Lightweight hydration that plays well under protective film and keeps color sections plump during the first week.
-
Aquaphor Healing Ointment. A thin layer applied very sparingly for the initial few days helps lock in moisture for fine line work without clogging needle channels when used correctly.
Frequently Asked Questions
Q: Will a fine line koi on my wrist blur faster than a traditional koi on the forearm?
A: It depends on placement and line weight. Wrist skin moves and sees more sun and washing, so fine line pieces there often need touch-ups sooner than a saturated forearm piece. Ask your artist for slightly denser single-needle work and plan a six- to twelve-month check-in for a possible touch-up.
Q: For colorful pond scenes, should I pick Saniderm or dry healing?
A: Artists split into two camps. One group prefers a protective film like Saniderm to limit infection and speed early healing. The other group favors dry healing to let scabs reveal true color and texture. Tell the artist which approach they follow and ask for post-session steps tailored to the piece and your skin type.
Q: How can I make a koi tattoo pop on darker skin tones?
A: High contrast is key. Strong black outlines, selective white highlights, and isolated color accents help koi read well in photos and when viewed in person. Discuss palette tests or healed photo examples with the artist so you see realistic results before booking.
Q: What should I wear to a ribcage session that lasts several hours?
A: A cropped athletic top or a button-down you can lift slightly works best because it exposes only the area being worked on while keeping the rest of your torso covered. Bring layers and a friend if you think breaks will be needed.
Q: Are koi on the hand or fingers worth the upkeep?
A: They are worth it if you accept maintenance. Hands and fingers are high-wear zones that often need annual maintenance to keep lines crisp. If you want longevity with fewer touch-ups, choose bolder silhouettes over micro shading.
