
Fine line wine glass tattoos are everywhere on pinboards and short-form feeds right now, and the trend split is loud. The look that scores the most likes when fresh often needs careful placement and realistic touch-up planning to age well. This guide jumps straight into 21 tiny wine glass ideas, where to put them, what to ask your artist, and which designs hold up beyond the first viral post.
1. Fine Line Single Wine Glass Outline on the Wrist
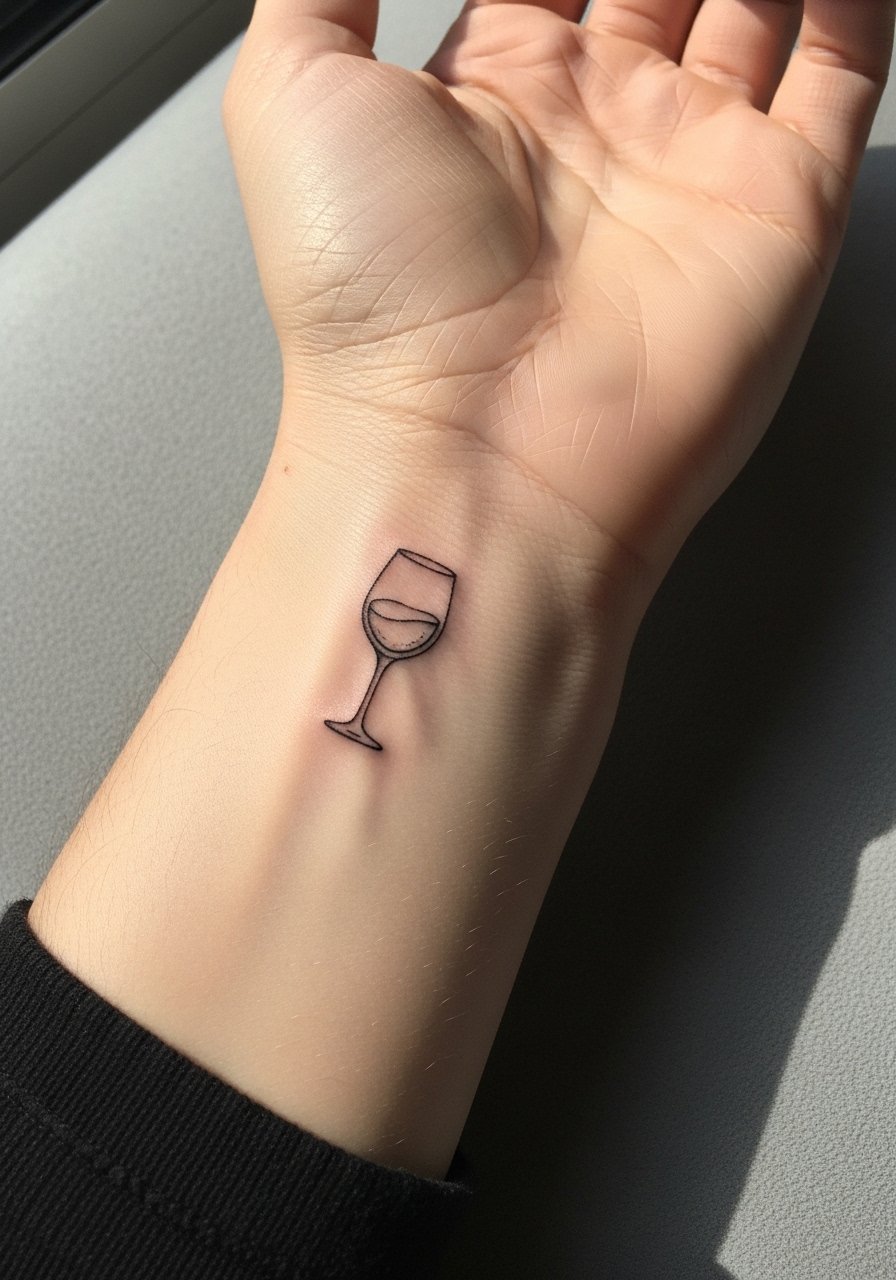
Fine line outlines read clean on the inner wrist for the first year, but they need discreet planning to avoid early softening. I recommend this when you want a minimalist mark that pairs easily with other wrist minis. Tell your artist you want the line weight consistent and slightly heavier than the thinnest single-needle flash. Expect a ten-minute session and low pain that reads about a four out of ten. Common mistake is asking for ultra-thin lines right at the wrist bone, where blowout risk and rubbing from bracelets speed fading. For showing it off, layer a thin silver chain bracelet on the opposite wrist so the ink breathes and the jewelry does not sit directly over fresh work.
2. Micro Wine Glass with Stem Details at the Ankle
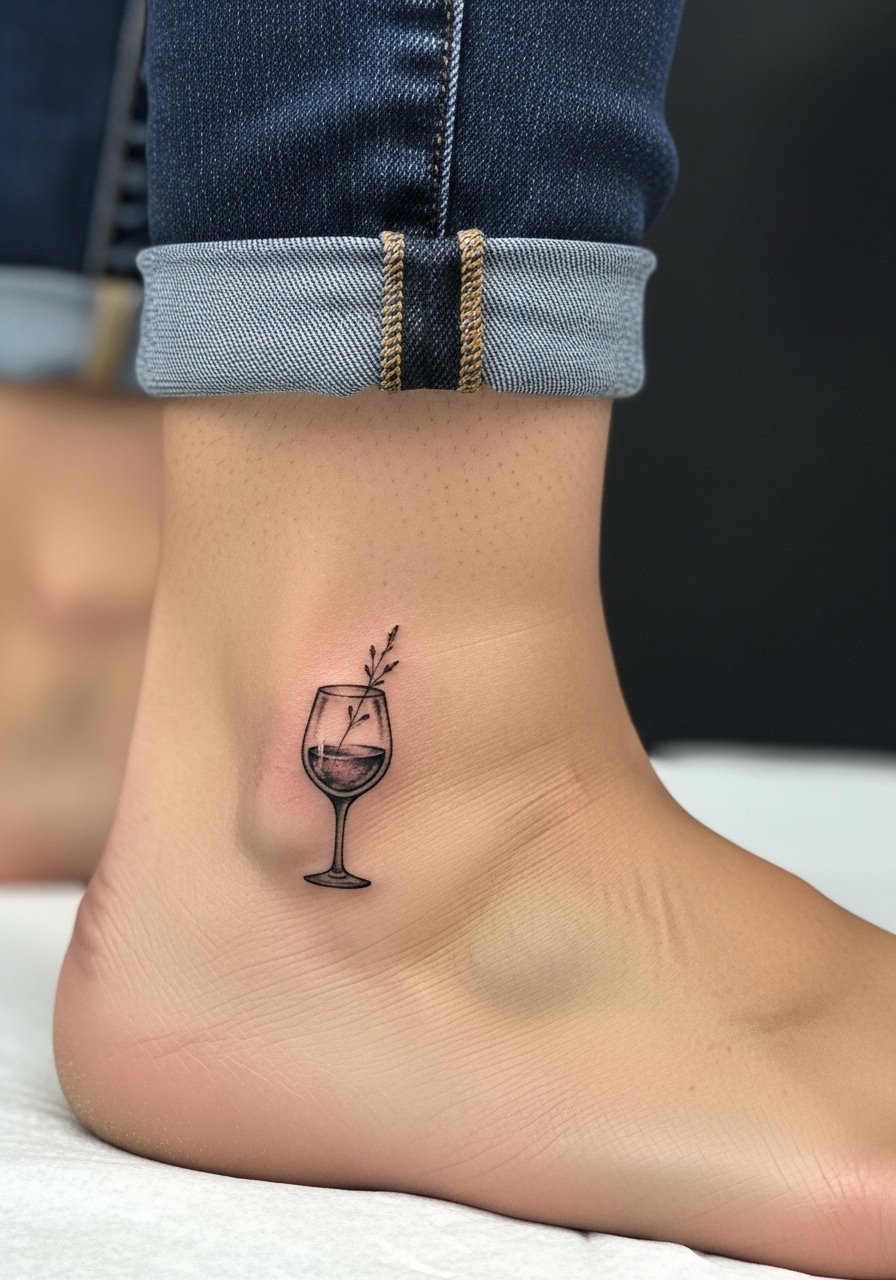
Ankle micro pieces photograph well and stay discreet under socks, but they face clothing rub in daily life. This is a go-to if you want a high-contrast tiny piece that photographs clearly. Ask for slightly darker gray shading in the stem to keep contrast on darker tones. Sessions are short, often under 20 minutes, with a pain level that is usually mild to moderate. A common error is placing it too low where shoes scrape the area. For summer styling, pair the ankle with strappy heeled sandals or cropped straight-leg jeans so the tiny realism reads as an intentional detail.
3. Dotted Line Wine Glass Silhouette on the Collarbone
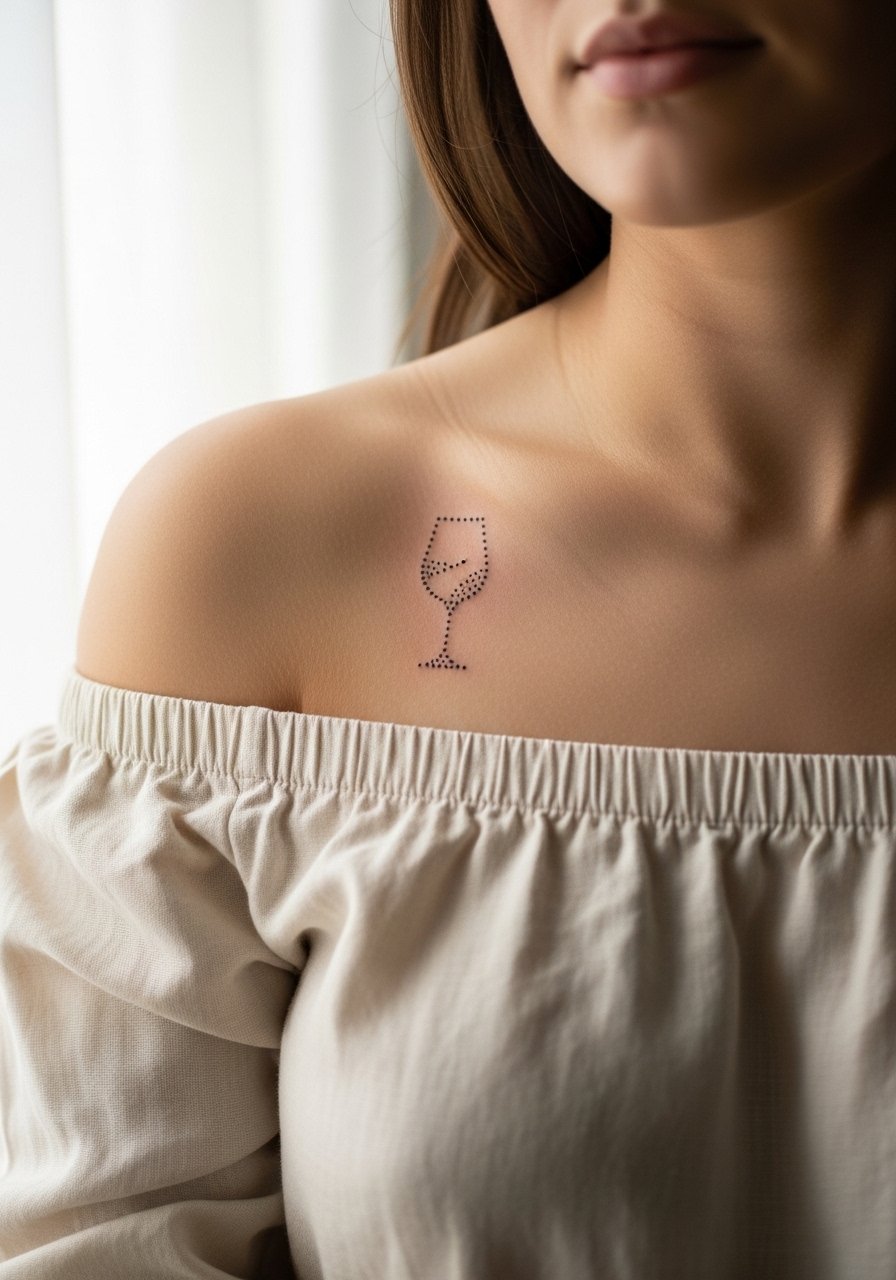
Dot work on the collarbone gives a modern, illustrative vibe that avoids dense linework in a high-movement spot. This style is best if you like animation from distance and a tactile feel up close. Tell your artist you want crisp dot spacing and a repeatable pattern that keeps distance between the dots. Expect a 20-minute session and a firmer sensation because the collarbone sits close to bone. The main mistake is packing dots too tightly, which causes merging as the piece heals. Layer an off shoulder blouse when you show it off, and wear a strapless top to the session so the area is easily accessible.
4. Wine Glass with Rising Bubbles on the Inner Bicep
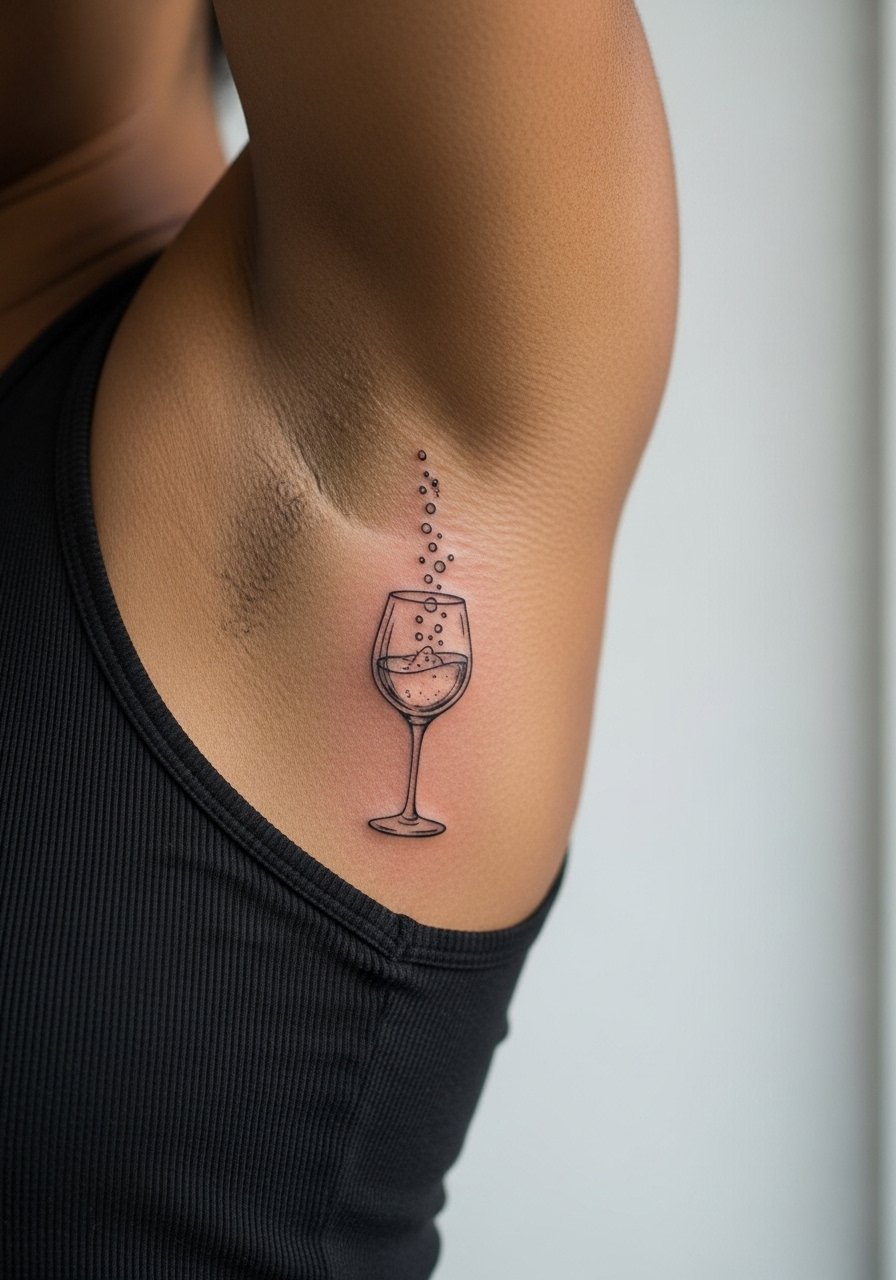
Inner bicep pieces give room for tiny illustrative details like bubbles while avoiding surface stretch that other spots cause. Artists split on whether small details stay crisp on the inner arm. One camp argues the skin there holds ink well if the spacing is generous. The other camp says movement and sweat on the arm blur tiny dots over time. If you choose this placement, ask for slightly bolder bubble outlines at the start so they read after a few years. The session can take 30 minutes to an hour depending on spacing and shading, with pain in the moderate range. For evening wear, a sleeveless silk camisole shows the placement without covering it.
5. Empty Wine Glass Contour on the Ribcage
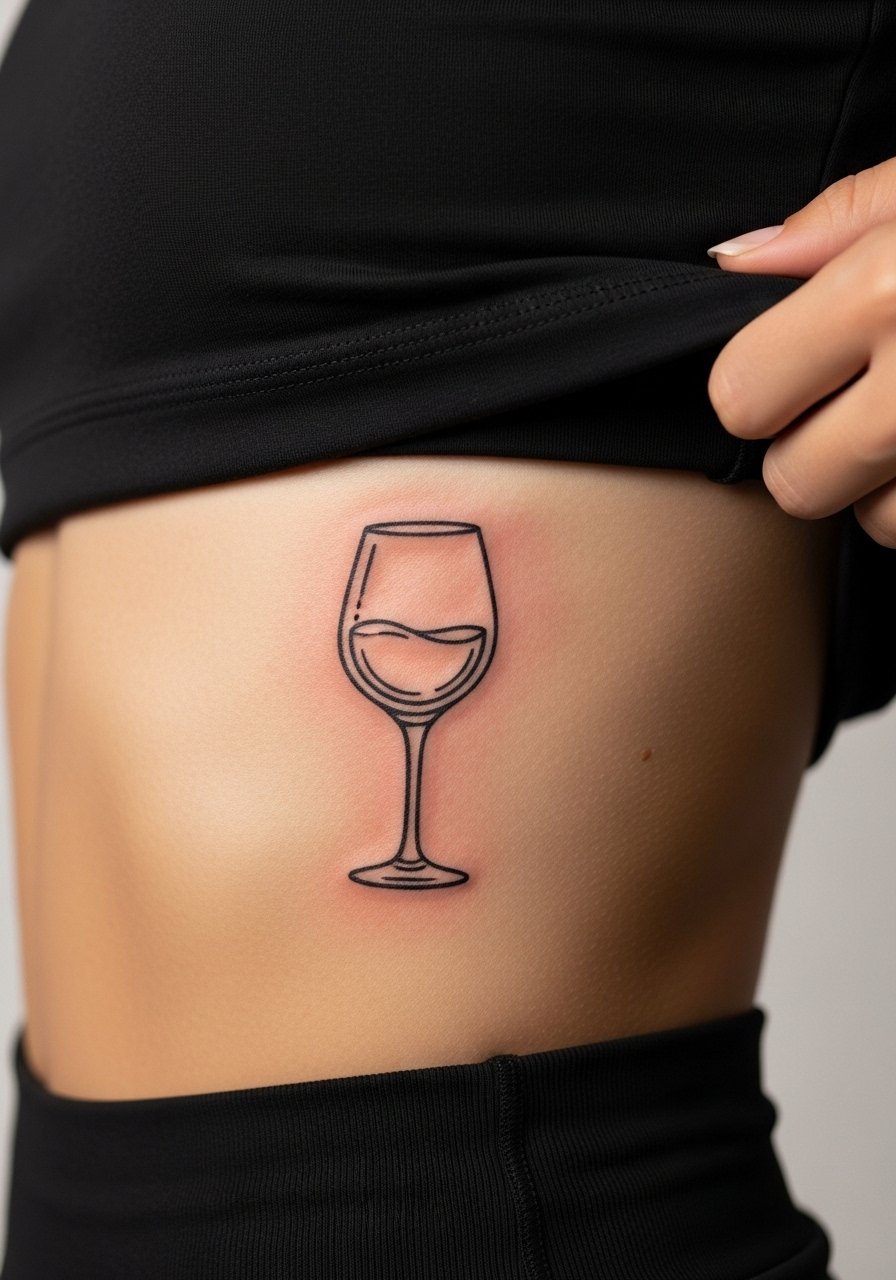
Fair warning, ribs are one of the higher pain spots for tiny tattoos and they also present long-term stretch concerns. The contour version works if you want a clean, symbolic piece that travels with clothing lines. Tell the artist to keep spacing between any internal lines so dense areas do not blur during healing. The two main camps here are split on fine line on ribs. One group says the skin stretch blurs lines within two years. The other group says with proper needle depth and spacing it settles fine. Ask the artist where they land and plan a possible touch-up at year one. Wear a strapless top or zip-up hoodie to the session so the artist can expose only the area needed.
6. Tilted Wine Glass Fine Line on the Outer Forearm
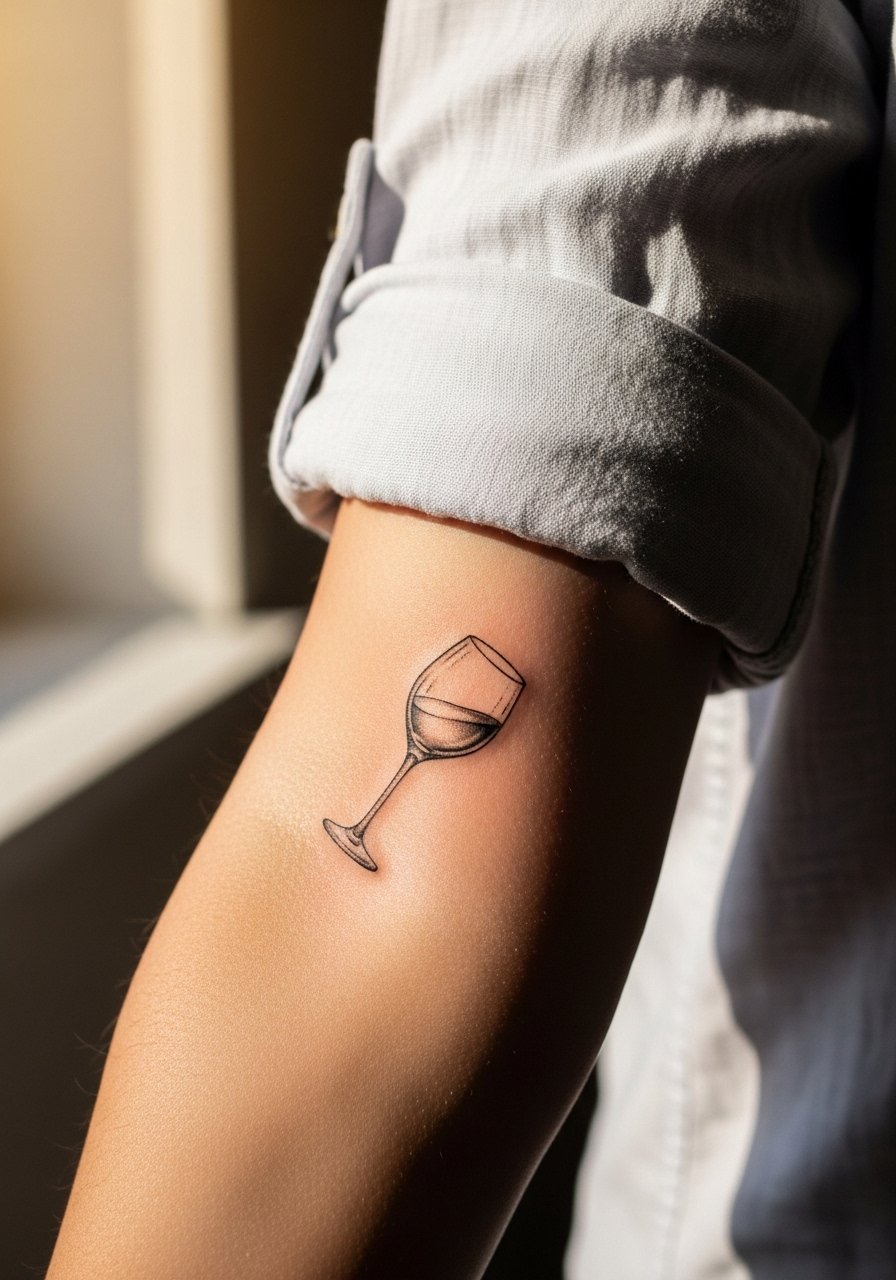
A tilted glass adds movement and reads like a spontaneous toast when the arm moves. Outer forearm is visible but also flexes, so this placement is prone to slight distortion when typing or lifting. I tell people to test the tilt with a temporary before booking so the angle sits right when your arm is in neutral. Sessions are short and the pain is mild to moderate. Common mistake is choosing a tilt that looks dynamic on the reference but flattens when the arm is at rest. For showing off the tilt, roll up a linen button up shirt so the design sits exactly where you expect.
Pre-Session Essentials
The wrist, ankle, collarbone, and ribcage pieces above have different prep and early-healing needs. These small items smooth the session and protect delicate linework in week one.
-
Tattoo Goo balm alternative. A thinner formula than heavy ointments that many people find less likely to clog for fine line wrist pieces.
-
Green Sheep Tattoo Balm. Good for colder months when ankle and lower leg pieces need extra dry-skin protection during healing.
-
Inked Balm travel tin. Fast-absorbing and useful for touch-ups on small areas where shine makes photos look off.
-
Topical numbing cream. Helpful if ribs or inner bicep make you nervous, applied before the session per your artist's guidance.
-
Aquaphor healing ointment. Thin layer during the first 48 hours helps protect fine line work from excessive scabbing while you rest.
7. Wine Glass Base with Shadow on the Shoulder Blade
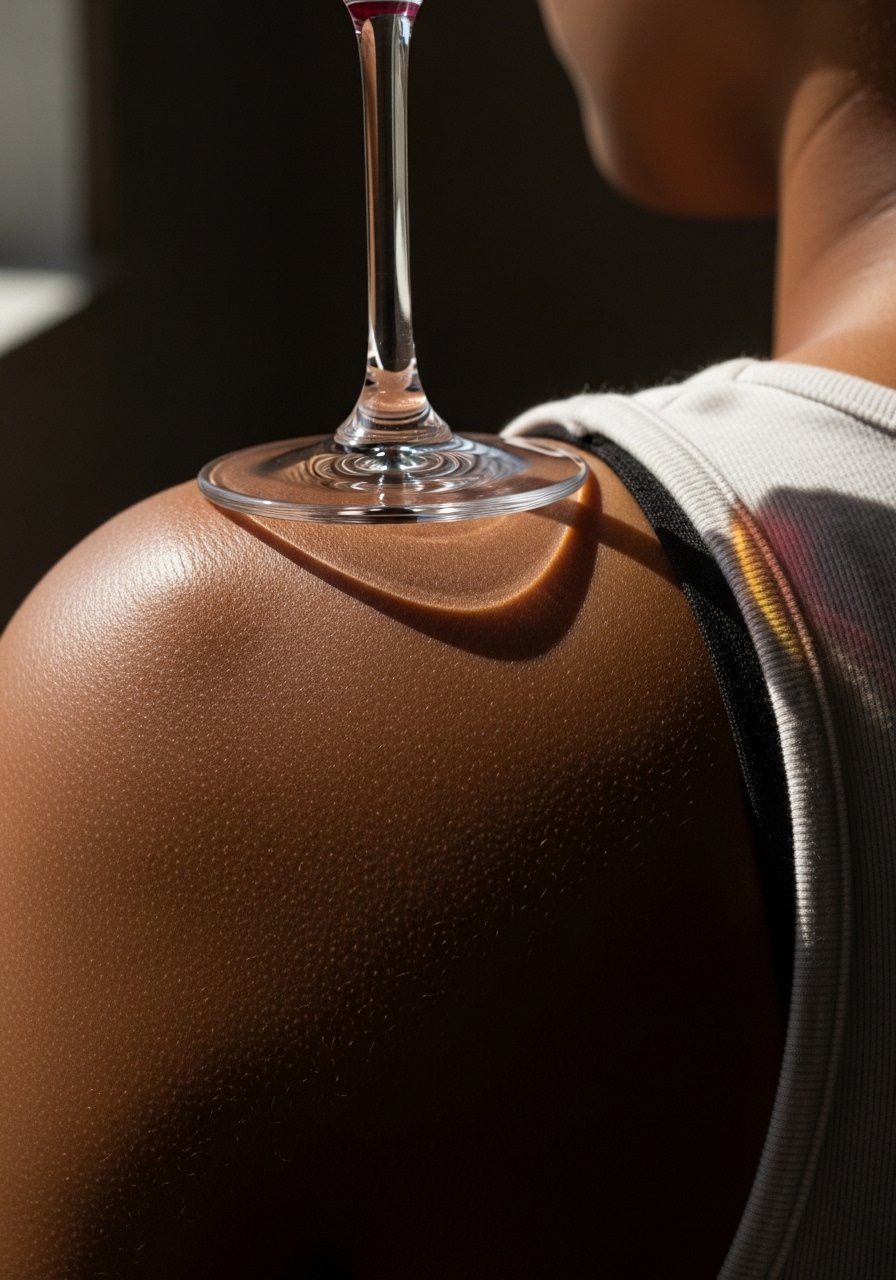
Shoulder blade is forgiving for small realism, and adding a base shadow gives depth that makes a tiny glass read as three dimensional. I recommend this if you want realism without bold saturation. Ask the artist for soft gray wash under the base rather than heavy black, because heavy saturation in a tiny space can age into patchiness. Sessions are short and the pain is typically mild. People often err by crowding the base with tiny texture that the spot cannot hold. Pair the placement with a backless halter top when you want to show it off.
8. Stemless Wine Glass Minimal Behind the Ear
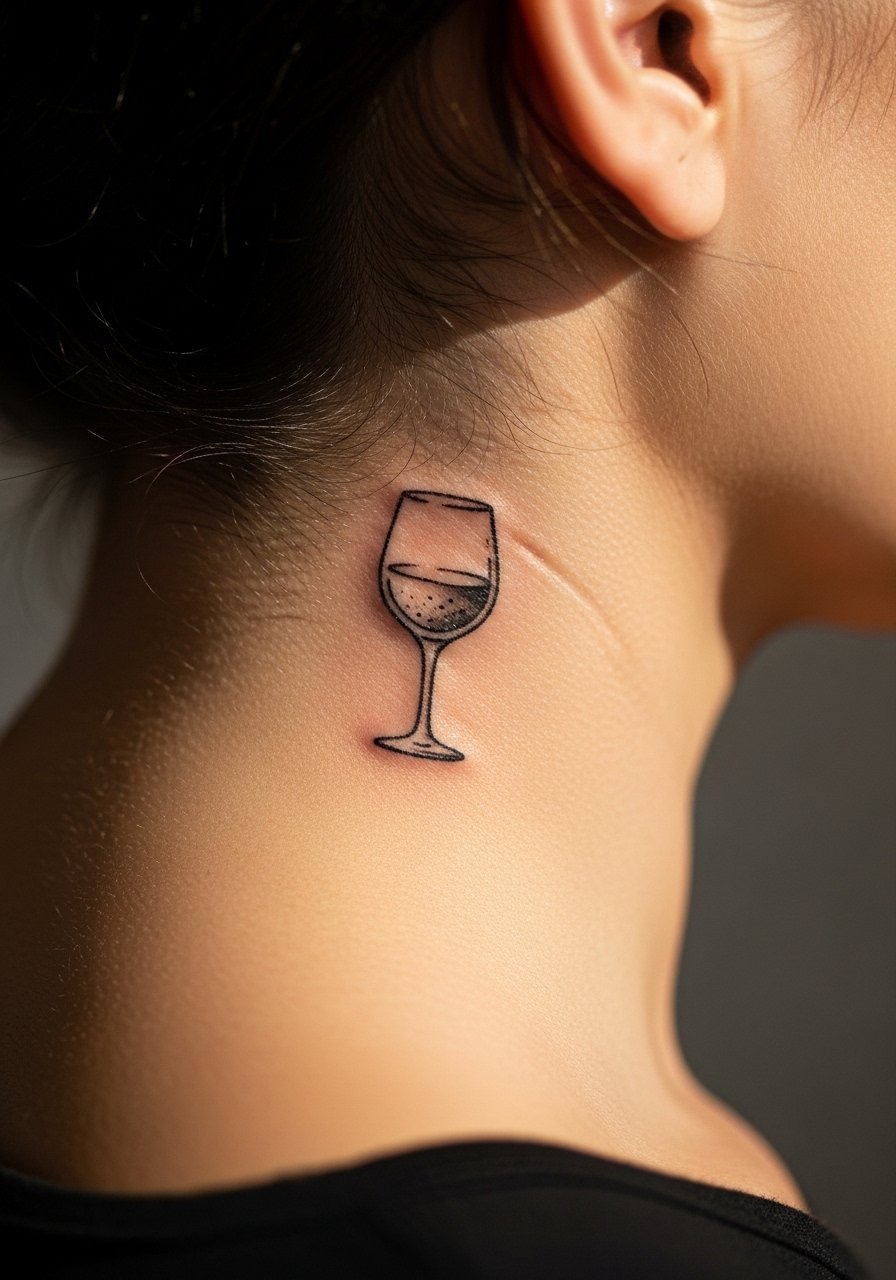
Behind-the-ear placements feel intimate and hidden, and a stemless silhouette sits discreetly in that curved niche. For safety and visibility, always describe the area as below the hairline on the neck when consulting an artist. The session is quick and pain is low, though the artist needs a steady hand. A common mistake is expecting the same line clarity as a flat surface, but the area curves and requires a slightly bolder contour. This spot reads well with a tucked hairstyle so the piece peeks out.
9. Wine Glass with Liquid Swirl on the Thigh
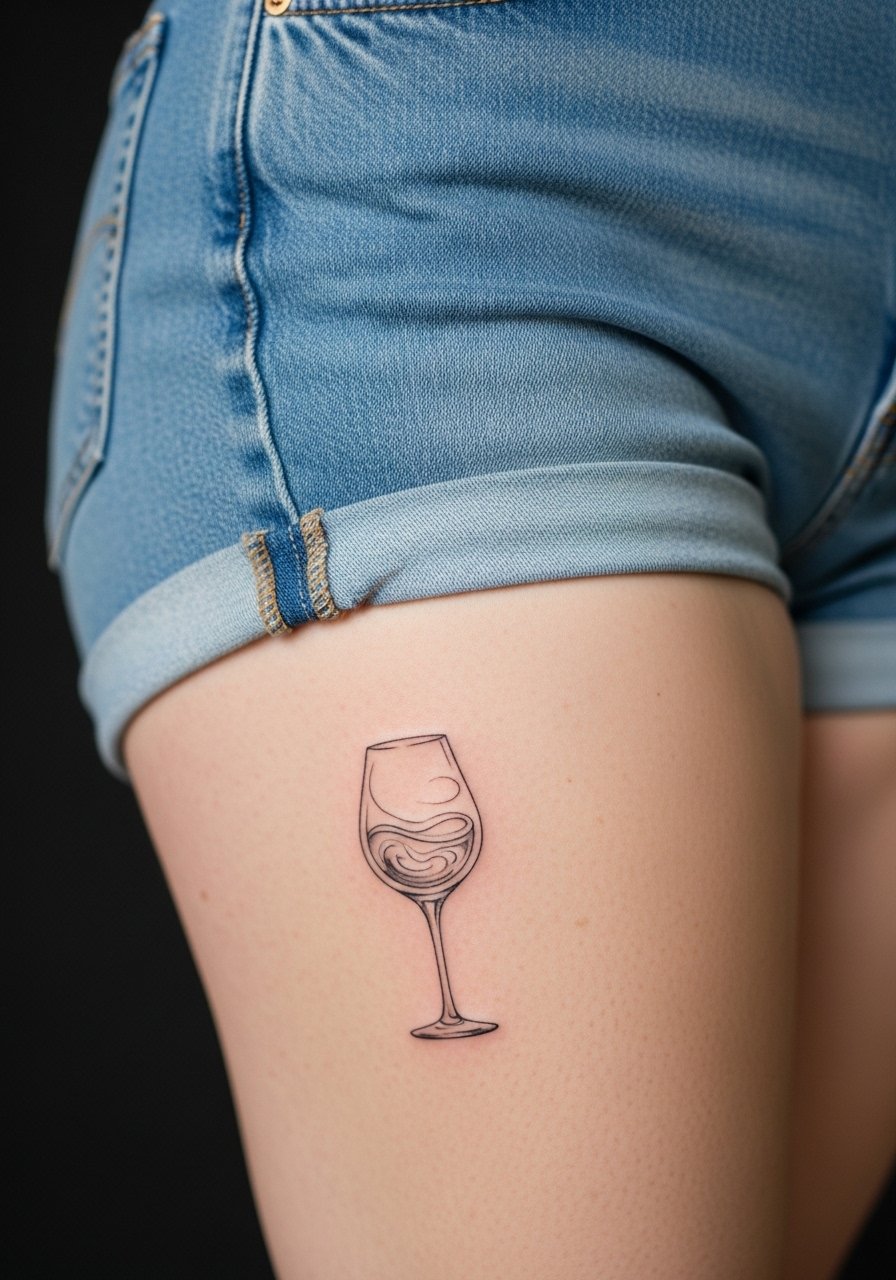
Thigh pieces allow more space for fluid, curved lines that mimic wine movement. The larger canvas lets artists use subtle washes that last longer than the thinnest lines elsewhere. If you want a swirl, ask for a light gray wash tied into the outline rather than loose watercolor splashes that can feather. Sessions may run longer, up to an hour, and the pain is moderate depending on placement. For summer looks, pair with high waisted denim shorts or mini skirts that let the swirl show.
10. Broken Wine Glass Edge on the Calf
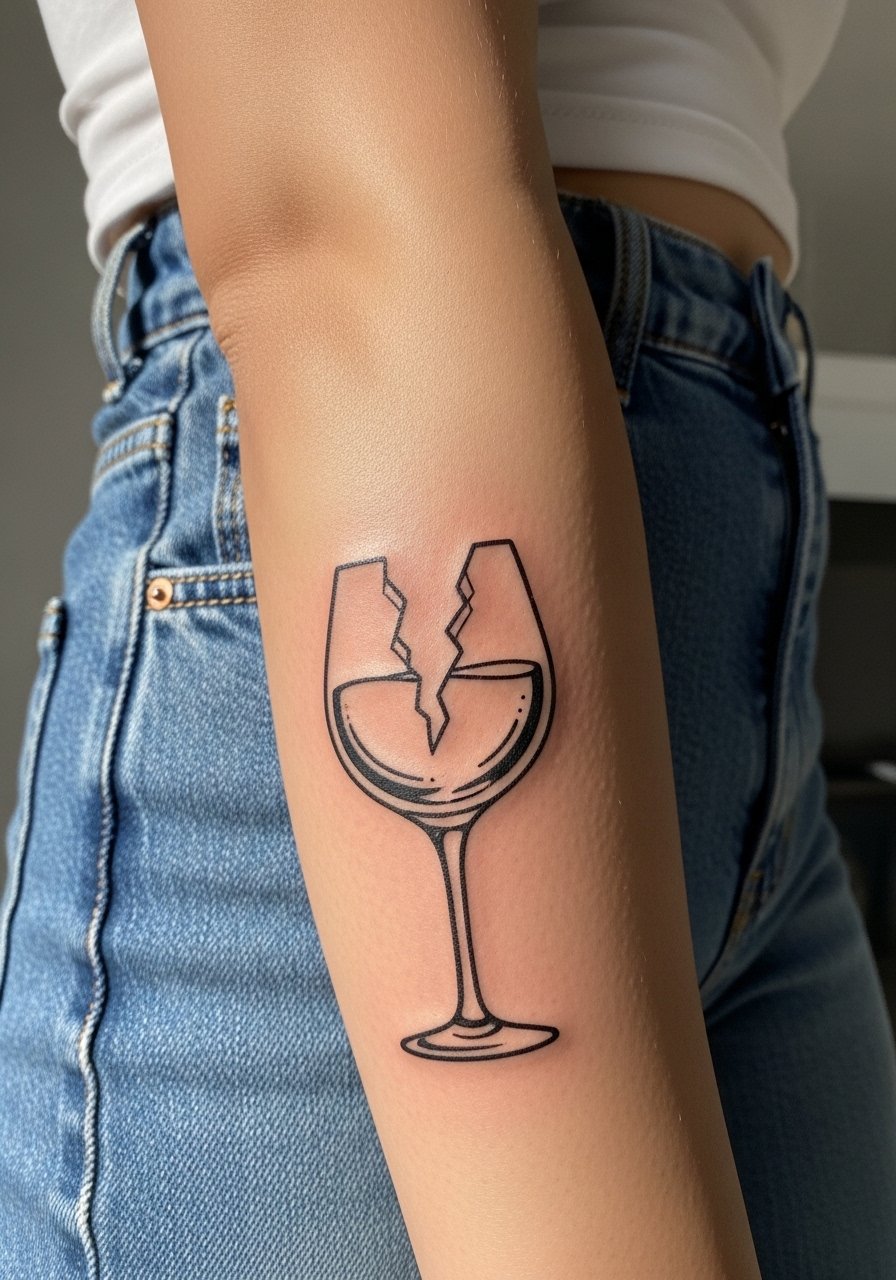
A broken edge motif gives narrative weight to a small piece, and the calf is a flat enough zone for bold line clarity. This blackwork approach ages better than very fine outlines in high-movement spots. Tell your artist you want crisp breaks in the contour and to avoid tiny crosshatching that can merge. Sessions are short and the calf is low to moderate on pain. For casual wear, cropped pants or boots help the design read without the piece being obscured.
11. Wine Glass and Grape Cluster on the Upper Arm
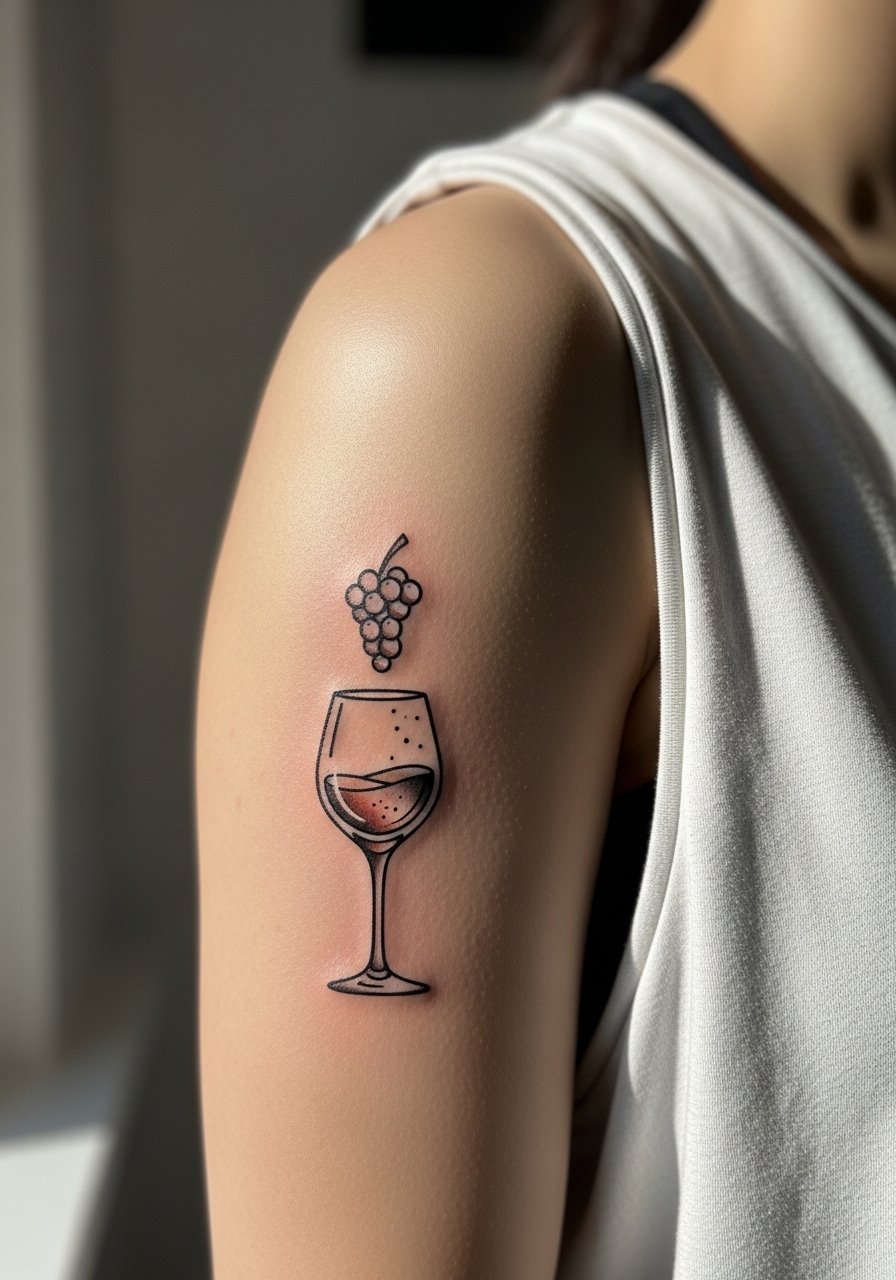
This combo solves the solo-glass simplicity by adding context that feels culinary and celebratory. Upper arm space supports a slightly larger composition that can include selective color without overpowering the tiny scale. During consultation, specify which element you want to emphasize and request color only as accent rather than full fill. The session could take 30 to 45 minutes and the pain is mild. Pair the piece with a loose muscle tank to show the cluster without covering it.
12. Inverted Wine Glass Drip on the Neck
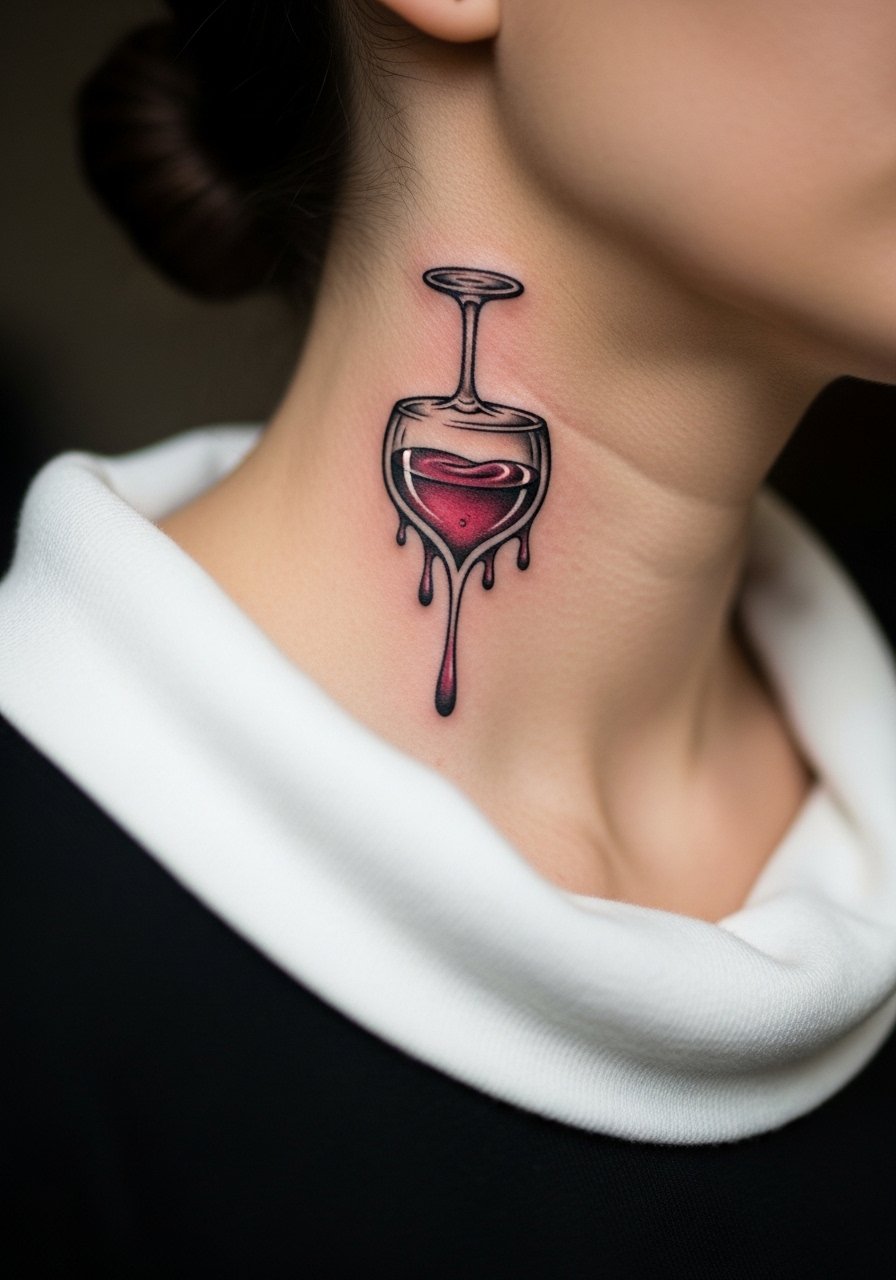
Neck placements carry visibility and a different aging profile because of constant sun and movement. The inverted drip reads as a tiny vertical statement that follows the neck line. This one asks you to balance edge and longevity, since the neck gets frequent sun exposure. Discuss sun protection and realistic touch-up needs with your artist. Sessions are quick but the neck can be sensitive. Wear a wide-neck top to the appointment so the artist can expose only the needed area.
13. Stem Detail with Initial in the Stem on the Finger
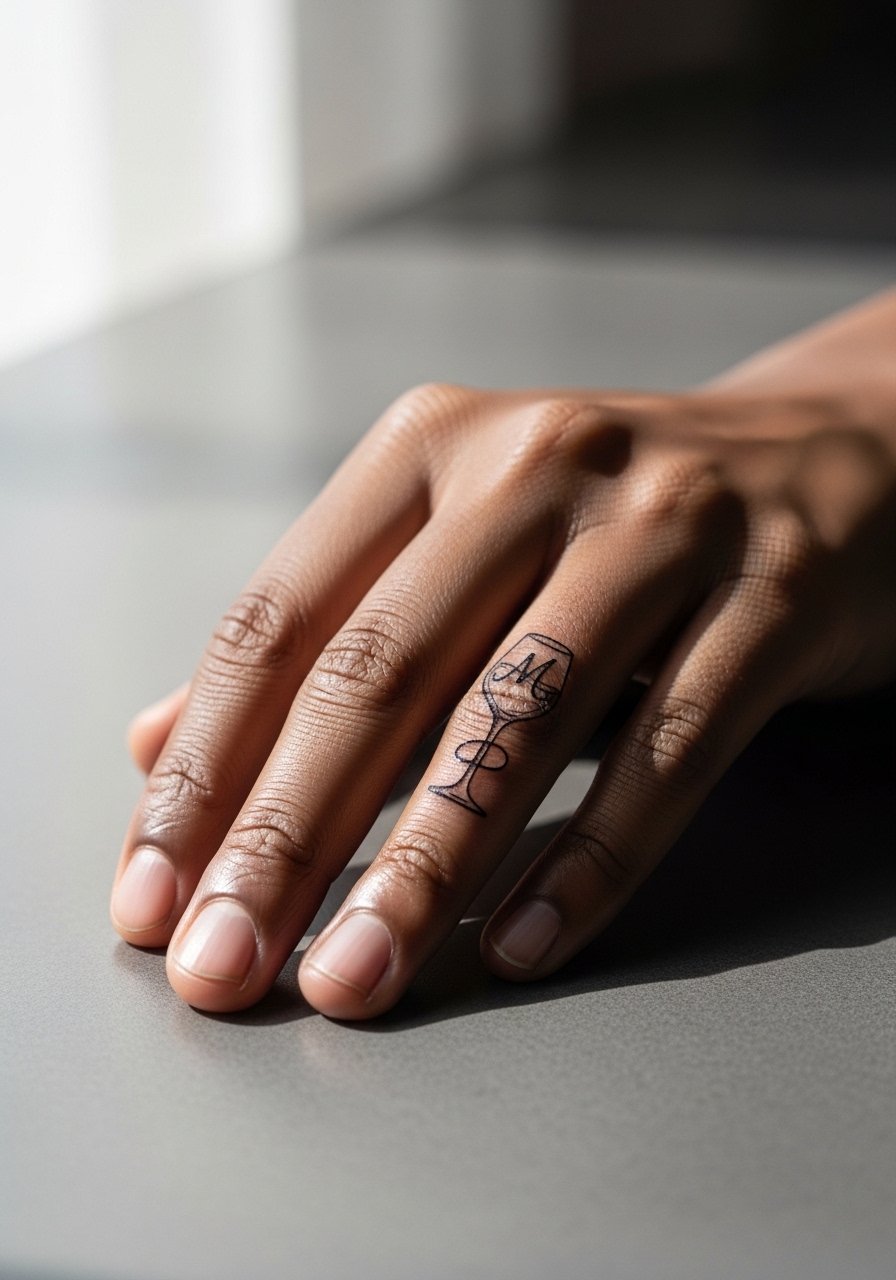
Finger tattoos function like jewelry alternatives, but they face constant use and wash friction. Personalizing the stem with an initial is a clever way to embed meaning without large scale. Ask for a slightly bolder stem and for the letter to be compact and high-contrast so it reads on darker tones. Expect a touch-up within a year more often than other spots. For session wear and showing off, a thin chain pendant necklace complements wrist and finger rings without crowding the hand visually.
14. Wine Glass Etching with Shadow on the Shoulder
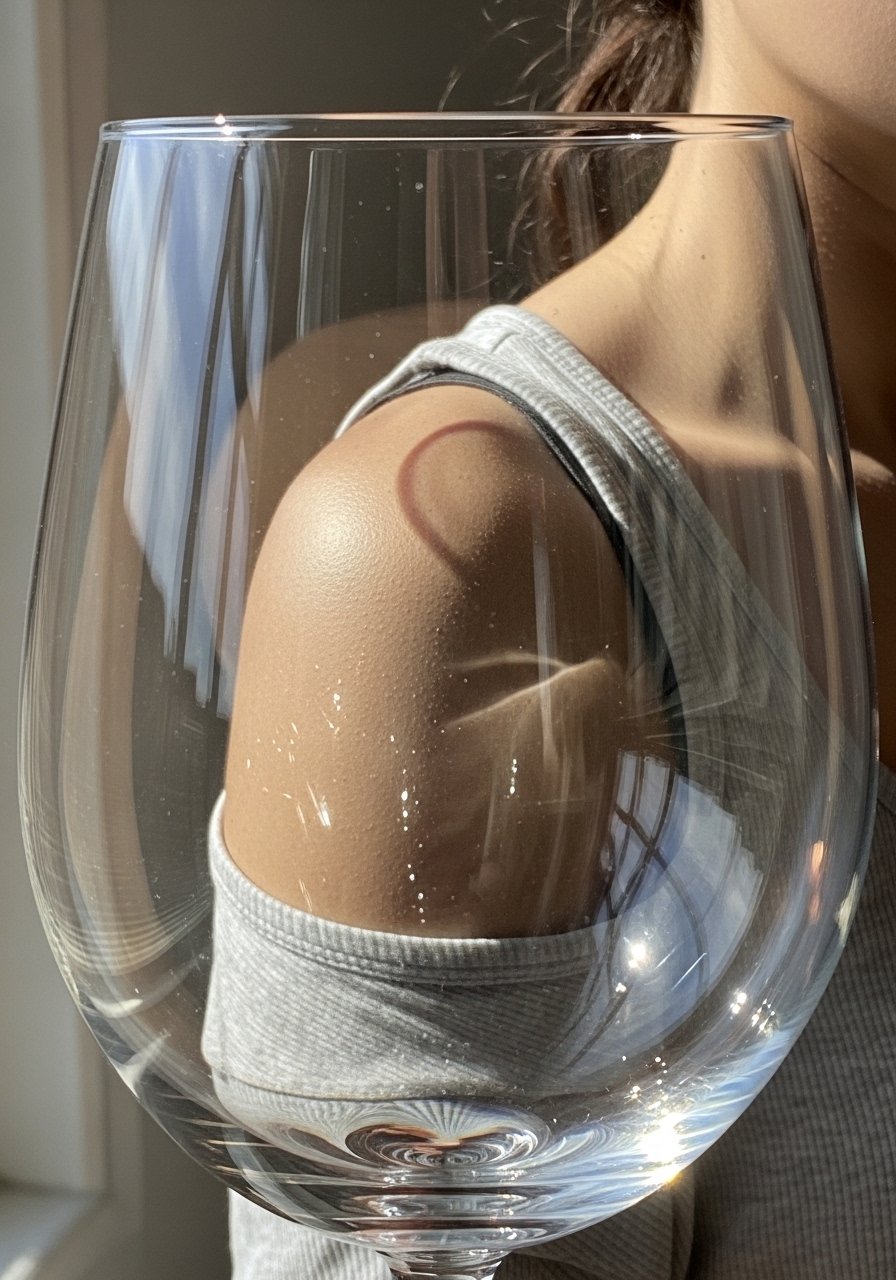
Shoulder placements tolerate small realism elements because they move less and are often covered during sleep, which helps healing. An etched base shadow gives the tiny glass dimension and avoids a flat outline. During consult, show the artist a close photo of your shoulder curvature so they can map the shadow to natural contours. Sessions are short and pain is mild. Avoid heavy black fills in tight spaces; a light wash keeps the detail readable over time.
15. Minimal Stemless Glass Behind the Ear with Hair Up
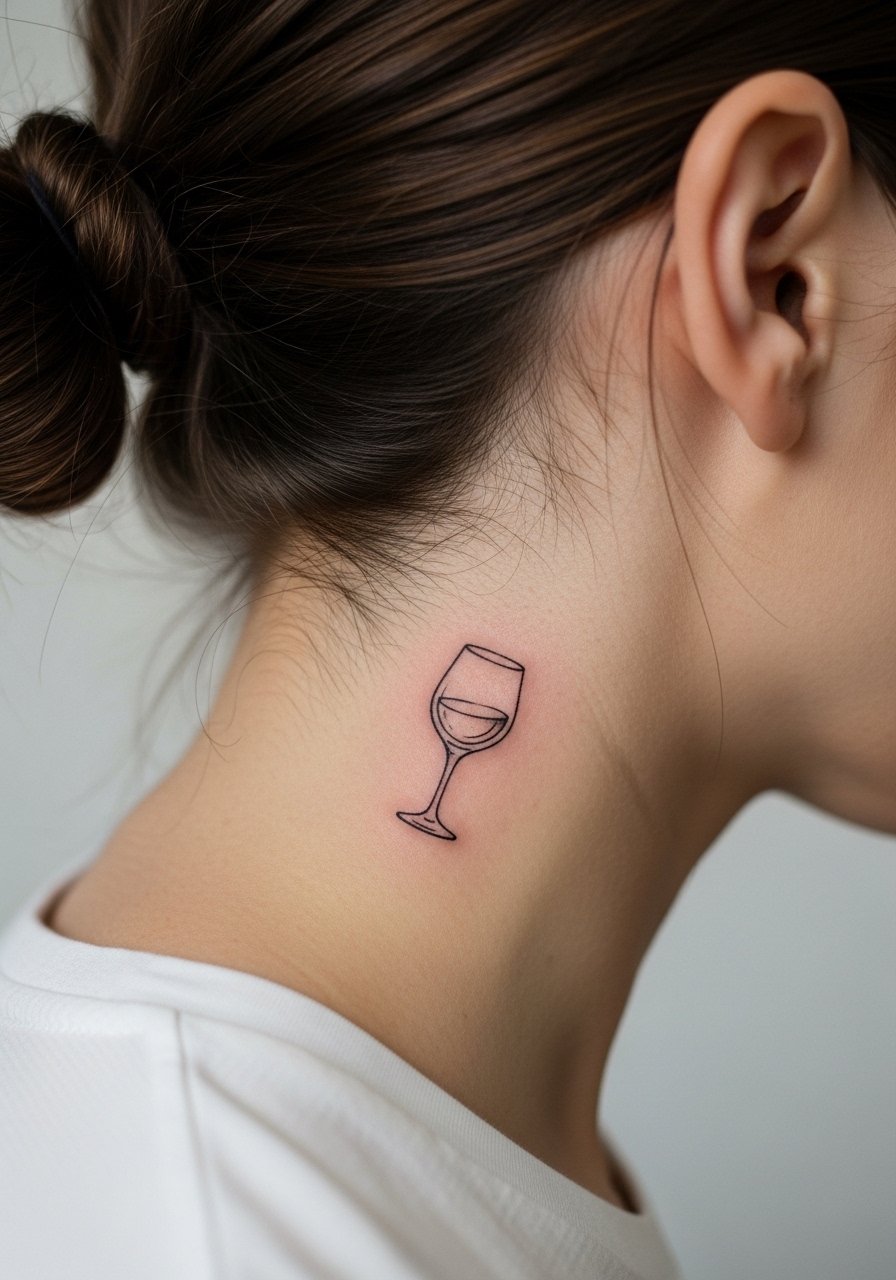
This spot works for people who like secrecy and only reveal the piece in certain hairstyles. The skin behind the ear is sensitive and curved, so ask the artist to use a slightly bolder contour than a flat reference. Pain is low but the needle has less room to settle. Try showing up with hair tied so the artist can see the exact placement. For nights out, a tucked hairstyle makes the small stemless glass peek out in photos.
16. Wine Glass with Scattered Bubbles on the Forearm Stack
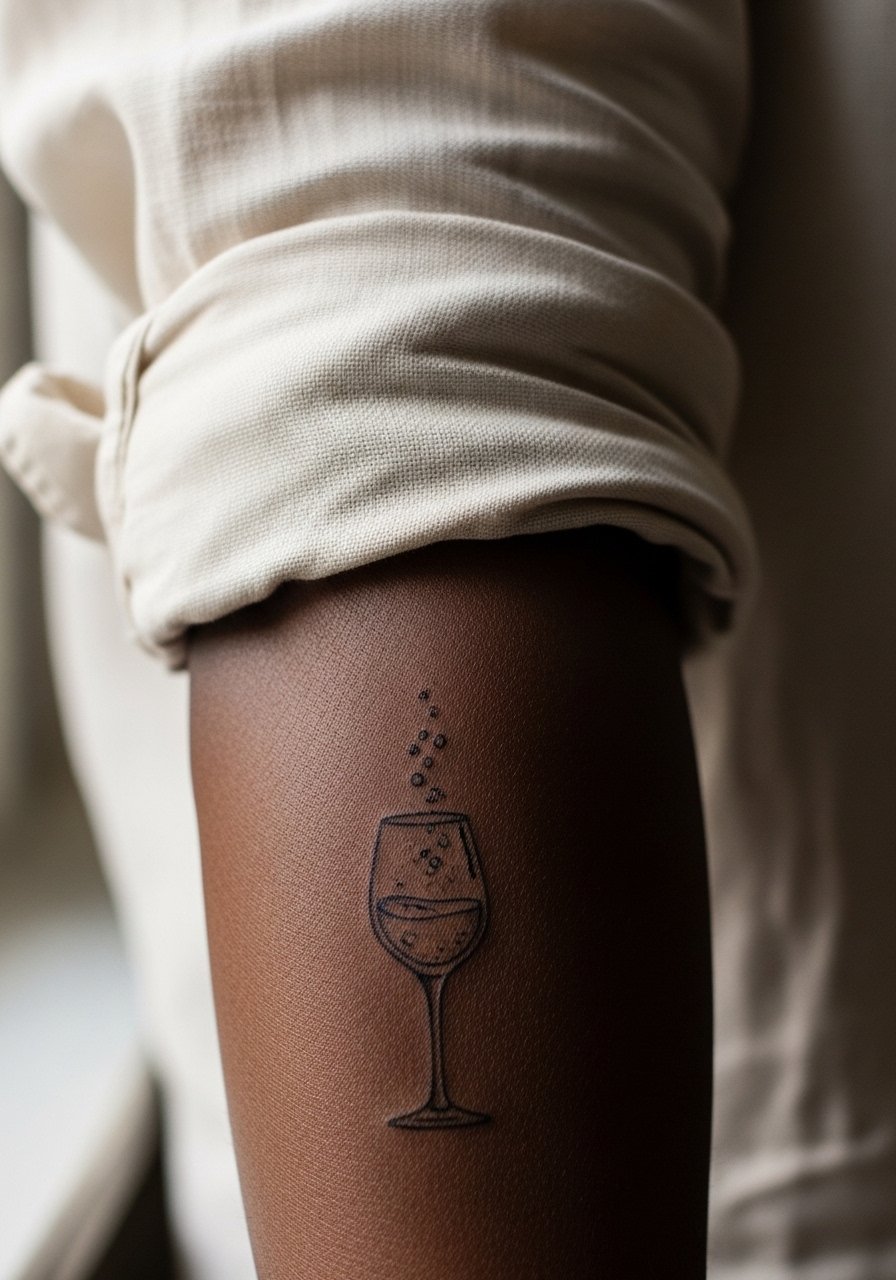
If you like tiny stacks, a single glass with rising bubbles plays well with rings, small florals, or tiny script. The outer forearm holds up better than the inner wrist for pieces that will be seen often. Ask the artist to map the bubbles to avoid high-flex zones and to recommend spacing that allows future additions. Session time is short and pain is moderate. Style it with a cream cable knit sweater with sleeves pushed up so the whole stack reads as a composed set.
17. Finger Ring Wine Glass as an Alternative to Jewelry
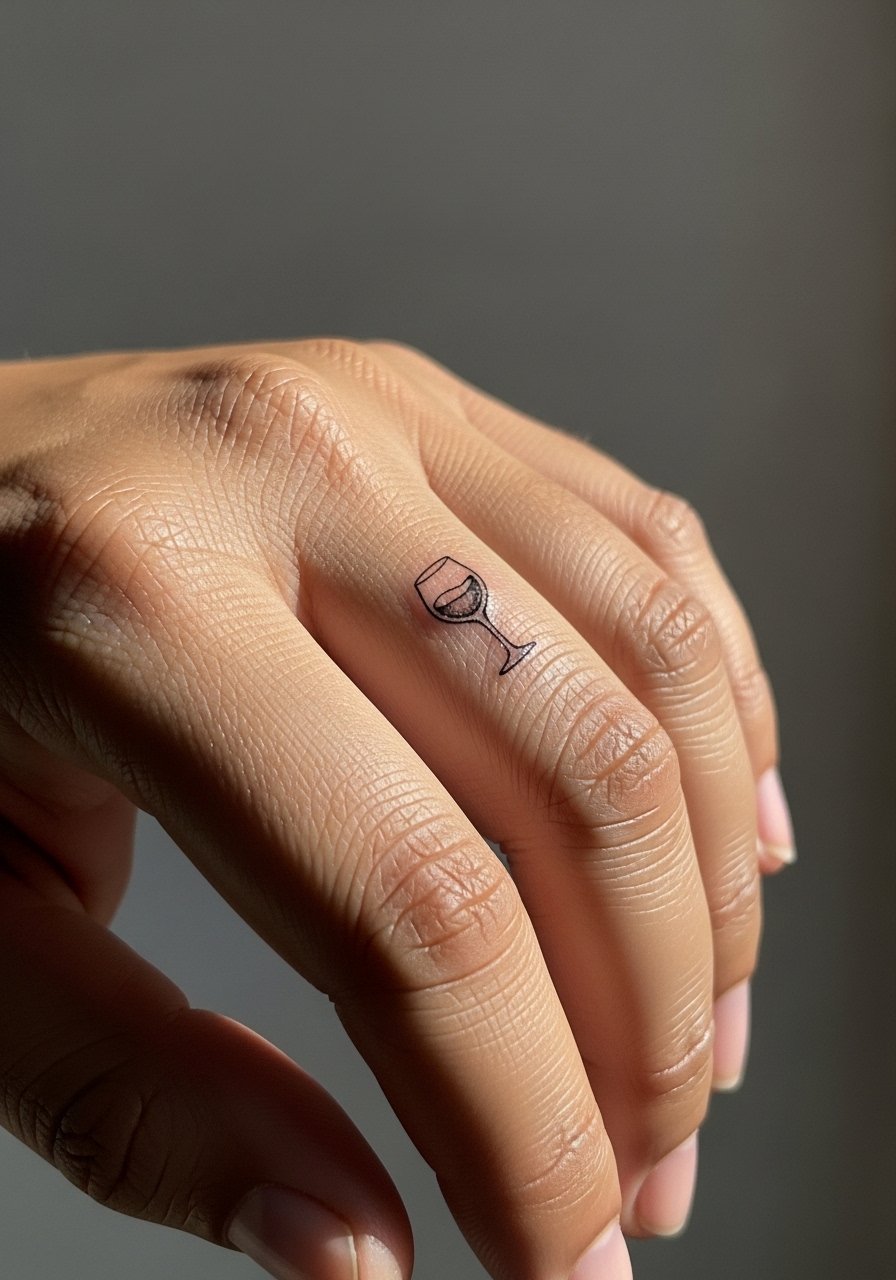
Finger ring tattoos mimic jewelry and make the wine glass feel permanent without metal. These are high-touch areas, so expect faster fading and more frequent touch-ups. Tell your artist you prefer a slightly thicker outline and avoid interior shading that will blur. Sessions are very short but the skin is thin and sensitive. A common regret is placing complex detail where it cannot be maintained. For an accessory pairing, keep metal rings minimalist so the ink has visual breathing room.
18. Rib-Adjacent Tiny Wine Glass with Micro-Shading
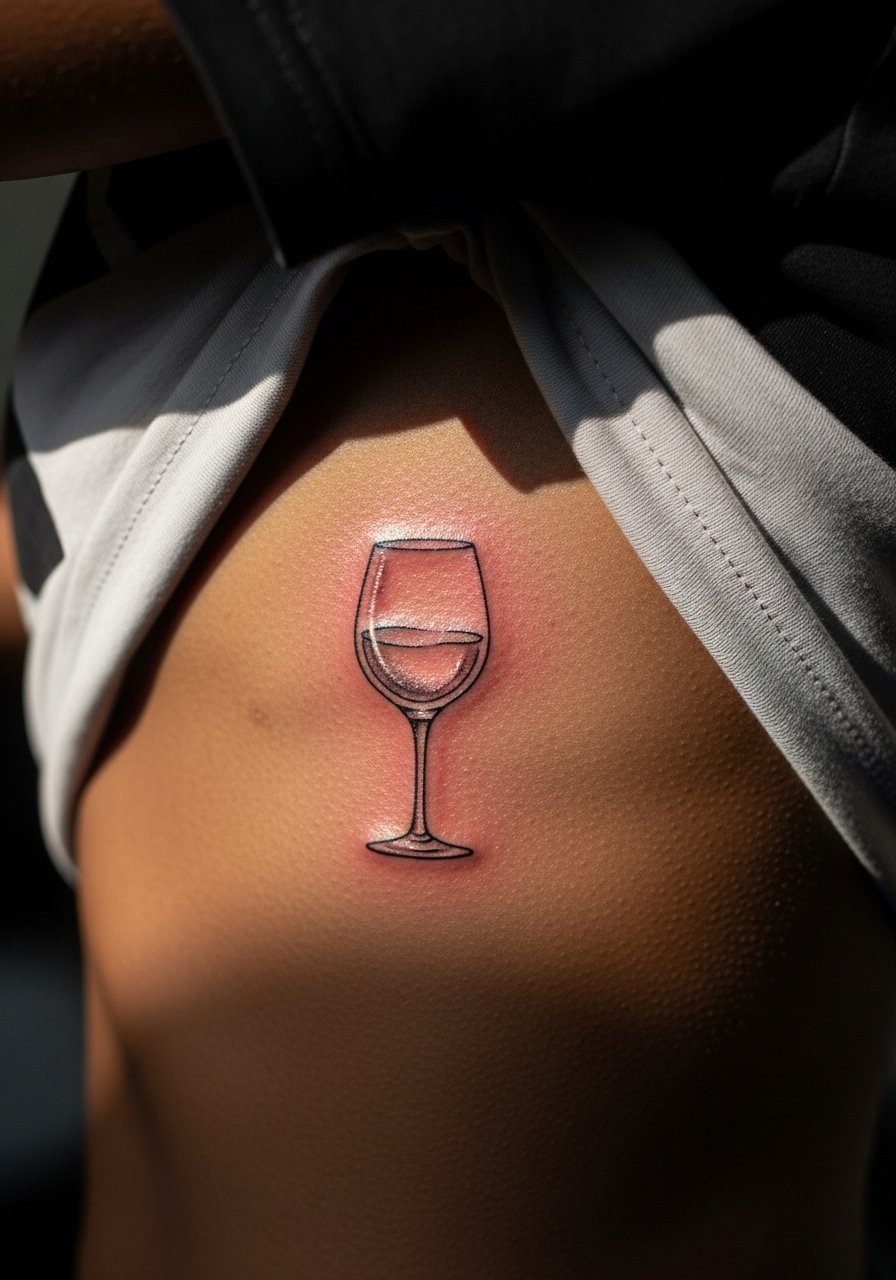
Close to the ribs but not exactly on the most curved spot, this version uses micro-shading to boost visibility on deeper skin tones. That micro-shade acts as a base that helps the outline show in photos and everyday light. Artists debate micro-shading around ribs because of stretching and scabbing. One side says any shade traps moisture and blurs lines. The other side says a light, even base improves contrast on darker skin. If you choose the shaded option, plan for a touch-up at six to twelve months. Wear a cropped t-shirt to the studio so the artist can access only the needed strip.
19. Tiny Stipple Wine Glass on the Lower Back
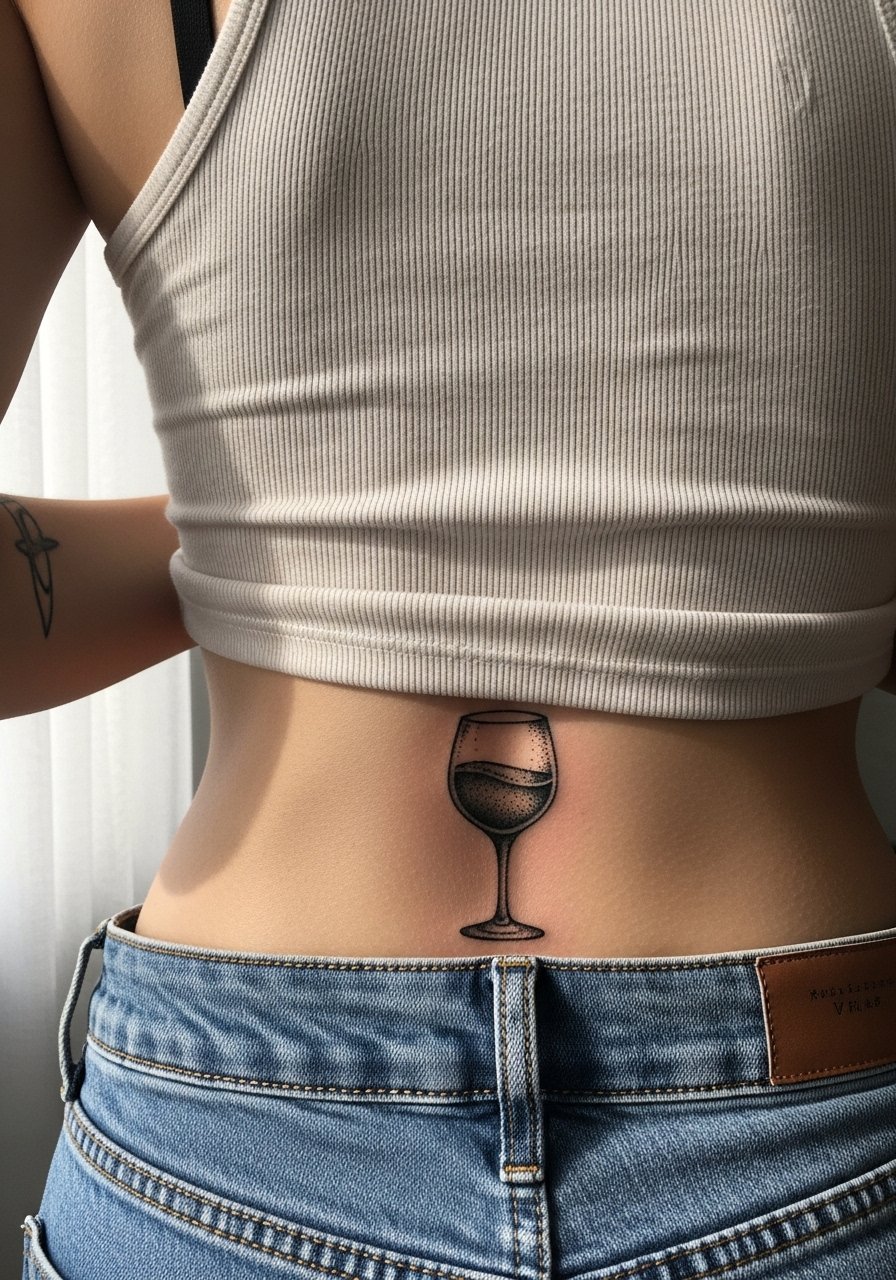
Lower back is a discreet zone that takes well to stipple shading, and the dot work adds texture without dense lines. This placement heals well when covered during the first week, and it tolerates occasional sun exposure if you protect it later. Ask for wider dot spacing to avoid merging, and plan for a single short session. For nights out, a backless halter top frames the piece without making it the entire outfit.
20. Tiny Wine Glass with Heart-Shaped Stem Personalization on the Collarbone
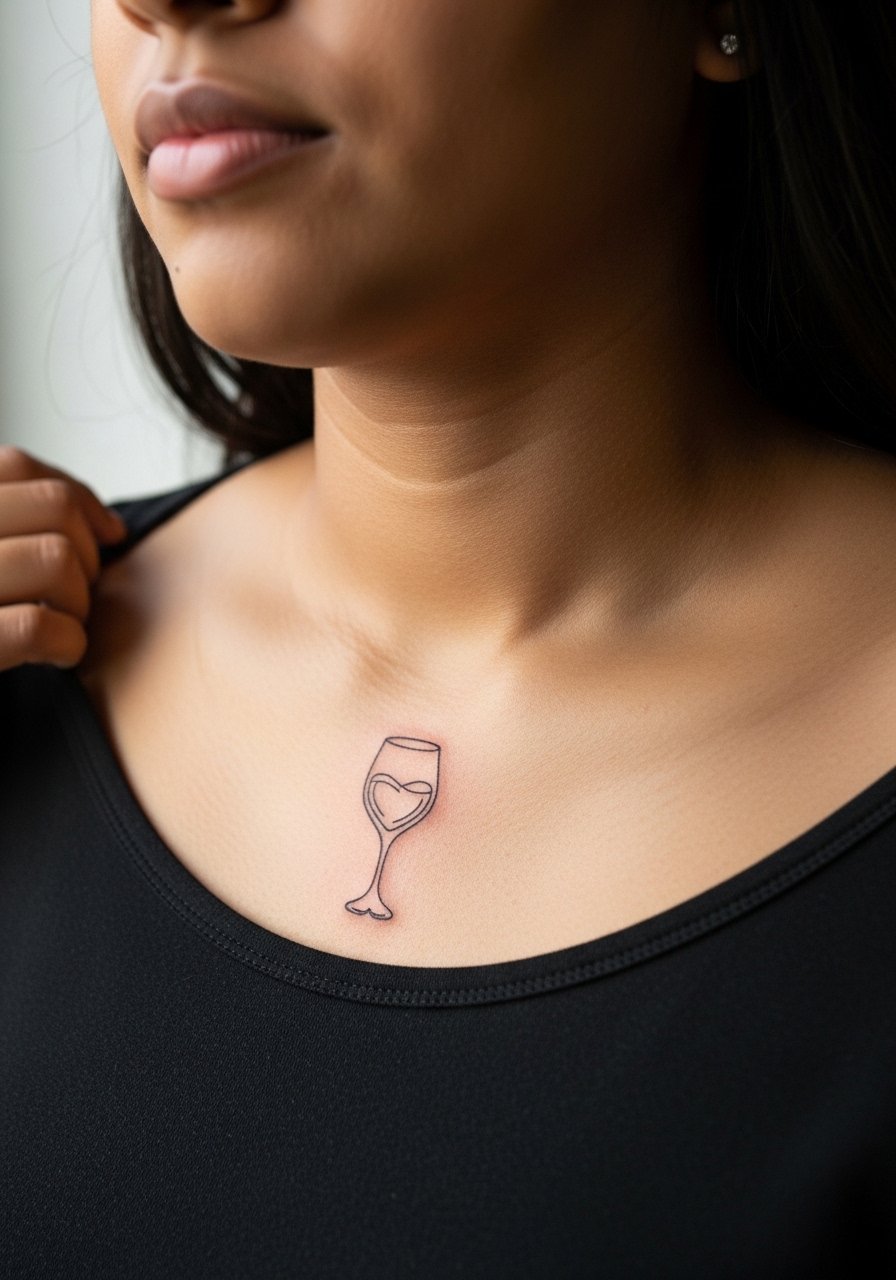
Personalizing the stem into a small heart or initial is a way to make a tiny piece feel specific without complicating the silhouette. Collarbone placement offers visibility but also movement from clothing. During consultation, bring the exact shape you want in reference and ask the artist to scale it to one and a half inches so details do not compress. Sessions are short and the pain is moderate. Pair with a layered delicate necklace that stops short of the tattoo so both elements coexist.
21. Tiny Wine Glass Flash on the Inner Forearm as a First Tattoo
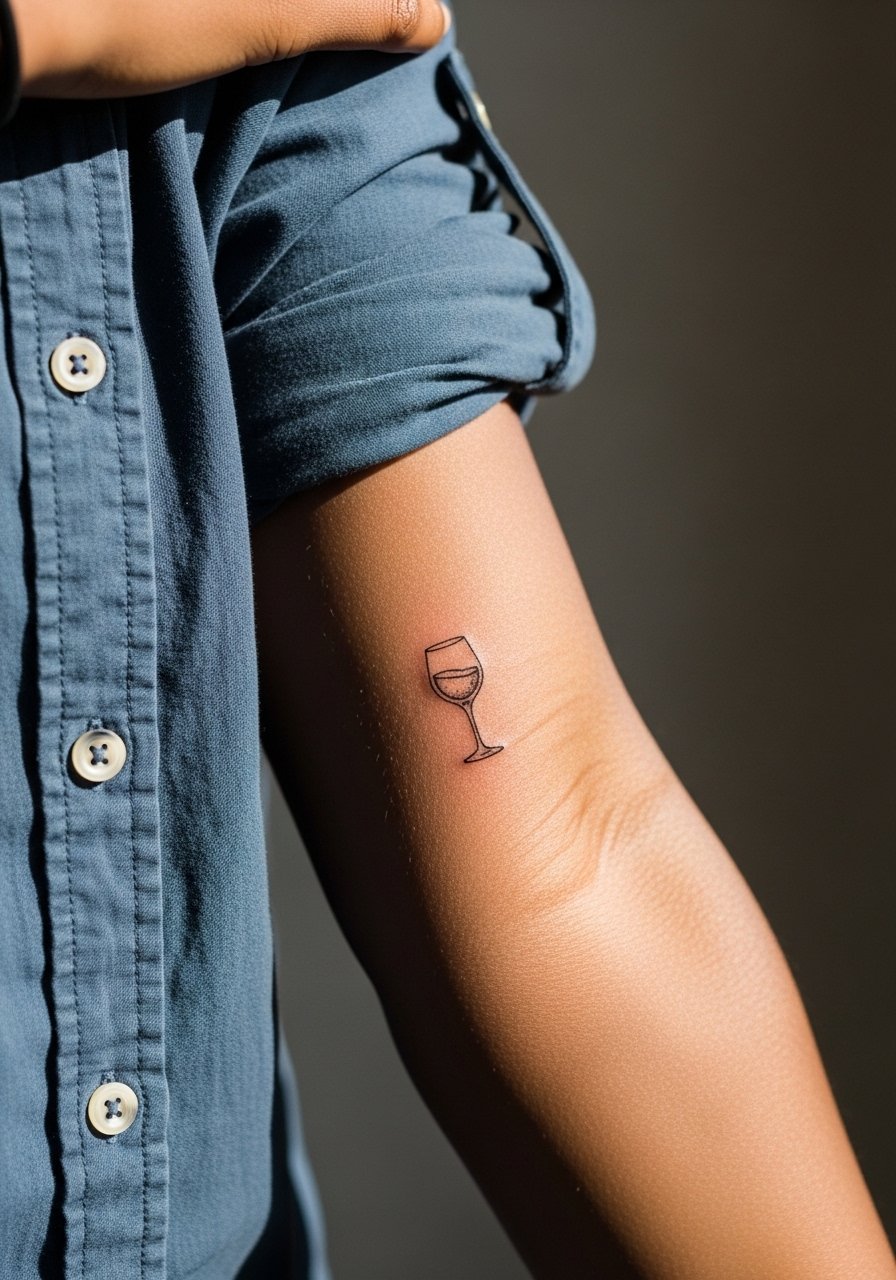
The inner forearm is an excellent tester zone for first-timers because it is relatively flat and heals predictably. If you are nervous about commitment, a small flash piece lets you evaluate how fine line holds on your skin. Tell the artist you want to see a temporary version before the appointment if you are unsure of size. Pain is typically low to moderate and the session is brief. A common error is choosing the tiniest possible scale, which limits future detail. For session comfort, wear a loose button-down shirt you can easily roll up.
Frequently Asked Questions
Q: Will a fine line wrist wine glass look like a smudge after six months?
A: From what I have seen, the wrist is one of the first places where the thinnest lines soften. Expect some softening at six months unless the line weight was slightly heavier to begin with. If longevity matters, ask for modest initial saturation and plan a touch-up between six and twelve months.
Q: How should I test a collarbone or forearm placement before committing?
A: Try a temporary transfer of the exact size and position you want and wear it for a few days while doing normal activities. That lets you see how the angle works with clothing and movement. Temporary testing is especially useful for dotted or tilted designs.
Q: Does dark skin make tiny wine glass tattoos invisible and how can that be avoided?
A: On darker tones, the trick is contrast rather than thinner lines. A small amount of micro-shading or slightly bolder contour keeps the design visible in photos and in person. Ask to see your artist's portfolio on similar skin tones before booking.
Q: Should I use Saniderm or dry healing for a tiny wrist piece?
A: Artists split into two camps on this. Some swear that protective film preserves crisp fine line work. Others say trapping moisture can cause soft scabs that blur tiny details. I suggest discussing your artist's preferred protocol and following their step-by-step for that studio. If you are unsure, plan a short follow-up to check the healing early.
Q: Are tiny wine glass tattoos overpriced when artists charge the same flat minimum?
A: Pricing for tiny pieces reflects clinic minimums, studio costs, and the artist's expertise, not just needle time. If cost is a concern, look for guest spots, convention walk-in rates, or apprentices for micro work. Booking with a deposit helps secure a spot without last-minute cancellations.
Q: Will numbing cream affect how an artist tattoos a tiny design?
A: Numbing cream calms pain for sensitive spots like the wrist or ribcage and does not typically harm linework when used as directed. Some artists prefer clients skip it to feel ink depth differences. Ask the studio if they allow topical numbing and how to apply it safely before the session.
