
Fine line swallows are everywhere online, but trends and reality do not always match. The designs that look crisp on a phone screen sometimes need careful placement, needle depth, and realistic touch-up plans to stay readable for years. Read through these 21 swallow tattoo directions and you will get practical notes on where each style thrives, what to ask your artist in consultation, and simple wardrobe moves to show them off after they heal.
1. Fine Line Flying Swallow on the Inner Wrist
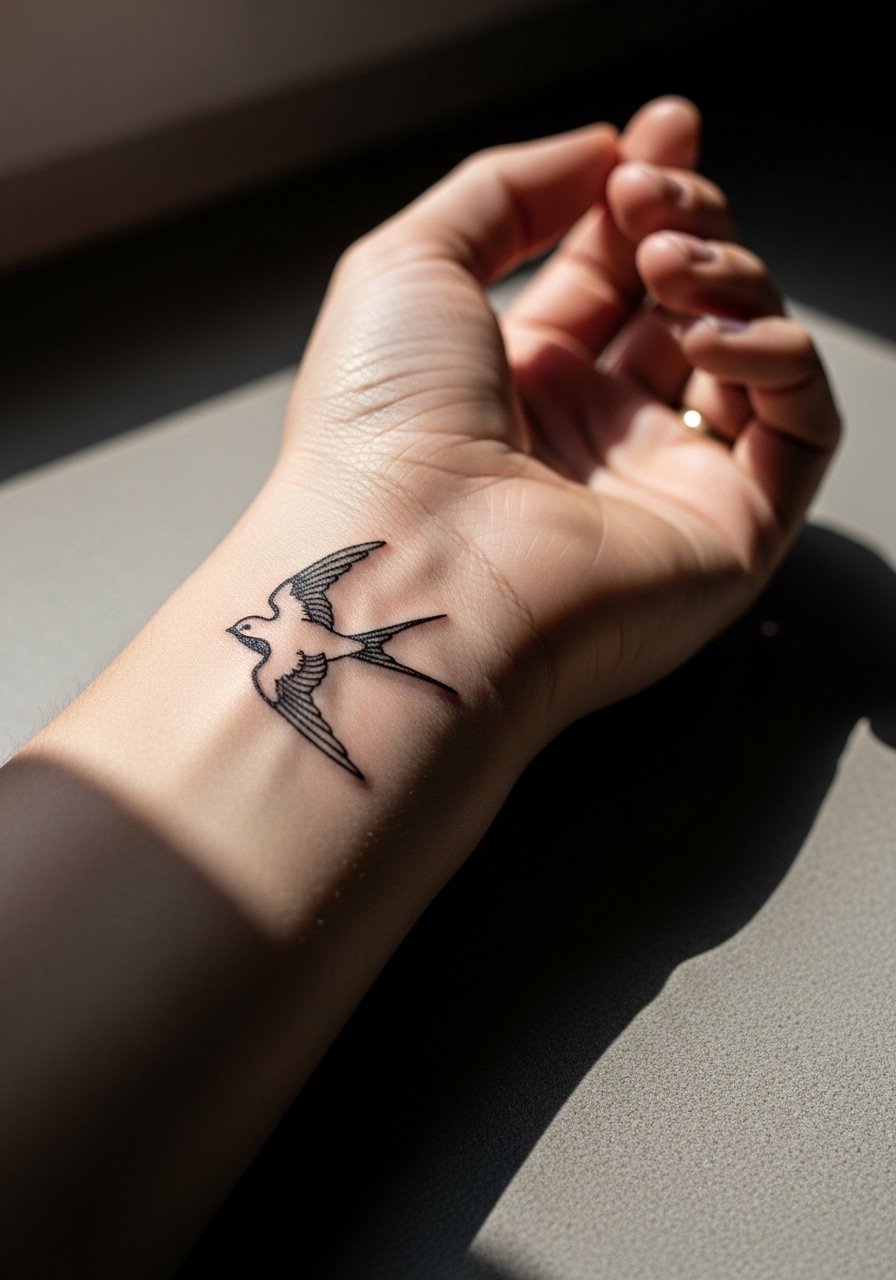
I've seen this classic wrist placement hold up for people who book a touch-up at year two. Expect a short session under 45 minutes and a low to medium pain level. Tell your artist you want slightly bolder anchor points where the wings meet the body so the outline keeps shape as the lines soften. A common mistake is asking for needle-gossamer lines that vanish after sun exposure and wrist friction. For the appointment wear a loose long-sleeve you can push up. To show it off, stack thin bracelets carefully so they sit on the opposite wrist and do not rub the fresh work, for example a thin silver chain bracelet complements the negative space.
2. Traditional American Swallow with Banner on the Forearm
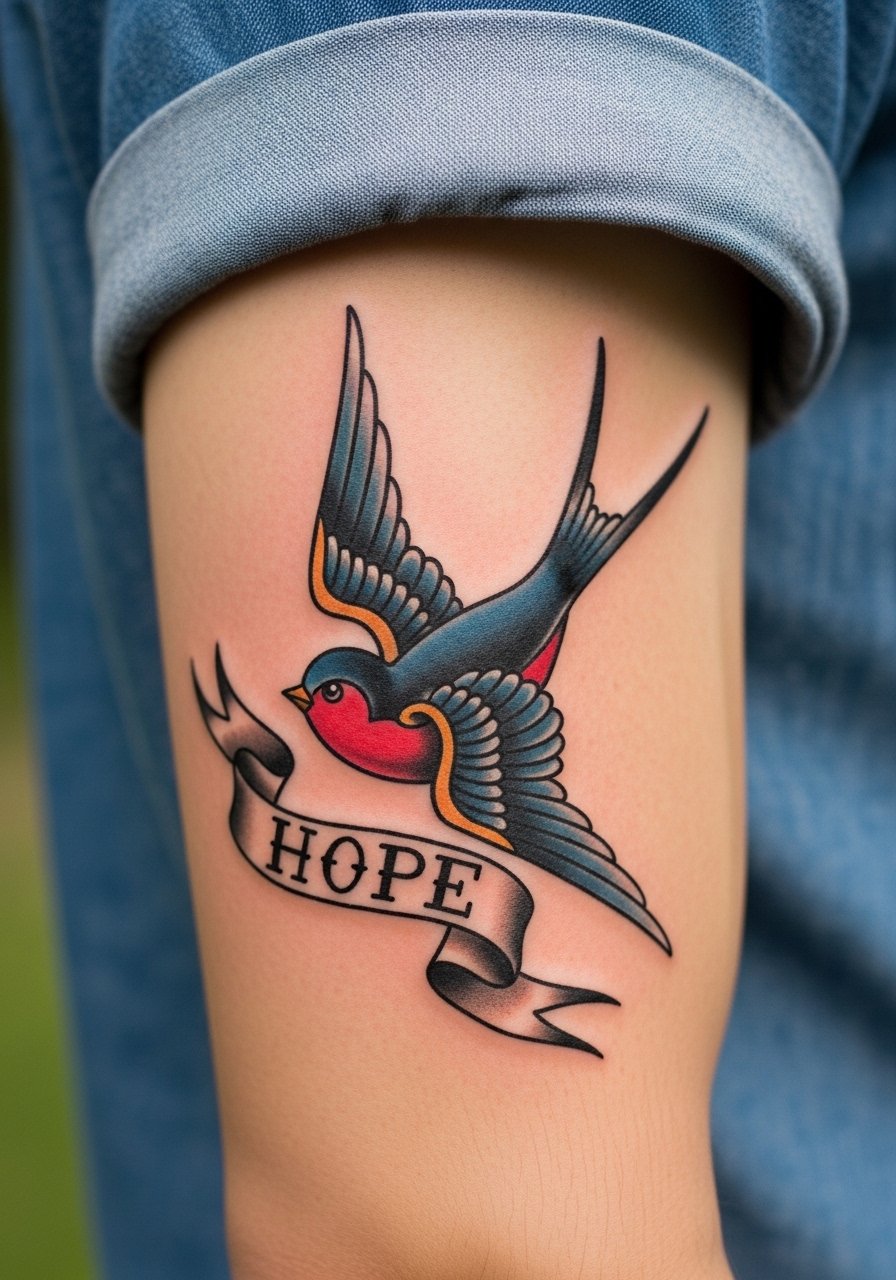
There is something about saturated color and bold linework that reads across a crowd. Forearm placement is medium pain and usually one session for a 3 to 5 inch piece. When you consult, bring banner text that fits the banner curve and ask for classic sailor flash proportions so the color remains legible as it ages. The biggest mistake is shrinking the banner too small, which makes lettering blur over time. For session day wear a rolled sleeve button up so the artist has full access without fabric rubbing the area afterward. Pair with a leather cuff bracelet on the opposite arm to balance the nautical look.
3. Neo-Traditional Swallow with Rose on the Shoulder
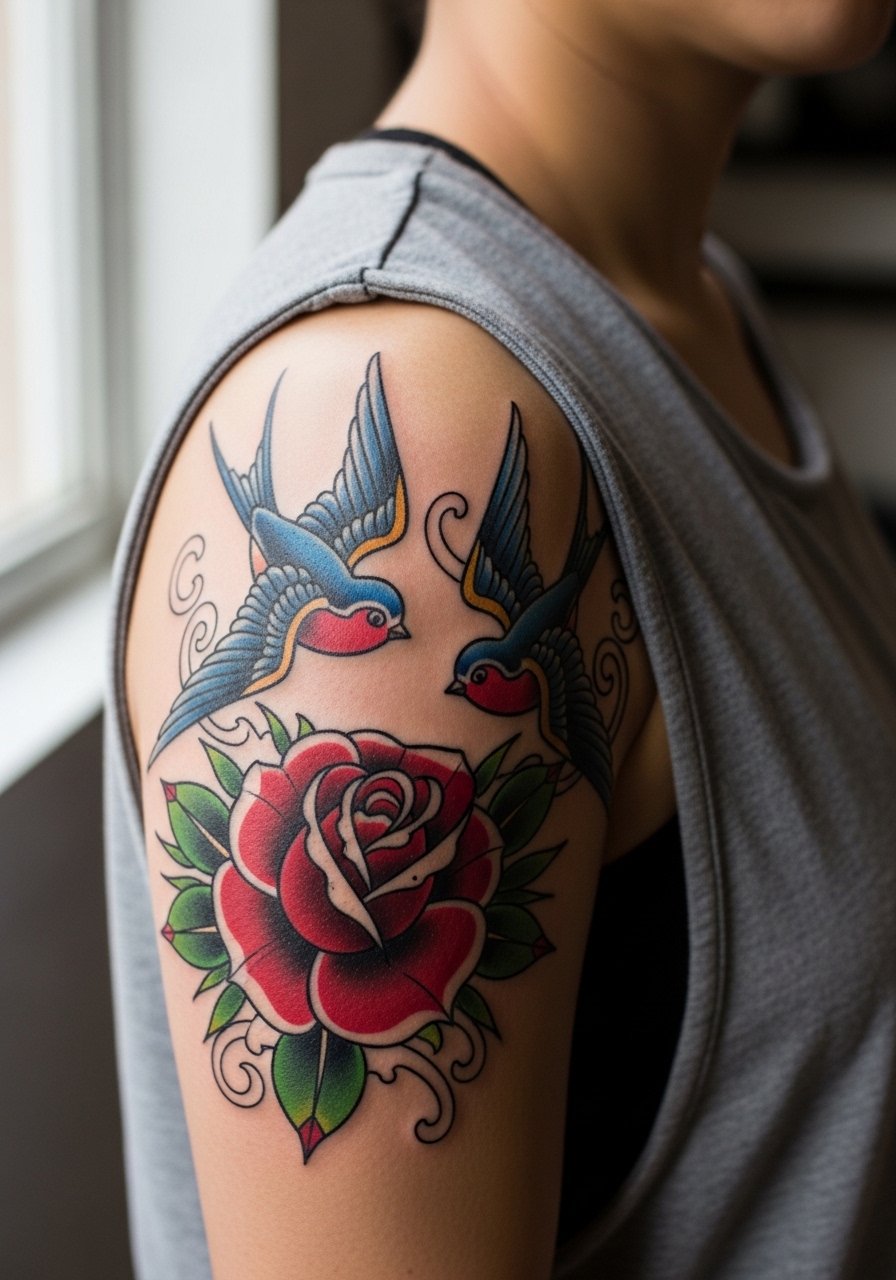
This shoulder piece benefits from strong outlines and a color palette that keeps saturation in the red and blues. Shoulder sessions are low to medium pain and usually one to two sessions depending on size. Ask your artist to plan color blocks with breathing room between shaded areas to avoid color muddle over time. A common version that ages poorly packs too many tiny details into a small shoulder cap. For the session wear a sleeveless muscle tank so the artist can access the shoulder without tugging. For evenings, off-shoulder tops frame the rose and swallow and keep attention on the colors.
4. Watercolor Swallow in Flight on the Ribcage
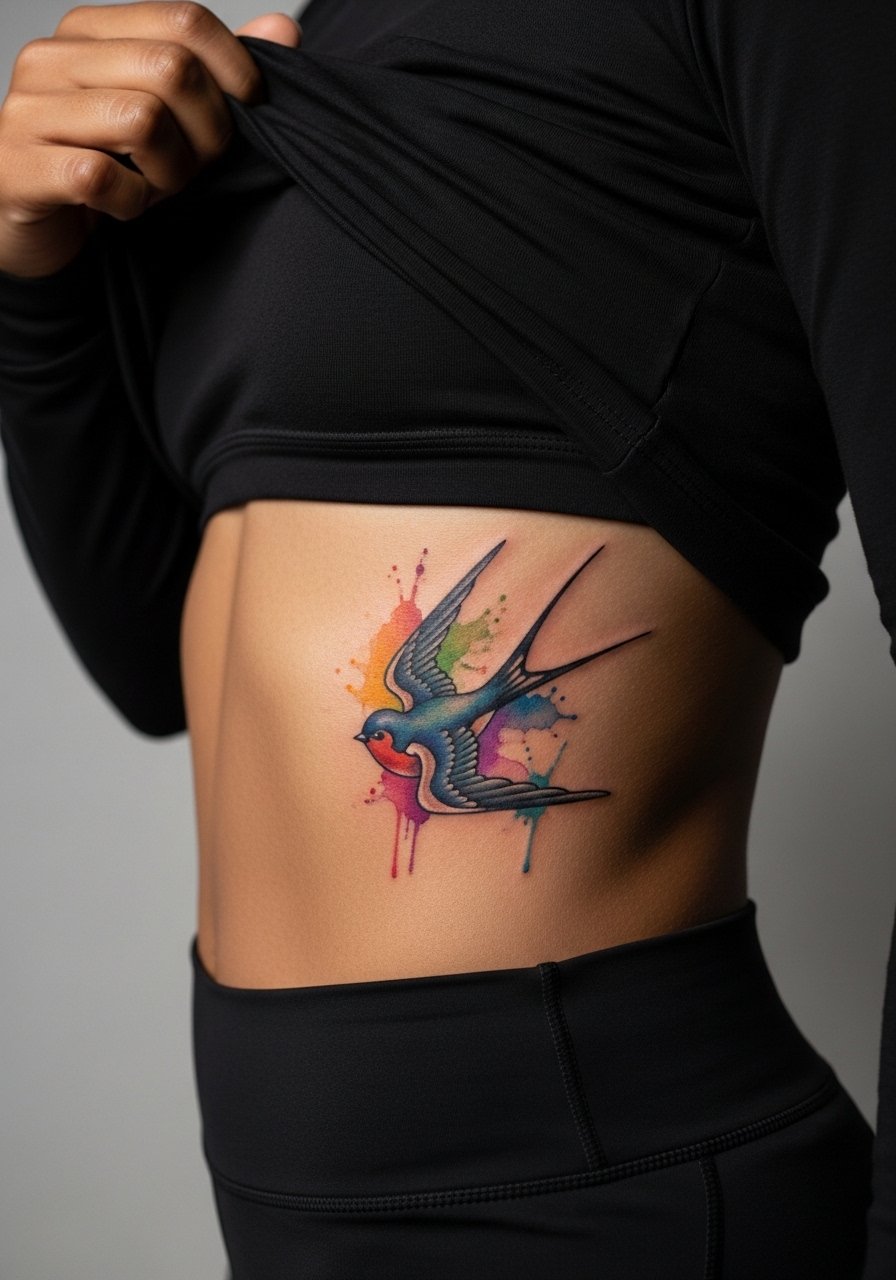
Fair warning: ribs are one of the higher pain placements and watercolor washes there demand careful saturation planning. Artists split on fine detail on ribs. One camp says the skin stretch and curvature blur thin lines fast. The other camp argues that with the right needle depth and spacing, washes can remain readable. When you bring a watercolor reference, ask how they handle pigment layering on curved skin and whether they recommend a follow-up to reinforce lighter washes. The typical mistake is asking for tiny, painterly strokes without accounting for movement in that area. For this placement skip tight garments for a week and expect a slower healing window.
5. Minimalist Single Line Swallow Behind the Ear
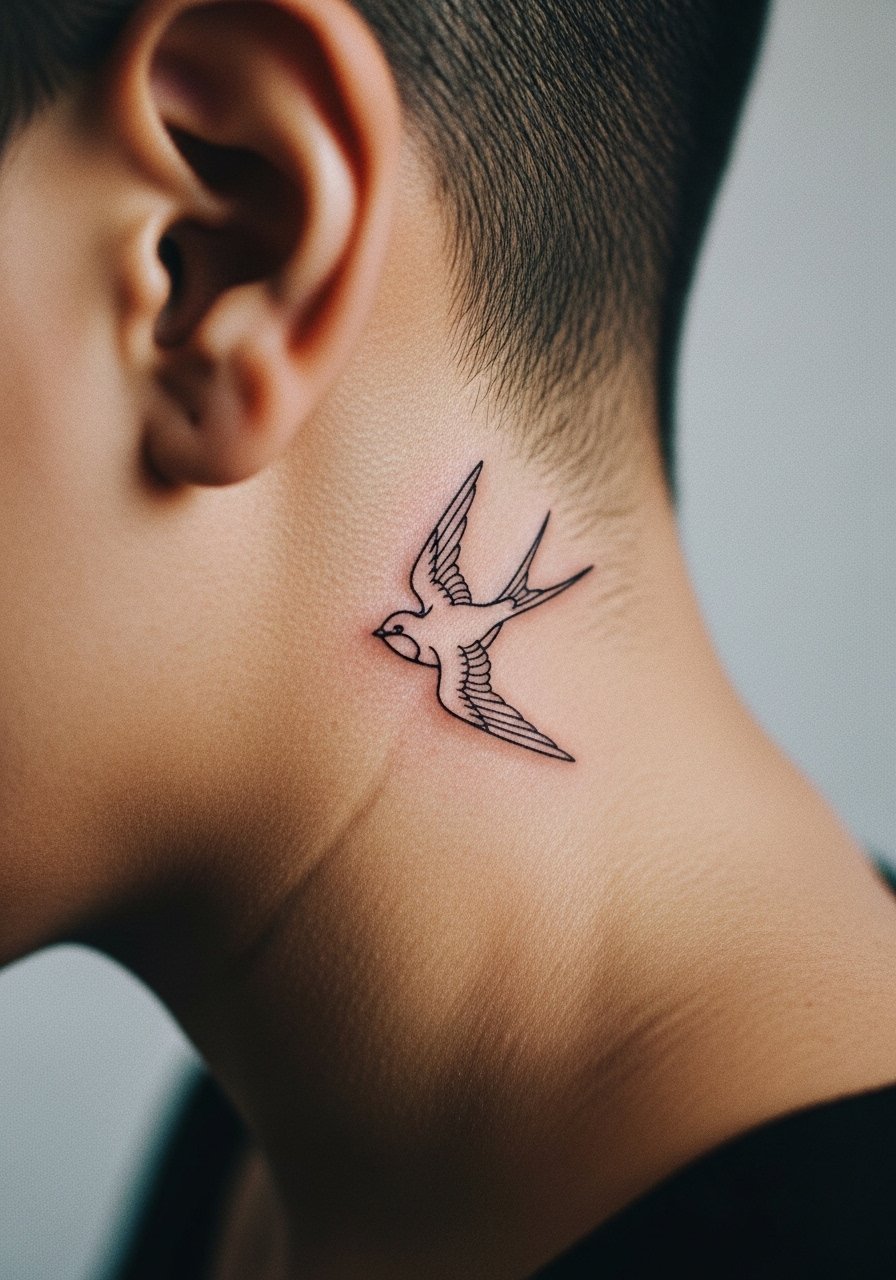
Behind-the-ear tattoos are small, discreet, and quick to do, usually under 30 minutes, but the skin there demands a confident needle. The mistake people make is asking for a micro single-line flourish with no weight variation, which disappears faster than a tiny thicker anchor. The touch-up timeline for single-line pieces is often around year two depending on sun and shampoo routines. For professional considerations know that hair can cover this area or reveal it depending on hairstyle choice. Mention in consultation you want definitive start and end points so the single-stroke reads like intentional design and not an accidental smudge.
6. Micro-Realism Swallow Portrait Behind the Finger
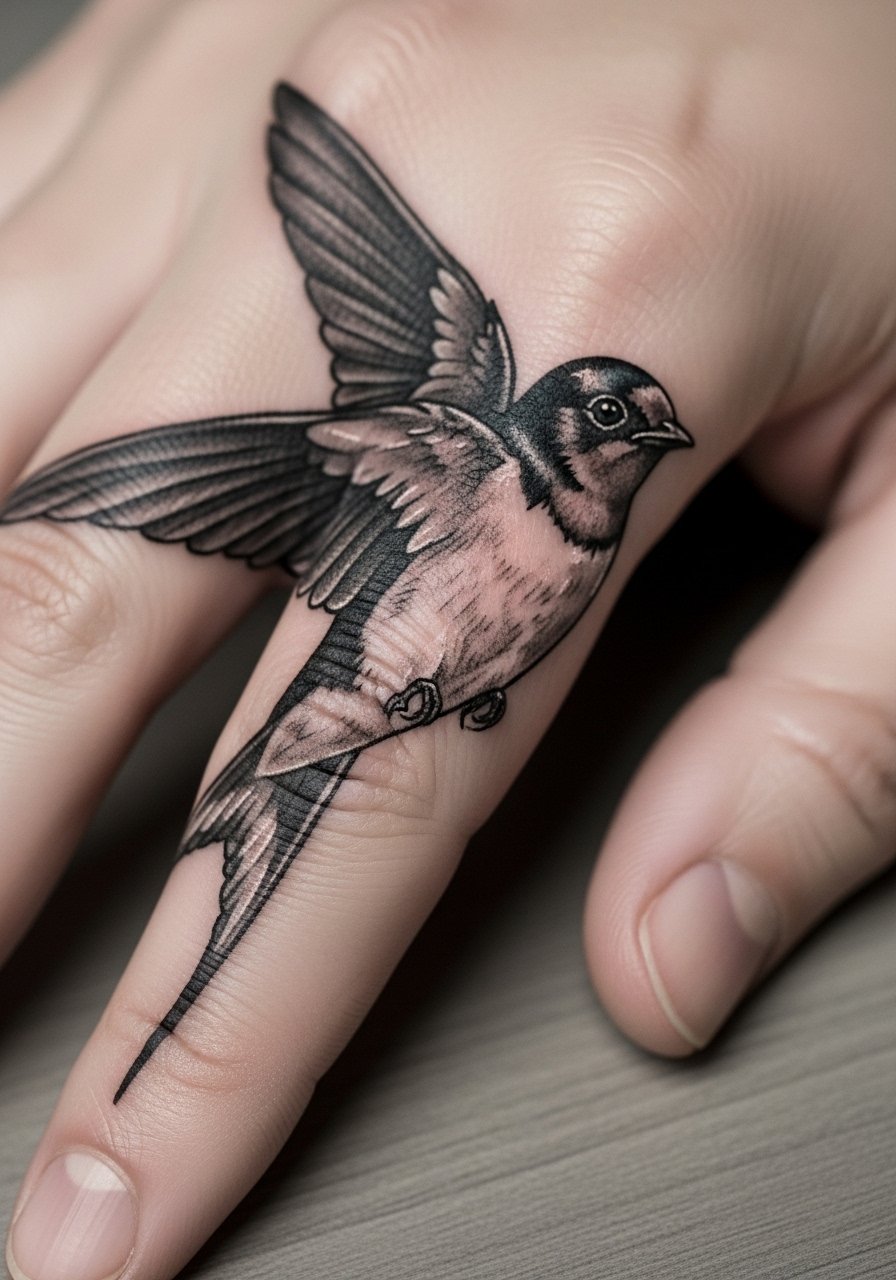
Finger work feels fast while you sit, but it is high friction and often needs touch-ups. Micro-realism shines in tiny portrait feathers when the artist uses subtle stipple shading instead of continuous gray wash. Expect a short session for a single small finger piece but plan for touch-ups at year one and then again as needed. The common error is asking for photorealistic shading without accepting that fingers lose pigment faster. For the session avoid rings on that finger. Hand and finger tattoos can affect some job options, so consider placement and visibility before booking.
7. Ornamental Swallow with Mandala Wings on the Calf
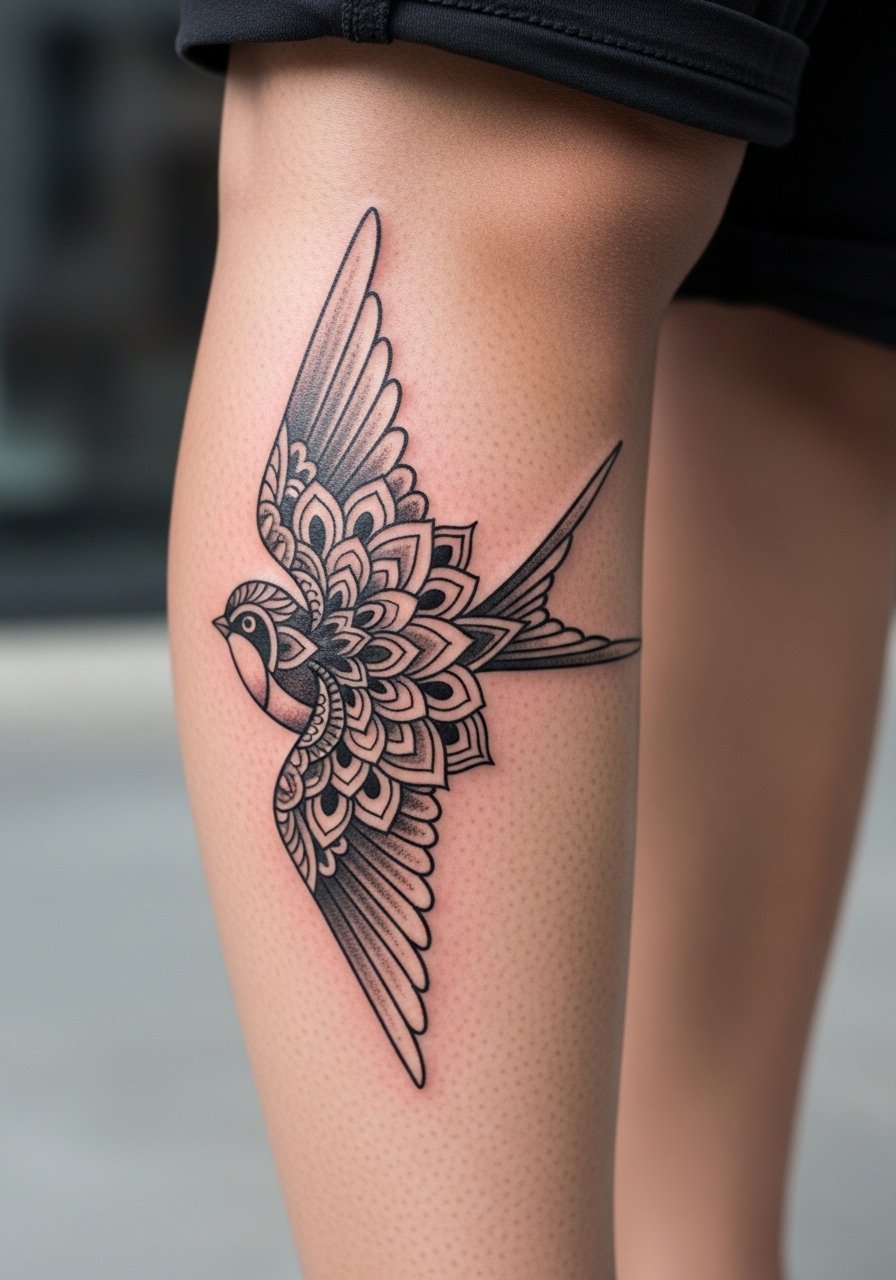
Calf tattoos handle larger blackwork patterns well because the canvas is generous. Sessions run one to two sittings depending on complexity and the pain level is usually moderate. Tell your artist you want clear spacing between mandala rings to prevent the dot work from merging as it heals. A common mistake is packing too many tiny dots into tight rings, which leads to softening over five years. For showing off, high socks with a slit or cropped pants make the mandala pop. Think about future calf sleeves so the ornamental piece can tie into larger migration scenes if you want a narrative sleeve later.
8. Blackwork Geometric Swallow for Upper Arm Sleeves
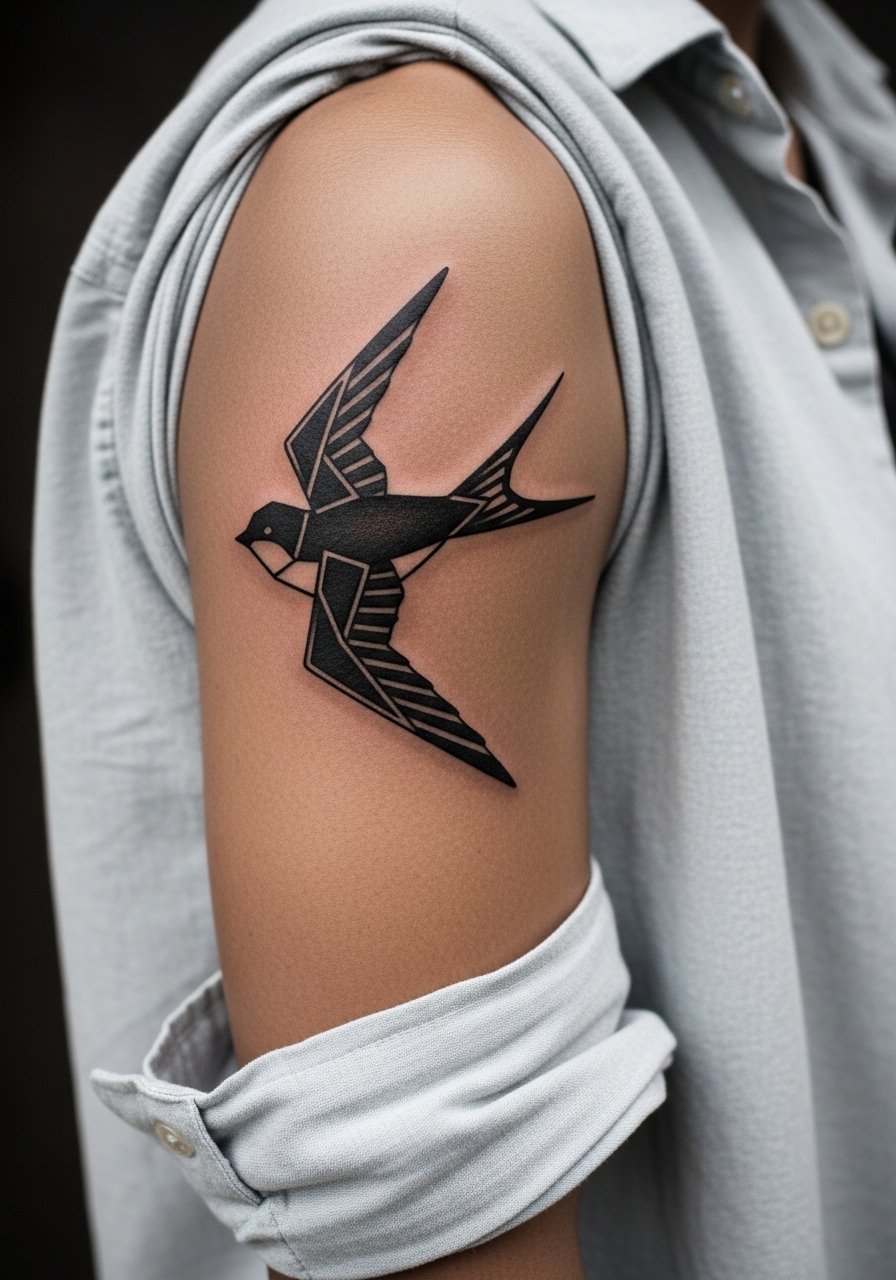
Upper arm blackwork is forgiving and ages into a bold silhouette. For sleeve work expect multi-session planning and a higher saturation strategy to avoid patchy fill. In consultation, request clear negative-space paths so the swallow remains distinct in a sleeve composition. The mistake is starting with dense black fields next to thin geometry which can create uneven aging. For the session wear a loose button-down shirt you can roll up and keep clean. Blackwork suits darker skin when lineweight is increased and contrast is planned.
9. Ignorant Style Swallow Outline on the Neck
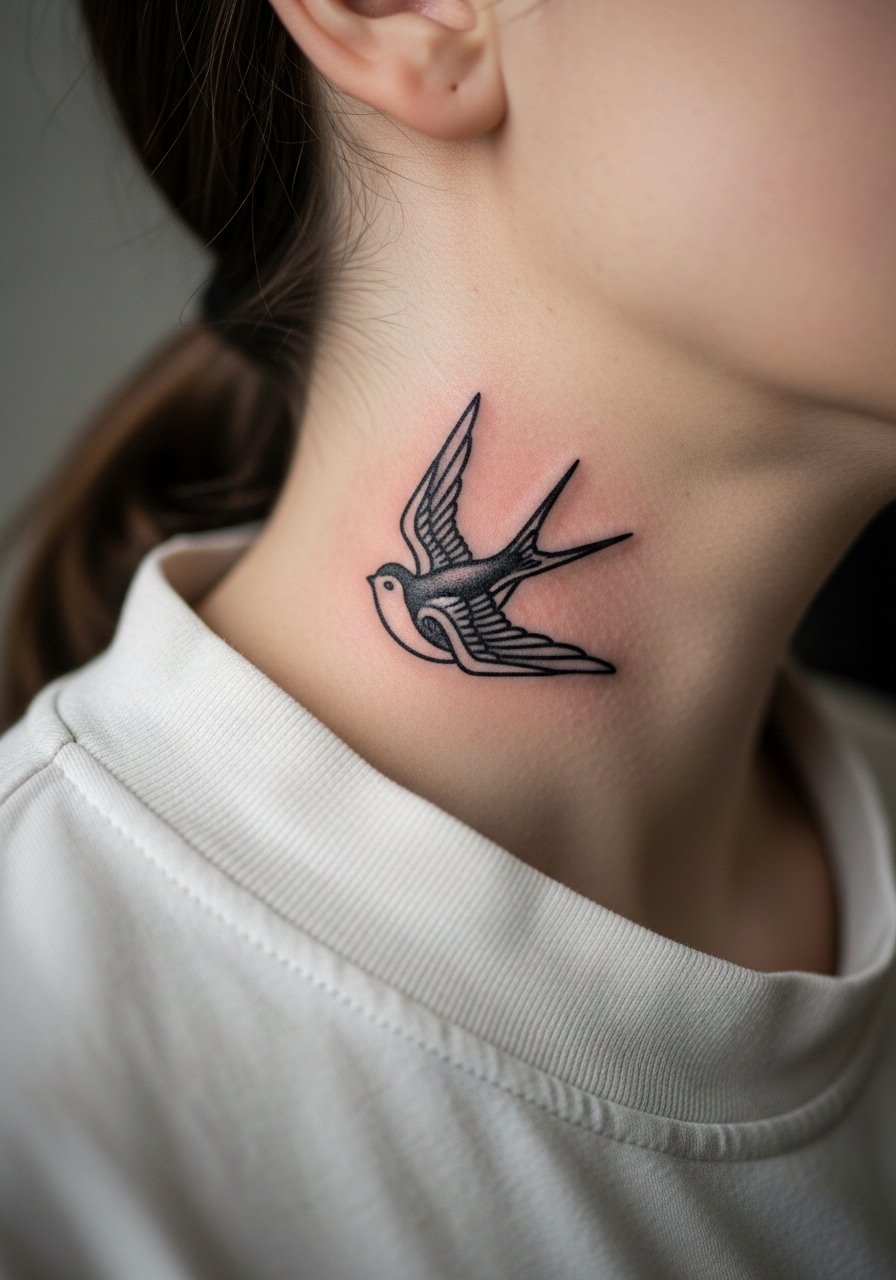
Neck tattoos are visible and some studios have strict booking policies. Ignite-style thick lines look intentionally raw but ask your artist how they adapt line weight for neck skin movement. The session usually runs under an hour and pain can be high on the side of the neck. The common mistake is requesting tiny text or detailed elements alongside the thick outline which then competes and blurs. Discuss career visibility with the artist since neck tattoos remain a professional consideration for many. For discovery, check style-specific hashtags and local studio tag searches to find artists comfortable with bold, imperfect lines.
10. Paired Traditional Swallows on the Collarbone
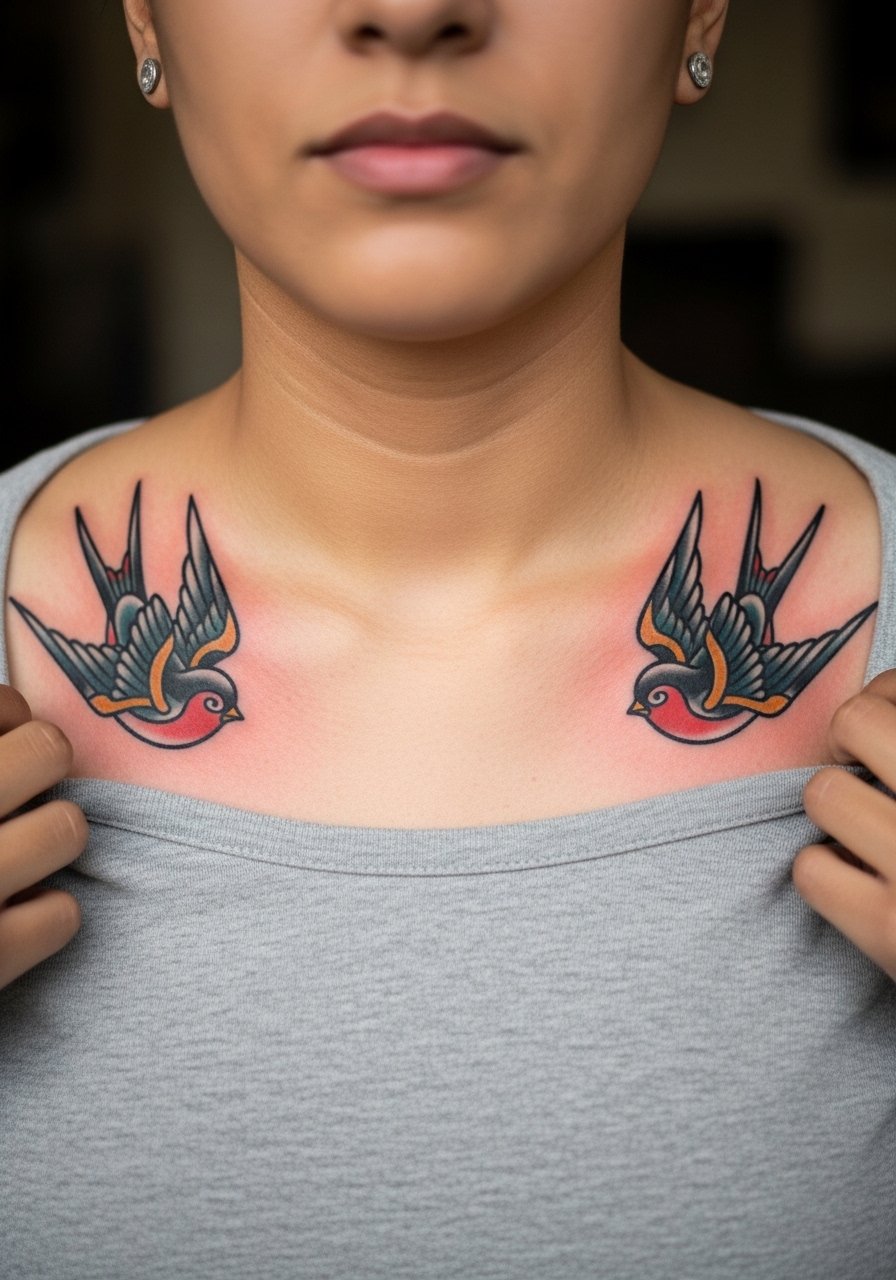
Matching collarbone swallows are common for couples or symbolic duality. Sessions are typically single sittings for each swallow and pain is moderate. Ask in consultation for mirrored placement guides so both pieces read balanced on the body. A common mistake is not measuring chest asymmetry, which makes matching pieces look uneven once healed. For showing this placement, choose off-shoulder blouses in solid dark colors to frame the design. Try an off shoulder blouse to highlight the collarbone work without pattern distraction.
11. Fine Line Swallow with Stars on the Ankle
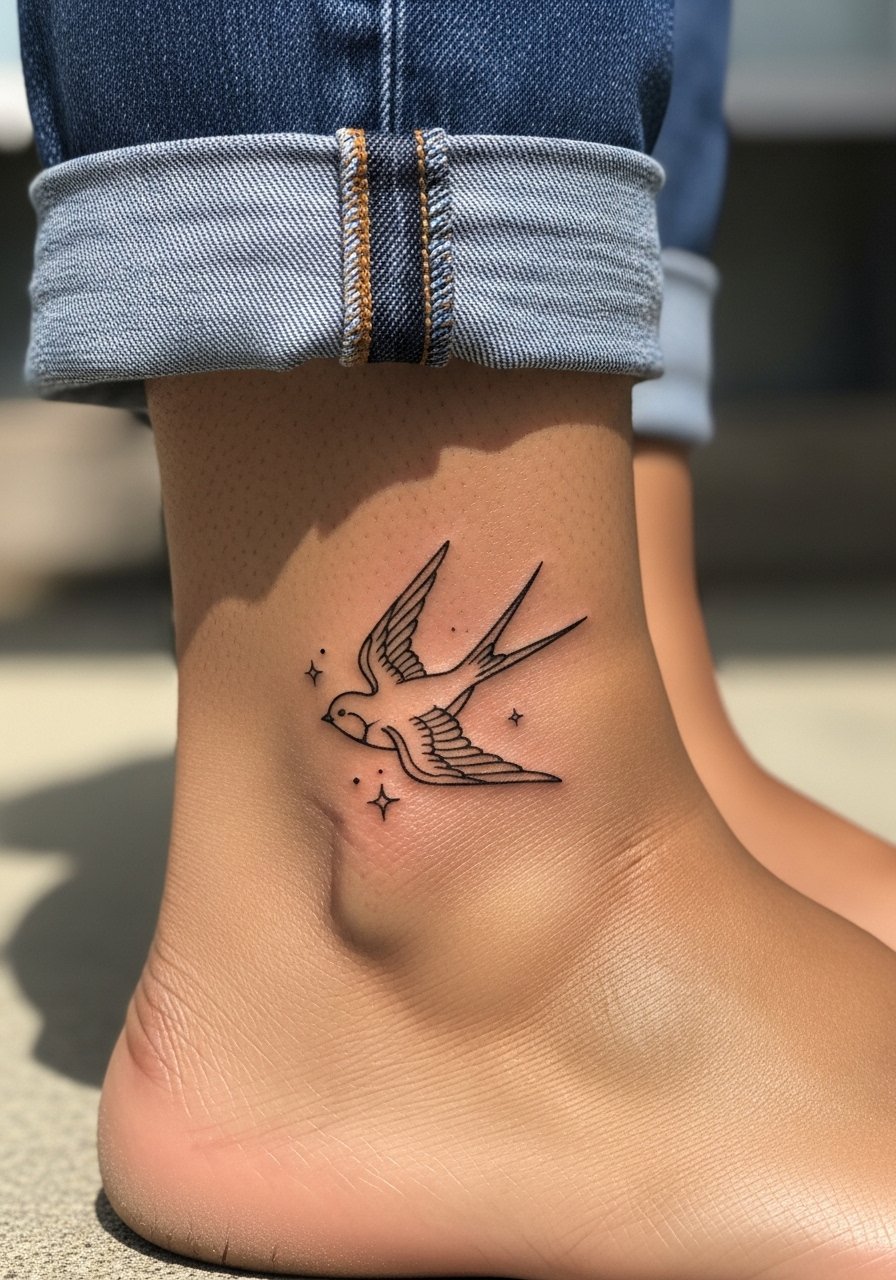
Ankle placements are low to medium pain but see a lot of rubbing from shoes and socks. Fine line details like stars need spacing to survive the constant friction. For consultation ask that stars be slightly spaced and not microdot sized so they remain distinct after a year. The mistake is crowding tiny elements in a small ankle area. For session day wear cuffed pants or shorts and remove socks. To show off wear cropped straight leg pants or cutout ankle boots in warmer months, for example a cuffed ankle jeans pairs well.
12. Watercolor Collarbone Swallow with Color Washes

Watercolor across the collarbone is visually striking but needs low-density pigment in areas that cross bone ridges. Expect the session to be single but meticulous. The debate about fine detail on curved areas appears here too. One side argues that thin washes over collarbone blur as the skin moves. The other side says carefully layered dilute color keeps the watercolor feeling and settles well. Ask how many light passes the artist plans and whether they schedule a follow-up to reinforce pale washes. For showing this placement choose V-neck or off-shoulder tops. A strapless bralette during the session gives access without exposing more than needed.
13. Minimalist Single Line Swallow on the Collarbone Edge

Single-line collarbone pieces look refined when the artist plans start and stop points with micro-weight variation. Pain is low to moderate and sessions are short. The mistake is asking for an absolutely hairline stroke across a high-motion area, which disappears faster than expected. In consult, ask the artist to show a printed stencil at your collarbone in several poses so you can see how it sits with breathing and movement. For session wear a V-neck top you can adjust without stretching fabric across the area.
14. Black and Gray Realistic Swallow on the Forearm

Realism on the forearm benefits from gradated stipple and whip shading. Sessions usually take longer for feather detail and pain is moderate. Tell your artist you want feather edges with negative-space highlights rather than solid gray blocks to preserve texture over years. A common error is asking for too much micro-shading in a small forearm patch which can soft-focus into blur. For the session wear a loose t-shirt or button-down with sleeves rolled above the elbow. For showing the piece try rolled short-sleeve chambray shirts which pick up the classic feel.
15. Small Micro-Swallow Behind the Ear with Script Accent
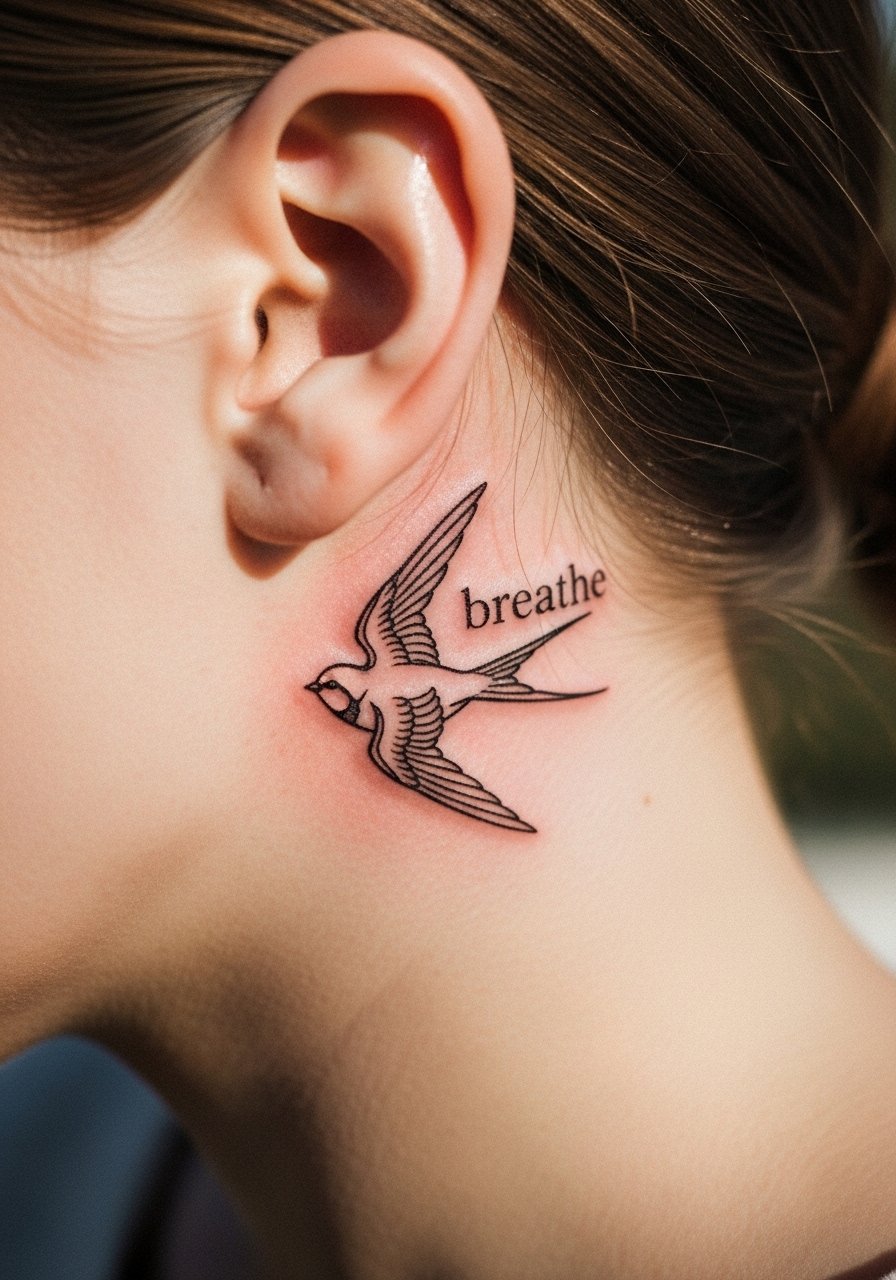
Tiny behind-the-ear work needs a confident needle and compact lettering that reads at real scale. Sessions are brief but precise. The mistake I see is asking for ornate script next to a micro swallow which competes visually. In consultation, ask the artist to stencil the exact word and test font size on skin so you can confirm legibility. Be mindful of hair products and scarves during healing. Visibility can be controlled by hairstyle which makes this placement flexible.
16. Migration Scene Sleeve Starter with Multiple Swallows
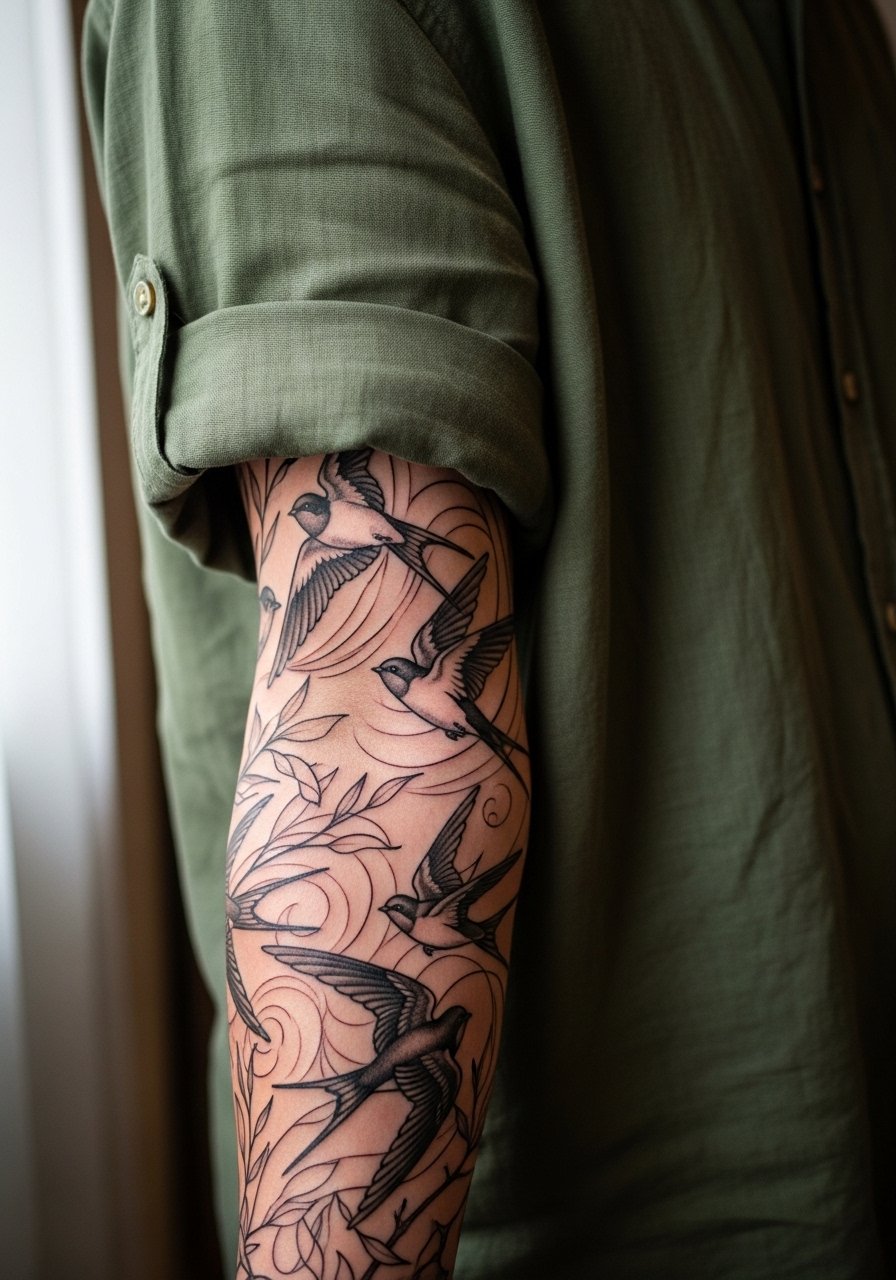
Starting a migration sleeve is a long-term plan. Expect multiple sessions and a clear map from the artist. One practical tip is to space each swallow with negative space corridors so the whole scene remains readable as you add filler. The common error is crowding birds early in the sleeve, which limits future composition flexibility. For the session wear a loose button-down you can slide aside. Consider discovery pathways like Pinterest boards and hashtag searches to curate a consistent reference set before your consult.
17. Neo-Traditional Swallow with Anchor on the Chest
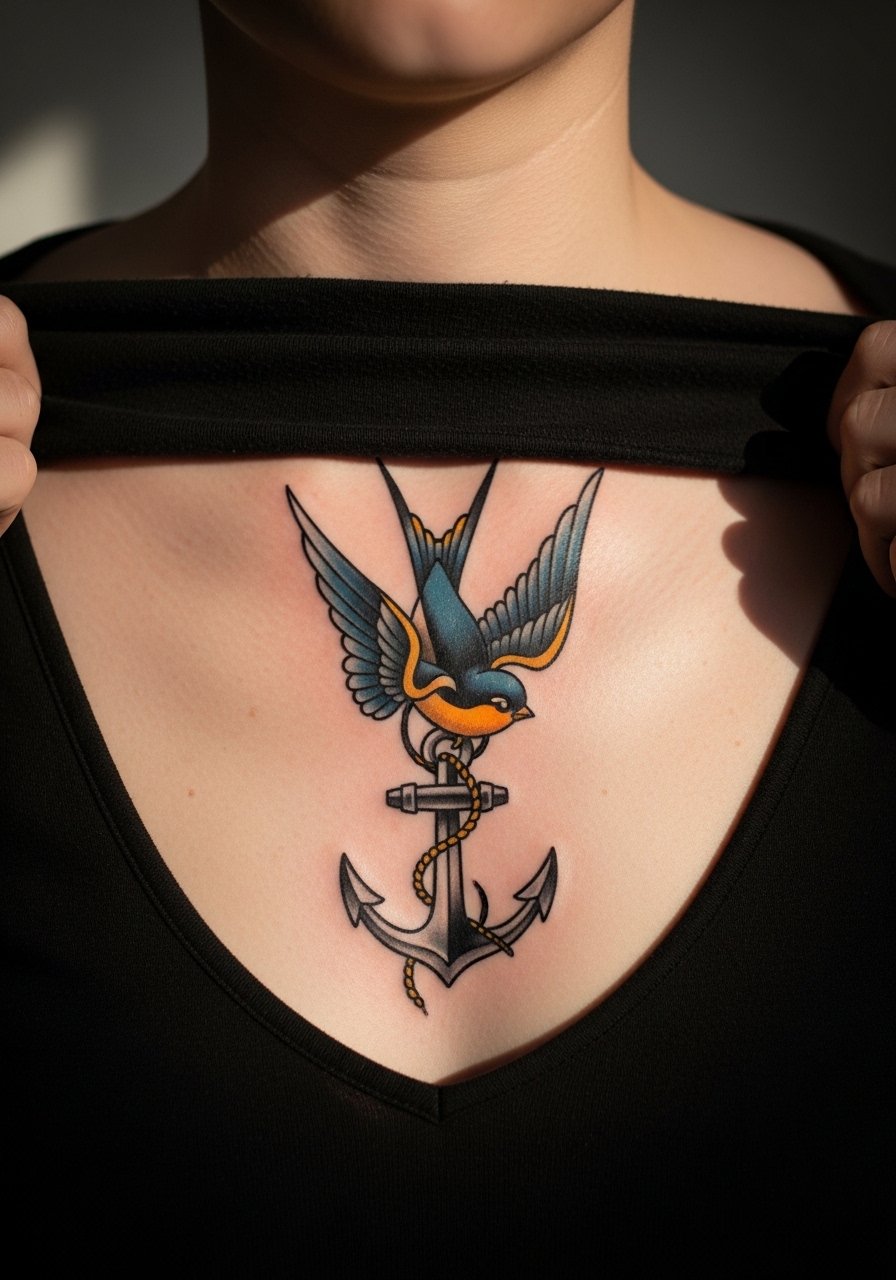
Chest pieces can carry strong nautical statements but require careful consideration of symmetry and breathing surfaces. Pain is moderate to high near the sternum and session planning often spans two sittings. Ask your artist to map the anchor so the swallow sits centered with chest movement. The mistake I often see is asking for heavy detail too close to the sternum where natural motion softens definition. For sessions wear a loose tank or a wide-neck shirt you can shift without exposing more than needed.
18. Fine Line Swallow on the Ankle with Celestial Accents
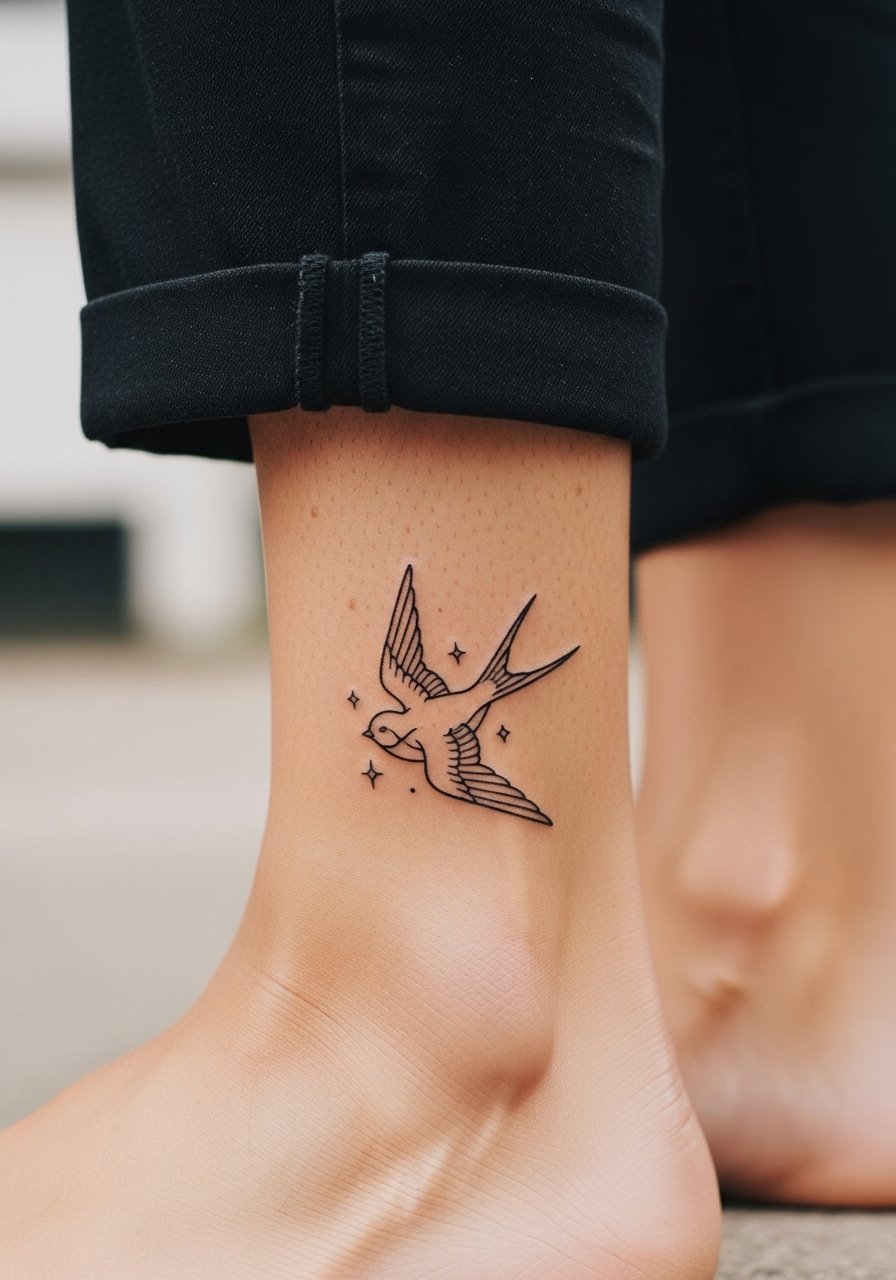
Ankle tattoos face constant abrasion from shoes. Fine line details survive better when stars are spaced and the swallow has slightly reinforced key lines. Sessions are quick and pain is low to medium. The common error is asking for coin-sized star clusters which merge after repeated contact. For showing the tattoo, cuffed straight-leg jeans or cutout ankle boots frame the artwork. Pick a cropped straight leg pants style for visibility.
19. Blackwork Outline Swallow for Darker Skin Tones on the Chest

On darker skin tones, bold outlines and solid black shapes increase contrast and longevity. Chest placement reads well when the artist plans strong negative space and avoids tiny interior detail that can lose clarity. Sessions may require one to two sittings depending on size and saturation goals. The common mistake is using fine detail that blends into the surrounding tone over time. For the session wear a fitted sports bra you can shift slightly so the artist has access without more exposure. This approach keeps the swallow legible for years.
20. Micro Realism Swallow on the Thigh
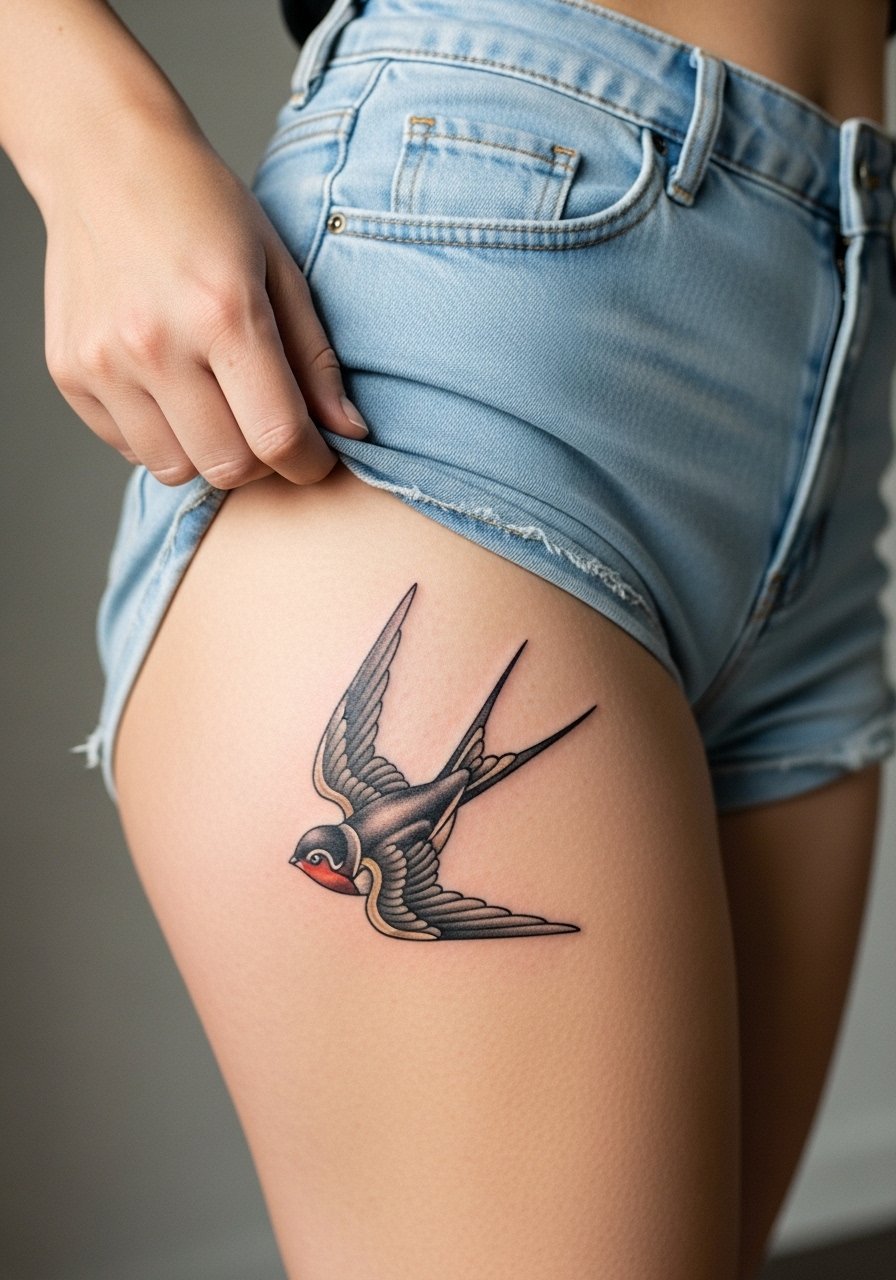
Thigh skin tolerates detail and larger sizes with less stretching than some torso spots. Sessions vary but medium to large micro realism often needs two sittings. Tell your artist you prefer feather-level stipple shading and ask how the design will age with weight changes and muscle tone shifts. The mistake is underestimating how curvature affects light on feathers which can make the piece read flatter over time. For session comfort wear high-waisted shorts you can shift easily and avoid pressure on the area during the first week. For nights out, high-waisted shorts or a slit skirt frames the piece well.
21. Paired Family-Style Small Swallows for Wrists

Small paired swallows for family or parent-child matching are distinctly readable when kept within 2 to 3 inches. Wrist placement is low to medium pain and often a single-session job. In consult, clarify whether you want mirrored orientation and ask for stencils placed on both wrists to check symmetry. A typical mistake is mismatched sizing or orientation which shows once both are healed. For session wear a sleeveless tank or a loose long-sleeve you can push up. Stacking thin bracelets on the opposite wrist helps balance the paired look without rubbing the new work.
Studio Day Picks
The first six ideas above include wrist, forearm, shoulder, ribcage, behind-ear, and finger placements, and each asks for different prep and protection during the healing week.
- Stencil transfer paper kit. Useful for previewing how a banner or mirrored swallow will sit on curved areas like forearm and collarbone before you commit in the chair.
- Topical numbing cream. Helps during short high-pain moments on ribs and neck if your artist approves pre-application.
- Thin protective film roll. Great for low-coverage areas like fingers and wrists that face constant washing and friction.
- Fragrance-free gentle body wash. Keeps healing skin clean without irritating fine line work on the ankle and collarbone.
- Aquaphor healing ointment. A thin layer during the first few days locks in moisture for small, detail-heavy pieces without clogging.
Frequently Asked Questions
Q: How much does a traditional swallow tattoo cost for forearm or chest work?
A: Costs vary by size and artist, but expect a rough range from $150 to $700 depending on saturation and whether it is a single session or multiple sittings. Smaller forearm pieces tend toward the lower end while chest or multi-color neo-traditional pieces can sit higher in that range. Get a quote in consultation so the artist can factor session time.
Q: Will fine line swallow tattoos blur faster than traditional saturated swallows?
A: From what I have seen, fine line pieces generally soften sooner because the lines are thinner and more affected by sun and friction. Traditional saturated work often ages into a solid silhouette that stays readable. Plan for potential touch-ups around year two to three for fine line work, especially on high-motion placements.
Q: What is the best swallow tattoo for a first-timer who wants something small and low maintenance?
A: Small single-line or minimalist silhouettes on the inner wrist or collarbone are common first-timer choices. They are quick sessions, lower pain, and easier to schedule. Be realistic about touch-ups and sun protection, since small lines can fade faster than larger saturated pieces.
Q: How do I choose an artist if I want a swallow that works on darker skin tones?
A: Search hashtags and location tags for blackwork and traditional portfolios, and look specifically for healed photos on skin tones similar to yours. Ask the artist how they adapt line weight and saturation for contrast. Artists who have worked across tones will show healed examples in their portfolios or on their studio pages.
Q: Does placement affect how I should dress for the session?
A: Yes. For shoulder or upper arm pieces wear a sleeveless muscle tank or a loose button-down you can roll. For chest and collarbone choose a wide-neck shirt or sports bra you can shift without full exposure. For thigh or ankle wear high-waisted shorts or cuffed pants so the artist has clean access and you avoid fabric pressure during healing.
Q: How long until a swallow tattoo looks like the healed photos in this article?
A: Initial scabbing and peeling typically finish within two to three weeks, but true settling takes six months to a year. Tiny lines can seem crisp at first and then soften, so plan touch-ups based on placement and your lifestyle rather than immediately after the first month.
