
Fine line wings are everywhere on feeds, and the truth is they look incredible fresh but act differently over time. Many people pick micro wing tattoo designs for the quiet symbolism and easy placement. What matters more than the picture on your phone is where the ink sits on your skin, how much spacing the artist leaves, and whether you plan a touch-up. Read these 21 micro wing ideas with practical notes on aging, session wear, and wardrobe so you get a wing that still reads well years from now.
1. Micro Fine Line Feather on the Wrist
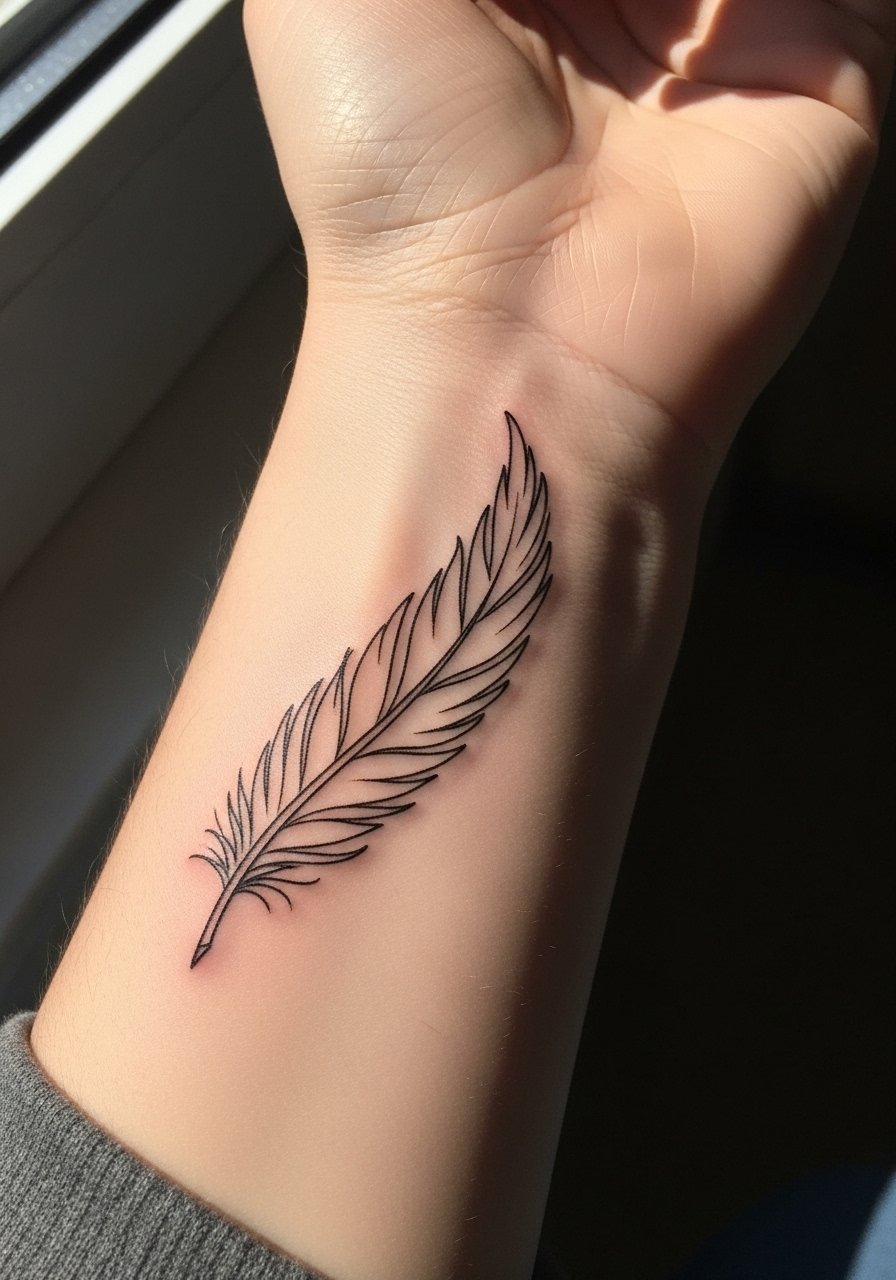
I see wrist pieces hold huge visual sway because the area is so visible. For a micro fine line feather keep the span to about 1 to 1.5 inches and ask your artist for slightly more spacing between barbs so the detail has room to heal. Fair warning, the wrist rubs against watches and sleeves which speeds softening, so plan a light touch-up at year one if you want the crispest linework. Session time is usually under 30 minutes and pain is low to moderate. For the appointment wear a sleeveless tank so the artist can access the wrist easily. A common mistake is going too dense with tiny cross-hatching which blurs in the first year.
2. Minimalist Single Wing Outline on Inner Forearm
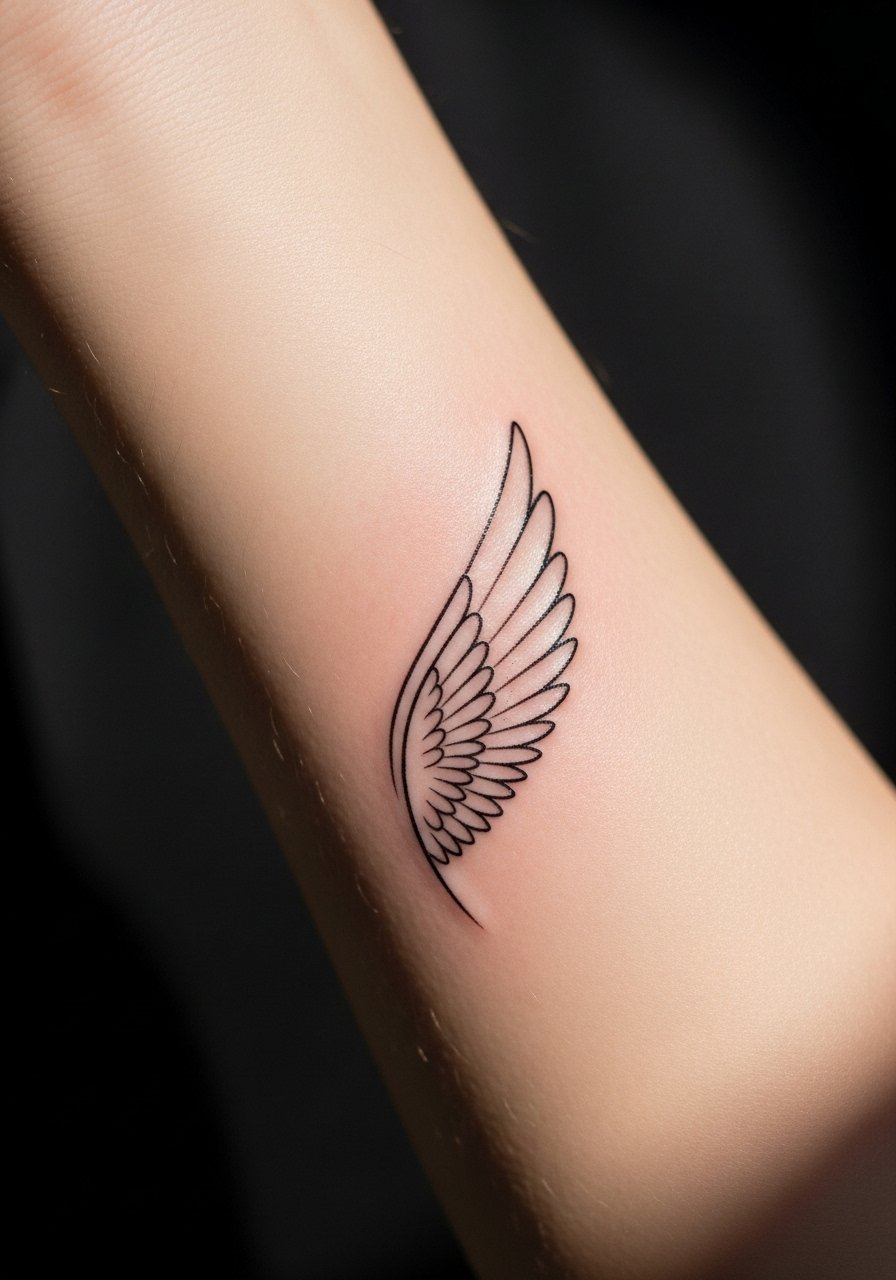
The inner forearm gives a flat canvas that suits single-line wings and makes touch-ups easy. I recommend a 1.5 inch outline with one clean contour and minimal internal strokes. During the consult tell your artist you want the stencil placed where veins and tendons do not curve the lines. Aging is kind here, but fine line camp and bold line camp disagree on longevity. One side argues fine line will soften faster. The other says proper depth and spacing keep it readable. In practice the truth depends on your skin and the artist's depth control. Wear a loose short-sleeve button-down to the session for easy arm access and avoid heavy shading that crowds the outline.
3. Tiny Geometric Wings on the Ankle
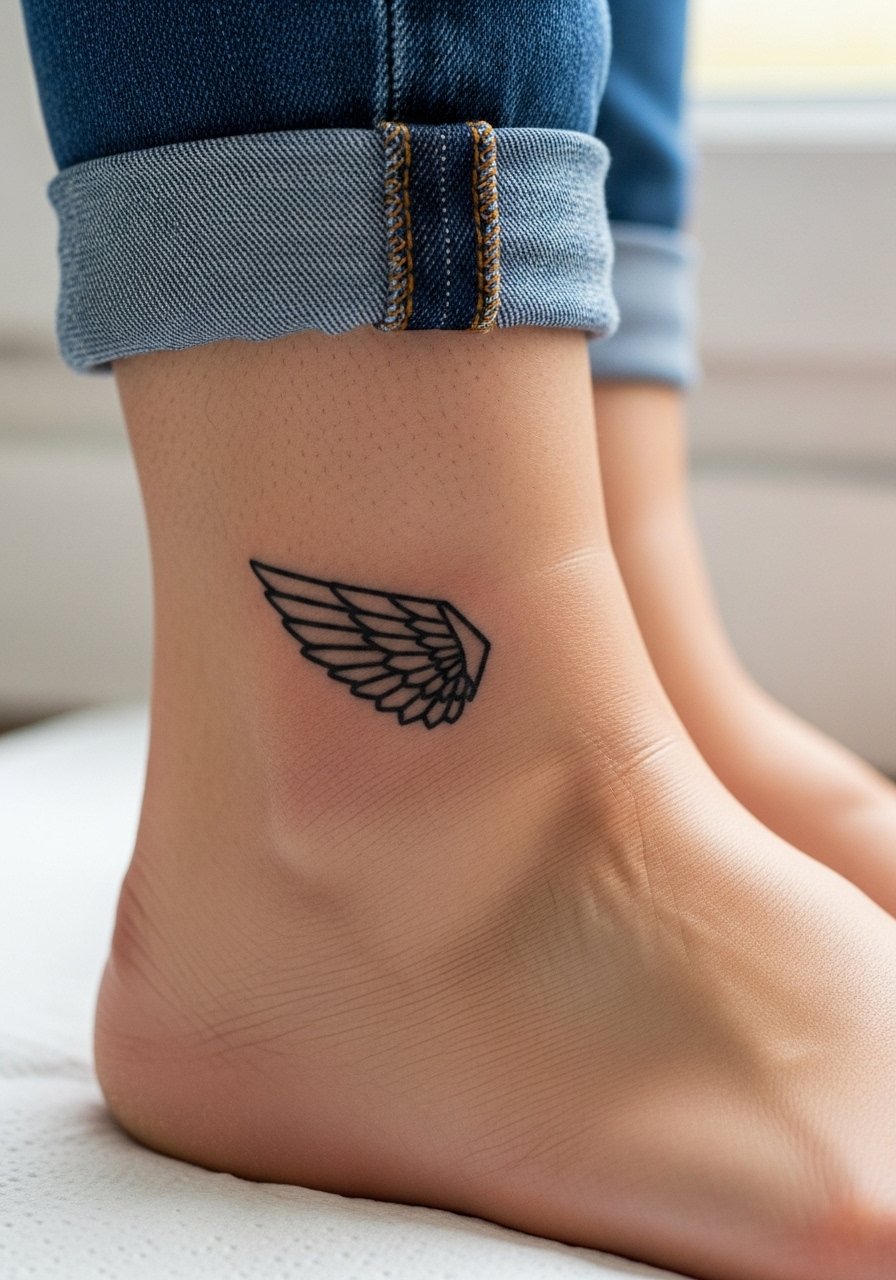
Ankle placements are low-profile and great for travel or seasonal visibility. Geometric wings with small triangles or chevrons work best under one inch so they tuck neatly under socks and shoes. Expect a single quick session and mild discomfort when the needle gets near bone. The common error is packing dense geometry into too small an area. That causes merging after a year. For showing this off pair with cuffed jeans and espadrille flats or a dainty ankle chain when the weather allows. If you get a lot of walking friction, expect needed touch-ups sooner than for forearm pieces.
4. Micro-Realism Feather Span on the Collarbone
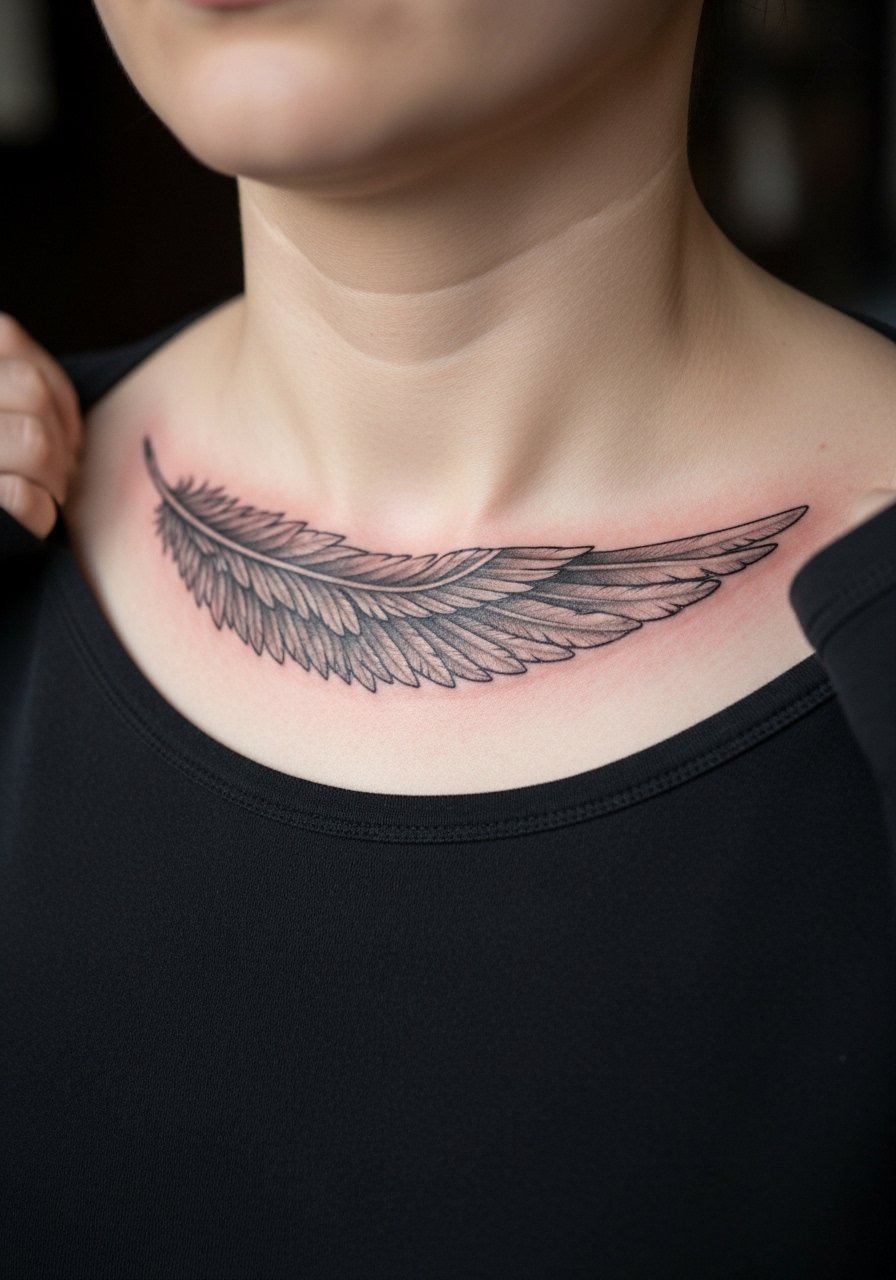
A collarbone feather lets micro-realism show off texture while still staying discreet under tops. This area handles subtle shading well but sits on mobile skin where movement can blur overly tight stippling over time. Tell your artist to aim for gentle graywash and avoid overly dense saturation in tiny patches. Sessions can take up to 90 minutes for two-inch spans and the pain is moderate because bone is close. For the appointment bring a strapless midi dress or a wide-neck shirt that can be shifted without rubbing the area. Healed, these read ethereal, but expect thin gray lines to soften by year three without touch-up.
5. Fine Line Paired Wings at the Nape
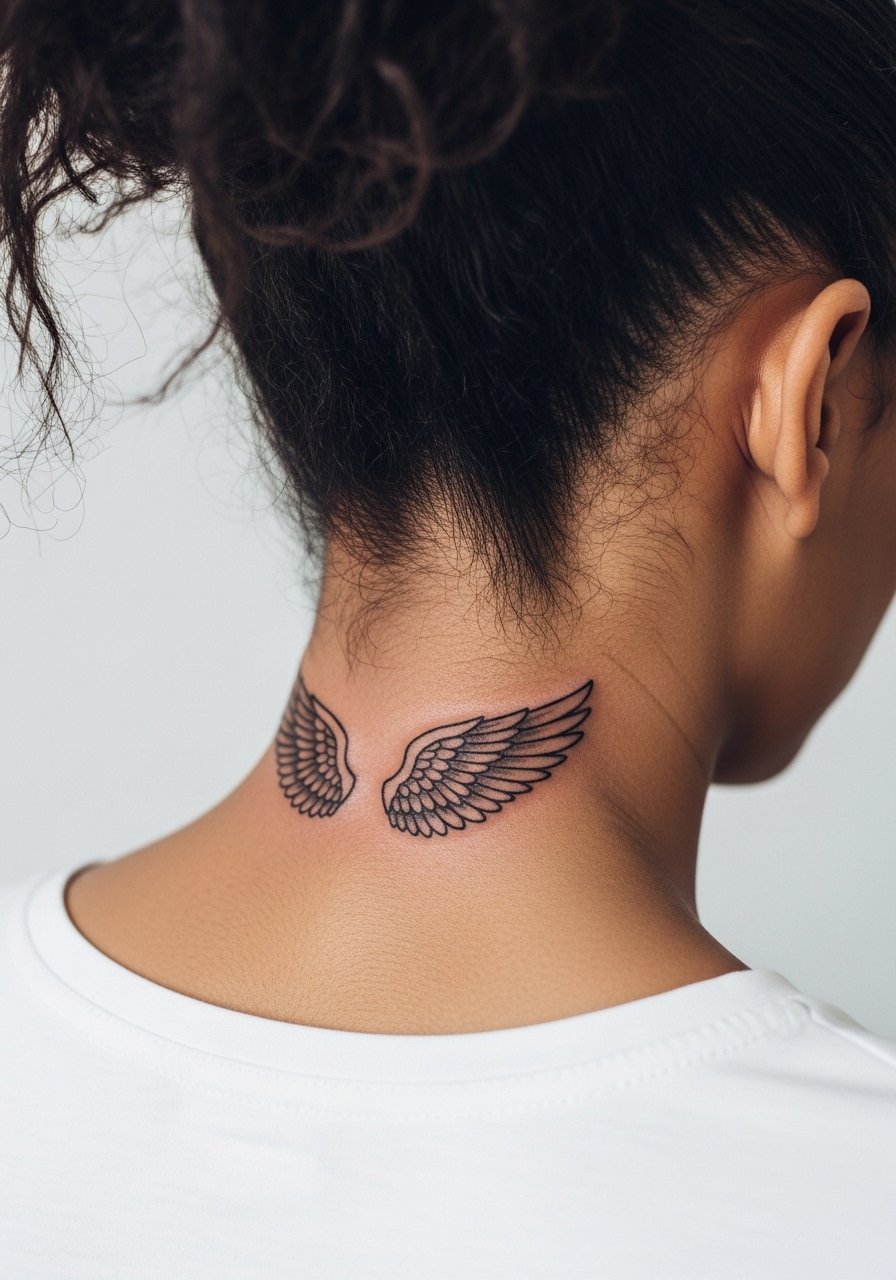
Back-of-neck wings are a stealthy option that you can hide under hair or show with an updo. The nape gives a narrow, slightly curved canvas so ask for symmetry checks while sitting up and while tilting your head. There is a heated debate among artists about fine line here. One camp says the skin movement and sweat will blur delicate lines within two years. The other camp says a slightly heavier lineweight set at correct depth lasts fine. I suggest asking where an artist stands before booking. Pain is low to moderate. For styling, a high ponytail and an off-shoulder blouse show the piece without overpowering it.
6. Dotwork Micro Wings on the Ribcage
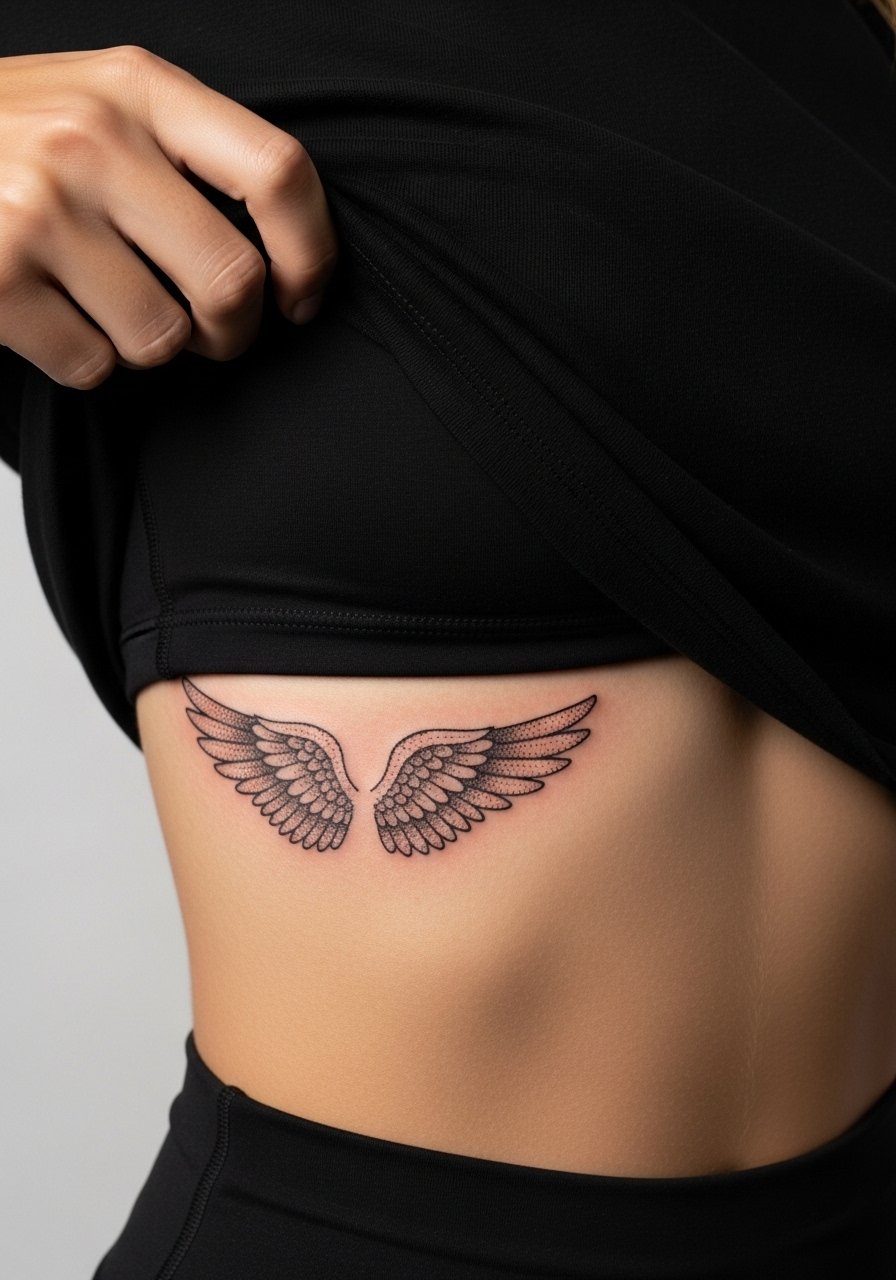
Fair warning, the ribcage rates high on pain charts. Dotwork looks delicate on ribs but the skin there stretches and shifts with breathing and body changes. If you want dotwork, ask the artist to space out stipple clusters so they do not crowd. A common mistake is insisting on extremely dense dot fields in a small area which leads to muddiness after healing. Sessions can be longer because breathing makes the artist pause often. For the appointment wear a cropped bralette or sports bra so the artist has clean access and you stay comfortable. Consider a slightly larger design here to let detail breathe over time.
Before You Book
The forearm, nape, and ribcage pieces above ask for different prep. A few small items smooth the session and the first week.
- Stencil transfer paper kit. Lets you preview line placement on skin which is crucial for paired and asymmetric wing stencils from ideas above.
- Topical numbing cream. Applied before a rib or ankle session takes the edge off wrist and rib sensitivity without changing the artist's work when used correctly.
- Thin protective film roll. Great for wrist and finger pieces where daily washing and friction threaten fresh lines.
- Fragrance-free gentle body wash. Cleanses healing areas without irritating delicate linework on forearms and collarbones.
- Aquaphor healing ointment. A thin layer for the first few days helps keep moisture in during the initial settle for fine line work.
7. Minimal Outline Wing Cluster on the Shoulder
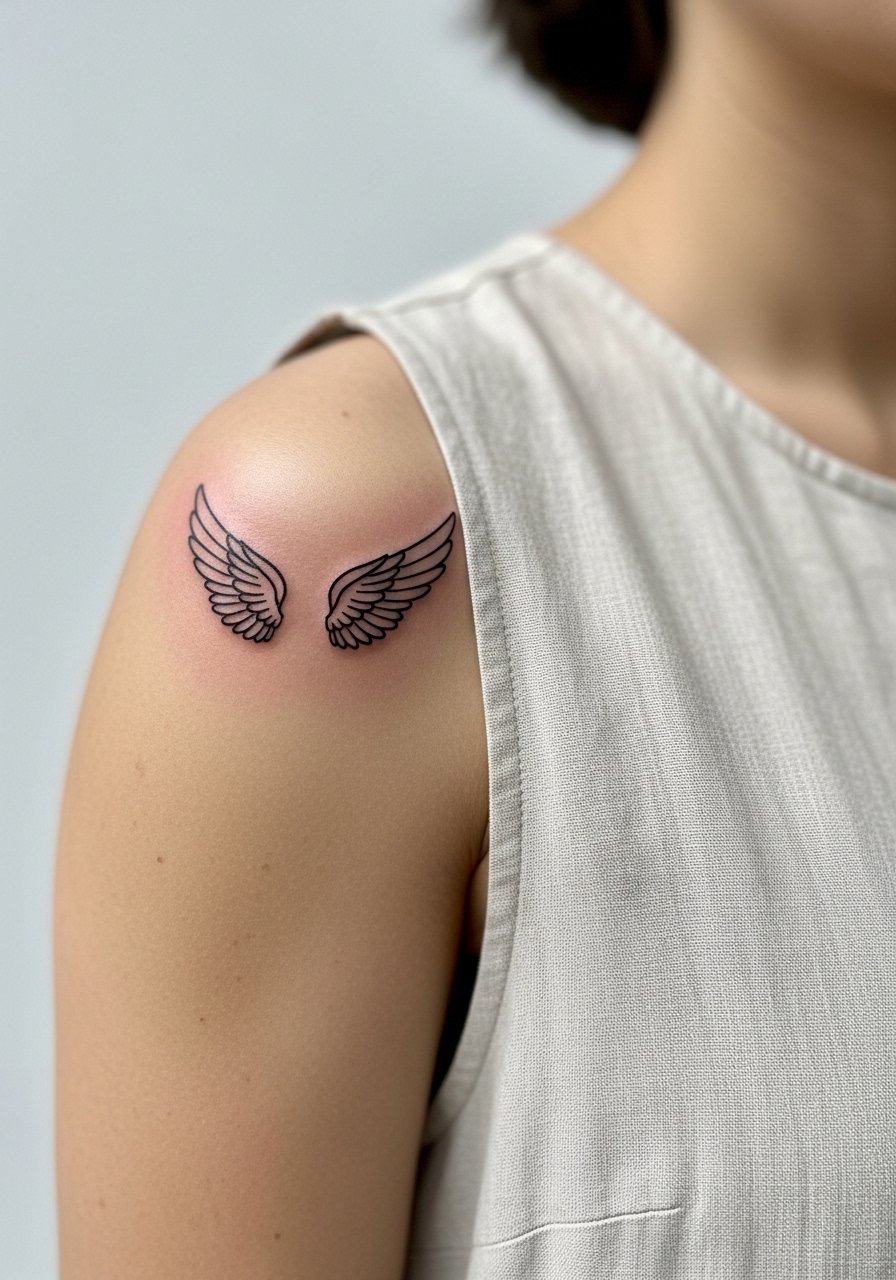
Shoulder clusters are forgiving because the skin is stable and the canvas is larger. Minimal outline clusters read like a small flock and age well if each wing has space. I usually tell people to avoid tiny overlapping wings which merge after a year. The session is quick, under an hour, and pain is low. For the session wear a sleeveless linen tunic or a button-down you can slide off easily. When showing off, the clean lines pair well with simple stud earrings so attention stays on the shoulder placement rather than competing jewelry.
8. Watercolor Micro Wings on the Inner Thigh

Inner thigh watercolor reads soft and private. The area heals fast because rubbing is limited but you must avoid heavy saturation in tiny areas. Watercolor wings age by losing pigment faster than blackwork, especially on higher-friction legs. Sessions take 60 to 90 minutes and the pain is moderate. For the session choose loose shorts so the artist can work without fabric pressure. Because watercolor fades, expect color refresh at year two if you want the same pastel intensity. If you prefer longevity, swap to black or gray accents instead of full watercolor fills.
9. Ignorant Style Tiny Wings on the Finger
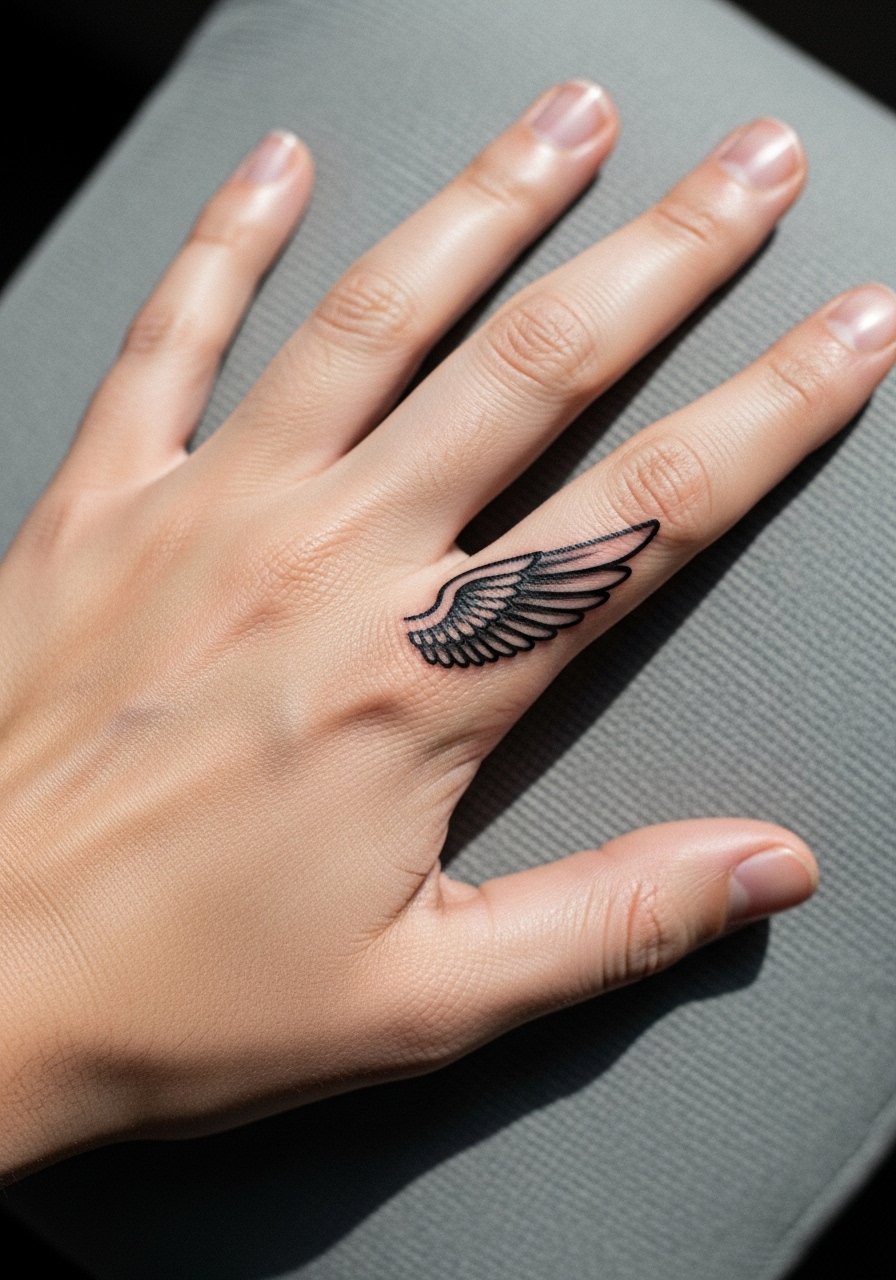
Finger tattoos show immediately but come with high wear. Ignorant style with bold, simple strokes suits the skin there because fine detail often disappears. Sessions are fast and pain varies based on placement near joints. A frequent mistake is asking for tiny feather detail on the finger. That detail rarely survives daily use and washing. For the appointment, keep hands bare and consider wearing a thin silver chain bracelet on the opposite wrist to balance jewelry attention. Expect touch-ups sooner than for arm work because fingers experience constant friction.
10. Ornamental Wing Mandala on the Calf
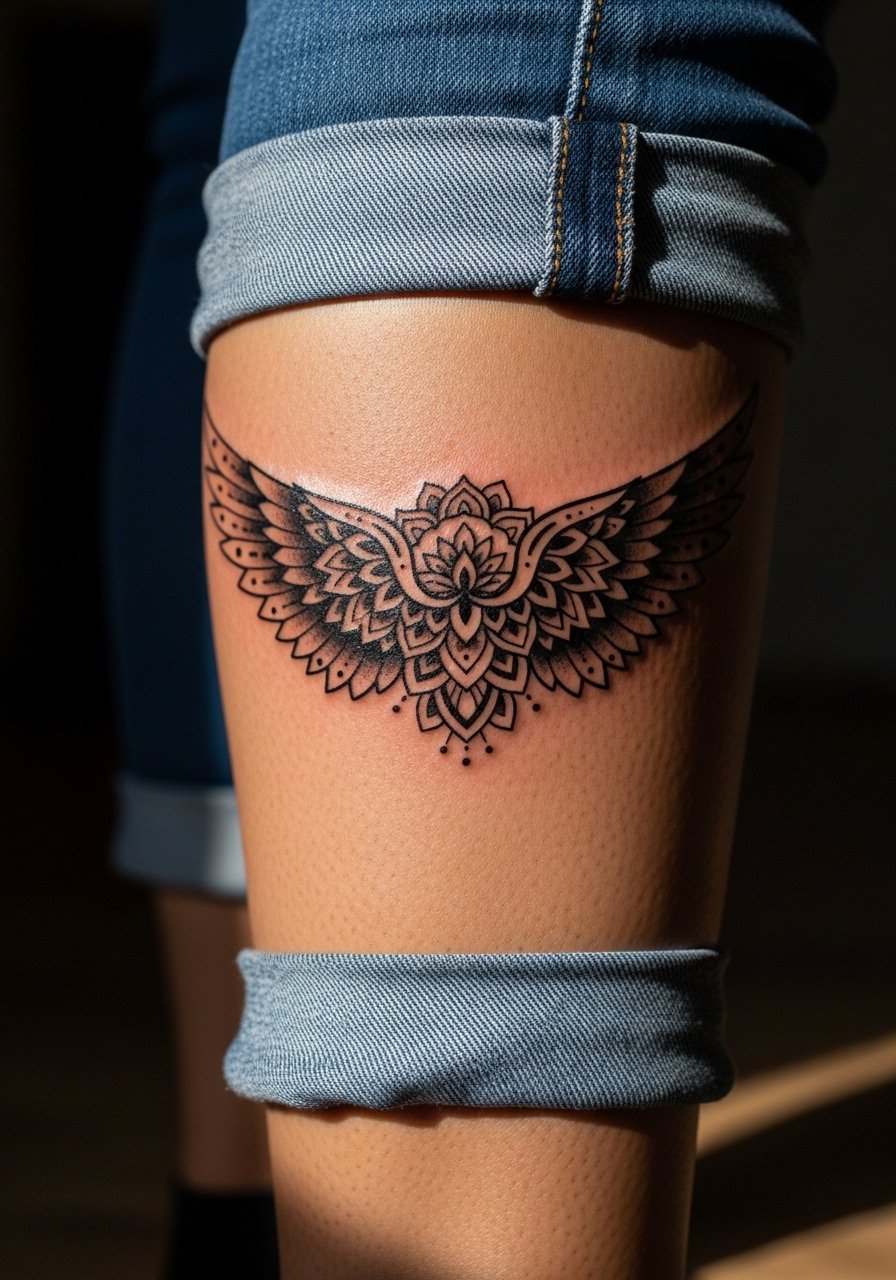
Calf placements are ideal for slightly larger micro wings that combine ornament and negative space. Mandala elements let the pattern breathe if each petal and barb has room. Pain is low to moderate and sessions take longer when dotwork is involved. A common mistake is compressing too many mandala rings into a small two-inch design which leads to merging after a couple of years. For showing off wear cuffed straight-leg jeans or espadrille flats that frame the calf. Calf skin holds saturation well so blackwork mandala wings tend to age better than tight stipple in the same spot.
11. Neo-Traditional Small Wing with Halo on the Upper Arm
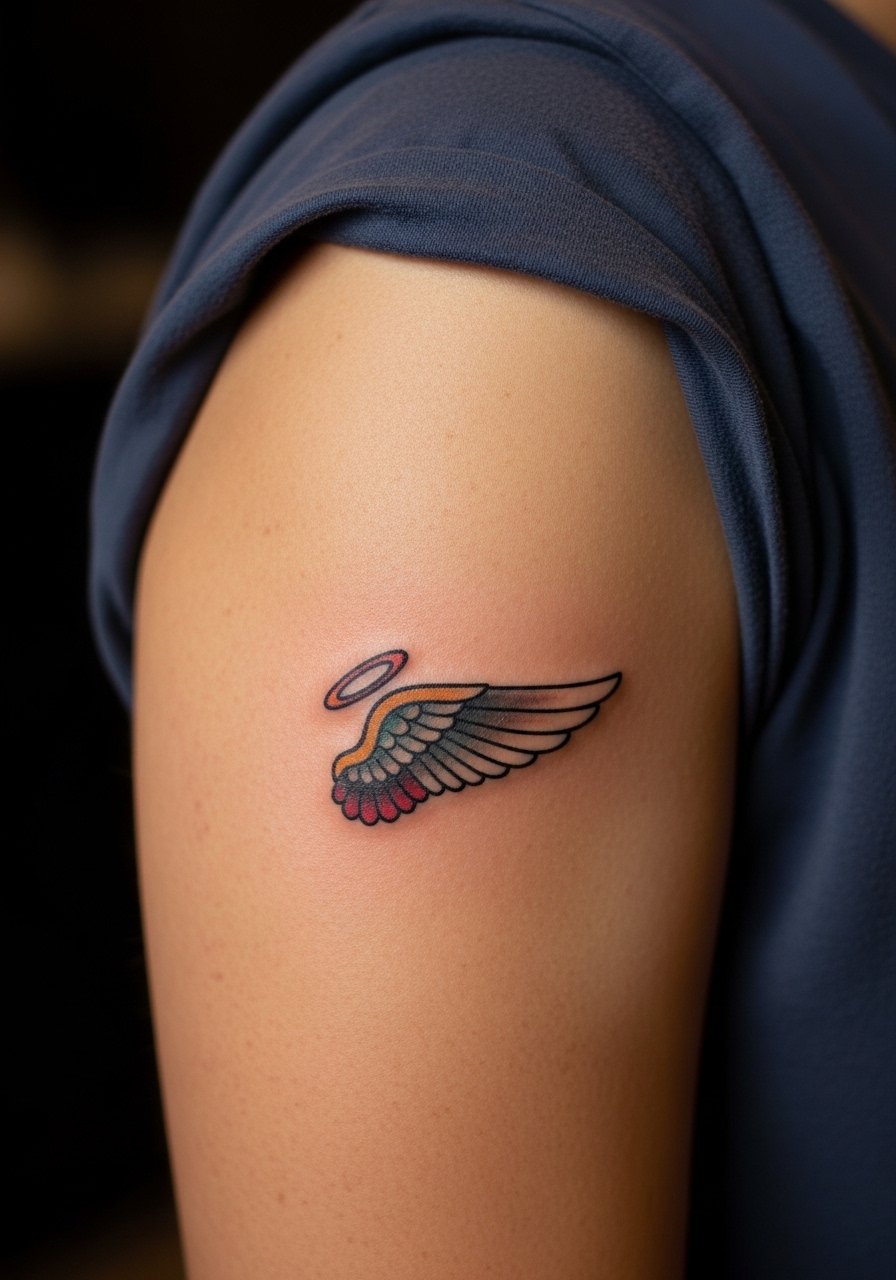
Neo-traditional elements add pop to micro wings with small color accents and bold outlines. The upper arm is forgiving and reads well from a distance, which is why people like this placement for a nostalgic vibe. Sessions may need two sittings for crisp color and saturation. The common mistake is pushing color into areas too small to hold it. During consultation ask for solid outlines around color zones so the pigment has room to age without bleeding. For the session wear a loose short-sleeve shirt that slides easily off the shoulder. Healed, these read vibrant longer than watercolor but may still need a color boost at year three.
12. Blackwork Single Feather Behind the Ear

Behind-the-ear placements are discreet and act like a secret strength mark. Because the skin is sensitive and the area small, solid blackwork works better than fine filigree. Note that the prompt for "behind the ear" should specify the skin below the hairline on the neck so placement is clear. Sessions are short and pain is low to moderate. A real mistake is asking for faint gray shading there which often disappears against hair and skin texture. For showing the piece, a high ponytail and a hair tie silk scrunch make the tattoo peek through without needing dramatic styling. Remember that hair regrowth can hide the piece until you pin it up.
13. Feather Pair on the Upper Thigh
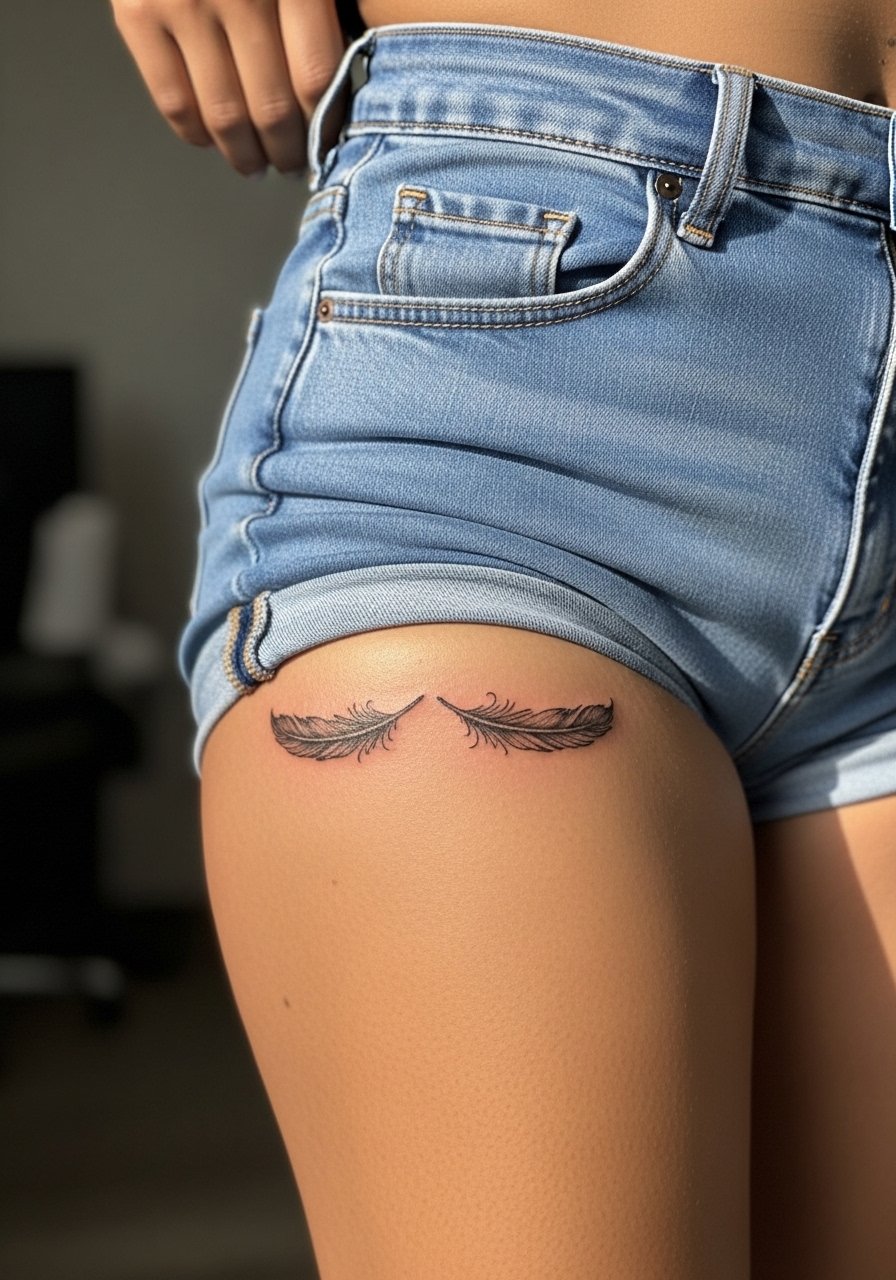
Upper thigh wings are intimate and heal well because friction is lower in that zone. They take detail nicely if you keep them around 1.5 to 2 inches. Sessions are comfortable for most people and pain is moderate. A common error is choosing overly dense linework where the skin stretches with body changes. For the appointment wear high-waisted jeans or shorts that can be shifted like high-waisted denim so the artist has clear access. These placements are low-risk for blurring but body changes can alter how the wings sit over long periods.
14. Stipple-Shaded Wings Over the Sternum

Sternum wings are delicate and visible when you want them to be. Because the area moves with breathing and is near thinner skin, stipple shading should be spaced out rather than densely packed. Pain is higher here than on the arm so bring breath control and a plan for breaks. For the session wear a fitted sports bra so the artist can access the area without exposure beyond the tattoo zone. The major mistake I see is demanding micro-shading that is too heavy. That tends to look like a smudge after healing. If you want longevity ask for slightly larger dots and intentional negative space.
15. Tiny Linear Wings on the Back of the Finger
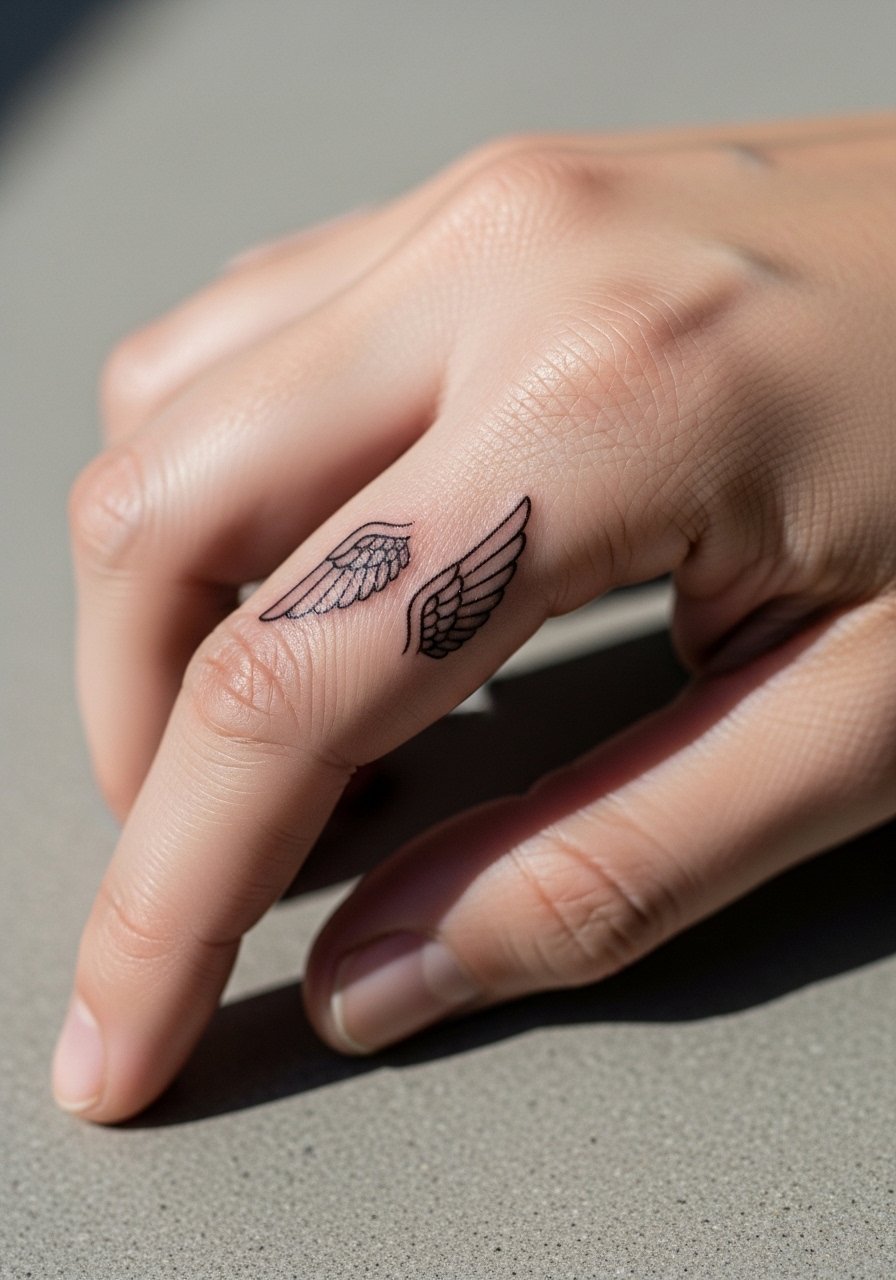
Back-of-finger placements are high-visibility and high-wear. Linear wings work better here than feathered detail because daily tasks and washing wear them down. The session is brief but you should expect touch-ups often. A common mistake is asking for filigree or tiny feather detail that disappears within months. For showing off, keep rings minimal and consider a slim gold ring stack on the opposite hand. If you're concerned about professional optics, know that hand tattoos still influence some employers, so weigh placement against work needs.
16. Micro Halos and Winglet Cluster on the Scapula
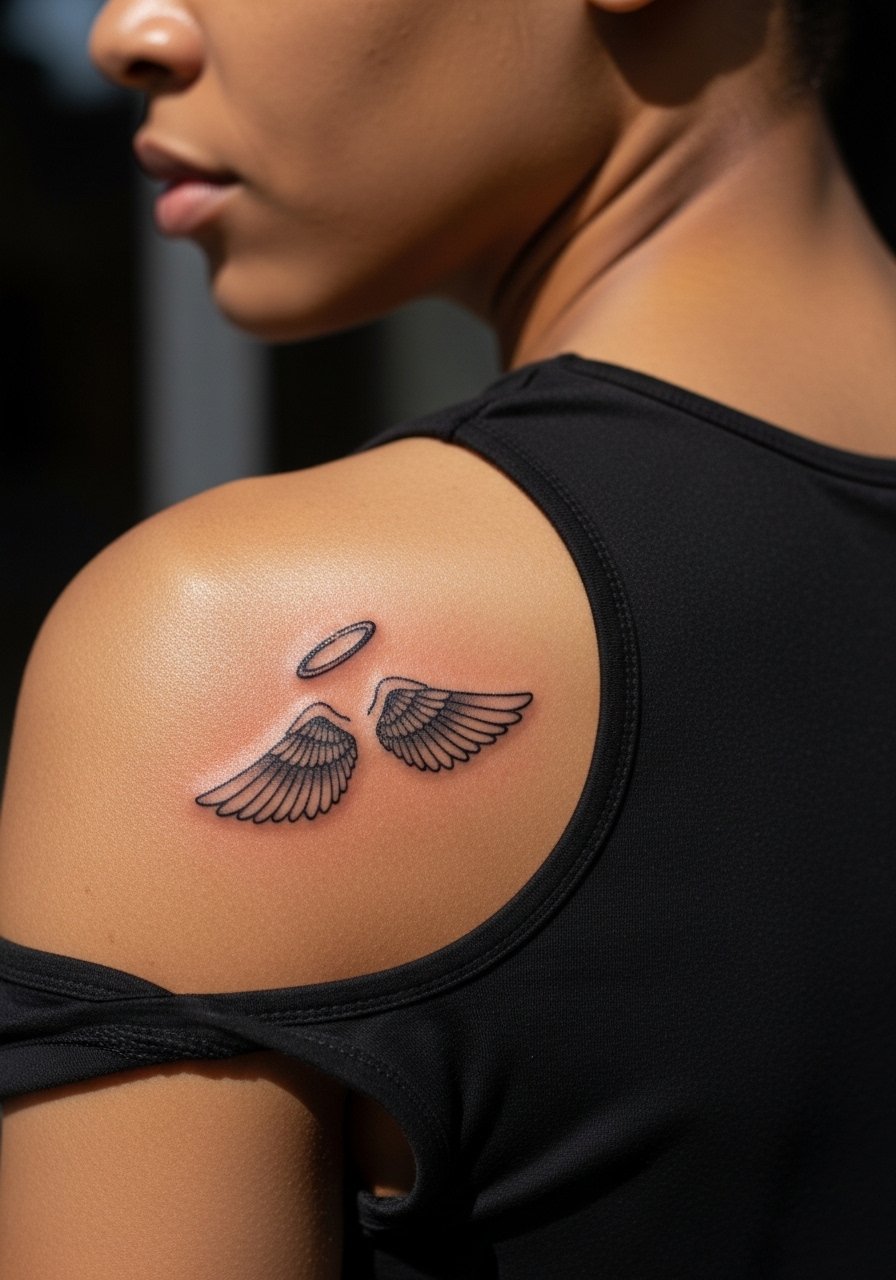
The scapula area is a great canvas for tiny halo accents and winglets that read like jewelry on the back. Because the skin is stable, delicate linework holds fairly well. I usually recommend spacing each winglet and keeping halos minimal so the negative space gives the design room. Sessions run 30 to 60 minutes and pain is moderate. Wear a tank top so the artist can move straps without friction. A mistake is compressing multiple halos into a one-inch area. That reduces legibility over time. Scapula placements age more like shoulder pieces than chest pieces.
17. Geometric Feather on the Side Rib
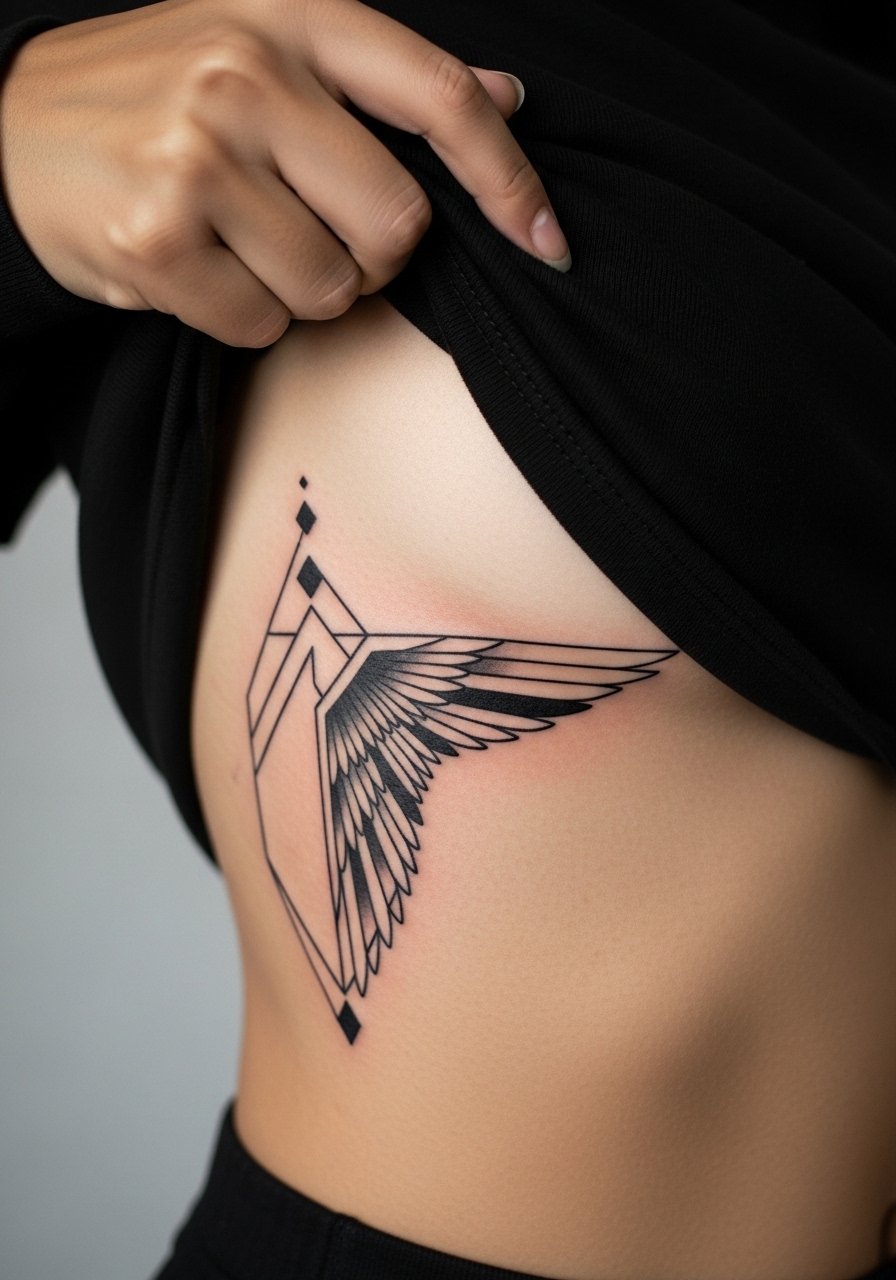
Side rib geometry reads sharp but the ribs are a stretch-prone area. People often want small intricate geometry there and then wonder why lines blur after weight changes. My recommendation is to increase scale marginally so each geometric segment has breathing room. Pain here is higher and sessions can be split. For the appointment wear a loose crop top so the artist can access the side without full exposure. There is debate whether fine line holds on ribs. One camp says the motion blurs work quickly. The other says with correct spacing and depth the lines settle. Ask about their rib portfolio before booking.
18. Micro Wing with Halo on the Lower Calf
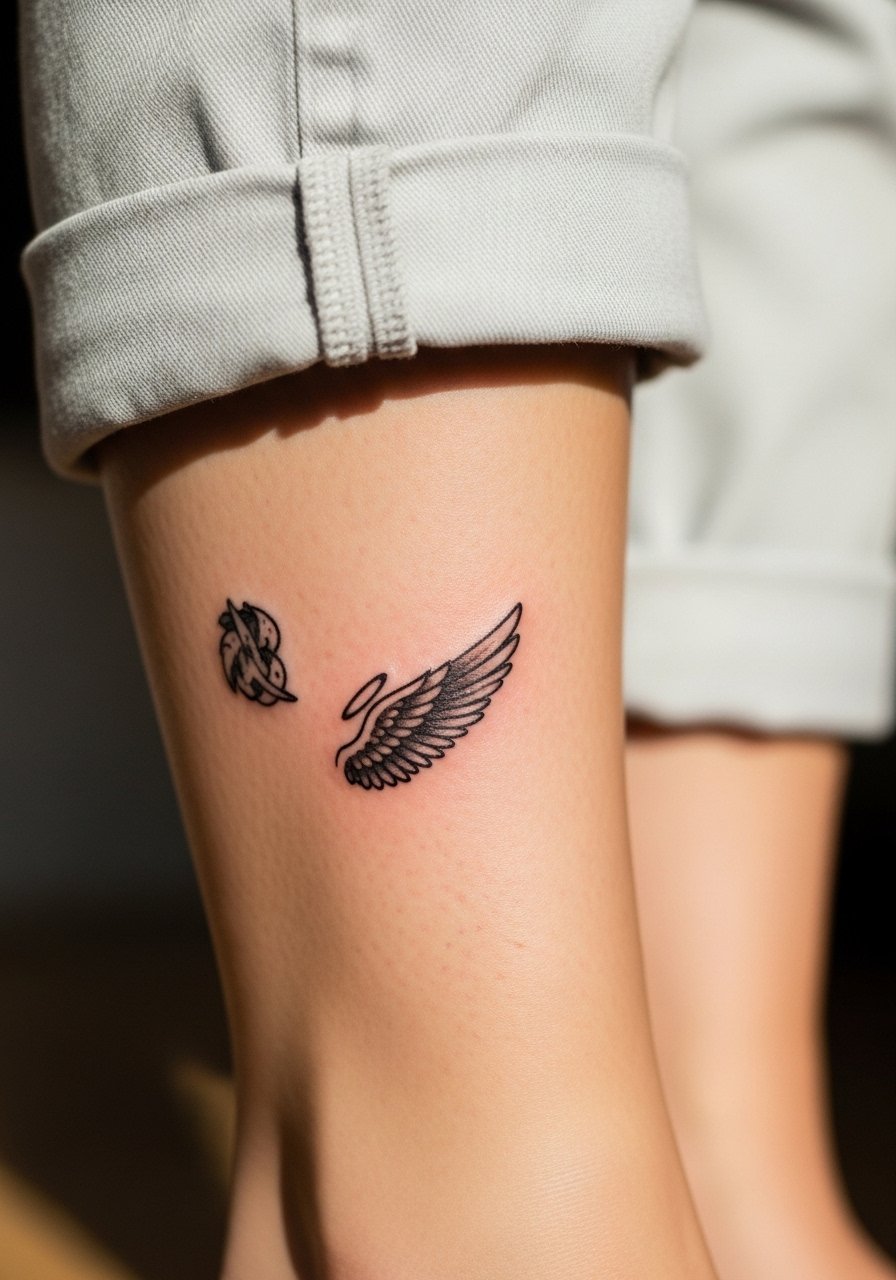
Lower calf wings sit where people can easily show them off with shorts or skirts. Because the canvas is stable, subtle halos around the wing read clearly. Sessions are short and pain is low. Avoid asking for too much internal shading in a micro piece because the skin texture there can break up tiny gradients. For outfit pairing, cuffed straight-leg jeans or a sleeveless linen tunic balance casual visibility. If you live in a high-friction wardrobe where leggings rub the area daily, expect touch-ups sooner.
19. Tiny Wing Tattoo Near the Collar of a Shirt

A small wing tucked near a shirt collar is great for subtlety. The upper chest handles detail fairly well but is exposed to sun, which fades ink. Ask your artist about slightly bolder outlines near the fabric line so the design holds up. The session is short and pain is low to moderate. Wear a loose button-down that you can slide off the shoulder. For the session pick a loose button-down shirt. Aftercare must include sun protection once healed because collar-area exposure accelerates fading.
20. Ancient Motif Isis-Style Winglet on the Hip
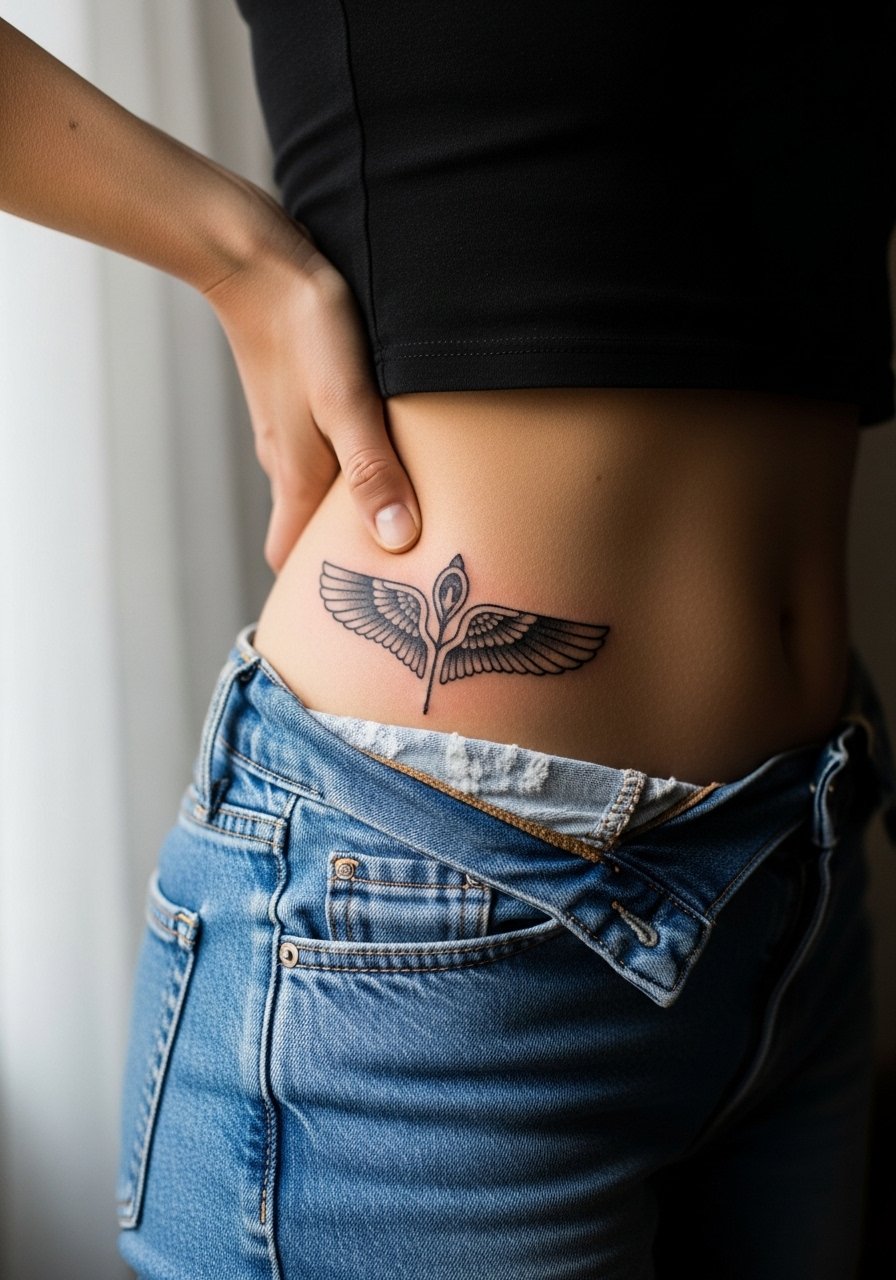
Designs inspired by ancient Egyptian motifs can be striking in micro formats on the hip. This placement heals well when the piece keeps clean lines and avoids tiny filling. Note that using cultural motifs invites responsibility. Some choose slight variations rather than direct replicas to show respect. Sessions are quick and pain is moderate. For the day wear high-cut shorts or high-waisted denim that can be shifted easily. A common error is asking for dense ornamental fill in a one-inch area, which ages into a spot rather than a pattern.
21. Micro Paired Wings Along the Spine
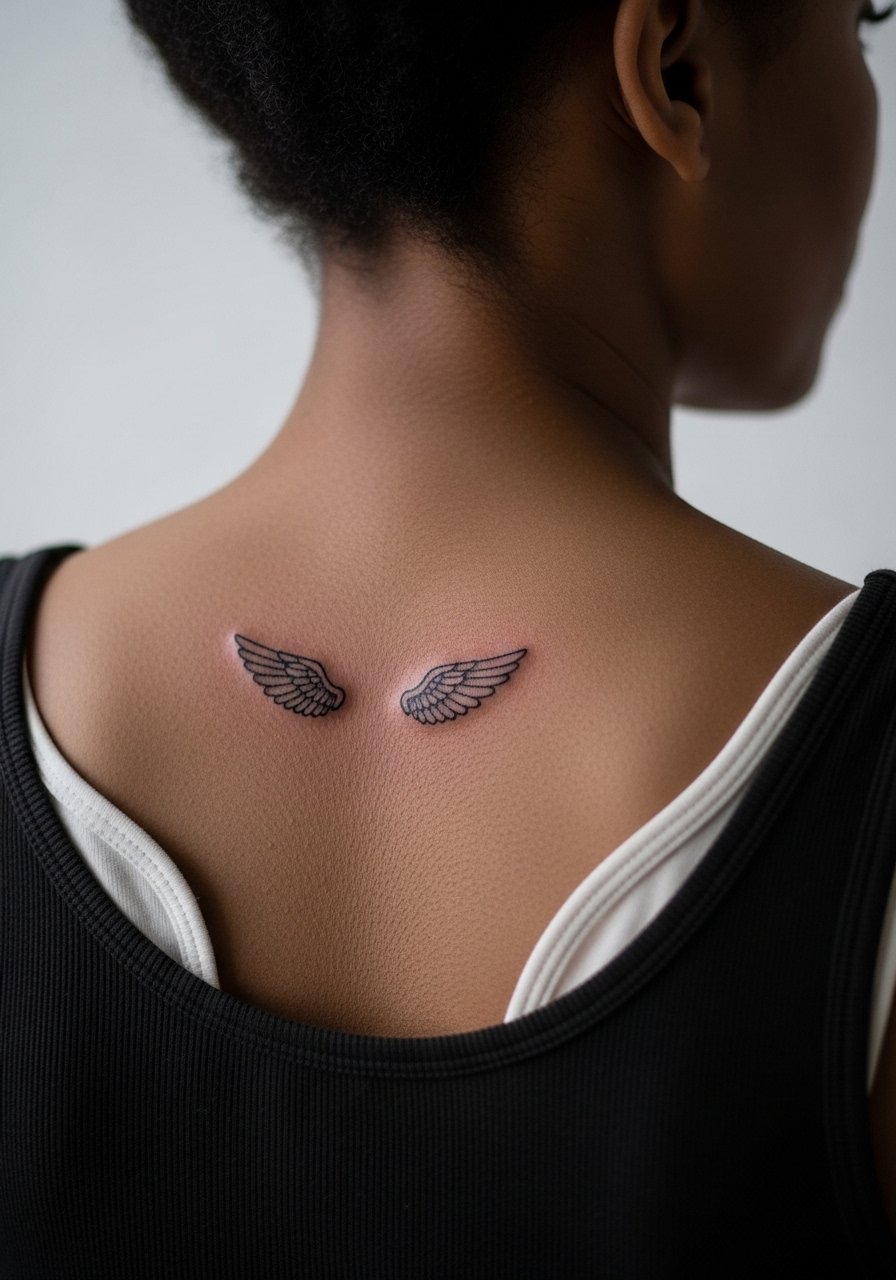
Spinal paired wings look architectural and read beautifully with the body's vertical line. Keep each wing small but spaced so the gap between them remains visible as you move. The spine is moderate in pain and sessions can be broken into short passes. A mistake is compressing too much dotwork in the gap which then fills in over time. For the session wear a tank top you can pull aside. If you plan to show the wings, open-back tops frame the placement without forcing overexposure.
Frequently Asked Questions
Q: Will fine line wrist wings blur faster than a bold wrist piece?
A: Fine line on the wrist tends to soften faster because the area sees a lot of friction and sun exposure. One camp says that is acceptable and part of the aesthetic. The other camp recommends slightly heavier lineweight for longevity. My advice is to discuss lineweight and spacing with the artist and plan a touch-up around year one to keep the contour sharp.
Q: Which placements from this list are best for first-timers worried about pain?
A: First-timers often start with forearm, shoulder, or calf placements because they are lower on most pain charts and give the artist a stable canvas. Rib and sternum placements are higher on pain, so if nerves are tight consider a shoulder or upper arm option first. Bring a loose top for easy access and schedule a lighter session to test comfort.
Q: How do I find an artist who understands micro wing tattoo designs without naming anyone?
A: Search hashtags like #microwingtattoo and #finelinewings on Instagram, check Etsy listings for custom stencils, and use local directories or forum threads on r/tattoos to read real client notes. Look specifically for healed photos showing the same placement you want and ask about touch-up policies before booking.
Q: What should I wear to a collarbone or sternum session for access and modesty?
A: For collarbone work choose a wide-neck or strapless top you can shift without full exposure. For sternum pick a fitted sports bra or bandeau that keeps coverage while giving the artist access. A good option is a strapless midi dress you can step out of or a sports bra that provides comfortable coverage.
Q: Do I need to plan for touch-ups on micro wings and when?
A: Expect touch-ups for fine line micro wings within one to three years depending on placement, skin type, and sun exposure. Fingers and wrists typically need earlier touch-ups. Ask your artist for a realistic timeline based on their healed portfolio so you know whether a single session covers it or a follow-up will be necessary.
