
Fine line dragons are everywhere on saved boards and short videos, and the reality is that the prettiest-looking pieces out of the gate are not always the ones that last. I keep hearing three common complaints at shops: fine line wrist pieces fading, small tattoos priced higher than expected, and color failing to read on darker skin. Read on for 27 small Chinese dragon designs that account for aging, placement, and visibility so you can pick something that actually looks good healed.
1. Fine Line Mini Dragon Coiling Around a Peony on the Wrist
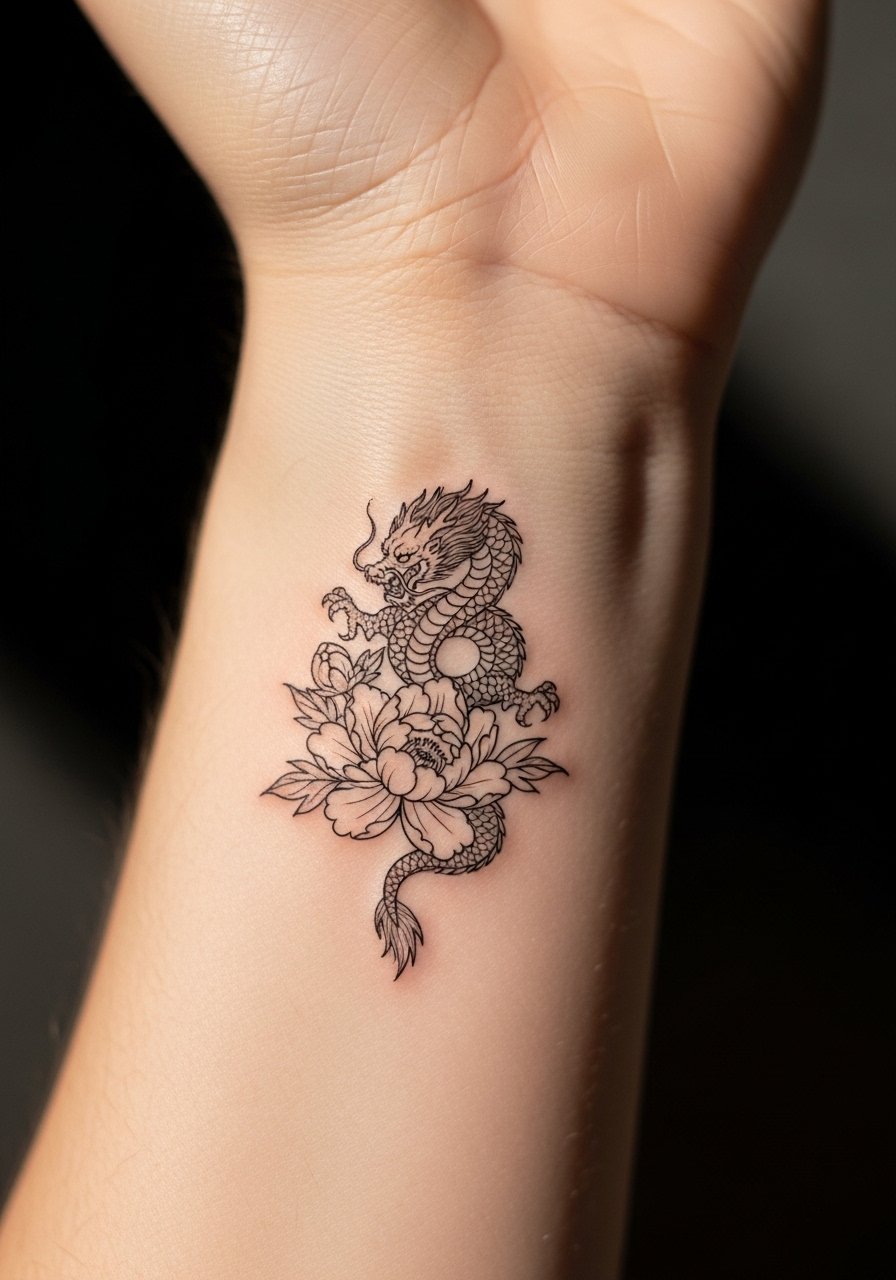
I’ve seen this wrist pairing a few times and it’s a favorite for first-timers who want myth and florals in one compact piece. Fair warning, the wrist takes a lot of washing and friction so the fine line version here should use slightly bolder contour strokes than a pure single-line flash. Tell your artist you want a one- to two-inch coil with reinforced outlines around the peony petals. For the appointment wear a sleeveless tank top so the artist can work without jewelry in the way. Expect a touch-up window around year two if you keep the original delicate hairlines.
2. Minimalist Single-Line Dragon Behind the Ear (Neck Framing)
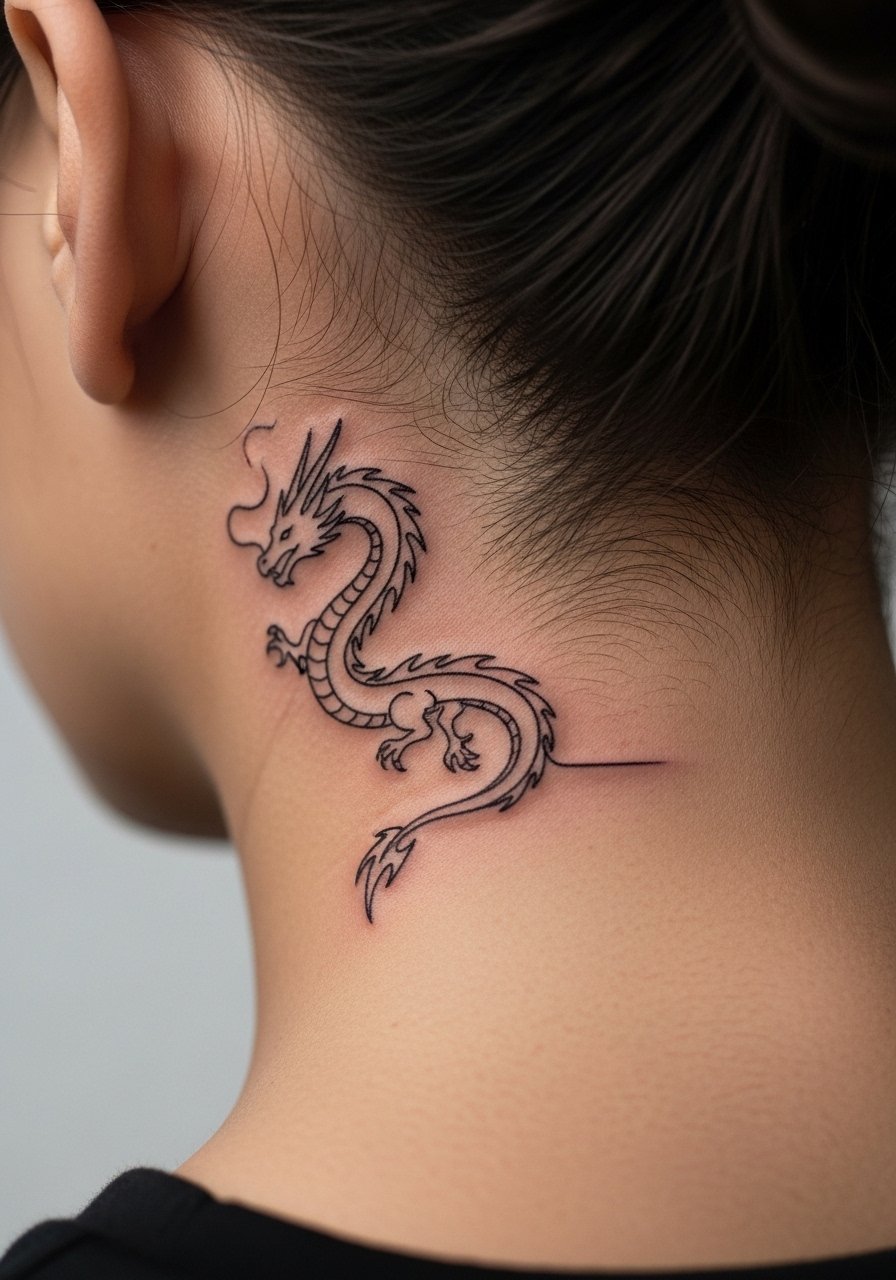
This micro silhouette reads like a secret peek when hair is up. Behind-the-ear placements need that exact phrasing to avoid placing ink on the ear itself. Pain is low, session time is under 30 minutes, and the design works best under one inch. The common mistake is asking for too many whiskers in a micro piece, which creates fuzz as it ages. Ask for clean negative space and consider a slightly thicker tail stroke so the motif holds at six months and beyond. If you want to show it off, slip your hair up and pair with a minimalist stud.
3. Watercolor Dainty Dragon with Flowing Whiskers on the Collarbone

Watercolor softens the dragon’s whiskers and gives a dreamlike edge, but color on small pieces can muddy if placed where sweat collects. The collarbone is an excellent middle ground because it shows well with off-shoulder tops and is easier to protect from sun. During consultation, ask the artist to use layered washes rather than saturated blobs and to maintain crisp black anchor lines at the whiskers. For show-off outfits try an off shoulder sweater that frames the piece. Expect more gentle fade than blackwork and plan a color refresh at two years if you want the pastels bright.
4. Neo-Traditional Dragon Head Wrapped Around the Ankle
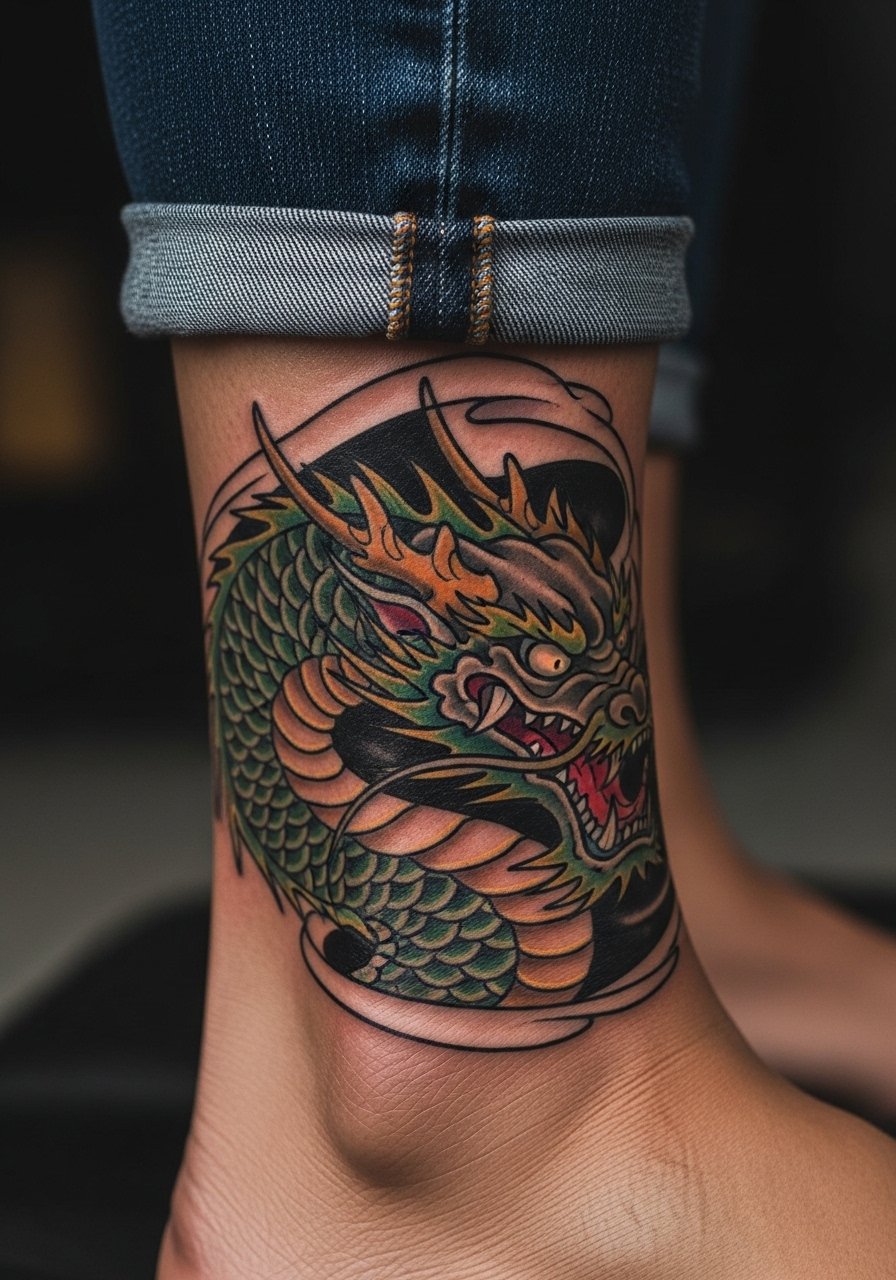
The outer ankle is great for wrap compositions. Neo-traditional outlines solve the fine-line fade issue by giving saturation and structure in a small footprint. Pain at the ankle is moderate and sessions often run 1 to 1.5 hours for a two- to three-inch wrap. A common mistake is asking for too many tiny color blends that age into mush in high-friction spots. Ask for clear black outlines and saturated fills. Pair with strappy heeled sandals and cropped pants for summer visibility. Watch for scab movement after week one and plan a touch-up if edges soften.
5. Minimalist Dragon Silhouette on a Finger
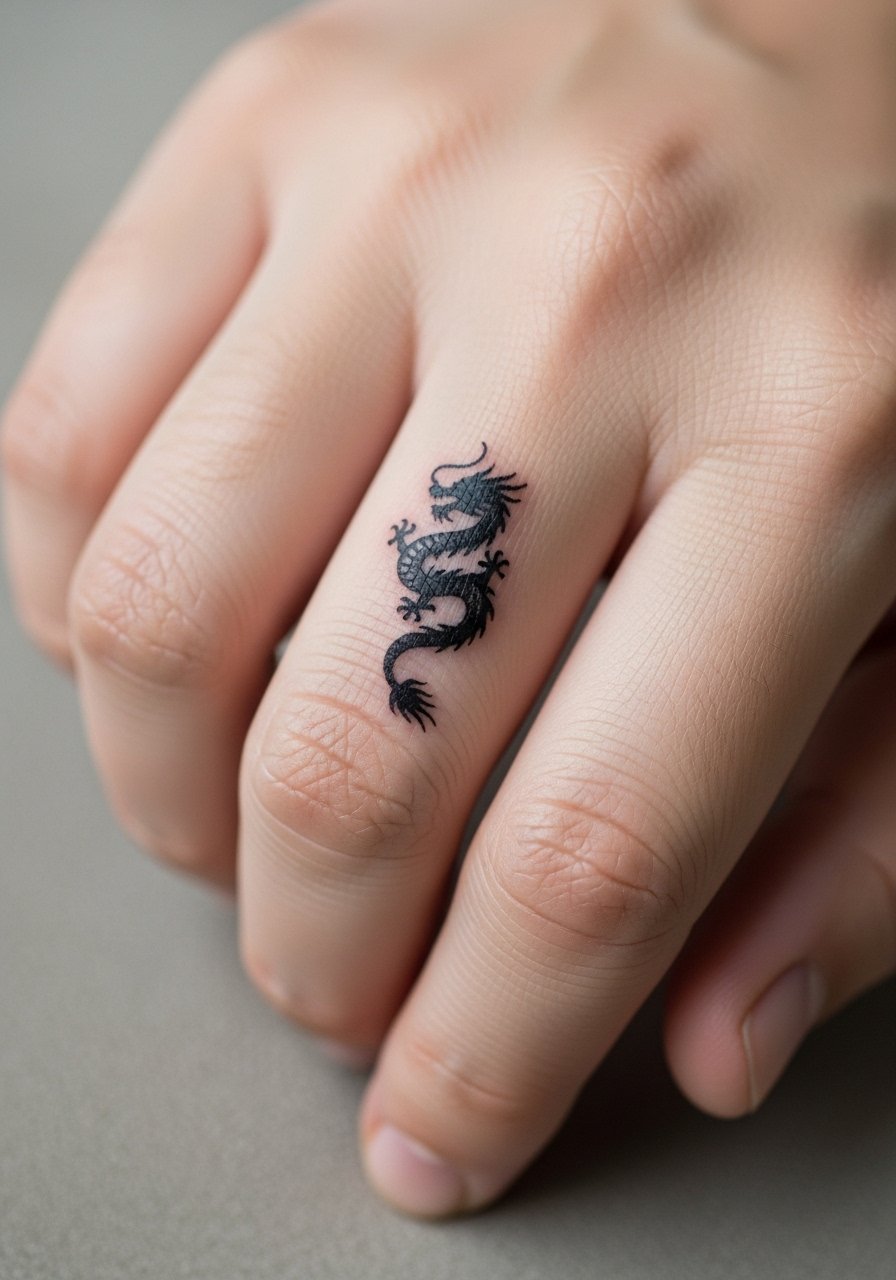
Fingers are the most prone to fade because of constant washing and skin turnover. That means silhouette shapes work better than fine detail here. The session is quick but expect frequent touch-ups compared with forearm pieces. The most common error is demanding linework equal to a forearm tattoo. Ask for a compact silhouette with a bold spine stroke and accept that a one-year touch-up is likely. For the session, remove rings and keep hands clear. Consider stacking a thin silver chain bracelet on the opposite wrist to balance visibility.
6. Blackwork Dainty Dragon with Geometric Scales on the Inner Thigh

Inner thigh placements hide well and age privately, but they react to body changes differently than limbs. Blackwork holds on darker skin tones and geometric scales resist washout better than pastel fills. Expect more session time for solid saturation and a stronger healing itch during the first week. During consult ask for bold scale blocks rather than tiny stipple that can blur over time. For the appointment wear loose shorts so the artist can access the area without pressure. A common mistake is under-sizing the piece; give the scales room to breathe so the pattern reads at six months.
Pre-Session Essentials
The wrist, collarbone, ankle, and inner thigh designs above each ask for different prep, and a few curated items smooth the session and the week after.
-
Frida Ink Balm. A thinner balm users praise for fine line pieces, it moisturizes without heavy residue that tends to clog tiny channels on wrist work.
-
Tattoo Goo Original. Lightweight and fast-absorbing for small color patches like watercolor collarbone pieces so saturation evens out during healing.
-
Curel Tattoo Lotion. Gentle hydration that reduces shine on blackwork thighs while keeping scales readable on darker skin.
-
Australian Tea Tree Balm. Anti-inflammatory properties can help red, sore areas on sensitive placements like the inner thigh or ribcage.
-
Aquaphor Healing Ointment. Thin layer for the first two to three days protects delicate linework on the wrist and finger while you sleep.
7. Coiled Dragon Around a Small Peony on the Inner Forearm
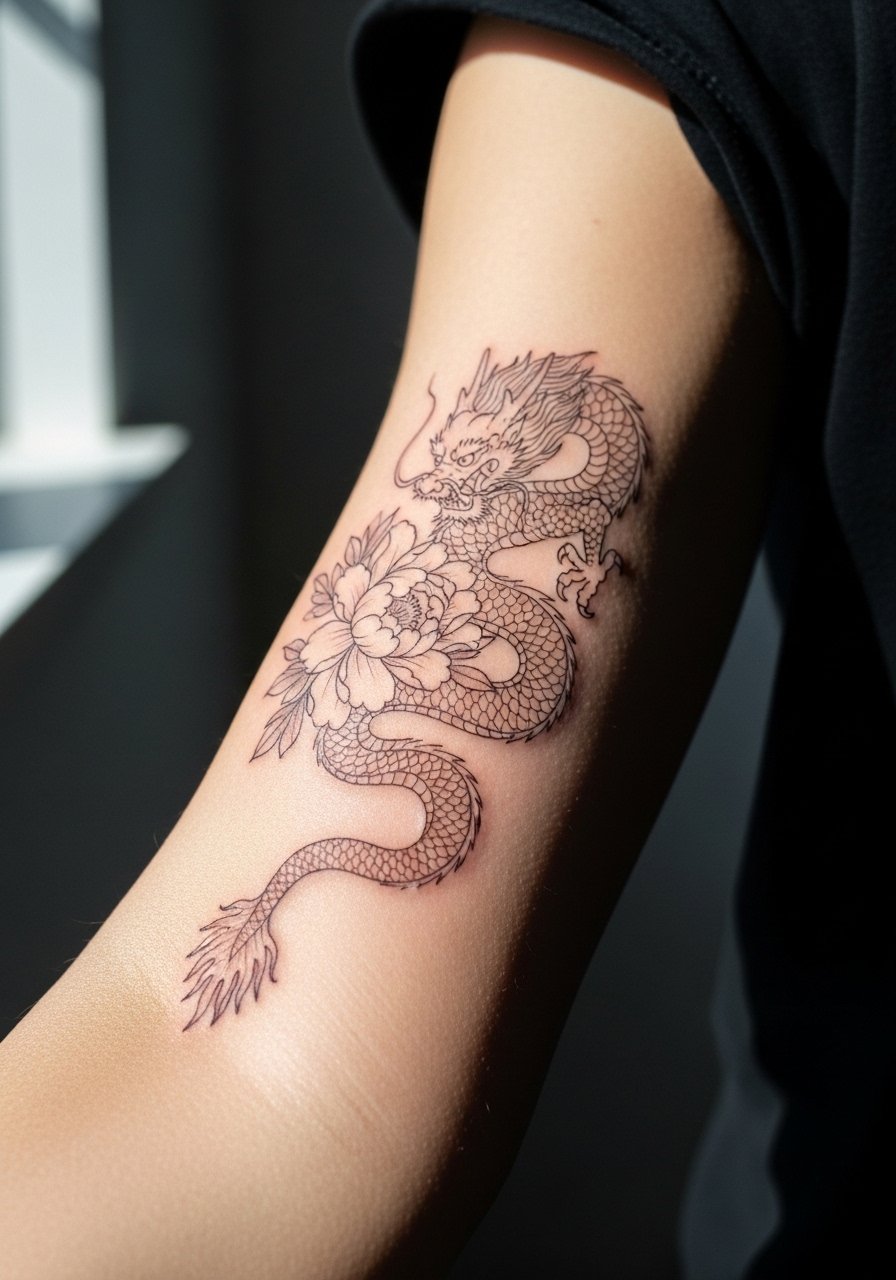
I’ve noticed that inner forearm placements age better than wrist pieces because of less constant friction. This coiled combo is a compact way to carry a motif without committing to a sleeve. During consultation say you want reinforced outlines on the dragon’s spine and lighter stipple shading inside the peony petals. The session runs about 45 minutes for a 1.5- to 2-inch piece and pain is mild. A mistake is asking for near-micro detail inside the flower; instead keep the flower open so the dragon’s scales remain legible at two years. For casual showing, roll your sleeves and try a linen button down shirt.
8. Tiny Dragon Head Behind the Ear with One Whisker Accent
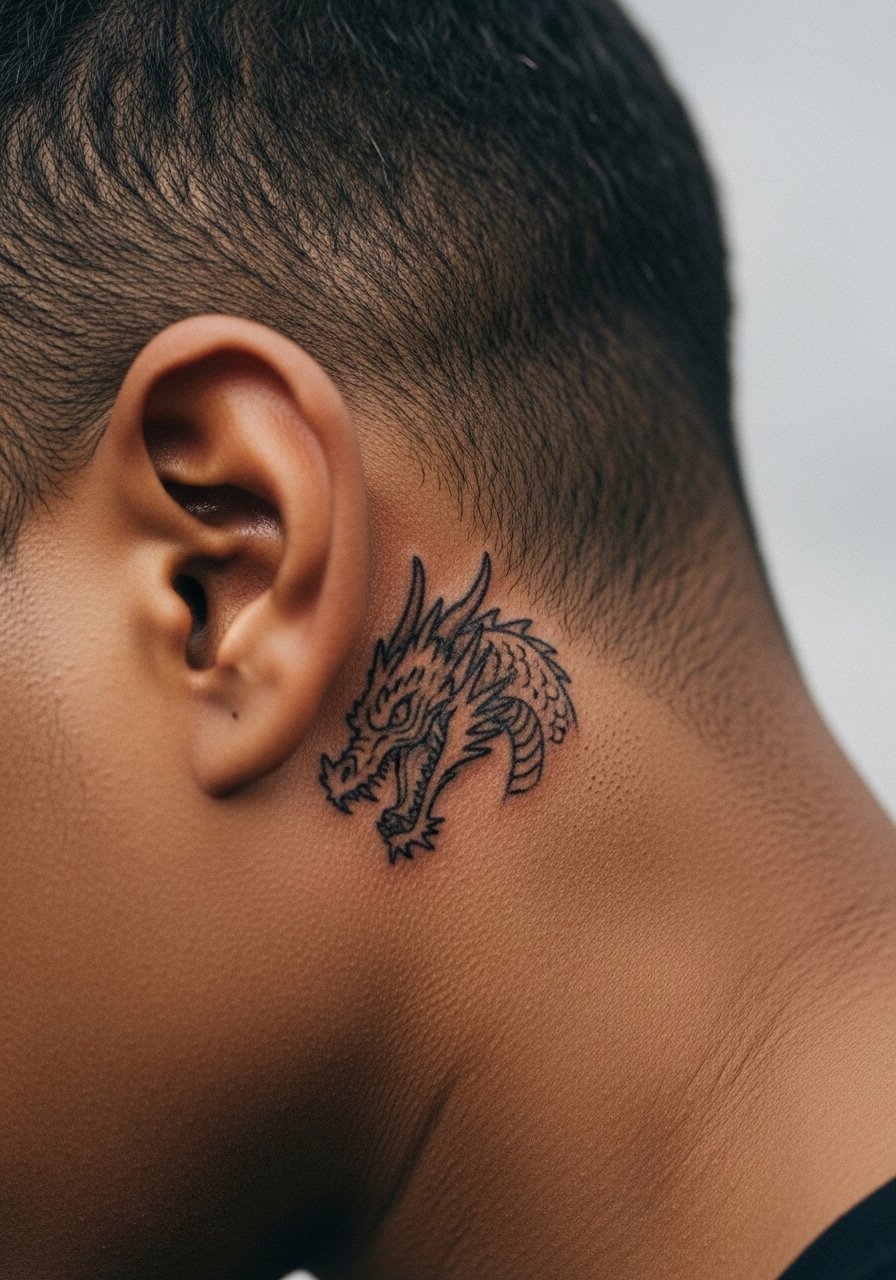
This micro head with a single flowing whisker feels like a secret accent when hair is pulled up. The placement is low on pain and quick to complete. A common version that ages poorly tries to cram too many whiskers and tiny scales into a small area. Ask your artist for a clear silhouette and one accent whisker meant to be the focal point. Because the area is sensitive to changing hairlines and glasses, expect occasional softening and accept a small touch-up once the lines settle.
9. Single-Line Dragon Silhouette Around the Ankle Bone

A single continuous line around the ankle looks sleek and modern. The real trick is spacing the loops so the line does not compress into blur from shoe friction. This placement hurts a bit near bone but heals fast. Tell your artist to plan larger negative spaces between coils, and avoid tiny whisker detail that will disappear. When showing it off, try cropped straight pants and sandals. Expect touch-ups sooner if you wear socks and shoes that rub the area daily.
10. Micro Stipple Dragon on the Side of the Ribcage

Ribcage work splits artists into two camps on fine line. One camp says the skin stretch there blurs lines within two years. The other camp argues that with careful depth and spaced stipple, fine line can hold. I tell clients to expect some softening if they want hairline strokes, and to ask for slightly heavier anchor lines with open stipple fill. Pain is higher on the ribs yet many report the work heals clean if they avoid aggressive sun exposure. Choose a design with breath in the composition to limit future merging.
11. Collared Shoulder Blade Dragon Wrapped with Stems
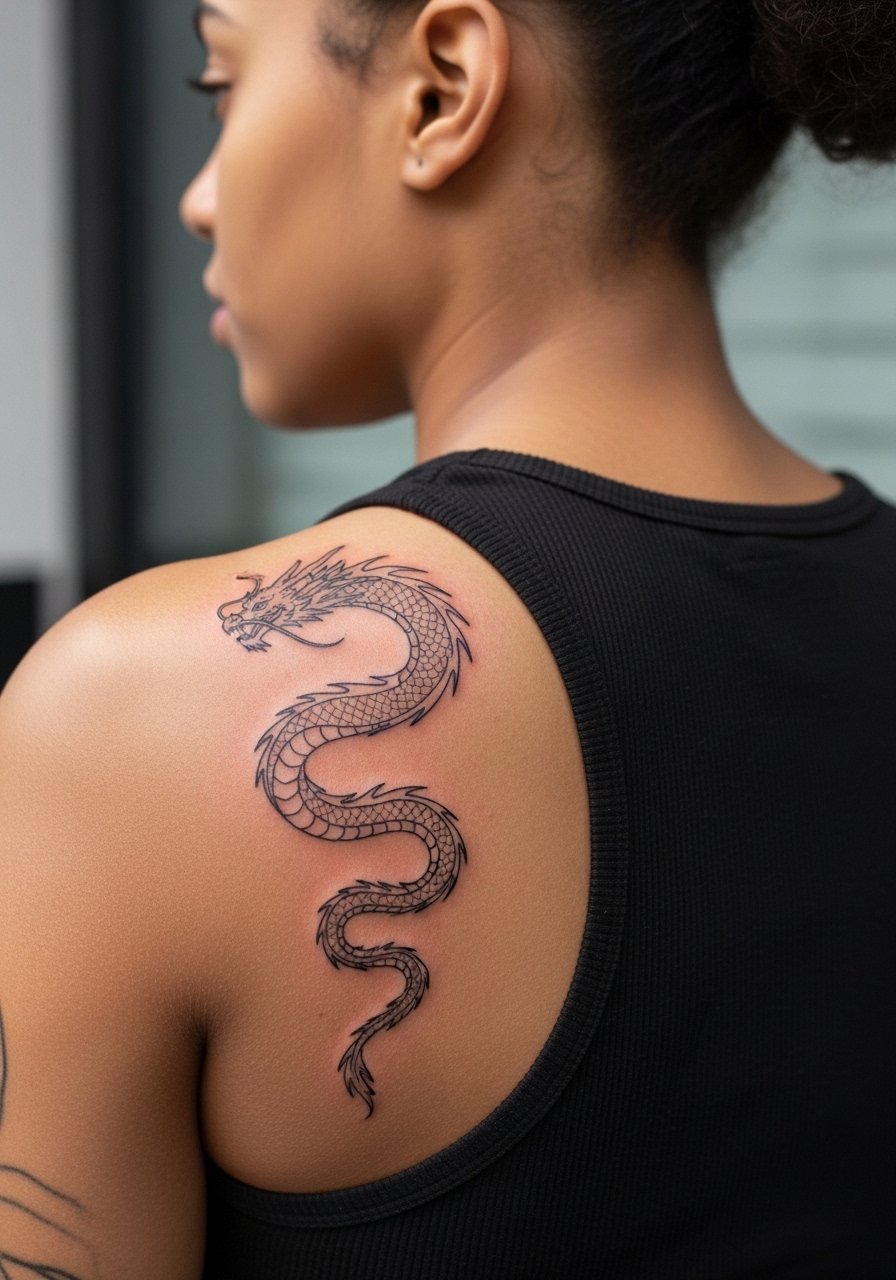
Shoulder blade pieces sit flat and heal well, which is why floral-accented dragons look great here. The common mistake is compressing too many tiny scales into a two-inch vertical. Ask for flow that follows the shoulder blade contour and for slightly bolder outline anchors so the piece reads in photos. Session wear should be a open back top or a button-down you can pull aside. Expect low friction after healing and touch-ups mostly for color or fine whiskers.
12. Tiny Neo-Traditional Dragon Head on the Outer Calf
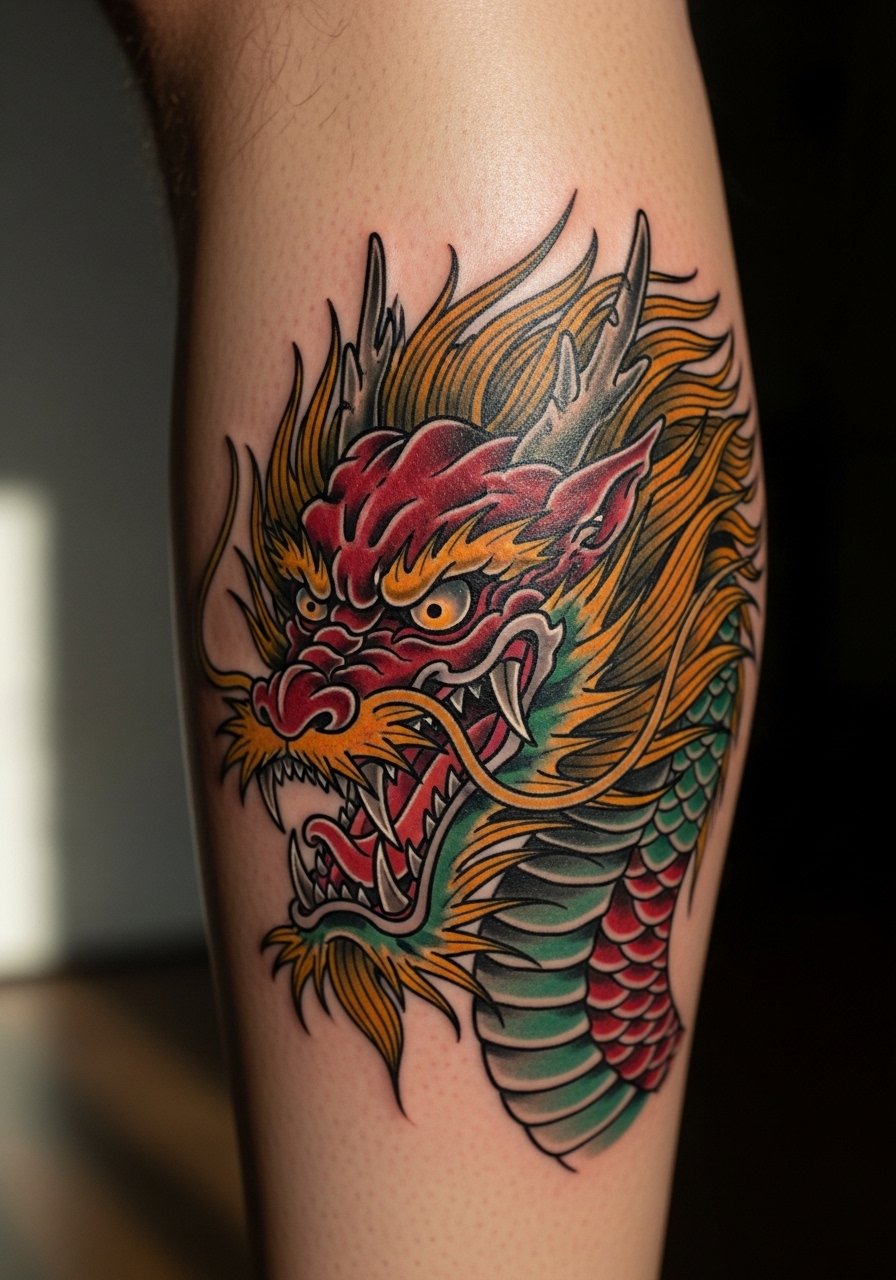
The calf is great for small neo-traditional pieces because it allows a bit more saturation than thin-lined limbs. Expect a one- to two-hour session for a two-inch head with color and outline. People often ask for intricate shading that ends up muddy in small areas, so request solid blocks of color with crisp black edges. The calf is low-friction and ages more predictably than ankles or hands. Pair with cropped pants or strappy heeled sandals to frame the piece when you want it visible.
13. Micro Blackwork Dragon with Geometric Scales on the Rib Side
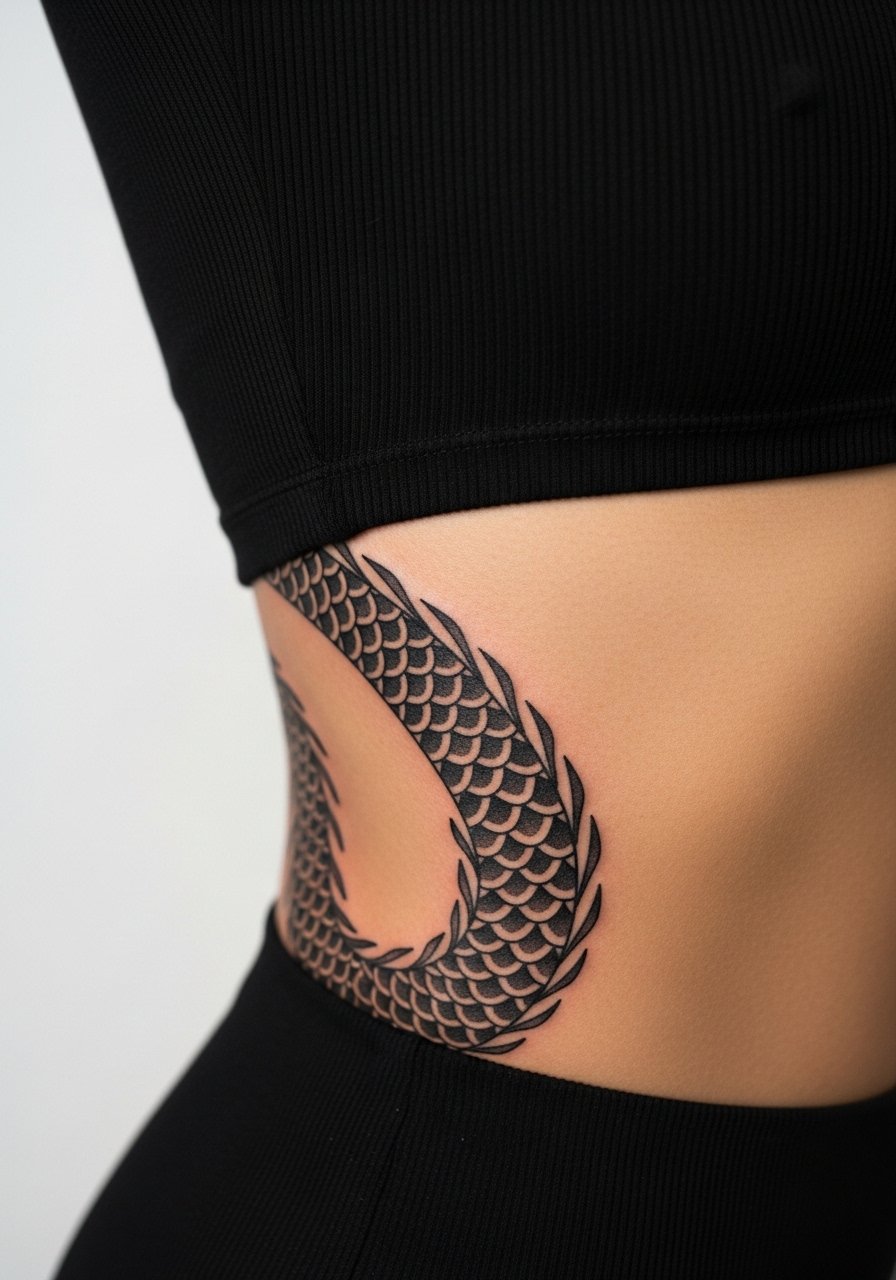
This version leans into solid black scales for longevity, which is helpful for darker skin tones where fine color can read faint. Skin on the side torso stretches sometimes, so ask for bold shapes and avoid tiny gradient fills. The session can be longer because blackwork requires saturation passes. The mistake is believing micro stipple will survive in a stretch-prone zone. Be ready for a touch-up at year two, and consider sizing up slightly so the geometry stays crisp.
14. Wrist Dragon Tail Looping to a Minimal Chain Design
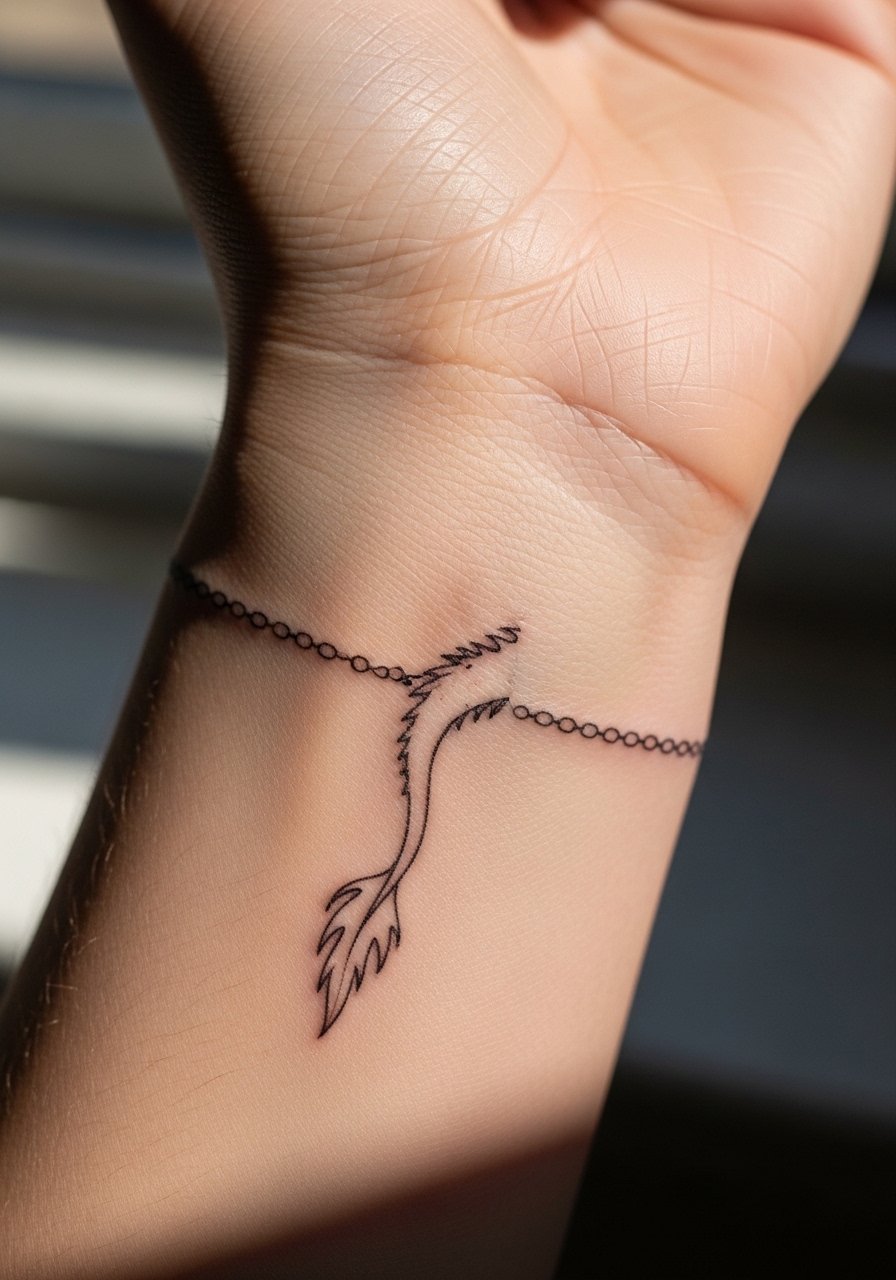
There is a lot of wrist movement and washing, so combining a dragon tail with a minimal chain benefits from slightly heavier chain links than a pure micro chain. If you want the chain to read at six months, ask for small open links with stronger black anchor points. A common error is using hairline loops that vanish. For session day wear a sleeveless tank top and remove bracelets. Plan on a touch-up in the first 12 to 18 months if you keep the original ultra-thin chainwork.
15. Tiny Watercolor Dragon on the Shoulder Cap
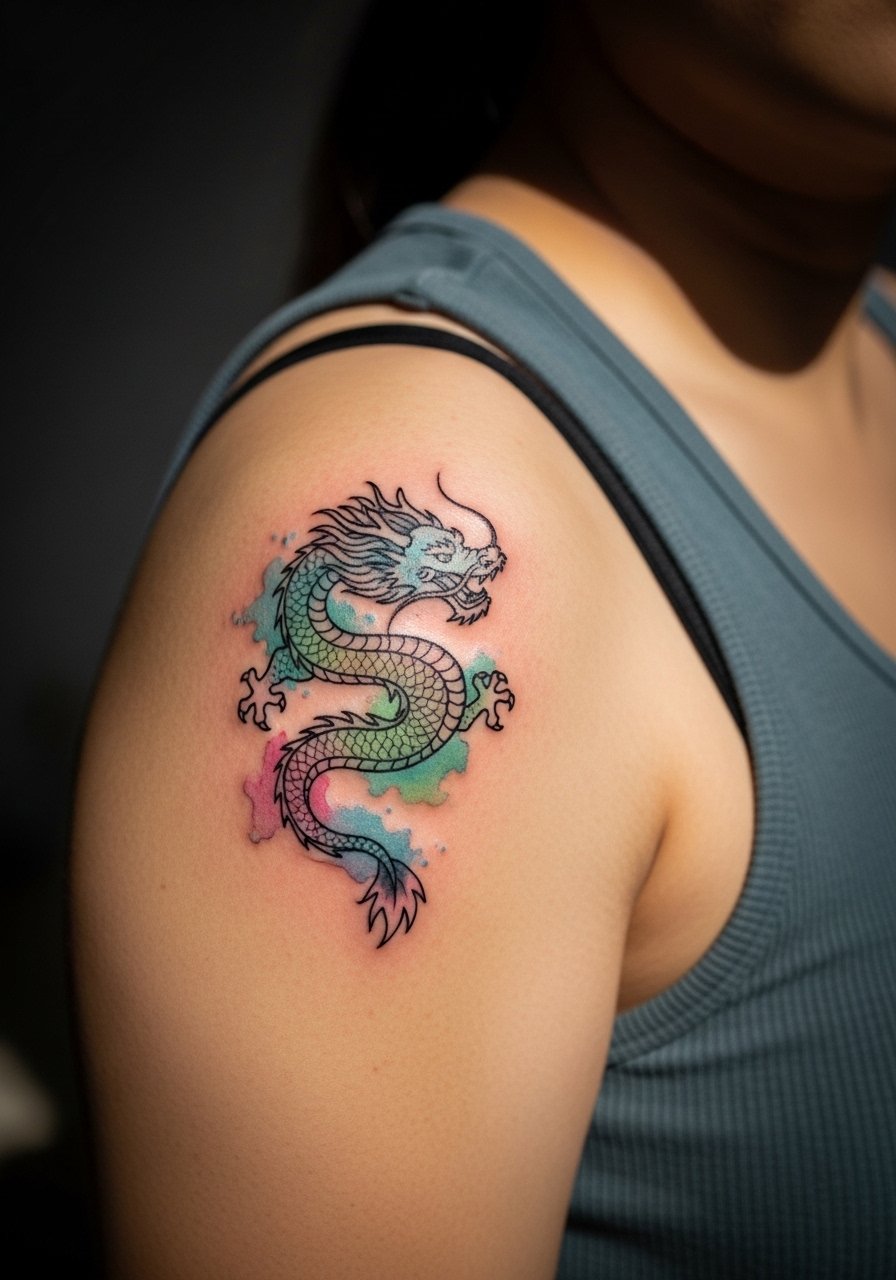
The shoulder cap takes color well and is easy to protect from the sun while healing. The key is to pair soft washes with confident black anchors so the shape remains readable on darker days. A mistake I see is asking for fully blended watercolor with no black structure; those pieces tend to look like soft bruises later on. For the session wear a loose button-down shirt you can pull aside. Expect gentle fade and a refresh for color at two to three years if you want brightness maintained.
16. Micro Dragon Crest on the Back of the Neck
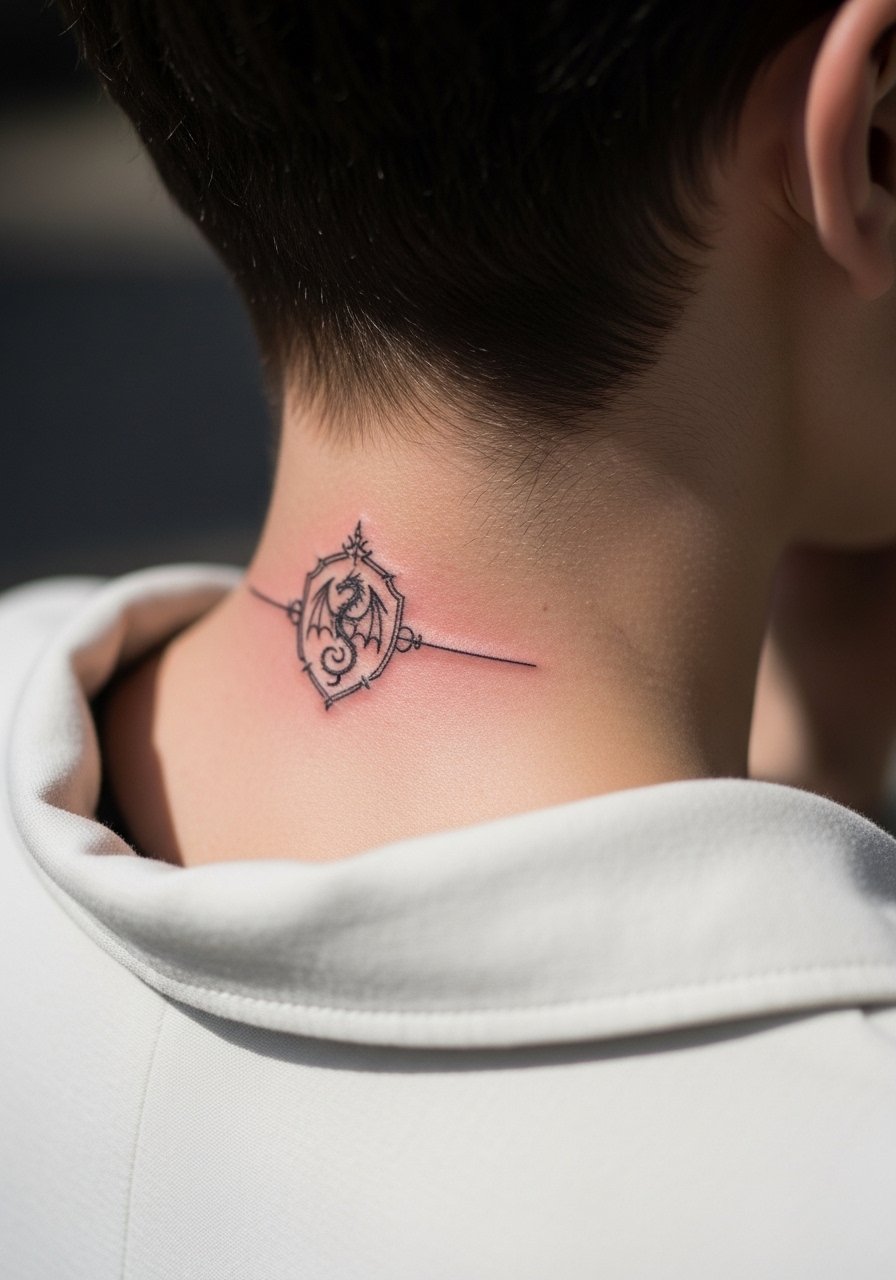
Neck placements need a specialist touch and public visibility varies by workplace. A common mistake is requesting intricate detail that the small neck canvas cannot hold. When you talk to your artist ask about needle depth and tell them you prefer slightly bolder anchors to stop early blur. Pain is moderate and healing requires attention to clothing friction. For session wear choose a wide-neck shirt you can pull to one side. If career considerations matter, keep a plan for concealing with collars.
17. Tiny Dragon Coil on the Inner Bicep

Inner bicep is softer skin and holds fine detail well if the artist spaces lines. The common mistake is going too tiny into the armpit crease where motion causes softening. Ask for an off-center coil that avoids the crease and for stipple shading that reads as texture rather than tight dot clusters. The session is usually short, but the area can be itchy while healing. Wear a loose tank top so the artist has clean access. Expect good longevity compared with wrists and fingers.
18. Small Dragon Head Near the Ankle with Floral Accents

Ankle canvas rewards clear shapes over micro detail. Floral accents help anchor the head visually and create contrast for photography. The common error is tiny petal detail that friction erases. Request bold petal outlines and dense black accents so the composition reads from a short distance. Session time is usually under 90 minutes. Pair with cropped straight pants and sandals to show it off in warm months.
19. Small Blackwork Dragon on the Lower Rib Border
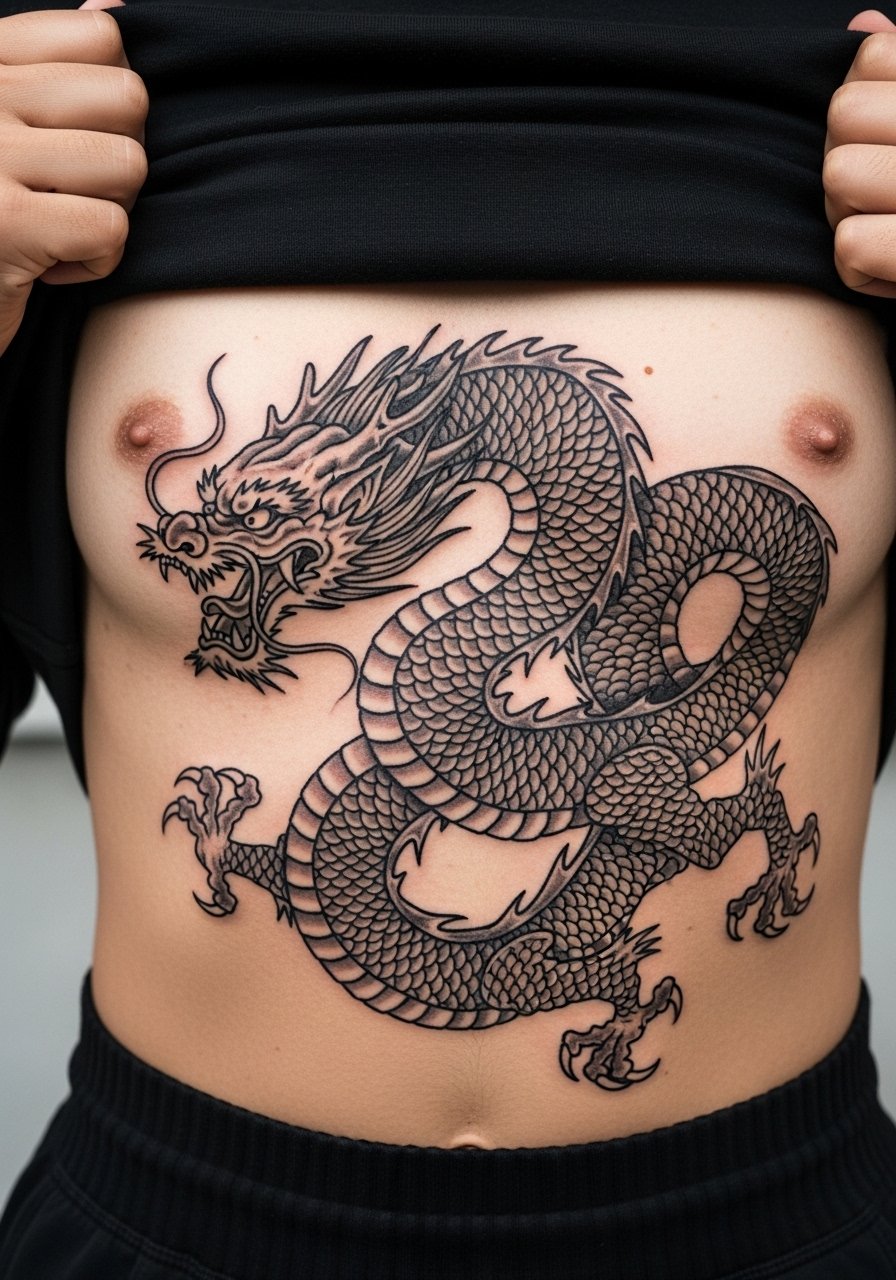
Lower rib border tattoos are intimate and can be painful, but they hide well and age privately. Blackwork solid fills age reliably compared with pastel washes in this zone. Be explicit in consult about sizing up scale blocks so the pattern does not blur if your body changes. The biggest mistake is underestimating pain and booking multiple sessions back-to-back. Wear a strapless bra or sports bra to the appointment and expect a longer initial healing window.
20. Neo-Trad Mini Dragon with Floral Eye on the Calf
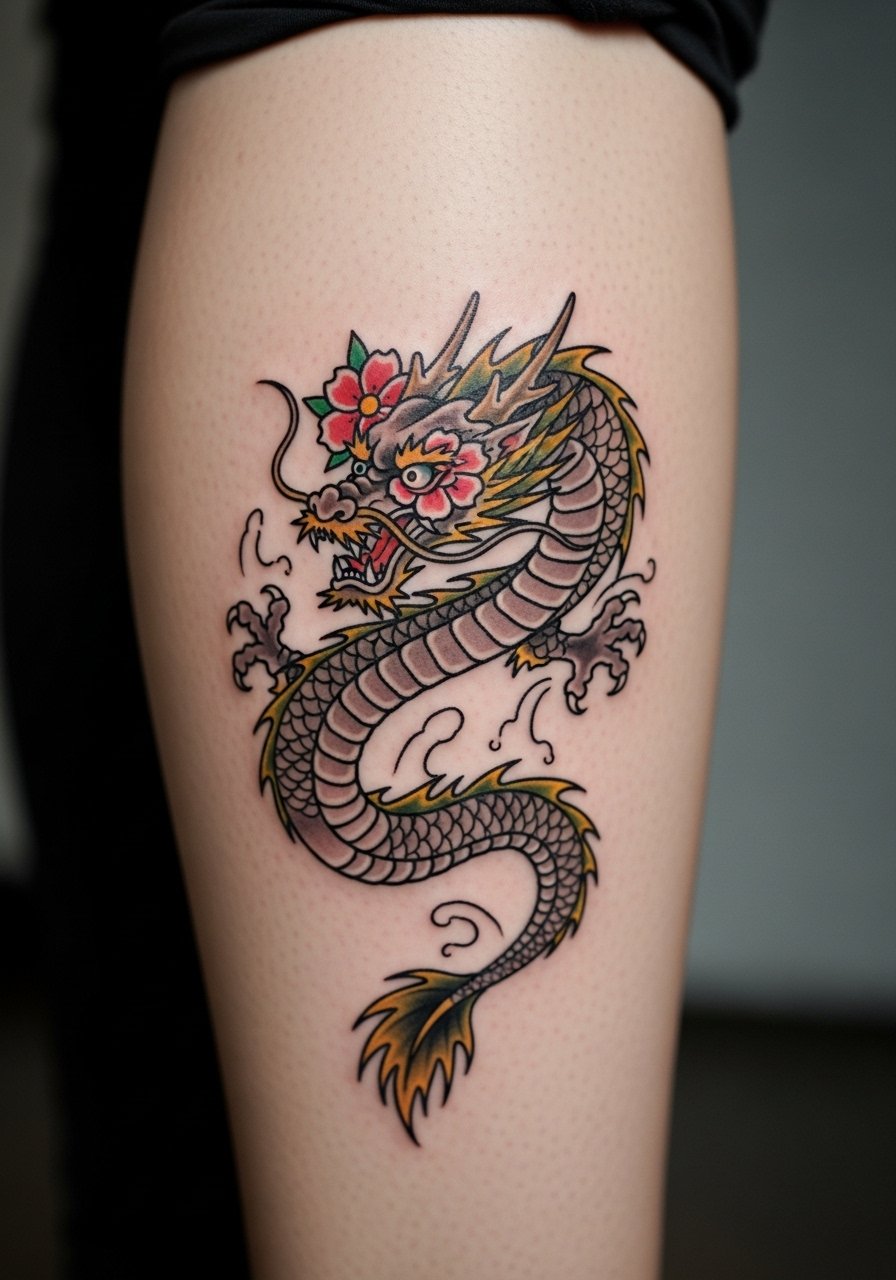
Calf pieces let neo-traditional color pop without the same friction worries as ankles. Artists can use denser saturation here to preserve color. The misstep is shrinking a neo-trad head too small; the eye and scales need room to breathe. Ask for crisp black outlines with controlled saturation to keep the palette readable. For visibility in warm weather, pair with cropped pants and strappy footwear. Touch-ups tend to be infrequent on the calf unless you get heavy sun exposure.
21. Single Needle Dragon Spine Accent Along the Upper Back
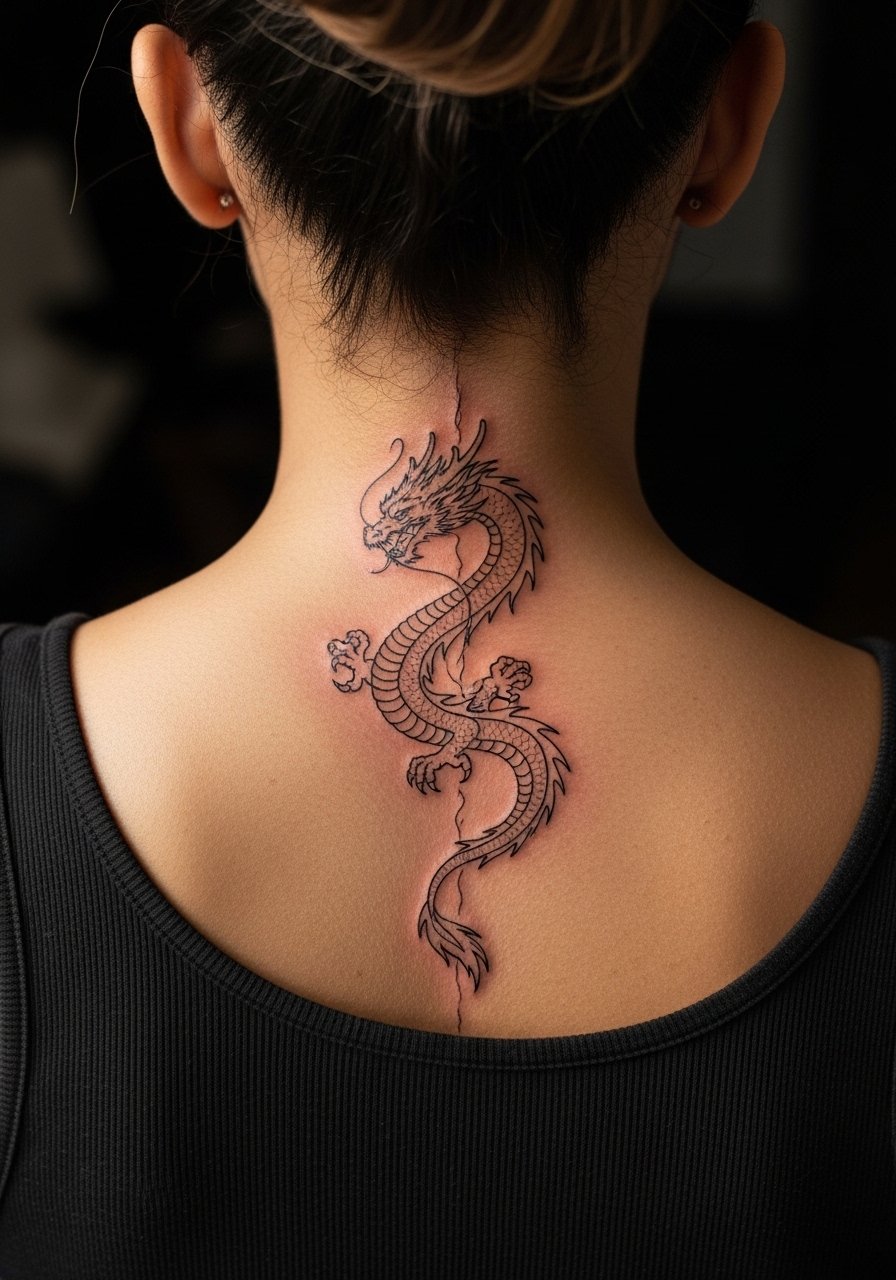
A spine accent needs a confident single-needle hand but also spacing that prevents merging. Single-needle work looks incredible fresh yet can soften if drawn too dense. Ask the artist to set anchor lines at the spine and use spaced dot work to imply scales. For showing off, try an open-back dress or sleeveless midi dress. Expect lower risk of friction-related fade, but plan for a color or line touch-up if you get heavy sun.
22. Micro Dot Work Dragon Near the Collarbone with Choker-Friendly Placement
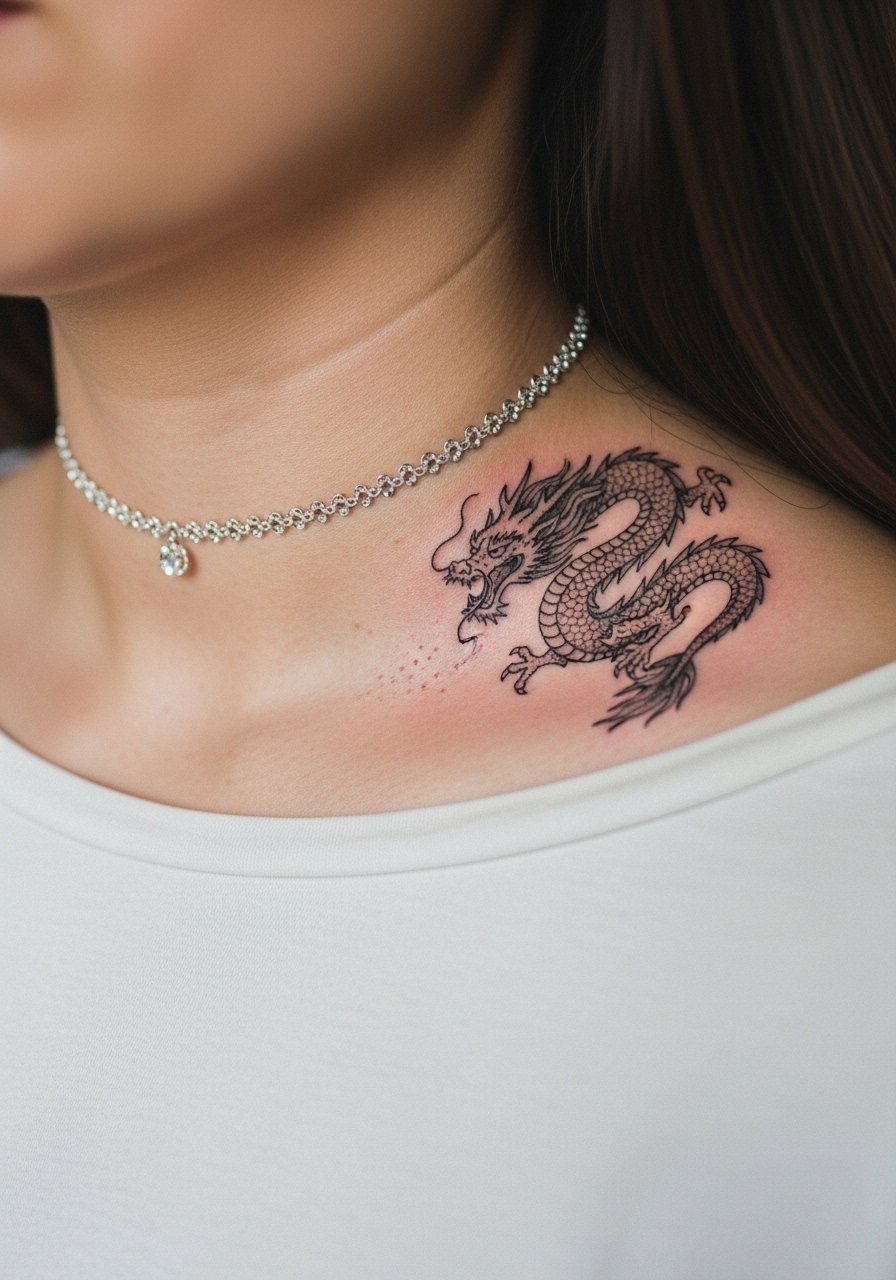
Dot work creates texture without relying on continuous lines that can blur. This placement pairs well with chokers and open tops, but be aware dot work reads differently across skin tones. The common error is packing dots densely and expecting them to stay crisp. Ask for spaced dot clusters with black anchor points. For styling, a delicate choker necklace can frame the piece. Expect subtle fade in color and texture over time, with touch-up windows similar to fine line.
23. Small Dragon Wrap Around the Ankle Bone with Open Scale Patterns
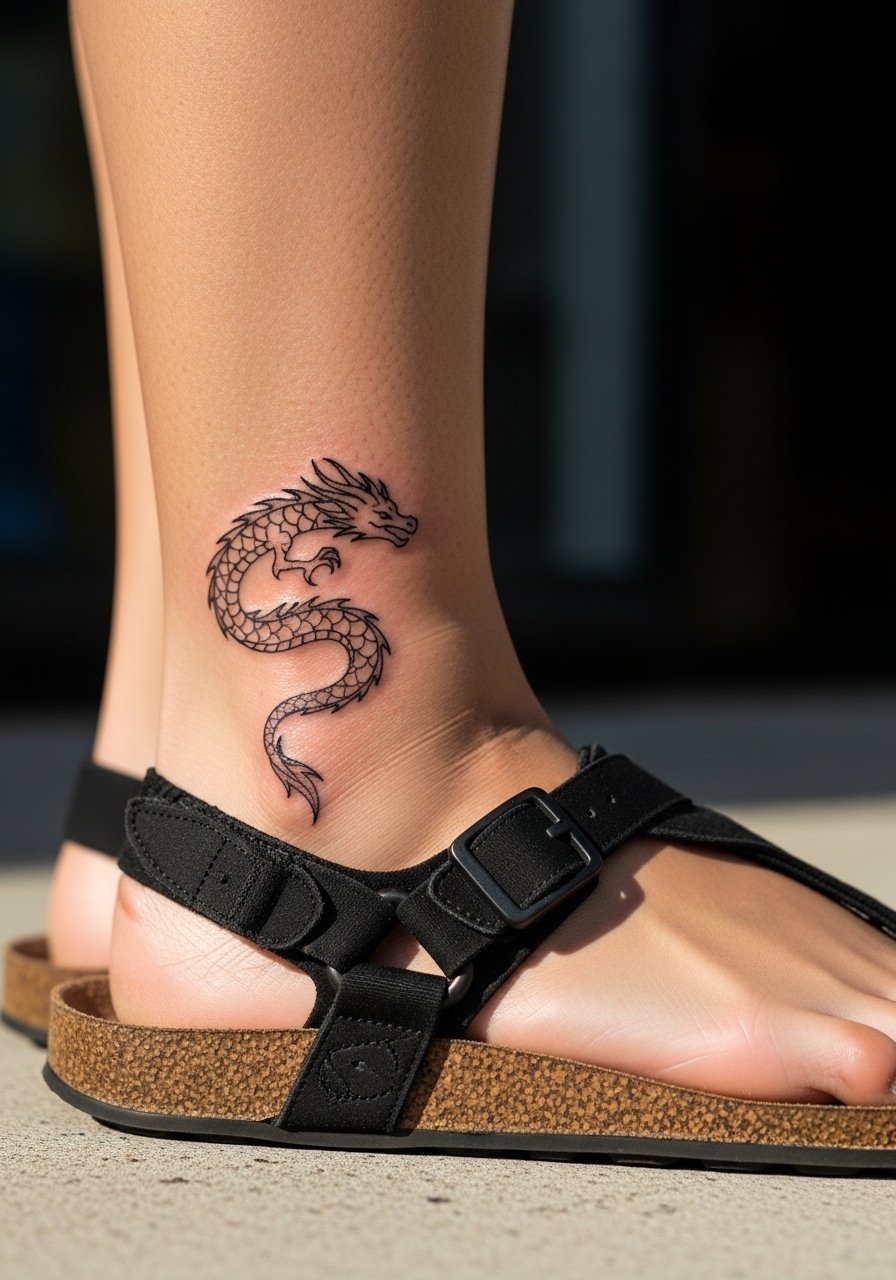
Open scale patterns on an ankle wrap allow the design to breathe and resist early blur. The mistake is filling every scale with micro shading; instead choose alternating solid and open scales. Ask your artist for negative space rhythm and slightly strengthened outer contours. For warm-weather wear, pair with strappy heeled sandals and cropped trousers. The ankle will likely need a touch-up before a hand or forearm piece would.
24. Minimal Dragon Curve Behind the Knee (Subtle Peek)
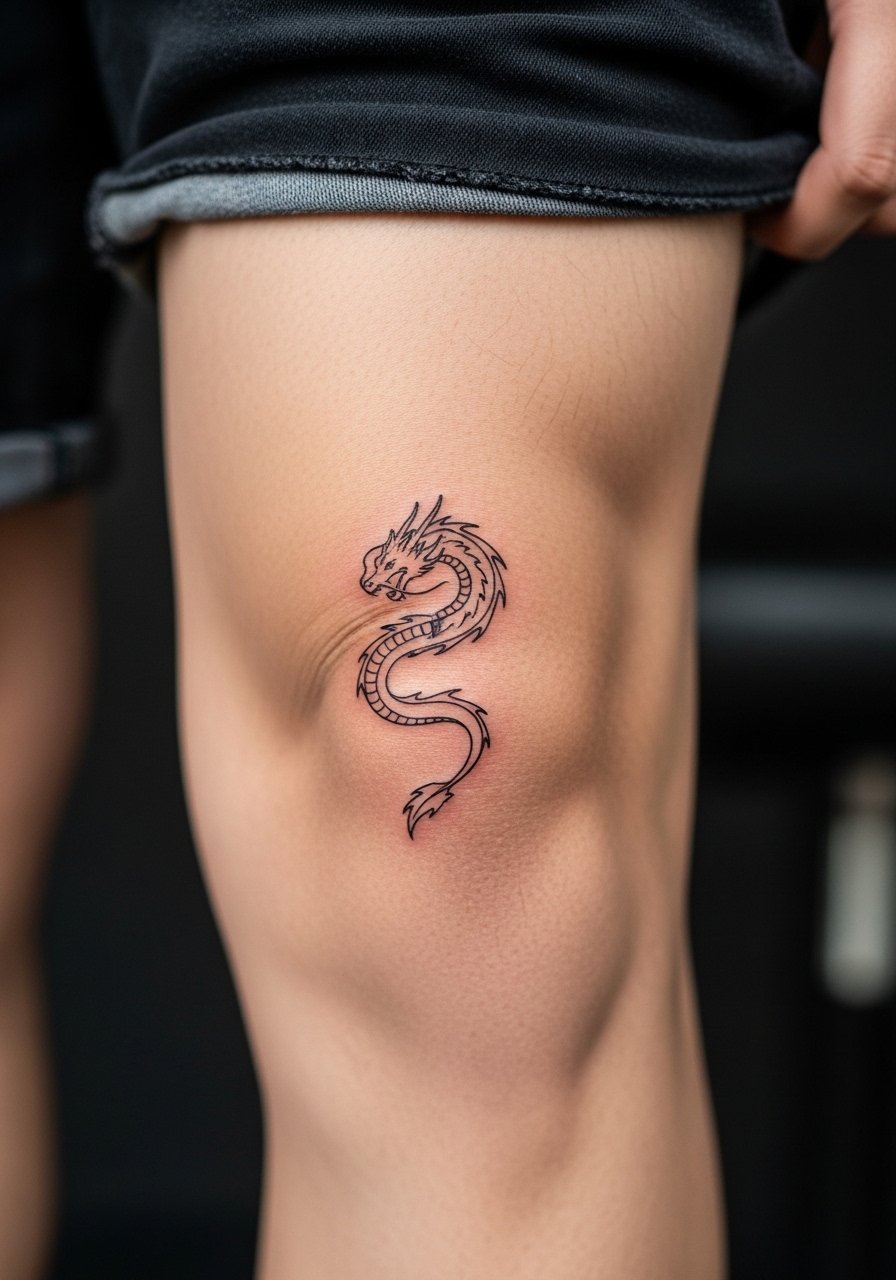
Behind-the-knee placements are tricky because of constant joint motion. A minimal curve that avoids the exact crease will last far better than a dense detailed piece. Tell your artist you want placement mapped while bending the knee to find a stable zone. Expect a longer healing time due to movement and a touch-up timeline that depends on how active you are. For session wear, choose loose shorts so the artist can access the area safely.
25. Tiny Dragon Motif Near the Sternum with Subtle Botanical Accents
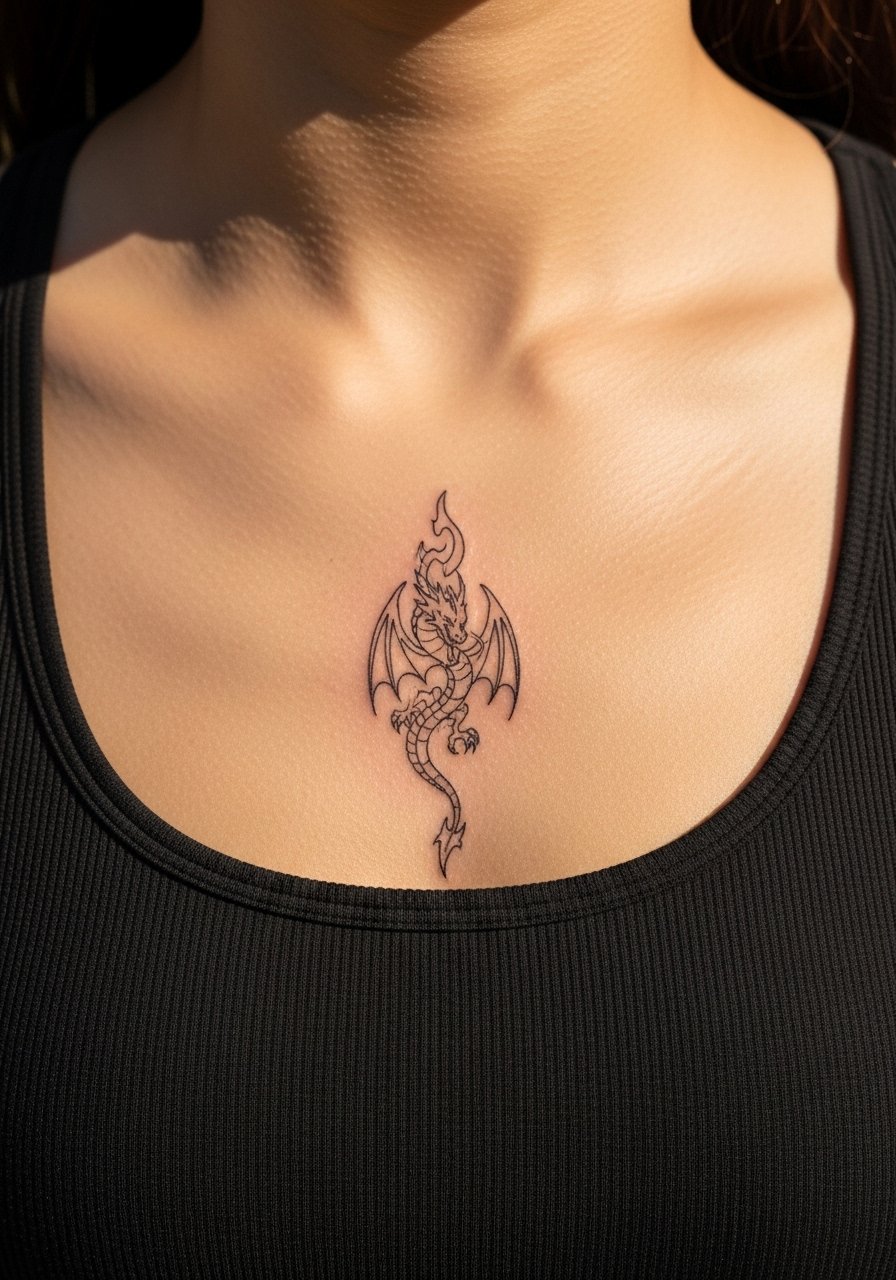
Sternum work must follow strict framing rules during imaging and in the studio. This spot can be more painful and requires an experienced hand for symmetry. The common mistake is asking for detailed micro scales in that tight area. Ask for balanced negative space and a central anchor line. Wear a fitted sports bra to the session so the artist has access and privacy. Expect a careful healing window and discuss touch-up needs in consult.
26. Micro Neo-Trad Dragon Scale Cluster on the Inner Wrist

Inner wrist pieces show clearly but face a lot of action and cleaning. Neo-traditional fills help retain clarity longer than pale watercolor. The mistake is trying to cram a full shading gradient into a tiny patch. Ask for distinct scale blocks and a simple color palette. For session day, remove jewelry and wear a sleeveless tank top or a loose button-down you can roll. Expect touch-ups at 12 to 24 months depending on exposure.
27. Tiny Dragon Tail Accent on the Side Hip
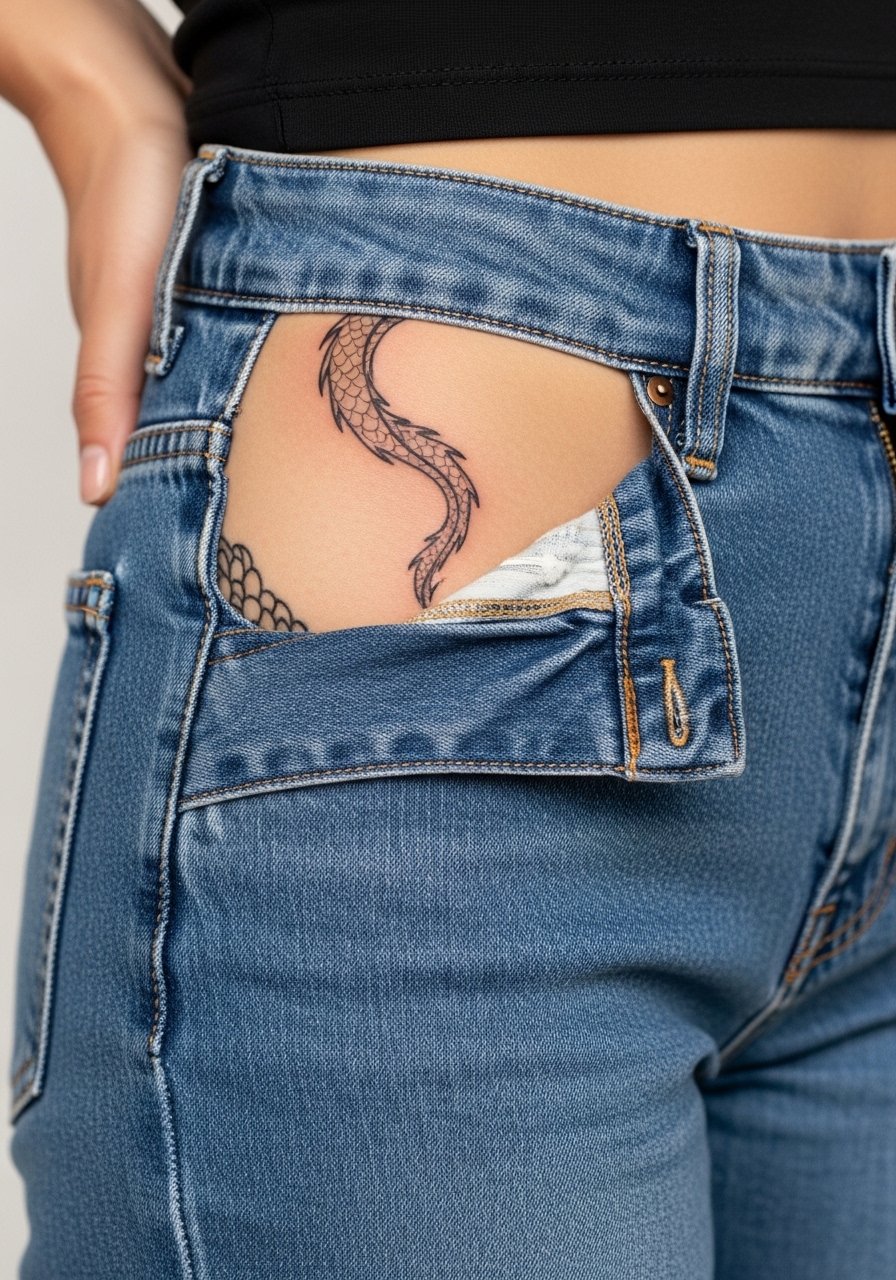
Hip placements hide well and are forgiving if you want something private. The key is to avoid ultra-micro scales near high-friction waistbands. Ask the artist to place the tail where the denim line won’t crease it daily and to use slightly chunkier anchor strokes. For post-session comfort wear high-waisted bottoms that do not press on the area. Expect stable longevity and infrequent touch-ups if the piece is shielded from constant rubbing.
Frequently Asked Questions
Q: Will a fine line dragon on my wrist blur faster than a neo-traditional one on my calf?
A: In my experience fine line on wrists fades faster because of washing and friction, while neo-traditional saturation on calves holds longer. The difference comes down to line weight and placement, so ask for slightly bolder anchors on wrists and plan a touch-up window at around year two.
Q: Do watercolor-style dragons need different aftercare than blackwork pieces?
A: The basic steps are similar, but watercolor sections often benefit from extra sun protection and gentler moisturizing to preserve pigment blends. Avoid heavy ointments that trap moisture under thin washes during the first week and be ready to discuss color refreshes at year two if brightness matters.
Q: I have darker skin. Which small dragon styles show up best in photos?
A: Bold blackwork and neo-traditional outlines read more consistently across darker skin tones. If you want color, ask the artist to anchor the palette with strong black outlines so the contrast translates in photos. Testing a henna mockup first can help visualize placement and contrast.
Q: How should I dress for a collarbone dragon session and for showing it off afterward?
A: For the session wear a strapless bra or a button-front top you can pull aside for easy access. To show it off afterward, try an off shoulder sweater that frames the collarbone without rubbing the area during healing.
Q: Artists disagree on Saniderm versus dry healing. What should I pick for a delicate wrist dragon?
A: There are two camps. One argues that Saniderm speeds healing and reduces mess, while the other prefers dry methods that let scabs form and fall. For delicate wrist linework I lean toward short-term protective film for the first 24 to 72 hours, then light moisturizing so lines can settle naturally. Ask your artist which method they use most and why before booking.
