
Fine line patchwork is everywhere on feeds right now, but what looks delicate in a photo can age into a soft blur if you pick the wrong placement or line weight. I have seen shoulder pieces warp after weight change, watched people scramble when guest spots were canceled, and heard complaints about fine lines vanishing on darker skin tones. This list focuses on patchwork tattoo ideas for the shoulder that take those realities into account and give clear consultation points.
1. Fine Line Quilt on Rear Shoulder
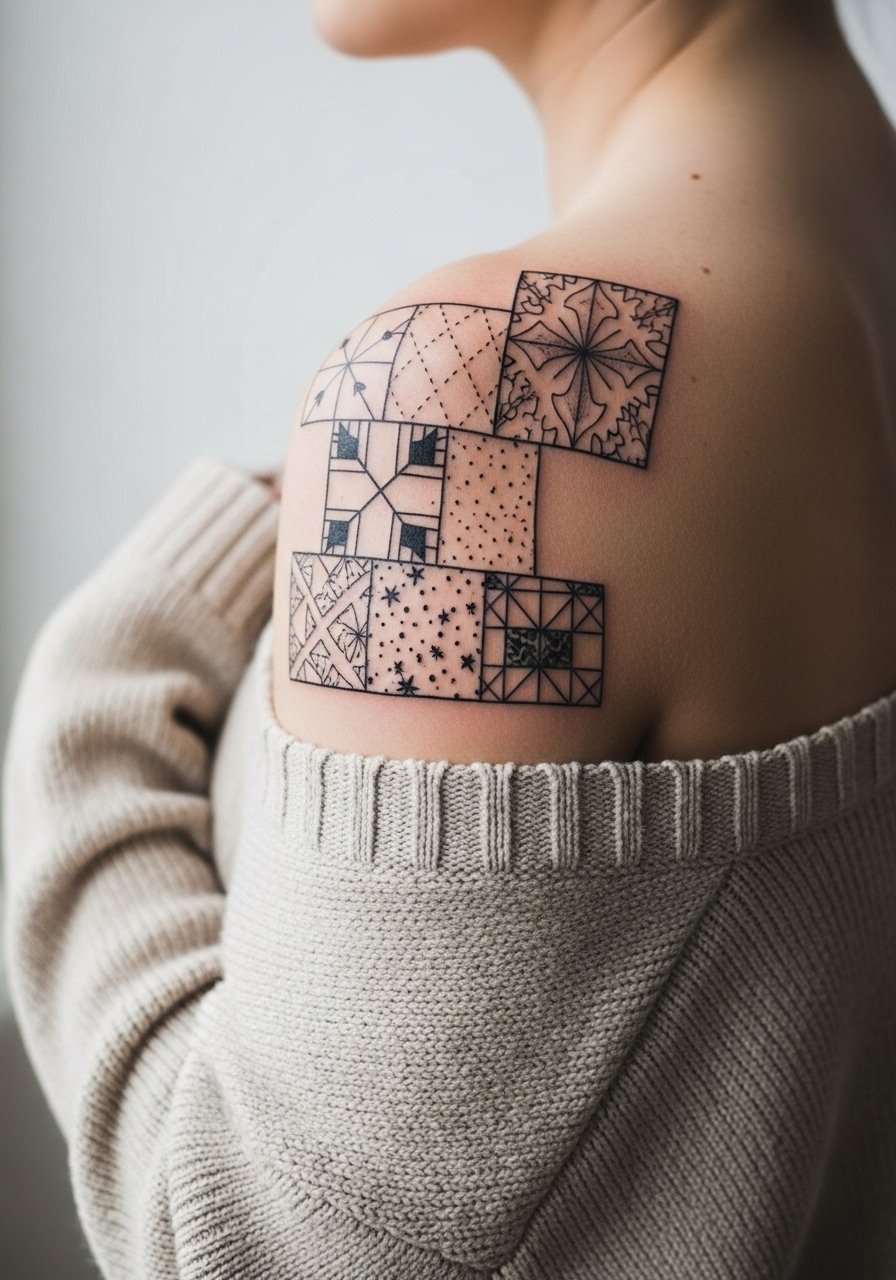
This is the quiet option for someone who wants multiple small motifs that read like matched fabric squares. Tell your artist you want single-needle linework with deliberate spacing so elements do not merge as the skin stretches. The rear shoulder is forgiving for fine work, pain is moderate, and a single session can cover several small patches. Common mistakes include going too small and packing pattern density. On darker skin tones choose slightly heavier black outlines and ask for mockups in shop lighting to check visibility. Pair this with an off shoulder sweater for subtle reveals.
2. Traditional Patchwork Cape Across Shoulder Cap

Classic motifs like anchors, swallows, and roses connect well across the shoulder cap. Request slightly thicker linework for longevity and full color saturation that allows the piece to age into rich tones. Expect moderate pain and two to three sessions for a medium cap. A mistake I see is crowding too many tiny motifs together, which blurs after a few years. For showing it off wear a fitted cotton tank or sling a vintage leather jacket over one shoulder to frame the color.
3. Blackwork Geometric on Outer Deltoid
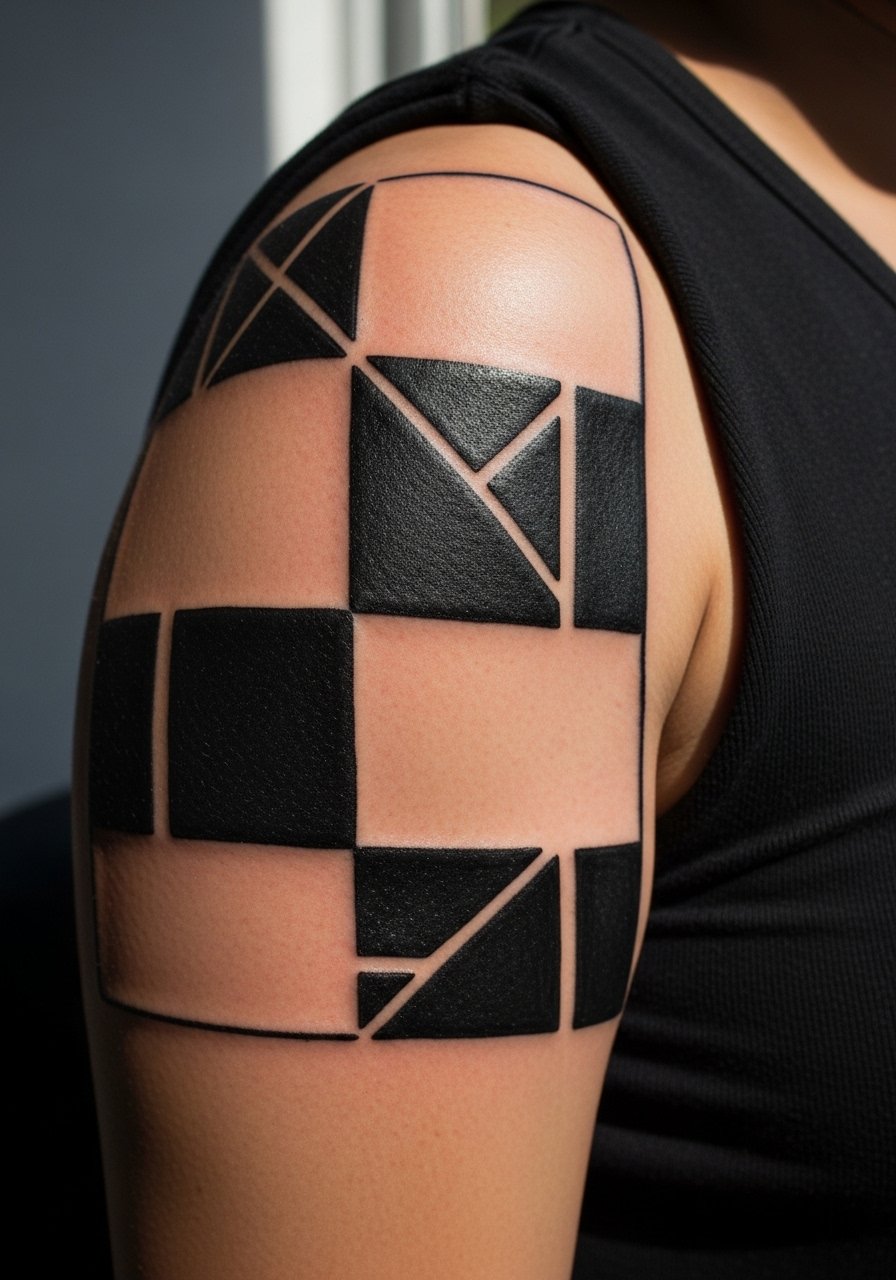
Blackwork holds up on shoulders because saturation resists fading, and geometric spacing gives each patch room to breathe. Ask for bold linework and crisp negative space to avoid early merging. This placement reads well from distance and heals with less friction than the front deltoid. Sessions run 2 to 3 hours each for larger pieces. A common error is making dense geometry too small, which creates an uneven surface as skin ages. Show it off with a sleeveless performance tee so the high contrast pops.
4. Neo-Traditional Illustrative Patch at Shoulder to Upper Arm
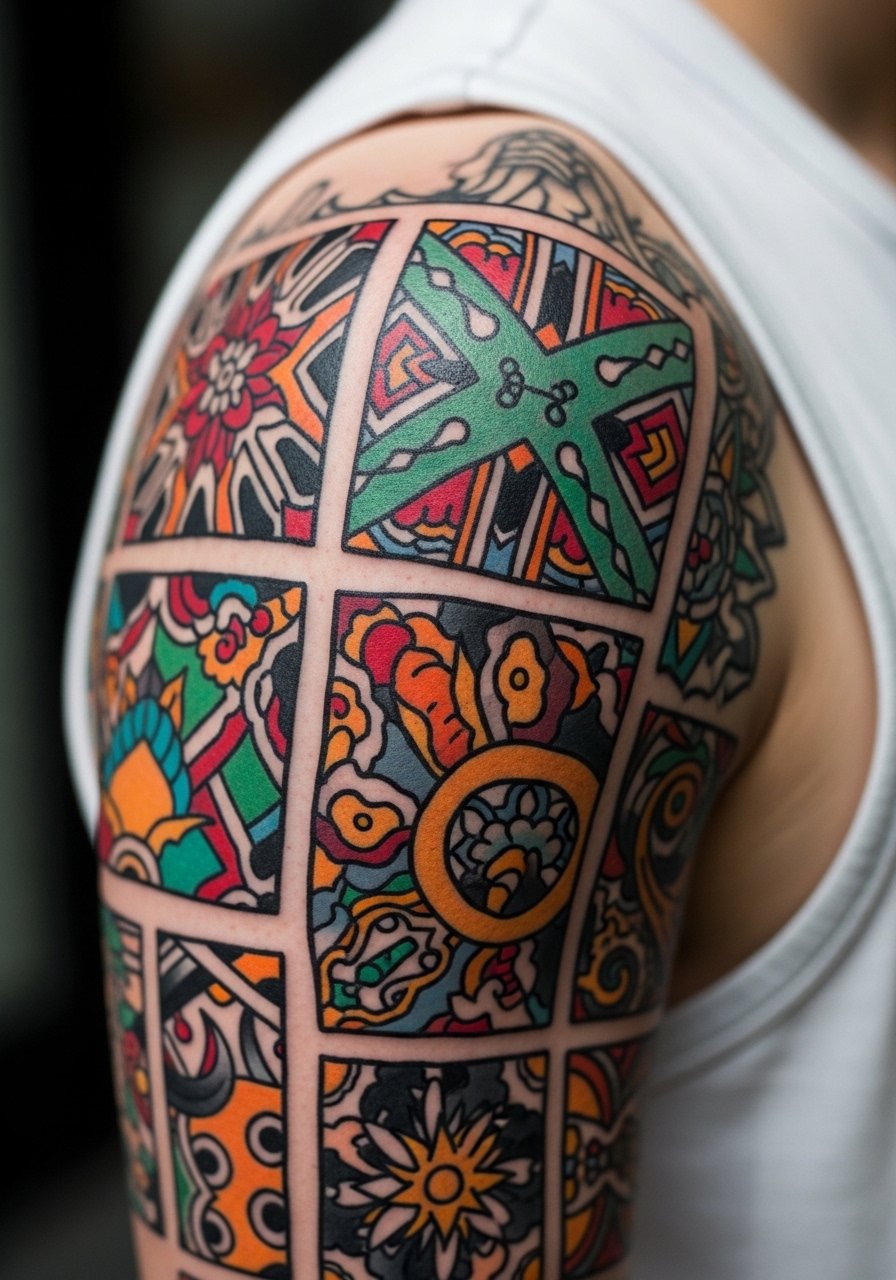
Neo-traditional blends bold outlines with playful color, which helps disparate patches read as a collection. In consultation say you want connecting black shading so future guest pieces slot in smoothly. Pain is moderate on the shoulder cap and increases toward the inner arm. The usual mistake is letting reference images mix too many eras of style. Keep motif scale consistent and plan spacing for future additions. For session comfort wear a loose button-down shirt you can pull aside for access.
5. Ornamental Mandala Filling the Shoulder Hollow
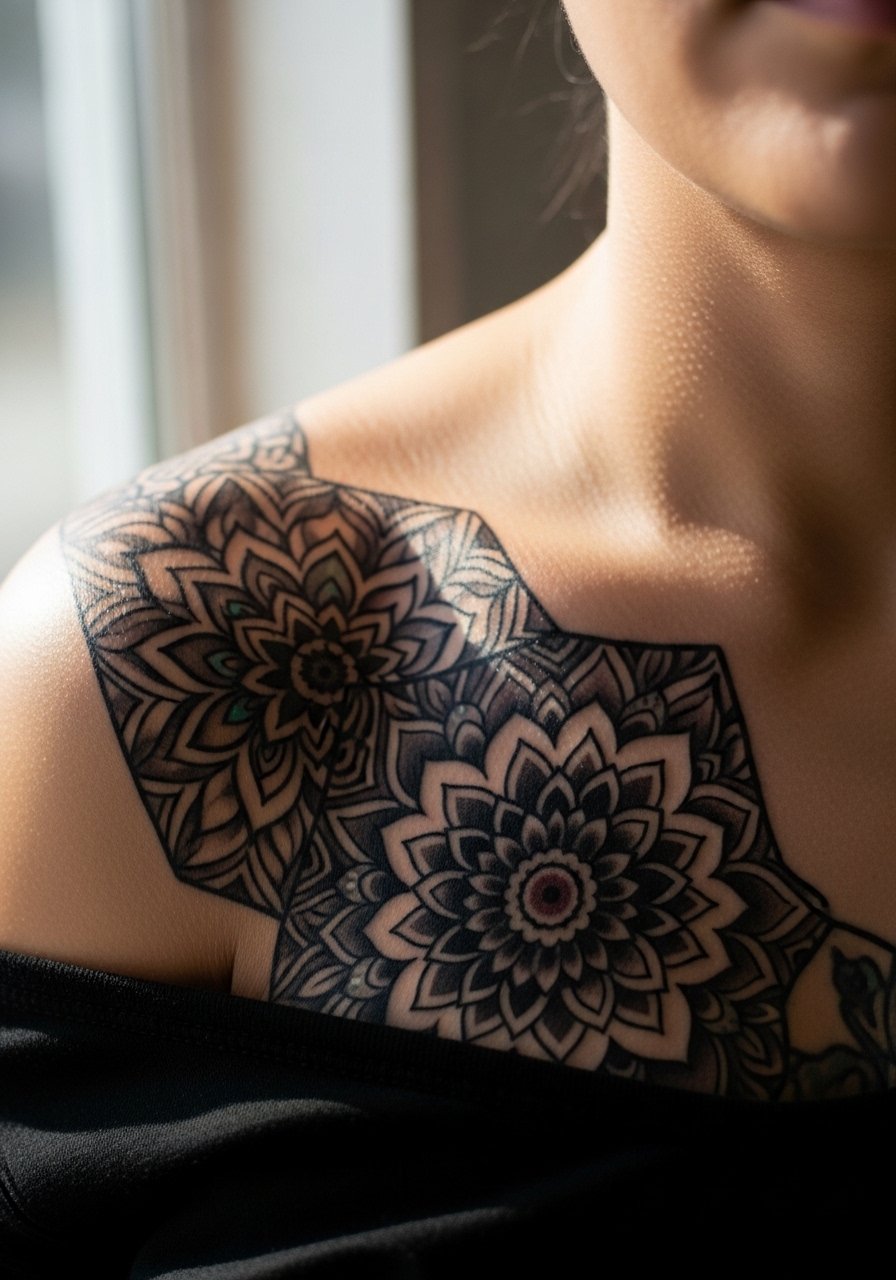
Mandala work follows the curve around the shoulder and looks deliberate if the artist maps the flow to your anatomy. Ask for stipple shading rather than solid fill in dense areas so the design ages without turning into a dark patch. Pain is lower near the clavicle and higher where the bone protrudes. A common error is centering a mandala without testing how it sits when you move your arm. Pair the finished piece with boatneck linen tops to show the curve without distraction.
6. Illustrative Nature Patchwork on Upper Deltoid
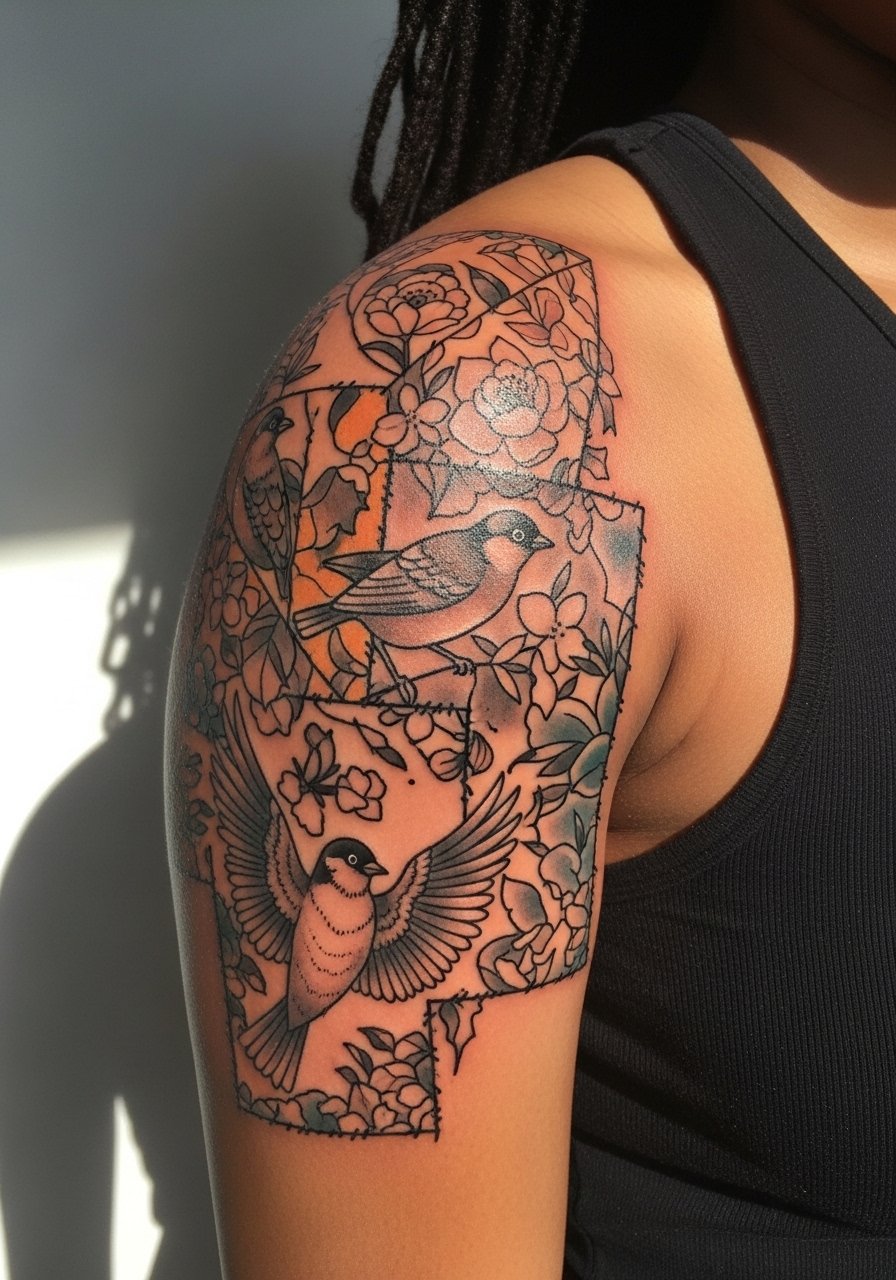
Birds and florals interlock naturally, letting you tell small stories across patches without heavy outlines. For longevity ask the artist to use anchoring linework around watercolor washes, so color loss does not flatten the composition. Expect moderate pain and three short sessions for layered color. Mistakes include letting watercolor bleed into tiny detail areas. For showing it off, wear a white linen button down unbuttoned at the top to keep attention on the deltoid.
Studio Day Picks
The first six designs above span exposed deltoid work and back shoulder pieces, so a few small items can make the session and first week cleaner and more comfortable.
-
Tea tree salve from indie sellers. Lightweight salves are often preferred by people who find heavy ointments too greasy on exposed shoulders during warm weather.
-
Australian manuka balm. Offers antibacterial properties for areas that rub against straps or bags while healing.
-
Japanese rice bran lotion. Thin absorption helps keep fine line patches visible without leaving a white cast.
-
Indie dotwork oil. Breathable oil options can be better for blackwork shoulders where saturation is key.
-
Hustle Butter. A thinner alternative to greasy ointments that many people prefer for humid climates, applied after the first day.
7. Minimalist Linework Patch on Trapezius
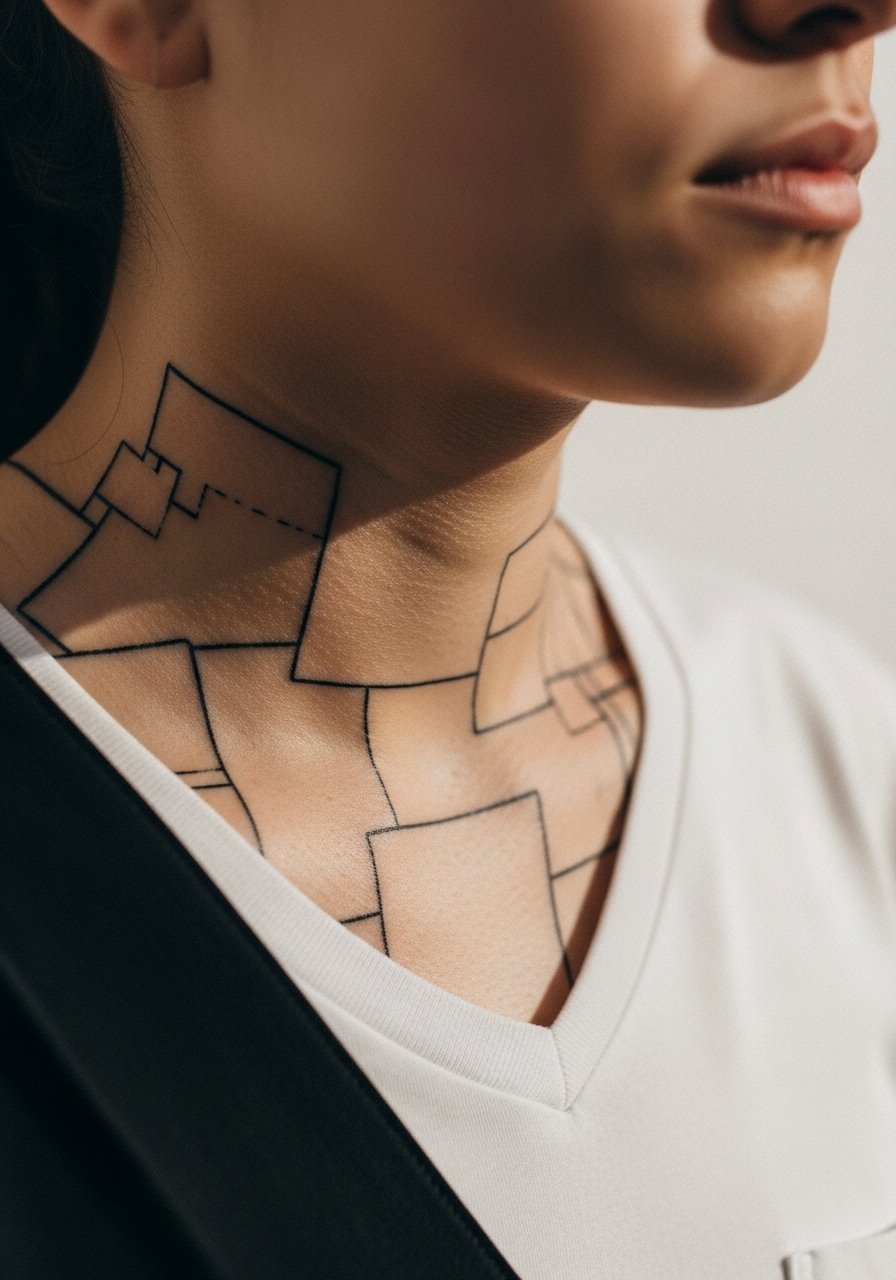
This placement reads delicate and moves with shoulder motions in a subtle way. Ask for slightly heavier single-needle outlines than you might want on forearm work to keep visibility on darker skin tones. Pain is moderate to low and sessions are short. A frequent error is asking for too many tiny motifs in a tight grid. For shows and casual wear roll a v neck t shirt neckline to let the trapezius peek through.
8. Ignorant Style Doodles Across the Shoulder Cap
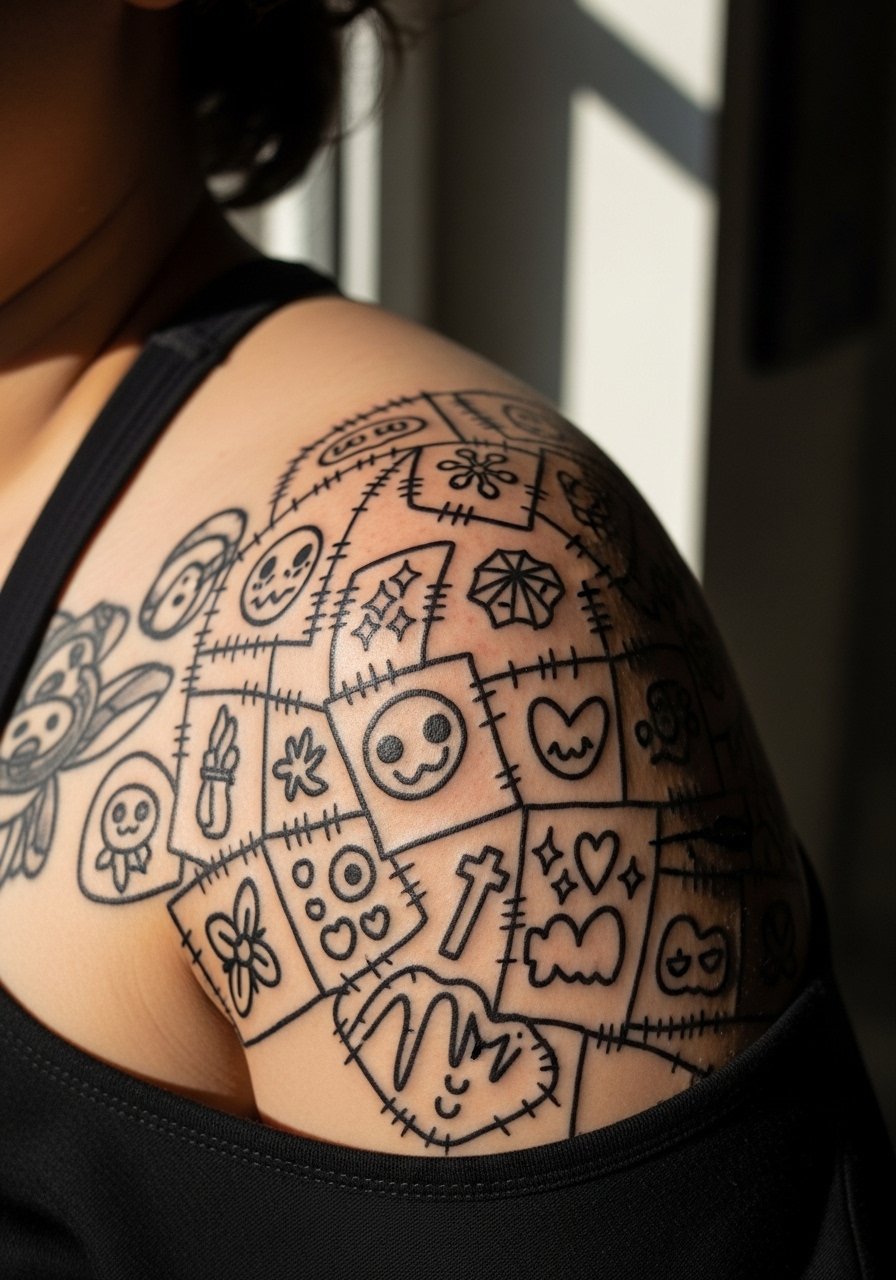
Ignorant style embraces uneven lines and charm, which can be great for a collage shoulder cap. Tell the artist you want deliberate sketchy lines so pieces read intentional rather than shaky. Sessions are forgiving and quick, pain is moderate. Common mistake is attempting to over-polish this style. For a casual reveal try a button up chambray shirt worn open to reveal the cap.
9. Micro-Realism Portrait Patches on Front Deltoid
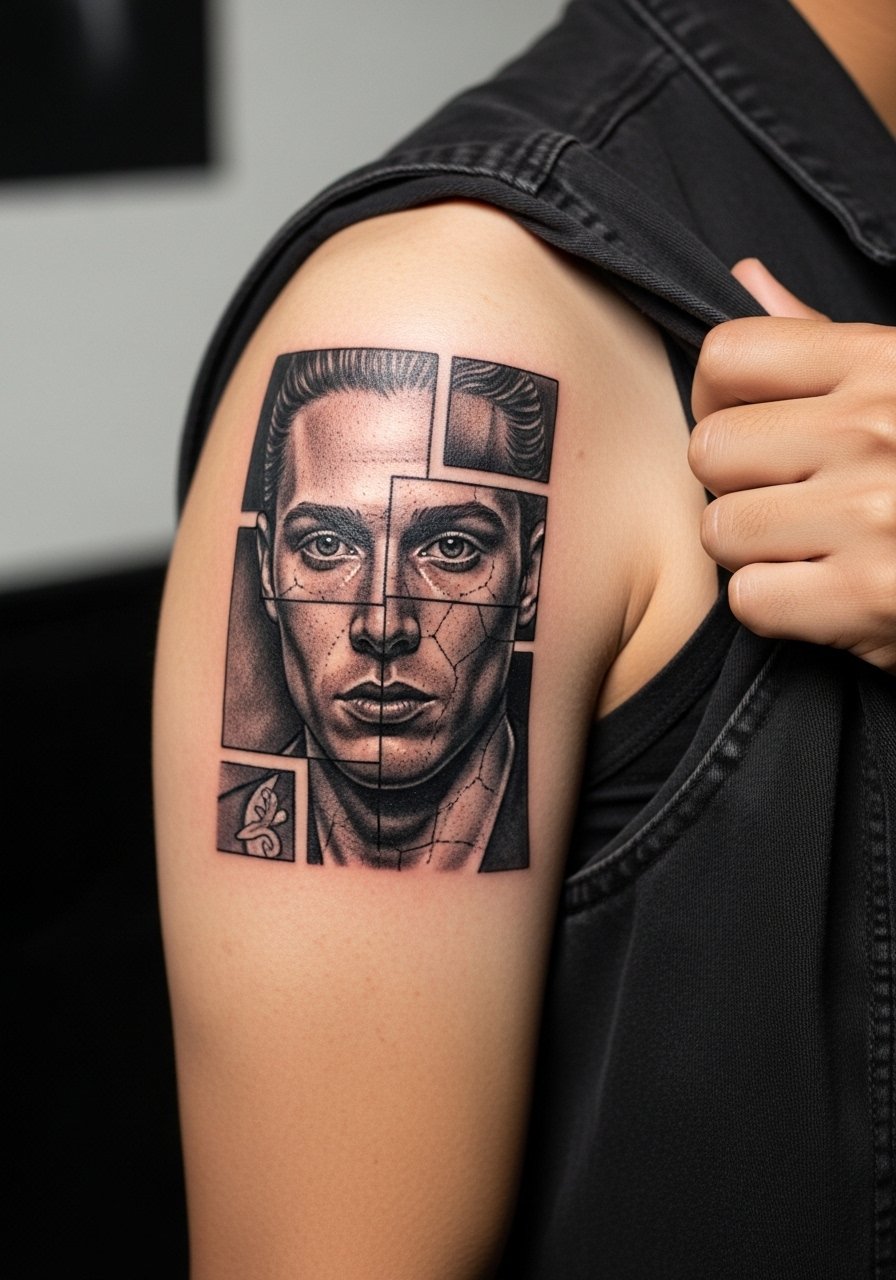
Portrait patches are powerful in small doses on the front deltoid. Demand clear photographic references and insist on small-scale tests so skin texture does not swallow tiny facial details. This work needs multiple sessions and steady touch-up planning. The common mistake is underestimating how much time realistic shading needs on curved anatomy. For evening wear, an unbuttoned open front vest keeps attention on the portrait.
10. Fine Line Symbolic Patchwork on Rear Shoulder
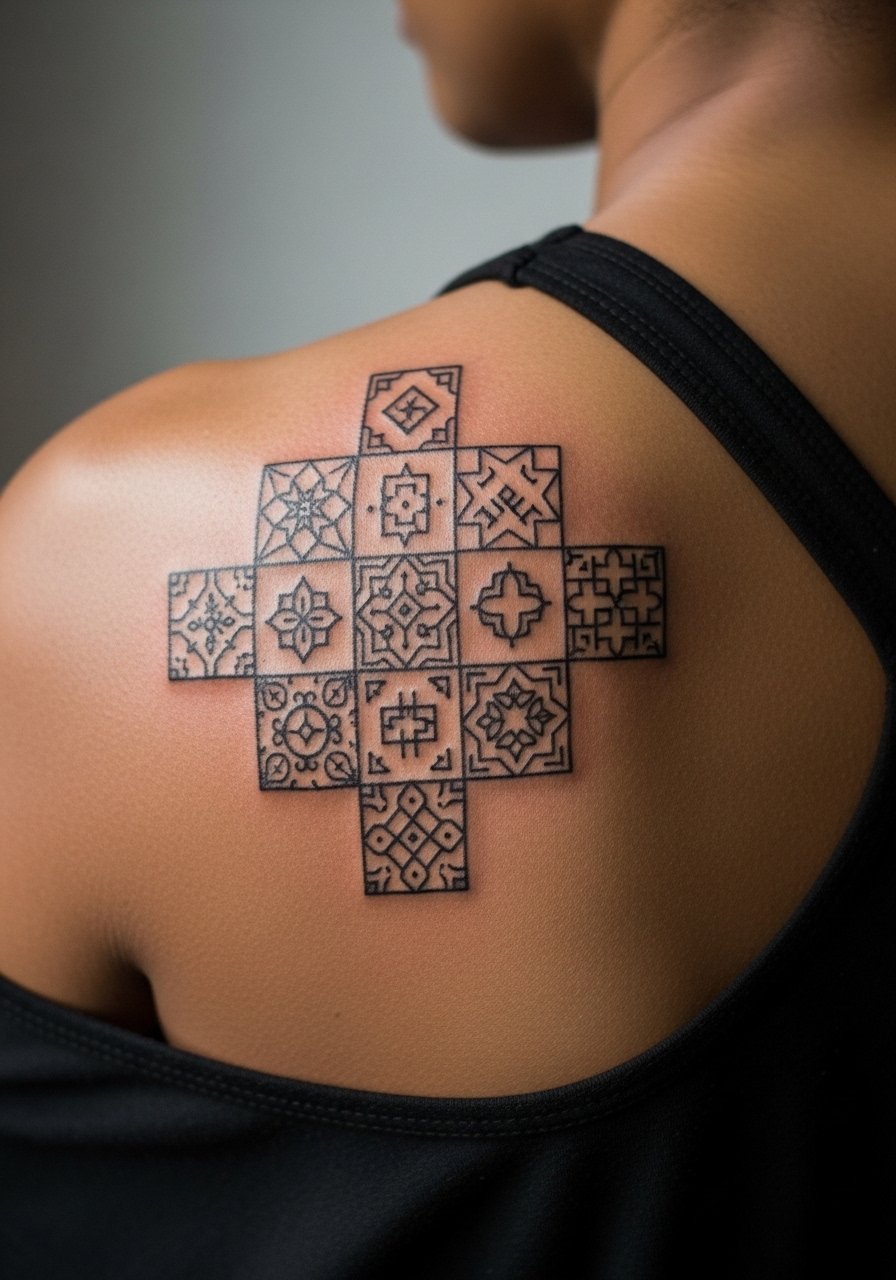
Fine line patches can look exquisite on the shoulder blade but artists are split on whether they hold up here. One camp says fine single-needle work blurs quickly on moving, textured skin. The other camp argues that with correct needle depth and spacing, single-needle pieces can last five years before a touch-up. Ask your artist which camp they belong to and request mockups in shop lighting. Wear an off shoulder sweater for subtle reveals.
11. Black and Gray Realism with Skulls and Clocks on Deltoid
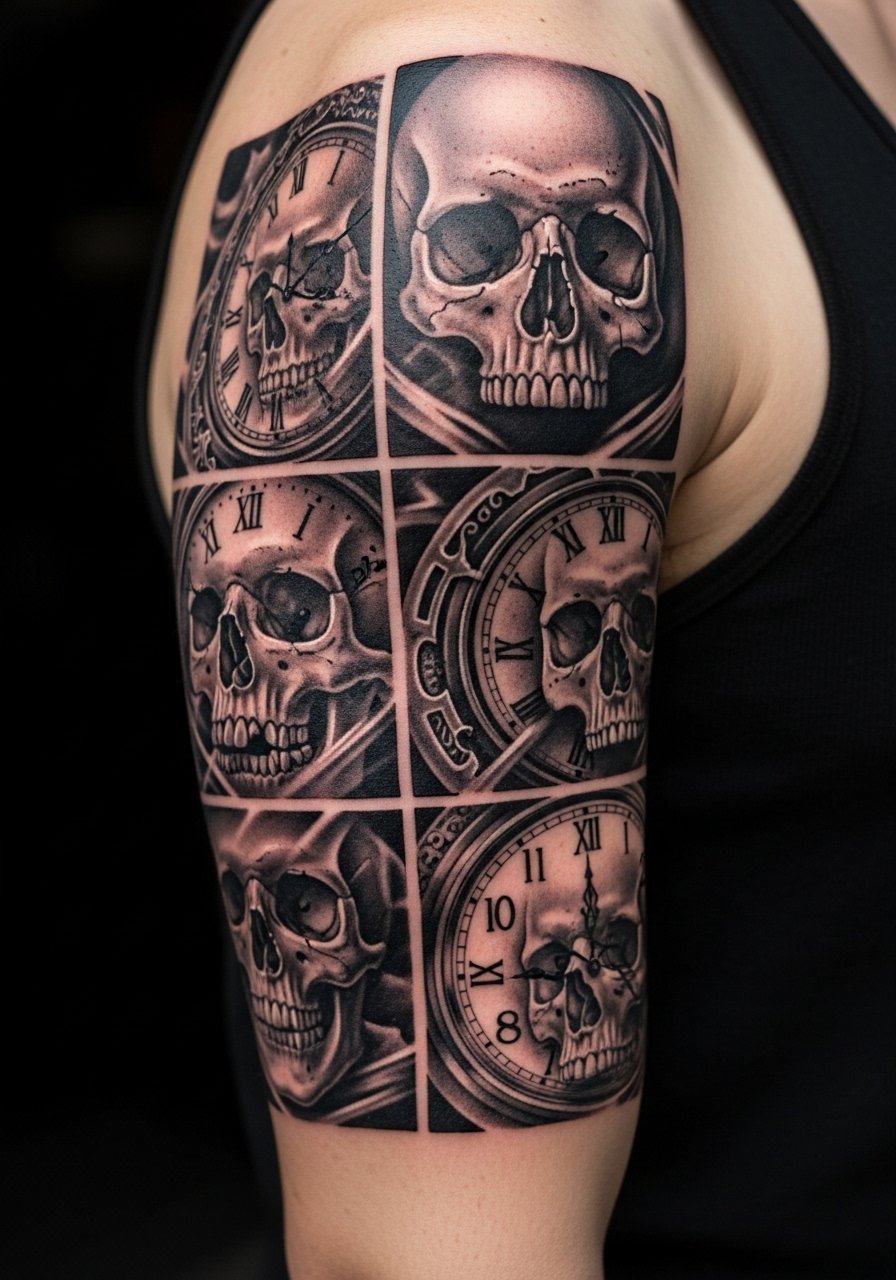
This darker approach uses shadow to mimic fabric texture and creates dramatic patches that age into moody depth. Ask for gradual transitions and stipple shading in textured areas to avoid flat black blobs. Larger pieces need longer sessions and steady hydration during healing. A typical error is asking for very tight detail inside deep shadows, which can slow healing. Show it off with a vintage leather jacket slung over one shoulder for a retro feel.
12. Watercolor Abstract Blobs on Shoulder Ridge
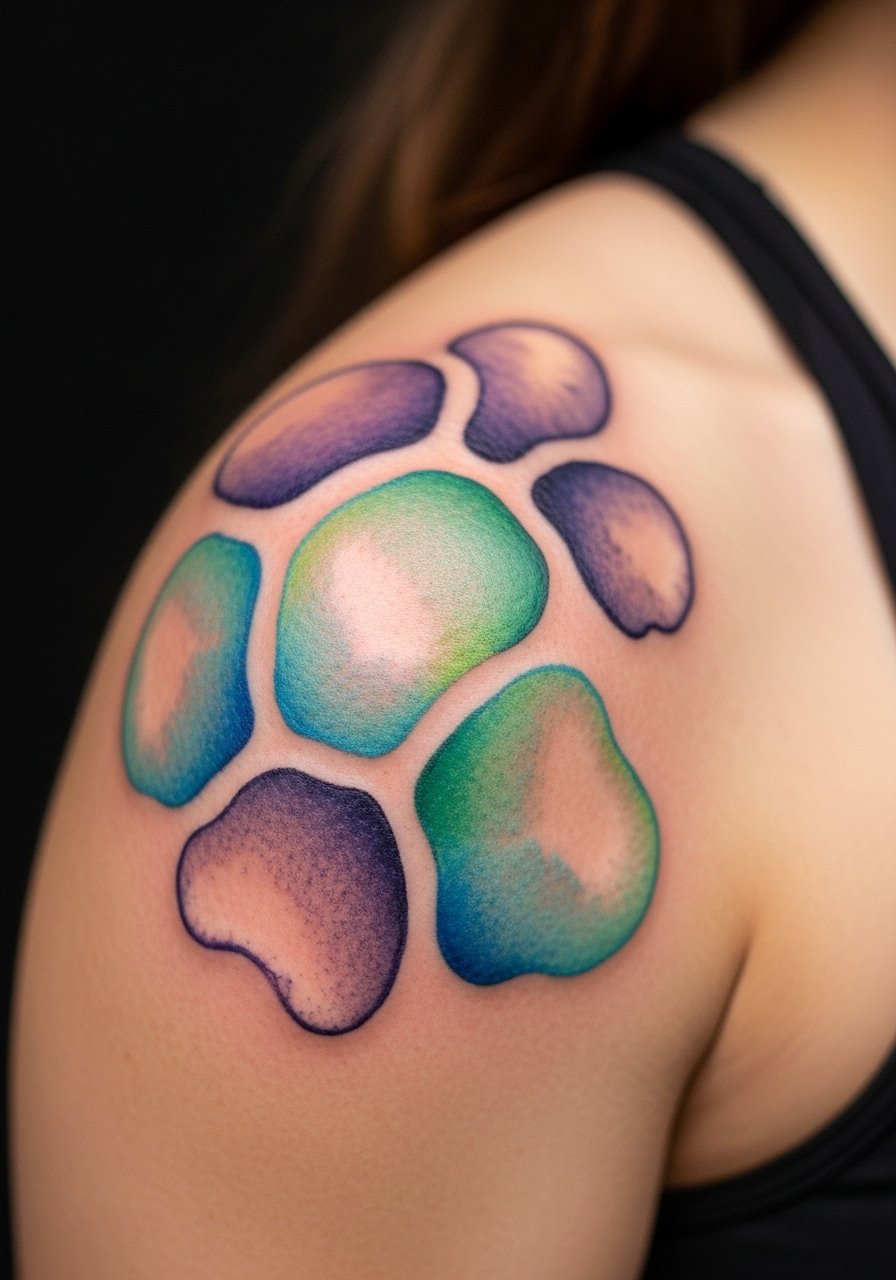
Watercolor edges soften the shoulder silhouette but require bold anchors if you want longevity. Ask for defined black anchors or linework so fading does not erase shape entirely. Pain is moderate and sessions are short to medium. People often request full bleed watercolor without anchors and come back for touch-ups sooner than expected. For summer outfits try a racerback tank to show the top curve.
13. Micro-Realism Faces Integrated into Patchwork
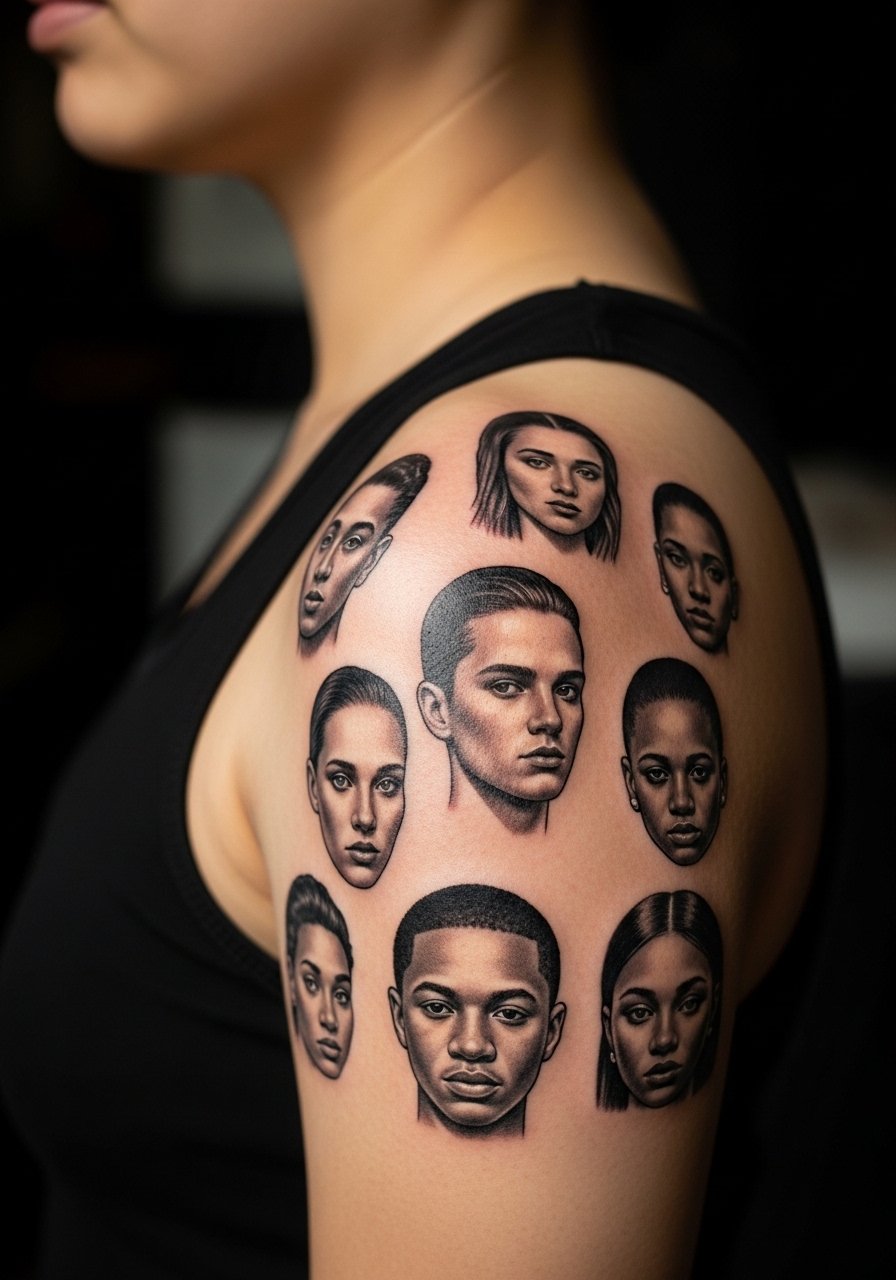
Mixing tiny realistic faces into abstract patches is a rare, striking choice. Emphasize that each portrait needs space and planned negative areas so expression lines remain readable as the skin moves. These take multiple sessions and close attention to reference scale. The main mistake is crowding portraits near heavy black fills. For smart casual looks, pair with a white linen button down unbuttoned to keep the focus on realism.
14. Geometric Mandala Cluster on Outer Shoulder
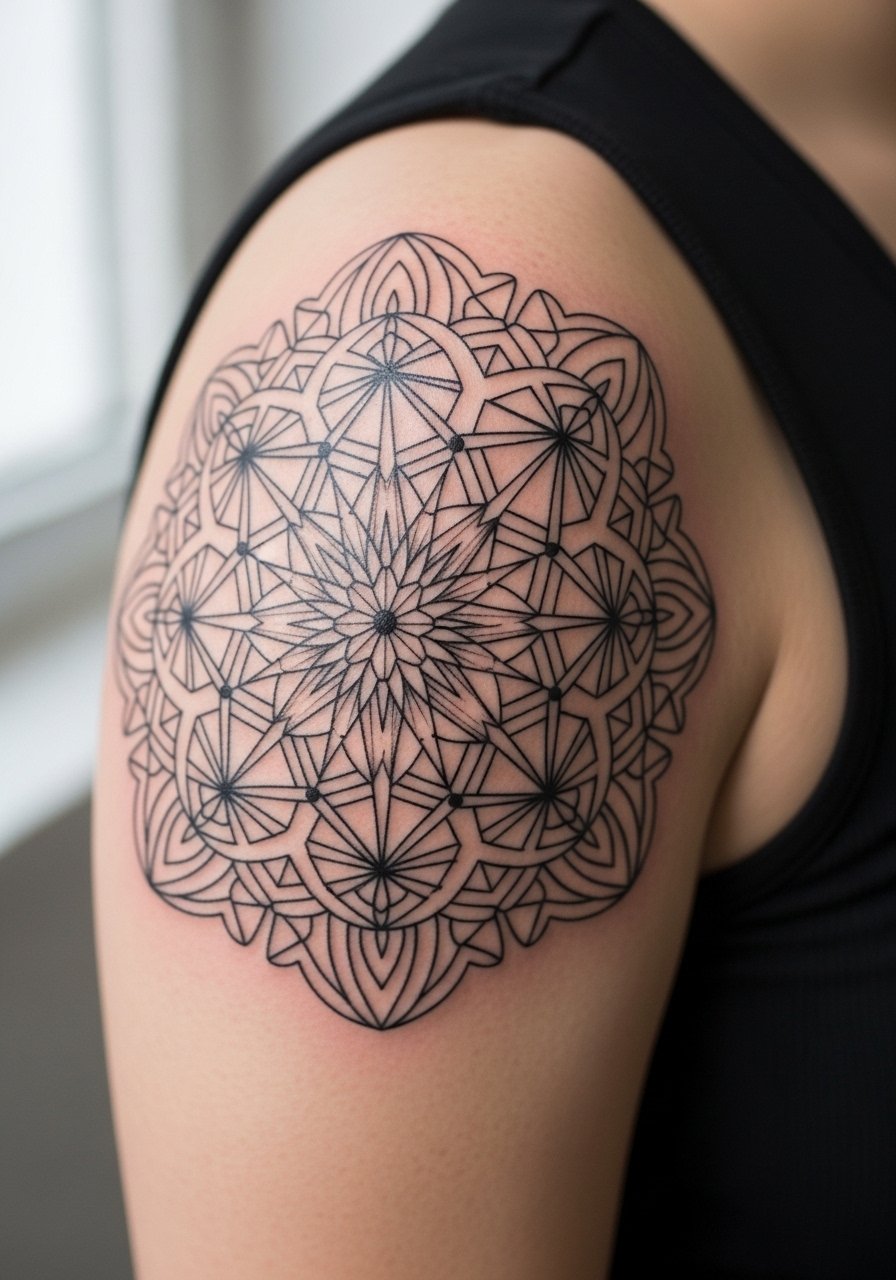
Geometric mandalas give a structured patchwork that resists visual drift if you allow breathing room. Tell the artist each ring needs spacing scaled up slightly from flat-surface designs so the curved shoulder does not compress patterns. Sessions depend on size but are usually two to three hours. A mistake is matching mandala scale too small for your shoulder cap. To frame it wear a sleeveless performance tee with a clean neckline.
15. Small Patchwork Motifs Along Clavicle to Shoulder
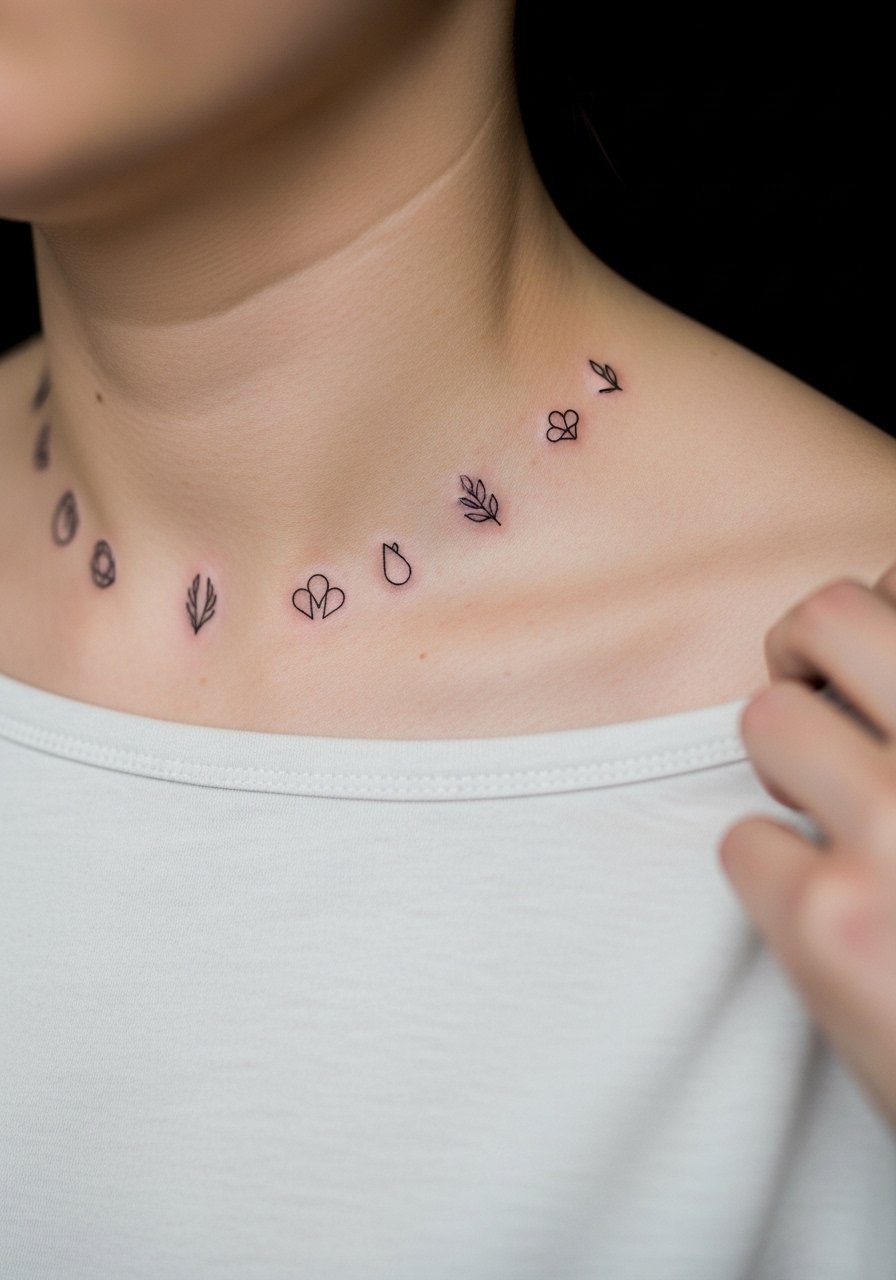
Clavicle patches are highly visible and need precise placement so lines follow bone shape. Ask for slightly increased line weight near bone areas to avoid early fading. Pain near the clavicle is higher than the cap and sessions are shorter but more sensitive. The common error is placing too many patches in a tight row without contour planning. Pair the finished look with a boatneck linen top for understated framing.
16. Ignorant Style Doodle Across Trap and Shoulder Cap

When doodles cross the trap and cap they animate with shrugging motion. Advise your artist to play with scale so motifs align with muscle movement. Sessions are fast and pain is moderate. The mistake is placing heavy detail in high-movement zones which blurs quicker. For session comfort wear a collarless shirt you can raise or lower easily.
17. Ornamental Filigree on Rear Shoulder
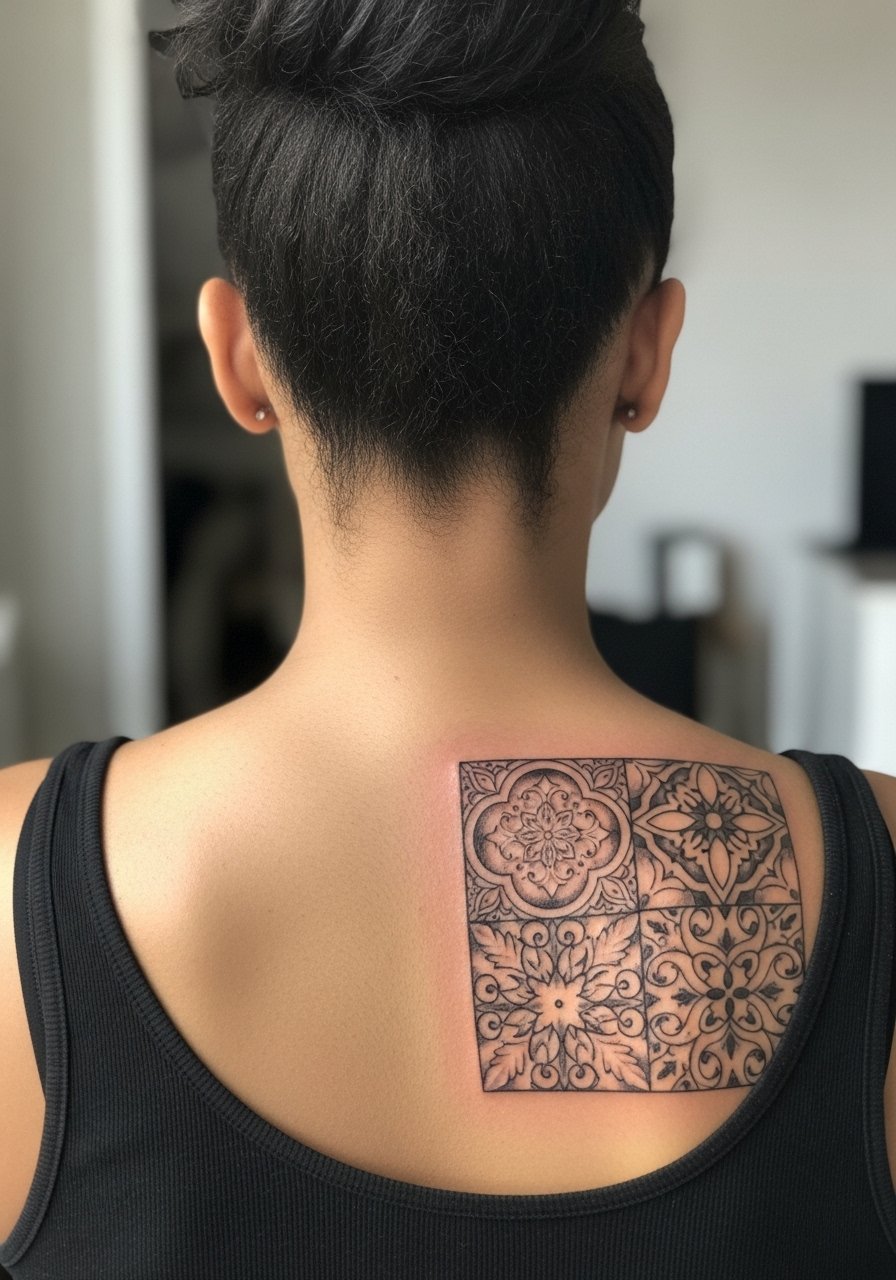
Filigree patterns flow with the lower rear shoulder and can hide old scars if you want coverage. Tell the artist about any scar tissue so needle angle is adjusted. Pain is moderate and sessions are short. The common error is repeating the same filigree motif without varying scale, which becomes visually flat. Pair with a strappy tank for evenings out.
18. Blackwork Sleeve Starter Patch at Shoulder
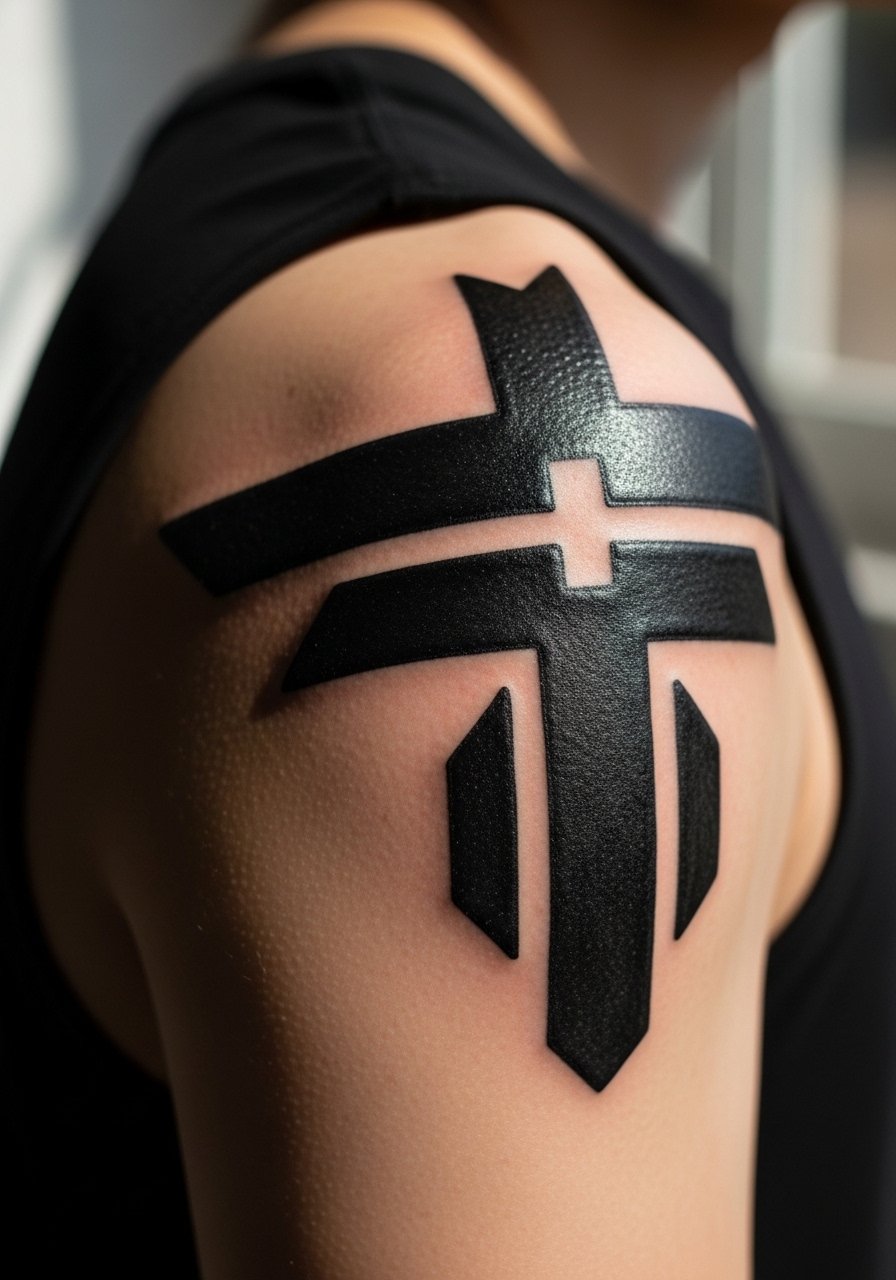
If you plan a sleeve over years, start with a large blackwork anchor on the shoulder. Ask for edge treatments that make future fills blend smoothly. Sessions will be longer and may require 2 to 3 sittings. The usual mistake is letting initial pieces float without planned transition zones. For during-session wear a loose tank top so the artist can work without fabric interference.
19. Patchwork to Conceal Surgical Scars on Shoulder
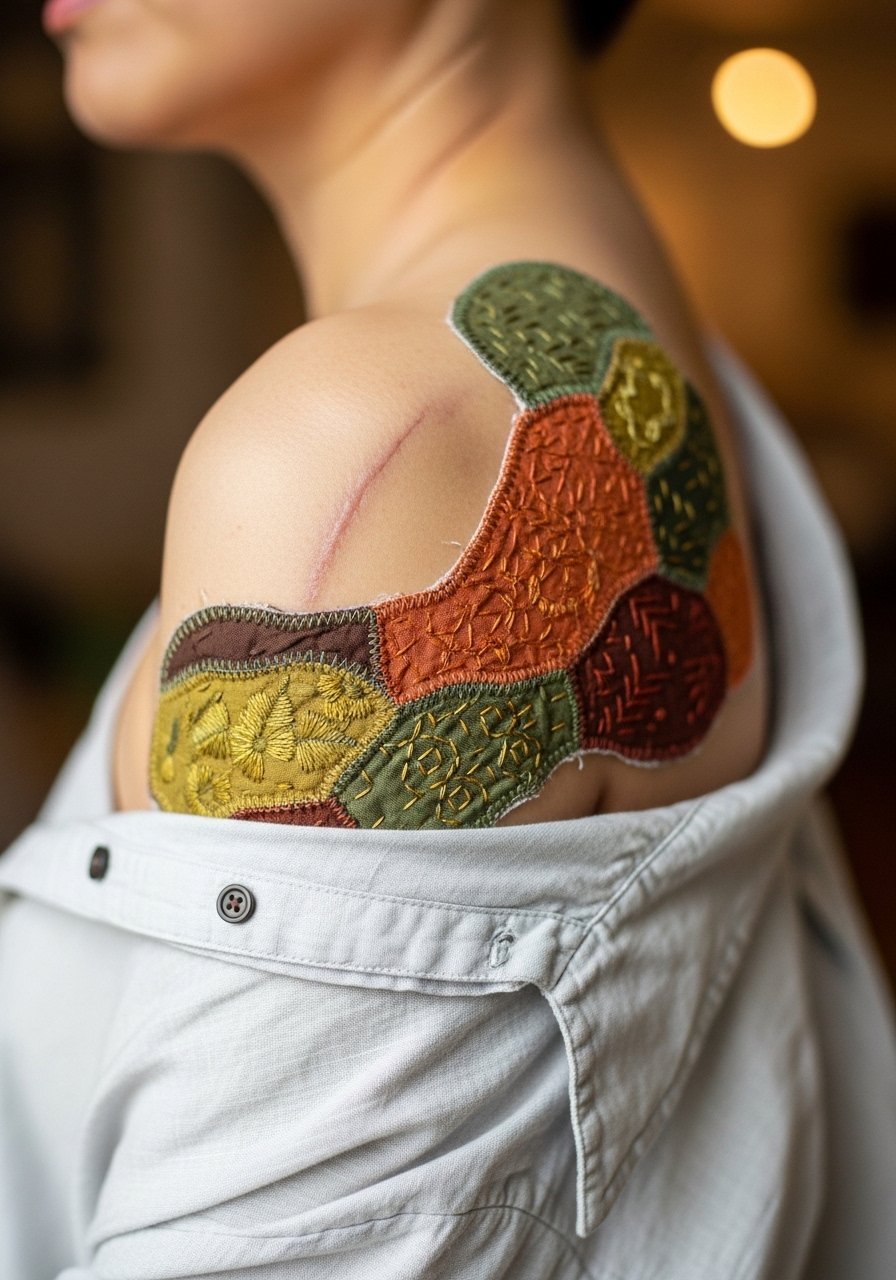
Using patchwork to mask scars is a smart, under-covered idea. Bring photos of the scar in different positions so the artist can map how it moves and plan motifs that camouflage texture. Pain varies based on scar sensitivity and sessions may be staged. A common mistake is asking for heavy color over fragile scar tissue on the first pass. For session comfort wear a loose button-down shirt that you can pull aside without rubbing the area.
20. Neo-Traditional Pin-Up Patch Extending from Shoulder
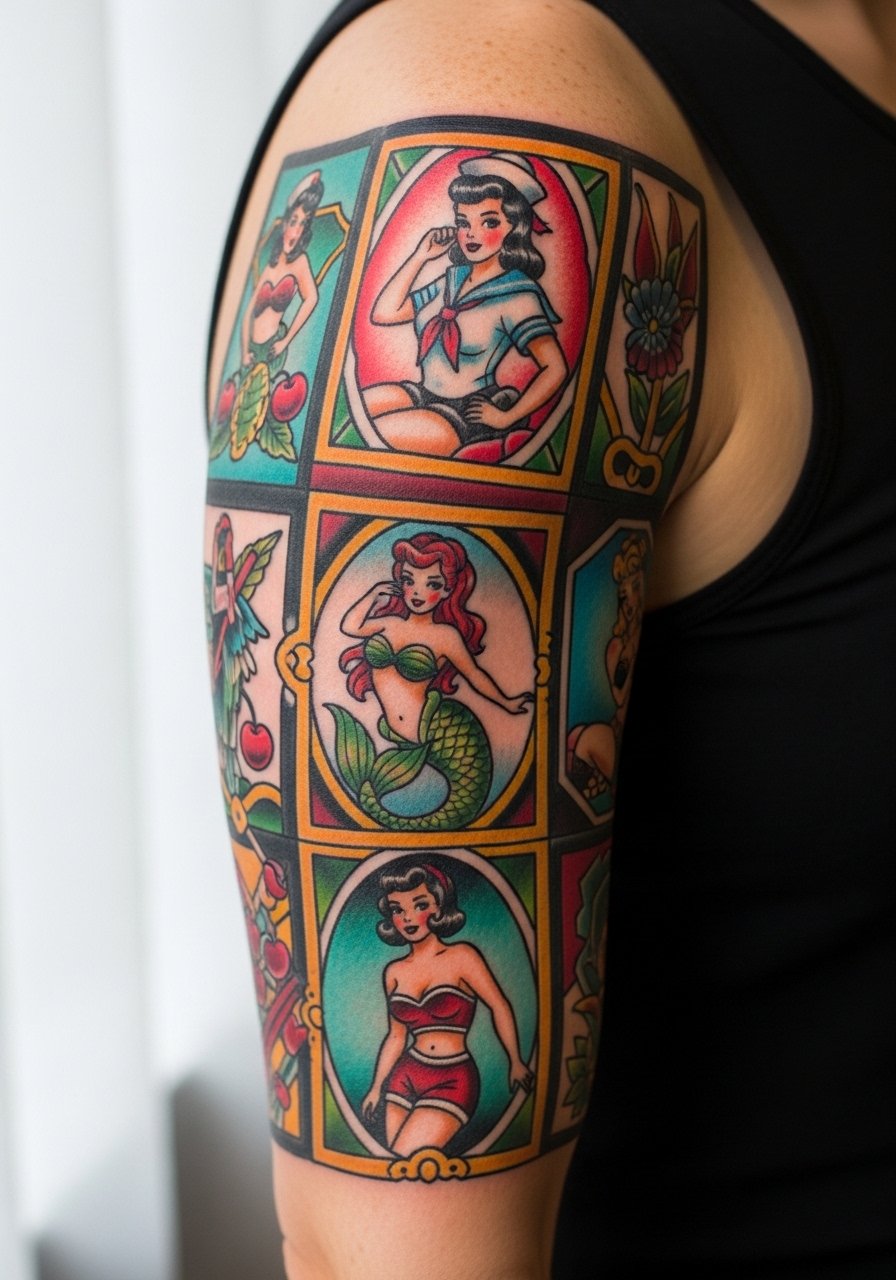
Pin-up motifs modernized with neo-traditional shading help unify older arm work into a fresh patchwork. Specify consistent line weight and palette so future pieces do not clash. Expect two to four sessions for a medium extension. The main mistake is mixing decades of flash without a unifying ink tone. To show it off, unbutton a white linen shirt and roll sleeves to the bicep.
21. Small Symbol Cluster for First Patchwork Tattoo
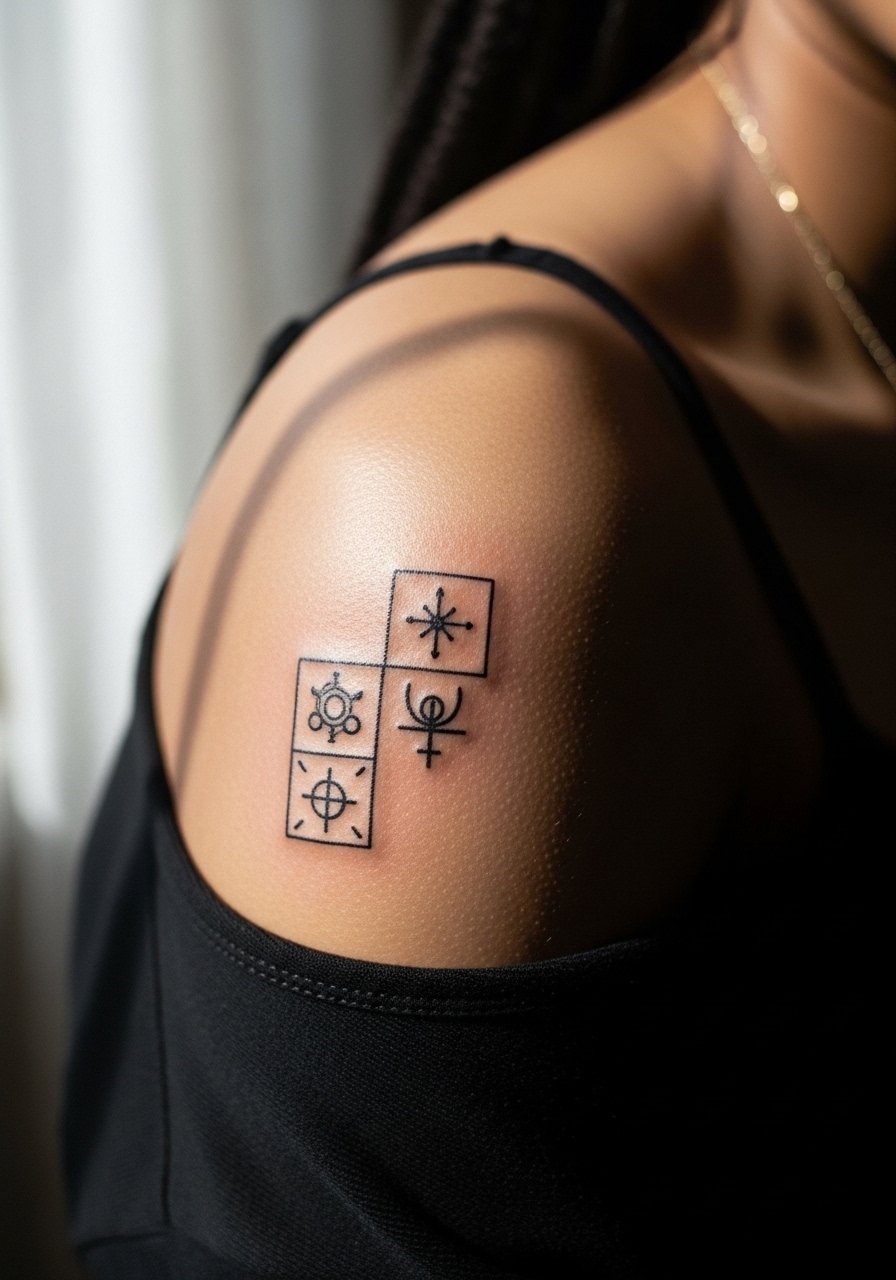
For a first patchwork tattoo choose a cluster of small motifs to test how your skin holds single-needle work. Ask for a mockup in the exact spot and request slightly heavier anchors if you have darker skin. Sessions are short and recovery is straightforward. People often regret going too tiny on their first try. For session day wear a sleeveless performance tee so the artist has free access.
22. Quilt Stitch Illusion via Dotwork Texture
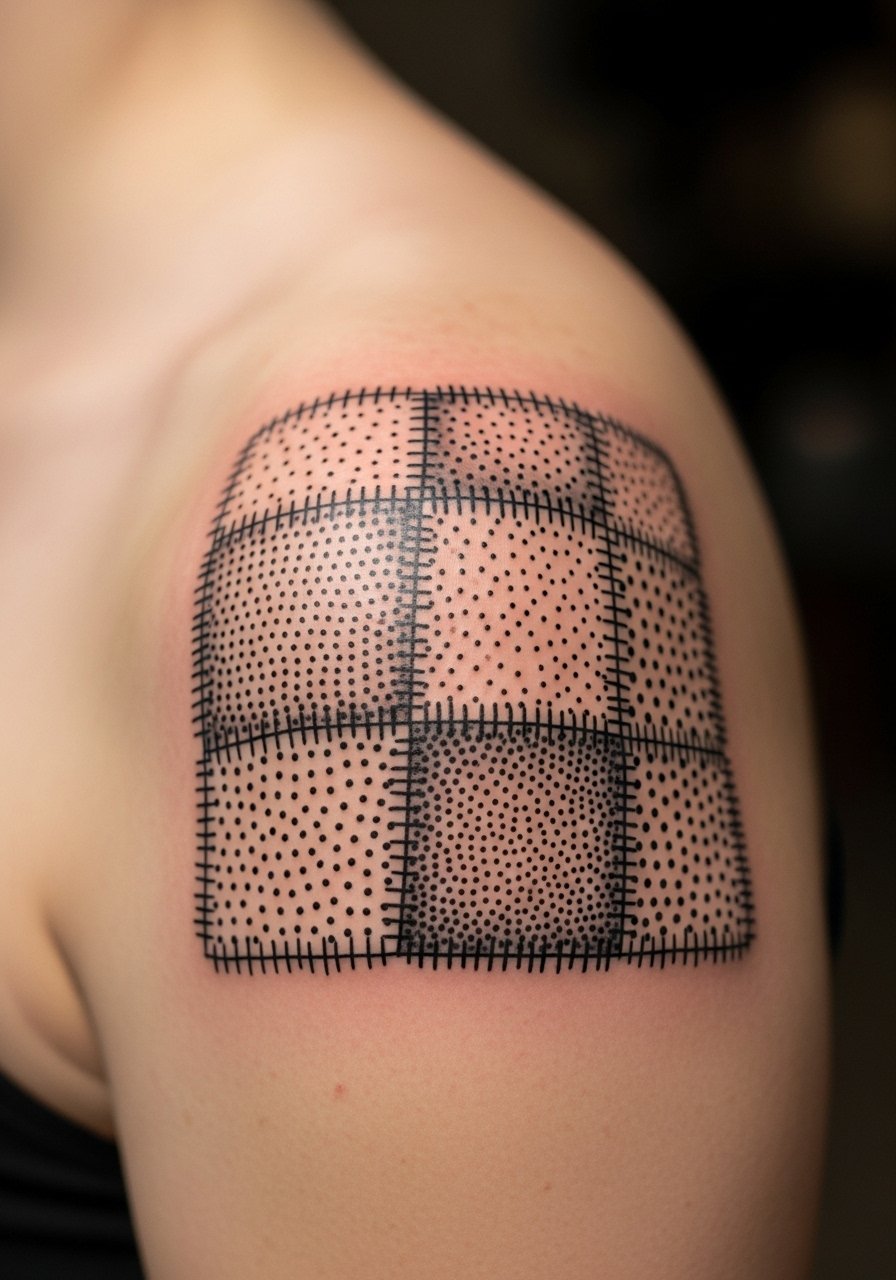
This under-covered idea uses dot work to simulate stitched fabric without heavy color. Ask for stipple shading and varied dot density to create tactile depth. The shoulder curved surface is ideal for this illusion, and touch-ups may be needed in two to three years. A common error is keeping dot density uniform which flattens the effect. For a casual reveal, wear a fitted cotton tank.
23. Memorial Patchwork with Micro-Realism Tokens
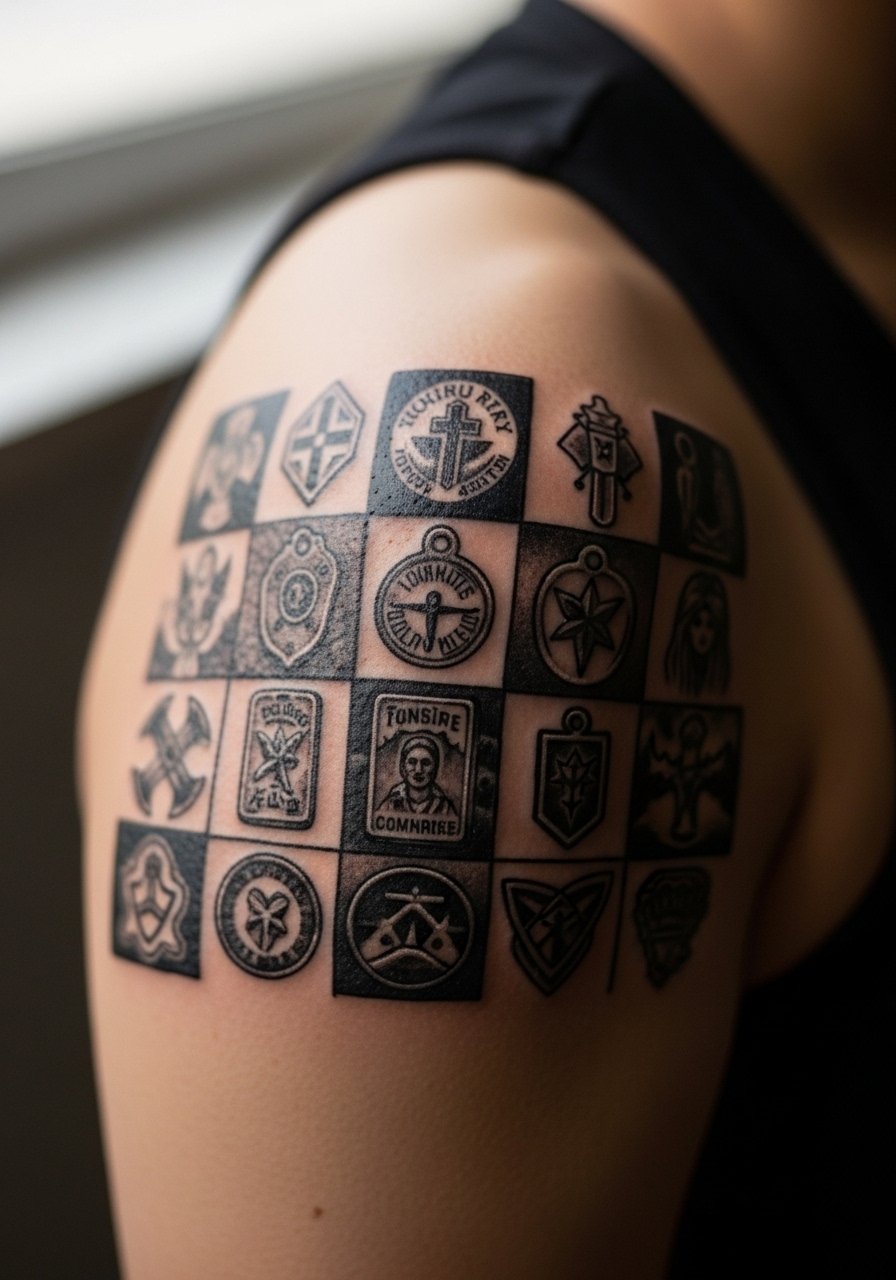
Memorial patches with tiny realistic tokens let you add portraiture or objects in a modular way. Make sure each token has its own negative space so detail stays readable as more patches are added. These take multiple sessions and careful reference photography. A mistake is compressing too many tokens into a small area where they fight for attention. Pair memorial patches with a white linen button down for respectful visibility.
24. Dynamic Guest-Artist Patchwork Plan
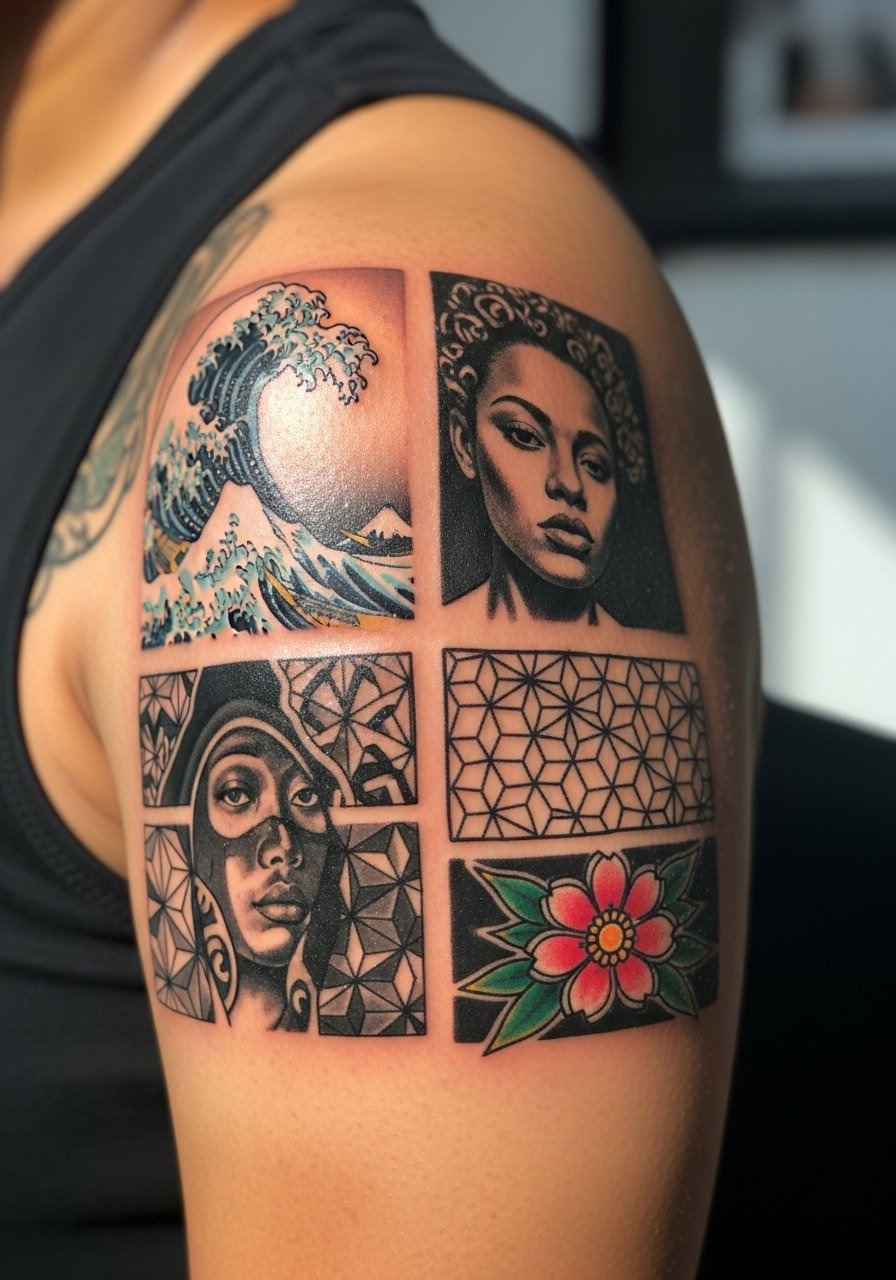
If you want a shoulder that evolves, plan negative margins and color anchors so guest artists can add without redoing existing work. Discuss a timeline and bring a wish list for each future slot during your initial consultation. This approach reduces the chance of mismatched sessions and the pain timeline is spread over years. The most common issue is failing to document color swatches and scale, which causes clashes later. For booking days use a [Booksy or tattoo app screenshot on your phone] to keep schedules organized in the shop.
25. Black and Gray Realism with Clock Faces on Deltoid Edge
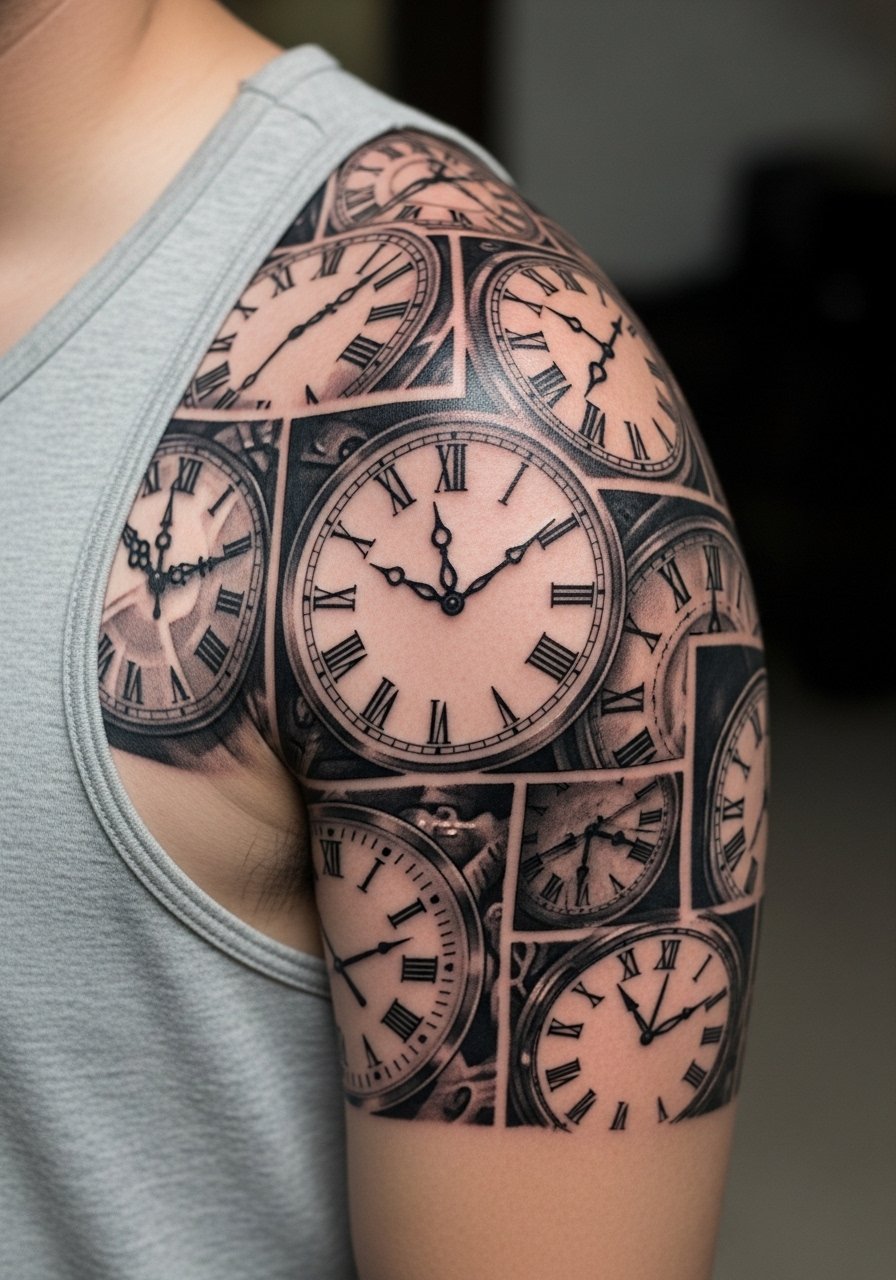
Clock faces and shadowed objects create a moody patchwork that anchors a shoulder. Request soft transitions and stipple work in low-light zones to preserve texture without heavy solid black. These pieces need 2 to 4 sessions depending on scale. A common mistake is overcrowding clocks with tiny numerals that blur. For a night-out look try a vintage leather jacket to highlight the mood.
26. Watercolor Edge Botanical Patches on Upper Deltoid
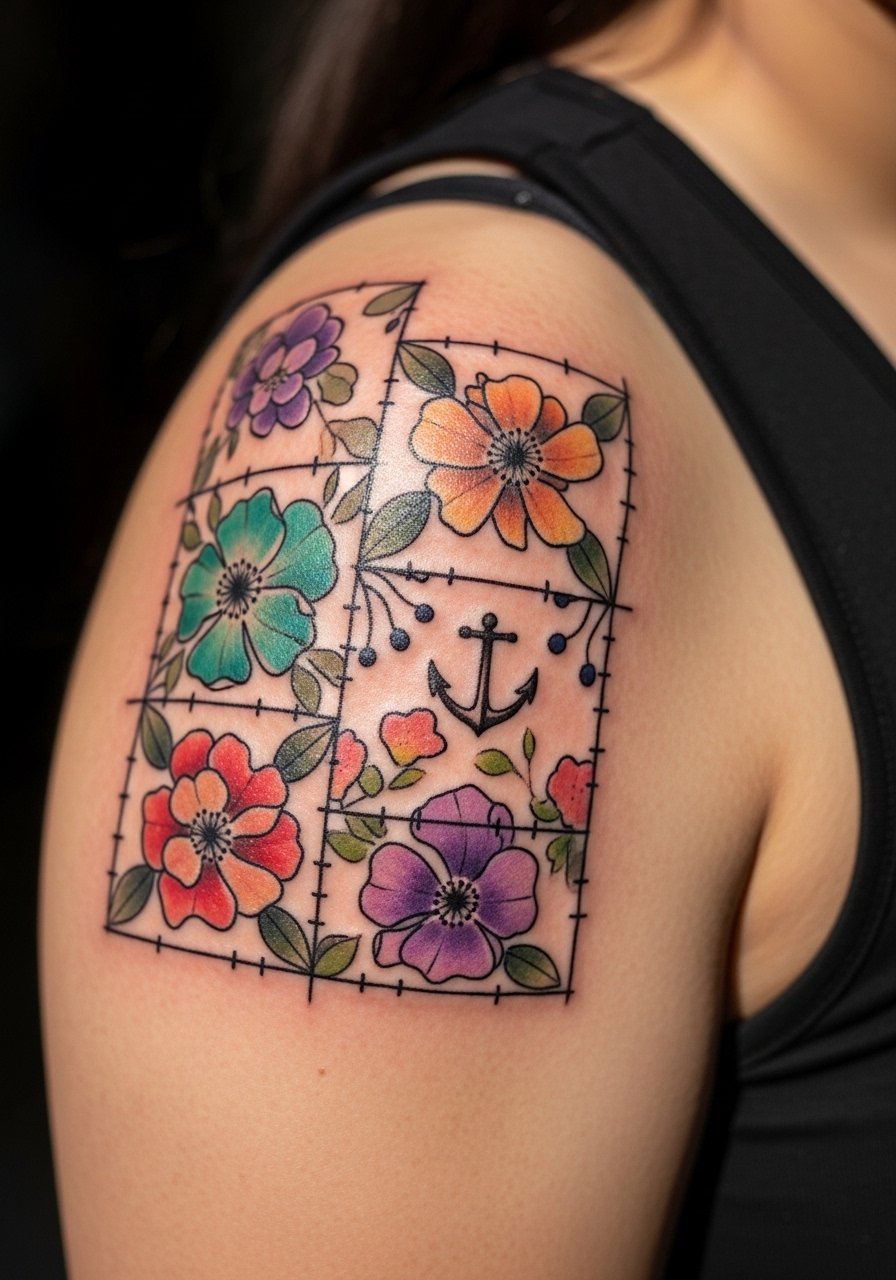
Botanical patches with watercolor edges read fresh when anchors hold the silhouette. Tell the artist to use black line anchors around petals and leaves so the color loss does not erase the motif. Pain is moderate and sessions are usually two. The mistake is asking for loose washes without anchors. For day-to-day style, pair it with an open-back midi dress or a simple racerback tank for casual shows.
27. Fine Line Shoulder Cap That Ages Better
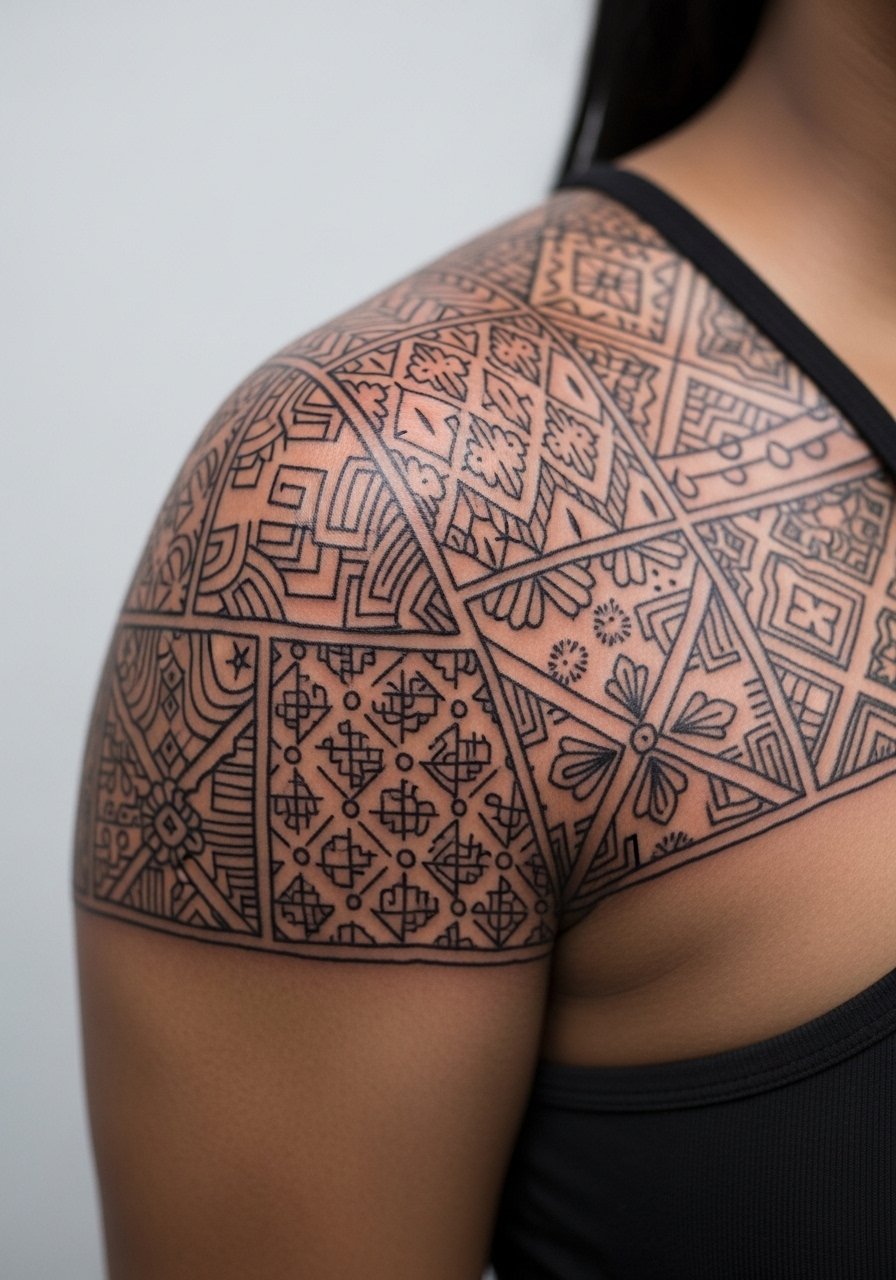
If you want fine line without early fade, ask for measured line thickness and spacing that anticipates two to three years of wear. A small adjustment to needle depth and line weight makes a big difference in how lines hold on shoulders. Pain is moderate and a short touch-up at year two is common. People who insist on ultra hairline lines often regret visibility loss. For reveal outfit choices go with a fitted cotton tank or a button up chambray shirt worn open.
Frequently Asked Questions
Q: Will fine line patchwork on the shoulder blur faster than bold work and what should I expect for touch-ups?
A: Fine line does tend to soften sooner than heavier work on the shoulder, especially in high-friction zones. Expect a touch-up window around two to three years for single-needle pieces, and plan for stronger anchors if you want longer between sessions. Discuss realistic timelines with your artist and ask to see healed photos of similar work.
Q: How should I prepare for a shoulder session if the artist might reschedule or cancel?
A: Have a backup plan and a local shop on standby, or use apps that show studio schedules so you can rebook quickly. Bring flexible clothing like a loose button-down shirt that you can raise or lower depending on which shoulder area is worked on. Keep communication clear about deposits and cancellation policies.
Q: My skin is dark. Which patchwork styles show up best on my shoulder and how do I test visibility?
A: Blackwork and designs with slightly heavier outlines tend to read better in photos and real life on darker skin. Request in-shop mockups under natural light and ask the artist to adjust line weight before inking. Avoid ultra-fine single-needle pieces unless the artist has a portfolio showing similar healed work on your skin tone.
Q: Is Saniderm better than dry healing for shoulder patches, or are both camps valid?
A: Both camps have advocates. One group prefers Saniderm for less mess and shorter visible healing time. The other prefers dry healing to avoid trapping moisture and to let scabs form naturally. The best approach is to ask your artist which method they use for shoulder work and why, then follow their instructions closely.
Q: How do weight changes affect shoulder patchwork and what design choices reduce distortion?
A: Areas with large volume shifts will distort motifs if they are tightly grouped. To reduce distortion choose designs with deliberate negative space and slightly larger motifs. Plan for touch-ups in the years after major weight changes and discuss placement that sits on more stable tissue if you anticipate change.
