
Fine line rose trends look incredible on feed, but the reality often bites. On darker skin thin lines can fade into a soft blur, small pieces sometimes outprice budgets, and studio no-shows or deposit drama wreck plans. These 17 abstract rose directions span bold blackwork to tiny micro clusters, and include what to ask at consults, how each idea ages, and a few wardrobe tips that actually help the tattoo read in real life.
1. One-Line Continuous Rose on the Wrist
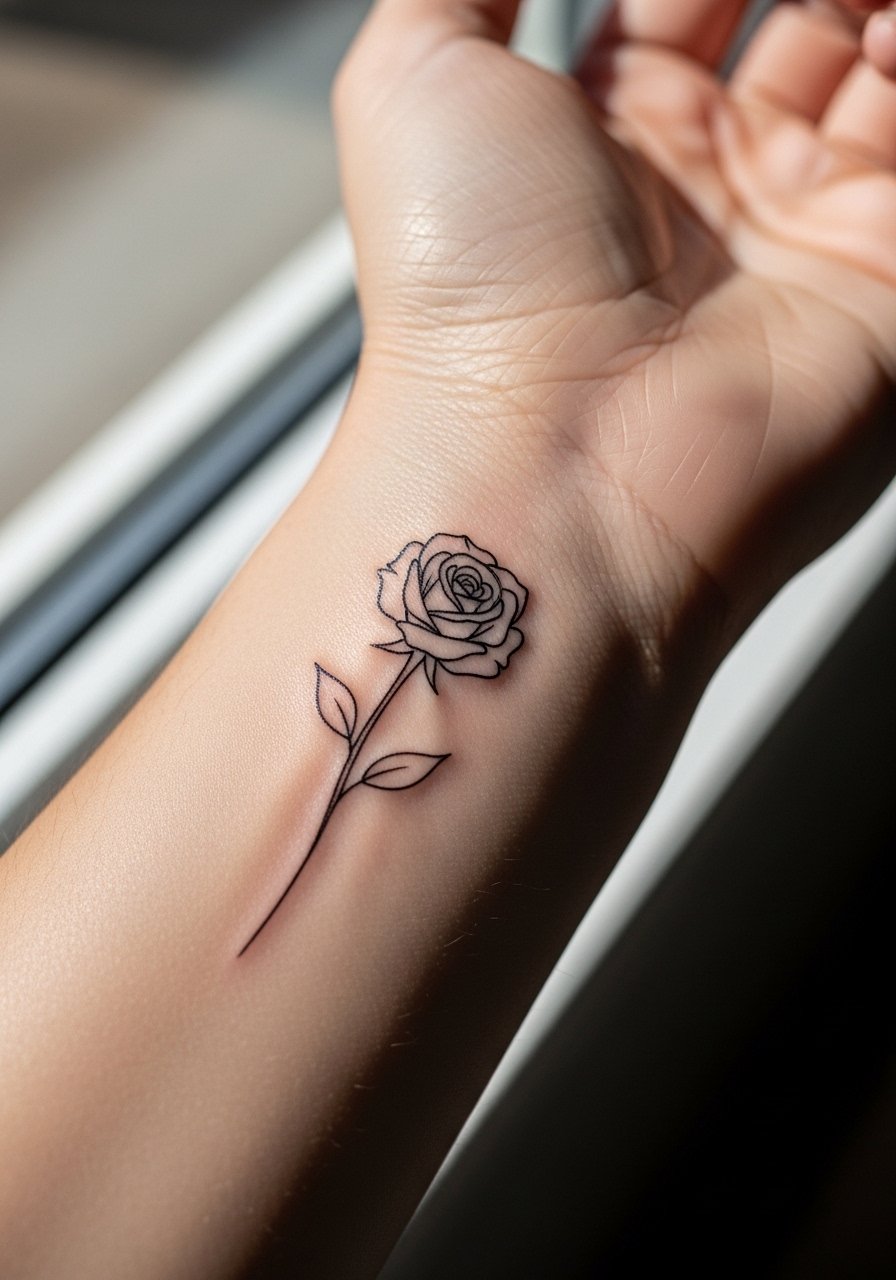
I recommend a one-line wrist rose when you want visible, low-session ink that still reads from close up. Tell your artist you want a slightly heavier line weight than the sketched version so the stem keeps shape after a year. A common mistake is asking for the absolute hair-thin line seen on galleries. That looks fragile on movement-heavy spots like the wrist and often needs a touch-up at year two. Expect a short single-session sit and brief itching during days three to seven. For showing it off, pair with a neutral leather watch or one cuff on the opposite wrist so the design stays the focal point. Blowout risk is low if the design keeps clear spacing around tight curves.
2. Geometric Petal Rose on Inner Forearm
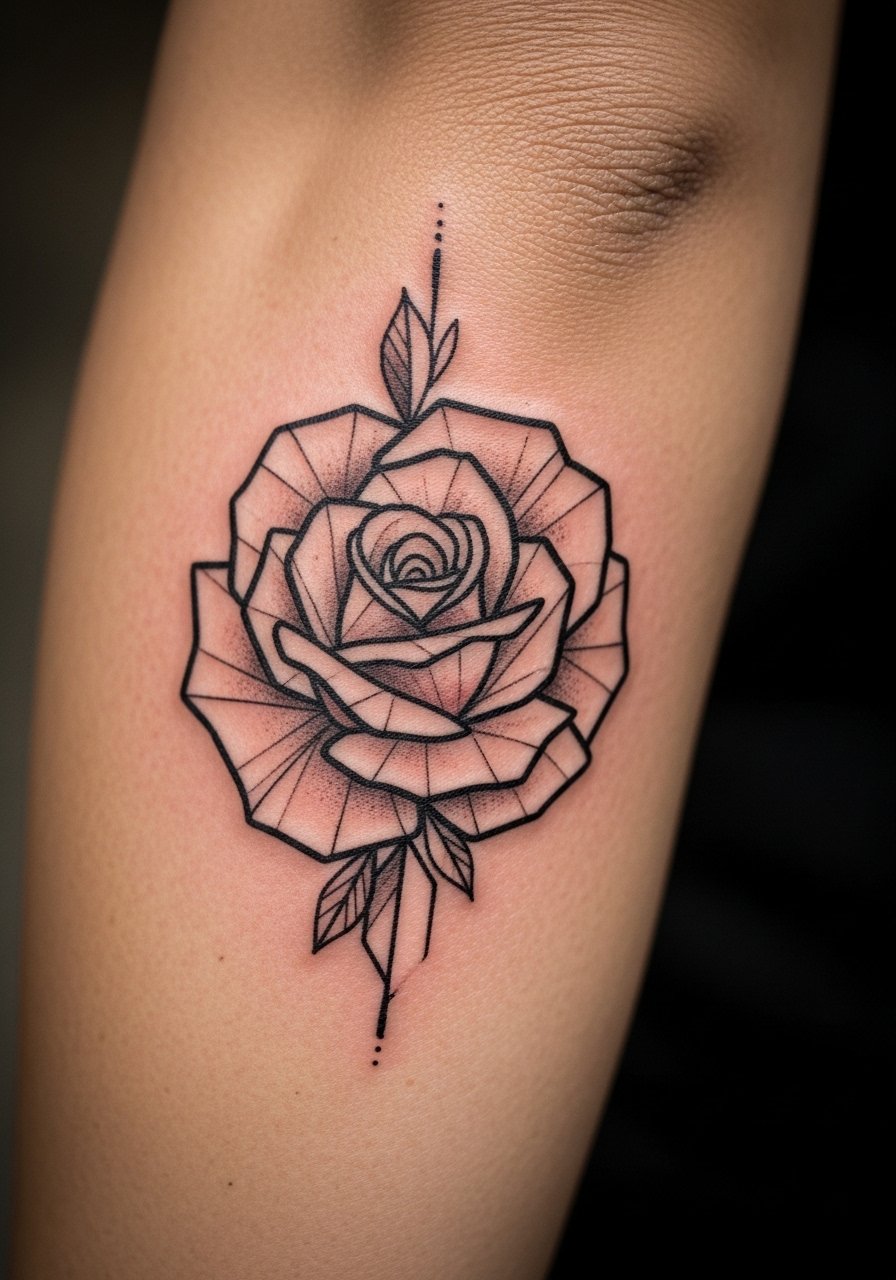
This hand-drawn rose blends organic curves with geometric petals and fits the forearm well because the flat plane gives the geometry room. In consults say "sharpen outer petal edges and leave inner fields open" so the geometry does not visually collapse. The common aging issue is packing too many tiny shapes, which merge by year three. For longevity ask for slightly increased spacing and medium lineweight. Session time is usually 1 to 2 hours and expect moderate discomfort when needles cross the inner arm. Wear a chambray rolled cuff shirt to reveal the piece when you want to show it. If you plan a sleeve later, tell your artist that from the start so the angles can align.
3. Minimal Spiral Single-Line on the Collarbone
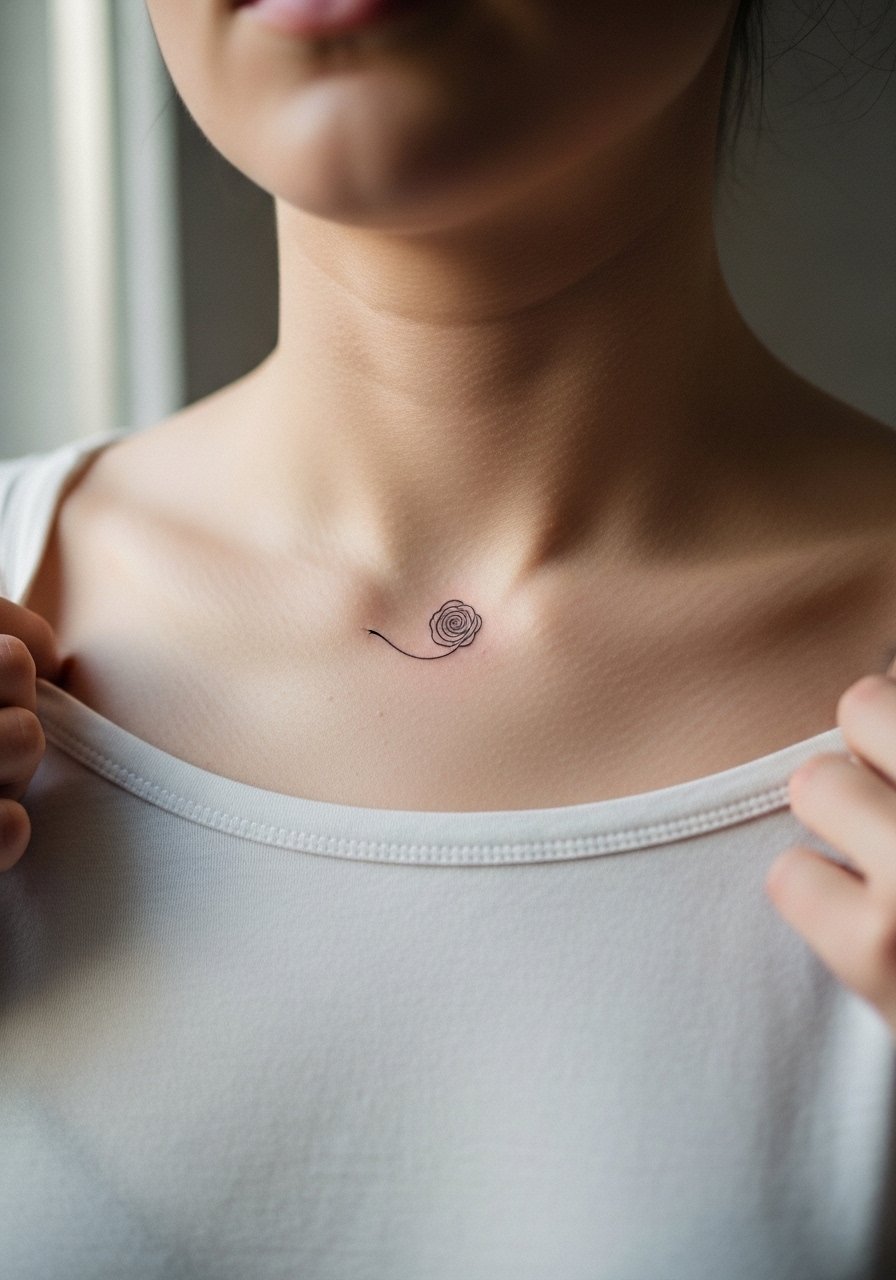
Collarbone roses heal visibly and stay readable under necklaces. The spiral one-line style works well here because the bone gives a crisp silhouette. Ask the artist to approve the stencil while standing so the curve follows your clavicle. Pain sits at a medium level because the area is bony and sessions are brief. A rookie mistake is placing the spiral too low, where clothing chafes during healing. For session day wear a strapless bralette or a wide-neck top you can pull aside easily. Expect a one-session piece with touch-up possibility at year two depending on sun exposure.
4. Watercolor Bleed Rose on the Shoulder

Watercolor bleed gives motion and soft edges that photograph well. Shoulder placement keeps the color safer than high-friction spots, but faded pigments are a known trade-off. If you love the painterly look, ask for a black base to anchor the color so the bleed reads longer. One common mistake is starting with overly diluted pigment that disappears after months. The session runs one to two hours and is easy to dress for with a racerback tank for access. If you have darker skin tones consider deeper pigments from the start so the bloom keeps contrast over time.
5. Neo-Traditional Rose with Abstract Thorns on Outer Thigh
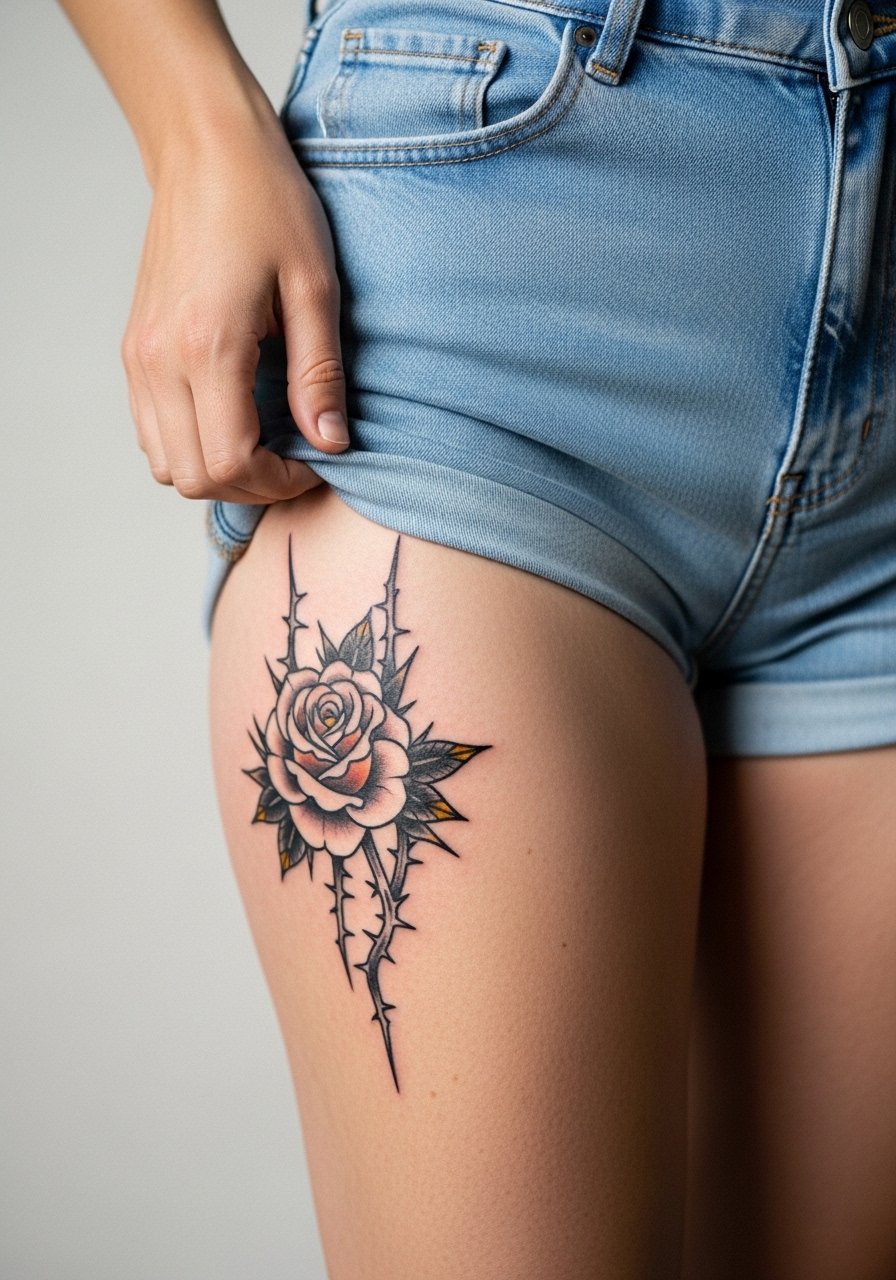
Thigh pieces allow for richer saturation and bolder outlines, which helps the neo-traditional twist age well. For consults say you want bold thorns and slightly muted color fills so the contrast remains in sunlight. A common error is asking for too many tiny gradients in a medium piece, which can oxidize and soften. Sessions are longer and you should hydrate and eat first because thigh work can be two to three hours. Wear high waist denim shorts the day of the appointment so you can lower fabric without rubbing the area. Weight changes can shift thigh placement, so plan the composition with that in mind.
6. Blackwork Abstract Rose Mandala on Upper Arm

Collectors choose blackwork mandala roses for bold coverage and symmetry. The upper arm tolerates heavy saturation, which makes this style age into a solid, wearable piece. Tell your artist you want blocky fills with negative space rings so the mandala keeps definition. A mistake is compressing too many concentric rings into a small area, causing early merging. Sessions range from two to four depending on size and you will feel sustained pressure. For a session wear a loose button-down shirt you can pull aside for access. Blackwork generally outlasts watercolor in terms of contrast on darker skin tones.
Studio Day Picks
The wrist, forearm, and shoulder pieces above each need slightly different prep, and these five items smooth the session and early healing without clutter.
-
CeraVe Healing Ointment. Lightweight and non-greasy for the first few days, helpful on wrists and forearms where thick balms trap sweat.
-
Ink-Ichie Breathable Tattoo Balm. A thinner artist-style balm that artists mention for color abstracts on thighs and shoulders where heavy occlusion can dull pigments.
-
Australian Gold Aftercare Spray. Quick-dry spray that works well if you need minimal touch handling during long sessions on the upper arm.
-
Tea Tree Soap Bar. A gentle pre-session cleanse that some people use to reduce surface oils before stencil application.
-
Saniderm Protective Film. Keeps friction-heavy wrist and ankle pieces covered for the first few days if your artist supports occlusive aftercare.
7. Fine Line Fragmented Rose on the Ribcage
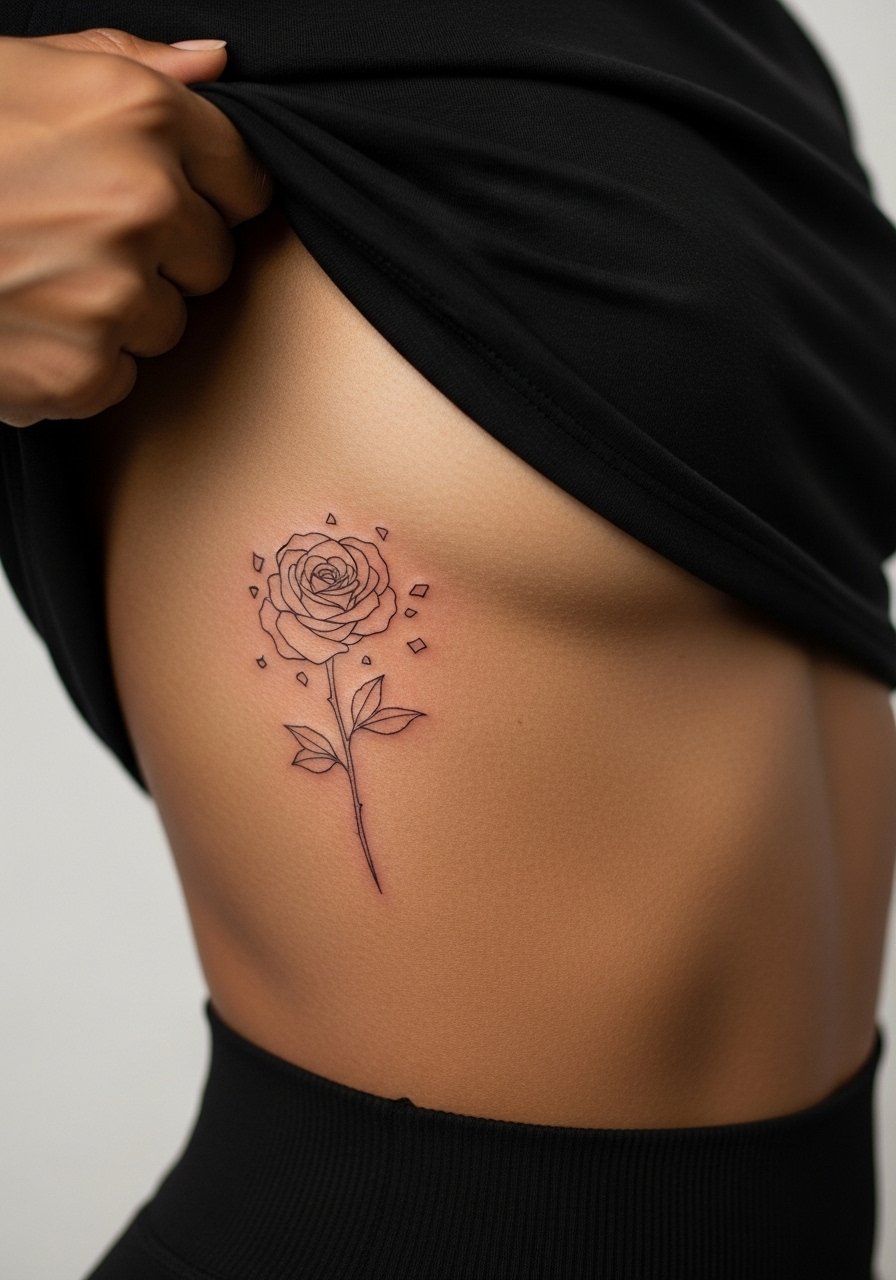
Ribcage is high on the pain chart, so expect a sharp reminder during the session. Fragmented fine line roses look like a puzzle up close, but the biggest risk is going too small. Artists are split on fine line here. One camp says the skin stretch on the ribs blurs lines within two years. The other camp says with the right needle depth and spacing it holds fine. Ask your artist where they stand and plan slightly bigger fragments if you want longer-lasting clarity. For session wear a loose tank you can lift without tugging. Touch-ups at six to twelve months are common for dense fine work on ribs.
8. Micro-Realism Petal Cluster on the Inner Wrist
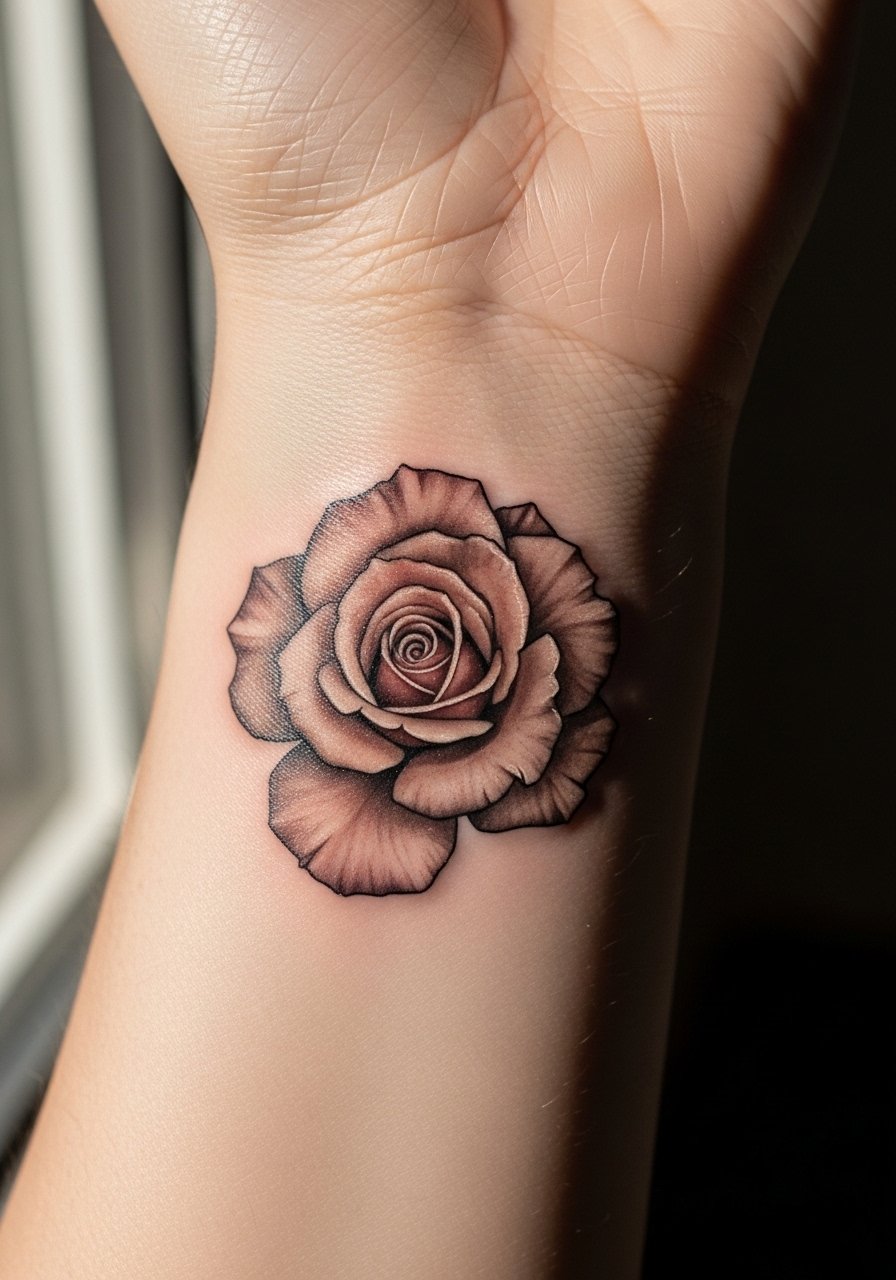
Micro-realism fits the inner wrist when you want subtle depth without large commitment. Tell your artist to favor contrast over tiny hairlines so the shading reads after a year. The common mistake is requesting micro stipple that is too faint, which becomes a soft gray smudge with time. Session time is short and expect some itching in the first week. For showing it day to day, add a thin silver bangle set on the opposite wrist so the micro work does not compete with jewelry. Because the wrist moves constantly, plan for a possible light touch-up at year two.
9. Ignorant-Style Chunky Rose on the Calf
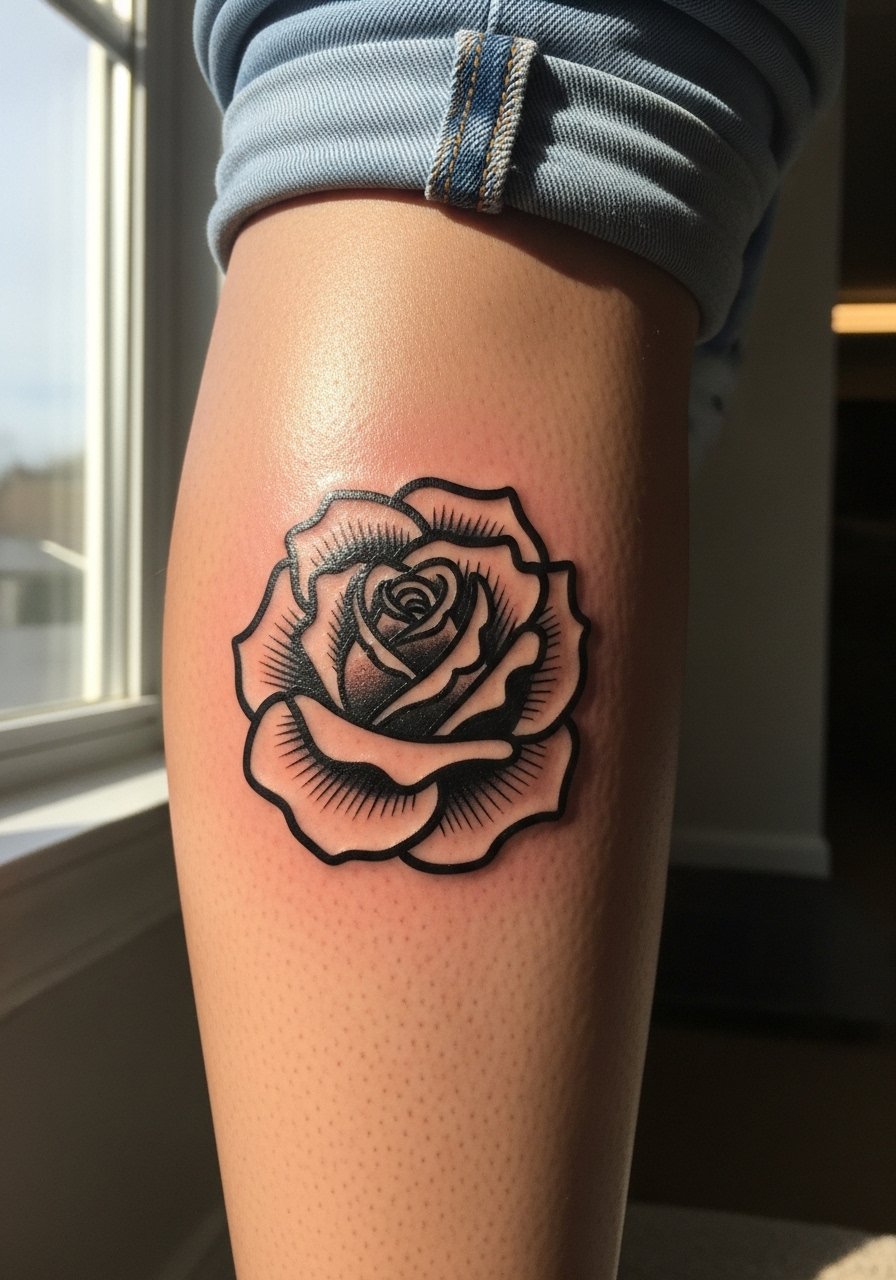
Ignorant style uses chunky outlines and playful proportions, which age well because they rely on clarity, not tiny detail. Calf placement is forgiving for blowout and you can go mid-size without worrying about early merging. In consults ask for bold silhouette over micro-shading to keep the playful feel after several years. The session is comfortable and allows solid linework in a single visit. Pair the piece with rolled bootcut jeans or midi dresses to show it off seasonally. If you expect major leg workouts or weight shifts, mention that so the layout avoids skin-fold zones.
10. Traditional Rose with Abstract Twist for Forearm Sleeve Start

Use this piece as the anchor for a sleeve because traditional saturation and bold outlines age into reliable legibility. Tell your artist you want vivid core color with abstract negative-space elements that let future pieces breathe. A common error is starting too small for a sleeve anchor, making matching later work awkward. Sessions usually run two to three hours for a strong base. For session day wear a loose fit tank top so the artist can reach the whole forearm comfortably. Expect saturation to mellow slightly by year two, but bold outlines will remain readable.
11. Ornamental Vine Rose Ankle Wrap

Ankle wraps look delicate with negative space, but thin lines near the foot face friction and fading. Ask for slightly reinforced outlines on the underside where socks hit so the wrap keeps its shape. The session is short but healing demands minimal tight footwear for the first week. For show-off moments wear strappy heeled sandals or cropped straight jeans to reveal the wrap. A common mistake is placing the vine too close to the bone where touch-up is harder, so aim for an inch of soft tissue around the design when possible.
12. Watercolor Explosion Thigh Piece
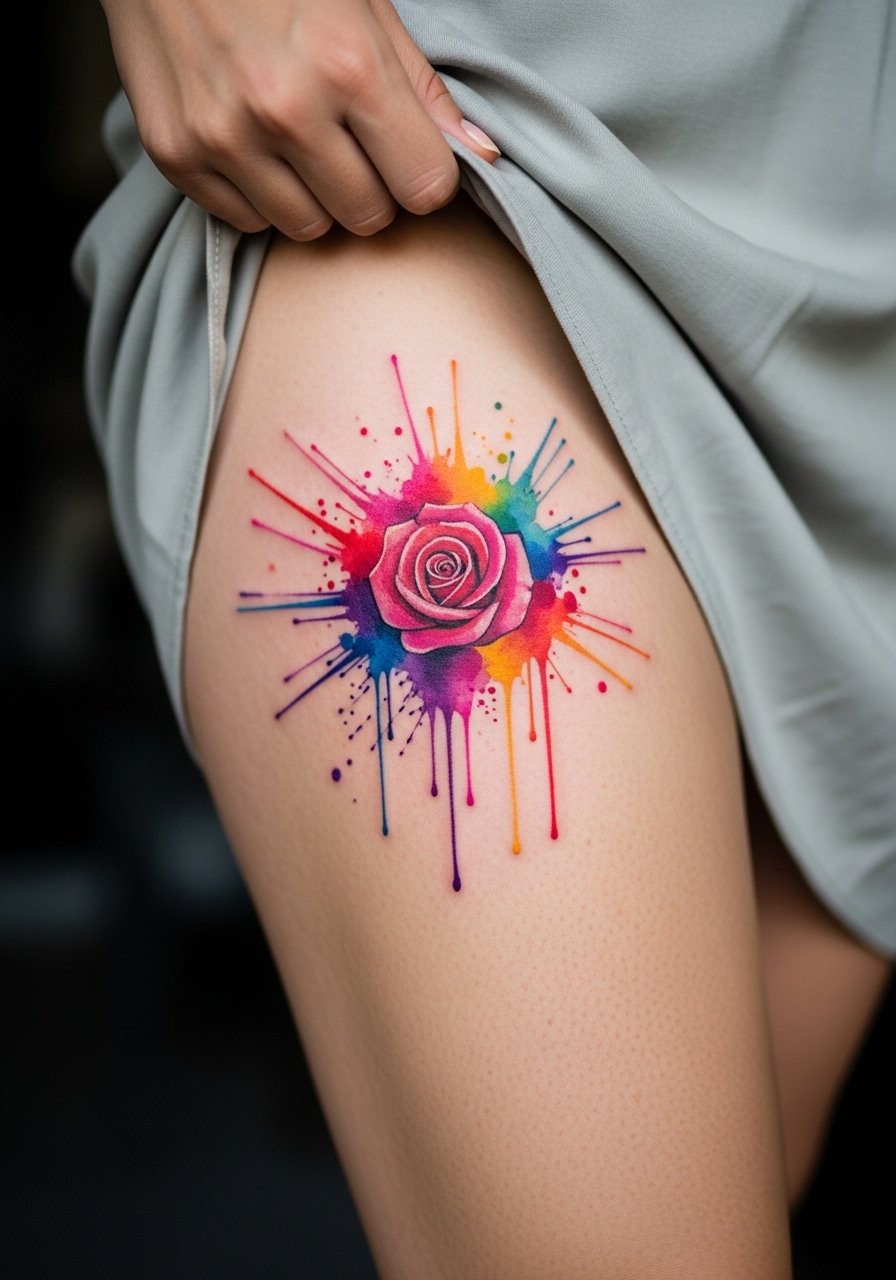
Thighs take color beautifully and allow painterly compositions that look like a splash of paint. If you worry about color bleed, ask for a black or deep base layer to maintain contrast. A typical mistake is overusing pale pastels without a darker counterpoint, which fade into a bruise-like look. Sessions are medium length and require you to keep the area dry and cool during healing. For showing it off choose high-waist shorts or a side slit midi skirt. Expect color refreshes at two to three years if you want to maintain vibrancy.
13. Black and Gray Shaded Rose Bud at the Neck Side

Side-of-neck pieces are intimate and visible, and shading can create a shadowy, introspective look. Tell your artist to keep tones slightly bolder than you think so the bud keeps shape under sun and clothing friction. One mistake is asking for ultra-fine stipple too close to the throat area, where touch-ups are harder. Sessions are brief but the placement can affect job perceptions in some fields, so consider that. For session wear a wide-neck shirt you can shift easily. Touch-ups at year two are common for shaded neck work.
14. Negative Space Vine Illusion on the Calf
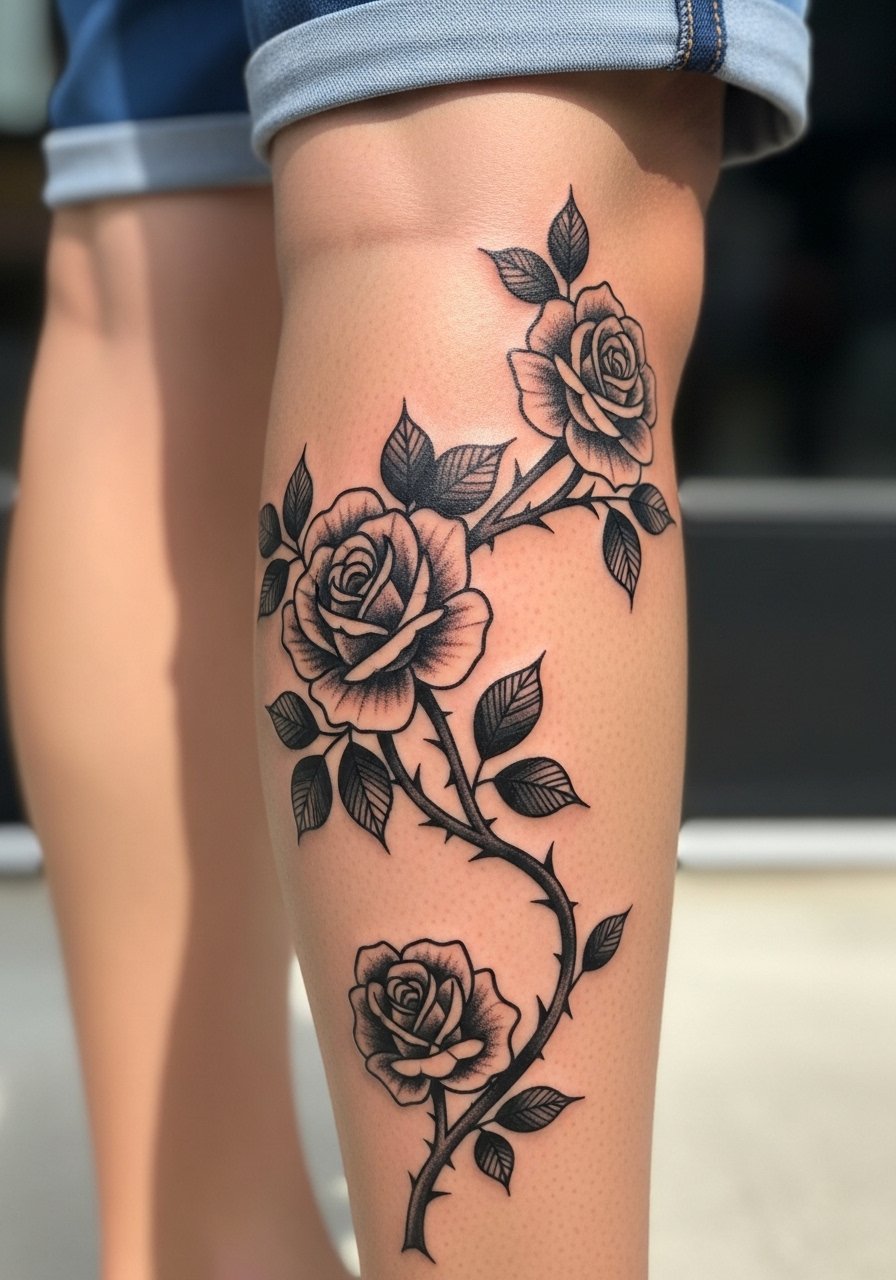
Negative space on the calf can create optical illusions that wrap naturally with muscle curves. This placement resists distortion compared with inner thigh or forearm, which makes it smart for long-term visual effects. Discuss with your artist how much skin to leave as negative zone so the pattern does not close up over time. Sessions are comfortable and healing is straightforward if you avoid tight socks. For seasonal wear pair with rolled jeans or a midi wrap dress so the vine reads without extra clutter. Expect low blowout risk if the lines are bold.
15. Fractal Rose for Sternum with Heartbeat Lines

Sternum placements require careful planning because of curvature and movement. The fractal rose with heartbeat lines feels private and can be hidden under clothing when you want. Artists vary on the fine-line approach here. One group warns that the sternum's motion blurs ultra-fine work. The other says spacing and shallow depth keep lines intact. Bring references and approve the stencil standing up because the chest sits differently when upright. Wear a fitted sports bra to the session for modest access. Expect higher pain but rewarding center-placement visuals.
16. Constellation Dot Rose Pairing on the Hip
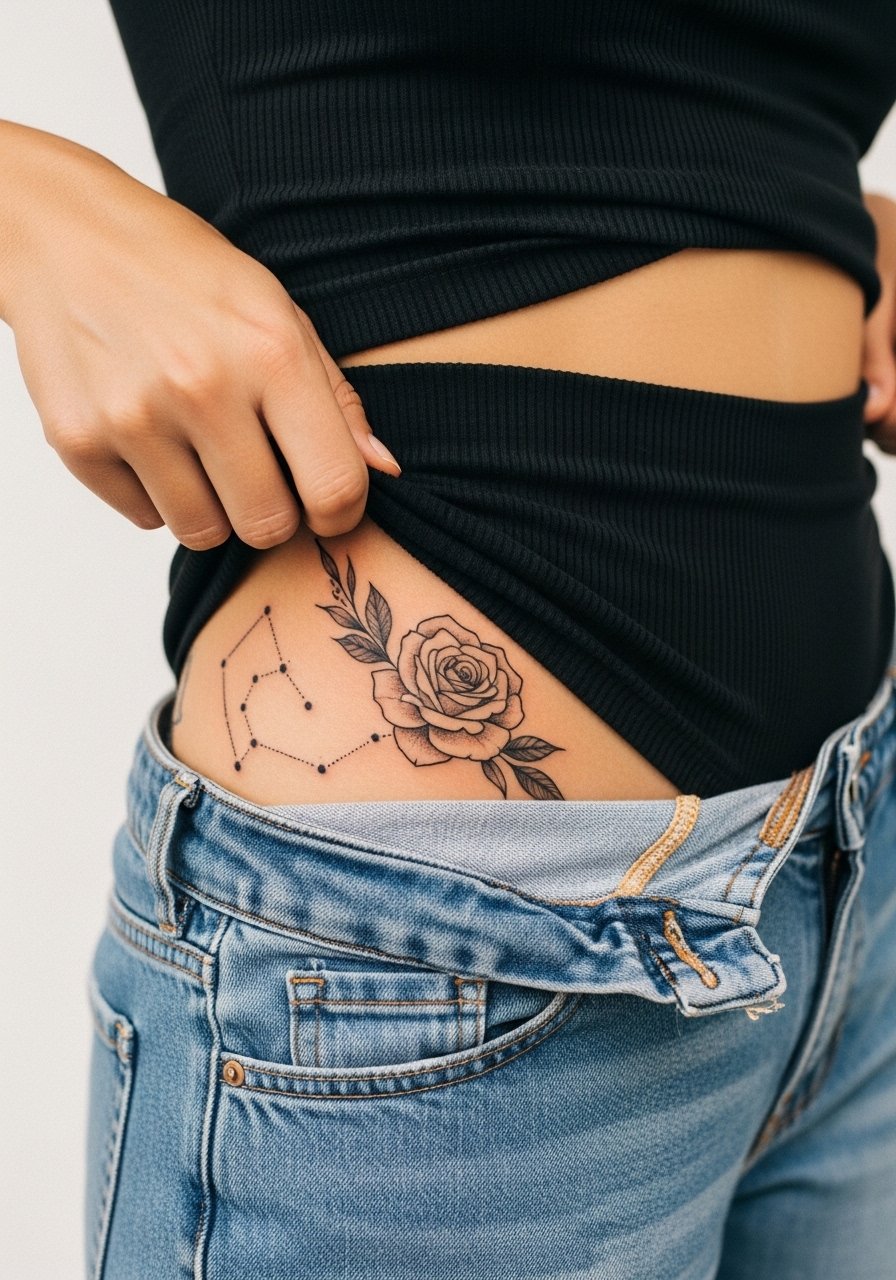
Hip pieces are flirtatious and work well with small dot clusters for astrological personalization. Tell your artist where you want the constellation relative to the rose so the dots do not crowd the petals. The most common mistake is squeezing too many tiny dots into a compact area, which creates a muddy patch later. Session wear should be high-cut shorts or the kind of bottoms you can adjust without rubbing the fresh ink. For a subtle finish try a muted palette and expect touch-ups only if dots lose their sharpness after sun exposure or weight shifts.
17. Knuckle and Small-Surface Aging Simulation Rose
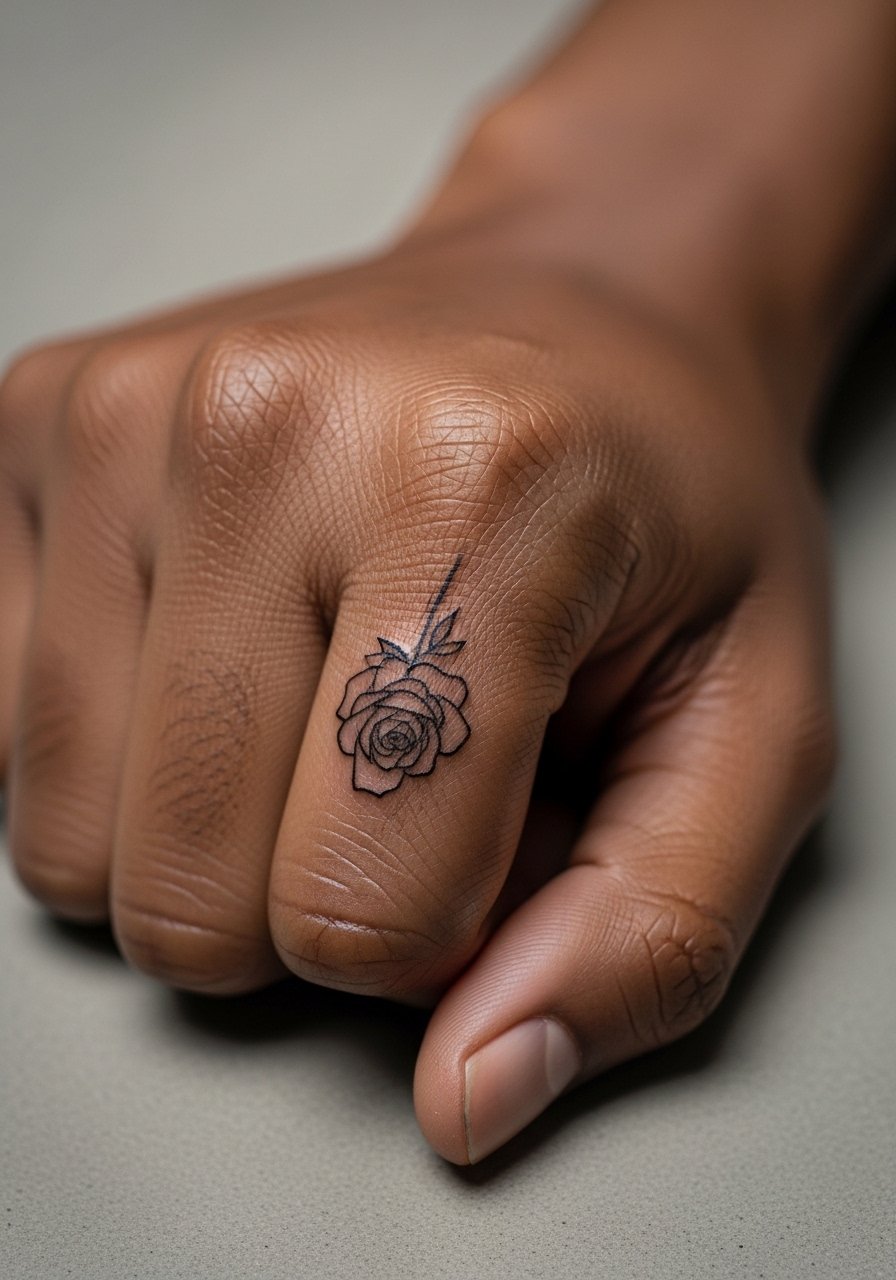
Knuckle and small-surface roses show aging fast because of constant hand use. Before booking, ask for a simplified silhouette without tiny interior detail so the design reads longer. A common regret is asking for too much detail on knuckles, where lines can spread into a single gray mass by year two. The session is quick but healing requires hands-off care for the first week. Professionals often recommend slightly heavier outlines for short-term clarity. If you need daily hand function during healing plan for easy tasks and minimal soaking.
Frequently Asked Questions
Q: Will fine line abstract roses fade faster on darker skin tones, and what helps them hold up?
A: Fine line can appear to soften quicker on darker skin because contrast between ink and skin is lower. From what I have seen, choosing slightly bolder line weight and asking for deeper initial saturation helps, and planning for a touch-up at year two is realistic. Some people test a temporary version first to see how the line weight reads on their skin tone.
Q: How should I time a small ankle or wrist abstract rose around summer activities?
A: Book when you can avoid long soaking and heavy sweating for two weeks after the session. If summer plans include lots of beach time or tight shoes, schedule before or after the trip so you can keep the area clean and dry during the initial healing window. Wear breathable materials and avoid friction from straps for at least the first week.
Q: Artists disagree on Saniderm versus dry healing. What are the camps and which is safer for small roses?
A: The Saniderm camp likes the sealed early protection and fewer dressing changes, while the dry-healing camp worries about trapped moisture and possible infection. For small areas like wrists and knuckles some people prefer a short Saniderm window then open-air care, but others choose gentle dry healing. Ask your artist what they have seen work in their studio and follow their step-by-step timeline.
Q: If my artist cancels or the studio ghosts me, what’s the practical next step to protect my deposit?
A: Use booking platforms with clear cancellation policies and request a written refund term when you pay a deposit. If a studio is unresponsive after an agreed date, follow up in writing and keep receipts. Many people find guest spots or conventions for small pieces if they need a reliable alternative quickly.
Q: Are watercolor abstracts worth it, given color bleeding complaints, or should I pick blackwork instead?
A: Watercolor pieces photograph beautifully but often need refreshes sooner, especially in high-friction areas. Blackwork or black-anchored color tends to hold contrast longer, which is why many people go black after a faded watercolor. If you love watercolor, plan for a color refresh at two to three years and ask the artist to include deeper anchor points so the design still reads as it ages.
