
The nostalgia rush for childhood characters makes illustrative Winnie the Pooh tattoos a popular pick right now, and they come in a surprising range of approaches. Some fans want a small, sketchy Pooh that reads like a page from a storybook. Others ask for saturated color and background elements that age differently. Start with a small forearm piece if you want to test placement and longevity, then read the first idea for how to do that well.
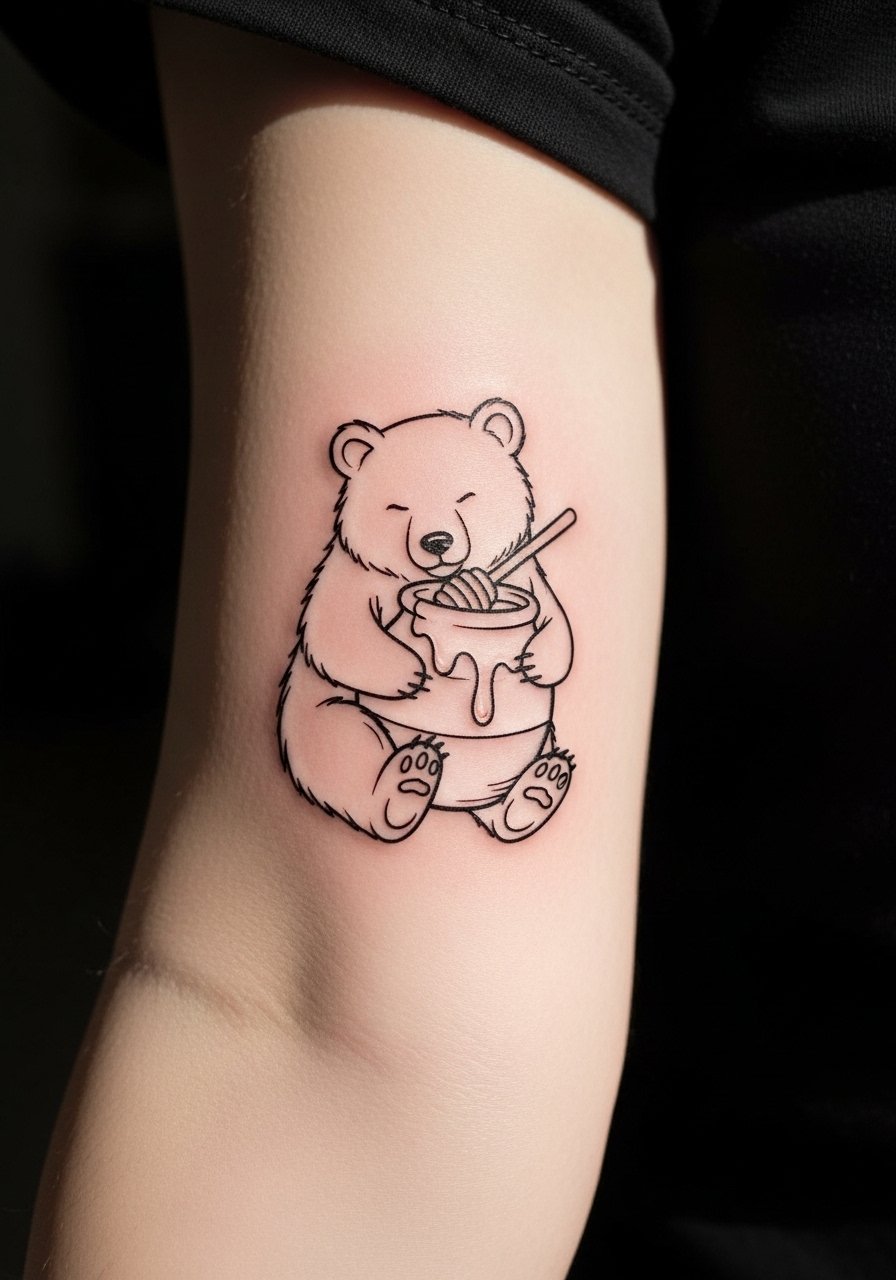
1. Tiny Illustrative Pooh on Inner Forearm
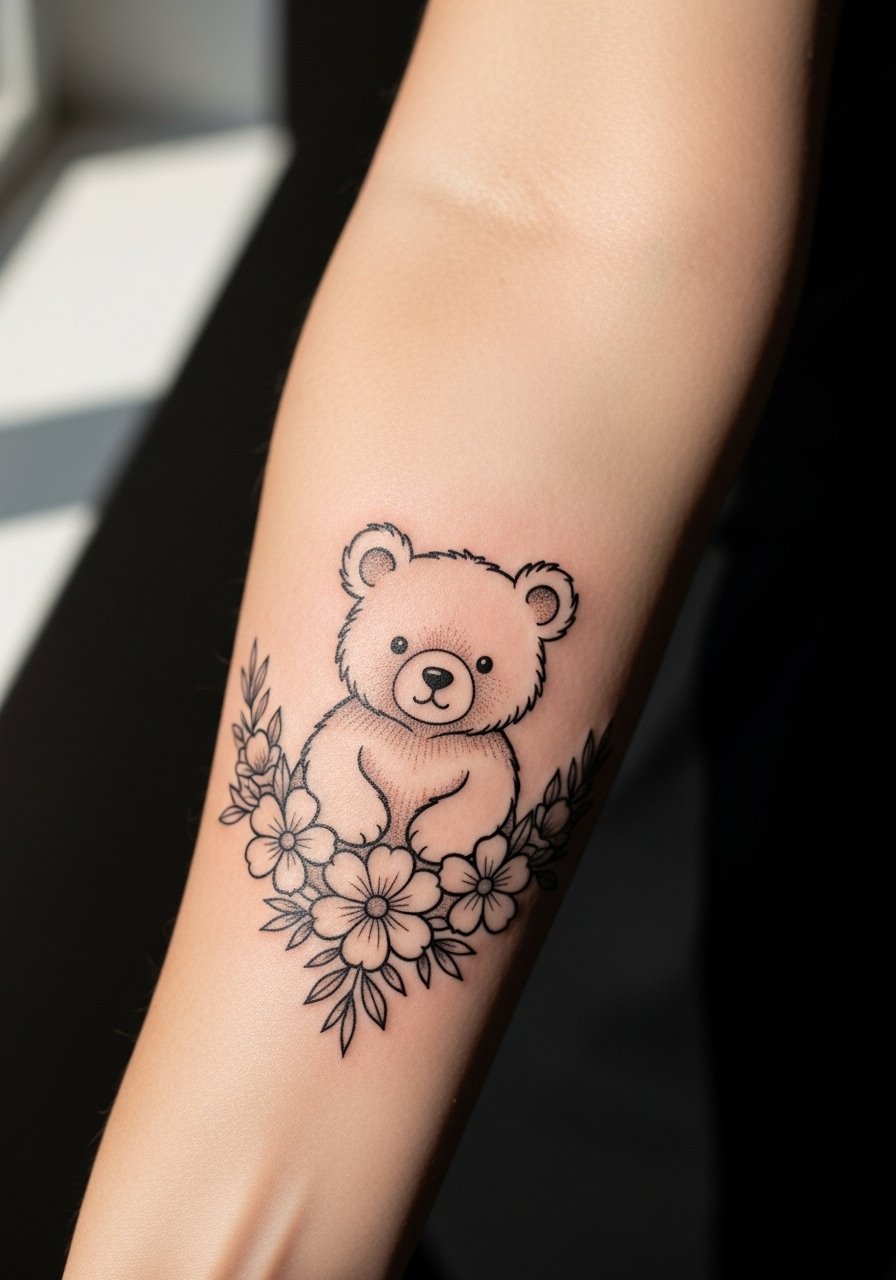
A small, illustrative Winnie the Pooh hugging a honey pot on the inner forearm reads like a private keepsake and ages predictably if you keep the linework airy. I recommend asking your artist for slightly heavier outer contours and lighter interior strokes during consultation so the silhouette holds at year two and five. Fair warning, the inner forearm sees constant friction from sleeves. For the session, expect a one- to two-hour appointment and a medium pain level. Common mistakes include asking for ultra-fine lines that merge over time. For showing it off, roll up sleeves or wear a rolled-up linen shirt in cream so the piece reads clearly without competing patterns.
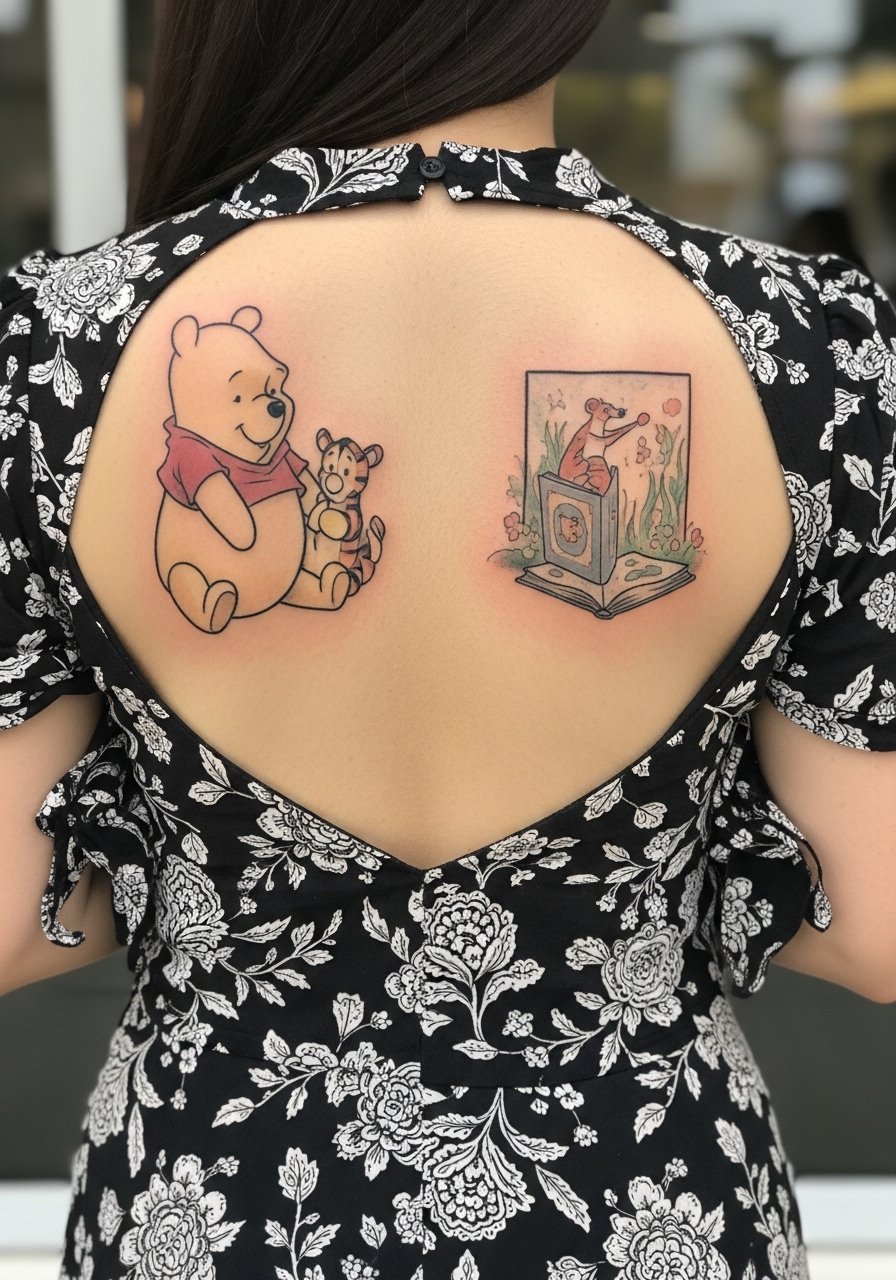
2. Storybook Page Backpiece with Soft Color Wash
This one spans the upper back with Pooh and a small scene framed like an open storybook. The larger surface lets artists use gentle stipple shading and soft color saturation that ages better than tiny watercolor fills. Tell your artist to keep contrast on the character outline and use stipple shading for backgrounds so the core figure stays distinct at two and five years. The session is longer and split into two visits. For wardrobe on reveal nights, an open-back midi dress frames the center back while keeping attention on the illustrative detail. Sensitive-piece note, plan for a tank top or button-up you can pull aside during the appointment.
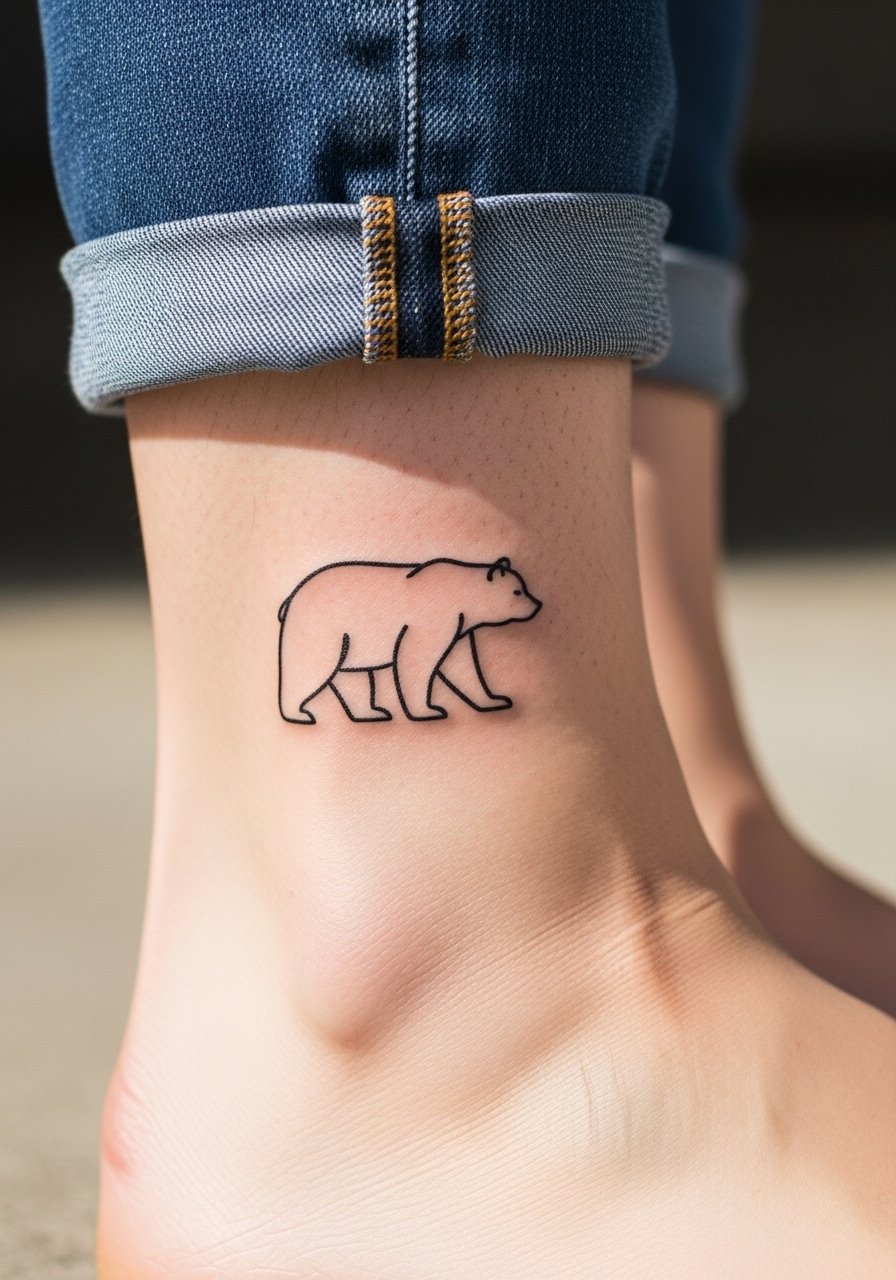
3. Minimalist Pooh Outline on Ankle
A tiny outline on the outer ankle gives a subtle nod to Pooh without heavy commitment. The ankle is a high-movement, high-friction zone so expect some softening at year two. Ask for a slightly thicker outline and avoid tiny interior details that blur. The session is short, often under an hour, and the pain is lower than ribs but higher than the forearm. A common mistake is requesting excessive fine detail at this scale. For showing the piece, wear jeans rolled up or a pair of sandals that expose the ankle so the tiny illustration reads like an intentional accent.
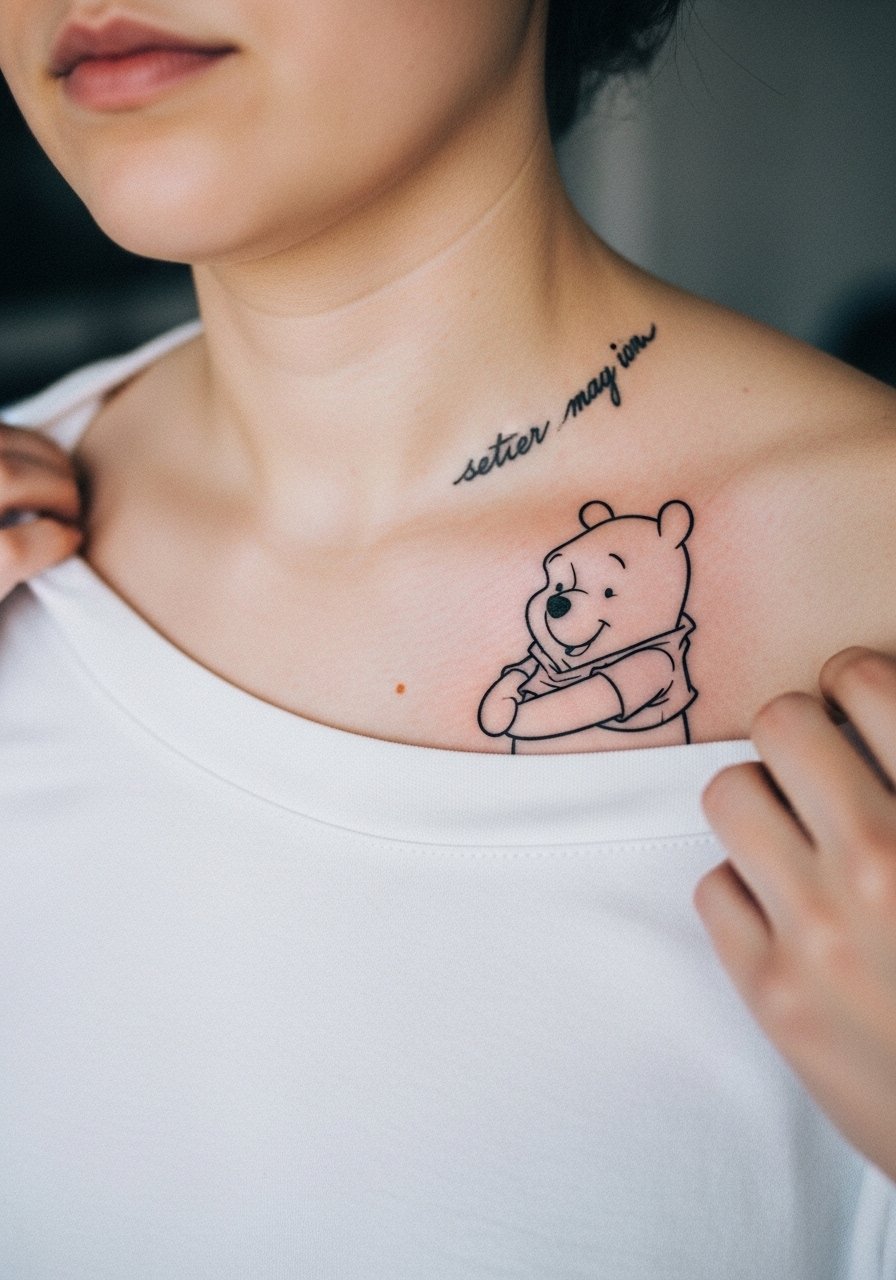
4. Collarbone Illustration with Tiny Script
An illustrative Pooh sitting near a short phrase suits the collarbone, where the flat plane keeps lettering clean when placed correctly. The conflict artists mention is whether script near the collarbone should be small. One camp says tiny script holds if the letters are spaced and the artist uses shallow depth. The other camp warns that collarbone movement can blur fine letters faster than expected. The truth depends on the artist's portfolio and linework depth, so ask to see healed examples. Session time is modest. For showing it off, pair the piece with a thin chain pendant necklace that sits above the script without crowding the illustration.
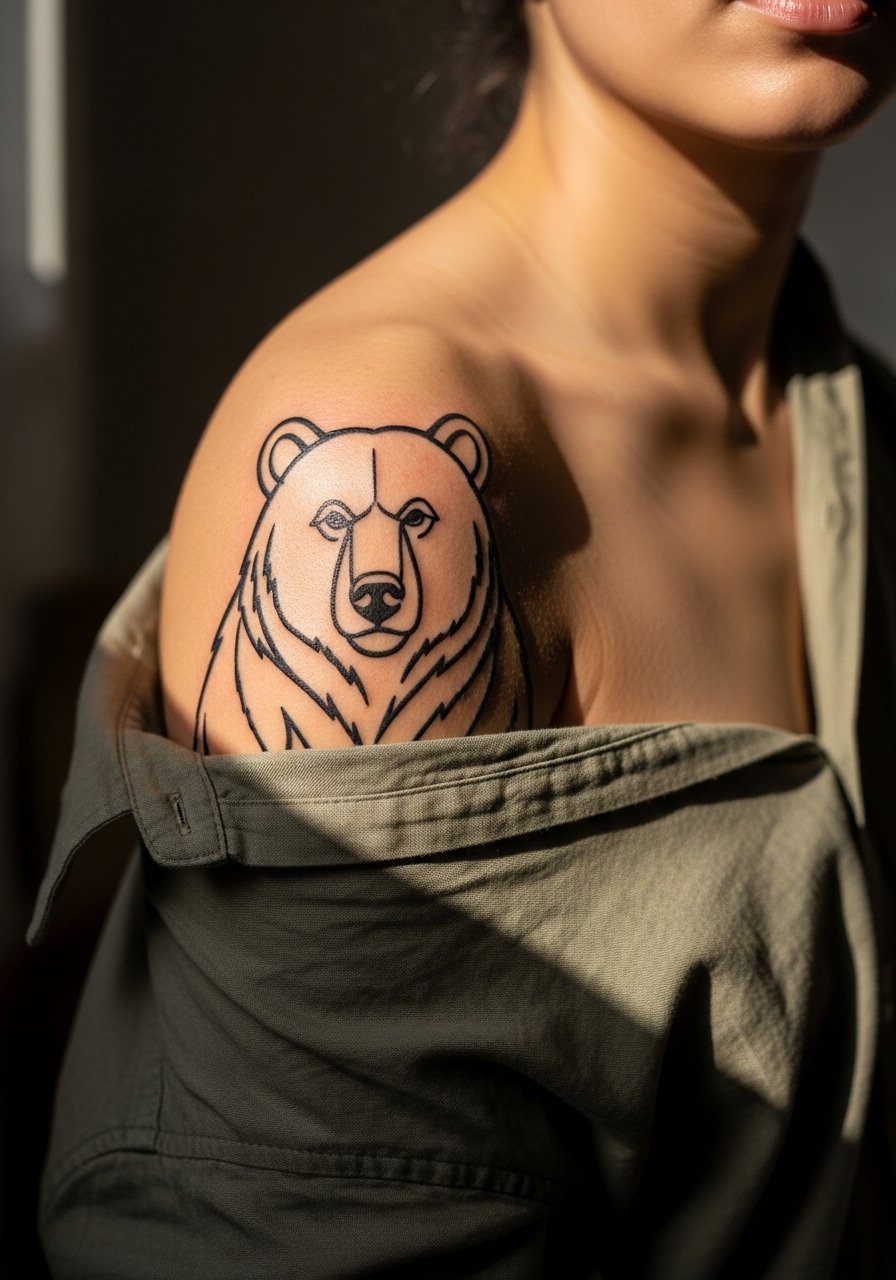
5. Shoulder Cap Pooh in Black Linework
A shoulder cap piece of Pooh using bold black linework reads from across a room and handles sun better than delicate color. If you want longevity, bump the lineweight and use clean negative space around the figure. Expect a one- to two-hour session and a moderate pain level. Common mistakes include cramming background elements against the shoulder seam where the skin moves. For the session, wear a loose button-down shirt you can slide off one shoulder so the artist has clear access. This placement pairs well with sleeveless tops when you want to show the piece.
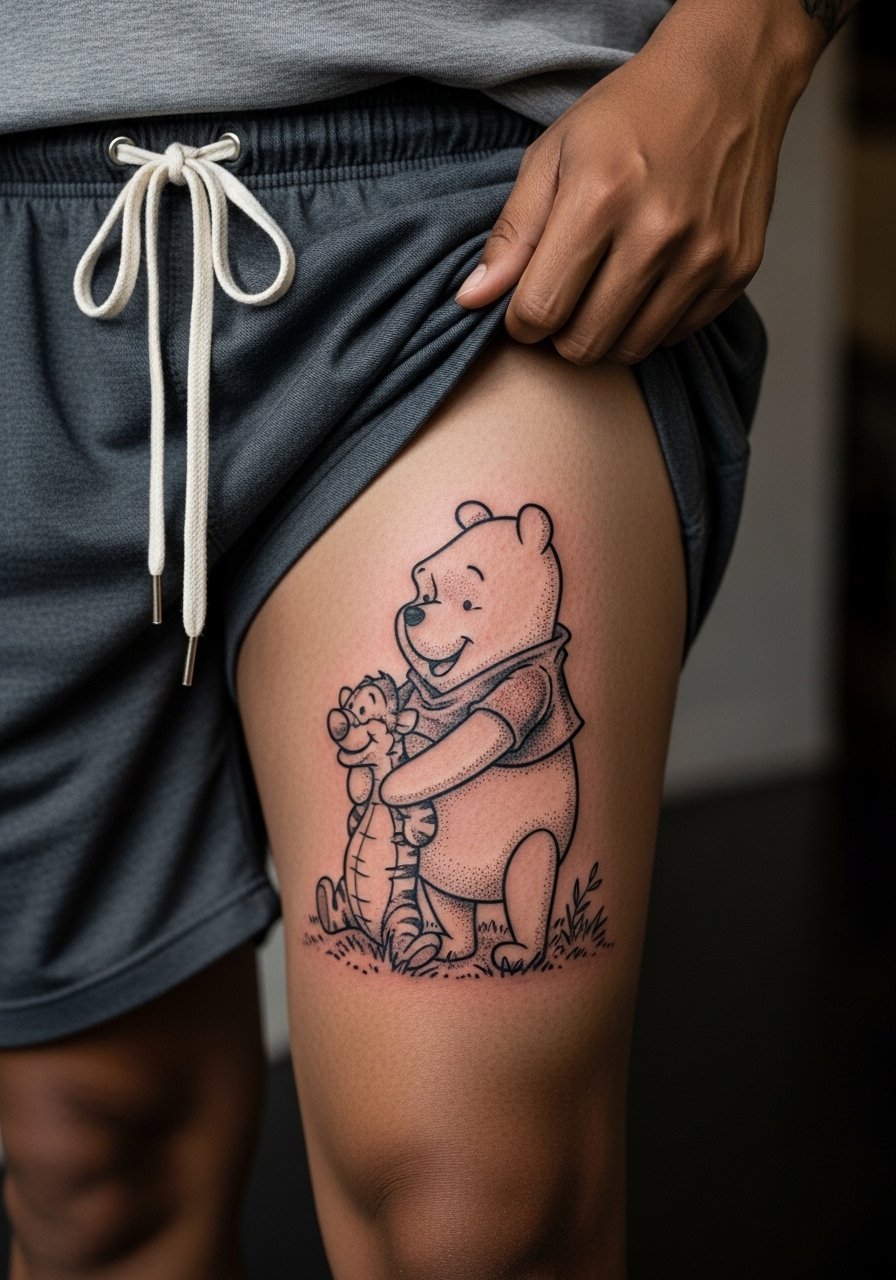
6. Vintage Story Illustration on Thigh
A larger illustrative scene on the upper thigh gives room for narrative elements like trees, a pot, and a small Christopher Robin silhouette. Thighs tolerate saturation and detail well, and the area holds color longer than hands or feet. For consultation, bring a few storybook references and ask for margin space so the central figure has breathing room. Sessions are longer and may be split. For the appointment wear loose drawstring shorts or loose linen drawstring pants so the artist can expose the area without discomfort. Plan for touch-up at year three or later depending on activity level.
Studio Day Picks
The upper-arm, shoulder, and thigh pieces above need different prep than tiny wrist and ankle work, so these picks smooth the session and first week.
-
Stencil transfer paper kit. Lets you preview the exact placement and linework on the skin before the needle hits, especially helpful for the thigh story scenes and collarbone lettering.
-
Topical numbing cream. Applied 30 to 45 minutes before takes the edge off sensitive zones like the inner thigh and sternum without affecting stencil clarity.
-
Thin protective film roll. Keeps ankle and finger tattoos protected from friction while you heal, which matters for small illustrative outlines.
-
Fragrance-free gentle body wash. Cleans healing skin without stripping pigment on delicate linework like inner forearm pieces.
-
Aquaphor healing ointment. A thin application in the first days helps keep fine line pieces from drying into heavy scabs, which preserves linework clarity.
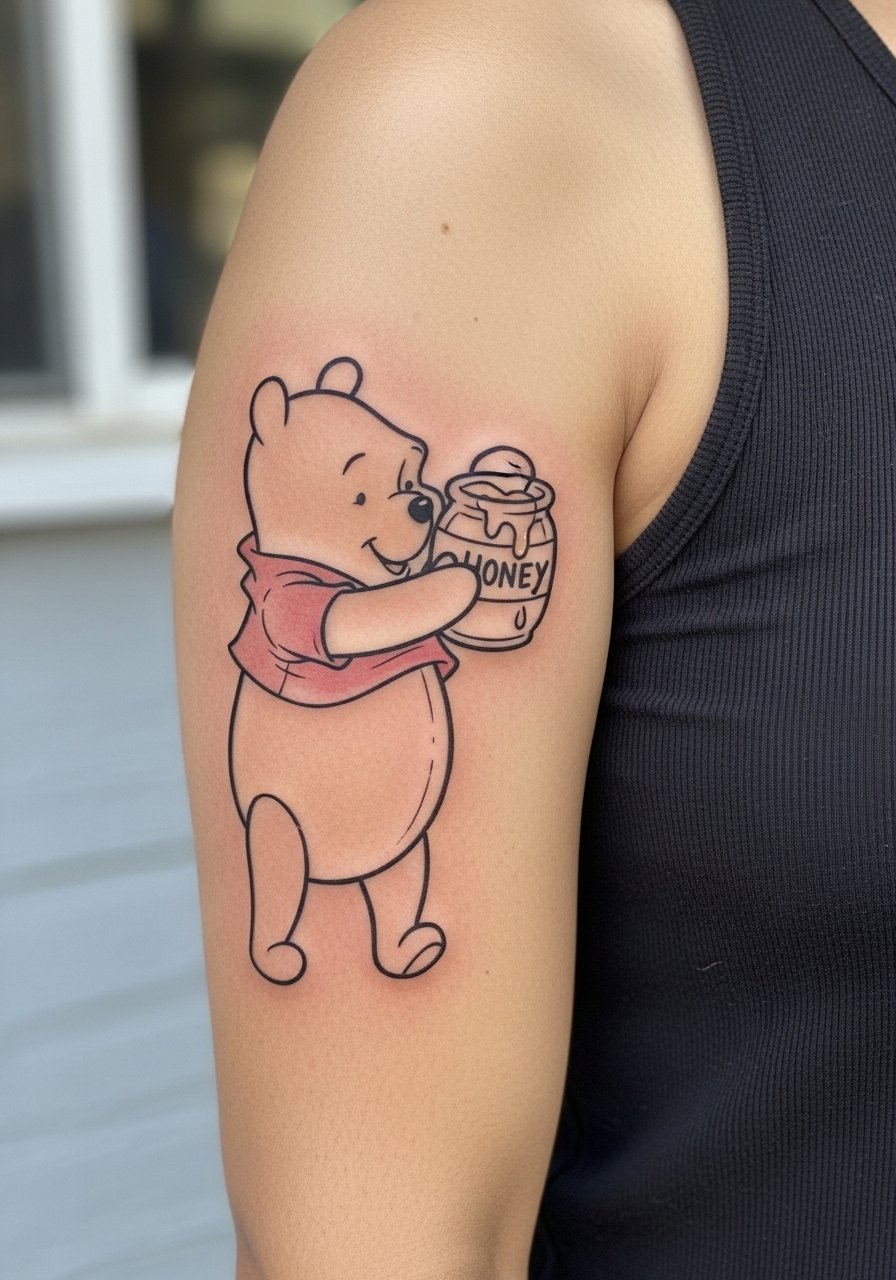
7. Pooh with Honey Jar on Inner Bicep
The inner bicep gives a vertical canvas that flatters an illustrative Pooh reaching for a jar. Artists split on whether fine line holds on the inner arm. One camp says skin there stretches and blurs thin lines quickly. The other camp says proper spacing and consistent needle depth prevent early smudging. Ask your artist where they land and to show healed inner bicep samples. Sessions are moderate in pain and usually single-visit. For the appointment wear a tank top so the artist can raise your arm comfortably. Expect touch-up discussions at the consult.
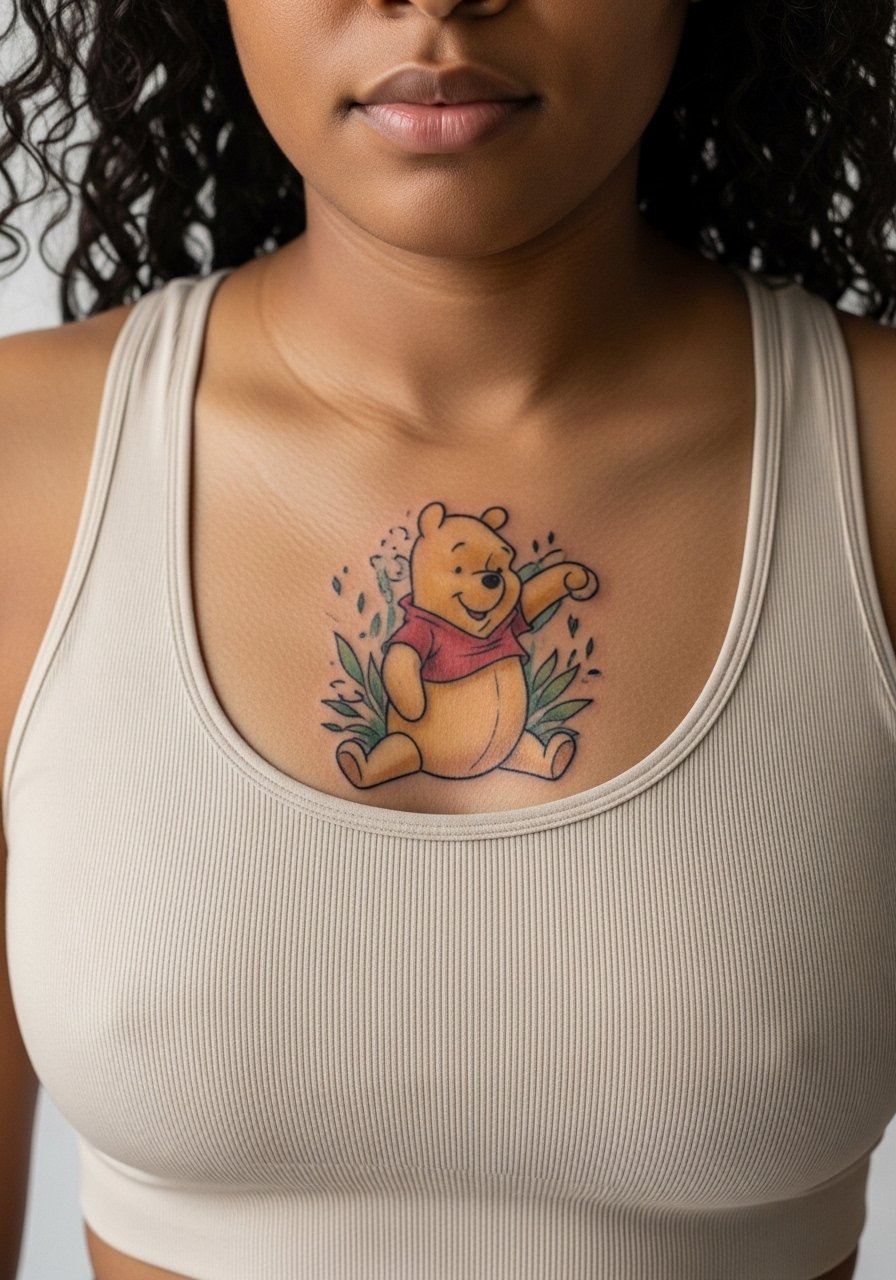
8. Chest Panel with Pooh and Honeycomb
A central chest panel with Pooh and honeycomb looks classic when framed by negative space and kept at a sensible scale. For sternum-adjacent pieces, wear a fitted sports bra or wide-neck top during the session. The chest moves more with breathing, so ask for bolder outlines around the character and looser detail in the honeycomb to avoid merging. Pain is higher than limbs but manageable. Think about career visibility for hand and chest placements. For showing the piece, an open collar or wide-neck top highlights the panel without exposing too much.
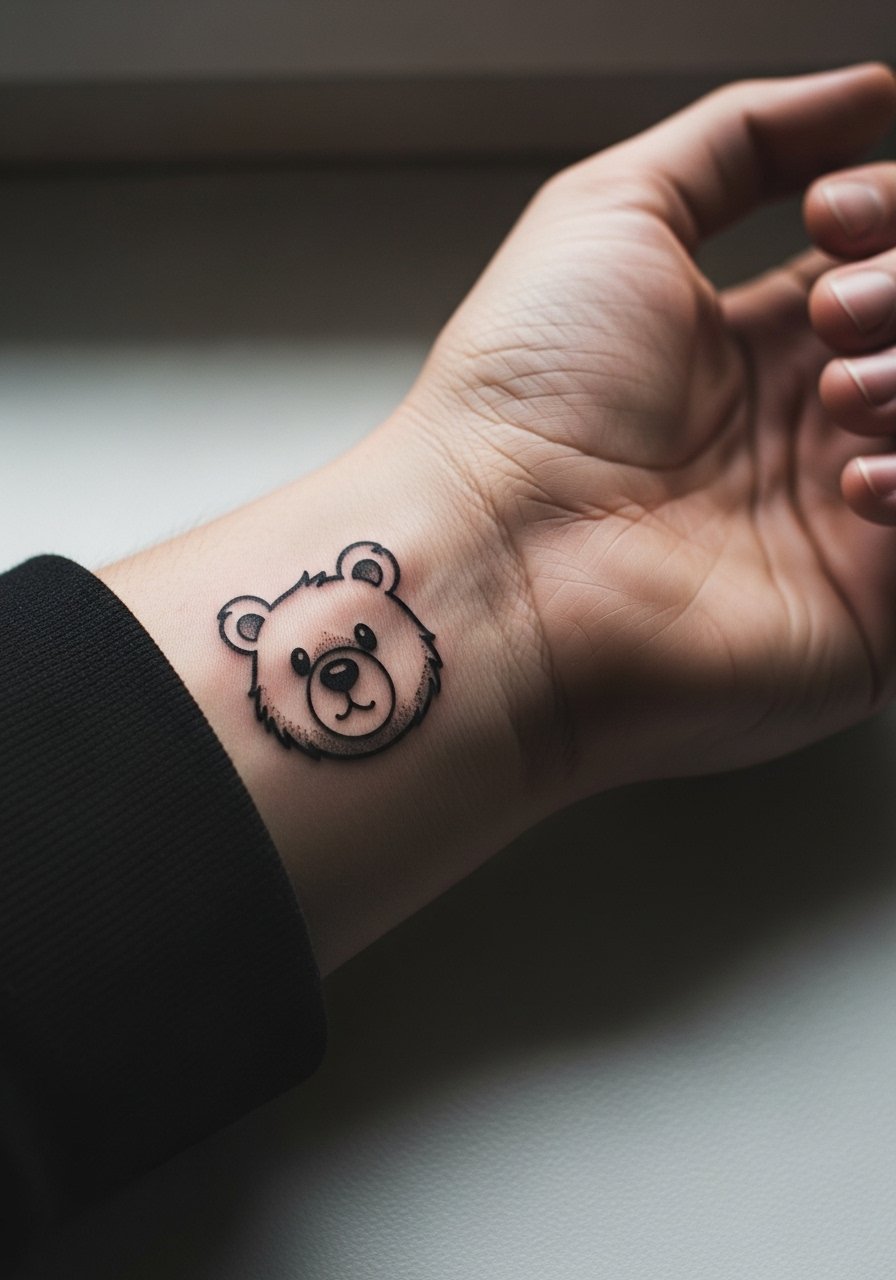
9. Small Pooh Head on Wrist
A tiny Pooh head on the outer wrist is cute and immediate, but wrists see constant washing and sun exposure. Keep the design simple with bold outer contours and minimal interior shading. The session is short and the pain is mild. Expect the piece to look sharp at six months and to soften by year two. A common mistake is packing too much detail into the watch area where friction occurs. For daily wear, pair the tattoo with a minimalist watch or thin bracelets that frame but do not press on the ink.
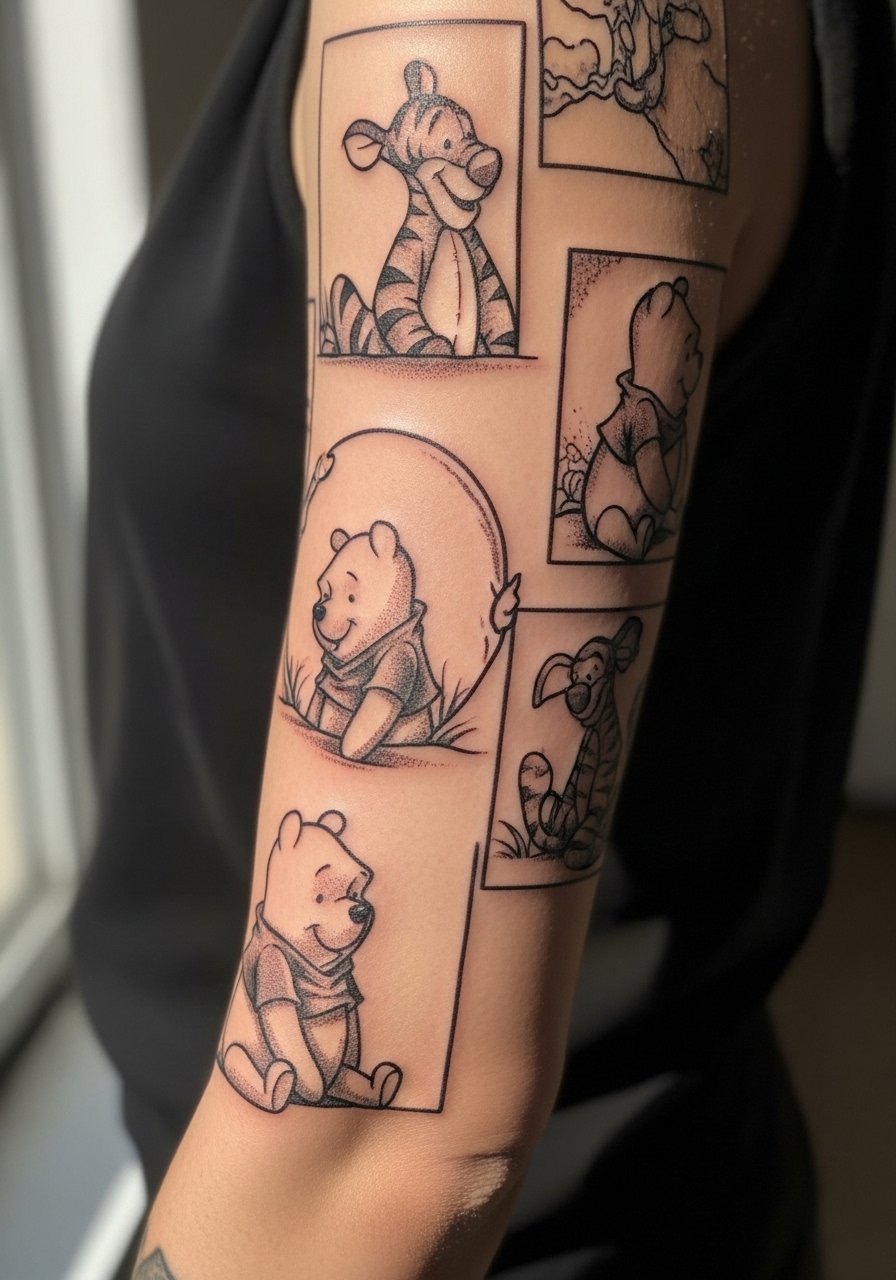
10. Full Sleeve Story in Illustrative Style
A sleeve lets you build a narrative that features Pooh in several small vignettes. Planning is key. Use reference panels and mark negative-space corridors during consultation so the sleeve ages legibly. Sessions are many and spread over months. Expect touch-ups where heavy saturation meets fine detail. A mistake is trying to cram too many tiny scenes without considering how they will blend over time. For a finished look, rolled-up sleeves or a short-sleeve linen shirt keep attention on the sleeve without visual clutter.
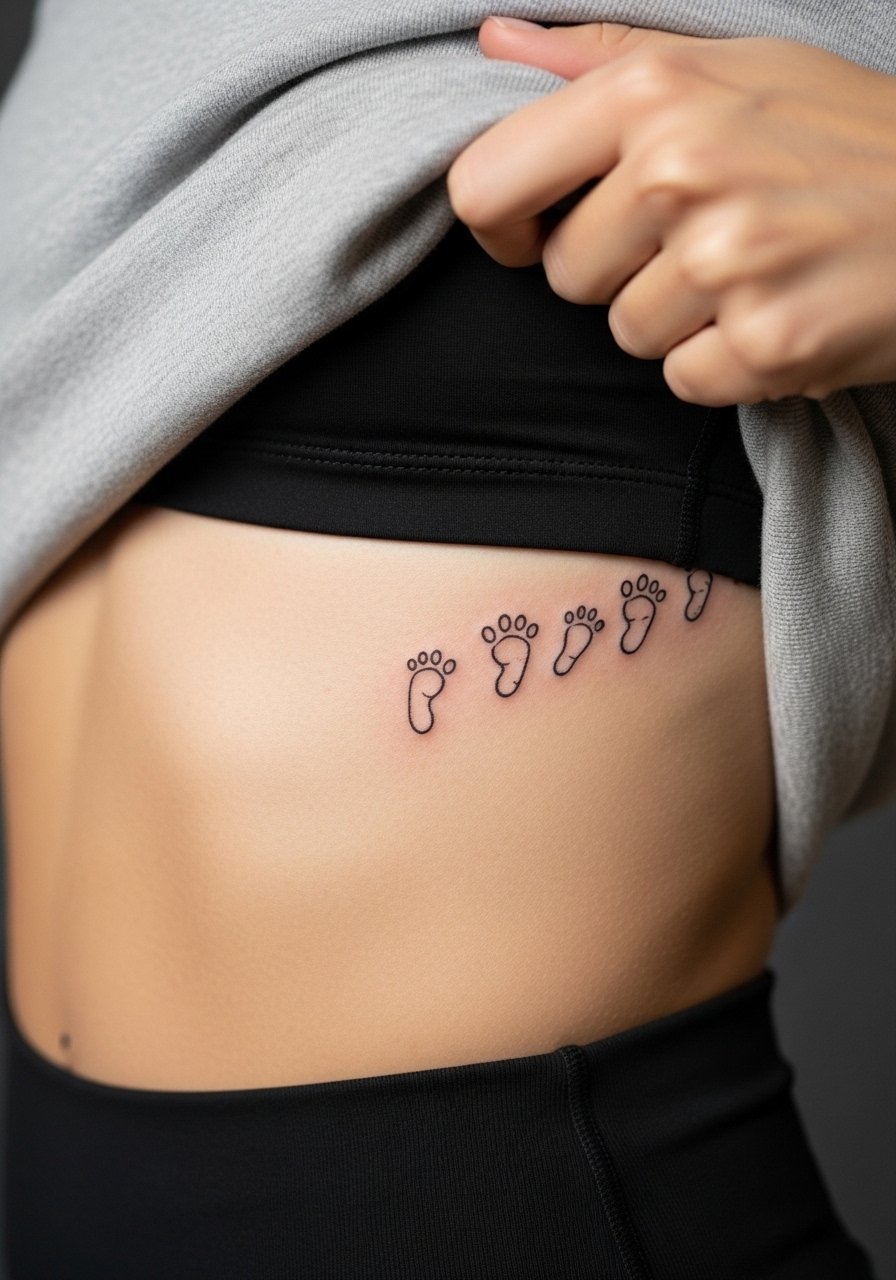
11. Footprint Trail Along the Ribcage
A string of small Pooh footprints across the ribcage makes a quiet, linear composition. Ribcage placements are notorious for tenderness and movement which can affect fine line. Expect higher pain and consider scheduling a consultation about spacing and needle depth. Many artists split their opinion on small rib pieces. One side warns that tight lines on ribs blend with skin stretch. The other says proper depth and spacing solve that. For the session wear a cropped top you can lift slightly or a shirt you can pull to the side for clean access. Plan for a two-step session if shading is involved.
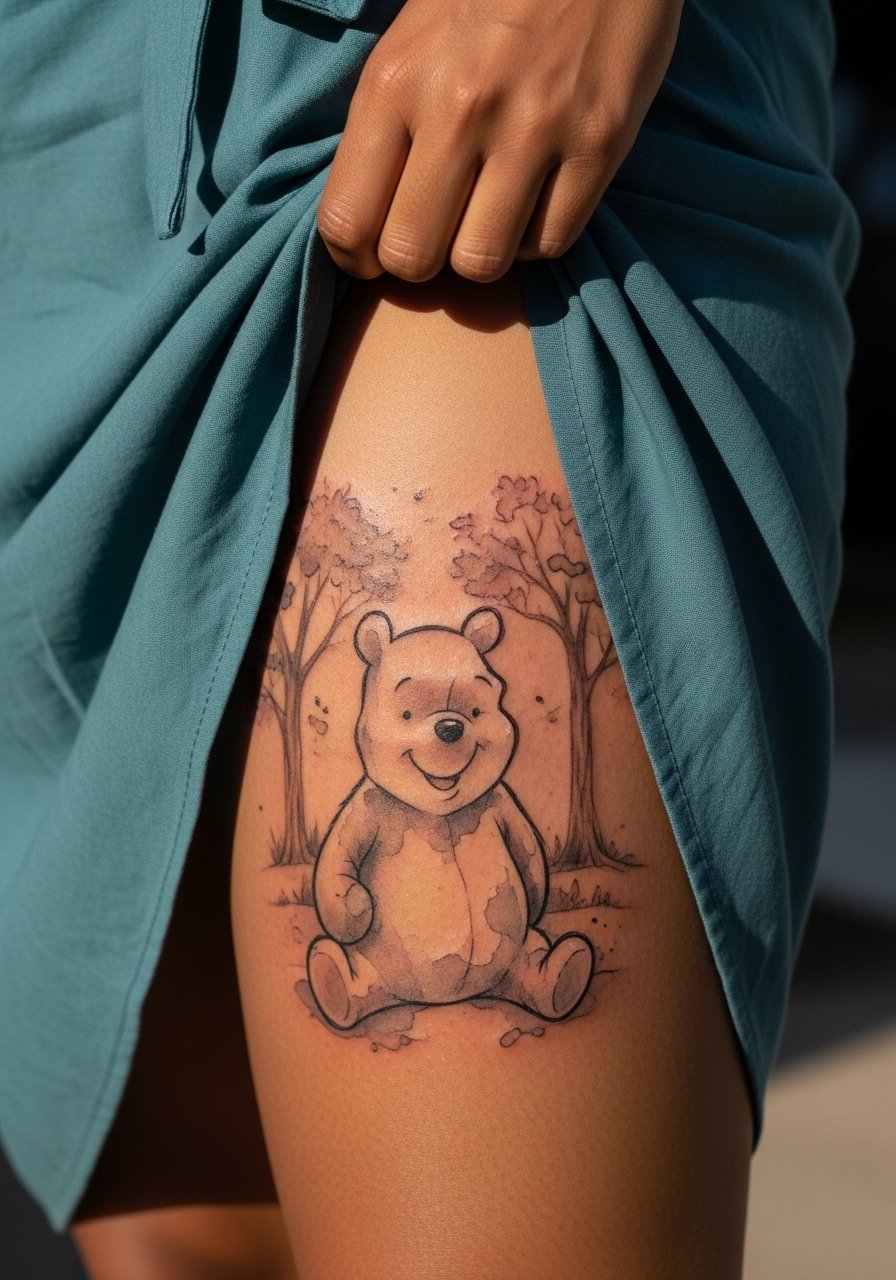
12. Watercolor Pooh with Faint Background Trees
An illustrative Pooh with watercolor-style washes and faint tree silhouettes reads like a painted page on the outer thigh or upper arm. Watercolor fades differently than solid color. For longevity, keep color washes more granular and pair them with clear linework on the character. Tell the artist you want color that settles into texture rather than a flat wash that disappears by year three. Session time varies. For showing the piece, a wrap skirt or high-waisted shorts reveals the thigh without constricting the area during the session.
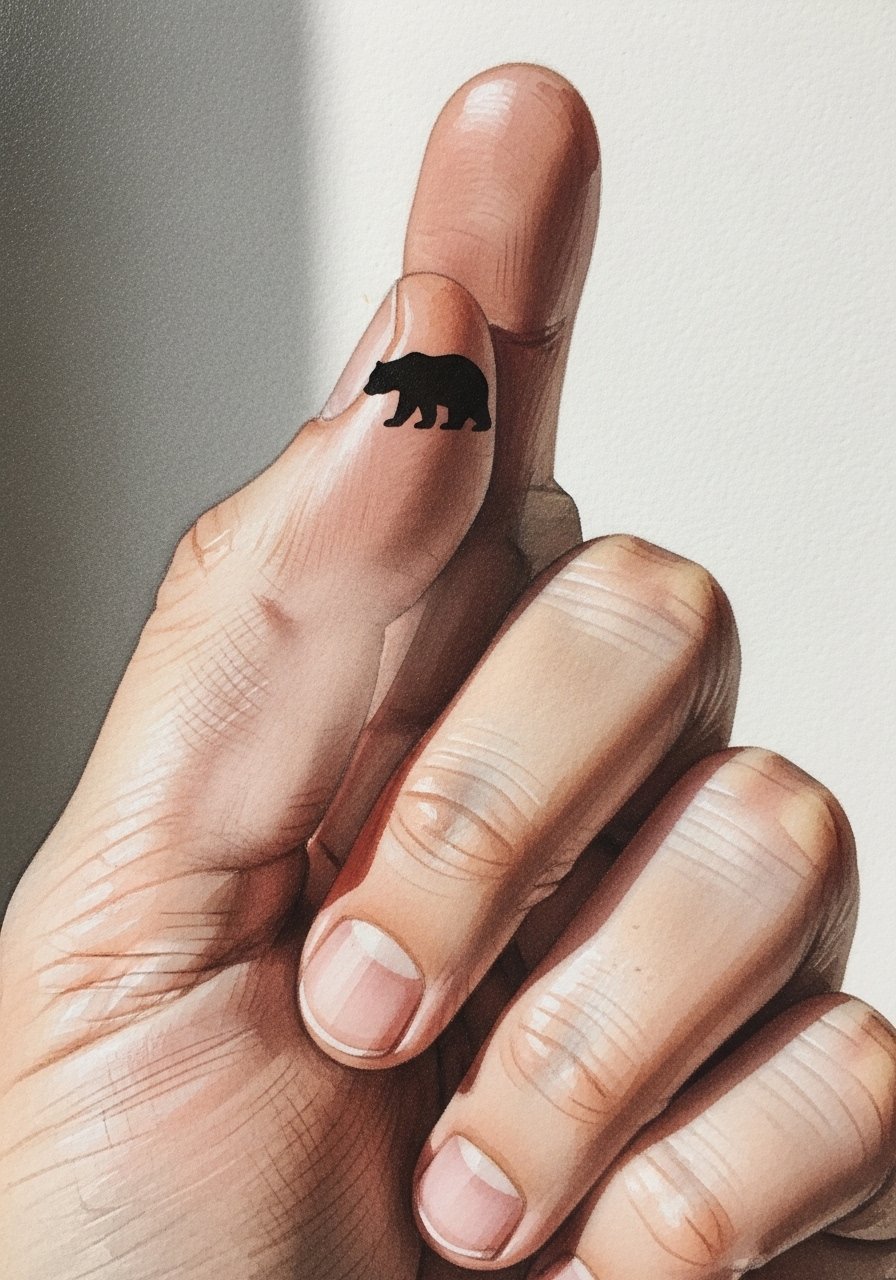
13. Tiny Pooh on Finger with Hidden Outline
Finger tattoos are intimate and have a high fade rate. An illustrative Pooh reduced to a silhouette or hidden-line mark can work if you accept likely touch-ups. Ask for slightly bolder edges and avoid tiny interior shading. The session is brief but the aftercare timeline is stricter because hands see constant use. A mistake is expecting the same permanence as arm work. For showcasing, a thin stack of rings complements but does not press on the design. Consider a delicate stacking ring set that draws attention without covering the ink.
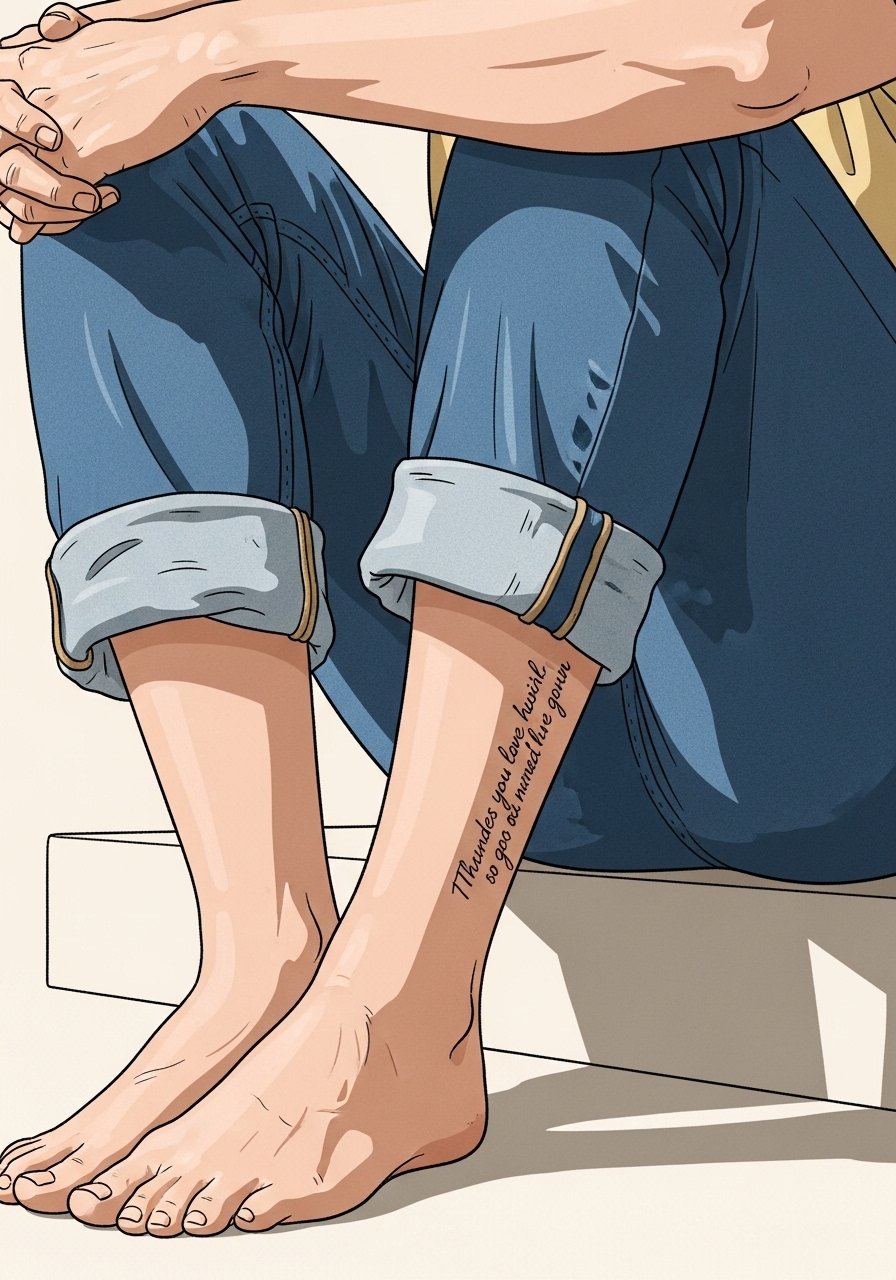
14. Calf Portrait with Scripted Quote
A vertical calf portrait of an illustrative Pooh paired with a short quote sits well on the outer calf where movement is mild and clothing often reveals the piece. Calf skin tolerates saturation and detail and touch-ups are less frequent than hands. Bring quote options and pick one that fits the space. The session is moderate and may require two sittings for shading. For showing it off, sandals and rolled-up pant legs highlight the vertical composition.
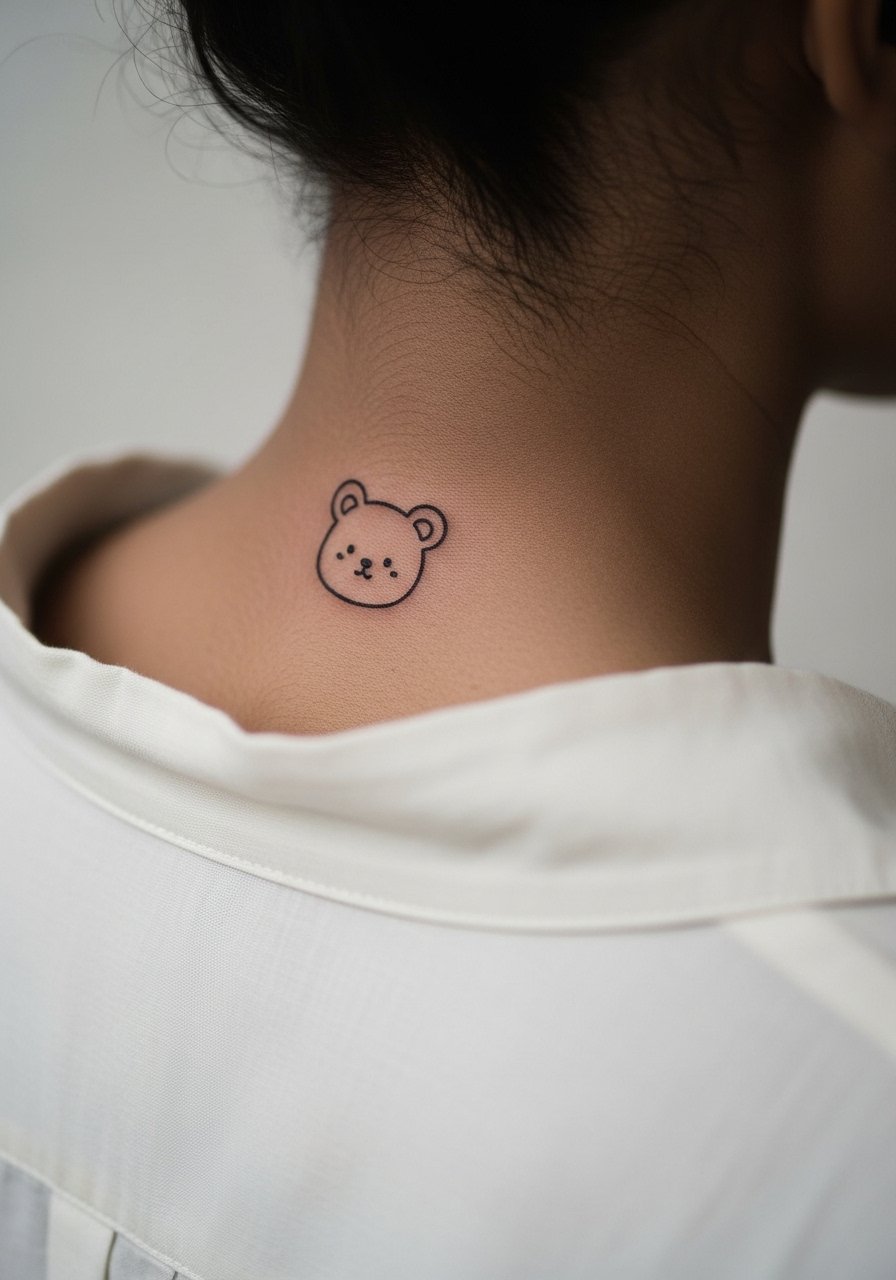
15. Back of Neck Pooh with Tiny Halo
A small Pooh at the nape frames an open-collar or updo nicely. Neck placements require an artist experienced with that thin skin. For the session wear a wide-neck shirt you can pull aside. One-sentence professional note, neck pieces sometimes need specialized needle pacing to avoid blowout. The finished look pairs elegantly with an updo or a wide-neck blouse that keeps the tattoo visible without exposing other areas. Expect a touch-up discussion at the consult.
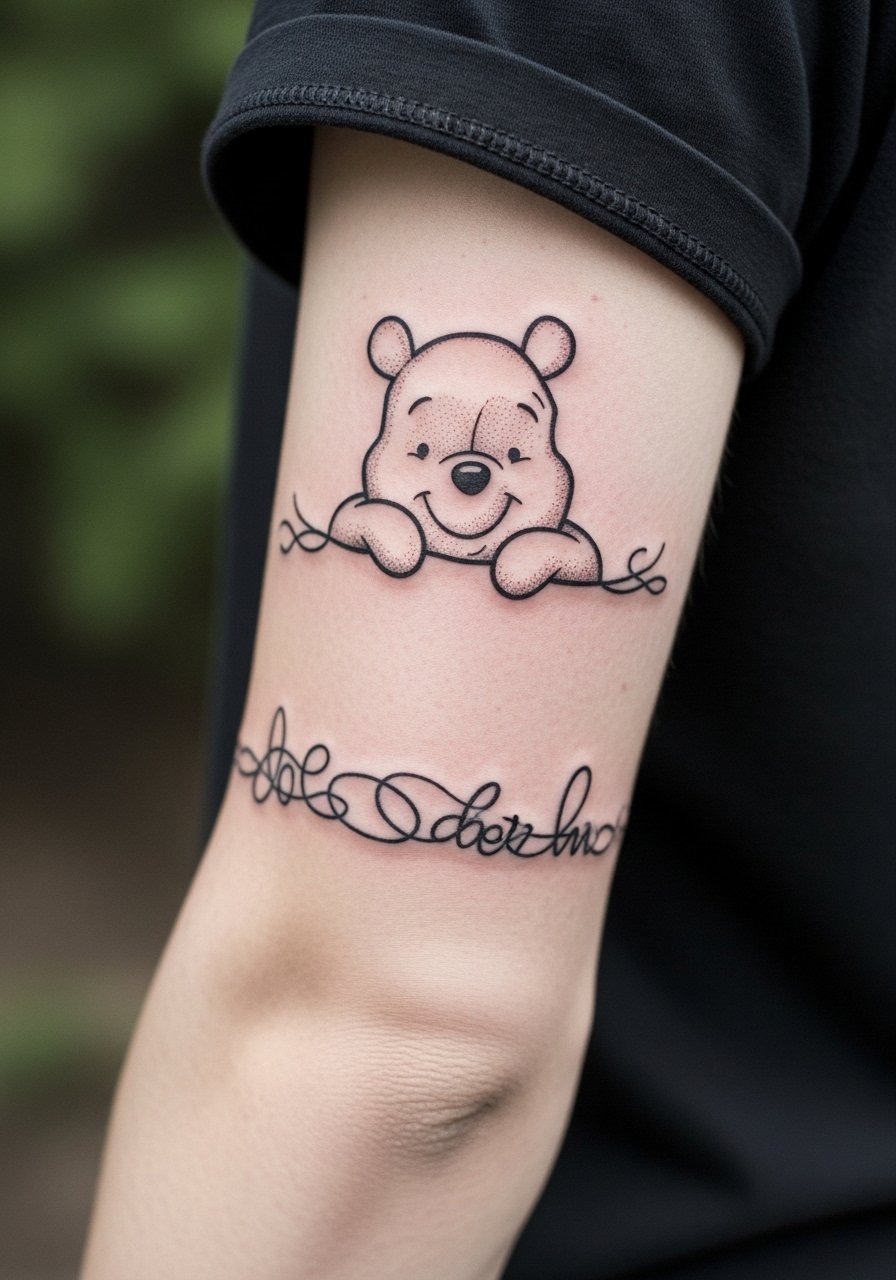
16. Illustrative Pooh Sleeve Accent Around Elbow
An illustrative accent wrapping the elbow can be playful when it respects the joint's motion. The elbow causes more wear and often softens lines, so avoid dense fine detail directly on the joint. Ask the artist to place the defining lines slightly off the joint and use stipple shading across curved areas. Sessions are segmented to allow healing between passes. For the appointment, wear a short-sleeve shirt you can roll up easily. For showing, a lightweight short sleeve keeps the elbow visible but comfy.
17. Sleeve Cuff Pooh and Floral Band
A cuff-style band around the upper wrist or lower forearm can frame a Pooh vignette with floral motifs. Bands work when negative space is respected and the motif elements are scaled for longevity. In consultation, ask for bold outer lines and breathing room between blooms to avoid merging at year three. The session is moderate. For showing the band, stack with a thin bracelet set that sits above the cuff so the tattoo reads as an accessory rather than competing jewelry.
18. Pocket Pooh for Rib-to-Torso Flow
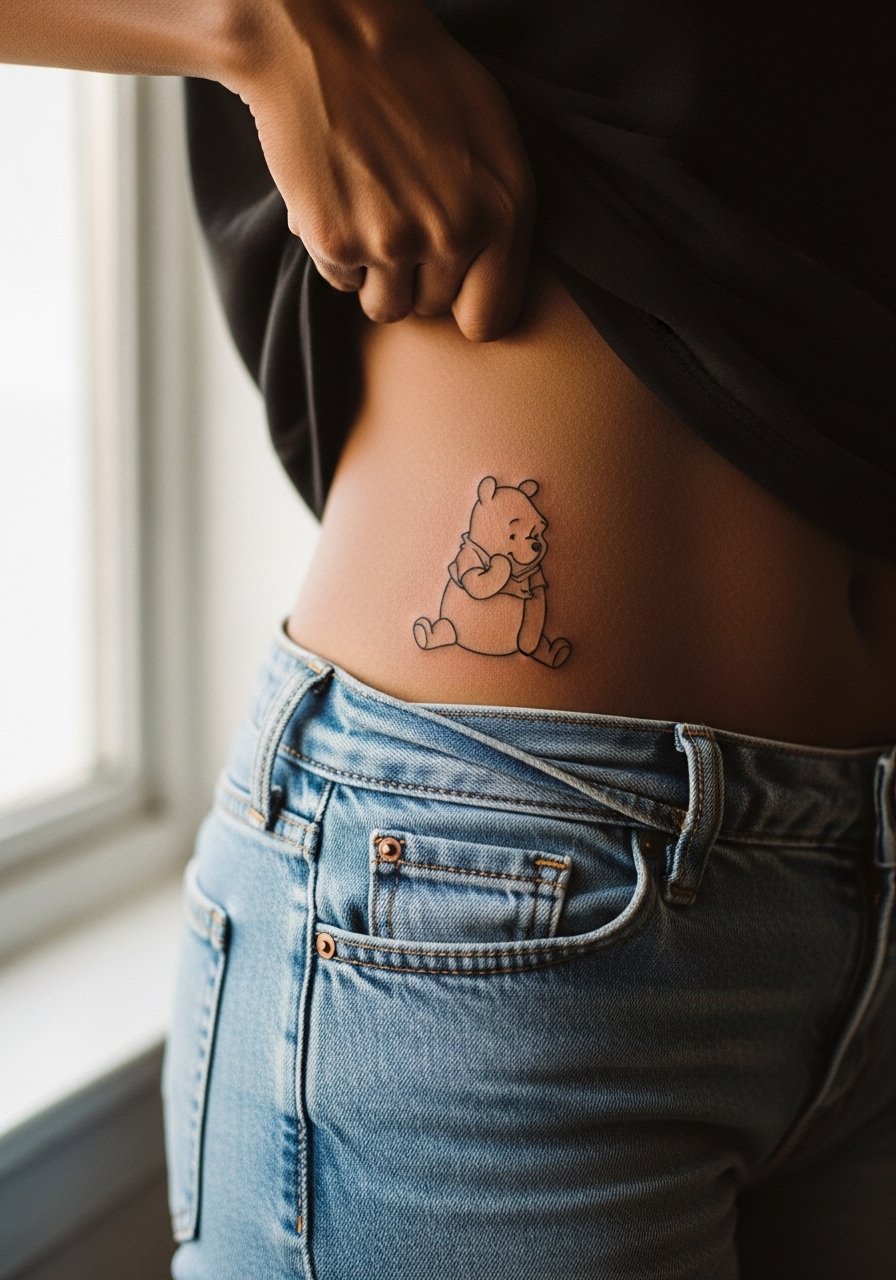
A small pocket-size Pooh that peeks from under a shirt hem works along the lower ribs or upper hip. For any rib or hip work plan a fitted garment you can shift for the session. Those areas are sensitive and may require a steady hand and patience. Common errors include compressing the image against seams or clothing edges. For showing the design with evening wear, a high-waisted skirt and a crop top that reveals a narrow strip keep the reveal intentional without exposing too much.
19. Illustrated Pooh with Balloon on Upper Arm
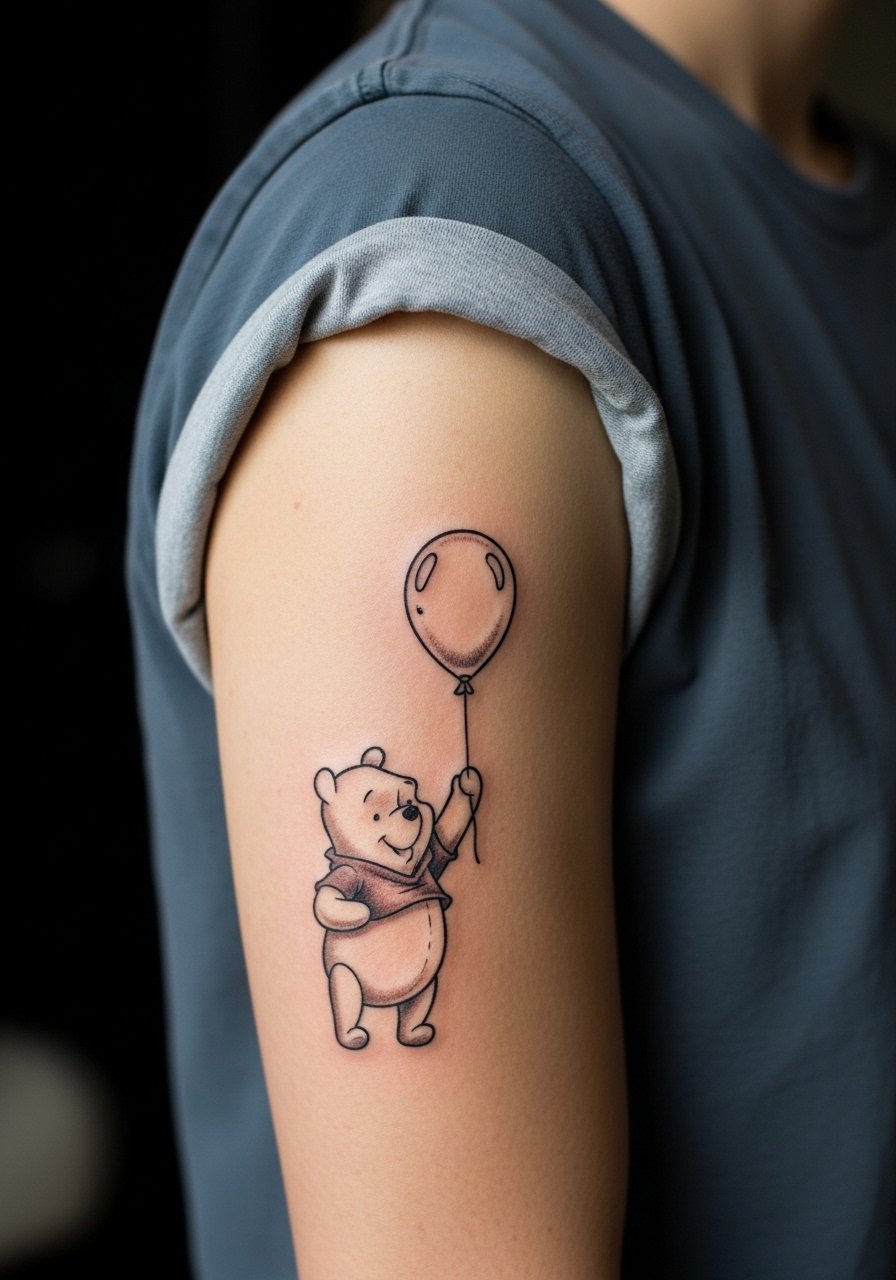
An upper-arm piece of Pooh holding a balloon is classic and low risk for blowout. The rounded surface of the arm helps color settle evenly. For a crisp look at five years, keep the balloon shape simple and avoid tiny highlight dots that can disappear. The session is comfortable and often single-visit. For casual showing, a rolled-up short-sleeve shirt keeps the balloon visible. Consider a short-sleeve cotton tee in neutral tones to keep attention on the illustration.
20. Tiny Pooh Behind the Ear, Hairline Peek
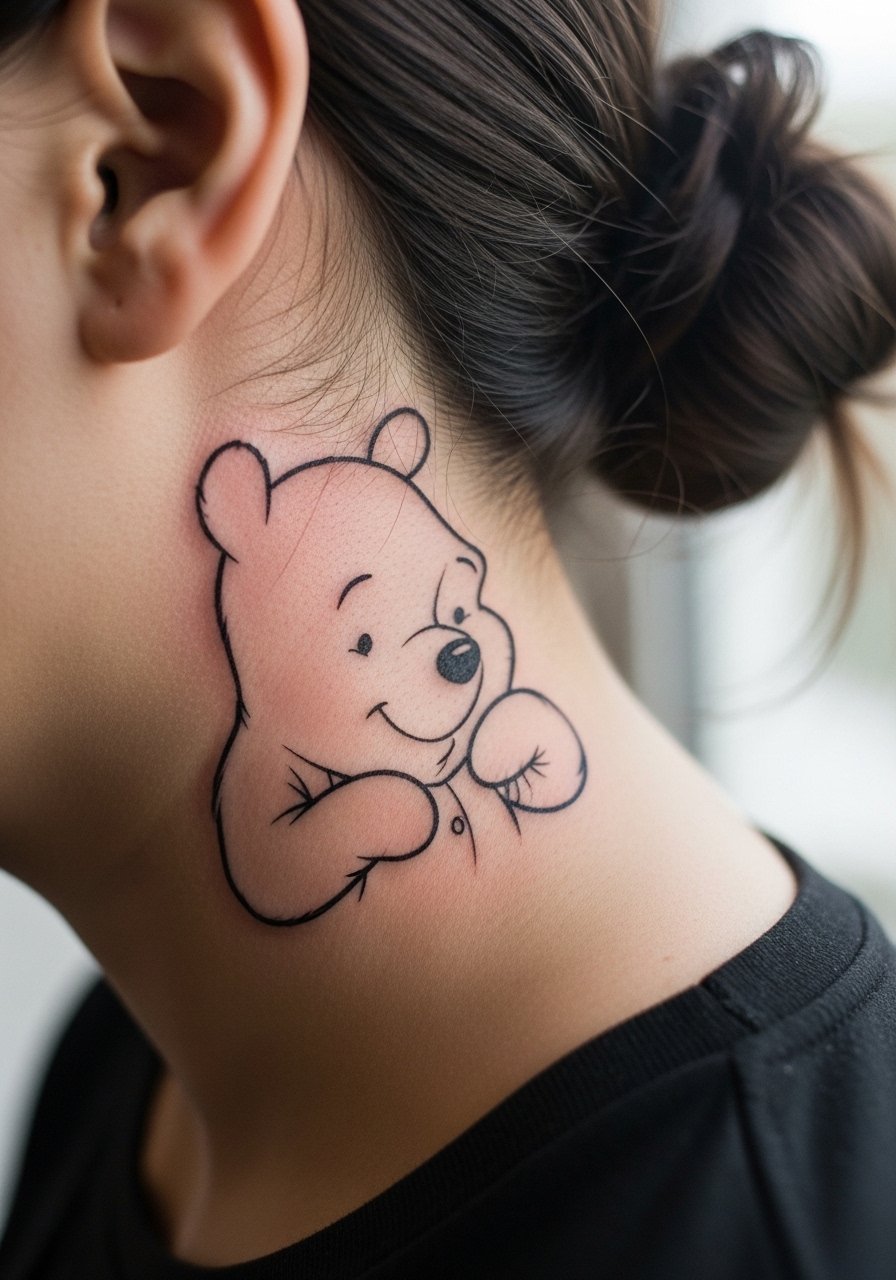
A micro illustrative Pooh placed on the skin just behind the ear below the hairline is discreet and playful. For safety and modesty note, describe it as behind the ear on the neck so the image is framed by hair. Artists experienced with this spot know to keep the piece small and bold. The session is quick and pain is low. For style, wear a loose hairstyle that reveals the tattoo only when you tuck hair back or wear an updo with a hair claw clip for controlled reveals.
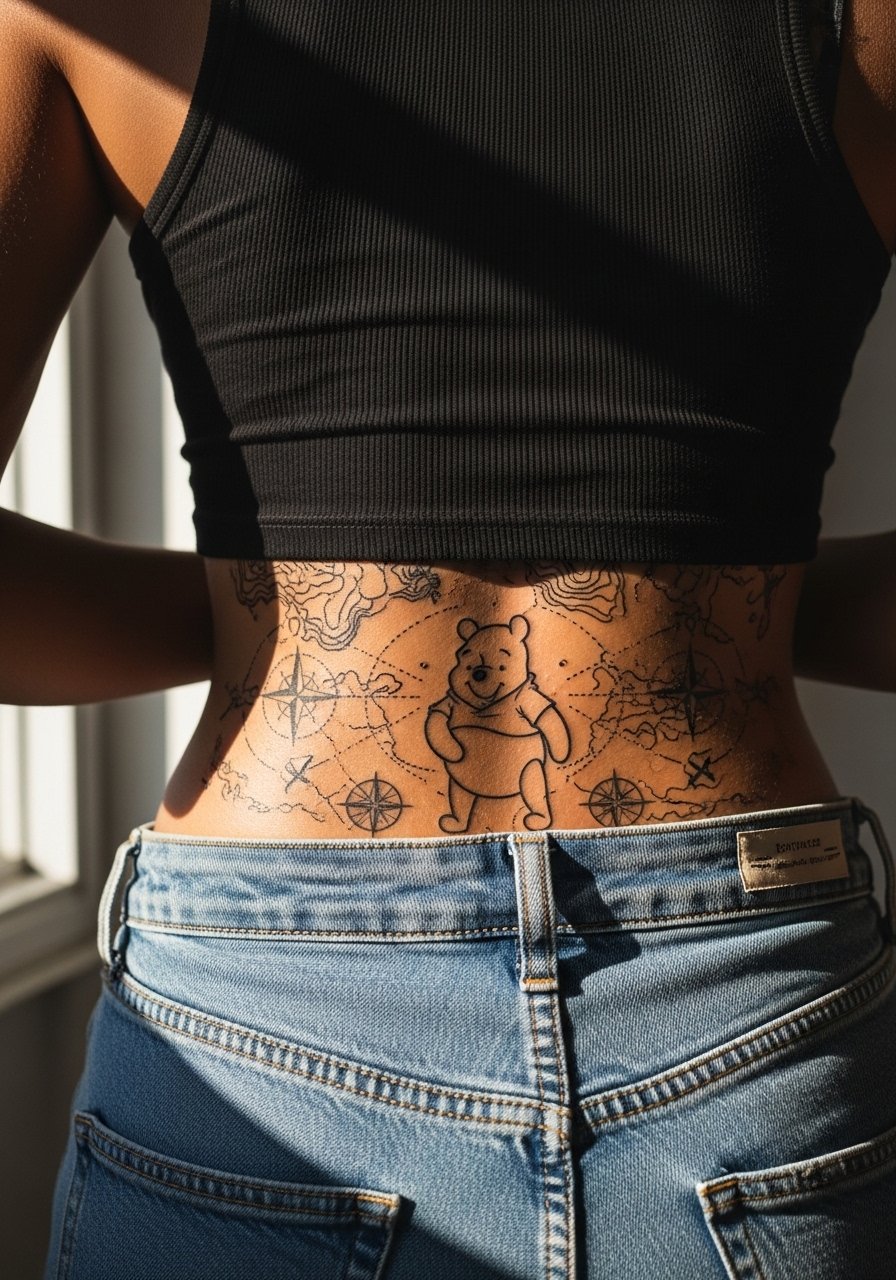
21. Illustrated Pooh with Map Elements on Lower Back
A lower-back illustrative scene that pairs Pooh with map-like motifs can feel vintage and travel-oriented. For safety and modesty ensure the subject wears a tank top or high-waisted bottoms pulled slightly low to show only the lower-back area. Lower back skin is forgiving and holds linework well when spaced. For the session expect a two-hour window and plan loose clothing for the ride home. For show-off looks, low-rise skirts and a tank top keep the scene visible without exposing the rest of the torso.
Frequently Asked Questions
Q: Will an illustrative Winnie the Pooh tattoo hold up if I choose a small scale like a wrist or finger?
A: Small scales demand bold borders and limited interior detail. For wrists and fingers, expect some softening by year two and a possible touch-up later. Choosing slightly thicker outlines and avoiding tiny cross-hatching helps maintain the character at six months and beyond.
Q: Are there legal or copyright concerns with getting a Winnie the Pooh tattoo in an illustrative style?
A: Fans debate this. One camp treats character tattoos as personal homage and sees no issue. The other camp recommends altering obvious branded features to avoid direct replicas and to respect intellectual property. If this matters to you, ask an artist who works with licensed or fan-art portfolios about how they adapt designs.
Q: How should I dress for a ribcage or sternum session so the artist can work comfortably?
A: Wear a cropped athletic top or a fitted sports bra you can lift slightly. That gives clean access while keeping exposure minimal and focused. Bring a loose zip-up hoodie for the trip home so healing skin stays comfortable.
Q: Do watercolor washes age worse than solid illustrative linework?
A: Watercolor fades faster in high-friction or sun-exposed areas. If you love the wash look, pair it with solid linework on the character so the central figure stays readable as the color softens. Placement matters more than the technique for longevity.
Q: How often should I expect touch-ups for detailed illustrative work on the ribs or inner bicep?
A: It depends on movement and sun exposure. From what I've seen, expect touch-ups around year two to four for high-movement zones. Ask to see healed pieces from your artist in those exact placements before booking.
Q: Where should I look for artists who specialize in illustrative character work if I want healed examples?
A: Use discovery paths like local shop portfolios, convention listings, niche Reddit threads, and hashtag searches related to illustrative character tattoos. Those channels help you find healed photos and artists who show placement-specific results.
