
Neo traditional cutie mark tattoos let you translate a handful of personal symbols into saturated, ornamental little badges that work surprisingly well outside fandom. They read bold from a distance, but still let room for tiny details when scaled down. Pick the placement that suits your lifestyle and plan the linework so those small flourishes age cleanly, and the next sections show exactly how to make that happen.
1. Sunburst Cutie Mark on Inner Forearm
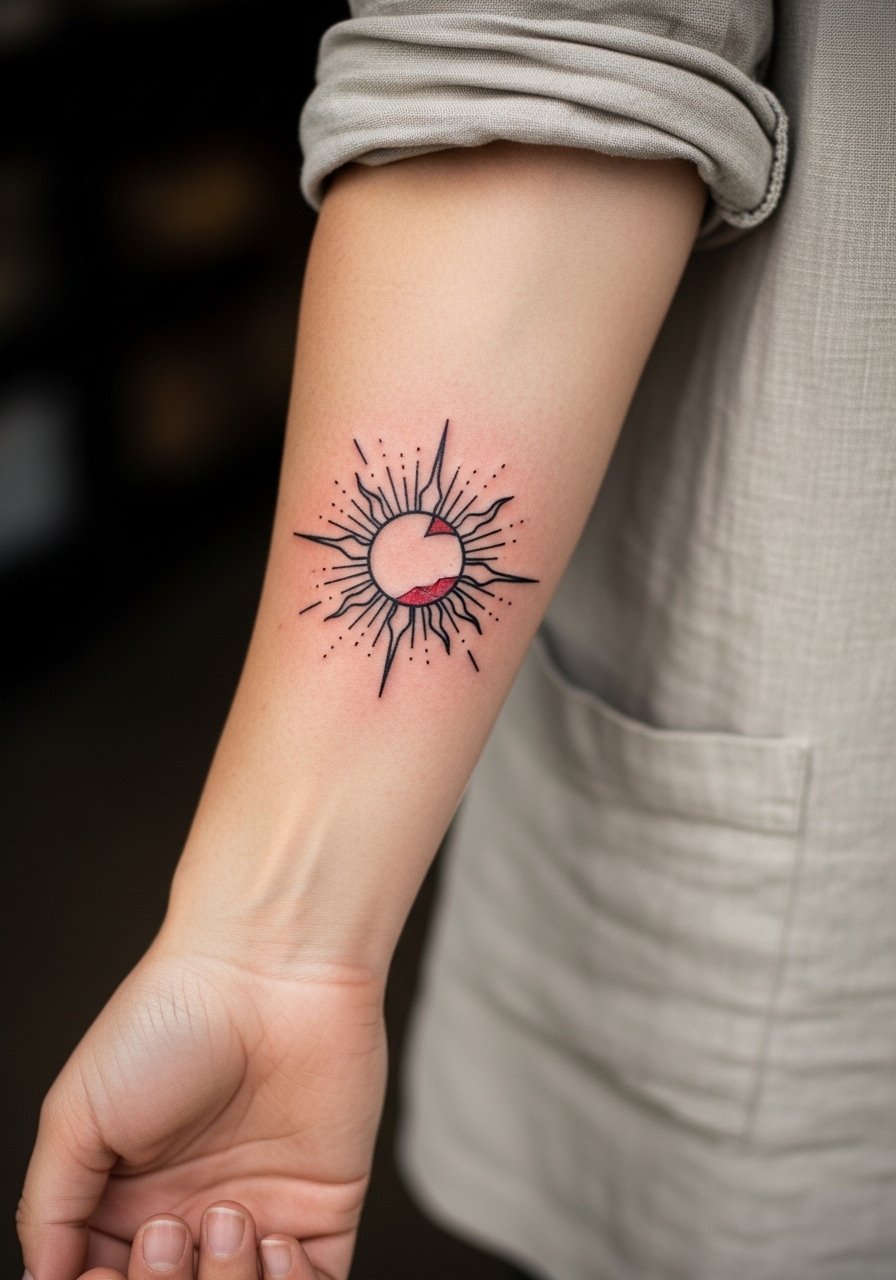
I recommend the inner forearm for this one if you want visibility without constant sun exposure. Ask your artist for slightly heavier linework than typical fine line, and for clean saturation in the color fields so the rays keep structure as the piece heals. Common mistake is asking for tiny rays that merge in year two, so give the rays room and expect a light touch-up around year three. Session feels moderate, expect one to two hours. Pair with a rolled-up linen shirt to show it off without overexposing the area during cooler months.
2. Minimal Star-Burst on Wrist
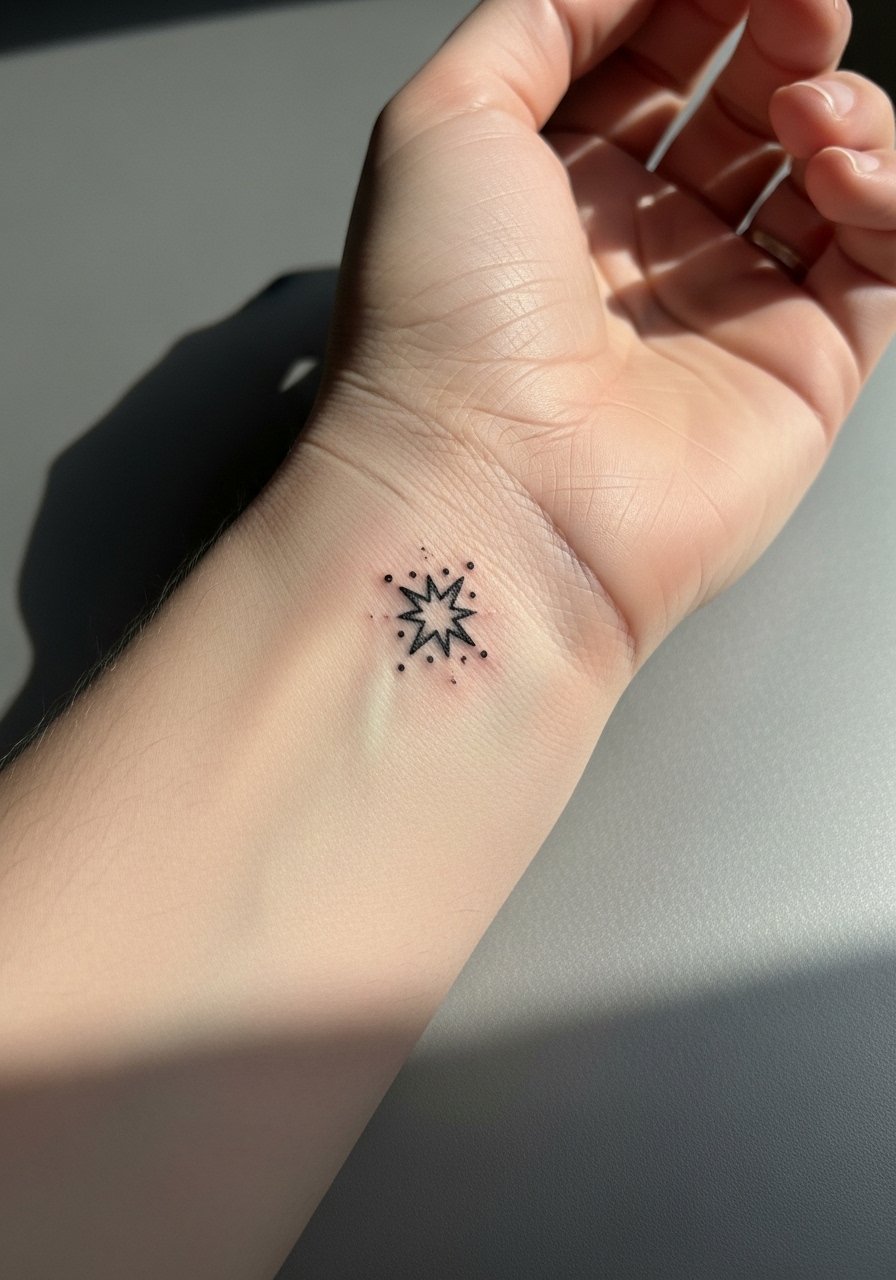
The wrist reads small elements well but it is a friction zone. I tell clients the wrist will scuff faster because of constant washing and bracelets rubbing. For neo traditional color blocks, ask for slightly bolder outer linework and reduced micro-detail inside the center so the colors read clean at six months. Pain is mild. Expect a 30 to 60 minute session for a small badge. Touch-ups are common at year two if you want the color saturated. Pair this with a thin chain bracelet that frames the wrist without rubbing the fresh ink.
3. Teacup Cutie Mark on Outer Bicep
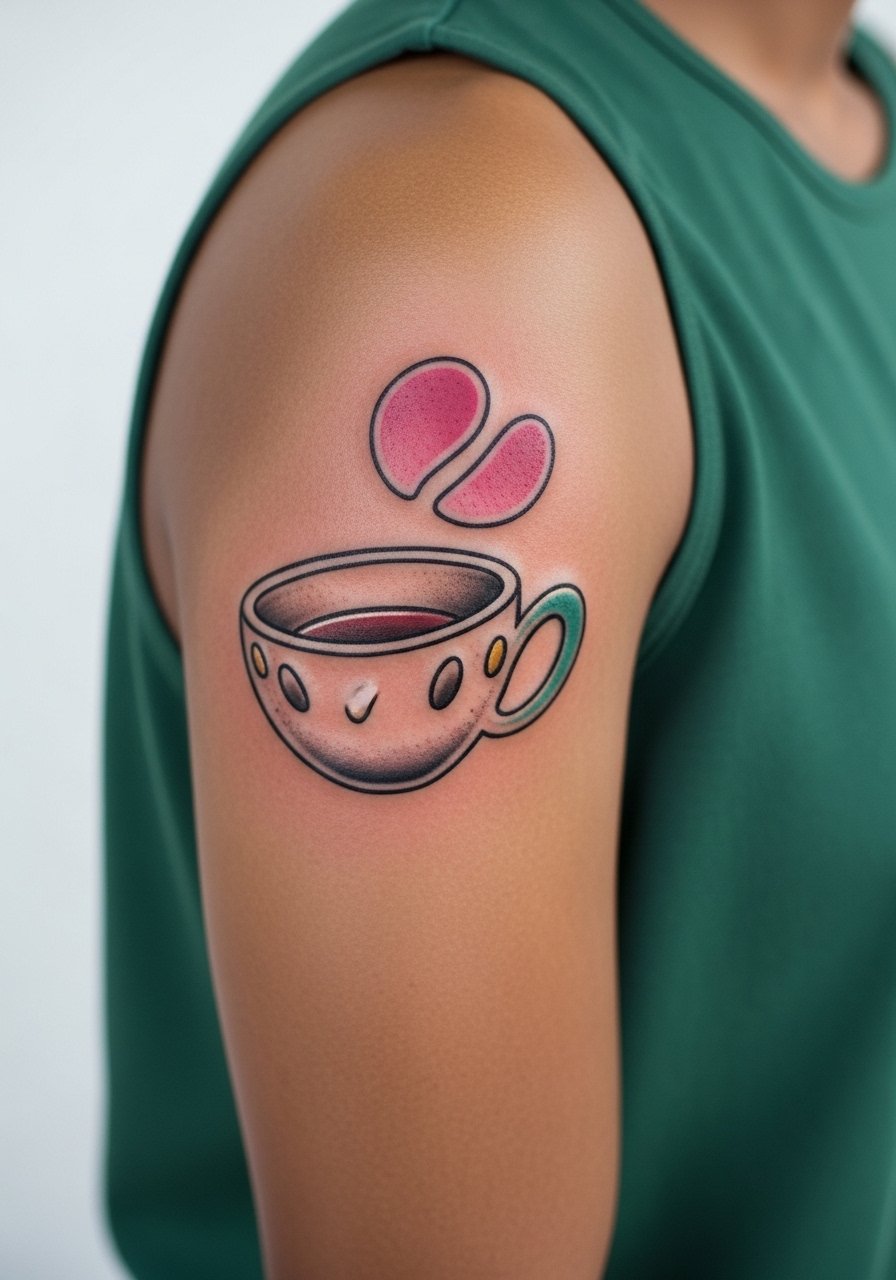
The outer bicep gives a larger canvas for neo traditional shading and stipple accents. In consultation mention you want strong saturation and pleasing negative space around the badge so the teacup silhouette holds at distance. A common mistake is cluttering the badge with tiny text or too many stars. Session time is typically one hour. The bicep ages well because of lower friction. Wear a sleeveless tank top to the appointment so the artist has clean access without shifting clothing.
4. Anchor Cutie Mark on Ankle
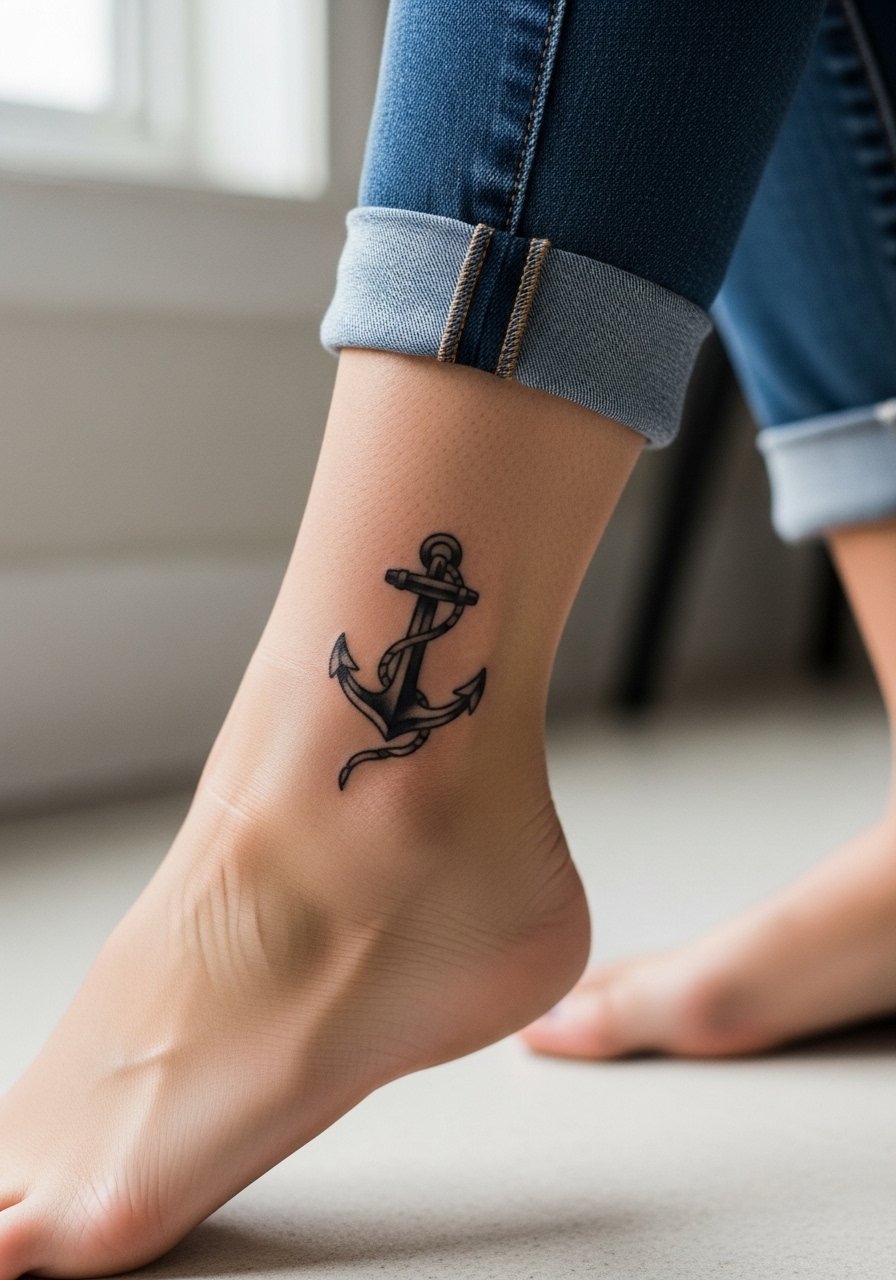
Ankle pieces look delicate but they endure a lot of friction from socks and shoes. Tell the artist you want a slightly thicker outline and denser saturation in the anchor fill to resist early patchiness. Pain ranges from mild to moderate near the bone. A common mistake is placing too much fine dot work in the fill, which softens over time. Expect a single short session under an hour. Show this design with cropped jeans or sandals and a pair of strappy sandals that keep the tattoo visible without rubbing.
5. Leafy Laurel Cutie Mark on Collarbone
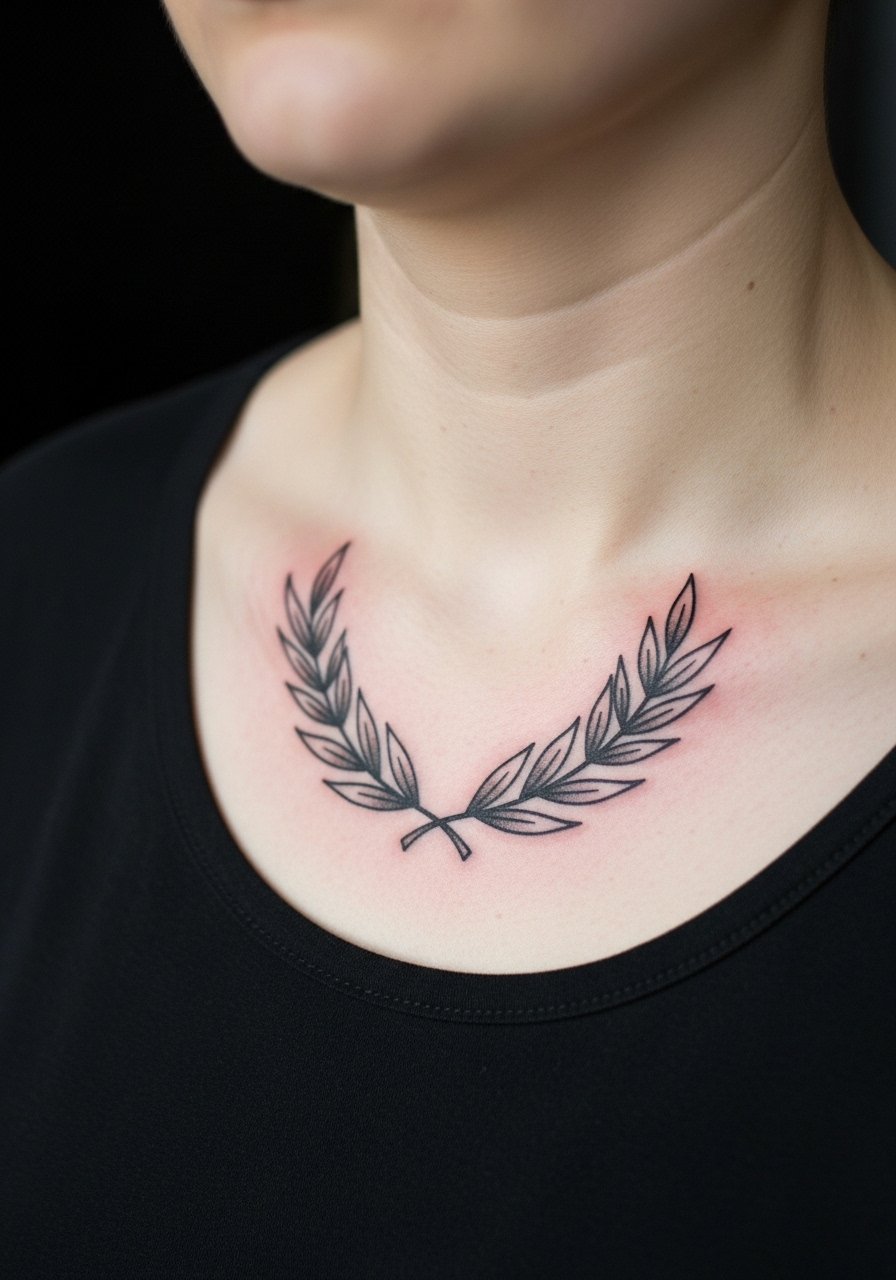
Collarbone placements read ornamental pieces beautifully but they are on moving skin. When you consult, ask for a design that follows the bone line rather than crossing it awkwardly. Artists split on how fine to go over the collarbone. One camp argues for bolder outlines to prevent blur, the other says careful depth and spacing will let finer work settle. Name where your comfort sits before booking. Expect a 45 to 90 minute session and mild-to-moderate pain. For show-off outfits, a wide-neck blouse frames the laurel without competing.
6. Lightning Bolt Cutie Mark on Side Ribcage
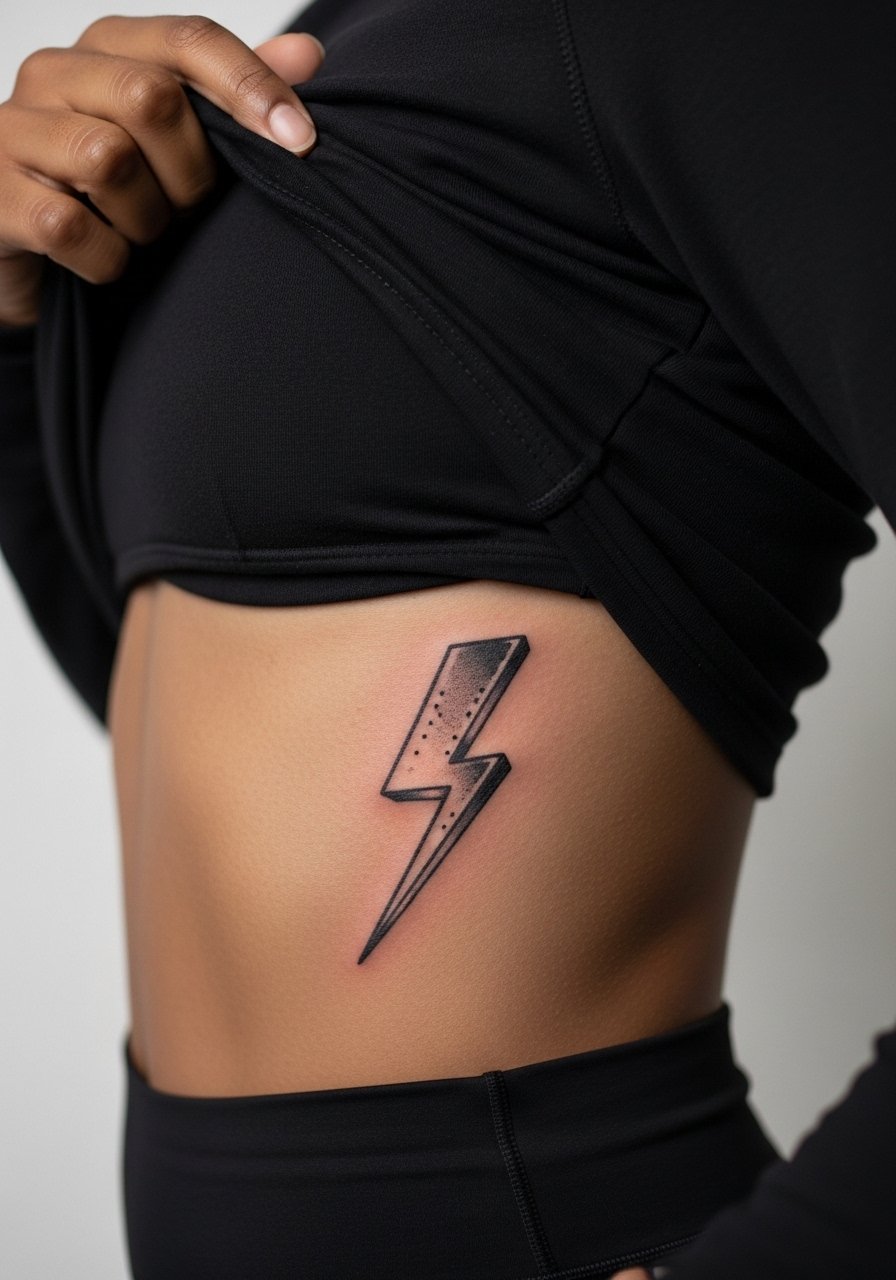
Fair warning, ribs are a sensitive placement and the session is physically demanding. The neo traditional approach here benefits from bold blackwork plus saturated color blocks so the bolt keeps definition as the skin shifts. A common mistake is sizing it too small which turns the bolt into a smudge within a couple of years. Touch-ups are normal at year two to re-saturate the color. Expect higher pain and a longer session, often over an hour. For the appointment, wear a cropped athletic top you can lift easily without removing too much clothing.
Studio Day Picks
The chest, collarbone, and ribcage pieces above ask for careful prep and the right session-day items make the difference between manageable and miserable.
- Stencil transfer paper kit. Lets you preview the badge placement and scale on your skin before the artist inks, especially useful for the collarbone and forearm pieces above.
- Topical numbing cream. Applied per directions before the session it can ease the sting on ribcage and collarbone sessions without changing the artist's work.
- Thin protective film roll. Helps small wrist and ankle badges survive the first week of friction and showers.
- Fragrance-free gentle body wash. Cleans the healing area without irritating the delicate linework that fine elements depend on.
- Aquaphor healing ointment. A thin layer for the first few days keeps moisture balanced so neo traditional color fields settle evenly.
7. Hourglass Cutie Mark on Back of Arm
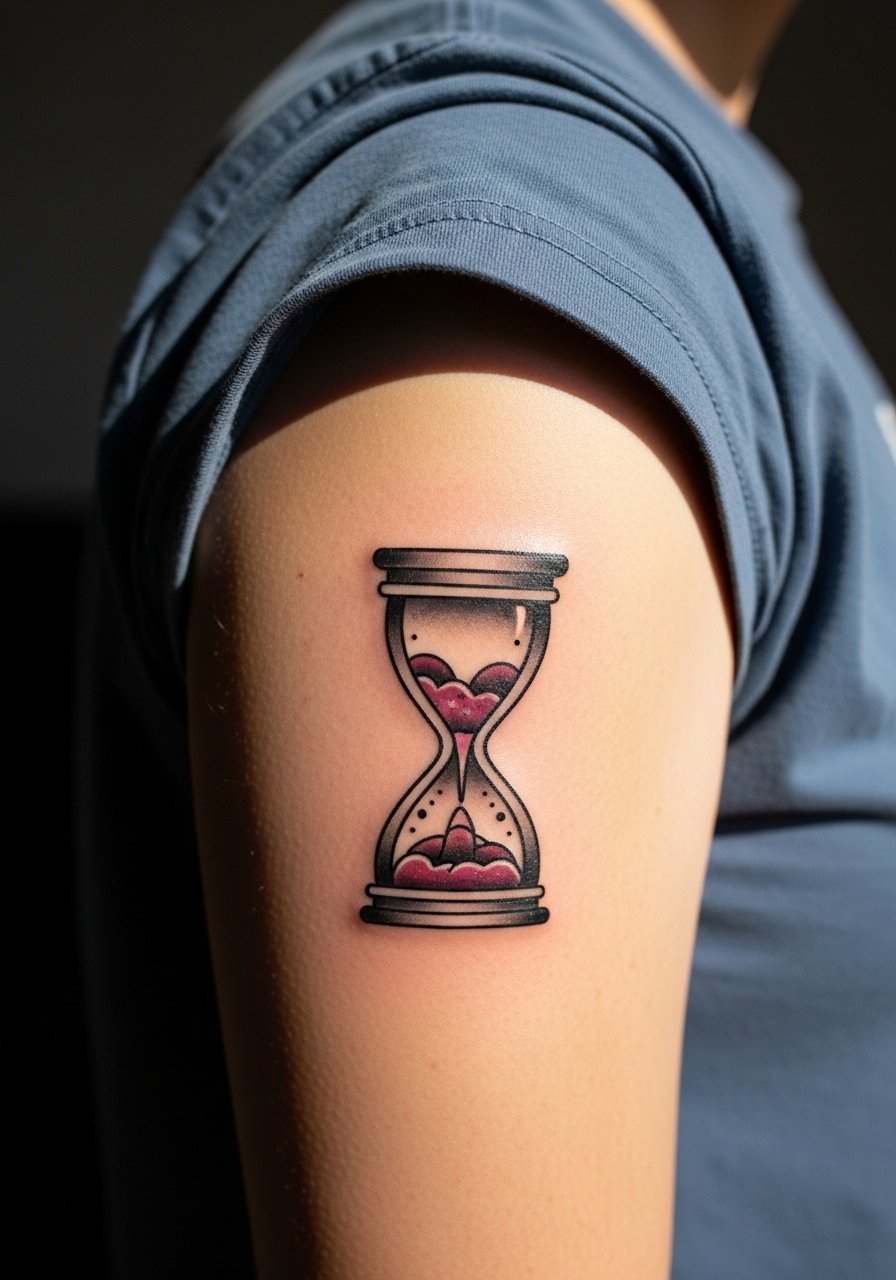
The back of the arm wears well and offers a mid-sized canvas for decorative neo traditional shading. I tell clients to avoid ultra-thin inner details because the skin there tends to soften lines over time. Ask your artist for controlled stipple shading inside the hourglass and denser saturation around edges. Session is comfortable to moderate and often one session. People often forget to think about seeing it from behind when dressing. Pair with a short-sleeve cotton tee that lets the badge peek out.
8. Tiny Paw Print Cutie Mark on Finger
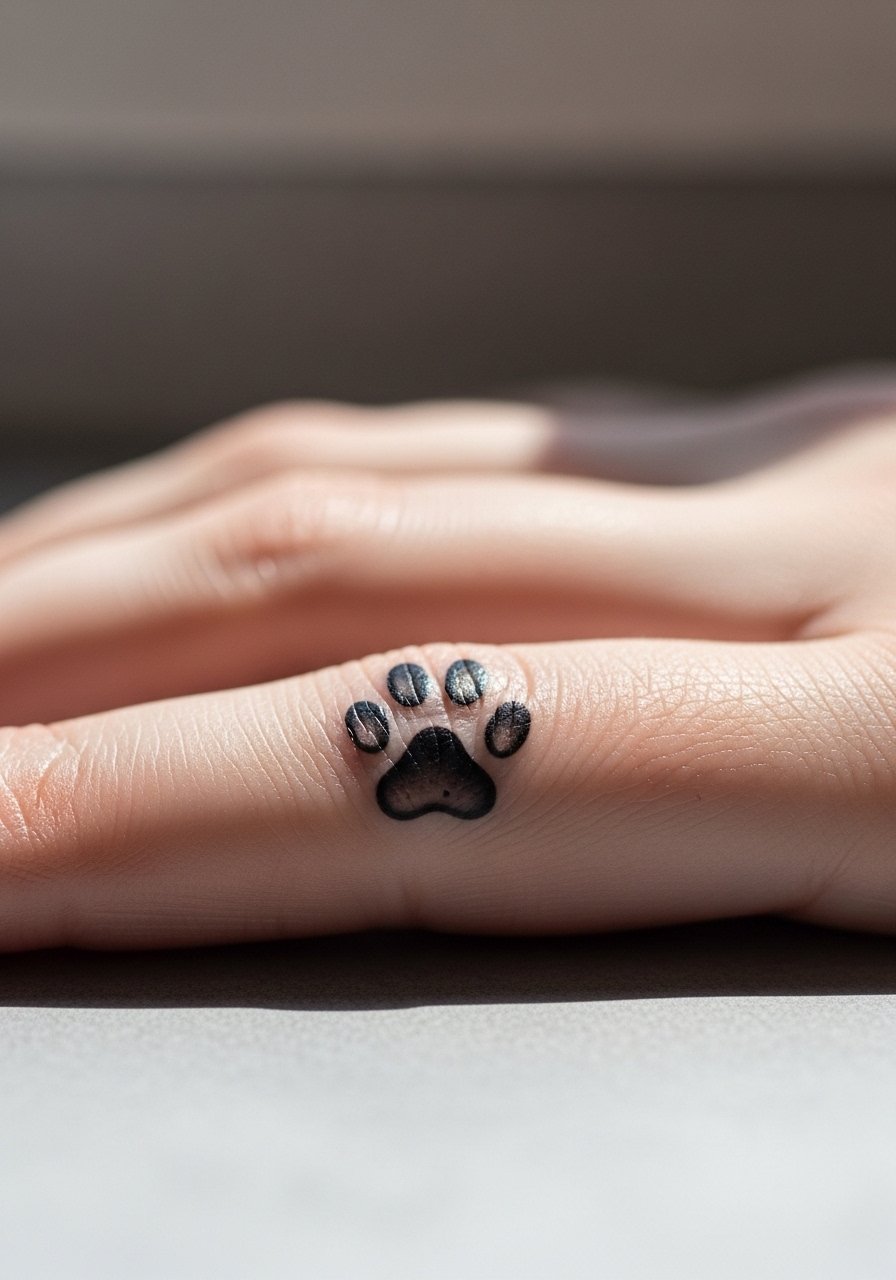
Finger tattoos are high-risk for fading and blowout. One camp insists fingers are fine if the lines are bold and the client accepts yearly touch-ups. The other camp warns that skin on fingers renews more and color rarely holds. Name which camp you align with before booking. For a neo traditional paw print, simplify the fill and amplify the outline. Expect a short but painful session and touch-ups at year one or two. Avoid rings in the first month and consider minimalist stacking bands after healing.
9. Moon and Stars Cutie Mark on Side Thigh
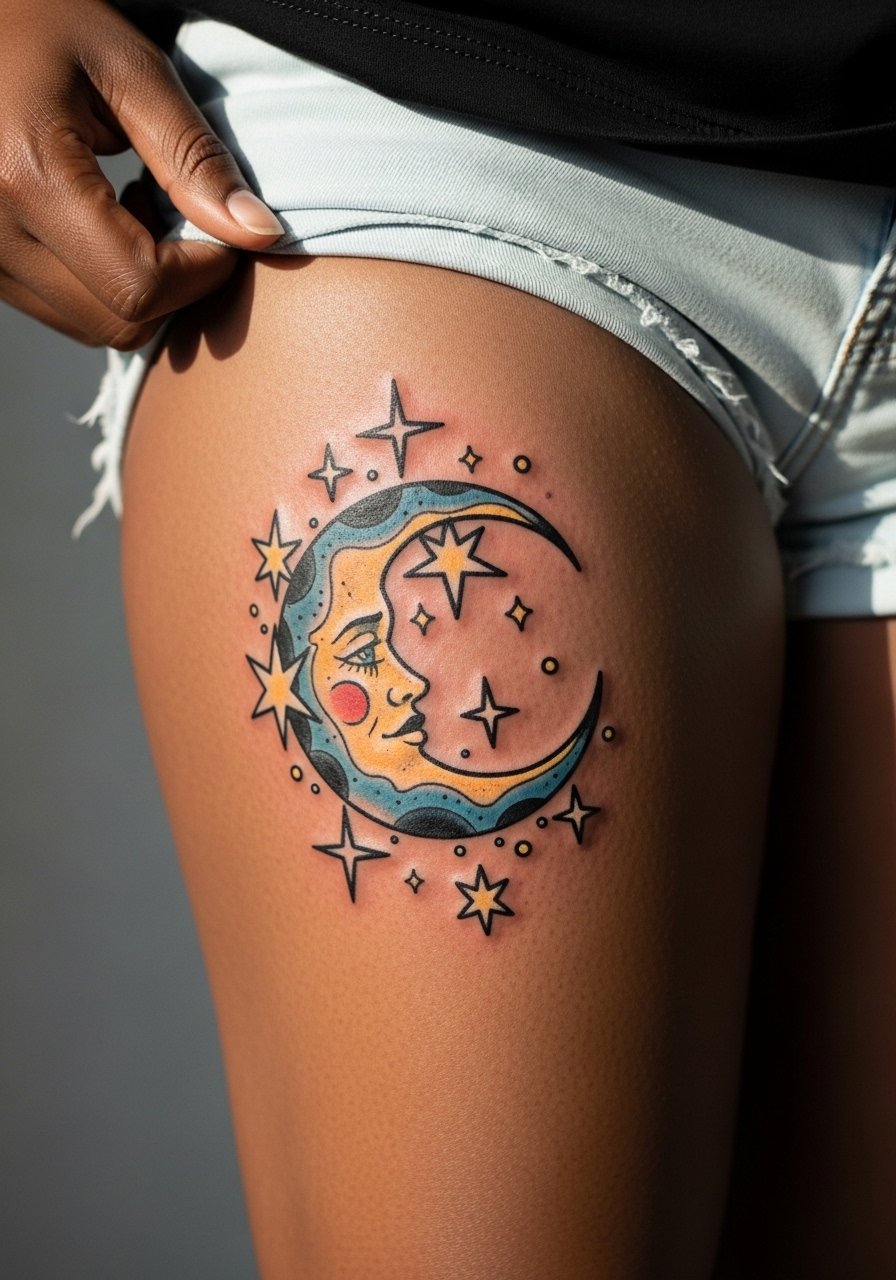
The thigh is forgiving and holds saturation well, which suits neo traditional color gradients. Mention during consultation that you want clear negative space around the moon so the stars do not merge over time. Session feels comfortable and usually longer if you add background shading. Touch-up timeline is longer than high-friction spots, often three to five years. For the appointment wear loose shorts so the artist can access the area without tugging.
10. Keyhole Cutie Mark Behind the Ear
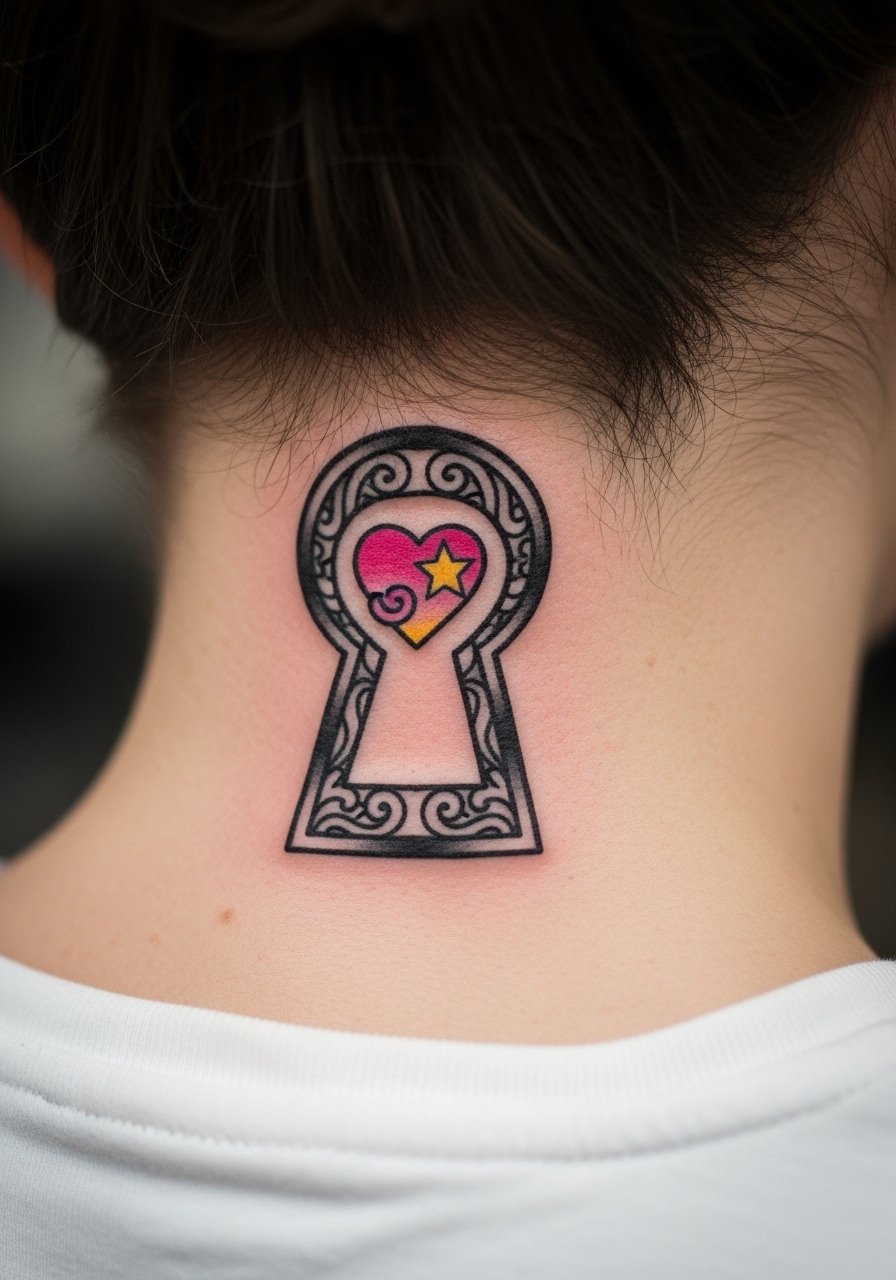
Behind-the-ear placements need precise framing and experienced hands because the skin is thin. Keep the design compact and avoid heavy stipple that can migrate. Ask the artist to show a mockup with hair tied back so you can judge visibility. This spot is low on friction but higher on sensitivity. Sessions are short. For the appointment pin your hair up and bring a soft hair clip so the artist has a clean field.
11. Compass Cutie Mark on Upper Chest
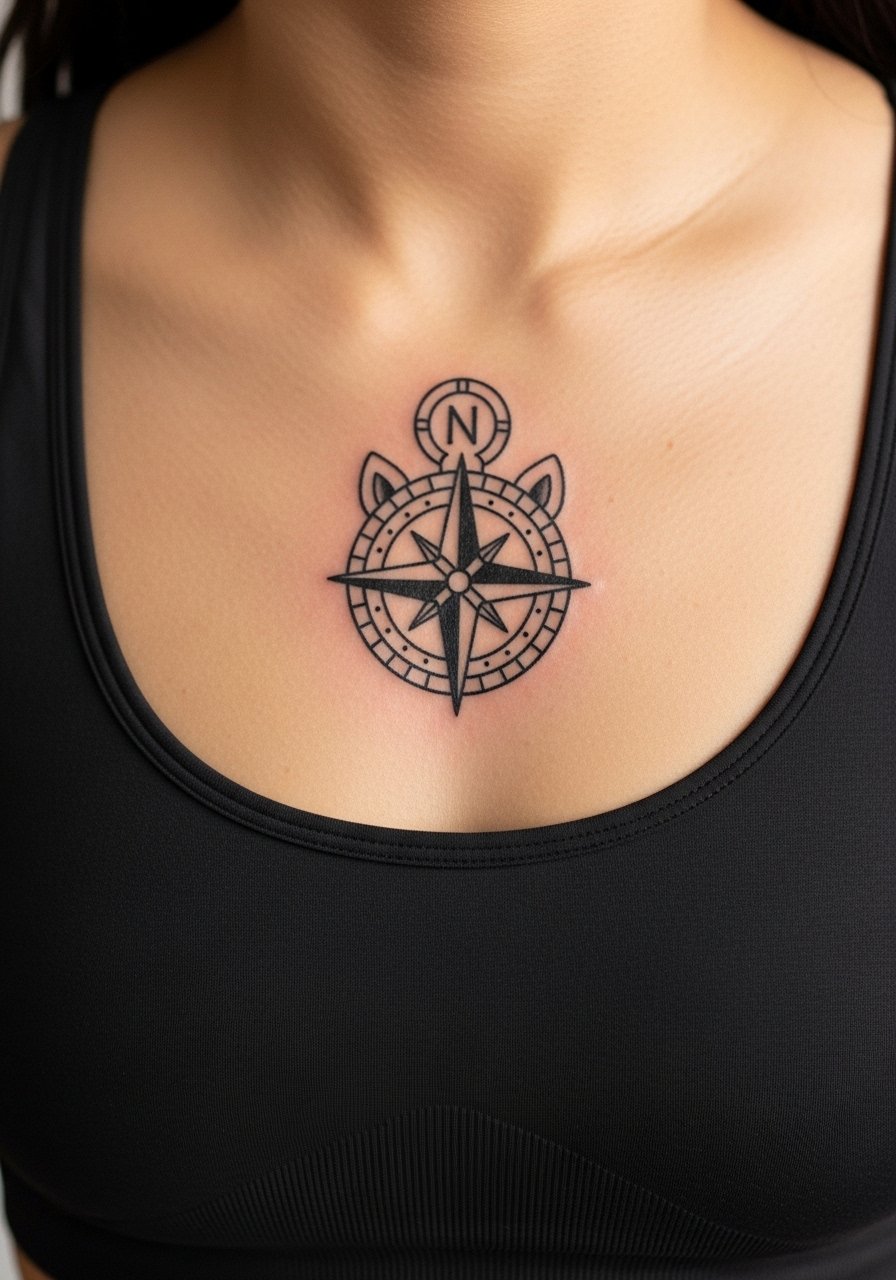
Upper chest pieces look striking but the skin there moves with breath and posture. For longevity ask for slightly larger negative spaces and bolder outer lines so the compass points stay distinct. A common mistake is crowding small decorative scrollwork around the compass. Pain is moderate to high and sessions can be longer. Consider a top that you can lift rather than remove. The placement pairs well with open-neck tees for off-duty looks.
12. Quill Cutie Mark on Ribcage (Controversy Acknowledged)
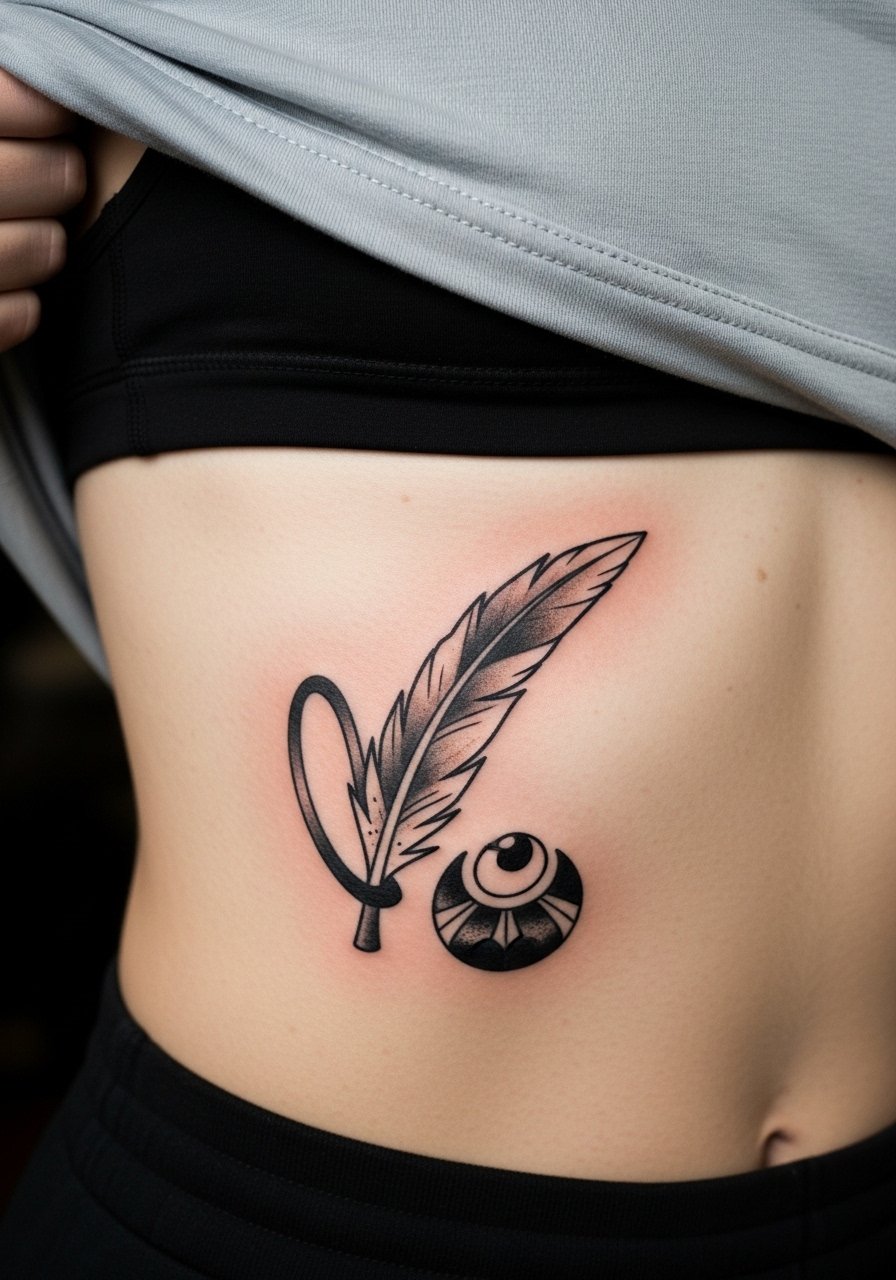
Fine line on ribs divides opinion. One camp argues the skin stretch and movement make tiny lines blur within two years. The other camp says with proper spacing and needle depth, fine line can settle nicely on the ribcage. For a neo traditional quill, choose bolder contour lines and moderate internal detail so the feather reads even as the skin ages. Sessions are painful and may require breaks. Expect a likely touch-up window around year two or three.
13. Gear Cutie Mark on Inner Wrist
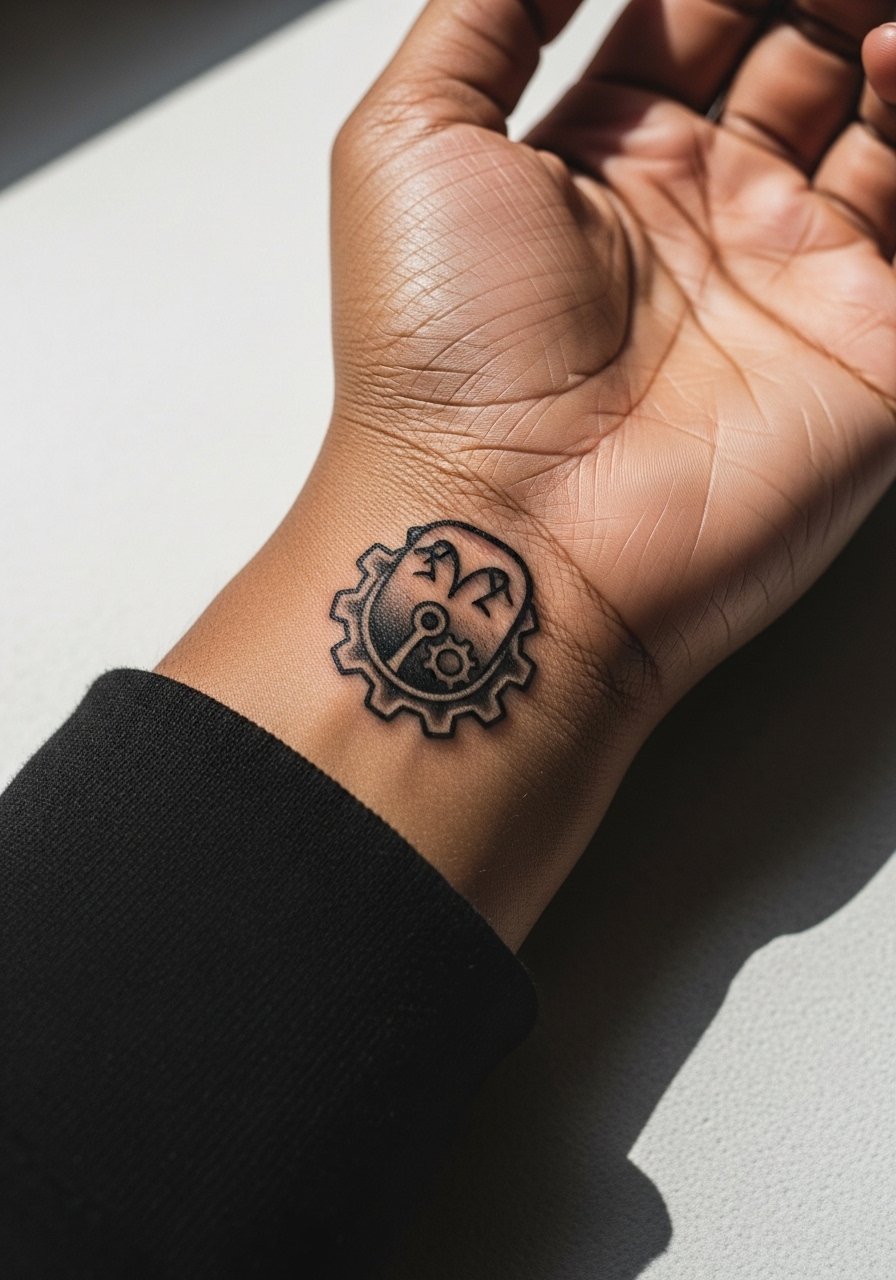
Inner wrist is a display spot with high exposure to sun and washing. Ask for UV-safe placement consideration, meaning slightly thicker outlines and room inside the gear for color saturation. A common mistake is insisting on micro-detail inside the tiny gear teeth. Session time is short. Plan touch-ups at year two to maintain saturation. Wear a thin leather cuff when you want to hide or frame the badge.
14. Music Note Cutie Mark on Calf
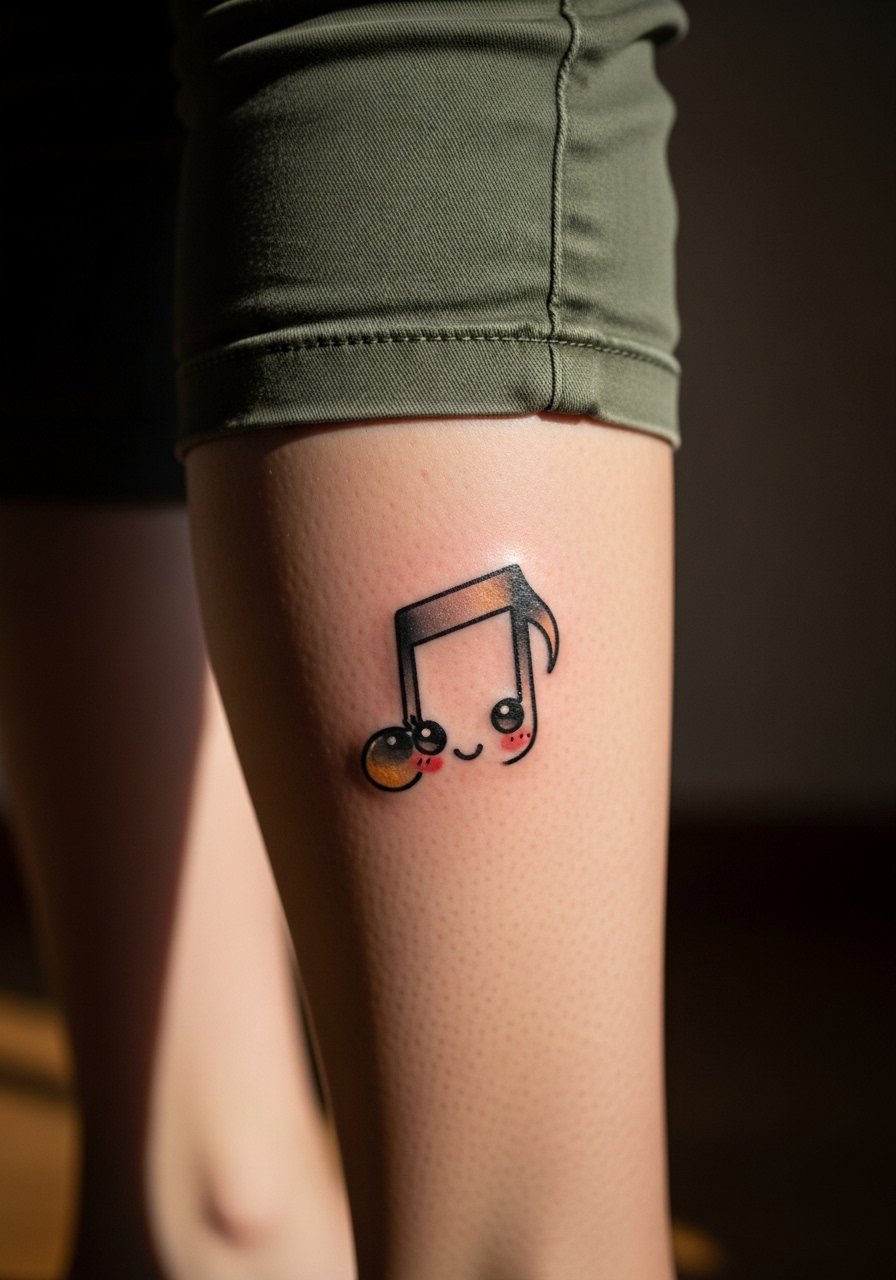
Calf pieces are comfortable to sit for and age predictably due to lower friction. For neo traditional color gradients inside the note ask for smooth saturation and controlled whip shading in the shadow fields. A mistake is placing too much tiny dot work in narrow bands where it will coagulate. Session time is moderate. For show-off moments pick mid-calf placements that appear when wearing cropped pants.
15. Pocket Watch Cutie Mark on Shoulder Blade
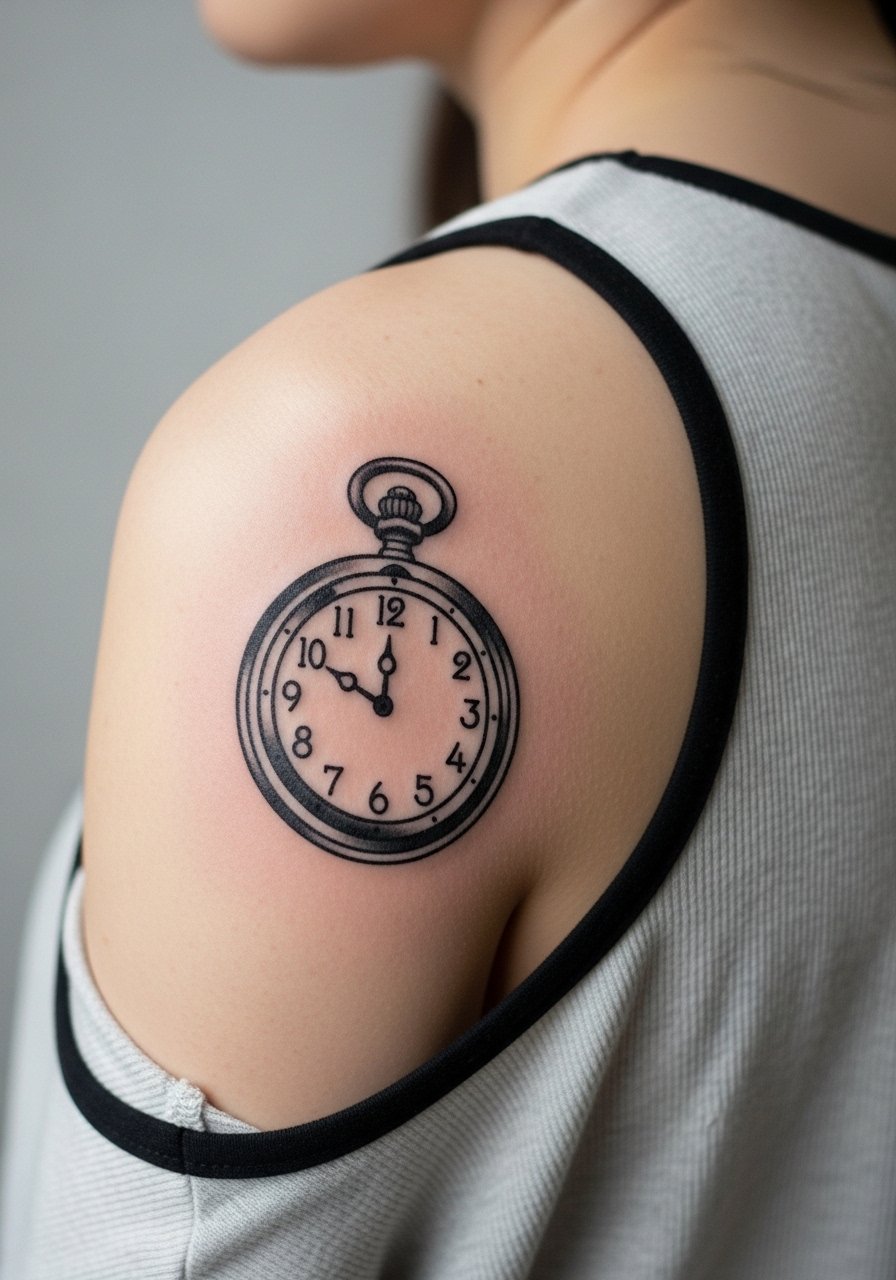
Shoulder blade gives a nice flat canvas for ornamental neo traditional fills. I advise asking for a balanced composition so the watch reads as a badge and not as a crowded scene. Common mistake is cramming too many floral elements into the surround. Session is comfortable and healing is straightforward. Bring a button-down shirt you can pull aside so the artist can work without exposing more skin than necessary.
16. Paw Heart Cutie Mark on Inner Thigh
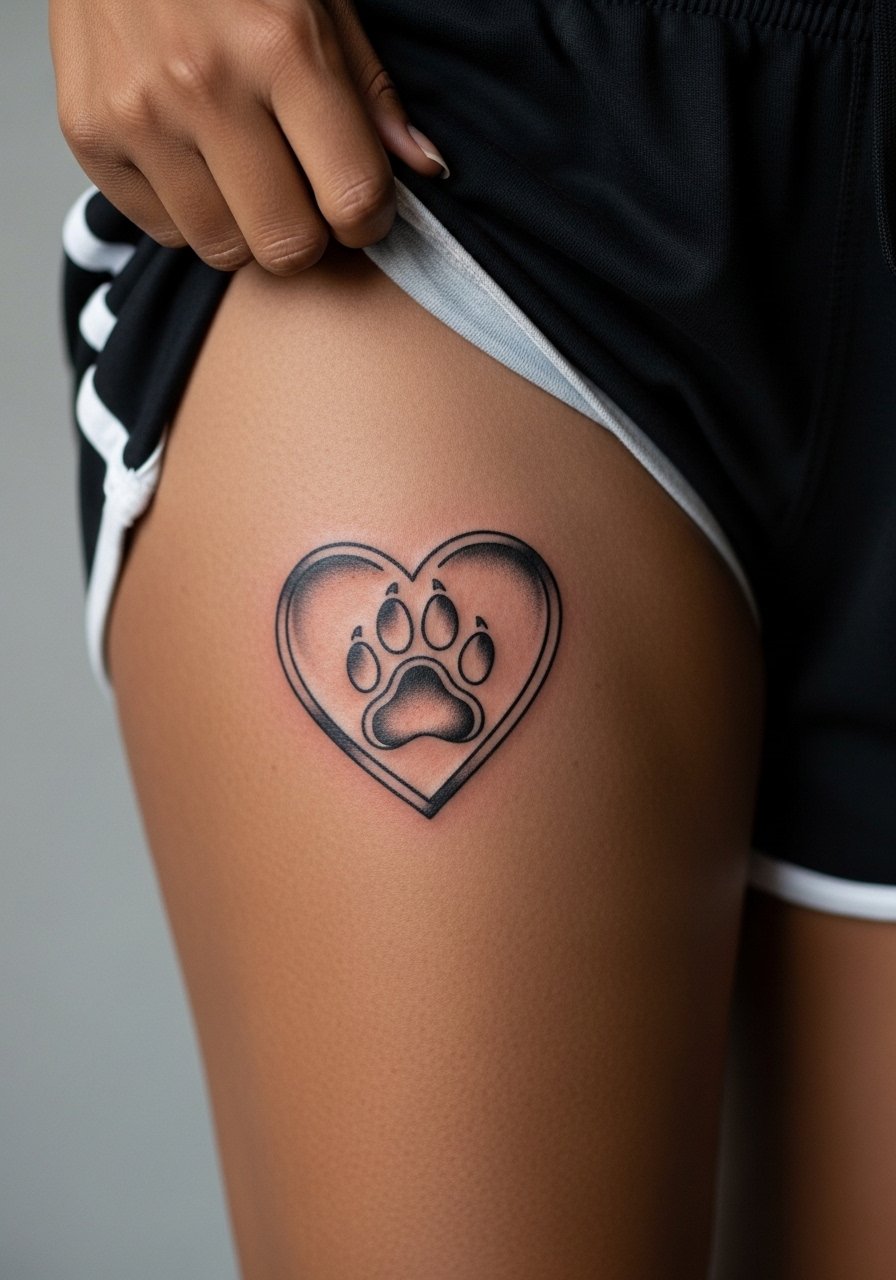
Inner thigh placements need extra consideration for comfort and privacy. Mention to your artist that you prefer a design with broader fills rather than micro-line detail which can soften from friction and body movement. The session is moderate in discomfort and you may want to schedule a relaxed recovery day. This placement is intimate, so plan clothing accordingly. For the appointment choose soft shorts that shift easily without tugging.
17. Lock and Key Cutie Mark on Behind-the-Knee
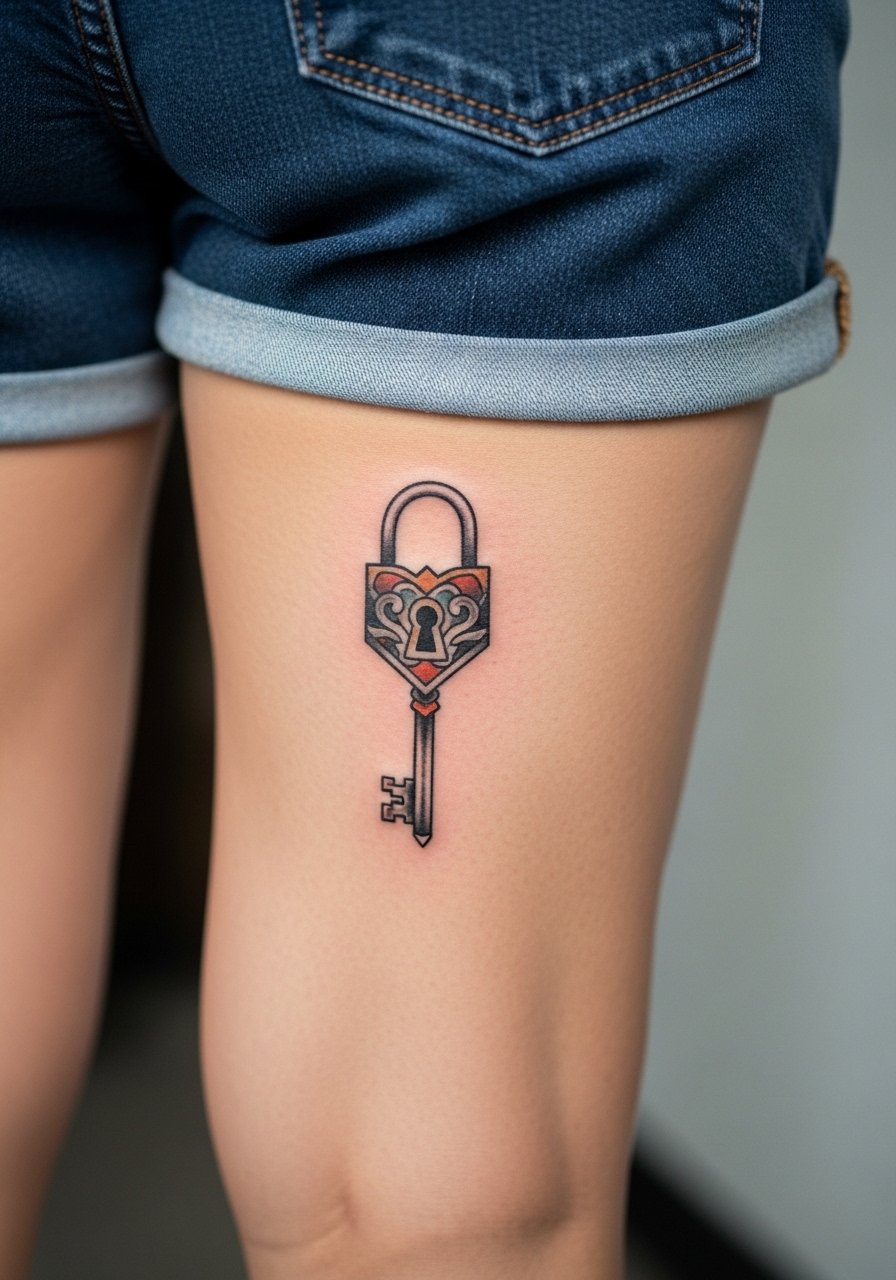
Behind-the-knee tattoos sit on mobile skin which affects how linework settles. Ask for simpler outlines and avoid tight patterns across the joint that could blur. Sessions can be fiddly because the artist needs the leg positioned carefully. Pain is moderate. Expect touch-up if you often bend your knee in a way that creases the ink. Wear loose shorts that allow the artist to position your leg without resistance.
18. Lantern Cutie Mark on Upper Thigh
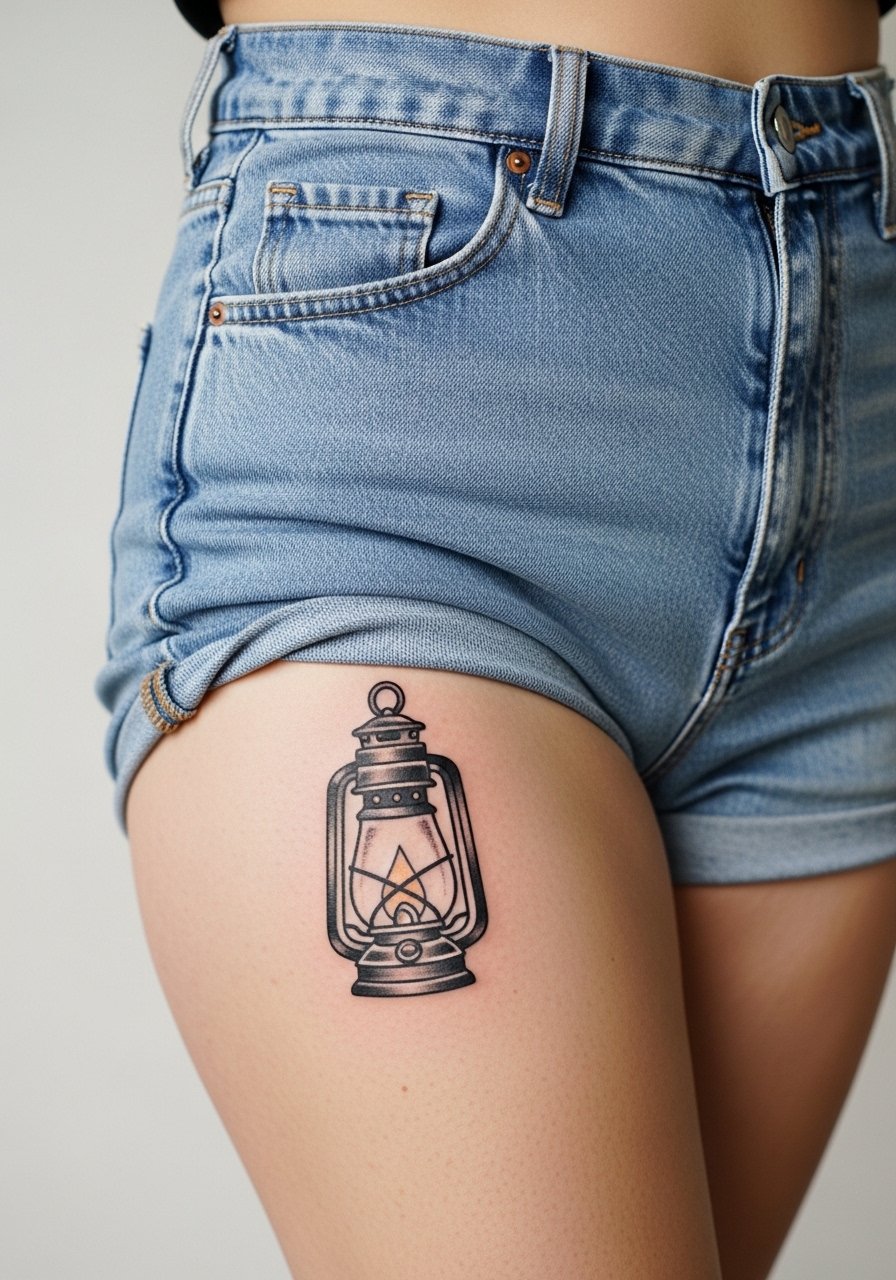
Upper thigh tolerates large neo traditional pieces and holds saturation well. In consultation, request clear foreground-background separation so the lantern reads as a badge instead of blending into surrounding shading. The session is comfortable and often longer if you add background ornament. Expect infrequent touch-ups compared with hands or fingers. For the appointment, wear high-waisted denim you can slide down slightly.
19. Book Stack Cutie Mark on Forearm Sleeve
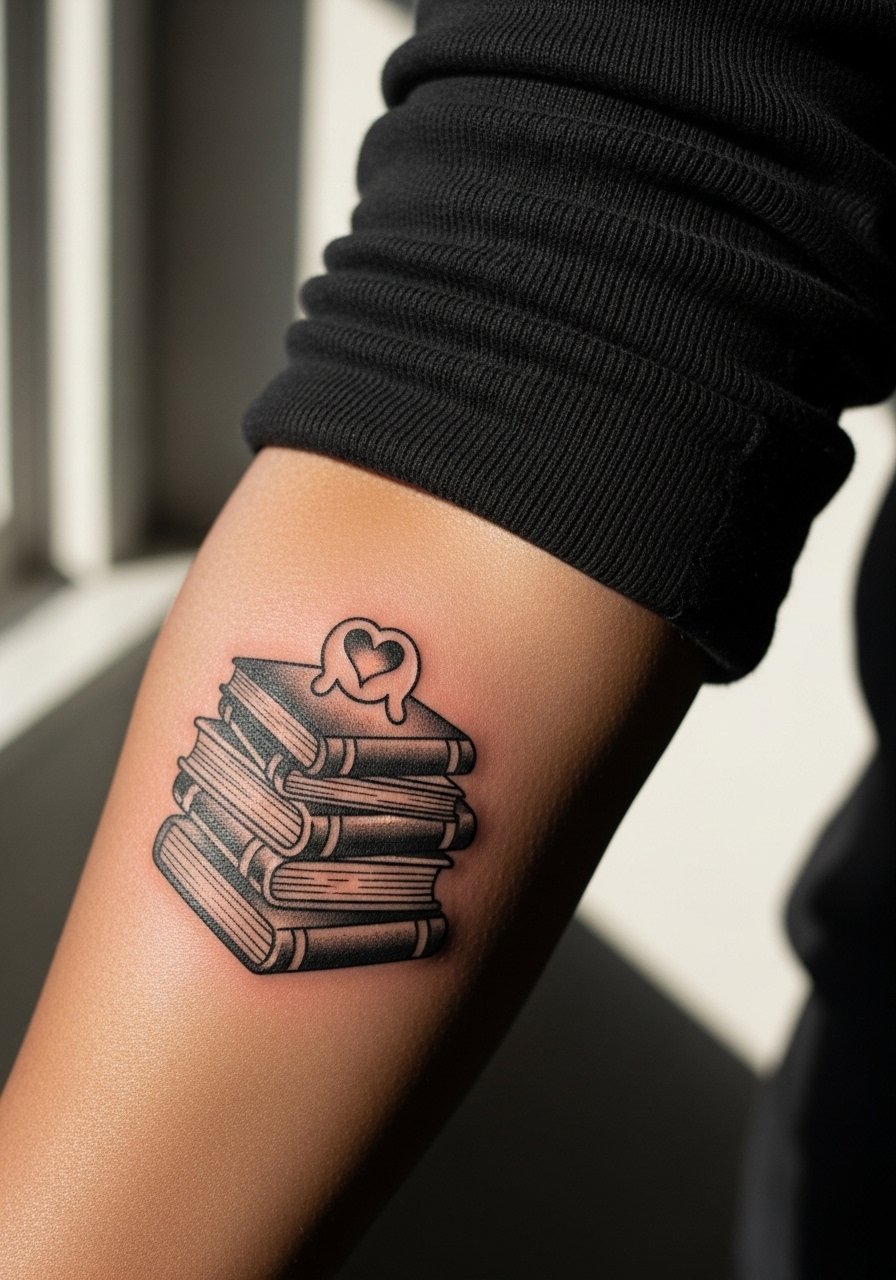
A forearm sleeve lets you combine a central cutie mark with supporting neo traditional motifs. I tell clients to plan the negative space carefully so the badge keeps focus as the arm moves. Common mistake is overcrowding with competing elements that age into a muddy mass. Session time varies by coverage. For show-off outfits, rolled sleeves and a casual blazer keep the forearm visible when you want it to be.
20. Hourglass Mini on Back of Hand (Controversy Noted)
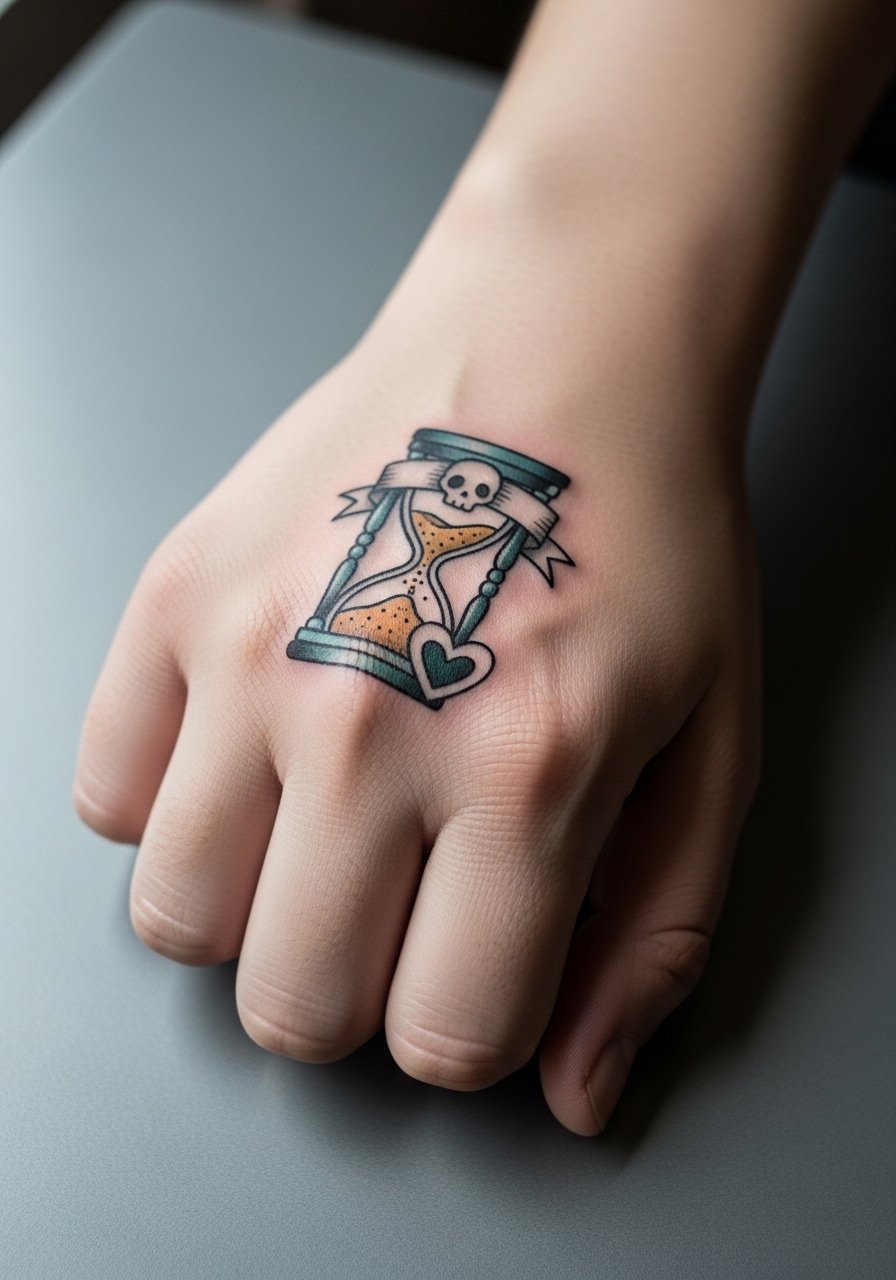
Hand tattoos still affect hiring in some industries and their longevity is debated. One camp argues hands are fine if you accept frequent touch-ups. The opposing camp warns hands fade quickly because of skin renewal and heavy friction. For a neo traditional mini badge on the hand, simplify the internal detail, strengthen the outline, and be ready for maintenance. Sessions can be sharp in pain. Consider career implications before committing and plan for annual touch-ups if you want crisp saturation.
21. Feather Cutie Mark on Inner Bicep
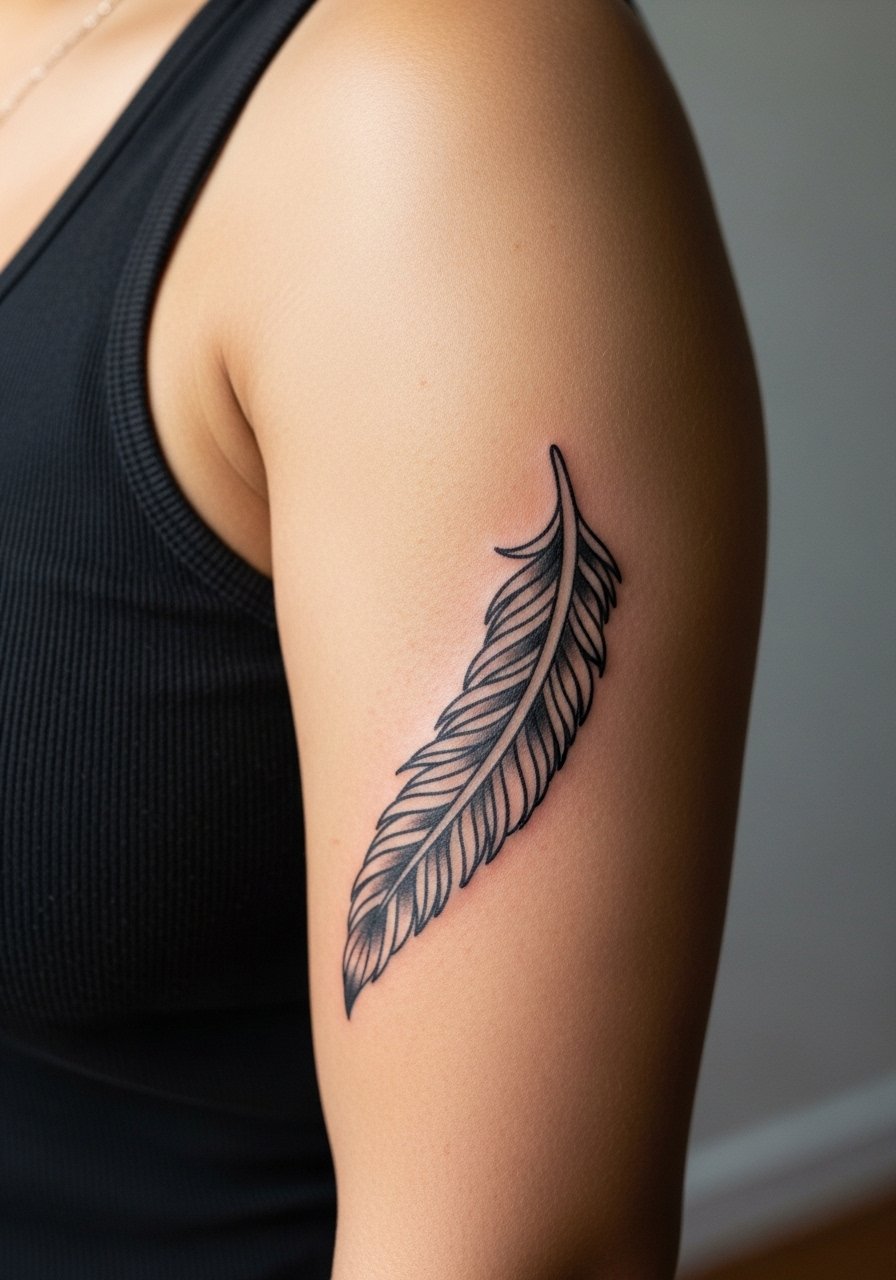
Inner bicep gives privacy but the skin there is softer which can affect line crispness. Ask for slightly bolder outlines and avoid too much micro-stippling inside narrow feather veins. Sessions are moderate in discomfort. A common mistake is placing the feather too close to the crease where movement softens the lines. For the session, wear a tank top that you can lift so the artist can access the area cleanly.
22. Crescent and Flower Cutie Mark on Side Neck
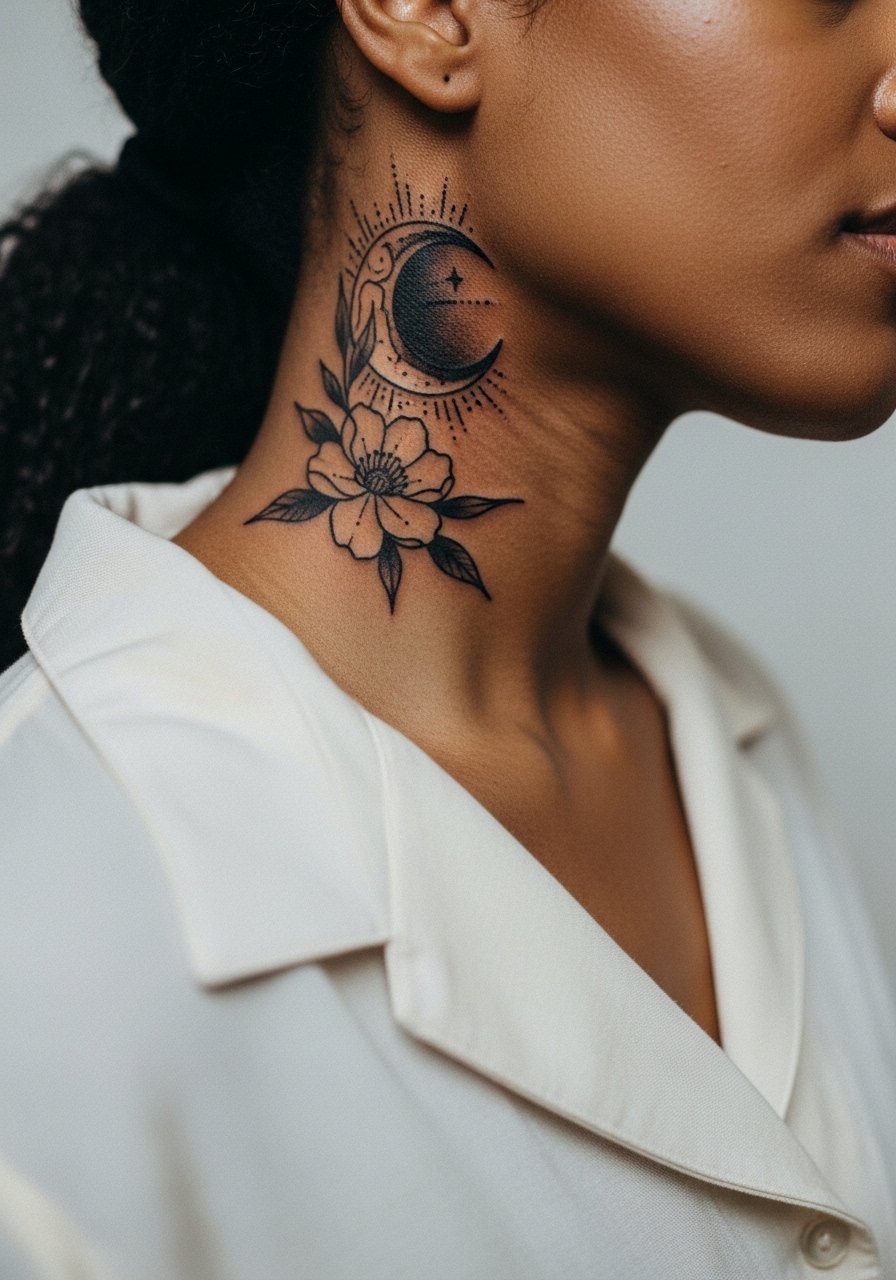
Neck placements are visible and can influence job prospects. Neo traditional shading looks great there but tiny detail can soften. Ask the artist for confident linework and avoid dense backgrounds. Sessions are brief but sensitive. Expect the need to touch-up at year two or three if you want the color holding. For the appointment wear a wide-neck shirt so the artist can reach the area without removing garments.
23. Seedling Cutie Mark on Lower Back
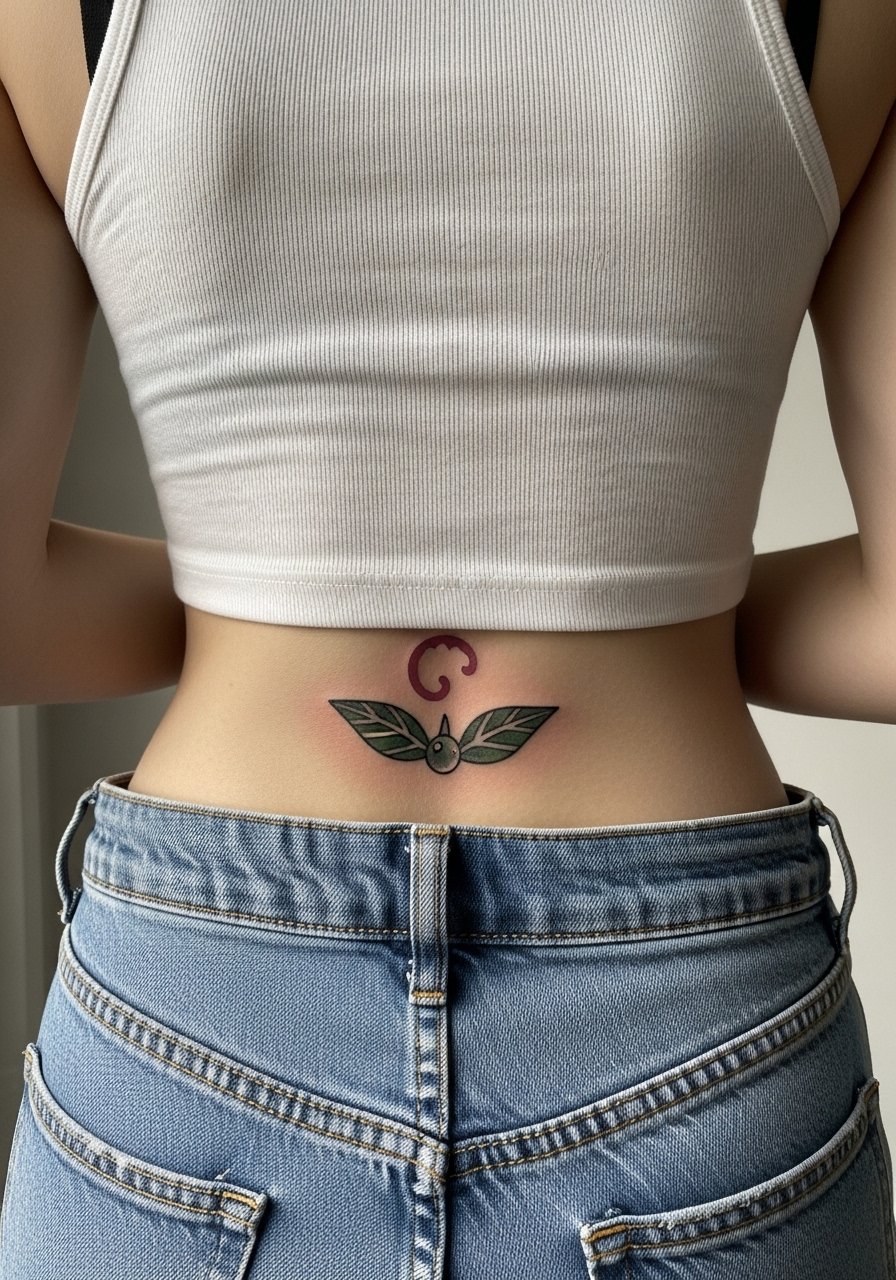
Lower back tattoos have regained favor and they sit on durable skin. For neo traditional badges keep the central motif clear and the surrounding ornament minimal so the seedling reads well when you move. Sessions are comfortable. Common mistake is over-decorating which makes the small badge lose definition. Wear a tank top and high-waisted jeans to the appointment so the artist can access just the lower back.
24. Crescent Compass on Ribcage Side
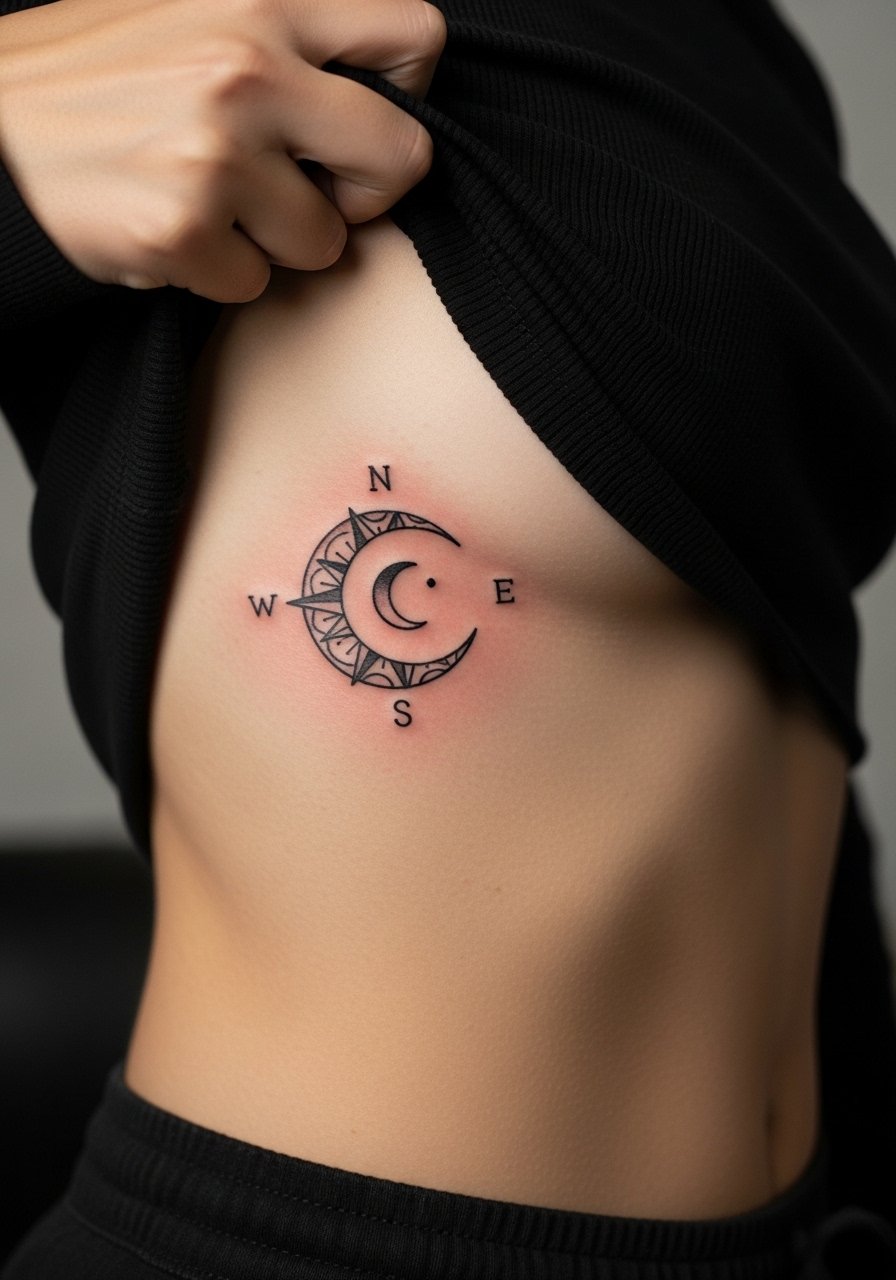
Side-torso placements are dramatic and allow for ornamental neo traditional shading. Tell your artist you want clear separation between the compass and background filler so breathing does not distort the motif. A mistake is insisting on dense dot work across the ribs which often blurs. Pain can be high and sessions may require breaks. Schedule recovery time afterwards and wear a cropped top that can be lifted for access.
25. Lantern Mini on Thumb
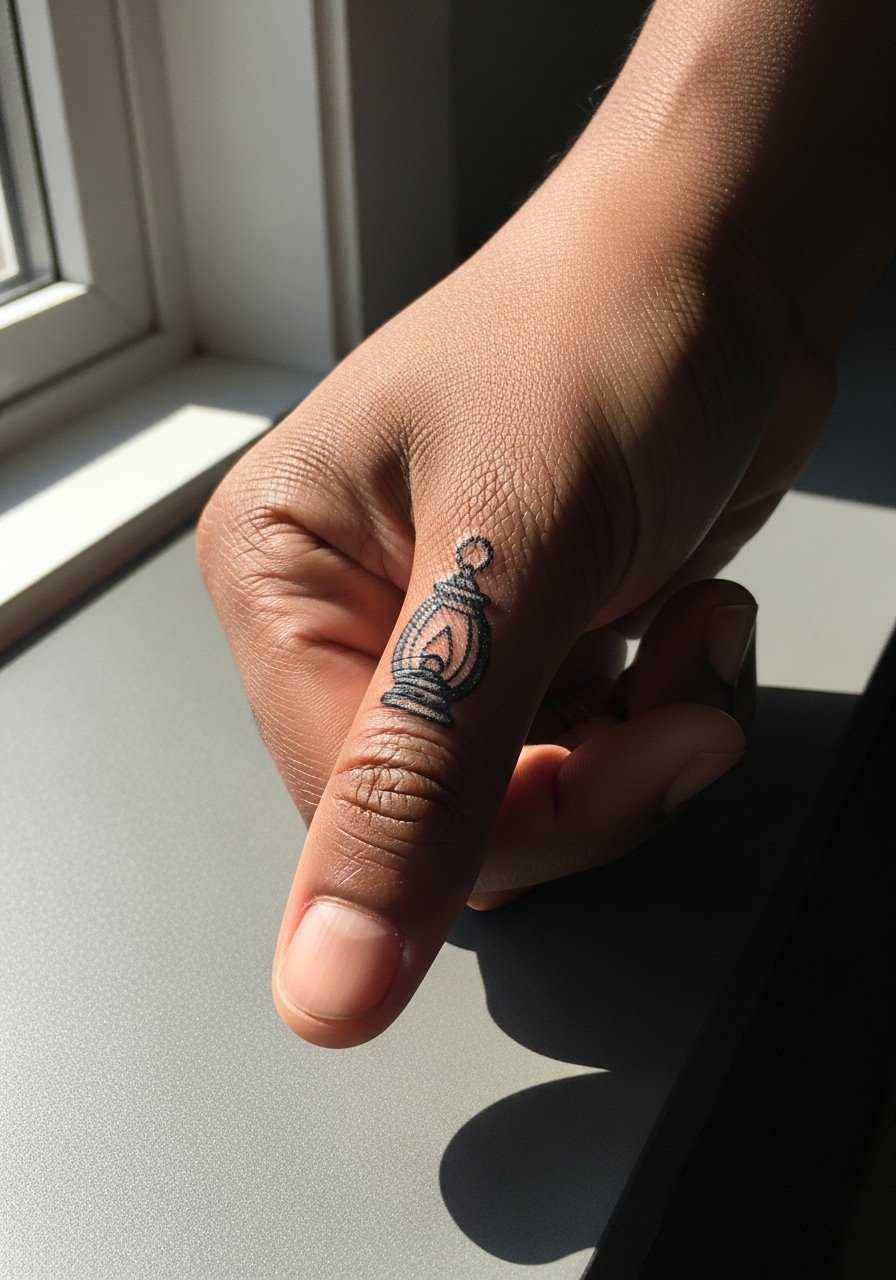
Thumb tattoos face constant wear and near-immediate fading. One camp accepts the upkeep as part of the look. Another warns against thumbs unless you plan annual touch-ups. For neo traditional thumbs, simplify the design and reinforce the outer contour so the lantern retains silhouette. Sessions are short but can be painful. Avoid gripping tools or rough surfaces in the first month to reduce early abrasion.
26. Crown Cutie Mark on Upper Chest Near Sternum
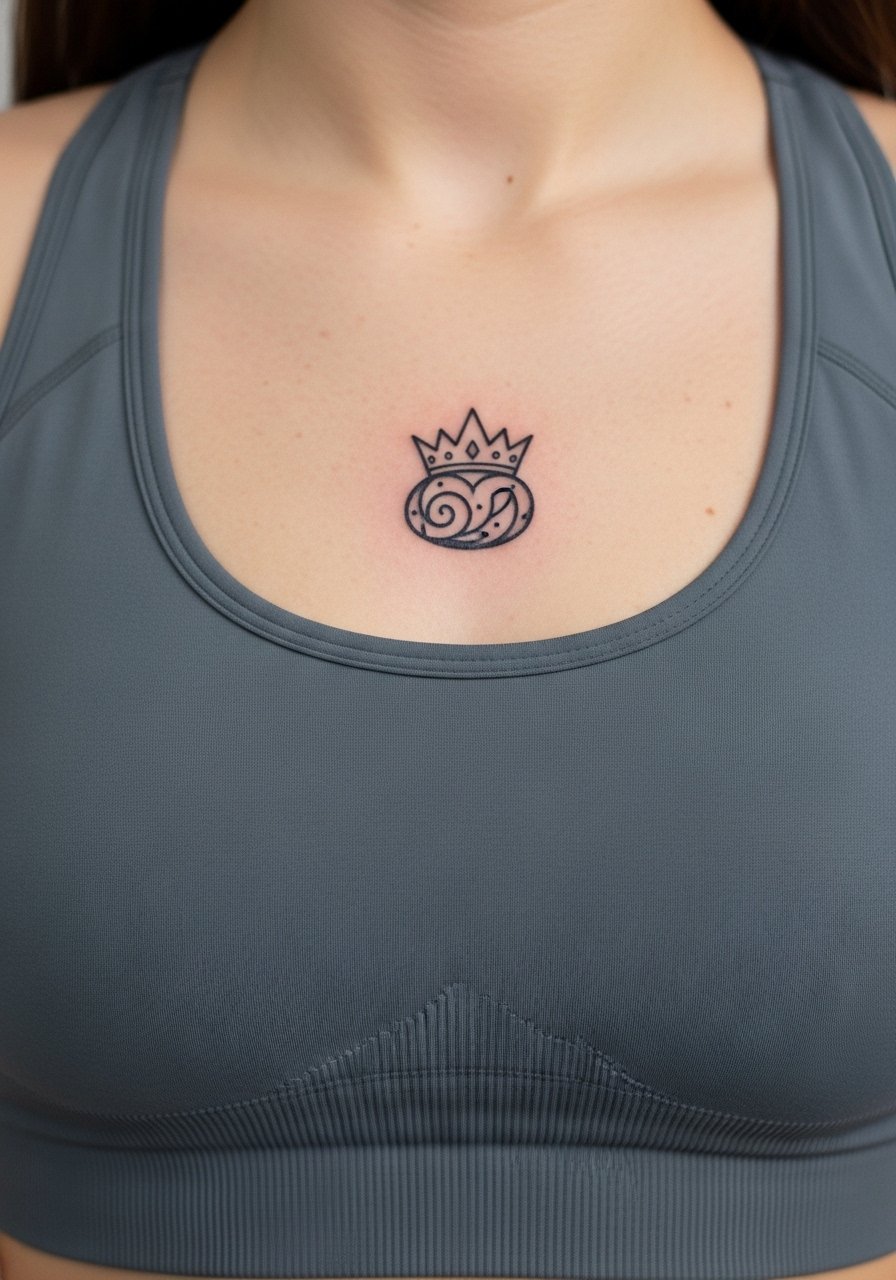
The sternum area needs careful placement because of curvature and movement. For this badge pick bolder outlines and avoid tiny interior scrollwork. A common mistake is placing text or tiny numerals that smear. Pain can be significant and you should expect a longer session. Wear a fitted sports bra you can pull aside for the session and that provides coverage afterward.
27. Laurel Wreath Cutie Mark on Upper Back
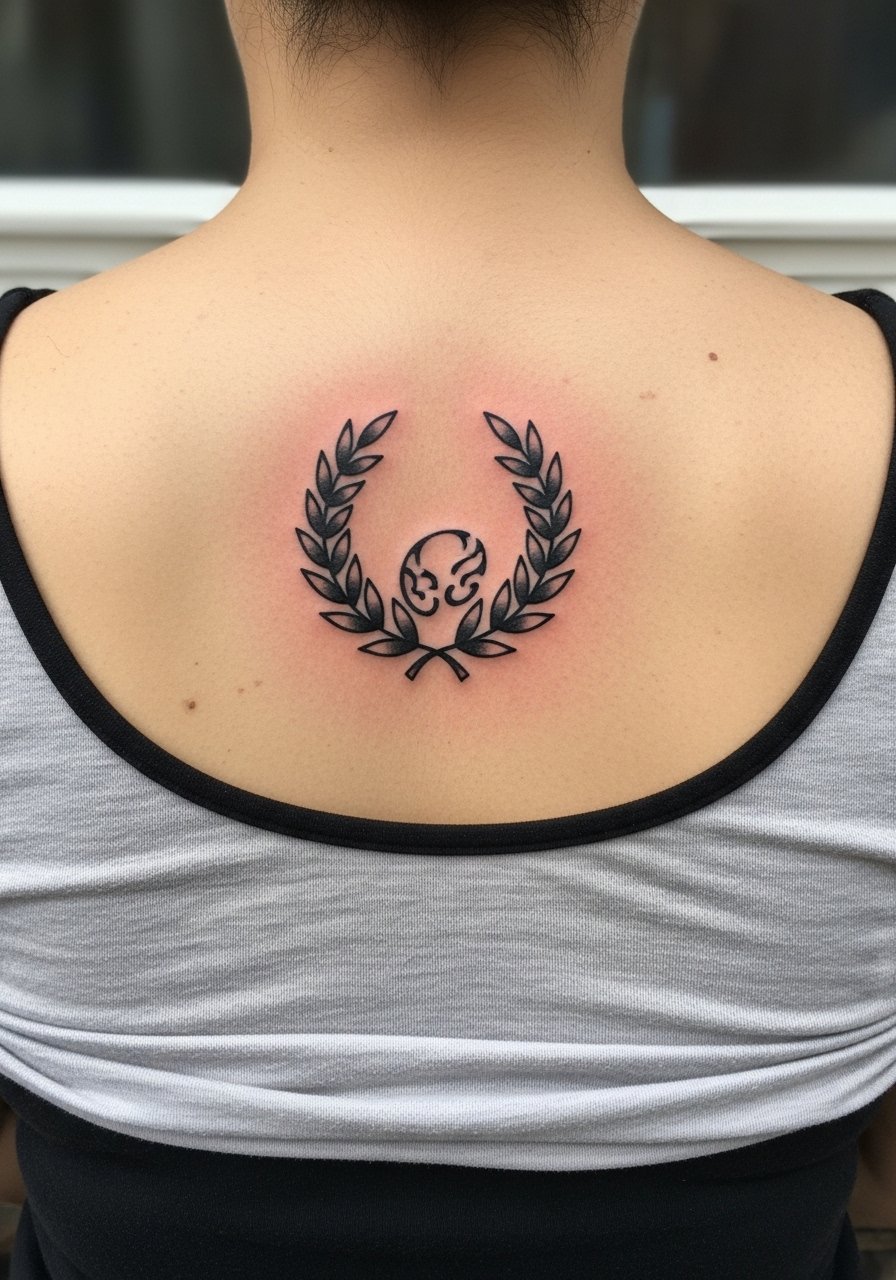
Upper back is a stable area for larger neo traditional badges. Ask for balanced spacing so the laurel maintains its circular shape as muscles move. Mistakes here involve overfilling the center which loses the badge quality. Sessions are comfortable and healing is straightforward. For the appointment bring a tank top you can pull down slightly so the artist can work without stripping down.
Frequently Asked Questions
Q: How small can a neo traditional cutie mark be before the details blur?
A: In my experience, once a neo traditional badge drops below about 1.5 to 2 centimeters across the interior details start competing with the outline. Ask your artist to simplify internal ornament and to widen exterior linework if you want a mini version. Finger and thumb placements force compromises, so expect a faster touch-up cycle there.
Q: Do neo traditional colors need different touch-up timing than blackwork?
A: From what I have seen, color saturation can fade faster in high-friction areas compared with bold black outlines. Blackwork tends to hold a cleaner edge, so for small neo traditional badges plan for a color refresh around year two to four in spots like the wrist or ankle. For larger pieces on the thigh or back, touch-ups are less frequent.
Q: Are there copyright or fandom concerns with cutie mark designs?
A: Yes, people split into two camps. One group treats cutie marks as personal symbols and adapts them freely. The other group is cautious about direct replicas of trademarked characters or logos. If you want a badge inspired by a franchise, ask the artist to create a custom, original emblem that nods to the idea without copying a protected design.
Q: What should I wear to a collarbone, ribcage, or sternum session?
A: Plan clothing for access and modesty. For collarbone pick a wide-neck shirt you can slide aside. For ribcage and sternum bring a fitted sports bra or a cropped top that lifts easily. These items let the artist work without you feeling exposed and they reduce tugging that can irritate fresh ink.
Q: How do I find artists who specialize in neo traditional cutie mark work without naming specific people?
A: Search local shop portfolios, browse tattoo convention guest lists, and use community hashtags that match the style. Online directories and forum threads also surface portfolios. When you reach out mention the scale and placement and ask for healed photos of similar placements to judge how the linework and saturation settle on real skin.
