
Fine line sketch tattoos look effortless on saved boards, and they can feel fragile in the chair when the stencil goes down. Longevity, placement pain, and how a piece reads once healed are the three things that trip people up most. Pick ideas that give you room to breathe at the edges and a clear consultation script, and the first entry below shows how to start that conversation.
1. Scribbled Arrow on the Inner Forearm
I've seen this one evolve from a flashy impulse to a staple when the linework is given room. Ask your artist for slightly spaced strokes rather than a single hairline to avoid early merging. Pain is low to medium and sessions run under an hour. At six months the edges soften, and by year three tiny touch-ups often keep the arrow crisp. Common mistakes are asking for the smallest possible scale and placing it too close to the wrist where movement blurs detail. For showing it off, roll up sleeves and pair with a racerback tank or a thin chain bracelet to frame the forearm.

2. Loose Botanical Wrist Band
Personal observation: wrist bands done with sketchy stems and sparse leaves age better than dense cuffs. Tell the artist to keep spacing and to avoid heavy stipple near the wrist joint. Pain is higher than the forearm and sessions are shorter but stinging. Expect the first six months to show crisp lines, then gentle softening at two years. The big mistake is packing too many small leaves into a narrow band. For the session, wear a loose button-down shirt you can pull aside and pair the healed band with a minimalist watch to balance the wrist without crowding.

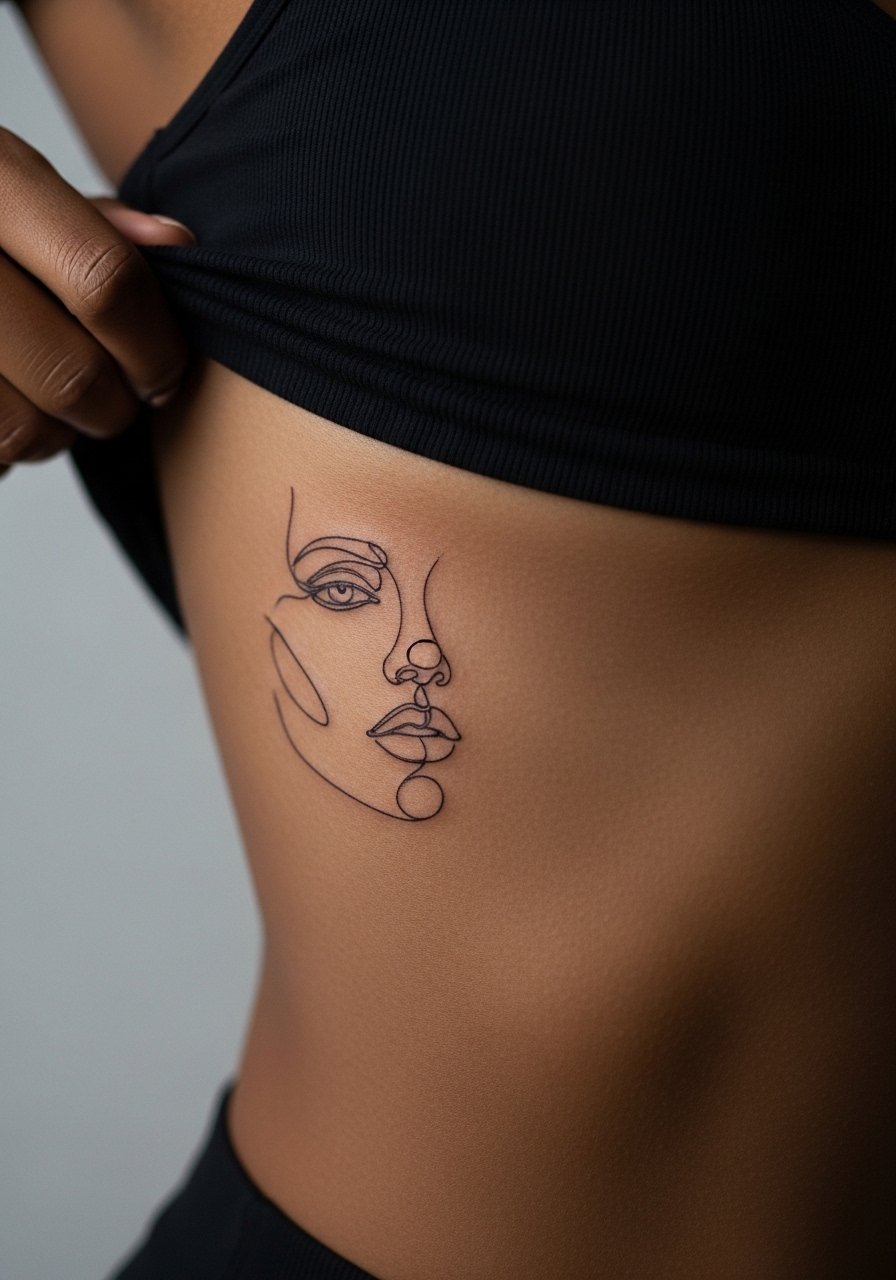
3. Single-Line Face Contour on the Ribcage
Fair warning: the ribcage is a high pain area, but the sketch approach can read like a soft drawing when healed. Artists split on fine line on ribs. One camp says the skin there stretches and blurs lines quickly. The other camp argues that with careful depth and spacing it holds up. Ask the artist their experience with ribcage sketches before booking. Expect visible detail at six months and possible touch-up at year two. For session wear, bring a fitted sports bra so only the area is exposed. Sensitive placement note: choose an artist experienced with torso stretches.
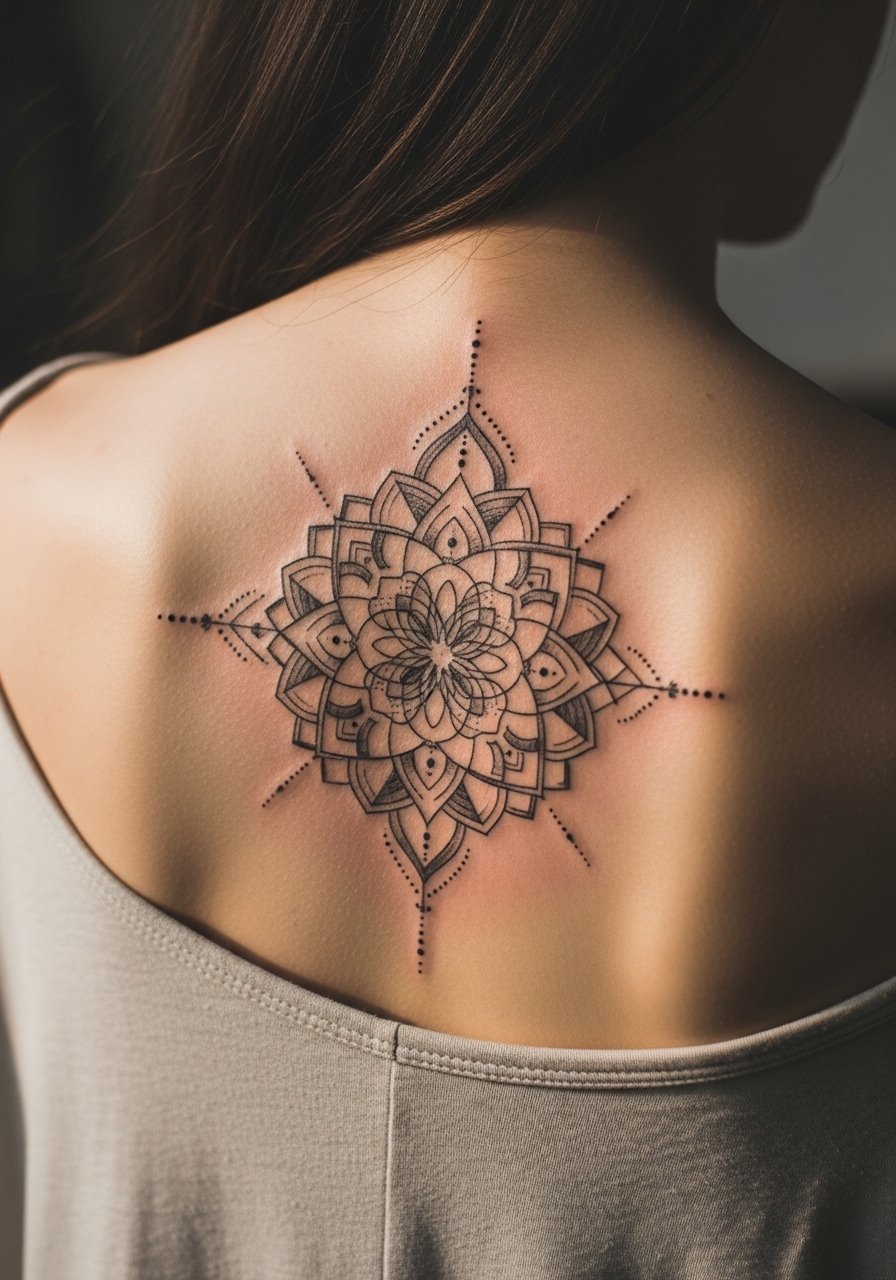
4. Sketchy Geometric Mandala on the Upper Back
When you sit down with your artist for this one, bring photos that show the exact line density you want. Upper back pieces let the negative space breathe, which helps the sketch style avoid muddying. Pain is moderate and sessions can be two to three hours for scale. The common version that ages poorly is one packed too tightly in the center. To avoid that, request broader spacing toward the center and denser marks along the outer rings. Pair the final look with open-back tops or a backless dress for evenings out.
5. Tiny Script Sketch on the Side of the Finger
The finger is unforgiving and needs simpler marks. Most people underestimate how quickly ink fades there. Pain is sharp and session time is short. Tell the artist to use slightly bolder single strokes and to expect a touch-up at year one or two. A common mistake is asking for hairline cursive that will blur from hand use. For showing it off, layer with thin rings and a dainty signet ring. Note on careers: hand and finger tattoos still affect hiring in some fields.

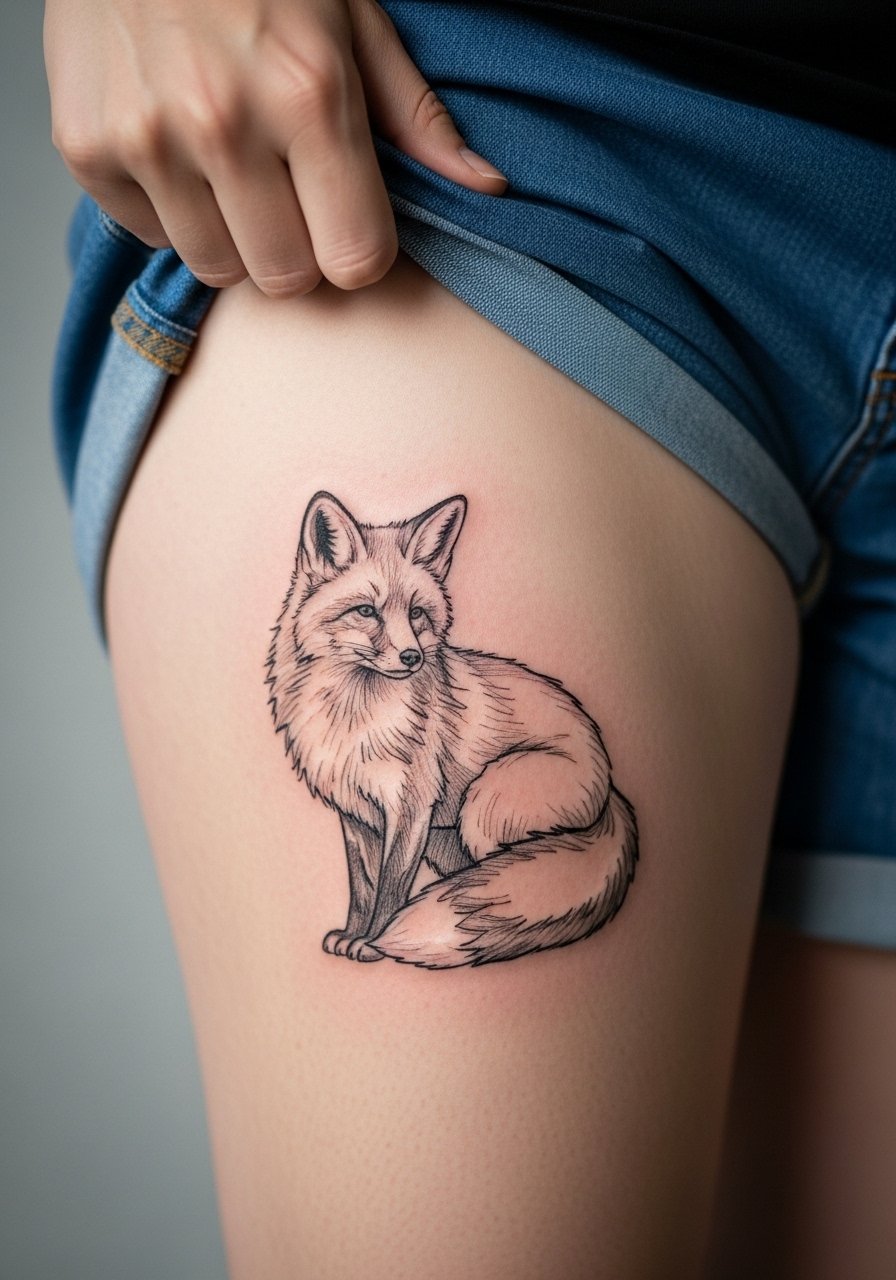
6. Whip-Shaded Animal Sketch on the Thigh
Visual impact lead: there is room on the thigh for whip shading and sketchy motion that reads like a drawing in motion. Sessions are low to moderate pain and usually run one to two hours depending on size. Tell the artist to start with light guide marks and build shading in strokes. At six months the shading softens into texture, and at five years it keeps form if touch-ups are scheduled. The mistake is going too small, which flattens motion. For the session, wear loose drawstring linen pants so the leg is easy to access and comfortable afterward.
Studio Day Picks
The wrist, finger, forearm, and thigh pieces above each ask different prep, and these items smooth the session and the first healing window.
-
Stencil transfer paper kit. Lets you preview line placement and spacing before the needle meets skin, especially useful for ideas with tight draft-style marks.
-
Thin protective film roll. Helps finger and wrist tattoos survive the first week of friction from daily washing and typing.
-
Fragrance-free gentle body wash. Cleanses the area without stripping the delicate linework sketch styles depend on.
-
Topical numbing cream. Useful for high-pain zones like ribs and inner thigh when you need the extra minutes to settle into the stencil.
-
Aquaphor healing ointment. Thin layers in the first days lock in moisture for fine line work without suffocating the skin.
7. Cross-Hatched Portrait Fragment on the Collarbone
Personal observation: collarbone sketch fragments read like jewelry when placed with negative space. Pain is moderate and the session is often under two hours. Tell the artist to avoid heavy saturation near the bone because it can raise scabbing. At six months the texture settles and light cross-hatching becomes subtle. A mistake is over-detailing a small collarbone piece. Pair with a thin chain pendant necklace to sit just above the script without competing. Sensitive placement note: wear a wide-neck shirt you can shift for the session.

8. Stipple-Shaded Mini Landscape on the Calf
Aging and healing lead: stipple shading gains texture with time and often looks richer at year two than at six months. The calf is low pain and the session usually runs under ninety minutes. Ask for denser dots near shadows and more open stippling in highlights to preserve depth as it softens. A common mistake is packing too many dots in a small patch which clogs over time. For showing it off, wear rolled-up jeans or ankle boots that expose the calf and let the art show while keeping the rest covered.

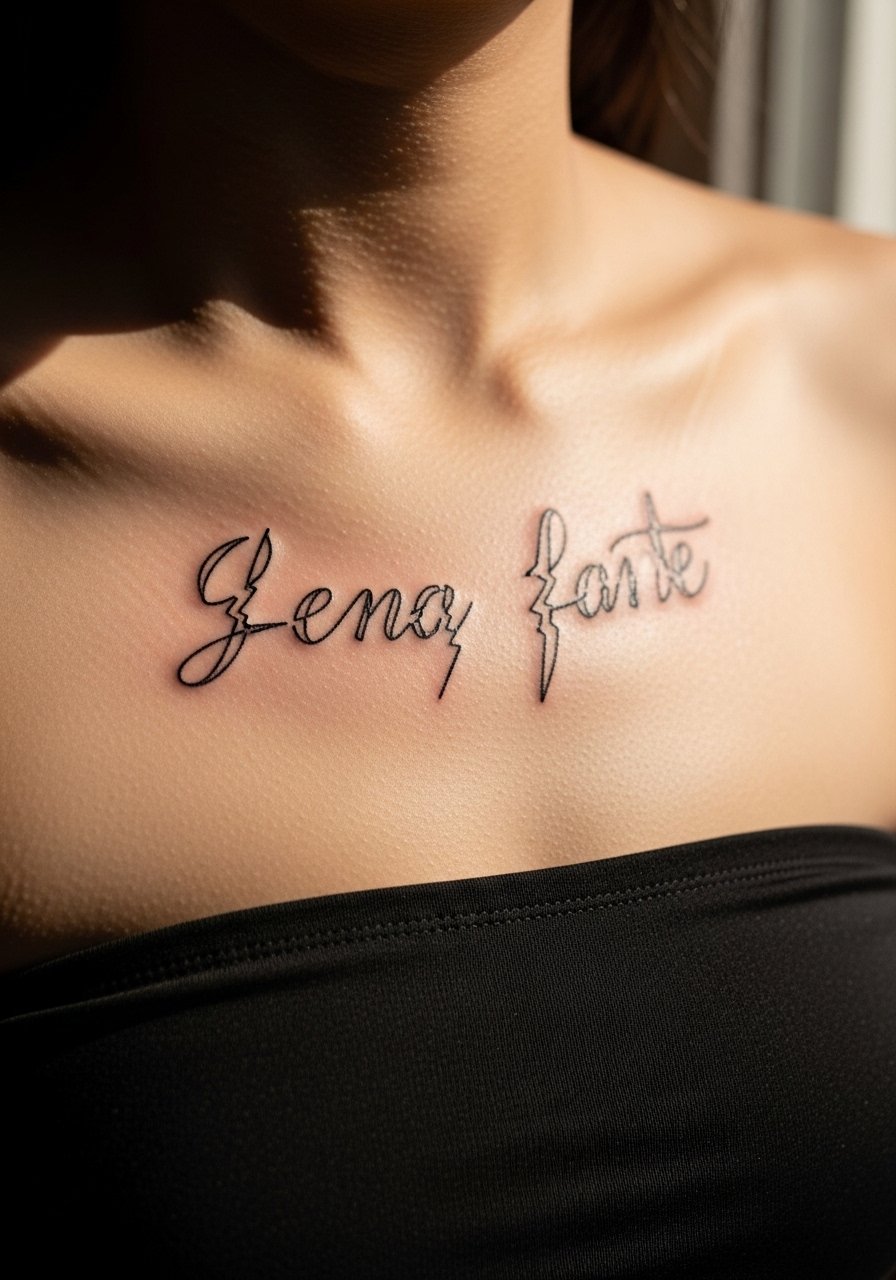
9. Broken Line Script Over the Sternum
Consultation lead: bring the exact wording and the preferred spacing to your artist. Sternum work is sensitive and sits near clothing lines, so a fitted bandeau helps during the session. Expect sharp pain and sessions split into short passes. The sketch treatment here should favor open letter spacing to avoid letters blurring together as the sternum moves with breathing. Cultural note: for phrases with cultural origins pick respectful variations instead of direct replicas. For the session, wear a bandeau top so only the immediate area is exposed.
10. Sketch-Style Floral Half-Sleeve on the Outer Arm
Mistake lead: the biggest error with half-sleeves is trying to cram every reference image into one piece. Choose a main motif and let the sketch lines imply the rest. Pain is moderate and sessions are multiple shorter appointments. At six months the sleeve starts to read as a composition rather than individual stems, and touch-ups at year three keep edges crisp. In consultation, specify overall flow and where you want negative space. For showing it off, roll up a linen shirt sleeve to the elbow.

11. Abstract Scribble Under the Lower Back
Visual impact lead: lower back sketches can look like a draft sketch anchored to clothing lines. Sessions are low to moderate pain and sizing matters for graceful aging. Tell the artist to keep strokes horizontal to mirror natural waist movement. A common mistake is centering too low where jeans or belts rub the tattoo frequently. For showing it off, high-waisted styles and an open-backed tank complement the area. Wear a tank top with high-waisted pants for the session and afterward.

12. Fine Line Botanical Sleeve Accent on the Inner Bicep
Pain warning lead: the inner bicep is tender, especially near the armpit. But a sketchy botanical accent here can sit well in the flow of a sleeve. Session time is moderate. Ask for spaced linework and minimal dense shading to avoid blowout. The mistake is packing dense black into a narrow inner arm stripe. For the session, wear a loose tank top and be ready to keep the arm raised slightly. Sensitive placement note: expect extra care for stretching and aftercare.

13. Broken Geometry on the Ankle
Consultation lead: small geometric sketches on the ankle need clear spacing and bold anchors so they do not dissolve into the skin texture. Pain is brief and sharp. Sessions are short. The most common mistake is asking for complex geometry at ankle scale. For the session, wear footwear or pants you can shift easily and pair healed work with sandals or a minimalist anklet to frame the piece without crowding it.

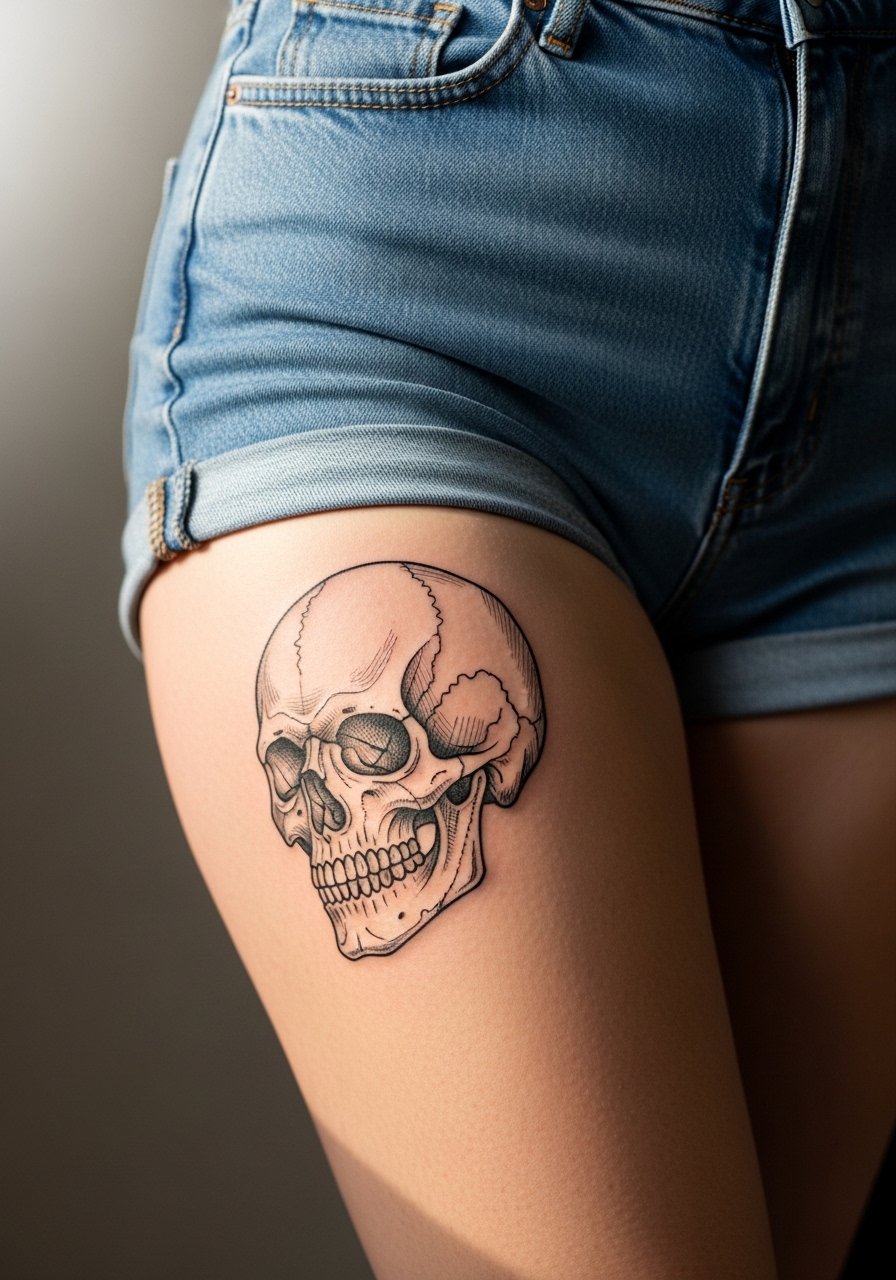
14. Cross-Hatched Skull on the Upper Thigh
Personal observation: the upper thigh tolerates dense cross-hatching better than flashier color because it sees less friction. Sessions are low to moderate pain and allow longer passes. Ask the artist to use gradual build-up so the cross-hatching keeps texture as it heals. At two years the piece keeps character if not over-saturated. For the session, wear high-waisted shorts so only the work area is exposed and you stay comfortable.
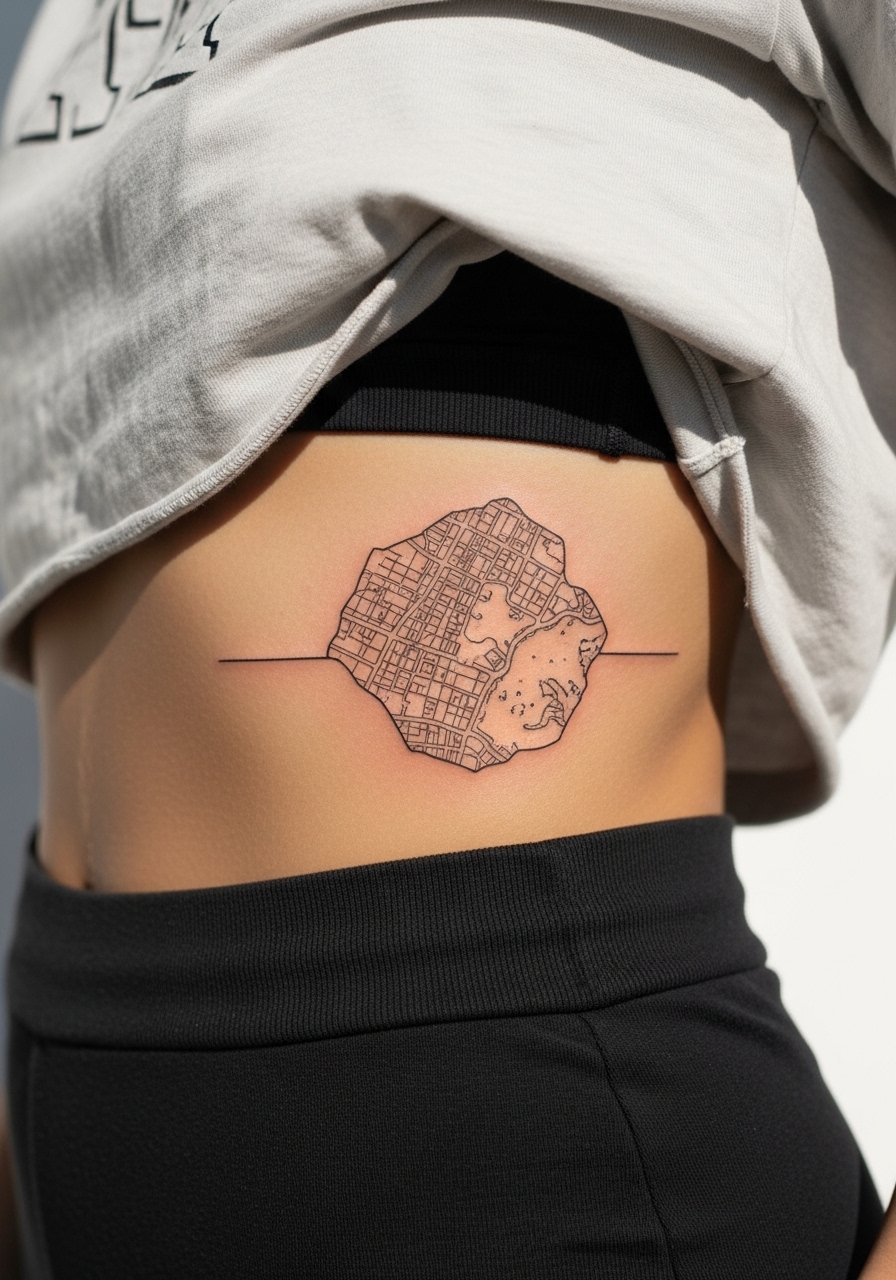
15. Minimalist Map Fragment on the Side of the Stomach
Aging/healing lead: stomach tattoos shift with weight changes, so sketch fragments need fewer tight curves. Sessions are moderate pain and often split. Tell the artist you want broad strokes and let the contour of the body define edges. Common mistake is requesting tiny landmarks that lose detail quickly. For the appointment wear a cropped tee and high-waisted bottoms so only a narrow strip is exposed. Sensitive placement note: this area needs an experienced hand for consistent depth.
16. Lightly Sketched Constellation on the Shoulder Blade
Visual impact lead: the shoulder blade gives the illusion of floating ink when sketched lightly. Pain is low and session time is under an hour for small constellations. Ask for slightly bolder anchor stars to preserve pattern over time. The common mistake is making the constellations too faint which can disappear against sun exposure. For showing it off, wear an open-back blouse and apply regular sun protection once healed.

17. Scribbled Linework on the Side Neck
Controversy lead: sketch work on the side of the neck splits opinion. One camp warns about visible scarring and career impact. The other camp emphasizes correct depth and placement to minimize issues. Ask your artist how they manage texture and scarring in that area. Sessions are higher on pain and shorter in duration. The mistake is rushing a neck sketch without a conservative stencil check. For session wear, choose a wide-neck shirt you can pull aside. Sensitive placement note: neck work requires a portfolio of healed neck pieces.

18. Sketchy Wave on the Ankle Bone
Pain warning lead: the ankle is close to bone and the sting is sharp. Keep the wave design simple and avoid dense shading. Sessions are brief. Ask for a single confident stroke with a few anchor dots for longevity. At six months the stroke will soften but still read if given room. For showing it off, try sandals or rolled pants and a beaded anklet to highlight the area.

19. Fragmented Botanical on the Upper Arm
Personal observation: upper arm fragments let artists build around muscle contours and age with the body. Pain is low and sessions are short. Ask for a composition that follows muscle flow rather than forcing symmetry. The common mistake is centering details on a curve that distorts when you move. For showing it off, roll sleeves to the mid-bicep or wear a sleeveless tee to let the sketch breathe.

20. Scribbled Script Along the Spine
Decision-pressure lead: getting a spine line means sitting straight for long passes. The sketch script here should be spaced wider than you expect so it does not merge along the vertebrae. Pain is variable depending on proximity to bone. Sessions are often split into passes. The mistake is choosing tiny lettering. For showing it off, wear open-back tops that reveal the length without exposing other areas. Sensitive placement note: spine work needs an artist experienced with midline symmetry.

21. Loose Doodle Fox on the Calf Pocket
Consultation lead: tell your artist the exact amount of negative space you want around the doodle. Calf pockets tolerate motion lines and keep sketchy texture intact. Pain is low and sessions are comfortable seated. At two years the doodle should keep personality if not overfilled. For showing it off, wear culottes or cropped pants or boots that let the calf peek through.

22. Thin Single-Stroke Heart on the Chest
Aging/healing lead: chest skin moves and stretches, so single-stroke sketches need extra spacing. Sessions are moderate and pain varies by chest anatomy. Ask for slightly thicker main strokes and lighter filler marks. The mistake is insisting on the thinnest line possible. For the session, wear a wide-neck shirt you can pull aside so only the area shows. Sensitive placement note: chest pieces sit near clothing lines so plan wardrobe accordingly.

23. Scribble Rose on the Back of the Hand
Mistake lead: back-of-hand sketch tattoos are visible and face more friction than many people predict. Expect faster fading and frequent touch-ups. Pain is sharp and sessions are short. Ask your artist to avoid tiny stems and to place the rose where daily wear is minimal. For showing it off, pair with a simple leather bracelet instead of rings that compete with the petals. Note on careers: visible hand tattoos still carry professional consequences in some workplaces.

24. Scribbled Wave Band Around the Wrist
Personal observation: wrist bands that mimic ink sketching work best when slightly irregular in width. Pain is moderate and sessions brief. Ask the artist for intentional variation rather than perfect symmetry. At two years the band will read as texture if not over-inked. For the session, wear a loose button-down shirt and show the healed band with stacked minimal bracelets for a layered look.

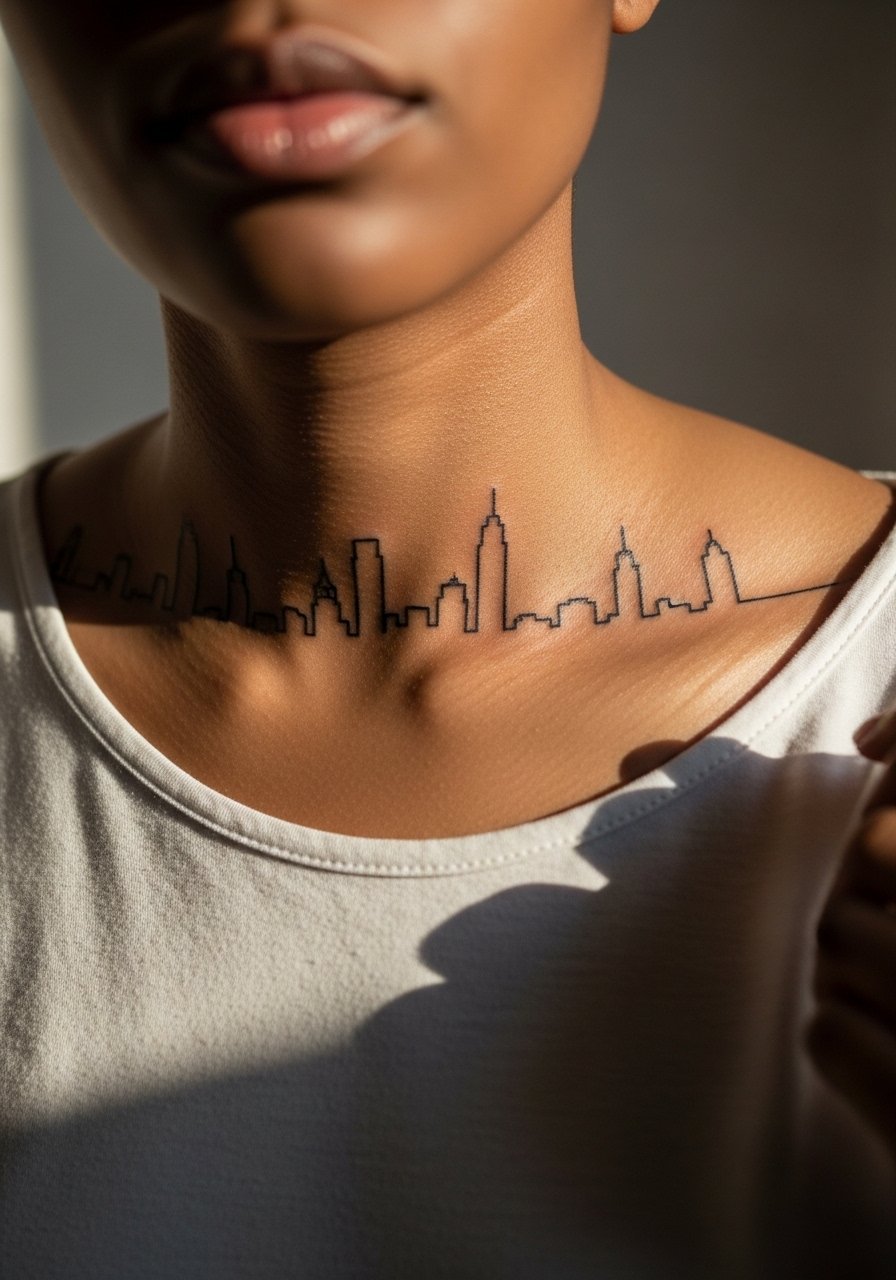
25. Minimalist Skyline Across the Collarbone
Decision-pressure lead: collarbone skylines need room to breathe and clear negative space between buildings. Pain is moderate and session time is usually under ninety minutes. The common mistake is compressing too many skyline details into a narrow strip. For the session wear a wide-neck shirt so only the collarbone shows. For nights out, pair the healed piece with layered delicate necklaces that follow the same horizontal line.
26. Fragmented Botanical Behind the Ear
Consultation lead: behind-the-ear sketches must be described as on the skin behind the ear, below the hairline so placement stays correct. Pain is low but the area is sensitive. Ask the artist for micro lines that follow hair growth so it looks intentional. A common mistake is expecting a large design in that tiny zone. For the session wear hair pulled up and a thin hair tie so the artist can access the patch cleanly. Sensitive placement note: behind-the-ear work requires precise framing under the hairline.

27. Loose Sketch Compass on the Outer Calf
Final personal observation lead: compasses in sketch form read as motion pieces on the outer calf and keep a map-like charm over time. Pain is low and session length is comfortable for standing or seated work. Ask for bold anchor points and lighter directional strokes so the center does not clog. At three to five years the anchors may need a touch-up to keep orientation sharp. For showing it off, wear cropped trousers or a pair of sandals that reveal the outer calf.

Frequently Asked Questions
Q: Will fine sketch lines blur faster than bolder blackwork on my forearm?
A: Sketch lines usually soften faster than bold blackwork because they rely on sparse strokes that can merge as the skin shifts. On the forearm you have more room, so slightly bolder anchors and spacing make a big difference. Expect a touch-up around year three for delicate work, and ask your artist how they space lines for longevity.
Q: How should I dress for a ribcage or sternum sketch session?
A: For ribcage or sternum sessions wear a fitted sports bra or bandeau that you can lift just enough to expose the area. That keeps the rest of your torso covered and makes passing short sessions easier. Bring layers for after the session because the area can feel chilled.
Q: Are hand and finger sketch tattoos worth it if they need frequent touch-ups?
A: They are worth it if you accept maintenance. Fingers and hands face constant washing and friction so expect touch-ups at one to three years. Keep designs simple and ask for slightly thicker strokes to delay blurring. Consider placement on the side of a finger instead of the pad for longer life.
Q: What should I ask about during consultation for a sketch-style ribcage piece?
A: Ask the artist how they handle depth on stretch-prone skin and request a stencil check in different body positions. Also ask about their touch-up policy for torso work. That conversation reveals their experience with sketches on moving skin.
Q: Do sketch-style pieces require different sun protection after healing?
A: All healed tattoos benefit from sunscreen, but sketch-style work with fine lines shows sun damage faster. Use a broad-spectrum SPF where the tattoo is exposed and cover up with clothing when you can. Applying sun protection consistently is one of the simplest ways to keep sketch lines readable.
Q: How do I find an artist who understands sketch-style techniques if I do not want a named recommendation?
A: Use local shop directories, portfolios on shop websites, and convention listings to find artists who post healed sketch work. Search hashtags and subreddit threads focused on sketch tattoos to see healed examples and discover artists who show both fresh and healed photos. Schedule a consultation and bring clear references that show the exact line density you want.
