
Fine line willows are everywhere on saved boards right now, but what holds up and what hollows out over time are two different stories. Expect decisions about placement, line spacing, and contrast to affect whether your branches look delicate or turn into a muddy wash years down the line. Below are 21 geometric weeping willow ideas, with notes on aging, what to tell your artist, session reality, and how to show them off.
1. Minimal Geometric Willow on Inner Forearm
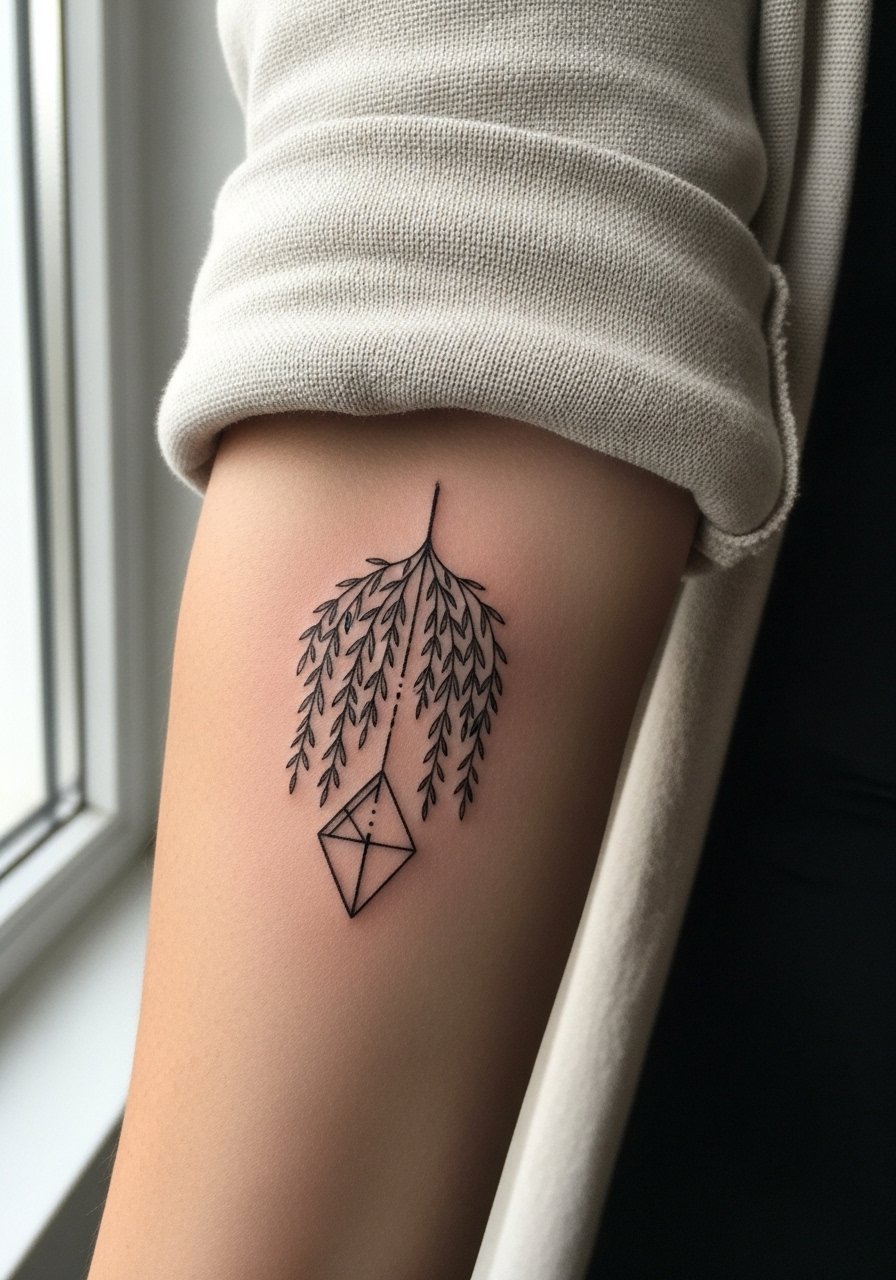
I’ve seen this placement age well when artists allow spacing between the thin branch lines. Ask for slightly heavier primary stems and airy negative space in the drooping leaves so the pattern keeps definition at year three and five. Fair warning, the inner forearm is sensitive for some people but typically a manageable pain level. The session runs about one to two hours depending on detail. A common mistake is making the twig work too fine and dense, which leads to merging over time. For showing it off, wear a rolled-up linen shirt in neutral tones so the delicate geometry reads clearly against your skin.
2. Micro-Geometric Willow Around the Wrist
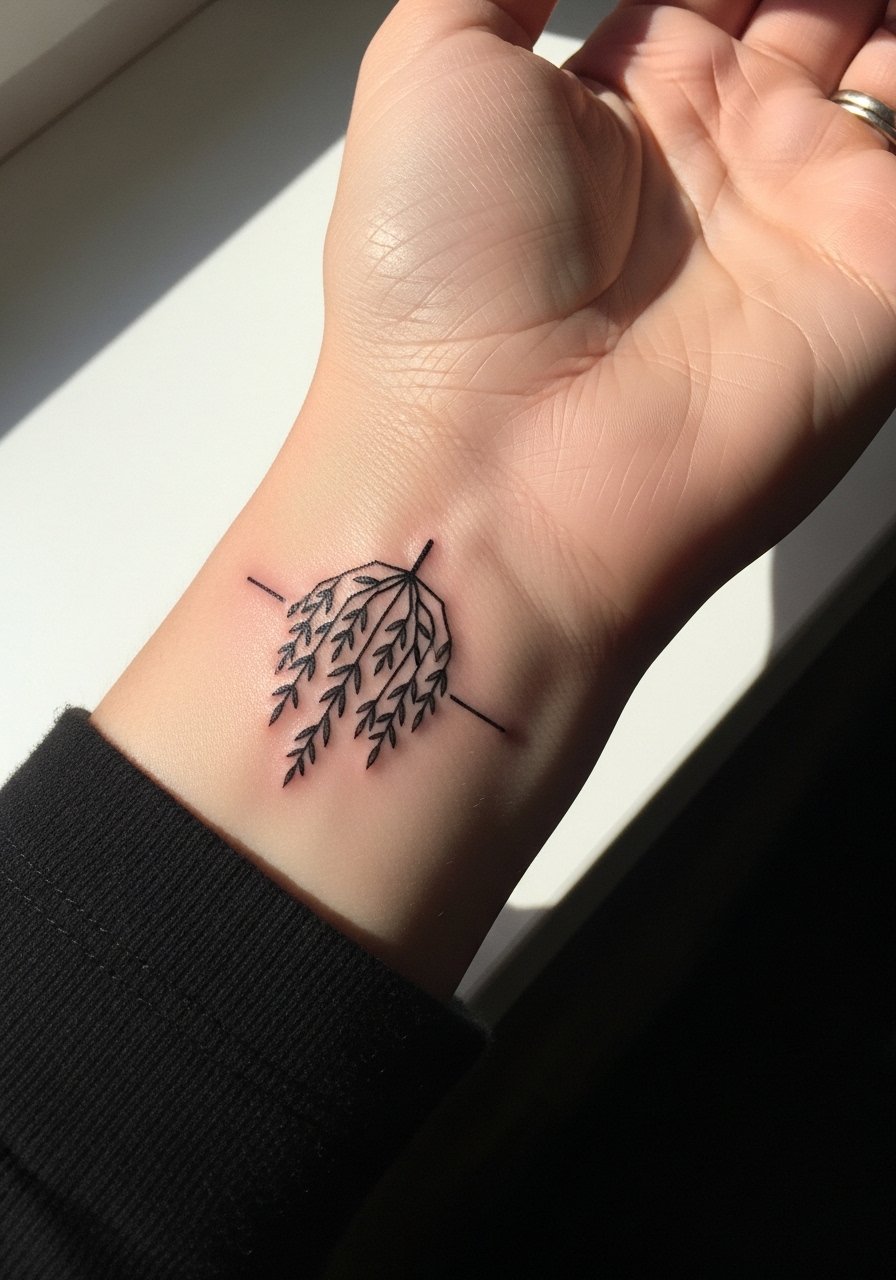
Personal observation tells me wrist wraps need breathing room. Tiny repeating branch motifs look charming initially but friction from sleeves and washing wears them quickly. When you consult, ask for slightly thicker anchor points and intermittent negative spaces between branches to slow blur. Expect a 45 to 90 minute session and a touch-up around year two for many people. The wrist is high friction, so plan wardrobe choices accordingly. Pair this design with a minimalist watch strap or thin bracelets that do not sit directly on the tattoo while it heals to preserve the linework.
3. Geometric Willow That Cascades Over the Ribcage
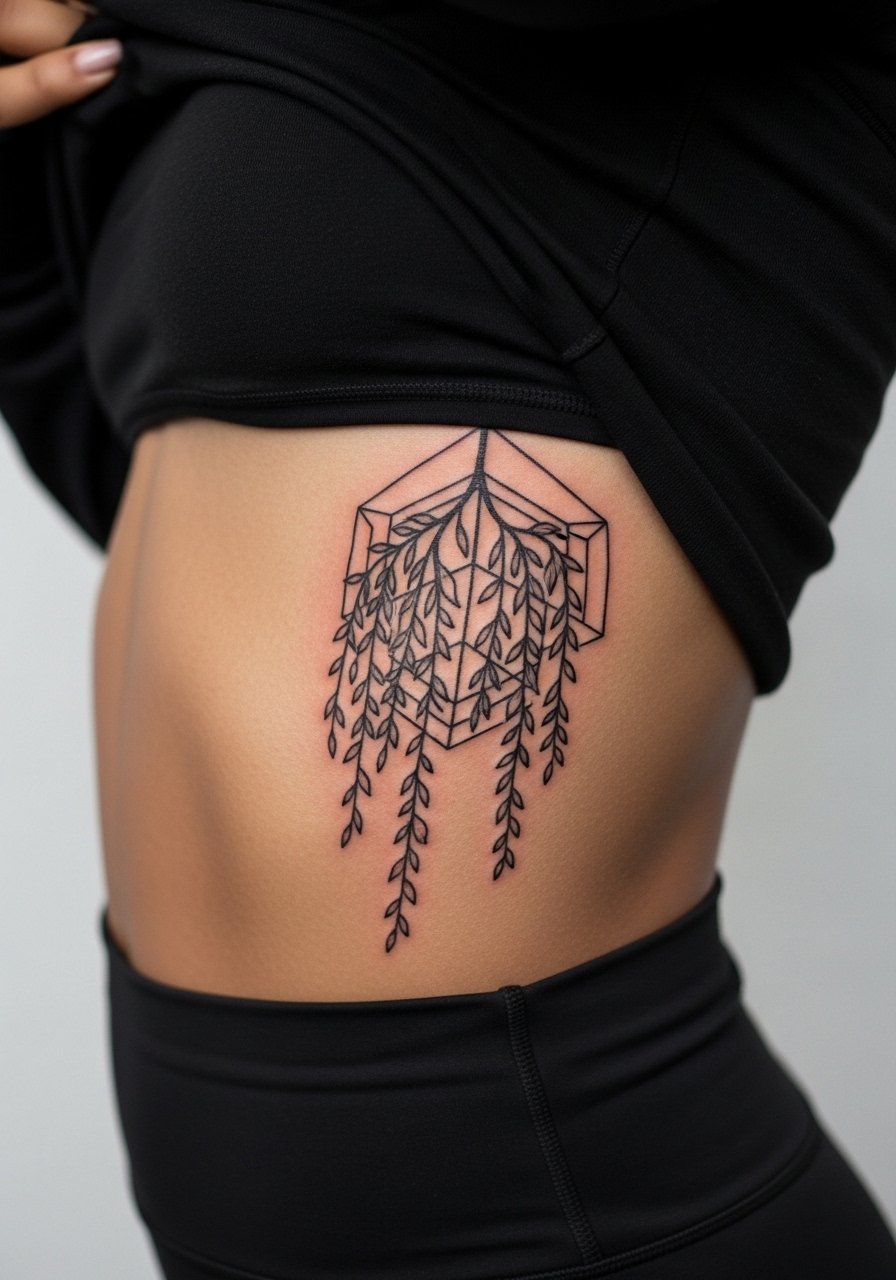
Fair warning about ribs, they register higher on pain scales for many people but the vertical flow of willow branches can be breathtaking there. Artists split on fine line on ribs. One camp says the skin stretch and periodic movement will blur the thin lines within two years. The other camp argues that with proper needle depth and spacing the design settles fine. Ask the artist how they space negative areas and how many passes they plan. Sessions can be longer and broken into two visits. For the appointment, wear a cropped athletic top you can lift slightly so the artist has steady access without exposing more than the ribcage area.
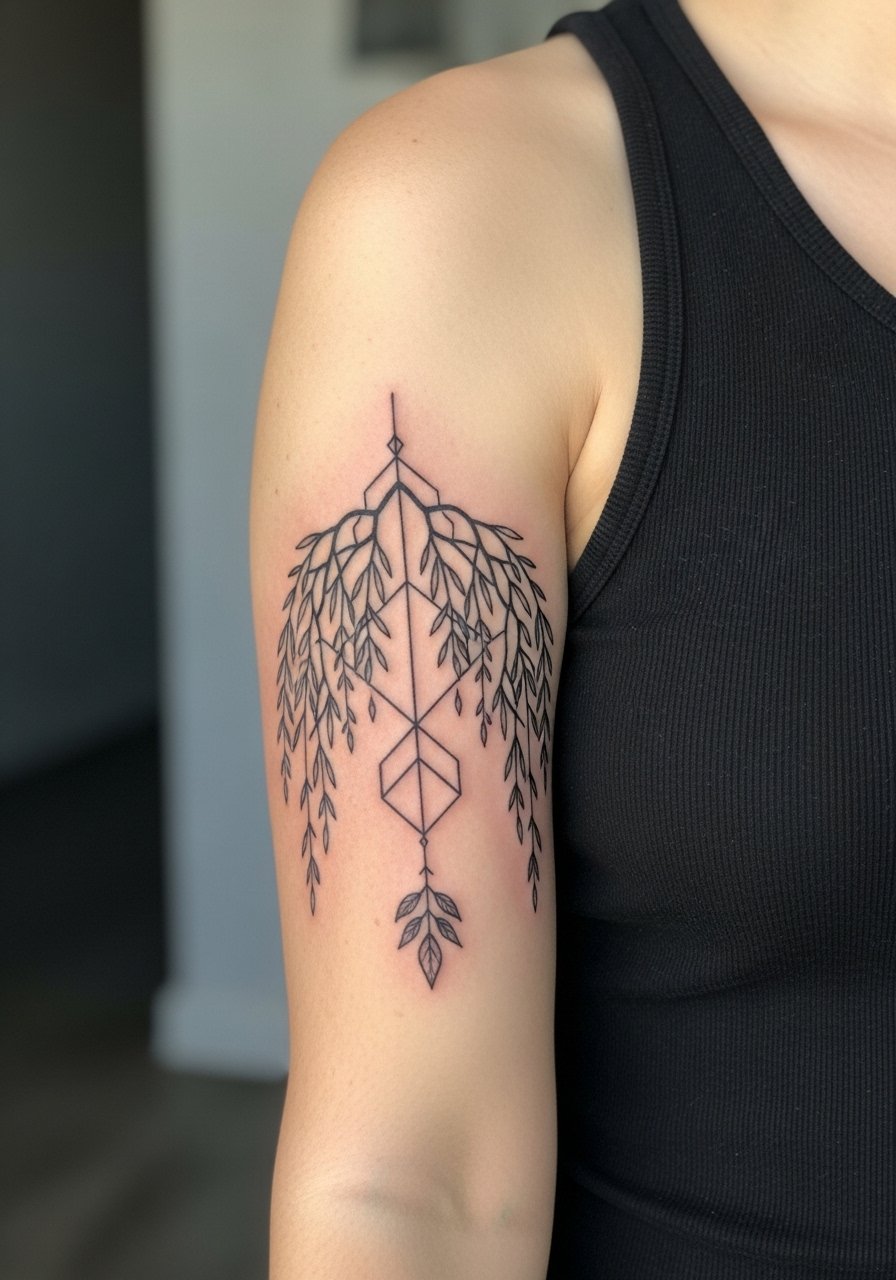
4. Geometric Willow Sleeve Accent on the Outer Bicep
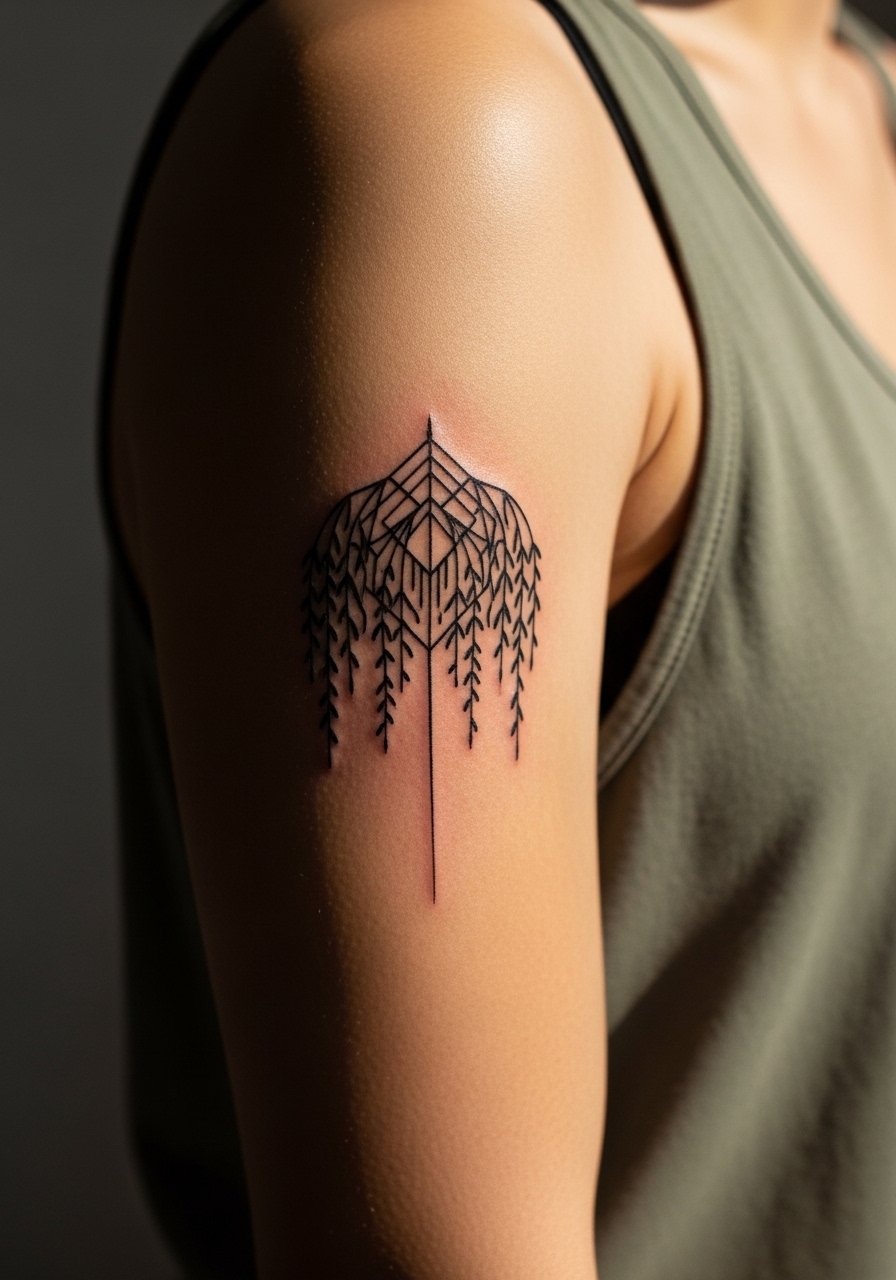
There is something about a willow branch wrapping the bicep that reads like motion even when you are still. For sleeves this works as a transitional motif between florals and geometric fills. Tell your artist you want bold main stems with stipple shading in the leaf clusters so the piece keeps contrast as the rest of the sleeve fades. Expect moderate pain and a two to three hour session for a medium-sized accent. The common mistake is packing too many micro-branches at the edge. For evenings out, roll a sleeve on a loose tank top to frame the wrap without crowding the arm.
5. Tiny Geometric Willow on the Side of a Finger
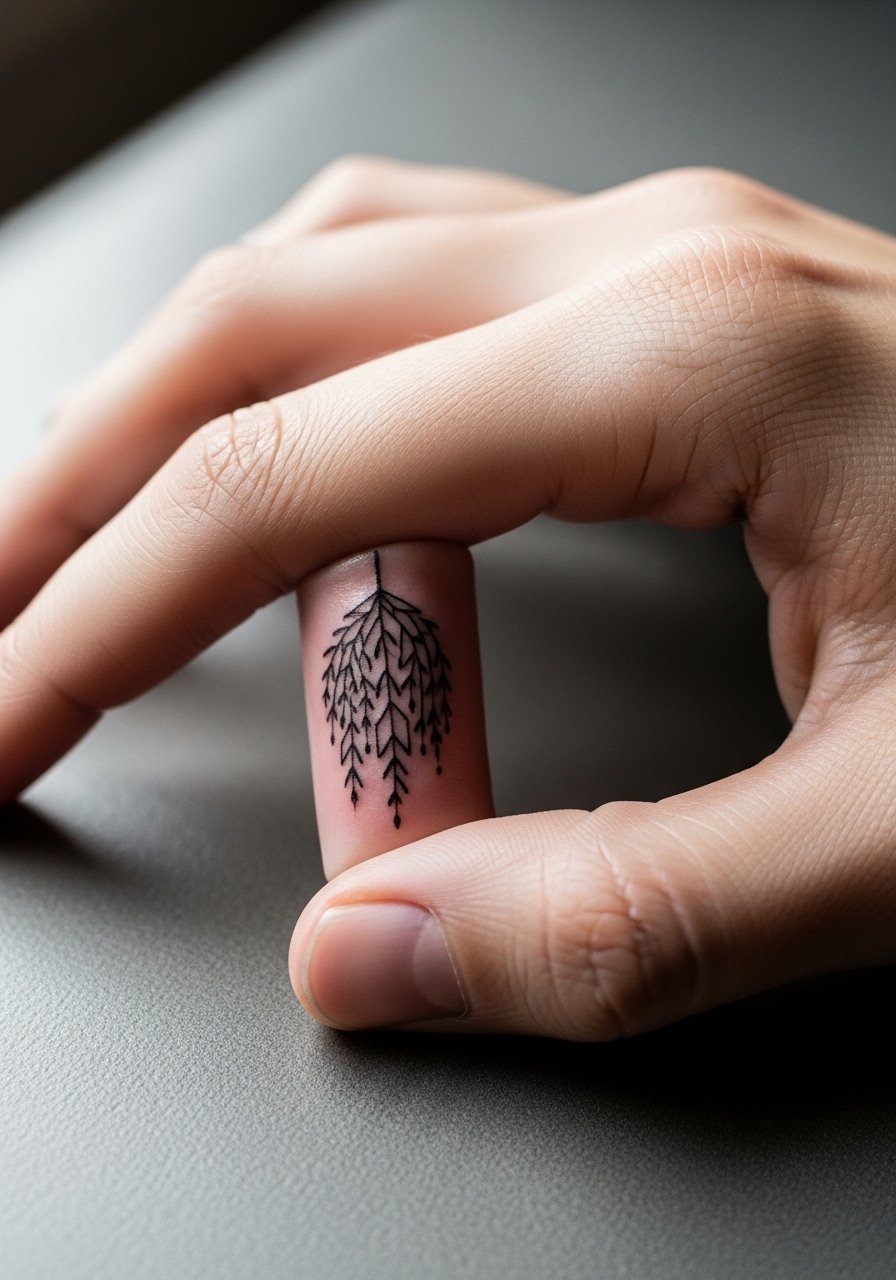
Mistake lead: finger tattoos are notorious for fast fading and touch-ups. The skin here is thin and exposed to constant washing and friction. If you want a willow on a finger, ask for simplified stems, fewer leaves, and slightly bolder outlines to buy time between touch-ups. Session time is short, usually under an hour, but expect touch-ups at year one and year three. Hand and finger tattoos can affect some job prospects, so consider your career trajectory before committing. During the session, a clean short-sleeve shirt helps the artist work without fabric in the way.
6. Geometric Willow Across the Collarbone
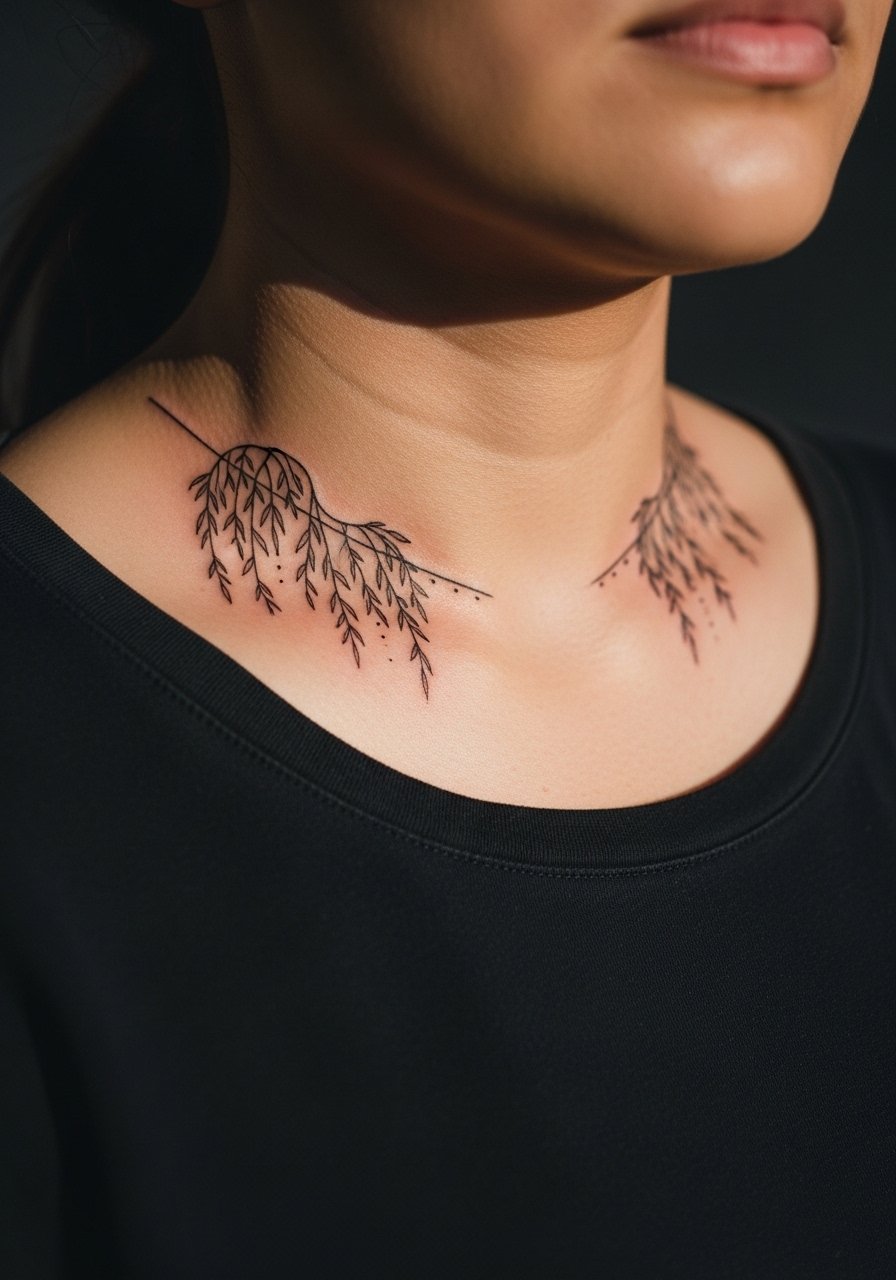
Consultation lead: when you sit down for a collarbone piece, bring photos that show how the lines follow the bone rather than cut across it. That alignment stops the design from looking compressed as the body moves. The collarbone is sensitive but short sessions work well. Expect an hour for a small to medium motif. A common aging issue is lines sinking into natural creases if the artist places branches too close to the joint line. For dresses and tops, pair this placement with an open-neck blouse to let the willow trace the collar without competing straps.
Studio Day Picks
The first six ideas above include wrists, forearms, ribs, and the collarbone, so these picks focus on session comfort and protecting delicate linework during the first week.
-
Stencil transfer paper kit. Lets you preview how the willow branches flow around curves, which is crucial for collarbone and rib placements.
-
Topical numbing cream. Applied as directed before a rib or collarbone session can reduce discomfort during longer passes.
-
Thin protective film roll. Great for small wrist and finger pieces that face constant hand washing and friction.
-
Fragrance-free body wash. Cleanses healing areas without stripping dye or irritating sensitive fine line areas on the forearm.
-
Aquaphor healing ointment. Thin layers help maintain moisture on narrow linework without clogging the needle channels during the first few days.
7. Geometric Willow Backpiece Spreading Over the Scapula
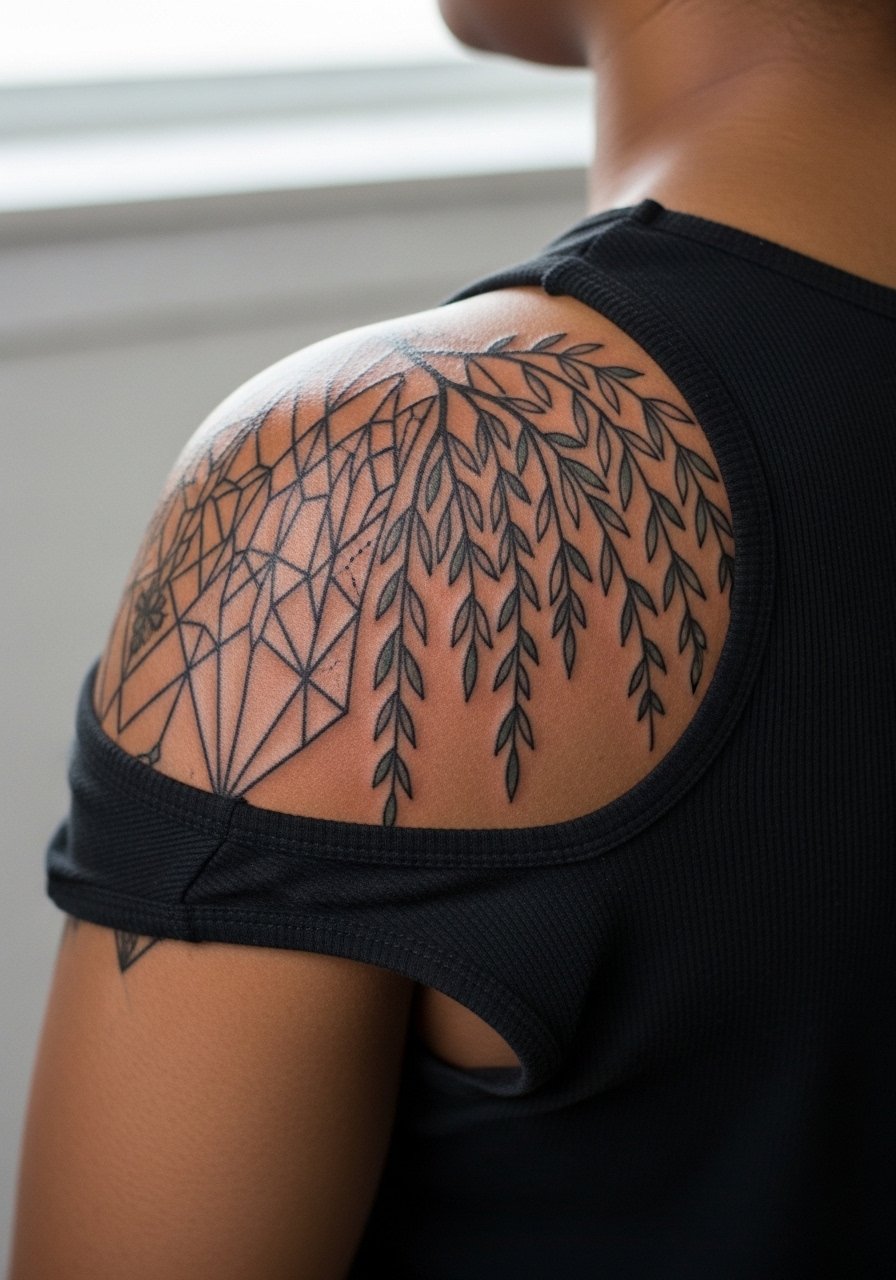
Visual impact lead: a scapula placement lets a willow breathe and move with the shoulder. For backpieces, ask for a plan of primary stems and secondary detail areas so the artist can stage sessions. Pain is moderate and sessions will be longer, often split into two. Expect the big stems to age well while micro-branches in shaded areas may soften, so request higher contrast and stipple shading rather than dense micro-lines. For session wear, a button-down shirt you can remove or pull aside helps keep the process sanitary and comfortable.
8. Geometric Willow Framing the Sternum
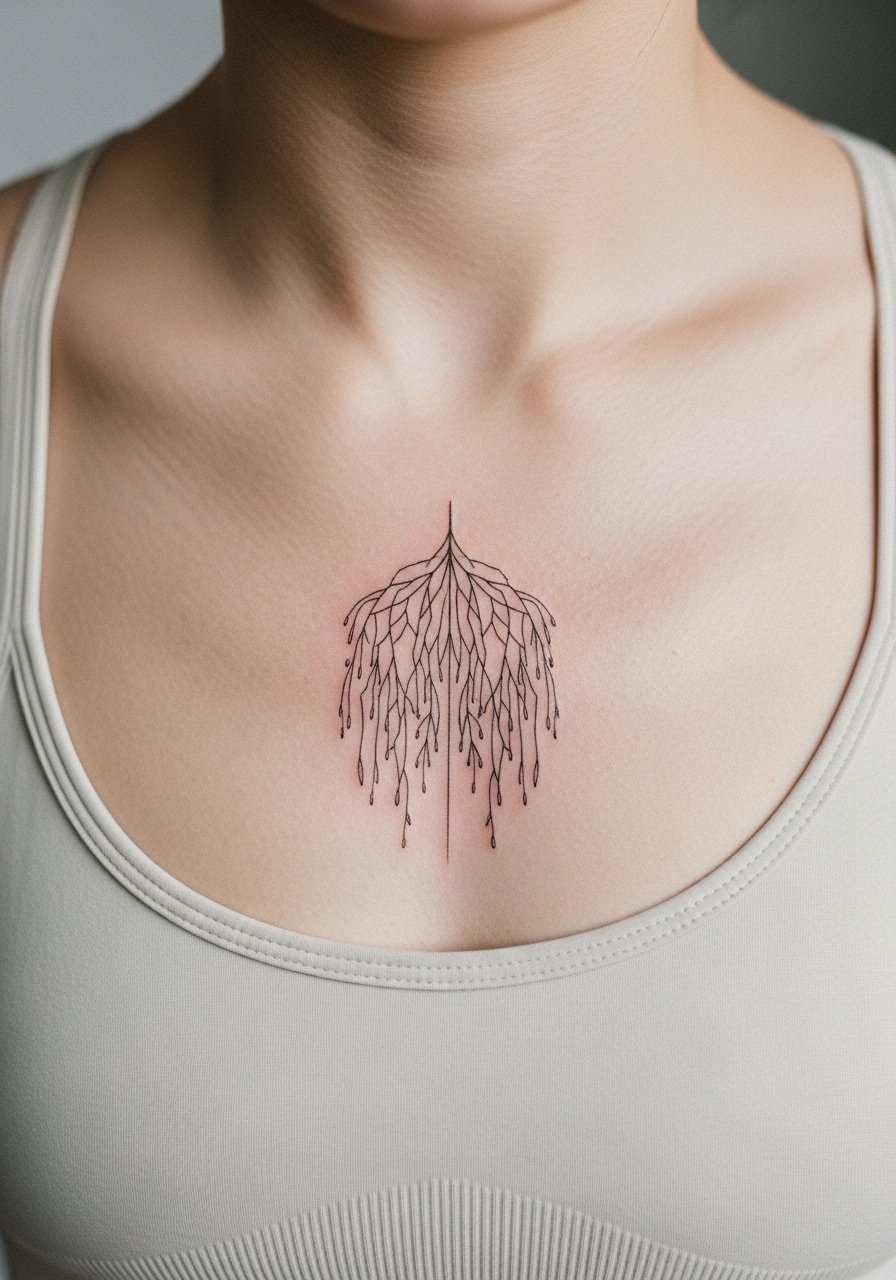
Aging/healing lead: sternum placements can blur if branches are too fine and packed. I recommend clean, slightly bolder stems radiating from a central point to hold over time. Sessions here are short to moderate but the area moves with breathing, so expect a one to two hour session and possibly a touch-up within three years. Sensitive placements like sternum need an artist experienced with chest work. For the appointment, wear a fitted sports bra so the artist can access the area while you remain covered.
9. Geometric Willow That Curves Over the Ankle

Pain warning: the ankle can be sharp for some people because of thin skin over bone. The willow motif works well when kept slightly larger than expected. Tiny branches on the ankle blur fast because of shoe friction. During consultation, ask for thicker anchor lines and fewer tiny leaf clusters. Sessions are usually under an hour. For wearing during healing, slip on flat sandals or roll pant cuffs so the band does not rub the area during the first week.
10. Geometric Willow Down the Spine
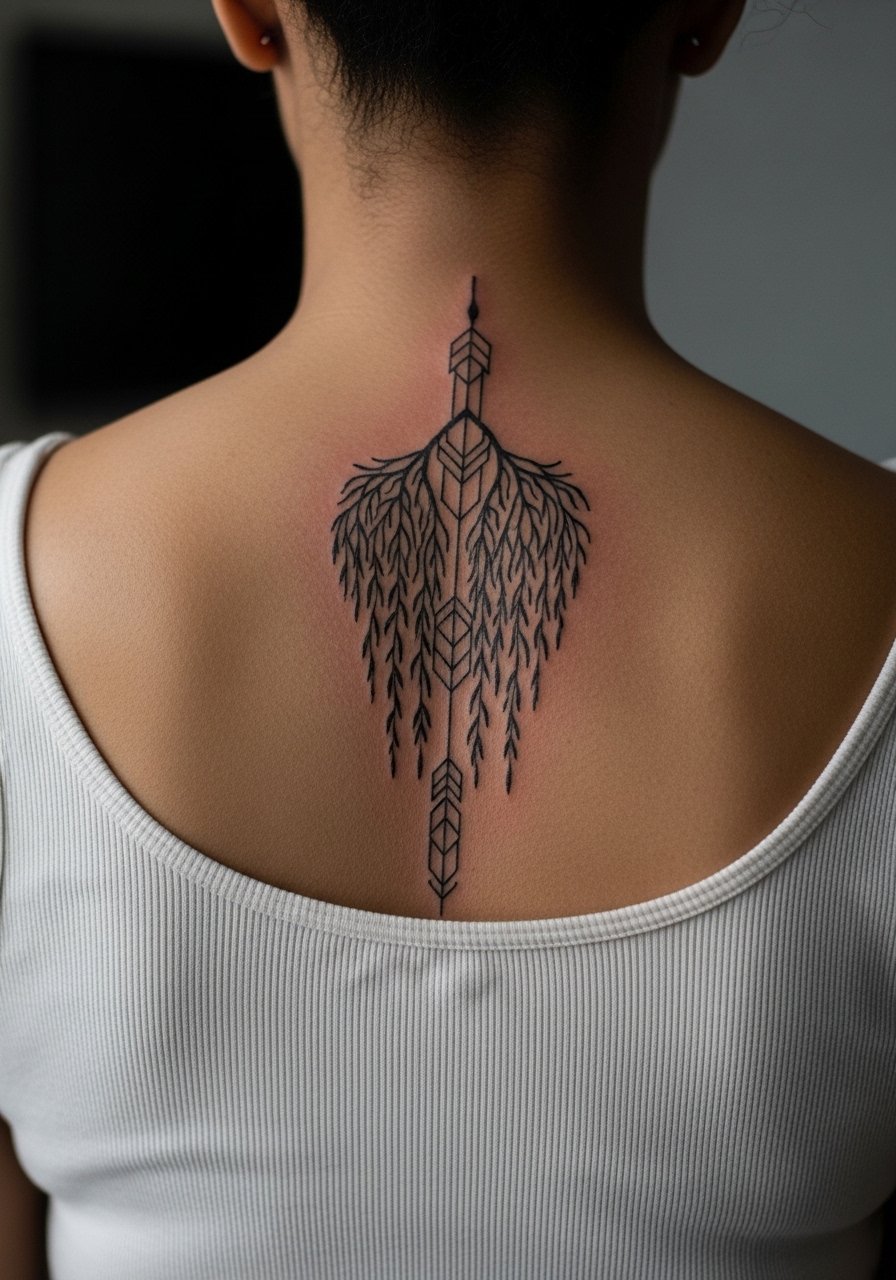
Mistake lead: clients often ask for excessive micro detail down the spine and regret the blurring later. For spinal pieces, favor rhythm and negative space. The spine moves with posture, so maintain a balance between thin stems and bold anchors. Pain varies along the spine but many find it more sensitive near the vertebrae. Expect a multi-hour session or two shorter appointments. For showing the work, open-back tops complement the vertical flow and make the willow the focal point.
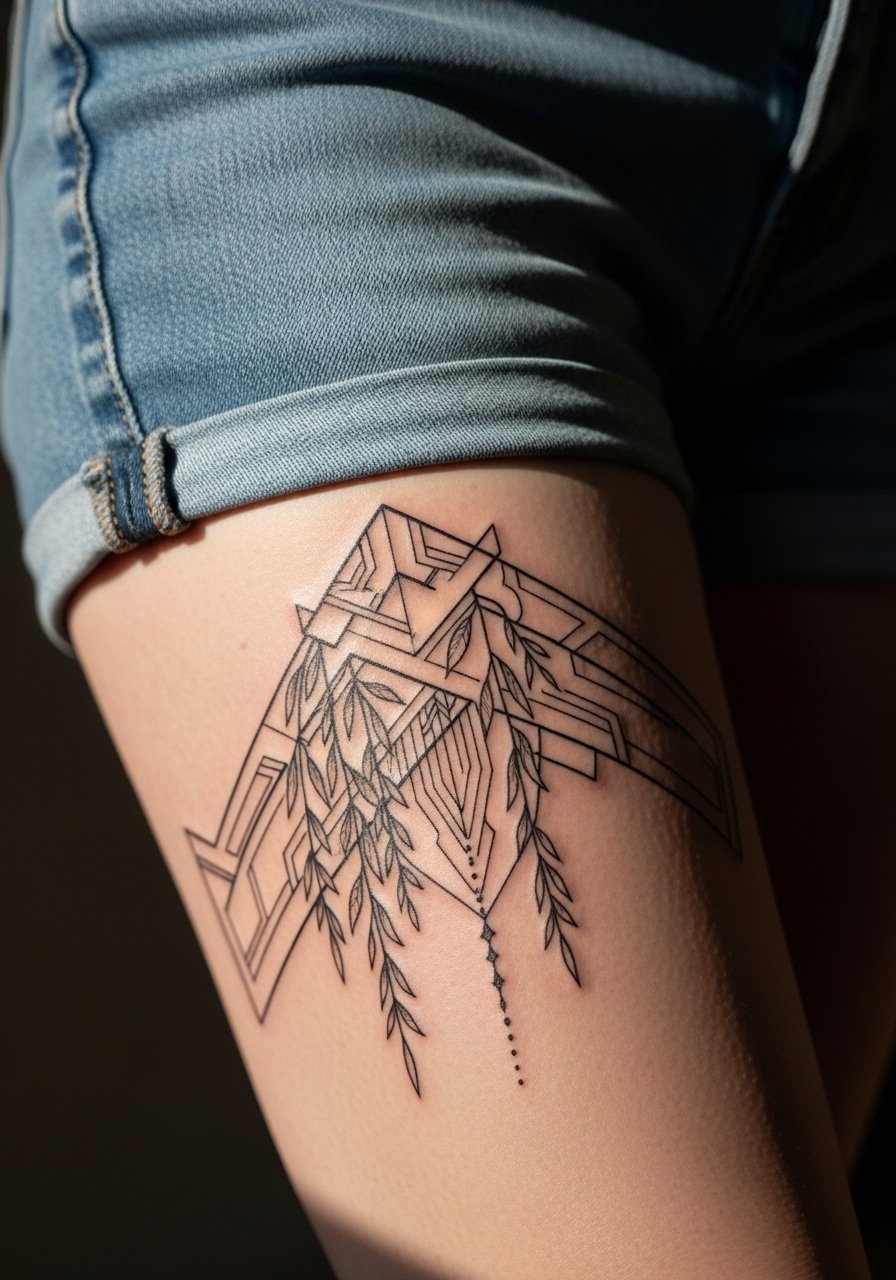
11. Geometric Willow as a Thigh Panel
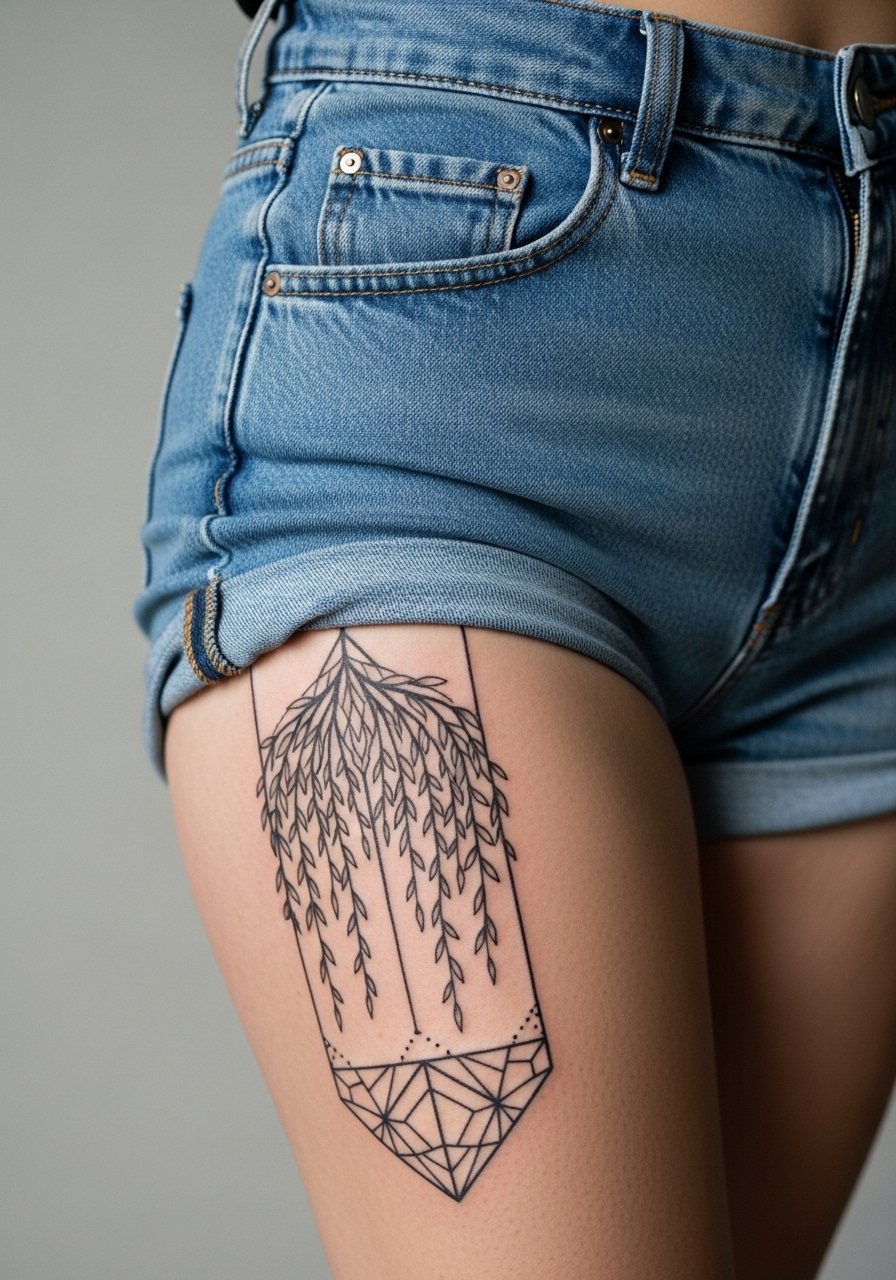
Aging/healing lead: thighs are forgiving for fine line detail because of lower daily abrasion. If you want high-density geometry, the outer thigh is a good canvas. Expect moderate pain and a session of one to three hours depending on scale. Tell your artist if you plan weight fluctuation or muscle changes, because that affects how the branches will stretch. For the session, wear high-waisted shorts so you can expose only the working area while staying comfortable.
12. Geometric Willow Over the Lower Calf
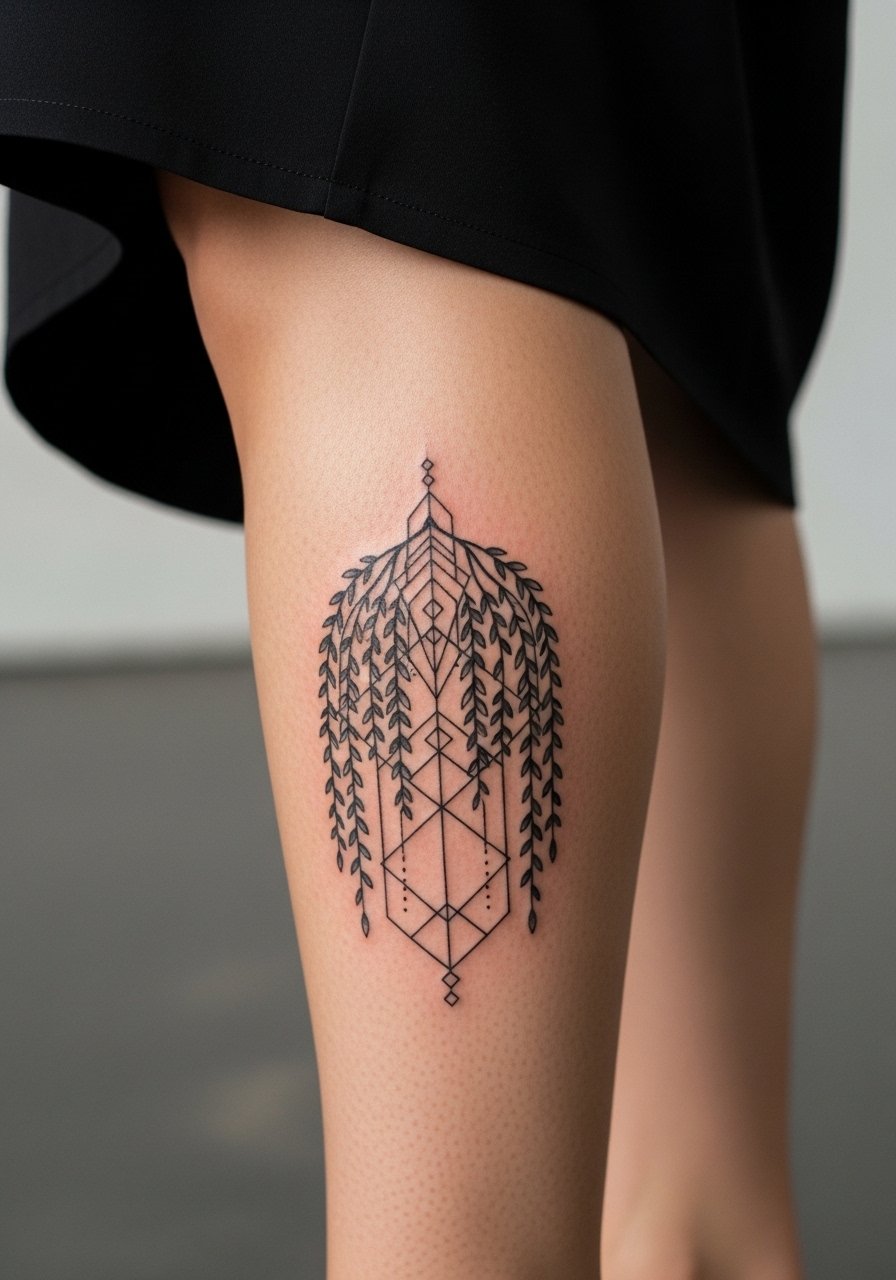
Personal observation lead: calf placements are excellent for readable vertical designs. The lower calf sees less daily friction than the ankle and ages predictably. Ask for tapered branch endings and some dot work shading near the roots for texture that keeps reading as the pigment softens. Sessions are moderate in length and touch-ups are uncommon if the original saturation is solid. Pair this placement with cropped trousers or a midi skirt to show the willow when you want it visible.
13. Geometric Willow That Wraps the Shoulder Blade Edge
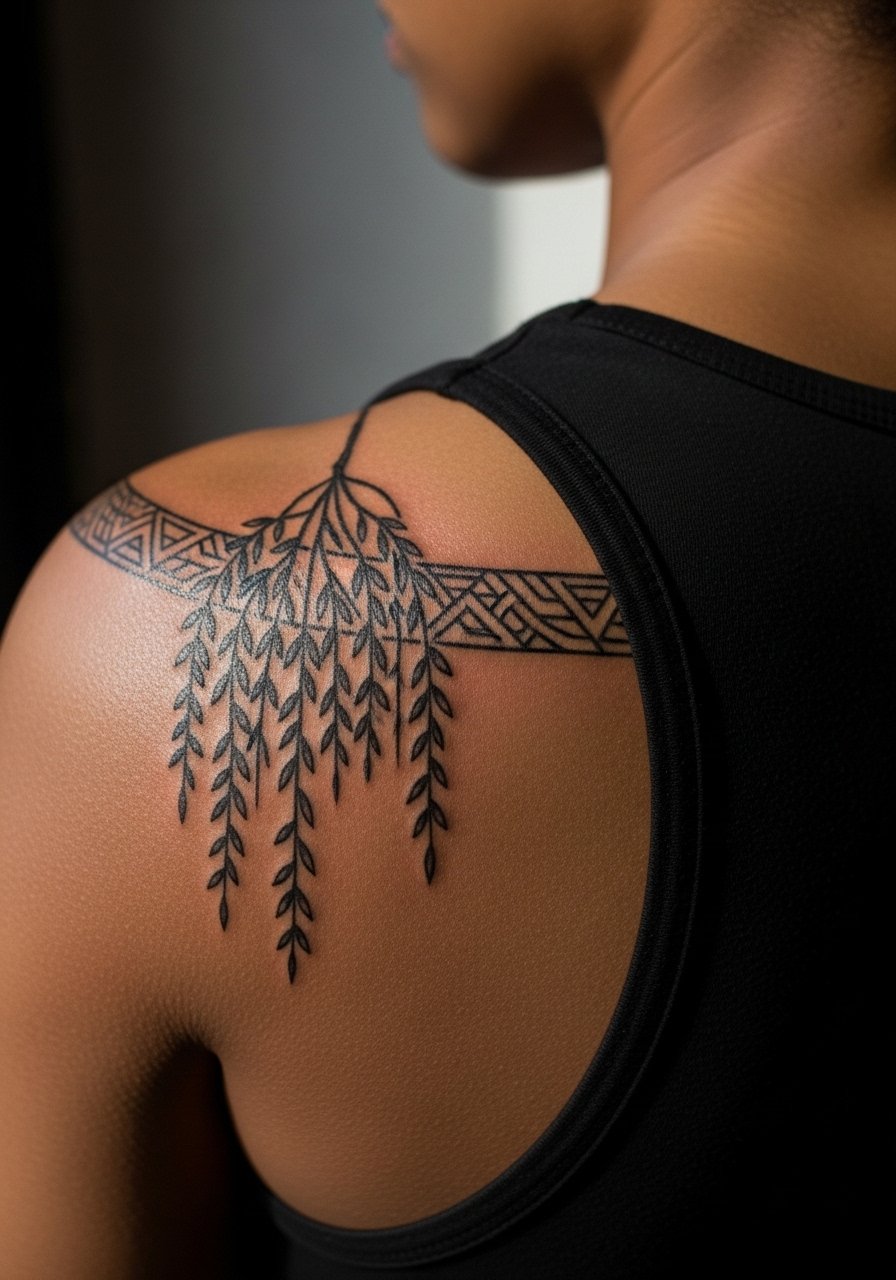
Consultation lead: when wrapping the shoulder blade edge, have the artist map how branches will read in both relaxed and raised-arm positions. The biggest mistake is cutting branches across natural musculature so the piece looks misaligned in movement. Sessions are moderate. For show-off styling, roll a strapless or thin-strap top and use a loose button-down shirt for casual framing that does not hide the flow.
14. Small Geometric Willow Behind the Ear
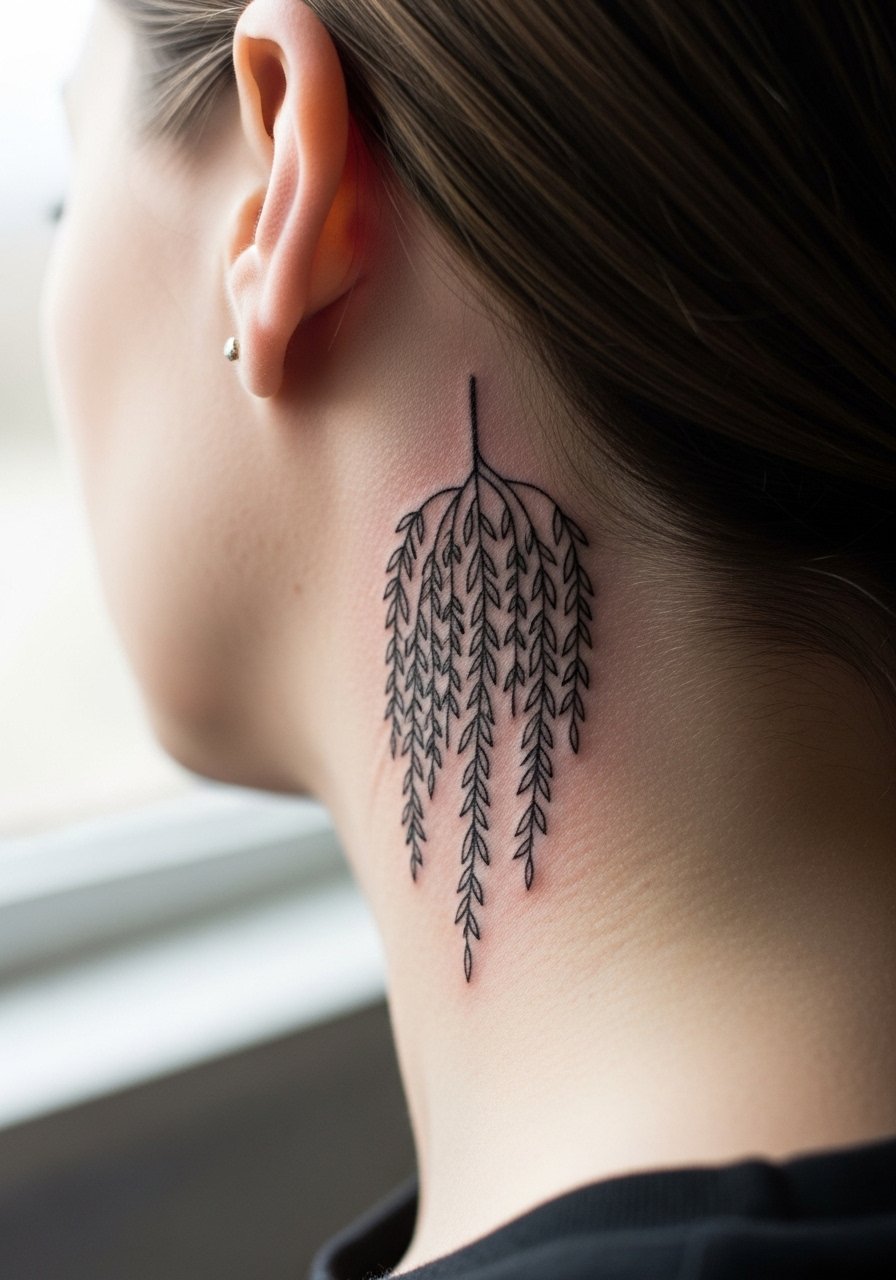
Pain warning lead: behind the ear is sensitive and requires precise stencil placement because the space is small. Never describe this as on the ear itself. Keep the willow minimal and ask for a single pass with conservative spacing so the tiny filigree does not merge. Sessions are short. Consider career visibility for neck fittings, as some workplaces still react to visible neck ink. For discovery, check local shop directories and convention portfolios to find artists experienced with small behind-the-ear work.
15. Geometric Willow Merging with Dot Work Mandala on the Upper Arm
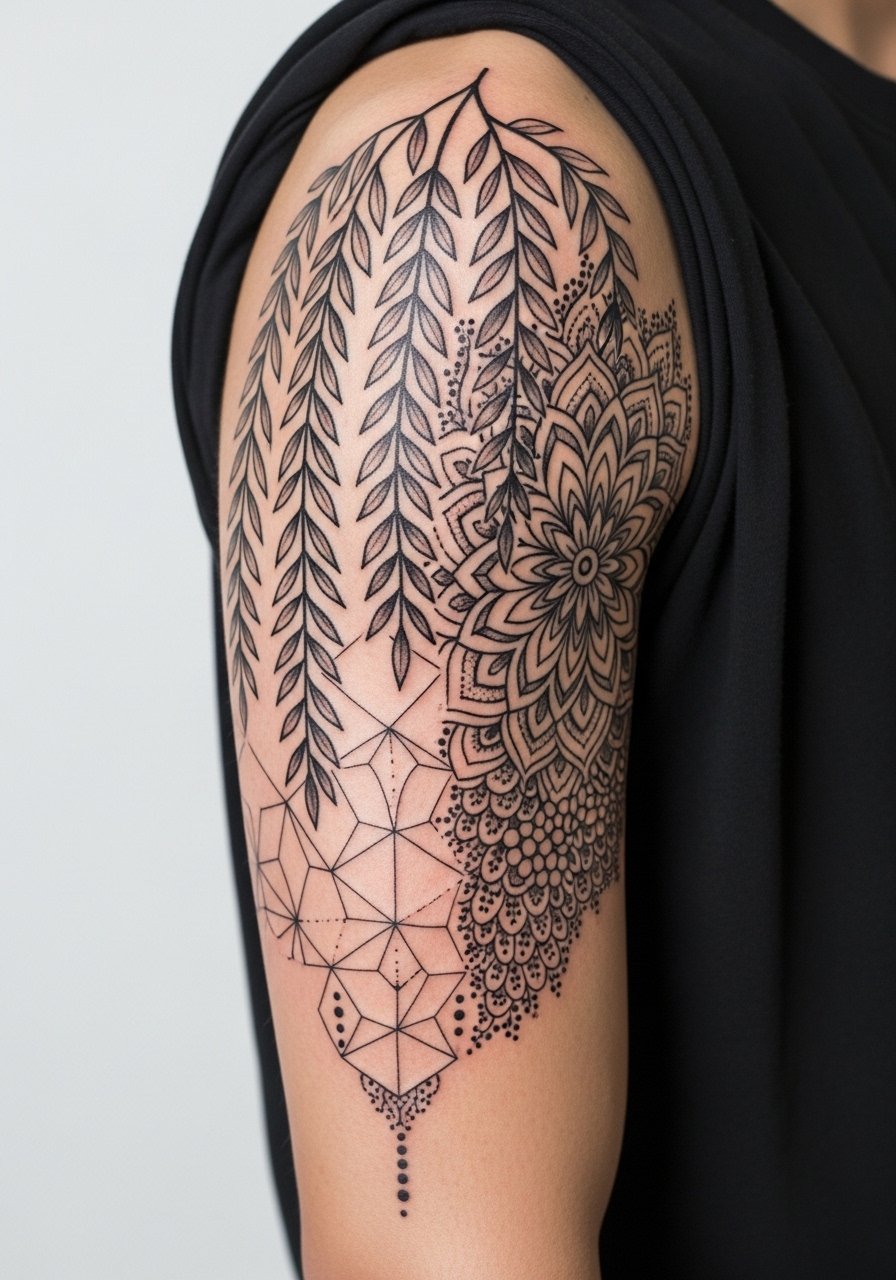
Visual impact lead: combining willow branches with stipple mandala textures creates a durable contrast. Tell your artist you want the mandala area done with dot work and the willow stems slightly darker to maintain a focal hierarchy. The upper arm tolerates denser detail and the design will age predictably. Expect two to three hour sessions for a seamless blend. For evenings out, a sleeveless blouse frames the combined work without covering the mandala.
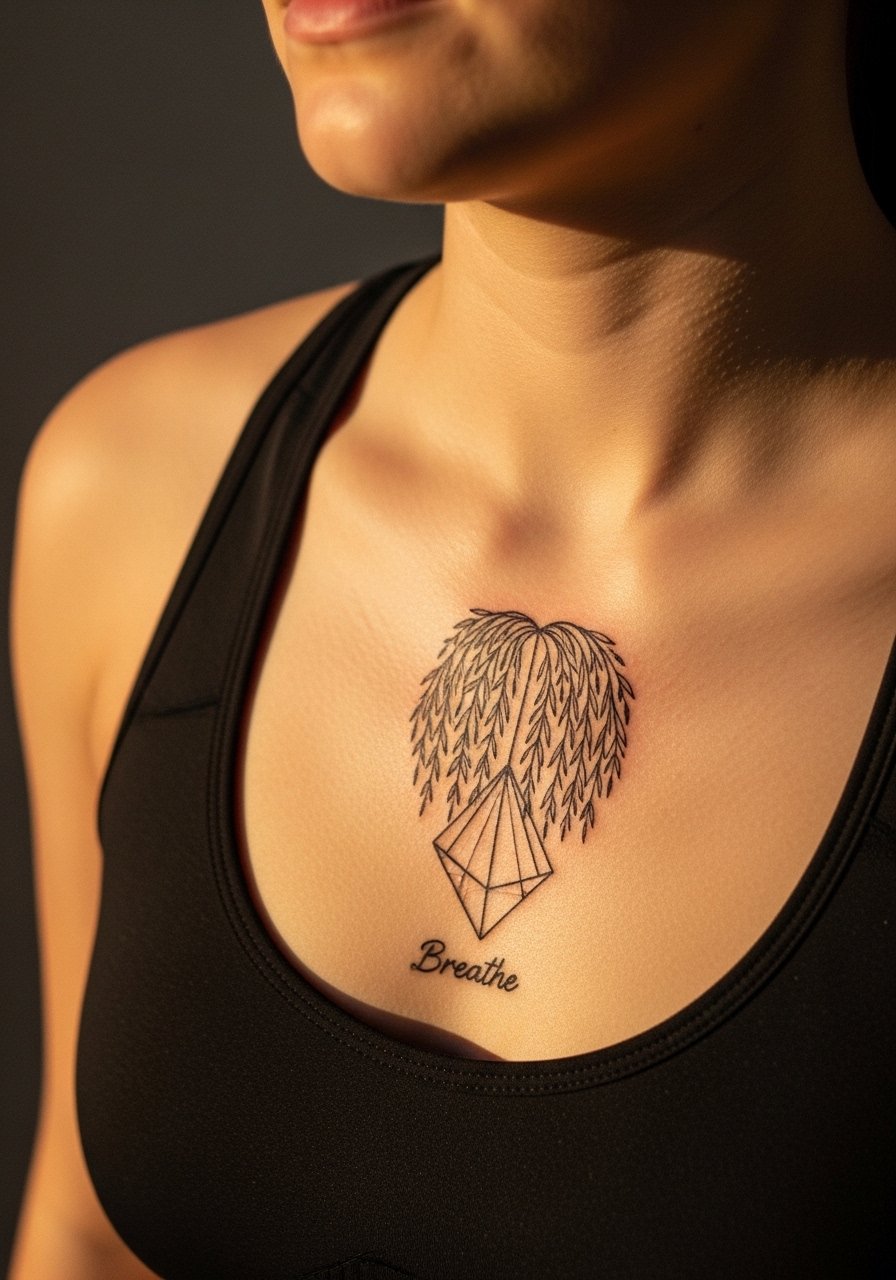
16. Geometric Willow as a Chest Accent Near the Heart
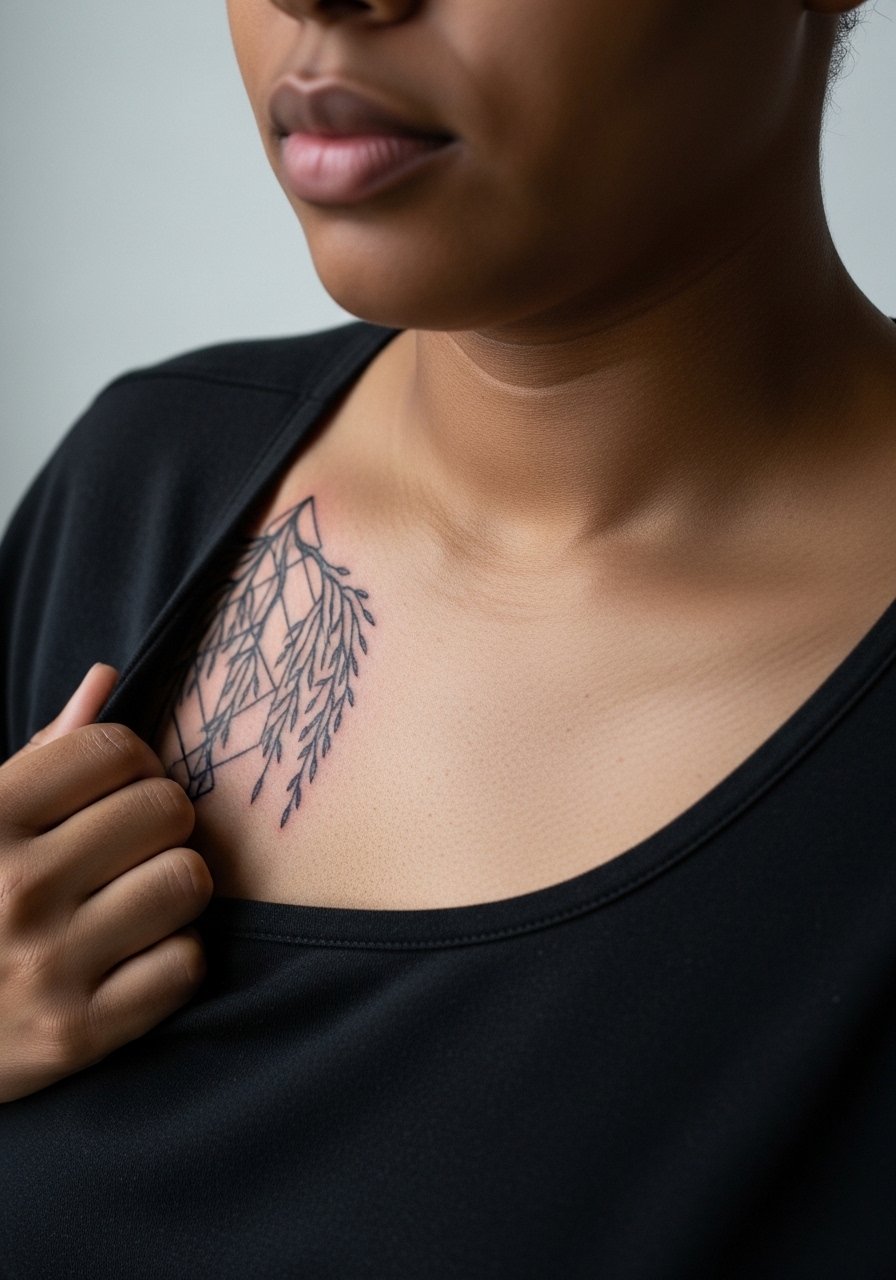
Controversy lead: chest work near the heart divides opinion on size and detail. One camp urges bold, simple stems to avoid rapid blur. The other favors delicate branches for the emotional effect. Both sides are right depending on skin type and placement. My advice is to discuss spacing and ask for test stencils in different sizes. Sessions here are short to moderate depending on detail. Choose a wide-neck shirt for the appointment so the artist can access the area while you remain covered.
17. Geometric Willow Tattooed as a Sleeve Connector on the Inner Arm
Styling lead: inner arm connectors camouflage transitions between styles while giving the willow a hidden surprise. This area can be sensitive, especially near the armpit, so expect higher pain at points. Ask your artist for gradual stem widths and whip shading to prevent dense patches from softening. Sessions may be split for comfort. For the session wear, throw on a loose tank top so the artist can reach the inner arm without you feeling exposed.
18. Geometric Willow Around the Hip Bone
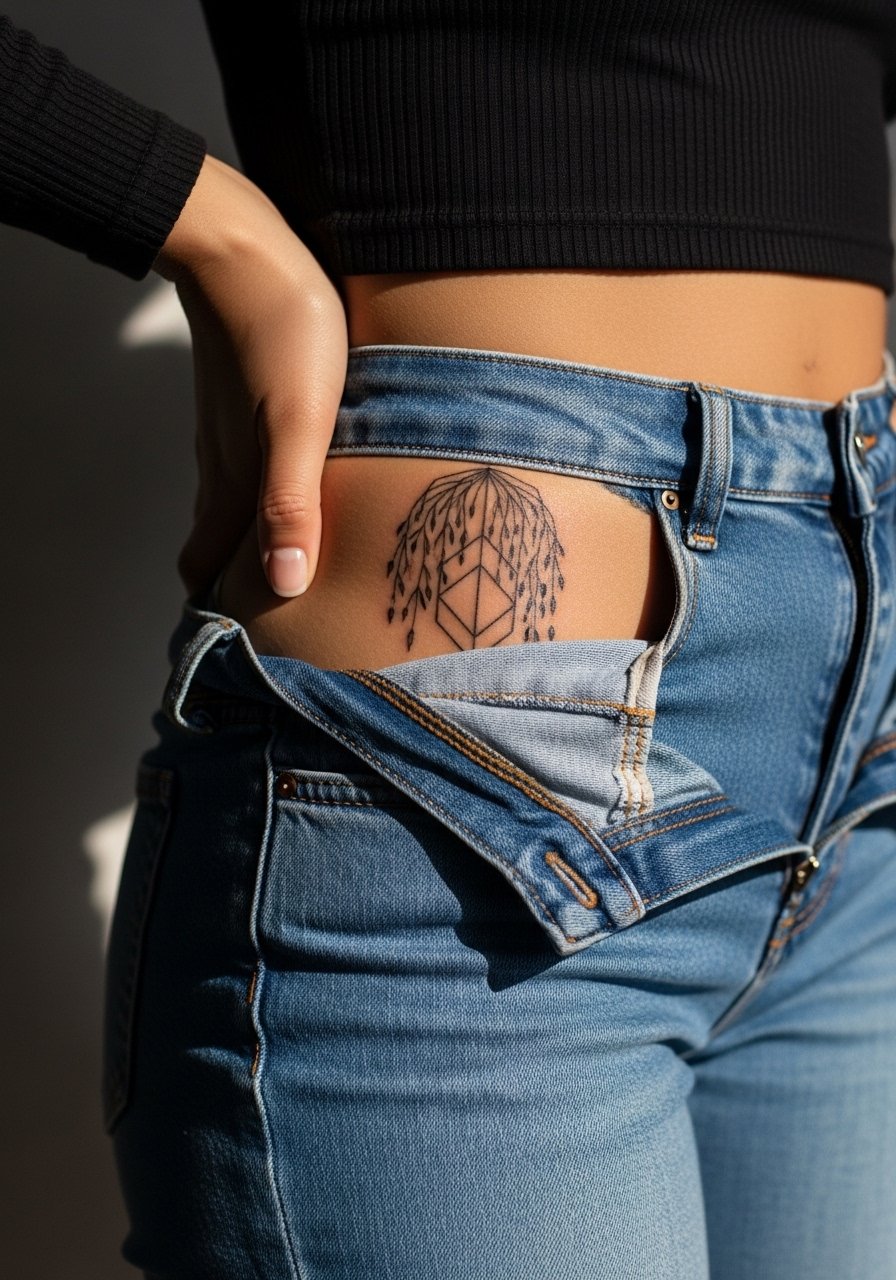
Personal observation lead: hip work reads best when branches curve with the hip line rather than cutting across it. The hip is forgiving for detail but shifts with clothing and movement. Mention any waistband preferences to the artist so the design does not sit under a regular pant seam. Sessions are moderate and healing is private, which many people like. For the appointment, choose high-waisted bottoms that unzip or can be pulled down slightly so the artist has clear access.
19. Geometric Willow That Blends with Small Script on the Sternum Edge
Mistake lead: combining script and fine willow lines can lead to legibility issues if the script is tiny. If you plan text, specify exact size and font and ask the artist to stencil both elements together so you can see spacing. Sternum movement with breathing makes consistent depth important. Sessions are short but precise. For appointment comfort, wear a fitted sports bra so access is clear and the rest of your torso stays covered.
20. Geometric Willow Cascading Over the Lower Back
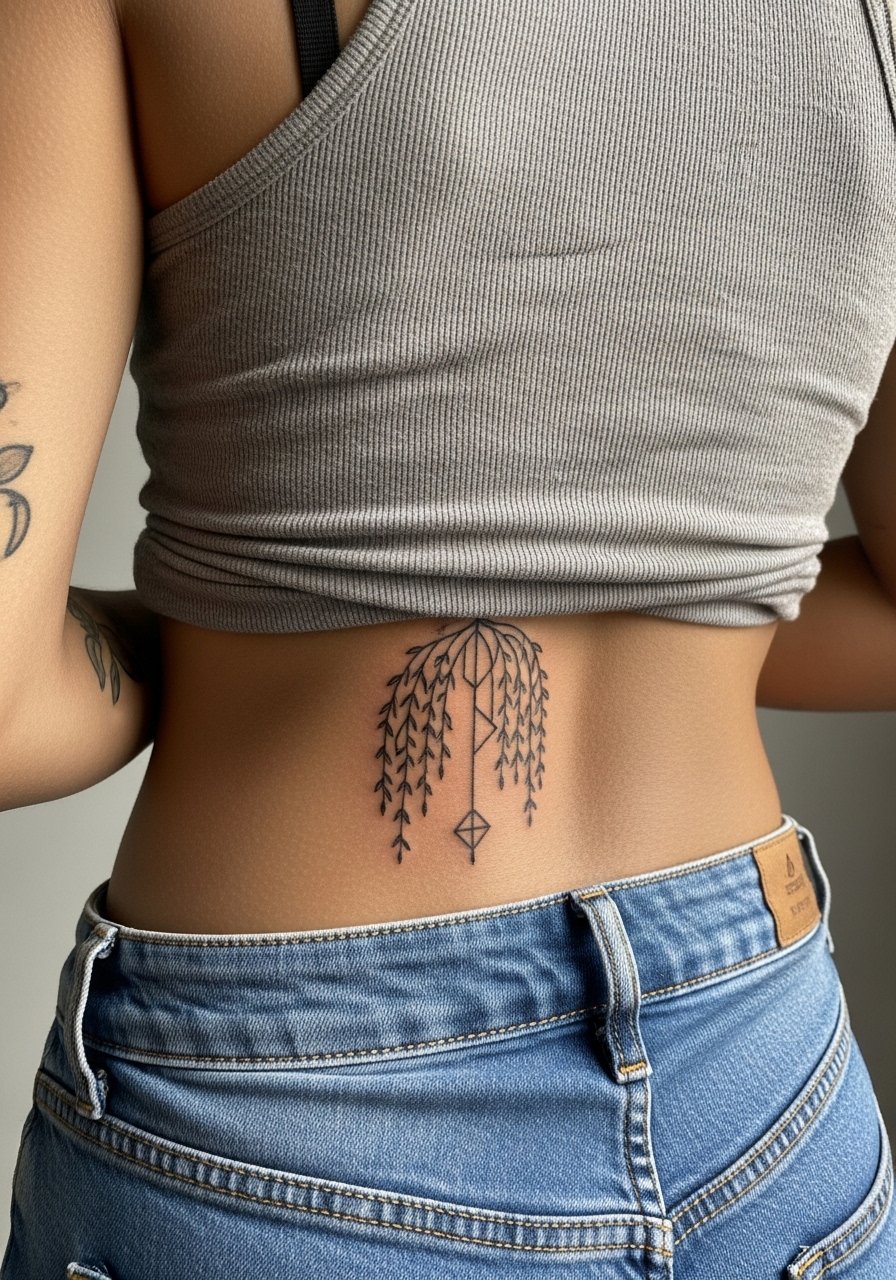
Aging/healing lead: lower back skin moves with sitting and bending, which can soften micro detail. For this placement, prioritize strong primary stems and lighter secondary branches. The lower back often tolerates longer sessions but consider splitting for comfort. Many people find that a subtle lower back willow holds shape better than dense micro-branches. For showing it off, low-rise jeans or a cropped top keep the tattoo visible when you want it.
21. Geometric Willow as an Upper Thigh Band
Consultation lead: band tattoos on the thigh work best when the artist accounts for muscle curvature and potential seasonal swelling. A wide band with alternating thick and thin stems reads longer without frequent touch-ups. Sessions are moderately comfortable and healing is private. A common mistake is using too fine a pattern in a high-movement area. For the session, wear loose drawstring linen pants so the leg can be exposed comfortably without constriction.
Frequently Asked Questions
Q: Will a fine line geometric weeping willow blur faster on ribs than on forearms?
A: It depends on spacing and skin movement. Ribs flex with breathing and can make extremely fine clusters merge sooner. Forearms face more sun and abrasion but move less with every breath. For ribs, ask for stronger stems and deliberate negative space. For forearms, prioritize sun protection and thicker anchor points.
Q: How often should I expect touch-ups for a wrist or finger willow?
A: From what I have seen, finger and wrist pieces often need touch-ups earlier than larger placements. Plan on a possible touch-up around year one to two, and expect another around year three depending on exposure and your skin. Ask the artist about planned touch-up windows during consultation.
Q: Are there special artist qualifications I should look for with chest or sternum willow designs?
A: Yes. Look for portfolios that show healed chest and sternum work, not just photos fresh from the chair. Use shop directories, convention lineups, and hashtag discovery to find artists who post long-term healed photos. Ask how they handle breathing areas and how they plan negative space.
Q: Which clothing helps the healing process for rib and hip placements on the appointment day?
A: Breathable, non-binding garments are best. For ribs choose a cropped athletic top you can lift slightly. For the hip pick high-waisted pants that can move down a bit without irritating the new ink. The goal is access plus coverage.
Q: Do geometric elements like dot work and stippling age better than dense fine lines?
A: Dot work and stippling often hold texture longer because they avoid continuous thin lines that can merge. Dense fine lines can look crisp initially but may soften into indistinct areas over several years. If longevity matters, mix stronger anchors with stipple fills and space the micro-lines.
