
Fine detail and heavy shadow play look incredible in photos, but the truth is that black and grey Medusa work ages in ways most people do not expect. Small linework can blur, dense snake scales can soften, and placement matters more than the reference image. Below are 27 stencil ideas that balance initial impact with realistic longevity, plus what to say in consultation and how to wear each piece so it reads its best beyond the first touch-up.
1. Inner Forearm Micro-Realism Medusa
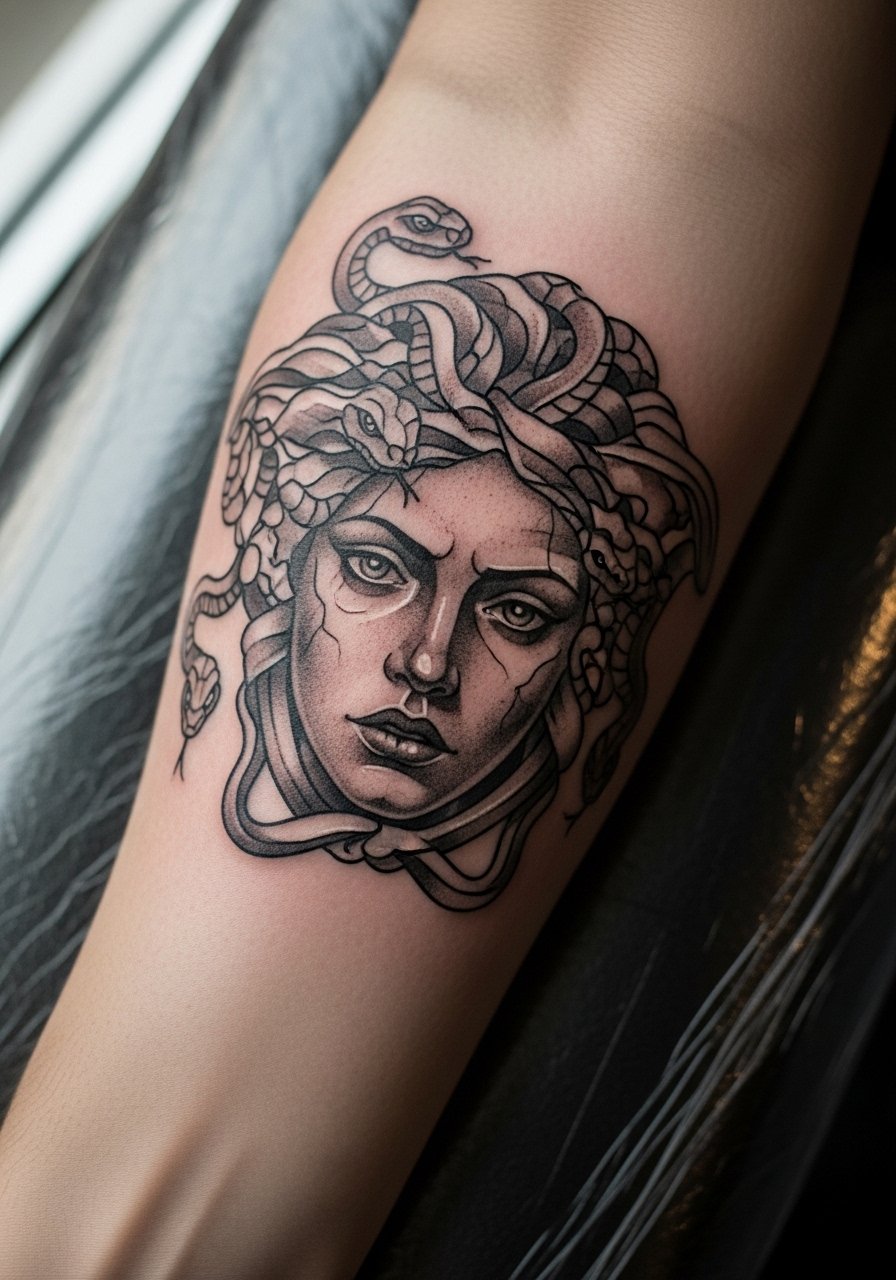
I have seen inner forearm pieces hold crisp detail for years when the stencil is scaled to fit the anatomy. Tell your artist you want negative space around the snakes so the scales do not merge into the background. Fair warning, the forearm is visible and gets sun, so plan for yearly sunscreen protection. A common mistake is insisting on hair-fine scales that look great fresh but blur by year three. Session time runs moderate, and pain is low. For showing the piece off, pair it with a rolled-up linen shirt that keeps focus on the portrait without visual clutter.
2. Upper Arm Portrait with Stipple Shading
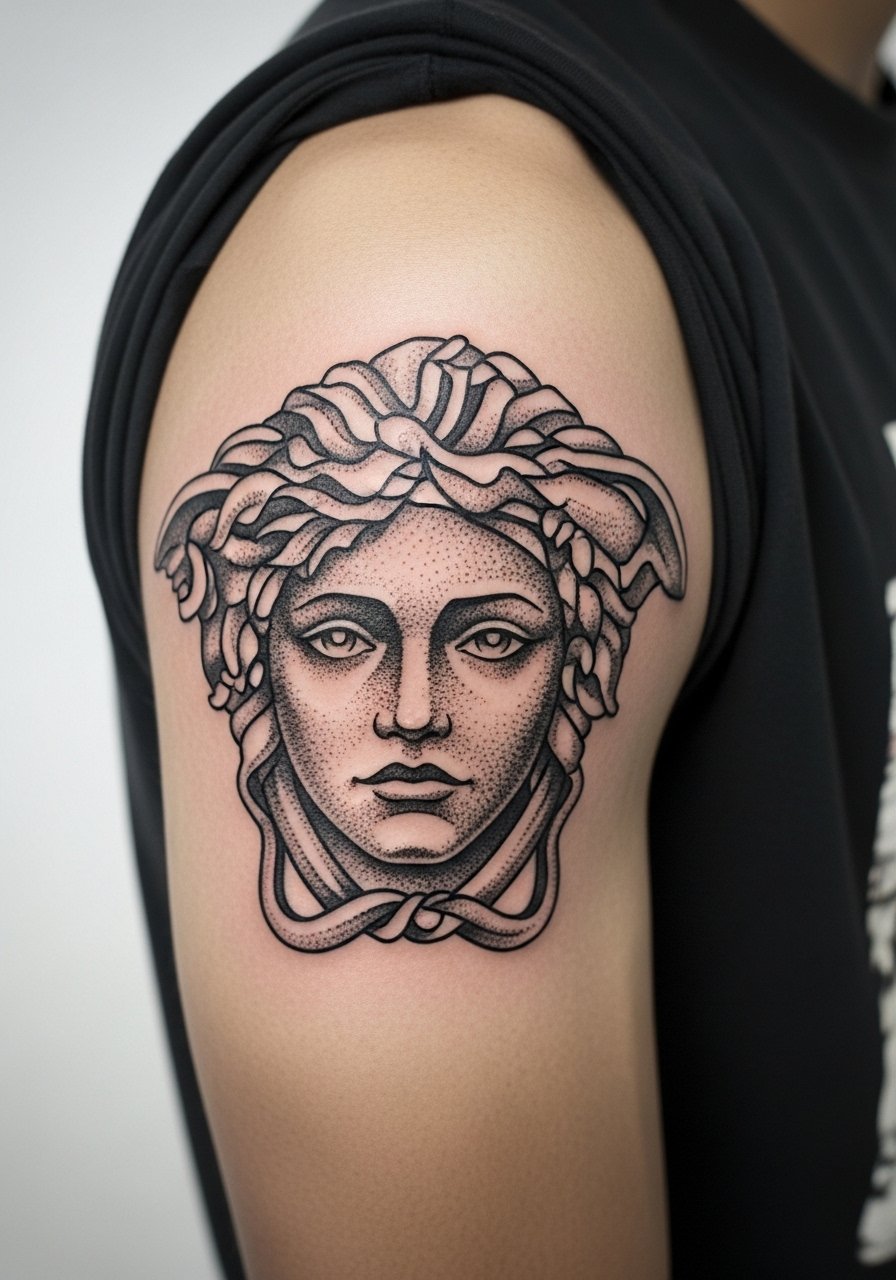
Most artists recommend stipple instead of continuous grey wash for upper arm work because stipple holds texture as it settles. When you consult, bring references that show skin grain and stipple density. The session feels like long steady passes rather than sharp jabs, and pain is moderate. Expect touch-up around year four if you want the crisp dots to remain high contrast. A common error is over-shading the background which steals depth from the face. For evenings out pair the piece with a short-sleeve button shirt with sleeves that sit just above the tattoo to frame it.
3. Small Wrist Medusa Head with Clean Linework

Wrist tattoos age differently because of constant motion and washing. I recommend a simplified head with bold contour linework rather than a hyper-detailed face. Tell the artist you want slightly thicker primary lines and minimal inner detail. The biggest mistake is packing tiny scales into the wrist where blowout risk is higher. Expect a quicker touch-up window, often around year two to three. For session comfort wear a loose button-down shirt you can pull sleeve aside without tugging the area during work.
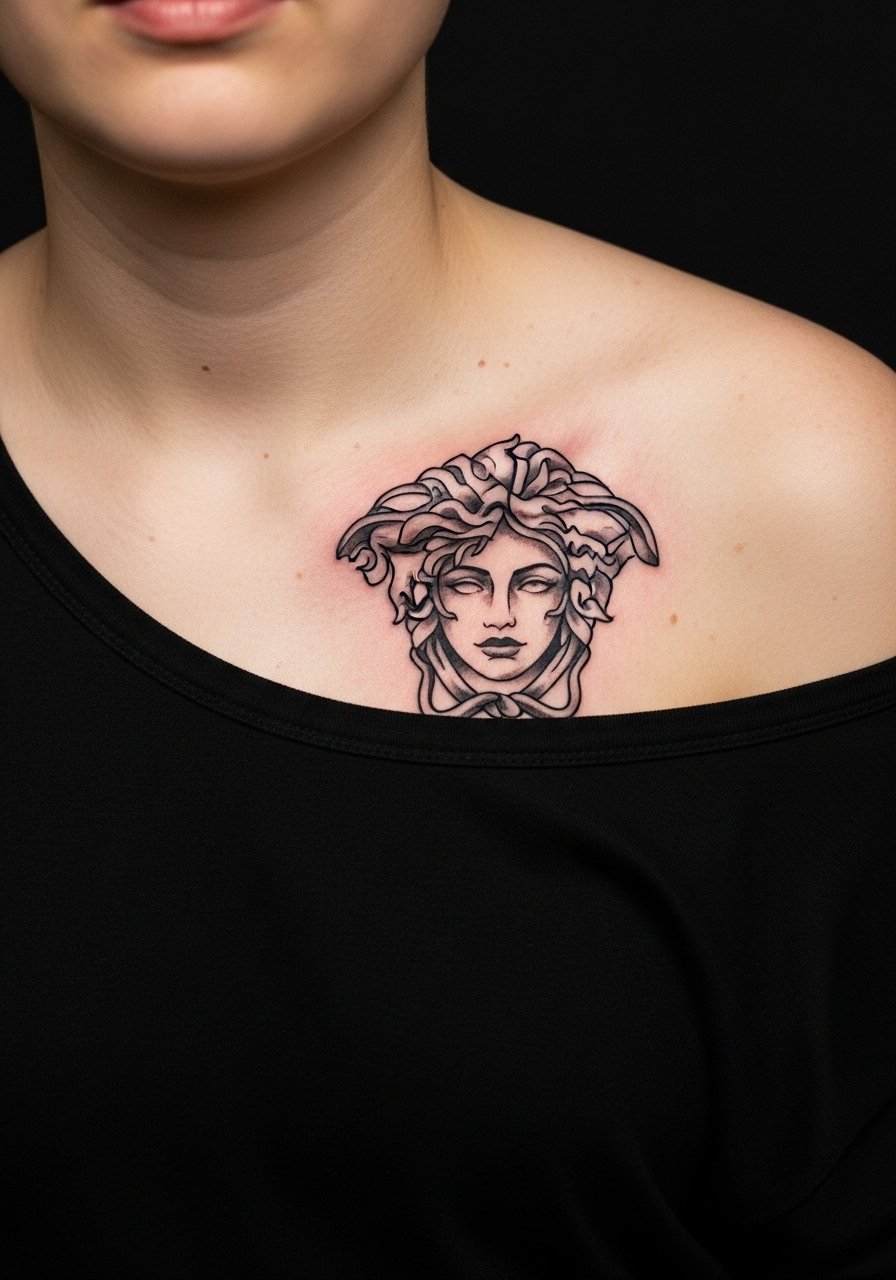
4. Sternum Medusa with Soft Whip Shading

Sternum placements demand a different approach because the skin stretches with breathing. I tell clients to expect more sessions and careful spacing between elements. Many artists split into two camps on sternum detail. One camp avoids fine line there, saying the breathing motion blurs delicate work within a year. The other camp uses controlled needle depth and spacing to make fine line last. Ask your artist which camp they practice. For the appointment wear a fitted sports bra you can lift slightly so the artist has clean access during longer sittings.
5. Ribcage Full Medusa with Negative Space

Ribs are painful but they give dramatic canvas for a Medusa that breathes with negative space. My consultation tip is to request clear breathing room between the face and the snakes. The most common mistake is compressing too much detail into the rib area to match a photo, which leads to early merging. Expect longer single sessions and a realistic touch-up timeline of two to four years. Because the placement is intimate, wear a cropped top you can shift easily for the session. Consider pairing the final look with an open-back dress for shows, but avoid tight garments during healing.
6. Back Scapula Medusa in Classic Blackwork
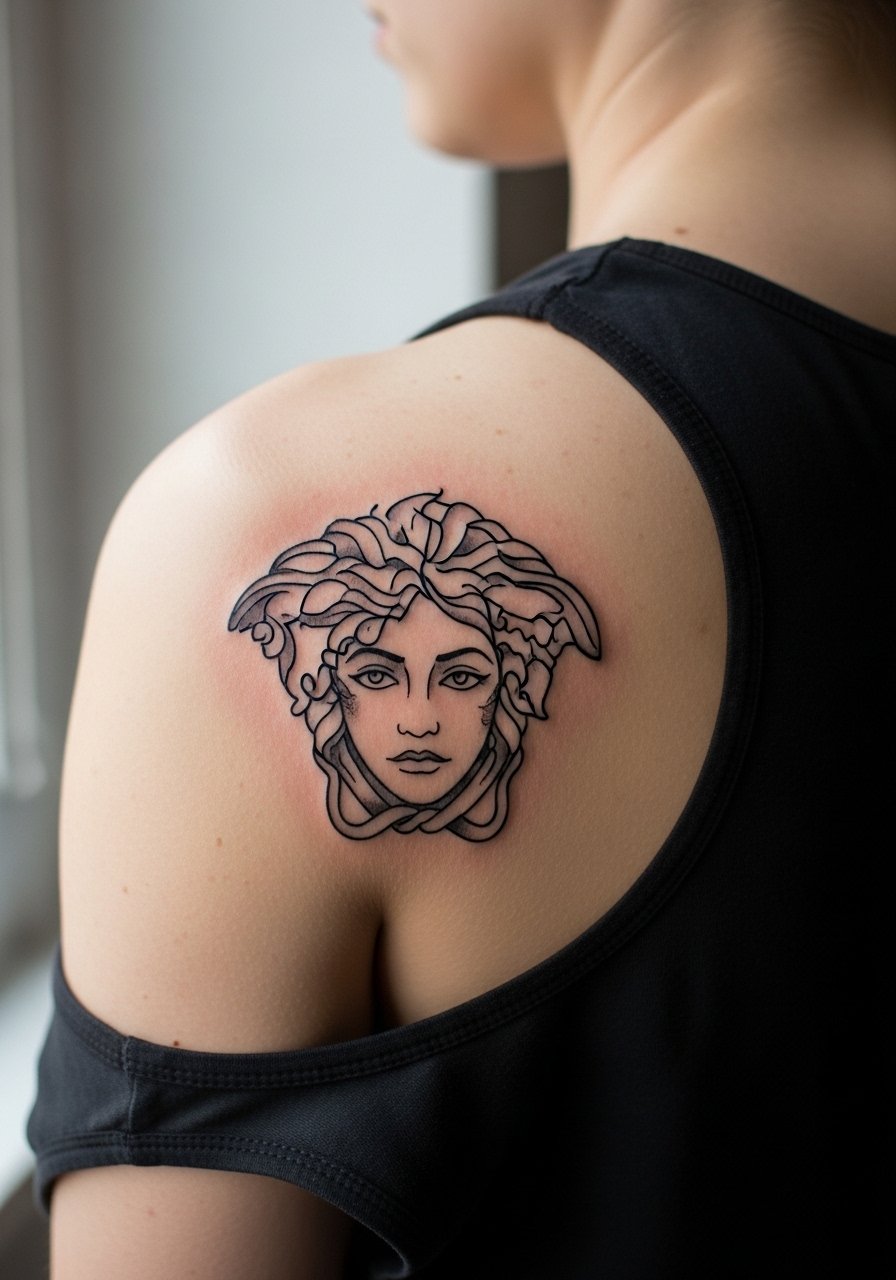
The scapula provides a flat plane that suits graphic blackwork. My rule is to prioritize bold silhouette over micro-detail so the portrait remains readable from a distance. What people misorder is asking for photo realism in one sitting. Break this into two sessions for saturation and then texture. Pain sits in the mid range for back work and healing benefits from loose tops. For show-off styling try a thin strap tank so the edge of the tattoo peeks out without forcing a full reveal.
Pre-Session Essentials
These items smooth the chair day and address the wrist, sternum, rib, and scapula concerns above.
-
Stencil transfer sheets. Use before booking to confirm placement on skin and avoid surprises with scale on forearm and wrist pieces.
-
Benzocaine topical numbing cream. Applied per instructions it eases rib and sternum sensitivity during long sessions without affecting linework when used correctly.
-
Thin breathable protective film roll. Keeps finger and wrist tattoos cleaner through frequent hand washing and reduces friction on healing scapula pieces.
-
Fragrance-free gentle body wash. Prevents irritation when showering areas like the chest and ribs where fine shading needs careful cleansing.
-
Aquaphor healing ointment. A thin layer during the first two to three days helps retain moisture on delicate linework without suffocating the skin.
7. Thigh Medusa Portrait with Layered Shading

Thighs tolerate heavier shading and hold saturated greys well. I often suggest layered shading so the snakes read separate from the face when motion compresses the area. The session feels like long blocks of work and pain is usually low to moderate. A mistake is trying to cram full facial detail into a small thigh spot. For session comfort wear high-waisted shorts you can shift easily and that keeps the artist from tugging fabric. For show-off outfits a slit skirt or shorts frames the piece without covering it.
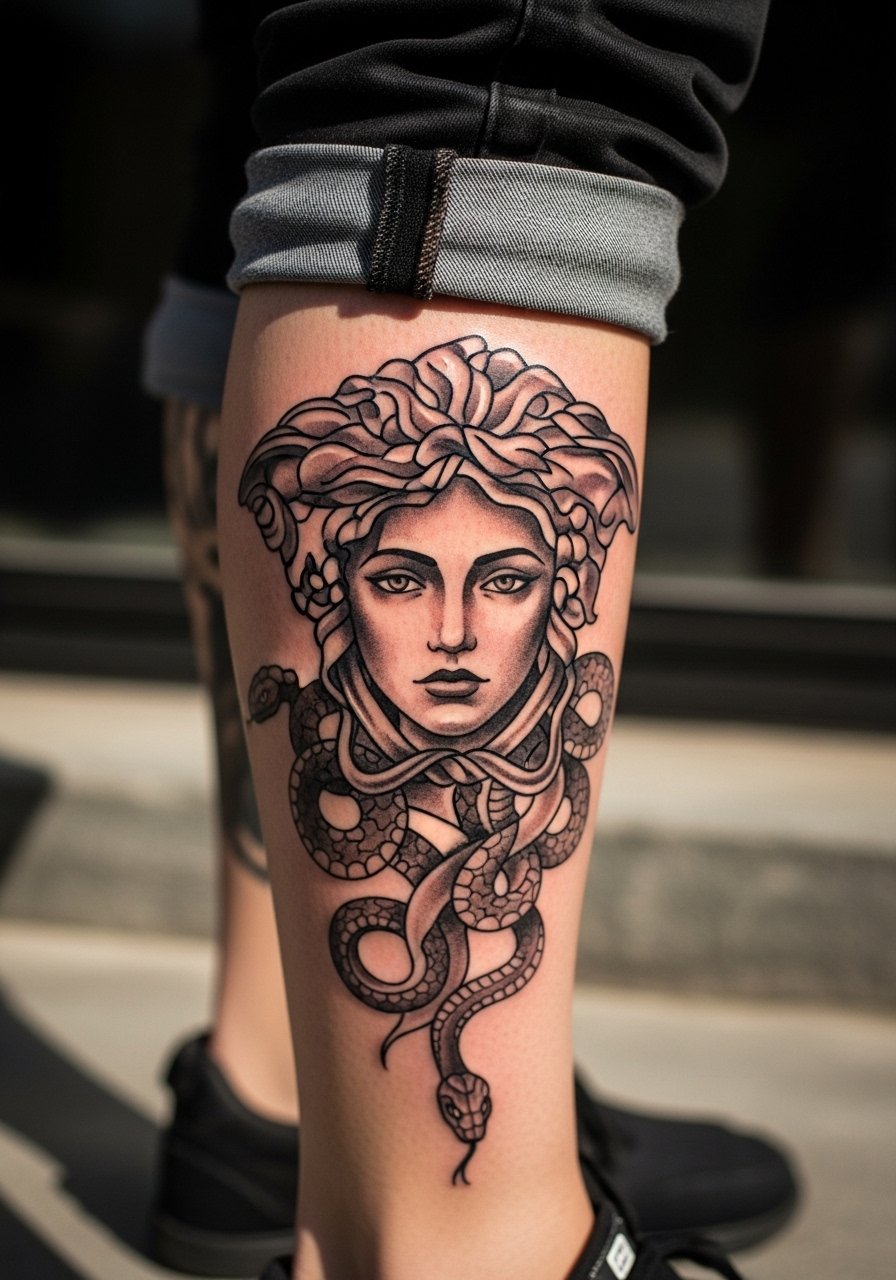
8. Calf Medusa with Flowing Snakes
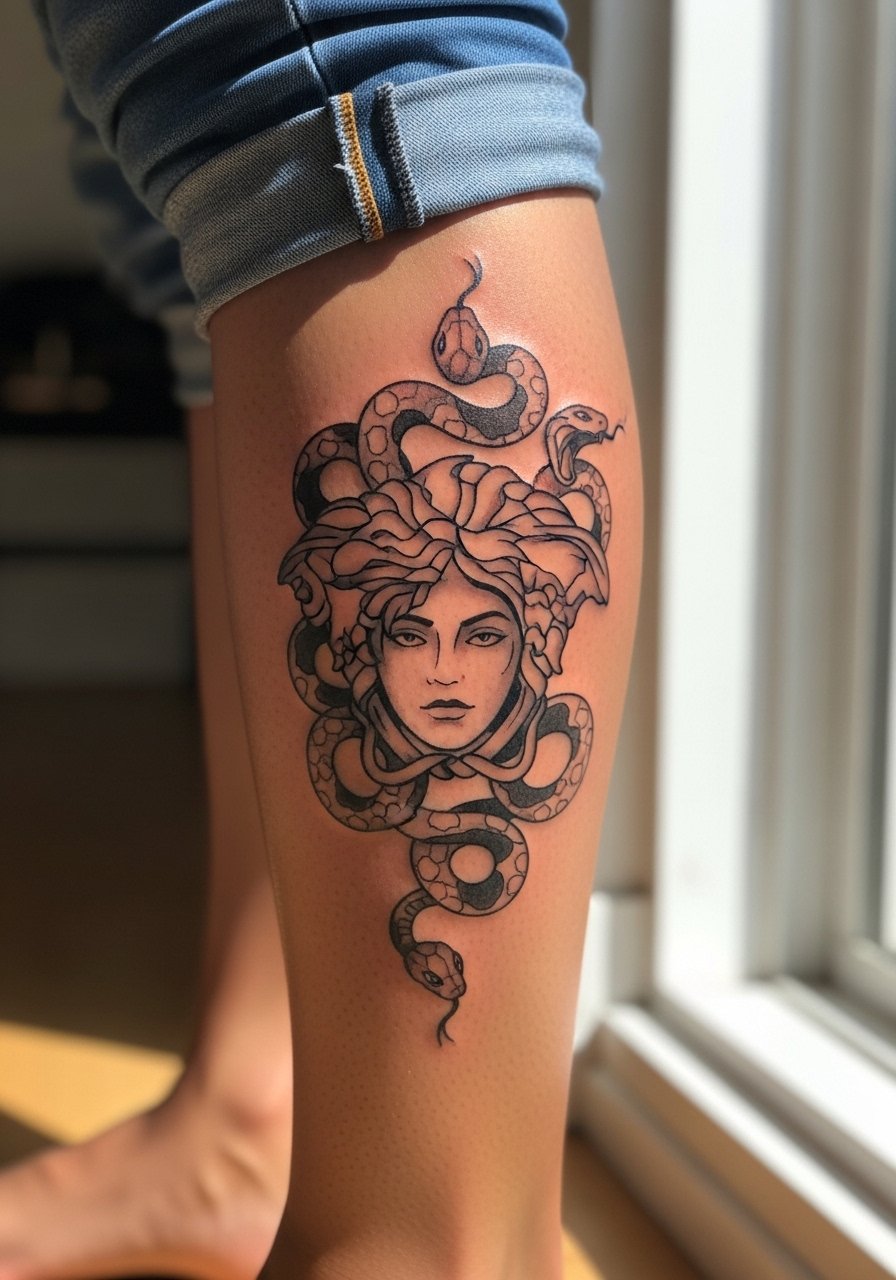
Calf work benefits from designs that follow muscle flow so the snakes appear dynamic as you walk. I advise mapping the snake curves directly onto the standing calf so the stencil sits right. Common error is ignoring movement and placing snakes that kink when the muscle flexes. Expect moderate sessions and touch-ups around three to five years if you want strong contrast. For sessions wear pants that roll easily, like drawstring linen pants so you avoid rubbing the fresh work.
9. Ankle Medusa with Minimalist Head

Ankle tattoos live in a high-friction zone from socks and shoes. My go-to is a minimalist Medusa head with bold outer contour to resist early fading. The typical mistake is too much interior detail that gets lost under footwear rubbing. Pain is higher near bone and session time is short. For the appointment wear shoes that slip on and off easily and opt for ankle strap sandals post-healing to show the piece without abrasive socks.
10. Hand or Top-of-Hand Medusa Emblem

Hand tattoos are the most controversial in the community. One camp warns that constant washing and sun exposure will fade delicate work within a year. The other camp points out that with bold blackwork and realistic expectations, hand pieces can age acceptably and become part of one’s style. Say which camp your artist practices in the consultation. A common mistake is asking for extreme micro-detail on the hand. Expect faster touch-ups and potential professional consequences. For showing this off pair with a thin chain bracelet that complements the emblem without covering it.
11. Finger Ring-Style Medusa Strip
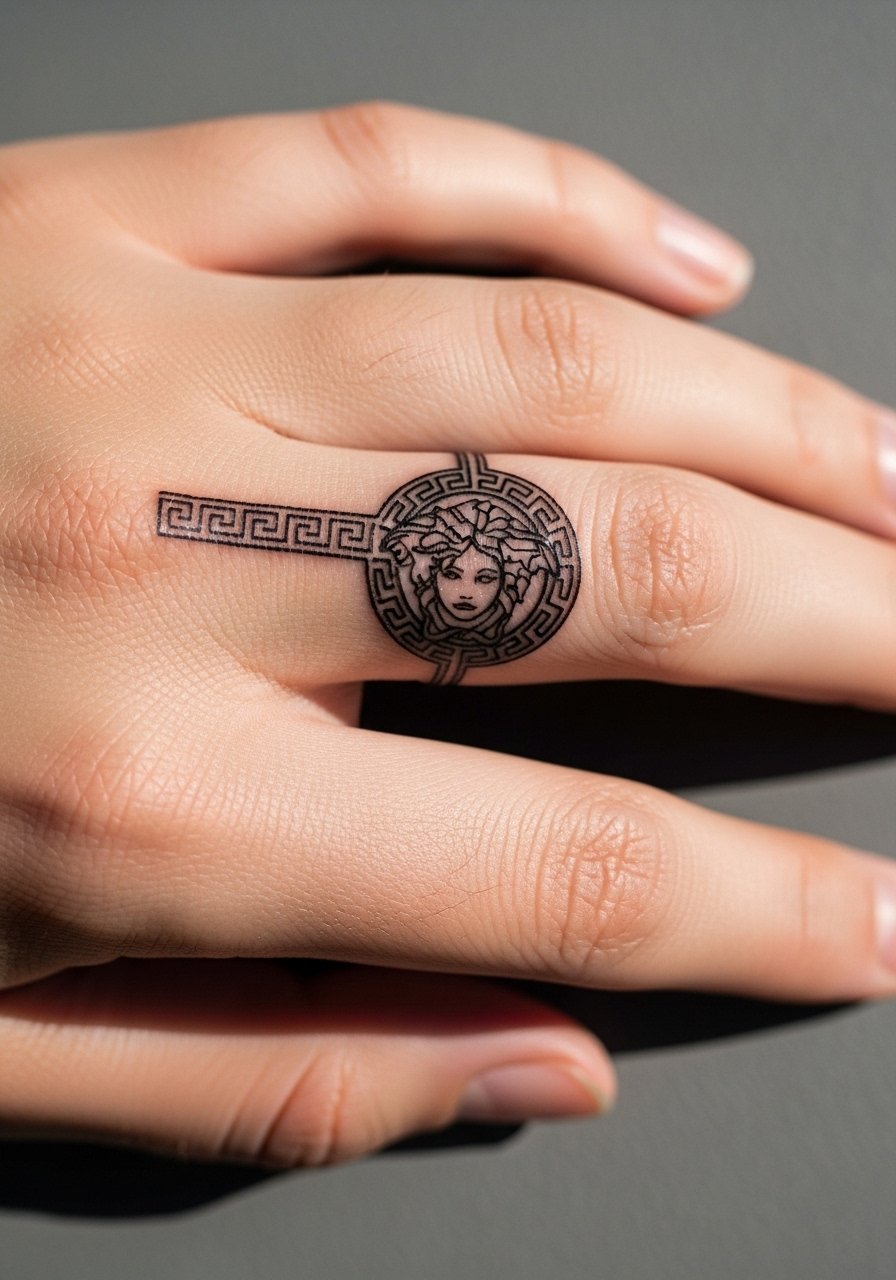
Finger pieces age quickly and need simple geometry to survive. I recommend a single snake head or repeated glyph rather than a full portrait. Ask for slightly heavier edges to prevent blowout. Finger work often requires touch-ups within one to two years because of skin turnover and constant use. A real mistake is expecting the same lifespan as forearm tattoos. Keep the design compact and consider narrow bands or negative space for longevity. For the session, remove rings and wear comfortable clothing that does not brush the hands.
12. Behind-the-Ear Invisible Medusa Accent
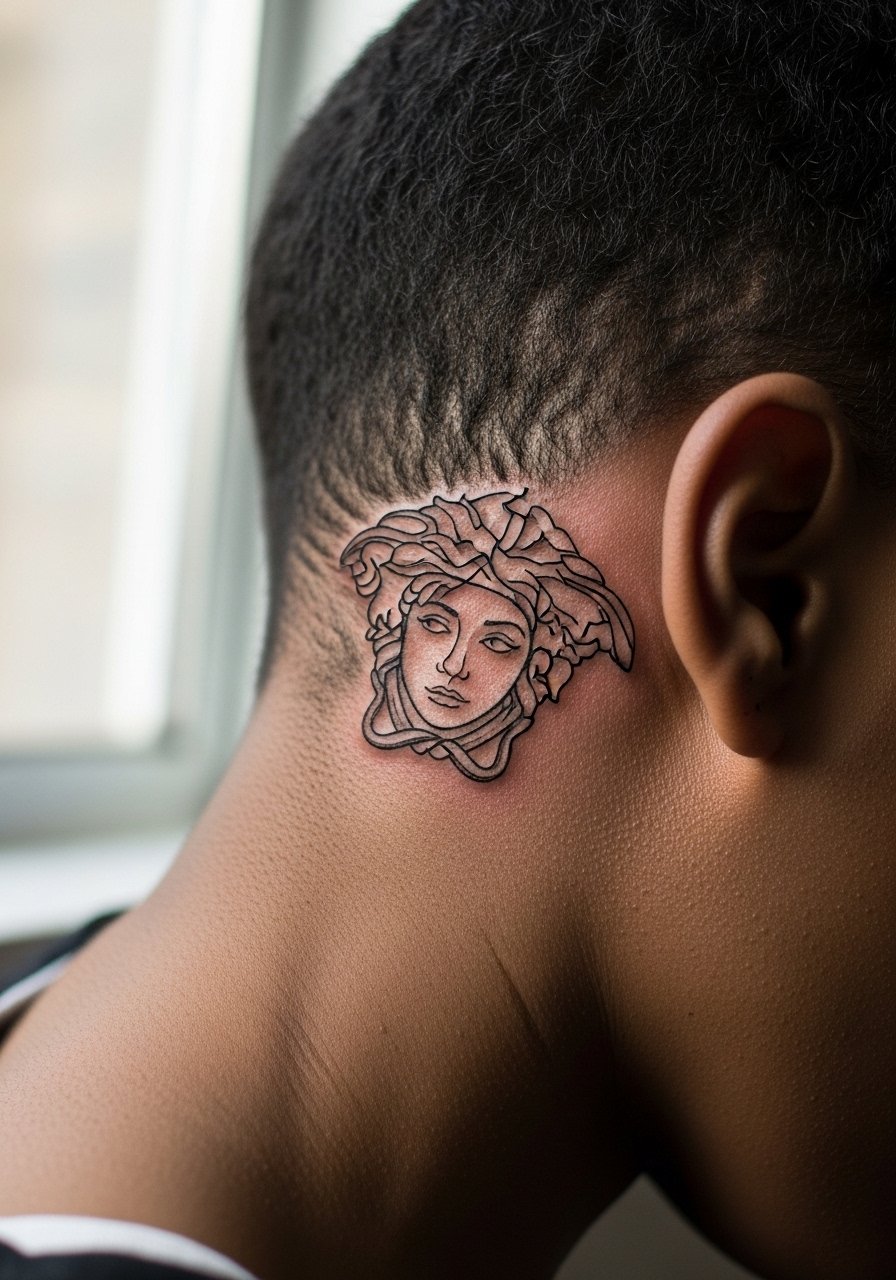
This is a discreet spot that reads like a secret detail when hair is swept back. Because of the small canvas I advise the artist to treat it as an accent rather than a full face. The most common error is attempting facial realism here. Pain is low but the area is sensitive. For the appointment tuck hair behind the ear or bring a clip so the artist has clear access. If you want a visible styling choice, wear a thin hoop earring that lets the accent peek through without competing.
13. Nape of Neck Medusa with Subtle Shading

Neck placements need clean composition because collars and hair interact with the design daily. I suggest subtle shading behind the head and clearer edges in the foreground so it does not muddle. Pain is moderate and healing benefits from light clothing. A mistake is overworking the background which can flatten when the hair rubs the area. For session access wear a wide-neck shirt you can pull to one side without exposing more skin than necessary.
14. Collarbone Medusa with Open Composition
Collarbone work reads well when elements are open and not crammed against the bone. I tell clients to let snakes trail toward the shoulder rather than pressing into the clavicle. The common mistake is forcing symmetry that fights natural anatomy. Pain is higher near the bone and sessions are intermittent to let the area settle. For showing it off pick a thin chain pendant necklace that sits above the work so the tattoo remains the focal point.
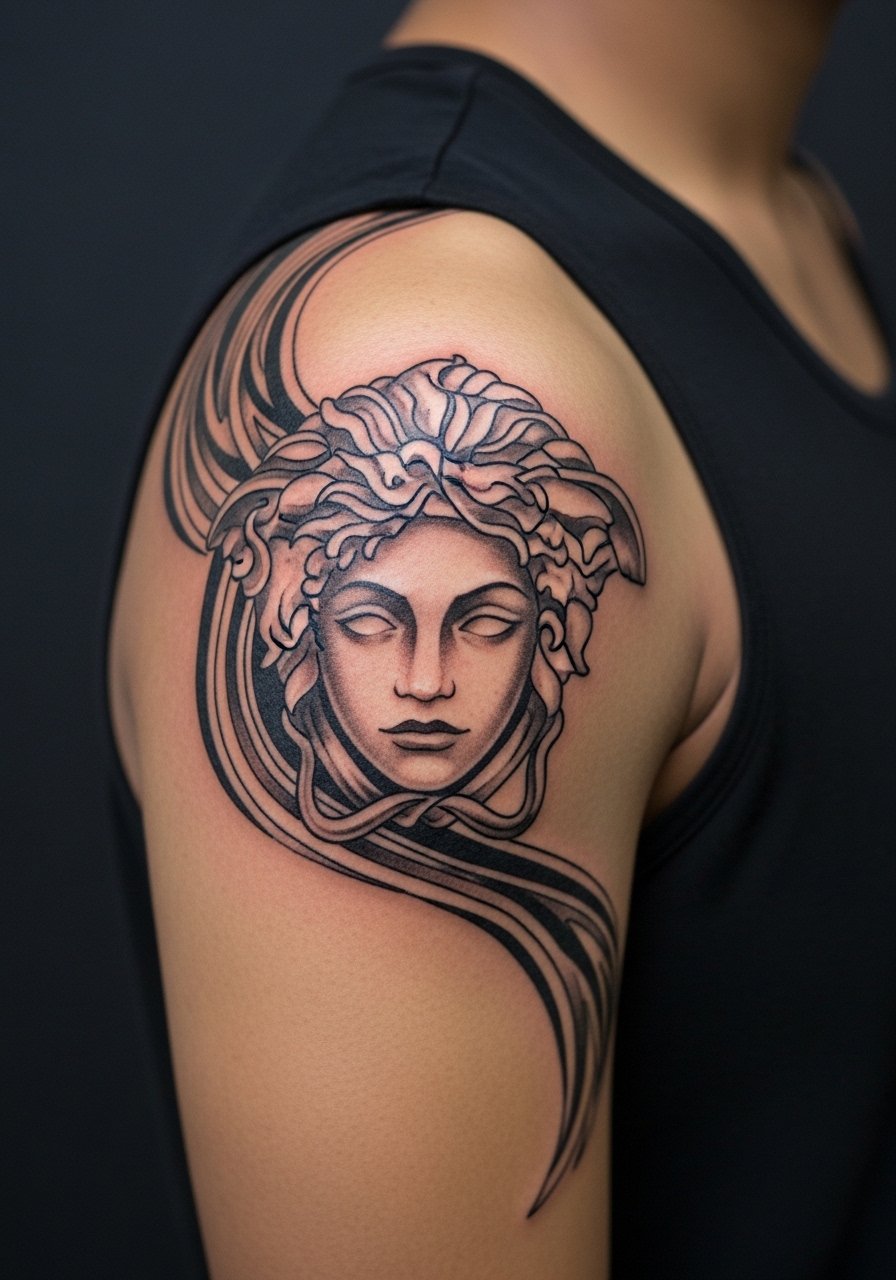
15. Shoulder Cap Medusa with Bold Silhouette

Shoulder caps handle bold silhouettes well and those silhouettes hold longer than fine interior detail. I advise prioritizing a strong outline and sparse texture inside the snakes. A mistake is over-embedding tiny facial details that compete with movement and wardrobe. Sessions are generally short and pain is low. Wear a sleeveless top that provides easy access while keeping the rest of your clothes on during the appointment.
16. Scalp Edge Medusa Accent Near Hairline

Scalp-edge tattoos are subtle and require careful placement so they do not look unintentional as hair grows. I recommend a compact design with clear negative space around the head. The session can feel sharp because the skin is thin, and touch-ups may be needed to keep contrast. The common mistake is mirroring a full portrait here. For the appointment bring a hair clip and consider wearing a baseball cap after the session to reduce immediate sun exposure.
17. Full Side Torso Medusa with Layered Texture

Side torso allows a sprawling Medusa that follows rib and waist lines. My best result comes from layered texture rather than heavy continuous fills so the snakes remain separate when skin moves. The mistake is trying to mimic full photographic shading that the skin cannot hold on this stretch-prone area. Sessions are longer and pain is high. For the session wear a cropped tank you can shift easily without exposing more skin than needed.
18. Lower Back Medusa with Centered Face

Lower back tattoos stand up well to dense work if the design has a clear central focus and room for negative margins. I suggest centering the face and letting snakes arc outward to avoid edges rubbing with clothing. The common mistake is tight edge work that sits under waistbands and thins quickly. Pain is moderate and healing benefits from loose waistlines. Wear high-waisted jeans you can lower slightly during the session and keep pulled up loosely while the area heals.
19. Upper Back Between the Shoulders Medusa Panel

This plane is great for symmetrical compositions. I recommend strong negative space around the head and lighter stipple for the background scales. Mistakes come from trying to cram asymmetrical elements into a centered panel. Sessions are moderate and the area tolerates saturation well. For the appointment wear a button-back shirt you can slip on after while keeping pressure off the fresh work.
20. Half Sleeve Medusa with Dot Work Texture

Half sleeves let you combine portrait and ornamental elements. My approach is to set the face in clear contrast and build dot work backgrounds that age subtly. The error is packing every inch with heavy grey wash. That reduces readability as the piece heals. Sessions are multi-block and the arm tolerates work well. For show-off styling roll sleeve cuffs and try a short-sleeve tee that frames the upper arm.
21. Geometric Medusa with Mandala Frame

Combining Medusa with geometric mandala elements requires careful spacing so the mandala does not compete with facial detail. I advise crisp primary lines for the mandala and softer shading on the portrait. The most common mistake is matching mandala density to the portrait scale. That flattens the composition over time. Expect a moderate session and occasional touch-ups for the mandala points. Pair it for evenings with open-back midi dresses that let the chest work peek through.
22. Minimalist Single-Head Medusa on the Rib Edge
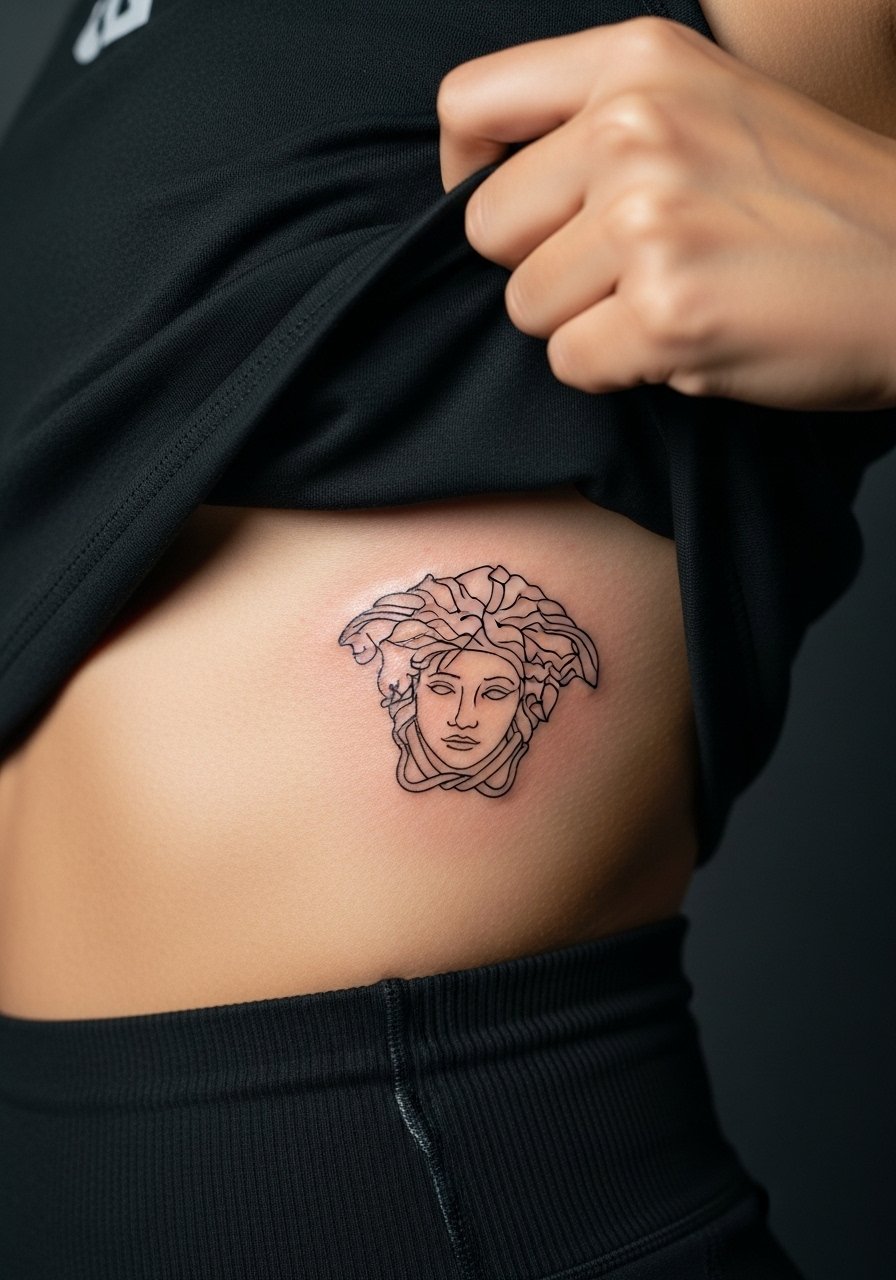
Minimalist rib pieces can work if they embrace scale and spacing. My note is to keep linework slightly bolder than usual to resist blurring from the breathing motion. Artists split on this placement but the discussion is clear. One camp avoids delicate lines on the ribs saying they blur quickly. The other camp uses deliberate spacing and depth to make them last. Ask where your artist stands before booking. For the session wear a cropped top you can adjust without tugging the area.
23. Portrait Medusa on the Calf with Flowing Hair
Inner calf placements show portrait detail nicely because the skin is stable and protected from sun. I encourage softer hair texture and sharper eyes to keep the face readable as the piece settles. A mistake is applying heavy background near the ankle which draws attention away from the face. Sessions are moderate and touch-ups are usually minor. For the appointment choose pants you can roll up easily and consider wearing slip-on shoes afterward to avoid pressure.
24. Shoulder Blade to Upper Arm Wrap Medusa
Wraps that flow from scapula to arm look cohesive when the snakes follow muscle contours. My tip is to ask for a compositional sketch that you can preview on skin while standing. That prevents awkward kinks when the arm moves. The main mistake is forgetting to test the stencil position while the body is both relaxed and flexed. Sessions are broken into parts and pain varies by zone. During the appointment wear a sleeveless top so the artist has access without full exposure.
25. Micro-Realism Medusa on the Inner Bicep

Inner bicep work carries moisture and friction risks but rewards with protected aging. I recommend moderate detail with softer shading so the facial features remain distinct as the area stretches with movement. The common error is making the face too small for the curve. Pain is moderate and the session needs proper positioning to avoid slipping. Wear a loose tank top for the appointment so the artist can work without fabric interference.
26. Instep or Foot Medusa Accent Near Toes

Feet are high friction and low longevity spots, but small symbolic accents can survive with solid outlines. Ask for reinforced outer lines and minimal interior detail to reduce fading. A big mistake is treating foot work like forearm work. Expect touch-ups frequently. During the session wear shoes that are easy to slip into to avoid compressing the area right after work.
27. Scalp-to-Nape Medusa Panel with Hairline Integration

This placement reads like an intentional hairline motif when planned carefully. I suggest subtle transitions between hair and tattoo so the snakes do not look abrupt. Mistakes come from ignoring how hair will grow and cover parts of the piece. Sessions are short but may need touch-ups where hair growth causes rubbing. Bring a clip for the appointment and consider a casual baseball cap for immediate sun protection afterward.
Frequently Asked Questions
Q: Will a black and grey Medusa tattoo on the ribs blur faster than one on the forearm?
A: In my experience ribs are more likely to show early softening because of breathing and skin stretch. The forearm gets sun exposure but is a flatter canvas. If you want ribs, ask your artist for increased spacing and slightly bolder primary lines to offset the movement.
Q: How should I phrase the consultation when I want a photo-real Medusa but worry about longevity?
A: Say you want a photo-real look with preserved readability at year five, and ask the artist how they handle spacing, needle depth, and touch-up plans. That steers the convo away from "copy this photo exactly" and toward a plan that fits your skin and placement.
Q: Are fine dot and stipple textures safe for chest and collarbone Medusa pieces?
A: They can work well if the dots are spaced and not packed too tightly. Collarbones and upper chest see movement and occasional rubbing from straps. Ask for stipple density samples on similar skin so you know how it will heal.
Q: Do hand and finger Medusa pieces affect job prospects and how should I plan?
A: Hand and finger pieces remain the most visible and occasionally controversial. Some industries are still conservative, and some are not. Think about your career path and ask artists about how bold they make the outer contour so the piece reads as an emblem rather than a smear.
Q: What should I wear to a long Medusa session on the back or ribs?
A: Choose garments that provide access without full exposure. For ribs and sternum a fitted sports bra or cropped tank works, and for back or scapula a loose button-down you can move aside is ideal. Comfort matters because long sessions require repositioning and breaks.
Q: Can I ask for a preview of the stencil on skin before committing to placement?
A: Yes, always ask for a transfer preview. It will show scale and how the composition sits with movement. If the artist hesitates, treat that as a prompt to walk through adjustments until the placement feels right.
