
Fine line wrist work looks incredible fresh, but what holds up is often the piece that was planned around movement and wear. Trends swing toward micro detail, then the truth shows up at year two when tiny gaps blur. Read these seventeen traditional wrist options with notes on how they age, what to say in consultation, and how to wear the piece so it looks intentional every time you roll up a sleeve.
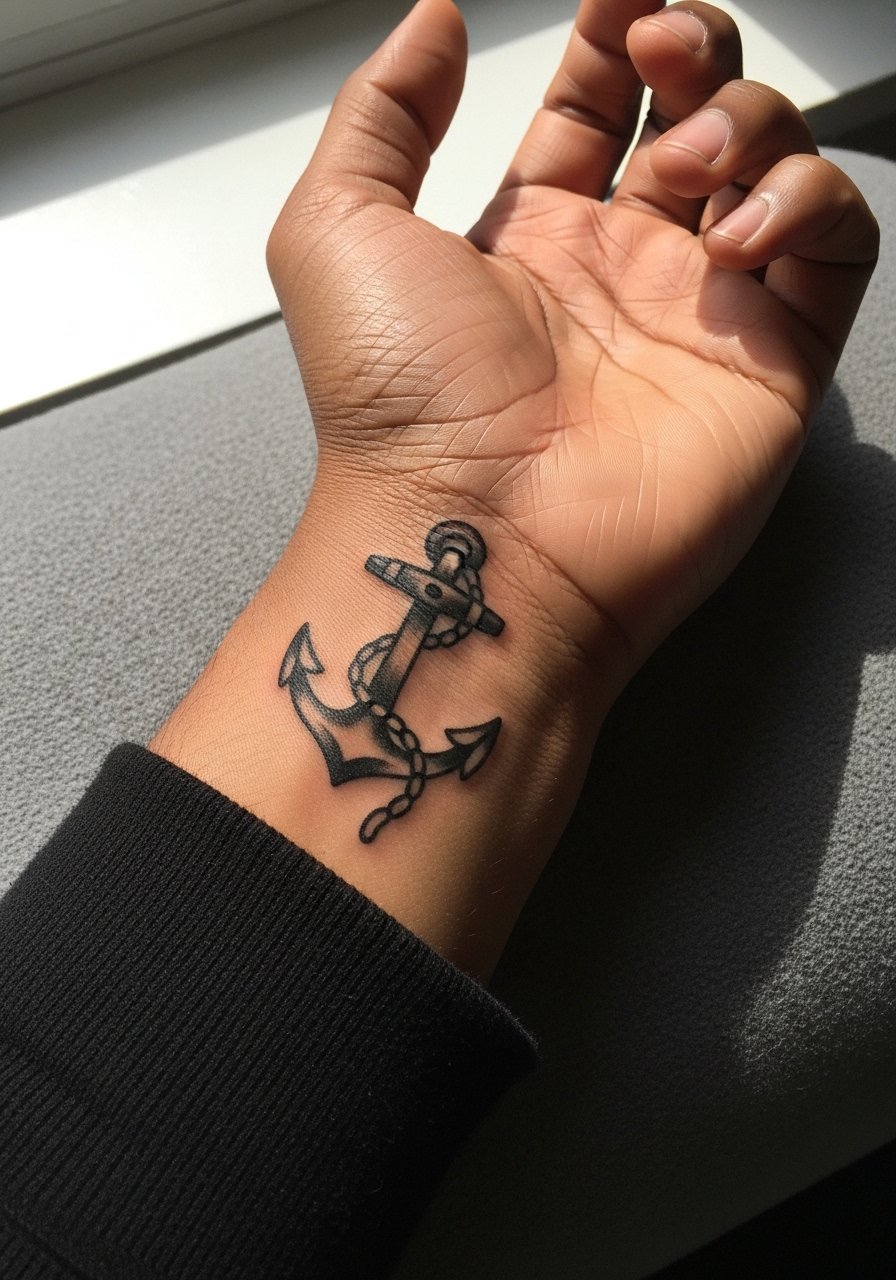
1. Classic Anchor on the Inner Wrist
I've seen this one on sailors and city commuters alike, and the inner wrist keeps the anchor readable without crowding. Ask your artist for slightly heavier linework and a tight knot detail so the shape survives daily rubbing from watches and bracelets. Caveat, tiny anchors done in ultra-fine line tend to lose definition by year three, so size up modestly. Pain is low but sharp, session time is under an hour, and expect a touch-up at year two if you wear a watch often. Pair this with a slim minimalist leather strap watch when you want the tattoo framed without competing.
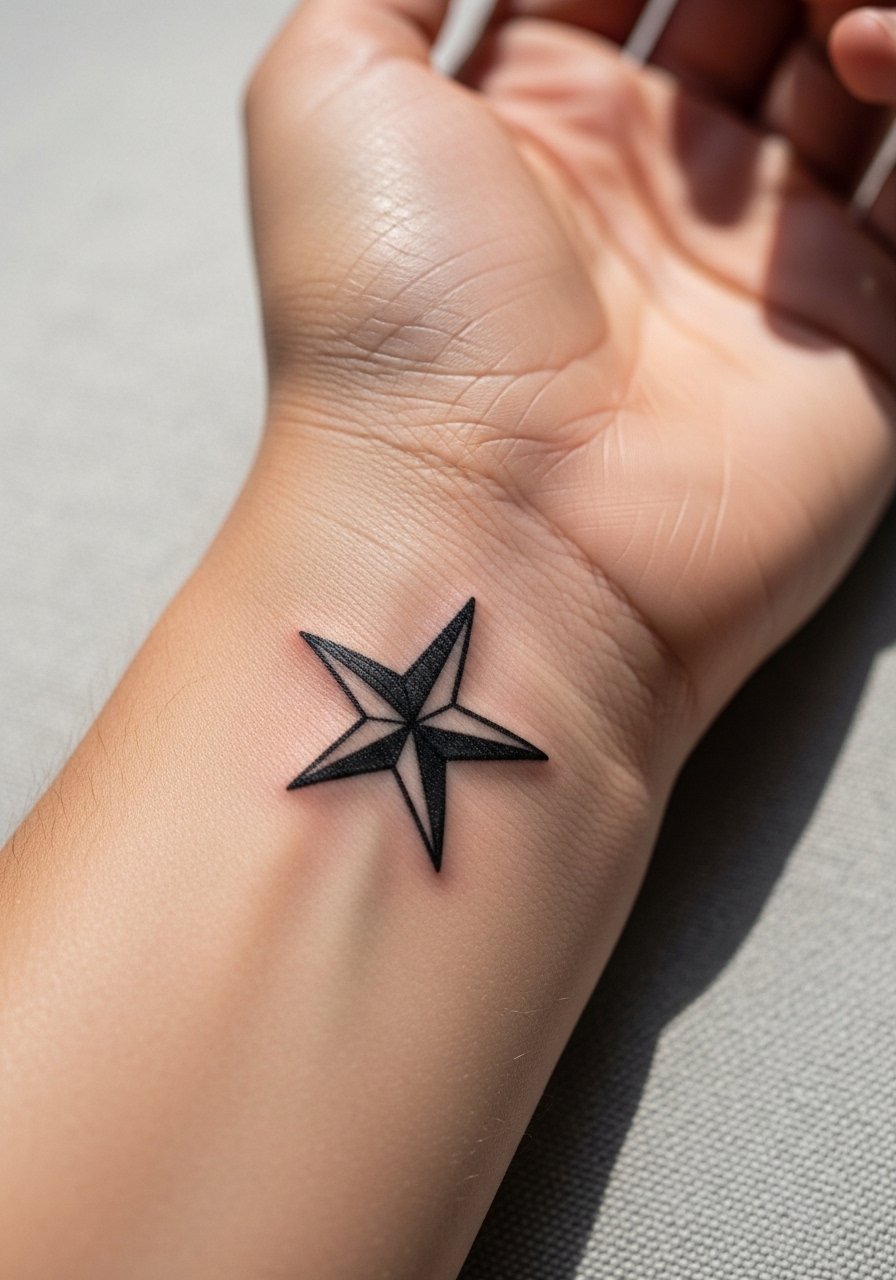
2. Tiny Nautical Star on the Side Wrist
Fair warning, the side of the wrist sits where skin flexes most, and that motion can blur micro details faster than flat spots. For a star, ask for bolder points and more spacing between rays so the shape stays crisp. A common mistake is requesting a micro-sized version of a complex star, which quickly becomes blotchy. The session is quick and the pain is moderate because bones are near the surface. For showing it off, slide up a sleeve or wear a thin canvas bracelet that complements the nautical vibe without covering the tattoo.
3. Bold Traditional Rose on Outer Wrist
There is something satisfying about saturated color and heavy outlines on the outer wrist because that placement gets a clear view and less constant friction. Tell your artist you want the black outlines bold enough to act as a frame, and request dense saturation in the petals so the red ages into a rich tone. The mistake people make is asking for thin petal veins that vanish with time. Expect a longer session for color work and a likely touch-up around year three. For evenings out try a rolled sleeve over a linen button-down to reveal the piece without overexposing it.

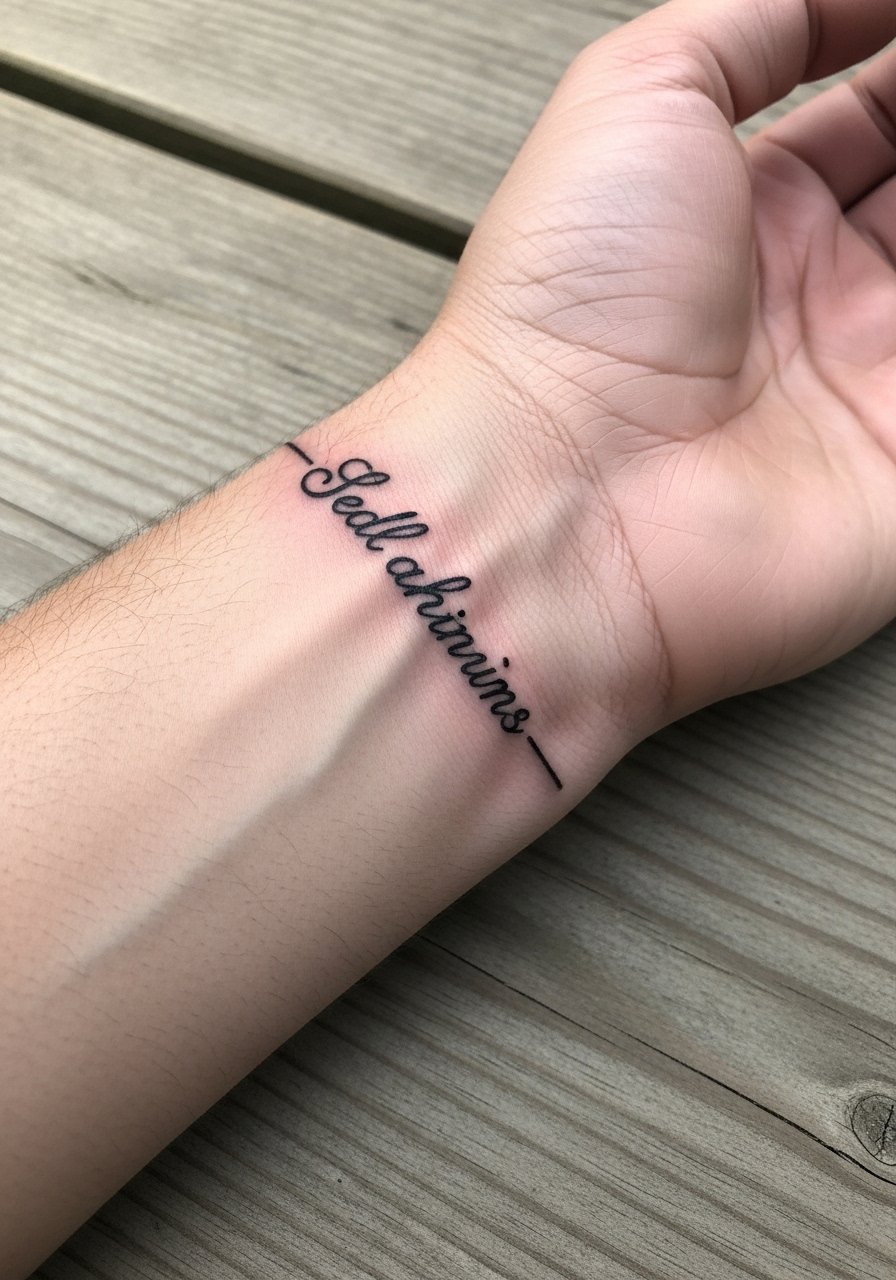
4. Script Band Wrapped Around the Wrist
When a script wraps the wrist, spacing is the critical factor. Most artists will warn against ultra-small lettering because the curve and frequent motion make letters merge. During consultation, specify your font size and ask for a hand-drawn mockup in place so you can check kerning on your skin. Pain is low and the session is brief, but plan to check how the letters settle at two months before committing to more text. For a subtle show-off look, stack a thin chain bracelet above or below the script, which frames the lettering without crowding it.
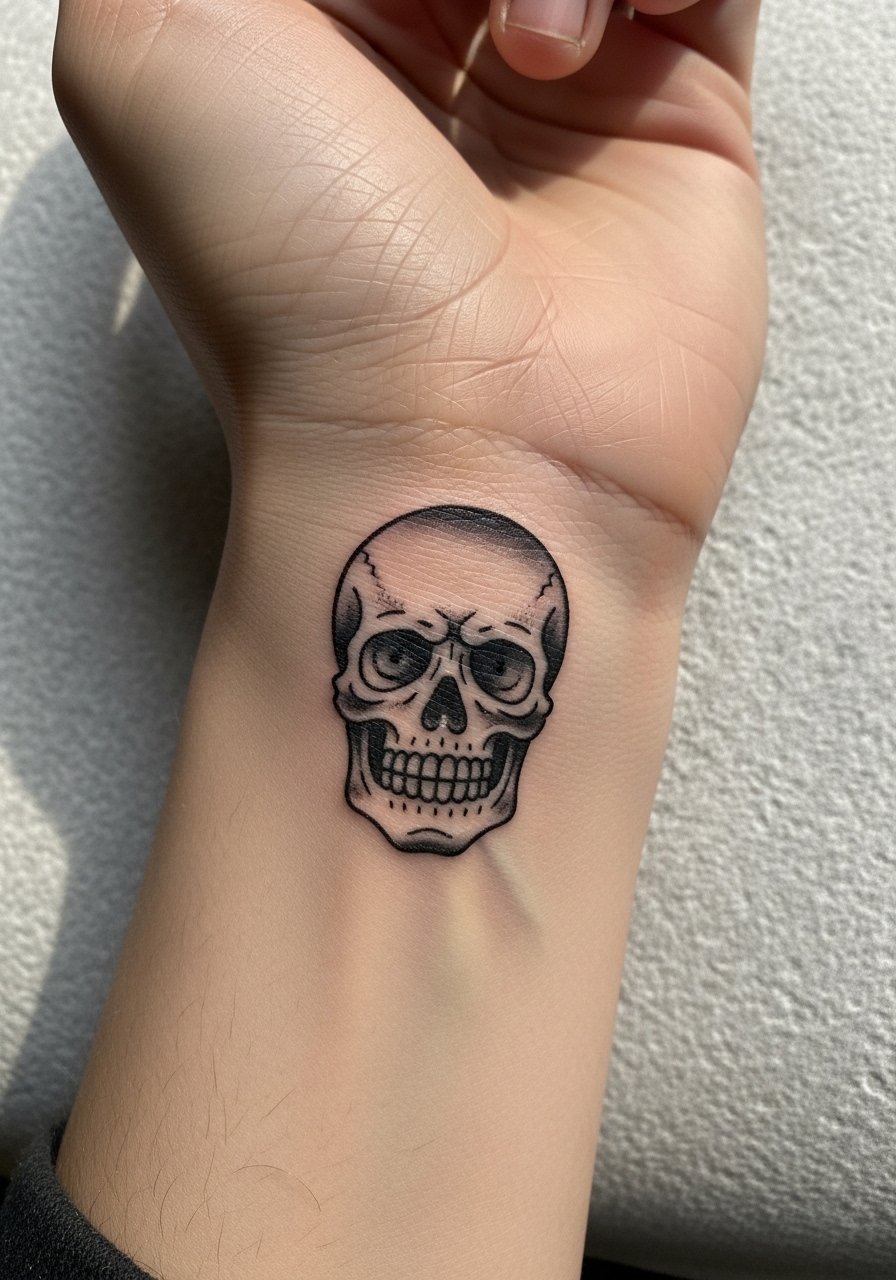
5. Tiny Traditional Skull at the Wrist Crease
The wrist crease introduces a crease-and-stretch zone, so a skull with clear negative space will survive better than a heavily shaded micro skull. When you book, tell the artist to keep shading airy and to prioritize contrast over small interior details. Expect a quick session with sharp but brief discomfort where the needle meets thin skin. A frequent mistake is packing too much shading into a tiny skull, which often looks like a smudge at 18 months. For casual layering, pair the piece with a worn canvas cuff bracelet so the skull peeks out without rubbing constantly.
6. Chain Link Around the Wrist, Like a Bracelet
When you ask for a chain link, clarity in each link is essential because the pattern repeats with every movement. Tell your artist you want slightly thicker links and a little gap between each loop so the negative space reads long term. The common error is requesting tiny, tightly packed links that fuse together with time. Sessions are moderate in length and the pain is manageable. This design pairs perfectly with actual jewelry. Wear a slim silver cuff to echo the tattoo without overwhelming the wrist band.

Pre-Session Essentials
Those first six wrist pieces sit in high-movement zones and often rub against watches and cuffs, so a few targeted items make the session and the first week of healing smoother.
-
Stencil transfer paper kit. Lets you preview how a wrap or band will sit on the curved wrist before the needle touches skin.
-
Cooling gel cold pack wrap. Useful for reducing swelling right after a wrist session that hit a bony spot.
-
Thin protective film roll. Helps keep new wrist pieces clean from constant handwashing and friction during the first days.
-
Fragrance-free gentle body wash. Mild cleansers protect delicate linework while you shower.
-
Aquaphor healing ointment. A thin layer early on locks moisture for neat linework without suffocating the skin.
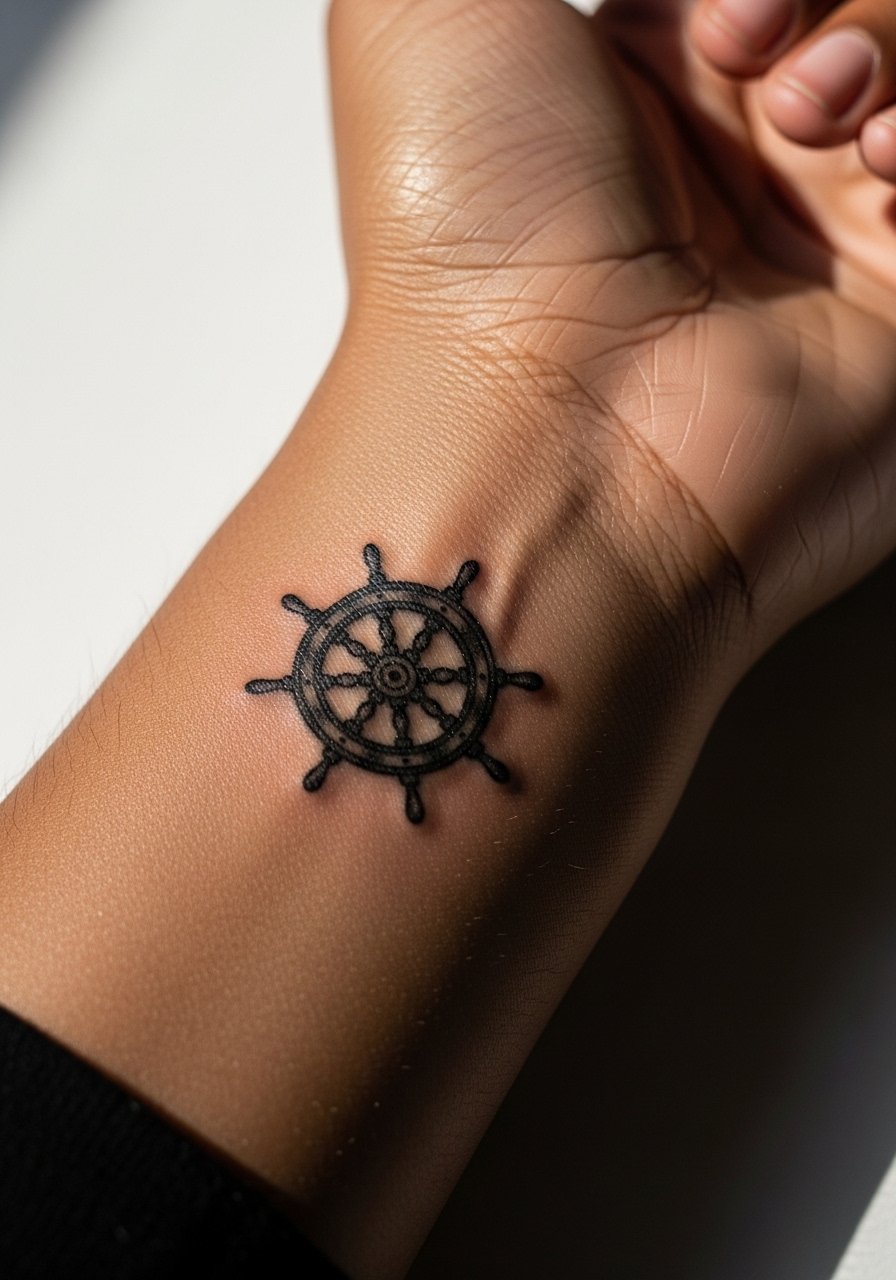
7. Small Nautical Wheel on the Back of the Wrist
Visual impact is immediate with a nautical wheel because the spokes create natural rhythm across the wrist. For this placement ask your artist to keep spokes bold and evenly spaced so the wheel reads as a single unit from a distance. One trap is over-ornamenting the center hub with tiny dots that disappear. Sessions are short but the back of the wrist can be bony, so expect a sharp prologue of pain. For outfits, a rolled sleeve or a simple button-up shirt with sleeves rolled frames the wheel cleanly without distracting.
8. Single Needle Dagger Pointing Down the Wrist
Consultation lead, bring reference photos that show exact line weight, because single-needle daggers look very different at varying weights. The trick is balancing a tapered point with a reinforced spine so the tip stays sharp after healing. People often ask for the finest possible needle to show detail, which is precisely when blowout risk rises. Expect a short but intense session, and plan a touch-up if the tip softens after a year. This placement reads well with a slim leather bracelet that sets the dagger against texture rather than more ink.

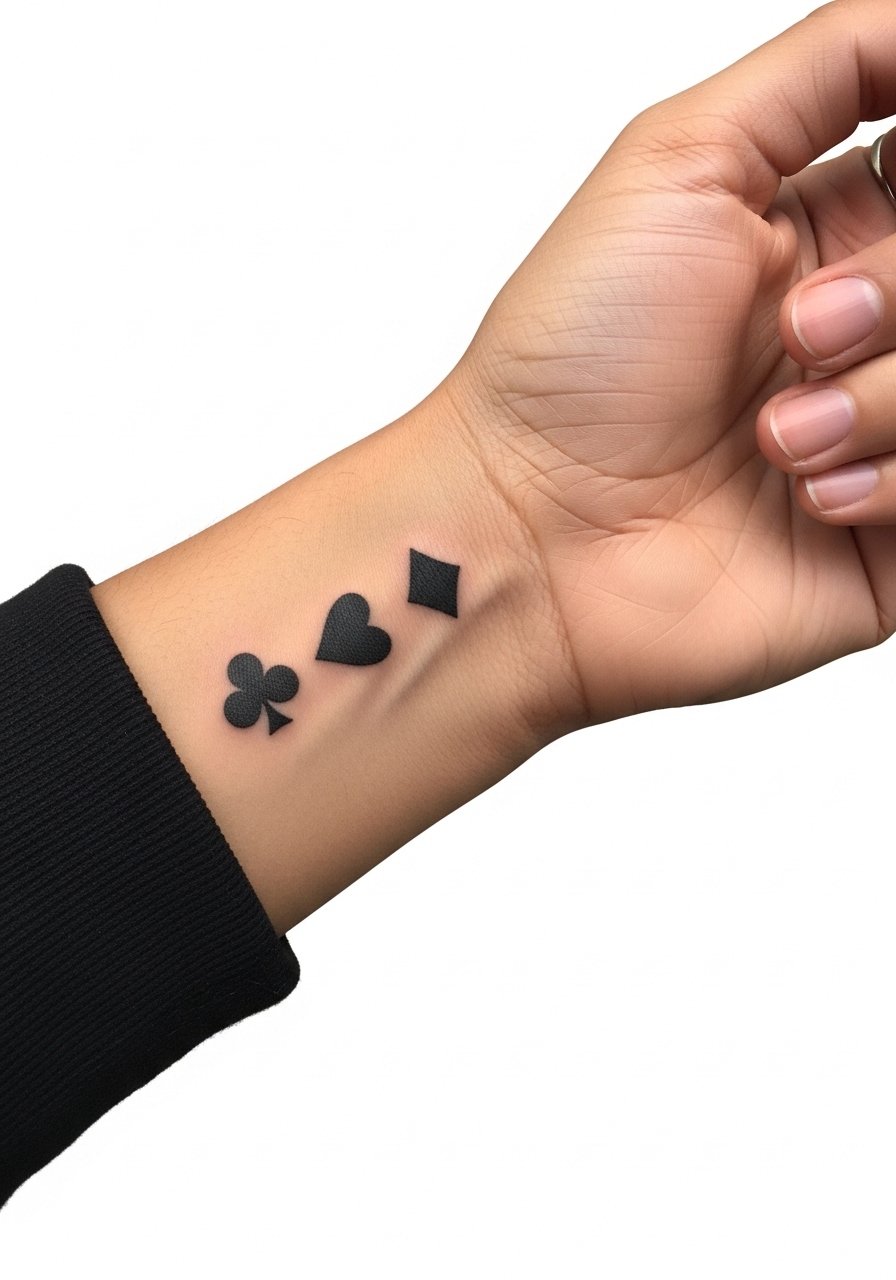
9. Playing Card Suit Trio Along the Wrist
Aging and healing lead, simpler shapes like hearts, spades, and clubs survive better than tiny pictorial scenes on the wrist. Ask your artist for solid silhouettes rather than internal ornamentation so each suit reads at arm's length. A common mistake is trying to miniaturize decorative card faces, which blur into indistinct dark patches. Sessions are very quick. For showing off a trio, cuffed sleeves or a short-sleeve knit polo let the icons peek out neatly without covering them.
10. Nautical Rope Knot Wrapped on the Wrist
Mistake lead: the biggest error with rope knots is asking for too many twists in a small space. When lines overlap on a tiny wrist knot they can become a single dark mass with time. Ask for clean crossing points and slightly thicker outlines to keep the negative space between strands visible. The placement feels like low to moderate pain and the session is short. For session comfort wear a loose short-sleeve tee so the artist can easily access the area without tugging on fabric.

11. Minimalist Cross at the Wrist Center
Personal observation lead, this is the wrist design people choose when they want meaning without a sleeve. Request slightly thicker termini on the cross arms so the intersection holds as the skin moves. Tiny delicate crosses that use ultra-thin strokes often need touch-ups by year two. Pain is brief and the session is quick, which makes it accessible for first-timers. Style it with a thin beaded bracelet above the cross to create a layered, considered look that reads intentional.

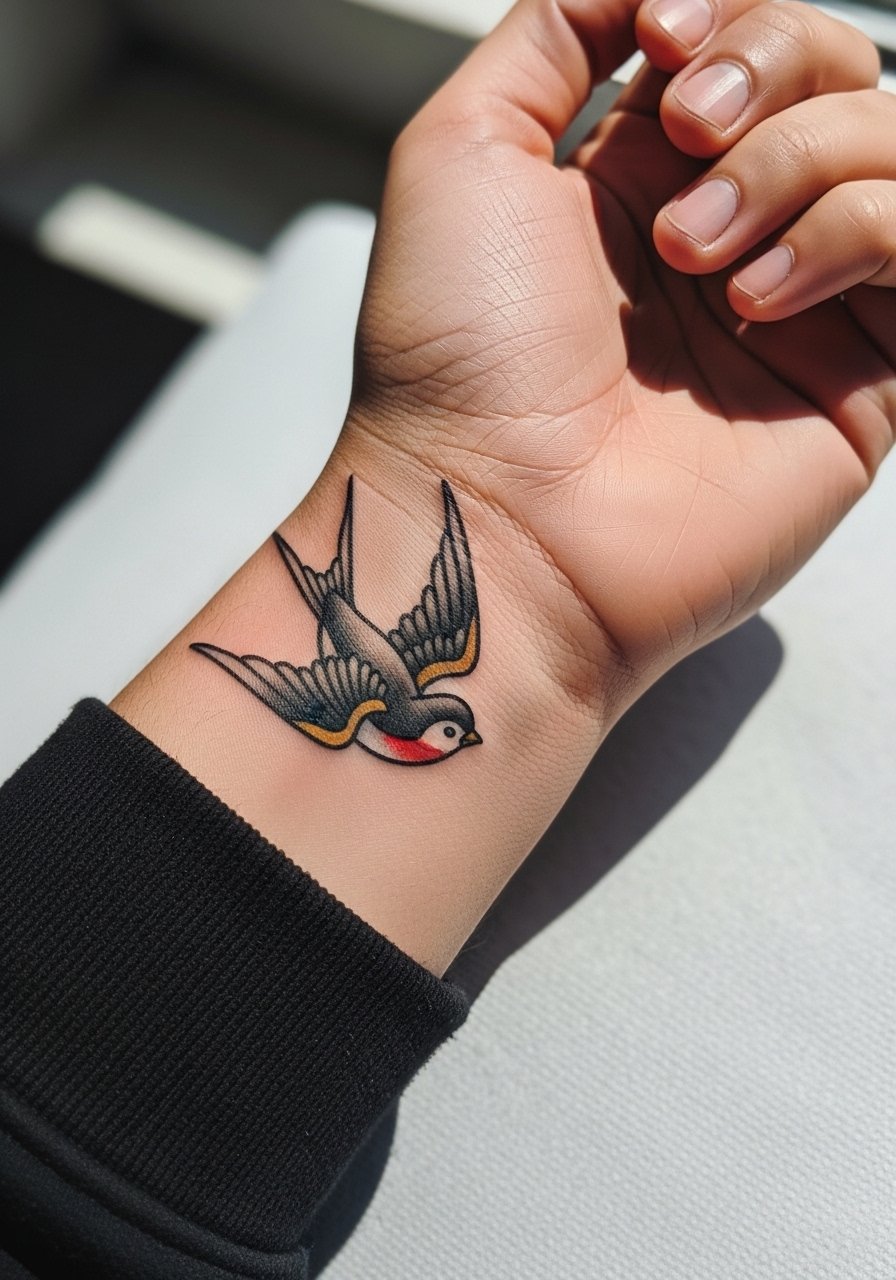
12. Traditional Swallow Flying Across the Wrist
Visual impact lead, swallows need enough wingspan to keep feather details from merging when healed. Ask for simplified feather block shapes and bold wing outlines to keep motion readable. Artists split on whether micro-feather detail works on the wrist. One camp says traditional bold outlines age best. The other camp argues modern single-needle feathering can hold with expert spacing. Name both camps directly in your consultation and ask where your artist stands. Expect a moderate session and plan for a touch-up if you want jewel tones in the feathers.
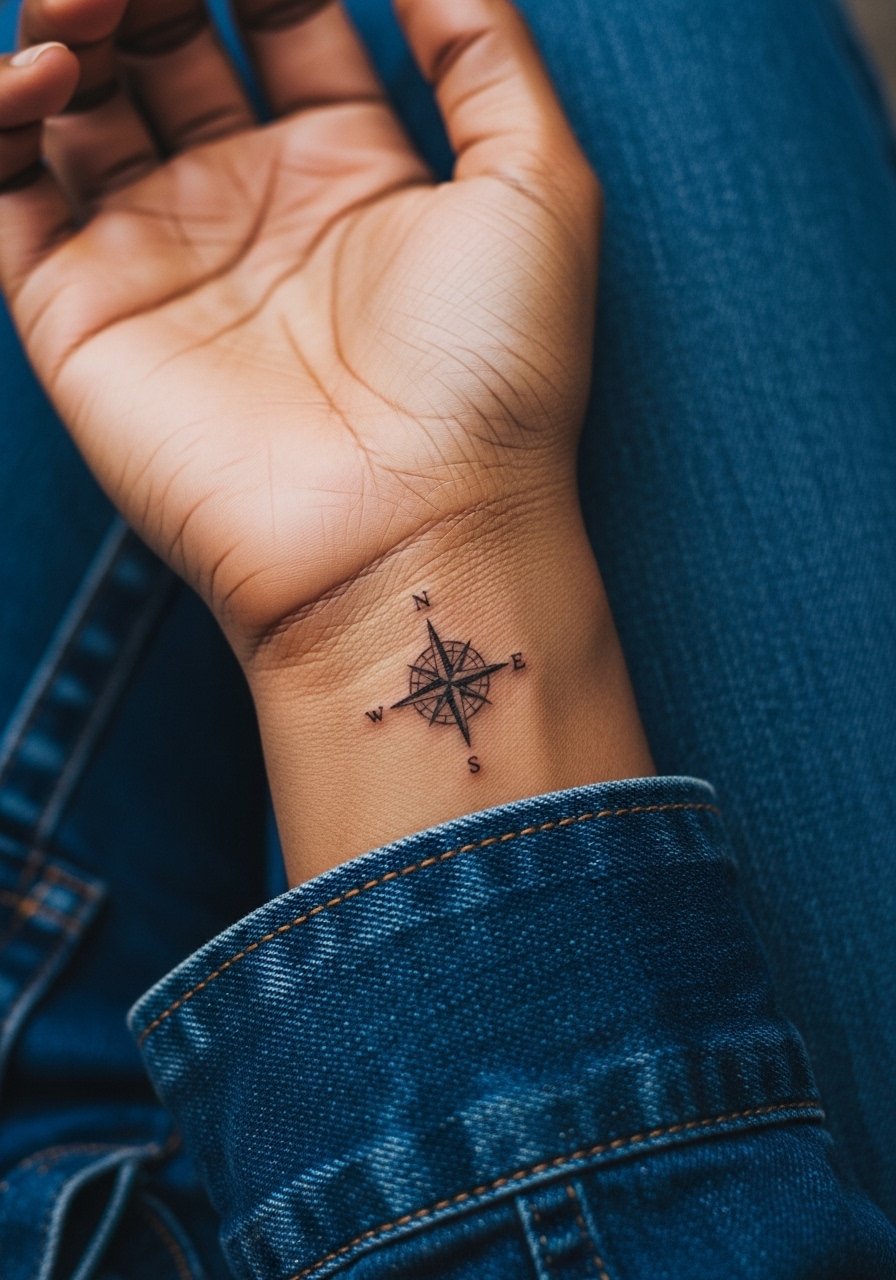
13. Tiny Compass Rose Near the Radial Styloid
Consultation lead, if you want true north on your wrist tell the artist where your hand naturally rests so the point aligns when your arm is relaxed. The radial styloid is a high-visibility spot and small misalignment becomes obvious. A common mistake is not considering how the piece sits when you walk or reach. Sessions are short but precision matters. Pair the compass with a slim field watch that mimics the tattoo scale and keeps the wrist composition cohesive.
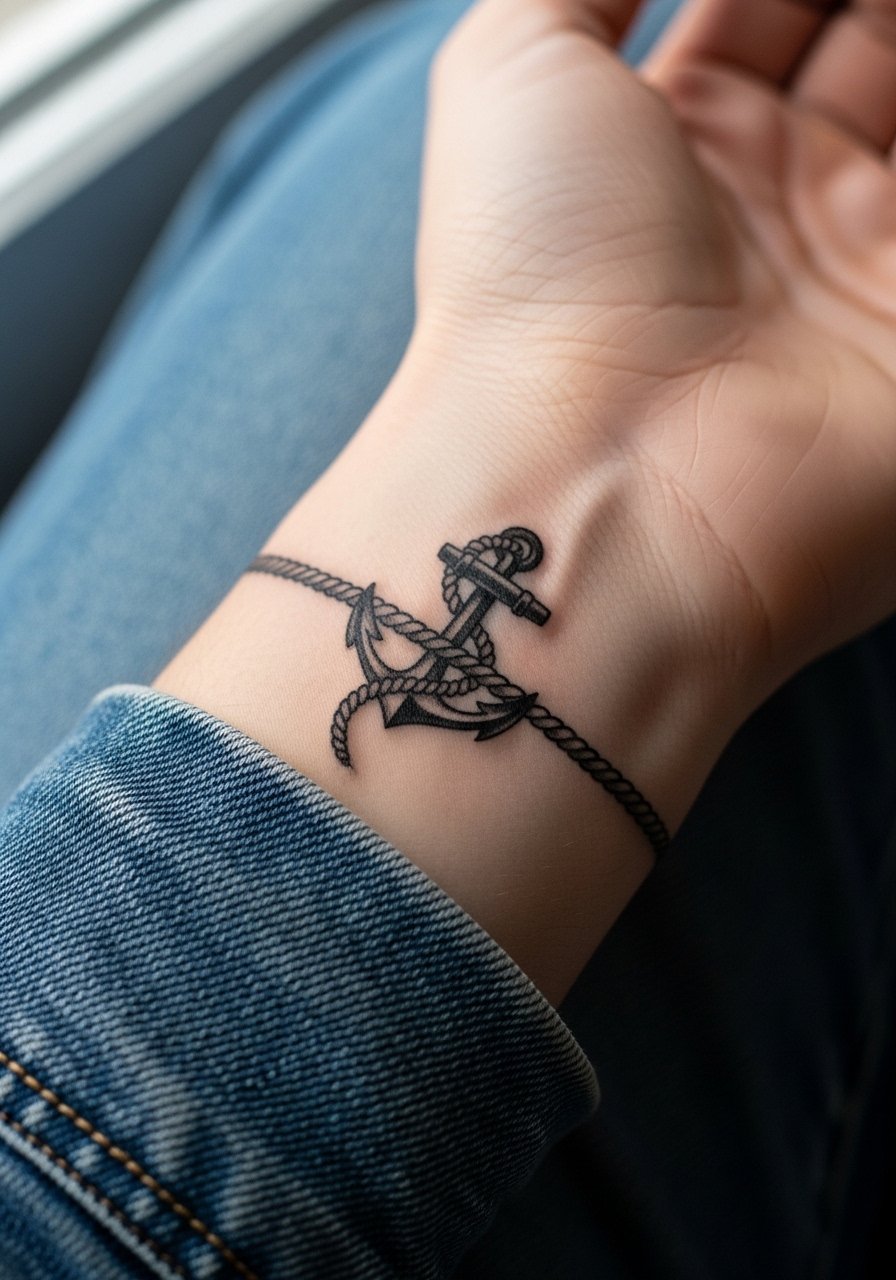
14. Anchor and Rope Tiny Sleeve at the Wrist
Aging warning lead, combining an anchor and rope into a tiny wrist band can look great at first and then lose detail in the rope twists. To avoid that, ask the artist to simplify rope texture and let the anchor take the visual weight. The session runs a little longer than single-icon pieces but remains under two hours. Wear a rolled denim jacket sleeve for casual days when you want the wrist band to peek through without rubbing constantly.
15. Morse Code Line Around the Wrist
Styling lead, Morse code tattoos give a personal line without obvious imagery, but spacing is everything. Tell your artist the exact dot-and-dash sequence you want and ask for slightly wider gaps so the code does not run together after healing. Expect low pain and a fast session. Many people forget to plan how the code sits under bracelets, which can obscure the rhythm of dots and dashes. For showing it off consider a thin silver slider bracelet that echoes the line without covering the code.

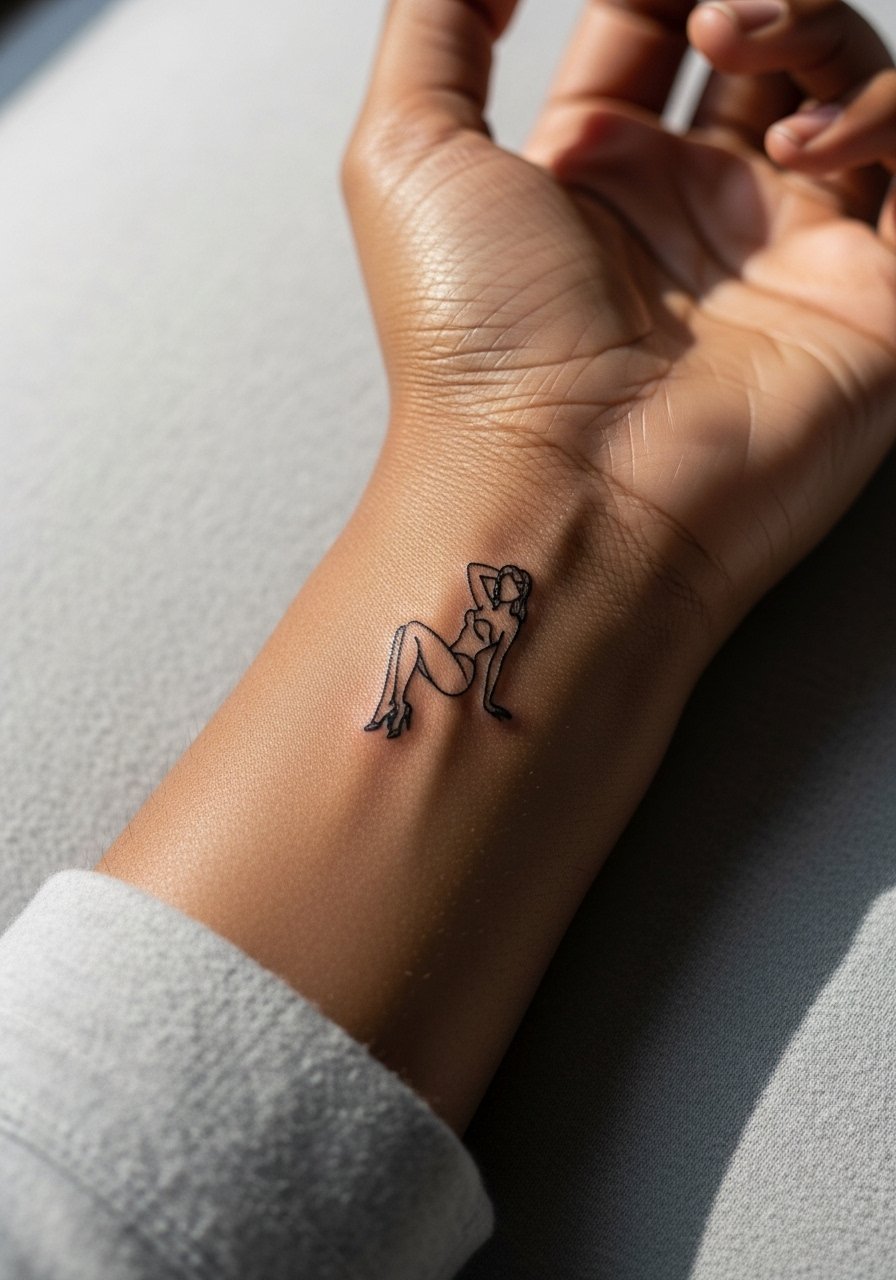
16. Tiny Pin-Up Silhouette at the Wrist Edge
Mistake lead, pin-up silhouettes look strong when scaled correctly but lose female silhouette clarity if shrunk too small. Ask the artist to prioritize an elegant outline and refrain from inner shading that will compact into a dark smudge. The wrist edge is visible and playful, with brief discomfort during the session. If you work in a conservative environment remember that visible wrist imagery still affects impressions in some workplaces. For casual styling a rolled sleeve and a slim bangle bracelet set the piece off without overexposing it.
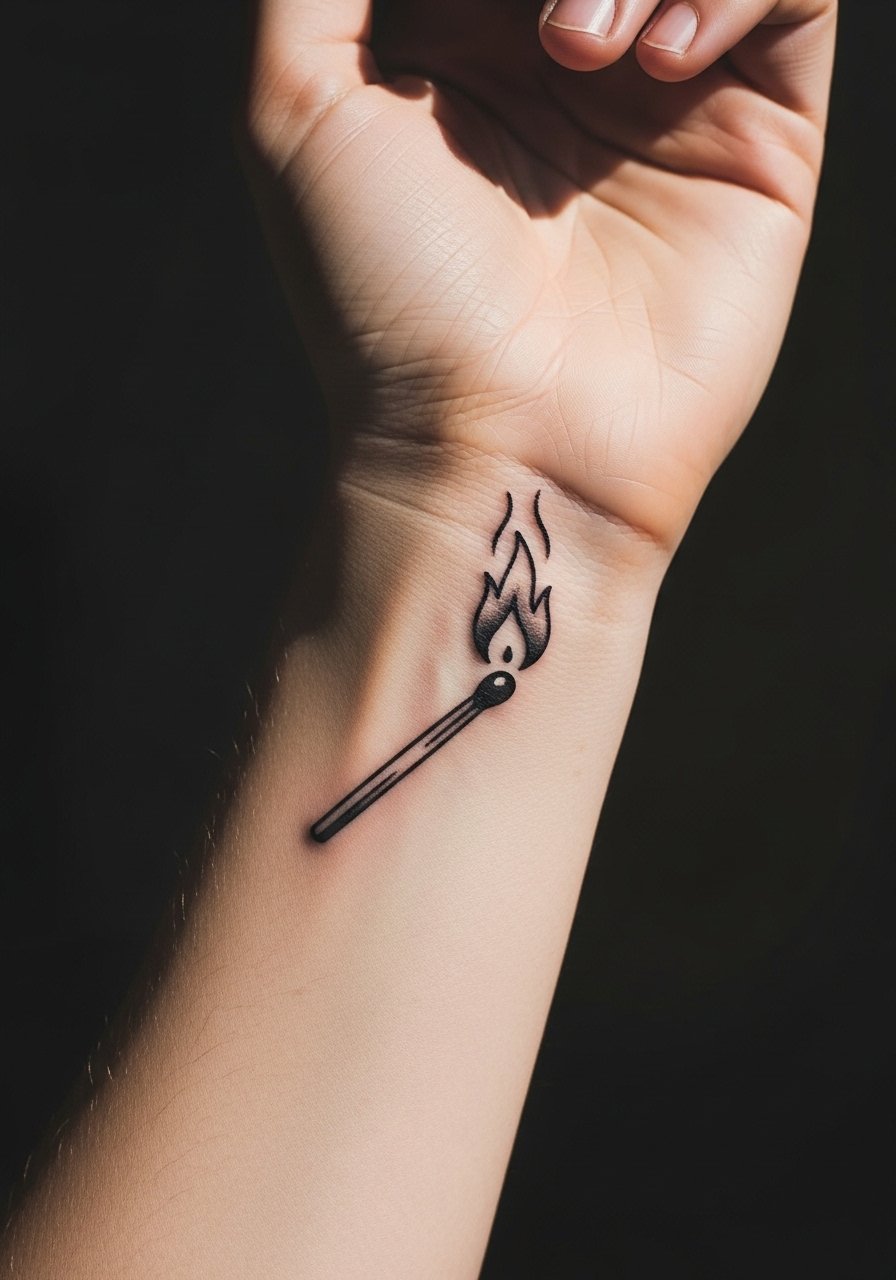
17. Traditional Matchstick with Flame on the Wrist
Personal observation lead, matchstick tattoos survive when the flame is simple and the shaft has a bold outline to keep contrast. Too much internal flame detail becomes a blurred orange-brown patch after sun exposure. Ask the artist to keep flame shapes graphic and consider adding a small black tip for longevity. Sessions are quick and the pain is manageable. For a night-out look the match plays nicely against a suede cuff bracelet that echoes the warm tones without touching the ink.
Frequently Asked Questions
Q: How long will a traditional wrist tattoo typically stay crisp before needing a touch-up?
A: It depends on size, ink saturation, and how much the area rubs during daily activity. Larger, bolder outlines usually hold up for three to five years before many people consider a touch-up. Fine single-needle work often needs attention around year two or three.
Q: Are wrist tattoos harder to heal because of handwashing and movement?
A: Yes, wrists are in constant use which raises friction and exposure during healing. Keeping the area protected and avoiding tight bands helps. The right thin protective film during the first week reduces contact without blocking airflow.
Q: Should I choose traditional saturation or fine line for a wrist piece if I want longevity?
A: Traditional saturation with stronger outlines generally lasts longer on wrists. Fine line can look delicate and beautiful at first, but talk to your artist about spacing and line weight so the design is set up to heal well. Ask them for healed photos of similar wrist work.
Q: Can I wear a watch or bracelet during tattoo sessions and the first few days of healing?
A: For the session itself avoid wearing tight watches or bracelets that could shift stencils. After the initial scabbing phase wait until your artist gives the go-ahead before returning to daily jewelry. A lightweight fabric band is less likely to cause rubbing than metal during the first few weeks.
Q: How do I find an artist whose portfolio shows wrist work that ages well without naming specific shops?
A: Use discovery paths like local shop directories, convention lineups, and tattoo community forums to find artists with wrist pieces in their portfolios. Look for healed photos, not just fresh shots, and ask to see examples where the work is at least a year old so you can judge longevity.
