
Fine line work rules the saved boards, but dotwork flower arm tattoos are the pieces that age with the most dignity when you plan for spacing and placement. Small, dense dot clusters look incredible fresh, and they can merge if placed over a high-friction zone. Pick the right forearm location, ask for breathing room between petals, and you get a piece that still reads at year five. The first example below shows how to set that spacing in a way your artist will understand.
1. Delicate Dotwork Rose on Inner Forearm
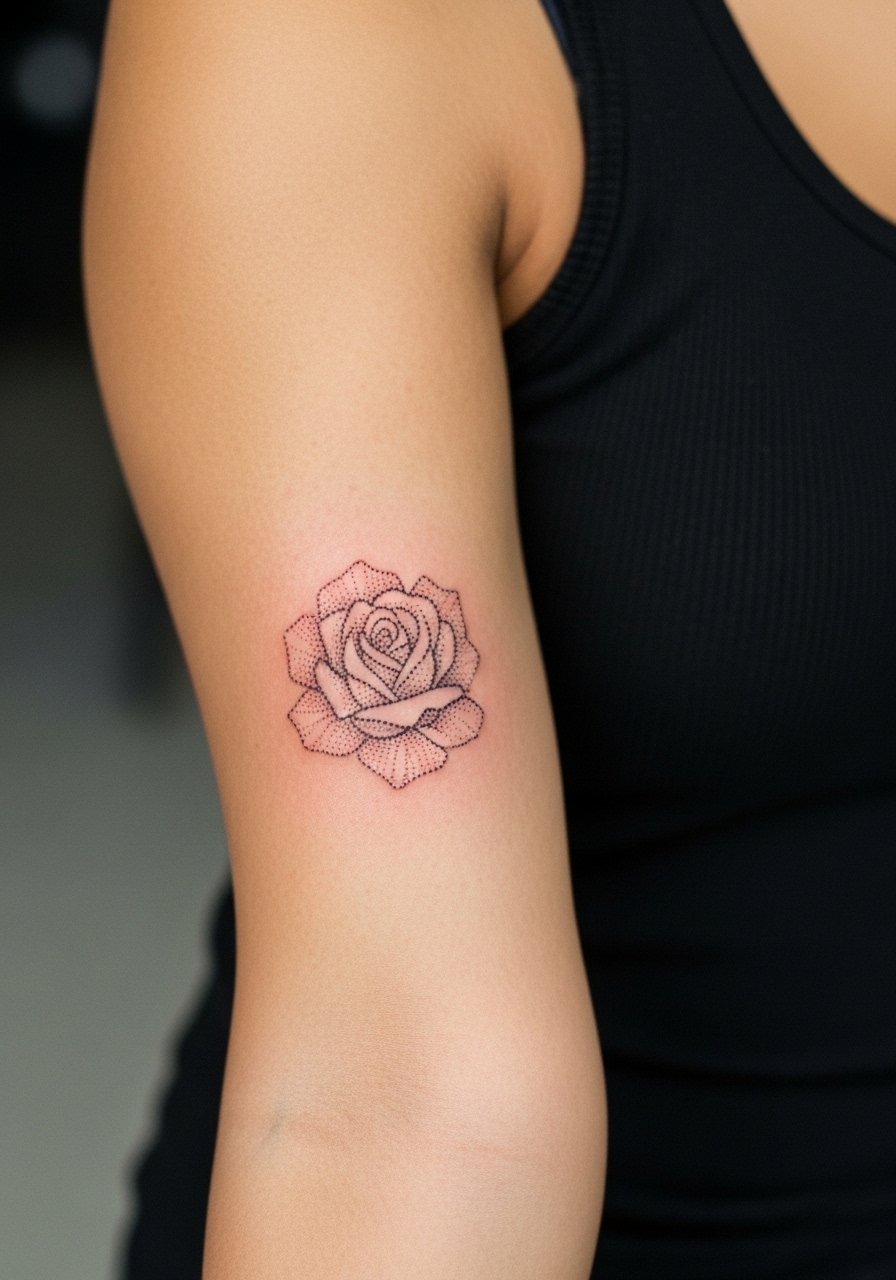
I recommend this when you want floral detail without heavy linework crowding the skin. It feels like a three out of ten on most pain charts because the inner forearm is soft. Tell your artist you want open petals with stipple shading and at least 2 to 3 millimeters between dense dot clusters so the dots do not fuse over time. A common mistake is asking for ultra-tiny petals too close together. That looks great at six months and can soften into a blur by year three. Expect a single session under two hours and a potential touch-up at year three. For showing it off, roll up a linen short sleeve shirt to keep attention on the forearm.
2. Cluster of Tiny Daisies Along Outer Forearm
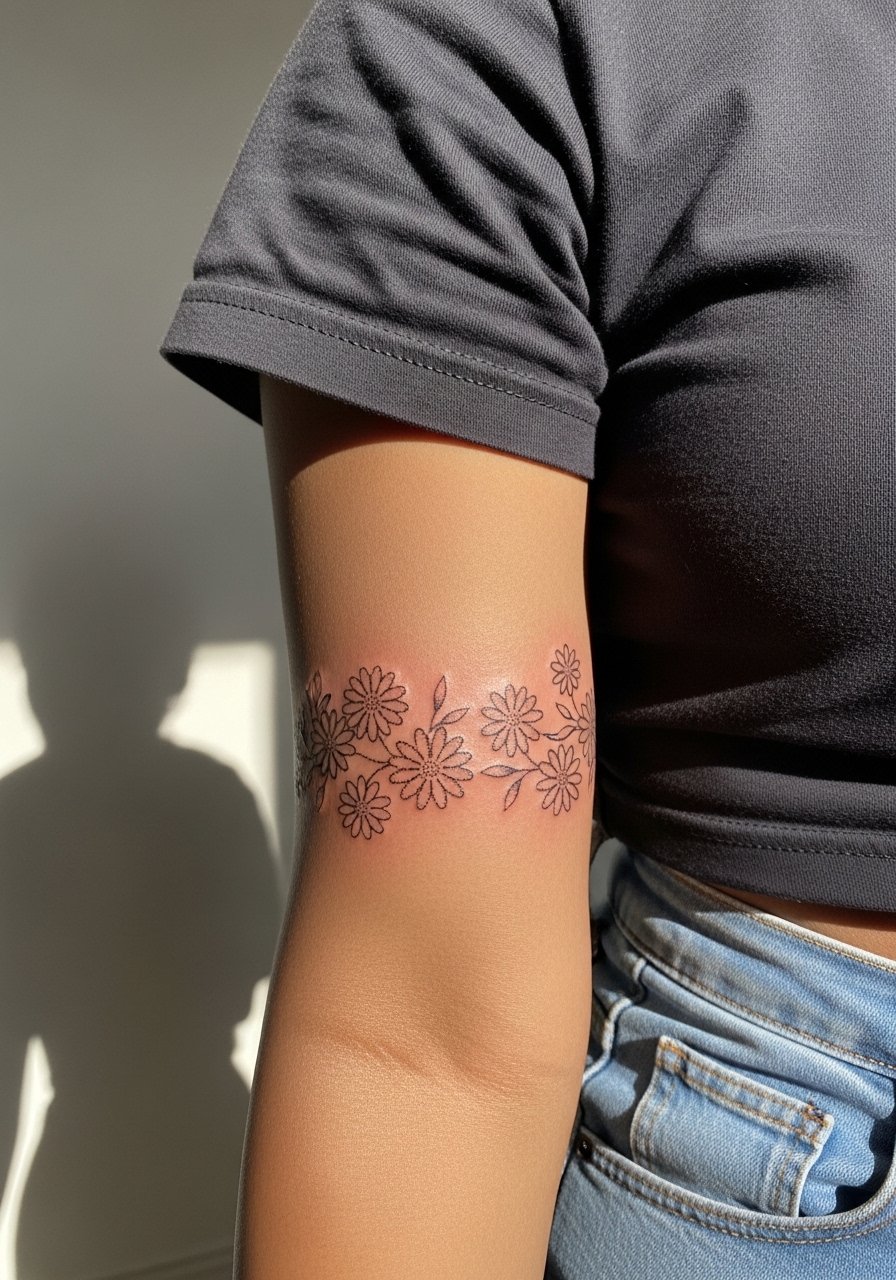
I've seen this cluster work best when spaced like a chain rather than a bouquet. Start the design narrow near the wrist and let it widen toward the mid-forearm for balance. During your consult, ask for slightly heavier outer dots and lighter inner stippling so the silhouette stays readable from a distance. Mistake to avoid is packing too many daisies in a tight band. At six months the dots read crisp, and at two years the outer dots keep the silhouettes intact if the spacing was respected. Pain is low and session time is often 60 to 90 minutes. For evenings out, pair with a thin chain bracelet that sits above the cluster.
3. Mandala Flower Near the Elbow
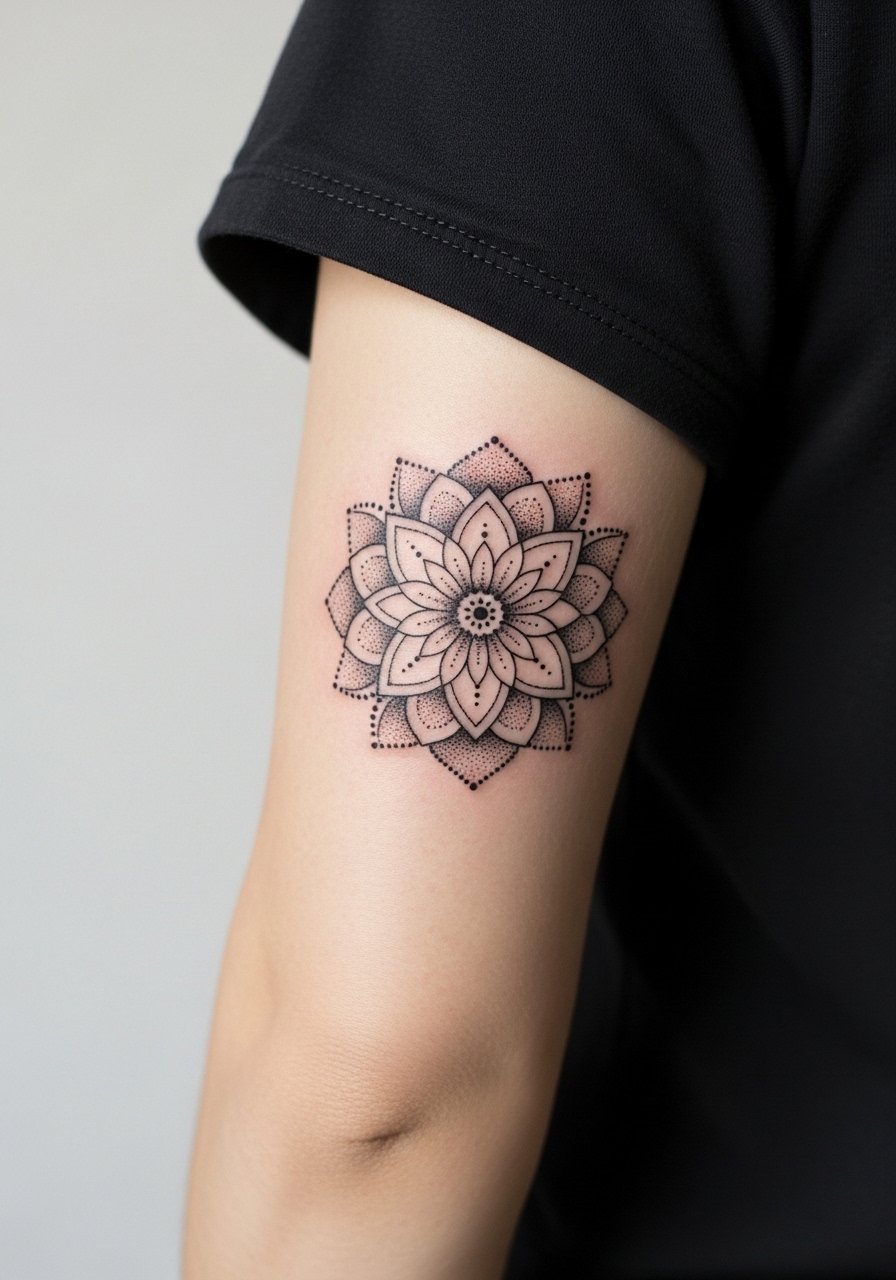
Fair warning: the skin around the elbow moves and creases, so the biggest mistake is designing a dense mandala that crosses the joint. When the pattern spans the crease it risks line merging. I suggest positioning the main mandala just above the joint so the petals sit on stable skin. Tell your artist to use gradated dot density rather than solid fills. This placement feels like a five out of ten during the session and may need two shorter passes rather than one long session to avoid swelling. At two years the outer dots keep the geometry clear if spacing was intentional. Wear a loose button-down shirt to the appointment so the sleeve can be rolled without tugging the area.
4. Botanical Half-Band Sleeve with Dot Accents
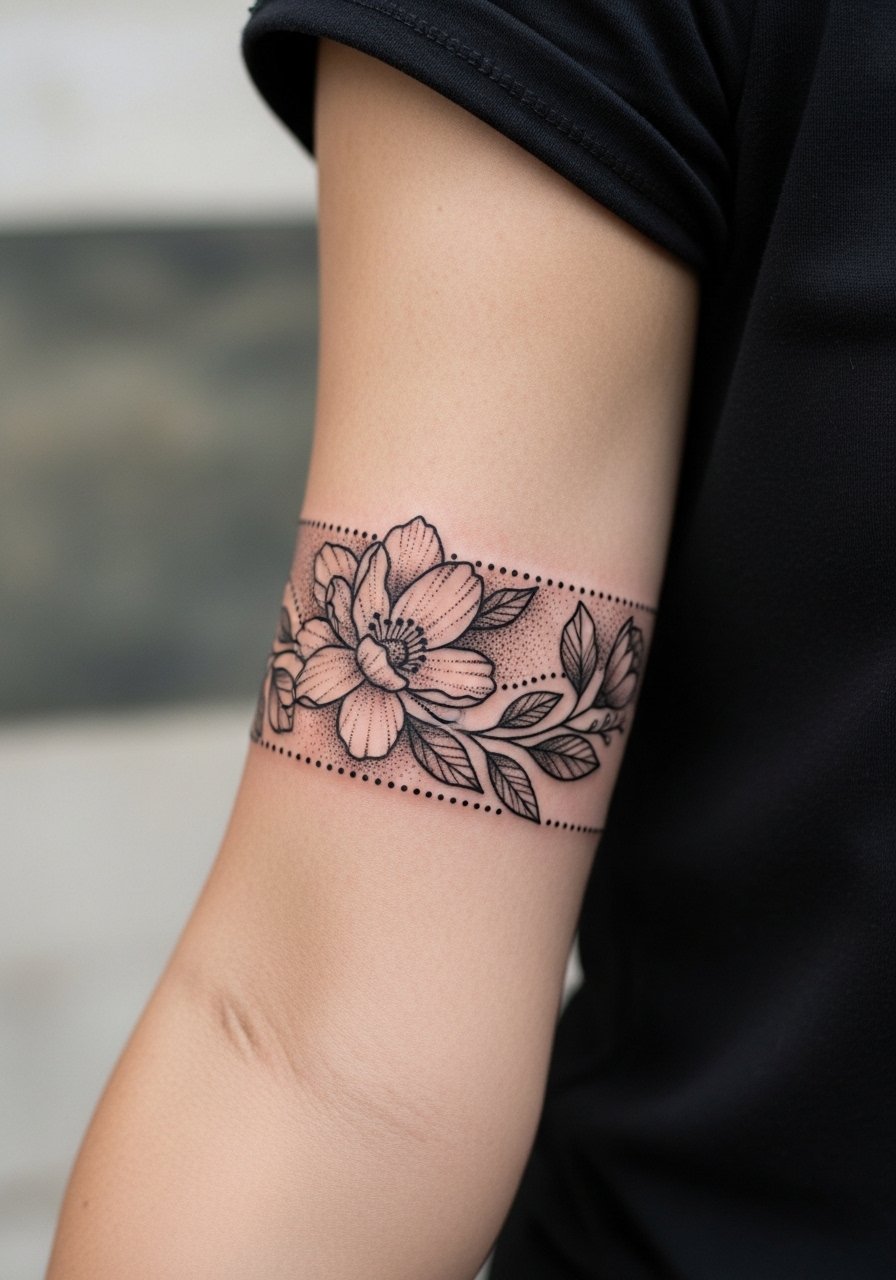
There is a debate in the community about how dense a half-band should be. One camp says heavy saturation builds durability. The other camp wants airy spacing to preserve detail. Both are valid. For a half-band I recommend mixing negative space with dense dot accents so the piece still breathes. During consultation point to photos that show spacing rather than photos that only show saturated black. Expect this to take two to three hours depending on coverage. Common mistake is asking for a full wrap without considering how clothing will rub the sides. For showing off, pair the band with a rolled sleeve denim jacket that keeps the forearm visible.
5. Minimalist Lotus at the Wrist
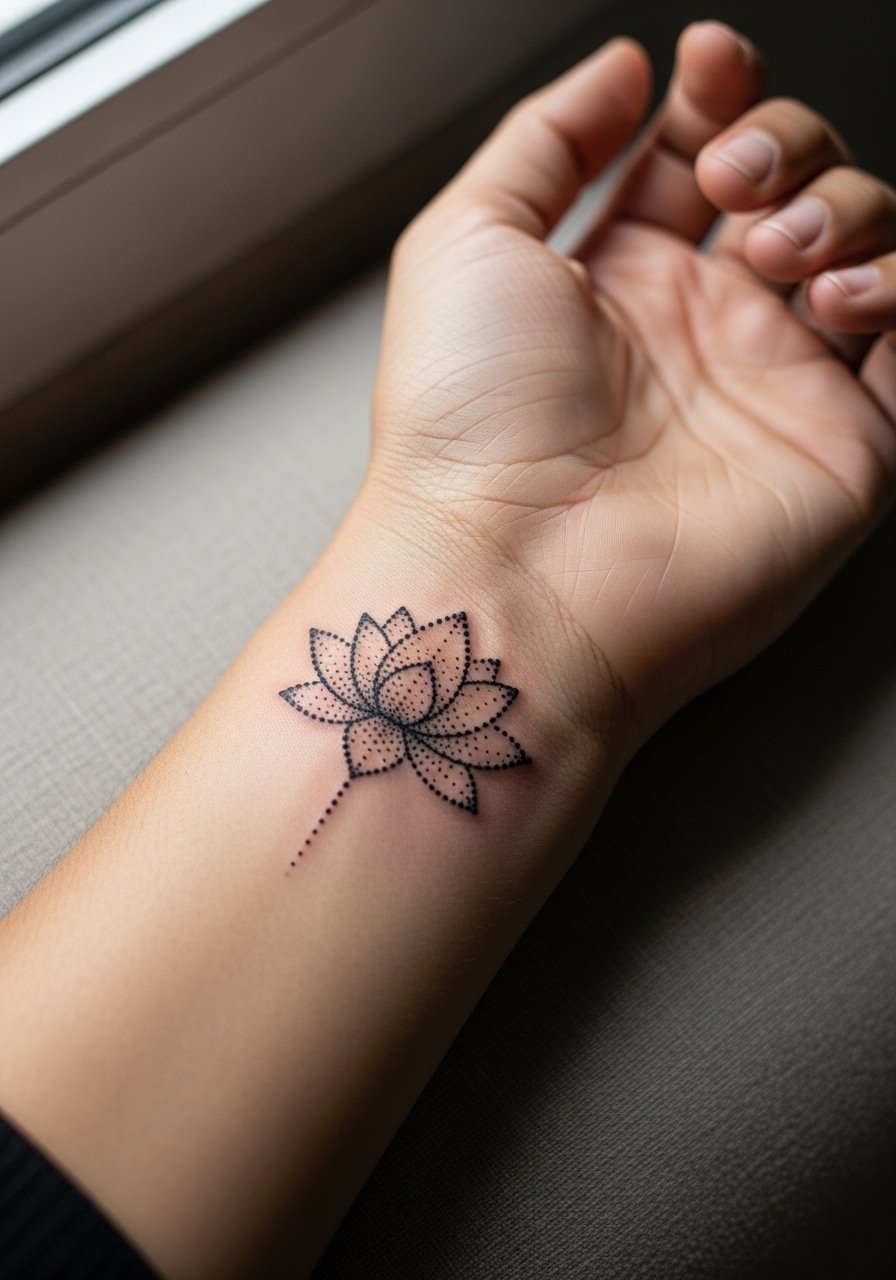
There is a practical trade-off here. Wrist space is tight and constant friction from clothing and watches makes tiny dots vulnerable. I usually tell people to widen the negative space between petals when they want durability. Ask for shallow stippling rather than deep solid fills. The session is quick, often under 45 minutes, but expect touch-up sooner than other forearm placements, typically around year two or three. If you work in a hand-facing environment remember wrist tattoos get noticed more than forearms. Pair this with a minimalist watch strap that sits slightly above the design so the tattoo does not rub under hardware.
6. Sunflower with Negative Space on Upper Arm
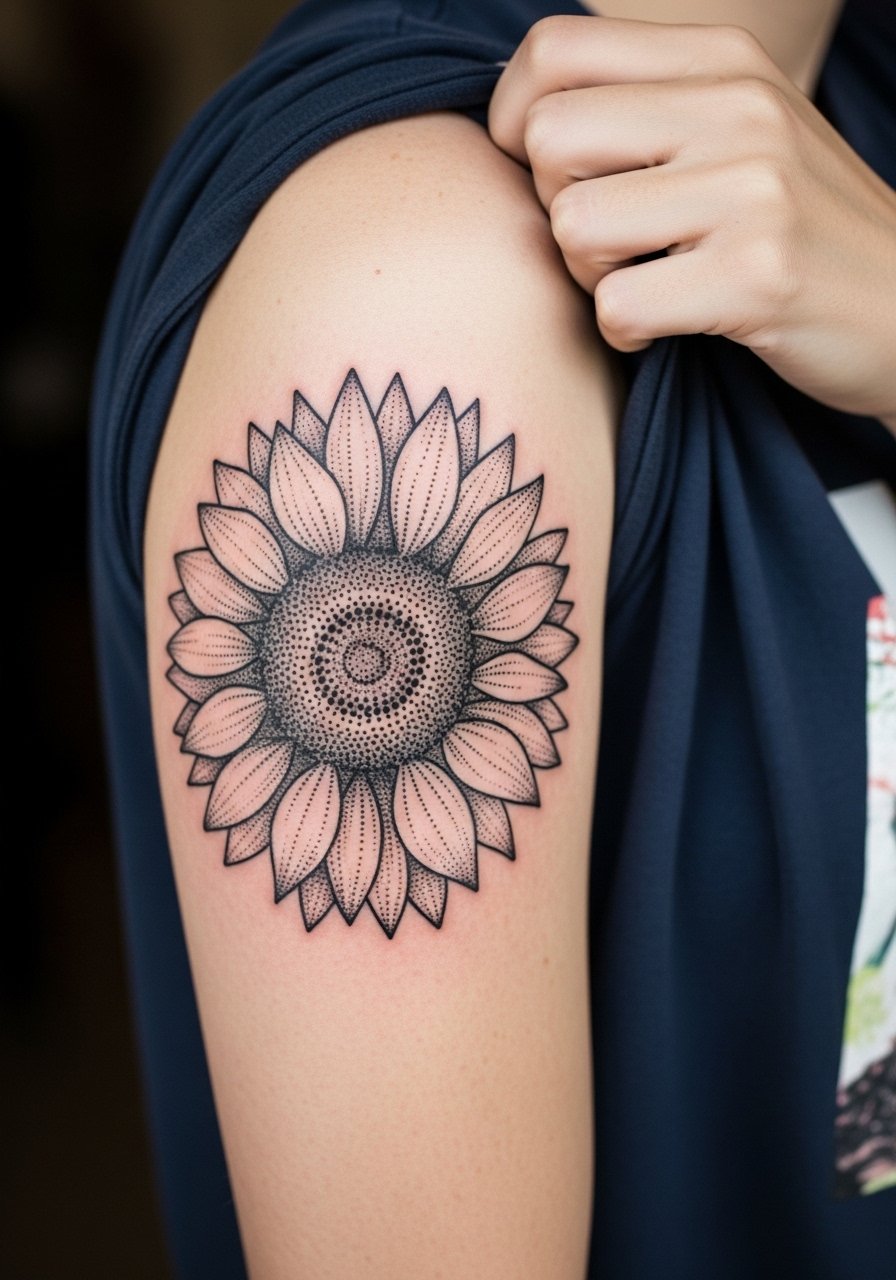
When you want a bold presence but not a full sleeve, a sunflower with deliberate negative space gives the look without heavy saturation. Visual impact comes from holding the petals open and letting skin show through as part of the design. Tell the artist you want dot gradients radiating from the center outward. Pain is moderate at the upper arm and sessions typically run one to two hours. A common mistake is overfilling the center with solid black, which ages into a blob. For warm-weather showing, this piece pairs well with a sleeveless linen top to keep the upper arm visible.
Studio Day Picks
The upper arm and forearm pieces above reward simple prep and a couple of smart supplies on chair day.
-
Stencil transfer paper kit. Useful if you want to preview the exact placement and rotate the stencil before the needle touches skin.
-
Topical numbing cream. Applied per shop guidance about 30 to 45 minutes before can take the edge off wrist and inner-arm sensitivity.
-
Thin protective film roll. Handy for areas that face friction from clothing during the first 48 hours, such as long-sleeve cuffs over forearms.
-
Fragrance-free body wash. Cleanses healing skin gently without stripping dots that rely on shallow hues.
-
Aquaphor healing ointment. A thin layer in the first days can protect fine stippling while skin starts to close.
7. Geometric Poppy on Outer Bicep
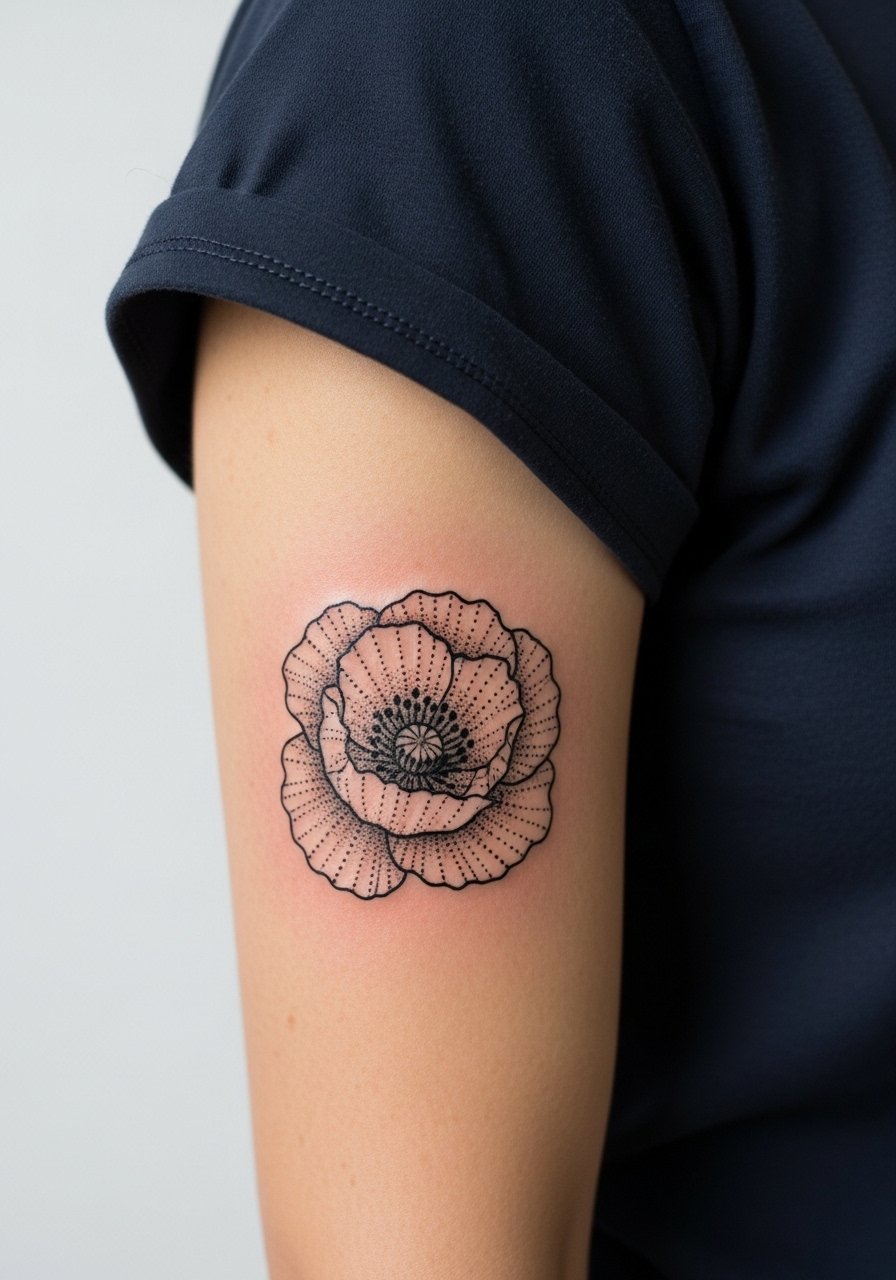
Personal observation is that the outer bicep gives enough flat space for geometry to read cleanly. Ask for stronger outer dot anchors and lighter inner stippling to preserve the poppy silhouette at distance. Mistakes often come from trying to force a circular mandala into an oblong bicep shape. Pain here is low and sessions are comfortable at one to two hours. Expect this placement to age well because it avoids high-friction zones. For show, a muscle-fit short sleeve shirt frames the bicep without covering the piece.
8. Vine Wrap Around Forearm
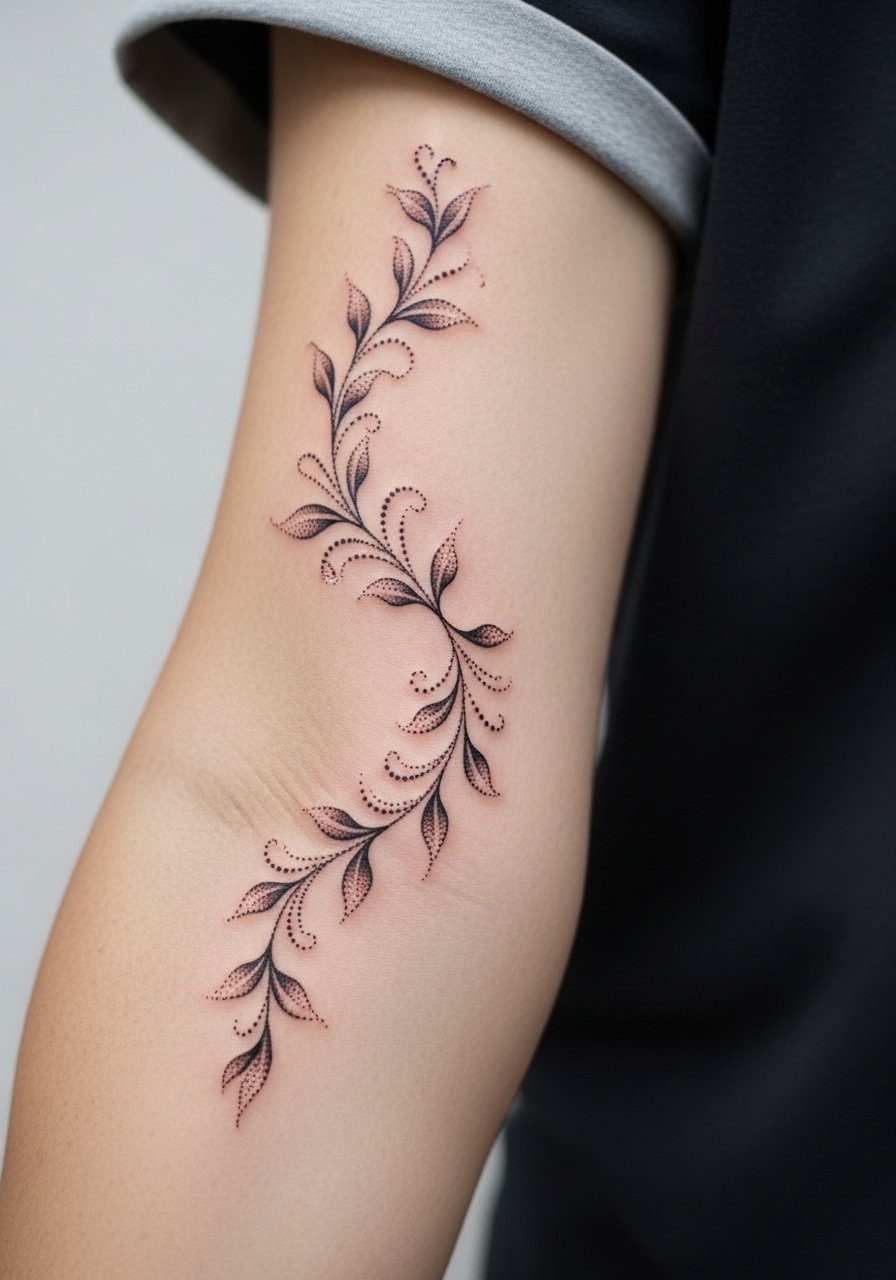
The visual goal with a vine wrap is movement along the arm without creating a full band that sits under shirt cuffs. Consultation note: specify how far around you want the vine to travel and whether you want small gaps where the skin shows. A common mistake is requesting a continuous dark band. That wears into the cuff and can blur with frequent washing. Session time varies from 90 minutes to three hours based on length. For everyday wear, much better to keep the vine partial and pair with a rolled sleeve oxford to expose the piece without rubbing.
9. Tiny Chrysanthemum Stack Near Wrist and Finger
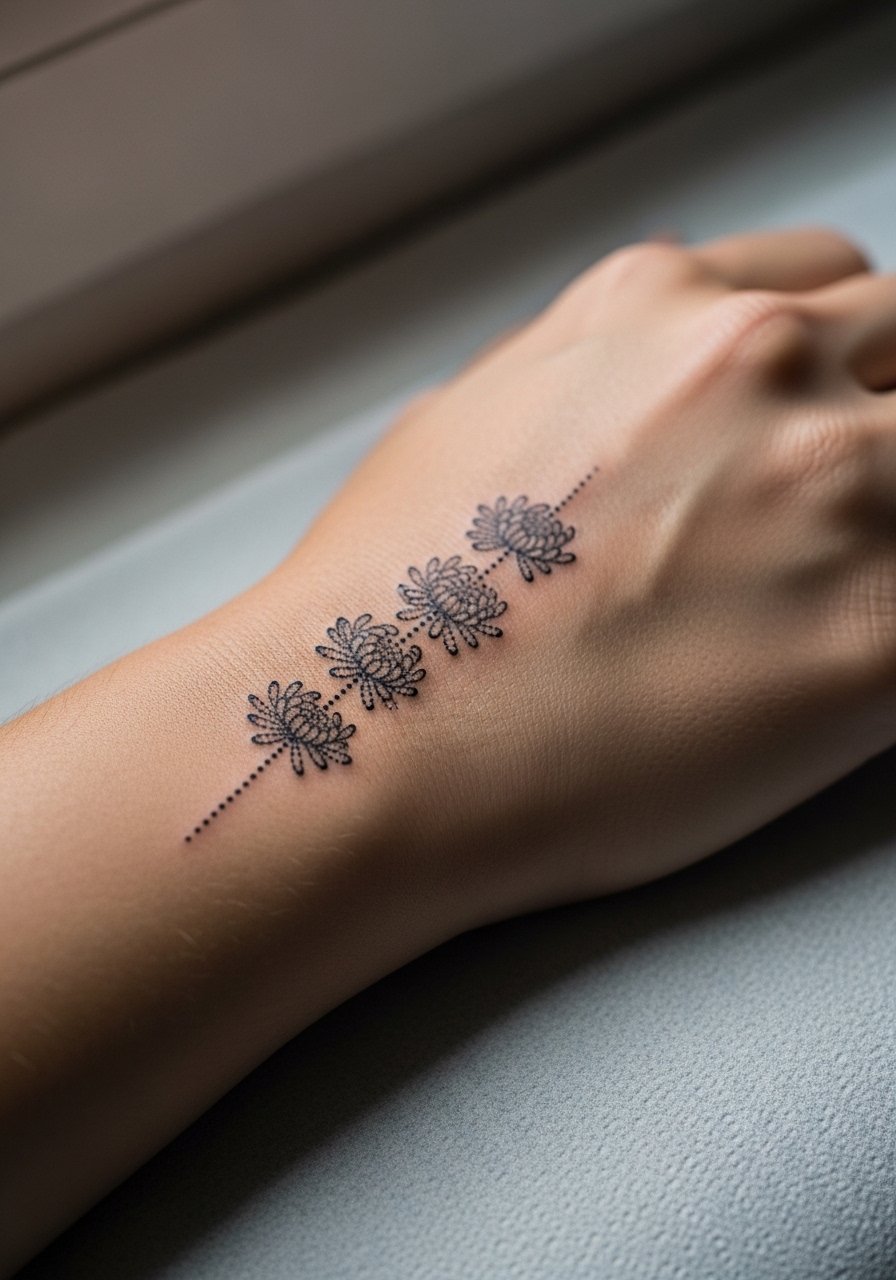
Half the debate about wrist-to-finger pieces is longevity. One camp says small finger-connected clusters fade quickly because of constant hand washing. The other camp has seen them hold when dots are spaced and not inked too deep into the skin. My advice is to keep the finger portion minimal and let most of the design sit on the wrist. Session discomfort can be higher on the finger, so plan short passes. Most people need touch-ups on the fingers by year two. If you need to hide work for certain workplaces note that hand and finger tattoos still affect some industries.
10. Dotwork Peony on Outer Forearm
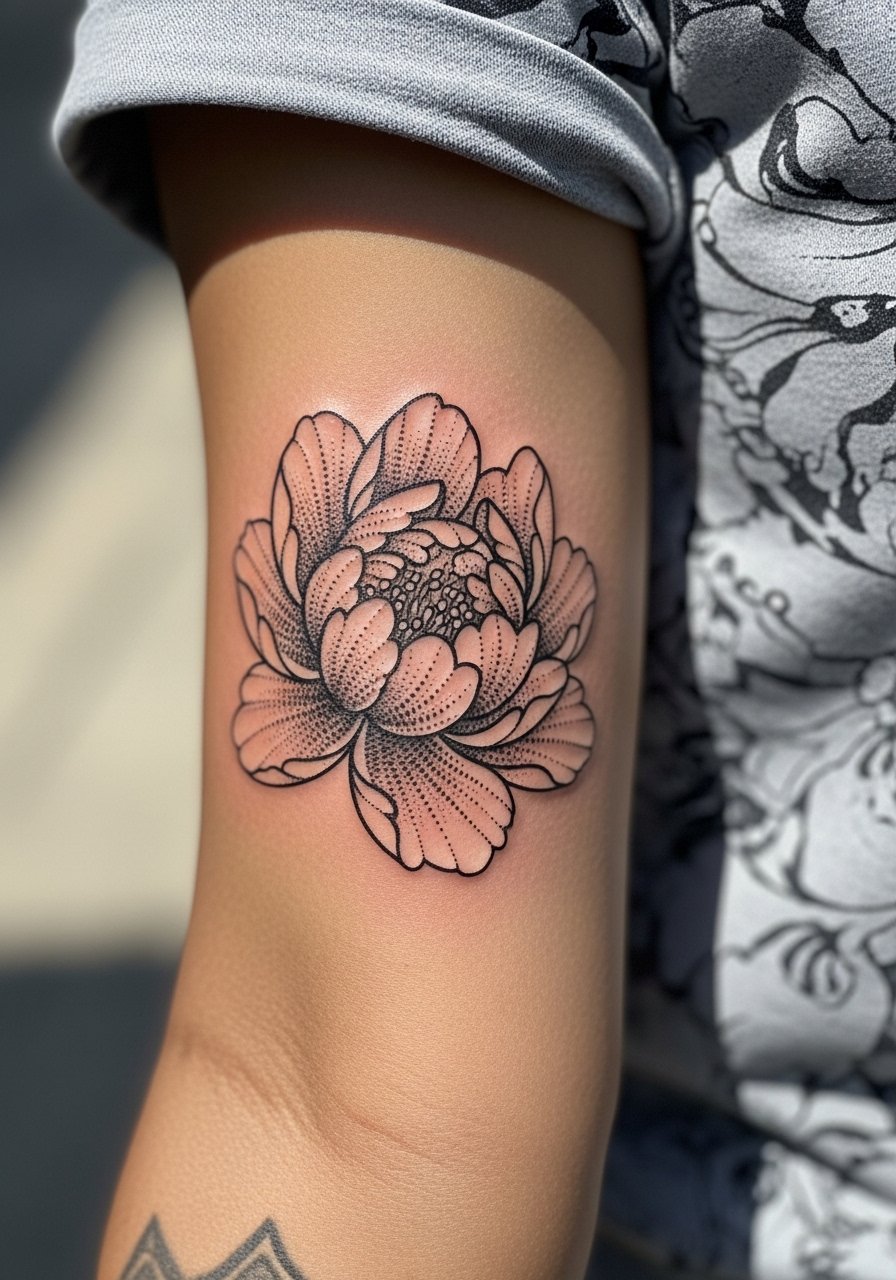
When you want scale on the forearm without a full sleeve, place a single peony off-center so it reads when the arm is relaxed. Be specific in your consultation about petal overlap and ask the artist to use stipple transitions rather than solid fills. A common mistake is crowding leaves into the wrist area where friction is higher. Expect a two-hour session and plan for a touch-up around year three depending on sun exposure. For styling, pair this peony with a rolled-up camp collar shirt when you want the forearm to be visible without overexposing the whole arm.
11. Crescent Flower Trio on Inner Bicep
The inner bicep is sensitive and the one mistake I see is underestimating swelling there. Sessions can feel like a six out of ten and may need breaks. Ask for slightly larger spacing than you think you need so the crescents keep their shape as the tissue settles. This placement hides easily under short sleeves, which is good for workplaces that care about visibility. For session comfort, choose a loose tank top so the artist has clear access without you exposing more skin than necessary.
12. Abstract Floral Sleeve Panel
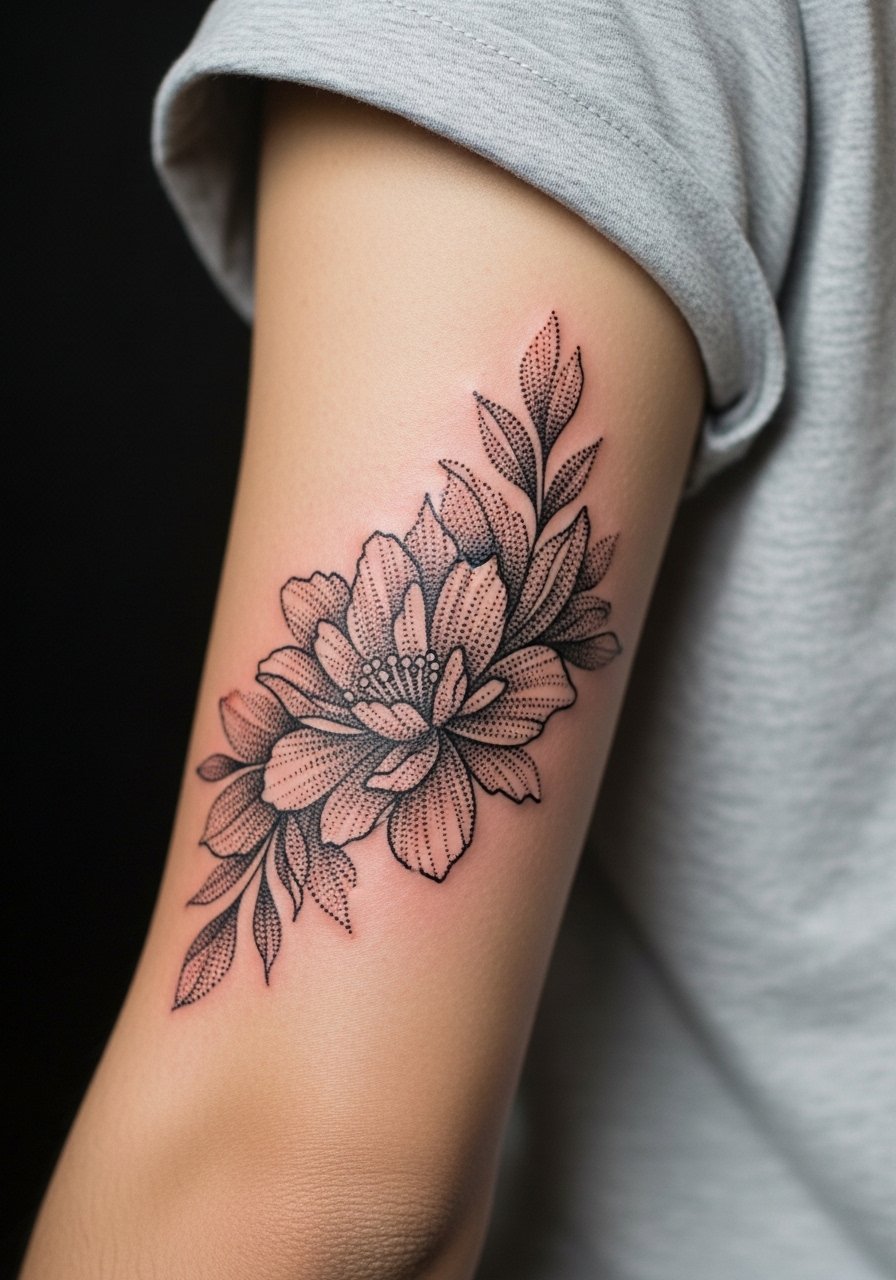
When you plan a partial sleeve panel, think about how this panel will sit next to future work. My consultation tip is to request interface areas with open negative space so adjoining pieces can connect later. A common error is filling every square inch, which makes blending future additions harder. Sessions for a panel usually run multiple shorter sittings to avoid swelling. At two years the panel holds well if dots are not too dense near edges. For staged sleeves, bring reference images that show how different panels read together.
13. Matching Flower Bands for Couples on Forearms
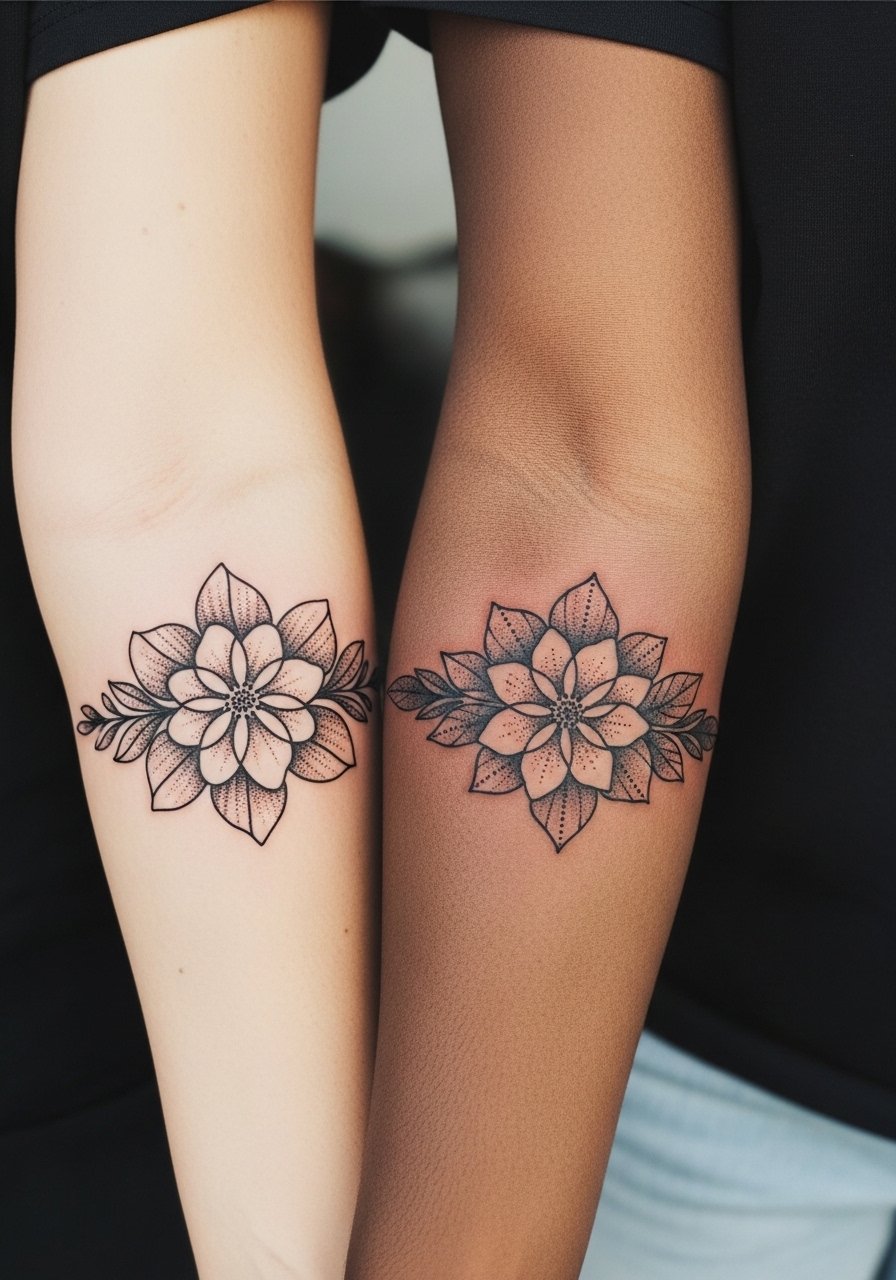
If you and a partner want matching bands, decide whether you want the same exact placement. One common mistake is matching the visual but not matching the placement, which makes them look off when arms are held at rest. I suggest both people pick their dominant forearm if visibility matters. Touch-ups may happen on either arm at different times due to sun exposure and daily habits. Sessions are efficient when booked back to back. For reveal photos, coordinate with a linen short sleeve shirt so the band sits cleanly against fabric.
14. Compass Rose Flower Fusion on Upper Arm
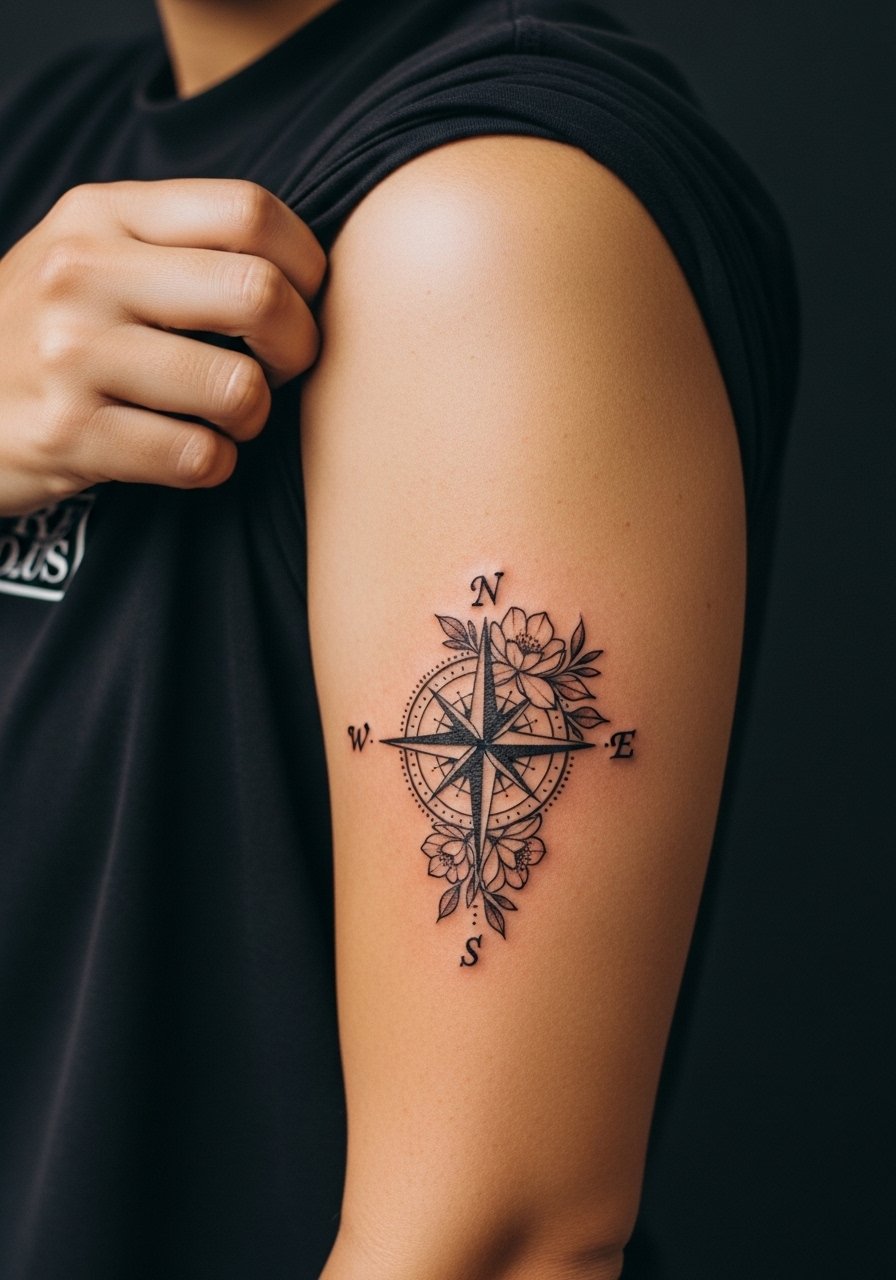
Visual impact is the reason people pick a compass-flower fusion. The key is to balance the geometric center with organic petals so neither element overwhelms the other. Ask for clear negative space between the compass points and the petals. Pain is moderate and sessions often run two hours. A mistake I see is squeezing too many directional points into a small compass which then reads messy at distance. For showing off in summer clothes pick a sleeveless linen top that leaves the upper arm visible.
15. Micro-Realism Floral Portrait Near Tricep
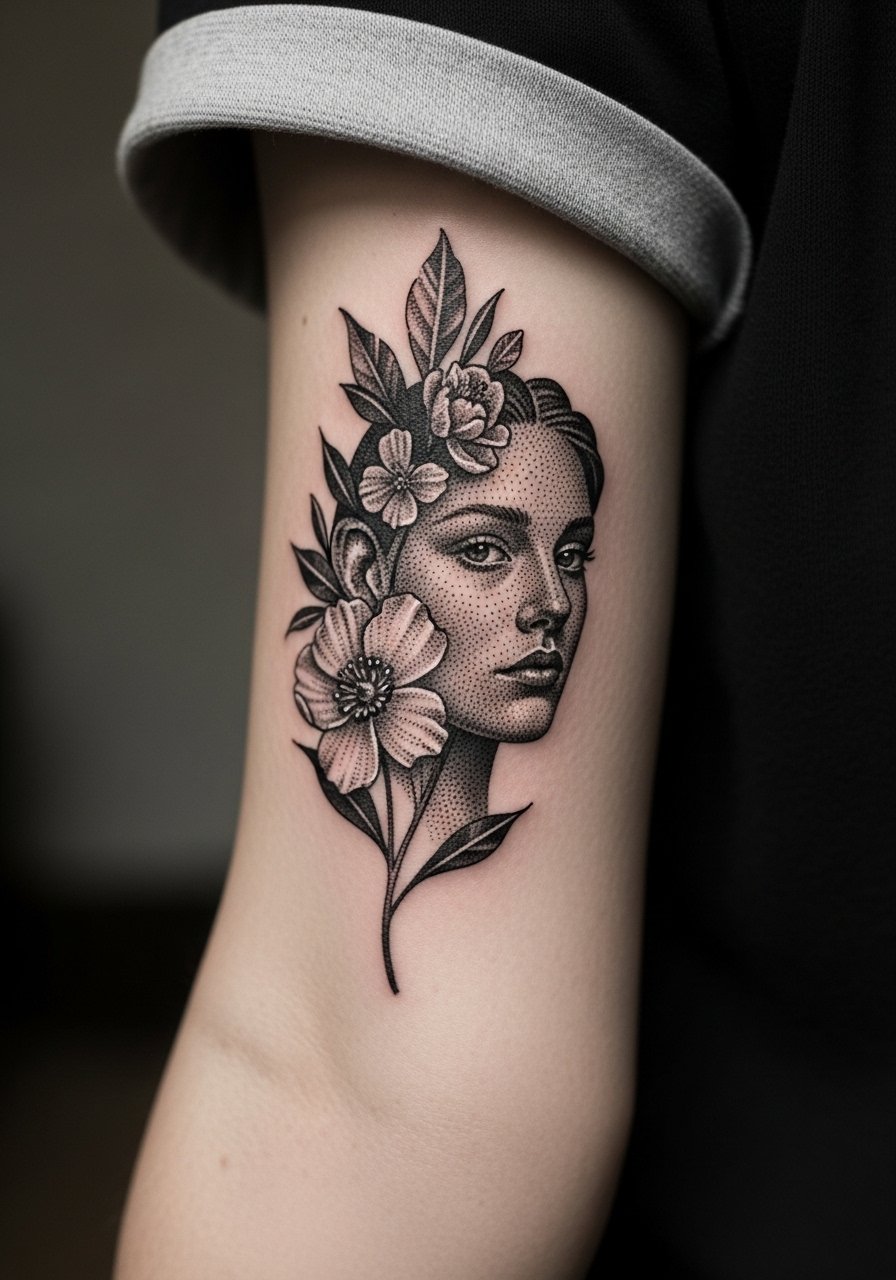
Consultation matter: micro-realism relies on subtle dot density changes, so bring clear, close-up references of the flower you want. The tricep is forgiving and often takes ink well, but the mistake is asking for too much tiny detail in a very small patch. Session time is likely two to three hours. Expect the piece to soften gently; the key is gradation so the portrait still reads at year three. For session comfort, wear a loose tee that you can roll without pulling the area.
16. Old-School Dotwork Daisy on Outer Elbow Area
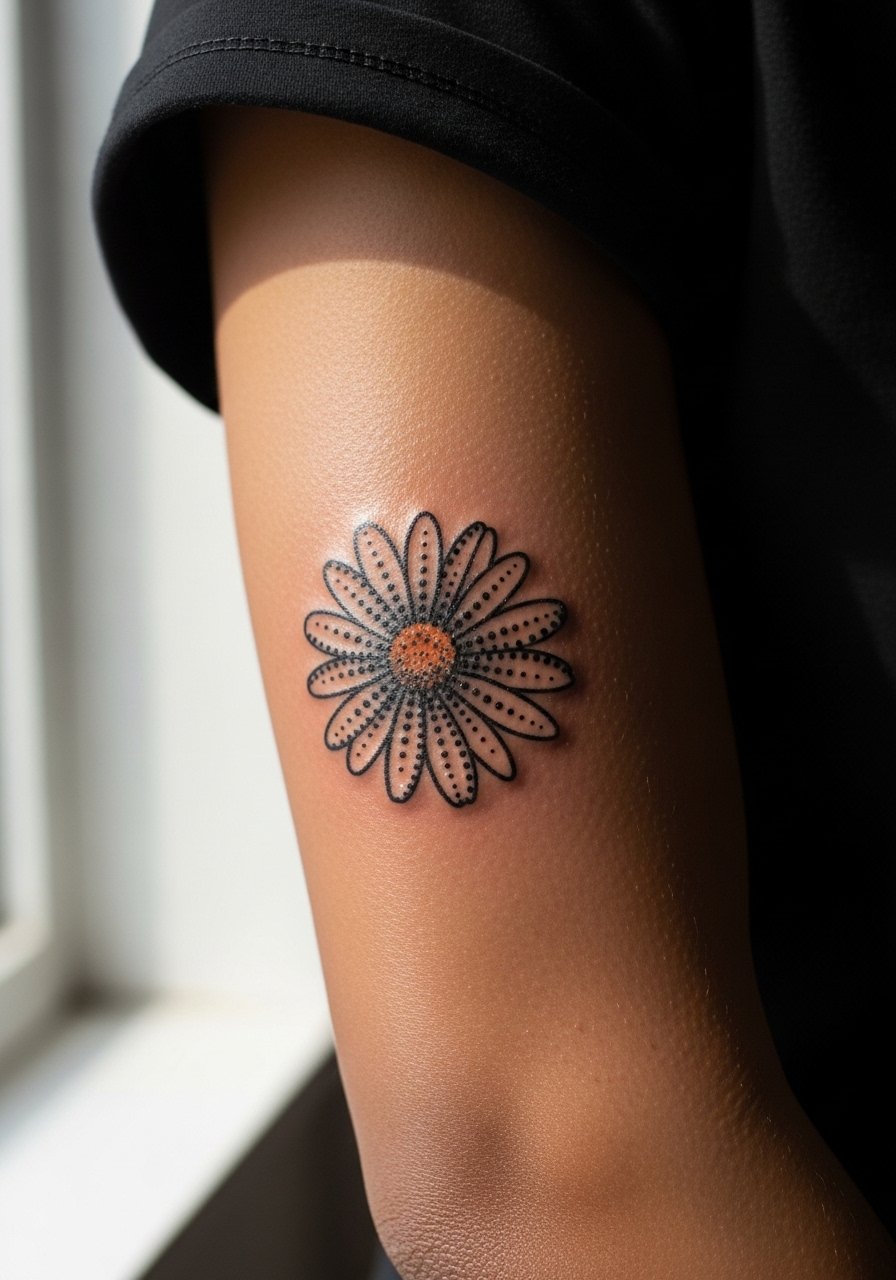
The elbow area challenges durability because of constant movement. One camp prefers bold outlines to anchor the design. The other camp favors stipple anchoring with reinforced outer dots. I tell clients to pick which look they prefer knowing that both need touch-ups more often than flat forearm pieces. The session can feel sharp near the bone and often takes shorter passes. Avoid asking for ultra-fine interior dots across the joint. For casual styling consider a rolled sleeve sweatshirt that frames the daisy without constant cuff friction.
17. Petite Forget-Me-Not Above the Wrist

Most petite wrist florals look best when given some breathing room. The tiny error I see is trying to cram text or extra motifs into the same small strip. If you want durability ask for slightly bolder outer dots and open negative space between the flowers. Session time is short and pain is low, but expect earlier touch-ups than larger forearm pieces. For appointment ease wear a button-down shirt you can slide your hand through without tugging on the wrist area.
Frequently Asked Questions
Q: How should I ask for spacing in a dotwork floral so it holds up over time?
A: Use clear language in the consultation. Say "leave at least 2 to 3 millimeters between dense dot clusters" and show examples that highlight negative space. I have seen artists respond well to spacial measurements rather than vague terms like "delicate" or "fine."
Q: Will dotwork on the inner bicep blur faster than on the outer forearm?
A: It depends on skin movement and how deep the ink is placed. Inner bicep sees more stretching and swelling, so ask for slightly bigger spacing and plan on a touch-up sooner than outer forearm work.
Q: Are wrist-to-finger flowers worth it if I wash my hands a lot?
A: Many people accept a trade-off. Fingers and wrists face constant washing and friction so expect touch-ups by year two. If longevity is a priority keep the design more on the wrist and lighter on the fingers.
Q: What should I wear to my dotwork forearm appointment so the artist has good access?
A: Choose clothing that provides access without exposing more skin than necessary. A loose button-down shirt or a tank works well depending on placement. Aim for comfort and easy sleeve movement.
Q: How do I find an artist who specializes in dotwork flowers without following a specific handle?
A: Use discovery pathways like searching hashtags, checking local shop portfolios on directories, and browsing community forums. Look for portfolios that show healed work and spacing similar to what you want.
