
Fine line Princess Mononoke work looks incredible on a fresh photo, but the reality is that compact realism and heavy texture need careful placement and spacing to last. Expect questions about pain, fading, and touch-ups during your consult. These 27 realistic ideas focus on how each design settles over time, what to ask your artist, and how to style the piece so it reads like a deliberate part of your wardrobe. The first idea jumps straight into a forearm piece you can show off easily.
1. Micro-Realism Kodama Cluster on Inner Forearm
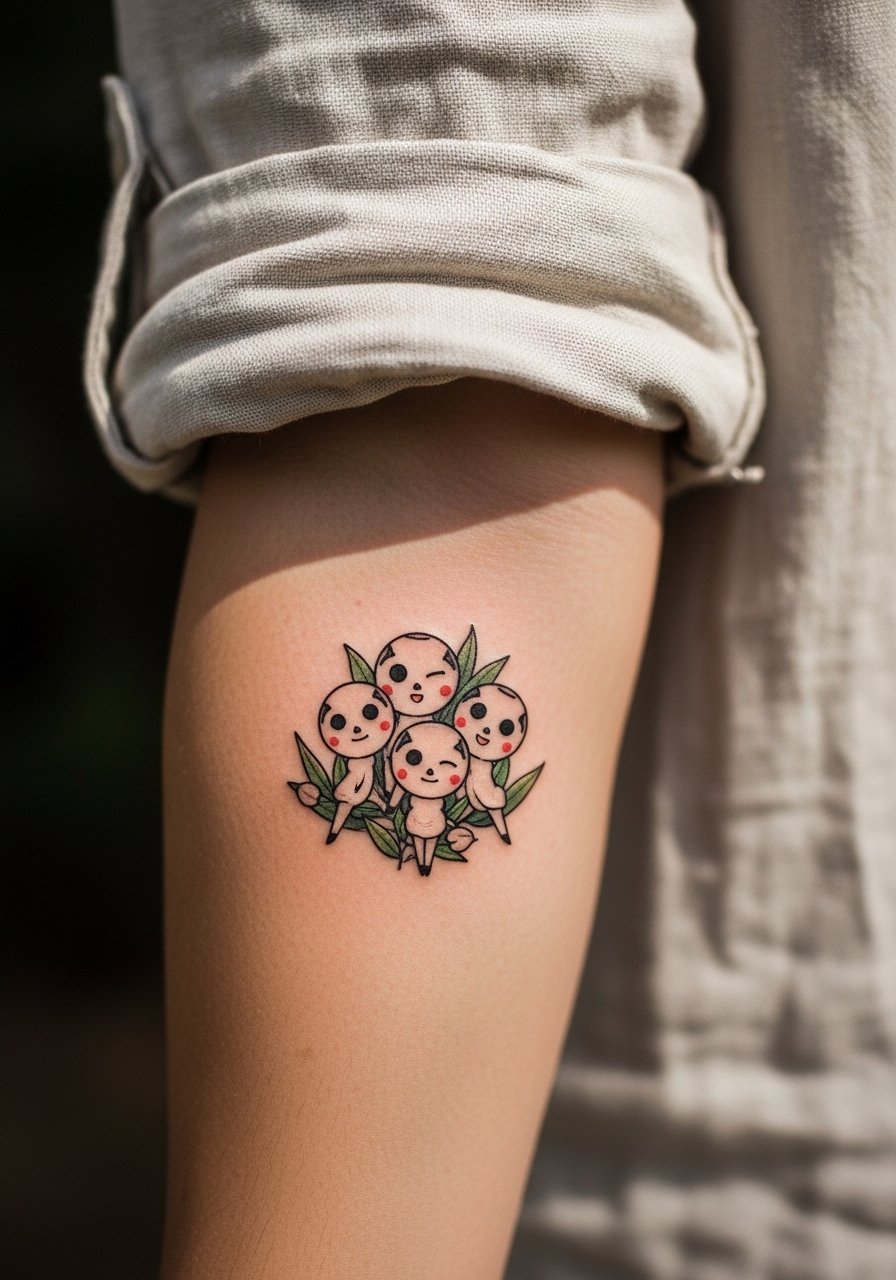
I like this placement because forearm flesh settles predictably and shows detail without too much distortion. Fair warning, the inner forearm is sensitive for some people, but most clients describe it as manageable for a one to two hour session. Tell your artist you want slightly heavier linework around the eyes and mouth of each Kodama so they stay readable at year three. The common mistake is shrinking the faces too small so they merge with light wear. Expect a touch-up around year two for crisp micro details. For showing it off, roll sleeves or wear a short-sleeve linen shirt so the cluster sits in plain view and a thin chain bracelet keeps attention on the wrist without crowding the ink.
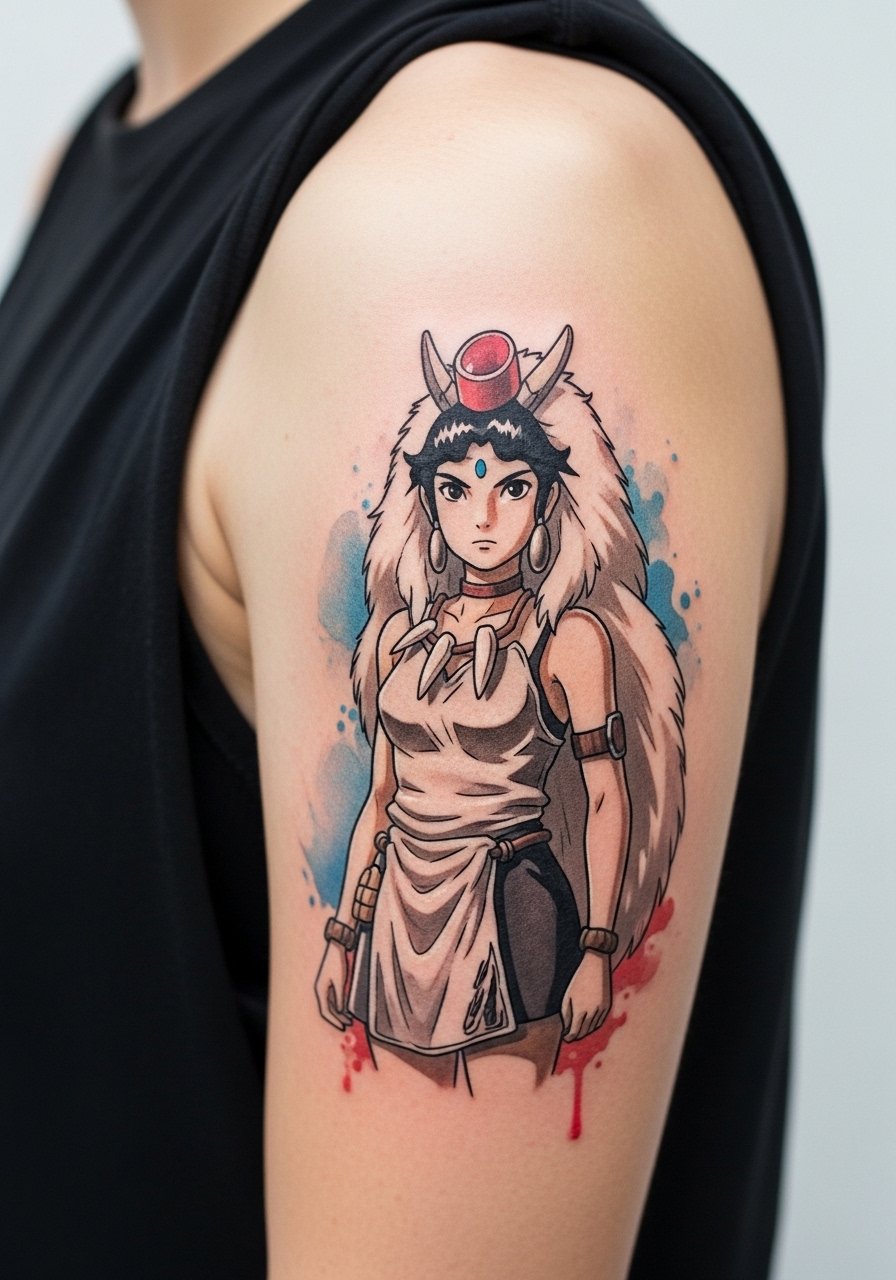
2. Princess Mononoke Portrait on Outer Bicep
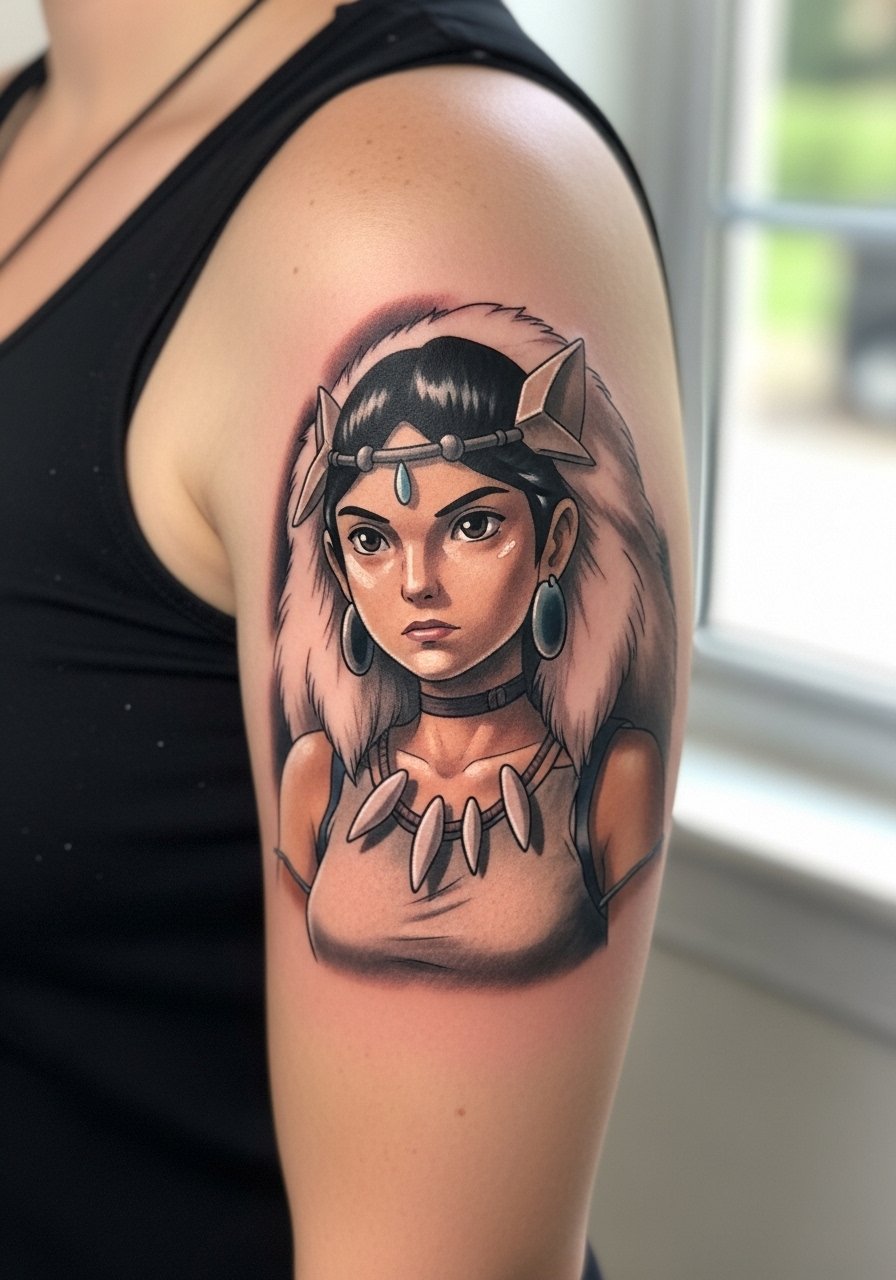
There is a visual impact to a portrait placed on the outer bicep that reads from a distance, which makes it great for mid-sized realism. Pain levels are moderate since the bicep has thicker muscle. During the consult, bring clear reference photos showing the exact facial angle and ask the artist to block in larger values first so features do not get lost. A frequent mistake is overworking tiny highlights that blow out as the skin moves. Aging depends on saturation and contrast, so plan a touch-up at year three if your lifestyle exposes the arm to sun often. Pair this with a loose tank top when you want the piece visible.
3. Kodama Trail Along the Spine
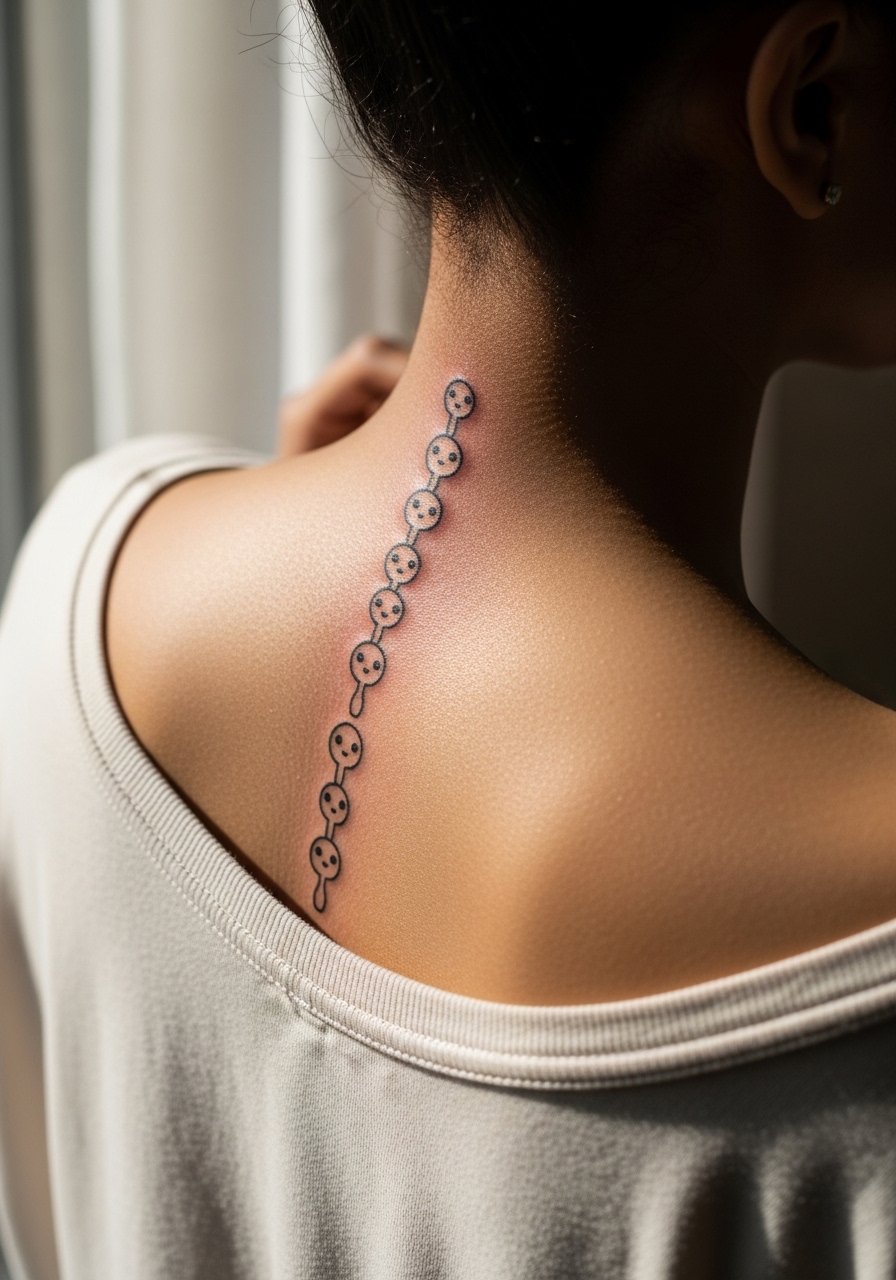
Fair warning, spine work can be more sensitive and the session may require short breaks. The vertical flow of tiny Kodama suits the spine because the skin there doesn't stretch the same way as ribs. Ask for slightly increased spacing between figures so the dots and stipple shading do not merge over time. A common aging issue is compression from sitting that can soften dot work in lower spine sections. Expect two sessions if you want additional depth in the shadows. For discovery, look up local convention portfolios and neighborhood shop directories to find an artist who posts healed spine photos.
4. Large Forest Scene Across the Back Shoulder
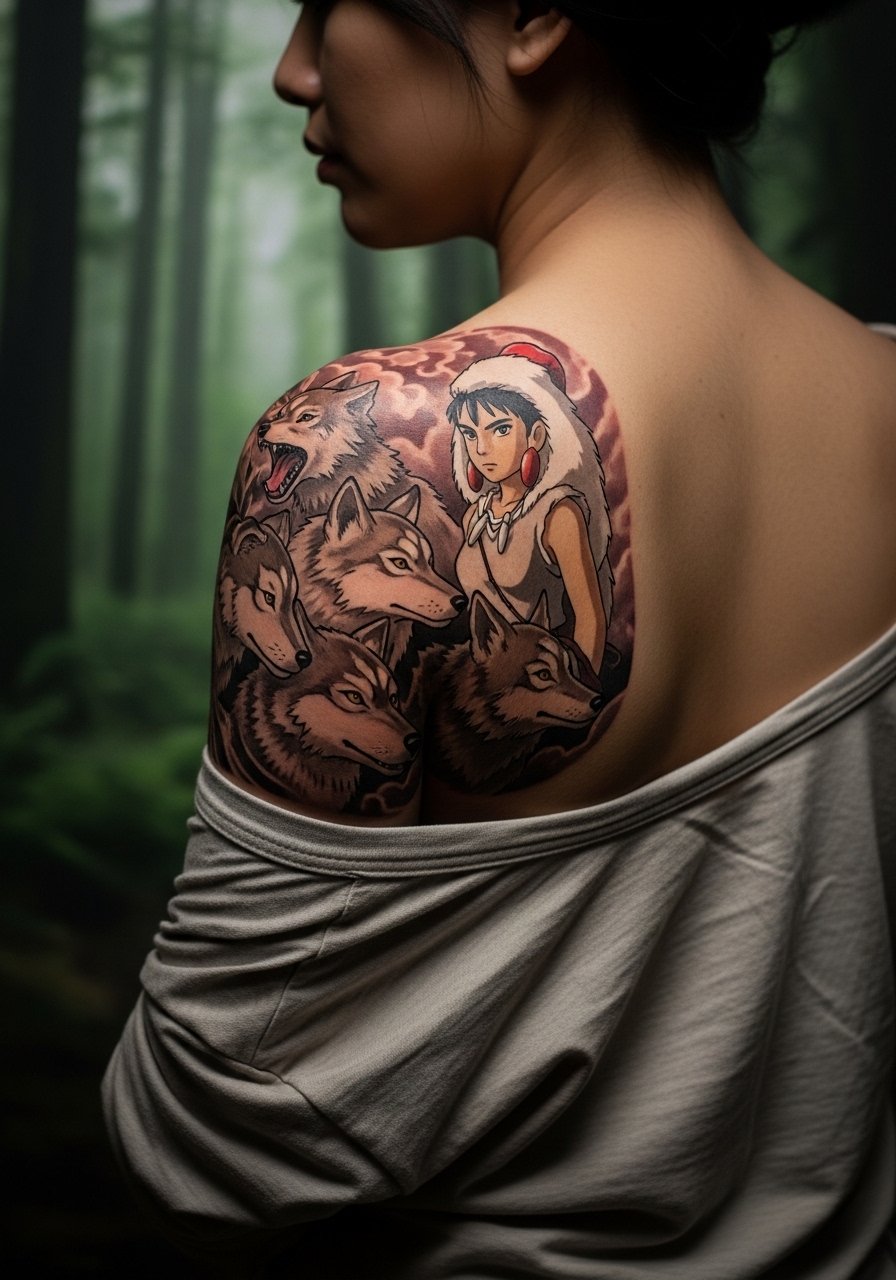
There is something about a shoulder-spanning forest that reads cinematic from a few steps away, and the shoulder handles saturation well. Sessions run longer for layered trees and fur texture, so plan for two to three sittings. The typical mistake is packing too much tiny detail into a single session, which increases scabbing and uneven healing. Ask your artist to plan staging so the darkest values are done first and medium tones follow in subsequent visits. This placement pairs well with an open-back dress when you want to show off larger work.
5. Little Moro Wolf Head on the Collarbone
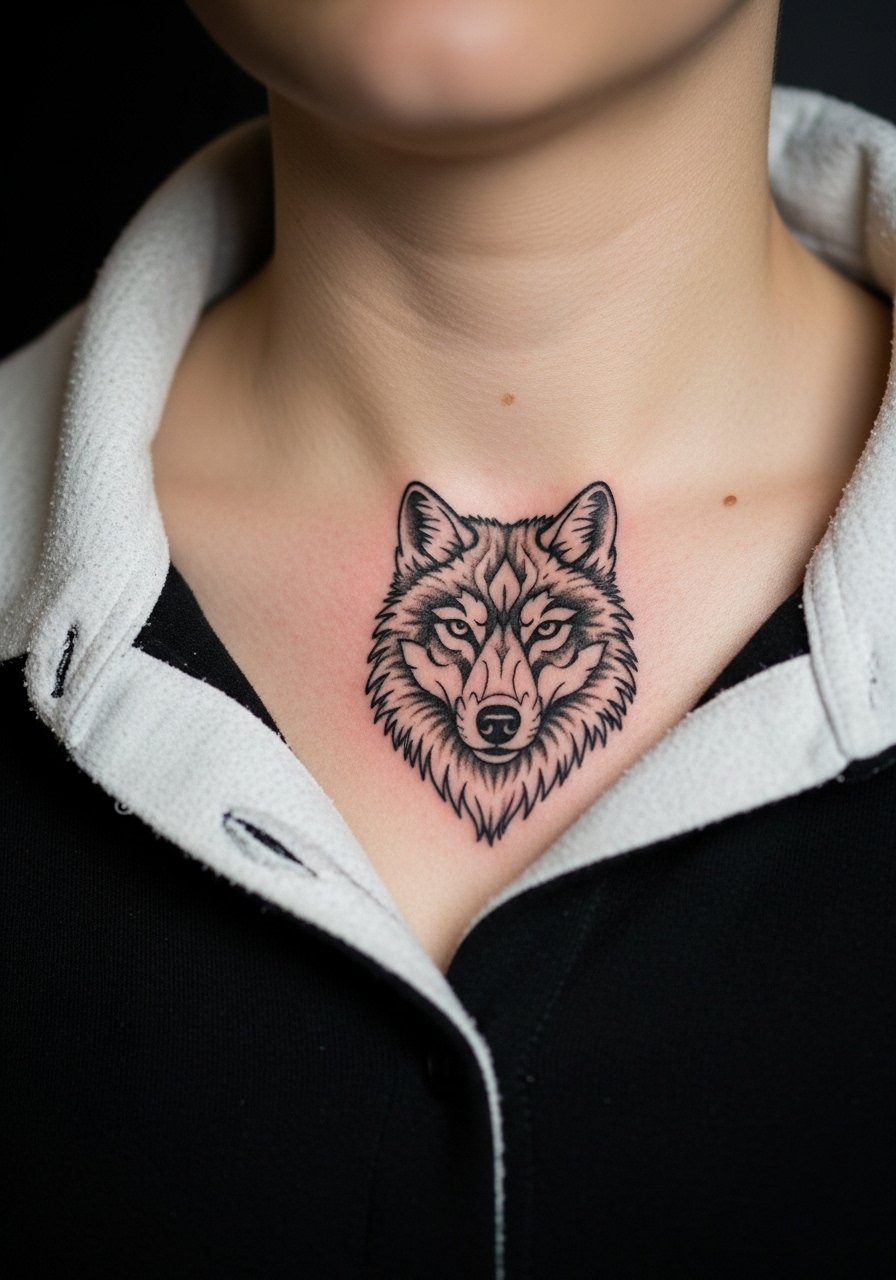
Most people underestimate collarbone sensitivity, which can make a small session feel sharper than expected. This placement reads intimate and frames clothing. During the consult say you want the jawline defined with thin yet deliberate linework because collarbone skin can cause thin lines to blur. Aging usually softens the finer whisker lines, so plan a one-hour touch-up at year two if you want crisp edges. Show-off pairing with a delicate pendant necklace keeps attention above without crowding the tattoo.
6. Full-Length San Running on the Side Ribcage
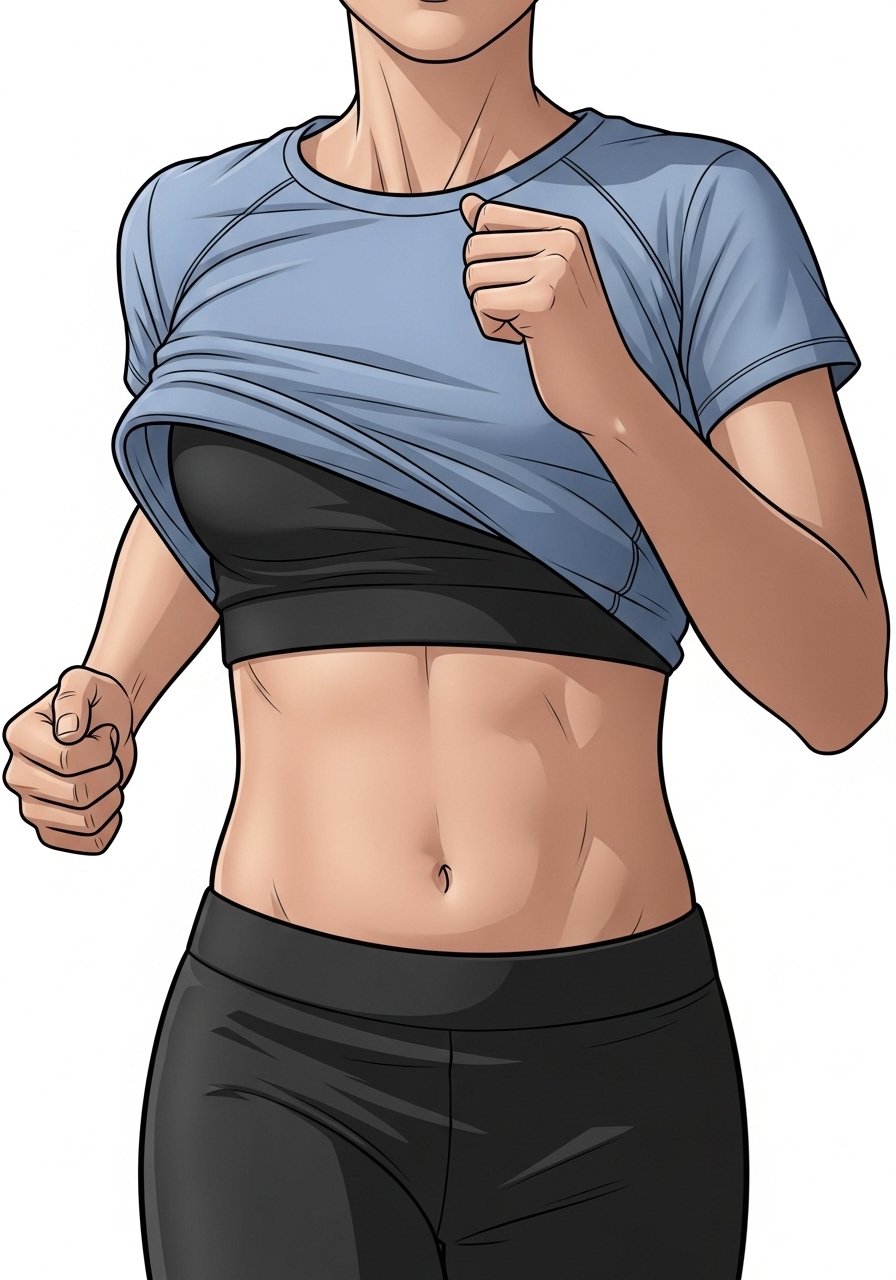
Artists split on fine line on ribs. One camp says the skin stretch blurs lines within two years. The other camp argues that with proper needle depth and spacing, fine line settles fine on ribs. Name both camps and ask the artist which approach they use before booking. Pain is higher on the ribs, so sessions tend to be shorter and require patience. A common mistake is requesting extremely dense detail in a single pass, which leads to excess trauma and longer healing. For the session, wear a sports bra or zip-up hoodie you can easily adjust.
Studio Day Picks
The ribcage and collarbone pieces above demand different prep than forearm tattoos, and a few targeted items make the session and first week easier.
-
Stencil transfer paper kit. Lets you preview exact placement on skin for asymmetric pieces like the ribcage San so you can see how it moves with breath.
-
Thin protective film roll. Helps shield small collarbone and wrist pieces from friction during the first days of healing.
-
Topical numbing cream. Useful for longer back or rib sessions to ease the sharp edge of pain without altering linework if used per instructions.
-
Fragrance-free gentle body wash. Cleanses healing zones without stripping delicate pigment, which matters for pale fine-line details.
-
Aquaphor healing ointment. A thin layer for the initial days keeps small lines moisturized while you avoid over-saturating the area.
7. Princess Mononoke in Profile on the Calf

This placement works well for narrative portraits that move with your stride. The calf has moderate sensitivity and tolerates longer sessions. A mistake I often see is compressing background texture too tightly around the face, which crowds the portrait when the calf sits. Ask your artist to treat the calf like a vertical canvas with breathing space around the head. Aging is mostly about sun exposure if you wear shorts a lot. When you want to show it off, pair with roll-up denim shorts or a mid-calf skirt.
8. Tiny Wolf Paw on the Side of the Finger

Finger tattoos are notorious for faster fading and occasional blowout because of constant washing and skin texture. Pain is sharp but brief. For this tiny piece, make the lines slightly thicker than you'd choose for a larger area so they stay readable. The common mistake is picking ultra-fine work that disappears within a year. Expect touch-ups often, sometimes at year one. Hand and finger work can still affect job prospects in some industries, so think about career implications before committing.
9. Forest Silhouette Sleeve Half-Charted
There is visual clarity in bold black silhouettes that age into a cohesive block rather than a patchy fade. Sessions are longer for solid saturation and require solid aftercare during the first week. The mistake is starting with too small a silhouette that looks weak from across the room. Ask for a mock-up at size so you can judge the negative space. For the session, bring a loose button-down shirt you can easily roll up.
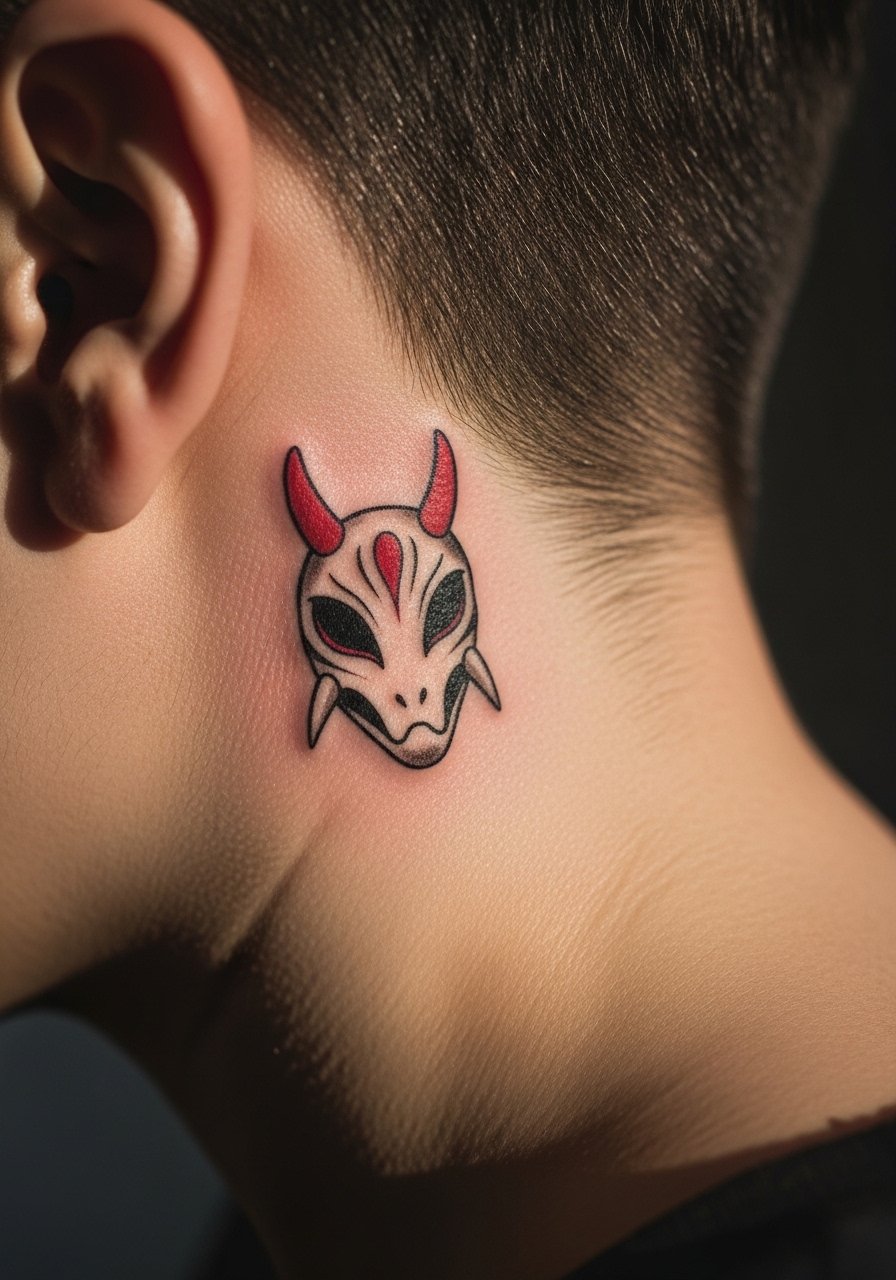
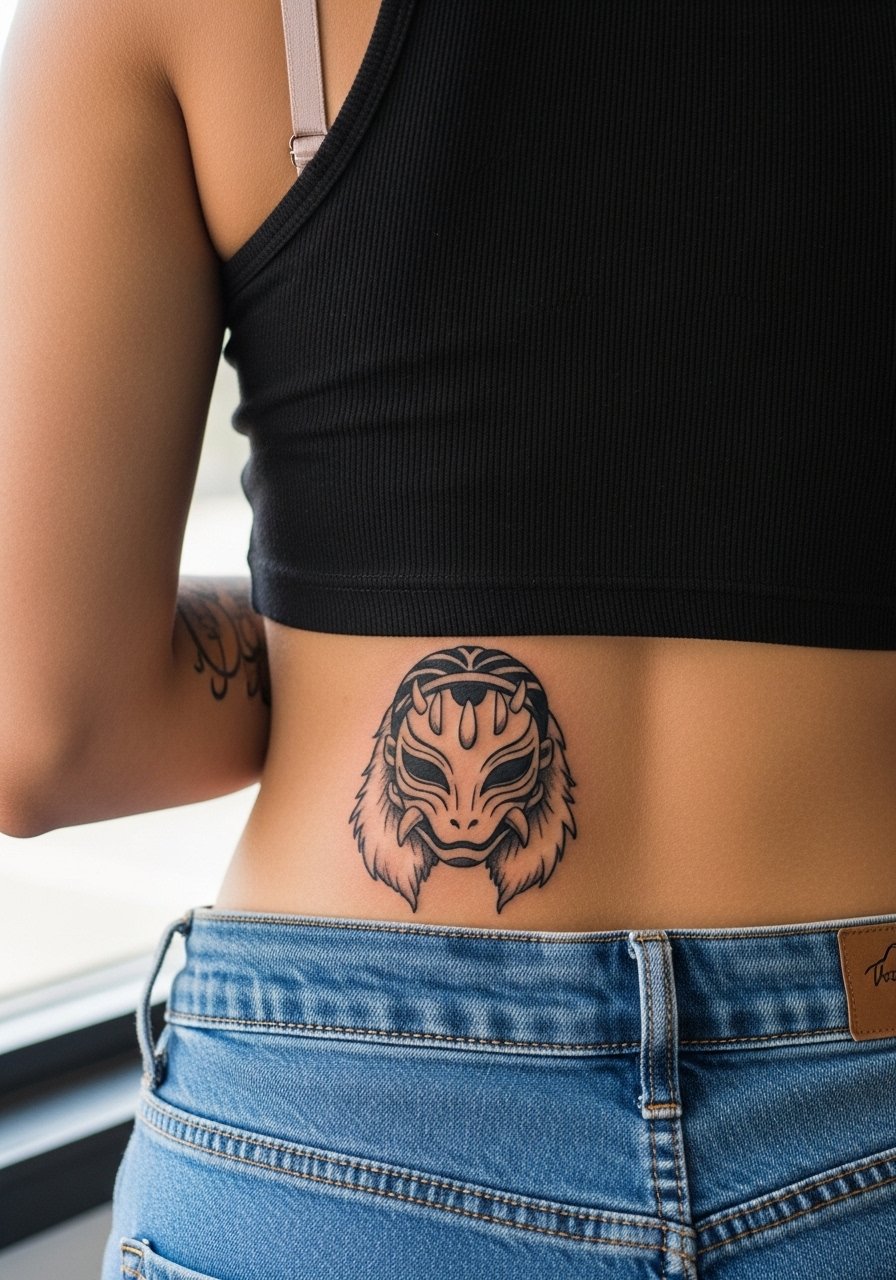
10. Princess Mask Fragment on the Back of the Neck
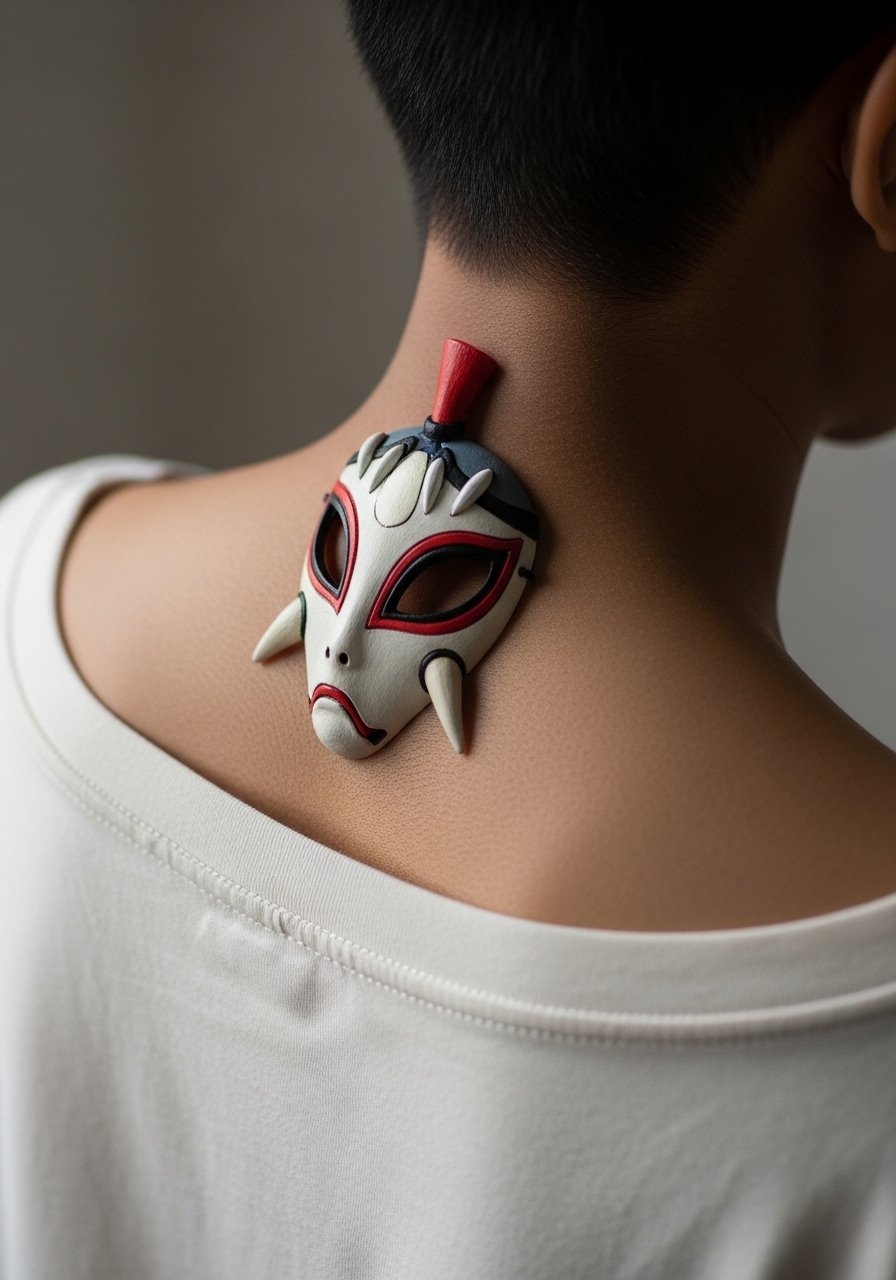
Neck placements read as bold statements and heal differently than torso work. Pain is higher for some because of thinner skin and less padding. A common mistake is picking ultra-fine detail that the neck does not hold over time. If you want longevity, ask for slightly heavier contrast and a touch-up plan. Note that neck tattoos can affect certain job prospects, so factor that in. For session comfort, wear a wide-neck shirt you can pull aside.
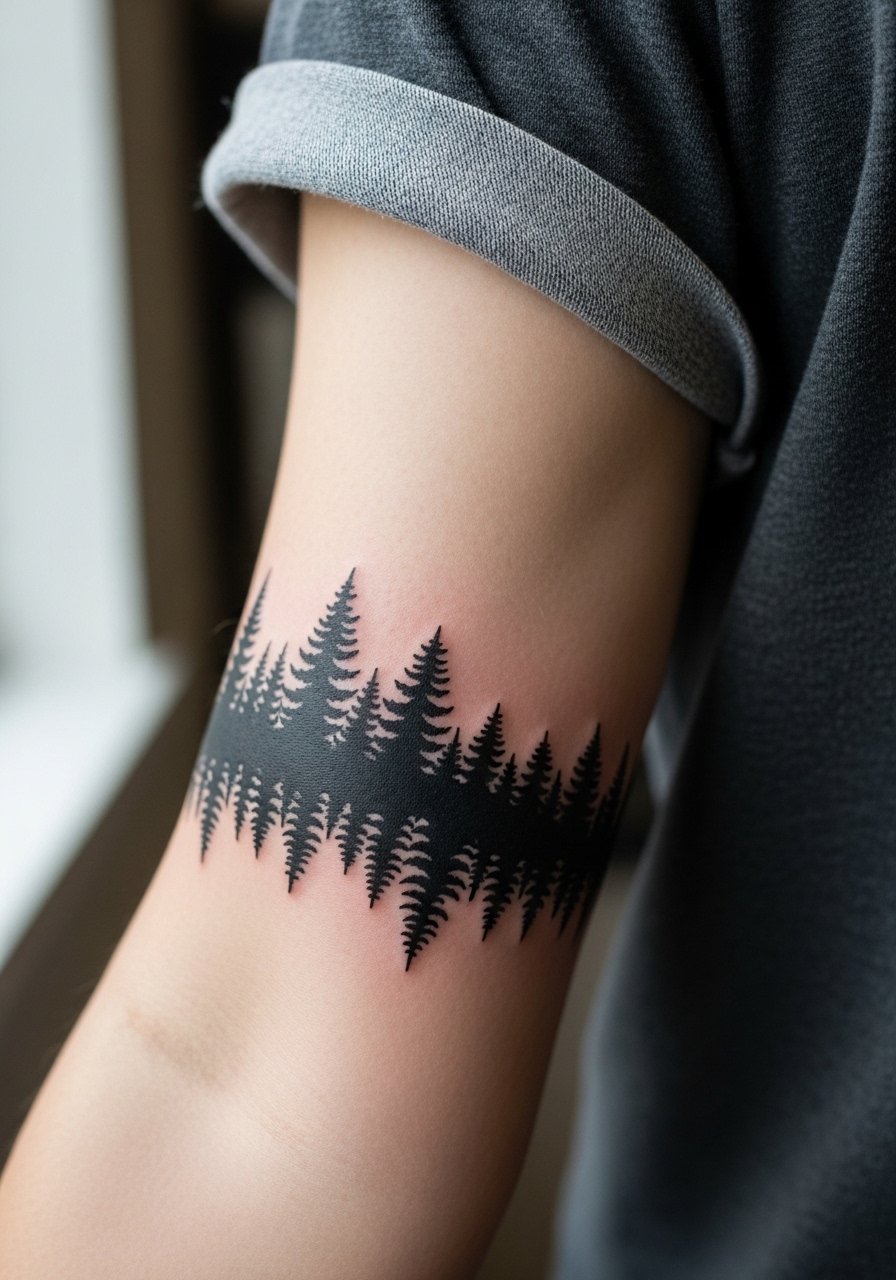
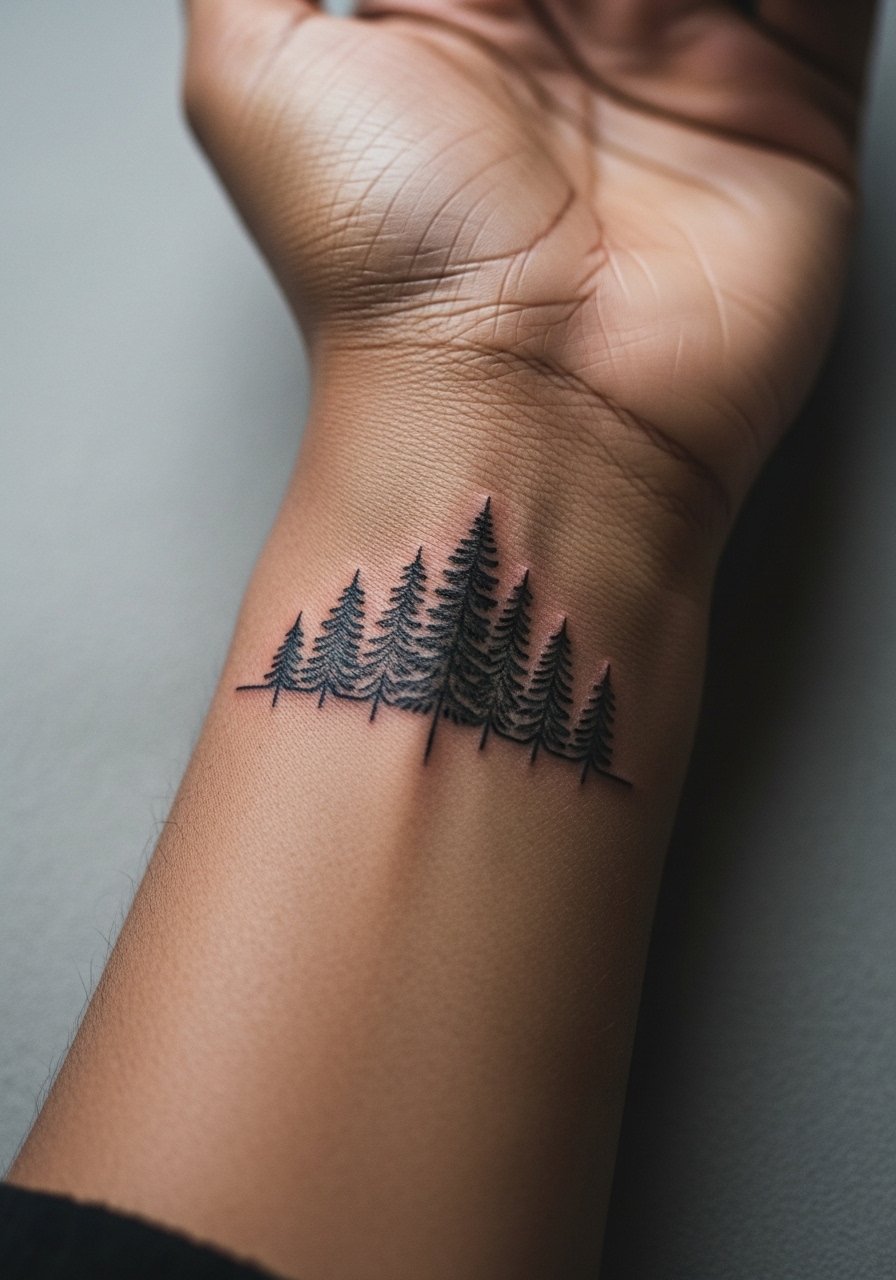
11. Whip-Shaded Forest Wrist Band
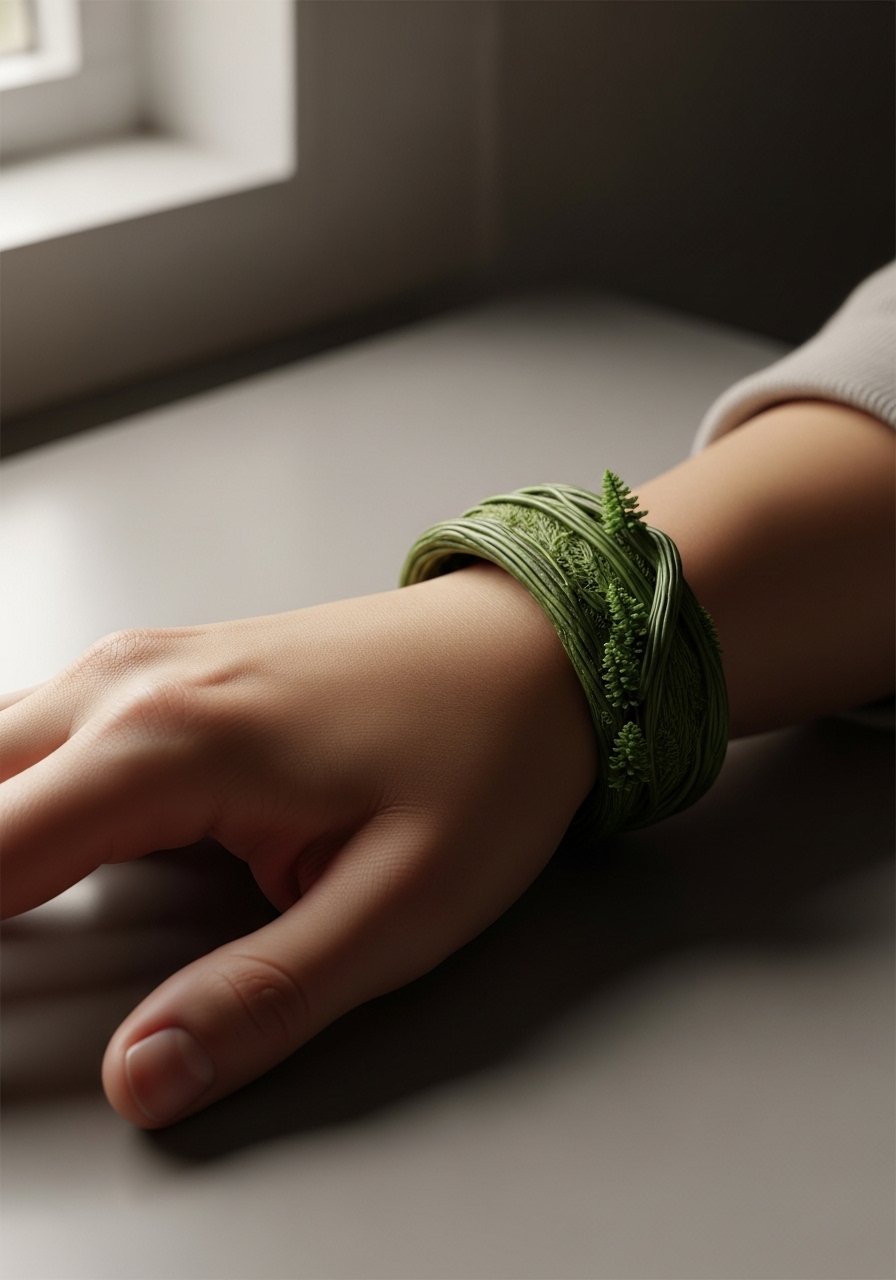
Wrist bands are visible and constant friction zones, which accelerates fading. Pain is moderate and sessions are usually short. The mistake is wrapping a high-density scene into a thin band. Ask the artist to design negative space that lets trees breathe and to use whip shading for soft texture that ages more predictably than dense stipple. Expect a touch-up at year two for edge crispness. Style it with a minimalist watch so the wrist area reads cohesive.
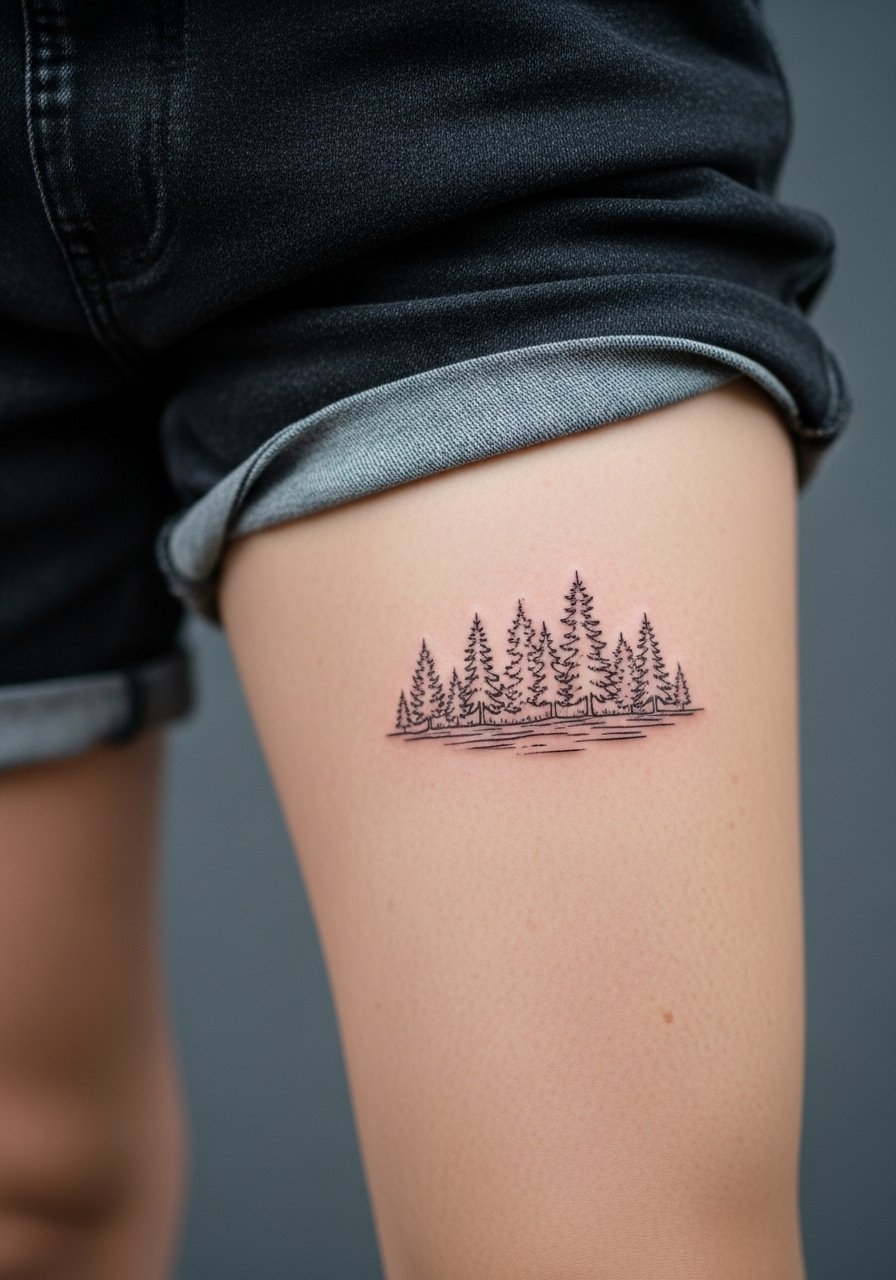
12. Small Forest Scene on the Ankle
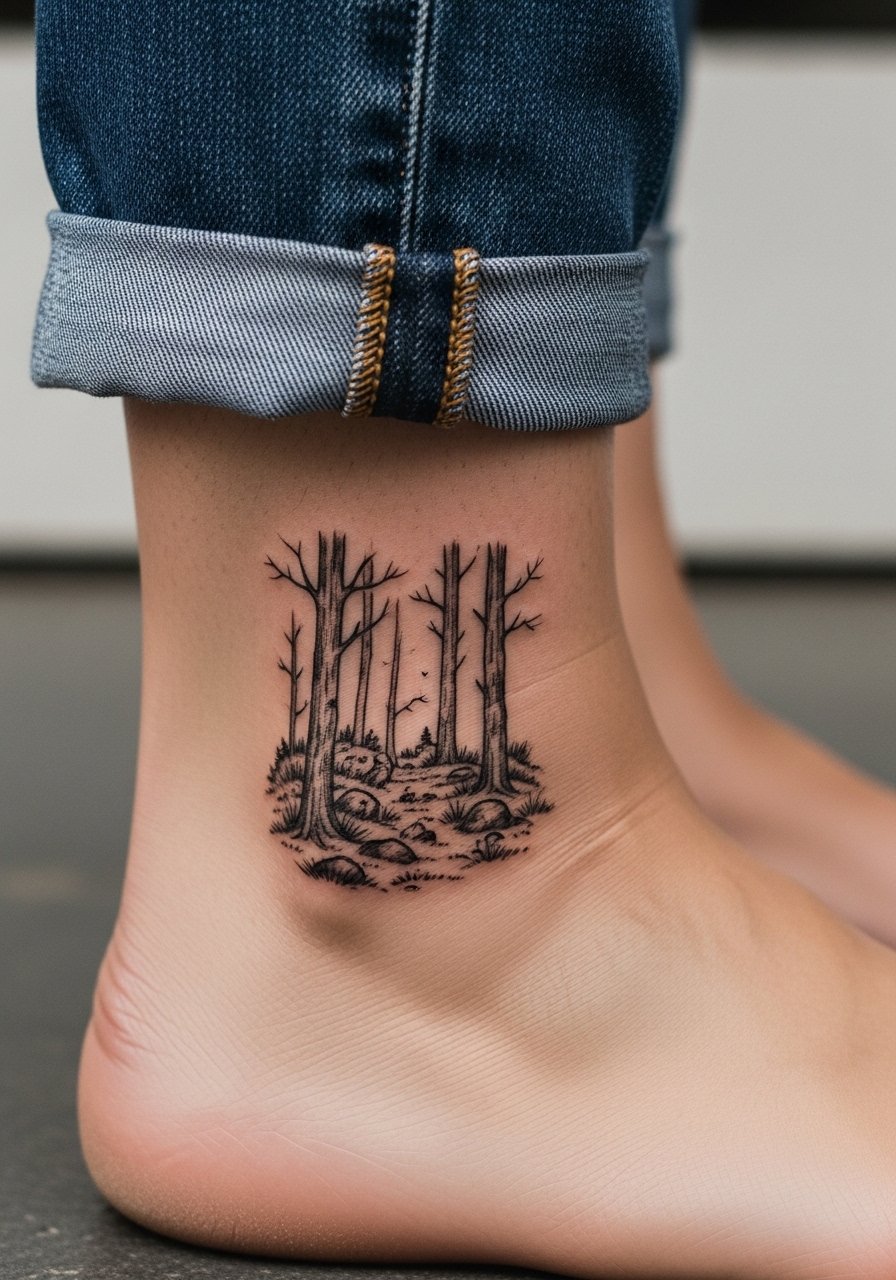
Ankle tattoos sit in high friction zones from shoes and socks which speeds fade. Pain on the ankle varies, often sharper near bone. For a small forest, ask for fewer tiny branches and more solid negative space so the piece stays legible. The common mistake is packing too much micro detail into an area that gets rubbed daily. Plan for touch-ups at year two. For showing it off, choose sandals or roll pants as a frame.
13. Princess Mononoke with Moon on the Thigh
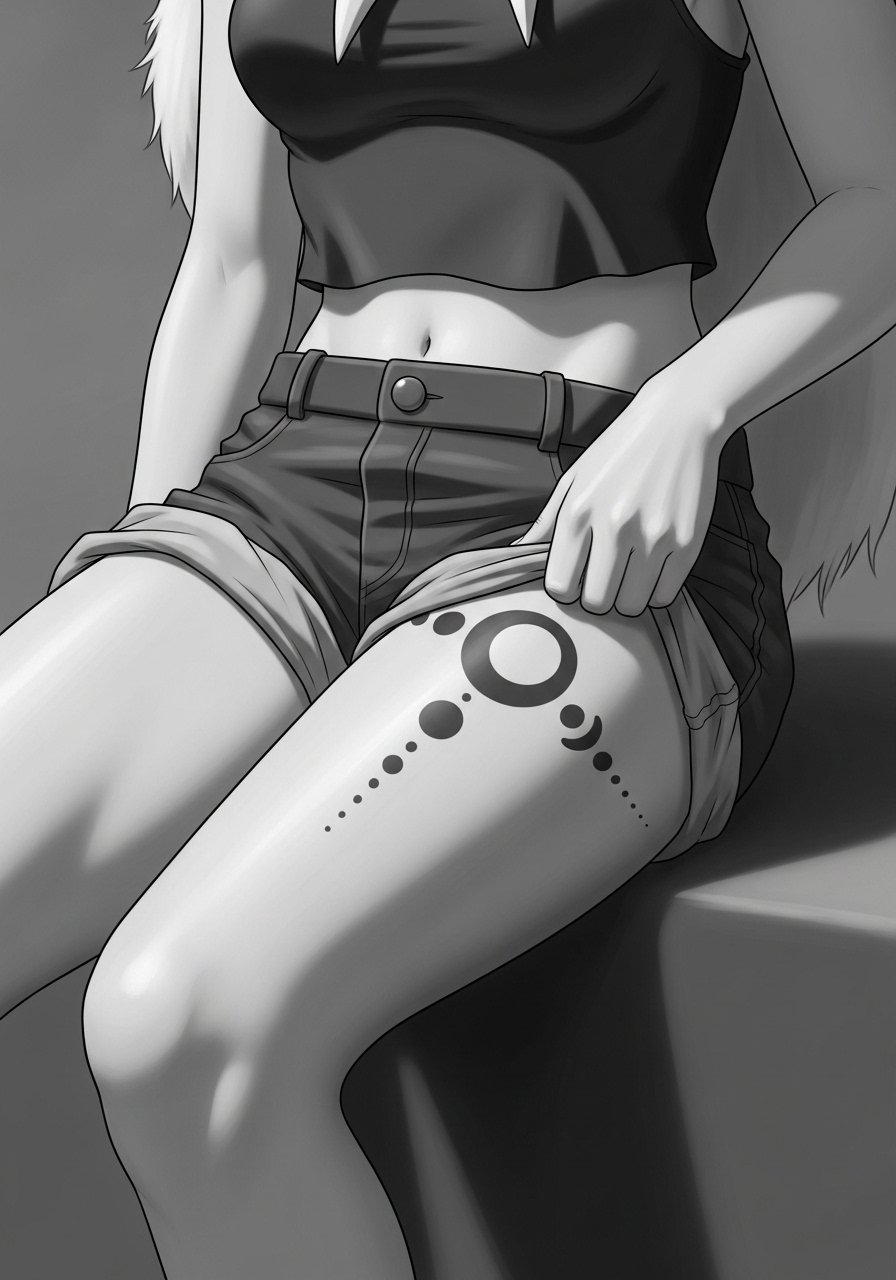
Thigh flesh handles large, tonal realism well and sessions can be long but comfortable for most clients. A frequent mistake is requesting too small of a moon that loses its glow as the textured shading softens. Ask for a strong midpoint tone in the moon so it keeps depth after healing. Expect the piece to age kindly if you avoid constant friction from tight clothing. For the session, wear loose high-waisted shorts.
14. Micro-Realism Wolf Eyes on the Inner Arm
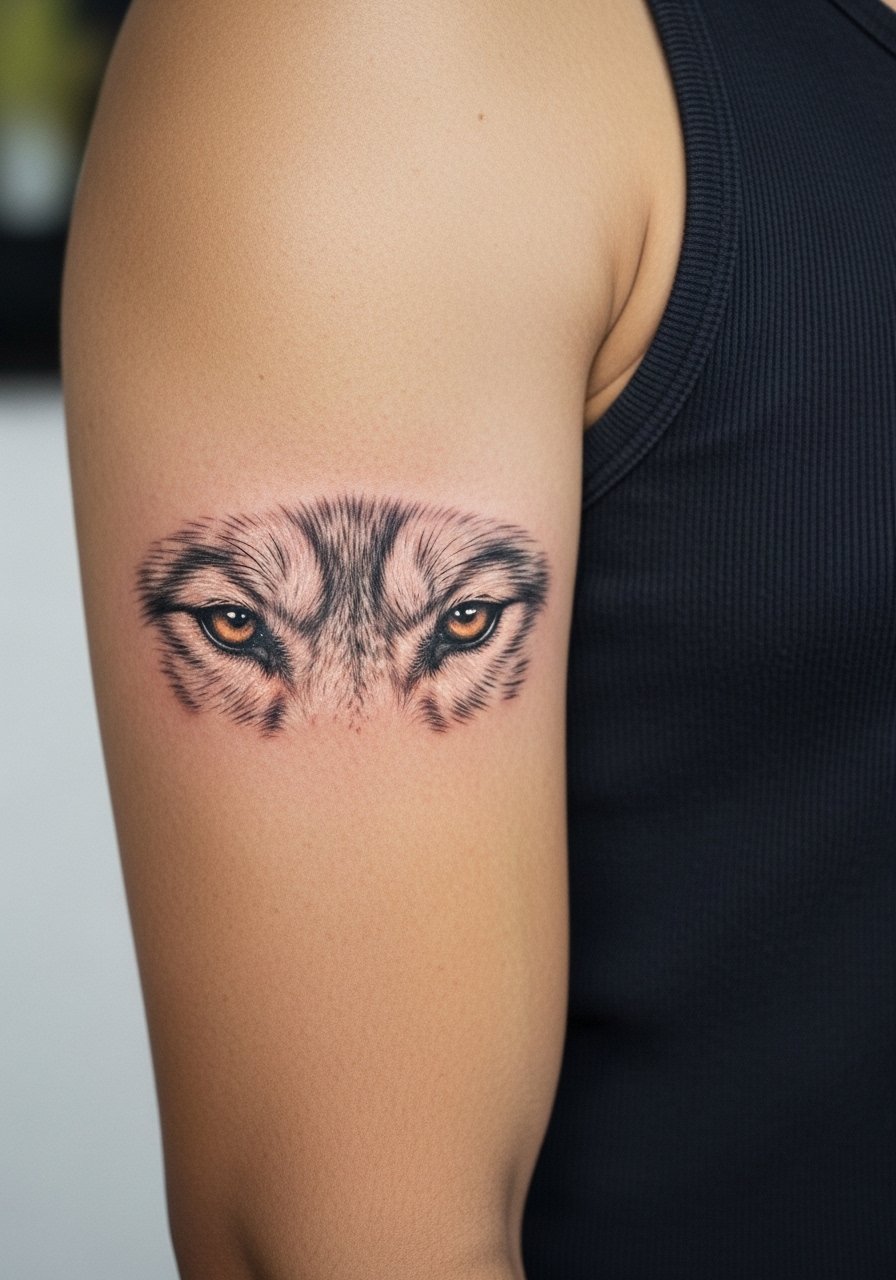
The inner arm has softer flesh and can be forgiving for subtle realism, but blowout risk rises if the needle goes too deep. The mistake is pushing linework too densely in a single pass. Say you want layered shading with stipple work rather than pure hair-fine lines to retain depth after six months. Sessions are moderate in length and a touch-up at year two keeps the eyes sharp. For the session, a loose tank top lets the artist access the area cleanly.
15. Minimalist Red Mask Accent Behind the Ear
Behind-the-ear pieces are small and subtle, which makes placement planning crucial. Pain is usually low to moderate. The main mistake is choosing a color or tiny linework that breaks into the hairline area and becomes invisible. Ask for a color deposit slightly stronger than you think you need so the red reads through hair growth. Because of visibility with hair down, consider how you wear your hair. This placement benefits from careful artist selection using local shop listings and convention portfolios.
16. Full Wolf Pack Across the Shoulder Blade
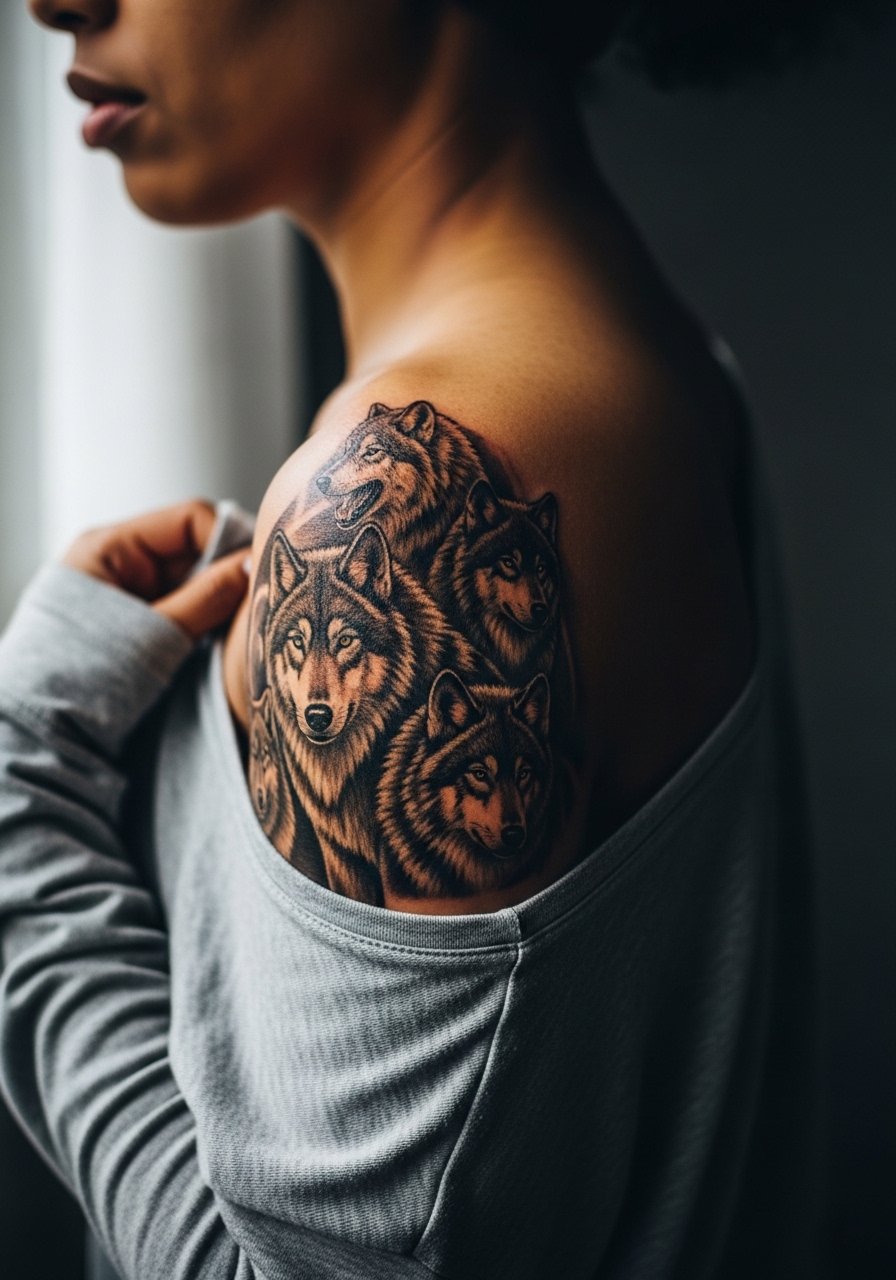
Shoulder blade work handles layered texture and larger composition. Sessions are longer and often split into multiple sittings. A common mistake is asking for extreme micro detail near the scapula where motion can blur tiny strokes. Ask your artist to map the composition with the shoulder's natural curves so wolves' poses flow with the muscle. Expect the piece to hold well if you protect it from heavy sun exposure during summer.
17. Single Kodama Near the Ankle Bone
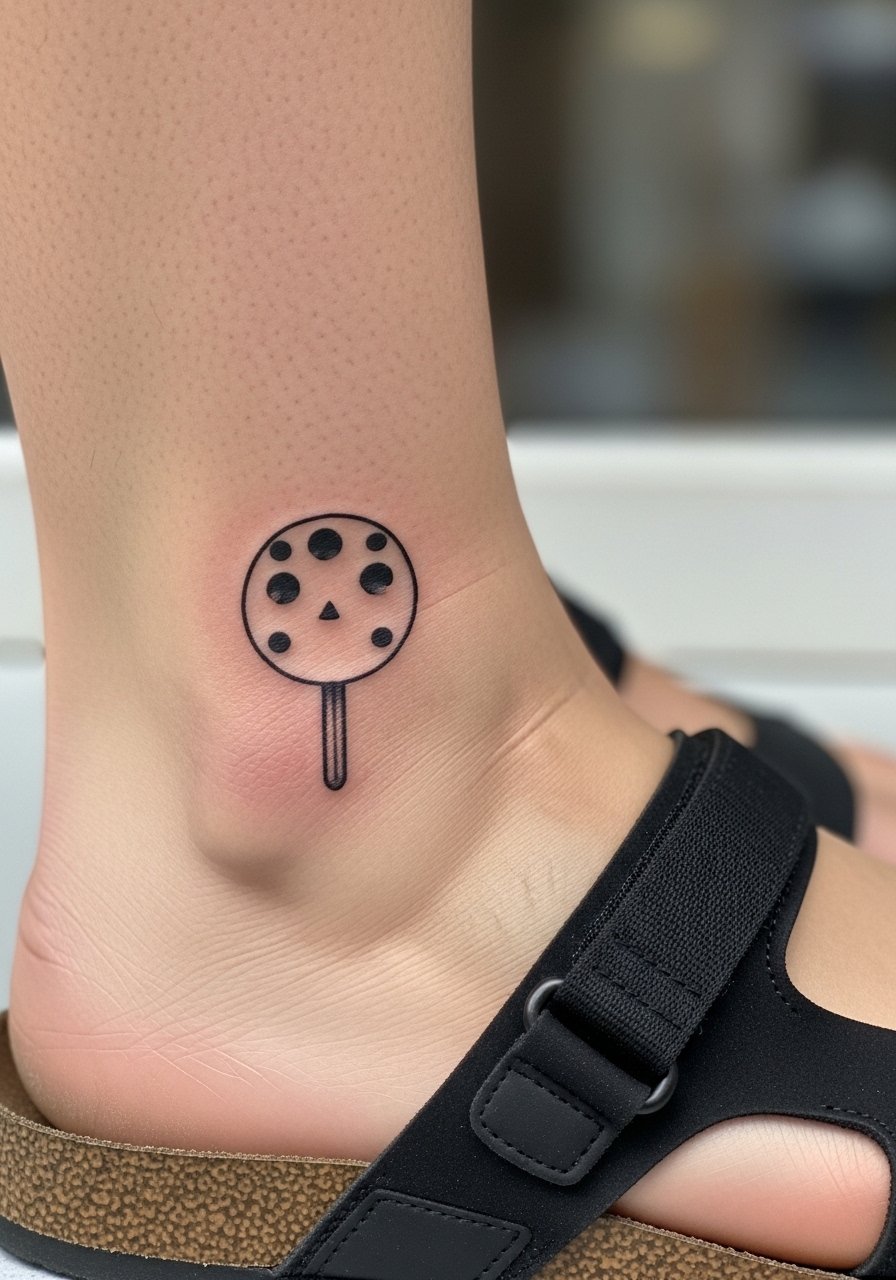
Ankle bones are sensitive and prone to faster fading because of movement and footwear. Keep the design compact and avoid ultra-fine stippling. I recommend slightly bolder contour lines that settle while still feeling delicate. The mistake is asking for tiny dots that vanish under shoe friction. For showing it off, choose low-profile sandals or strappy sandals so the ankle sits in plain view.
18. Stipple-Shaded Wolf Paw on the Upper Chest
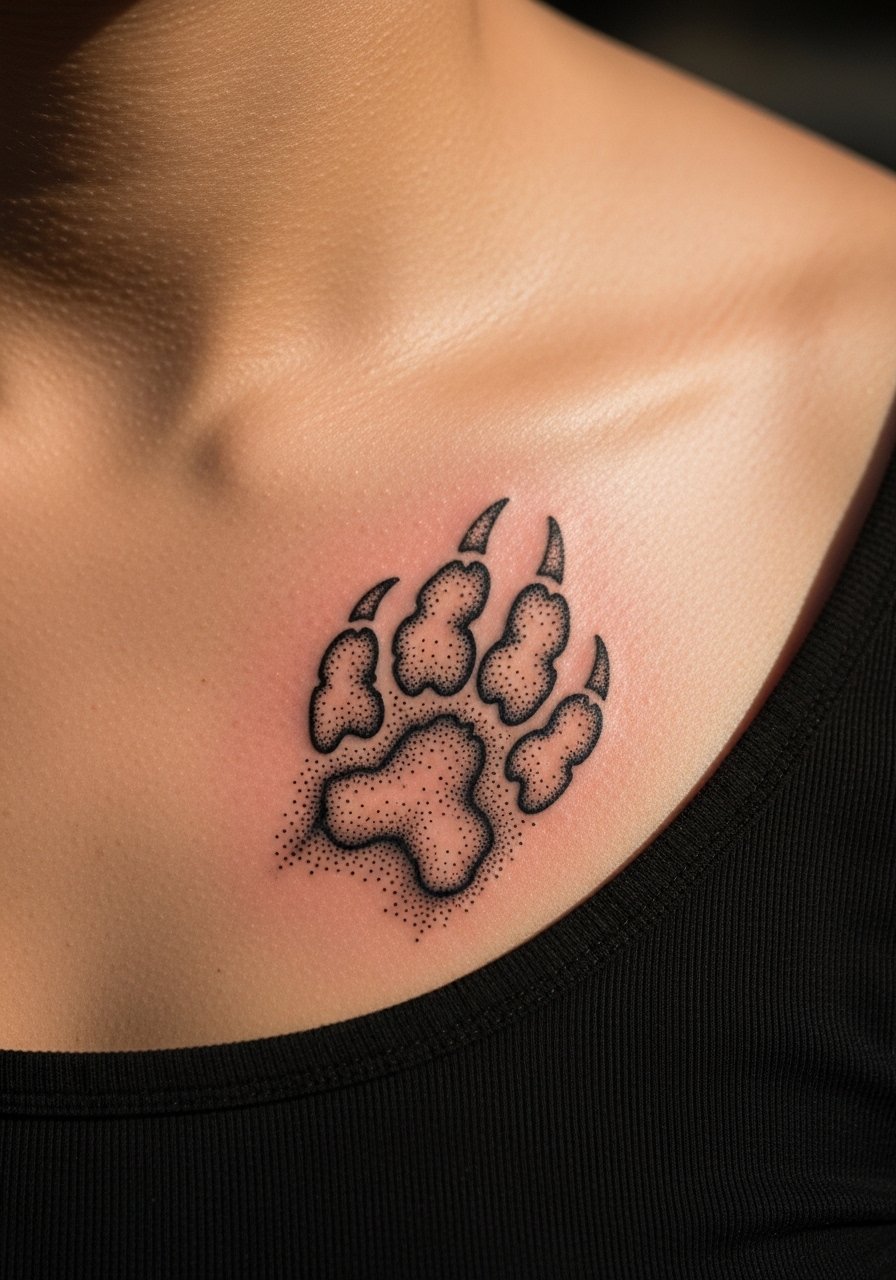
Chest pieces can be more sensitive and require planning around clothing. Stipple shading ages well if spaced correctly since dots soften into texture rather than smudge. The common mistake is overdense dotting that compacts during healing. Ask your artist to stagger dot size and leave breathing space between clusters. For the session wear a fitted sports bra so access is easy and modest.
19. Fine-Line Forest Wrist Cluster
Fine-line on wrists divides artists into two camps. One camp says wrists lose crispness quickly due to daily washing and motion. The other camp argues that with strategic line weight and spacing the wrist can hold fine detail. Ask your artist which camp they align with and how they plan needle depth accordingly. Expect touch-ups earlier than on the forearm, sometimes at year one. For showing it off, wear rolled-up sleeves and a delicate bangle bracelet so the wrist piece keeps visual balance.
20. Watercolor-Style Background with Realistic Foreground
Watercolor backdrops look painterly but they require more maintenance because diluted pigments fade faster. The session may be split into a realism pass first and a color wash later. The mistake is asking for high-saturation watercolor with zero contrast in the foreground. Tell your artist you want strong foreground values and softer, fading washes behind so the realism holds. Plan on color boosts at year two or three. For the session, wear a sleeveless top to keep access easy.
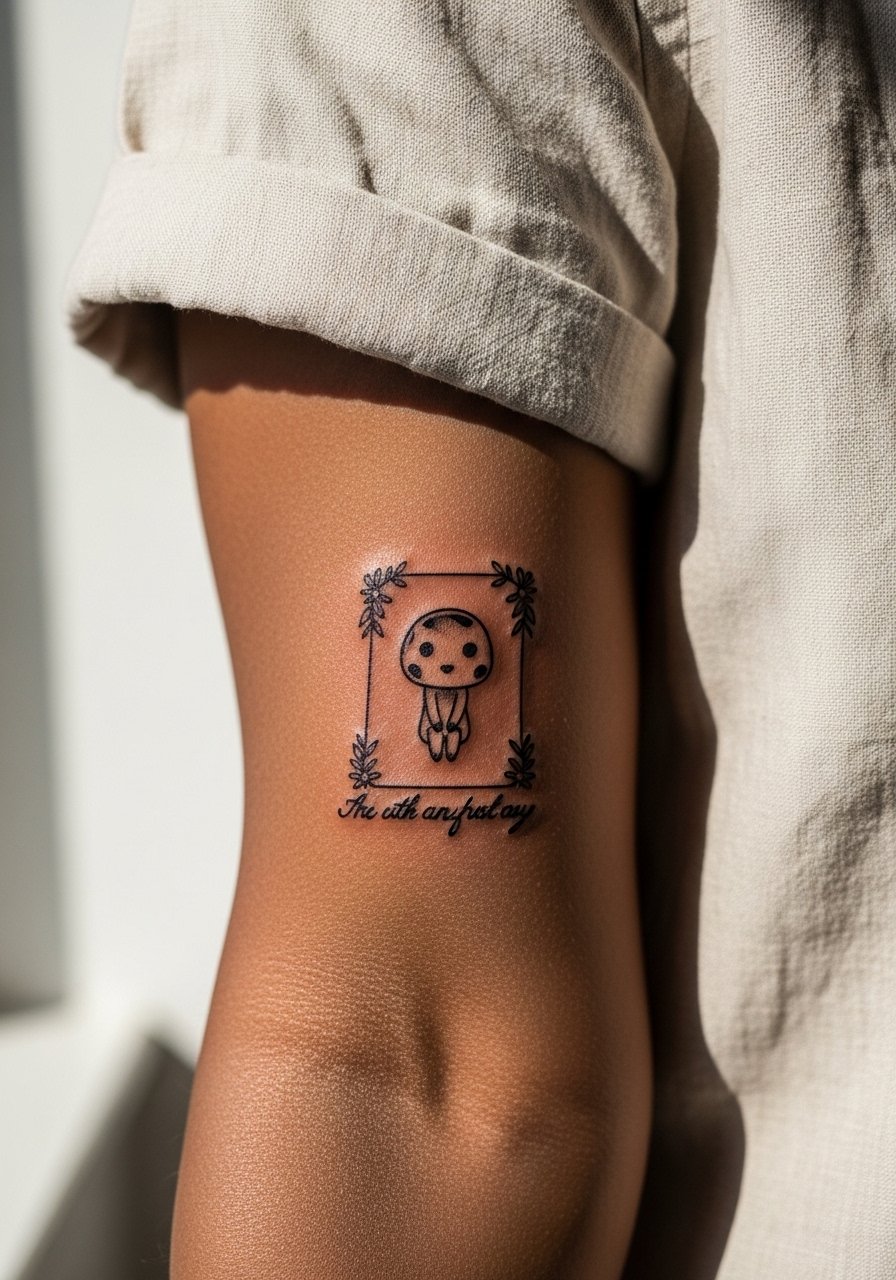
21. Tiny Script Quote Under a Kodama

Text with realism needs exact spacing so letters stay legible over time. The inner wrist is a high-motion area so choose a slightly bolder script weight than you might online. The common mistake is picking a needle-thin script that fragments. Ask to preview the scaled lettering sitting next to the Kodama preview. Expect touch-ups sooner for text than for larger portraits. Pair with a thin chain bracelet if you want to frame the script.
22. Half Sleeve That Blends Forest and Mask
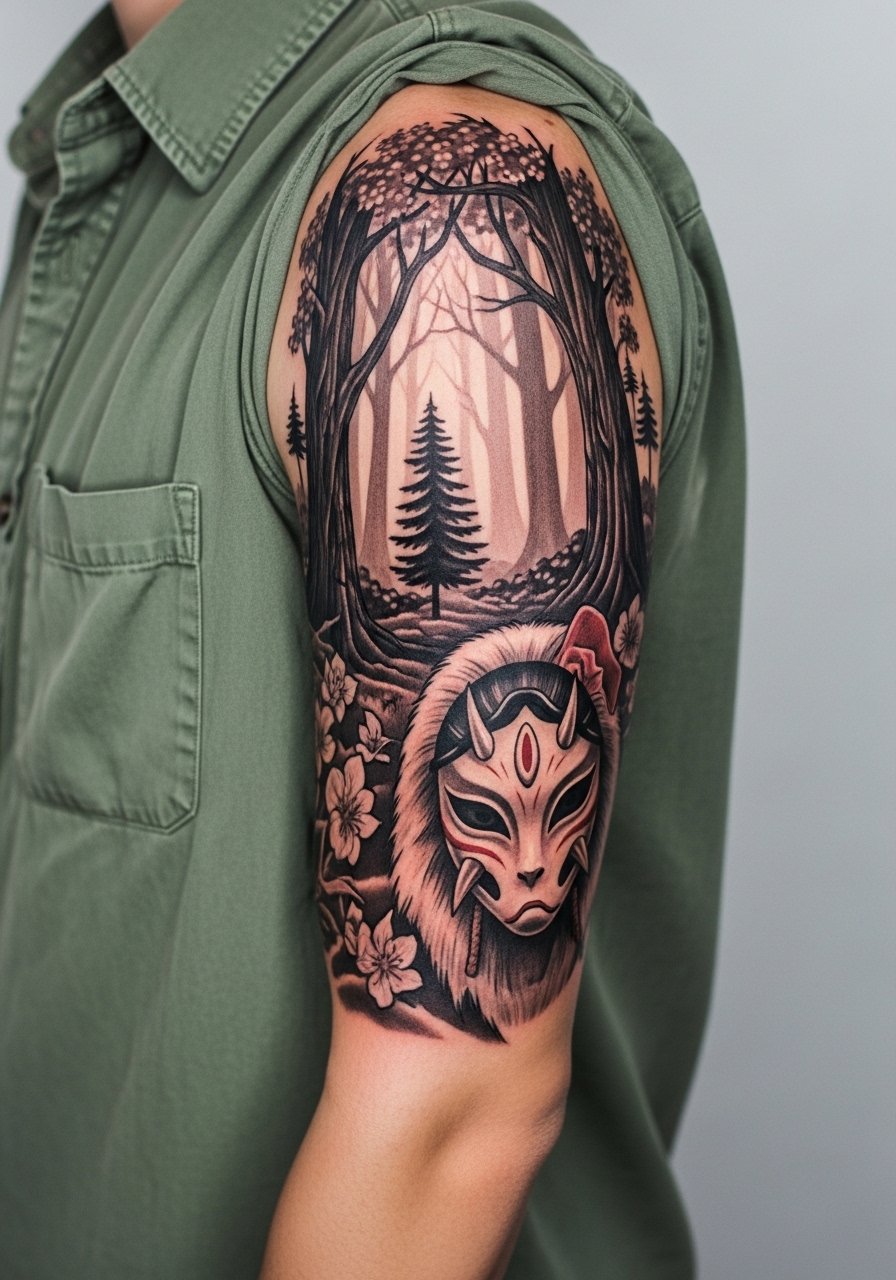
Half sleeves need coherent negative space planning so elements do not fight as the piece ages. Sessions are long and best split into well-defined passes. Mistakes happen when clients ask to pack every favorite element into a single session rather than mapping phases. Ask your artist for a staged plan showing how contrast will build across sessions. Expect touch-ups in three to five years depending on sun exposure. For showing it off, roll sleeves on a loose button-down.
23. Tiny Forest on the Inner Thigh
Inner thigh skin can be more forgiving for delicate shading, but it also sees friction from clothing. The mistake is pushing ultra-detailed textures into an area that will rub against fabric. Ask your artist about spacing and healing expectations. For the session, wear loose shorts you can shift so the artist has clear access. Consider how intimate placements sit with your lifestyle before booking.
24. Negative Space Mask on the Lower Back
Lower back tattoos age well under clothing but can fade from friction at the waistline. The session is generally comfortable, but align the mask with your body contours to avoid distortion when bending. The mistake is putting too much tiny internal detail into negative space that reads weakly after healing. Ask for a clear boundary around the negative area so it keeps shape. For wardrobe, choose low-rise or high-waisted options depending on how much you want the piece visible.
25. Small Forearm Script Framed by Kodama
Forearm scripts framed by small figures are classic because the area shows detail and we can read text easily. The mistake is using overly thin lettering that fades into the Kodama shading. Ask the artist to set the script at a slightly heavier weight and place the Kodama with breathing room. Forearm friction is lower than wrist friction so longevity is better. Style with a short-sleeve linen shirt to keep the piece visible around the clock.
26. Realistic Wolf Howling on the Sternum
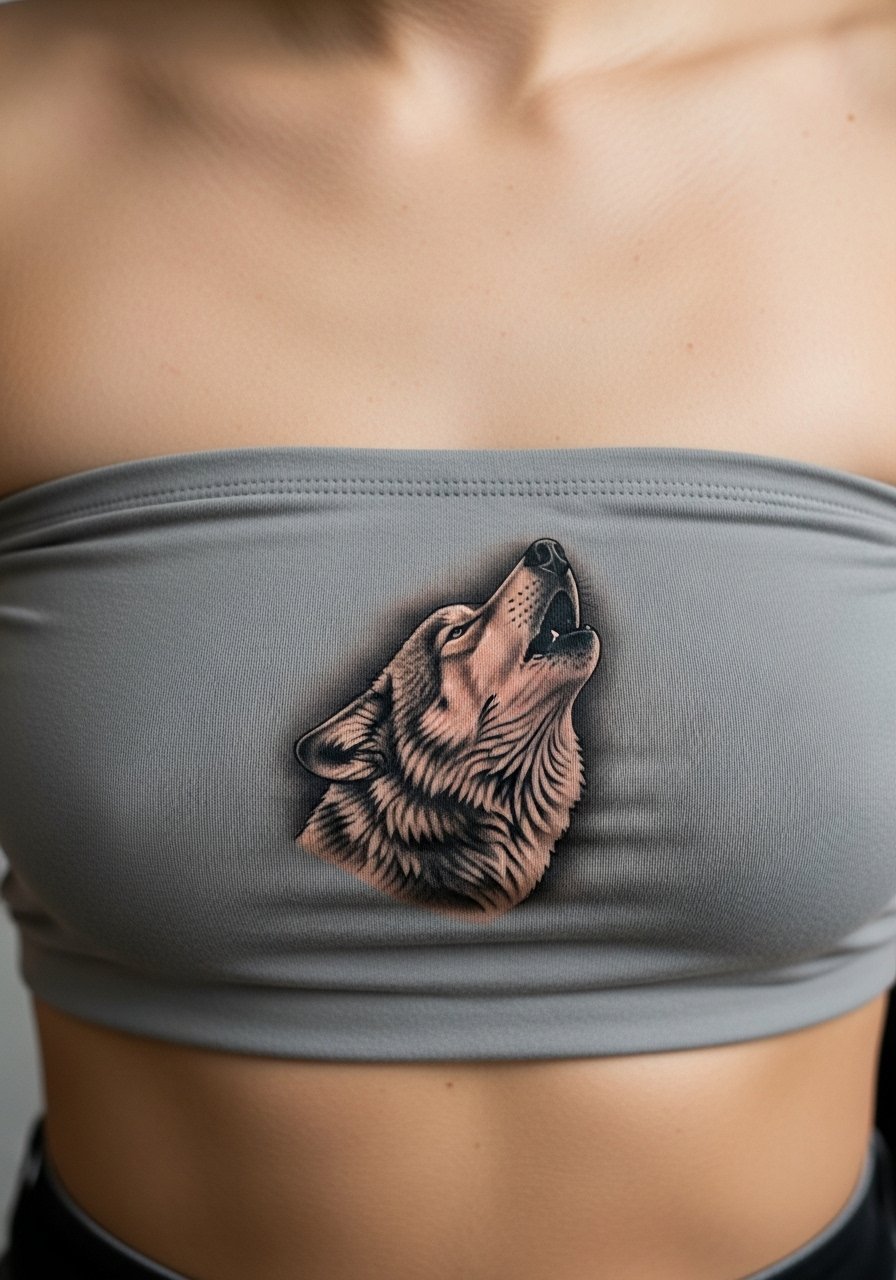
Sternum work is intimate and requires a steady hand from an artist who has done chest realism. Pain can be high and sessions are shorter with breaks. The frequent mistake is requesting thin contour lines across the sternum where movement causes quick fade. Ask for slightly bolder contouring and plan an extra session for contrast. For the appointment, wear a fitted bandeau or zip-up that you can shift easily.
27. Large Backpiece Featuring a Wolf and Forest Panorama
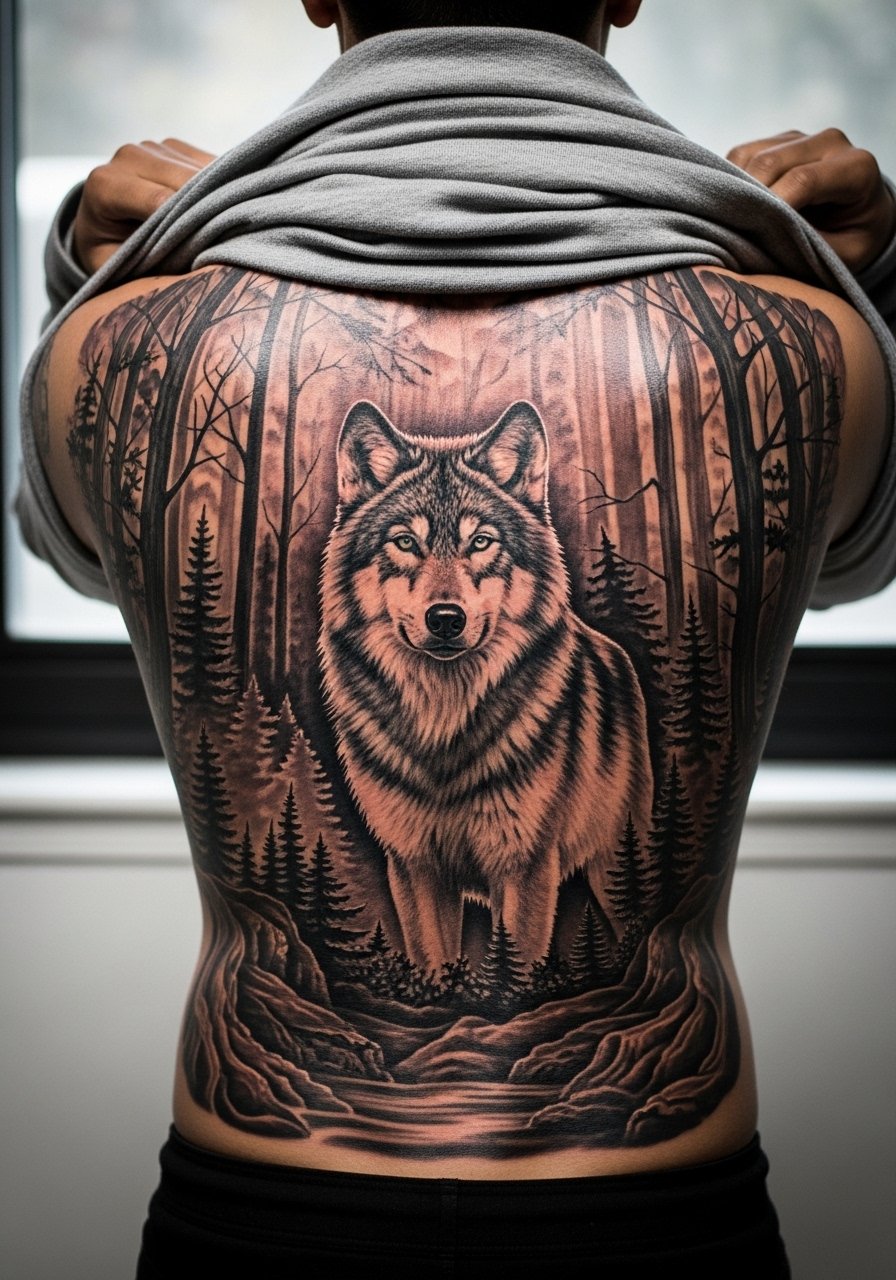
A backpiece is an investment in time and planning, which makes up-front mapping essential. Sessions will be long and split across months to avoid overworking the skin. The common mistake is rushing scale so the piece loses impact when viewed from a distance. Tell your artist you want reading distance mock-ups so they can adjust scale before the first pass. For discovery, use convention portfolios and shop profiles that show full healed backpieces so you can compare healed tones. Expect touch-ups at multi-year intervals depending on coverage and color.
Frequently Asked Questions
Q: Will fine-detail Princess Mononoke pieces blur faster than bold blackwork?
A: From what I've seen, ultra-fine detail tends to lose crispness sooner, especially on high-motion or high-friction areas like wrists and fingers. Bold blackwork absorbs wear differently and often reads cleaner as it ages. Choose slightly heavier line weight for small portraits or plan on a touch-up at year two.
Q: How painful is ribcage work compared to forearm placements?
A: Ribcage sessions are usually more painful because the skin sits over bone with less padding. Forearms are gentler and allow longer sittings. For ribs plan short focused sessions and bring breathing techniques. A topical numbing cream can help if the artist permits it.
Q: If I want to keep color in watercolor backgrounds, what should I ask my artist?
A: Ask for stronger initial color deposits and a plan for color boosts in follow-up sessions. Also request contrast in the foreground so the watercolor wash does not wash out the main subject. Sun protection after healing makes a big difference in color retention, especially for pale washes.
Q: How do I find an artist who has healed portfolio photos rather than just fresh work?
A: Use local shop directories, convention listings, and hashtag searches that include "healed" or "healed tattoo" plus your city or style. Forum threads and portfolio pages often indicate healed work. Ask during consultation for healed examples in the exact placement you want.
Q: Can tiny scripts under a Kodama stay legible on the inner wrist?
A: They can if you scale the lettering slightly larger and opt for a slightly heavier script weight. The inner wrist moves and washes a lot so thin lines fragment faster. Consider a line weight that sits midway between micro and standard script for longevity.
