
Fine line stairway motifs are everywhere on saved boards, but the pieces that still read well after a few years are the ones that plan for spacing and skin movement. Trend photos reward detail, not longevity. These 17 takes balance abstraction and structural choices so your stairway keeps its rhythm over time and looks deliberate from the day you heal.
1. Fine Line Inner Forearm Staircase with Negative Space

This delicate inner forearm piece uses negative space between treads to stop lines from bleeding together as skin ages. Fair warning, the inner forearm is a medium pain area and the session usually runs 60 to 90 minutes. Tell your artist you want spacing measured in millimeters, not visual guesses, so the stair gaps survive two to five years healed. Common mistakes are requesting too-small details and expecting perfect thin lines forever. Expect touch-ups sooner than bold blackwork, around year two to three for most people. Pair it with rolled-up sleeves for showing off the lines, and wear a loose button-down shirt to the session so the artist has unobstructed access.
2. Minimalist Wrist Stair Steps in Micro Dot Work
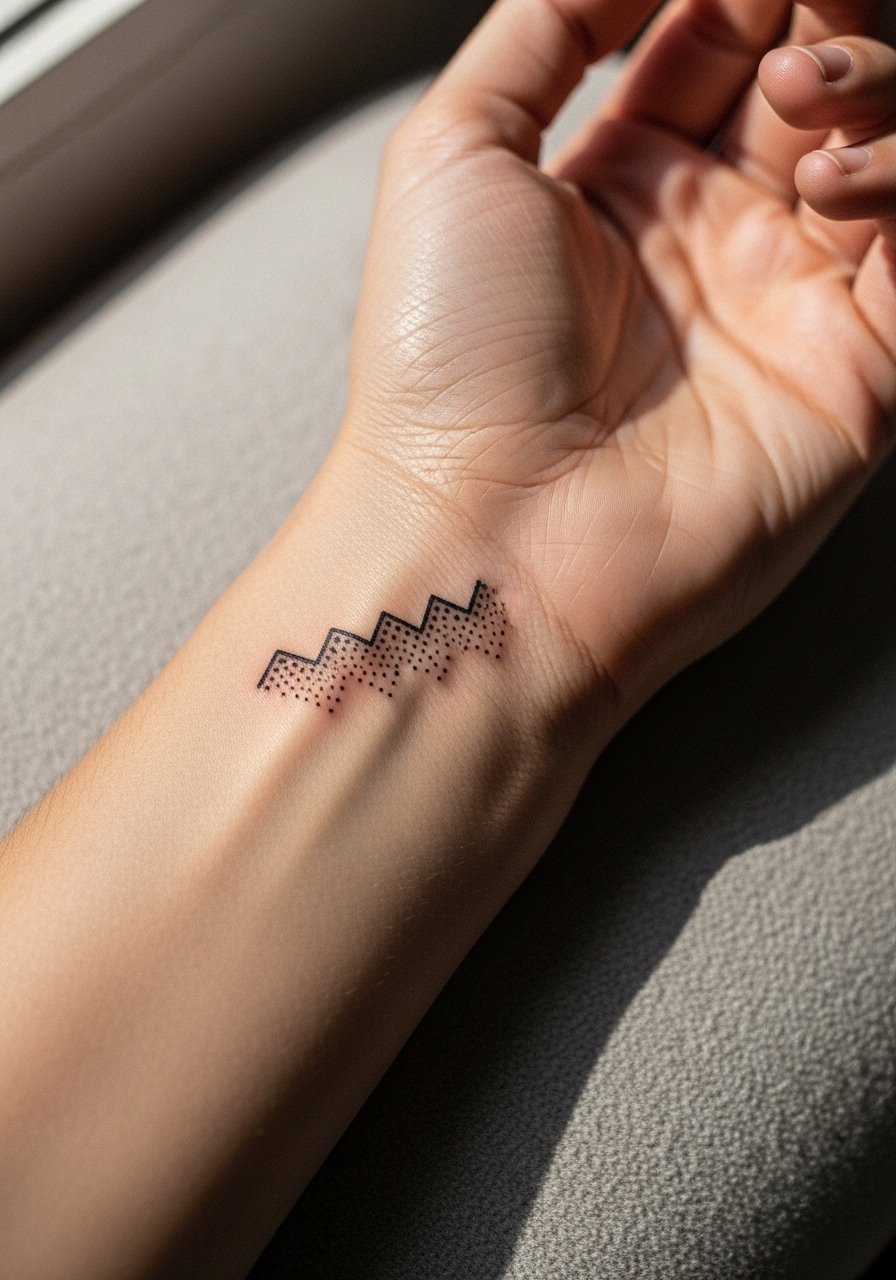
Wrist placements read small from close up so this micro dot approach gives the stairway shape without relying on fragile thin lines. The wrist sees constant friction from watches and sleeves, so the biggest mistake is placing dense detail where wear is constant. The session is short, often under 45 minutes, but plan for more frequent touch-ups. For showing it off, stack with a minimalist watch or a thin bracelet that frames the design without crowding it. Expect the dot shading to soften by year two, but the overall silhouette should remain intact.
3. Abstract Stairway Across the Collarbone, Open Composition
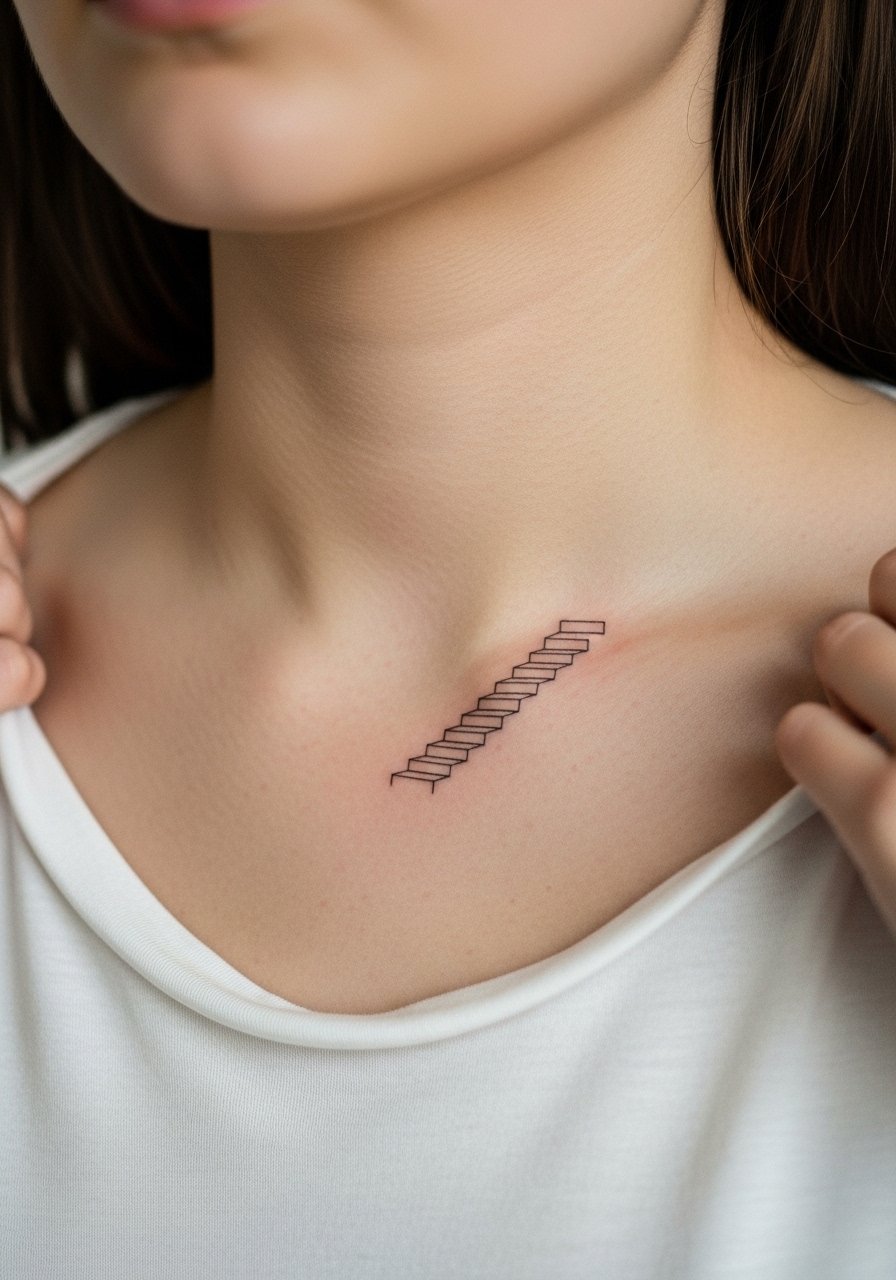
A collarbone placement gives the stairway an architectural slant that reads when paired with open necklines. Pain is a five out of ten for most people and the session is often broken into shorter passes because the spot is sensitive. The common error is insisting on dense intersecting lines that the collarbone cannot hold cleanly. Ask for slightly bolder lineweight near the bone and lighter steps over softer tissue. This placement looks great with open-back midi dresses or wide-neck tops that reveal the upper chest subtly. Touch-ups are usually needed in year three depending on sun exposure.
4. Geometric Blackwork Staircase on the Outer Bicep
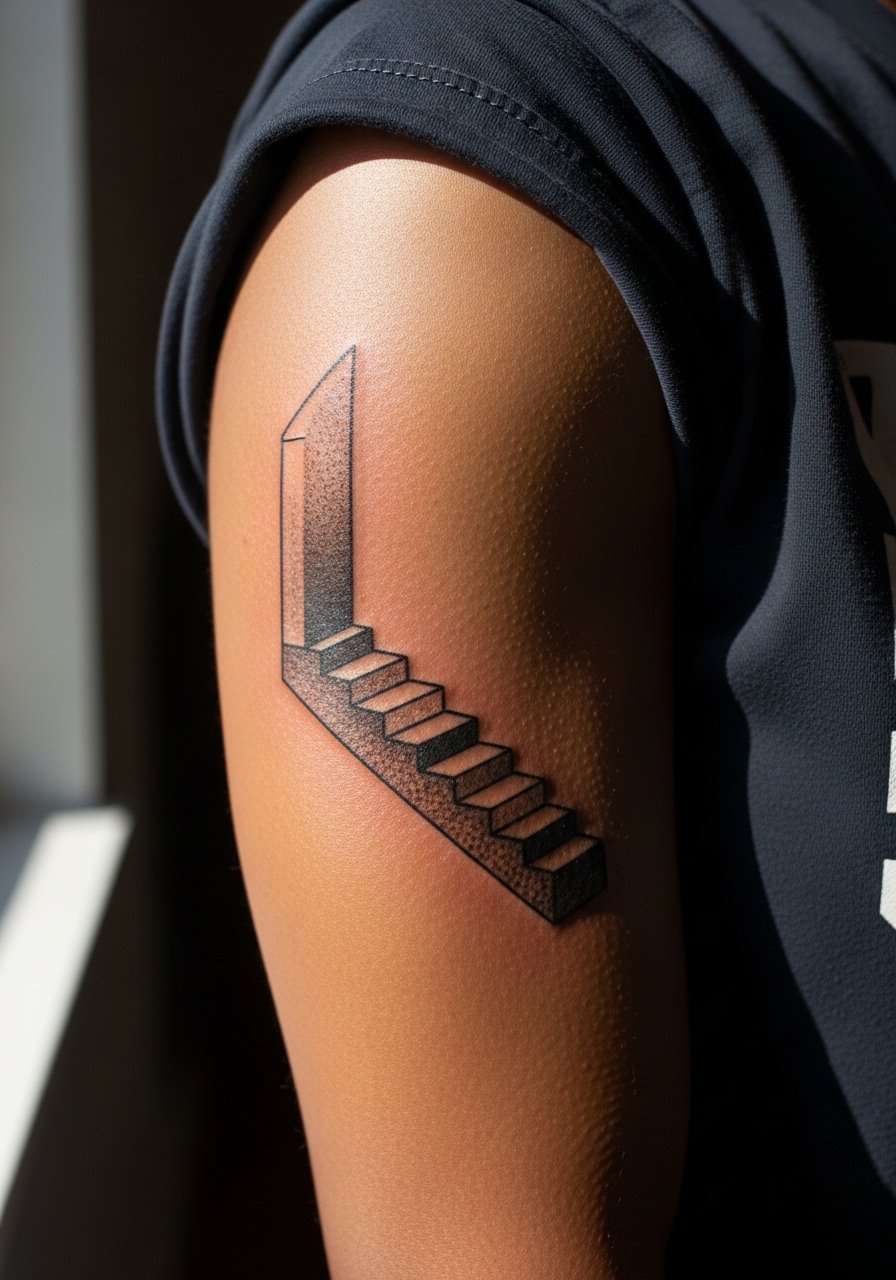
Outer bicep is forgiving when it comes to saturation and bold shapes, so an abstract stairway rendered in solid black blocks will age into a confident silhouette. The session is comfortable for most and often takes 90 to 150 minutes depending on coverage. A mistake is layering too many small angles inside the black blocks which creates hidden merging later. Tell your artist you want clean edges and room between saturated shapes for future retouching. For casual show-off style, a rolled sleeve tee frames the piece without hiding it. Expect minimal blowout risk here if depth is controlled.
5. Stairway Fragment on the Side of the Ribcage, Curved Flow
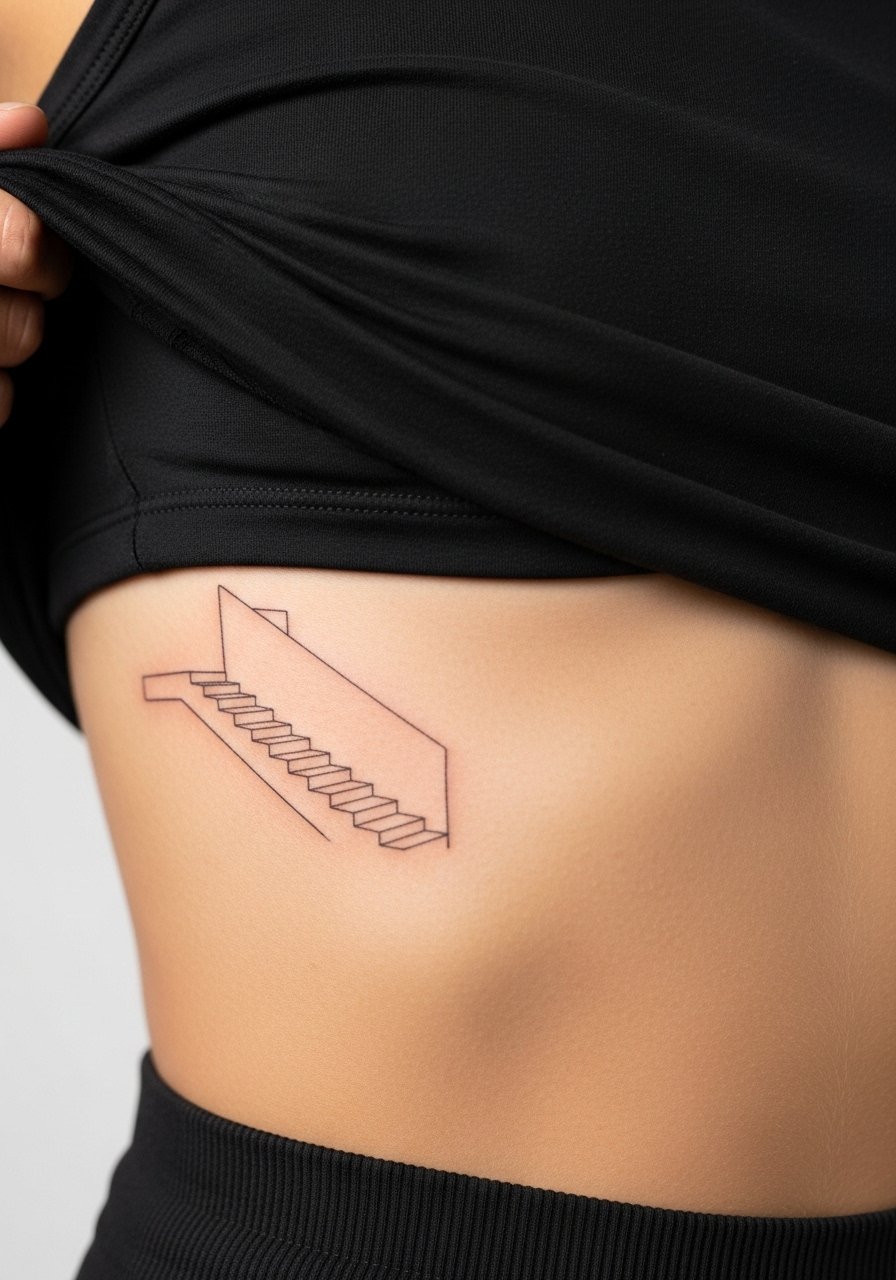
Ribcage work gives the stairway a natural curve but comes with higher pain and movement complications. Artists split into two camps on fine line there. One camp says the skin stretch and breathing blur delicate lines within two years. The other camp argues that with controlled needle depth and slightly larger spacing, fine line holds on ribs. Ask your artist where they stand and request slightly more breathing room between treads. Sessions take longer and often require breaks. For the appointment, wear a cropped athletic top so the area is easy to access and you stay comfortable. Healing needs careful sun avoidance to keep contrast.
6. Staircase Fragment Wrapped Around the Ankle
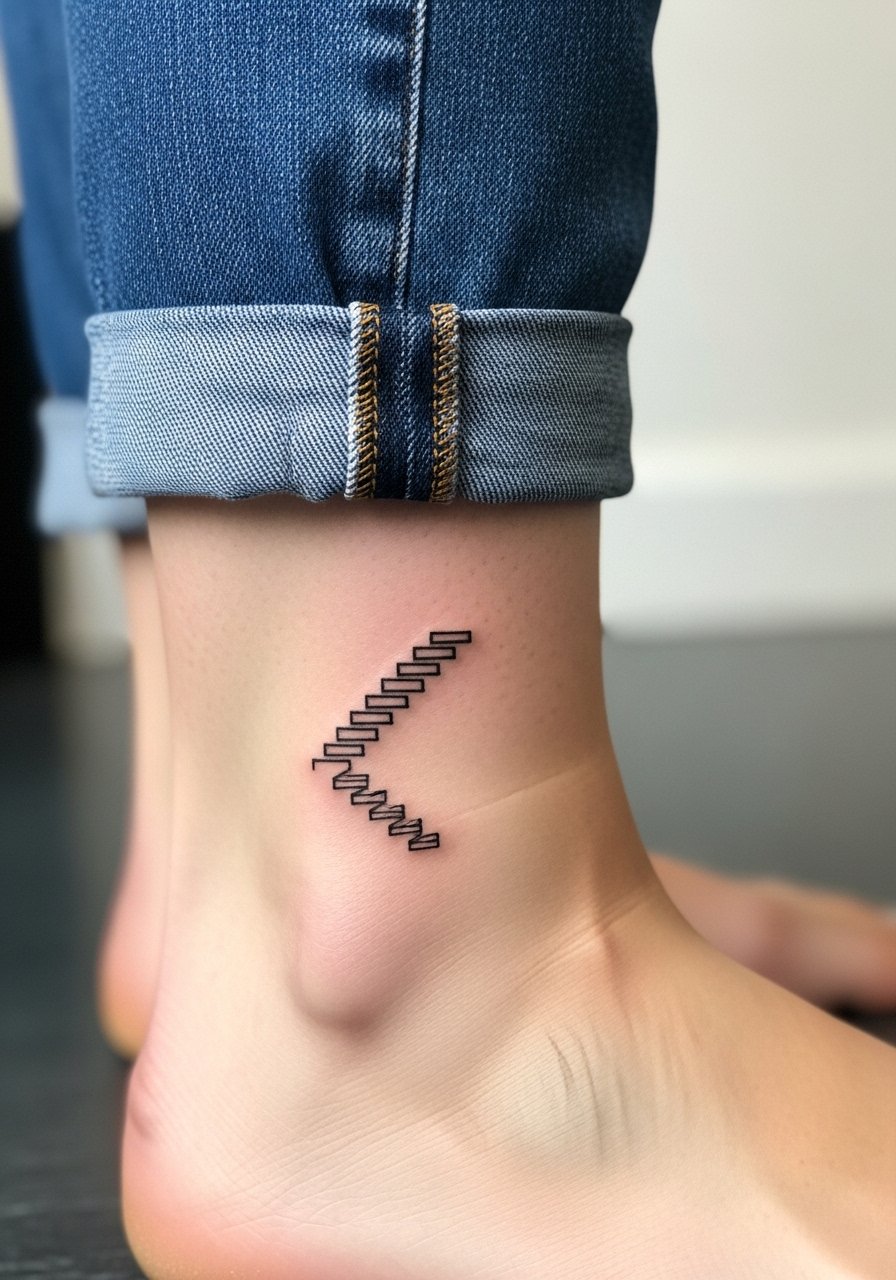
Ankle pieces show nicely but suffer friction from shoes and socks. The common mistake is packing too much fine detail into a small band. Plan for a design that prioritizes silhouette over micro-detail. Sessions are short, often under an hour, but the ankle can take longer if shading is added. A thin protective bandage and careful shoe choices during the first week matter more than people expect. For showing the stairway, a pair of sandals or rolled jeans highlights the wrap without interference.
Studio Day Picks
Those first six placements need different prep than larger pieces, so a compact kit focused on access, comfort, and first-week protection helps the session and the initial healing.
- Stencil transfer sheets. Lets you preview the stair spacing on skin before ink, which is crucial for small forearm and wrist placements.
- Low-odor topical numbing cream. Applied under plastic wrap 45 minutes before the chair can ease higher-pain sessions like ribs or sternum.
- Thin protective film roll. Keeps friction-prone spots such as ankles and fingers clean during the first few days.
- Fragrance-free gentle body wash. Cleans healing areas without drying out the fine line work seen in many of the designs above.
- Aquaphor healing ointment. A thin layer helps lock in moisture on delicate linework during the first few days without suffocating the skin.
7. Stairway in Stipple Shading Down the Spine
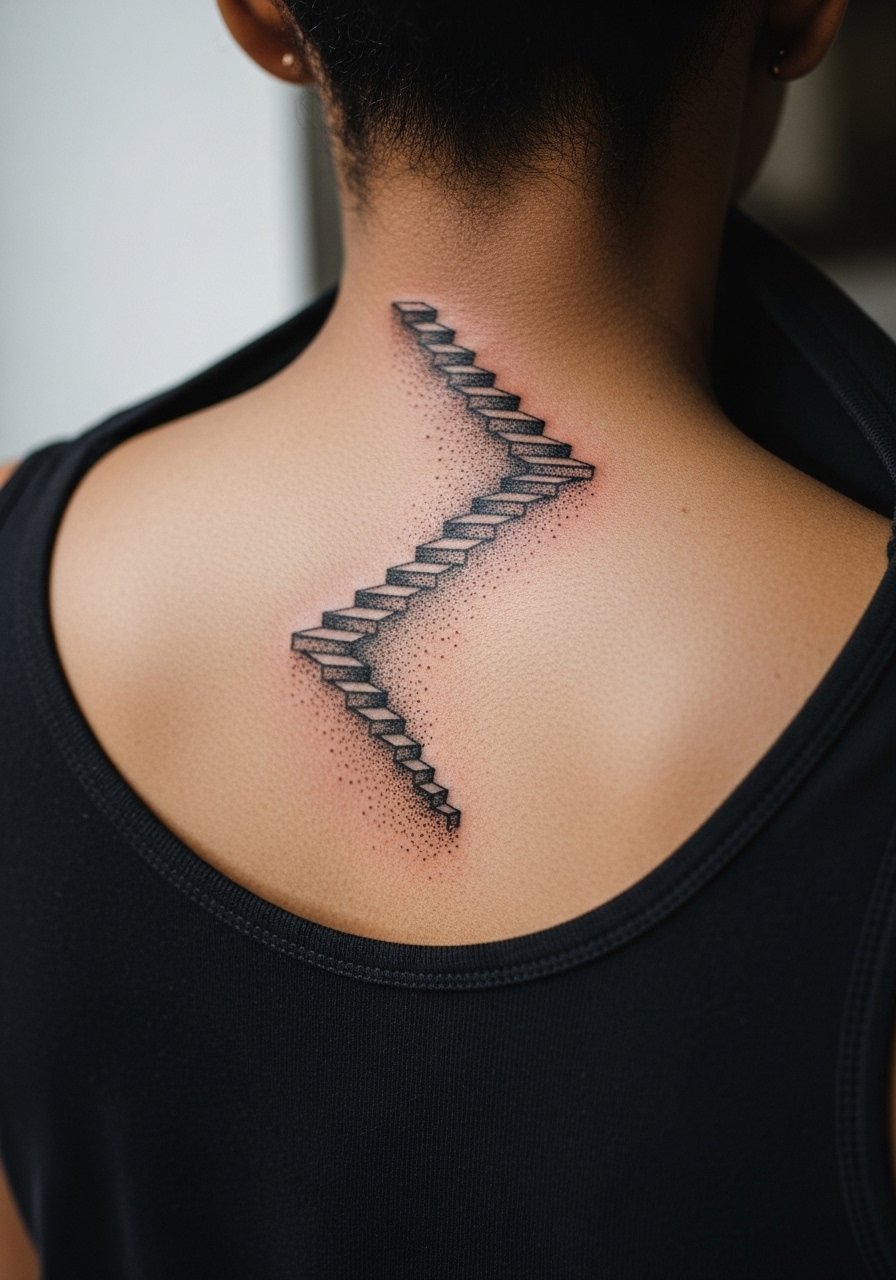
A vertical stair motif down the spine creates a strong composition for open-back clothing. The spine can be uncomfortable when needles run close to the vertebrae, so expect several short passes. The main mistake is packing too much dot work into tight rows which causes loss of definition as dots fill in. Ask for wider dot spacing toward the lower spine and denser grouping at the top where the skin is tighter. Sessions can run long but are often split into two appointments. For evenings out, an open-back dress frames the spine while keeping the piece visible.
8. Geometric Stairway Cluster on the Shoulder Blade
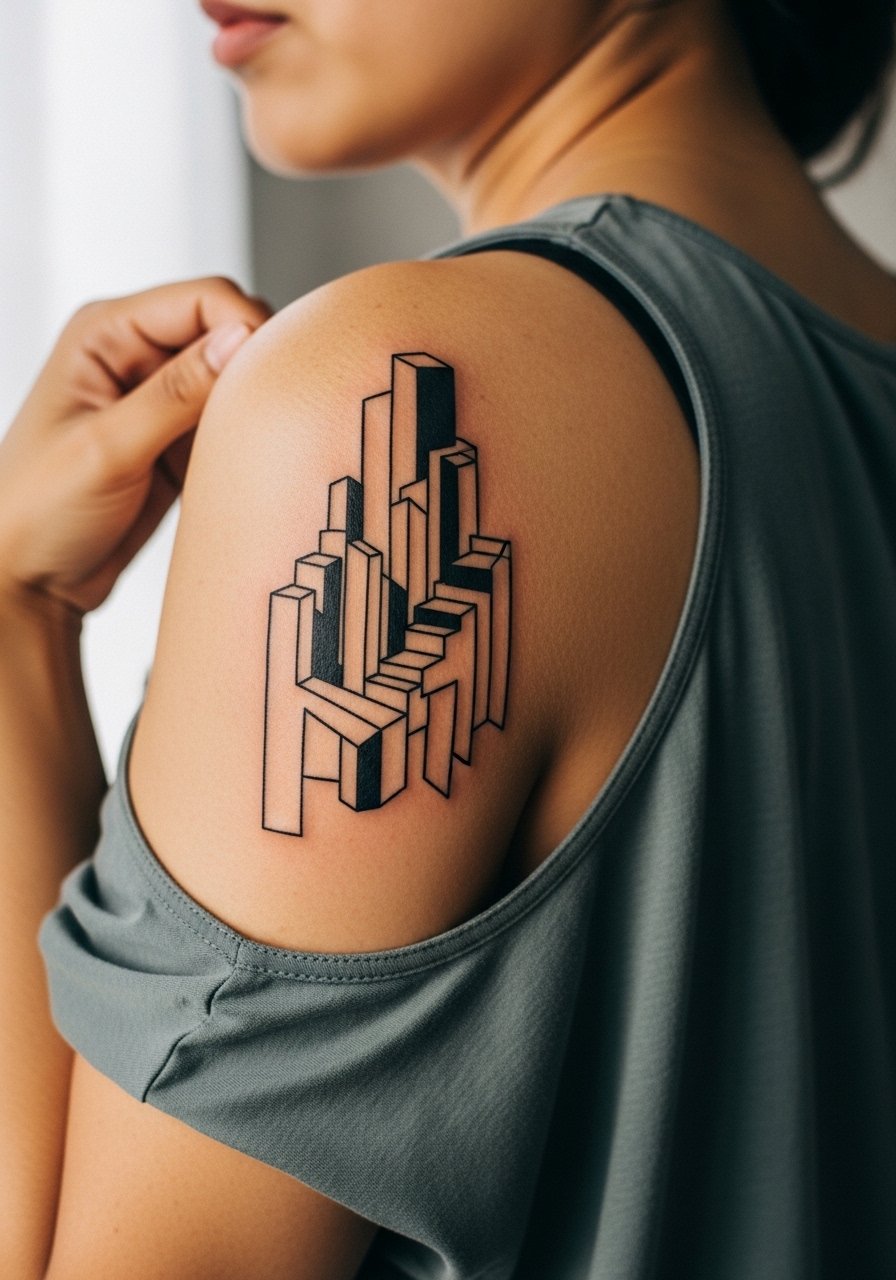
Shoulder blade placements are forgiving for geometric abstraction because the surface moves less and the skin is fairly stable. A frequent error is asking for extremely thin intersecting lines that later lose clarity. Tell the artist you want negative space between intersecting angles and check healed examples from their portfolio. Sessions usually sit in the 90 to 180 minute range. This area pairs well with a loose tank top that you can slide aside during the session and wear afterward to show the design without rubbing.
9. Tiny Stairway Accent on the Side of a Finger
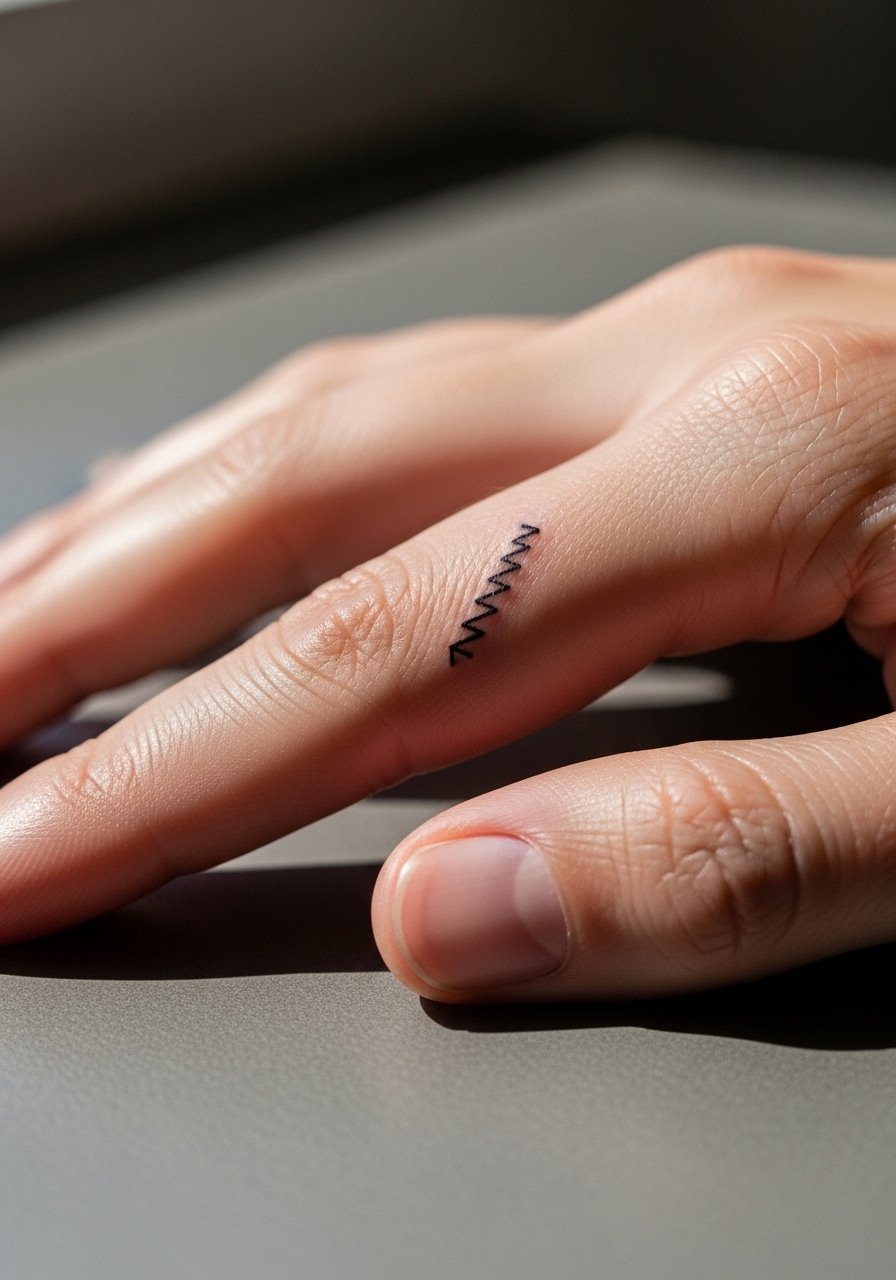
Finger placements are visible and brave, but they require realistic expectations. The skin on fingers sheds and moves, so detail melts faster than on the arm. The most common mistake is demanding identical detail to a forearm piece. Expect a touch-up timeline of one to two years and know that thin single-line steps may need a yearly refresh. Sessions are quick and often done with a tight focus, but the aftercare window matters more. For everyday wear, keep in mind rings can crowd the left-hand fingers and affect visibility.
10. Abstract Stairway Across the Calf with Whip Shading
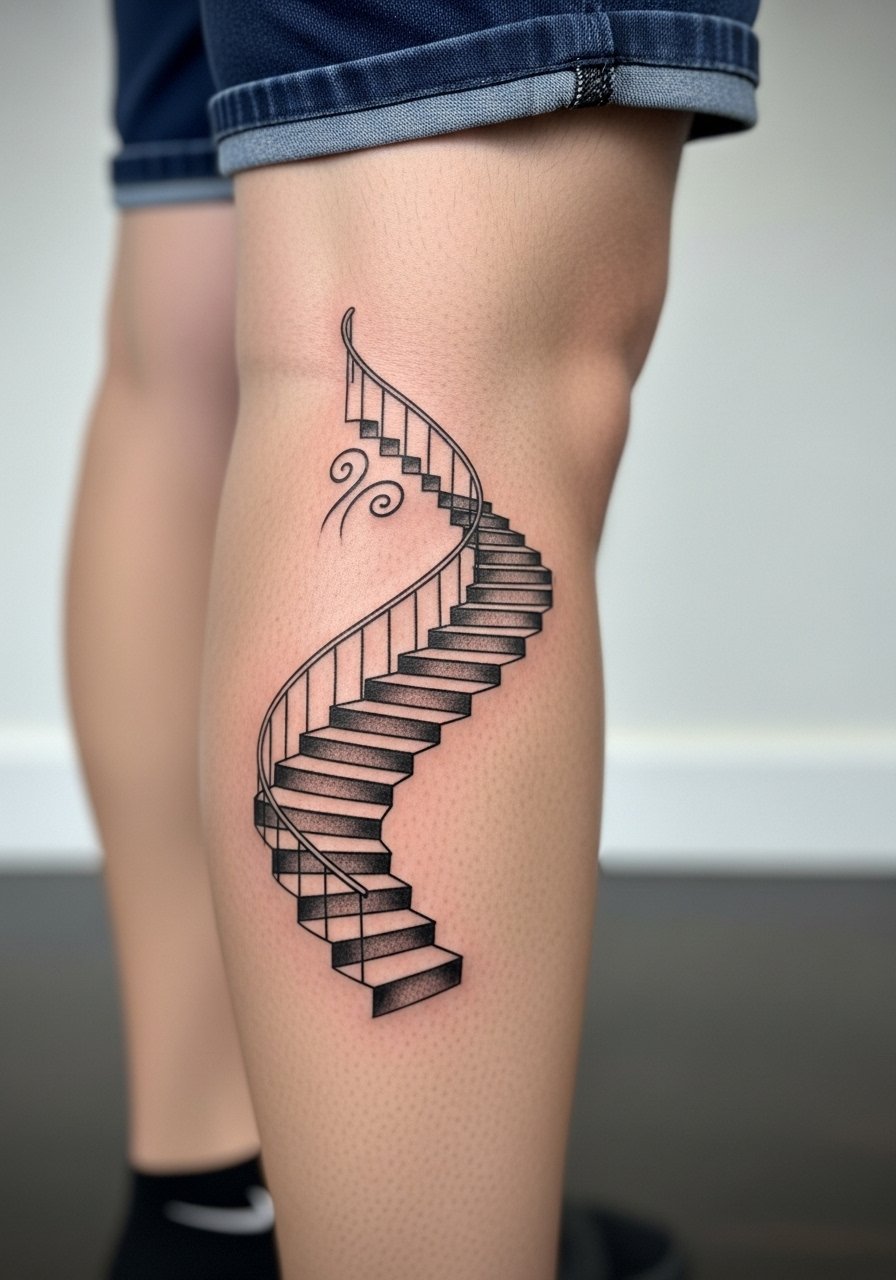
Calf pieces let you play with curved stairways and soft whip shading without risking blowout. The leg holds saturation well so the stairway can include gradated shadow steps. A mistake is compressing too many tonal steps into a narrow band which can look muddy after healing. Sessions range from 90 minutes to several hours for complex shading. For showing this off casually, a pair of athletic shorts or mid-length skirts work well.
11. Sternum Stair Motif Nestled Under a Bandeau Line
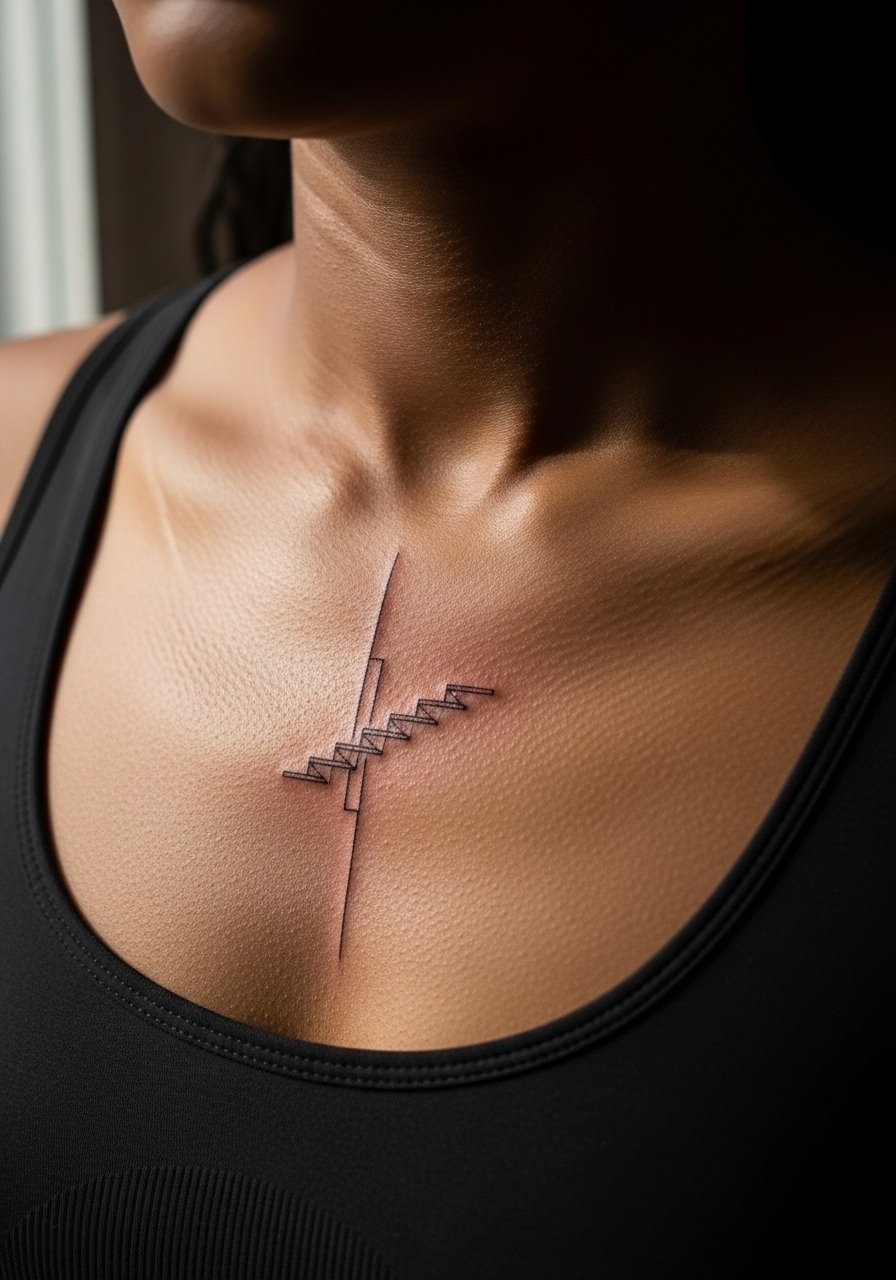
Sternum pieces are intimate and sit differently on every chest. This placement is higher pain and demands an artist comfortable with torso contours. The shared controversy applies here too. One camp avoids fine line on the sternum because of stretch and sweat, the other gets good results by spacing lines and using slightly heavier lineweight. Ask which approach your artist prefers and request a test stencil in the sitting position. Wear a fitted sports bra or bandeau to the session so the artist can access the area easily. Healing usually needs extra sun protection and patience.
12. Abstract Stairway as a Shoulder Cap Accent with Color Wash
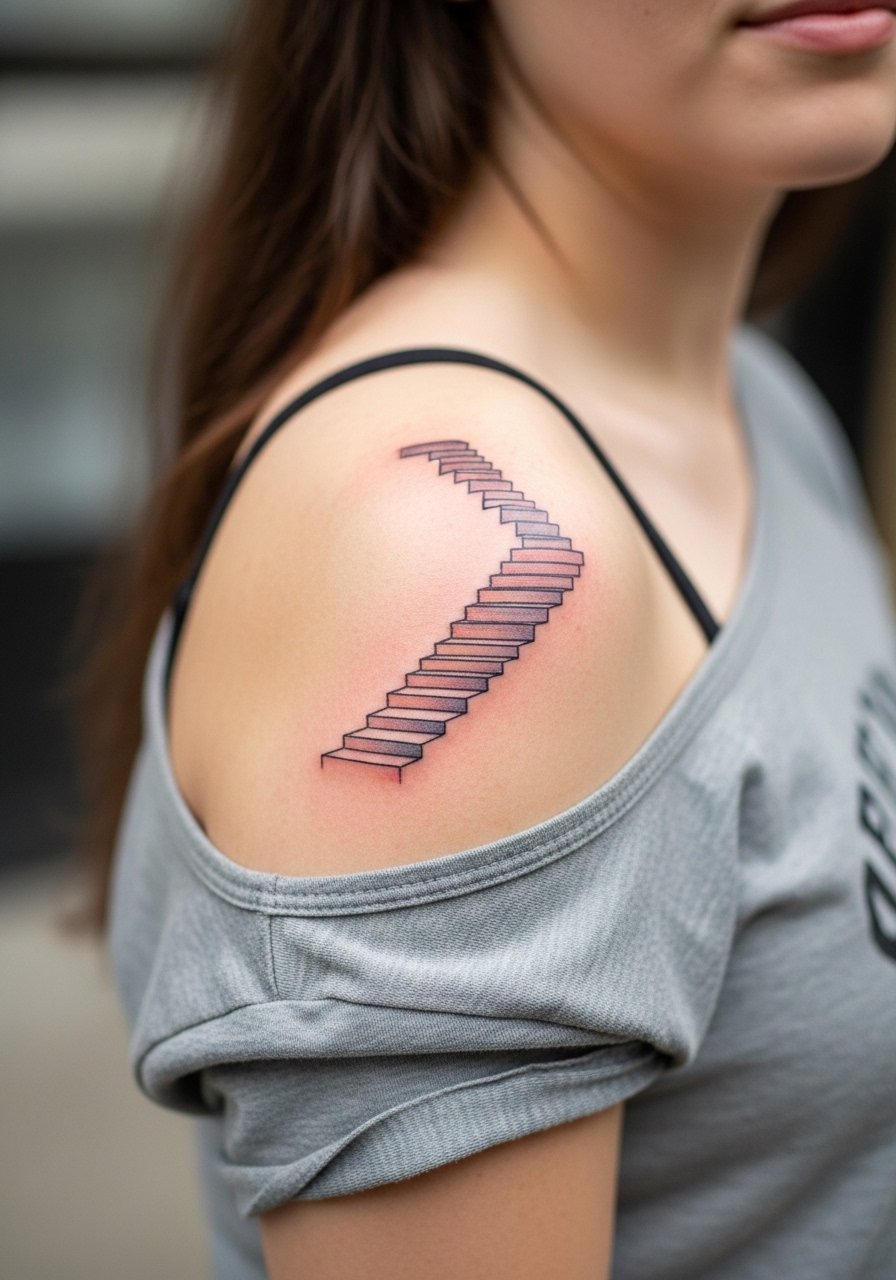
Adding a faint color wash behind an abstract stairway can increase legibility from a distance without compromising the linework. The shoulder cap tolerates color well but the common error is oversaturating with dense pigment that hides the stair edges. Ask for a translucent wash layer and keep color placement behind the steps. Sessions often run two hours and may be split to test color settling. For evenings, a cap sleeve blouse frames the shoulder accent and keeps attention on the stairway silhouette.
13. Fragmented Stairway on the Hip with Diagonal Flow
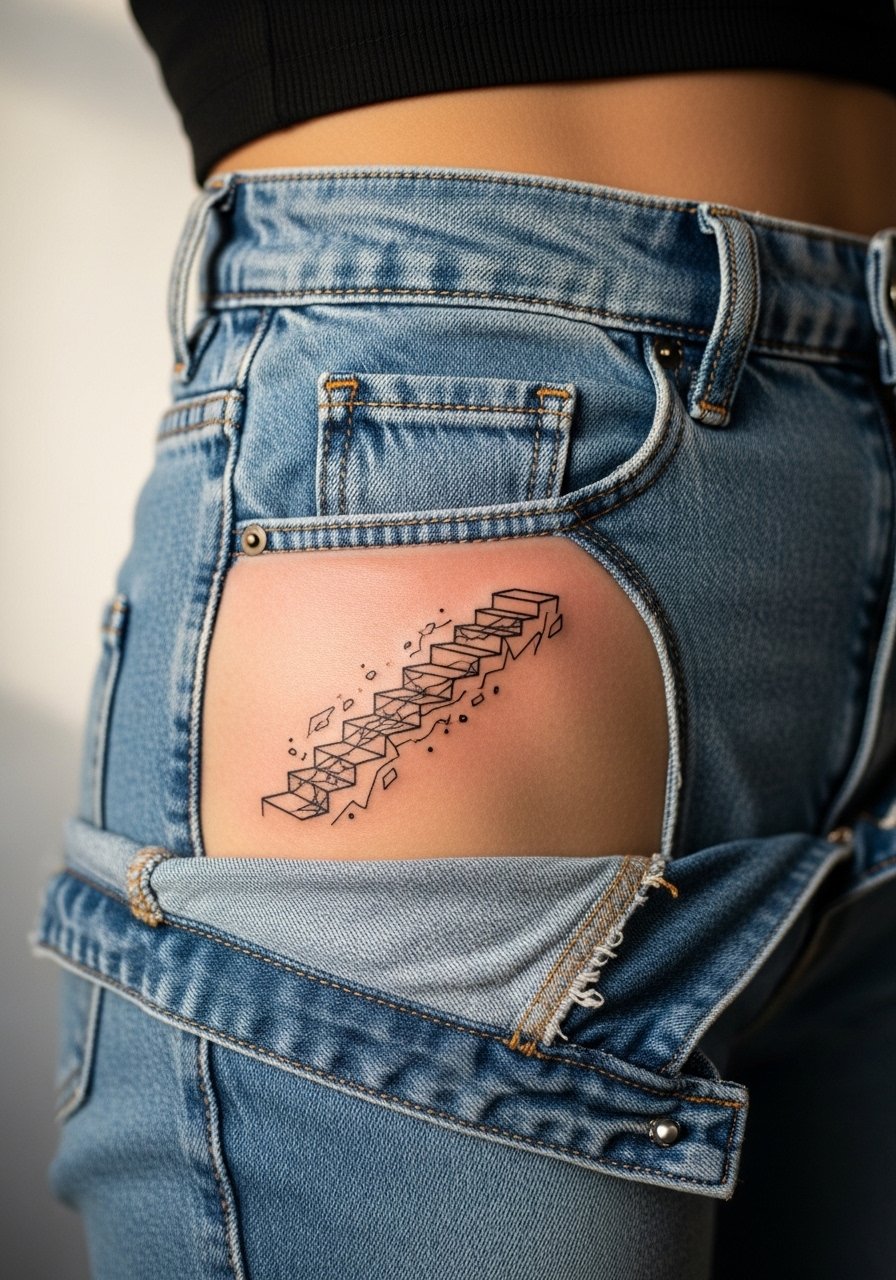
Hip placements let the stairway curve with natural body lines and peek out from swimwear or low-rise jeans. The main mistake is choosing dense cross-hatching that the thin hip skin cannot hold. Sessions can be interrupted for comfort and the area requires a little extra padding when sitting in the first week. For the appointment choose high-waisted jeans or a bikini bottom that allows exposure only where needed. Expect the hip to retain contrast well if you avoid heavy sun on the area.
14. Abstract Staircase Across the Thigh with Layered Dot Work
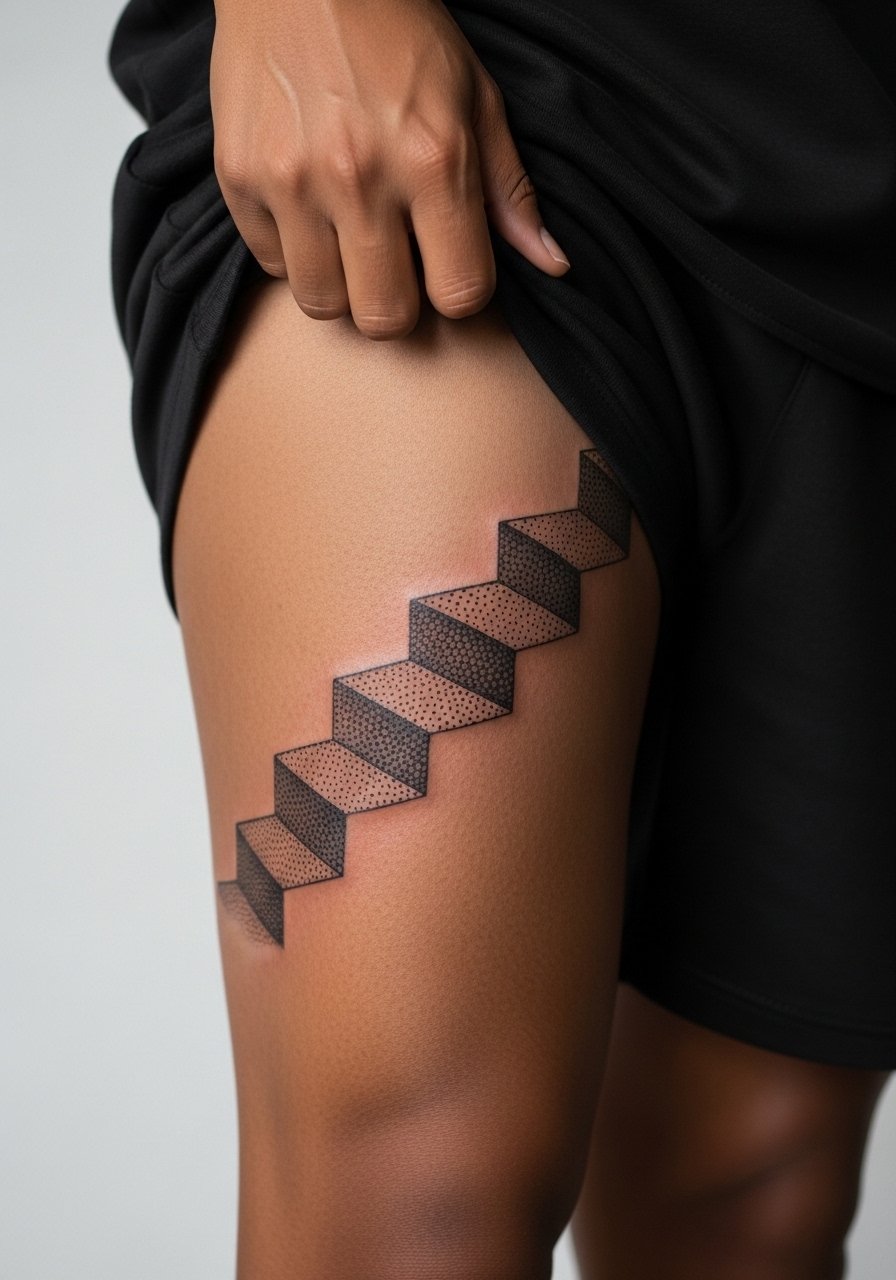
Outer thigh is friendly to larger-scale abstraction and layered dot work creates a soft architectural depth. The session can be comfortable since the thigh has thicker skin. The common error is placing too many micro gradients close together which can blur into one tone as the skin moves. Ask for gradual dot spacing and confirm the silhouette at normal standing and sitting positions. Wear loose shorts or a wrap skirt to the appointment for quick access. This design typically holds well and needs fewer touch-ups than fingers or wrists.
15. Neck-Side Stair Accent with Scripted Coordinates
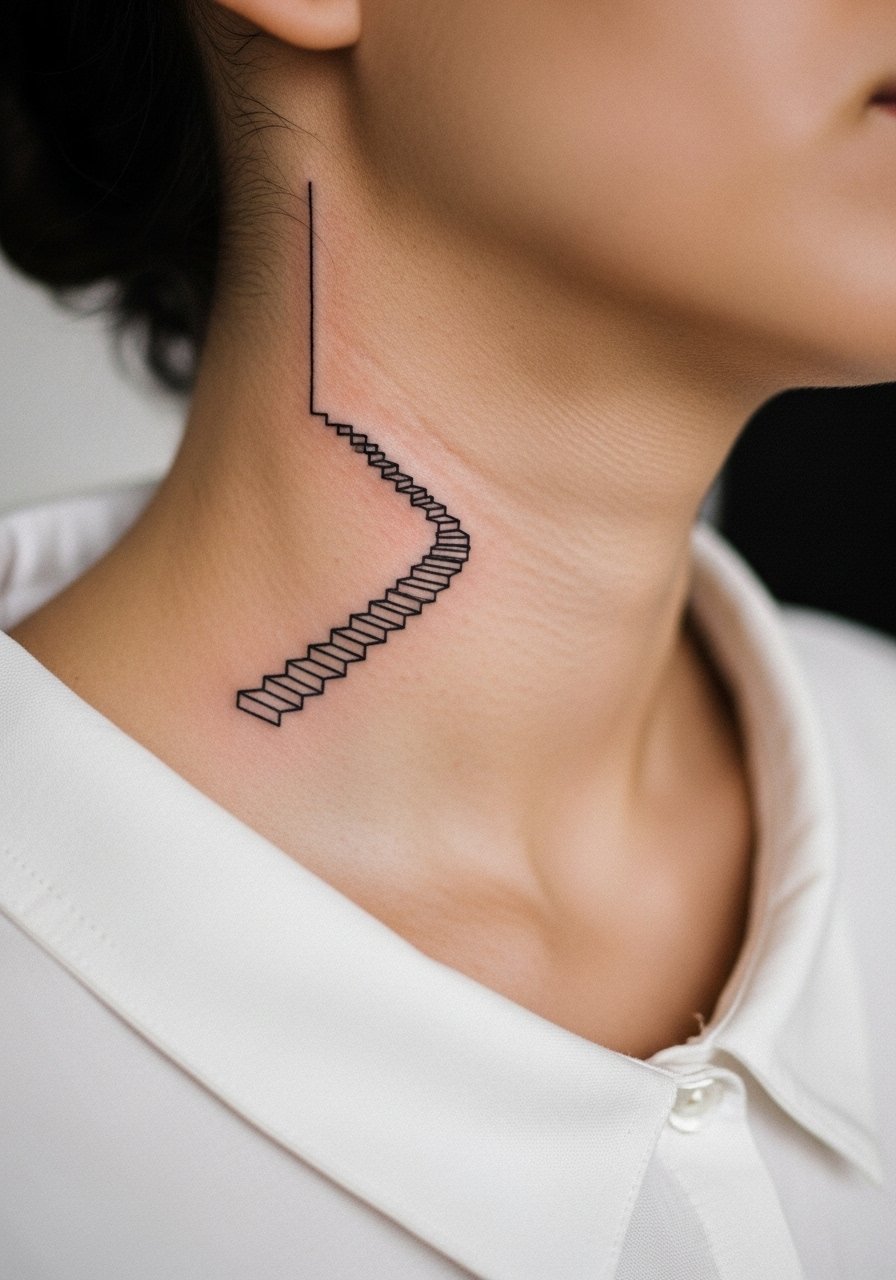
Side neck placements are bold and career-sensitive in some settings. If visibility matters to you, consider how workplaces treat neck tattoos before committing. The area is thin and moves a lot, so the mistake is asking for small, ornate detail. For text or coordinates next to the stairway include the exact phrase in your reference to avoid gibberish in design previews. Sessions are short but can be uncomfortable. For the appointment choose a wide-neck shirt you can pull aside easily and that keeps the rest of your neck covered.
16. Abstract Stairway as a Chest Anchor, Mirrored Pair
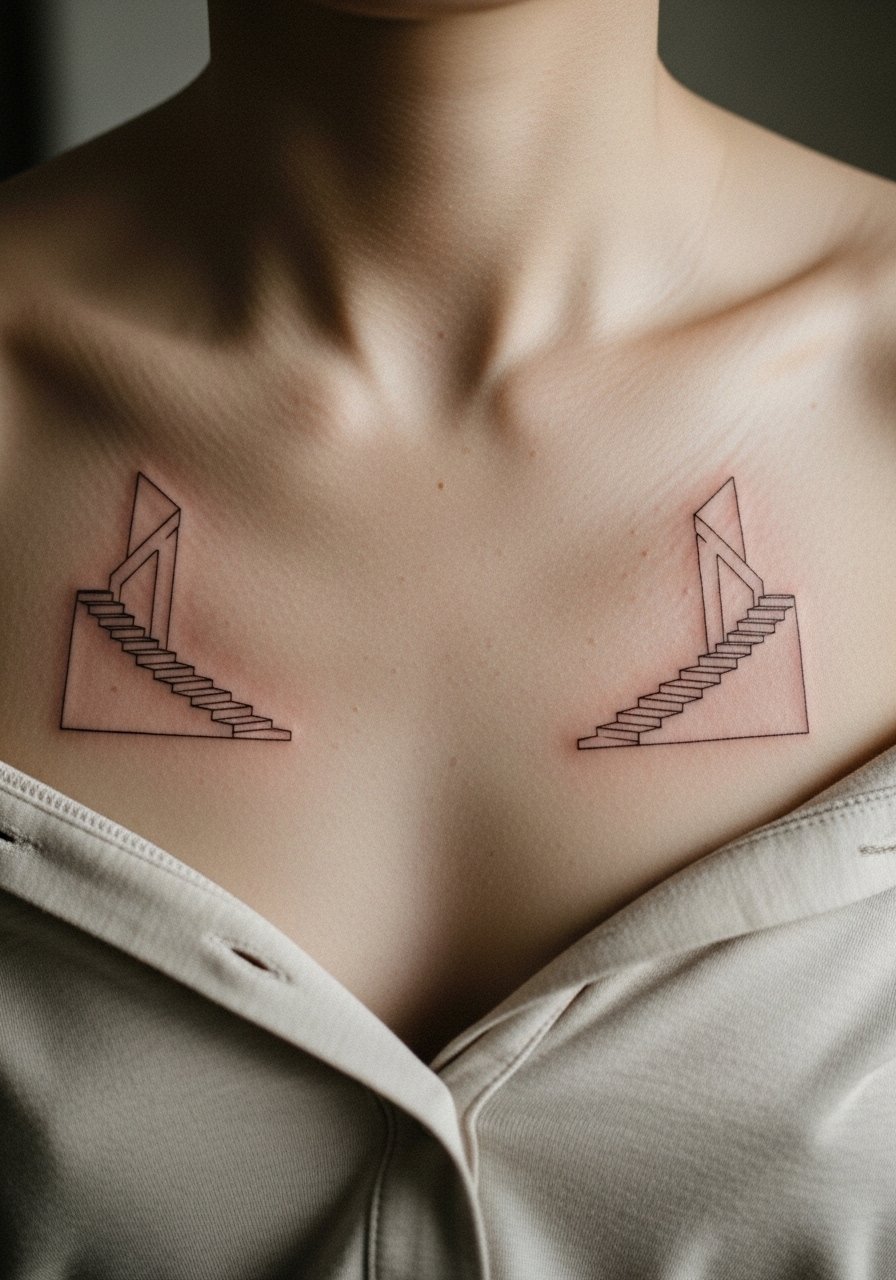
Mirrored chest placements create balance and play with negative space between the sternum and collarbones. The chest moves with breath so the mistake is matching every line perfectly without compensating for expansion. Ask your artist to place stencils with you sitting and lying down, and request slightly heavier line starts near the bone so the stair edges read after healing. Sessions can be split and breathing management matters for comfort. This motif pairs with wide-neck shirts that show the mirrored symmetry.
17. Tiny Behind-the-Ear Stair Fragment, Subtle Edge
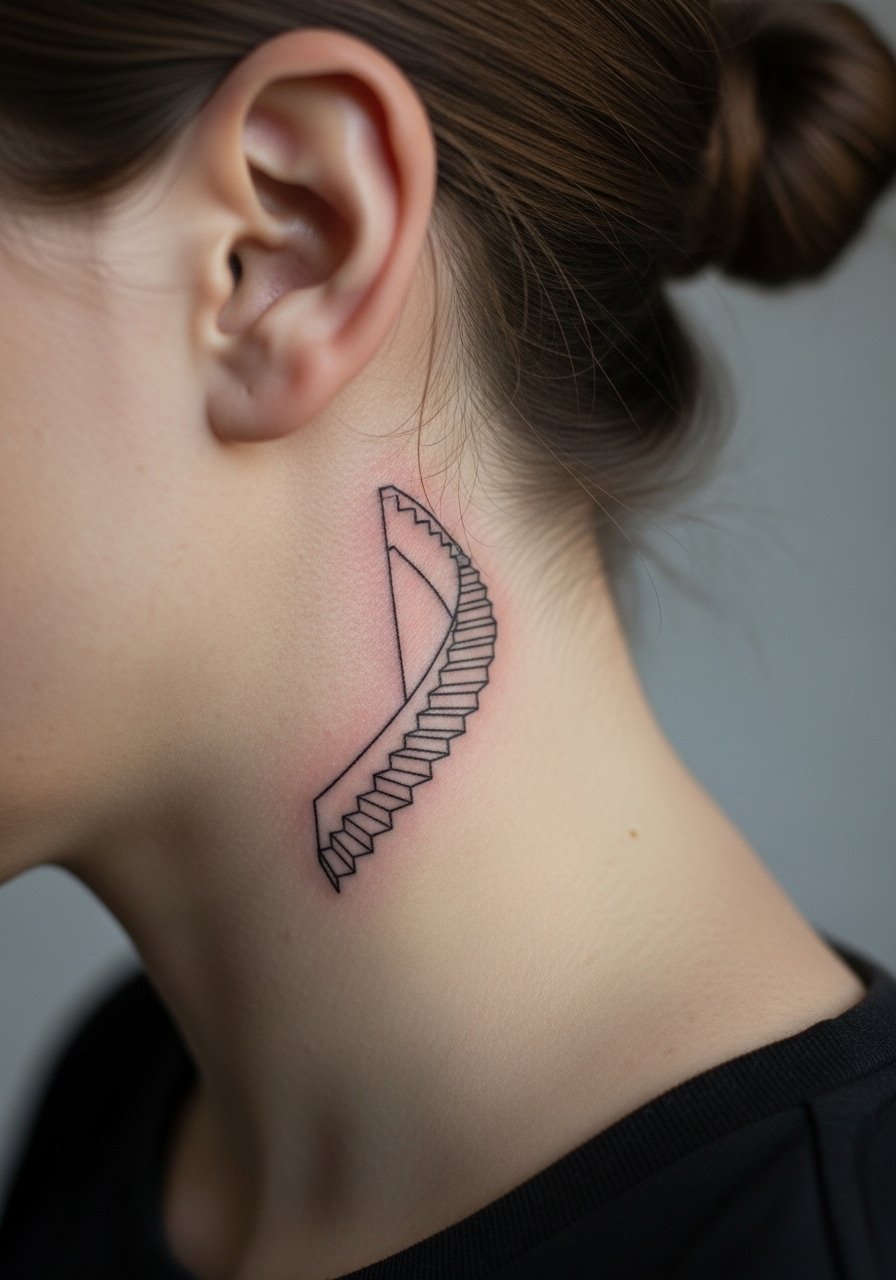
A tiny fragment behind the ear is discreet and works as a subtle nod to the stairway concept. Follow safety framing in the image and remember this spot is delicate and often covered by hair. The error is wanting the same definition as a forearm piece. Keep the lines slightly bolder and expect a short session. If you need to find a specialist for small placements use local directories, convention listings, hashtag searches, or community forums to vet portfolios rather than relying on a single image.
Frequently Asked Questions
Q: How long will fine line stairway tattoos hold their crisp edges on wrists and fingers?
A: From what I have seen, wrists and fingers lose crispness faster than the arm or calf because of constant movement and washing. Expect the silhouette to remain readable but plan for touch-ups around year one to three depending on your daily friction and sun exposure.
Q: Is bold blackwork a better choice than fine line for a stairway motif if I want low maintenance?
A: Bold blackwork tends to read longer without frequent touch-ups because saturation ages into a stable silhouette. The trade-off is it changes the aesthetic. If you want low maintenance, choose fewer micro details and more deliberate blocks that keep contrast as they age.
Q: Can I get a symmetric stairway across the chest and still have it look balanced as my body changes?
A: Symmetry works if the artist places stencils with you in natural poses and compensates for breathing and slight asymmetry. Ask for mirrored stencils while standing and lying down so the lines read balanced in everyday posture.
Q: What should I wear to a ribcage or sternum session so the artist has proper access?
A: For ribcage sessions pick a cropped top you can lift slightly or a button-down that opens. For sternum choose a fitted sports bra or bandeau that remains in place while exposing the work area. These garments let the artist work without compromising modesty or sterility.
Q: Are there placement choices I should avoid if I work in a conservative industry?
A: Visible neck, hand, and face placements still affect hiring in some fields. If you work in a conservative environment consider placements that can be covered by collars, sleeves, or hair until you are ready for visibility.
