
Fine line tattoos dominate Pinterest right now, and the same artists pushing them are quietly booking touch-ups at year two. The aesthetic sells because it reads delicate in photos. The reality is placement and skin type dictate longevity more than a trendy needle style. Read on for 21 spider web tattoo ideas that balance what looks good fresh with what still reads clean after two to five years, plus what to ask your artist in the consult.
1. Classic American Traditional Elbow Web
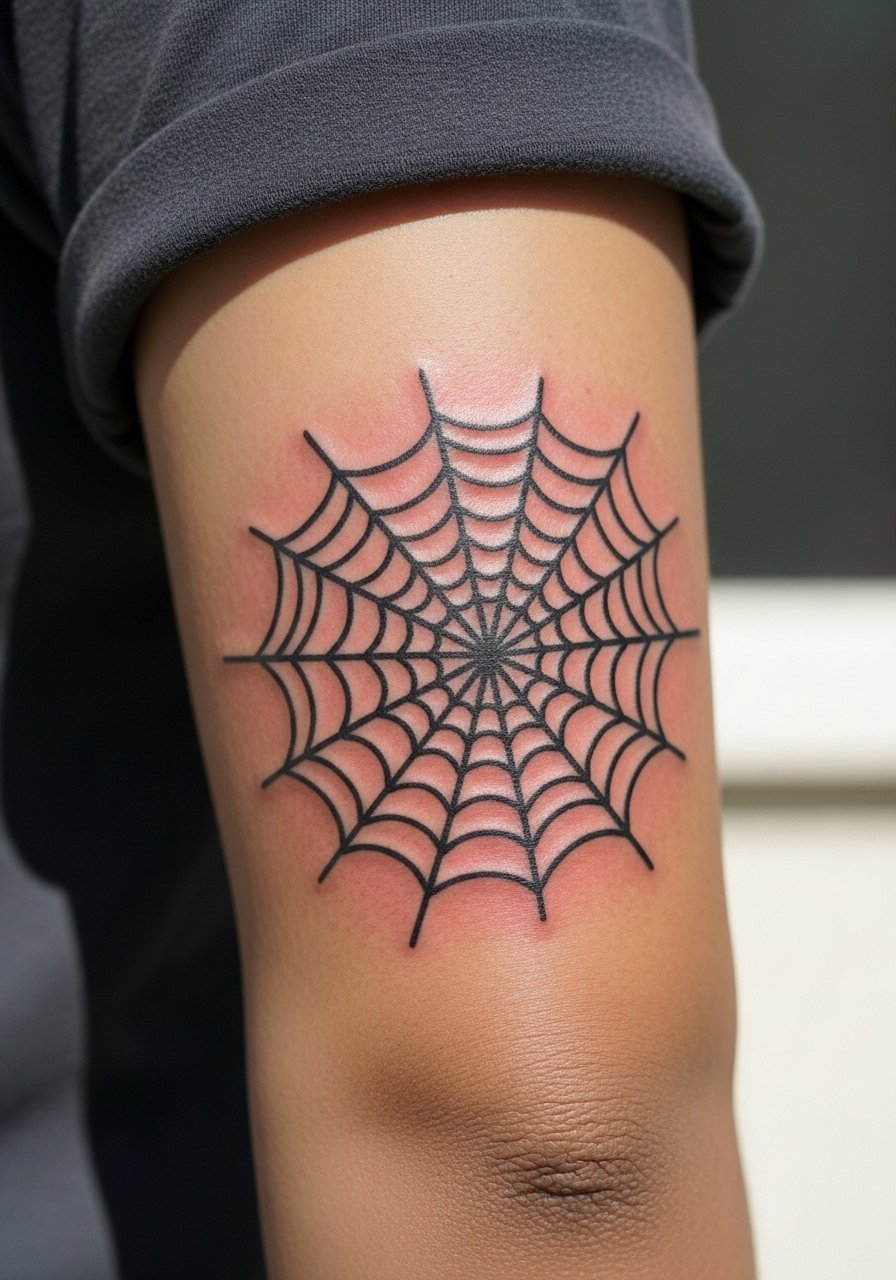
I’ve seen the elbow web age two ways. When done with heavy outlines and a touch of red saturation it keeps a graphic silhouette for years. When artists try fine line there, the web blurs into a grey patch after weight changes and normal joint wear. Fair warning, the elbow is a high-pain spot because the needle hits near bone. Tell your artist you want thicker outer spokes and open spacing so lines do not merge as the skin stretches. For showing it off, pair with a cropped hoodie men or rolled sleeves on fitted tees. During the session wear a loose tank so the arm can bend without torque.
2. Fine Line Minimalist Wrist Web
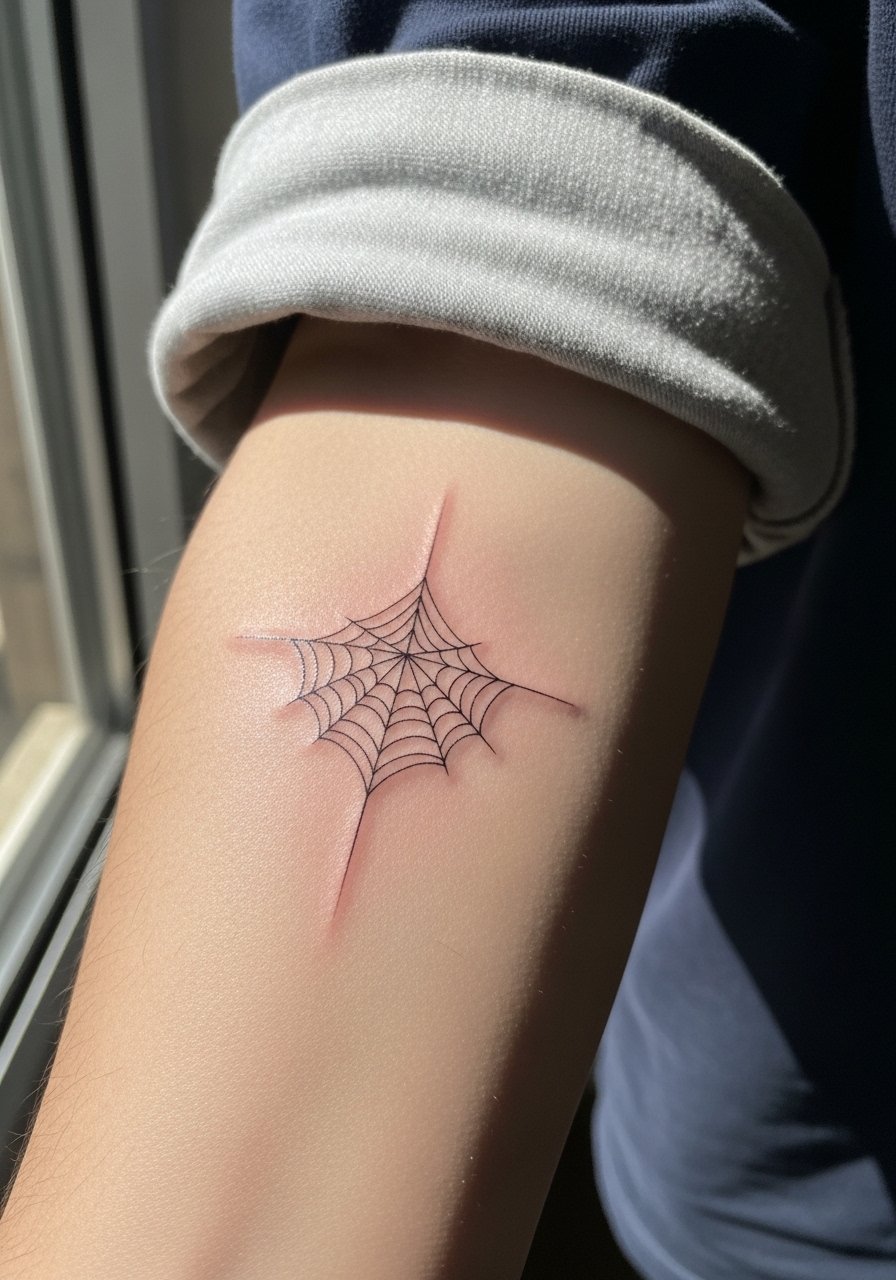
Most people pick a tiny wrist web for its discreet feel. Expect low pain and a quick session under an hour. The trade-off is longevity in high-friction spots. Artists divide on fine line here. One camp accepts faster fading as part of the aesthetic. The other camp recommends slightly stronger line weight to keep the pattern readable past year two. Ask for a specified line thickness in your consult and plan a touch-up at six months. For everyday wear, cuff your shirt and stack a thin bracelet to frame the piece, like a cuff bracelet leather.
3. Blackwork Geometric Forearm Wrap
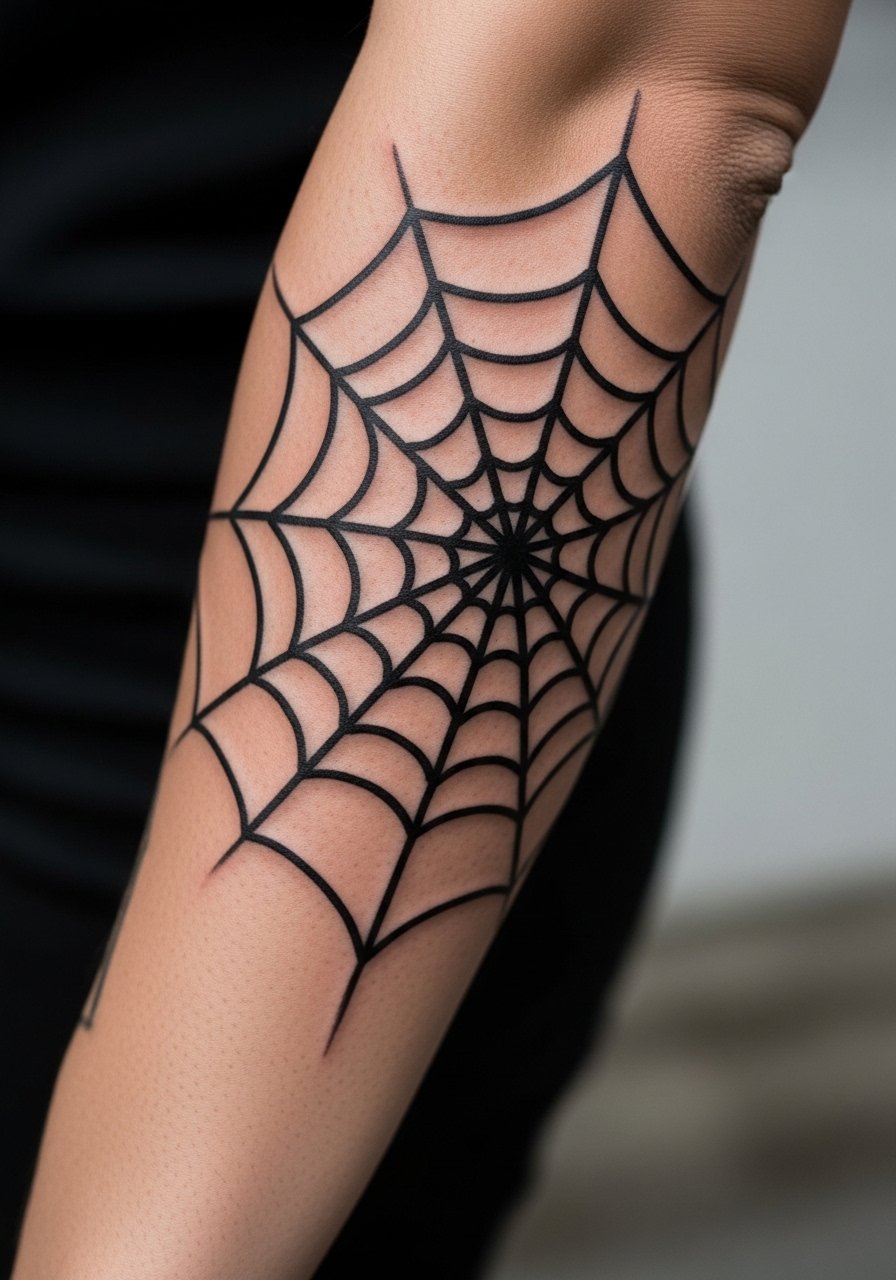
There is a hypnotic quality to a forearm wrap that reads from a distance. Expect two sessions for saturation and crisp edges. Common mistake is going too small. The geometry needs breathing room or the parallel spokes will merge into a shaded wash after a couple of years. Tell your artist to map the wrap onto your arm while you bend it. Forearms move and gain weight differently, so discuss how the pattern follows muscle contours to avoid distortion. For contrast, wear a black henley shirt and avoid busy sleeves that compete with the lines.
4. Neo-Traditional Rose + Web on Outer Thigh
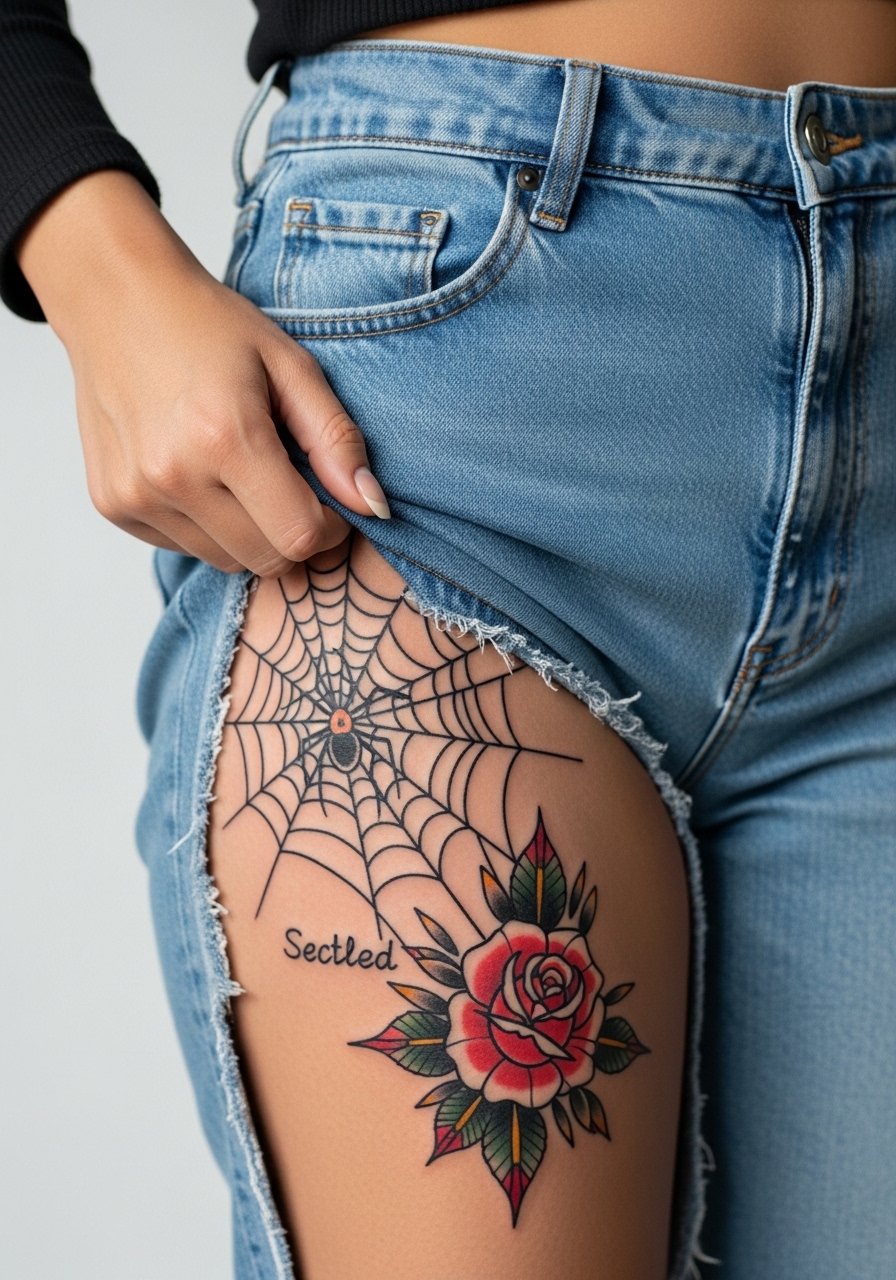
Thigh pieces let you mix softness and edge without daily display. The rose gives color that protects the web visually, and the thicker linework common in neo-traditional helps on contouring flesh. Session time is moderate because of color packing. A common aging error is cramming too many tiny petals next to tight webbing. Ask for defined negative space between floral elements and the web so the pattern reads at six months and at two years. For the session wear loose shorts so the artist can reach the outer thigh easily.
5. Micro-Realism Dew-Drop Web Behind the Ear
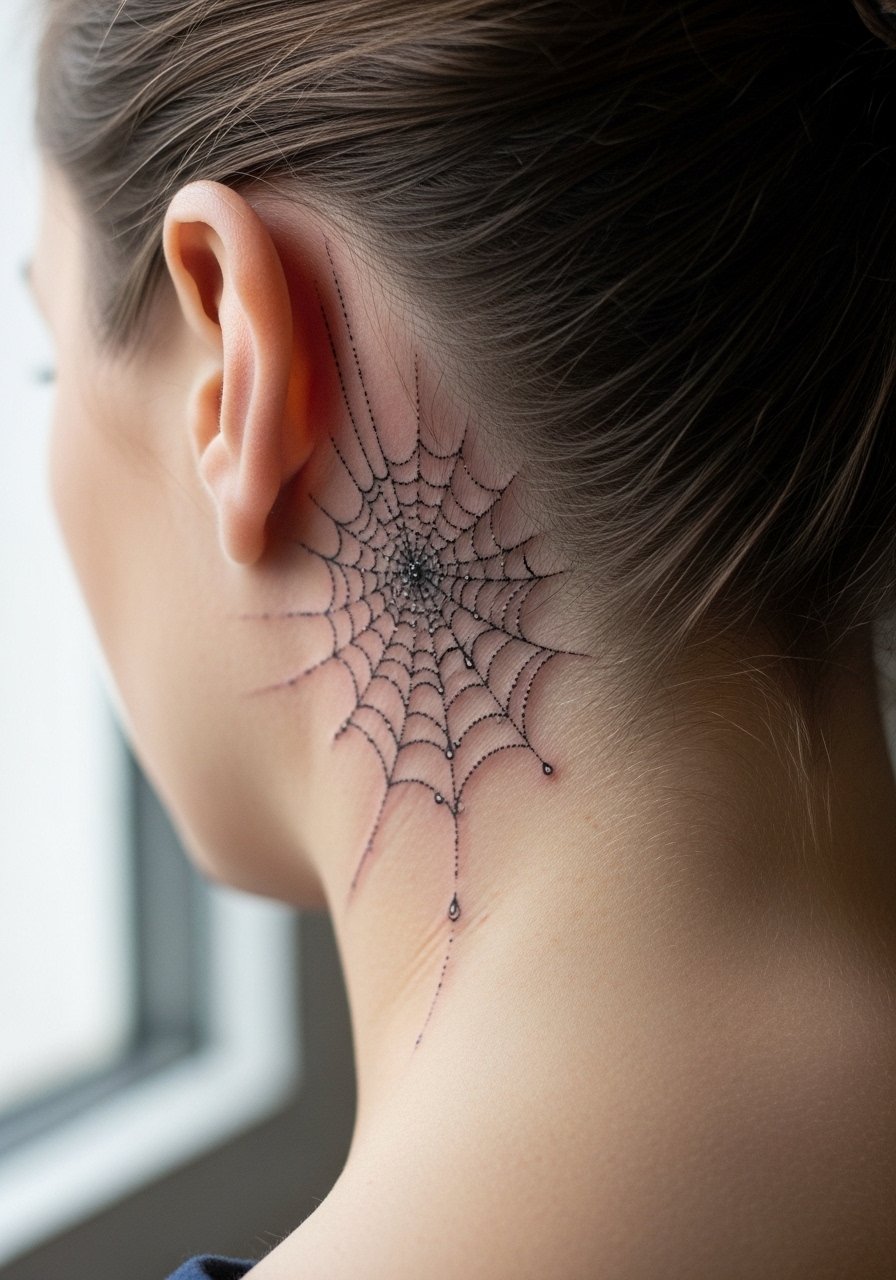
Behind-ear webs are tiny and surprisingly painful because of the thin skin. They heal fast but can fade sooner than expected. The fine dew-drop detail looks gorgeous in photos but needs thicker anchor lines than you might assume. If you want longevity, request slightly darker base lines and a plan for a touch-up at six to twelve months. For showing it off, pull hair into a high ponytail and wear small studs. Bring a hair ties scrunchie to the chair so you can keep the area exposed during shading.
6. Ornamental Mandala Shoulder Web
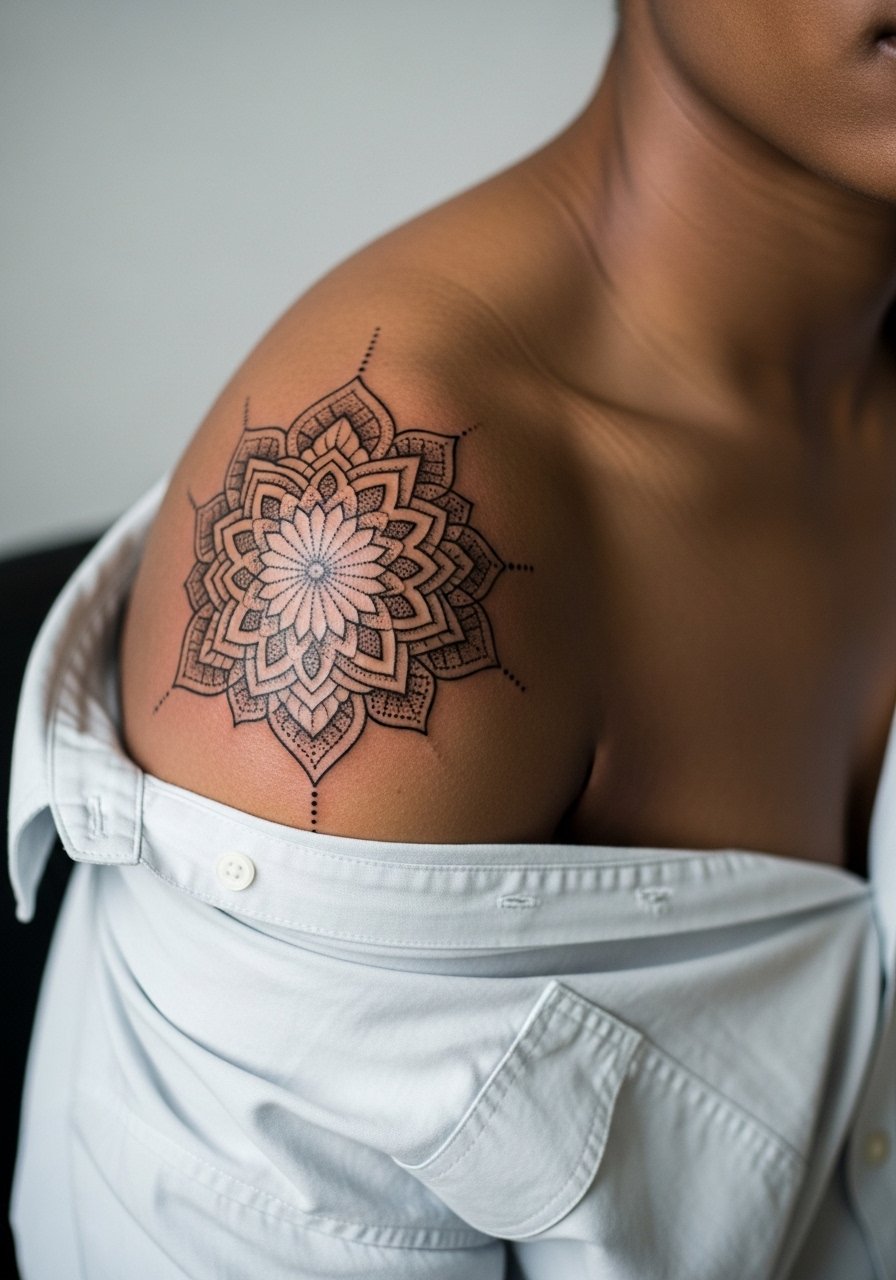
This symmetrical shoulder piece leans into dot work and stipple shading for a meditative look. Expect multiple sessions for crisp stippling across a six inch cap. The biggest mistake is over-dense mandalas with too many concentric dots placed closely together. That compresses with time and becomes muddled. Ask your artist to space rings and use stipple at varied scales so the mandala keeps its structure at two and five years. For the studio, wear a loose button-down shirt so you can pull the collar aside without rubbing fresh ink.
Studio Day Picks
The inner wrist, elbow, and behind-ear pieces above need different prep than larger thigh or shoulder work, so a few targeted items keep the session smoother.
- Stencil transfer paper kit. Helps you preview placement on wrist and forearm pieces before the needle hits, which is crucial for small fine line work.
- Topical numbing cream. Useful for elbow sessions where bone proximity spikes pain, applied per the product instructions.
- Thin protective film roll. Keeps small hand and finger webs clean during the first few days of heavy washing and typing.
- Fragrance-free gentle body wash. Safe for cleansing delicate wrist and behind-ear areas without irritating fresh linework.
- Aquaphor healing ointment. Thin application for the first days helps fine line edges settle without clogging.
7. Ignorant Style Back-of-Hand Web
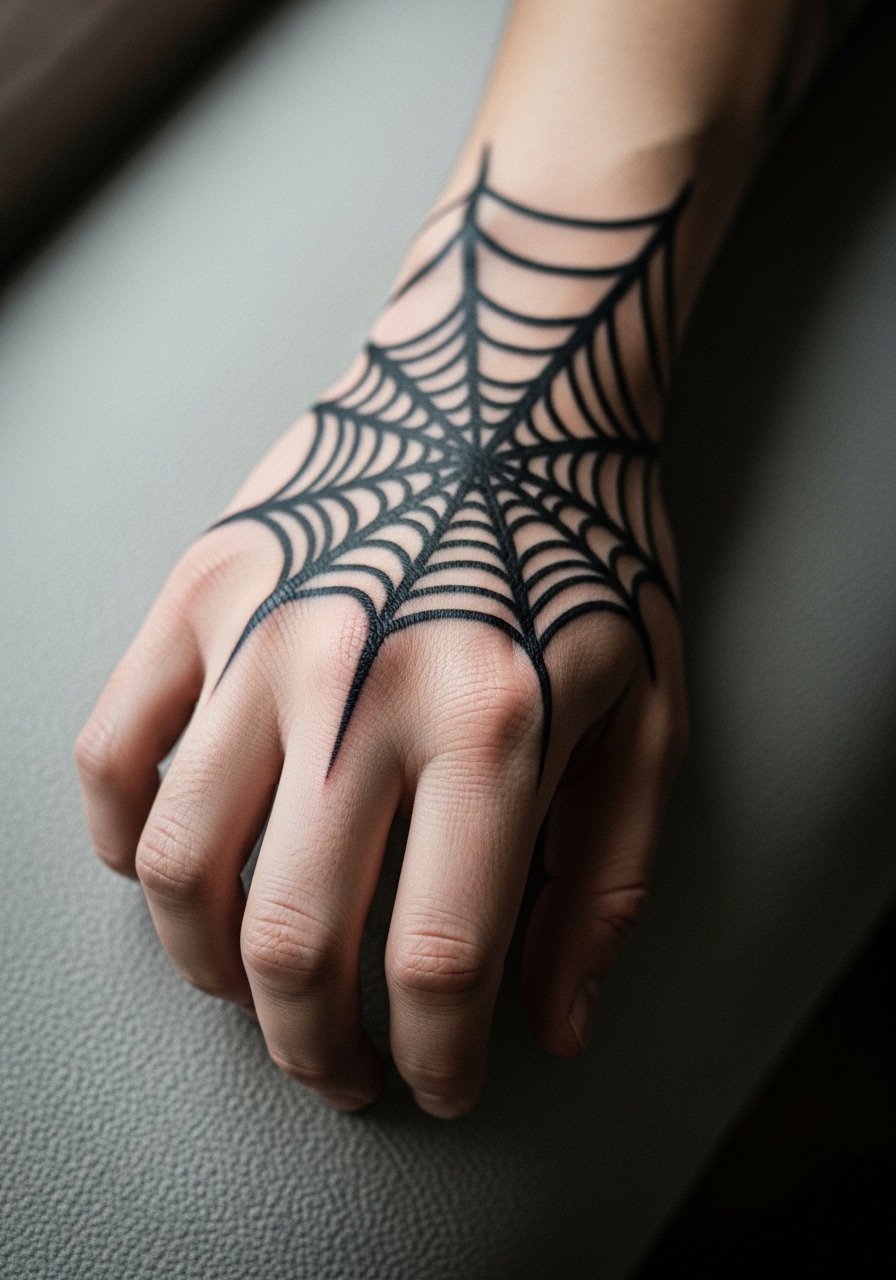
Hand tattoos live in a different etiquette. The hand gets constant washing and friction so these webs fade and sometimes blur into blotches. The ignorant style embraces raw, imperfect strokes which can make aging feel intentional. Common mistake is trying to make a hand web too polished. If you want the underground edge, ask for a looser, sketchy approach and accept more frequent touch-ups. Note that hand tattoos still affect hiring in some industries, so factor career considerations into your decision. Session time is short but the aftercare stage matters more than you expect.
8. Watercolor Collarbone Web
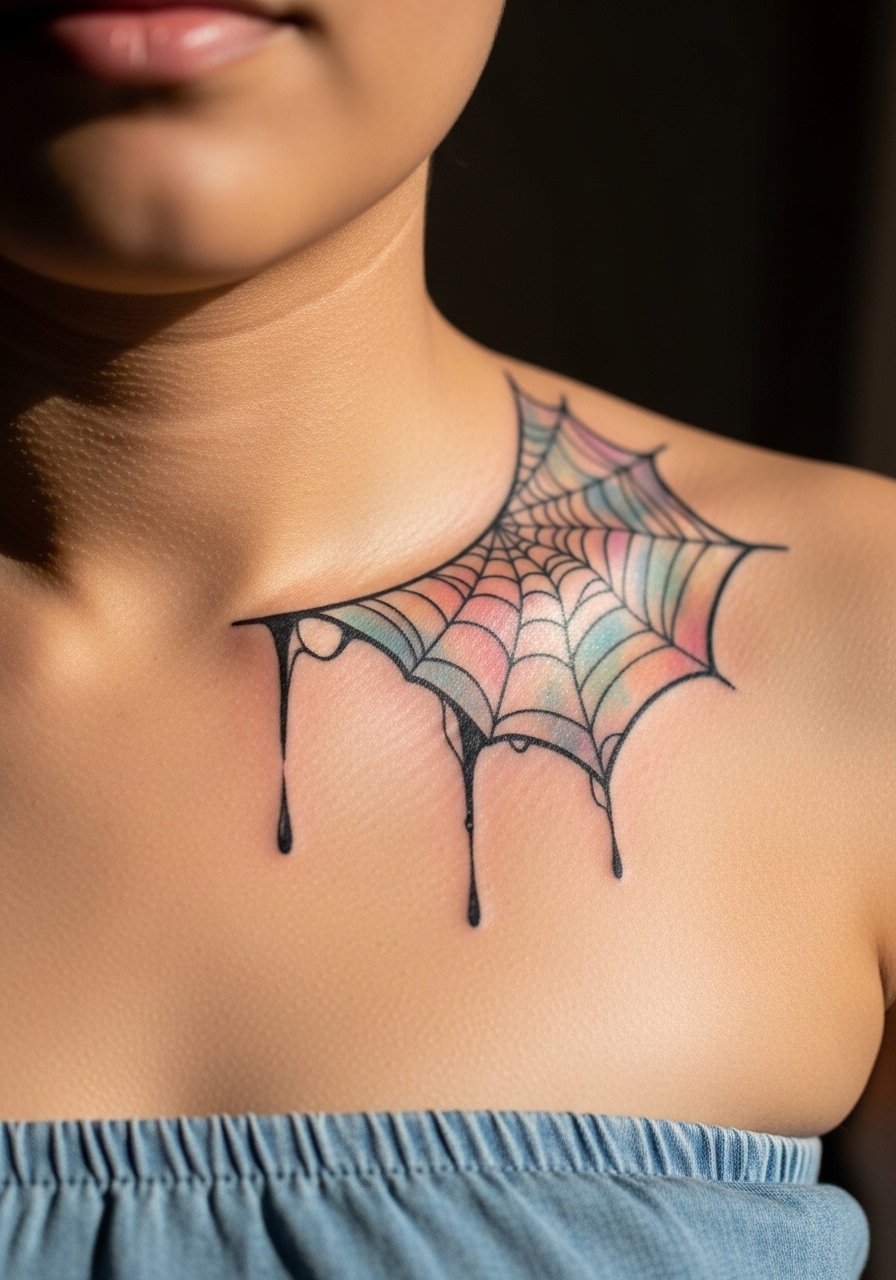
Watercolor fades give a soft contrast to crisp web lines, which can be beautiful on the collarbone. Pain is moderate, and sessions often require layering color to get that painterly fade. The key aging error is placing too much wash over very thin web linework. Keep the web’s structural lines slightly bolder so the washes do not swallow them in a year or two. For show-off outfits, pair with a strapless maxi dress or V-neck tops to echo the faded hues. For the session wear a strapless bra or wide-neck top so the area is accessible.
9. Black Gray Realism Calf Wrap
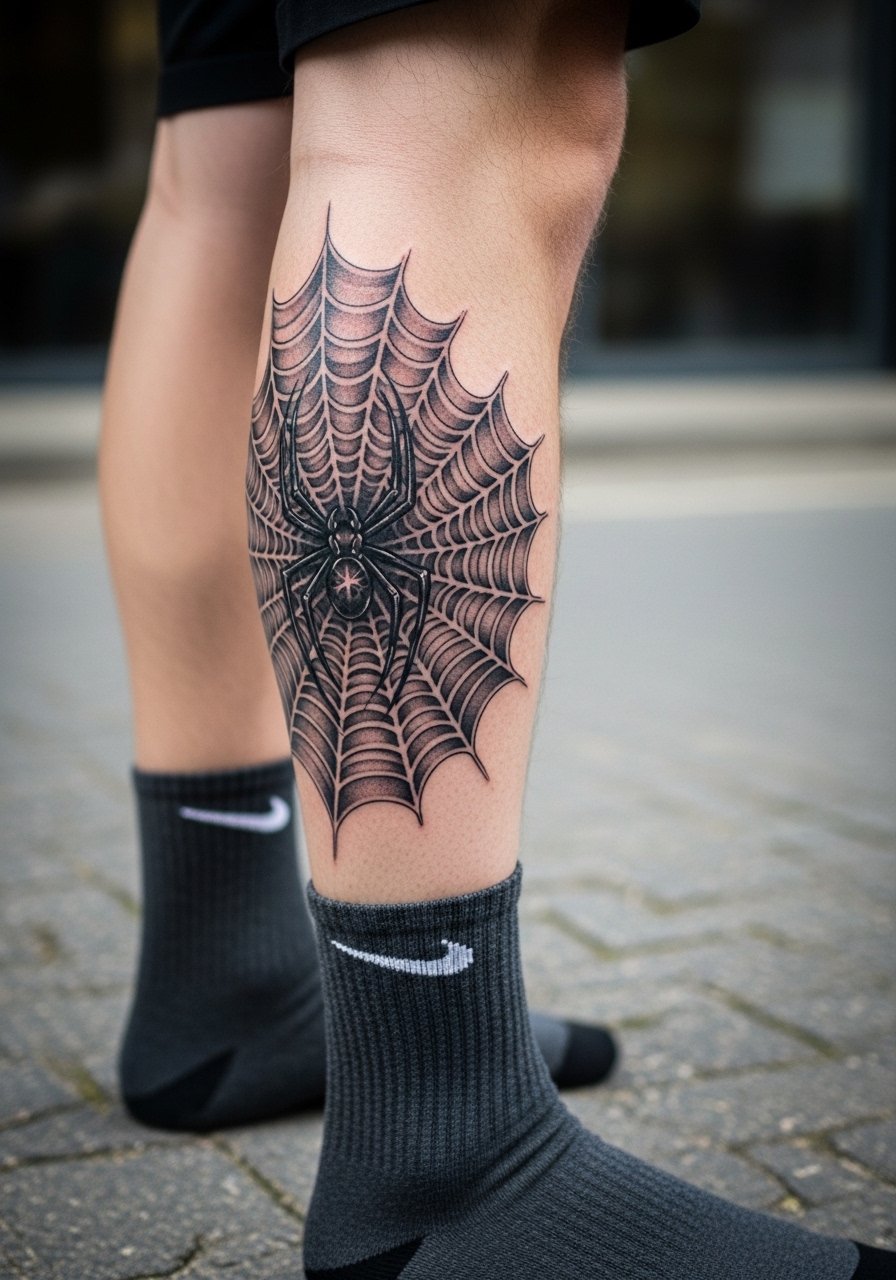
Calf placements let realism play with muscle curves for a three-dimensional trapped-web effect. Expect two to three sessions with careful saturation. Mistakes happen when artists ignore calf movement and place long spokes that cross muscle creases. Ask to see healed calf work in portfolio on similar builds because dark skin and light skin photograph differently. For easy reveal, roll joggers or opt for shorts, and try a pair of ankle athletic socks for casual show-off when healed.
10. Minimalist Dotwork Ankle Web
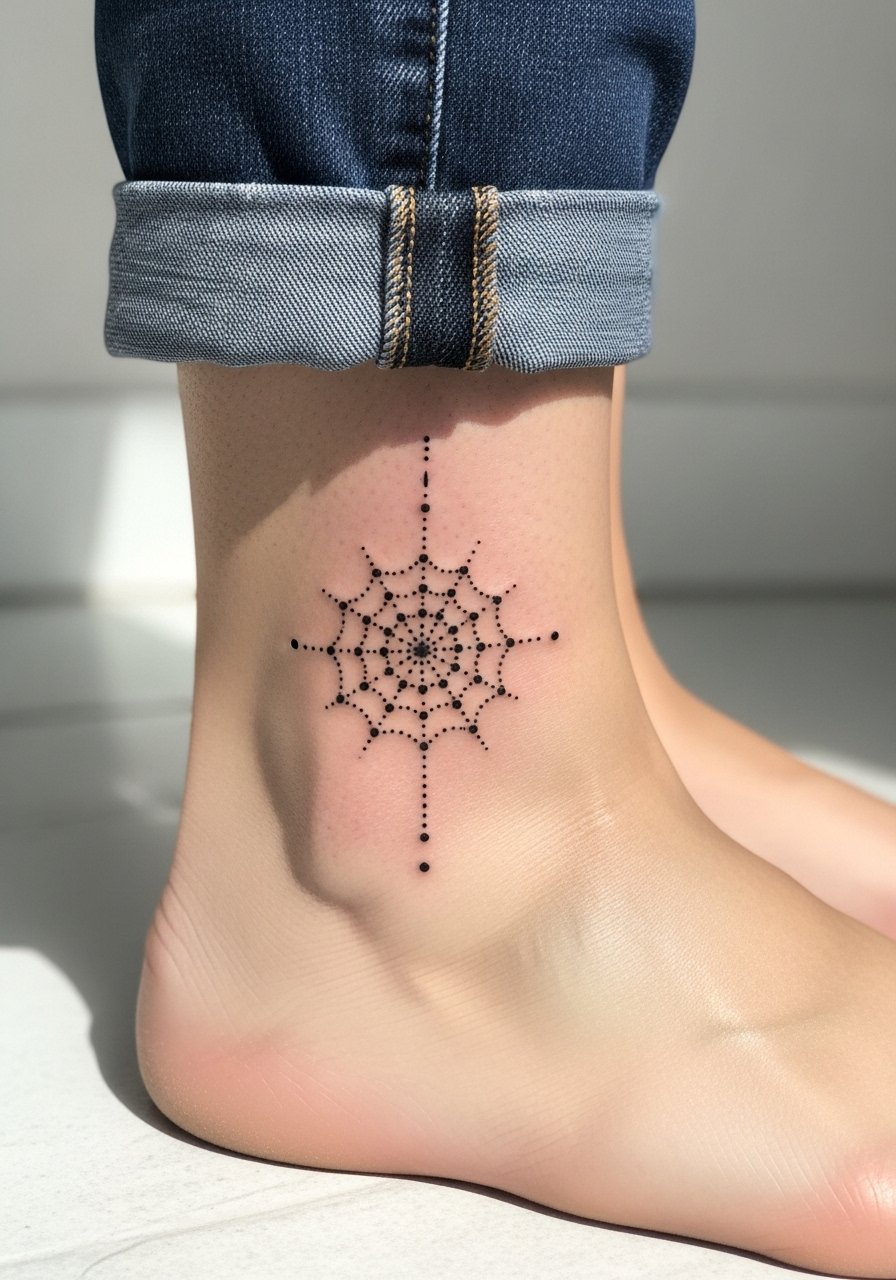
Ankle webs are low-commitment in size and healing time, and dotwork can make a simple design feel thoughtful. The usual mistake is putting too many dots too close. That compresses and reads as a blur after a few years. Ask the artist for a dot-spacing plan and a recommended touch-up window at six to twelve months. During the session wear pants you can roll up or a skirt so the artist has clear access. For wearing it out, a low-cut shoe or sandals keeps the ankle visible without rubbing the fresh work.
11. Traditional Spider Web with Spider on Side Neck
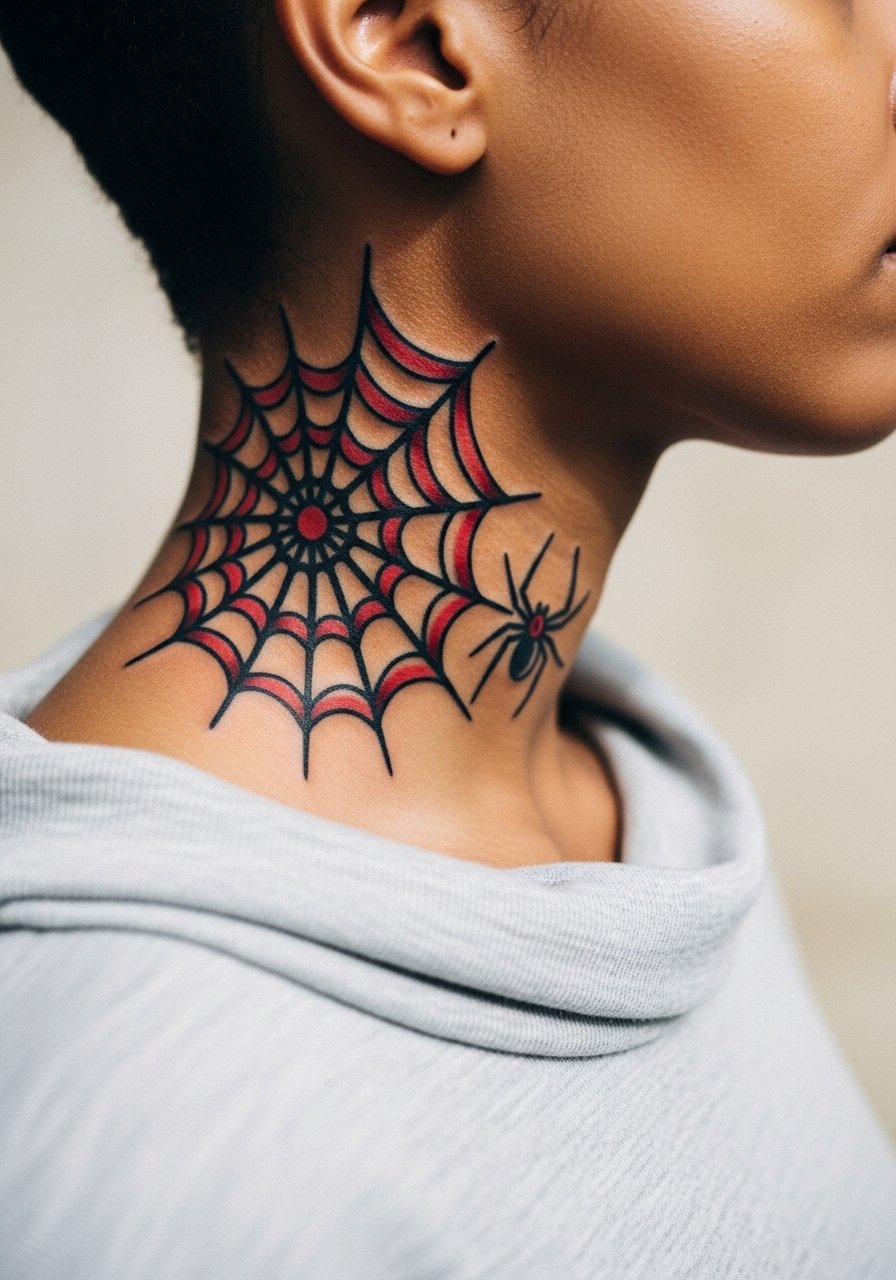
Neck pieces read bold because they are visible in many social settings. Expect moderate pain and a short session for a three inch motif. There is a real cultural angle to consider. Some people mention law enforcement or workplace assumptions linked to neck tattoos. The best consult includes a discussion about visibility and career implications. For longevity, request saturated outlines and ask how the spider will sit with collars or necklaces. Pair with an open collar shirt to frame the neck without overlapping the tattoo.
12. Fine Line Web Sleeve, Elbow to Wrist
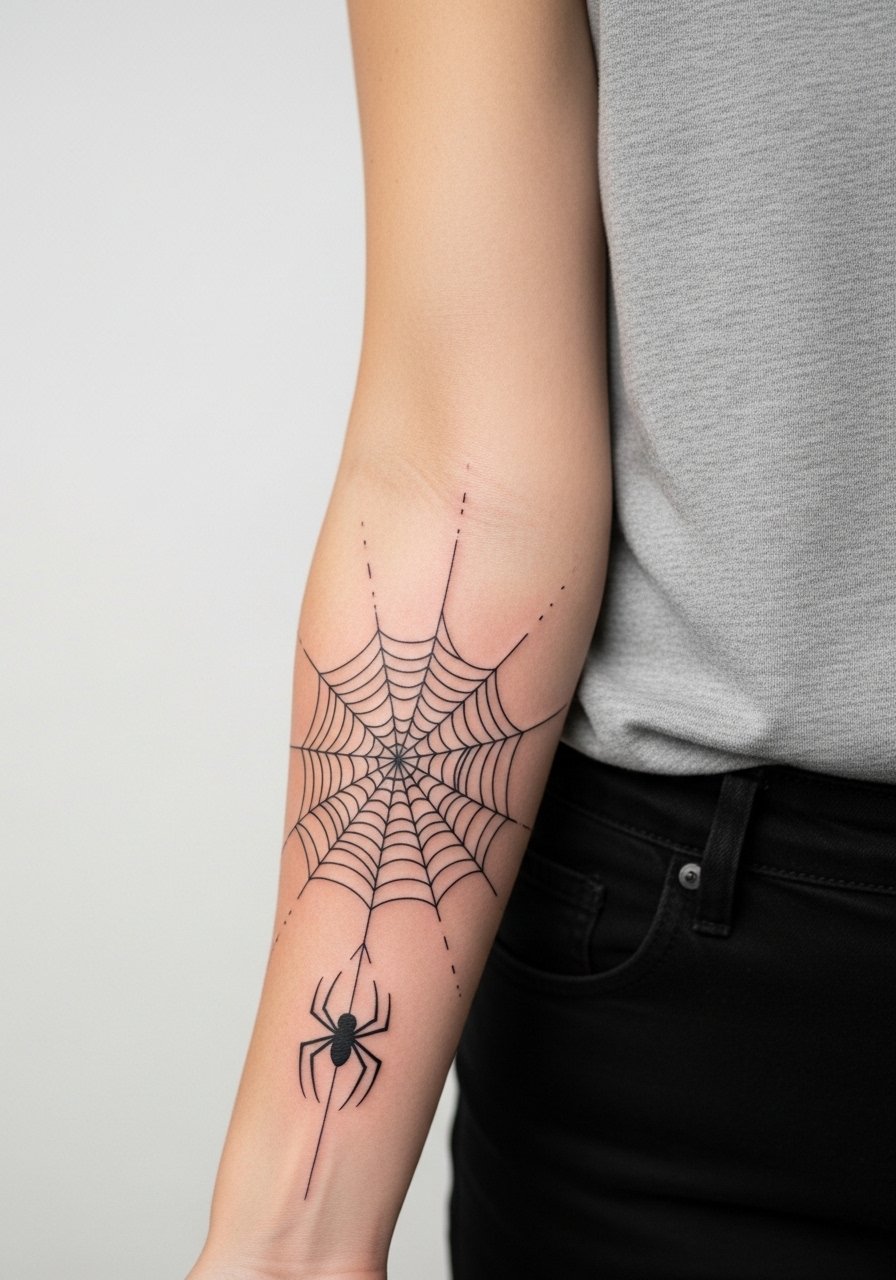
Full sleeve webs that build narrative are for collectors who plan over multiple sessions. Expect several appointments and staged progression so density increases without clutter. The common mistake is starting too tight. Fine line sleeves need negative space between sections or they will merge. Artists split on whether super-fine lines hold on the inner arm. One camp says the skin there stretches and blurs lines quickly. The other says correct needle depth and spaced design keep it readable. Ask how your artist spaces elements and schedule a touch-up plan at year one.
13. Micro-Realism Calf Detail with Dew Drops
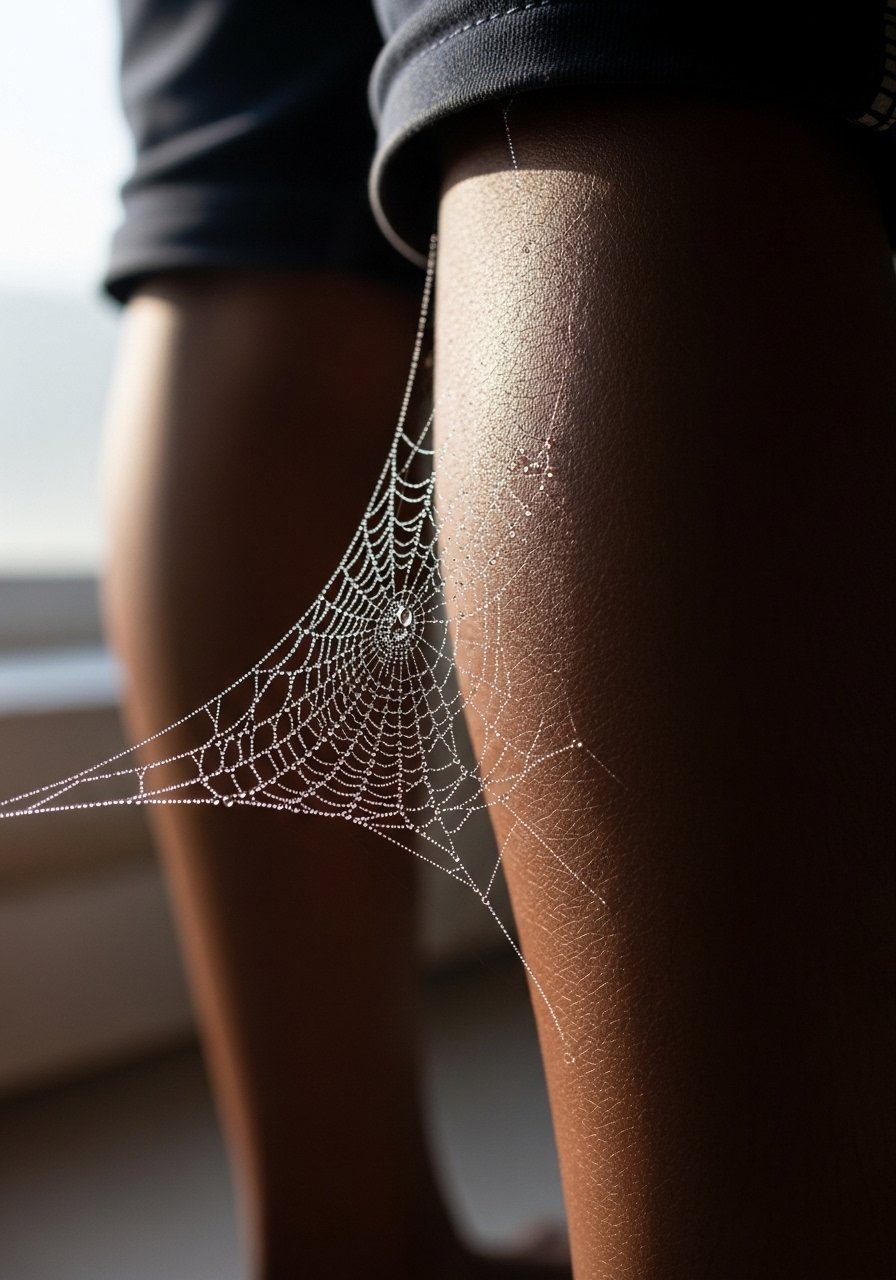
When you want photographic detail and depth, micro-realism on the calf delivers. Sessions run long because of tiny highlights and white ink work. A common mistake is overusing white highlights in areas that rub against socks. Ask how the artist protects white ink and how it will age with regular athletic wear. If you plan heavy gym time, bring that up in consult so the design can be positioned away from high-friction zones. Expect touch-ups for highlight restoration at two to three years.
14. Web as Patchwork Connector for Existing Tattoos
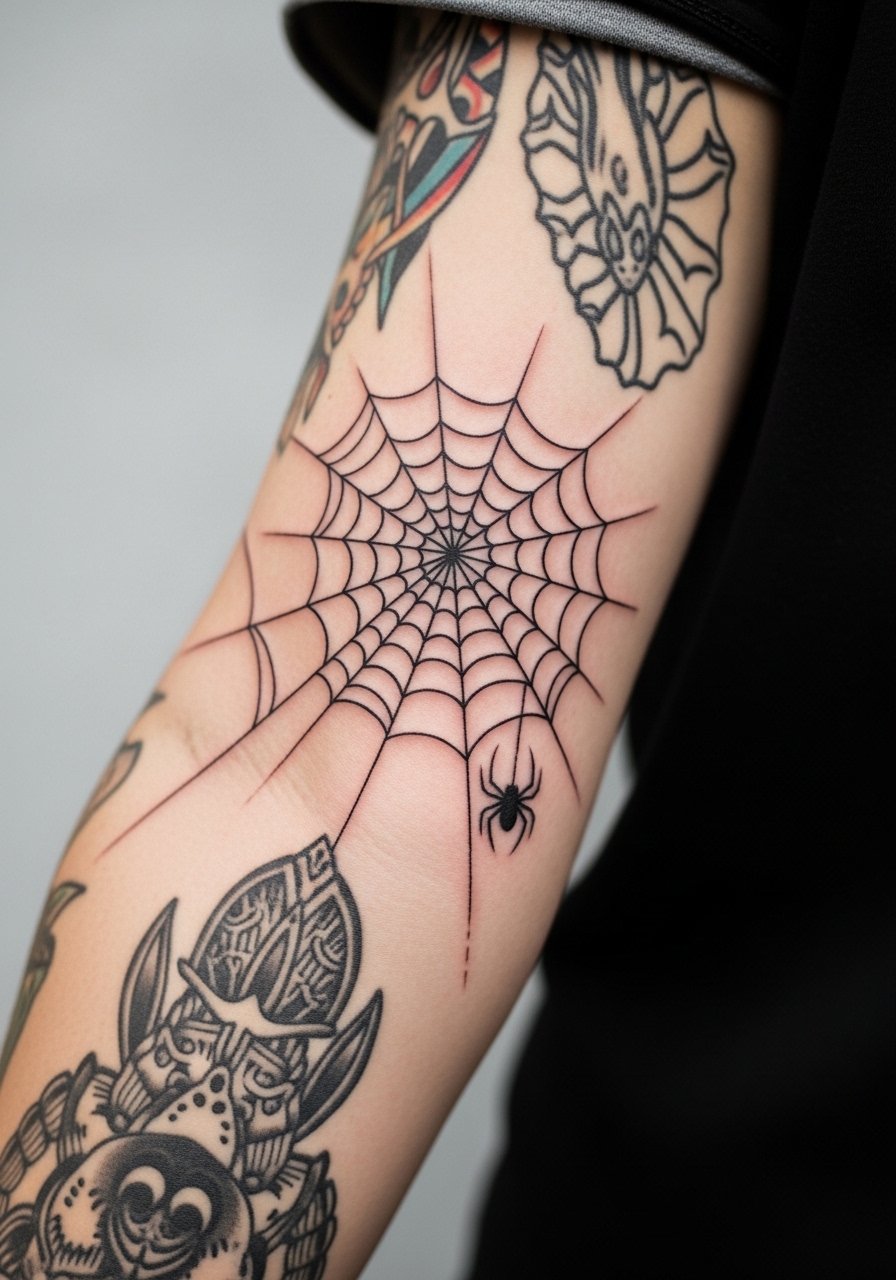
This is one of the under-covered ideas. A web can act as connective tissue between flash pieces and custom patches, making odd spacing feel intentional. The trick is to design spokes that respect the negative space of the older tattoos so nothing looks like it was layered haphazardly. Bring photos of all your existing ink to the consult. Tell the artist you want the web to read as a connector rather than a cover-up so they can plan overlaps and touch-up priorities. Session time varies depending on how much rework the old pieces need.
15. UV Color-Shifting Web for Nightlife
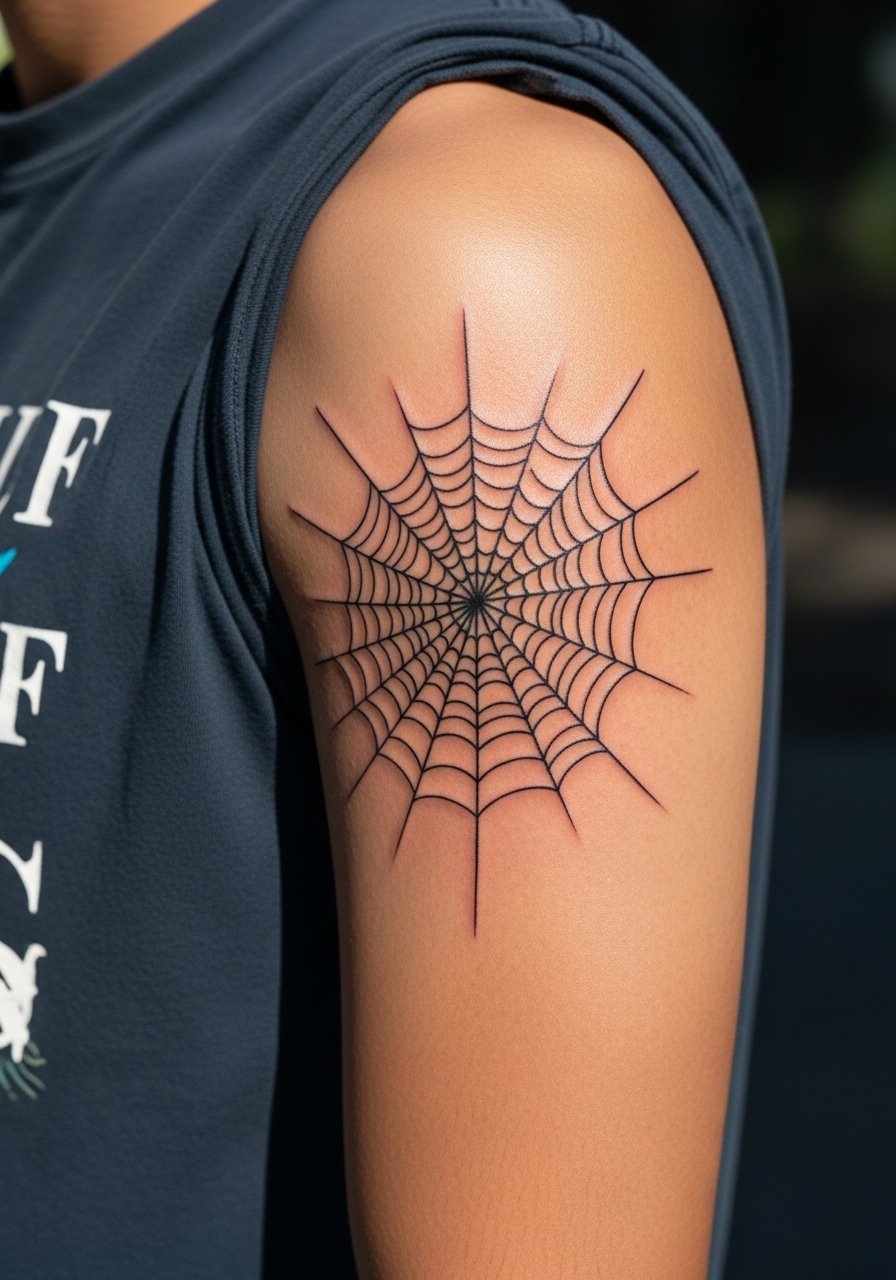
UV-reactive inks are a niche move that lets a web glow under blacklight without dominating daytime looks. Expect a specialist who works with UV pigments and can tell you about longevity because not all UV inks behave the same. A common mistake is packing too much UV color under thin black lines. Ask about healed appearance in both daylight and blacklight and whether touch-ups are commonly needed. For a session wear a short sleeve so the artist can reach the upper arm easily.
16. Knuckle Webbing for Gesture Play
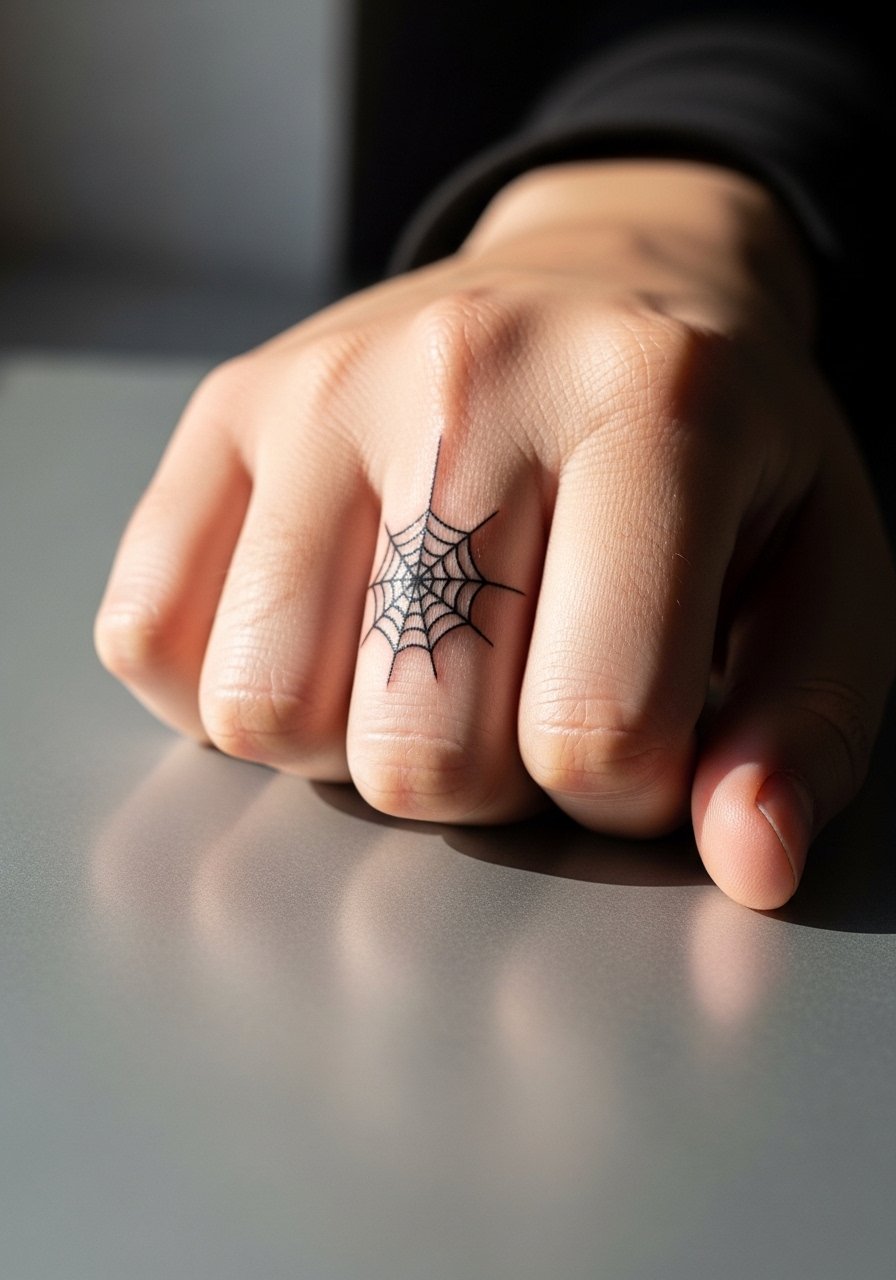
Knuckle webs are playful and meme-ready when you make the right proportions. They live in a brutal friction zone so expect frequent fading and touch-ups. The mistake is scaling the motif too small to survive daily hand use. Ask your artist to test the line thickness and to consider short, bold spokes that survive frequent washing. Session time is brief but plan for regular upkeep. Knuckle and hand placements still affect professional first impressions, so weigh visibility before booking.
17. Minimalist Web Behind the Ear for Festival Season
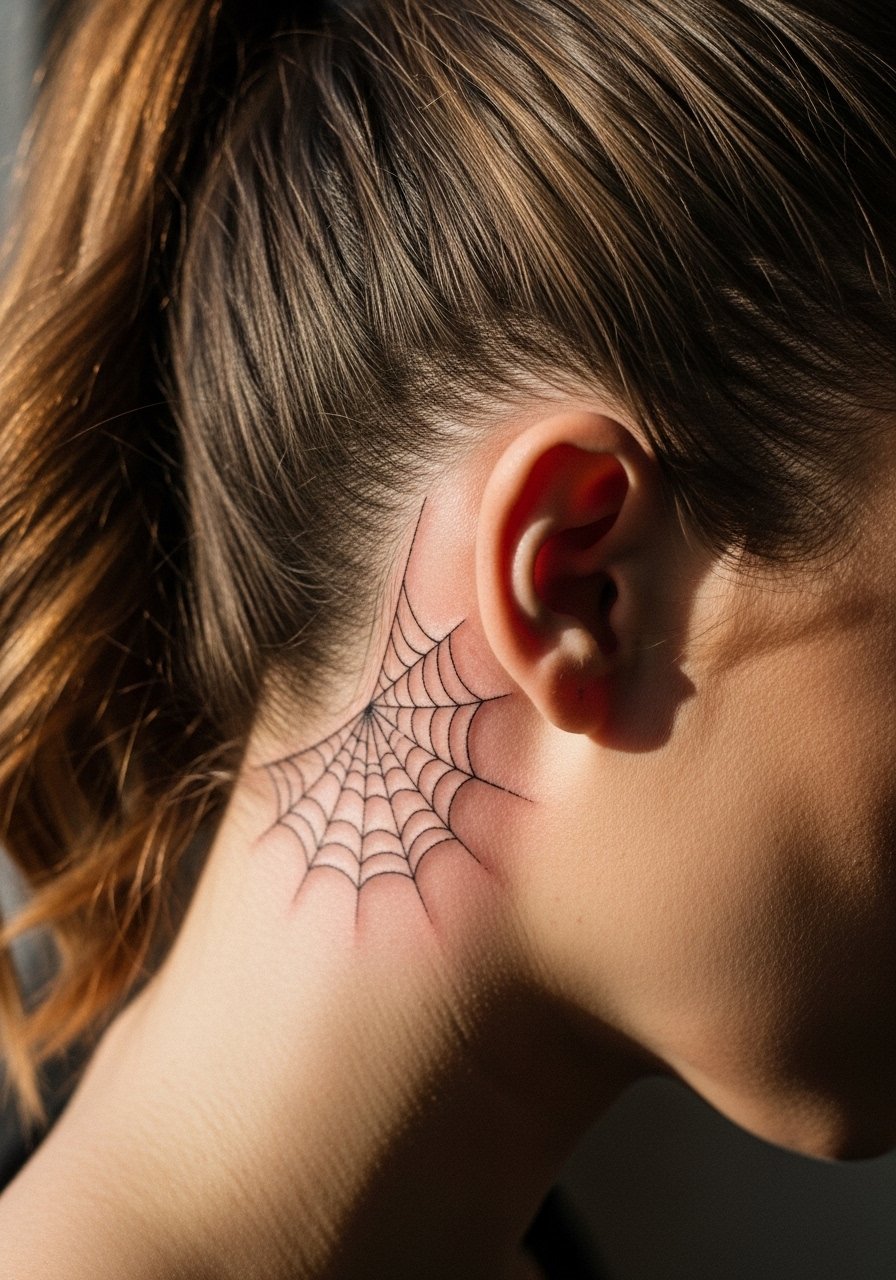
Festival-ready micro webs behind the ear are tiny and discreet. Pain is sharp because of thin skin, but healing is quick. The common problem is asking for ultra-fine detail that fades fast. If you want subtle longevity, agree to slightly stronger anchor lines during consult and schedule a touch-up at six months. For staging, high ponytails and small studs make the area pop. Pack a small stud earring set for show-off looks once healed.
18. Calf Mandala Web for Athletic Reveal
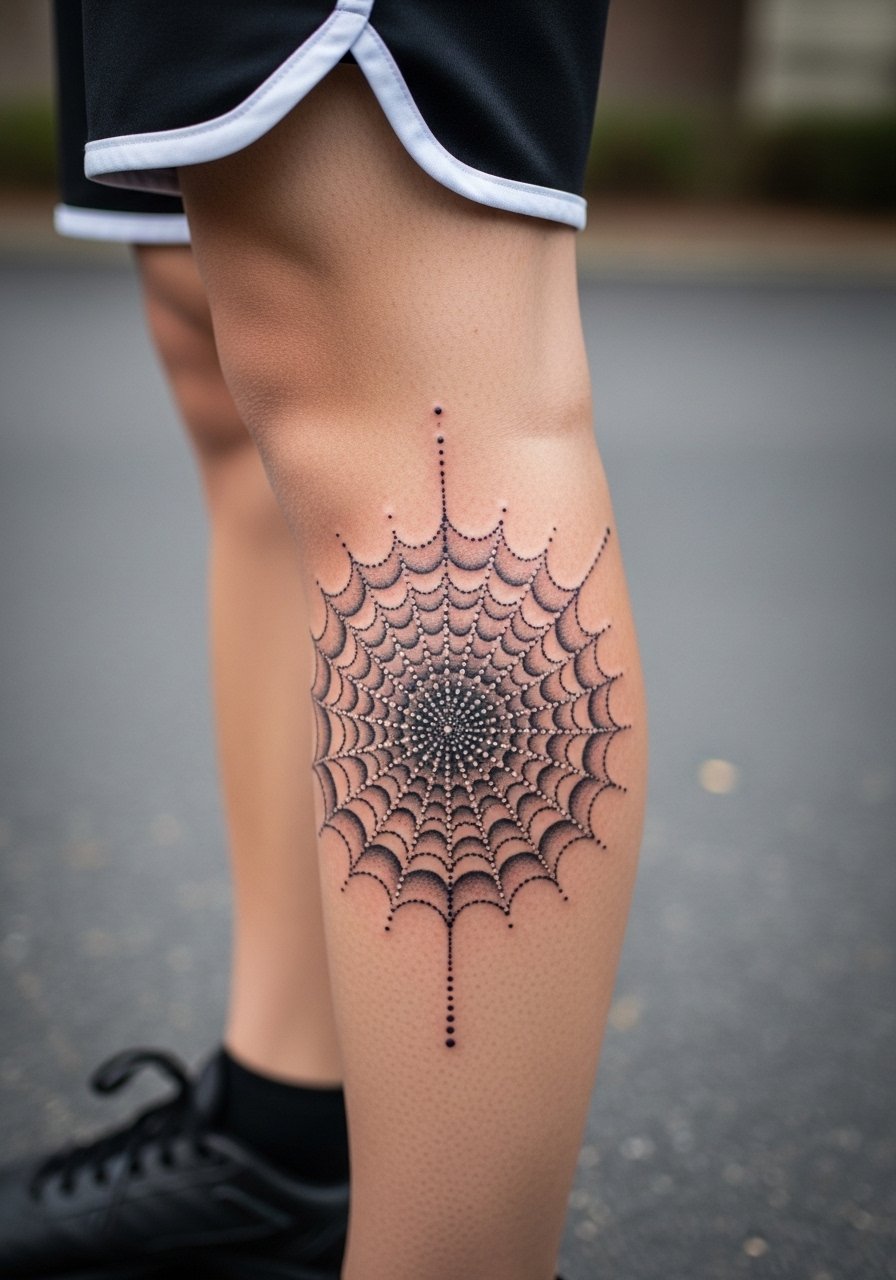
This hybrid leans ornamental and suits athletes who reveal lower legs during workouts. The piece benefits from clear spacing so the radial lines do not converge into a grey area when the muscle flexes. Artists often recommend building this over sessions to monitor how it sits when you move. A mistake is making the center too dense. Ask the artist to check the design with you standing and flexing to find natural breaks. After healing, a rolled jogger or shorts will show it off best.
19. Small Ankle Constellation Web
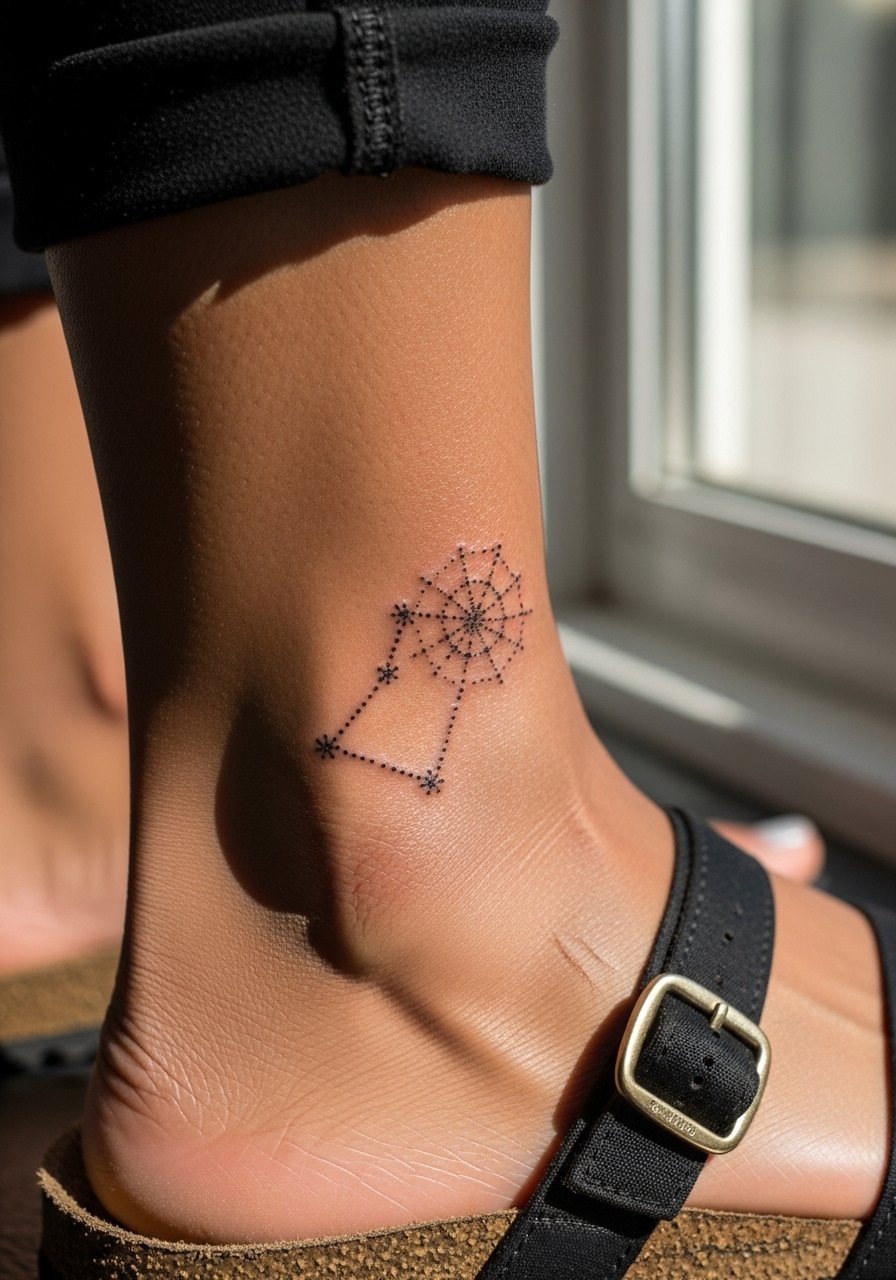
A constellation web uses negative space and tiny dots to suggest a pattern. The ankle is low on pain but high on rubbing from socks and shoes during the first month. A frequent error is requesting too many small dots close together, which compress into a blur. Ask for slightly wider spacing and a touch-up window at three to six months. For wearing it out, lower-profile footwear and rolled hems help the design breathe.
20. Prosthetic or Scar-Friendly Web Cover
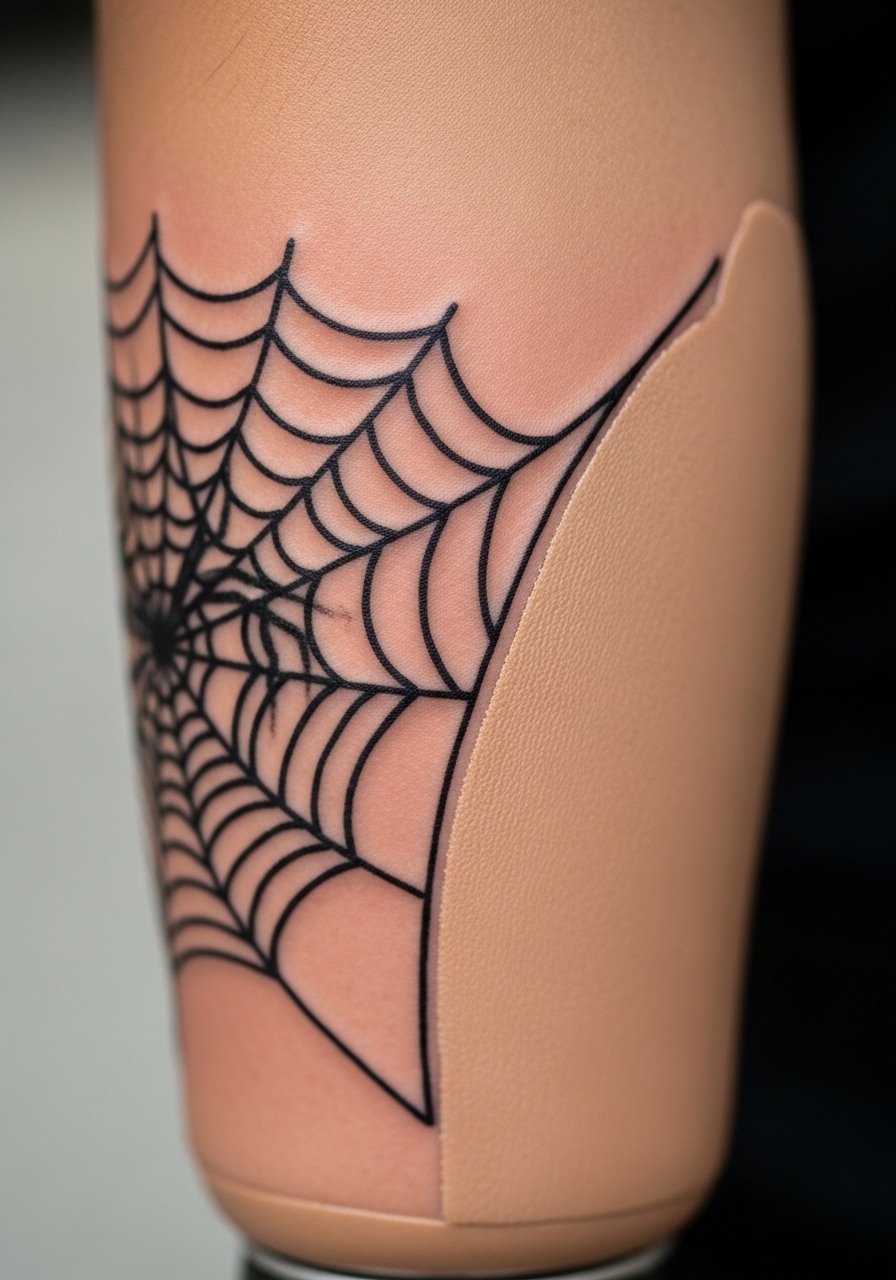
Designing a web to work with prosthetics or to sit over scar tissue requires a specialist approach. Scarred skin heals and absorbs ink differently. Tell your consult about scar age and whether it is hypertrophic or flat. The artist may recommend a softer needle depth and slower passes to encourage even saturation. This idea is under-covered and can be highly personal. Expect a conservative session plan and a possible patch touch-up once the area stabilizes.
21. Sleeve Accent: Spider Web Peeking from Under Clothes
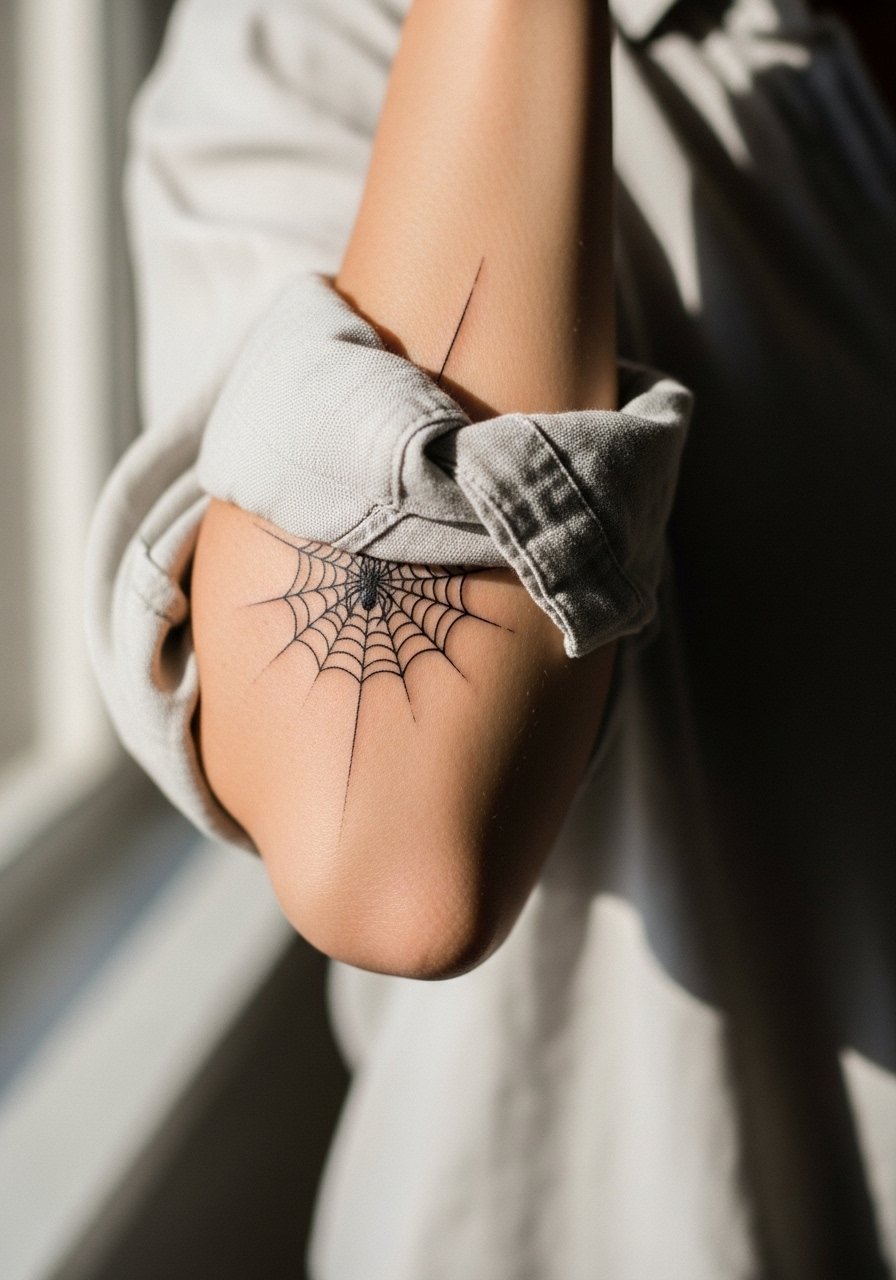
This approach uses a small web as an accent within a larger sleeve or look, placed so it peeks out from clothing. It is a good compromise if you want visible ink without full commitment. The usual mistake is putting it too deep under dense sleeves where it never reads. Ask the artist to preview the piece while you wear the clothing you usually choose. For session comfort, a loose linen shirt works well and also frames the finished piece when you roll sleeves, like a rolled sleeve shirt.
Frequently Asked Questions
Q: How much does a small wrist or ankle spider web usually cost and what affects the price?
A: Prices vary by shop and region and depend on size, line density, and whether color is involved. A small fine line wrist piece is quicker to execute than a multi-inch blackwork forearm wrap, so session time drives the quote. From what I’ve seen, custom work and experienced artists charge more because you get placement planning and a better chance of longevity.
Q: Will a fine line web on my wrist or hand blur faster than a traditional web on the elbow?
A: Generally yes. Fine line in high-friction zones like hands and wrists tends to fade and blur sooner than saturated traditional work on elbows. Two camps debate this. One says fine line aging is part of the look. The other says thicker anchor lines and careful spacing are necessary for long-term clarity. Ask about touch-up plans in your consult.
Q: I have darker skin. How will blackwork spider webs photograph and age?
A: Darker skin can make heavy blackwork read differently in photos because contrast behaves uniquely across tones. The practical fix is looking at healed examples on similar skin when you vet portfolios. An artist experienced with darker tones will recommend saturation and spacing that keeps the web legible over time.
Q: Are there special session or wardrobe tips for thigh and collarbone spider web tattoos?
A: Yes. For thigh sessions bring loose shorts so the artist can access the outer thigh without fabric pressure. For collarbone or sternum work wear a strapless bra or wide-neck top that you can pull aside easily. These small choices make the session more comfortable and keep the linework undisturbed by clothing.
Q: What should I ask my artist about aftercare and touch-ups before booking?
A: Ask how they prefer to handle touch-ups for fine line pieces and whether they recommend Saniderm style film or dry healing. Artists split on that. One camp prefers protective film for cleaner early healing. The other camp favors air drying to avoid moisture-related issues. Ask which method they use most and why so you can follow the plan that matches their technique.
