
Fine line anime ink looks incredible fresh, but ankles are unforgiving for tiny detail. The skin moves with every step and shoe friction eats delicate dots more than most placements. What keeps a Naruto motif readable on the ankle is scale, contrast, and smart placement that anticipates wear. Below are 21 ankle-friendly Naruto takes that keep the spirit while planning for longevity, starting with a tiny chibi Naruto that still reads through socks and sandals.
1. Tiny Chibi Naruto on the Inner Ankle
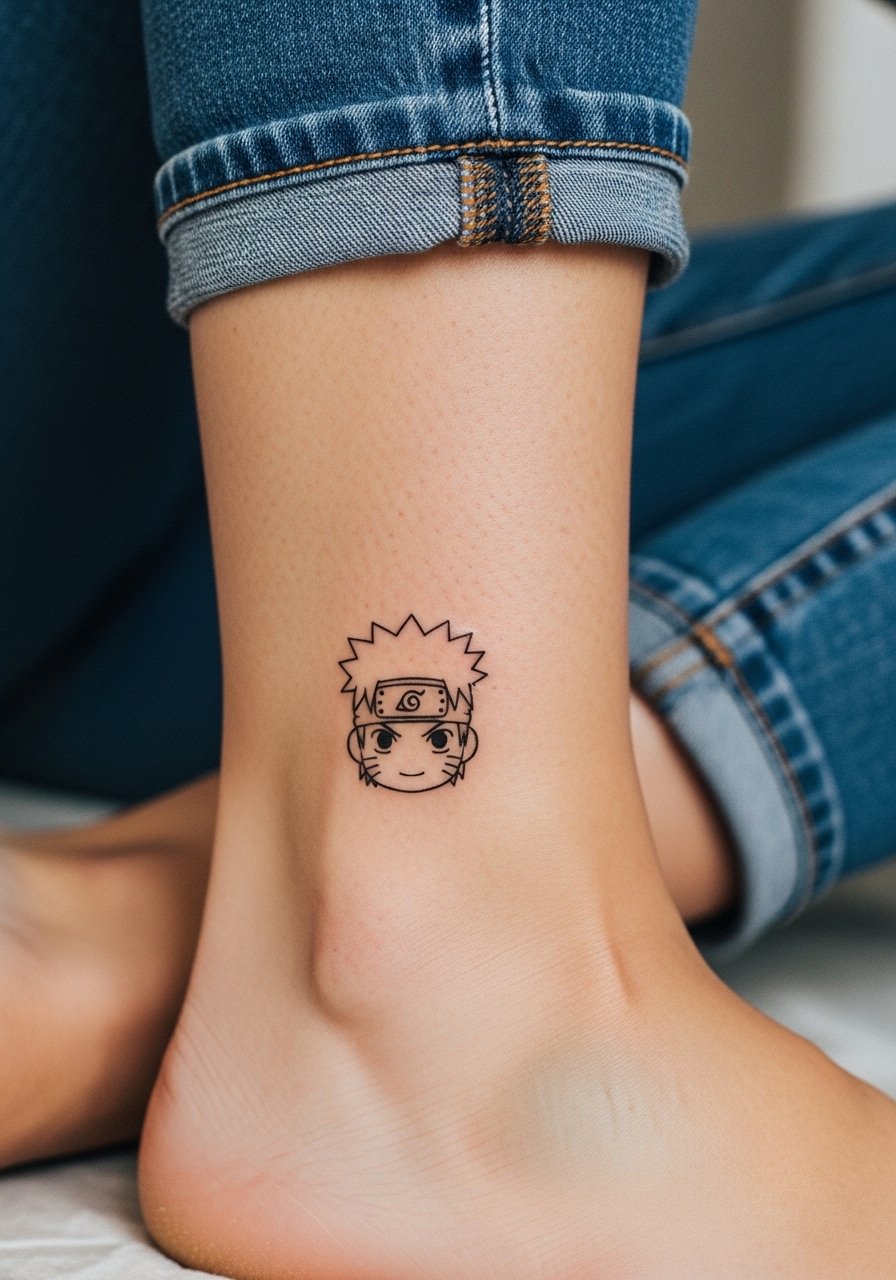
A chibi Naruto head is perfect for the inner ankle where a small, iconic silhouette reads well. Ask your artist for slightly thicker contour lines than you would for a forearm fine line piece so the whisker marks and headband stay distinct after a year. Common mistakes include asking for every facial detail at micro scale, which blurs into a smudge. Expect a low pain level and a short session of about 20 to 40 minutes. For showing it off, cropped jeans and strappy sandals frame the design without covering it. Plan a possible touch-up around year two if you keep it tiny.
2. Minimalist Uzumaki Spiral at the Outer Ankle
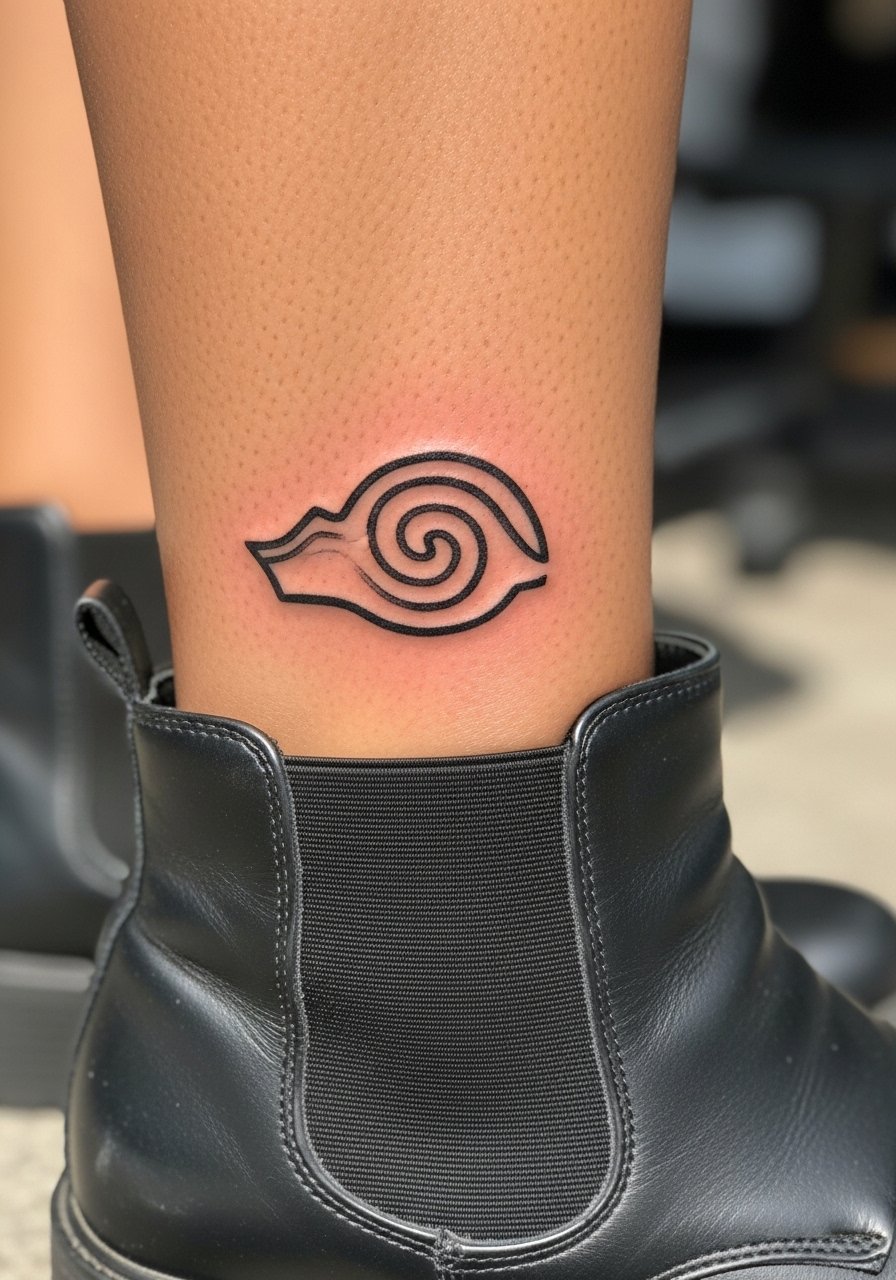
The Uzumaki spiral is a crisp graphic that holds up because it relies on shape more than micro detail. I recommend a medium line weight so the swirl keeps separation from shoe friction. A common version that ages poorly is one drawn with hairline strokes that merge after washing. During consultation, tell the artist you want negative space for the inner curl to breathe. Expect a 30 to 45 minute session with mild to moderate ankle sensitivity. For a wearable look, pair with ankle boots you can roll or wear low so the spiral peeks out.
3. Konoha Leaf Linework Just Above the Ankle Bone
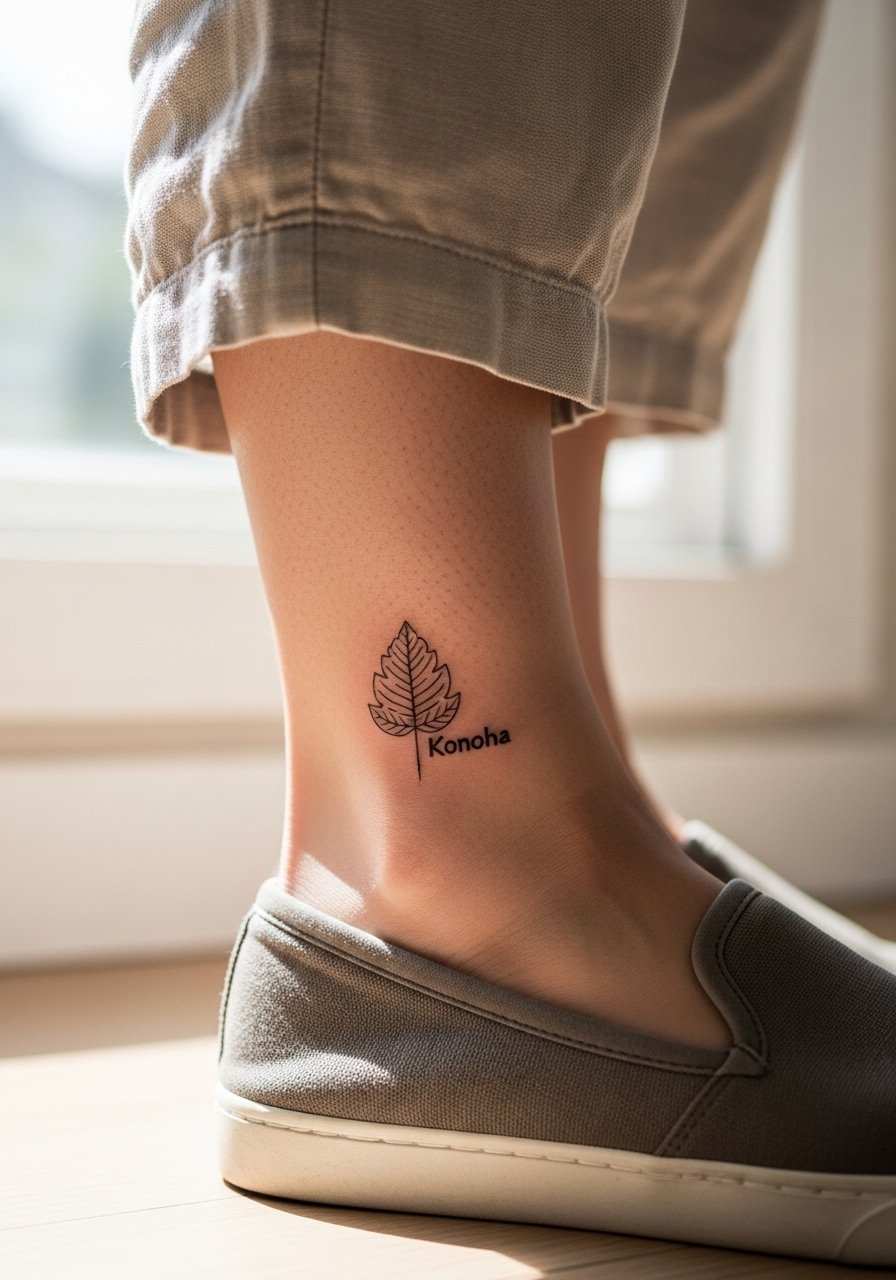
A small Konoha leaf reads classic on the ankle when the stem aligns with the bone for natural framing. In my experience, the leaf does best with slightly bolder veins than a strictly delicate design, because movement blurs thin veinwork faster. A mistake is centering the leaf over a crease where socks sit. Bring reference photos showing exact line weight to your consultation. Session time runs around 30 minutes and pain is usually mild. For showing it off, roll up cropped linen pants and add a simple anklet. Expect a touch-up possibility in year three if you keep it very small.
4. Micro Rasengan with Motion Lines at the Side Ankle
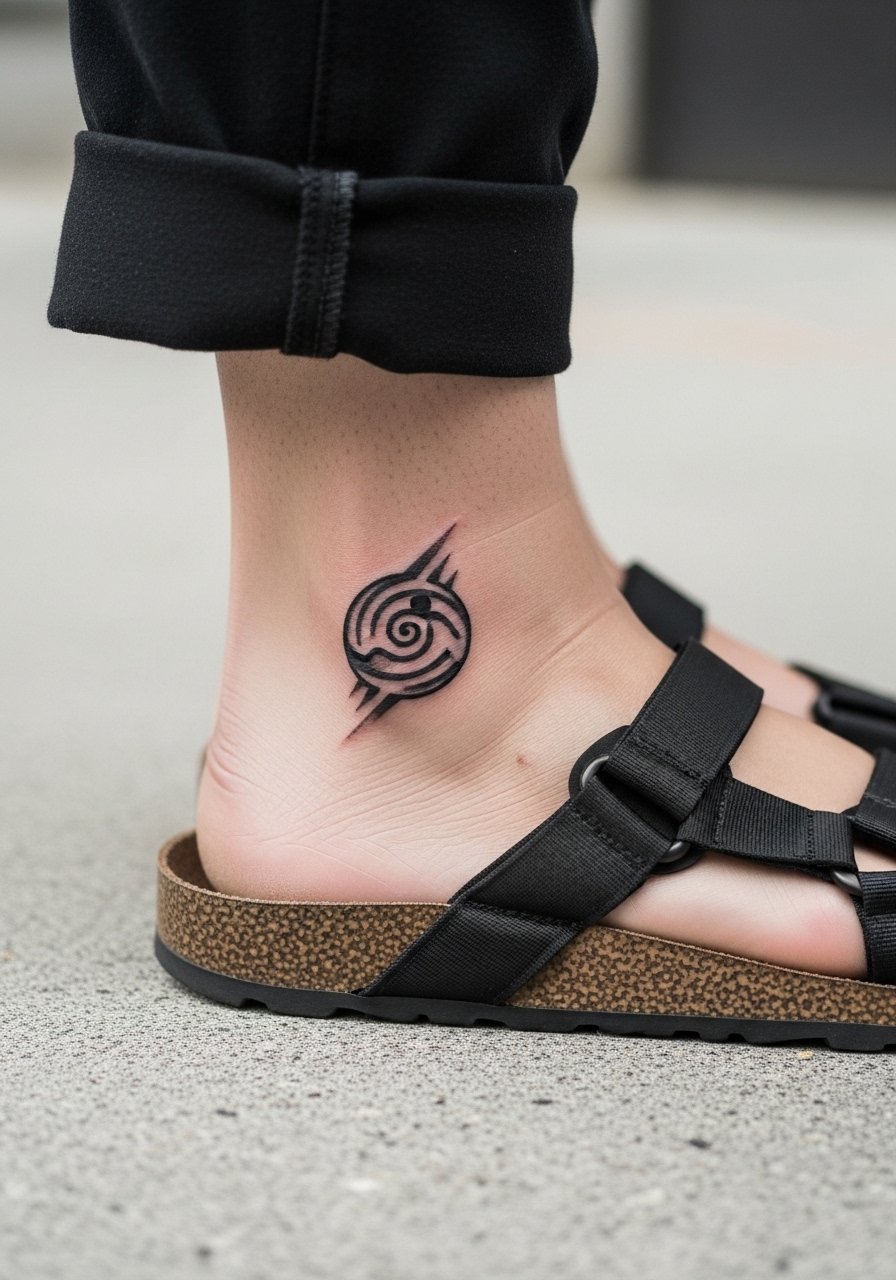
Rasengan pieces benefit from bold outer rings and suggestive motion strokes rather than crowded internal detail. The common error is asking for tiny inner texture that vanishes as the skin moves. During a consult, request a clean outline with light dot work inside for depth. The session usually takes 30 to 60 minutes depending on color. Side ankle work feels pricklier than the shin but not extreme. For day-to-day wear, strappy flat sandals reveal the motion and keep friction low. Expect color to soften by year two and touch-ups to restore brightness.
5. Naruto Headband Symbol Tucked Behind the Ankle Bone
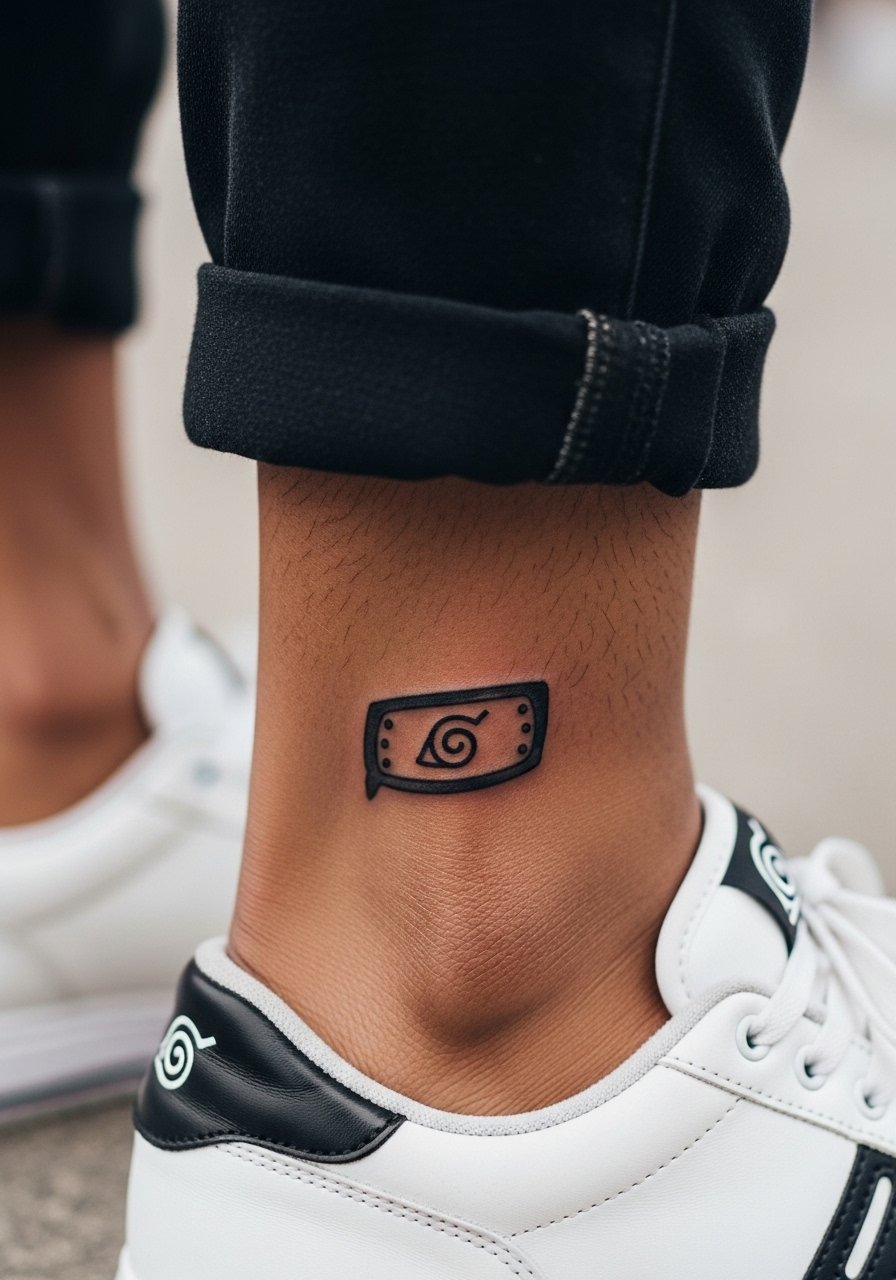
A headband symbol is a compact emblem that reads well tucked just behind the ankle bone. Tell your artist you want solid black saturation for the engraved parts so the negative space remains crisp. A frequent mistake is making the symbol too small to hold the inner breaks between strokes. Session time is short and pain is mild to moderate because of thin skin near bone. This placement is discreet which suits people who want fandom ink without shouting it. Wear low-cut sneakers during sessions and avoid long socks while healing to limit abrasion.
6. Kurama Silhouette Wrapping the Low Ankle with Whip Shading
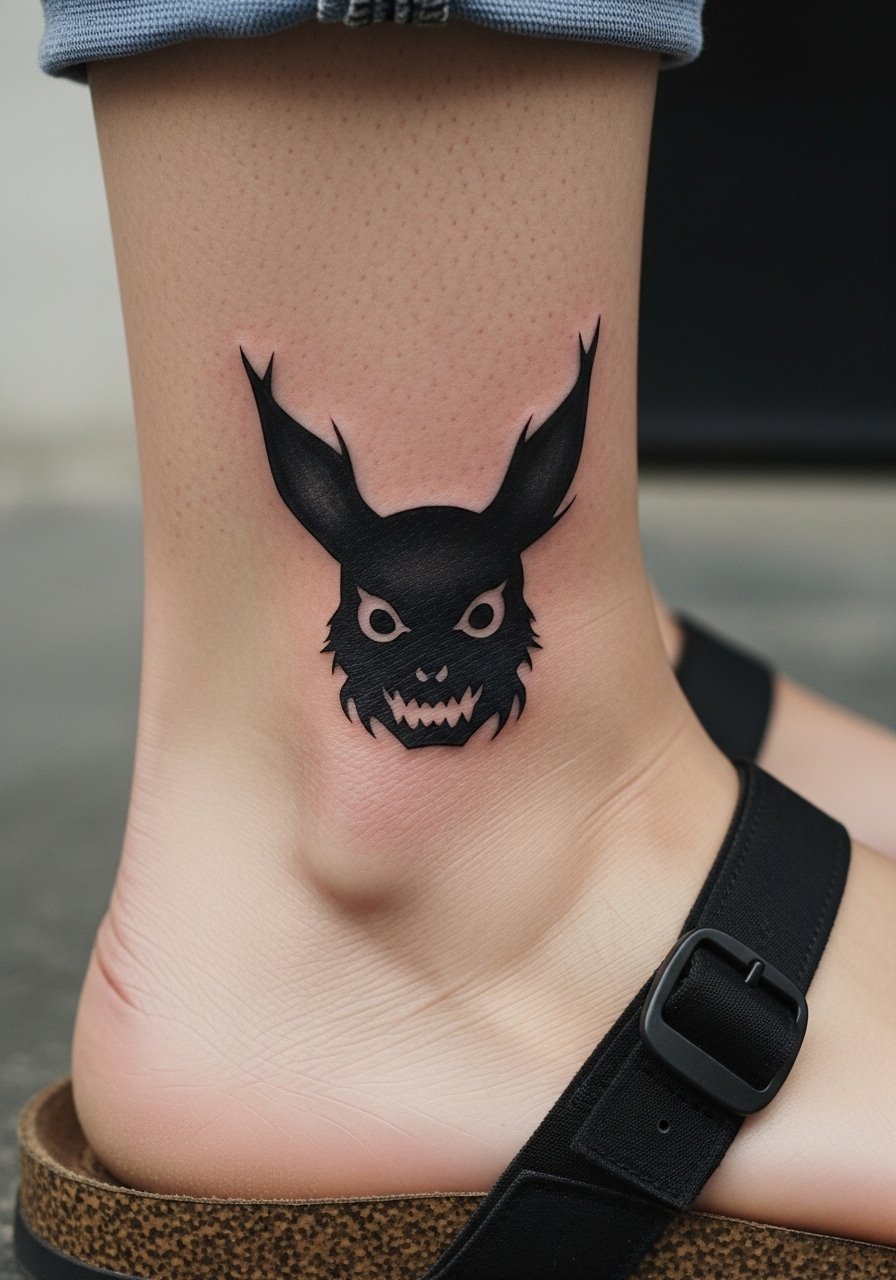
A Kurama silhouette uses negative space and whip shading to suggest the fox without tiny facial detail. That approach ages better than micro realism at this spot because the shapes stay readable as lines soften. A mistake is asking for fine facial features on the ankle, which rarely survive. The session can be 45 to 90 minutes depending on size. Ankle wrap pieces feel like constant movement while healing, so expect light itch and a need to shift footwear. Pair this with low sandals for evenings out and consider an anklet that does not sit directly over the ink. For more comfort during the appointment, bring slip-on shoes that are easy to remove.
Pack Smart
The first six ankle designs above deal with tight linework and shoe friction, so a little prep and the right small items smooth the session and early healing.
-
Stencil transfer paper kit. Lets you preview placement and tiny linework on the ankle before the needle touches skin, which is crucial for minimal Naruto motifs.
-
Silicone protective film roll. A thin film helps protect ankle tattoos from shoe rubbing during the first few days of healing.
-
Topical numbing cream. Useful for shorter ankle sessions if you are sensitive, applied with your artist's guidance.
-
Fragrance free gentle body wash. Keeps the area clean without stripping delicate linework that small Naruto pieces depend on.
-
Aquaphor healing ointment. A thin layer in the first 48 hours helps lock in moisture for fine line and small color work without clogging pores.
7. Tiny Kunai Cluster Curving Around the Ankle
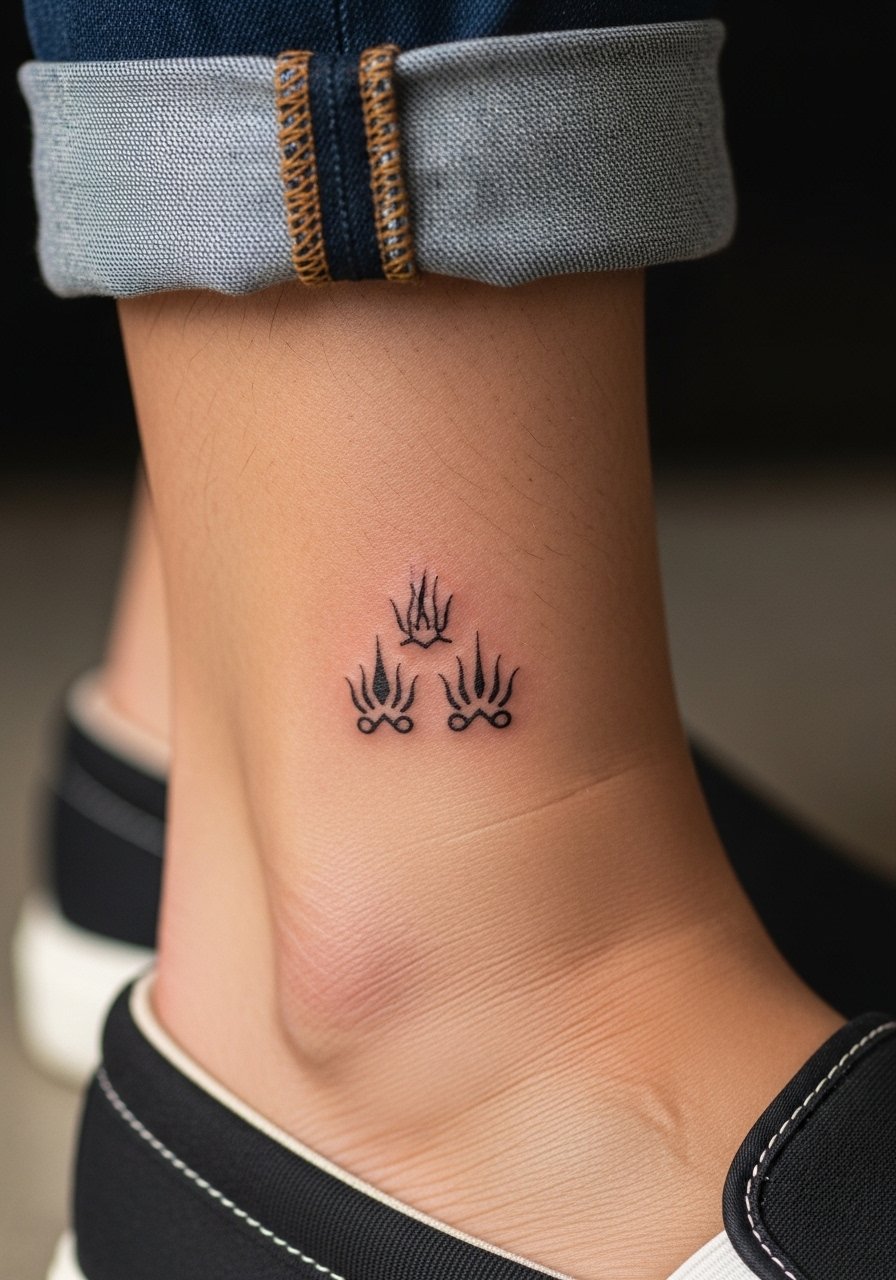
A cluster of micro kunai reads like a motif rather than separate objects when placed around the ankle. Ask the artist to vary the angle of each kunai so the group reads dynamic while keeping each outline bold enough to avoid merging. A common mistake is requesting minute inner bevels that the ankle cannot hold. The session is quick and feels like repeated shallow lines rather than one long stroke. For showing the cluster, wear rolled shorts or cropped trousers. Plan for a small touch-up in two to three years, especially where shoes brush the area.
8. Chidori Lightning Accent Near the Ankle Bone
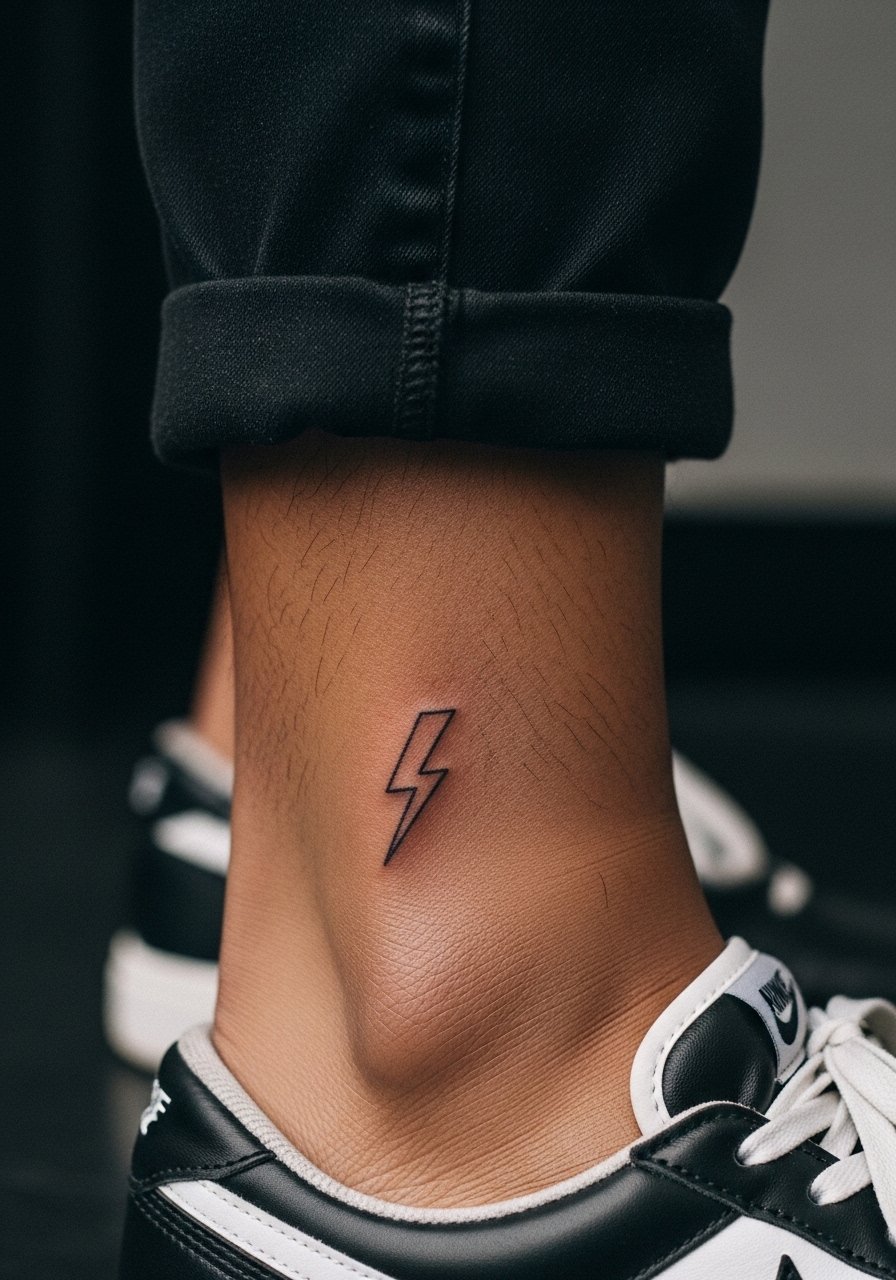
A single lightning bolt evokes Chidori without needing an entire character portrait. The trick is to keep negative space inside the bolt so it does not fill in from rubbing. Many people ask for sketchy strokes that blur into one blotch. Tell your artist you want clear, separated strokes with small gaps to catch light. Expect a 20 to 35 minute session with mild pain. For the session wear slip-on sneakers so you can remove them without catching fresh ink. This design is low maintenance and ages predictably, though thin streaks may need a touch-up by year three.
9. Sage Mode Eyes Miniature on the Medial Ankle
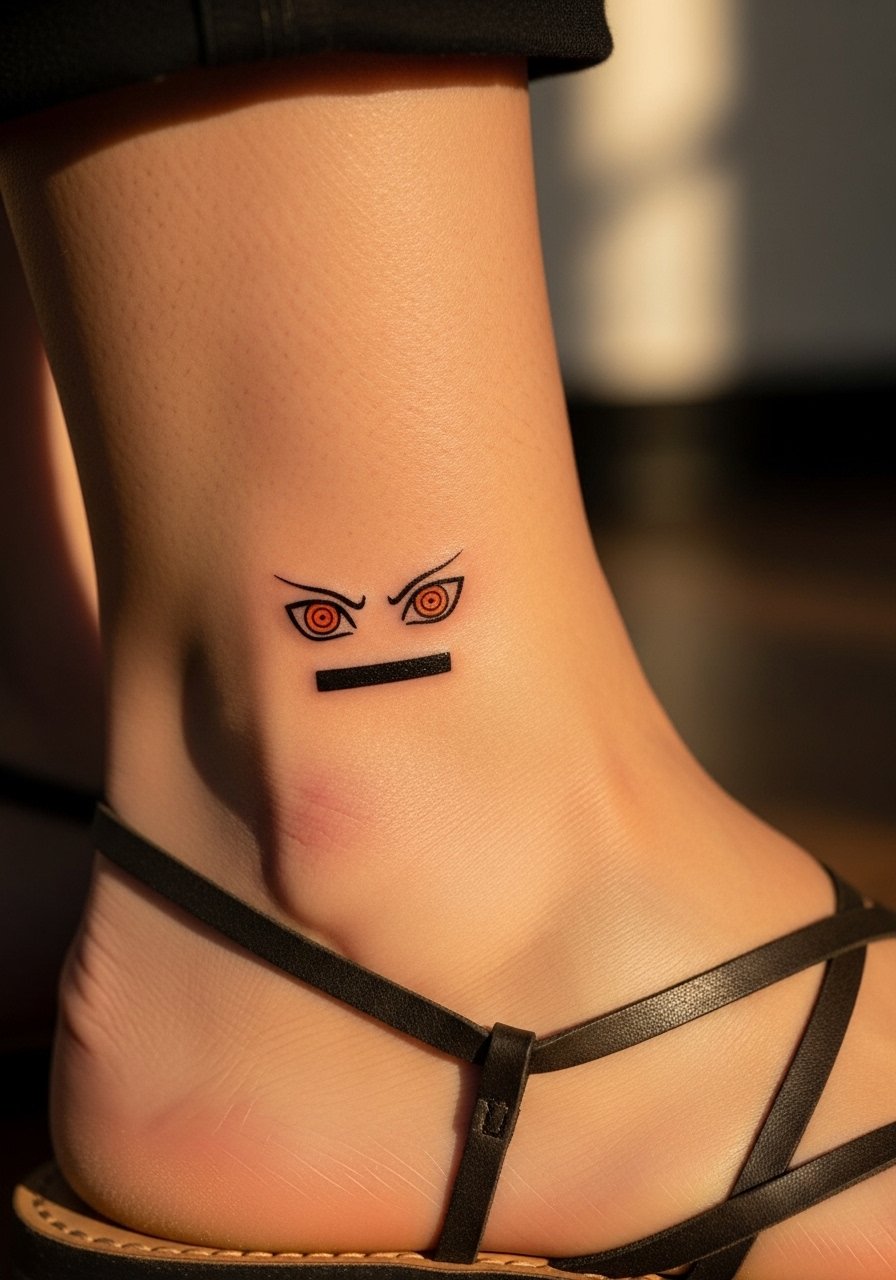
Sage Mode eyes are iconic and compact, which suits the medial ankle that sees less shoe friction. I often tell people to ask for slightly heavier outer lines and simplified pupils so the expression survives movement. A common error is crowding in surrounding detail that the ankle will not hold. The session is short and sensitivity is moderate. For showing the piece, slim strappy sandals and a simple anklet keep the focus on the eye symbols without masking them. Touch-ups may be needed in three to four years depending on sun exposure.
10. Nine-Tails Seal Minimal Band Just Above the Ankle
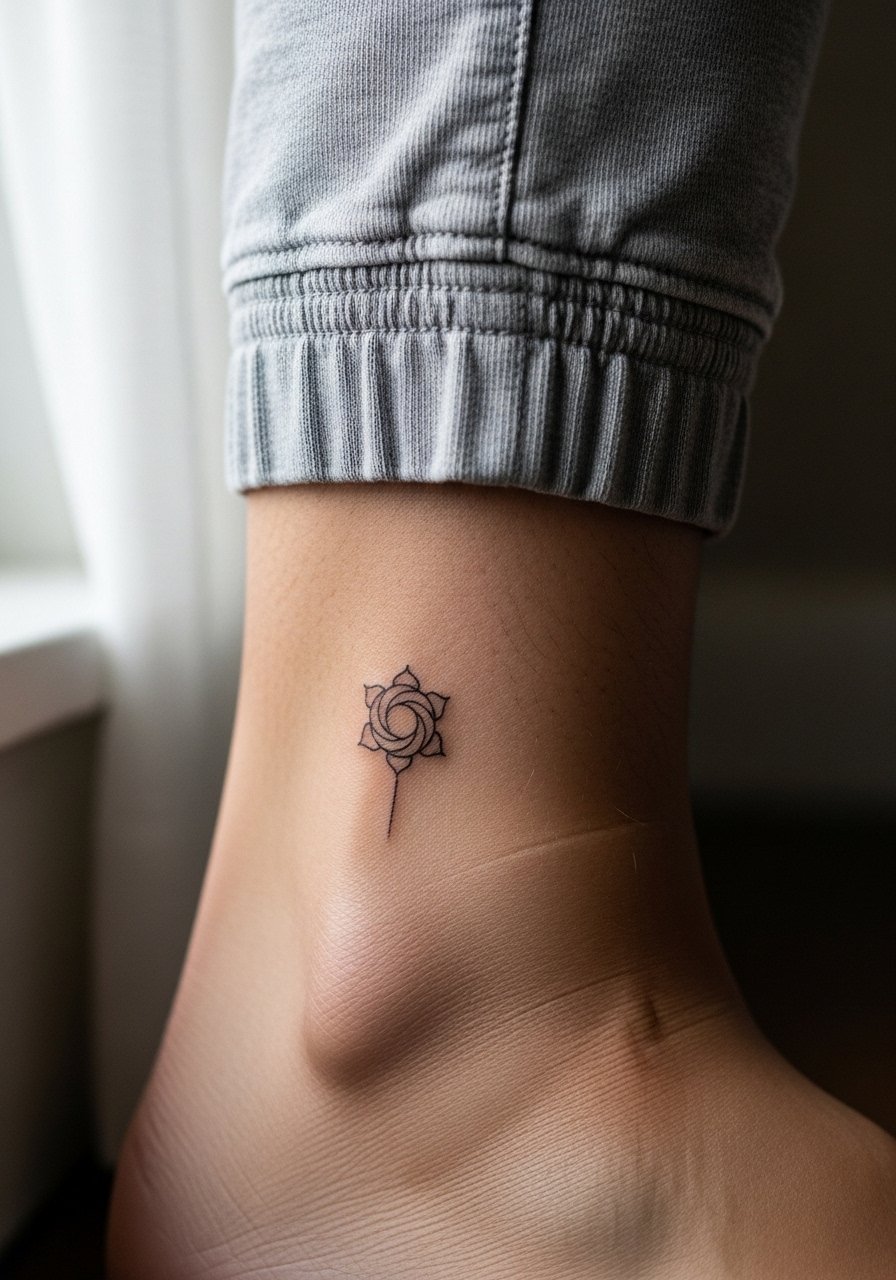
A seal band that encircles the low ankle makes a subtle statement and uses repetition to hold detail. The main mistake is making the band too thin, which causes the ring to break apart with wear. Tell your artist you want negative spacing between marks and slightly heavier connection points. Session time is roughly 30 to 60 minutes based on circumference. Ankle bands can feel tight during healing, especially with shoes. For the appointment pick loose joggers you can pull up easily. Expect the band to soften over time and consider a light touch-up if gaps appear.
11. Mini Kakashi Sharingan Patch Above the Ankle
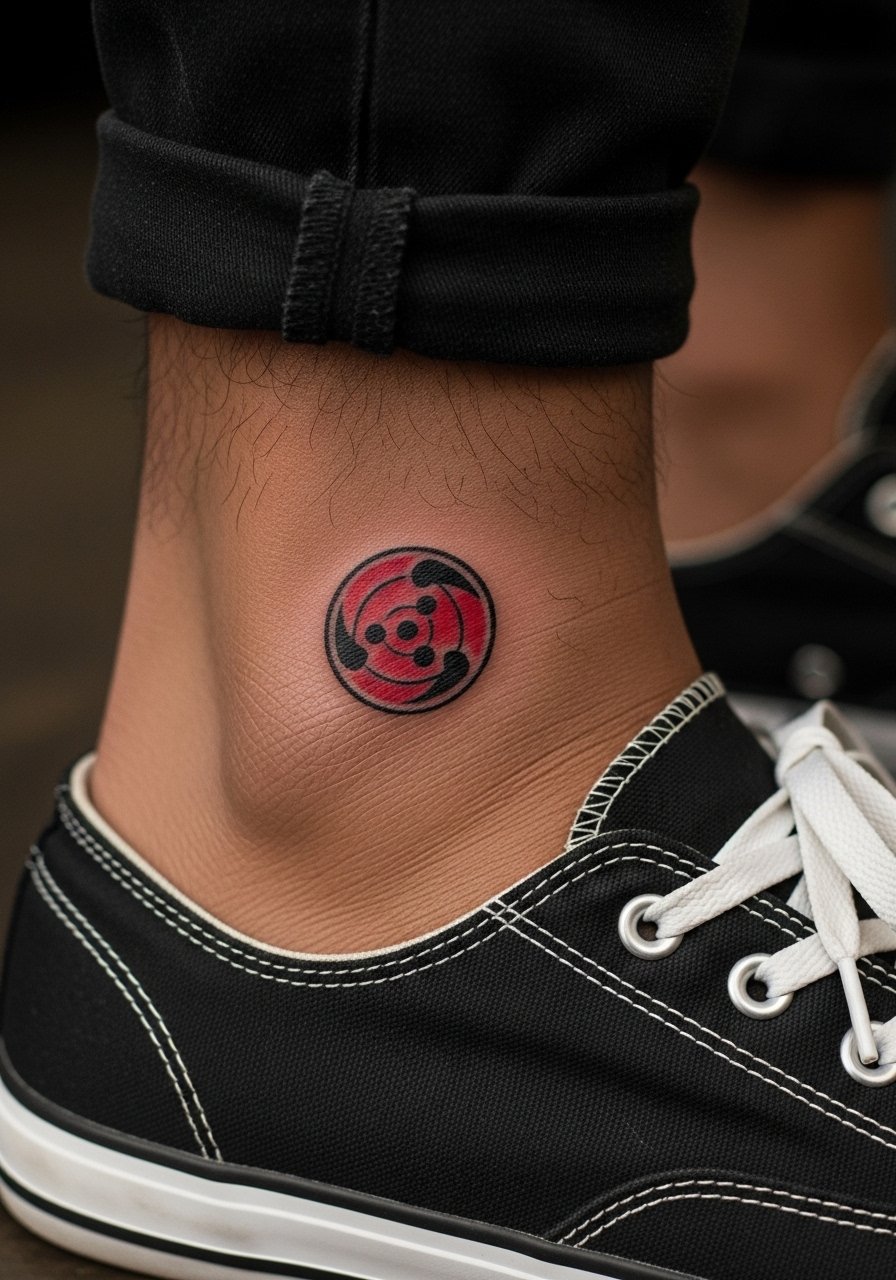
A single Sharingan-style circle reads bold if kept simple and centered above the ankle bone. Ask for saturated red and solid black so the pupil stays distinct. A usual mistake is adding tiny text or filigree inside the circle that becomes muddy. The session is quick and the pain is mild. For showing it off, roll up pant legs or wear low-top canvas sneakers and a subtle cuff. A thin canvas sneaker works well for photos and keeps pressure off the fresh ink.
12. Subtle Leaf Village Script Curving Along the Ankle
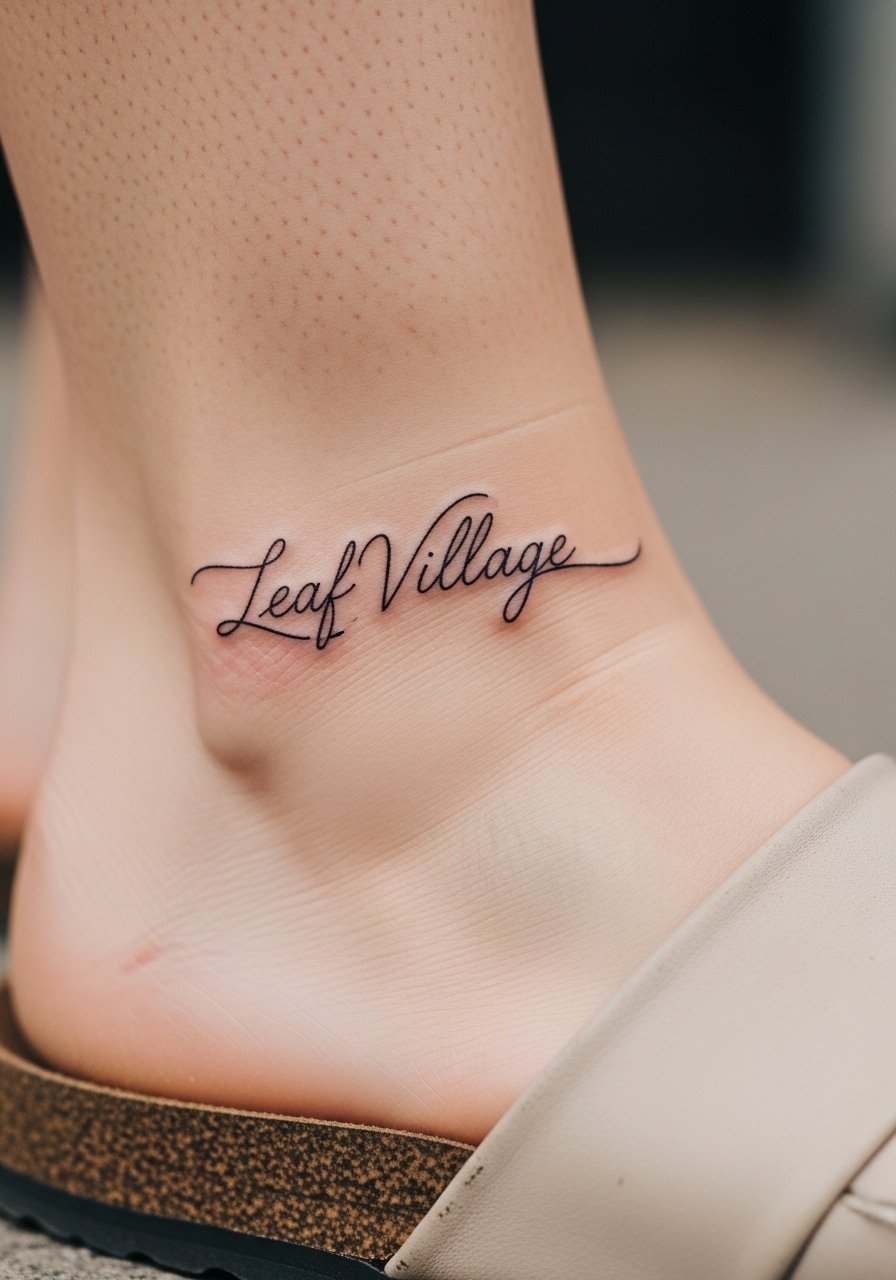
Script pieces on the ankle demand strict spacing and font choice. I advise using a compact, slightly bolded script rather than a hairline cursive to ensure legibility. People often pick ornate lettering that loses counters and becomes unreadable. During consultation bring several font options and ask the artist to stencil it in place to check flow over the ankle contours. Session time is around 30 minutes and sensitivity is mild. For footwear during healing choose sandals that avoid rubbing the letters. Expect possible softening and a touch-up in a few years if you keep the script small.
13. Stylized Shuriken Trio Framing the Ankle Bone
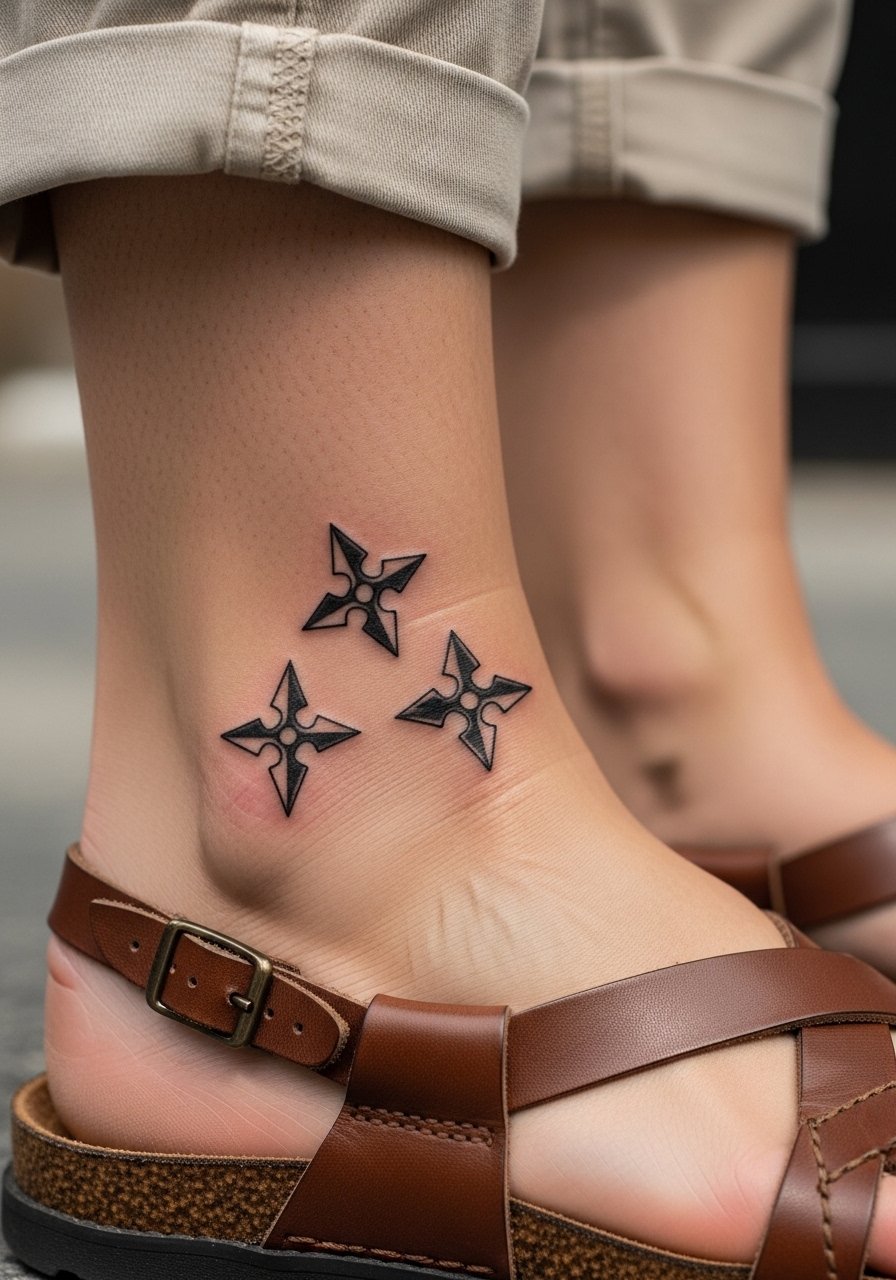
A trio of shuriken uses spacing to create motion and avoids tiny interior shapes that the ankle cannot hold. The design reads best when the points align with natural lines of the foot and ankle. A common mistake is placing them where sock edges hit. Tell the artist you want implied motion with open negative space rather than full filled detail. Sessions are short and the pain level is usually manageable. For showing this arrangement, cropped cargo pants and open sandals work well. Plan for a touch-up in year two to restore sharp points if they blur.
14. Signature Naruto Whisker Dots as a Linear Accent
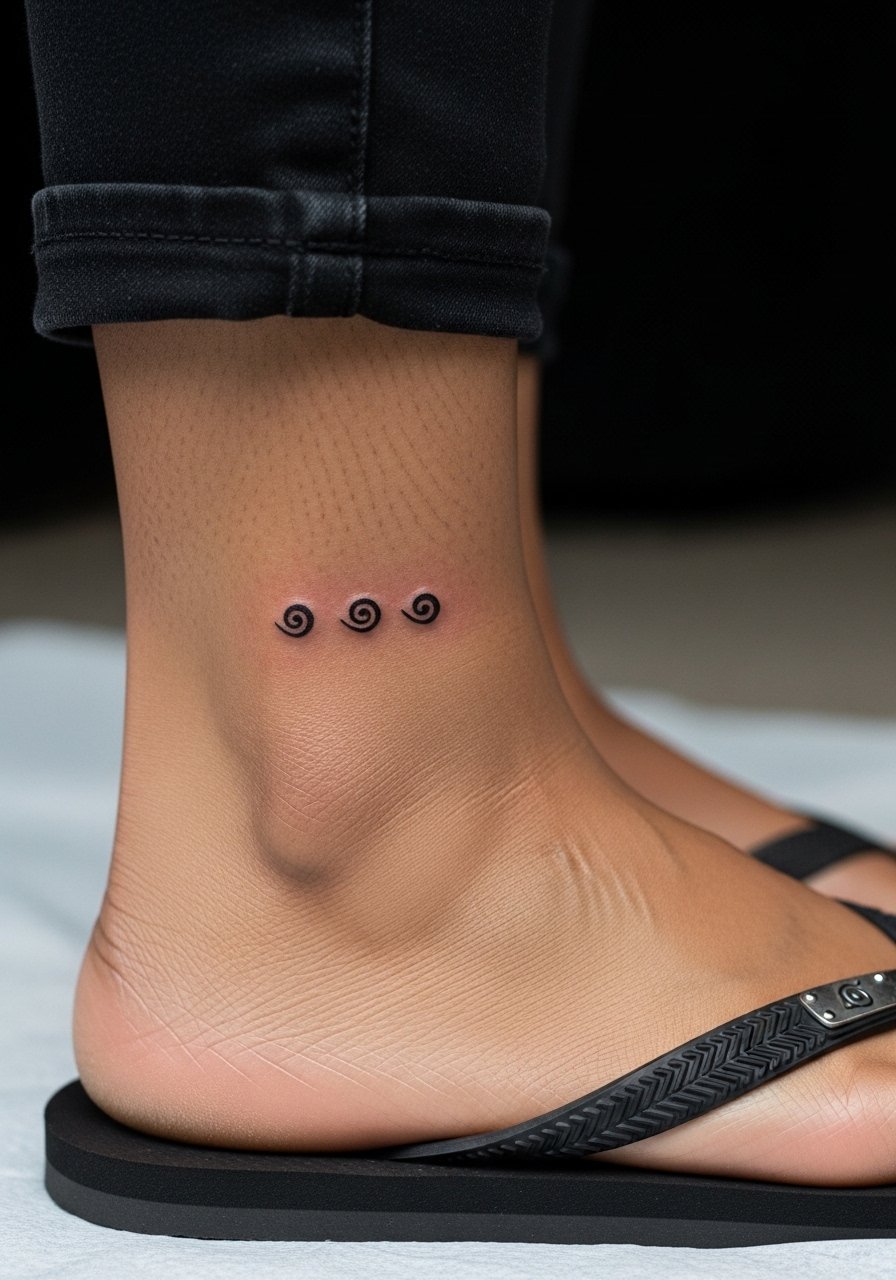
A line of whisker dots is minimalist and reads as a motif rather than a portrait. The trick is consistent dot size and spacing so they do not bleed into a single mark. The typical mistake is making dots too close or too faint. Ask for a slightly larger dot than you imagine and confirm spacing with a stencil. The session takes under 20 minutes and pain is low. Flip-flops during the appointment keep pressure off and let the skin breathe. Dots can fade unevenly so expect a touch-up sooner than for larger work.
15. Micro Rasengan in Color with Tiny Glow Accents
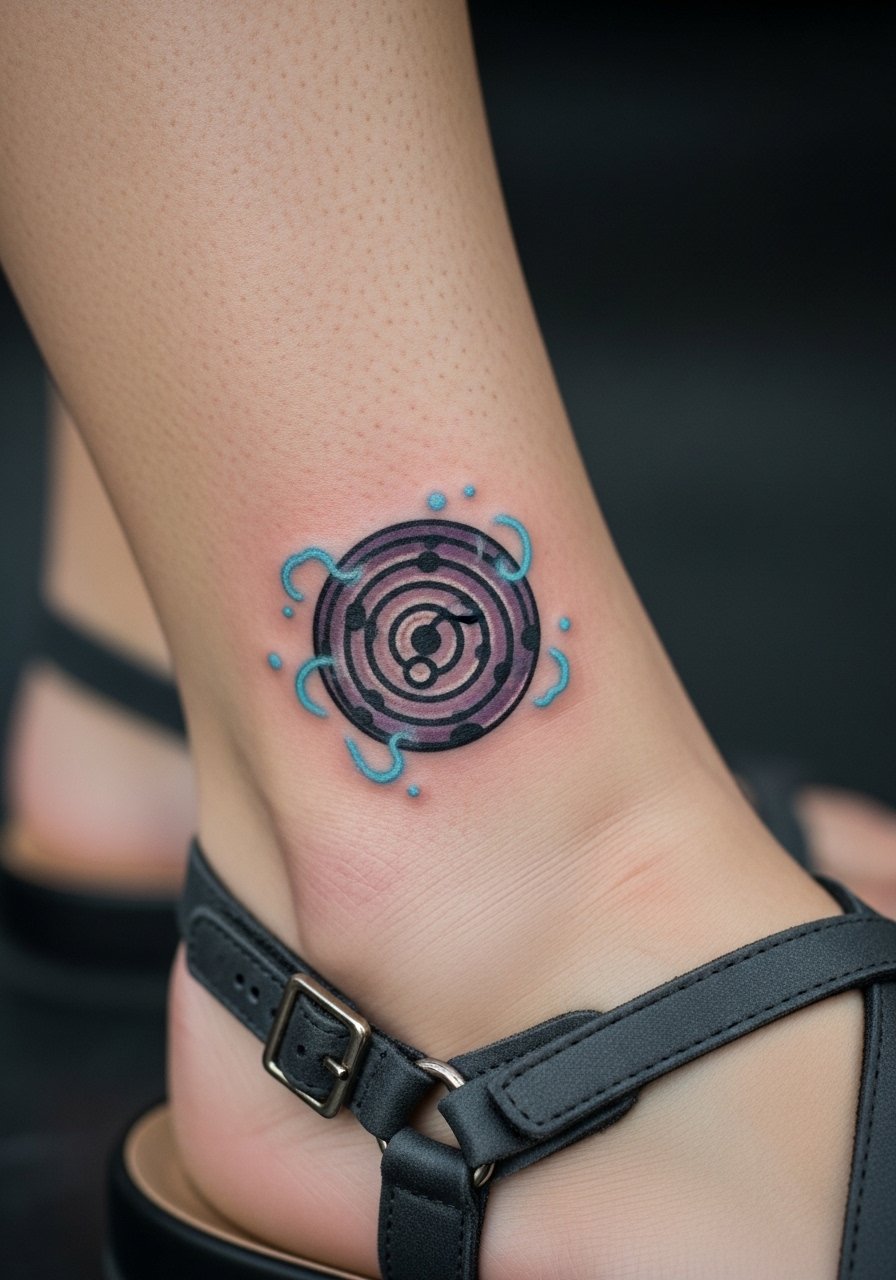
Color adds vibrancy to ankle motifs but also ages differently than black. For a micro Rasengan, pick saturated pigments and ask the artist to keep the blue as a ring rather than tiny interior blending that the ankle will lose. A common error is expecting watercolor blends at micro scale. Session time is 45 to 75 minutes depending on color layering. Color feels slightly more reactive while healing, so avoid tight socks. For evening wear pair with strappy sandals that let the color show. Plan on a color refresh in a few years for brightness.
16. Kurama Eye Line in Tiny Dot Work Around the Ankle
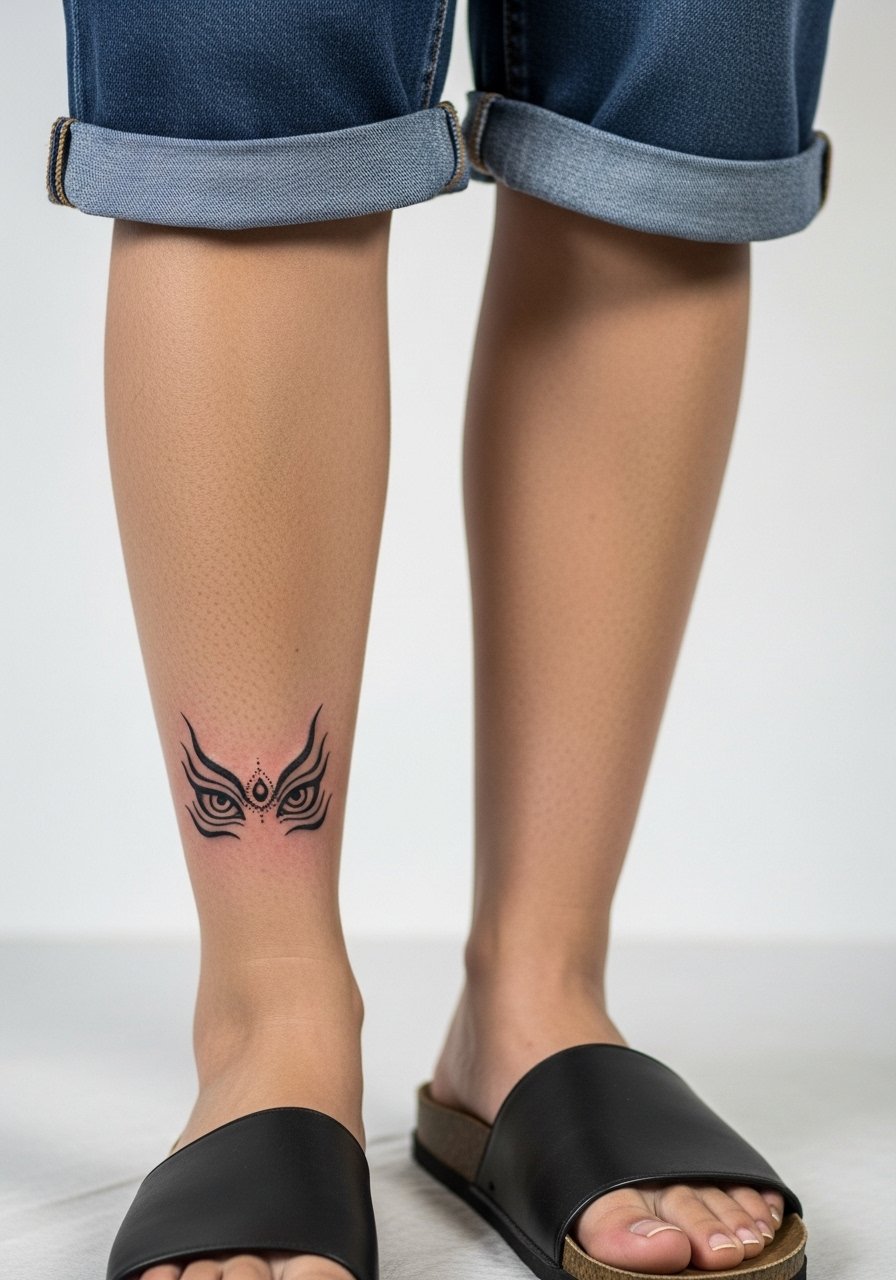
Dot work at the ankle can be elegant when it uses negative space to suggest form. The main risk is overpacking dots which creates a shaded blur. Tell the artist you want spaced stippling that reads as texture not solid fill. Sessions run longer when dot work covers circumference. Expect moderate sensitivity and intermittent itch during healing. Roll-up denim and slip-on sandals make post-session life easier. Dot work can keep its character longer than tight linework, but a touch-up may be needed to restore crisp stippling.
17. Chibi Team 7 Stacked Icons Near the Ankle
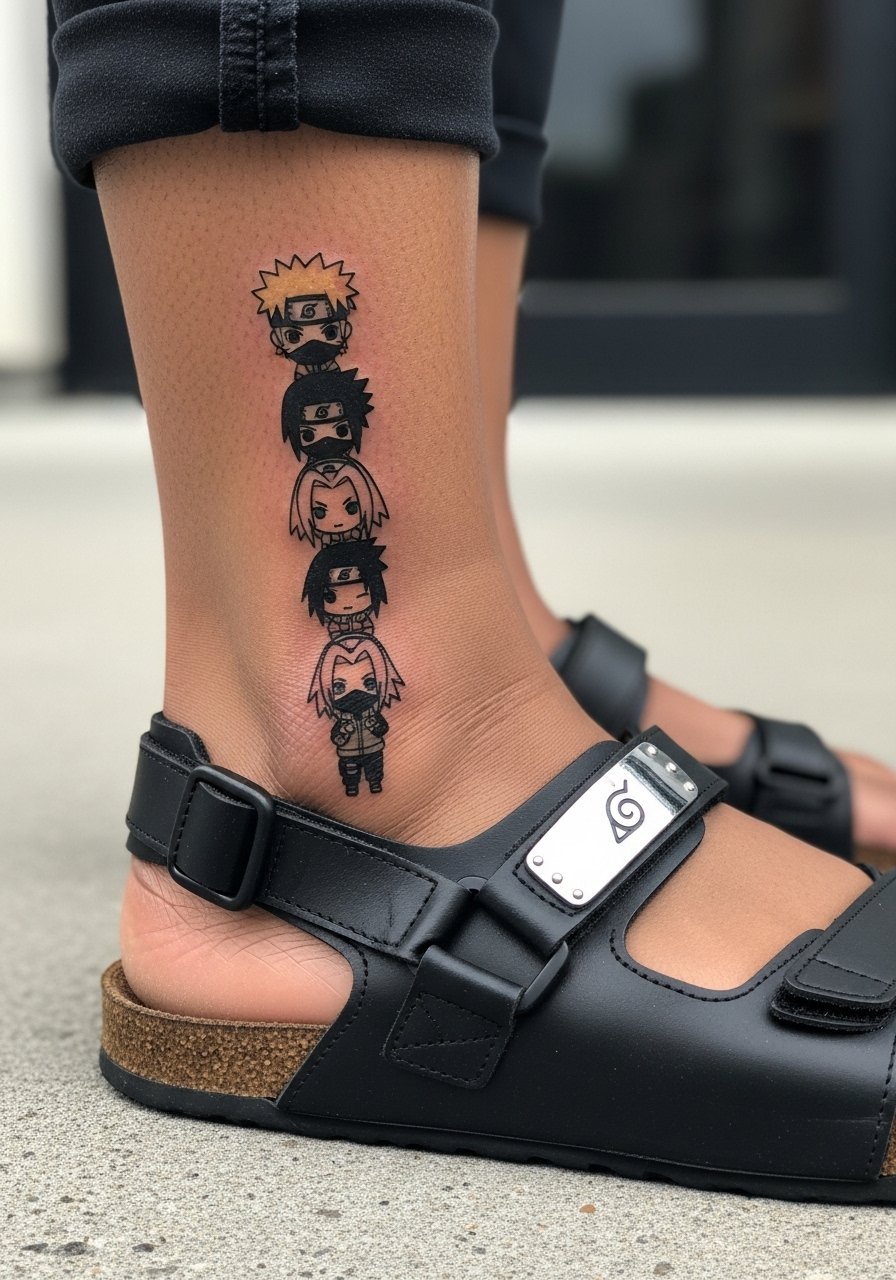
Stacking tiny icons gives a roster feel while keeping each element readable if scaled correctly. Ask the artist to prioritize bold silhouettes for each chibi head instead of fine facial features. A mistake is compressing too many details into each icon. Sessions are modular so you can spread them across two short appointments if desired. For showing this lineup, casual sandals and a slim anklet keep the focus. Consider spacing that accommodates future additions. Touch-ups are common when icons sit where shoes flex.
18. Small Bamboo and Scroll Motif with Tiny Script
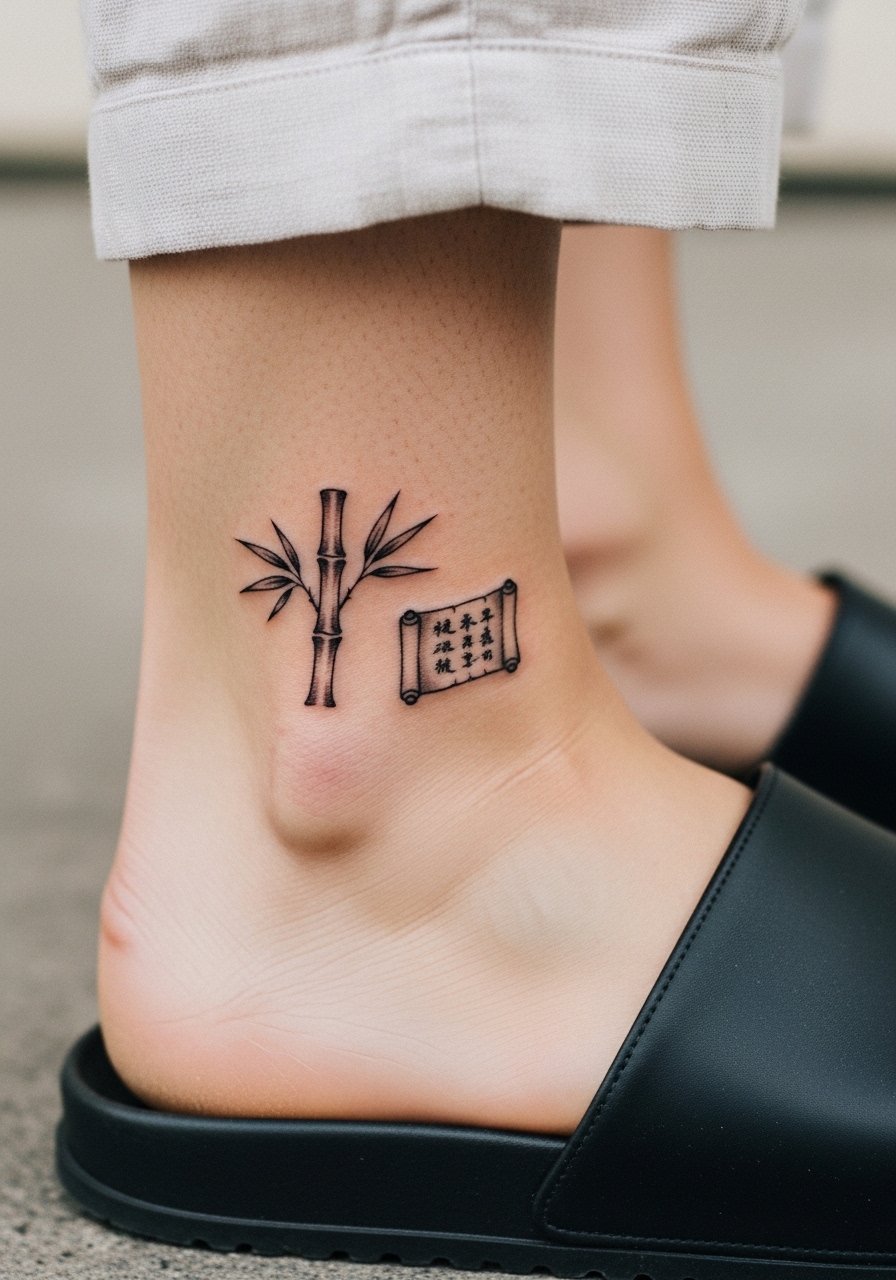
A small scroll paired with bamboo nods to the storybook elements without copying large panels. I recommend leaving the script slightly larger than you first imagine to maintain legibility. A common mistake is tiny calligraphy that fades into a line. The session is 30 to 50 minutes and ankle sensitivity is mild. Slides or slip-on sandals work best during healing so straps do not press on the scroll. If the piece has color accents, plan for a color refresh, otherwise a single touch-up may be enough in a few years.
19. Kyuubi Chakra Pattern as a Low Ankle Band
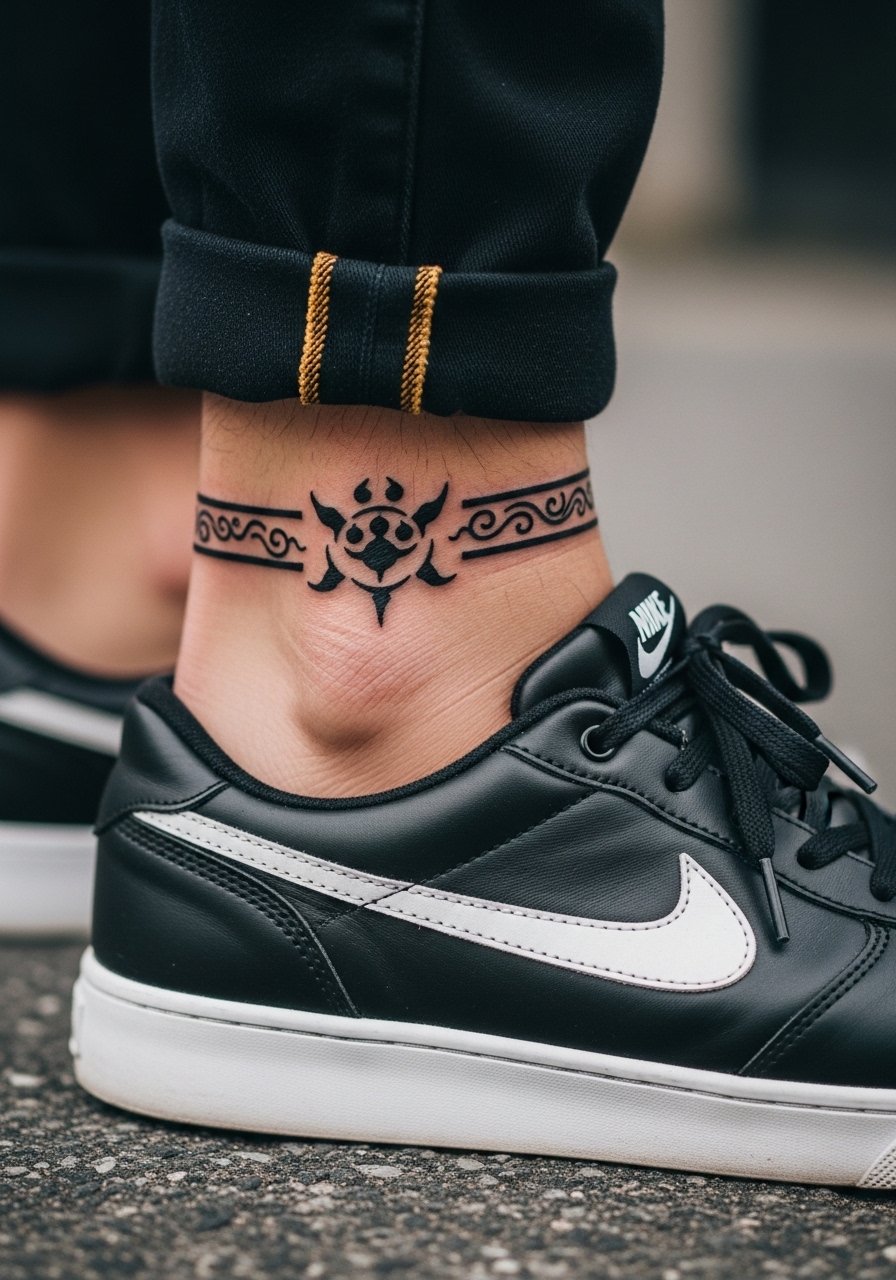
A chakra-pattern band wraps the ankle elegantly and uses repeating marks that hold better than tiny detailed iconography. The pitfall is making the band hairline thin which causes gaps where the skin stretches. Tell the artist you want thicker anchor points and consistent spacing. Sessions depend on band width and may run 45 to 90 minutes. Low-cut sneakers that you can remove easily are best for the appointment. For photos roll pants and wear low sneakers to avoid rubbing. Expect the band to soften over time and plan a minor touch-up if sections fade unevenly.
20. Minimalist Hokage Flame Mark at the Heel Edge
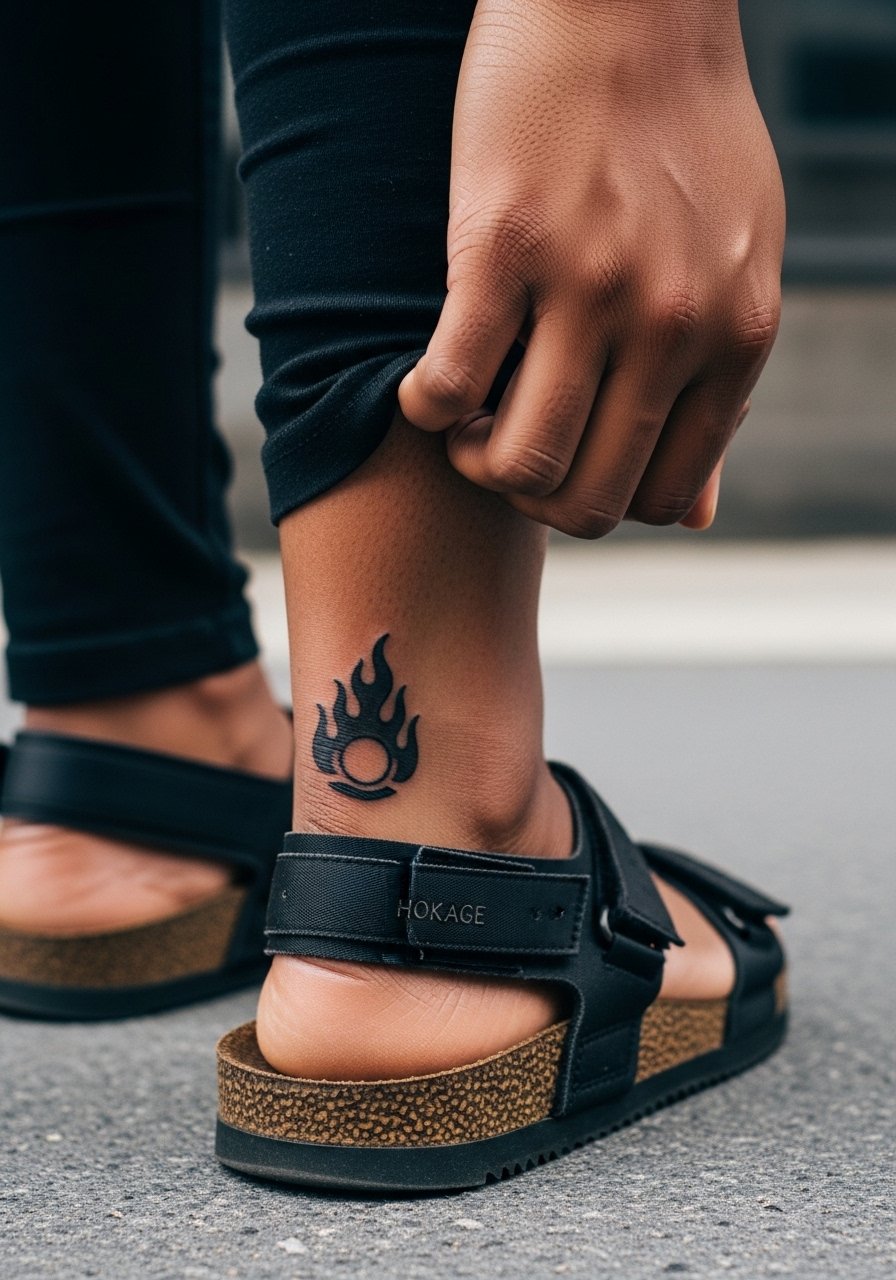
Placing a tiny flame near the heel creates a hidden nod that appears when you walk barefoot or wear sandals. The heel sees friction from shoes so thicker outline and simple shape are essential. A common mistake is putting fine filigree there which breaks down quickly. The session is short but the area can be sensitive. Wear open-backed footwear after the session to reduce rubbing. Because of constant contact with footwear, expect a touch-up within one to three years depending on activity.
21. Tiny Anime Panel Frame with Micro Script Above the Ankle
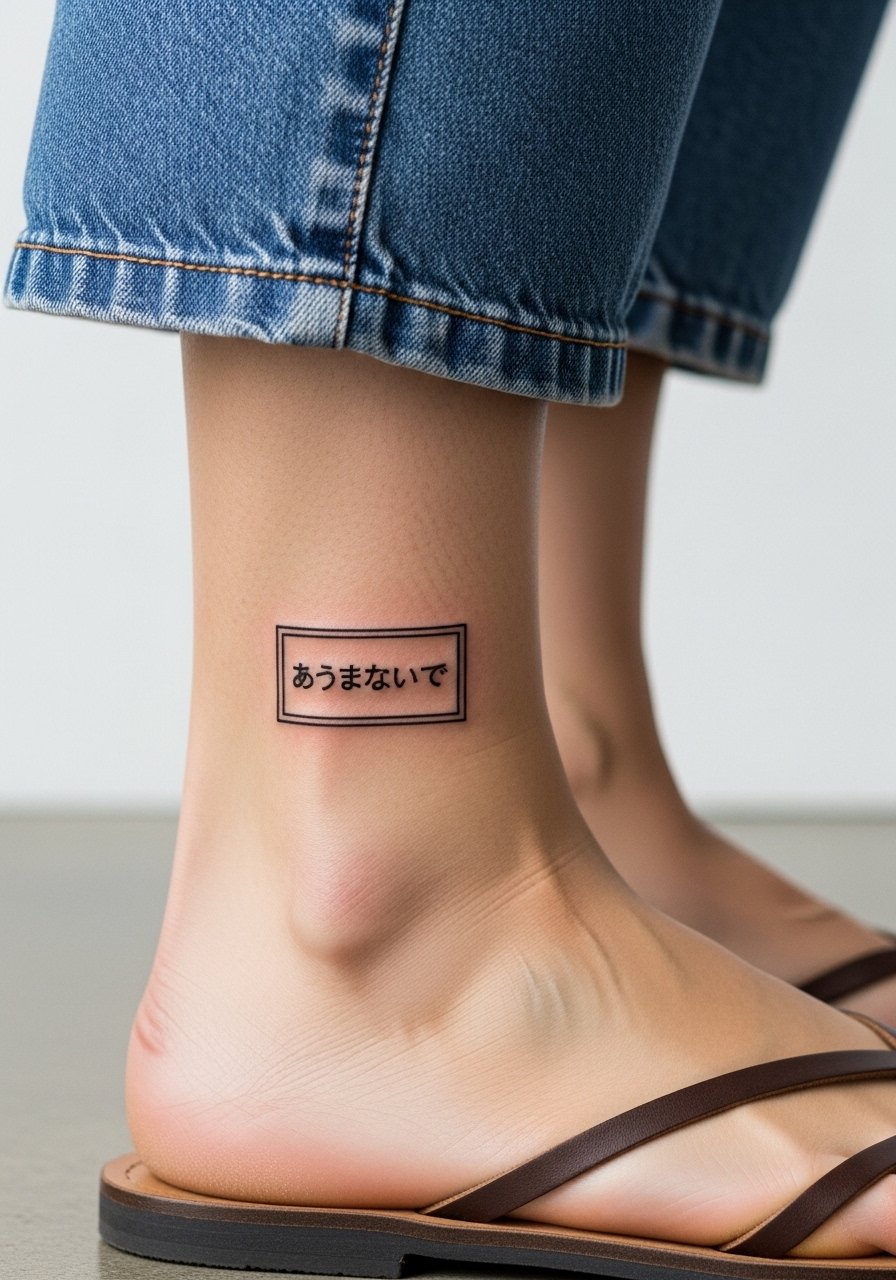
A mini panel gives a graphic comic feel when kept bold and boxed. The secret is to avoid inner detail and instead use a single phrase or symbol that anchors the frame. Many request tiny scene copies that the ankle cannot retain. During consultation, show a panel reference and ask the artist to reduce the scene to one clear focal element. The session is around 30 to 60 minutes based on how much shading you want. For showing it off, cropped trousers and simple sandals work well. Expect line softening and plan a touch-up if you notice merging inside the frame.
Frequently Asked Questions
Q: How small can a Naruto symbol be on the ankle and still read after a year?
A: In my experience, aim for at least a 1.5 to 2 centimeter baseline for symbols that include internal breaks. A bolder outer line and intentional negative space make a small symbol last longer. If you want micro text inside the symbol, plan on a touch-up within two years.
Q: Will color hold better than black on an ankle Naruto piece?
A: Color can look vivid initially but tends to fade faster on high-friction spots like the ankle. Black saturated outlines usually maintain shape longer. If you want color, ask for saturated packing and expect a color refresh in a few years.
Q: What should I wear to the appointment for an ankle tattoo?
A: Wear loose pants you can roll up easily and slip-on shoes you can remove without stepping on fresh ink. A pair like slip-on canvas sneakers works well for access and comfort.
Q: Are tiny Naruto portraits a copyright concern for tattooists?
A: People split on this. One camp sees character tattoos as personal tributes and commissions are common. The other camp worries about using exact copyrighted imagery. Many artists navigate this by stylizing or simplifying the reference so it becomes a personal piece rather than a direct replica.
Q: How often do ankle Naruto tattoos need touch-ups compared with forearms?
A: Ankle work usually needs touch-ups sooner because of shoe abrasion and movement. I tell clients to expect a possible touch-up around year two to three for fine detail, whereas forearms often last longer before a refresh.
Q: Should I avoid the ankle if I want a very detailed Naruto face?
A: If you want micro facial detail, the ankle is not ideal. The skin there moves and small strokes merge. Consider the inner calf or forearm for dense realism, or pick a simplified portrait with bold outlines for the ankle.
