
Fine line work is trending on feeds right now, but what holds up on a forearm months from now is rarely the flash that racks up likes the day it is done. I watch how spacing, needle depth, and the placement relationship to wrist creases decide whether a piece needs touch-ups or still reads sharp. Below are 17 forearm ideas that balance the initial impact with how they age, and what to ask your artist in consultation.
1. Fine Line Arrow on Inner Forearm
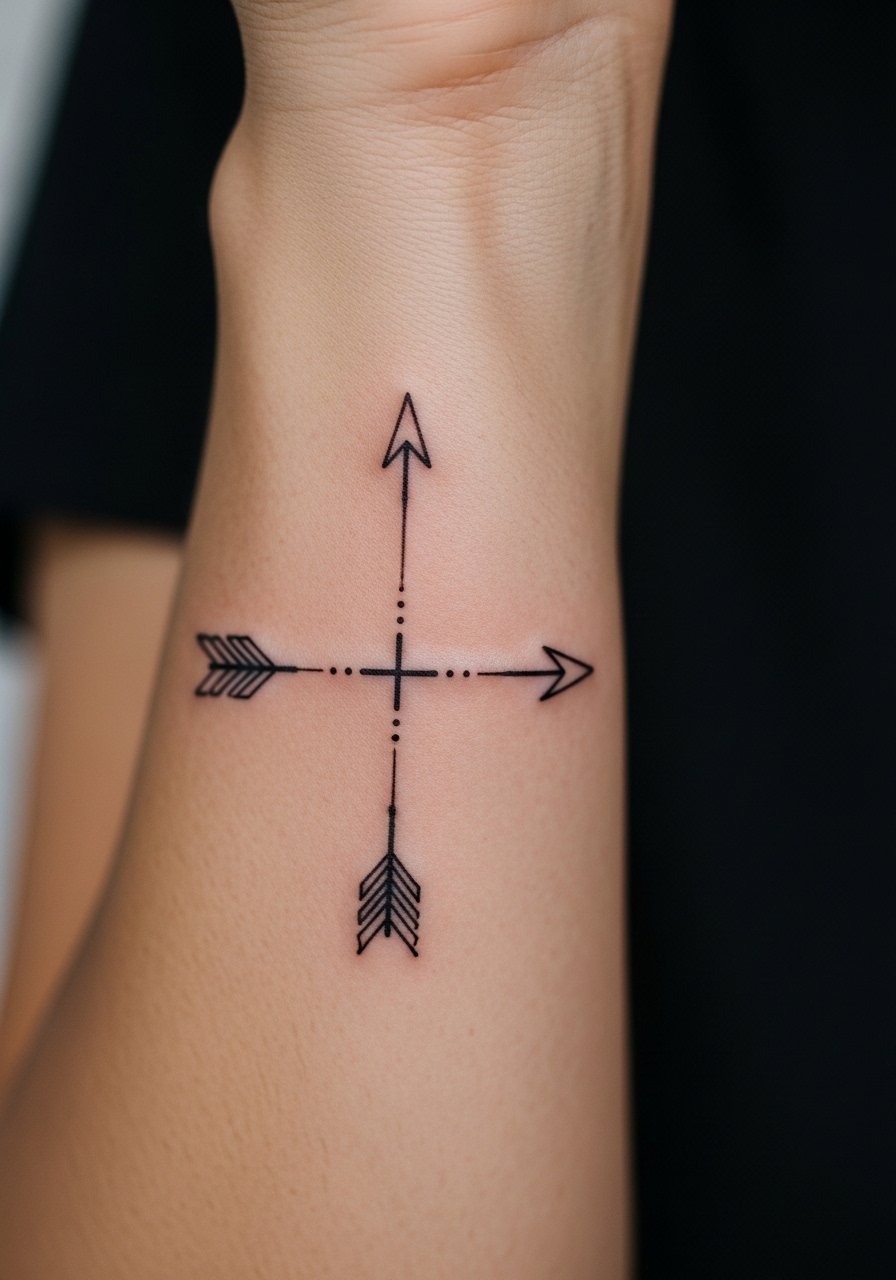
I recommend this when you want a minimalist motif that still reads personal. In consultation tell the artist you want slightly heavier primary lines with hairline secondary strokes so the arrow keeps clarity as it heals. Common mistake is asking for everything hairline thin, which looks fragile at month six when minor blowout starts to show. Pain is low to moderate on the inner forearm, and sessions are short, often under an hour. Expect the crispest look at six months, slight softening by year two, and a likely touch-up window around year three if you want to keep the original contrast. For showing it off, roll up sleeves and pair with a loose button-down shirt that frames the forearm without hiding the linework.
2. Micro-Realism Wolf Head Near Wrist
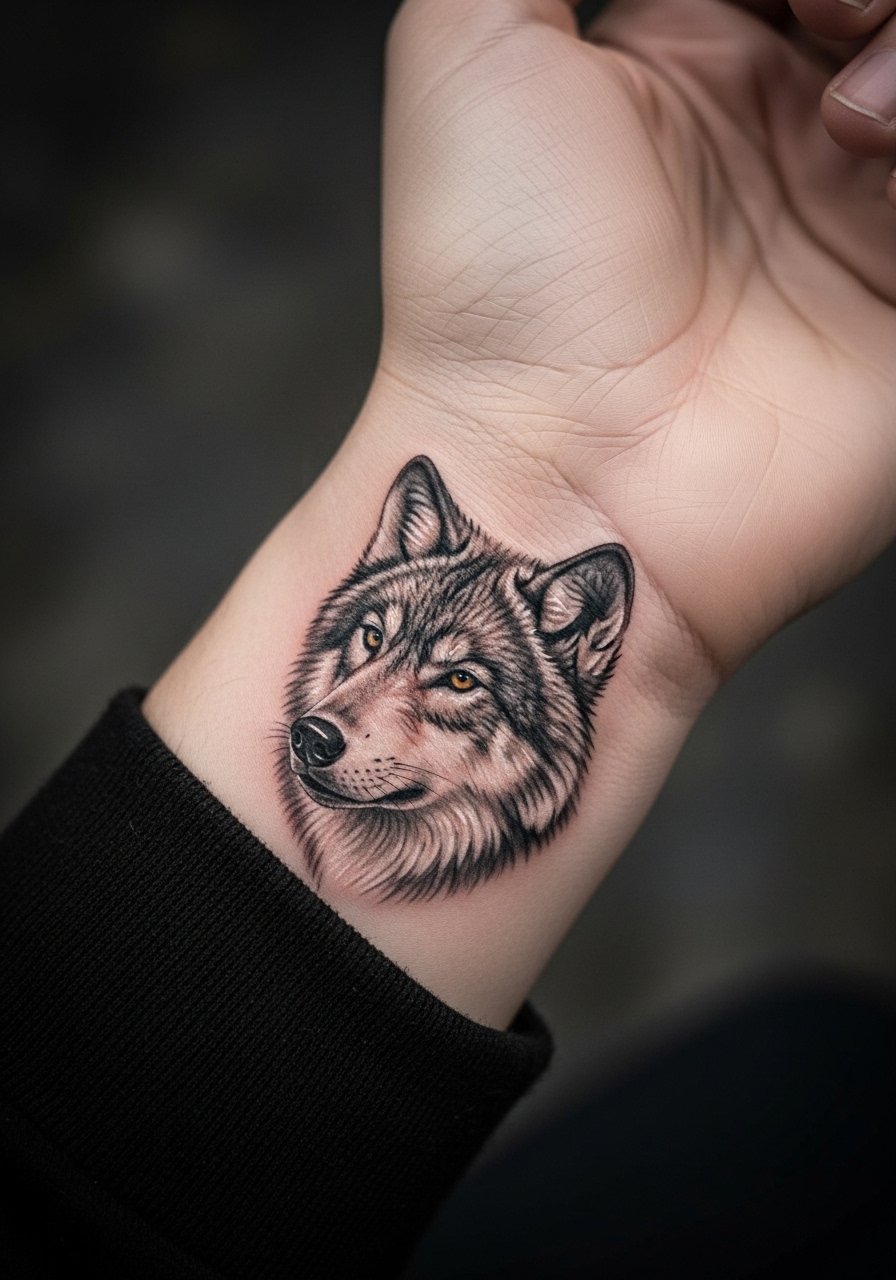
This runs small but demands planning. Ask the artist to sketch the muzzle slightly larger than your reference so the eyes remain legible after settling. The typical mistake is compressing detail into a thumbnail size. Expect the six-month look to show softer stipple shading and tiny loss of contrast by two years. Wrist placement means regular washing and friction from cuffs, so thin protective planning matters. Session time is often one to two hours depending on shading. For daily wear, a minimalist watch keeps the area visible without crowding the piece. Try a minimalist watch band to complement the portrait lines.
3. Bold Blackwork Band Across Lower Forearm
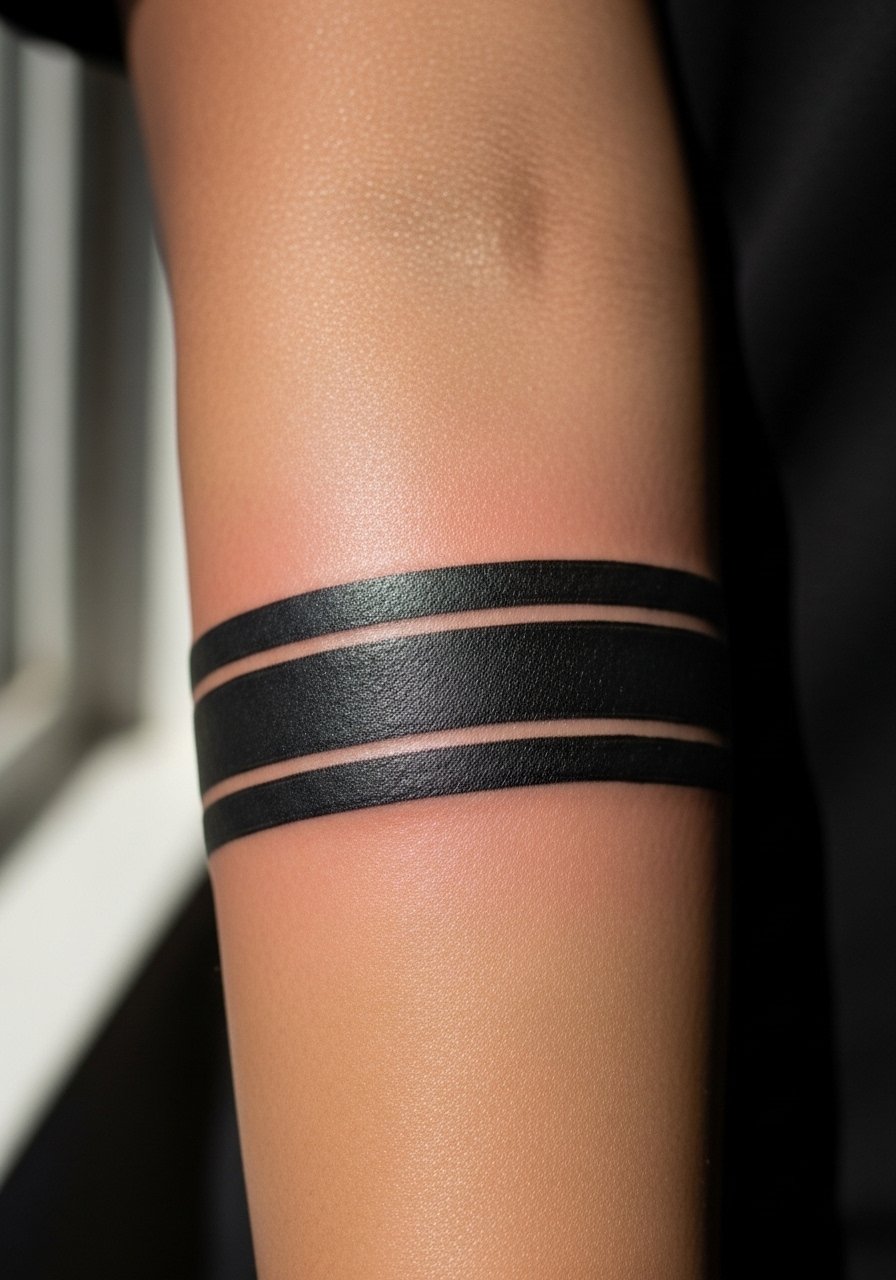
There are two camps on heavy black bands. One camp says saturation like this is the most durable choice and will age into a clean graphic. The other camp worries about long-term maintenance where large solid fills may need touch-ups in high-sun zones. I find they wear evenly if the artist works in even passes and plans depth. This design feels immediate from across a room and ages into a silhouette rather than a fading picture. Pain is moderate because of density, and a single session usually handles it. Tell your artist you want even saturation and consistent edge crispness to avoid patchy fading. For showing it off, short sleeves or cropped sleeves let the band read as a bold statement.
4. Geometric Mandala that Wraps the Forearm
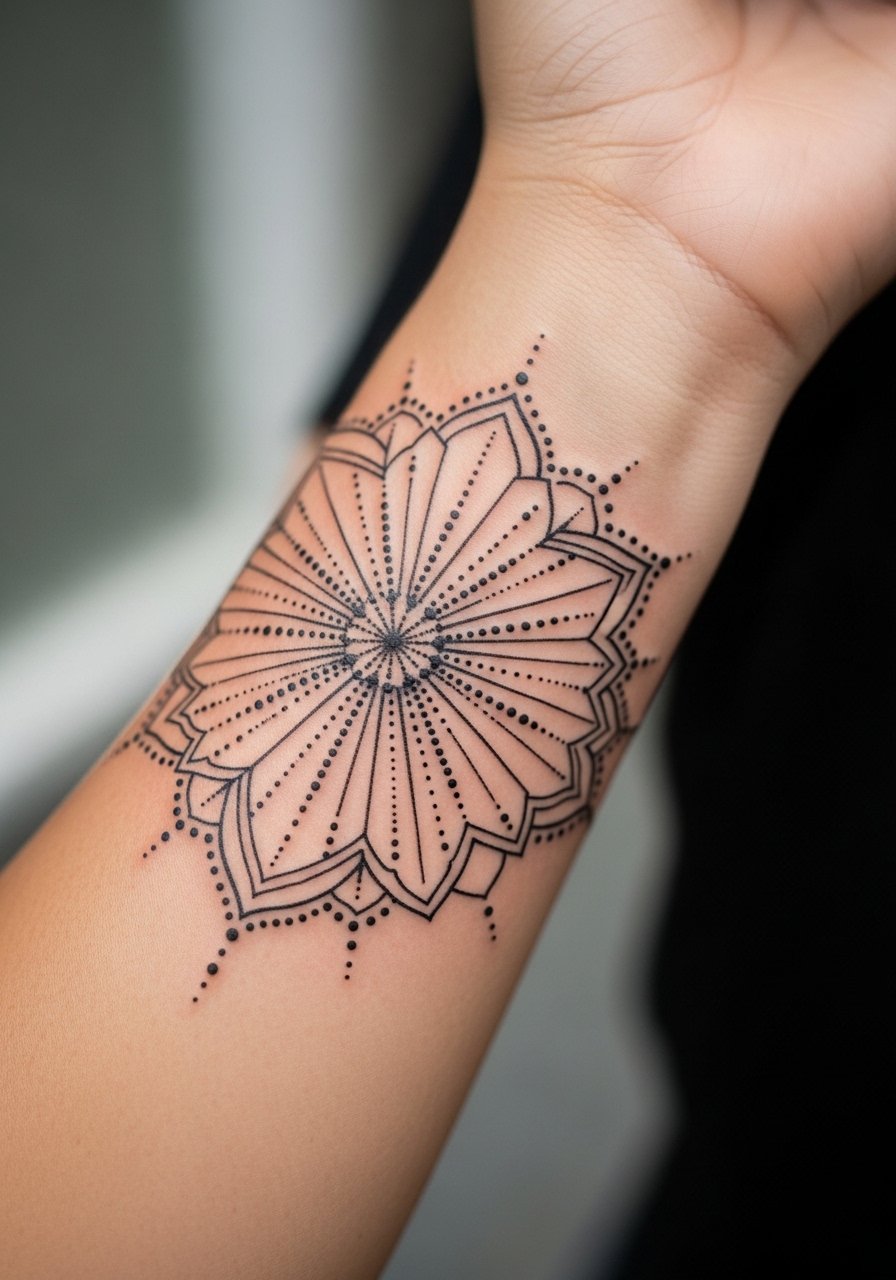
Mandala work thrives on spacing. The biggest mistake is packing radial elements too tightly. Ask for generous spacing between concentric rings so stipple shading can hold up without merging. Some artists say mandalas age poorly on creased areas because lines can merge, while others argue that with room and correct needle depth they settle fine. I recommend slightly enlarging the negative space in the design. Session time can stretch to multiple hours for wrap pieces. Expect a clear look at six months, then subtle softening by year three. Pair this with rolled-up sleeves and a short sleeve linen shirt to show the pattern without competing textures.
5. Neo-Traditional Rose on Outer Forearm
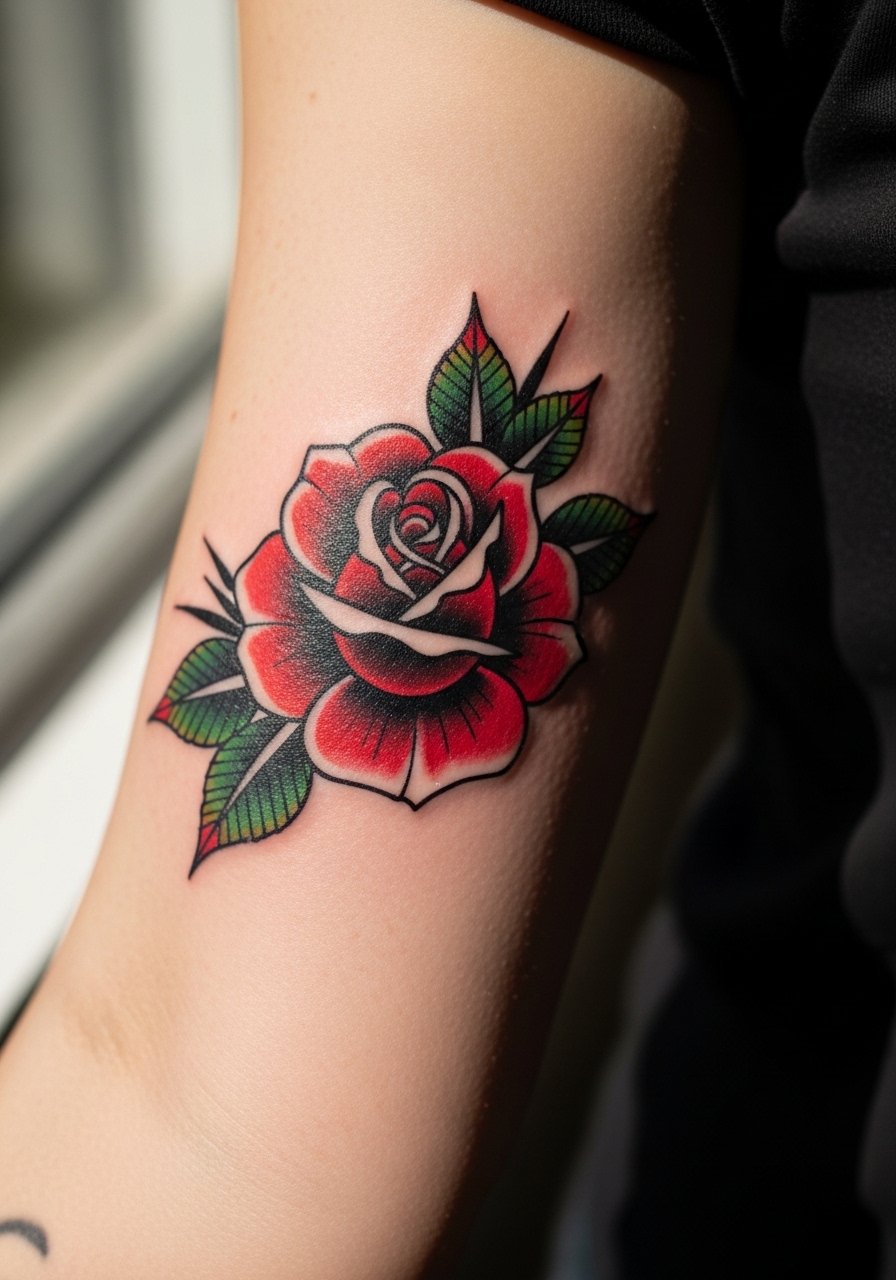
Neo-traditional pieces use bold linework and reliable saturation, which makes them resilient over time. Tell your artist you want solid black outlines with saturated fills and clear shadow so the rose retains shape as the color plates soften. Common error is asking for washed-out tones to mimic "tattoo flash" photos; those tones often need earlier touch-ups. Pain is low to moderate on the outer forearm and sessions usually finish under two hours. After a couple of years color will mellow, but a touch-up brings back pop without reworking the whole piece. For casual show-off, cuff a short sleeve henley so the floral sits neatly above the sleeve line.
6. Script and Coordinates Along the Inner Forearm
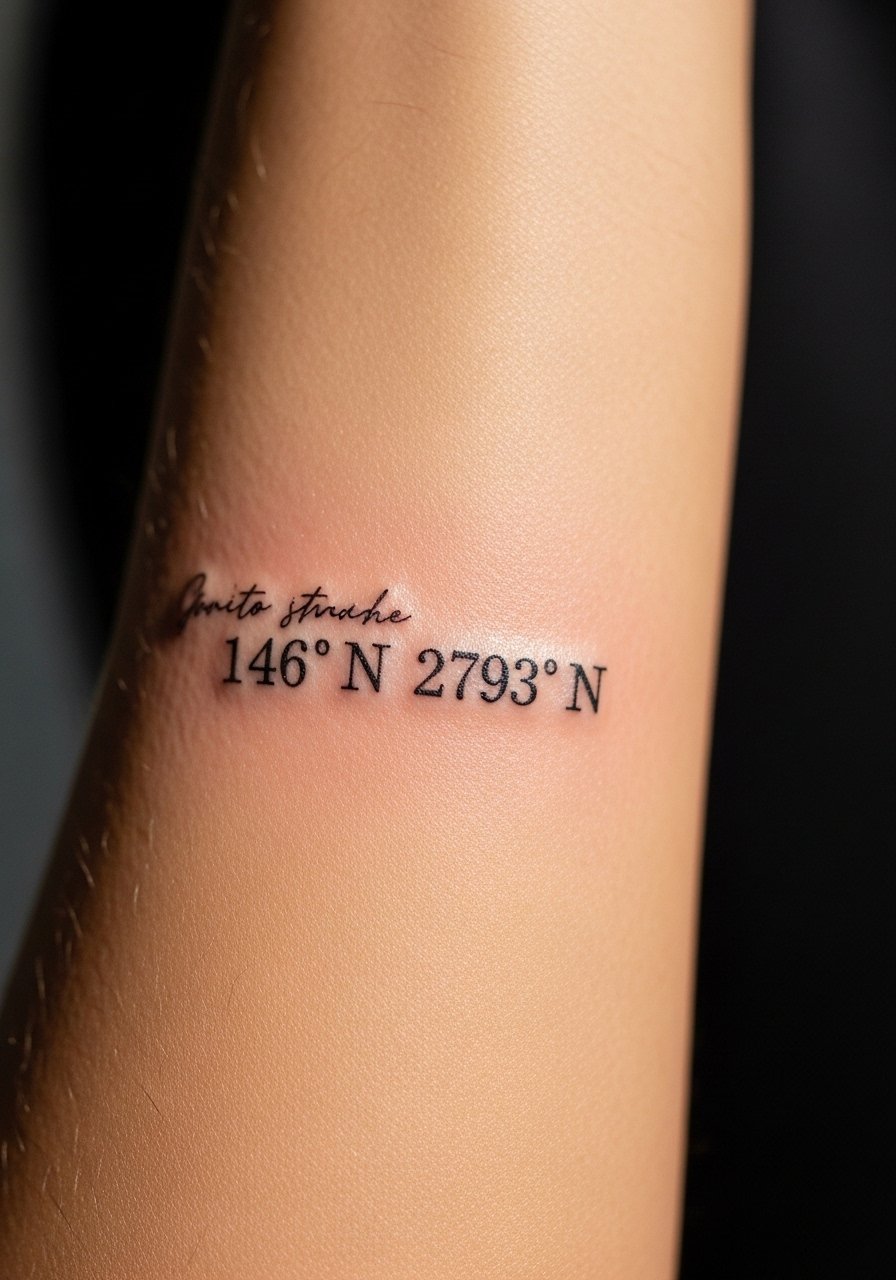
Text on the inner forearm is classic but needs exact sizing. Tell the artist the exact font weight and spacing, and confirm the final stencil sits on your arm before ink. Tiny lettering is the usual mistake, it blurs faster than blockier type. Expect the cleanest read at six months, slight softening by two years, and a possible touch-up at three to four years if you want the original crispness. Session time is short. If you want the text to remain legible, ask for slightly bolder primary strokes for numbers and keep script flourishes minimal. For everyday styling, a thin chain bracelet complements inner forearm script without drawing attention away.
Studio Day Picks
The small forearm and wrist pieces above need slightly different session prep and first-week care than larger sleeves, so these items smooth the appointment and early healing.
-
Stencil transfer paper kit. Lets you see the exact placement on skin before the needle touches, which matters for scripts and micro-realism near the wrist.
-
Topical numbing cream. Applied within guidance reduces wrist and inner forearm sensitivity during denser blackwork passes.
-
Thin protective film roll. Useful for finger and wrist-adjacent work to limit friction from sleeves and daily washing while the outer layer heals.
-
Fragrance-free gentle body wash. Cleanses the area without stripping pigment, helpful for fine line and color pieces you want to preserve.
-
Aquaphor healing ointment. A thin layer in the first days keeps delicate linework hydrated and reduces scabbing that can pull pigment.
7. Full Sleeve Patchwork, Forearm Anchor
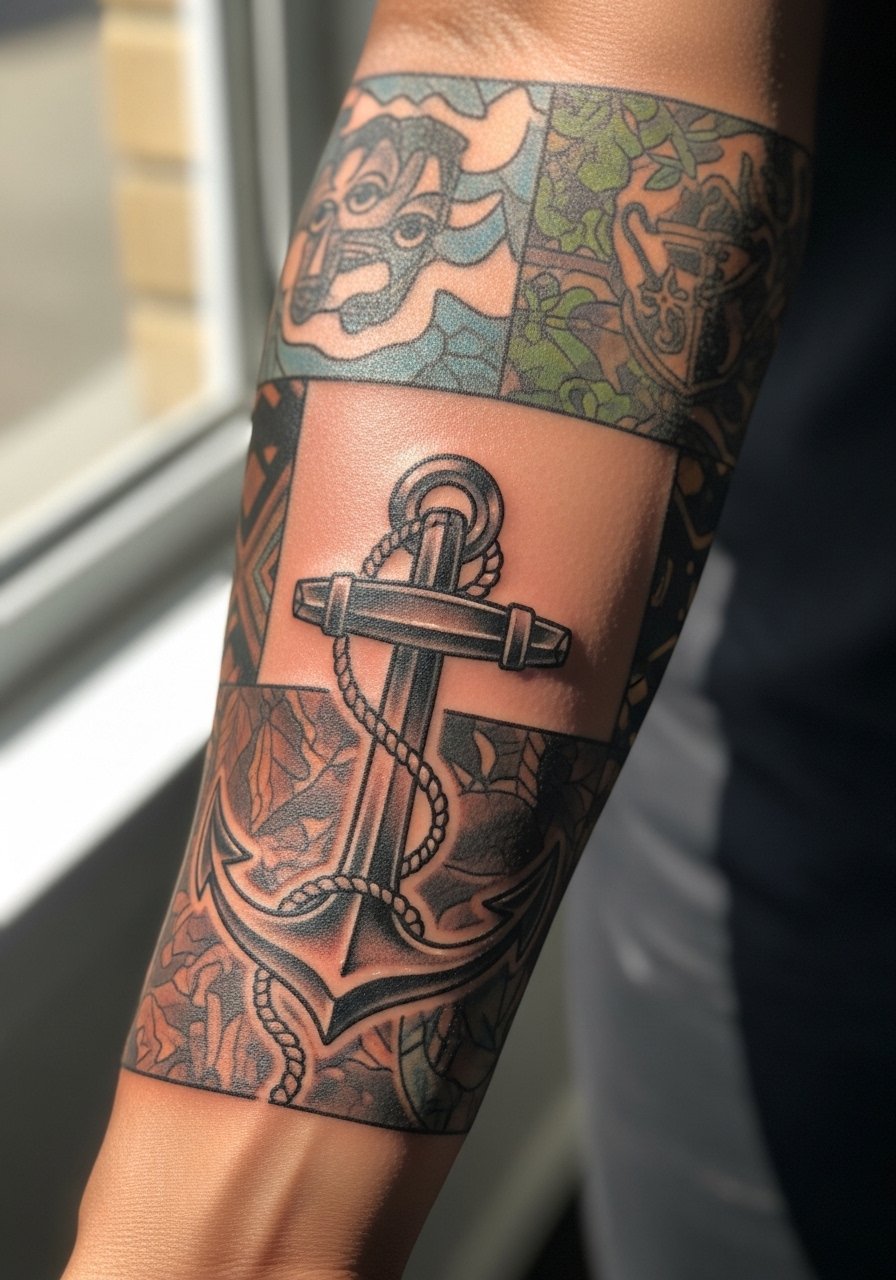
If you plan a sleeve, treat the forearm anchor as the piece that carries cohesion. Tell the artist you want the forearm design to read as the visual focal point so future additions can match the established line weight and saturation. A common mistake is building a sleeve from mismatched flash styles, which looks disjointed as the ink ages. Expect longer sessions for the forearm anchor, often two to four hours if it has color and shading. The forearm sees sun and friction so plan touch-ups along the sleeve timeline. For show-off fits, cuff a rolled sleeve denim jacket to balance coverage and reveal.
8. Dot Work Landscape Across the Inner Arm
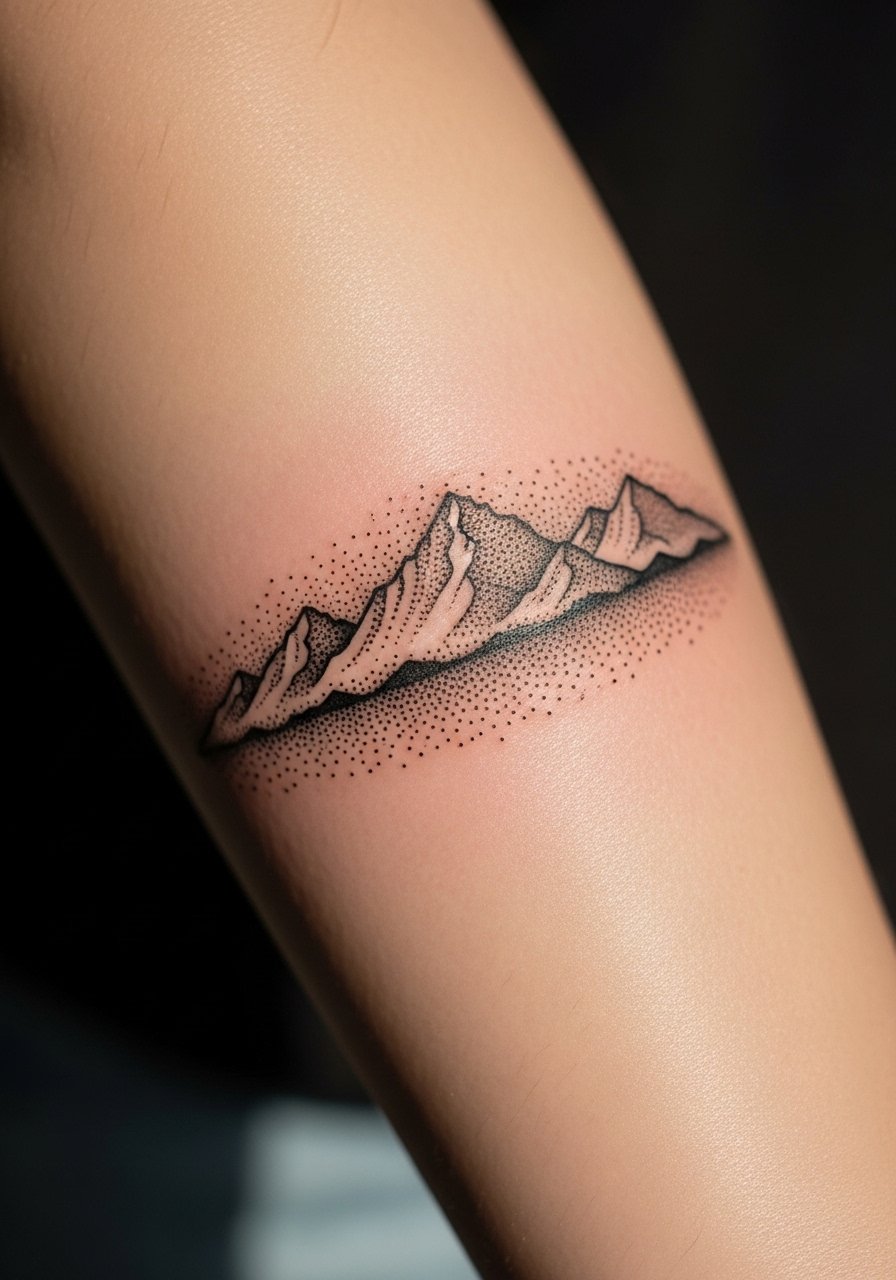
Dot work relies on spacing and consistent stipple density. In consultation ask the artist to map negative space carefully so the stippling reads as texture rather than gray blur later. The mistake is overpacking dots in tight areas. Pain is moderate on the inner arm because of thin skin, and sessions can be broken into two shorter sittings. At six months stippling keeps its texture, by two years fine dots can soften together and a touch-up refreshes separation. This style pairs with pared-back clothing so the art is visible, try a racerback tank for summer shows of contrast.
9. Japanese-Inspired Koi Flowing Along the Forearm
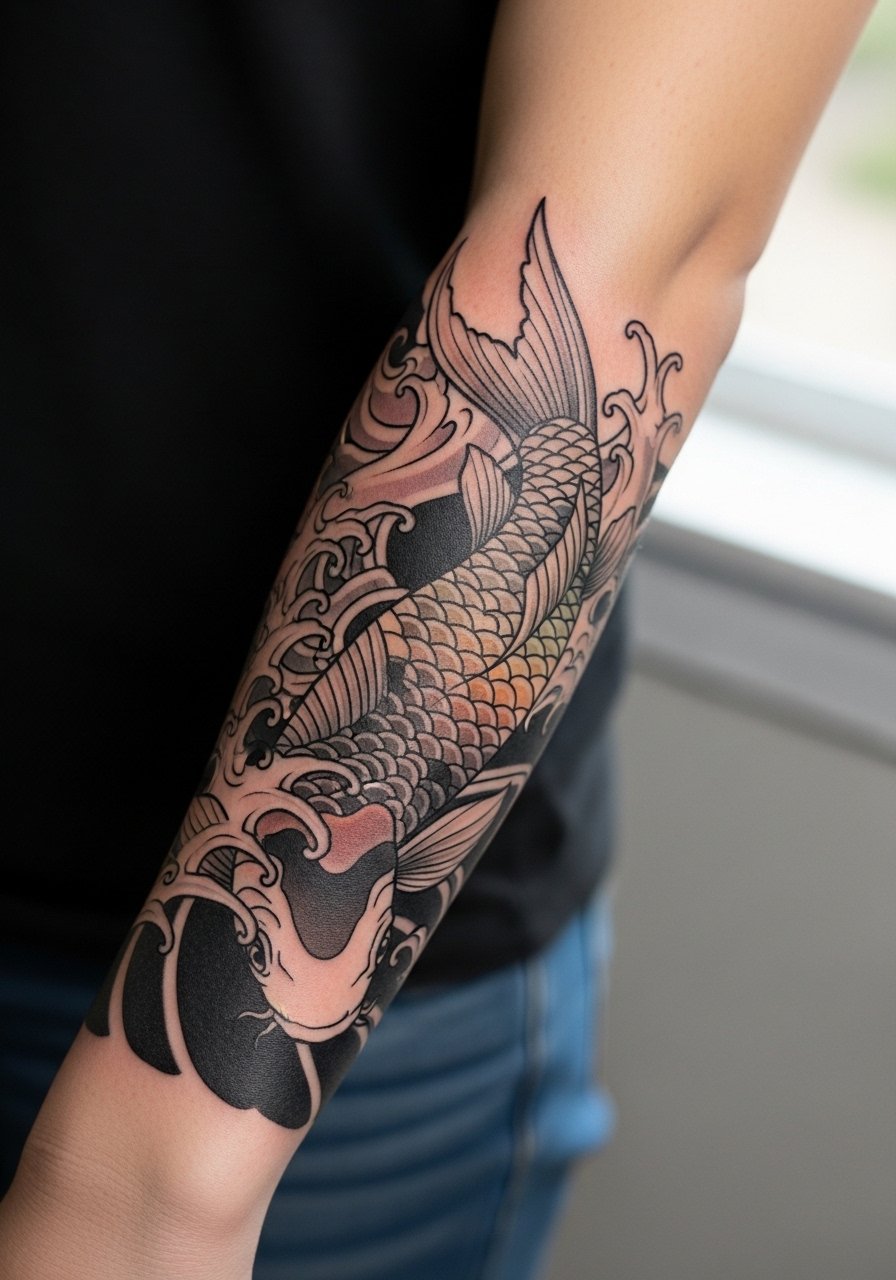
This draws from traditional motifs and deserves respect. Note that classic Japanese work has cultural weight, so many people prefer a contemporary take rather than direct copies. Tell the artist which elements matter to you, the scale you prefer, and how it should flow with the arm's natural lines. Common error is shrinking traditional compositions to a forearm size without adjusting layout, which leads to cramped imagery. Expect multi-hour sessions for color and shading. Over time the vivid color will mellow but outlines keep the composition readable. For evenings, a loose cuffed shirt shows off the koi arc without covering the main movement.
10. Chain-Link Geometric with Open Negative Space
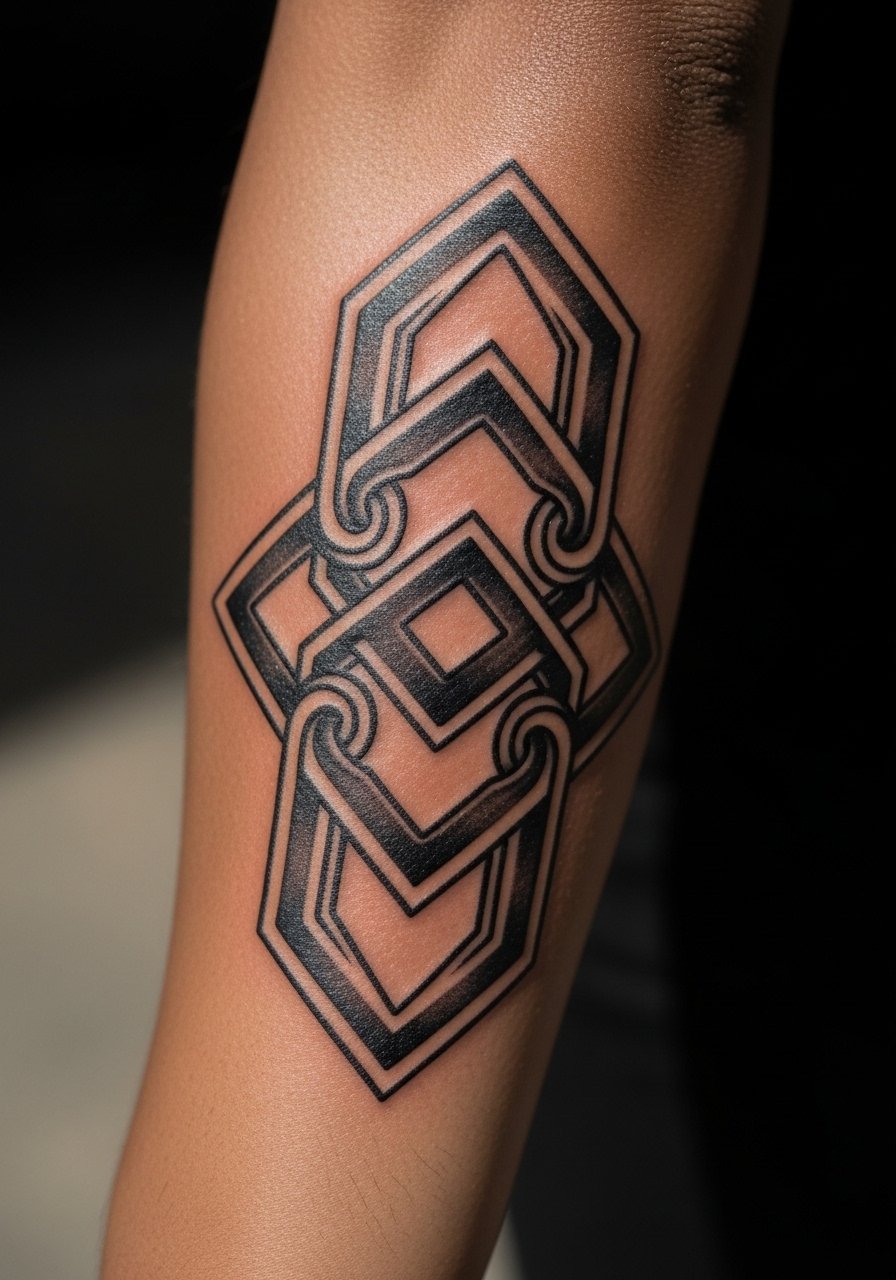
Geometric grids need breathing room. Ask the artist for modular patterns that respect wrist creases and muscle contours. A frequent mistake is forcing a perfect grid over curved anatomy, which distorts as you move. Pain is low on the forearm but the precision demands steady sessions and sometimes pauses. At two years the negative space helps the pattern resist merging. This design works with stacked accessories like thin bracelets rather than chunky cuffs.
11. Anchor and Compass Combo Near the Wrist
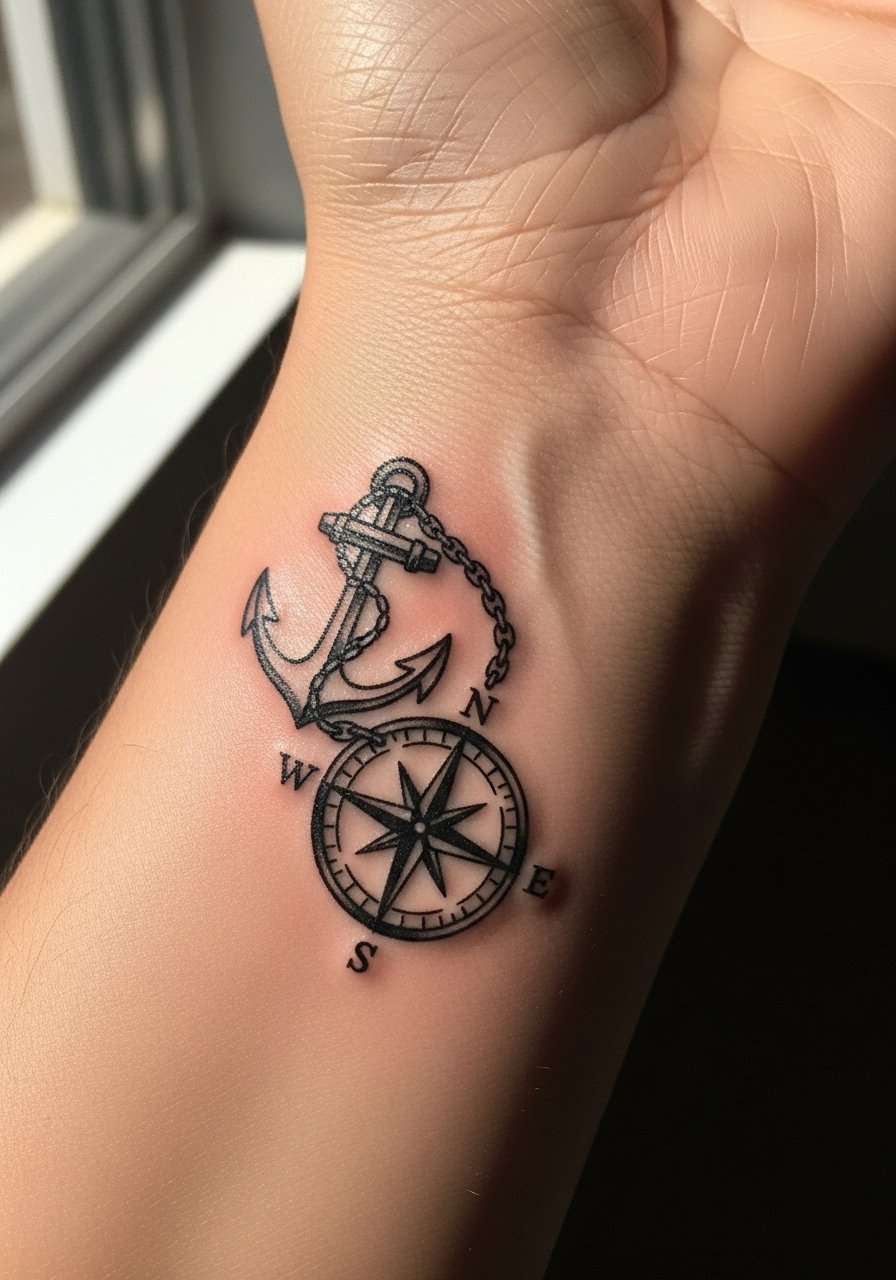
Anchors read strong when lines are bold enough to withstand wrist friction. In consultation ask for slightly thicker primary strokes around the compass points so the geometry holds as skin shifts. The typical mistake is asking for micro detail in the compass face that disappears over time. Sessions are short, often under an hour. Expect the shape to remain legible at year three with occasional touch-ups. This placement pairs with a slim leather bracelet or band to echo the nautical theme. Try a leather bracelet band to balance the wrist without covering the tattoo.
12. Minimalist Mountain Range Sleeve Accent
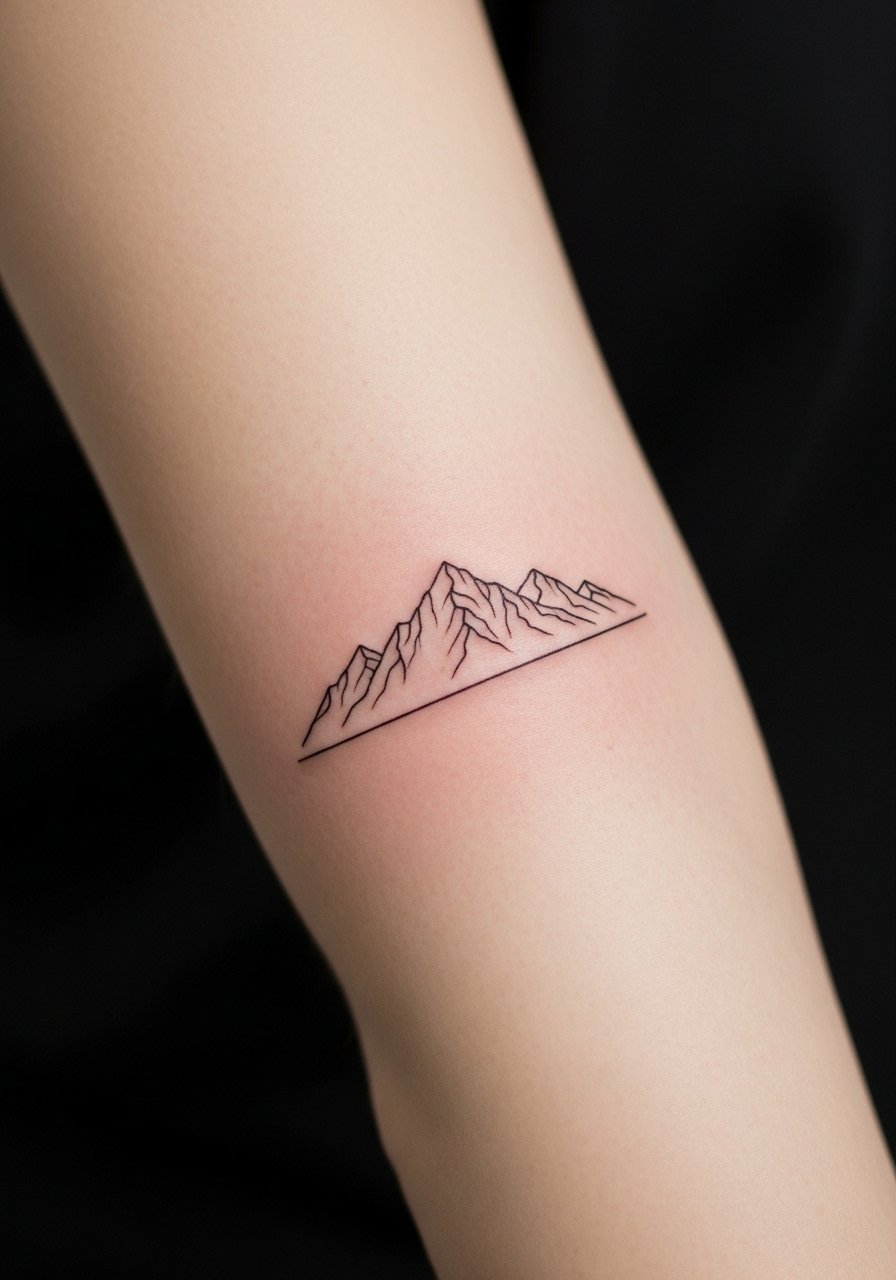
Minimalist mountains can be deceptive. The error is making the peaks so thin they lose definition after a year. Ask the artist for slightly firmer primary lines with thin interior gestures for texture. Pain is low and session time short. At six months the outline will look crisp, but by two years the thinnest strokes may soften. If you plan more landscape elements later, let this piece act as the base so additional shading can build around it. For casual wear, a short sleeve tee with rolled sleeves frames the horizon.
13. Surreal Micro-Realism Eye with Drip Shading
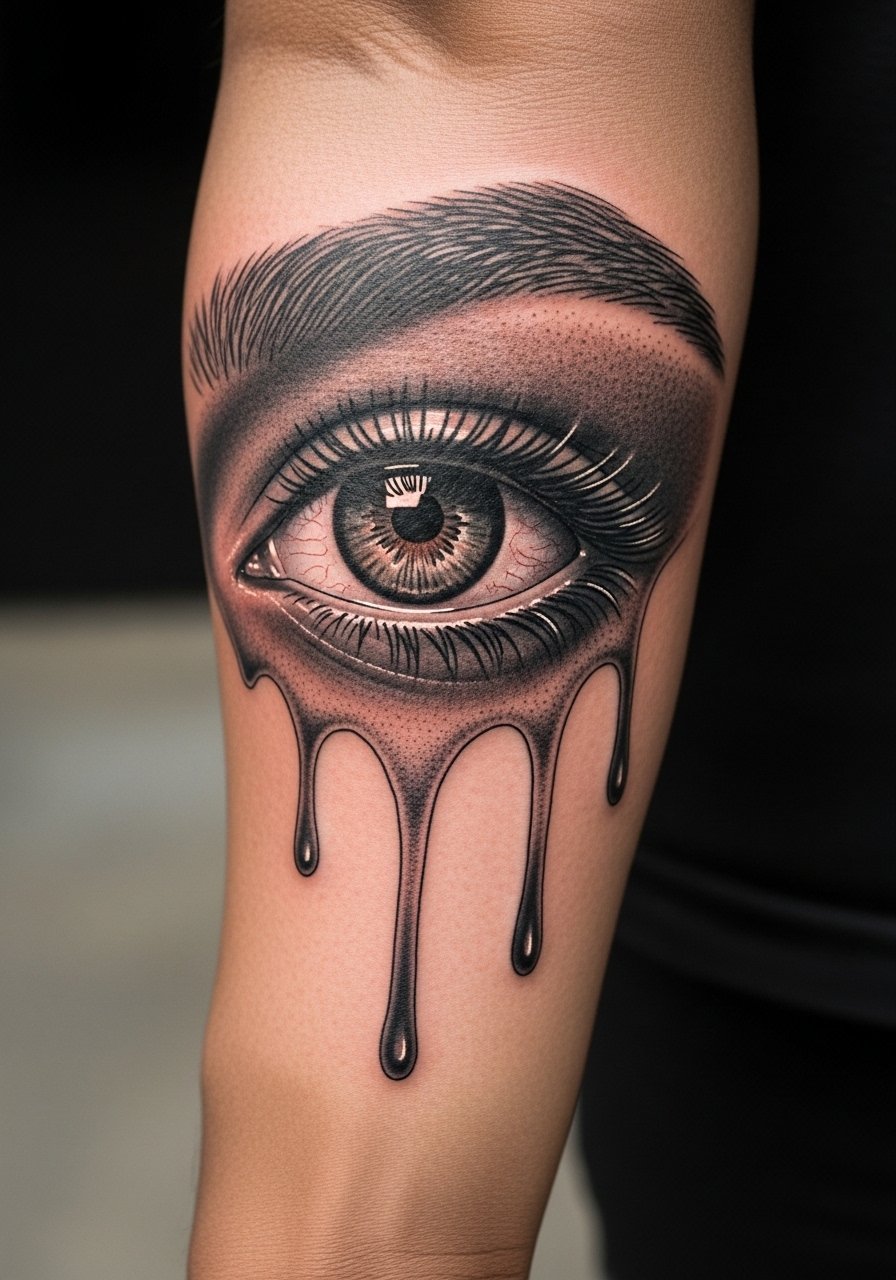
Micro-realism demands a skilled hand and honest sizing. Ask for a slightly larger scale than the image you like so the pupil and iris maintain their details after settling. The usual mistake is requesting photo accuracy at too small a size. Sessions involve careful layering of tiny needles and may be longer. Expect softening in highlights over time and an eventual touch-up to refresh contrast. For an edited look, wear a short sleeve with a subtle cuff so the eye sits just above the sleeve edge.
14. Traditional Sailor Pin-Up on the Outer Forearm
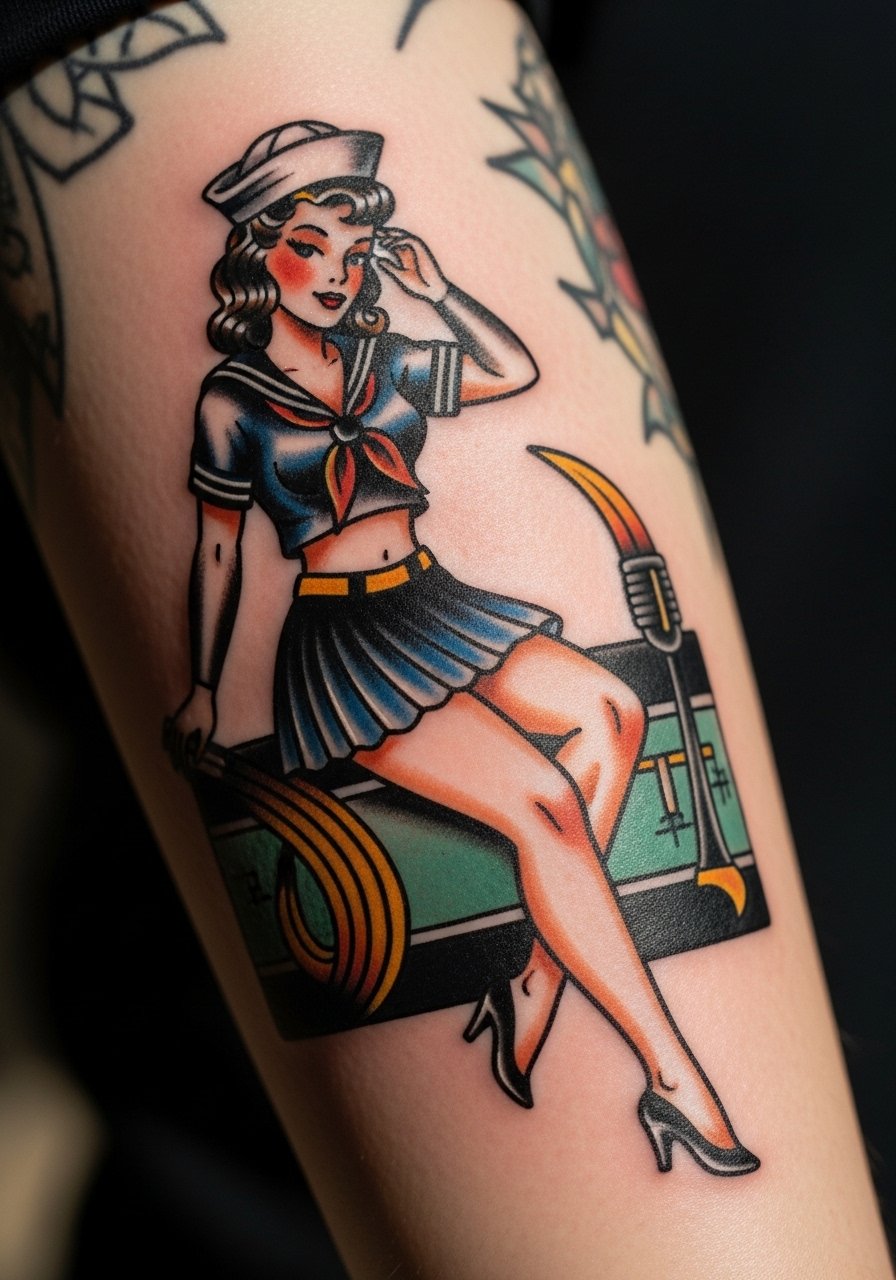
Traditional pieces age well because they rely on bold outlines and flat color. Ask the artist for classic line weight and saturated fills so the silhouette stays readable as the color ages. A typical mistake is over-softening the outlines to chase realism, which undermines the style. Sessions vary with color complexity but often complete in two to three hours. Expect the character to mellow but remain distinct for years. For a vintage vibe, cuff sleeves and wear a short sleeve button shirt that complements the color palette.
15. Scripted Quote with Illustrative Flourish
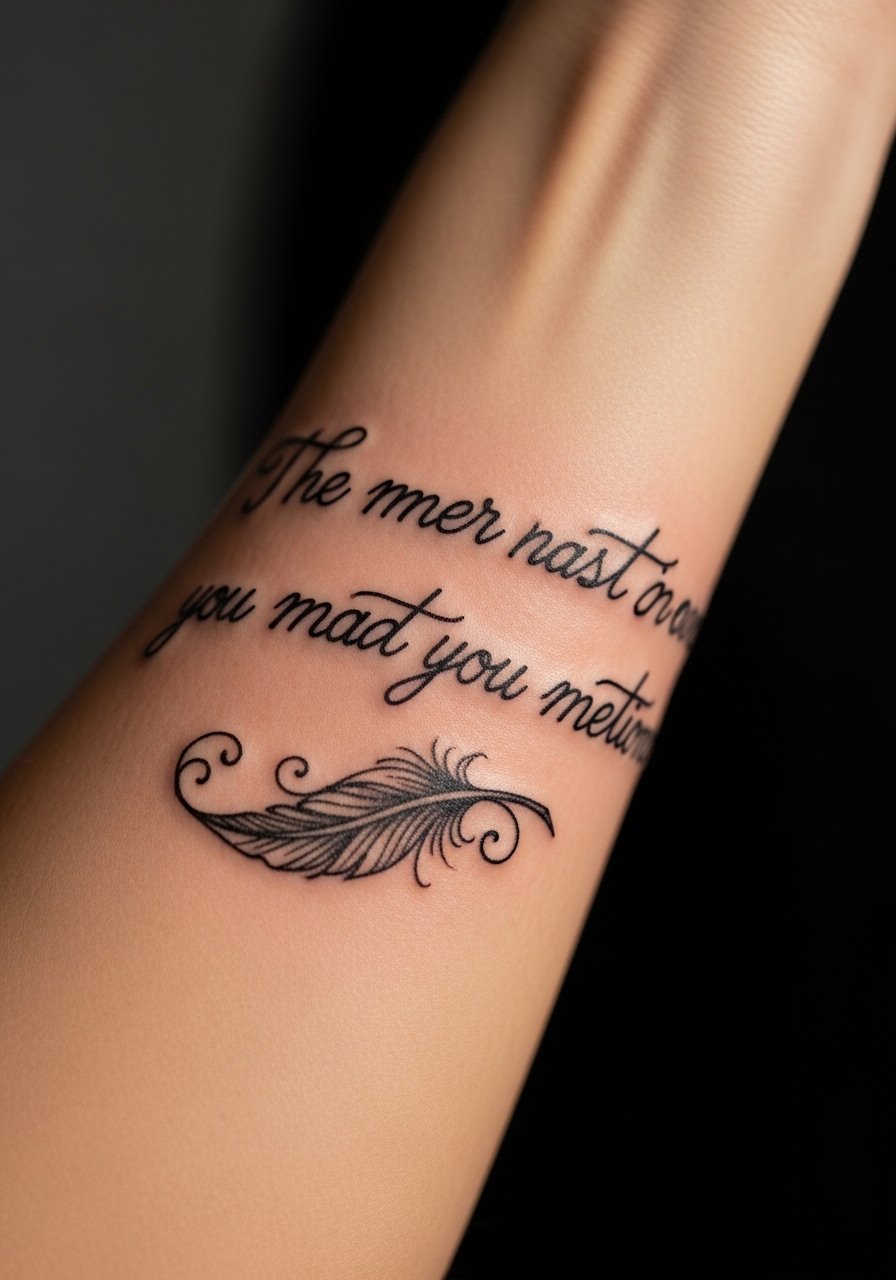
Long quotes need hierarchy. Tell the artist which words you want emphasized so they can adjust scale and weight accordingly. The mistake is making every word the same size, which becomes a line of noise after settling. Pain is moderate for long script pieces and sessions depend on length. Expect initial crispness at six months and gentle fading that may call for a touch-up if you want to preserve the exact contrast. Pair this design with a thin pendant or chain that does not sit on the script itself for evenings out.
16. Blackwork Tribal Band Reimagined for Modern Arms
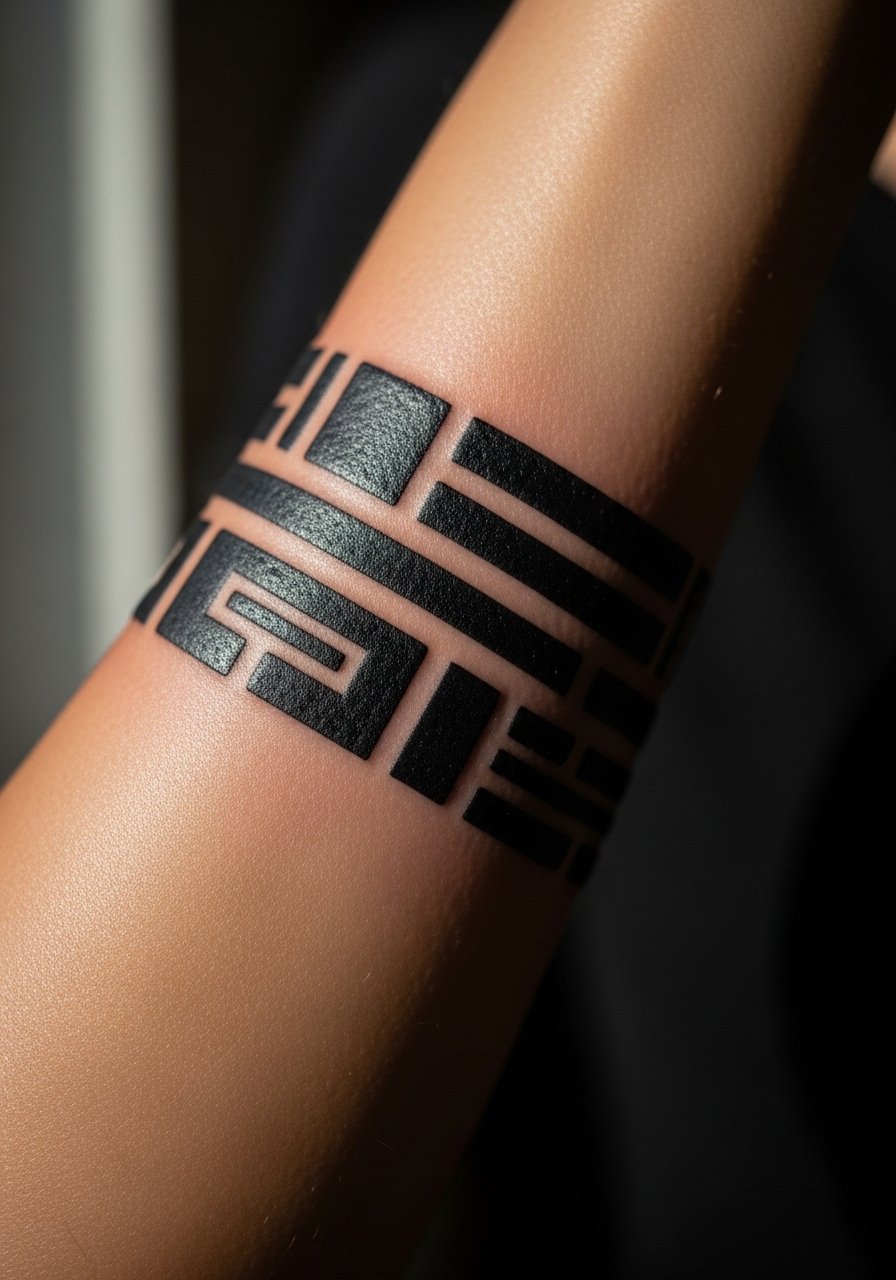
Tribal-inspired motifs are part of many histories, so consider cultural origin and avoid direct appropriation. Many people choose reinterpretations that acknowledge lineage without copying sacred motifs. In consultation discuss what elements you want adapted and why. The common mistake is picking a sacred pattern without context. For longevity ask for balanced saturation and consistent edge work. These bands hold up well with solid fills and age into bold silhouettes. For everyday style, short sleeves or cuffed shirts show the band cleanly.
17. Small Wrist-to-Forearm Constellation Path
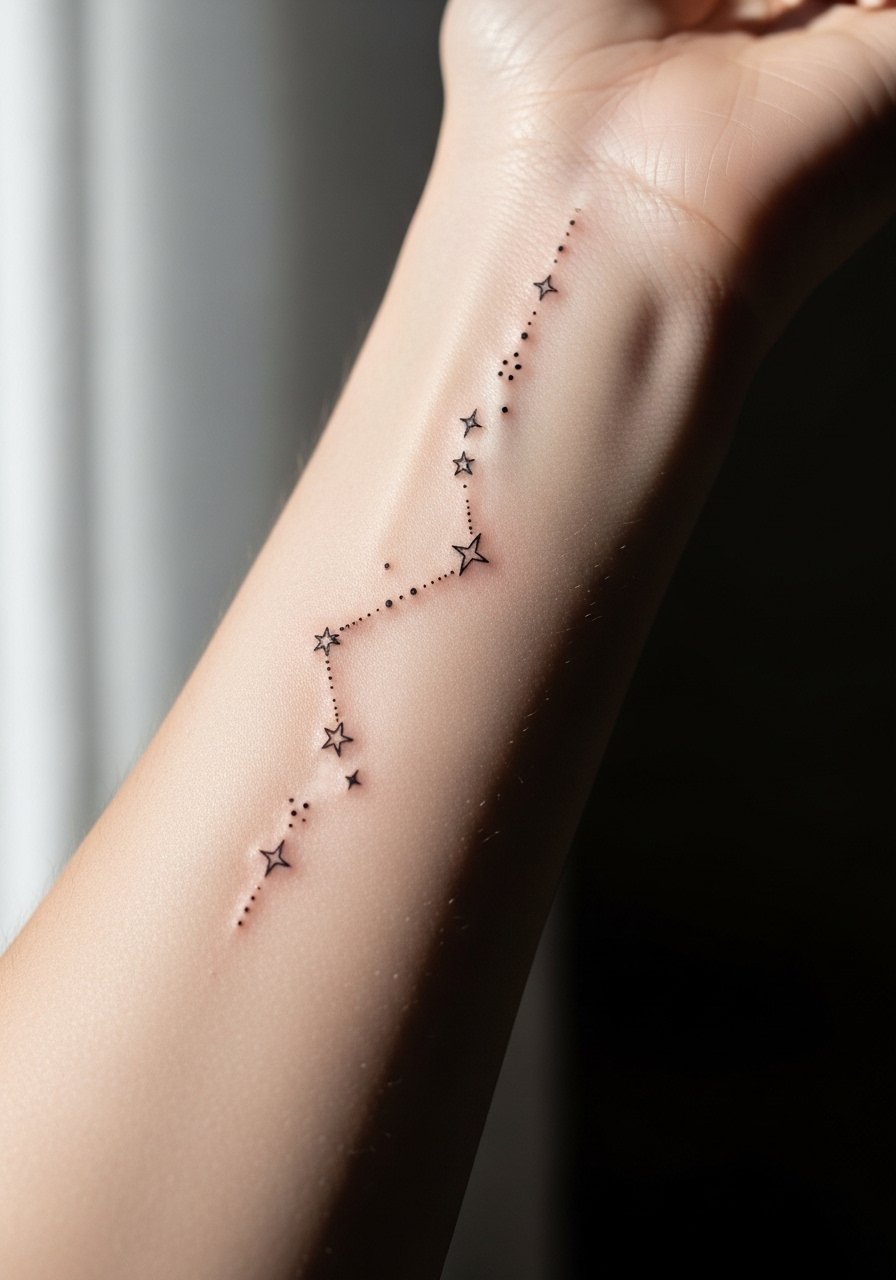
Constellation pieces are delicate and atmospheric, but require scale thought. Ask the artist to slightly increase dot size so constellations keep their separation after settling. The usual error is packing tiny dots too close, which leads to merging. Pain is low near the wrist but expect friction from watches and cuffs during healing. Touch-ups are common for tiny dots around year two. For nights out, a thin mesh bracelet shows the trail without obscuring star points. Try a thin chain bracelet to sit beside the path.
Frequently Asked Questions
Q: Will fine line forearm tattoos blur faster than bold blackwork on the same arm?
A: Fine line tends to soften sooner because thin strokes have less pigment mass. Bold blackwork stores more pigment so it usually maintains a graphic read longer. Placement, sun exposure, and how the lines were spaced all matter, so discuss touch-up timelines in your consultation.
Q: How should I prepare clothing-wise for a forearm session with color and shading?
A: Wear a short sleeve or a loose button-down you can pull aside so the artist has unobstructed access. For sleeves that wrap the arm, a tank top that allows the forearm to lay flat makes shading easier. A loose button-down shirt often hits the right balance.
Q: Are geometric mandalas safe on the inner forearm given the creases and movement?
A: They can work well but need extra spacing and slightly bolder primary lines. One camp thinks dense geometry fails on creased skin, the other says correct spacing and needle depth prevent merging. Ask your artist where they draw that line and request adjusted spacing if the piece crosses creased zones.
Q: How often should I plan touch-ups for small wrist pieces like scripts or tiny portraits?
A: For small wrist work plan to check the piece at year two to three. Tiny details and constant friction zones often need touch-ups earlier than larger, saturated pieces. Keep expectations realistic about the difference between a small refresh and a full rework.
Q: Does tattoo placement on the forearm affect job prospects or visibility concerns?
A: Forearm tattoos are visible but more accepted now in many fields. Some industries remain conservative. If you work in a setting with strict dress codes, think about placement closer to the inner forearm or lower forearm so it can be covered with long sleeves when needed.
