
Fine line Soul Eater references are all over feeds, but the tattoos that still look sharp years later tend to be the ones that sized up, used bold linework where skin moves, and matched the style to the placement. Fans complain about wrist smudging, ghosted consults, and anime pieces that look cartoony. The list below pairs 27 sketch ideas with real-world advice so you pick a version that heals into something you still want in five years.
1. Neo-Traditional Sun and Moon Duo on the Forearm
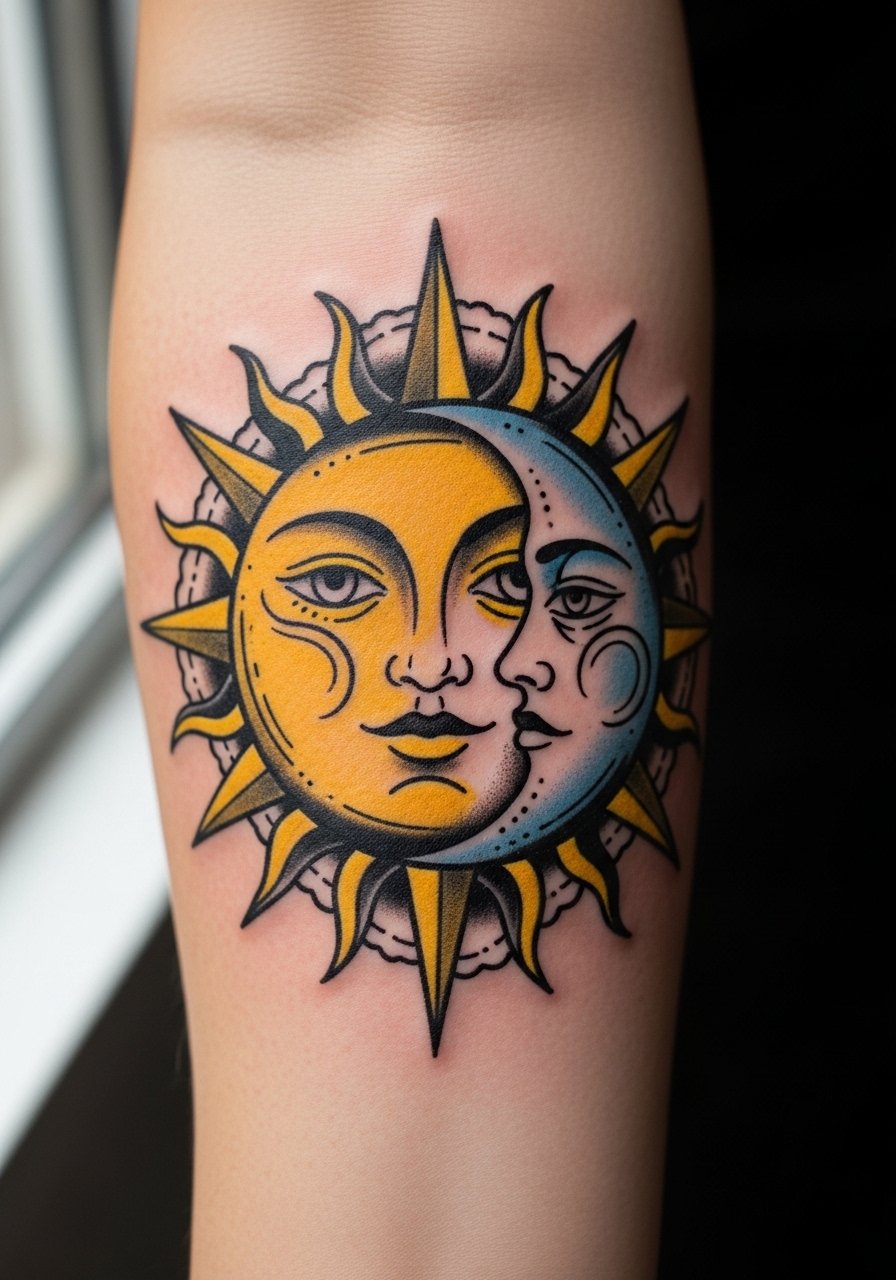
I recommend this for a forearm placement because the arm gives room for the grin detail and prevents small lines from merging. Tell your artist you want bold linework around the grin and slightly larger negative space between teeth so the expression stays crisp after healing. Common mistake is requesting micro detail in a 2-inch piece; size it to at least four inches for longevity. Session feels like steady vibration but not extreme pain. For showing it off, roll up a rolled sleeve graphic tee so the design sits in the open without competing fabrics.
2. Fine Line Moon Mini Behind the Ear
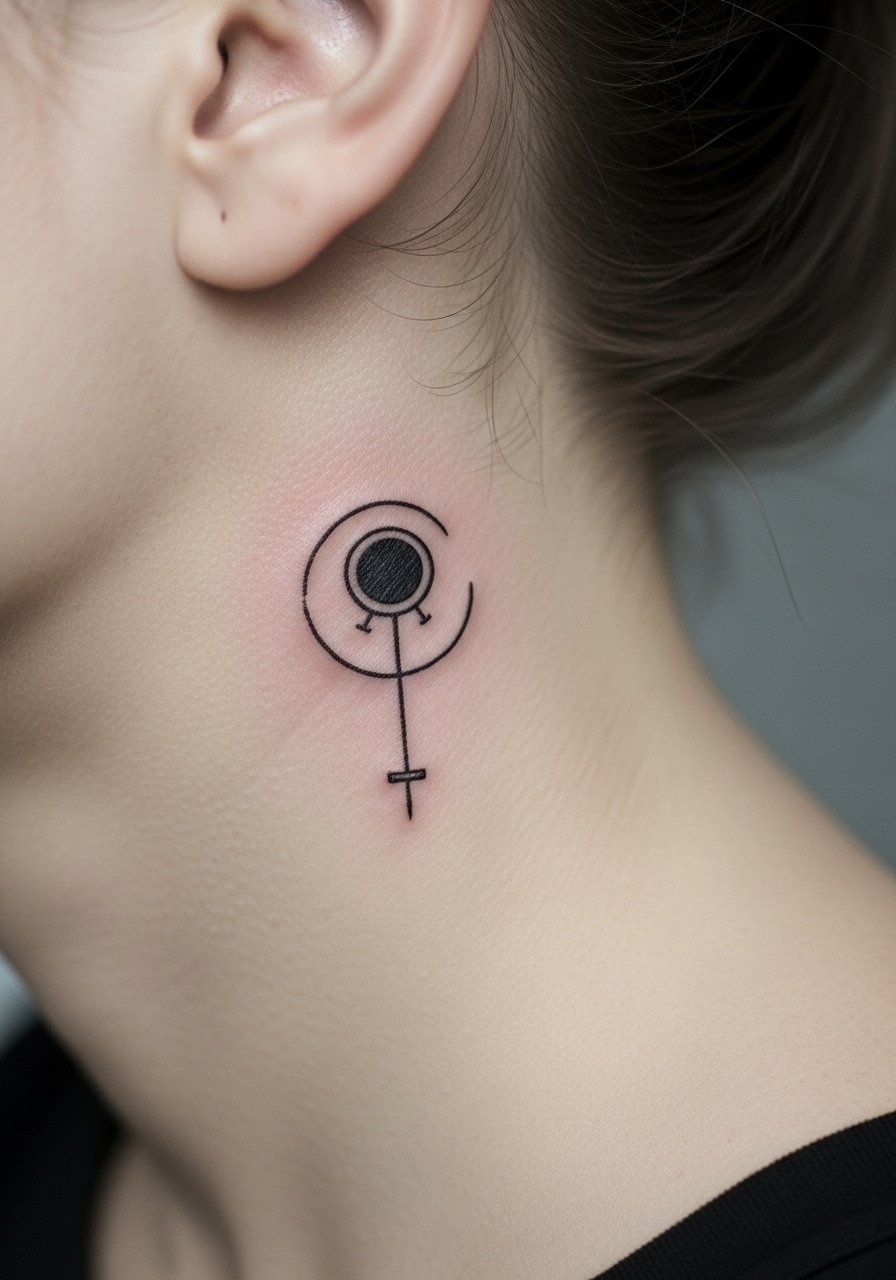
This micro moon works as a daily subtle nod to the series. Ask for single-needle work with slightly softened edges so the tiny crescent does not become a smudge after a year. A common version that ages poorly uses hairline-thin strokes that disappear; the fix is slight bolding of the contour. Healing here is fast but tricky if hair rubs against the area, so plan for careful shampooing for the first week. Behind-ear placements require an artist experienced with small-scale facial-adjacent work because of the curvature and sensitive skin.
3. Traditional Sun Solo on the Calf
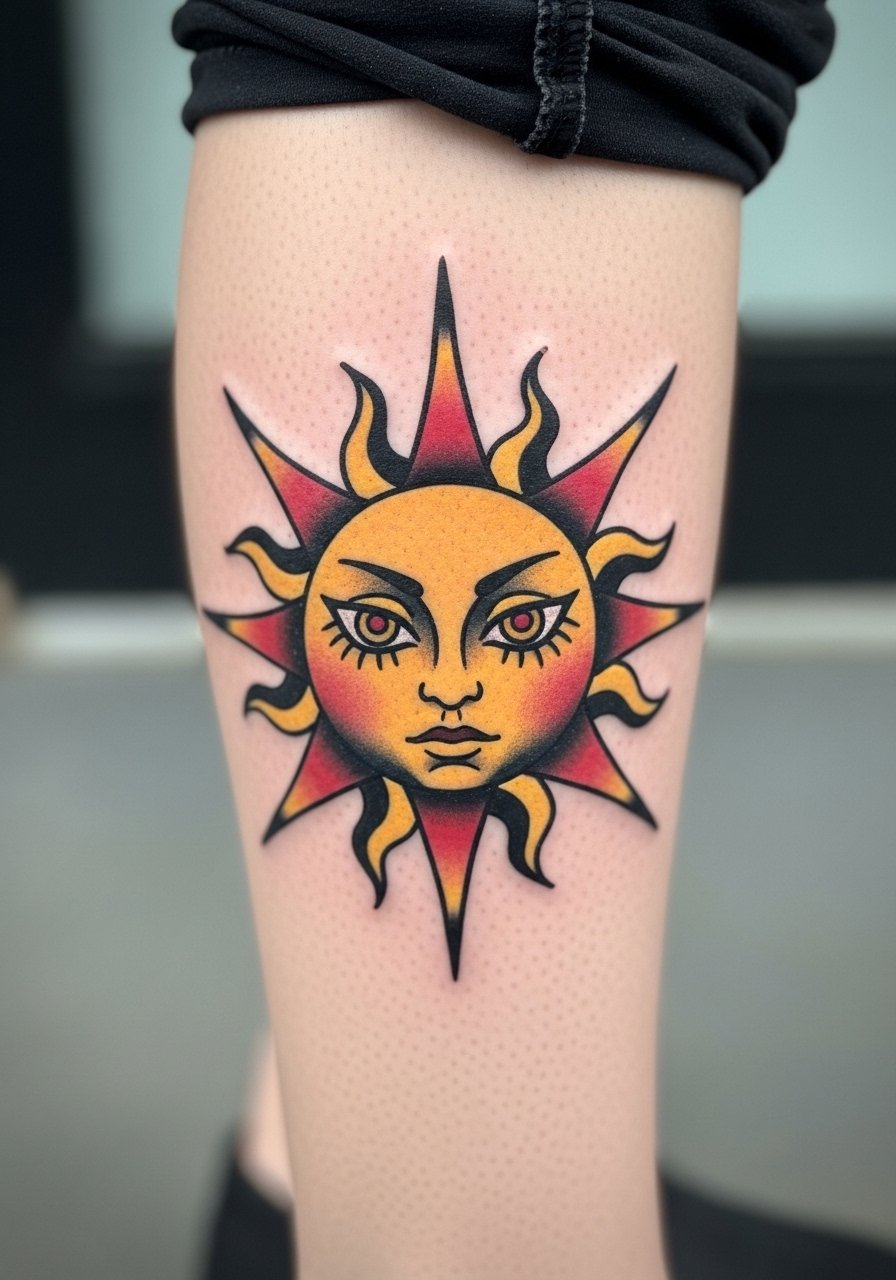
Calf pieces age well because they avoid constant friction and sun exposure. For the manic grin, ask for strong saturation and contrast so the yellows hold up without turning muddy. A frequent mistake is too little black around color fields, which makes color bleed appear early. Sessions are usually comfortable with the leg supported and last one to two hours. For summer visibility, pair the piece with slim athletic shorts that hit above the design so it reads when you walk.
4. Blackwork Professor Stein Screw Motif on the Forearm
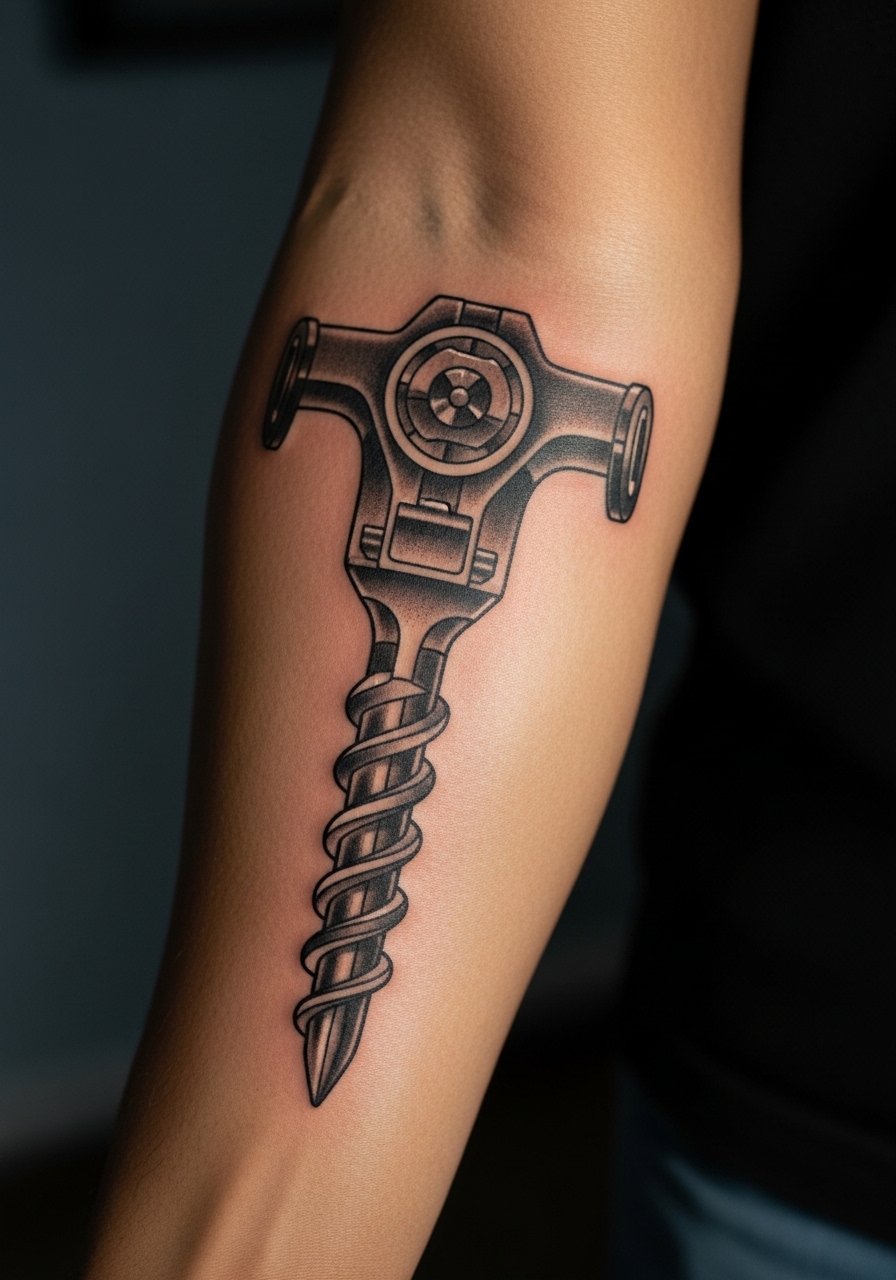
This compact blackwork motif channels the character's madness without portraiture. In consultation say you want dense black fills with a little stippling rather than delicate hairlines so the screw stays readable. Artists debate fine line on areas that flex, and this is one of those spots, so avoid asking for single-needle detail here. The piece usually takes one session and can be paired with nearby linework later. Forearm placements risk minor blowout if the needle is too shallow, so confirm the artist's blackwork portfolio during booking.
5. Crona and Ragnarok Abstract on the Thigh
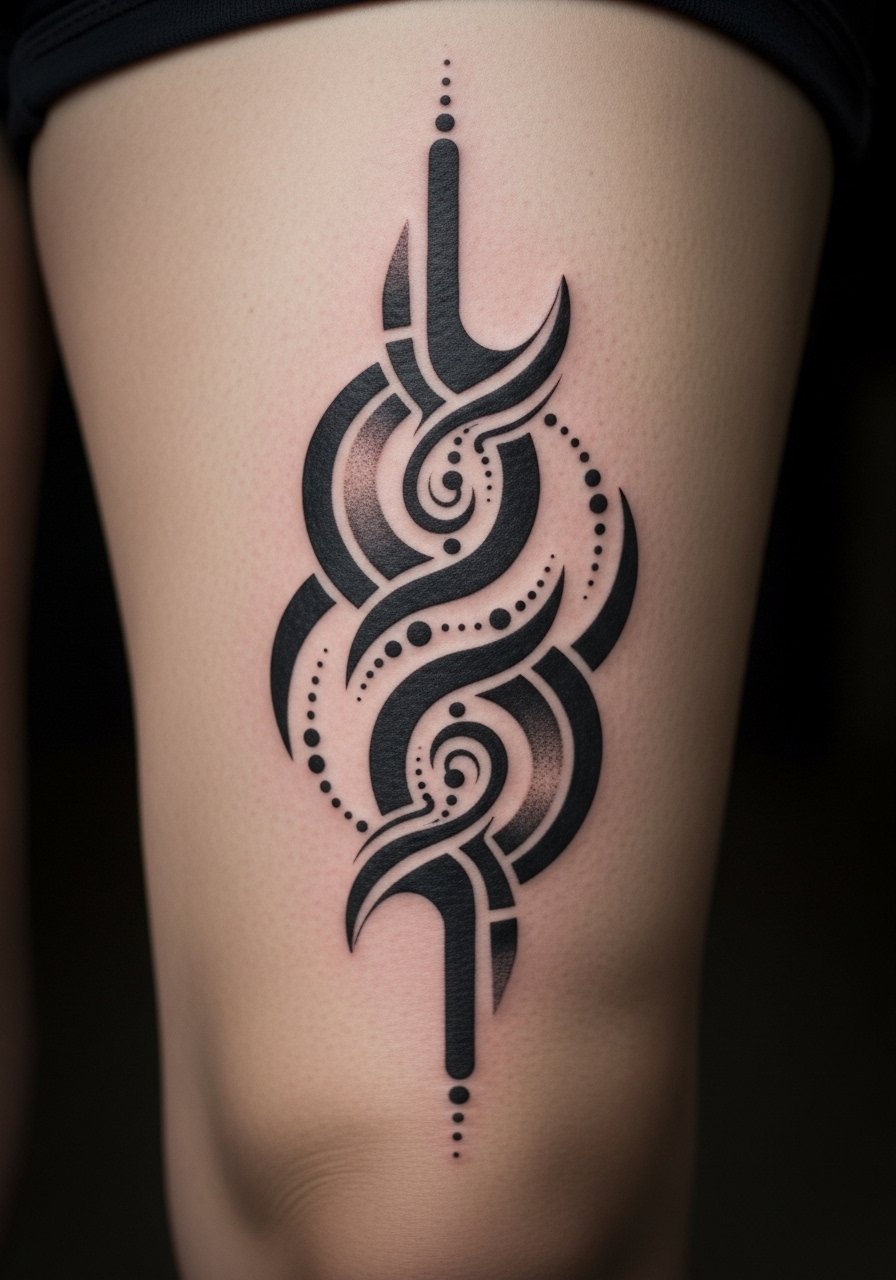
Thigh canvas lets you go abstract and maintain anonymity when needed. Ask for a pattern-driven sketch that hints at the characters rather than a direct copy, which keeps the design mature and avoids a kiddie look. A common version that heals oddly packs too much micro detail into a small area; scale the design to at least five inches with breathing room. Two sessions are normal for layered shading. For summer wear, high-waisted shorts frame this placement; try high waisted athletic shorts so the art peeks when you want it to.
6. Neo-Traditional Skull with Wings on the Shoulder
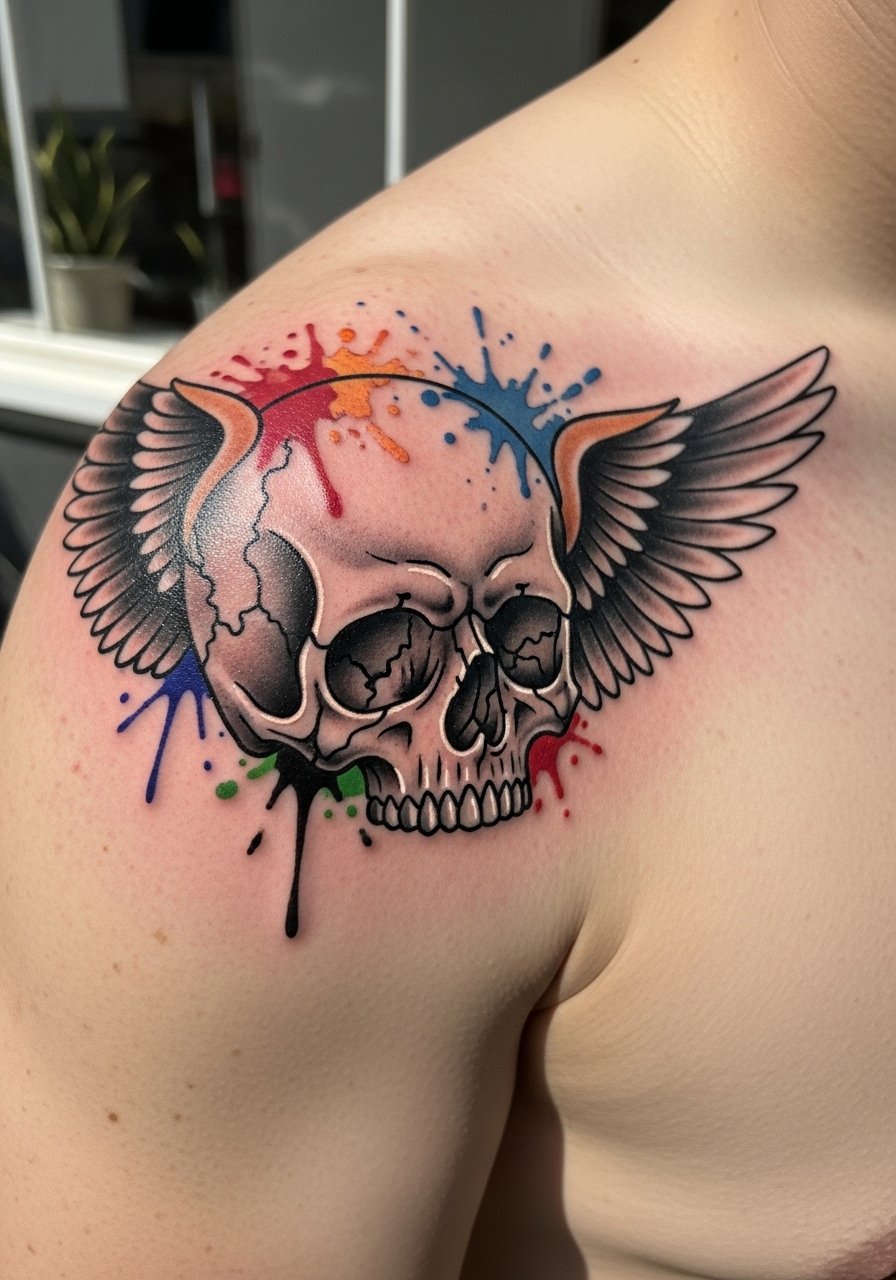
Shoulder pieces are forgiving and sit well under shirts for work days. Request bold outlines and selective color splashes so the wings keep their shape as the skin moves. A mistake is overfilling the feather details too small, which blends with time. The session is arm-access-friendly and usually one to two hours. Wear a off shoulder crop top or a wide-strap tank to show the design without rubbing the fresh ink during the first week.
Studio Day Picks
The wrist, forearm, and calf pieces above need slightly different prep than full-back scenes, so these picks smooth the session and the first week.
- Tea tree saline soak packets. Gentle antiseptic soaks are handy for thigh and calf work that sits under clothing and risks trapped moisture during the first three days.
- Japanese rice bran balm. A light, fast-absorbing balm keeps watercolor tones from looking shiny while the tattoo closes.
- Manuka honey wound patches. Small patches help avoid friction on inner thigh or ribcage pieces that rub clothing.
- H2Ocean Aftercare Spray. A light spray works well on fine line forearm and wrist tattoos to keep them clean without a thick coating.
- Fragrance free gentle body wash. Use this for showers the first two weeks so delicate linework does not get irritated by scented products.
7. Death Scythe Blade Outline on the Wrist
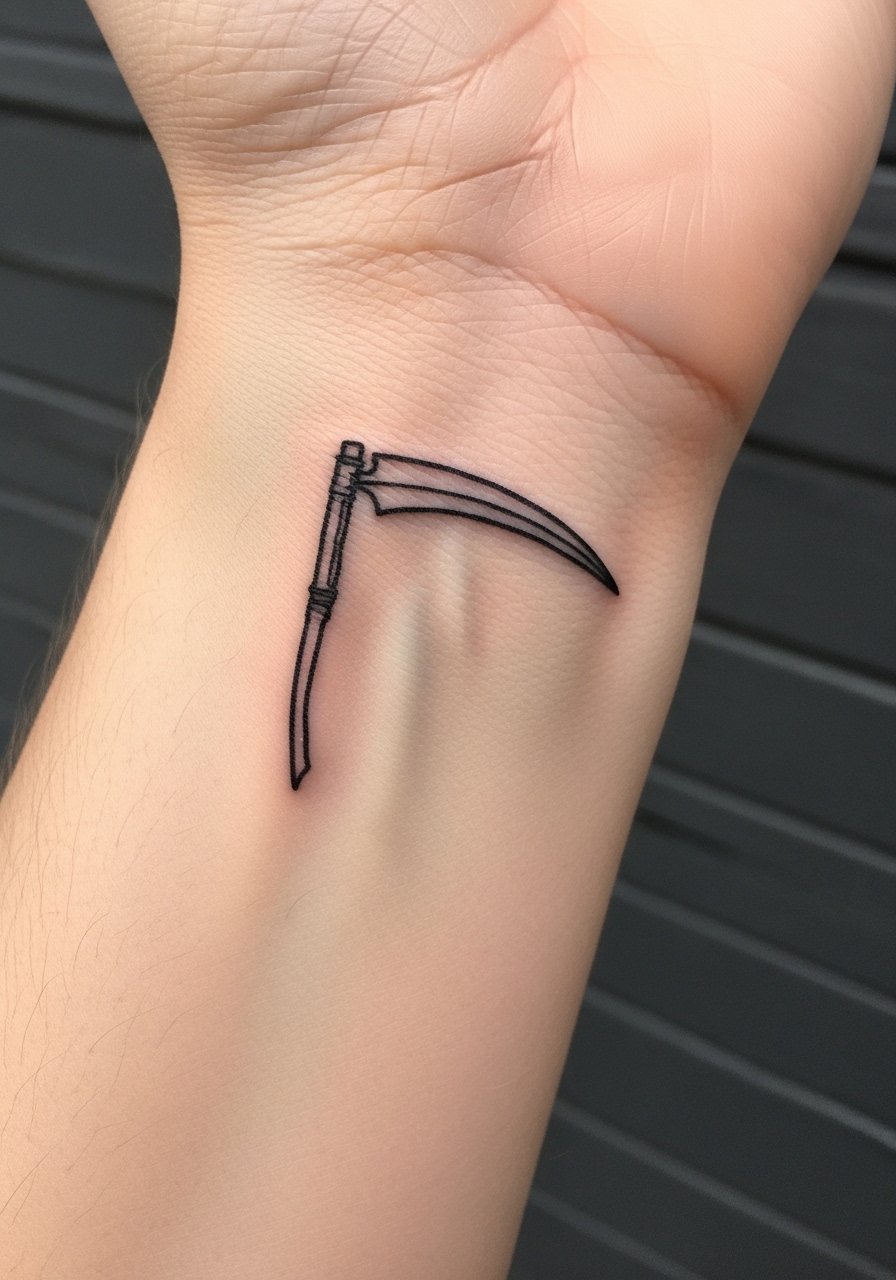
Wrist outlines are visible but they live in a high-friction zone. Size this to at least 3 inches and ask for slightly thicker line weight than a typical micro tattoo to avoid early blurring. The usual mistake is asking for a hairline blade that turns into a grey smudge at six months. Sessions are quick but sensitive because of nerves near the wrist. Pair the finished tattoo with a thin leather cuff bracelet on the opposite wrist to balance the look without covering the ink.
8. Minimal Soul Eater Logo Near the Collarbone
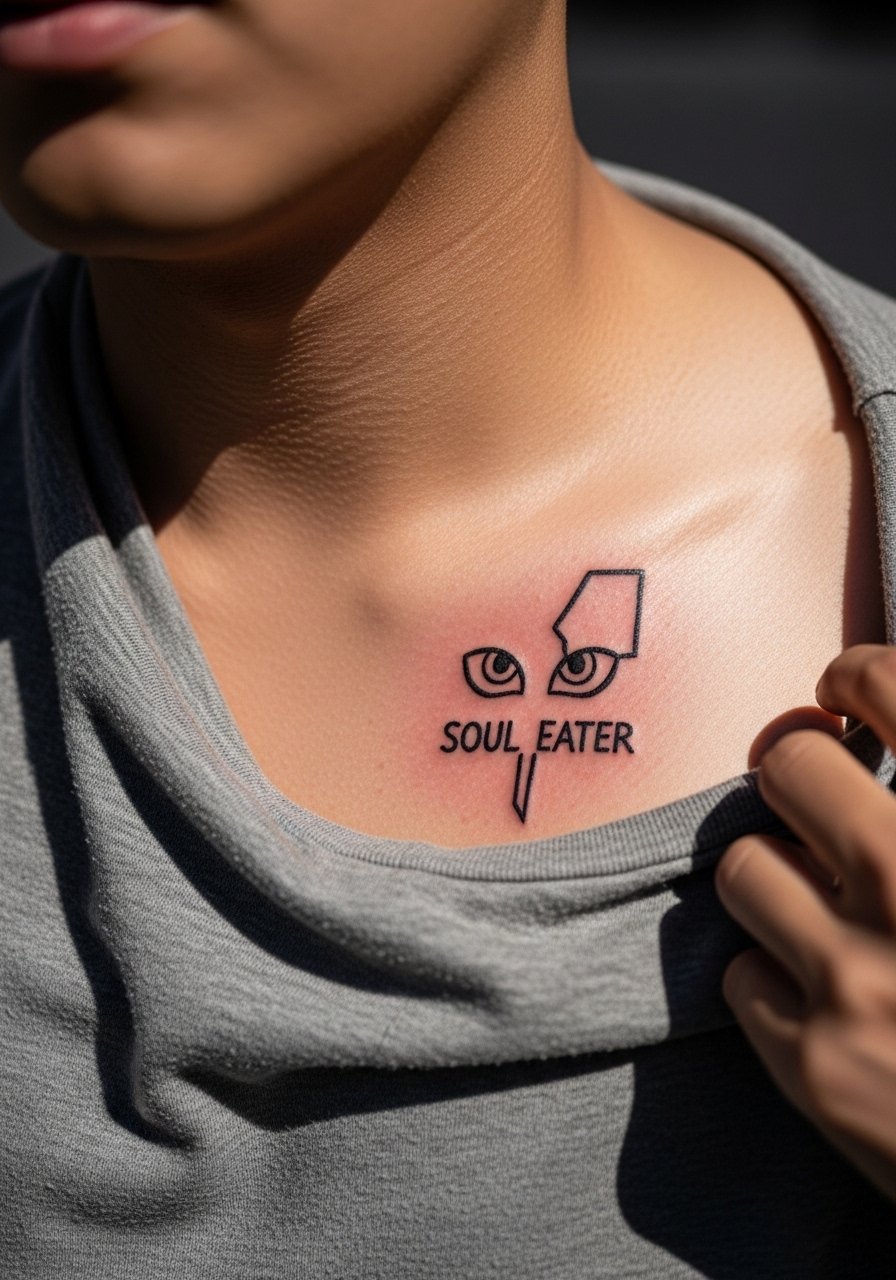
A collarbone logo is a subtle fan nod that can read like jewelry. Ask for micro spacing between the eye motifs and a touch-up plan at six months to preserve crispness. Fine-line logos fade fastest when placed too close to clothing seams or necklaces, so tell your artist where belts, straps, or necklaces sit. Pain on the upper chest can be moderate. Since this sits near clothing, plan a week of loose tops to avoid rubbing during healing.
9. Watercolor Soul Eater Scene on the Upper Arm
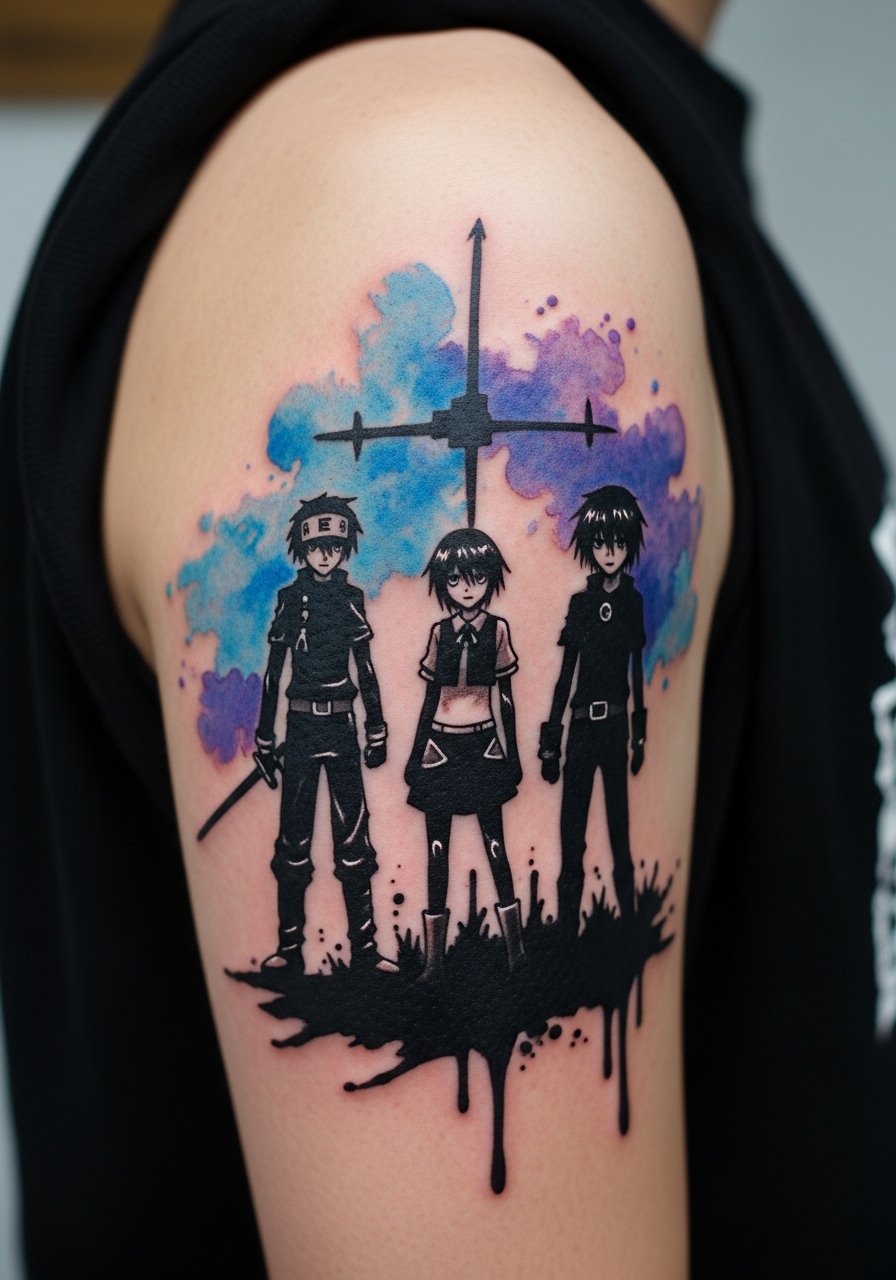
Large watercolor scenes read ethereal on the upper arm but need careful saturation planning. Watercolor tends to soften with time, so ask for backup black outlines where key shapes must remain readable. The common trade-off is stunning fresh photos that drift toward pastel over a couple of years. Plan for two sessions for layering and a possible touch-up at a year. For showing off, sleeveless muscle tees are ideal; try a sleeveless muscle tee so the color can breathe in daylight.
10. Tribal Soul Eater Mask Reinterpretation on the Calf
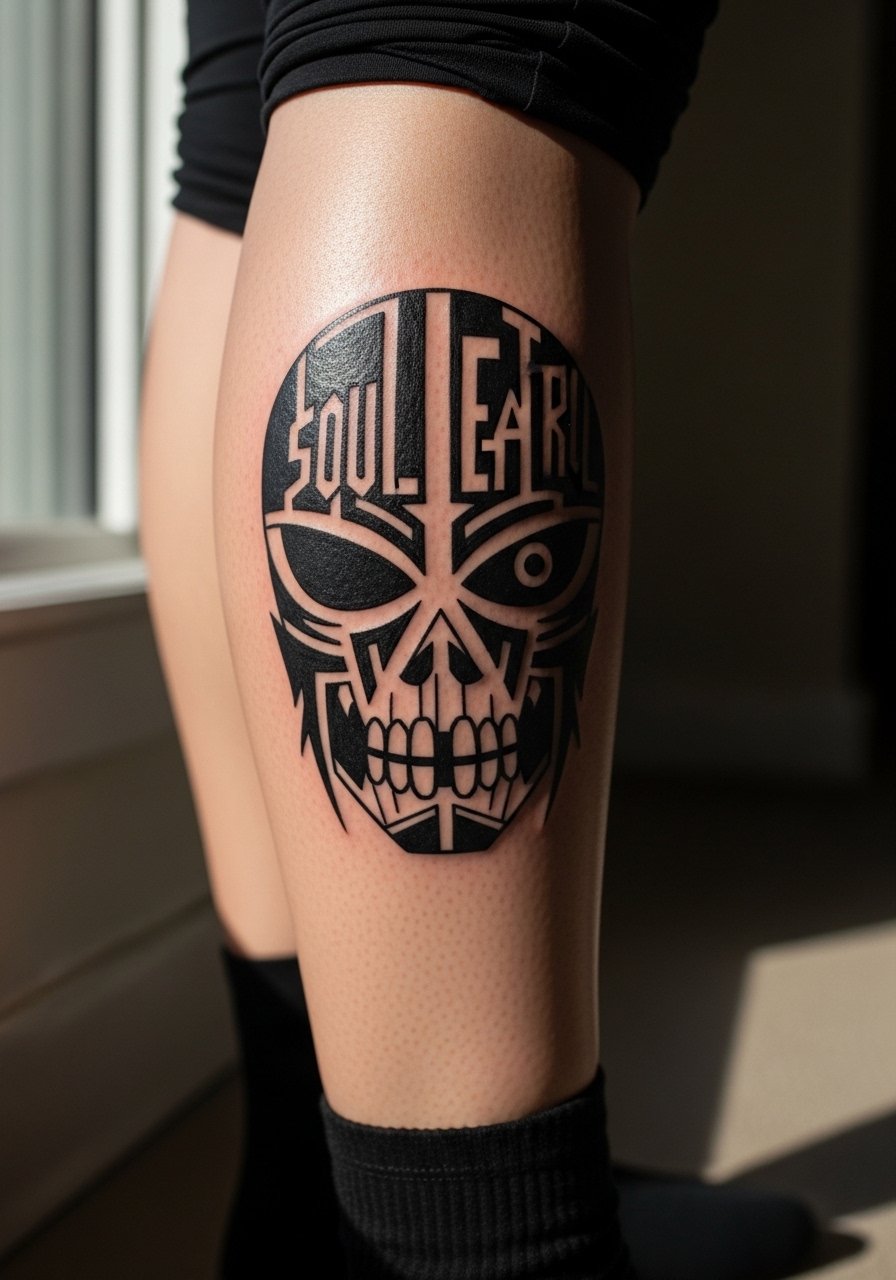
This geometric reinterpretation benefits from the calf because the shape follows the leg curve and resists constant abrasion. Tell your artist you want bold negative space and even line saturation to retain the mask's geometry over time. A mistake is overcomplicating the inner patterns at a medium size, which then merges. Sessions often require two passes for solid blacks. Wear cropped joggers or cropped jogger pants to show off the lower-leg placement once healed.
11. Dotwork Death the Kid Symmetry Across Both Forearms
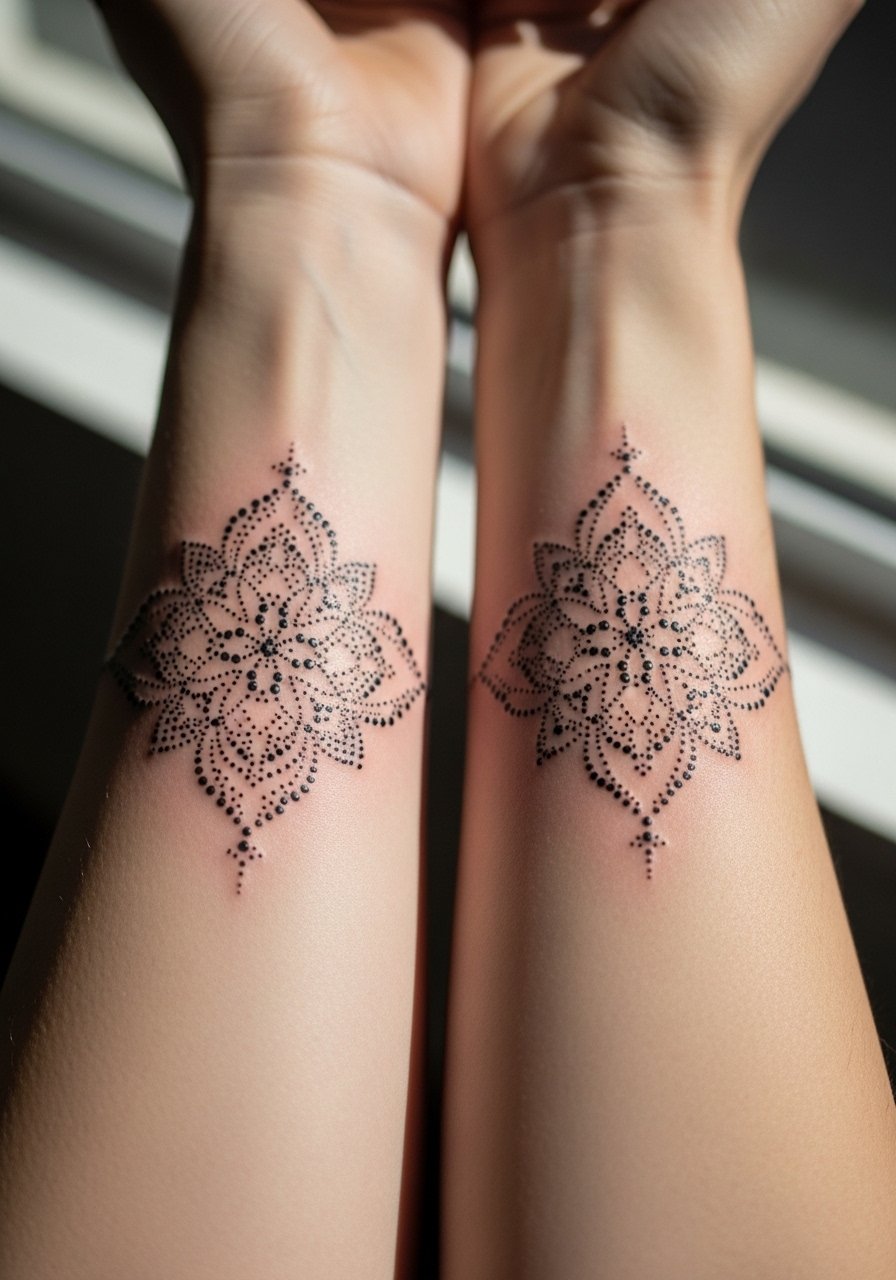
Symmetrical dotwork requires precision and measurement during the stencil stage. Ask your artist to measure and mark the midline several times before tattooing so both arms match. The common error is trusting a quick mirror placement; insist on layout proofs. Dotwork can look beautiful at two years if spaced properly, but expect two sessions for both forearms. Paired forearms read well when you roll sleeves and add a chunky silver chain bracelet on the opposite arm for balance.
12. Custom Apprentice Soul Eater Figure on the Forearm
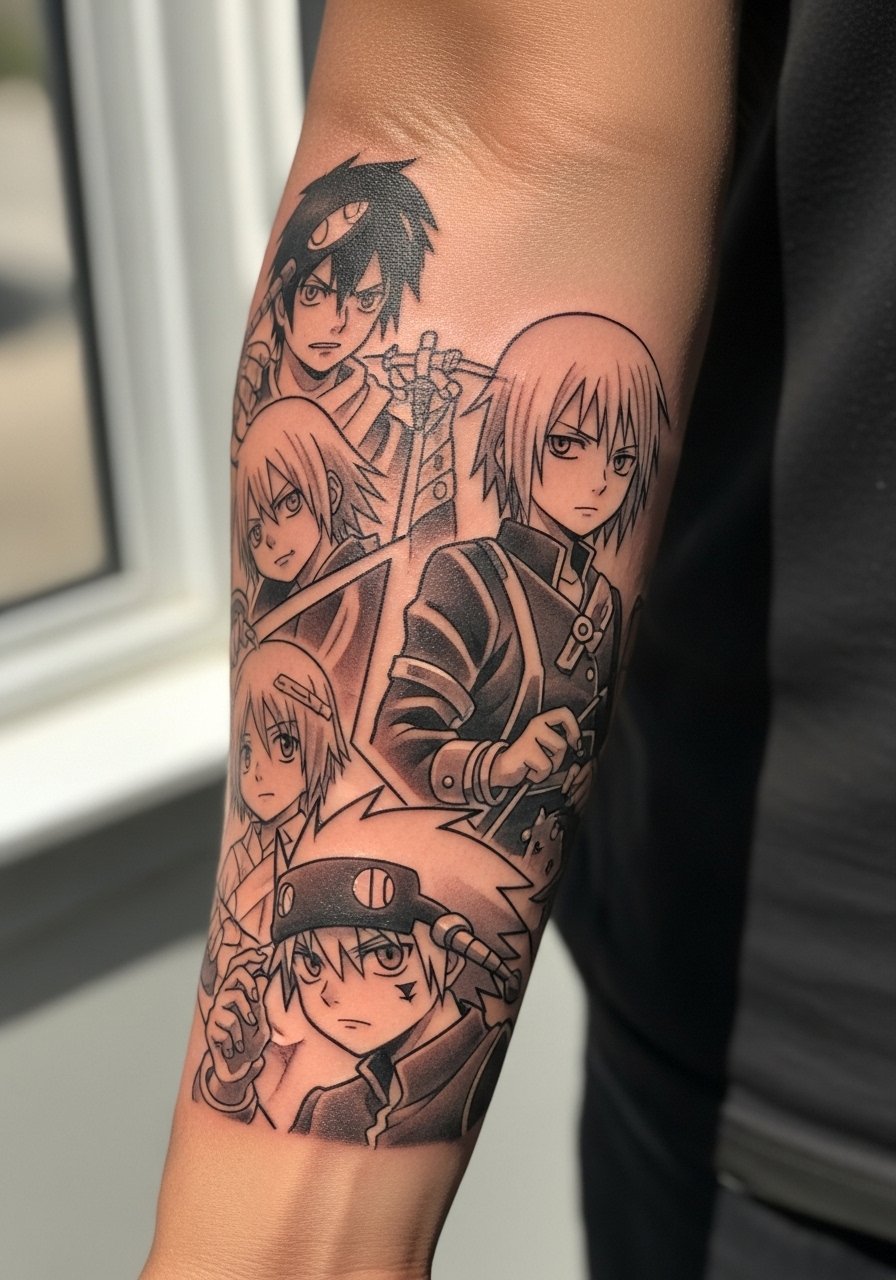
Custom apprenticeship pieces let you tweak character poses and clothing so the result feels unique. During consult bring notes about which facial features or costume elements you want emphasized and whether you prefer black and gray over color. A real mistake is expecting a first-draft sketch to be final without requesting revisions; ask for iterative sketches. Forearm placement can soften with heavy daily sun, so plan for a touch-up at six months if fine shading is essential. If booking an apprentice, use booking platforms with deposit features to avoid no-shows.
13. Symmetrical Collarbone Pair for Meister-Weapon Duality
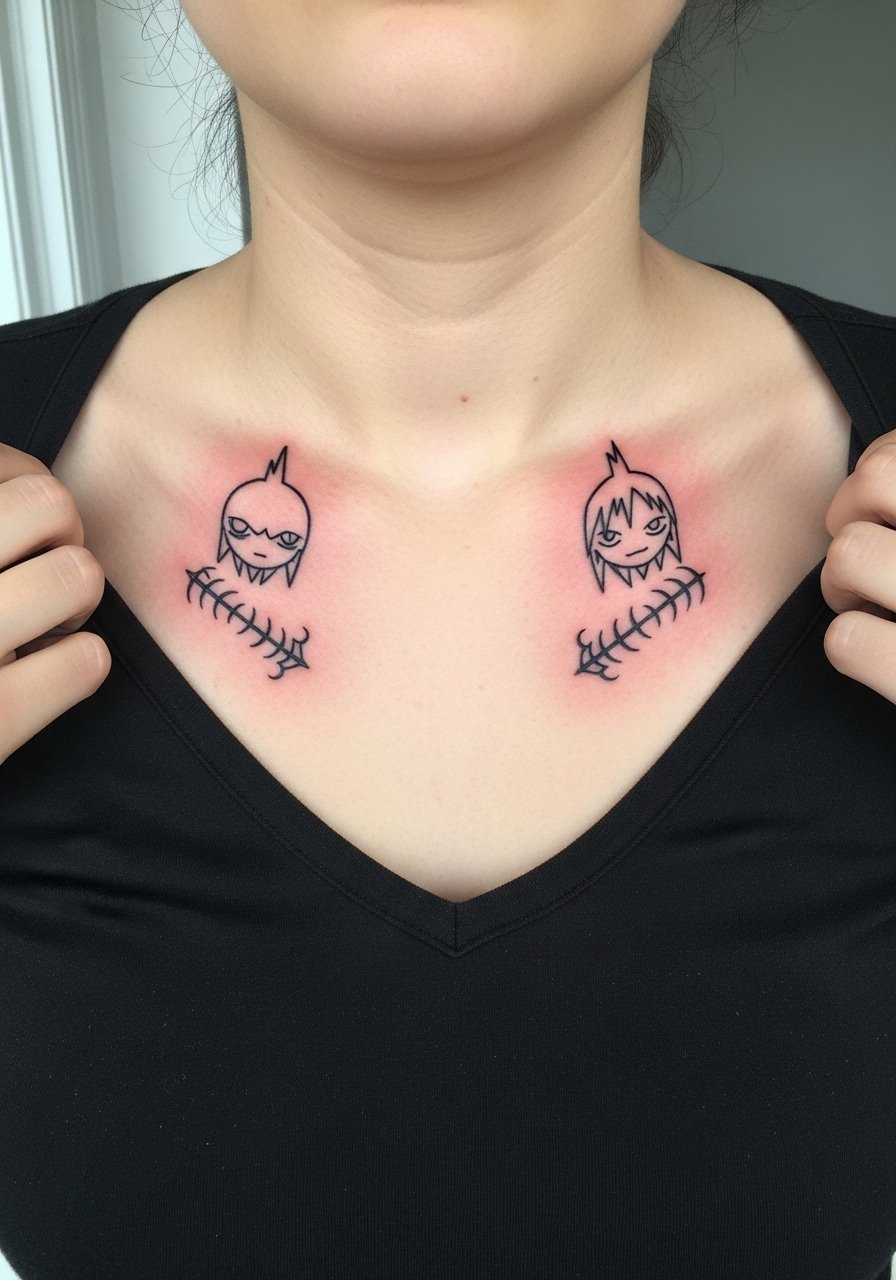
Collarbone pairs make a subtle statement about partnership themes from the anime while staying elegant. Specify symmetry and exact spacing in your consult and ask your artist to photograph the layout standing and sitting so the symmetry holds in motion. The common issue is mismatch from posture differences; insist on final stenciling with the exact clothing you plan to wear when photographed. Pain at the collarbone can be sharp but short. For evenings out, a low v neck tee frames both tattoos without crowding them.
14. Tiny Moon Behind the Ear for Daily Subtlety
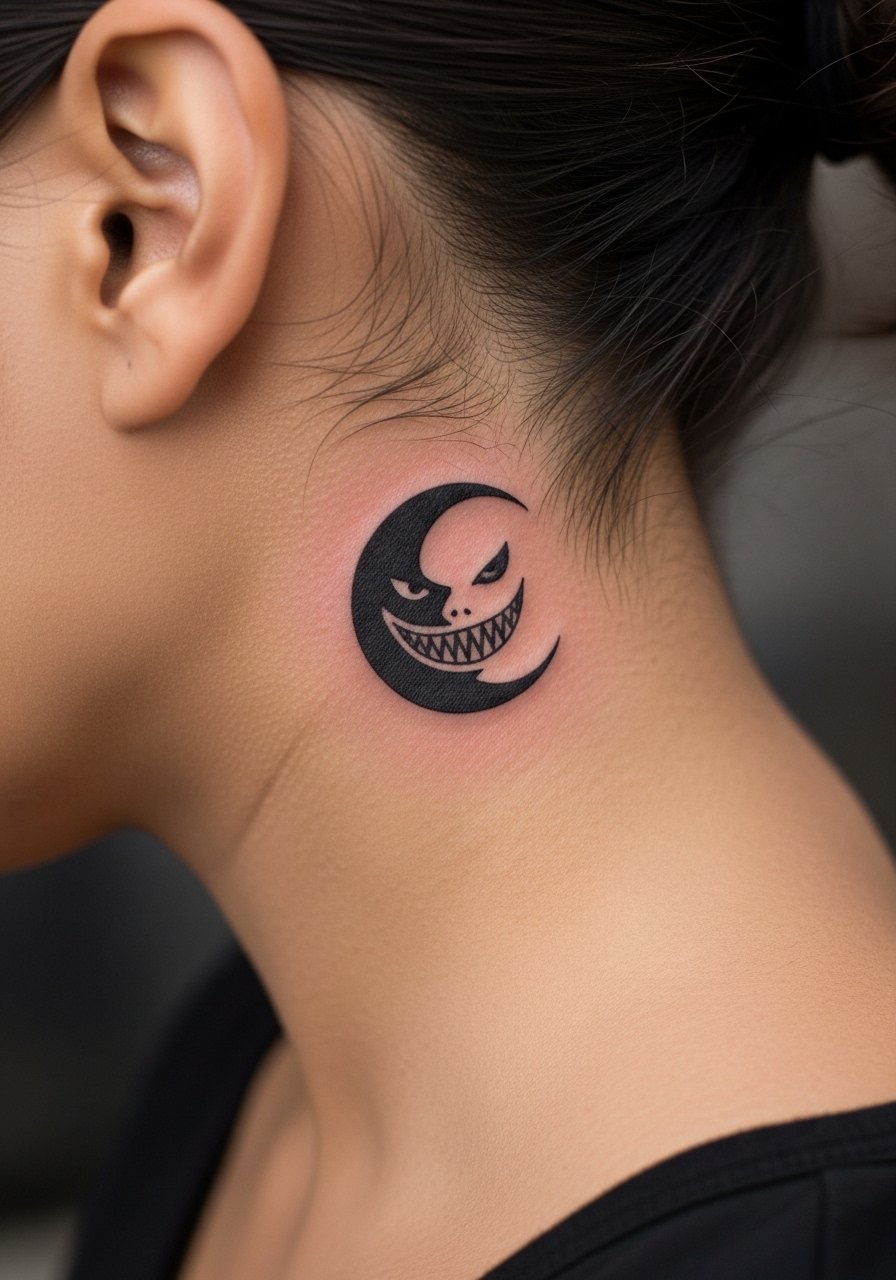
A behind-ear mini is all about placement and hairline management. Ask for slightly thicker contour than you would get on the wrist to offset hair rubbing. Tiny designs there heal fast but they can migrate if the stencil sits too close to hair follicles. This spot stays hidden under hair for most styles, which is the point, but be ready for careful aftercare in washing. Because of the area, pick an artist used to facial-adjacent tattooing.
15. Tribal-Dotwork Hybrid Crona Ragnarok on the Thigh
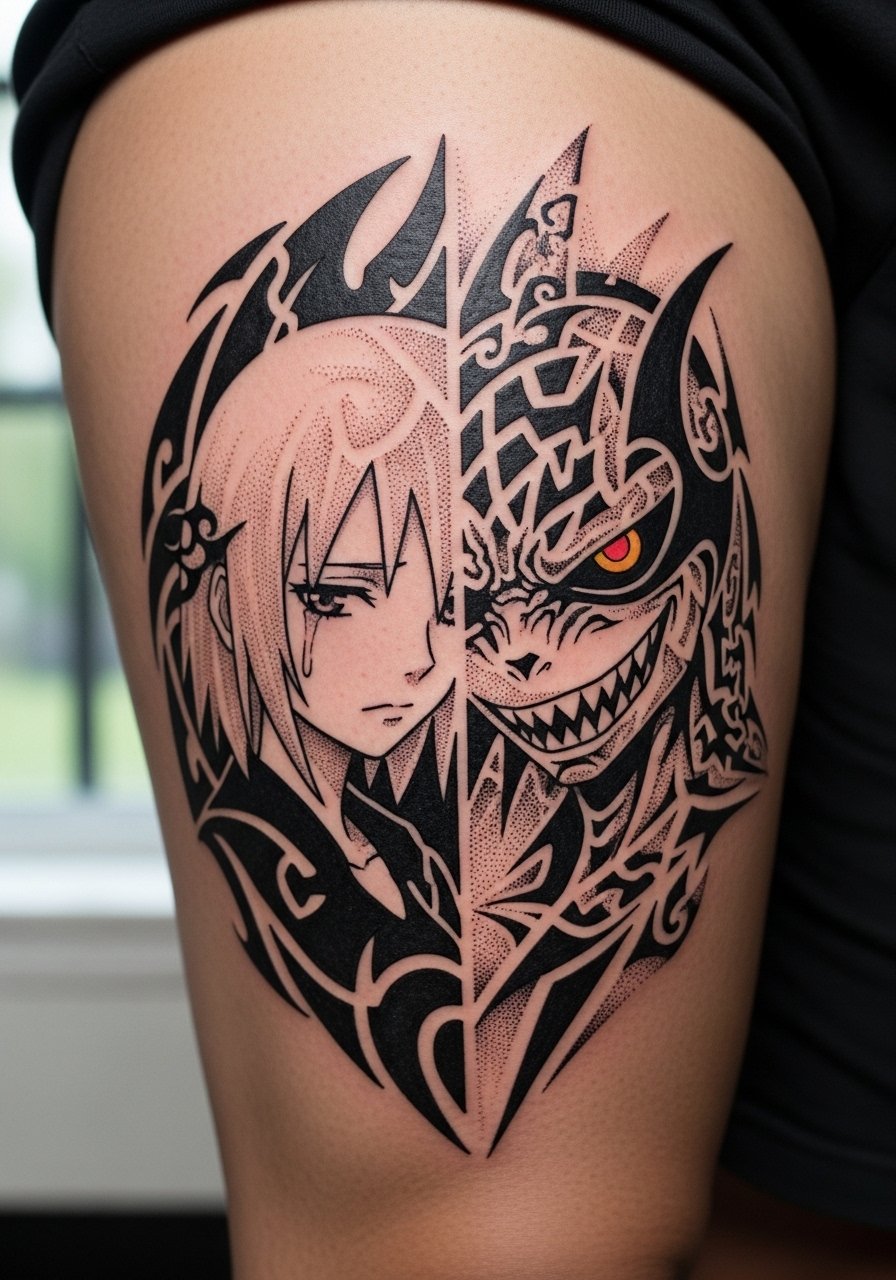
This hybrid gives you the drama of tribal geometry with the subtler texture of dotwork. Tell your artist you want clear separations between dot clusters and solid shapes so the two languages do not blur together. The main error is cramming dots into narrow bands. Two sessions are realistic for depth and contrast. For summer wear, high-waisted shorts frame the thigh artwork; try high waisted athletic shorts so the shapes align with your outfit.
16. Wrapped Scythe Linework Around the Forearm
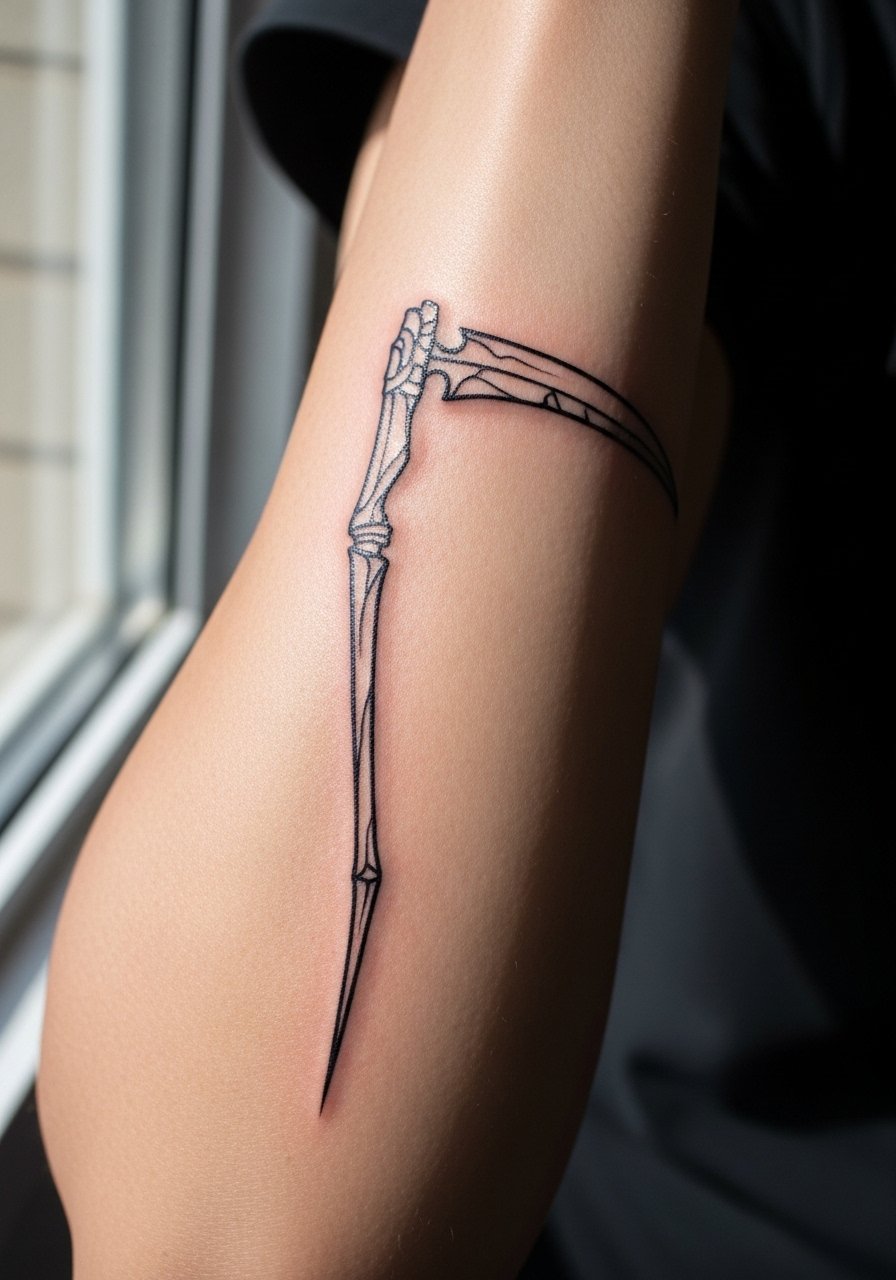
A wrap needs consistent line weight and clear start and end points to avoid a floating or broken look later. Ask for a stencil wrap proof while you flex the arm so the flow matches muscle movement. The mistake people make is placing a dense wrap too close to the wrist where skin movement softens detail. Expect one session and moderate pain where the needle crosses tendons. If you plan more work later, leave margin for future connecting pieces.
17. Calf Sun Solo Sized for Shorts Season
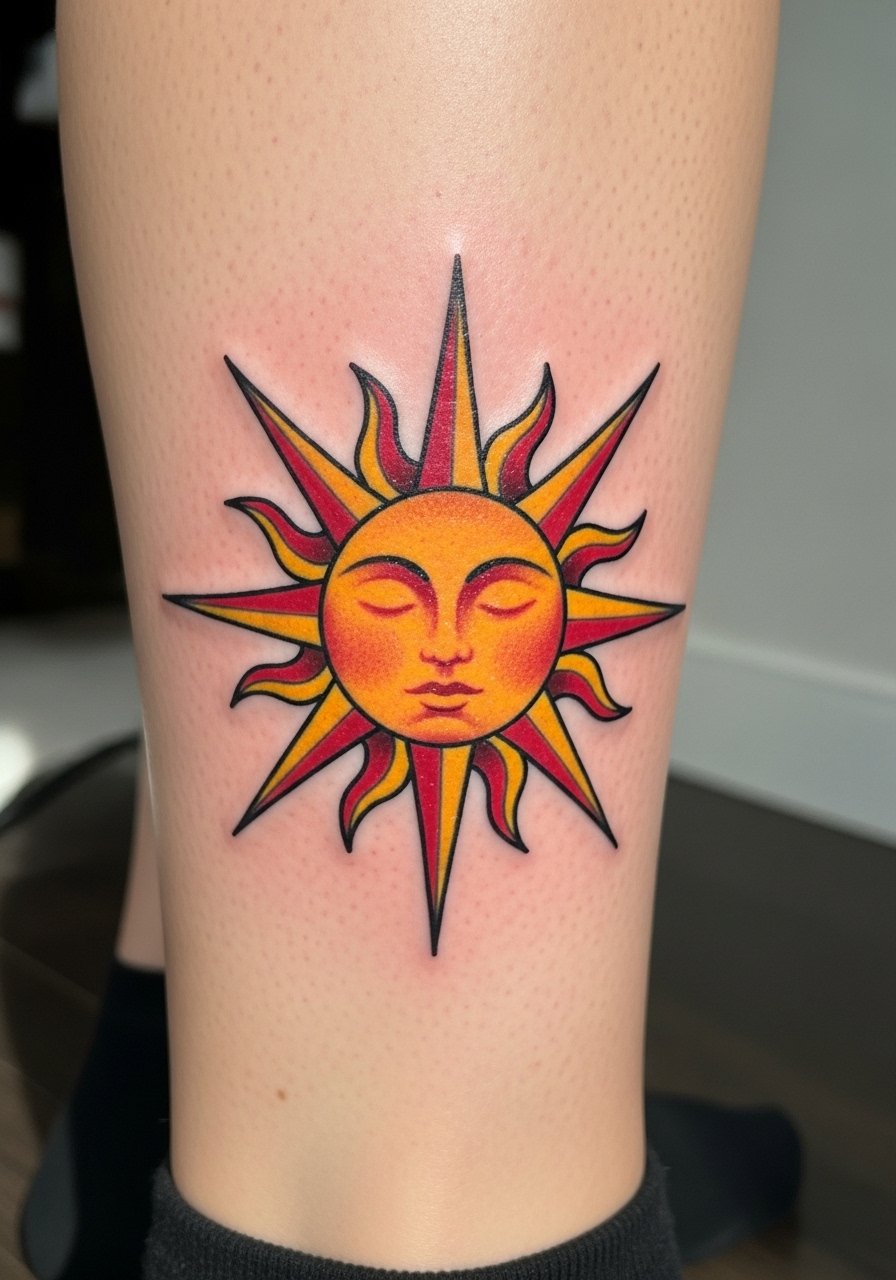
If you want the grinning sun to read from a distance, calf is one of the best seasonal spots. Ask for saturated color fields and a bold outline to keep the grin legible under sunlight, and discuss high-SPF routines for color retention. A common oversight is tiny sun rays that vanish; make them solid or slightly thicker. Sessions are comfortable with the leg propped. For showing it off wear slim athletic shorts and ankle socks so the art becomes the focal point.
18. Micro Scythe on the Outer Wrist
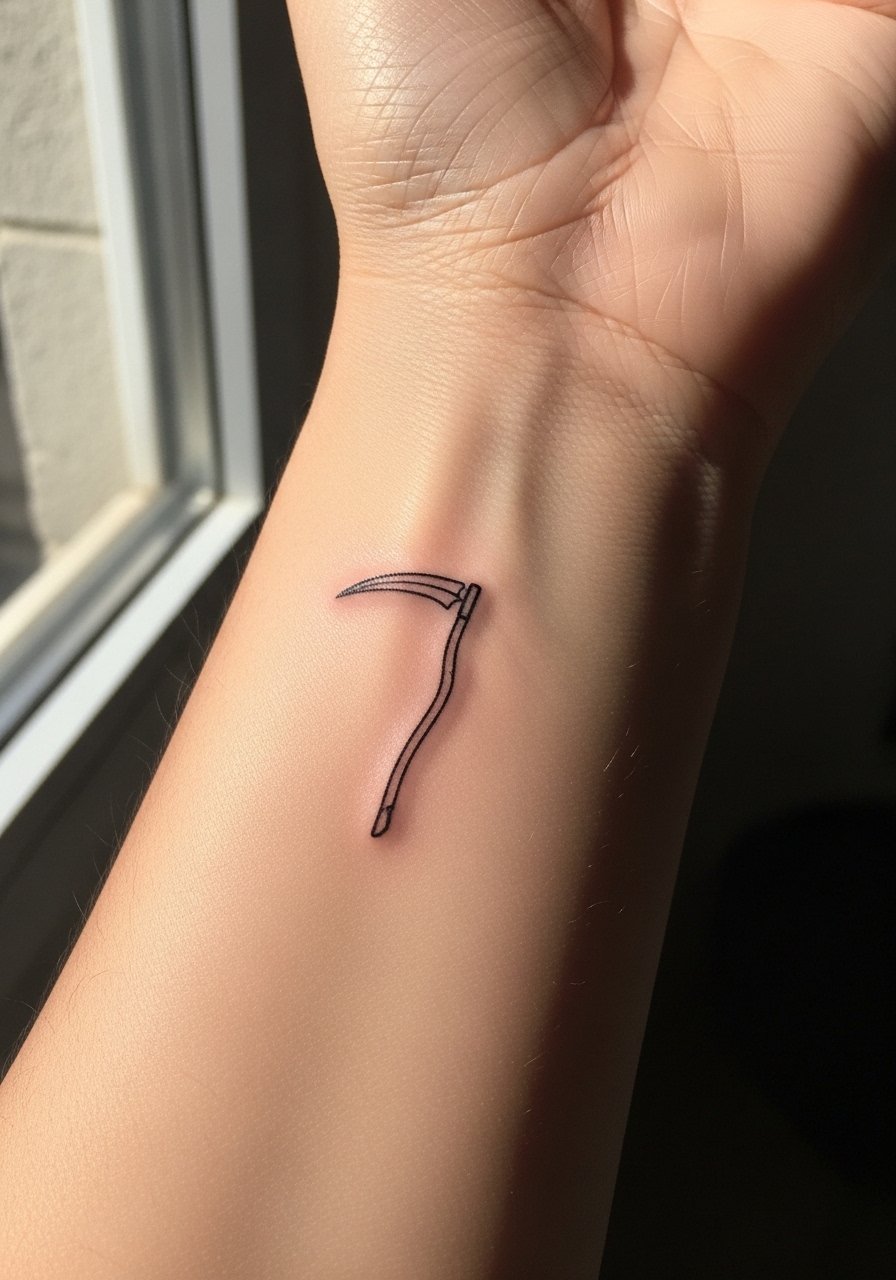
Micro wrist pieces are fast and very personal, but they are the ones that blur fastest if placed too close to hands. Ask for a slightly thicker stem and a plan for a six-month touch-up. The usual mistake is requesting single-needle pendant detail in a high-wear spot. Sessions take minutes and pain is sharp. Consider whether daily washing and typing will rub the area during the first month.
19. Upper Arm Watercolor Dream Sequence
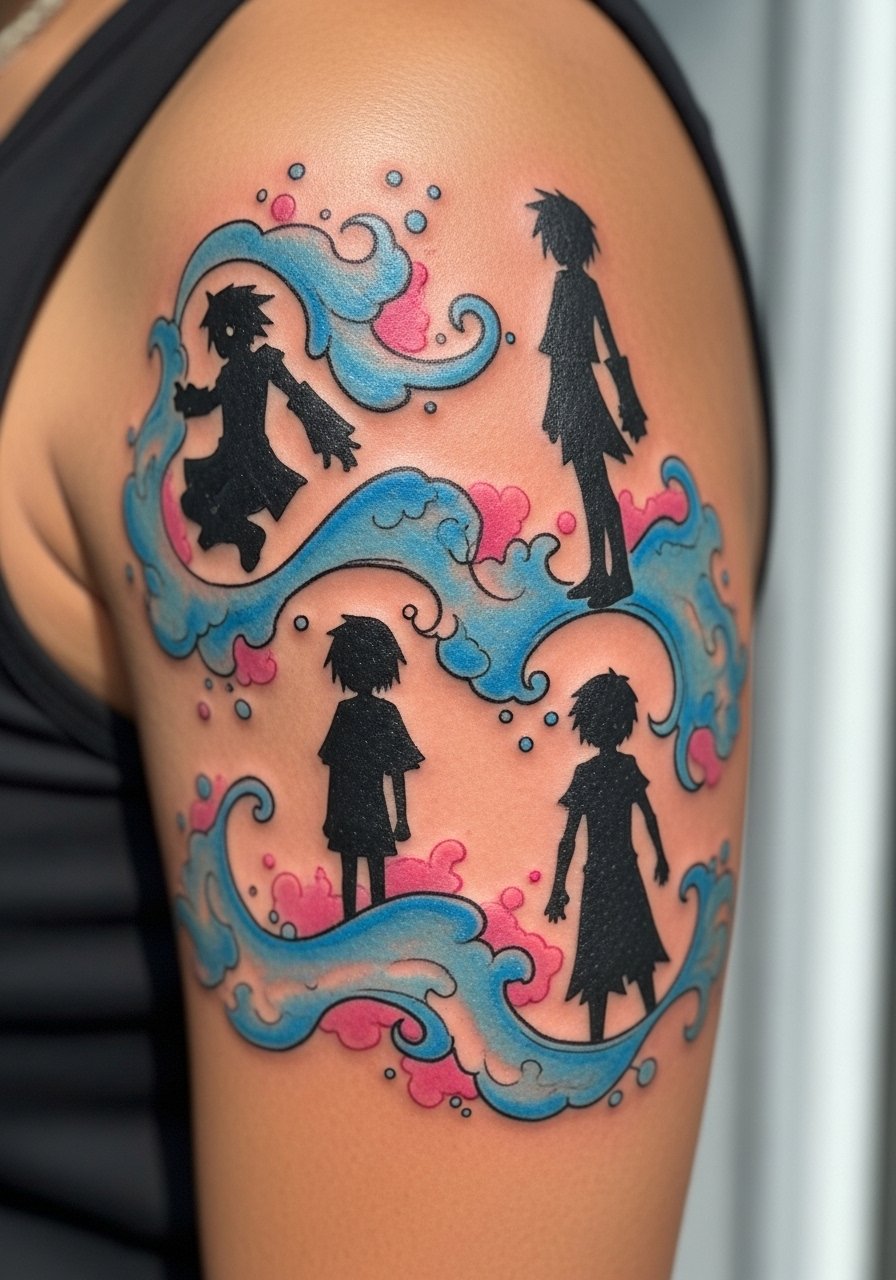
Upper arm watercolor scenes balance scale and subtlety, especially when you want something larger that still reads in close photos. Ask your artist for soft edges plus anchor outlines where shapes must stay readable. Watercolor ages into moodier hues on darker skin unless saturation is planned higher, so request a color test patch if you have concerns. Two to three sessions are normal for layered color. For session comfort wear a loose tank or an open denim jacket you can pull aside for access.
20. Thigh Portrait: Crona in Fine Line Illustration
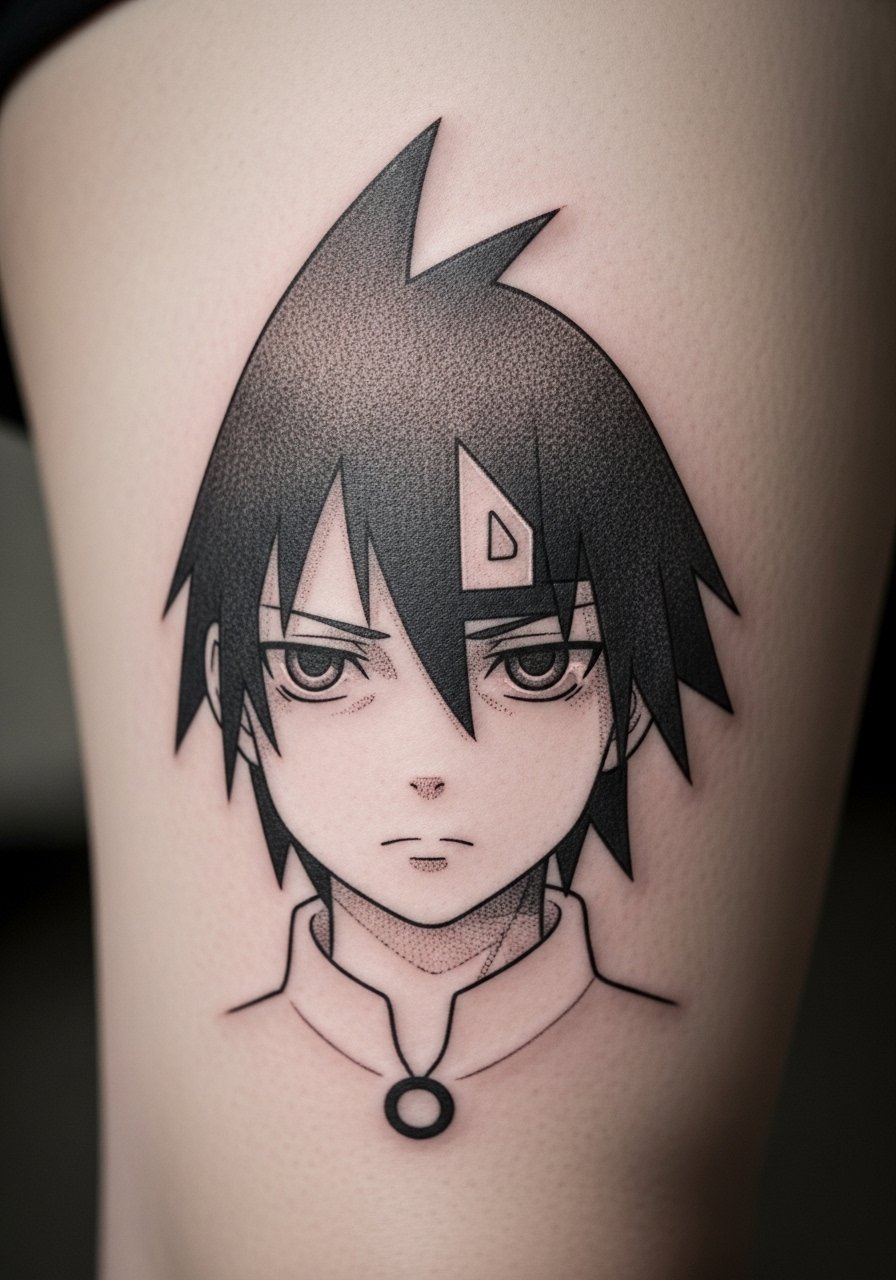
A thigh portrait gives space for facial nuance without forcing cartoonish proportions. Ask for a grayscale reference that leans illustrative rather than ultra-realistic to avoid uncanny results. Common mistakes include trying to shrink a portrait into a bit-sized tattoo; size this at least five inches for reliable detail. Two sessions for line and shading are typical. Thigh portraits can be sensitive to clothing friction while healing, so plan loose bottoms during the first week.
21. Shoulder Blackwork Stein Emblem
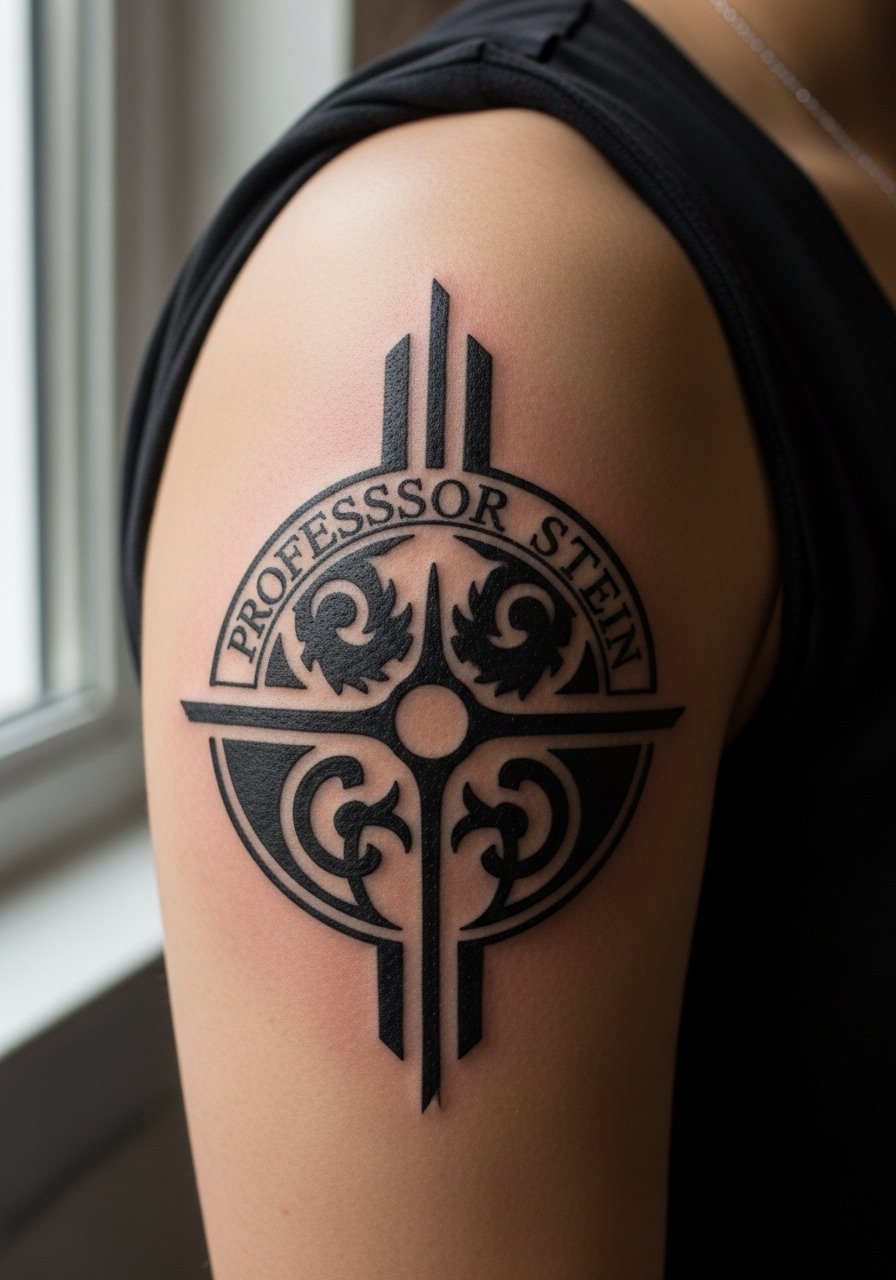
Shoulder blackwork reads as intentional and mature, and it sits well under most clothing. Tell your artist you want heavy saturation with crisp edges and a few subtle highlights in negative space to keep the emblem readable. The controversy over blackwork vs fine line is real; for this motif pick a proven blackwork hand. Sessions are comfortable with the shoulder exposed. Show it with an off shoulder crop top to frame the silhouette.
22. Chest Neo-Traditional Skull with Soul Collection Motifs
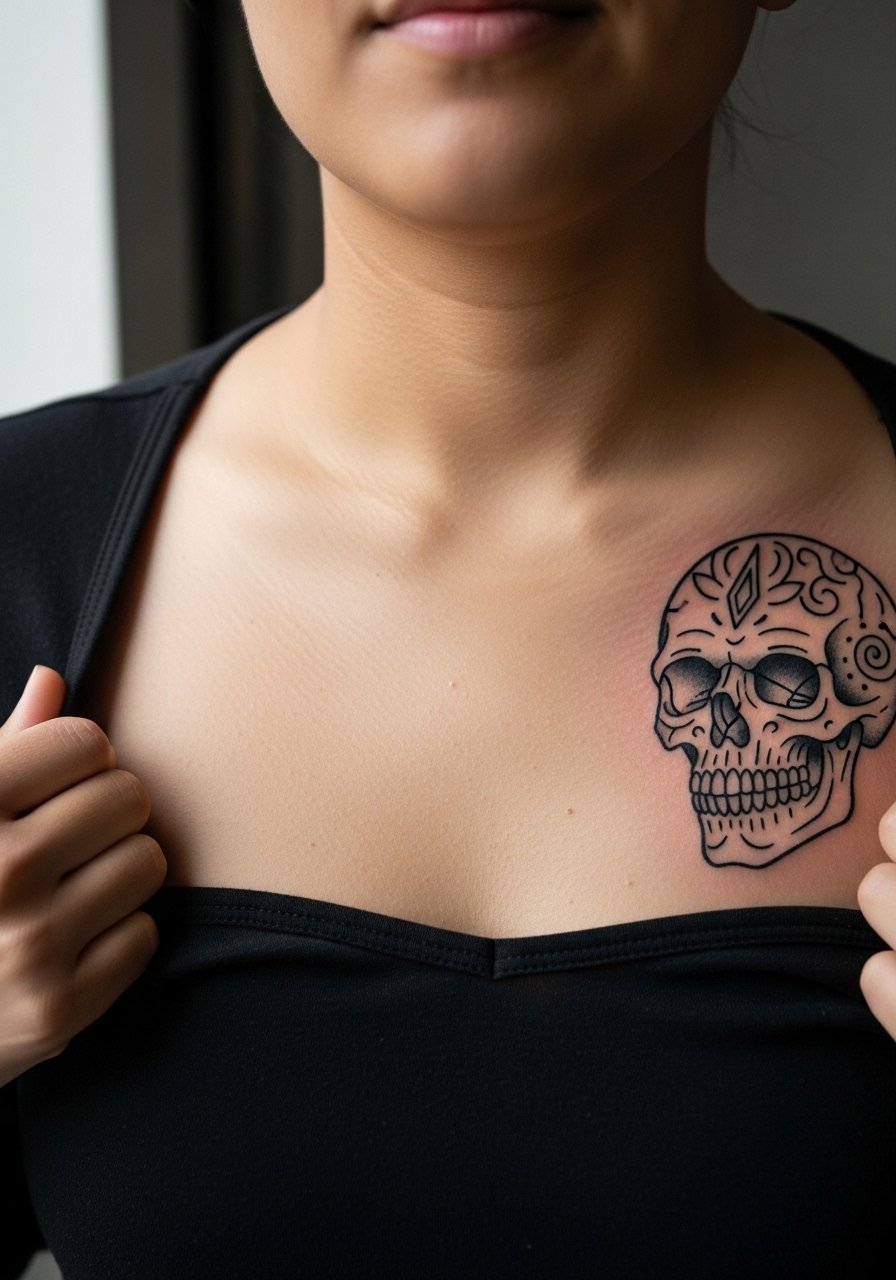
Chest pieces allow a central, shield-like composition that ages into a classic look. Ask for strong anchors in blackwork near the sternum and softer shading toward the collarbones so the skull stays defined. The sternum can be a high-pain area, and chest work needs careful clothing choices for the first week. For studio prep, bring loose tops and avoid tight straps that could rub the area while it seals.
23. Ankle Micro Soul Logo
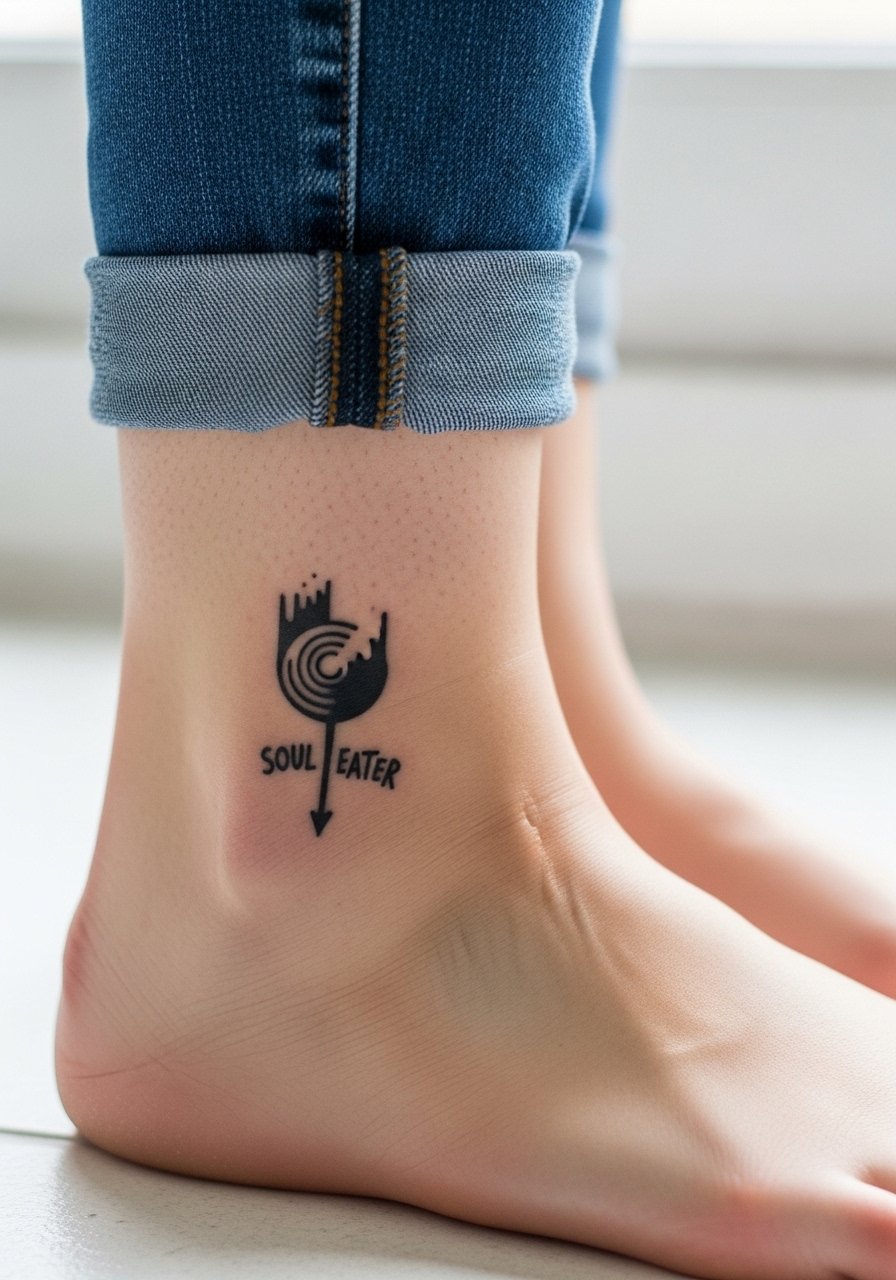
Ankle micro logos look crisp when kept simple and slightly larger than typical micro sizes. Request a slightly bolder outline and anticipate that shoes and socks can rub the area while healing. The common mistake is extreme miniaturization that fades into a thin line. Sessions are quick and the area is sensitive near bone. Keep socks off for the first day and wear sandals if possible to avoid friction.
24. Ribcage Crona Abstract with Flowing Lines
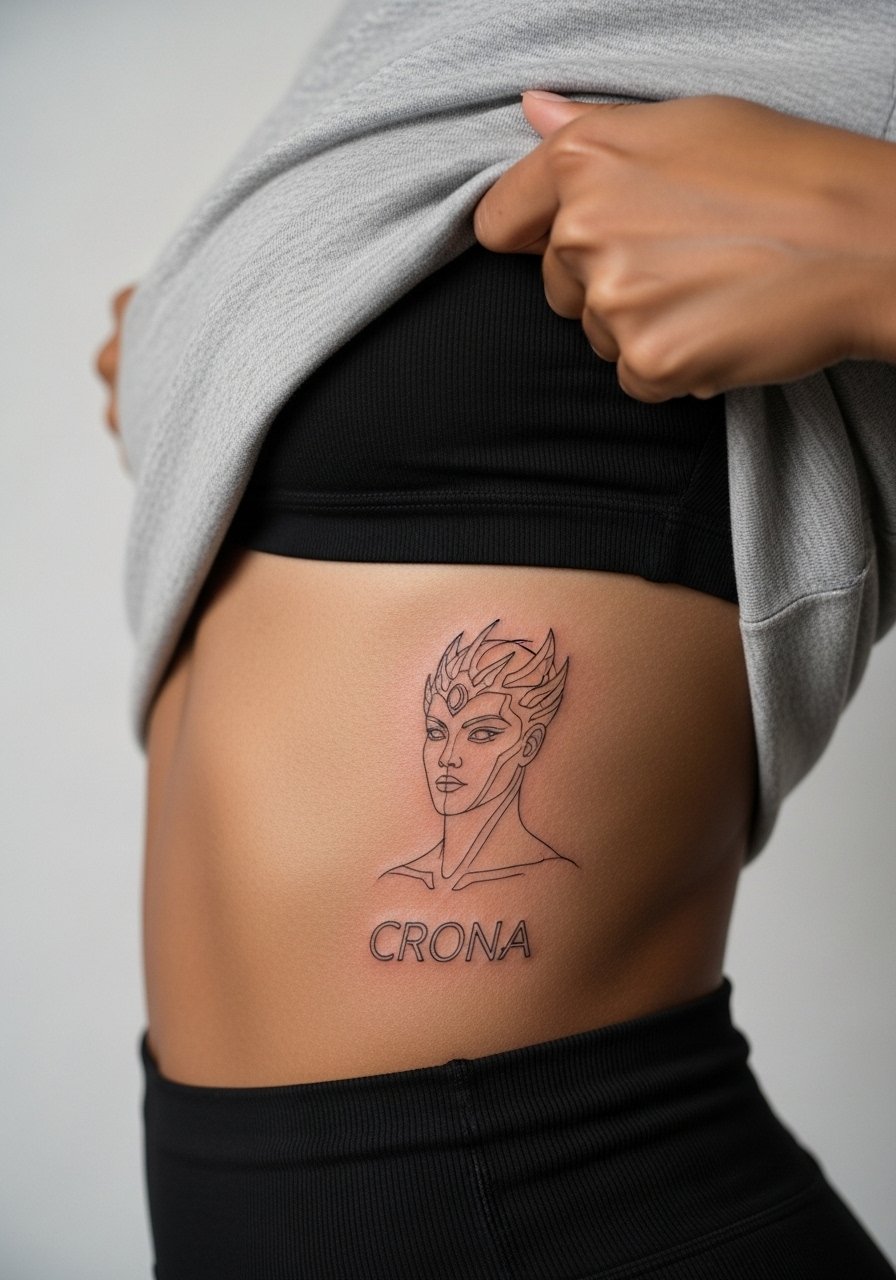
Ribcage designs read very intimate and offer dramatic negative space. Artists disagree on fine line here because skin stretch can blur dense lines; one camp warns of early softening and the other says careful needle depth fixes that. Name both camps in your consult and ask the artist where they sit before committing. Pain is higher on the ribs but the composition can wrap beautifully. Plan for clothing that lifts or slides aside during the session and for a few days after.
25. Small Collarbone Emblem for Low V-Neck Wear
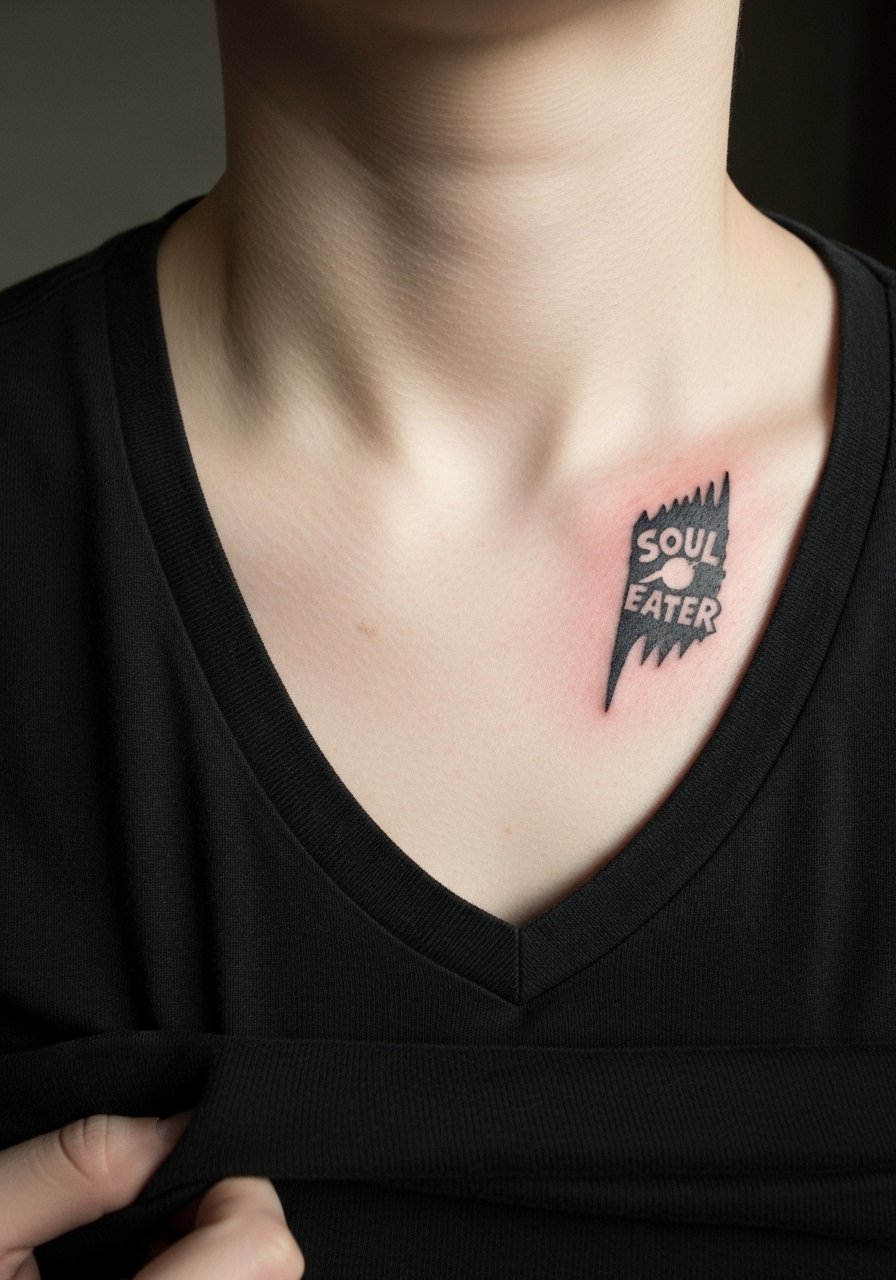
This tiny emblem plays well with jewelry and necklines if proportioned correctly. In consult ask for a slightly heavier outline and for placement photos with the exact tops you plan to wear so the emblem sits where you expect. Micro collarbone work can look uneven if your posture shifts during stenciling, so get a seated and standing proof. Pain is spicy but short. A low v neck tee keeps the look intentional for date nights.
26. Spine-Running Vertical Scythe Composition
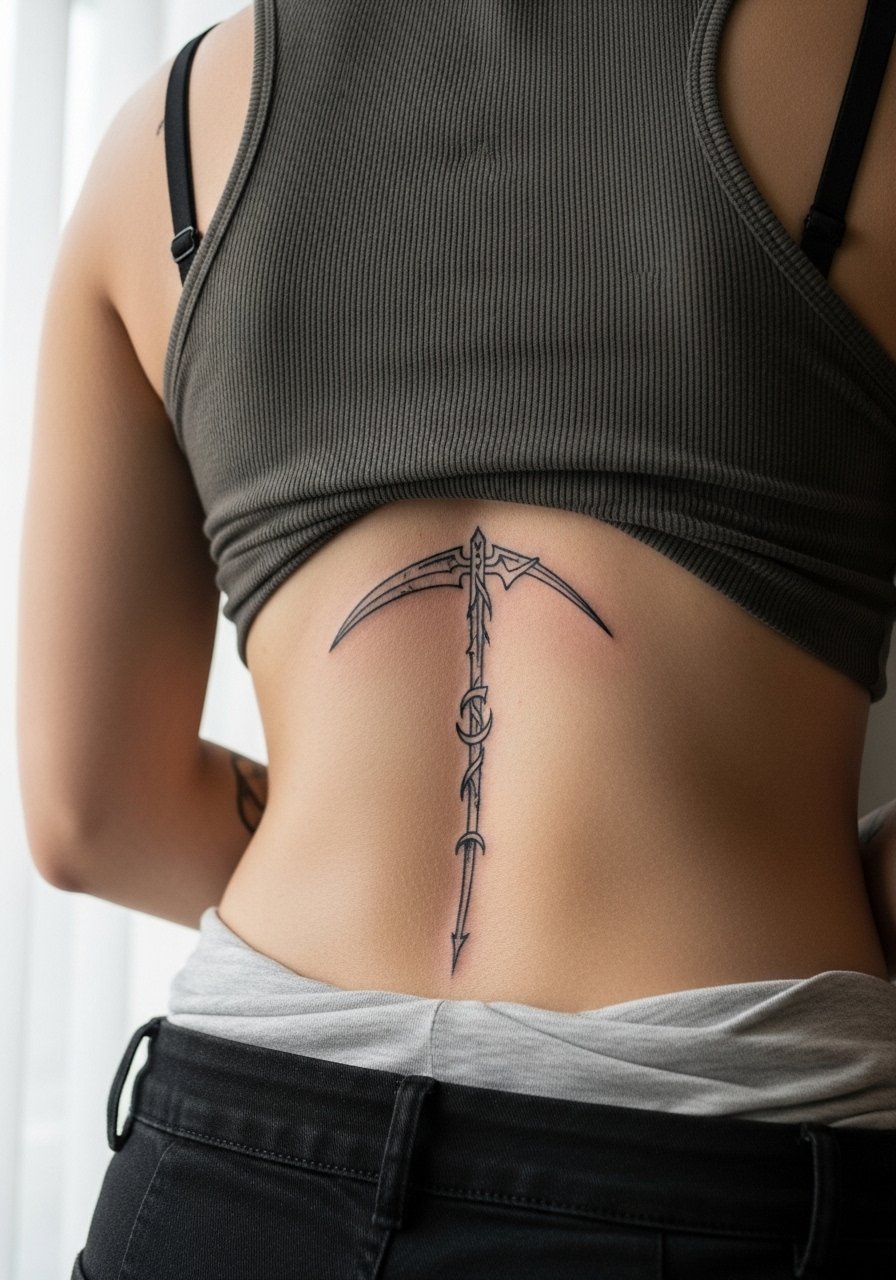
Spine pieces need careful planning for symmetry and body changes. Tell your artist the exact vertebrae height you want referenced so the composition aligns with your posture. Common mistakes are ignoring future back work that could clash with the vertical motif. Sessions can be long and the area is high pain for many people. For modesty and access, wear a tank you can lift or an open shirt.
27. Paired Forearm Meisters for Death the Kid Fans
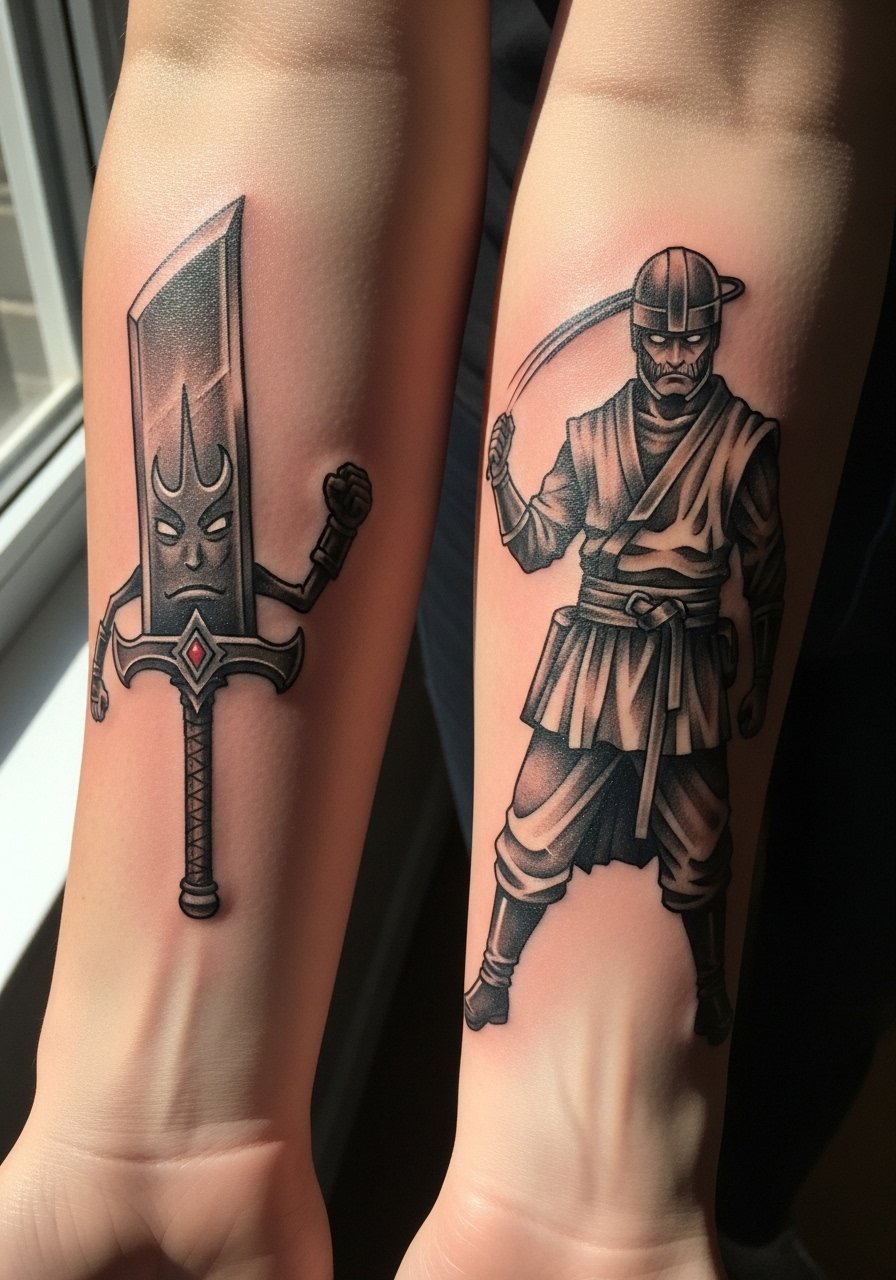
Paired forearm pieces read best when the two stencils are measured and stenciled at the same session. Ask for mirrored placement photos and insist the artist measure distance from the elbow crease on both arms. The usual mistake is trusting a quick mirror alignment; request a final placement check before the first line. Expect two sessions and a mid-year touch-up for symmetry maintenance. For styling, roll sleeves and add a rolled sleeve graphic tee to keep both arms in view without overcrowding the look.
Frequently Asked Questions
Q: Will fine line Soul Eater logos blur on the wrist, and how can I prevent that?
A: Fine line logos on the wrist blur faster than the same design on a forearm because of constant hand movement and washing. To prevent this, size the logo to at least three inches, ask for slightly bolder contour strokes, and plan a touch-up around month six if needed.
Q: How do I find an artist who can do an anime-style design without it looking cartoony?
A: Search hashtags like #SoulEaterTattoo and #AnimeNeoTraditional on Instagram and filter by shops in your city, or use Tattoodo and Booksy with the "anime" and "blackwork" tags. When you find portfolios, look for healed photos and ask for a recent healed example similar in scale to your idea before booking.
Q: Saniderm or dry healing for these Soul Eater placements, which camp is right?
A: Artists split into two camps on this. One camp prefers Saniderm for a sealed, lower-infection approach and faster surface healing. The other camp favors dry healing to let scabs form naturally. For high-friction areas like the wrist and ankle, a short Saniderm application followed by light moisturizing often helps, but discuss the plan with your artist so it syncs with their technique.
Q: How big should a forearm Sun and Moon be so it still looks good after two years?
A: Aim for at least four inches across on the forearm, with bold outline and space between high-detail areas. That size allows the grin and facial lines to hold without merging, and it reduces the chance of blowout from shallow needles.
Q: If I have darker skin, do Soul Eater colors like yellow and blue hold up differently?
A: Darker skin can show color differently, and saturation needs to be planned higher for bright yellows and pastels. Ask for a color patch or a small test area and request richer saturation and contrast so the colors remain visible in natural light after healing.
