
Fine line tattoos dominate feeds right now, and the designs that look best in a grid are not always the ones that hold up on real skin. Placement, line weight, and how you dress around the piece matter as much as the stencil. Read on for 27 arm pairings built to feel solid over time, with consultation notes, aging expectations, and wardrobe tips to help you book the right session.
1. Forearm Snake and Dagger
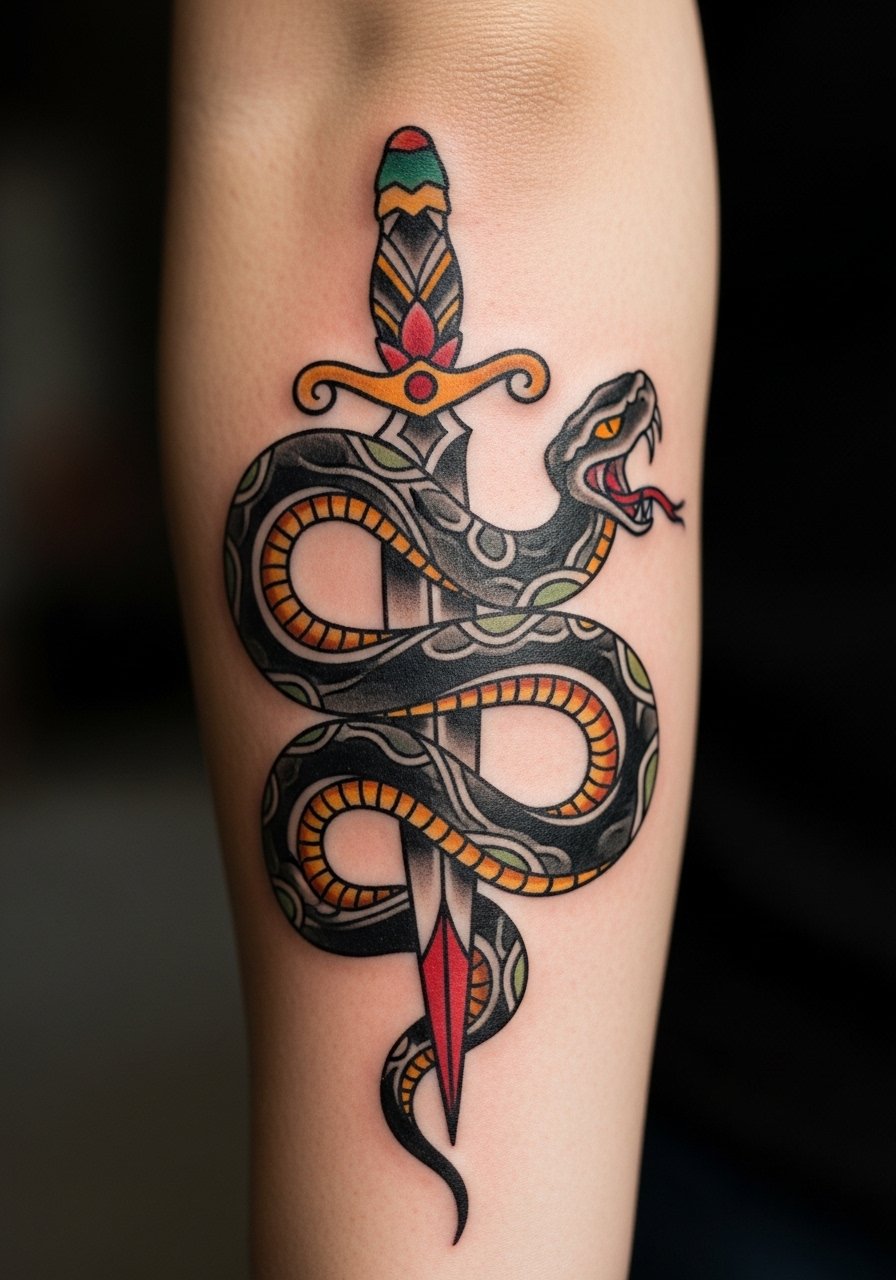
I've seen this design for men who want something that reads aggressive and tidy at the same time. Tell your artist you want thicker outer linework and reduced micro shading in the scales so the detail does not blur with time. The session feels moderate for an outer forearm, usually one short sitting of around 60 to 90 minutes. A common mistake is packing too much tiny texture into the snake's body, which ages into a muddle after two to three years. For showing it off, roll the sleeves of a fitted henley shirt to mid-forearm so the piece sits framed, not crowded.
2. Inner Arm Coordinates Script
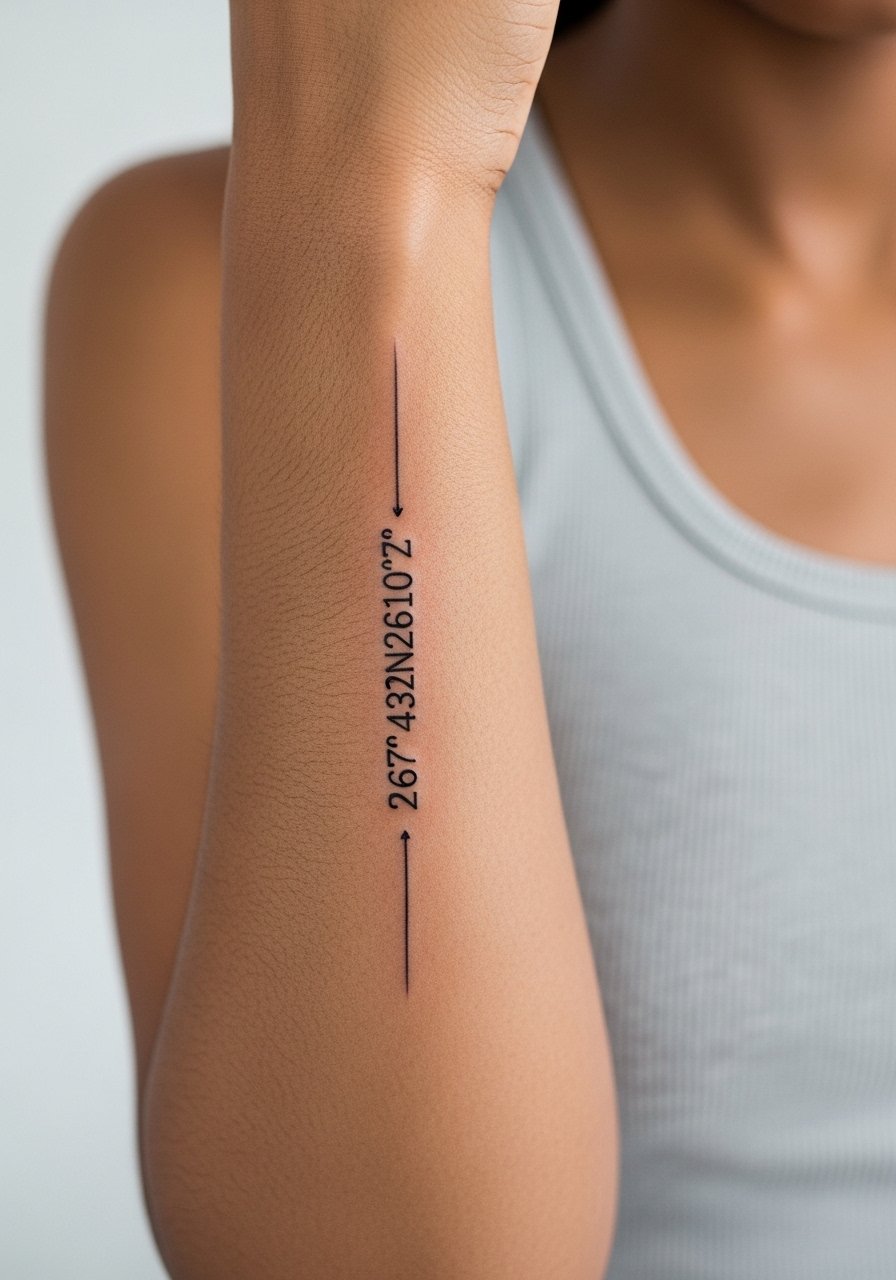
Fine line coordinates are discreet and scale easily into larger work later. Artists split on whether tiny fine line holds on inner forearms. One camp warns the softer skin and friction will thin lines fast. The other camp says properly pitched needle depth and slightly thicker letters keep the numbers crisp. When you consult, ask for a mockup with slightly heavier line weight so you see how the numbers age. Expect minimal pain on the inner forearm and a single short session. For the appointment, wear a loose fit tank top so the artist can work without sleeve drag.
3. Half Sleeve Lion with Roses
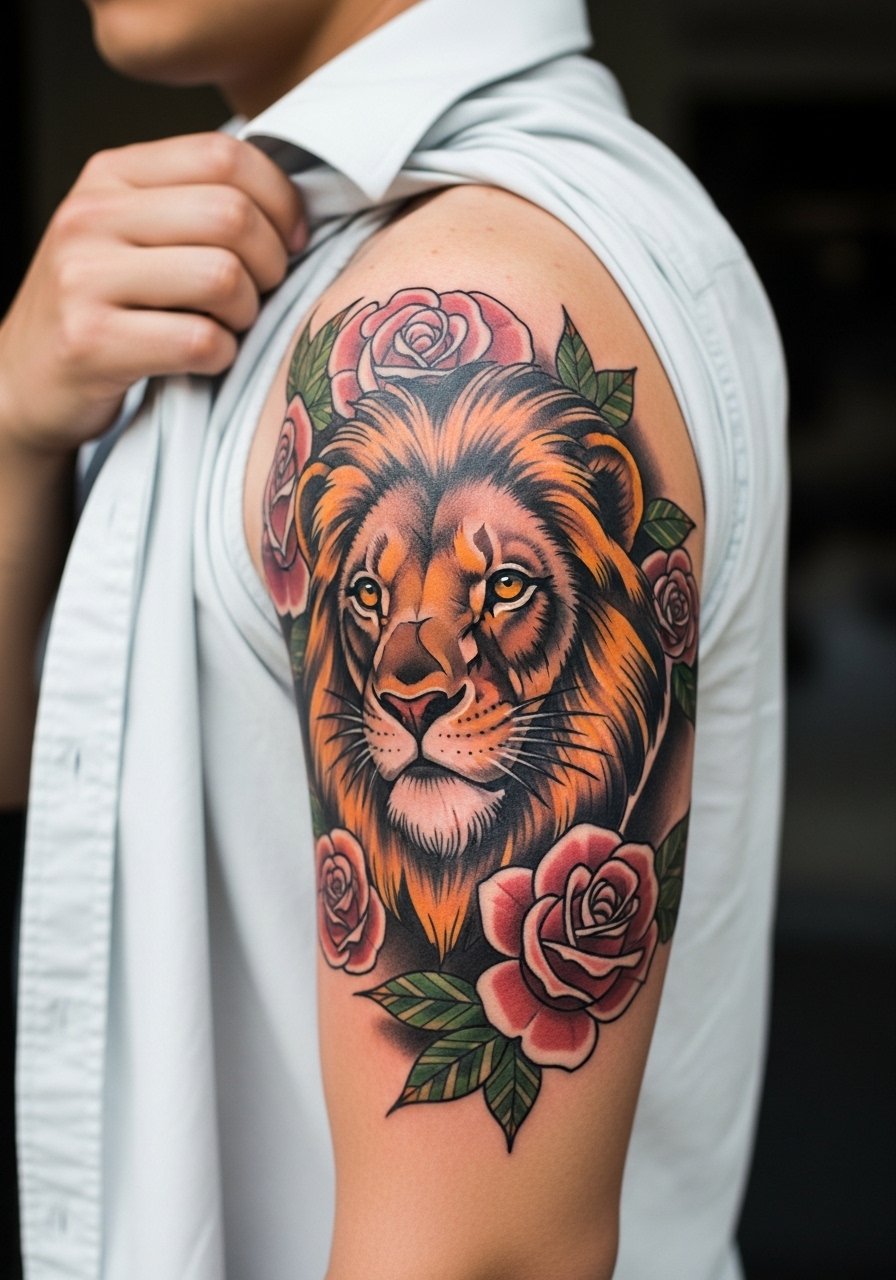
There is a reason collectors start with a lion core and build outward. Start with a central motif sized to the deltoid and plan negative space for future panels. Tell the artist you want the mane areas simplified so future additions do not fight the portrait. Upper arm sessions are long and can run across multiple visits. A typical first pass is two to three hours. The biggest mistake is starting too small, then running out of room when adding background elements. For evenings out, wear an open flannel shirt layered over a white tee to let the color peep through.
4. Armband Tribal Pattern
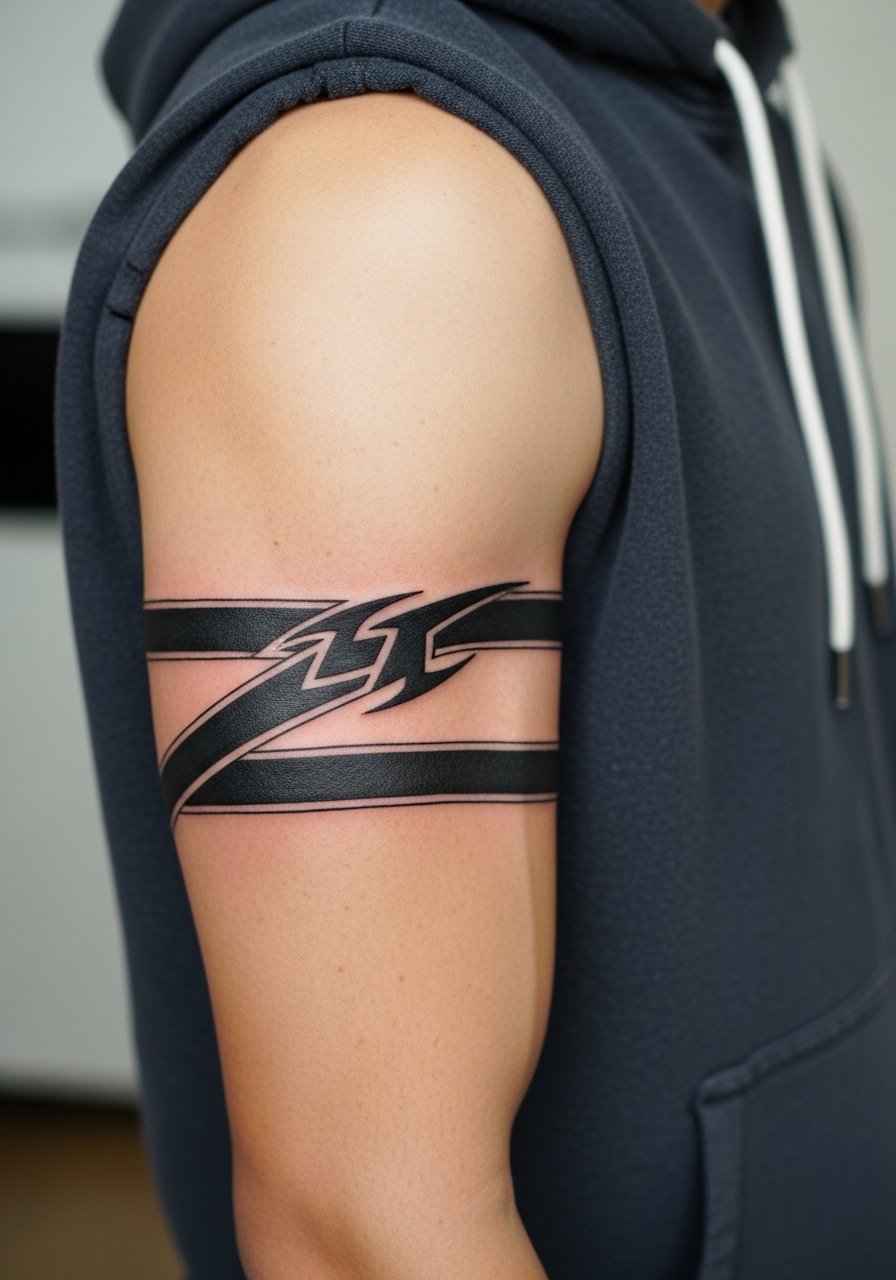
Armband work ages predictably because it relies on thick, simple negative space. For men who want something low-maintenance, ask for solid fills and crisp junctions rather than tiny filigree. The bicep is forgiving on blowout but watch for wrap misalignment when the arm is flexed. Session time is usually 60 to 120 minutes depending on width. A common error is placing the band too tight to the crease, which stretches and distorts when you move. Flex this with a sleeveless hoodie for a clean gym-ready look while keeping the pattern visible.
5. Angel Wings Upper Arm
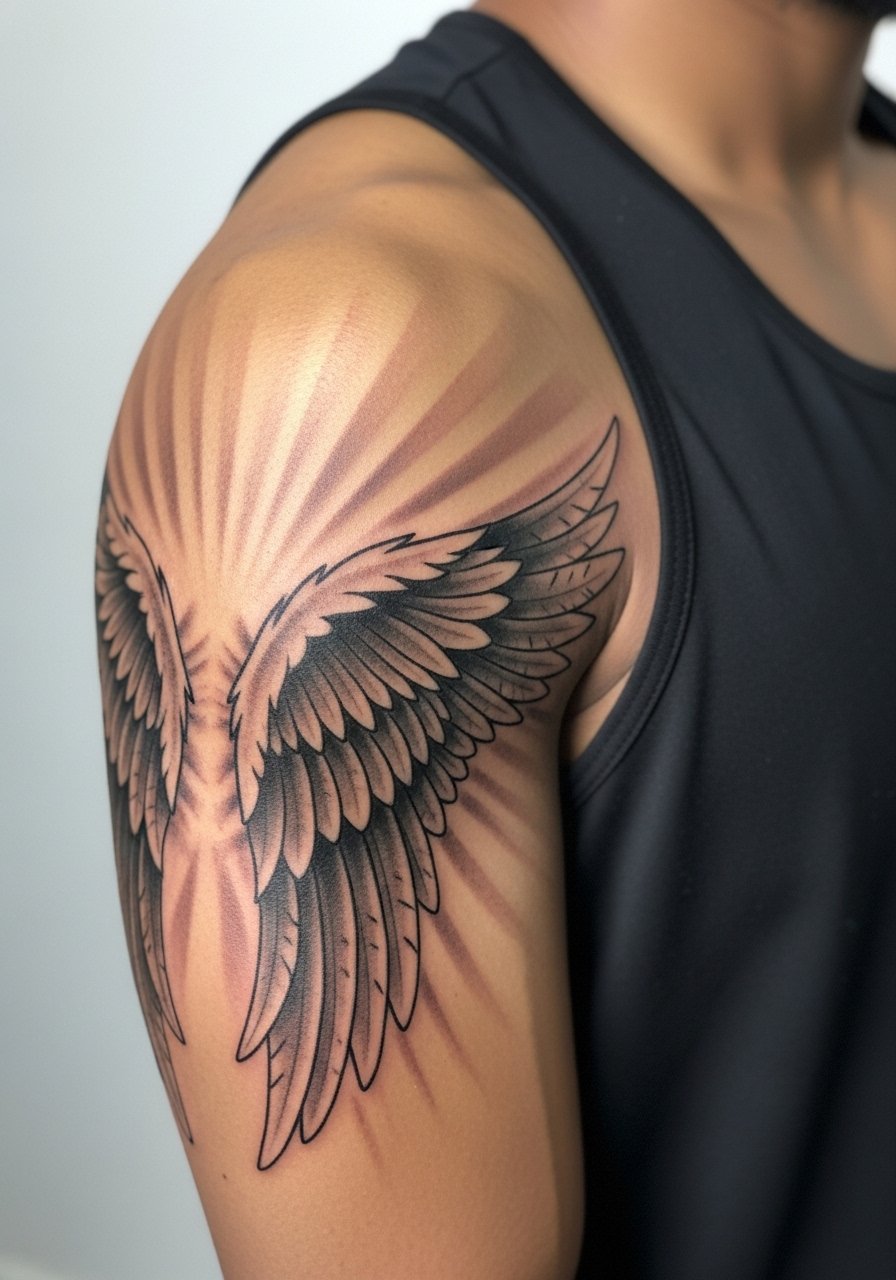
This one works when the wings wrap around the deltoid and taper toward the tricep. In consultation, request lighter negative space between feathers to prevent dense shading from pooling into a gray mass after a few years. Sessions can be split into two passes to get clean shading without overworking the skin. Newcomers often request ultra-fine feathery lines that disappear; ask instead for crisp feather edges with stipple shading. Pair with a muscle tank top to show how the wrap moves with the shoulder without covering it.
6. Geometric Mandala Forearm
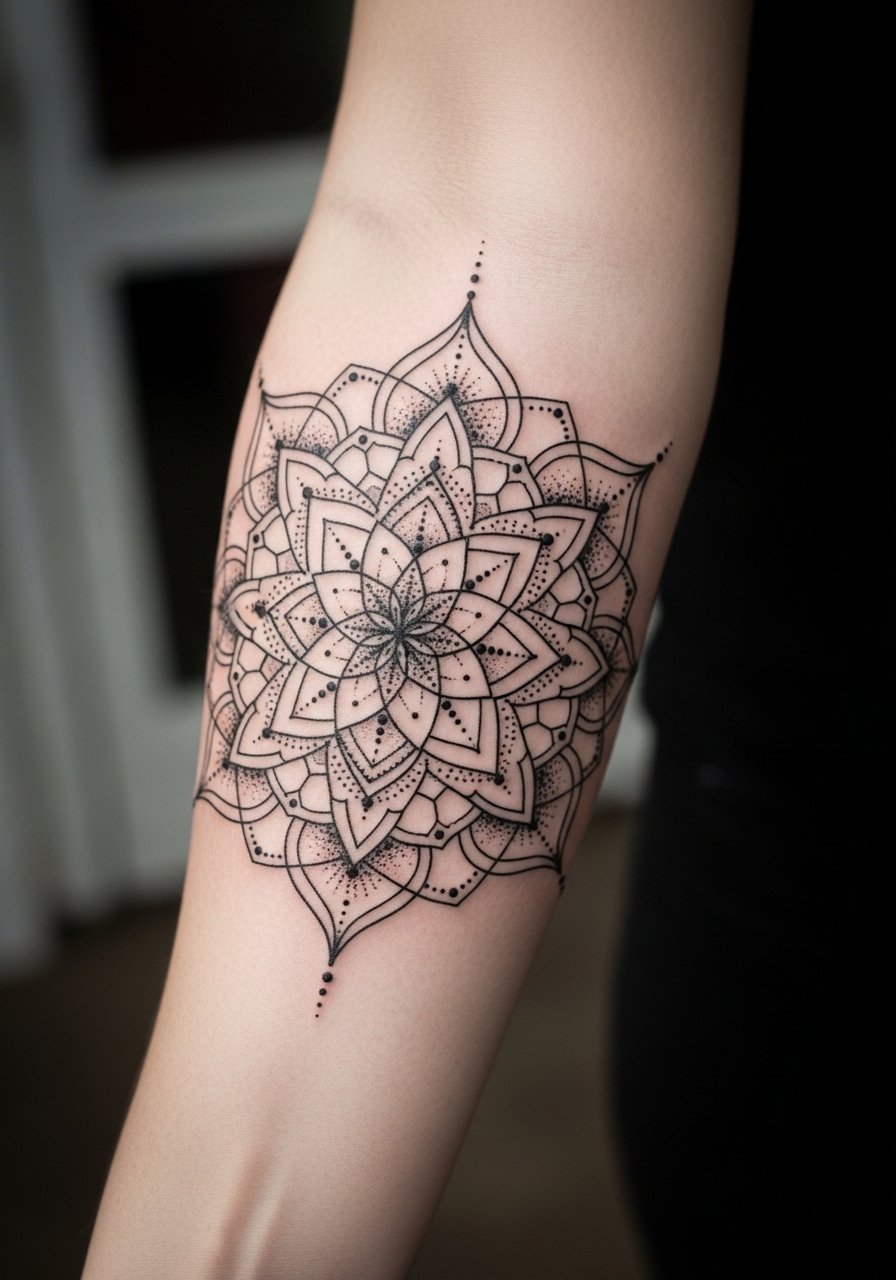
Geometric mandalas need breathing room. The biggest mistake is scaling these too small. Lines spaced appropriately hold for years, but tight lacework merges after two to three years on thinner skin. For a matching pair, map the exact diameter on both forearms during the consultation so both pieces align visually from across the room. Ask for a limited number of concentric rings and increased negative space toward the center. Expect one to two sessions with moderate discomfort on the forearm. For casual show-off, roll up a navy chambray shirt cuff to frame the mandala without distraction.
Studio Day Picks
These first six arm motifs cover forearms and upper arms where clean linework and accessible session wear matter most.
- Stencil transfer paper kit. Lets you preview placement and scale directly on the skin, which is crucial for matching numerals and mandalas.
- Topical numbing cream. Useful for longer upper-arm passes so the session stays manageable without affecting linework.
- Thin protective film roll. Keeps forearm and wrist pieces clean during the first week when friction from sleeves and typing is highest.
- Fragrance-free body wash. Gentle cleansing reduces irritation around fine line and stipple work as the tattoo forms its first layer of healed skin.
- Aquaphor healing ointment. Applied sparingly in the first days, it helps reduce hard scab formation that can affect thin script and delicate dots.
7. Matching Roman Numerals Wrist to Forearm
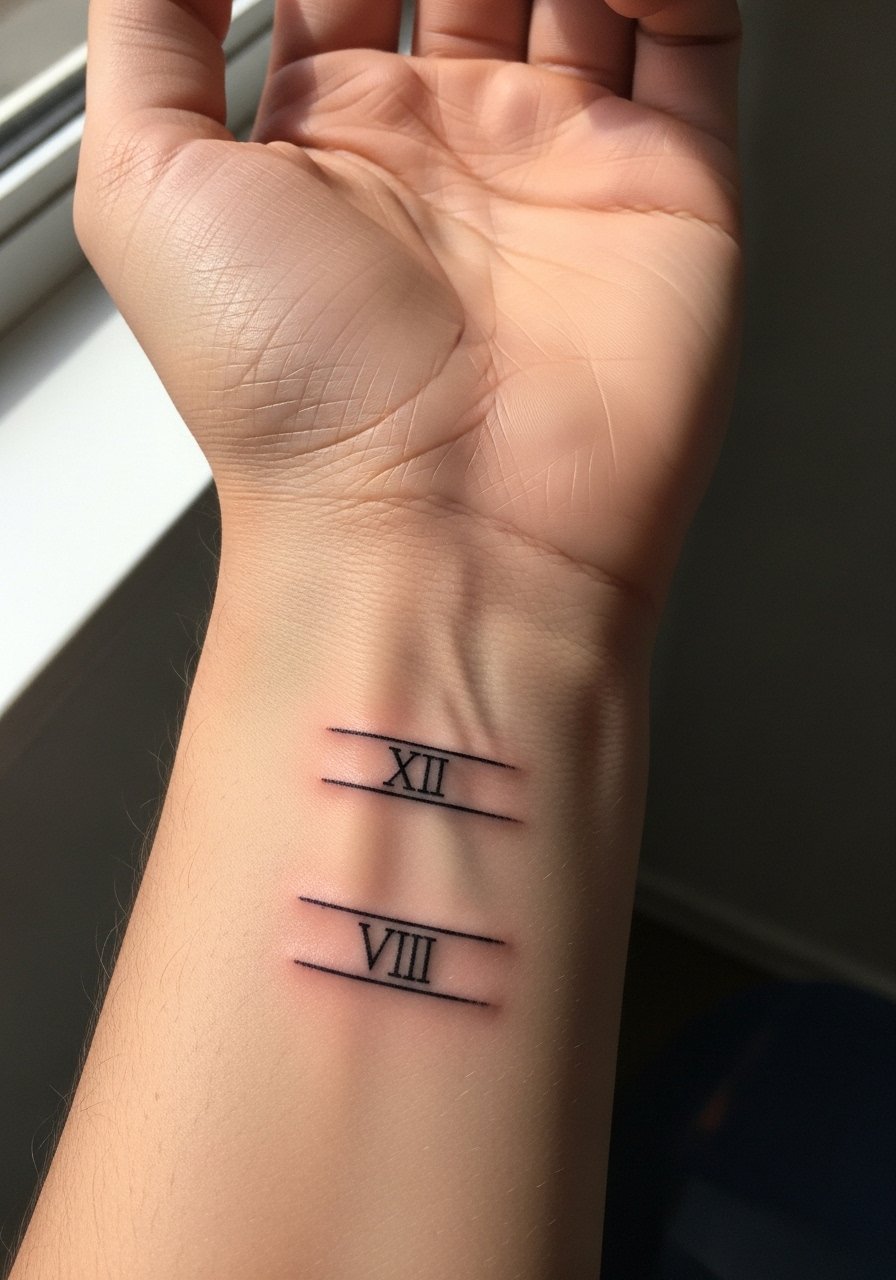
Roman numerals are timeless when spaced slightly larger than typical script. The inner wrist is a high-motion area so lines should be bold enough to power through daily wear. Tell your artist you want slightly increased stroke width, not thicker letters, so the character stays legible. Pain on the wrist is sharper but brief. A single short session usually suffices. A common regret is adding names or tiny dates that become hard to read after a few years. Style the finished piece with a slim leather cuff bracelet on the opposite wrist to balance attention without covering the script.
8. Complementary Sun and Moon Halves Forearm
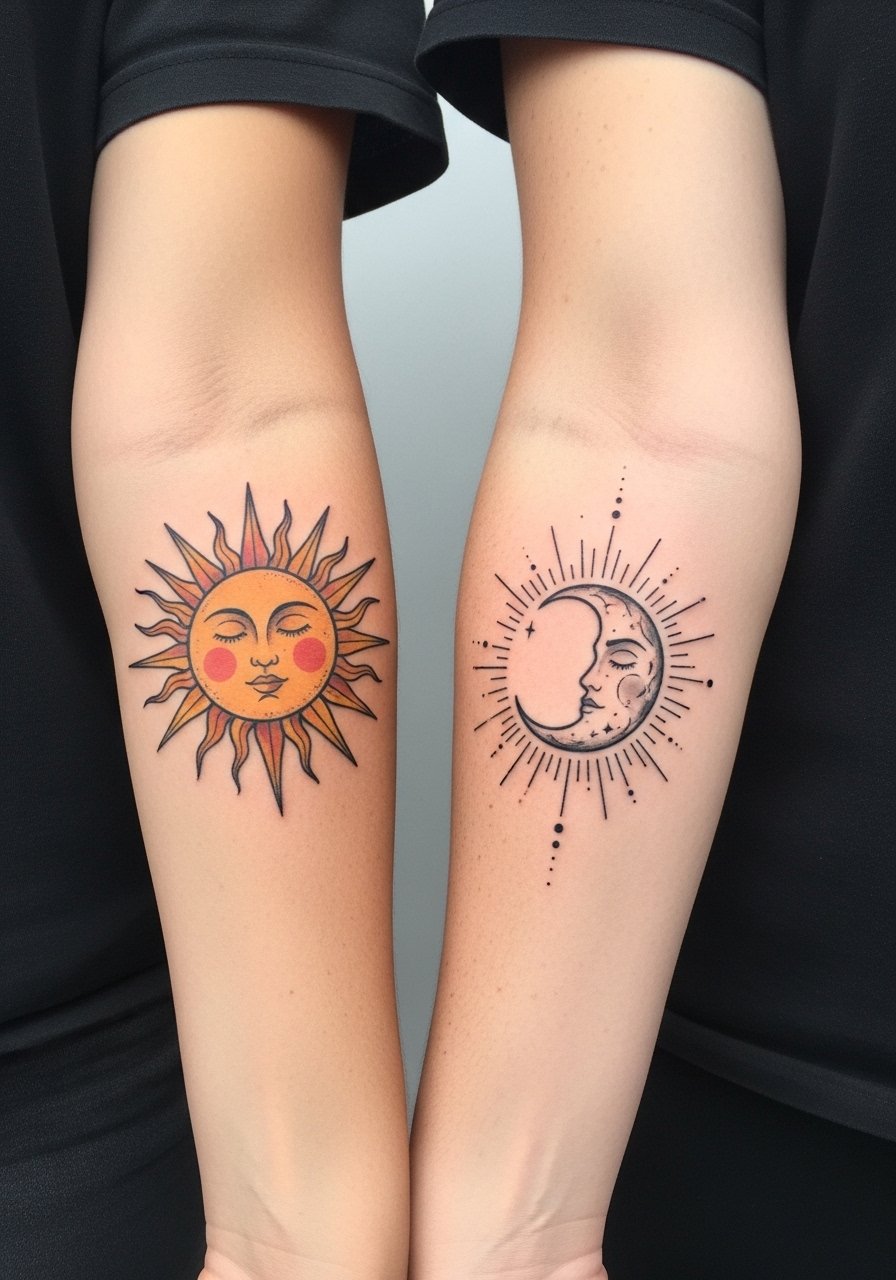
The interactive reveal when arms meet gives this pairing personality. Keep each half around 3.5 to 4 inches so the motifs align without crowding. The outer forearm is forgiving for color if you want a sun with muted gold and a moon with gray wash. One session per arm is typical. Designers sometimes overdetail the halves so they lose clarity when viewed together. Ask for simplified negative space where the halves will join. For show-off outfits, a fitted henley rolled to the mid-forearm frames both pieces cleanly.
9. Upside-Down Matching Symbols Bicep
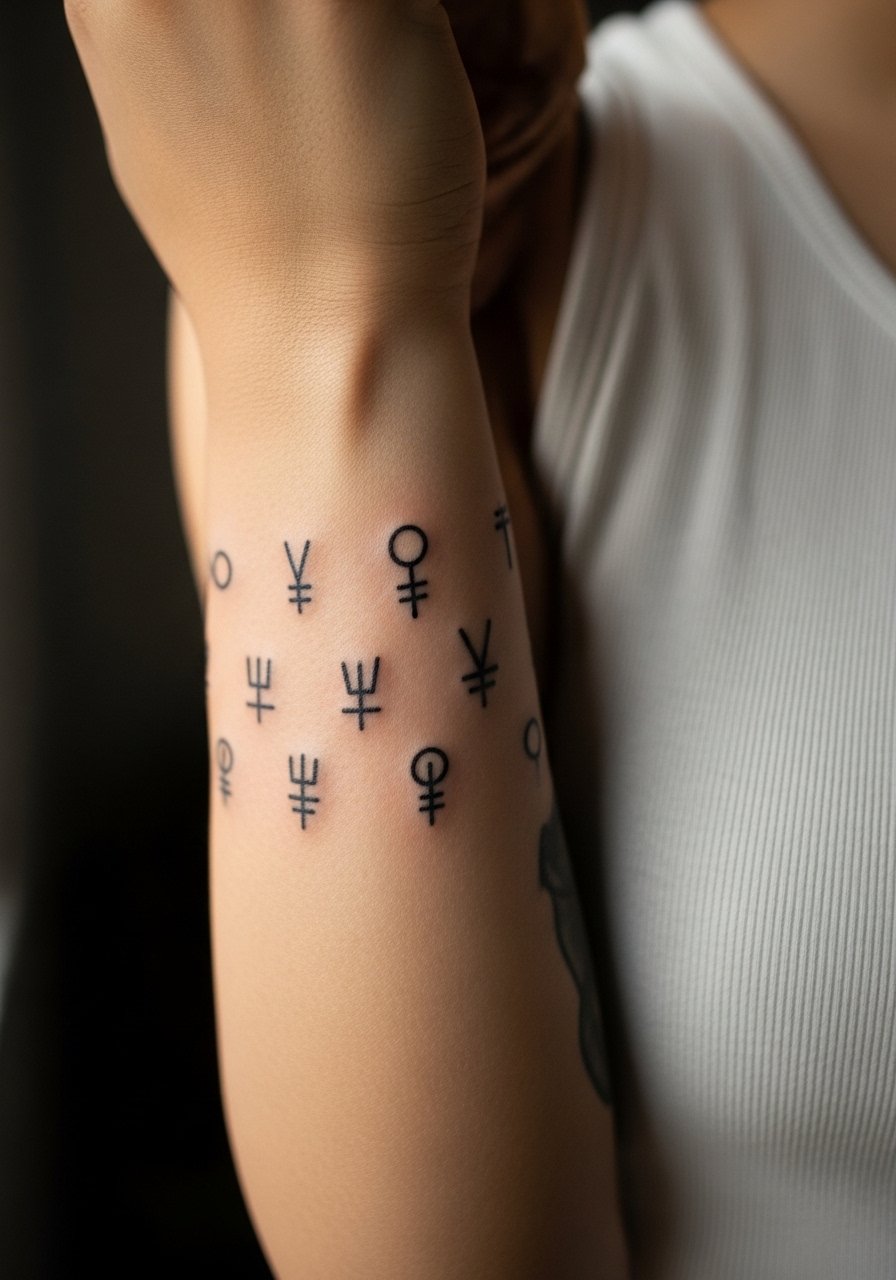
Upside-down symbols are playful because they become right-side up for your partner in an embrace. The inner bicep hides well under shirts, but it is a sensitive area. Expect higher pain and plan short sessions for symmetry work. The common mistake is not confirming rotation during stencil placement, which ruins the mirror effect. Ask the artist to photograph both stencils side by side before inking to confirm orientation. For the session, wear a loose tank so the arm can be raised without fabric pulling.
10. Puzzle Piece Lock and Key Forearm
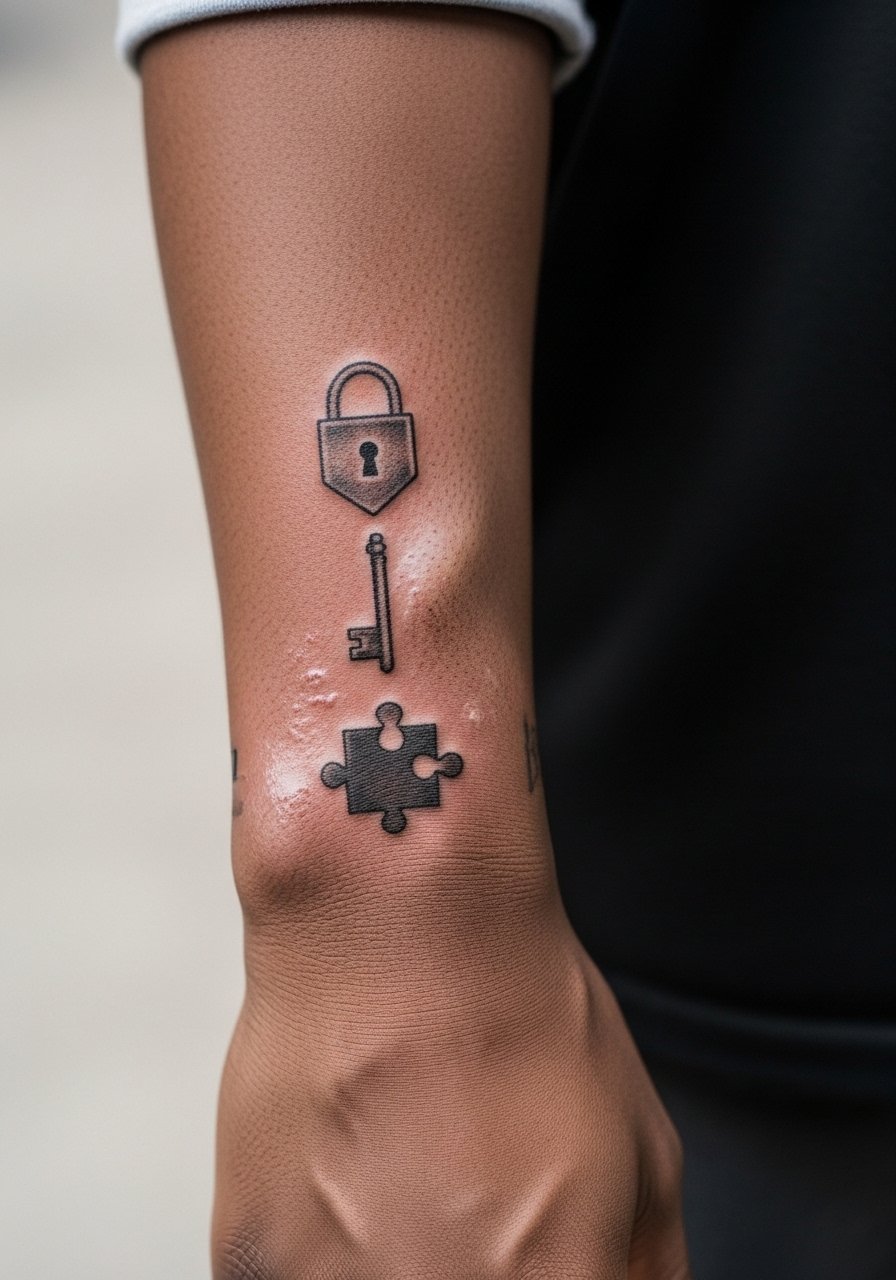
Small illustrative motifs like a lock and key read well on the wrist-to-forearm corridor because they are visible but not intrusive. Keep each element at 2 to 3 inches and avoid heavy shading that wears unevenly on wrists. The wrist area has constant motion and friction so expect touch-ups sooner than larger pieces. A common error is asking for too much tiny engraving on the lock, which disappears over time. For a casual finish, pair with a minimalist leather bracelet opposite the tattoo so the pair looks intentional without crowding.
11. Infinity Line with Coordinates Inner Arm
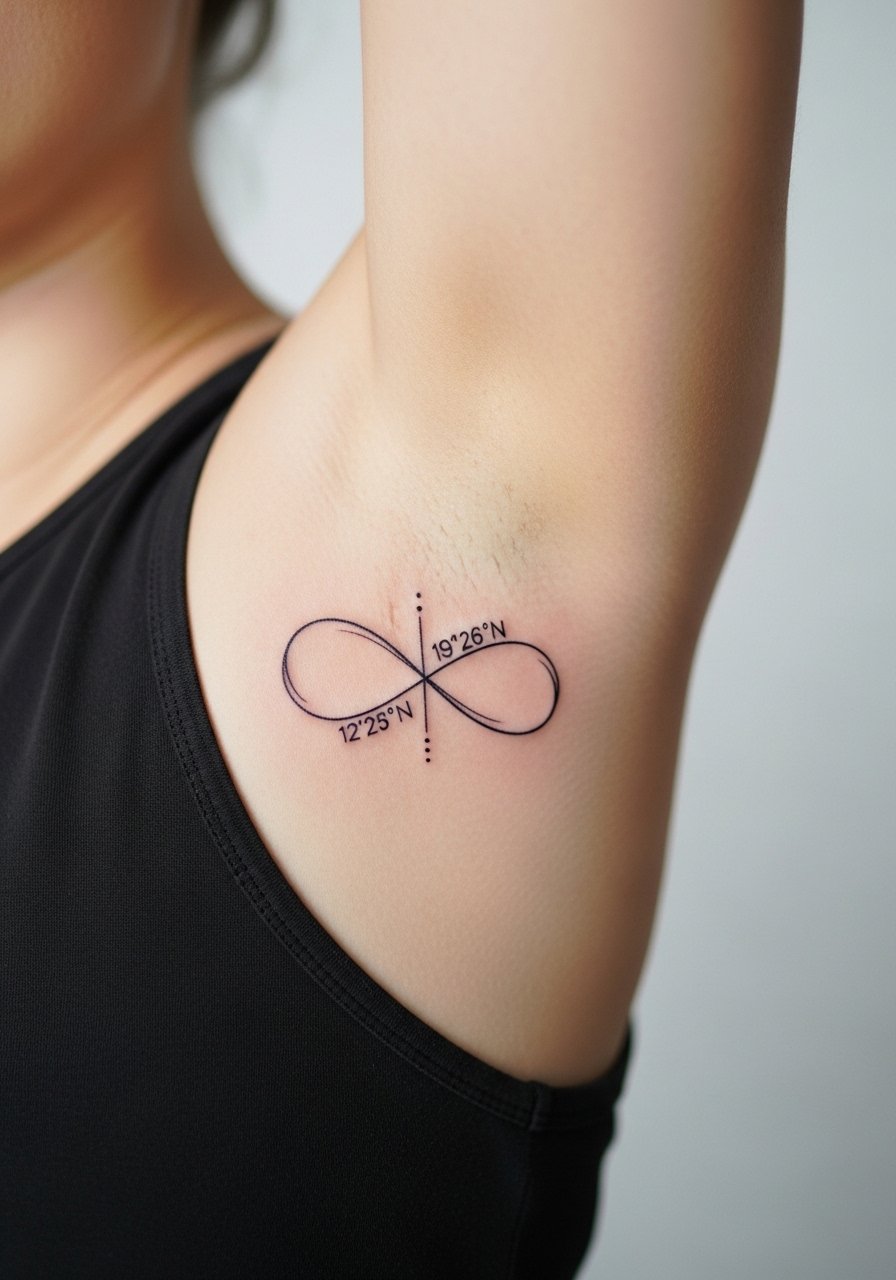
This design layers a universal motif with a discreet location. The inner upper arm provides shelter from sun and abrasion, which helps fine line hold longer. Still, artists debate fine line longevity on arms. Name both camps in the consultation. Ask for slightly denser strokes and a clean kerning of the numbers so the coordinates remain legible at 1 year and 3 years. Sessions are short and comfortable. For showing it off without shouting, wear a rolled cuff chambray shirt with sleeves pushed to the mid-forearm.
12. Cowboy Hat Matching Outer Arm
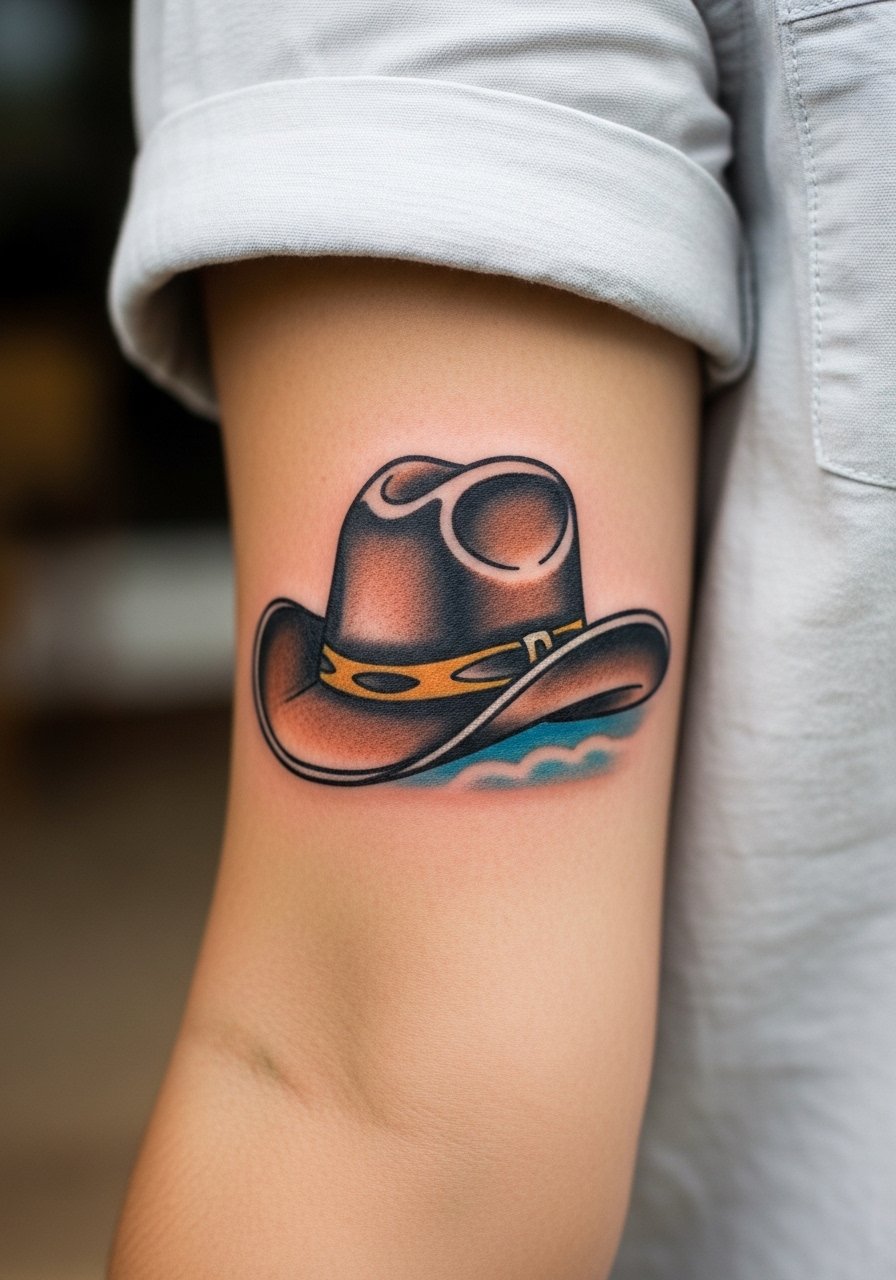
This is a niche option that reads iconic when scaled to forearm width. Outer forearm placement keeps the hat visible and easy to expand into Western-themed panels later. Tell the artist you want simplified shading and strong silhouette so the hat reads from a distance. A single session of about an hour usually does it. Avoid tiny decorative rope details that fill in over time. For an Americana vibe, pair with a short sleeve button-down shirt you can cuff to frame the piece.
13. Biomechanical Gear Half Sleeve
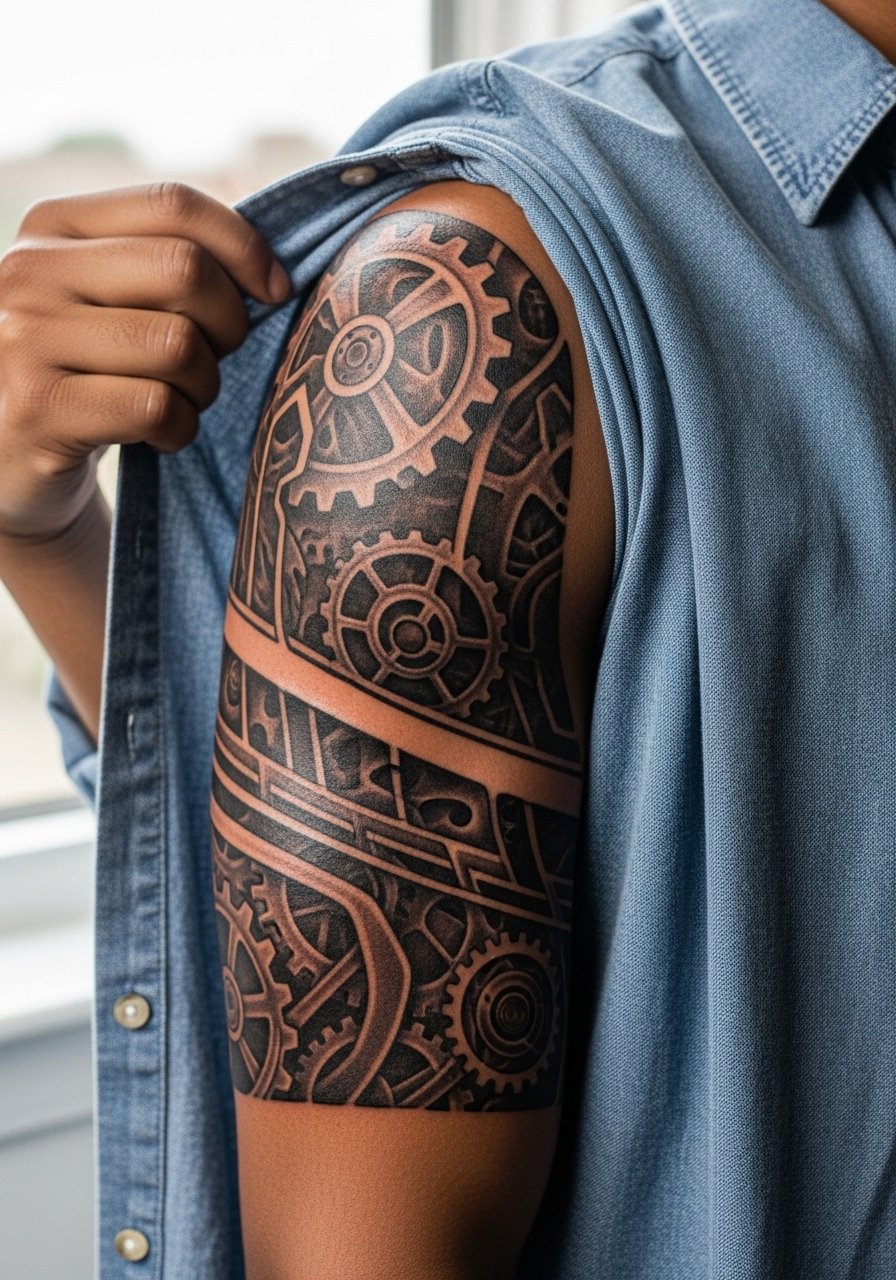
Biomechanical realism needs a large canvas and patience. Start with a single panel that focuses on depth and negative space. Tell the artist you want open mechanical cavities so future shading does not become a flat gray. Sessions are long and numbered, often four or more, and the work can be intense on the skin. The common mistake is trying to compress too many gears into a small area. For session comfort, bring a loose button-down that you can slide aside without tugging on the arm.
14. Praying Hands with Cross Forearm
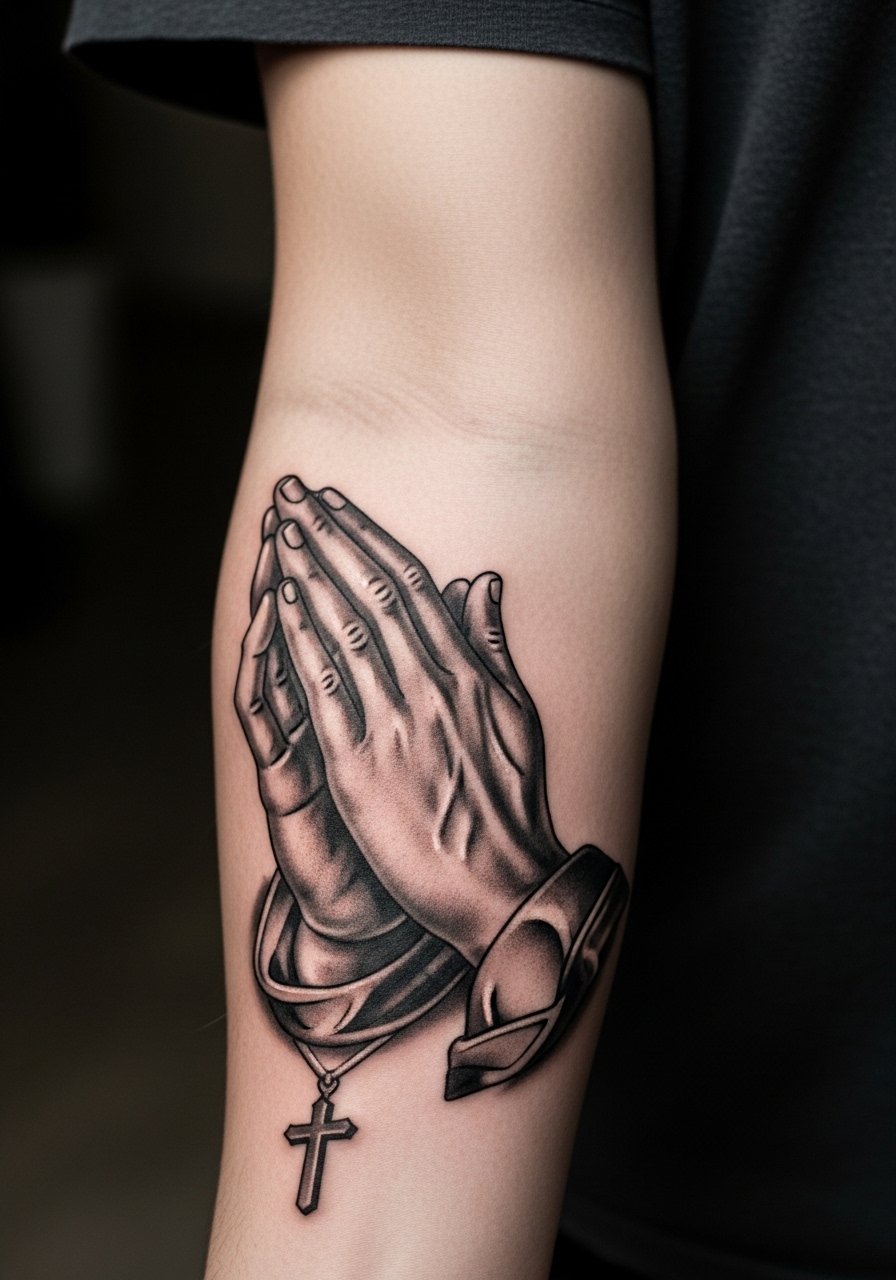
Faith pieces on the inner forearm read personal and public at once. Ask for a gray-wash technique that keeps highlights between fingers to avoid a solid gray block after a few years. This area is moderate in pain and usually takes a couple of hours for a detailed realism pass. People often over-detail knuckles and rings which fuzz over time. For immediate wearability during the session, pull on a short sleeve button-down so the artist can work without fabric friction.
15. Mirrored Arrow Pair on Inner Forearms
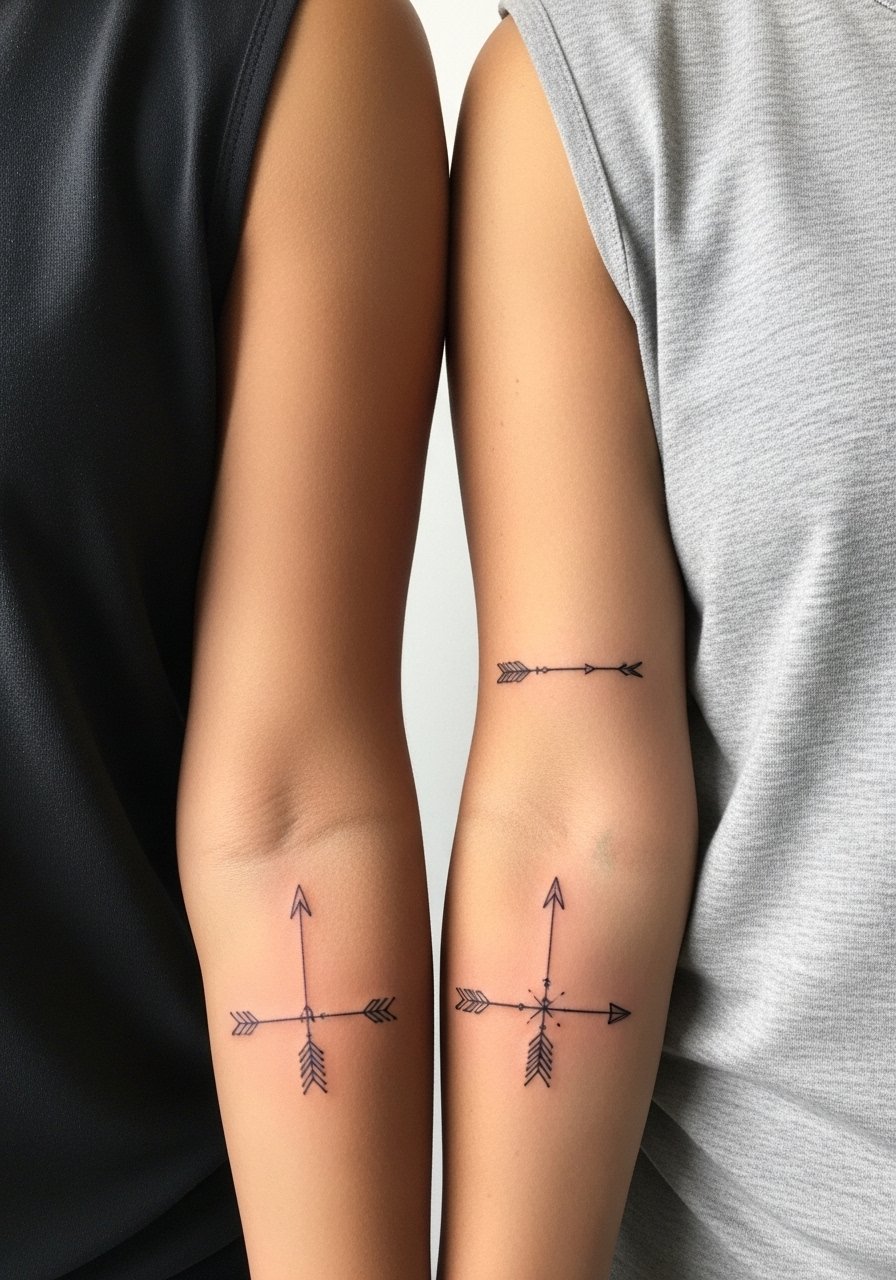
Arrows are classic for men who want symmetry without heavy symbolism spelled out. Place the shafts so they align near the wrist when palms meet. The inner forearm is lower pain and easy for matching work in a single session. A frequent error is making the arrowheads too ornate which adds fragile detail that fades. For a simple show-off, roll up a navy chambray shirt to mid-forearm so the pair frames the sleeve naturally.
16. Matching Compass on Upper Arms
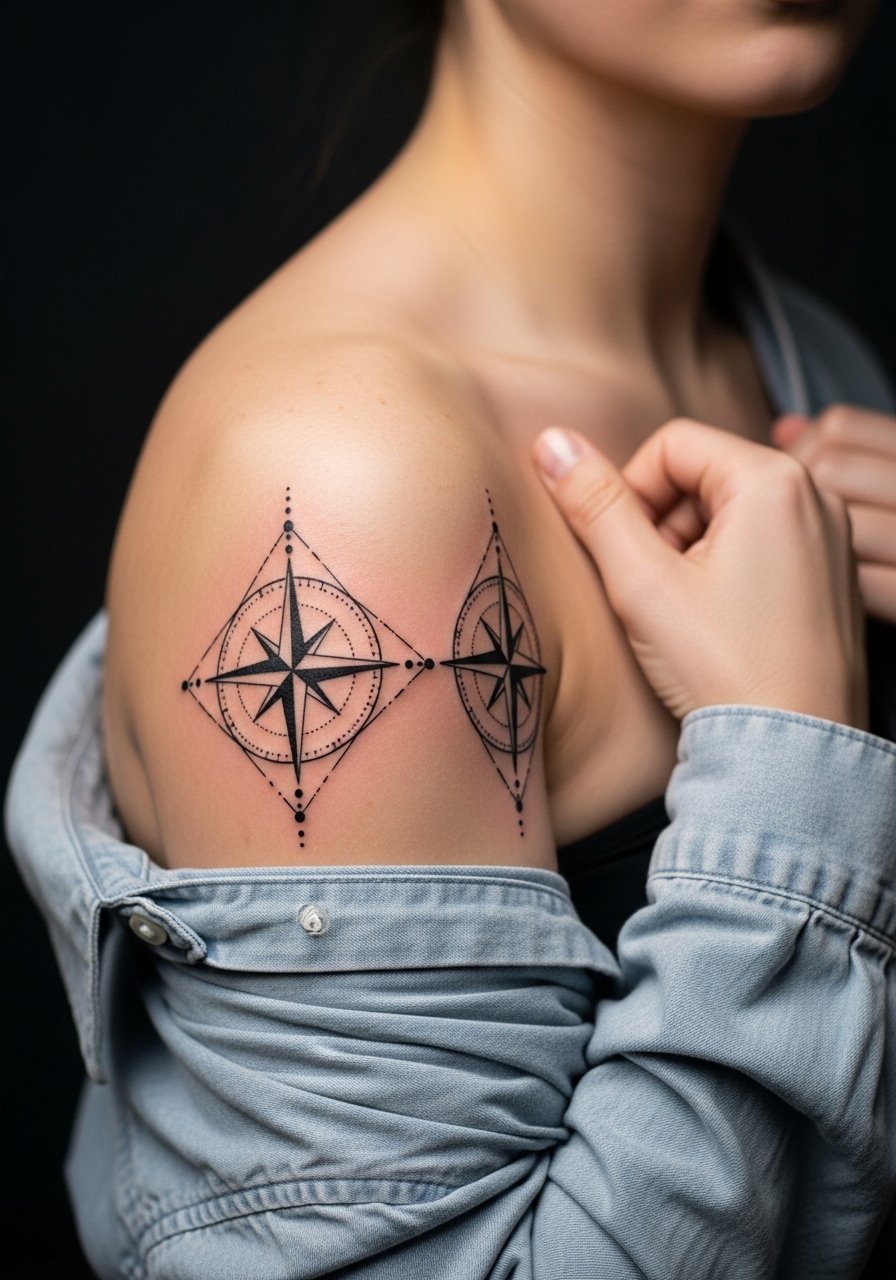
Compasses scale well to the upper arm and play nicely as matching pieces for partners or brothers. Ask for bold cardinal points and lighter inner detailing so the central ring does not turn into a dark blob. Upper arm skin tolerates heavier shading so consider subtle stippling for texture. Sessions are moderate to long. For a rugged show-off, layer an open flannel shirt over a tee to let the compass peek out seasonally.
17. Minimalist Barbed Wire Armband
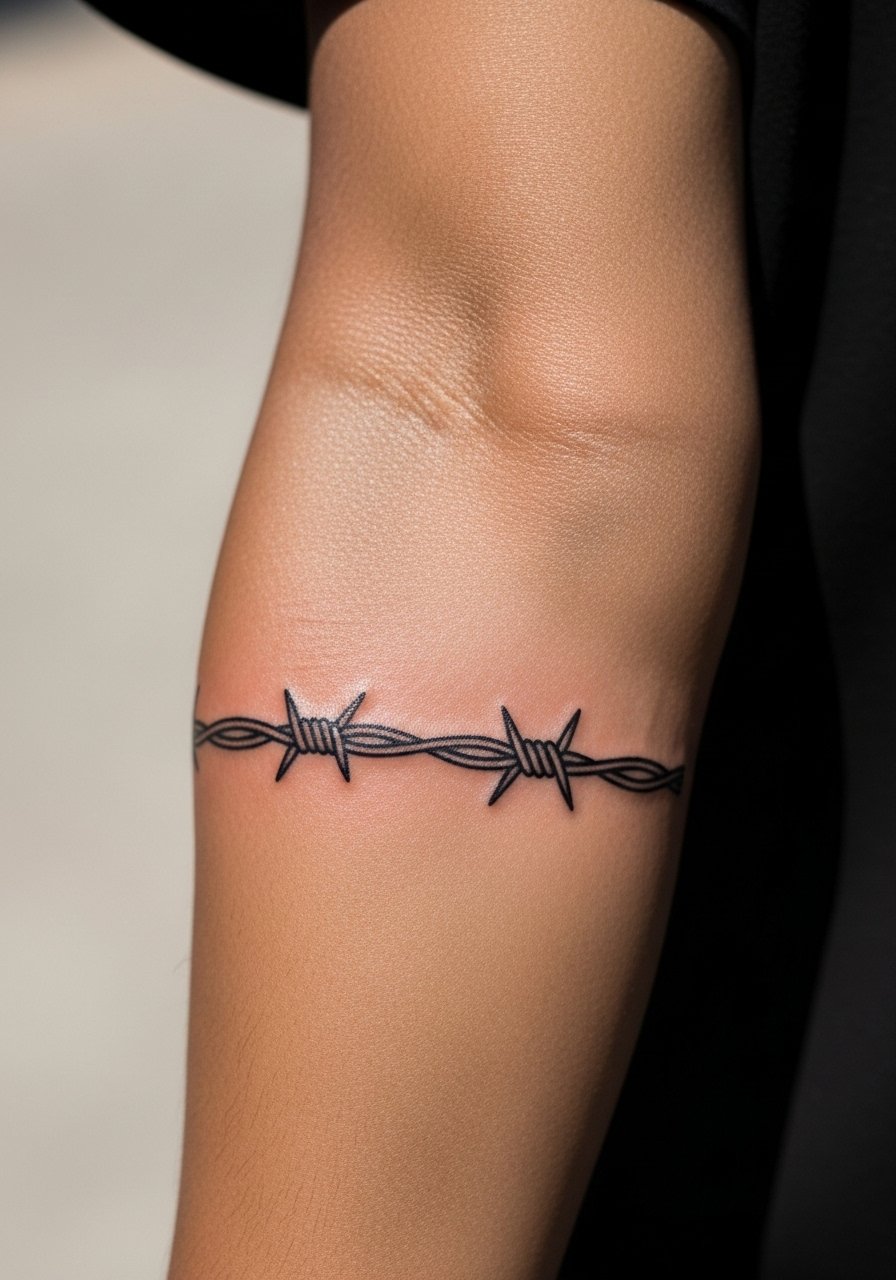
Clean, single-line armbands need exact spacing to avoid looking wobbly when healed. Have your artist trace the band while your arm is relaxed and flexed so you can see how it sits in both states. The forearm version has lower blowout risk than hands or wrists. Keep the barb spacing wide enough to preserve sharp points. Sessions are short. For a subtle pairing, wear rolled sleeves or a fitted henley to show an unbroken band line.
18. Micro-Realism Wolf Head on the Bicep
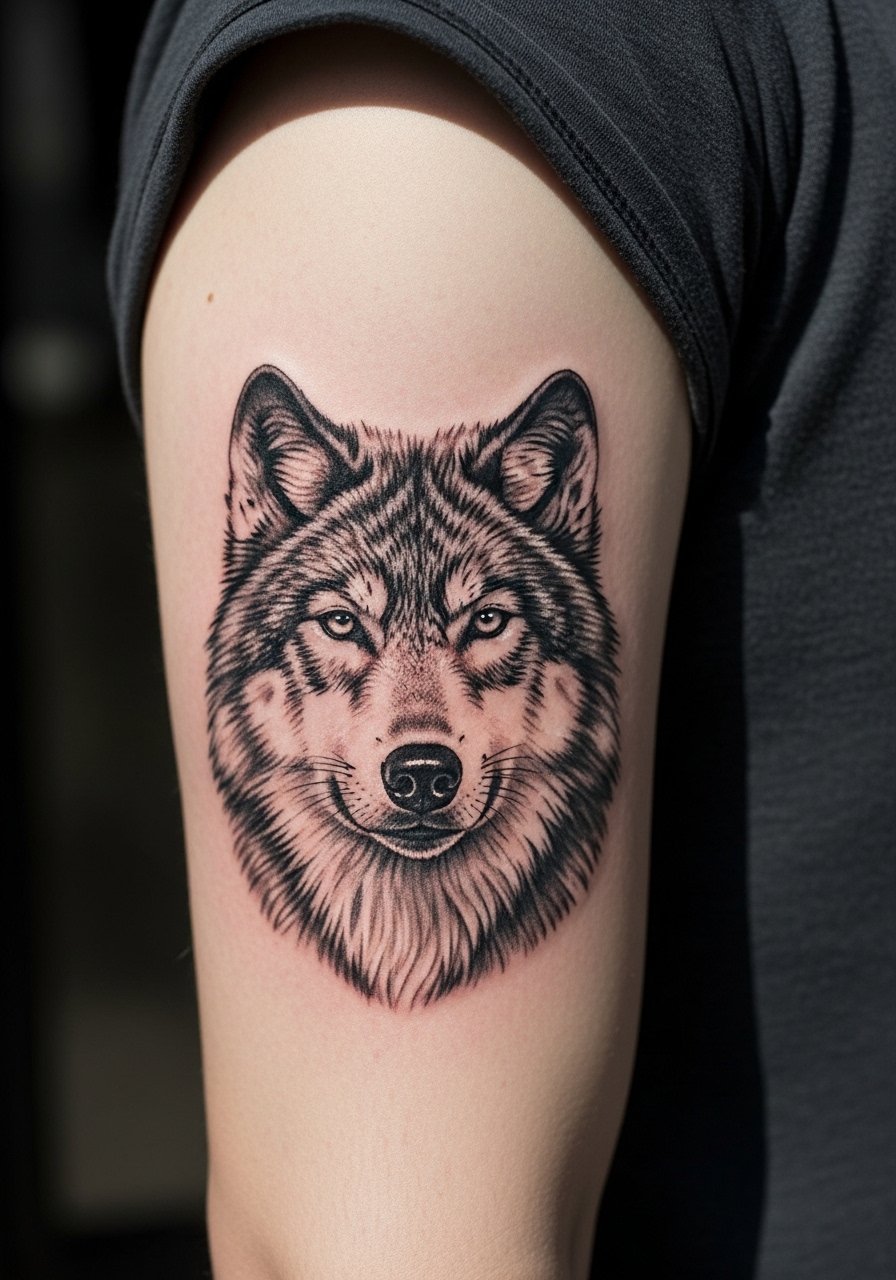
Micro-realism benefits from smooth skin and a steady artist hand. The outer bicep is forgiving for fine texture but avoid cramming too many whisker-style strokes into a tiny muzzle. Session time is short to moderate depending on size. A common error is choosing an image with too many tiny highlights that do not translate well in ink. For a clean presentation, a muscle tank top keeps the outer bicep visible without layering.
19. Chain-Link Cuff Forearm
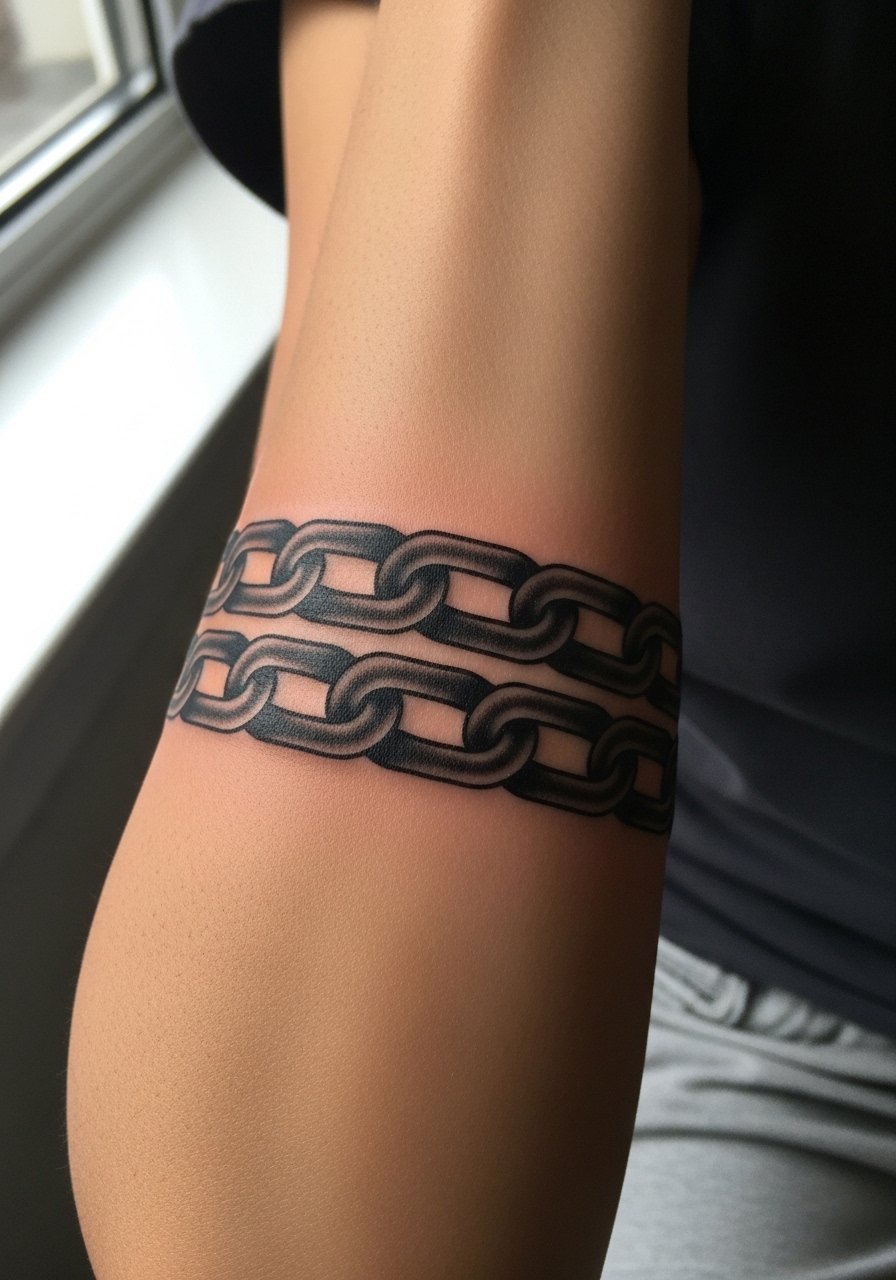
A chain-link cuff reads strong when the links have solid negative spacing and crisp edges. Avoid soft shading inside links that ages into flat gray. Have the artist stencil the cuff and test the flex to see how the links sit when your arm bends. Sessions are brief for a single band but expect touch-ups if the links are thin. Pair with a slim leather cuff bracelet on the opposite arm to balance the metal-inspired theme.
20. Small Anchor and Rope Near Wrist
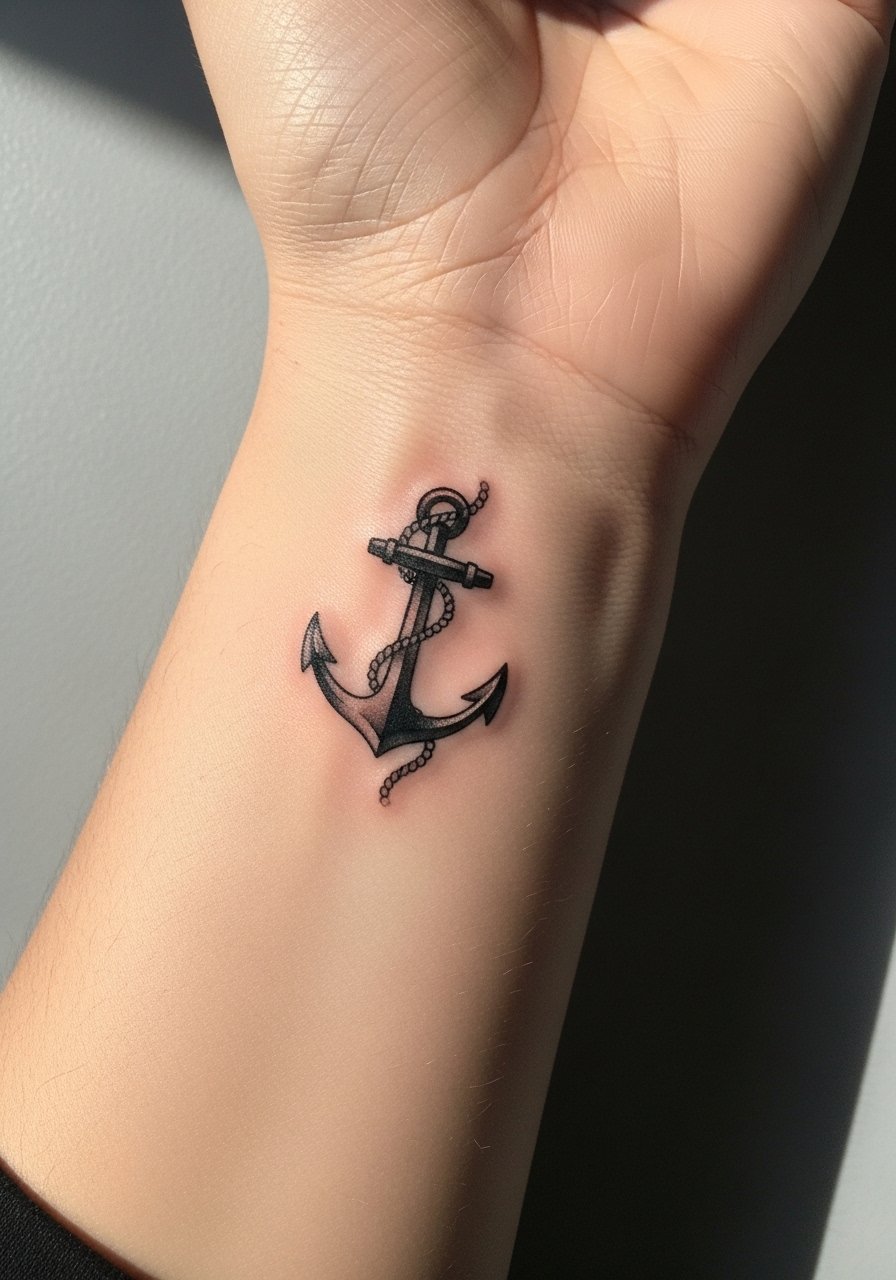
Anchors are symbolic and compact, and the wrist placement keeps them visible and wearable. Keep the rope simple and avoid micro-knotting that fails quickly under abrasion. Wrist tattoos lose pigment faster so plan for a touch-up in a couple of years. Pain is sharper at the wrist but short lived. For a nautical touch, wear a thin leather bracelet on the other wrist to frame the anchor without covering it.
21. Bold Traditional Rose with Dagger Upper Arm
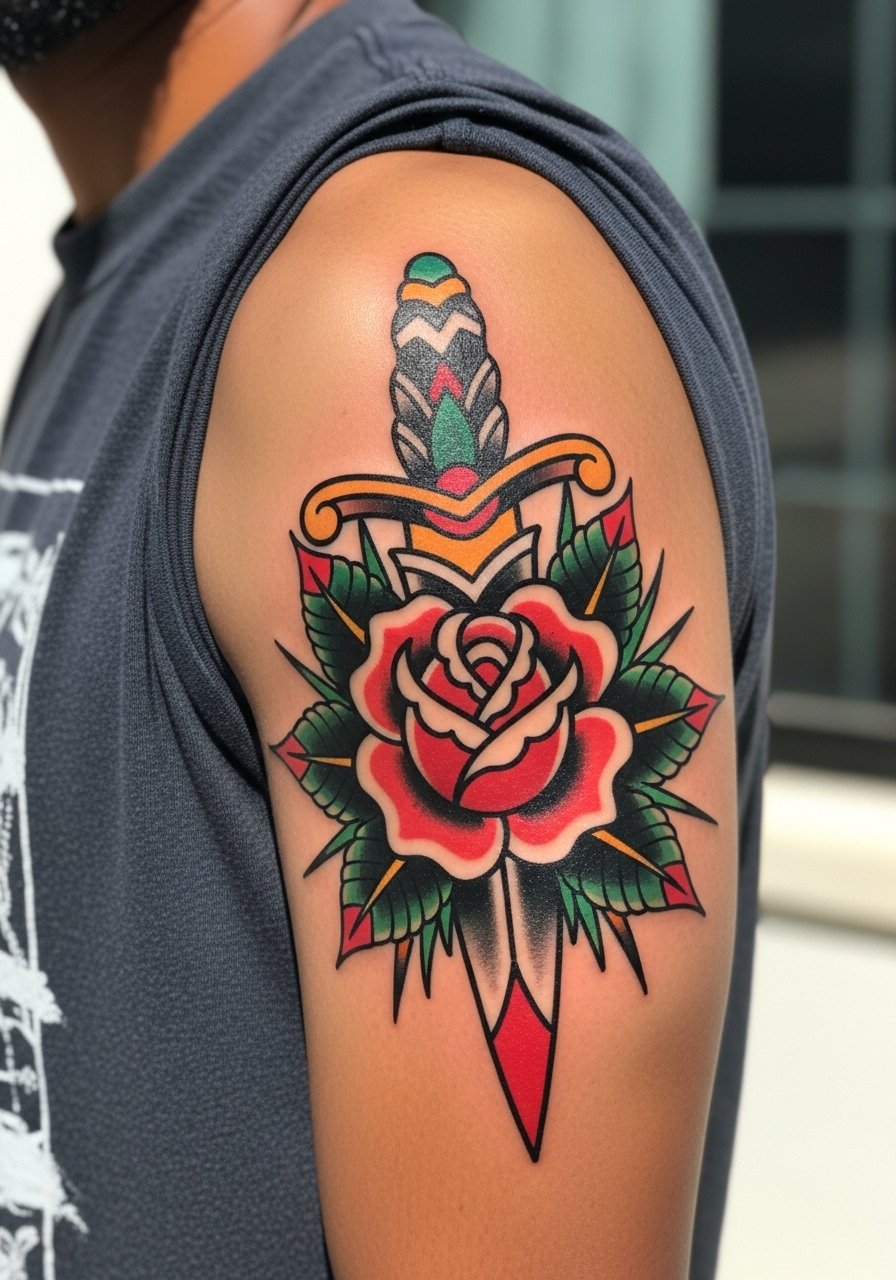
Traditional roses and daggers age well because of the heavy outlines and saturated fills. Ask the artist to lean into thick black borders and avoid overly detailed petal texture that blurs. Upper arm placement lends itself to color saturation that lasts. Sessions can be split into color and outline passes. New clients sometimes request fine veins in petals that disappear; specify bold petal blocks instead. For a work-ready look, throw an open flannel over a tee to let color peek.
22. Stipple Shaded Geometric Band
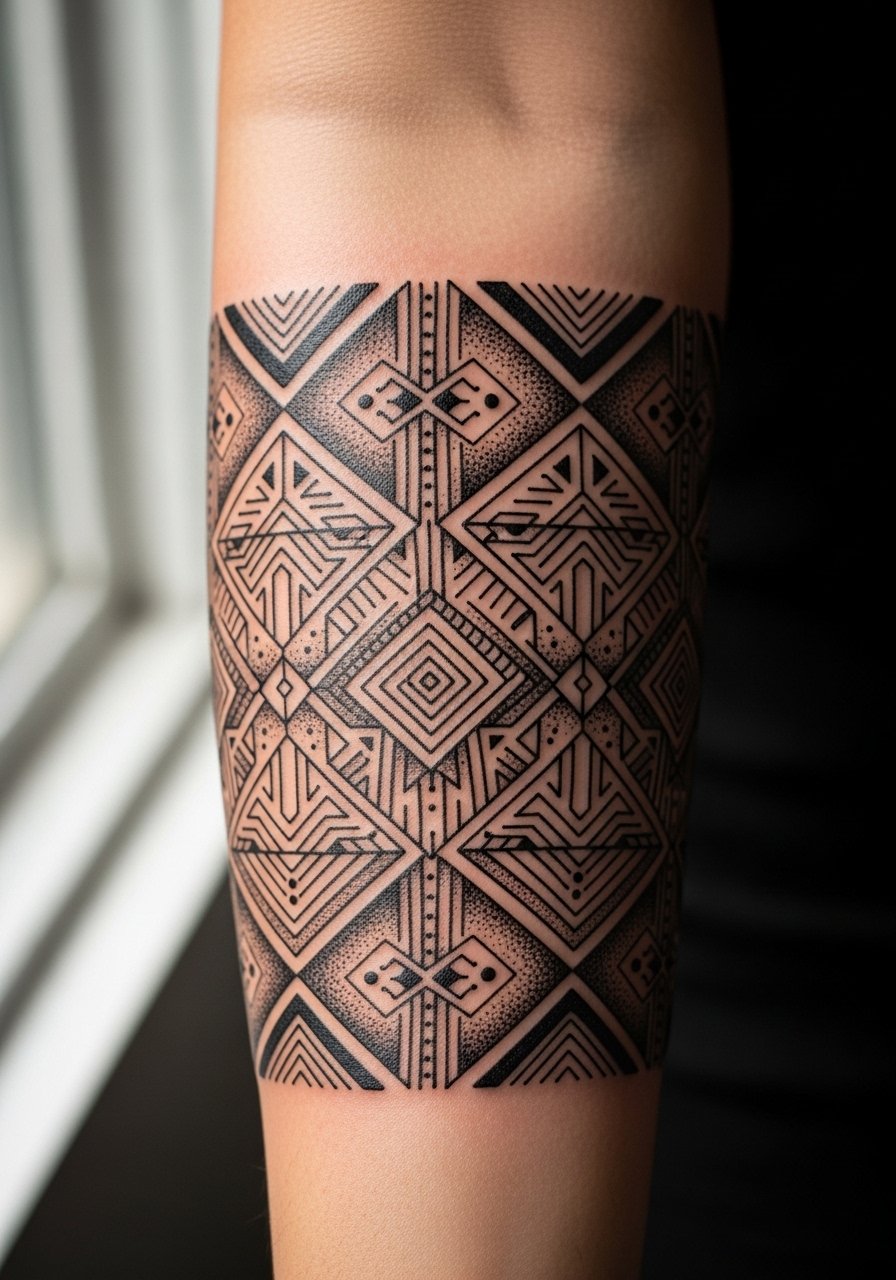
Dot work relies on spacing to maintain texture over time. The forearm is a forgiving canvas but avoid compressing dots too tightly in dense sections. Tell the artist you want a gradual stipple fade rather than a packed black fill. Sessions can be longer because stippling takes time. A common mistake is requesting micro-dots that look great fresh but soften into indistinct gray. For low-key wear, roll the sleeve of a navy chambray shirt to the forearm.
23. Coordinates with Tiny Star Inner Wrist
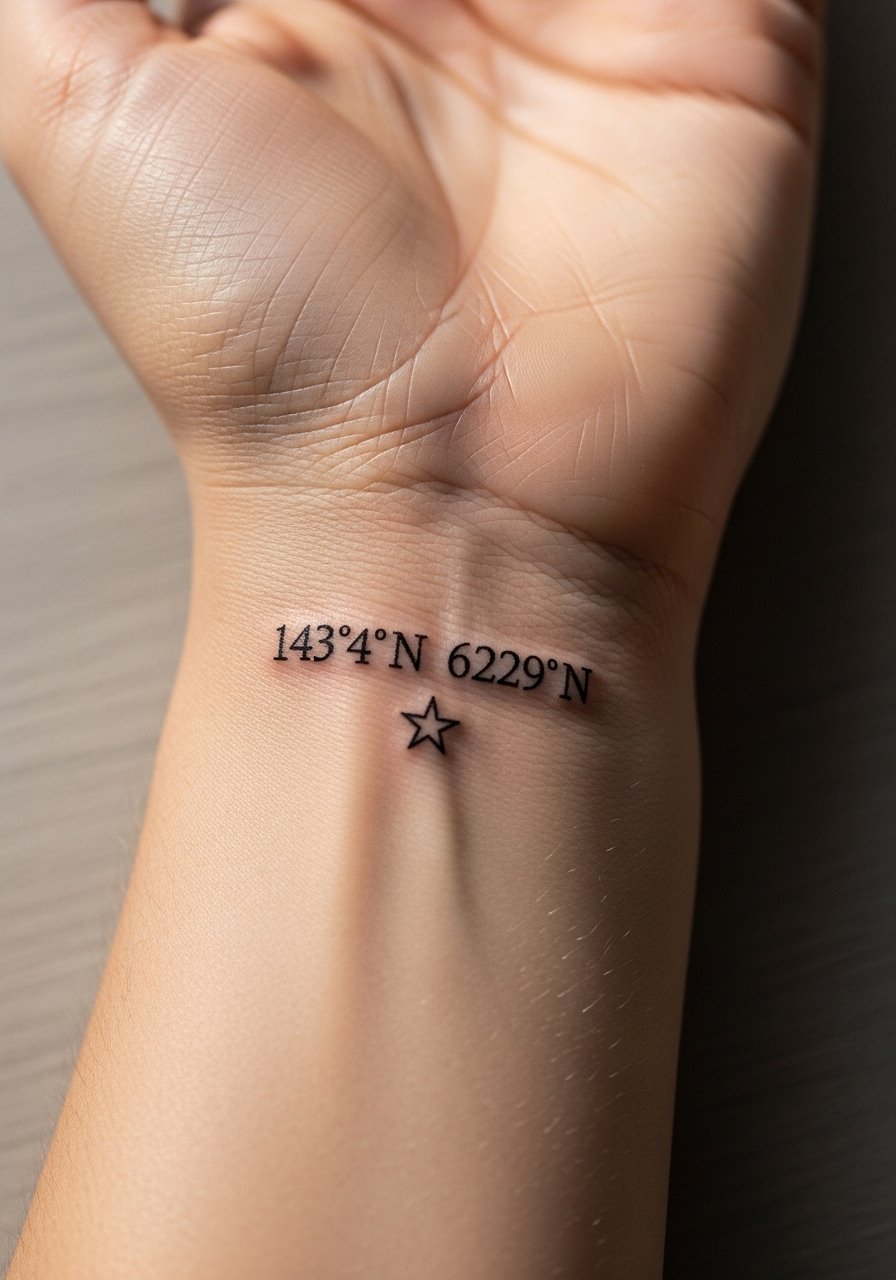
Tiny coordinate tattoos are discreet but vulnerable on the inner wrist. Ask for slightly bolder numerals and increased letter spacing for legibility. Artists differ on fine line longevity, so discuss minimal thickness before committing. Expect sharper pain but quick sessions. A typical regret is choosing a font that looks stylized in the studio but reads like a blur after healing. For a balanced wrist look, wear a minimalist leather watch on the opposite wrist.
24. Complementary Mountain Range Wrap Forearm
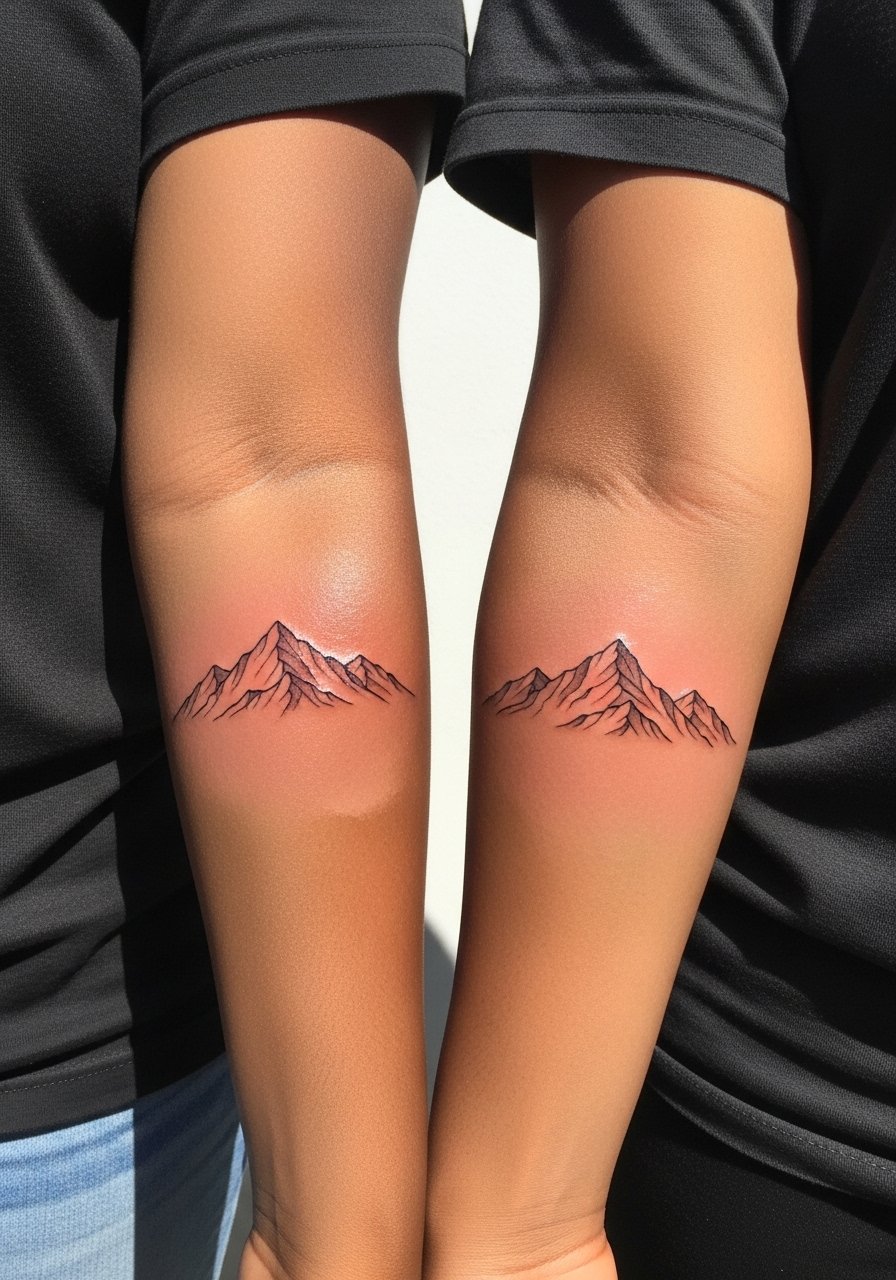
Mountain wraps work when the ridgelines align visually across both arms. Keep peaks simplified and avoid excessive cross-hatching that merges with time. The outer forearm tolerates a modest amount of gray wash for shadow but avoid dense fills near the wrist. Sessions are usually brief per arm. A common error is compressing too many peaks into a narrow band which reads cluttered. Pair with a fitted henley with sleeves rolled to mid-forearm for an outdoorsy look.
25. Minimalist Roman Coin Portrait Bicep
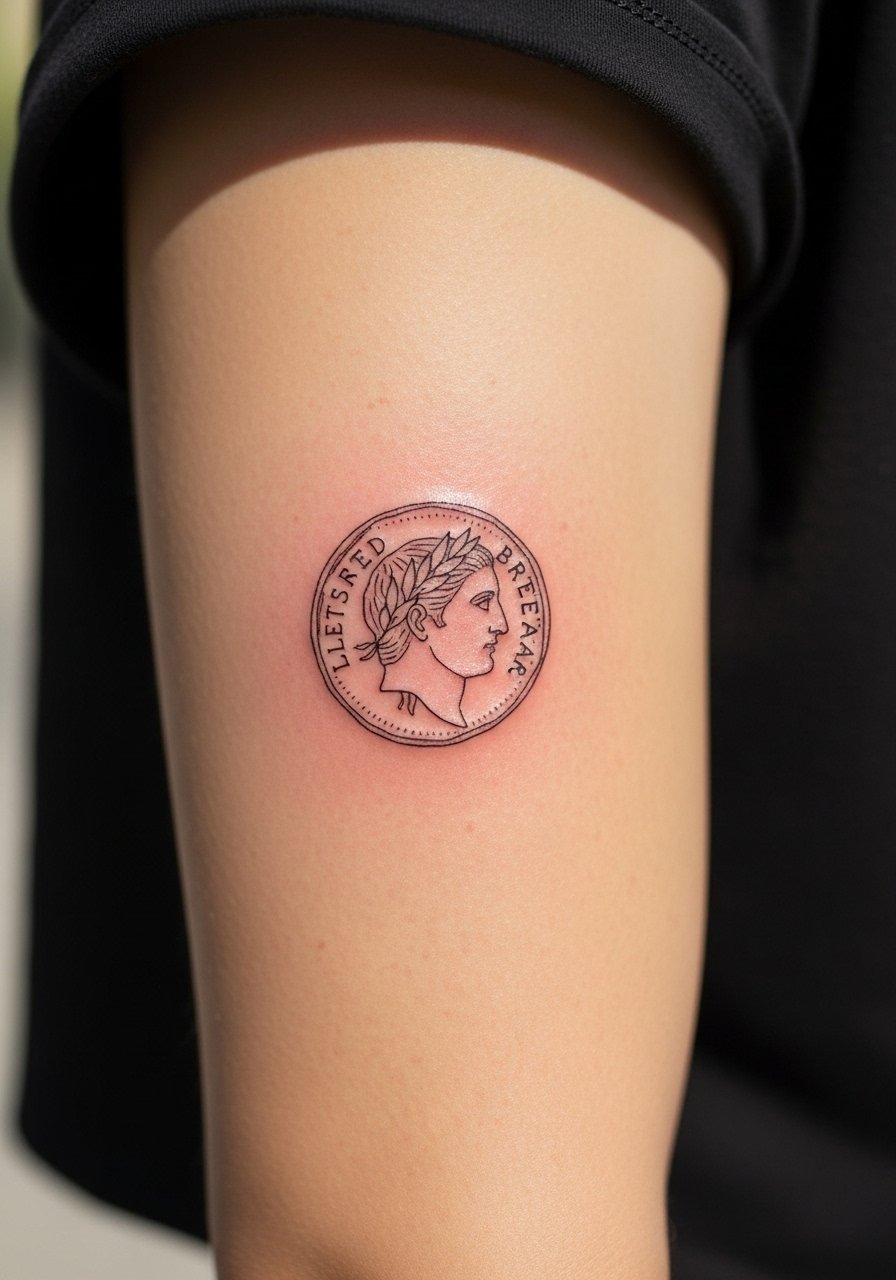
Portrait-like coin tattoos need simplified facial planes to avoid a smudged look. On the bicep, ask for bold contour lines and restricted interior detail to preserve identity over years. Sessions are short. The typical mistake is over-refined facial features that do not translate in ink. For an intentional vintage feel, pair with an open flannel shirt worn open to reveal the bicep.
26. Morse Code Phrase Around Forearm
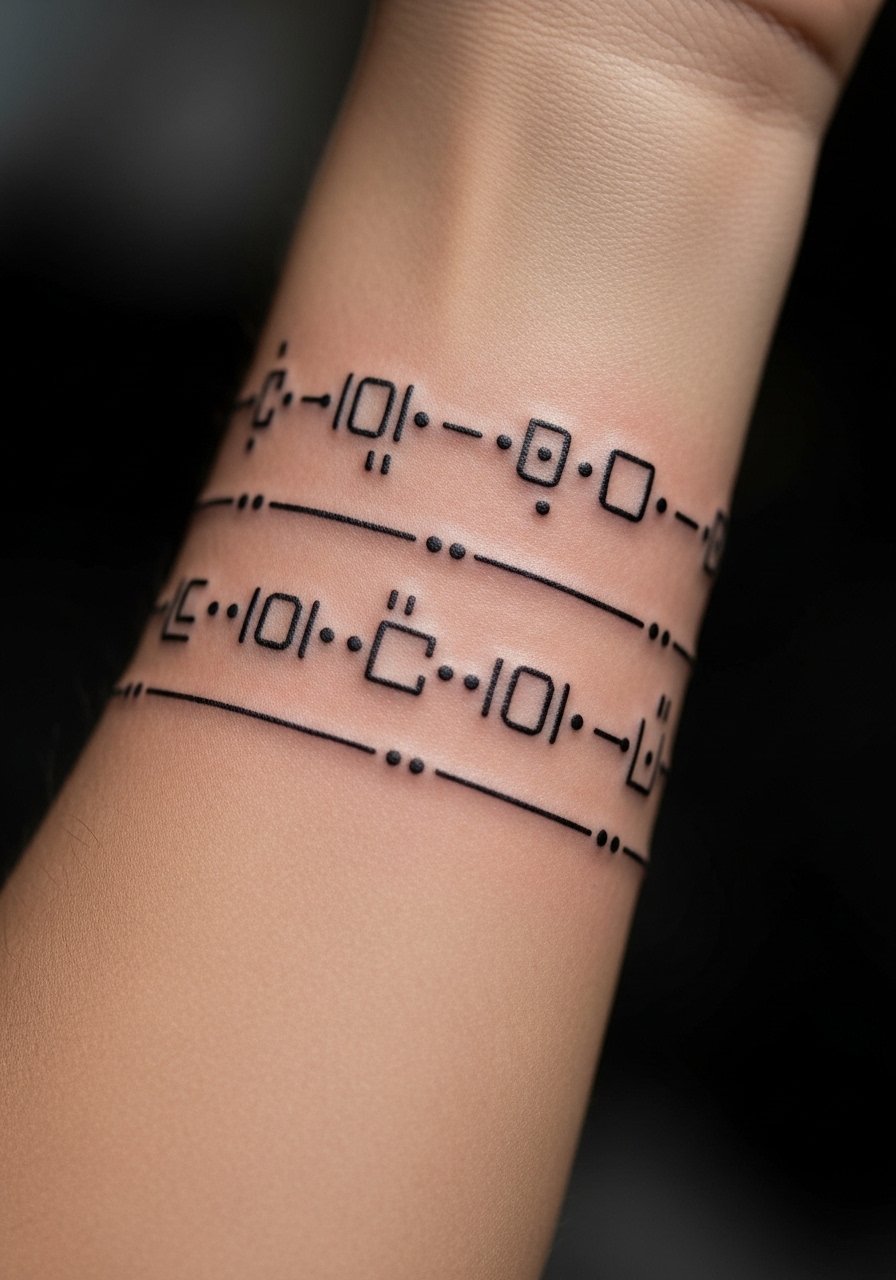
Morse code is subtle and resists fast trends because it is essentially a pattern, not a literal word. Keep spacing consistent and avoid turning dots into tiny blobs by asking for generous gaps. The forearm is forgiving but avoid placing code across high-fold areas. Sessions are quick. A mistake is compressing a long phrase into a thin band which loses readability. For a low-key accessorized look, wear a slim leather cuff bracelet on the opposite arm that echoes the linear pattern.
27. Rope and Anchor Half Sleeve
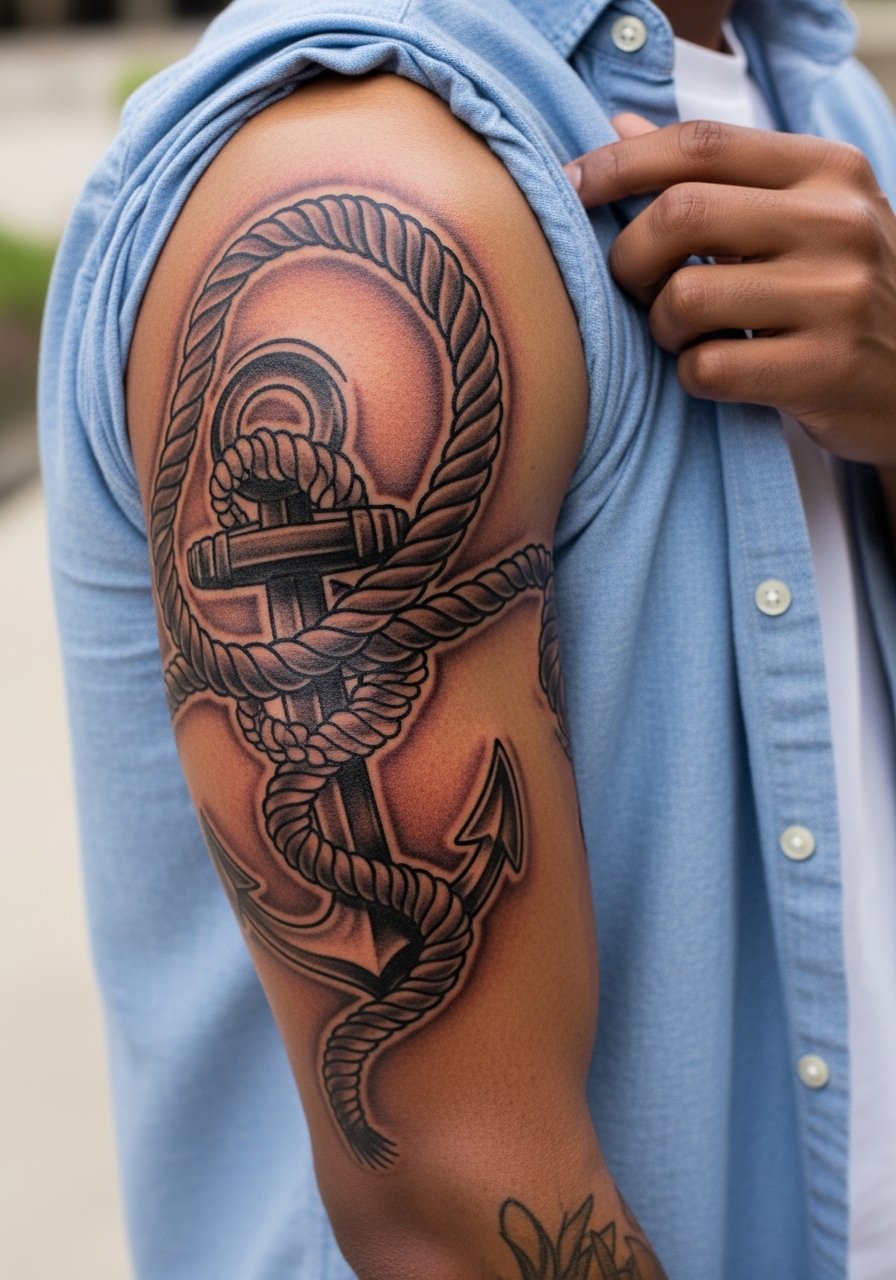
A half sleeve that integrates rope textures and anchor motifs ages well if the rope lines are bold and the anchor silhouette is simple. Plan negative space between rope coils to prevent a muddled fill. Sessions will span multiple visits to avoid overworking the deltoid. Avoid ultra-fine rope crosshatching which fills in over time. For session comfort, choose a button-down shirt you can slide aside so the artist has clear access without rubbing fabric on fresh work.
Frequently Asked Questions
Q: How much should I budget for a forearm matching tattoo?
A: Expect a range depending on size and style. Small fine line forearm pieces commonly fall in the 150-600 range for a single session. Larger or colored forearm work can push into higher ranges if you split sessions. Hourly rates vary by studio and location, so get an estimated session count during consultation.
Q: Will fine line matching designs blur faster than traditional blackwork on arms?
A: From what I've seen, fine line tends to soften sooner on high-friction or sun-exposed areas. Bold blackwork holds color and silhouette longer. The deciding factors are placement, line spacing, and aftercare. Discuss optimal line weight with the artist so both matching pieces age similarly.
Q: Do I need different aftercare for wrist and upper-arm tattoos?
A: Yes. Wrists and hands face more abrasion and washing, so short-term protective measures like thin film help. Upper-arm pieces tolerate more movement and less everyday wear. Use the products recommended in the Studio Day Picks block for the first week, and keep wrist pieces shielded during high-contact tasks.
Q: How do weight changes affect matching forearm designs?
A: Forearms hold shape better than midsection but dramatic weight shifts can warp long wraps and very thin script. If you're concerned, aim for designs that prioritize linework and spacing over large filled areas. That keeps matching pieces visually consistent even if body composition changes.
Q: Artists disagree about Saniderm versus dry healing. Which approach is better for arm tattoos?
A: Both camps have valid points. The Saniderm side says a moist barrier reduces scabbing and can speed early healing. The dry-healing side argues minimal occlusion avoids clogged pores and yields cleaner color in certain placements. The best choice depends on your skin type, sweat levels, and the artist's experience. Ask the shop which method they use and why before booking.
