
Fine line compasses dominate feeds right now, and the pieces that still look tidy at year five are not always the ones that scored the most likes at year zero. Forearm compasses can distort when you flex, tiny wrist marks can fade fast, and some designs lean so generic they show up as regret threads later. Read these 21 compass ideas with placement, aging notes, and what to ask your artist so the piece you pick actually holds up.
1. Traditional Compass with Rose and Anchor on Outer Forearm
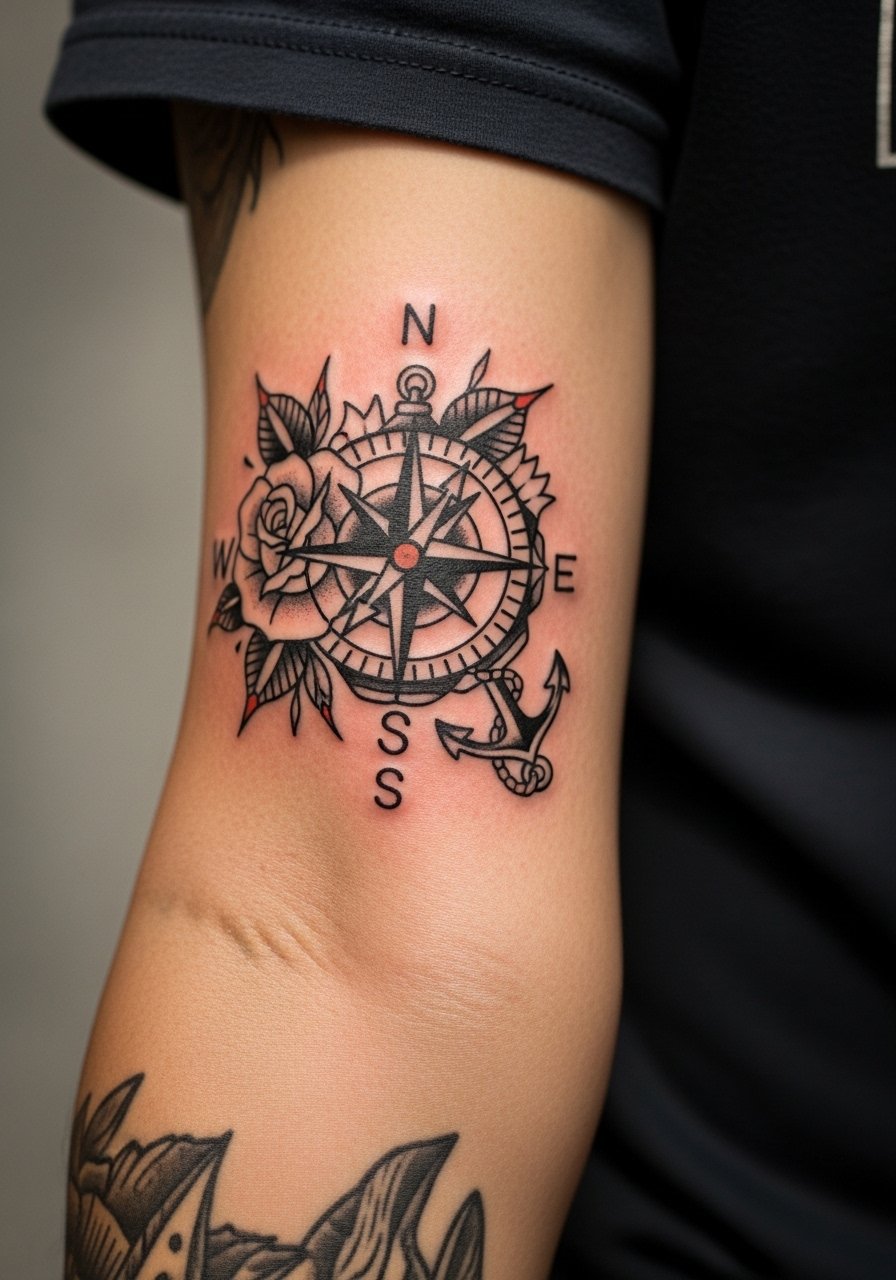
I've seen this version on dozens of forearms and the appeal is obvious. Ask for high-contrast outlines and saturated red in the rose so the central compass reads clearly over time. Fair warning, outer forearm placement flexes when you bend the elbow and that can stretch delicate internal detailing. The common mistake is shrinking the compass too small and relying on tiny inner ticks, which blur faster than thick cardinal points. For the session expect moderate pain and a single 60 to 90 minute pass for a 2.5 to 3.5 inch piece. To show it off wear a navy henley shirt with sleeves rolled or a short sleeve performance tee on appointment day for easy access.
2. Neo-Traditional Compass Nested in Ocean Waves on Calf
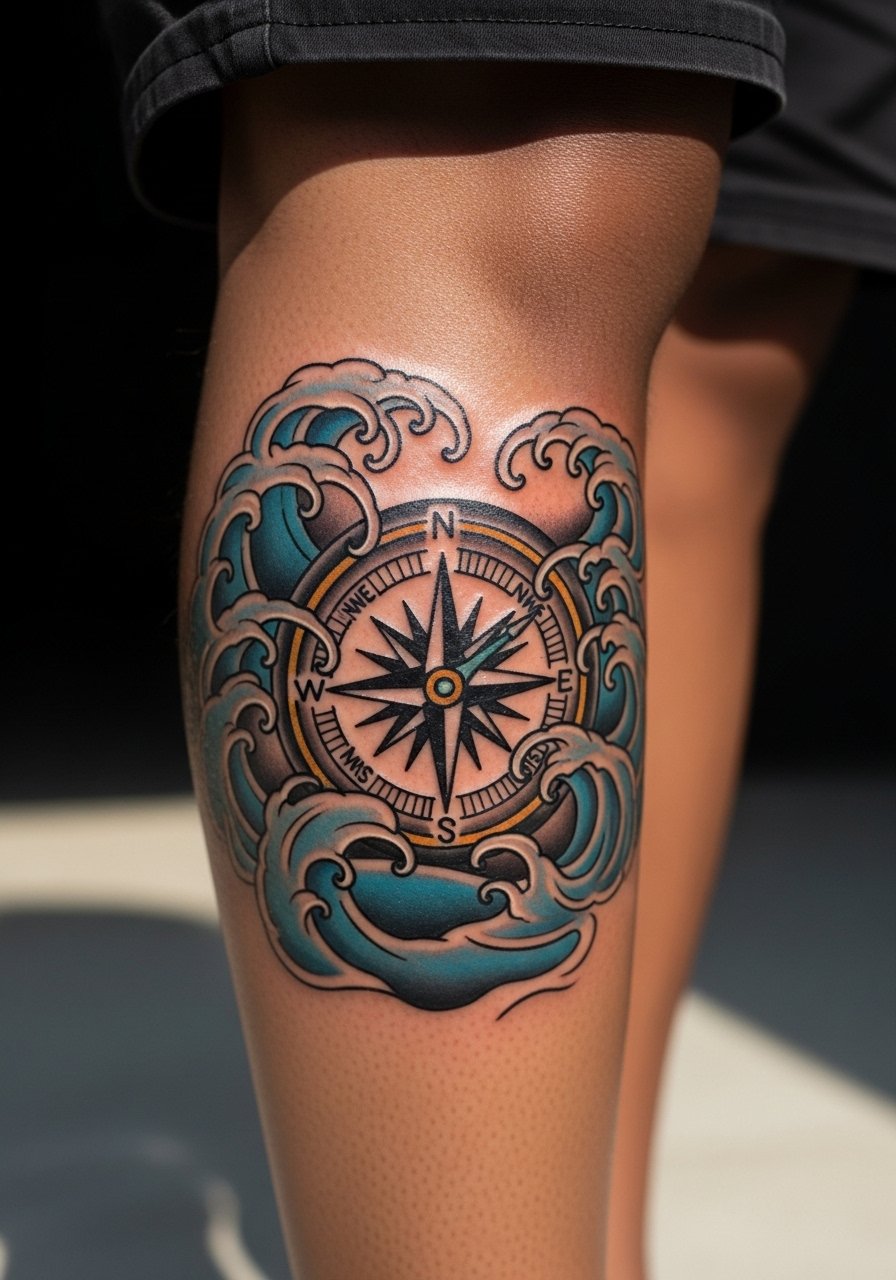
This pulls the compass into a larger scene without covering the skin in a single dark block. I recommend this if you like color but worry about heavy black swathes. Tell your artist you want waves that frame the compass and leave negative space so the compass face keeps clear contrast as it heals. Calf placement handles saturation well and ages predictably because skin there gets less daily abrasion than hands. The session feels straightforward, similar to an upper arm pass, and usually needs two short appointments if the color is dense. For casual show-off, slim joggers rolled to mid-calf work best and make the piece visible, try pairing with slim joggers men for outings.
3. Minimalist Single-Line Compass on the Inner Wrist
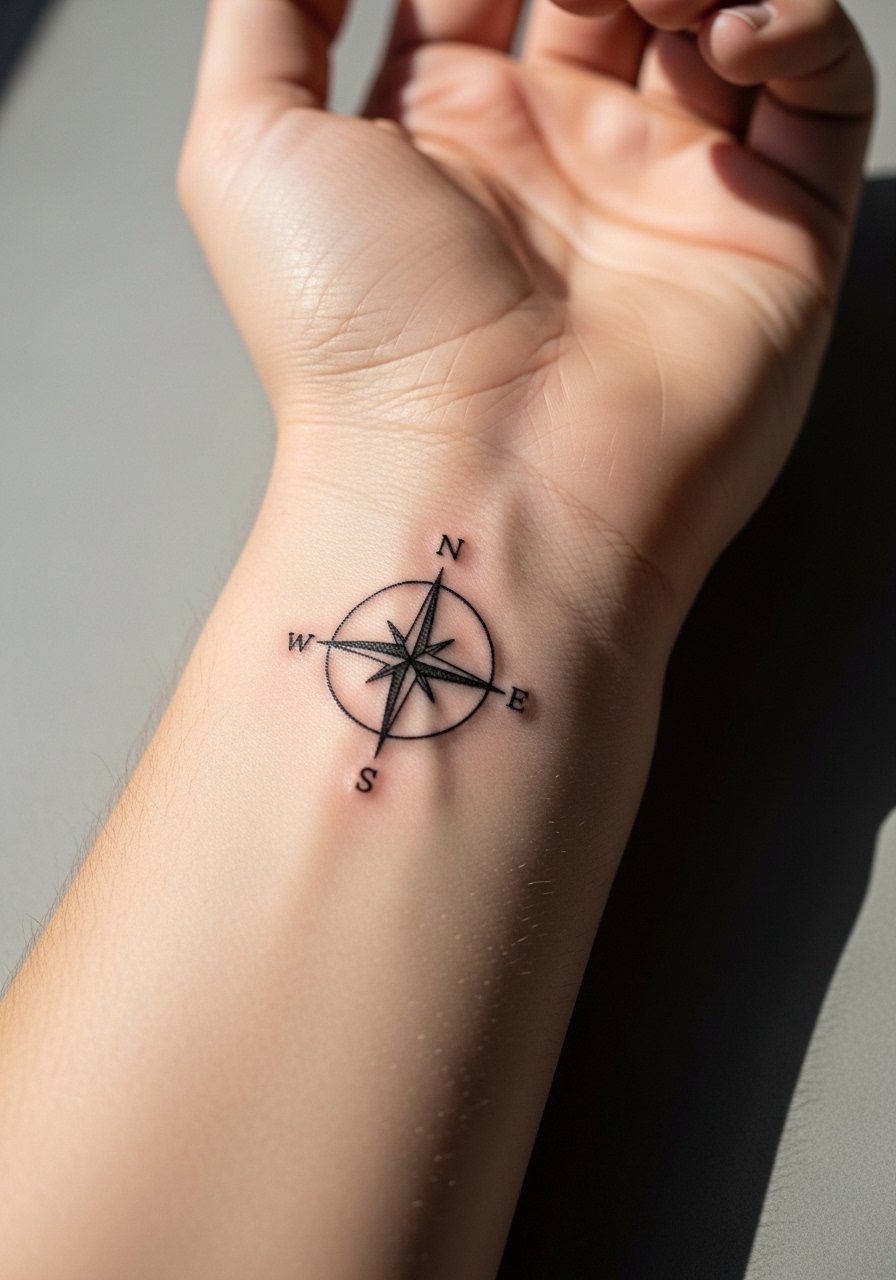
If it is your first compass this one reads subtle and carries symbolism without taking over. The trade-off is longevity. Wrist skin gets washed and rubbed a lot which causes fine line work to fade faster. Ask the artist for slightly heavier main points and a tight but simple circle so the tiny lines do not blur in months. Expect high touch-up potential around year two for very fine lines. The session is quick and sharp but brief. For the appointment wear a sleeveless workout tank or a short sleeve top you can roll up with ease.
4. Blackwork Geometric Compass Sleeve Starter on Upper Arm
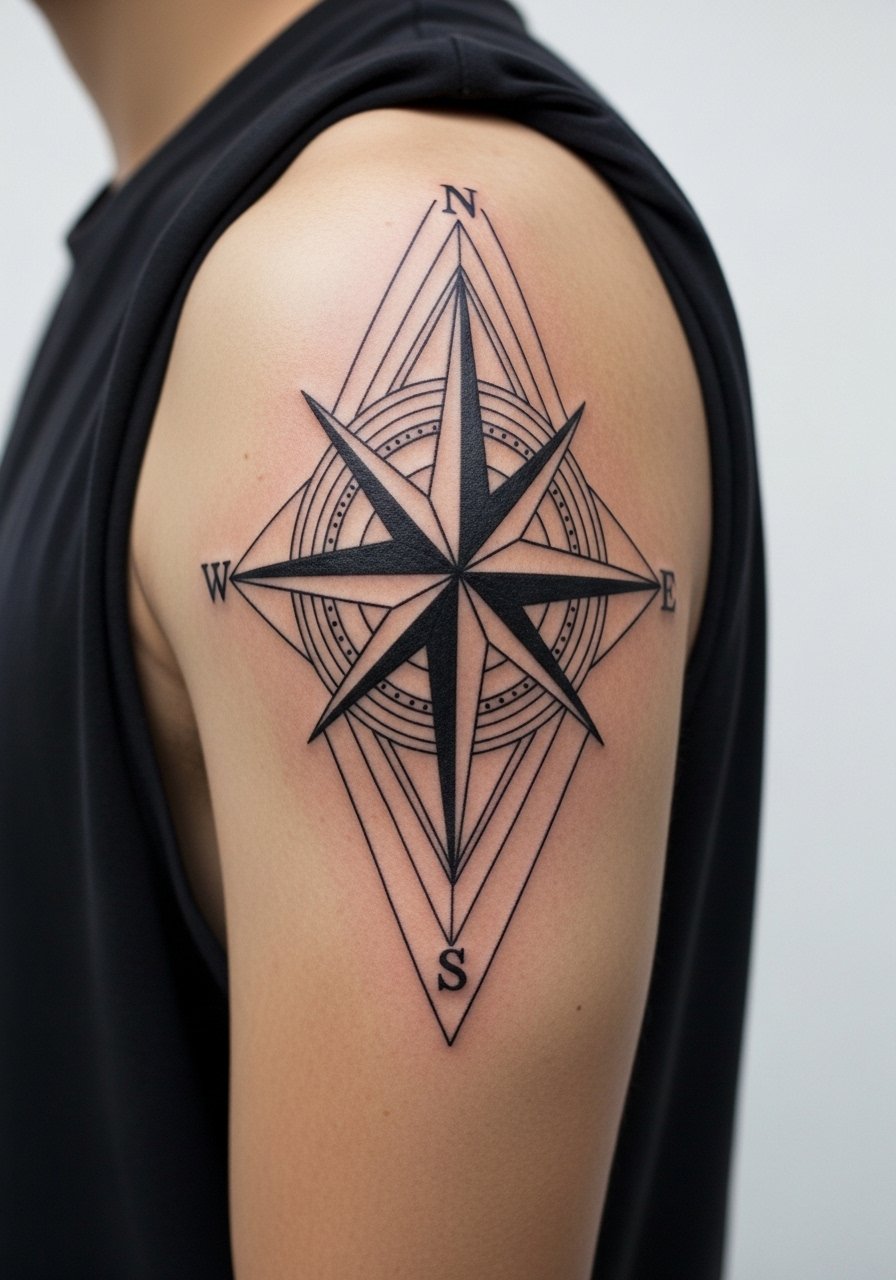
Collectors love this as a buildable piece. The trick is to plan negative space and edges so the sleeve can expand without crowding the compass face. A common mistake is packing too much dot work into the center, which merges over time. Tell your artist you want the compass face to remain a clear focal point with surrounding geometric panels that read when viewed from different angles. Expect multiple sessions, most artists prefer to space blackwork sessions several weeks apart for saturation. For session wear bring a chambray button down shirt you can pull aside so the shoulder and upper arm are accessible.
5. Fine Line Compass with Coordinates on Collarbone
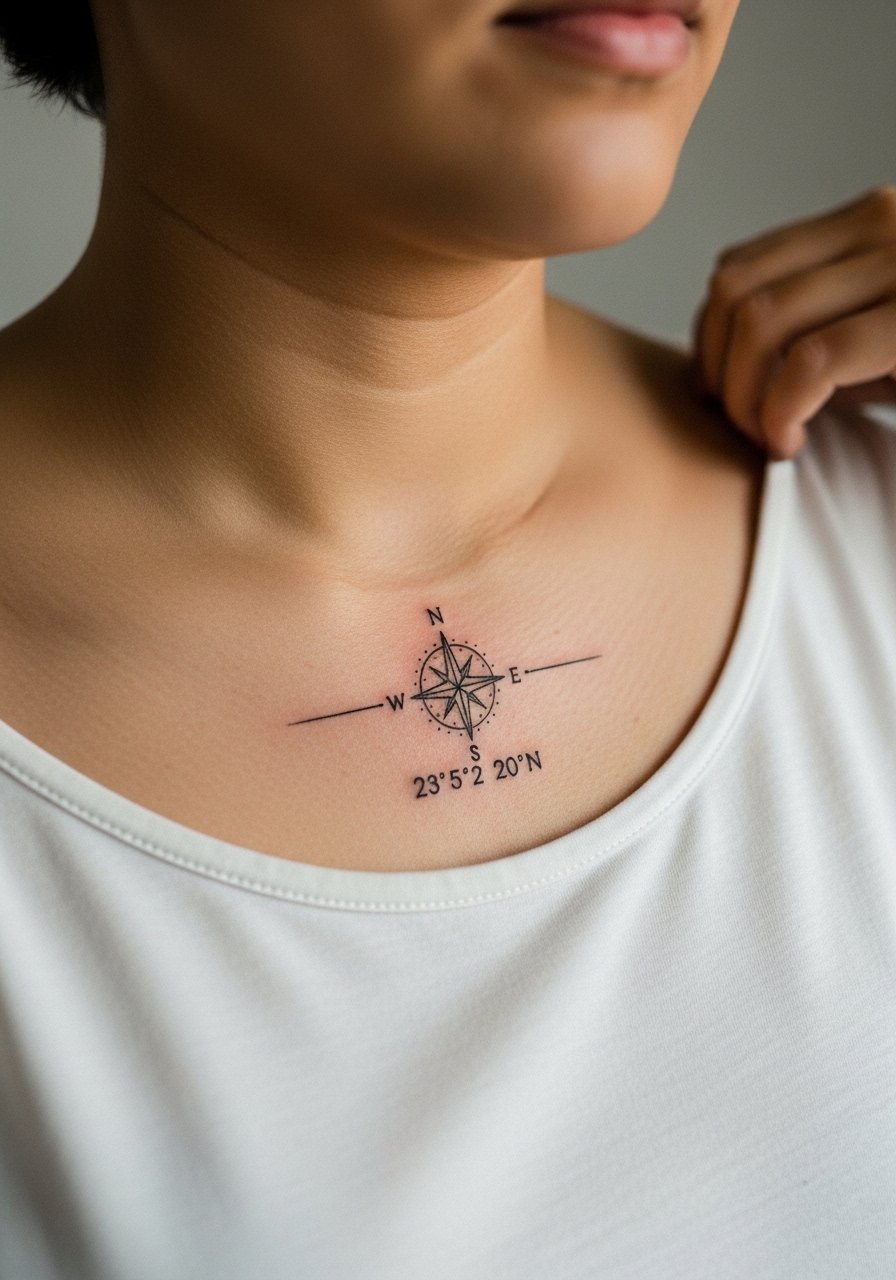
This feels intimate and lets you anchor the design with a meaningful coordinate. The collarbone skin is thin which amplifies fine detail but also increases the chance of slight blowout if the needle goes too deep. Ask for a steady, light touch and request the coordinates in a mono-spaced fine type so they are legible when healed. Aging depends on sun exposure and clothing friction from collars. Plan for a one to two year touch-up window for very thin script. For show-off pairing choose a v neck tee men that frames the area without competing with the linework.
6. Realistic Compass Overlaid on a Nautical Map on Upper Back
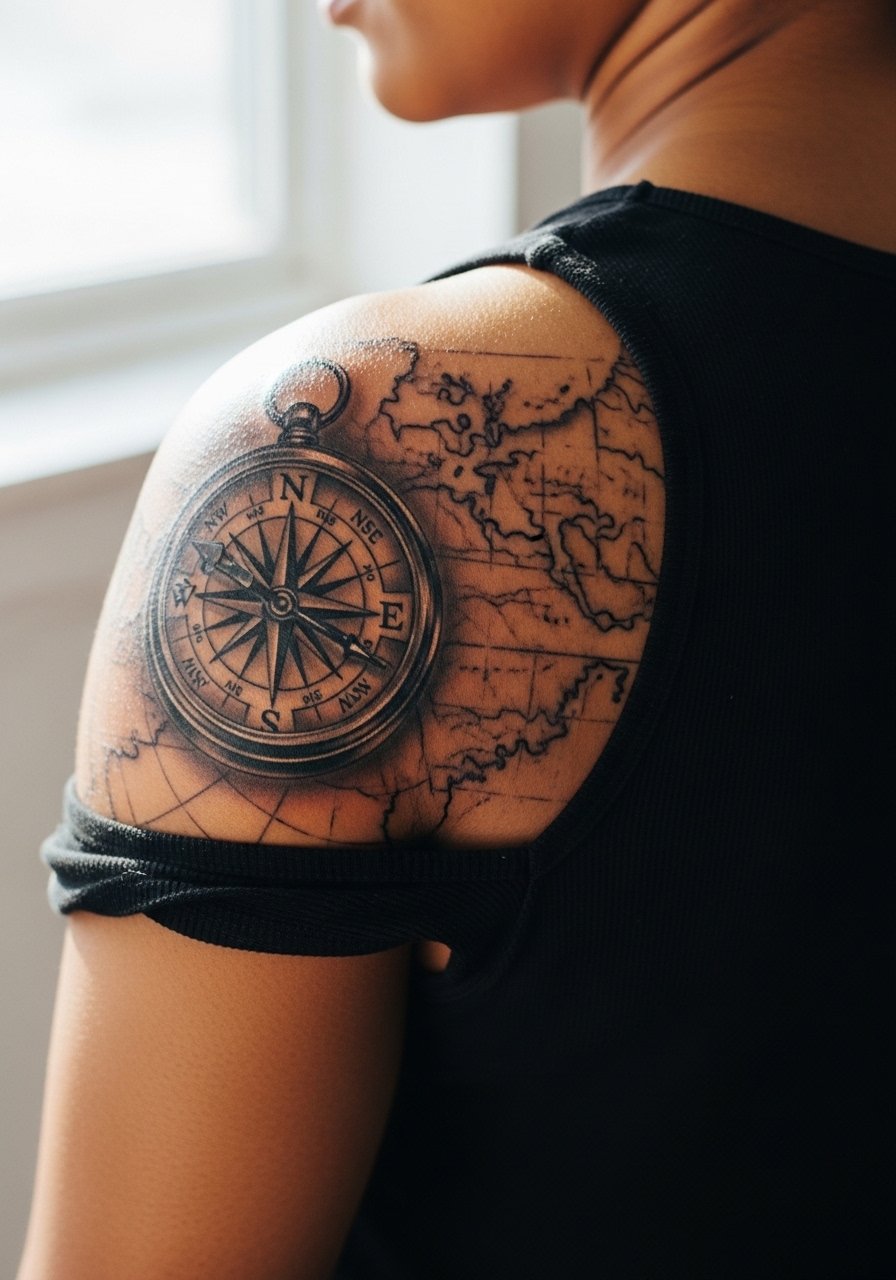
Realism reads cinematic on larger canvases and the upper back gives room for detail. Tell your artist you want the compass to sit slightly raised from the map with soft shadows under the rim so the face remains legible. The main mistake is overloading the map with tiny text and linework that blurs into texture after a few years. Sessions are longer and you will be prone during parts which can feel awkward but not overly painful. This placement also makes a strong sleeve-starter option if you plan to expand later.
Studio Day Picks
The forearm, wrist, collarbone and upper back pieces above need different prep and small items smooth the session and the first week.
-
Stencil transfer paper kit. Lets you preview the exact placement and line thickness on skin before finalizing the stencil, which is helpful for collarbone and wrist placements.
-
Topical numbing cream. A thin layer applied according to directions eases sensitivity for wrist and forearm spots without changing how the artist works.
-
Thin protective film roll. Useful for small high-friction areas like the wrist and fingers during the first two days of healing.
-
Fragrance free gentle body wash. Cleanses delicate linework on the collarbone and chest without irritating tender skin.
-
Aquaphor healing ointment. Thin layers for the first few days lock in moisture for fine line work without smothering the skin.
7. Watercolor Compass with Horizon Line on Inner Arm
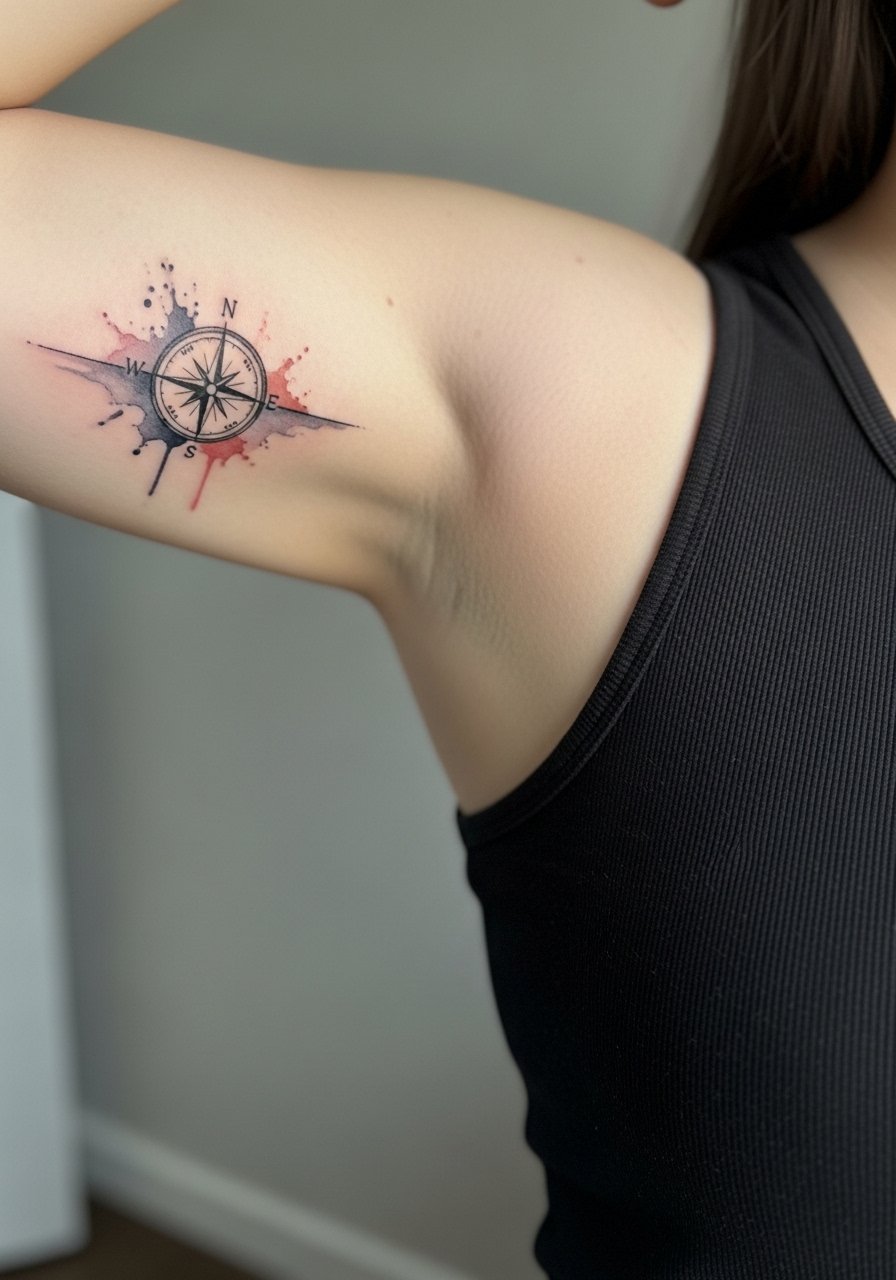
Watercolor looks organic but ages differently than black and gray. The first year is vivid, then colors can soften. For inner arm placement, sweat and movement can wash pigments quicker than on a forearm. Ask for a defined black rim around the compass and softer color washes outside it so the face stays readable as color fades. The session is comfortable for most people but the inner arm can be sensitive. For the appointment wear a linen short sleeve tee you can move for easy access.
8. Ignorant Style Distorted Compass on Forearm
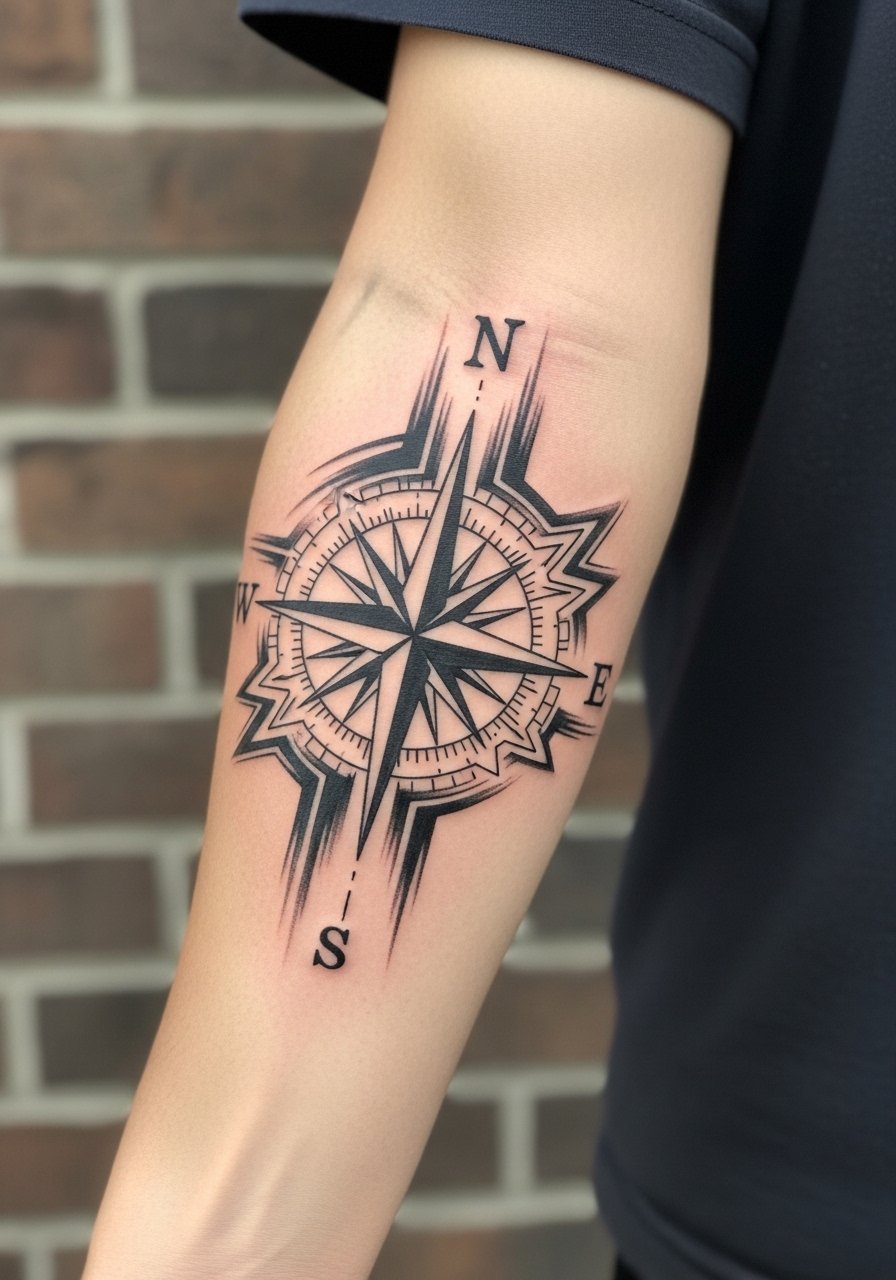
This intentionally raw, off-kilter approach reads like anti-perfection and works well if you want something that reads edgy rather than polished. The forearm is a forgiving canvas for irregular linework, and bold black holds well even on darker skin tones. The mistake is asking for tiny intentional mistakes that then look accidental; be specific about how much distortion you want. Expect a single longer session for heavy black application. For showing off try a leather cuff on the opposite arm and a leather cuff bracelet to balance the look.
9. Ornamental Compass with Skull Integration on Chest
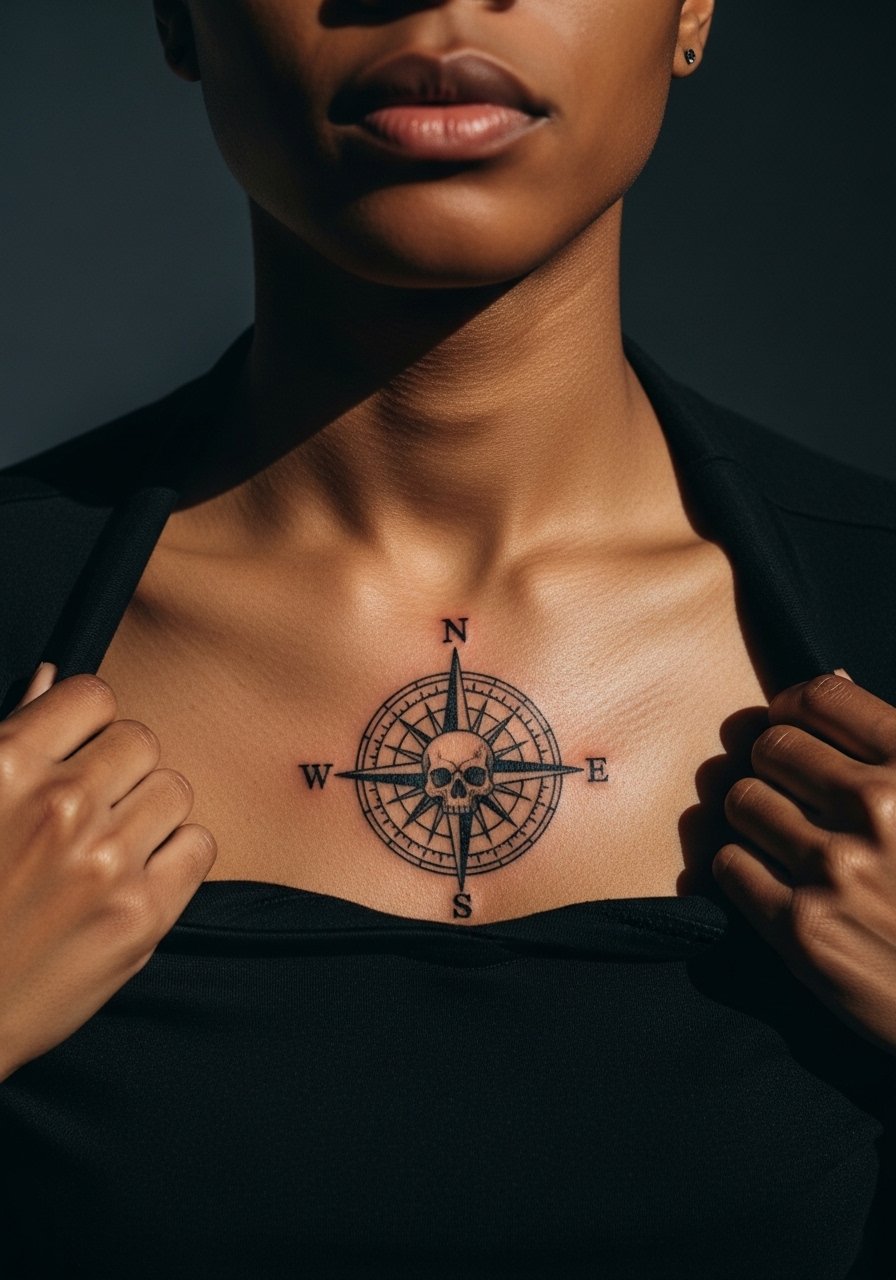
Chest placement gives a central, bold canvas for ornamentation but the sternum area can feel sharper during the needle work. Artists split on whether very dense ornamental filigree should be placed so close to the sternum. One camp says the thin skin there holds detail poorly. The other camp argues that with careful spacing and shallow dot work it settles cleanly. Name the debate and ask which side your artist follows. A common error is over-detailing the skull face which loses definition after healing. For session wear a black henley shirt you can pull aside to expose the collarbone and upper chest.
10. Micro-Realism Compass Face on Ankle
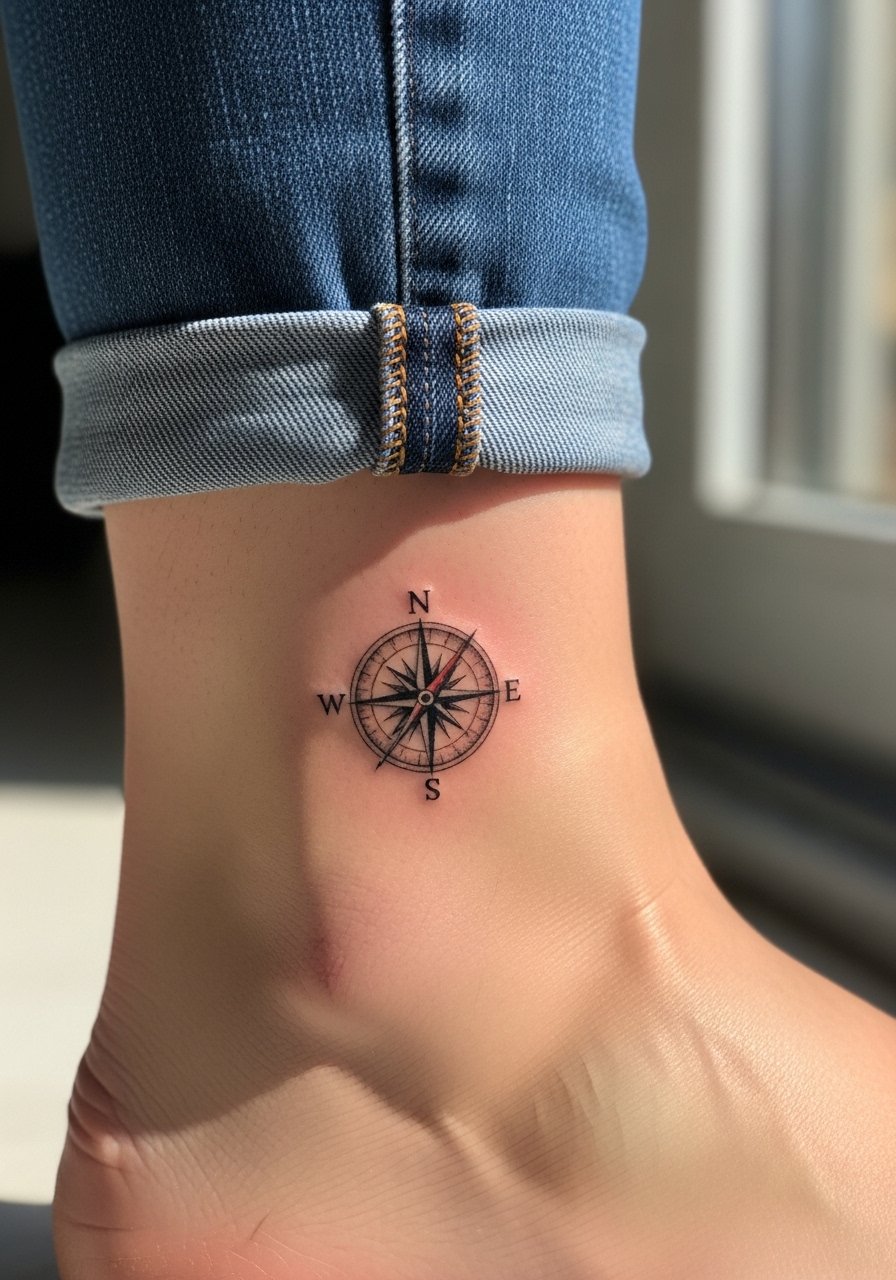
Tiny realism looks impressive but is one of the least forgiving styles on the body. Ankle skin moves and rubs against shoes which accelerates fading. Ask for the micro shading to be compact with clear anchor points, not an overloaded series of tiny grays. Expect a sharper, more painful session because of the thin skin and bone proximity. Plan for a year one touch-up as a realistic expectation.
11. Geometric Compass with Negative Space on Shoulder
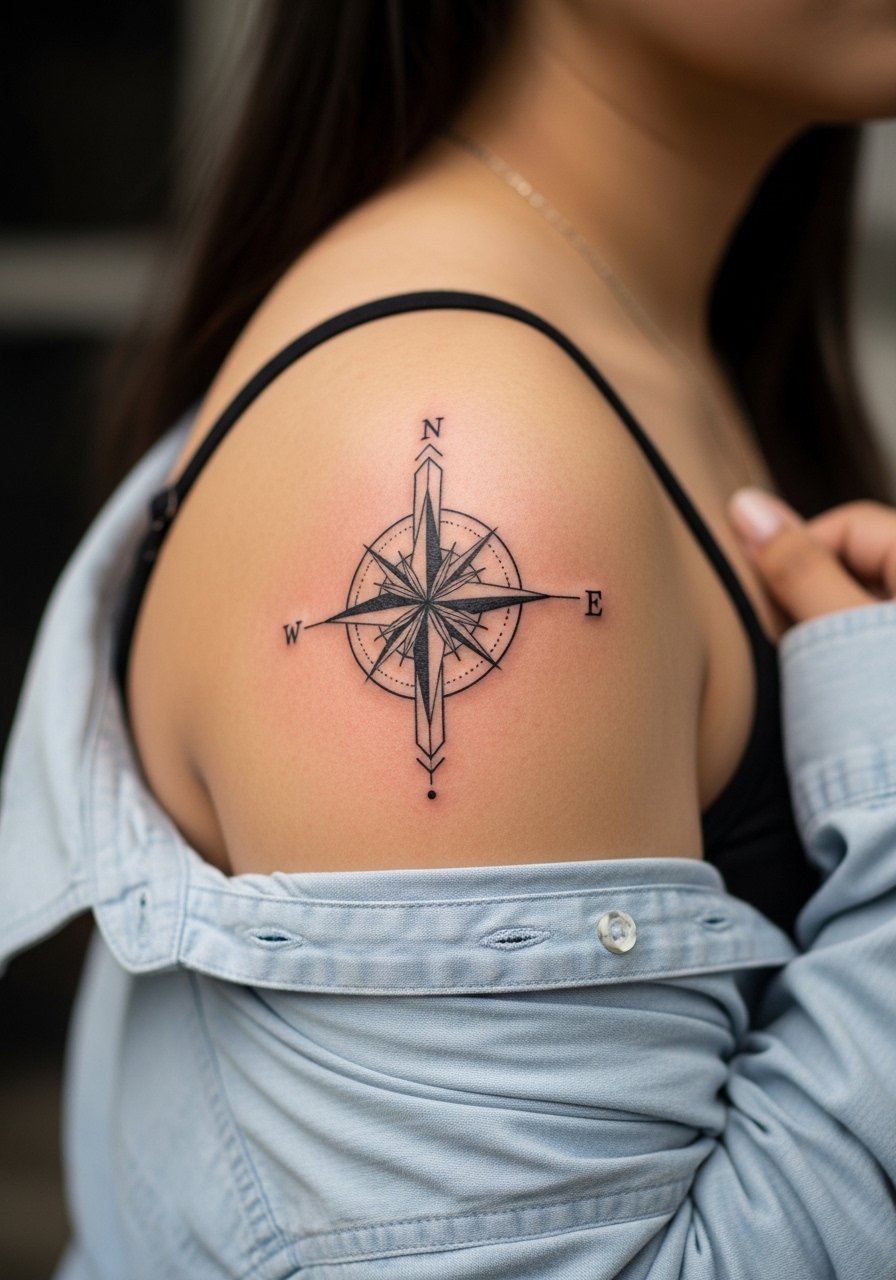
Shoulder placement is forgiving and great if you want something that can expand into a sleeve. The smart move is to ask for negative space lanes that protect the compass face as additional patterns are added. A failure mode is cramming too many intersecting lines without breathing room. Sessions are tolerable and usually split into two if you want dense black fills. For the session try a loose button-down shirt you can pull aside for clear access.
12. Micro-Realism Compass on Finger
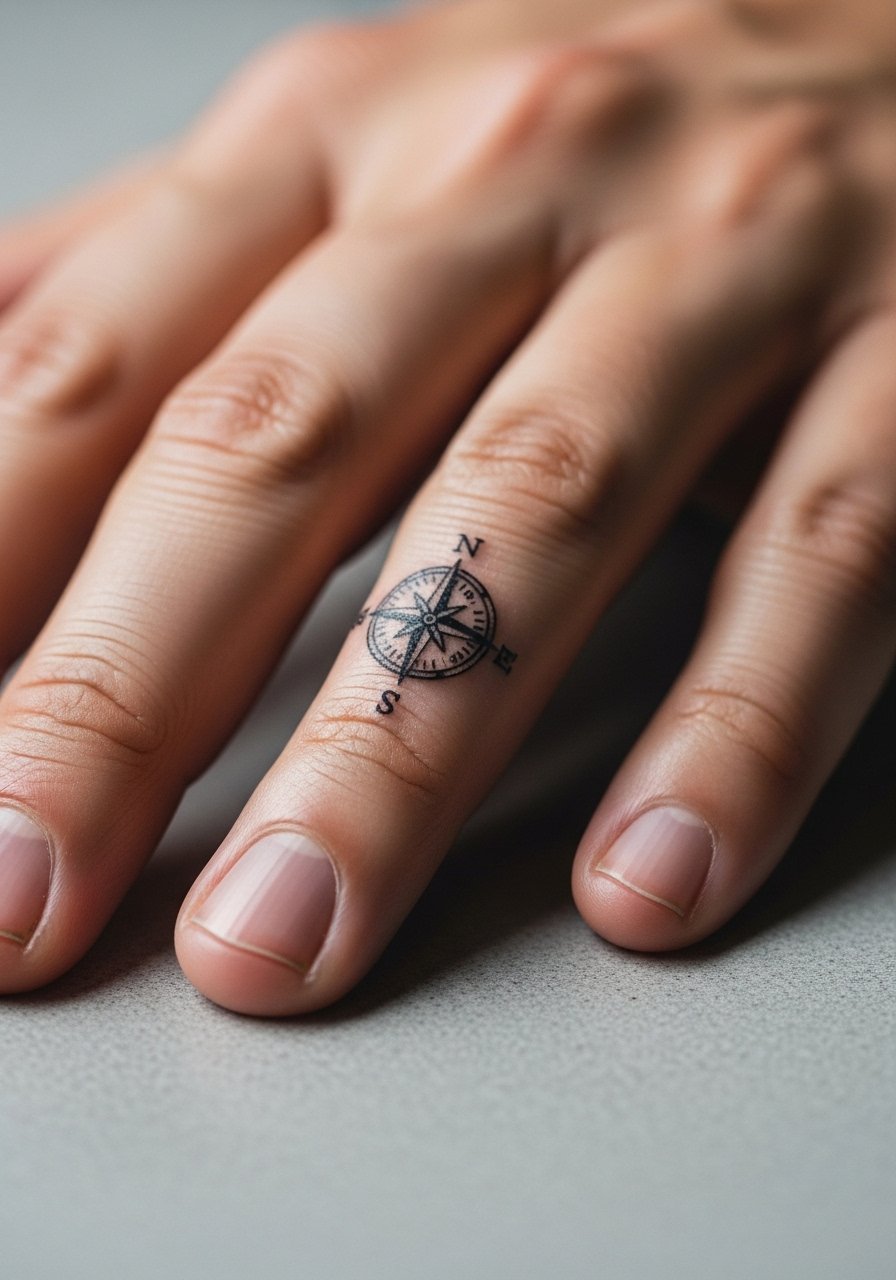
Finger tattoos are discreet but have one of the highest fade and loss rates. The skin there sheds and moves constantly which blurs fine detail quickly. If you want a finger compass keep the design ultra-simple, with bold compass points and minimal internal ticks. The session is sharp and short. Plan on frequent touch-ups and treat it as an adornment with limited longevity.
13. Realistic Compass on Nautical Map Thigh Piece
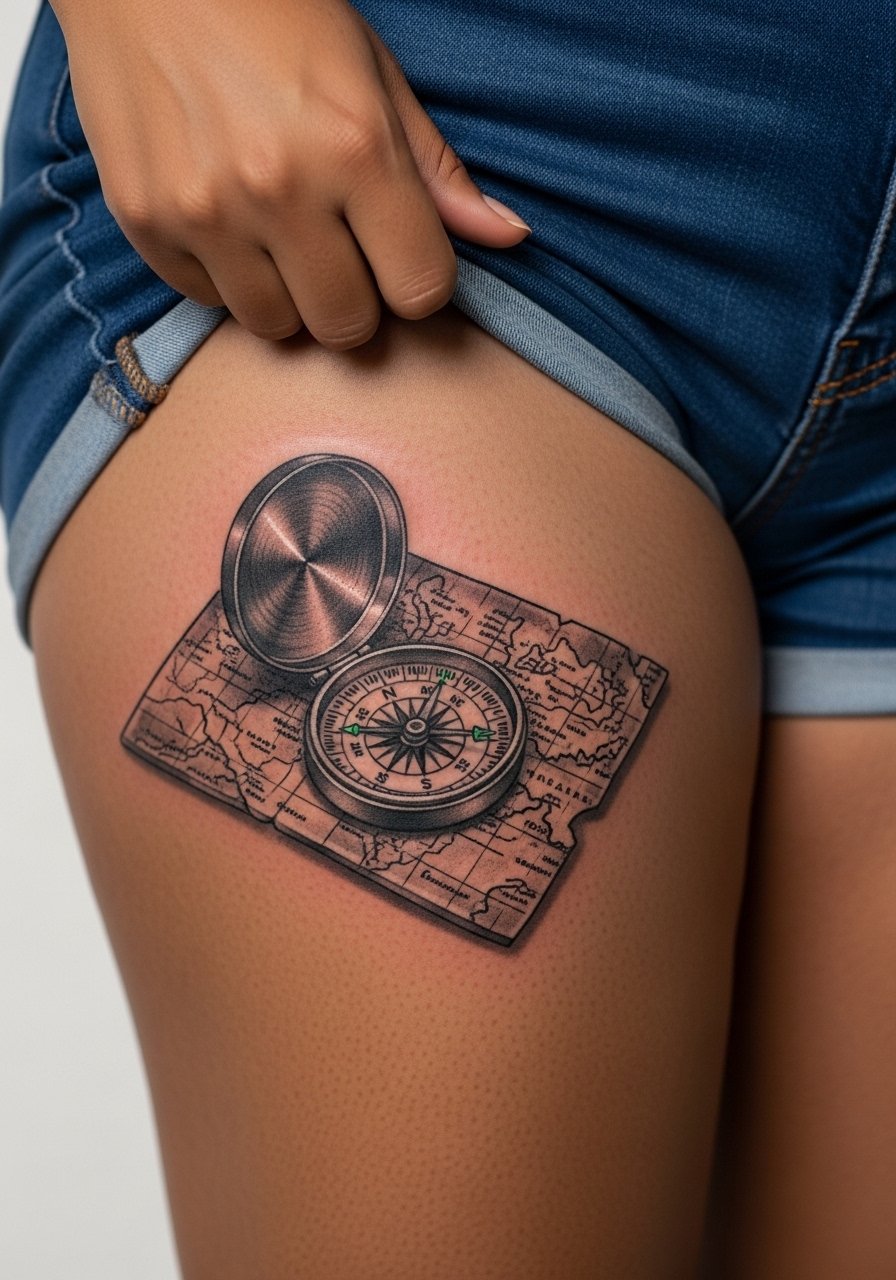
The thigh is a forgiving place for realism and allows for scale that keeps small details readable for longer. When paired with a map, keep text and map lines larger than you think you need so they do not collapse into texture later on. Sessions are comfortable and can be longer, which benefits heavy gray washes. For pre-session comfort wear loose shorts like a racerback tank for upper thigh access and comfort while seated.
14. Split-Compass Design Around the Elbow
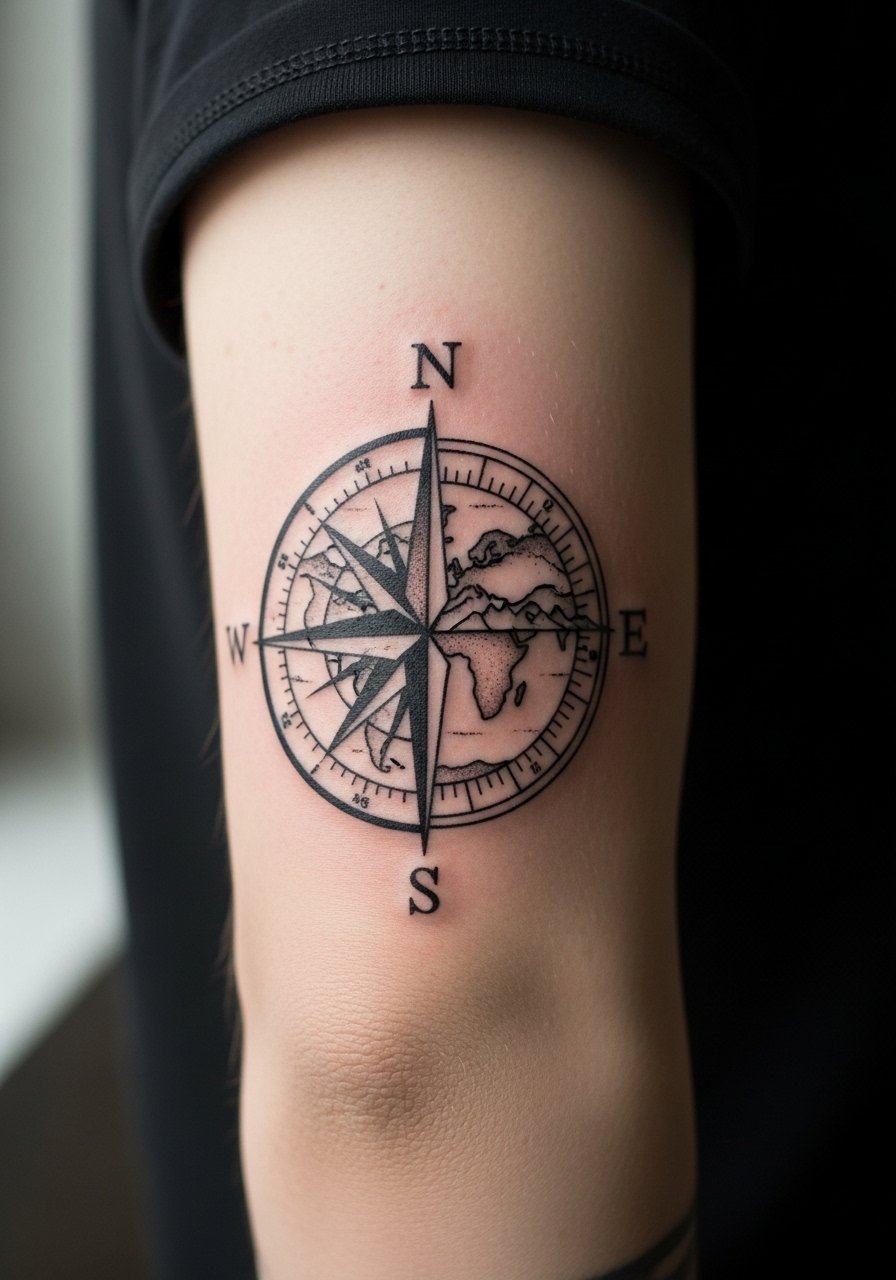
Elbow-adjacent work reads dynamic but is high risk for blowout if lines cross too close to the joint. The safest approach is to anchor the compass center away from the joint and let the cardinal points wrap without forcing hard detail over knuckle folds. Expect an odd sensation and some soreness as the artist works near the joint. Plan for longer healing and possible touch-ups because movement stresses the area constantly.
15. Stipple-Shaded Compass with Concentric Circles on Calf
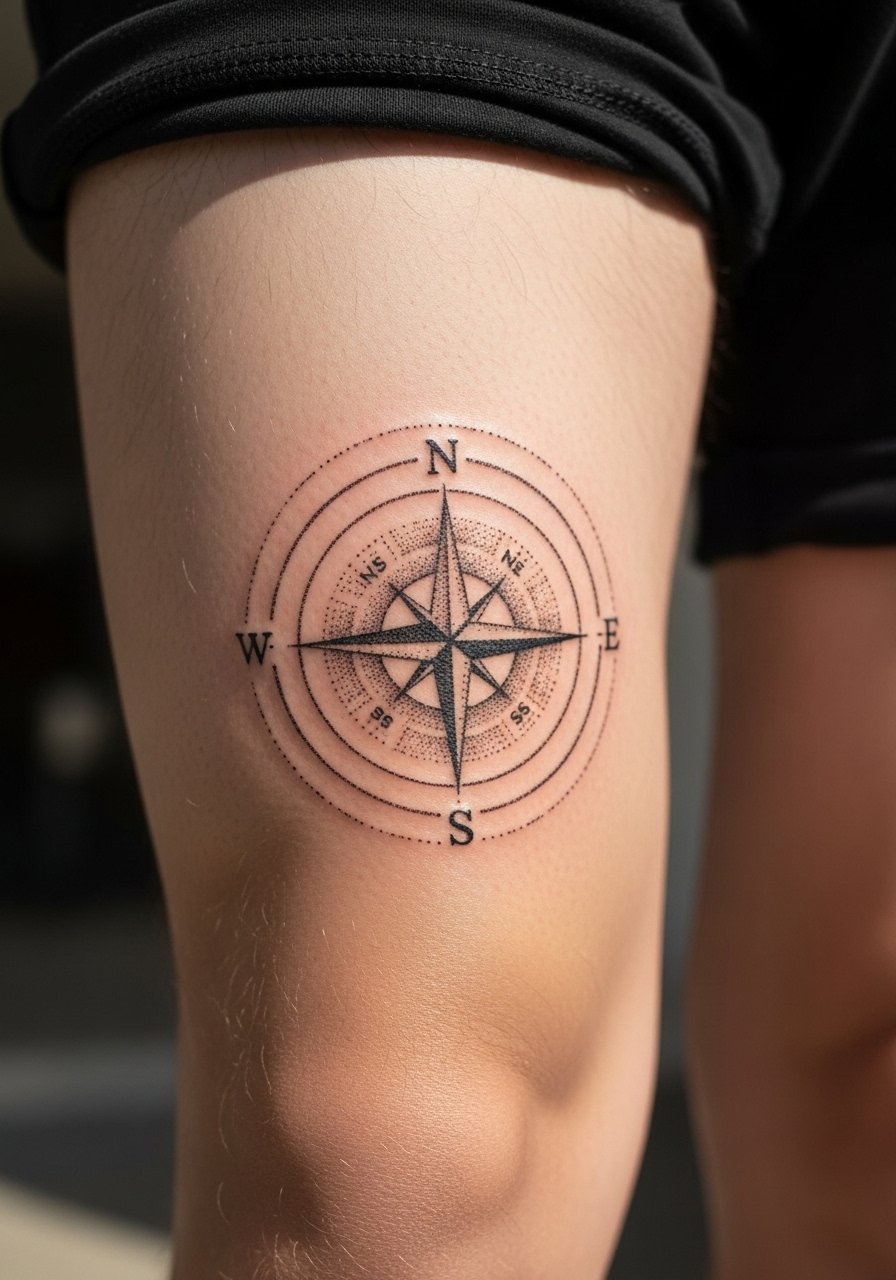
Stipple shading gives depth without heavy black and can age more gracefully than tight lines if spaced wisely. The calf accepts dot work well and it survives friction and movement. A common error is compressing dots so closely they read as gray blotches after a few years. Ask for open stipple patterns and progressive spacing. For casual show-off pair with athletic shorts loose fit rolled slightly to mid-calf.
16. Compass Mandala Hybrid on Side Torso
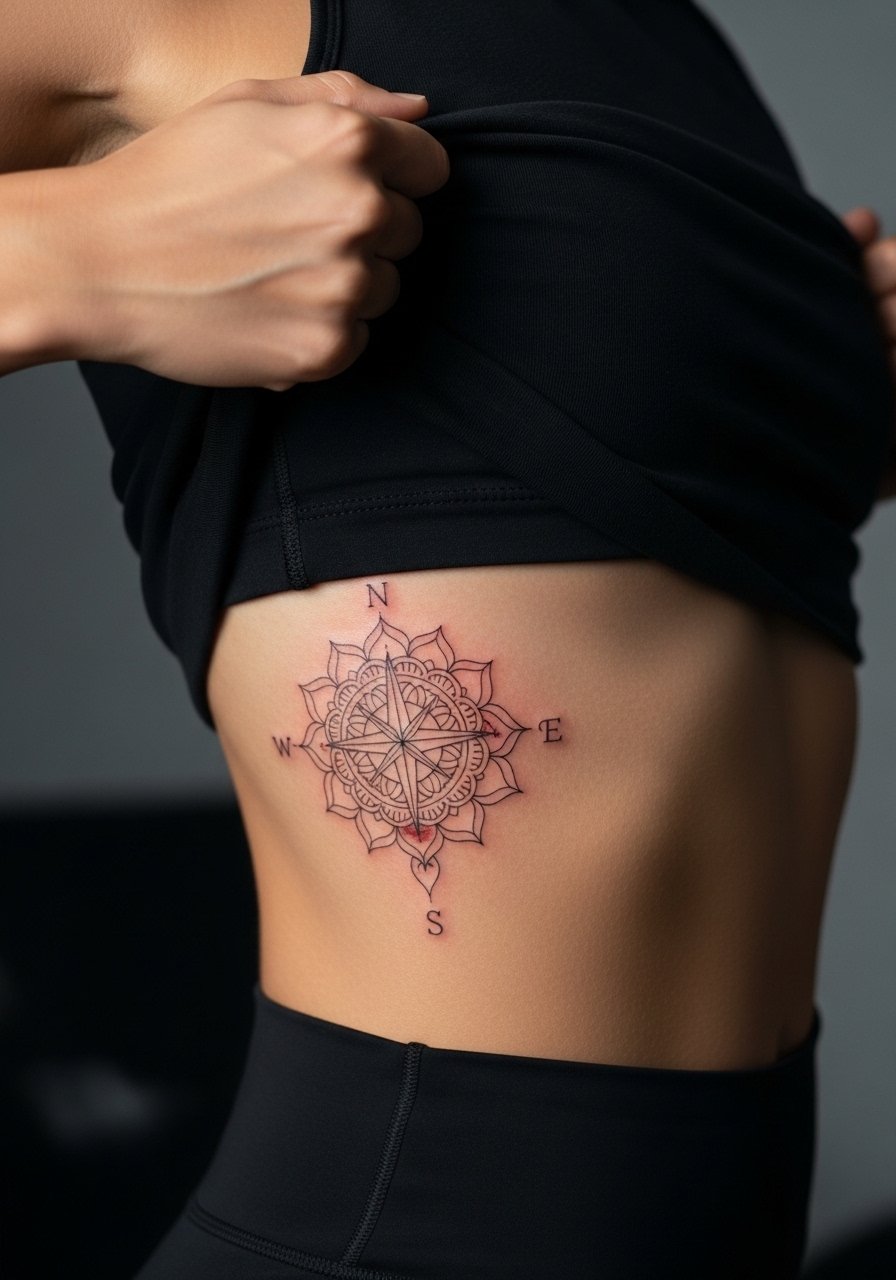
Side torso and ribcage work look stunning but are notorious for being sensitive and for skin stretch that can affect tight geometry. Artists split on fine line there. One camp argues the stretch blurs intricate circles within two years. The other camp says proper needle depth and spacing secures the work. Name that debate when you consult and ask your artist which side they practice. Expect a painful session and bring an extra recovery day.
17. Micro Compass with Roman Numeral Ring on Ankle
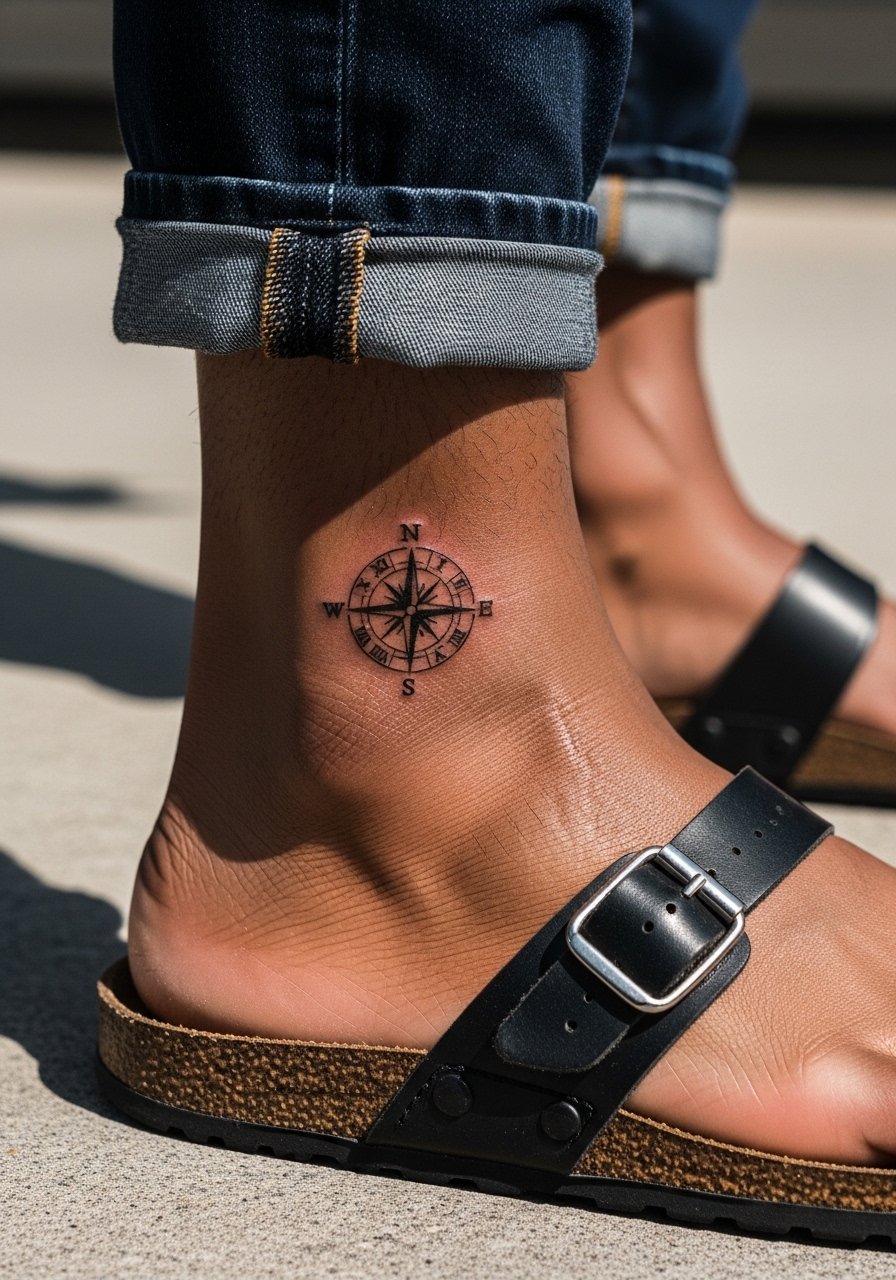
Combining small numerals and a compass in a tight ring is elegant if kept legible. Numerals and tiny tick marks must be sized so they stand up to rubbing from socks and shoes. Ask for bold numerals rather than thin script if you want longevity. Ankle sessions are short but can sting. For post-session comfort wear a pair of sandals or loose shoes and roll pants to avoid pressure.
18. Compass Integrated with Geometric Arrow on Inner Bicep
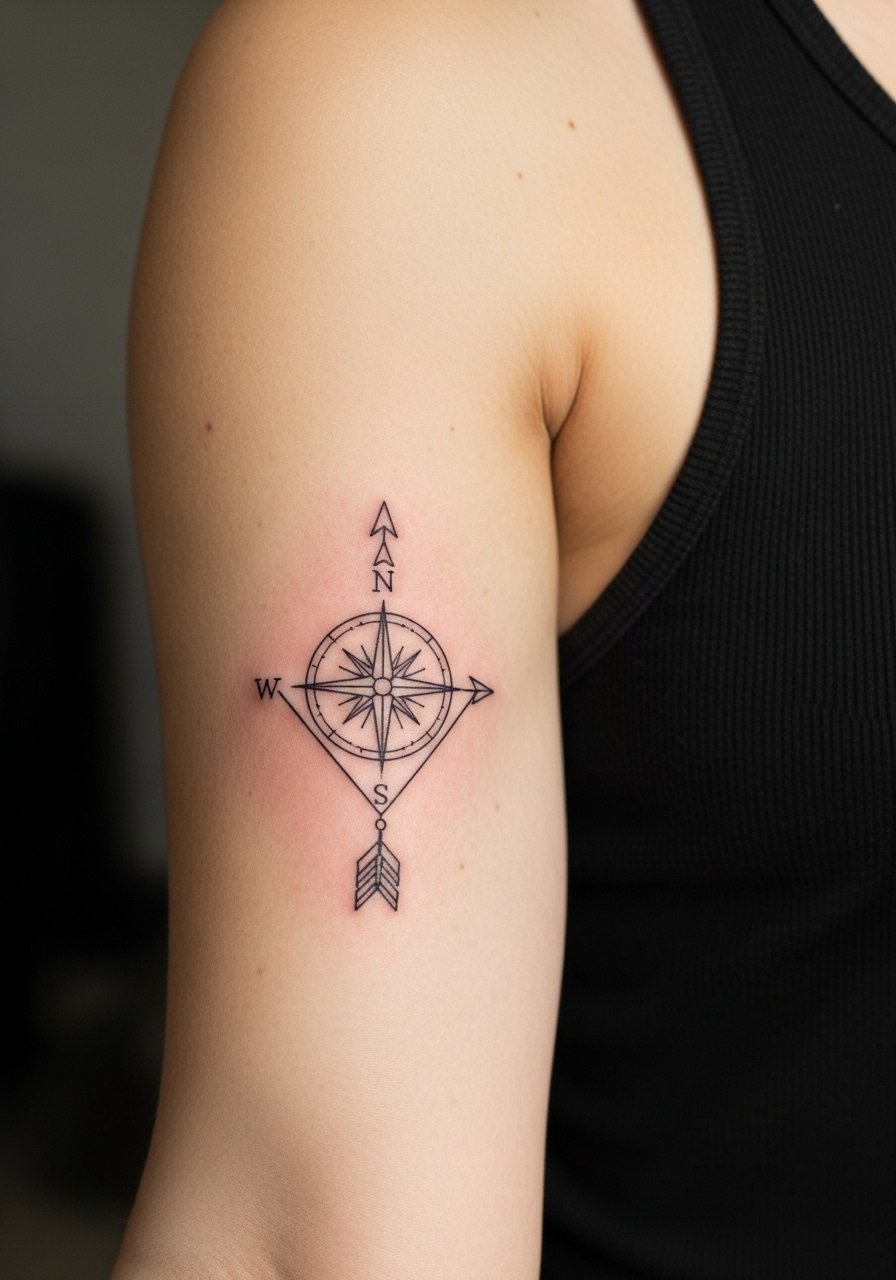
Inner bicep placement is discreet and flat which helps detailed line work hold. The inner arm can be tender but rarely produces blowouts when the artist spaces lines correctly. A typical mistake is packing too many tight concentric details. Tell your artist to use clear negative space between the compass and arrow elements. For the session wear a loose fit tee men or tank so you can move freely and keep the area accessible.
19. Compass as Part of a Sleeve Accent on Upper Arm
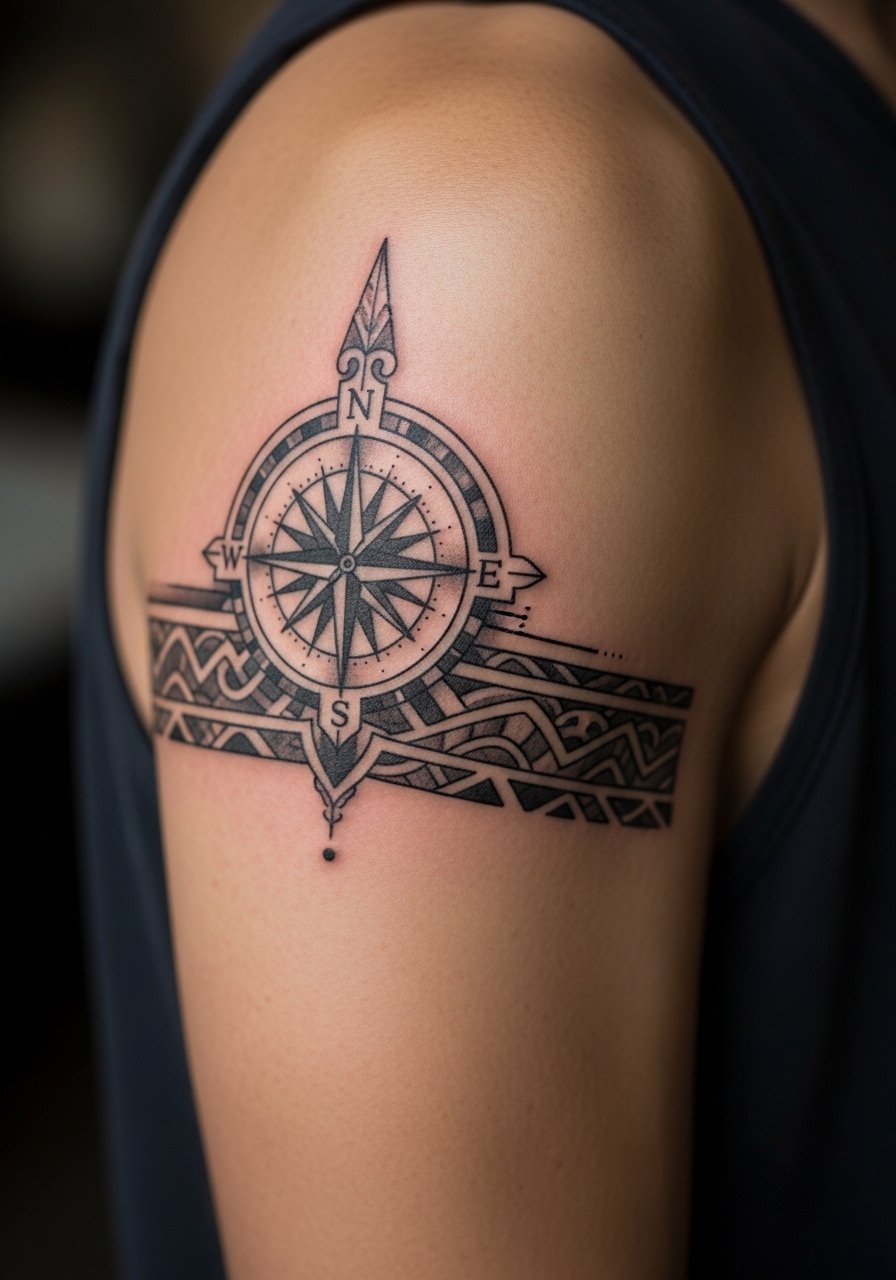
As a sleeve accent the compass should read as a node inside a larger narrative. The practical risk is losing the compass face when surrounding imagery becomes dense. The fix is to preserve a clean rim and contrast between the compass and neighboring motifs. Sessions vary depending on how much fill is needed. For the session bring a shirt you can remove without hitting the fresh ink, like a sleeveless muscle tank.
20. Compass with Horizon Watercolor Accent on Inner Forearm
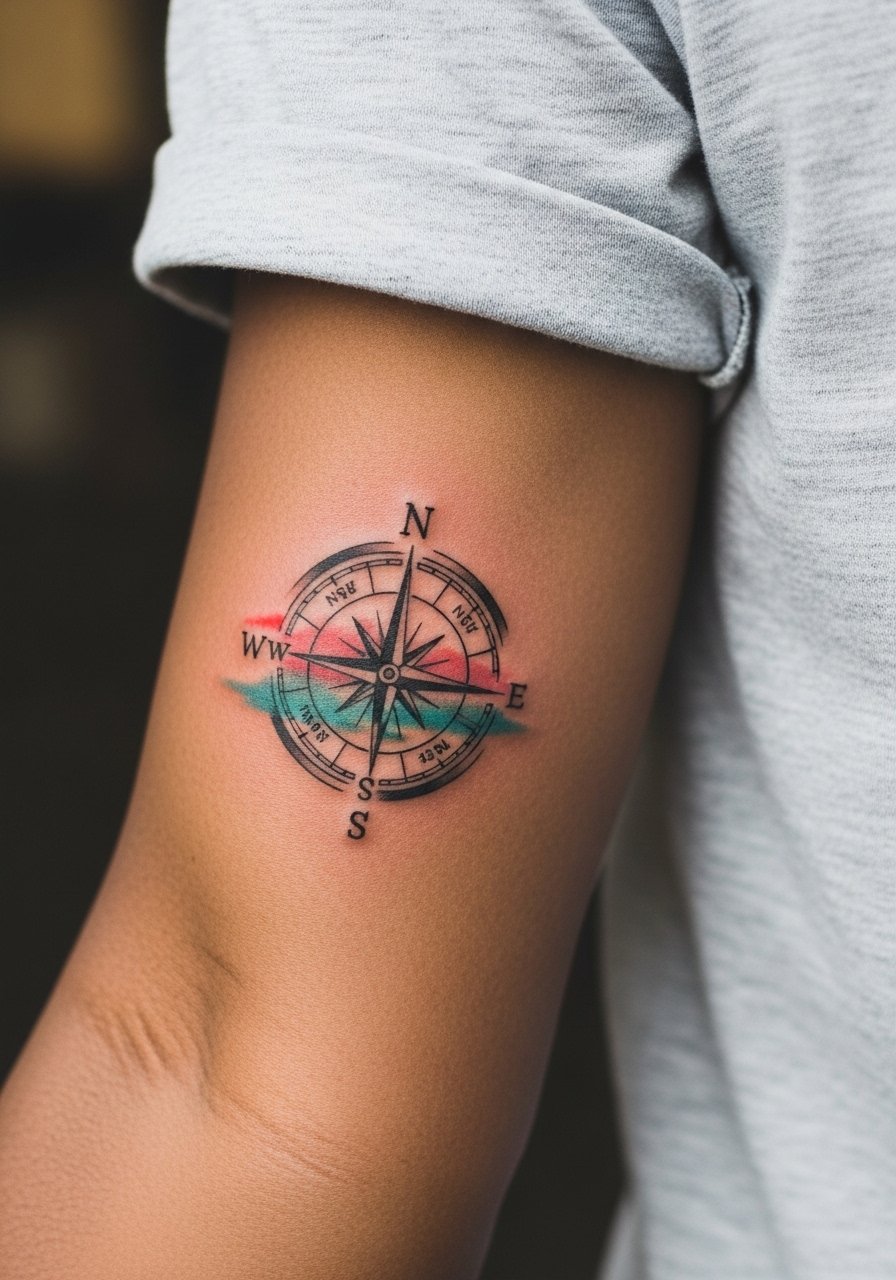
Inner forearm is one of the most forgiving spots for watercolor because it sees less abrasion than wrists. The key is to anchor the compass with a thin black rim so you retain the face as colors soften. The error is letting color bleed into the compass interior which weakens legibility. Sessions feel moderate and usually finish in one sitting for small to medium sizes. To show it off keep sleeves rolled and wear neutral tones so the colors read clearly.
21. Micro-Realism Compass with Dot-Work Halo on Thigh Side
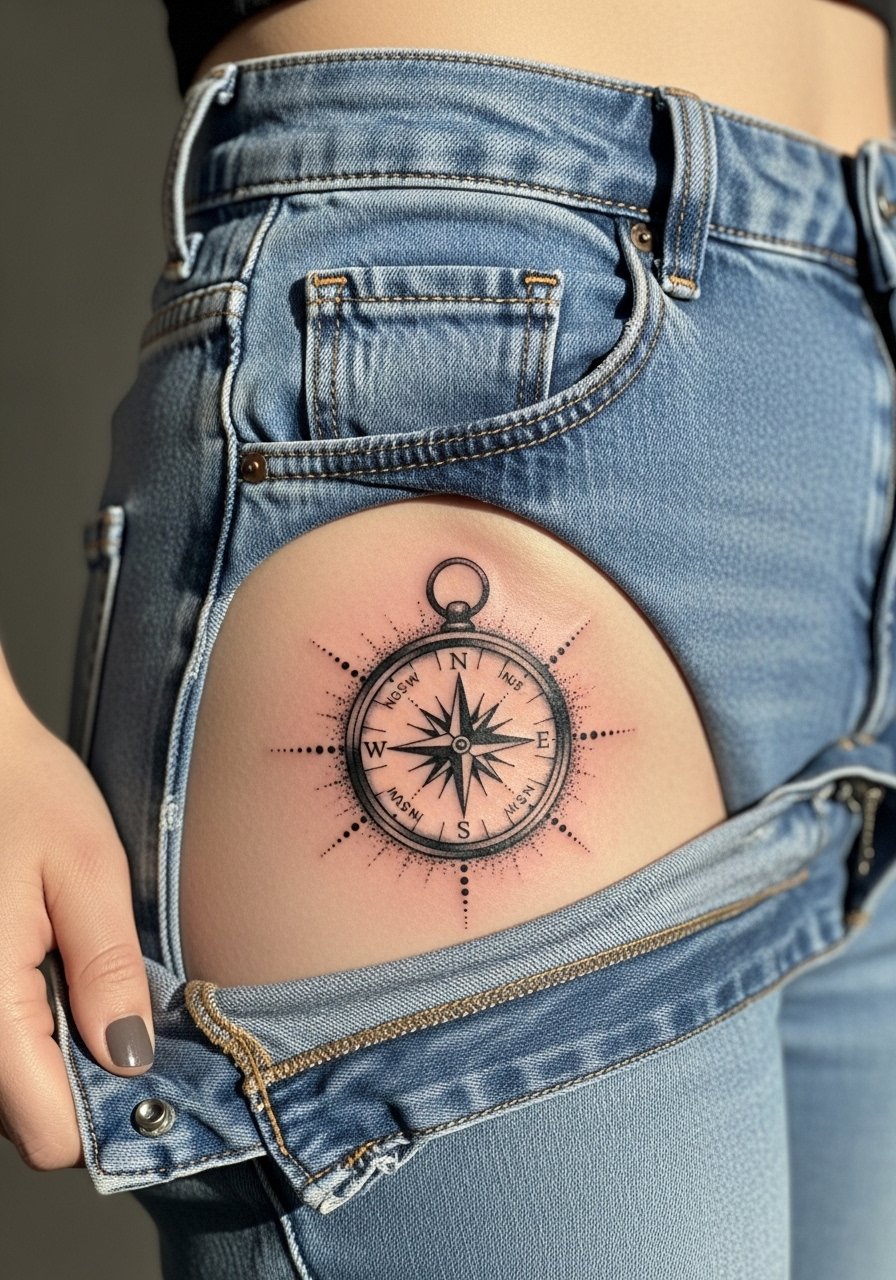
Side thigh gives privacy and scale that preserves micro detail longer than smaller body parts. The dot-work halo helps diffuse transitions to the surrounding skin and can age gracefully if the dots are spaced. Common mistakes include crowding dots too tightly which reads as gray sooner than expected. Sessions are comfortable and allow the artist to work at a steady pace. Consider this if you want a discreet piece that can scale into wider leg work later.
Frequently Asked Questions
Q: Will a fine line compass on my forearm blur when I flex my muscles?
A: It depends on placement and size. Lines over muscle bellies can shift slightly when you flex, which makes thin interior ticks prone to softening. Ask for a compass that keeps the main points bold and places most delicate marks away from the bulkiest part of the muscle.
Q: How do wrist and finger compasses compare for longevity?
A: Fingers and wrists face constant washing and friction which accelerates fading. Fingers are the shortest lived of the two. If longevity matters, choose slightly heavier key points and accept a likely touch-up at year one or two. A thin leather watch on the opposite wrist can frame a wrist piece without rubbing it.
Q: Are watercolor compasses harder to care for than blackwork?
A: Watercolor relies on softer pigments that can fade unevenly. Blackwork retains high contrast longer. If you choose watercolor, anchor the design with a thin black rim and protect the area from sun exposure to slow fading.
Q: Should I expect a touch-up for a micro-realism compass on the ankle or thumb?
A: Yes, plan for touch-ups. High-motion, high-friction spots like the ankle and fingers often need one or more touch-ups within two years. Consider slightly larger contrast points to reduce that need.
Q: How do I find artists who do clean minimalist compasses without generic results?
A: Use targeted discovery paths like specific hashtags and map filters. Search the hashtags mentioned earlier and filter portfolios by healed work rather than fresh photos. Look for consistent healed images that show crisp linework and minimal blowout.
