
Fine line stairways look dreamy on boards and feeds. The problem is that what reads perfect on-screen often needs planning to still read clearly in five years. Fine line, watercolor, and neo-traditional stairways each ask for different spacing, placement, and care. Read these 27 takes, pick the direction that suits your lifestyle, and learn what to tell your artist at the consultation so the design still reads years from now.
1. Inner Forearm Fine Line Winding Stairway
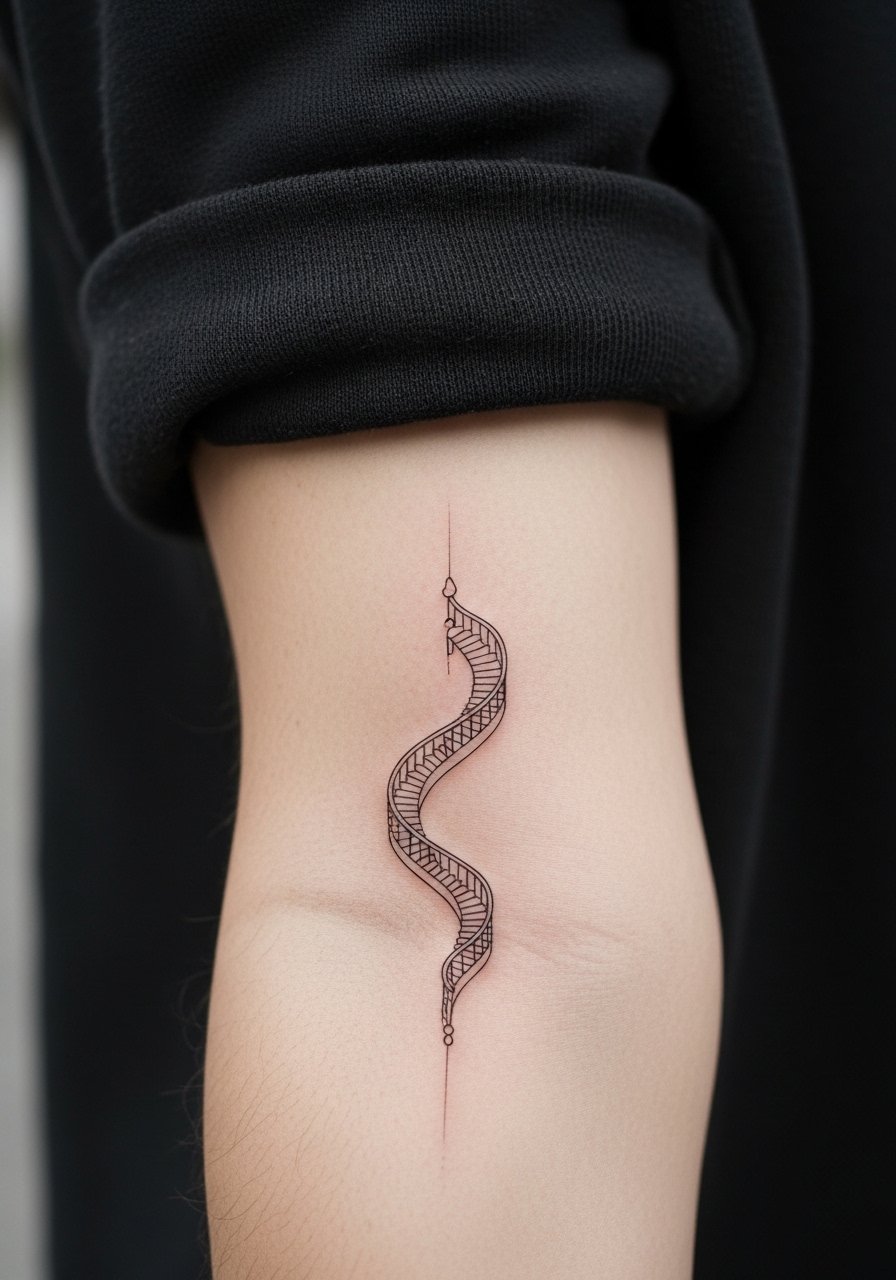
This is the go-to placement for readable detail without excessive scale. Expect a 1 to 2 hour session for a medium-length design and a pain level around 3 to 4 out of 10. Tell your artist you want slightly heavier anchor lines so the thin steps keep shape as the years pass. A common mistake is asking for ultra-micro steps that merge at year two. For the appointment, wear a loose button-down shirt you can pull aside and a watch on the opposite wrist to avoid pressure on fresh ink. Healed look holds well if lines have spacing and moderate saturation.
2. Watercolor Staircase with Cloud Wash
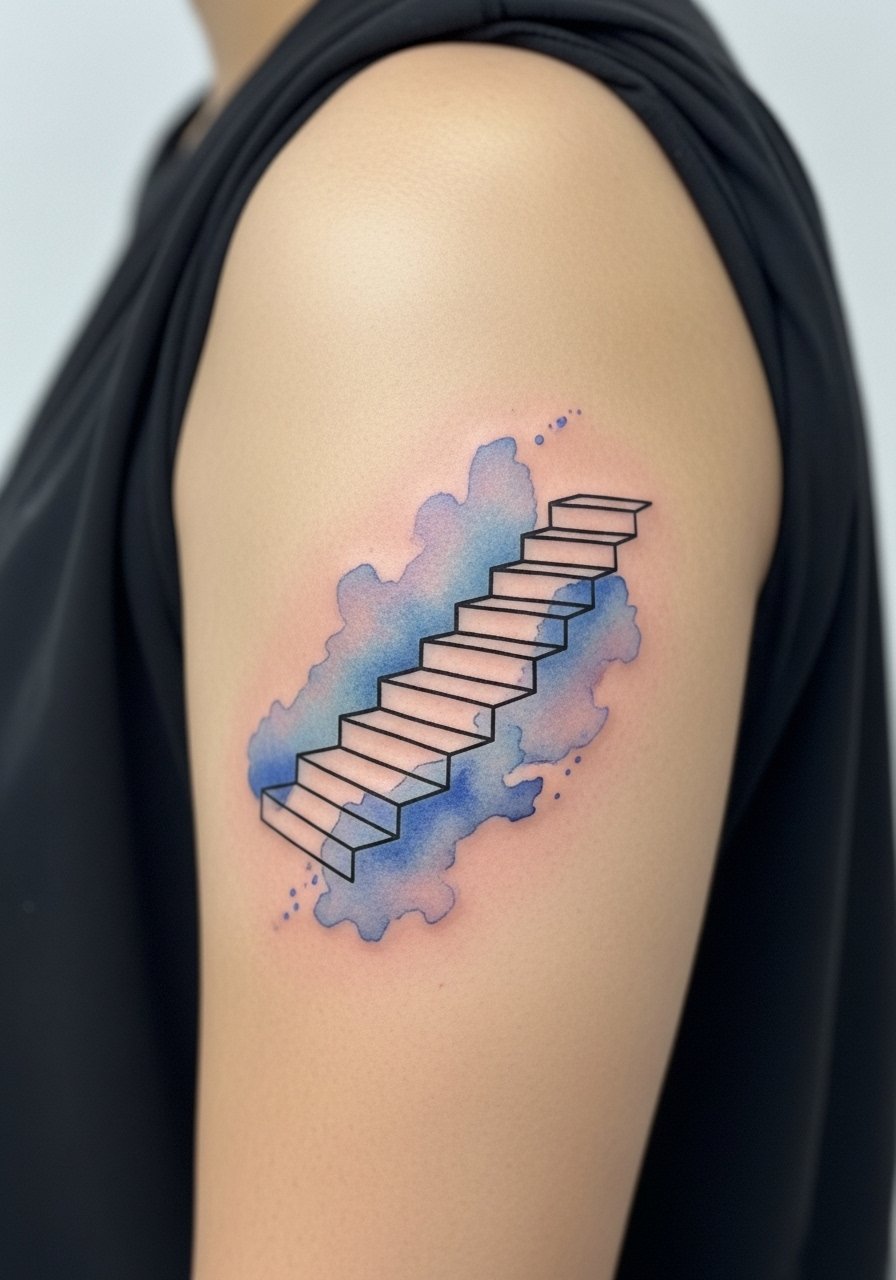
This version leans on color washes around the steps rather than heavy outlines. Pain is low for the upper arm. Watercolor ages differently than bold work. Artists split into two camps on longevity. One camp warns that watercolor needs touch-ups more often because washes fade faster. The other camp says skilled layering and good placement secure longer color life. Ask the artist how they layer pigment and what touch-up timeline they recommend. For showing it off, a sleeveless tank frames the wash without competing with pattern. Plan for a touch-up at two to four years if you favor bright washes.
3. Geometric Stairway on the Ribcage
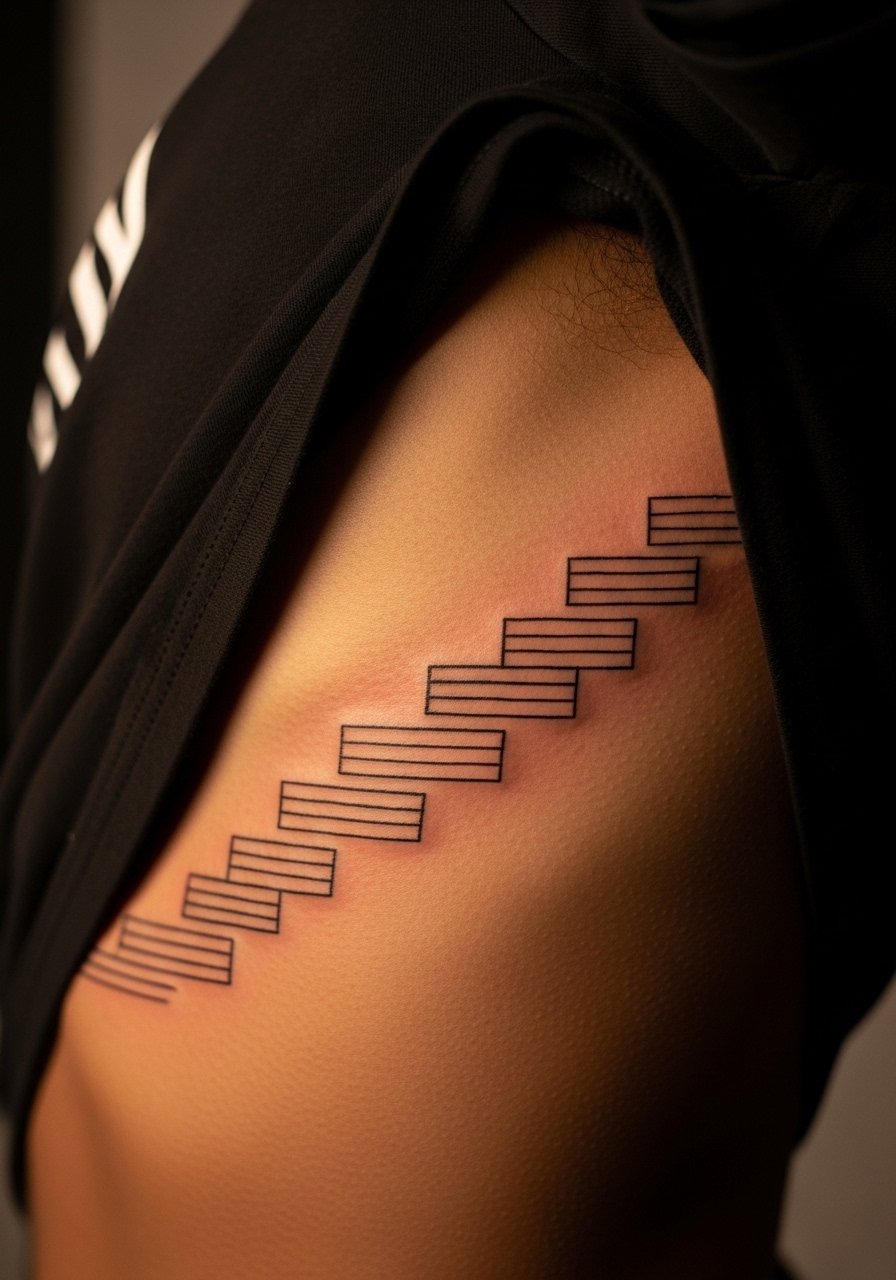
Rib work comes with higher pain and more skin movement. The biggest mistake is going too tight with geometry. Dense parallel lines can blur when placed on a curved, moving surface. In consultation, emphasize spacing and show the artist reference for the exact negative space you want. Expect the session to be split into shorter sittings if the piece is large. For session wear, bring a cropped tee you can lift without exposing more than the tattoo zone. If you want this look but worry about pain, ask about numbing and shorter sessions.
4. Stairway with Angelic Figures on Upper Arm
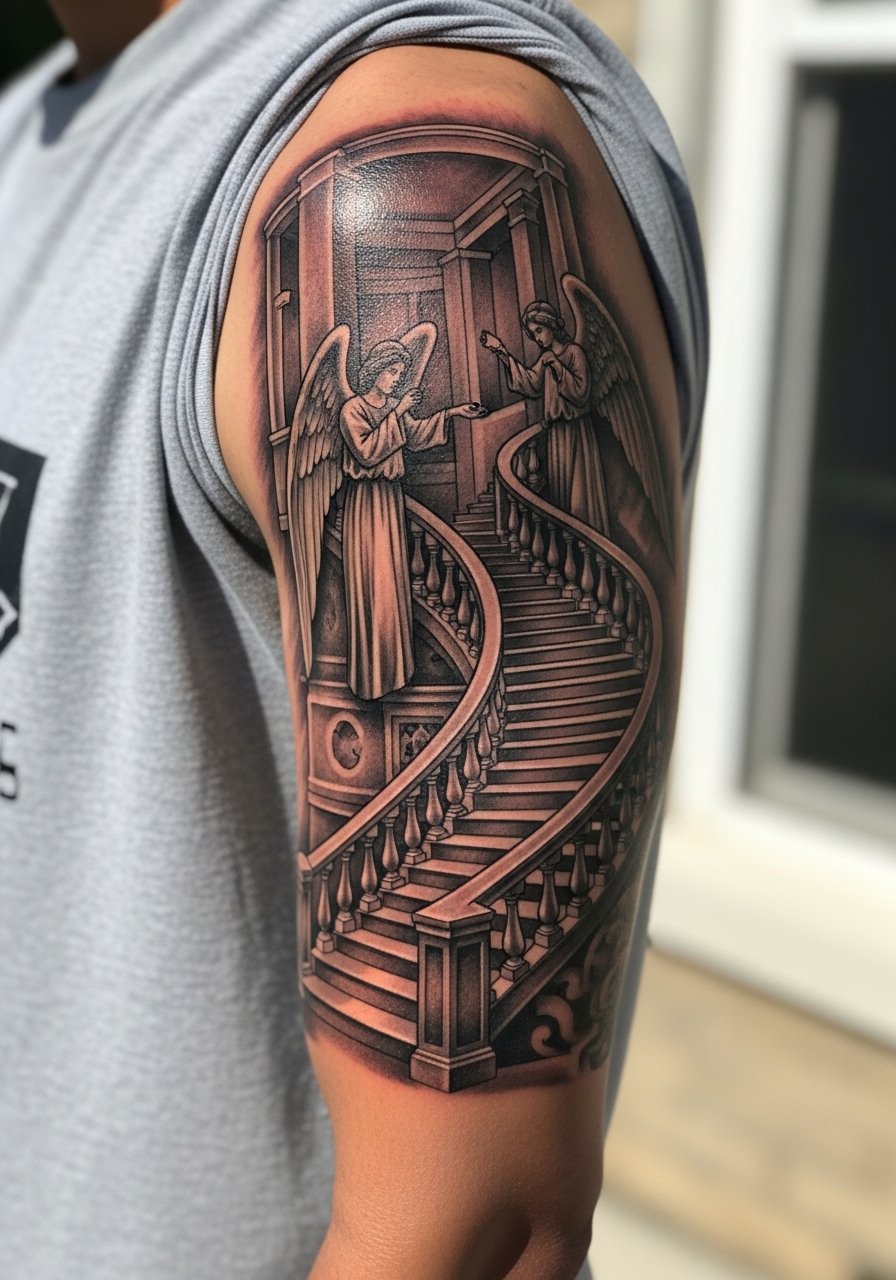
This neo-traditional option reads well from a distance because of stronger linework and saturation. It suits memorial pieces or faith-based symbolism. Common mistake is crowding the angels too close to the steps which creates visual clutter as the piece ages. Tell your artist which figure poses matter most and whether you want softer shading or crisp contrast. Plan for a two to three hour session with moderate pain. For casual show-off, a rolled cuff shirt frames the work while keeping it comfortable during healing.
5. Minimalist Path-Only Wrist Stair
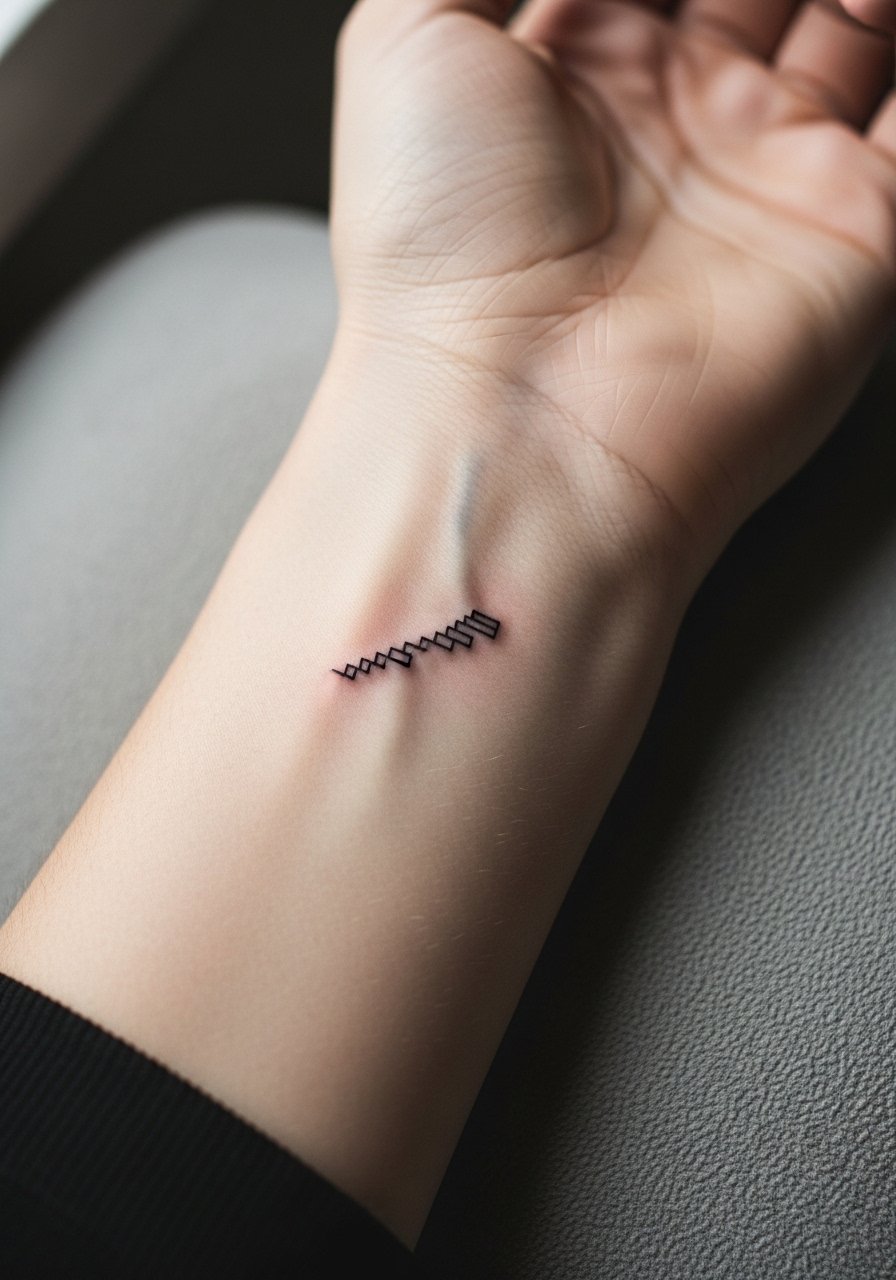
Wrist tattoos read intimate and delicate. The typical error is getting a path so small that daily washing and friction make it vanish quickly. Ask for slightly bolder linework at the wrist edge and test a temporary stencil for size. Expect a 30 to 60 minute session and a pain level around 4 to 5. For wearing post-session, avoid bracelets on that wrist until fully healed. Pair daytime looks with a minimalist watch on the opposite wrist so the tattoo has breathing room visually.
6. Stairway with Botanical Steps on the Calf
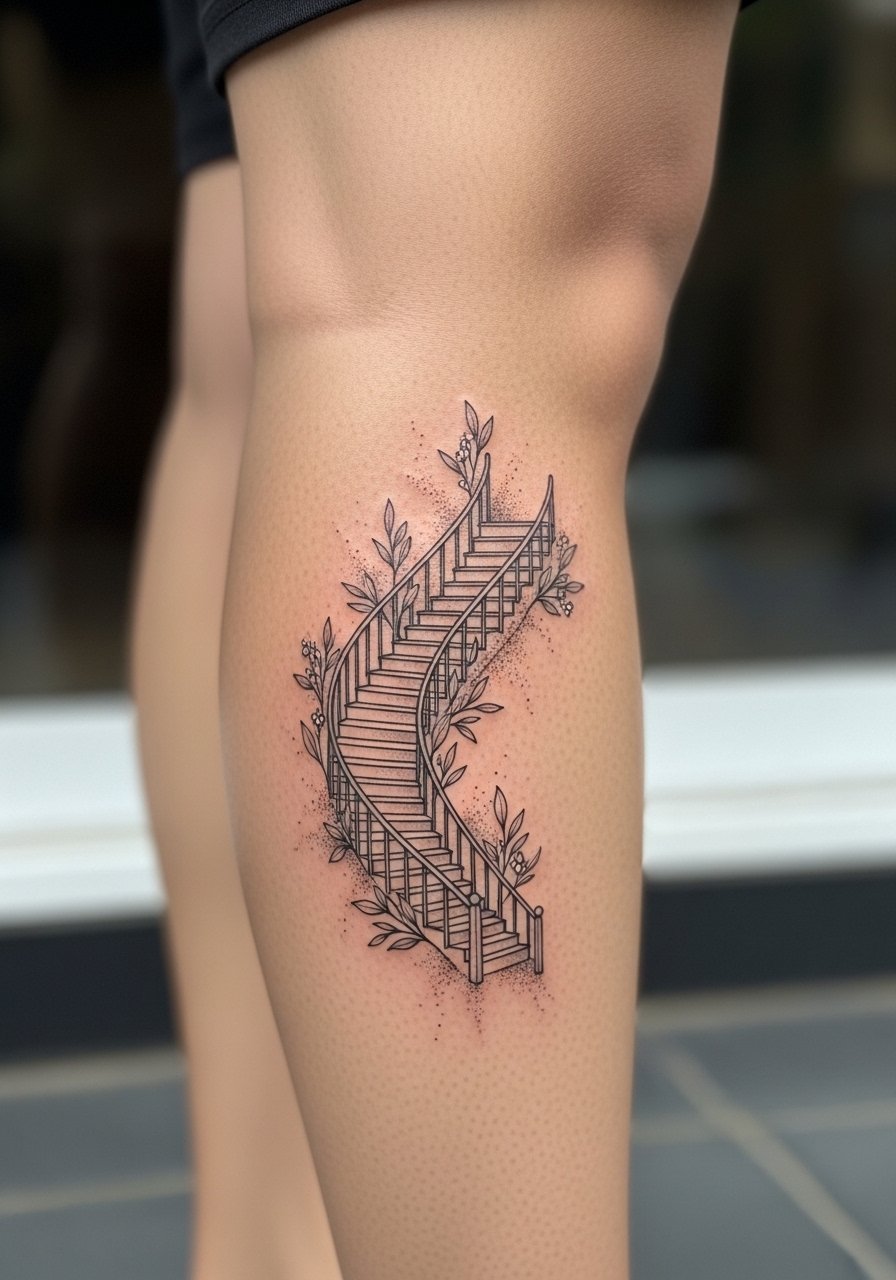
Calf placement gives room for layered elements like leaves and small blooms. A common mistake is squeezing too many tiny botanicals between steps which muddles during healing. Tell your artist which plant species matter to you and whether you prefer dot work or whip shading for texture. Sessions will be moderate in time and pain. For showing it off, cropped pants or tapered ankle pants highlight the piece without rubbing. Expect the design to soften slightly by year two if stipple shading is used.
Pack Smart
The upper arm and wrist pieces above need different prep from large back work. These items smooth the session and the first week so linework settles without avoidable irritation.
- Stencil transfer paper kit. Lets you preview exactly where the steps and botanical elements land before the needle, useful for wrist and calf placements.
- Topical numbing cream. Applied about 45 minutes before helps with rib and sternum sensitivity without affecting the artist's linework if used correctly.
- Thin protective film roll. Useful for finger and wrist tattoos that face constant friction from daily washing and typing.
- Fragrance-free gentle body wash. Cleans healing areas without irritating fine line work on forearms and calves.
- Aquaphor healing ointment. A thin layer for the first few days locks in moisture for delicate linework without clogging needle channels.
7. Sleeve-Scale Stairway Patchwork
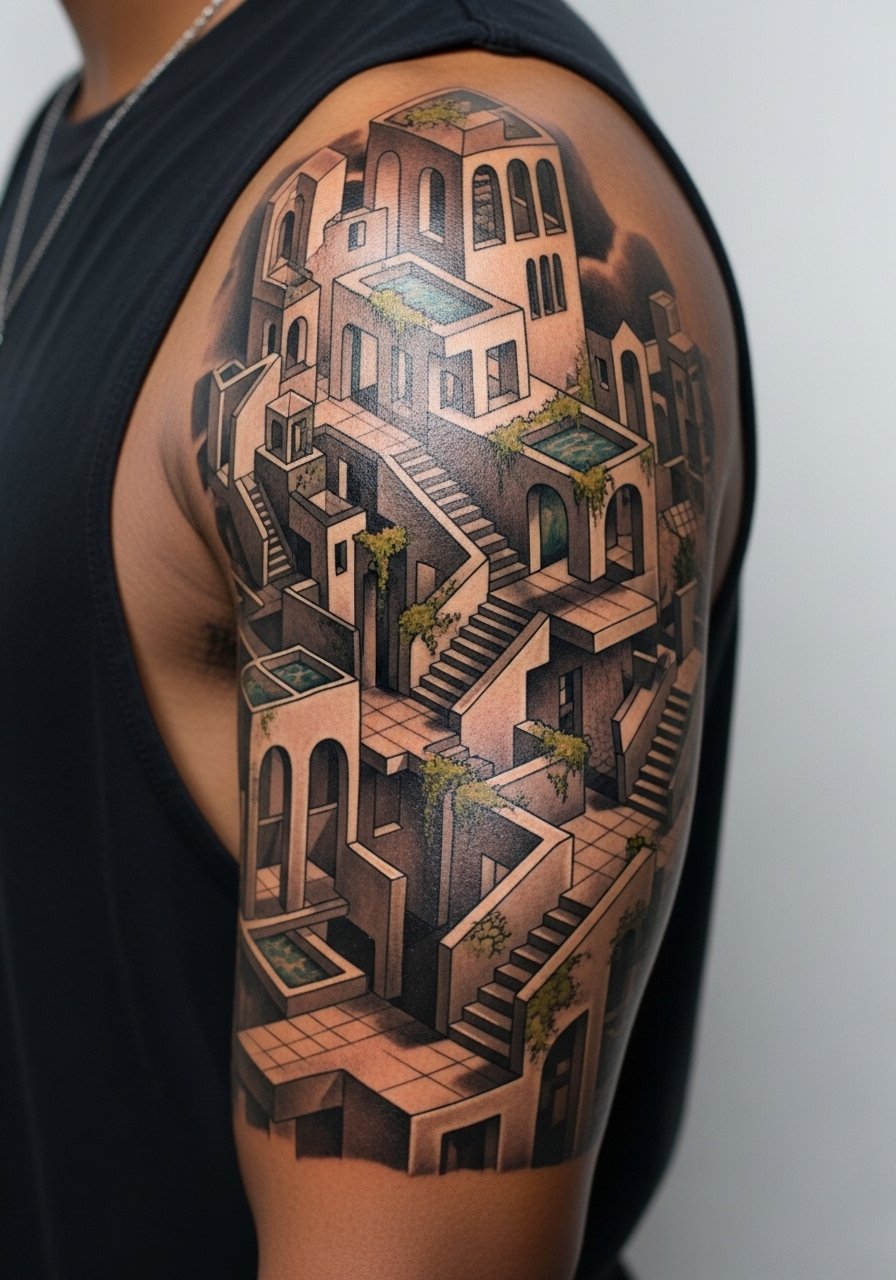
A sleeve lets you treat each step as its own mini-story. The common error is inconsistent scale when multiple artists contribute. In consultation, establish an agreed anchor palette and line weight guide before guests add elements. This will reduce visual clash over time. Expect multiple sessions over months and a variable pain curve. For session comfort, bring a minimalist tank so the artist has full arm access. Plan for touch-ups as separate bookings rather than one marathon session.
8. Stairway with Personal Items on Each Tread
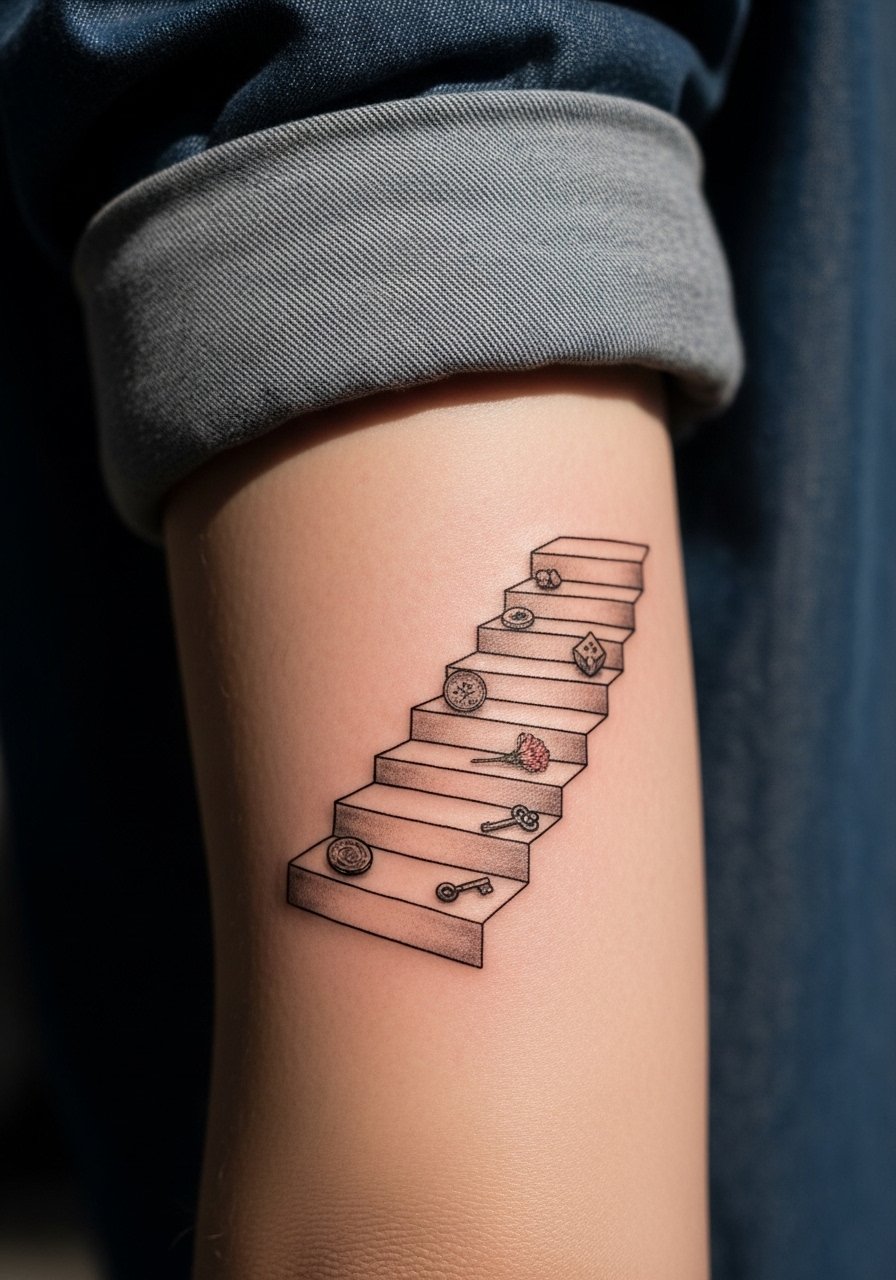
This is highly personalized and can tell a readable story if tokens are simple and spaced. The mistake is over-detailing small tokens. Tiny portraits or complex objects lose clarity when shrunk. Tell the artist which three items must be legible and simplify the rest. That way each tread reads at first glance. Expect a one to two hour session for a moderate forearm piece. For showing it off, a thin gold stacking bracelet on the opposite wrist complements the blackwork without crowding.
9. Celestial Symbols Stairway on Upper Back
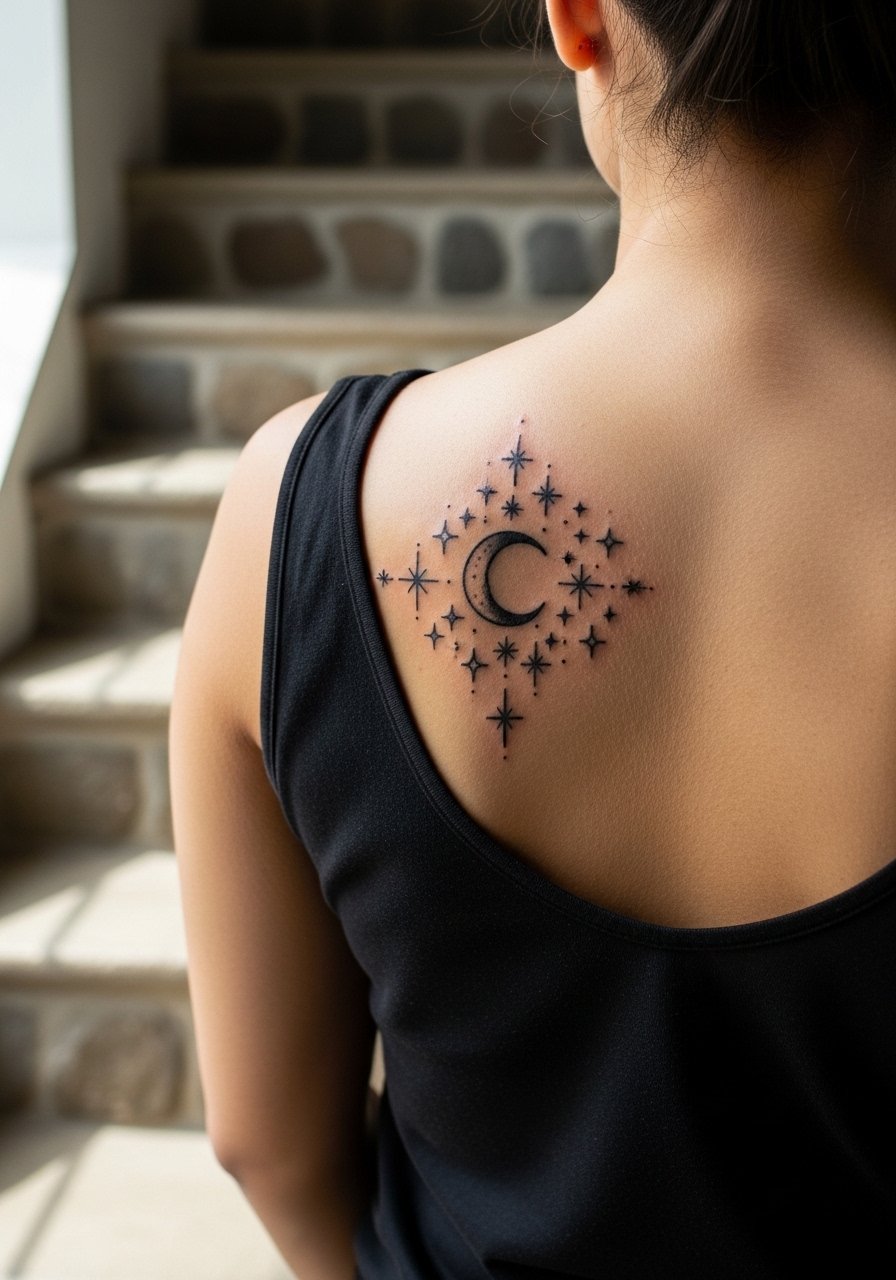
Upper back pieces let you scale celestial elements without crowding. A frequent error is centering too low which causes bra straps to rub during healing. Request placement mockups while wearing the clothing you plan to use so straps avoid the area. Sessions can be long but pain is moderate. Pair with open-back dresses for show time. If you plan large moons and planets, ask about saturation to avoid patchy fade in color fields.
10. Led Zeppelin Lyric-Integrated Stairway
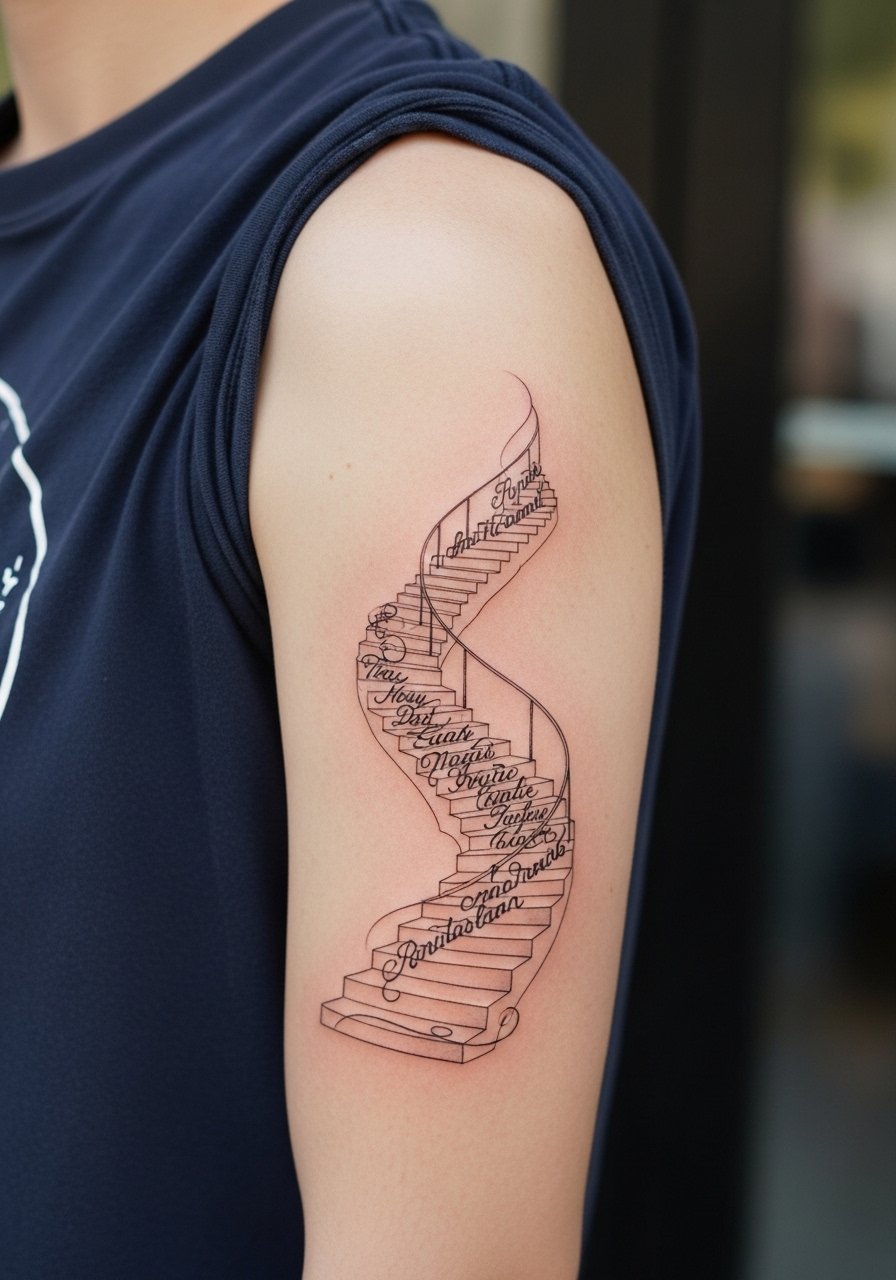
Music references are a classic motif, but they can read dated if the script dominates the composition. The common mistake is using long lyric lines that force tiny lettering. Instead, pick a short phrase or a symbolic glyph from the song and weave it into a step detail. In the consultation ask for script samples at actual size. Expect a 1 to 2 hour session depending on text length. For casual styling, a solid cotton button-up rolled at the sleeve frames the work for day looks.
11. Jacob's Ladder Biblical Interpretation on Sternum
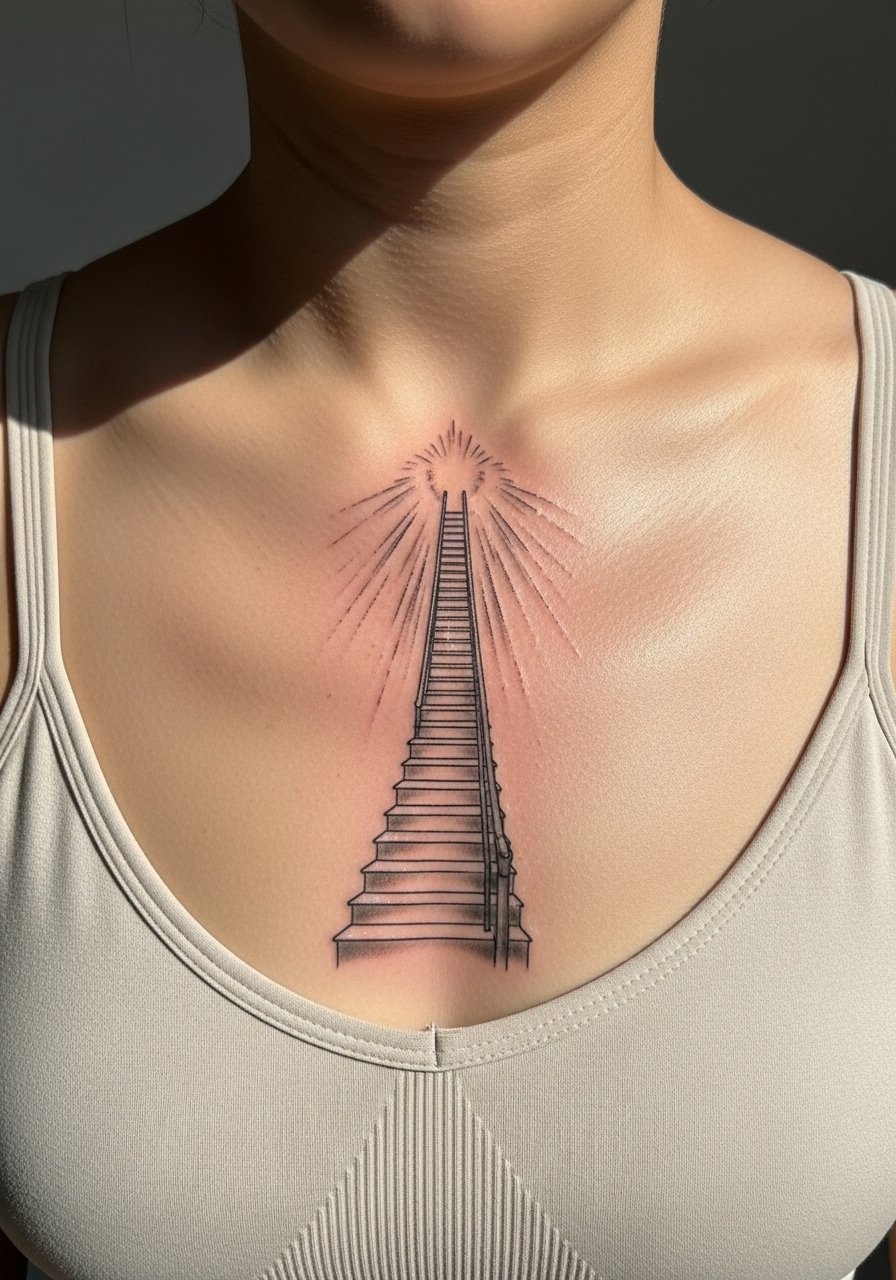
Sternum pieces require special consideration for body shape and clothing. The mistake is forcing wide horizontal designs across a curved chest without accounting for distortion when standing and sitting. Discuss how the ladder will align with the ribs and the clavicle so the final piece reads when you move. Sessions are more painful here and often split. For the studio, wear a fitted sports bra you can move aside without exposing more than needed. Expect higher sensitivity but strong visual payoff when healed.
12. Stairway with White Dove and Gates on Forearm
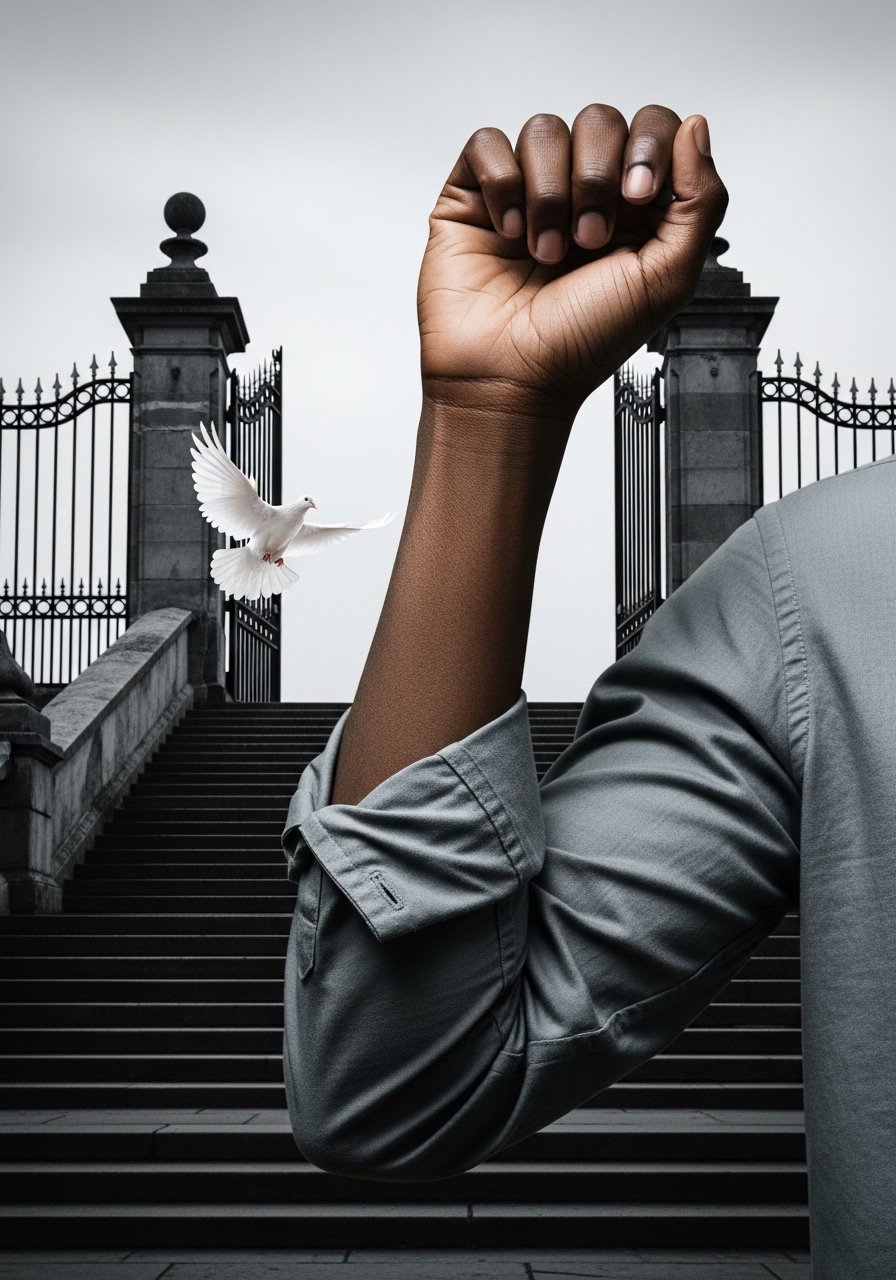
This composition pairs figurative symbols with architectural elements. A common mistake is scaling the dove too small so it becomes indistinct against the gates. Ask the artist to place the dove where negative space keeps it readable. Sessions will be moderate in length with low to medium pain. For show-off outfits pick a rolled linen shirt which keeps the forearm visible without harsh patterns that compete with the piece.
13. Tiny Staircase Behind the Ear
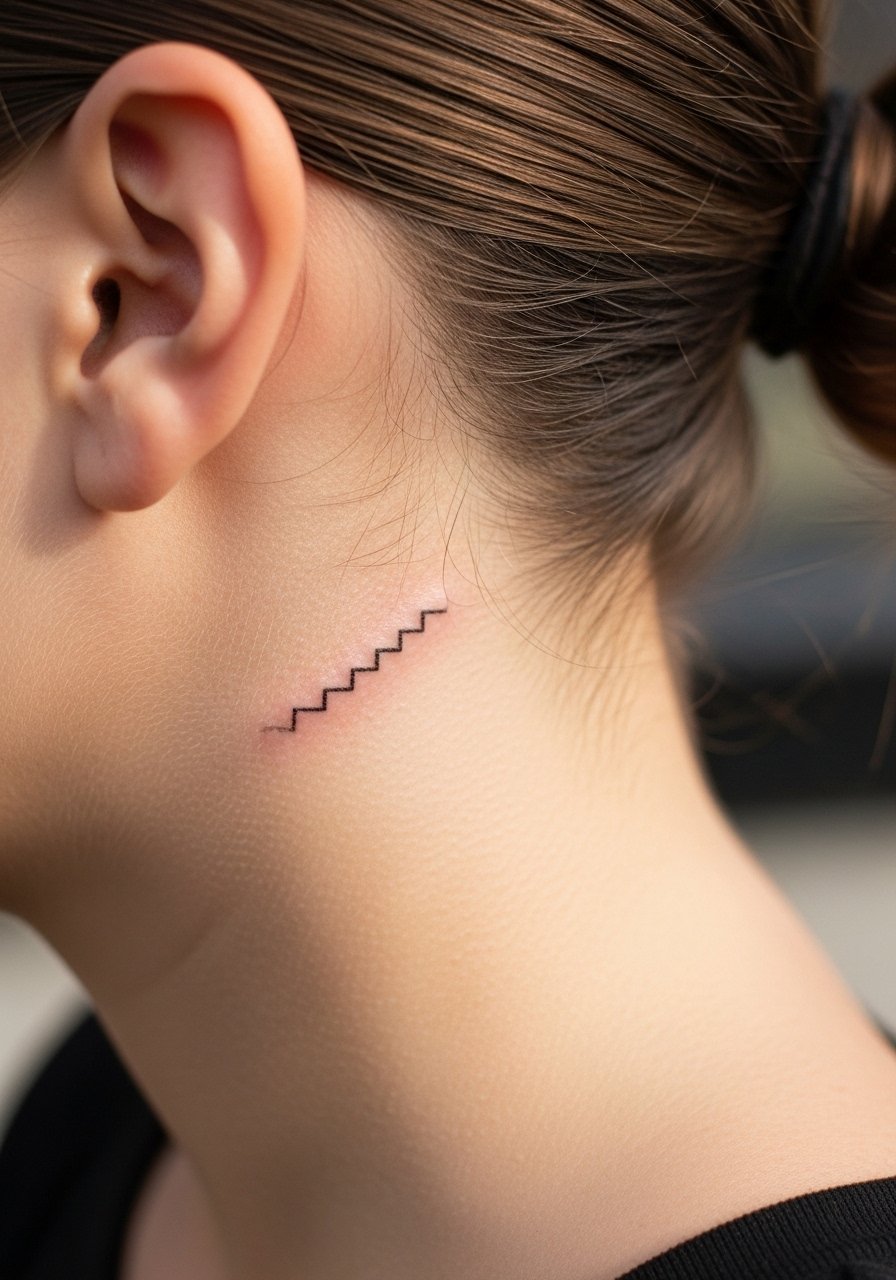
Behind-the-ear tattoos are intimate and require precise stencils. The error is expecting large detail in a very small zone. Keep the motif tiny and bold enough to translate into healed clarity. Pain is low to moderate and sessions are quick. Mention before booking that you want the area below the hairline shown in the stencil. Styling note, hair can be tucked up for showing the piece, but also keep it covered for work if needed.
14. Blackwork Staircase Across the Collarbone
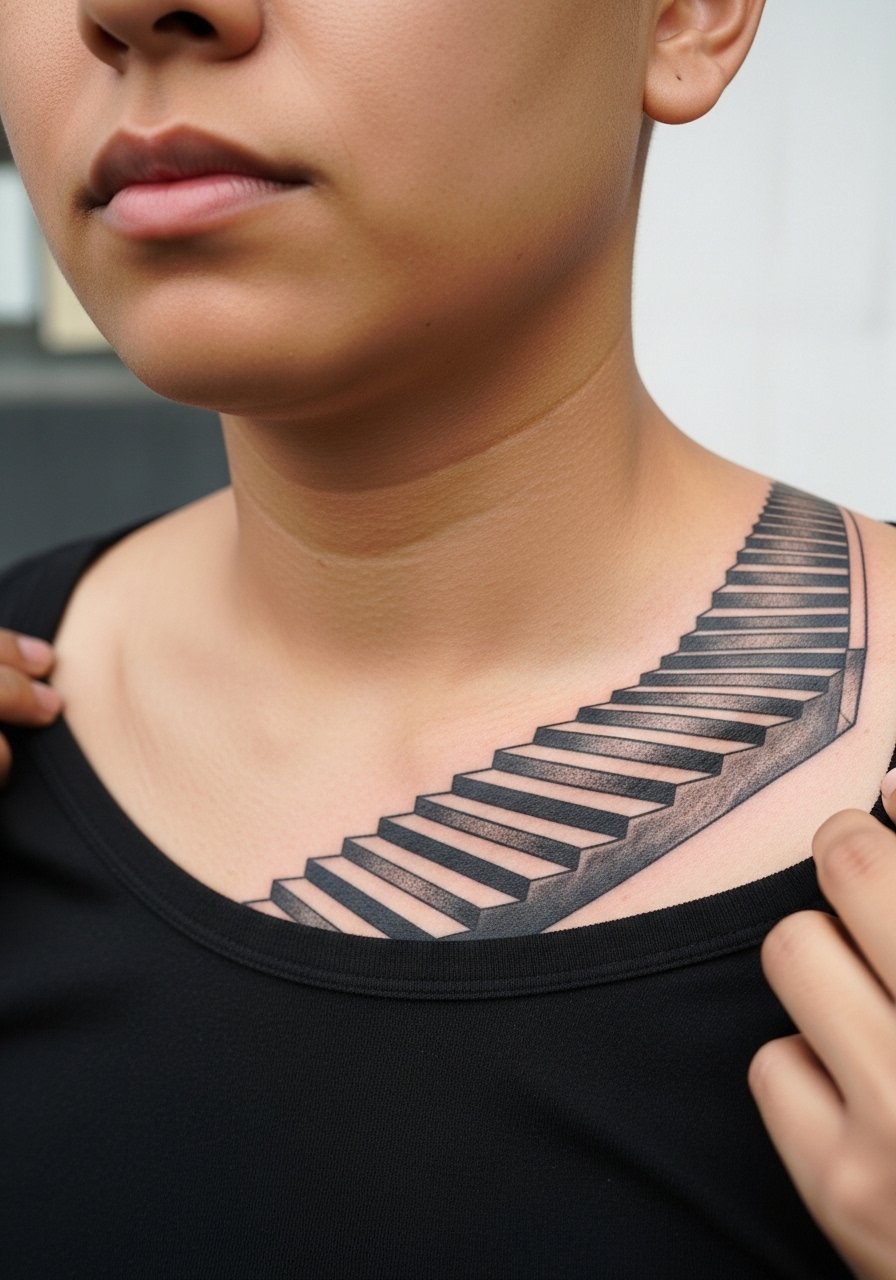
Collarbone pieces benefit from bolder linework because the area sees friction from clothing. The classic mistake is using ultra-fine lines that blur when shirts rub. Ask for a slightly heavier outline and clean negative space to keep each step distinct. Expect moderate pain and a one to two hour session. For showing it off, a wide-neck top pulled just aside highlights the collarbone without full chest exposure.
15. Geometric Stairway Down the Spine
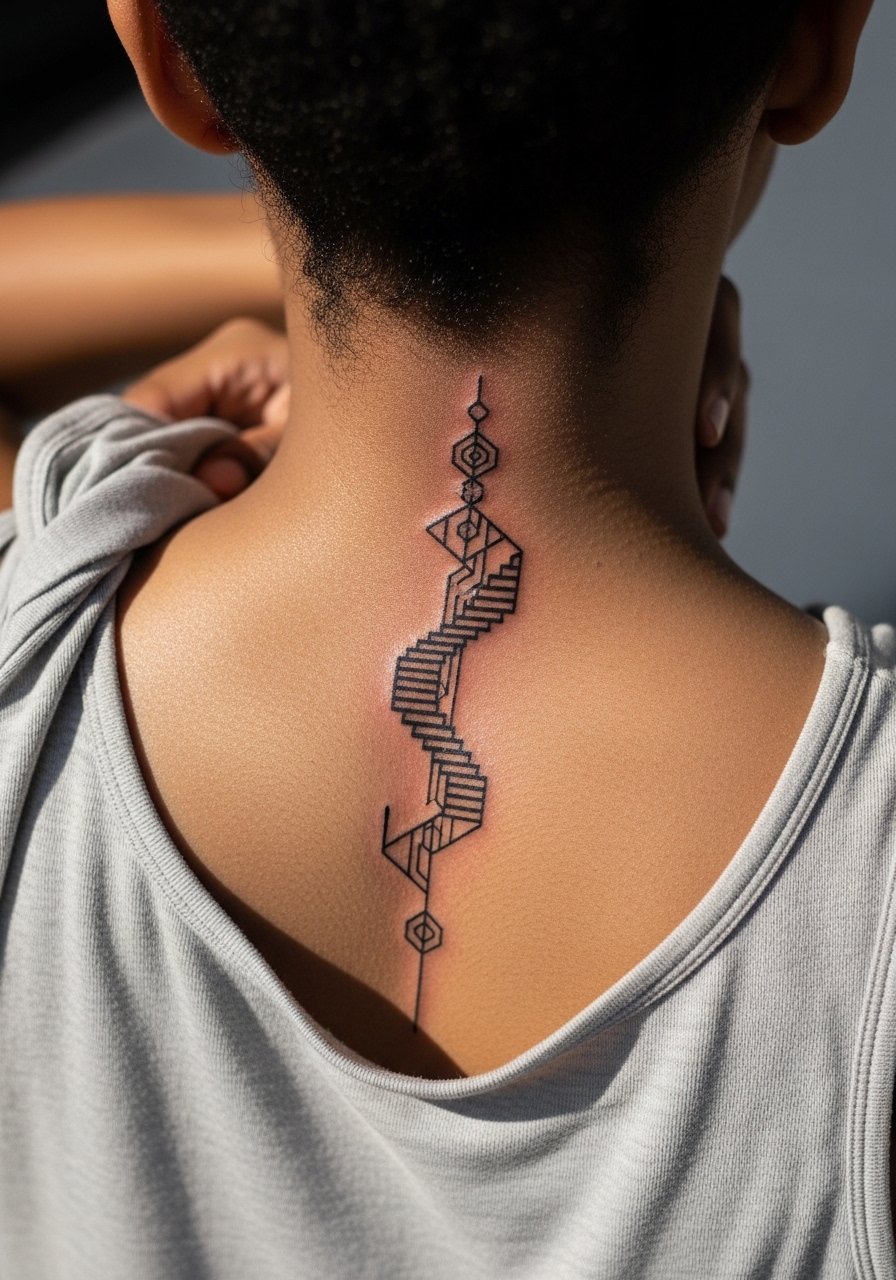
Spine placements require an artist comfortable with symmetry and negative space. The common error is compressing too many lines vertically which can cause merging as skin shifts. In the consultation ask for mockups with your posture variations so the artist can adapt spacing. Expect higher pain and consider multiple short sessions. For show-off occasions a backless dress works if you want the piece visible without exposing other areas.
16. Stairway with Floral Garland on Thigh
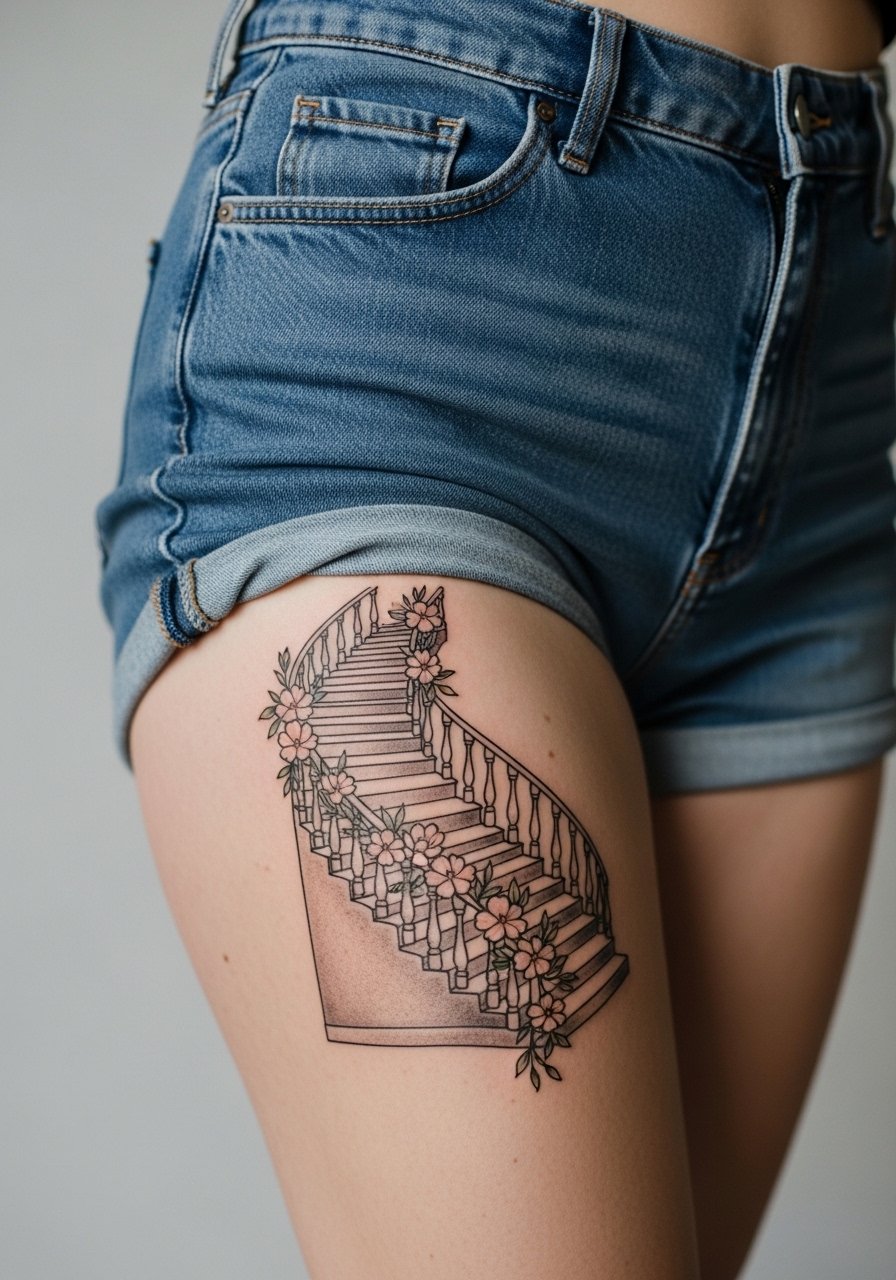
Thigh canvases let you add lush botanical details without crowding. The mistake is over-detailing tiny petals that flatten once healed. Ask the artist to use larger petal shapes and heavier contrast for long-term readability. Session time can be longer but pain is moderate. For the appointment wear high-waisted shorts that you can shift easily. Expect the design to soften slightly over a couple of years if stippling is used.
17. Micro-Realism Stairway with Tiny Portraits
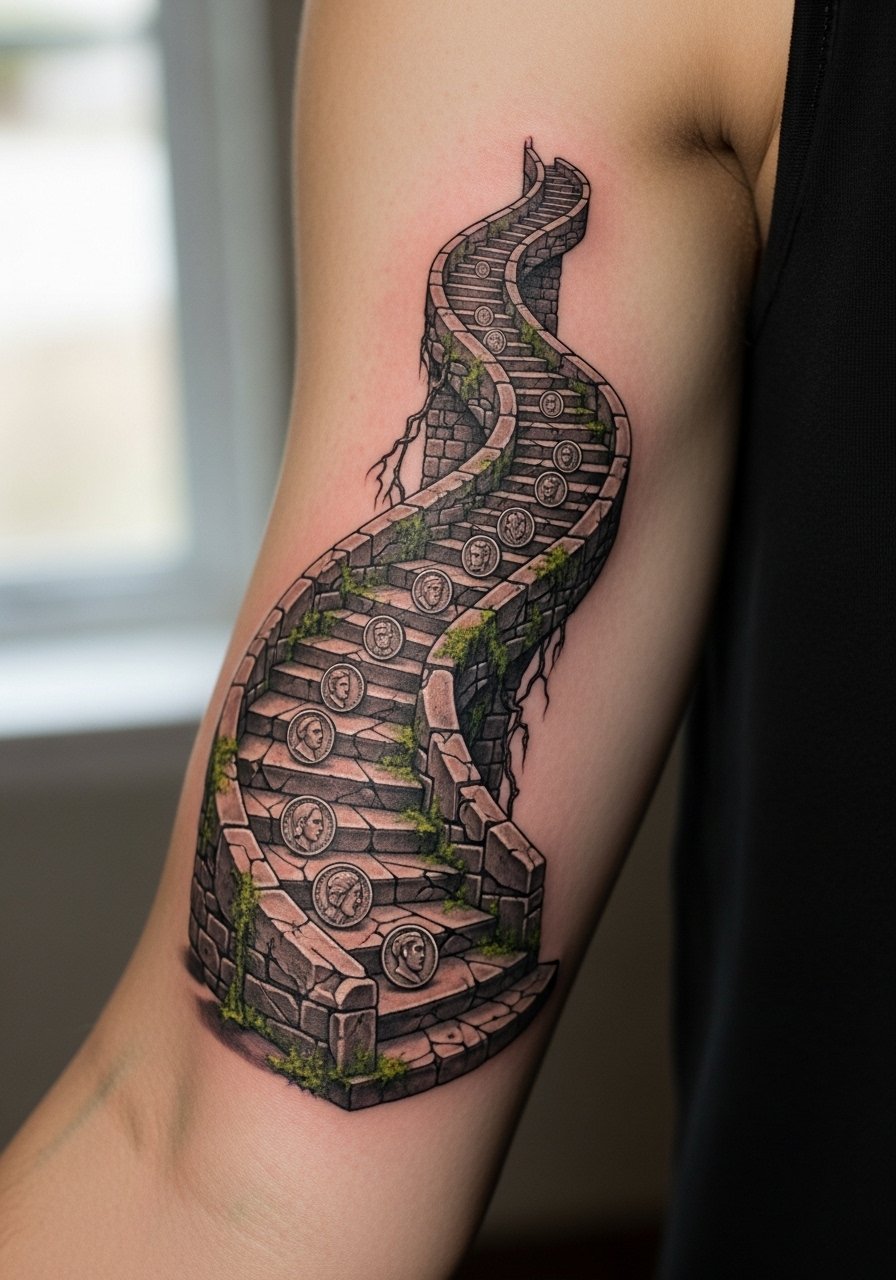
Micro-realism demands an artist comfortable scaling faces down small. The common mistake is expecting detailed portraits at postage stamp size. If you want faces, choose stylized silhouettes rather than full realism. Tell the artist which features must remain legible. Inner bicep sessions are medium pain and require arm position changes. Wear a tank top so the artist can raise your arm without exposing other areas.
18. Stairway with Sun and Planet Motifs on Shoulder Cap
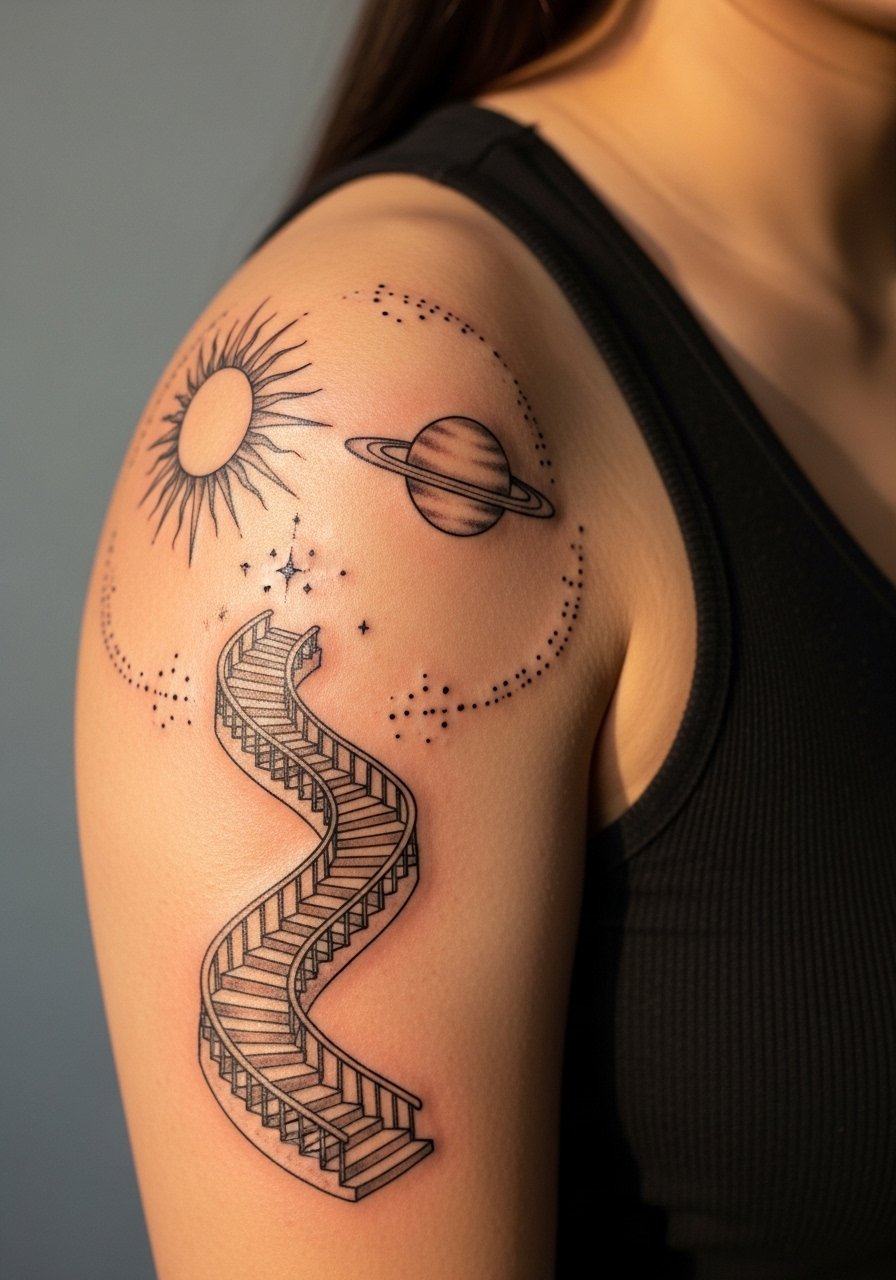
Shoulder cap allows curved compositions that read from different angles. The error is forcing linear steps across the curve without accounting for how the shoulder rotates. Ask for mockups with both relaxed and raised shoulder positions. Session time is usually moderate and pain is low. For showing it off pair the piece with a racerback tank or sleeveless shirts in plain colors. Color fields should be saturated enough to avoid patchy fade in two to three years.
19. Ankle Staircase with Constellation Accent
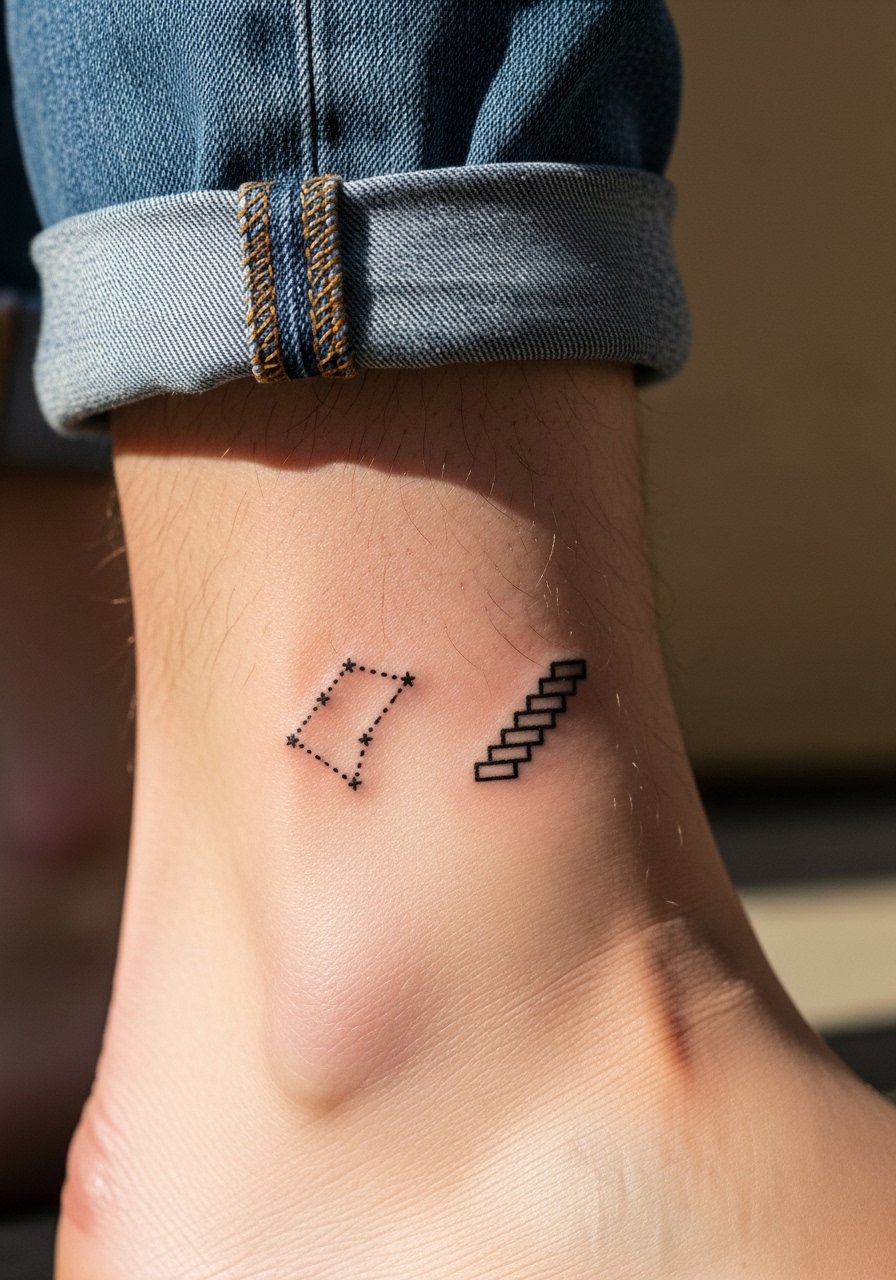
Ankle tattoos face constant friction and movement. A common mistake is putting too much fine detail that disappears under socks and shoes. Keep lines slightly bolder and the constellation dots spaced. Session is quick but the area experiences more irritation during walking. For sessions wear cropped linen pants so you can roll them up without pinching the fresh ink. Expect touch-ups earlier than forearm work due to abrasion.
20. Stairway Sleeve Accent Around Elbow
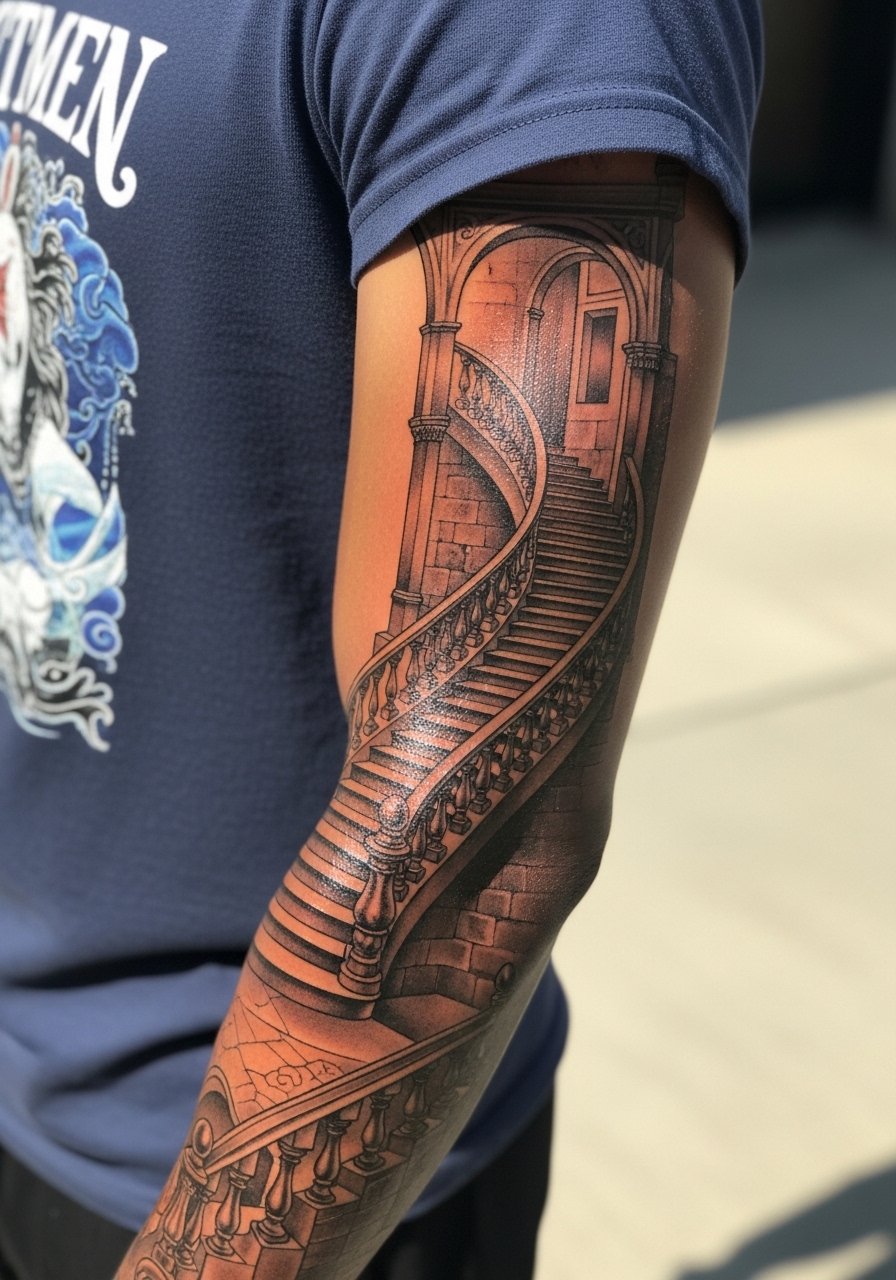
The elbow zone is tricky because of constant bending. The mistake is concentrating dense detail directly over the joint. Ask your artist to place cleaner, simpler steps across the bend and keep denser motifs on either side. Sessions often require small breaks due to discomfort. For the studio wear a short-sleeve tee that exposes the elbow and allows movement during the appointment.
21. Minimal Staircase on the Side of the Hand
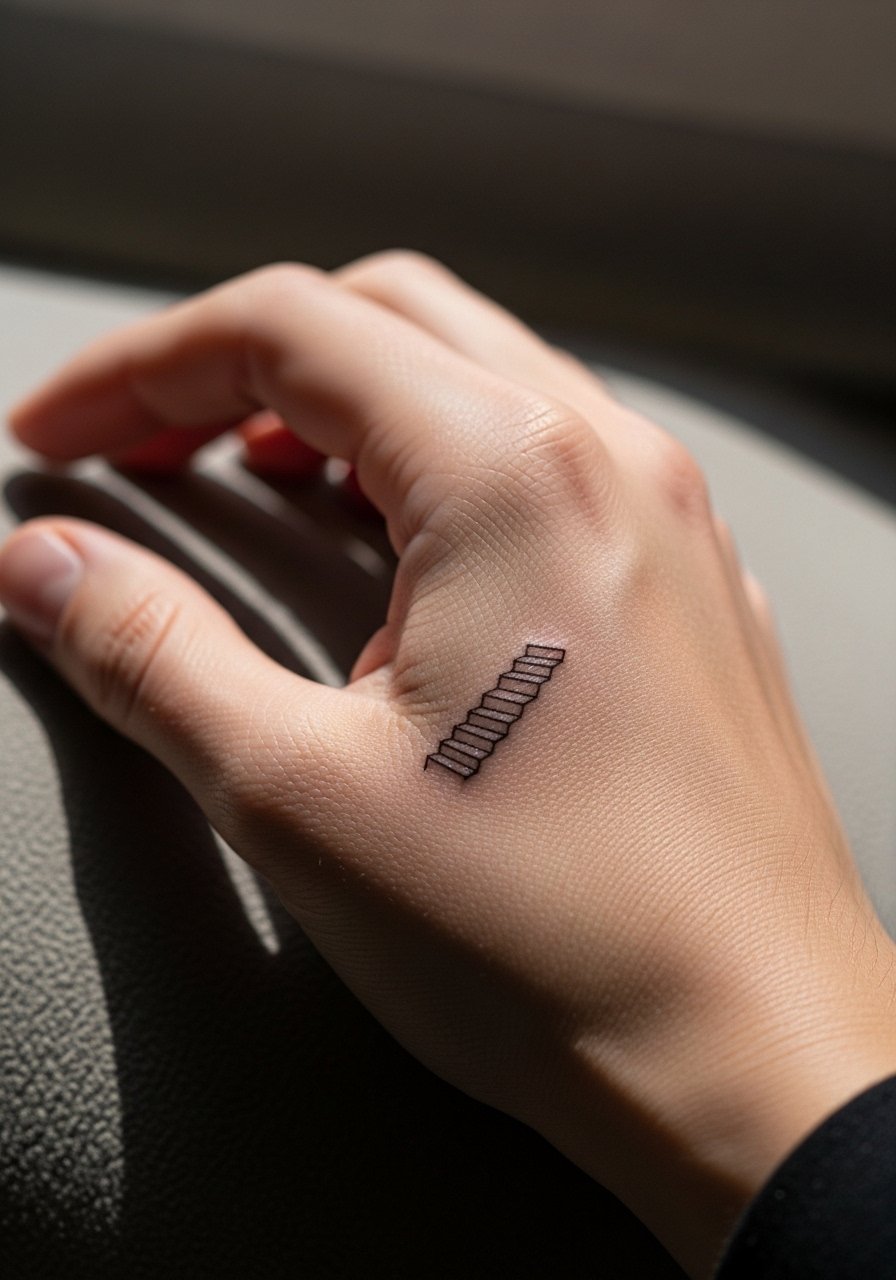
Hand placements are high visibility but high maintenance. Expect faster fading and possible touch-ups. The mistake is expecting ultra-fine steps to survive years of washing and sun. Tell your artist you accept heavier anchor lines to retain shape. Sessions are short but more painful than the forearm. Consider work and industry when choosing the hand. For show-off looks, minimal jewelry helps the piece read clean.
22. Stairway with Botanical Sleeve Transition on Upper Arm
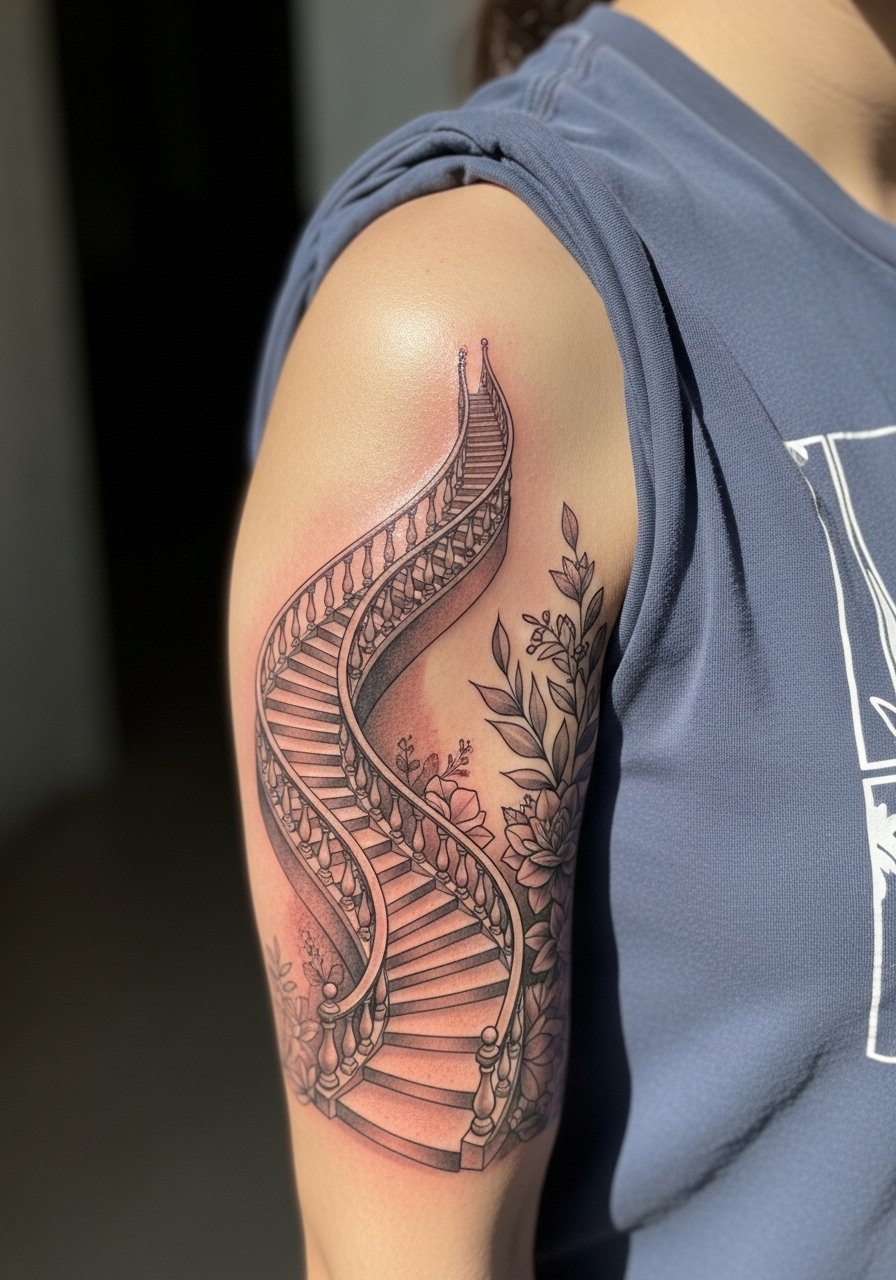
This approach is good if you plan a sleeve over time. The common error is starting with a stairway that prevents later flow into larger botanical elements. Ask the artist about negative space paths that future pieces can follow. Sessions will be staged over months. For the session wear a minimalist tank to keep the area accessible. Plan ahead if you want color filled later to match saturation across sessions.
23. Stairway with Scripted Coordinates on the Rib Side
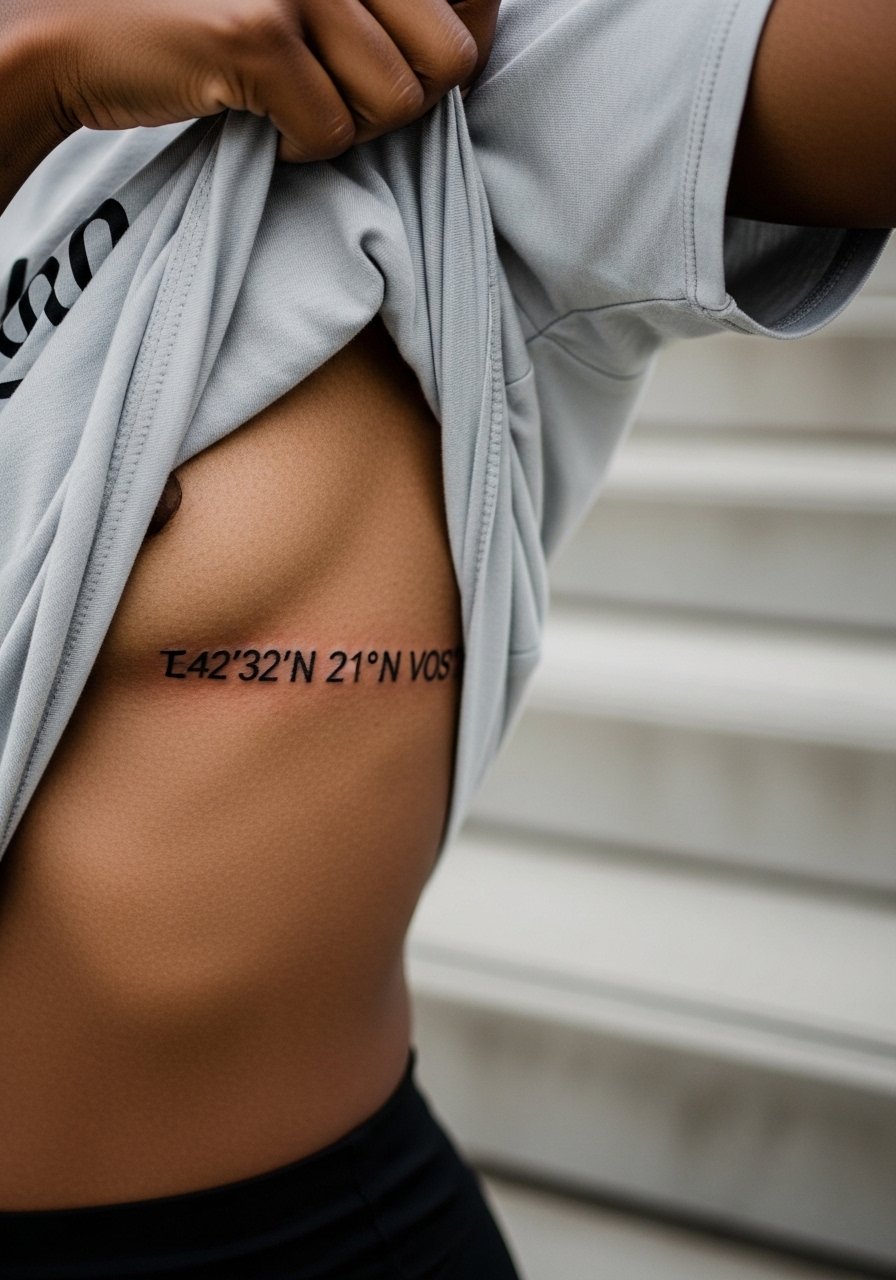
Coordinates are discreet markers that anchor personal meaning without long text. The main mistake is placing tiny numerals that blur. Ask for a slightly larger font and a test stencil on your skin where you will move and breathe. Sessions here are more painful and often split. Wear a cropped tee for the appointment. Remember that the ribs shift with weight changes so discuss how the piece will adapt to your body.
24. Stairway with Dot Work Sky Background on Shoulder Blade
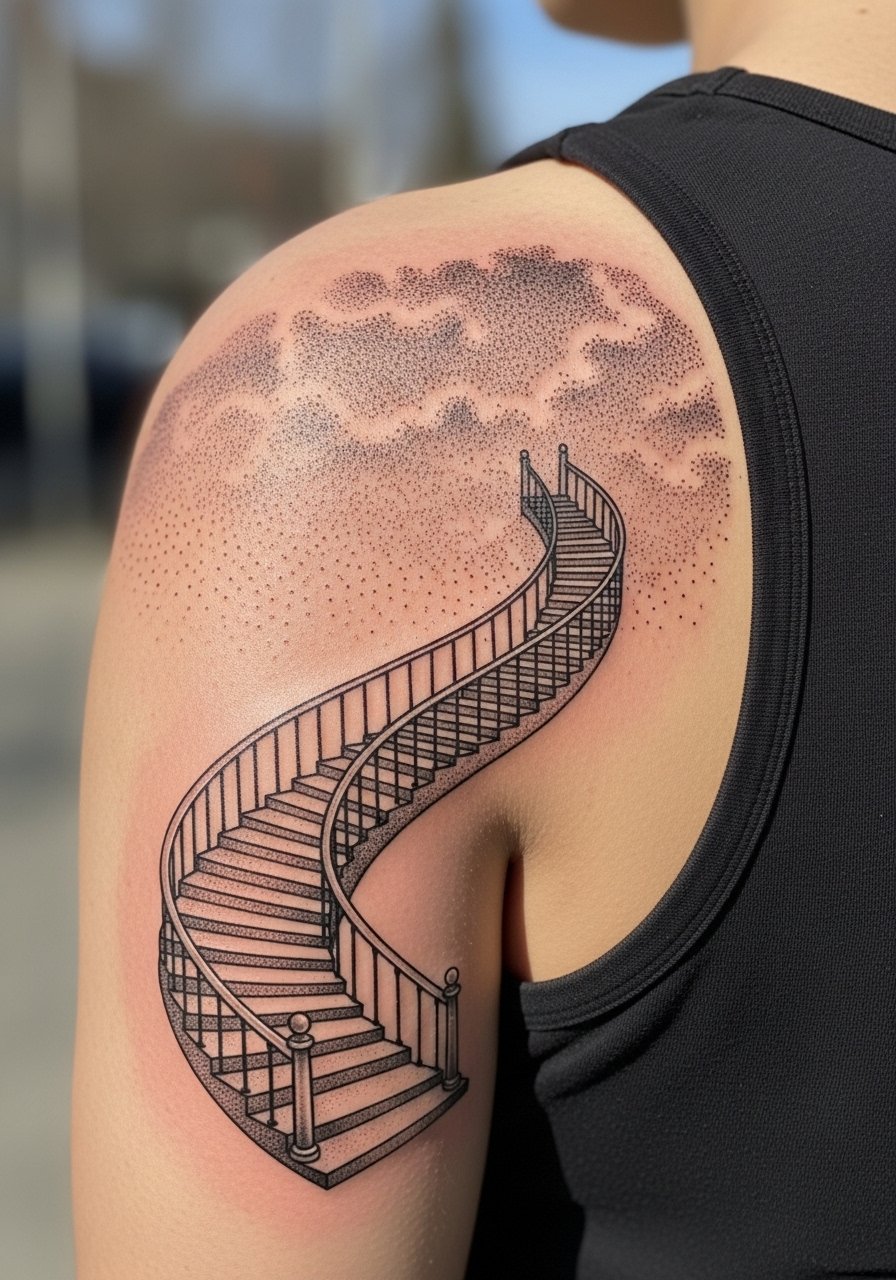
Stipple backgrounds read delicately when done with room to breathe. Overloading tiny dots near thin steps creates early blur. Ask the artist how dense they plan the stippling and where they will leave negative space. Sessions are medium length with lower pain. For showing it off choose a tank top that exposes the shoulder blade. Dot work can soften with time but holds texture if spacing is respected.
25. Stairway with Tree Growth Motif on Lower Leg
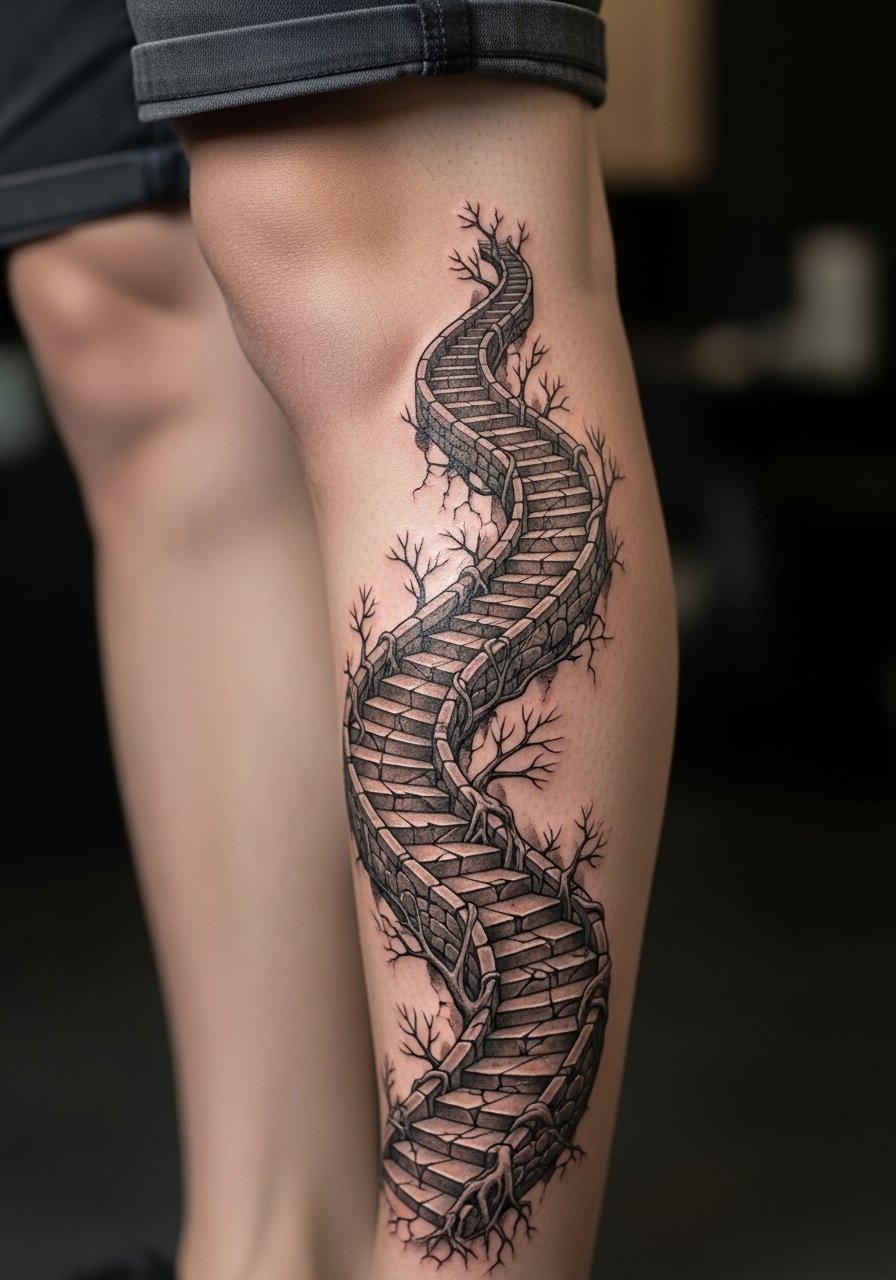
Lower leg pieces handle vertical compositions well. The mistake is crowding trunk details into thin areas near the ankle. Keep trunk lines bold enough to avoid breakup and let branches thin as they ascend. Sessions are moderate and the pain varies by proximity to bone. For session wear shorts you can roll up without compressing the fresh work. Expect minor softening in texture by year three.
26. Small Stairway with Moon Phase Accent on Collarbone
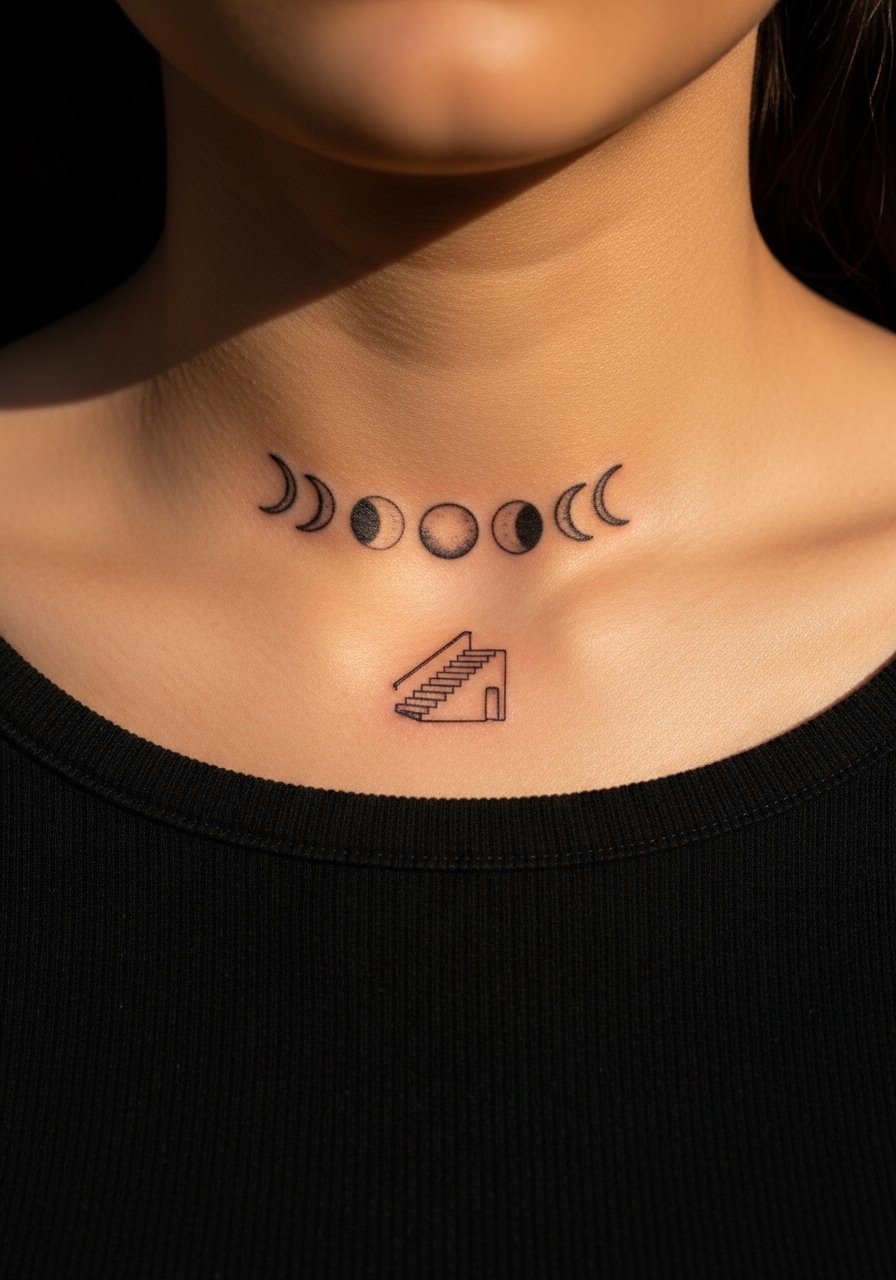
Moon phases add rhythm to a small stair motif and help with readability. A mistake is shoving many phases into a tiny band which makes them look like smudges later. Clarify exact phase shapes and spacing in the consultation and request a stencil on the body before inking. Session time is short and pain is moderate. Pair with a thin chain pendant necklace that sits above the script without crowding the collarbone area.
27. Stairway with Geometric Gate on the Lower Back
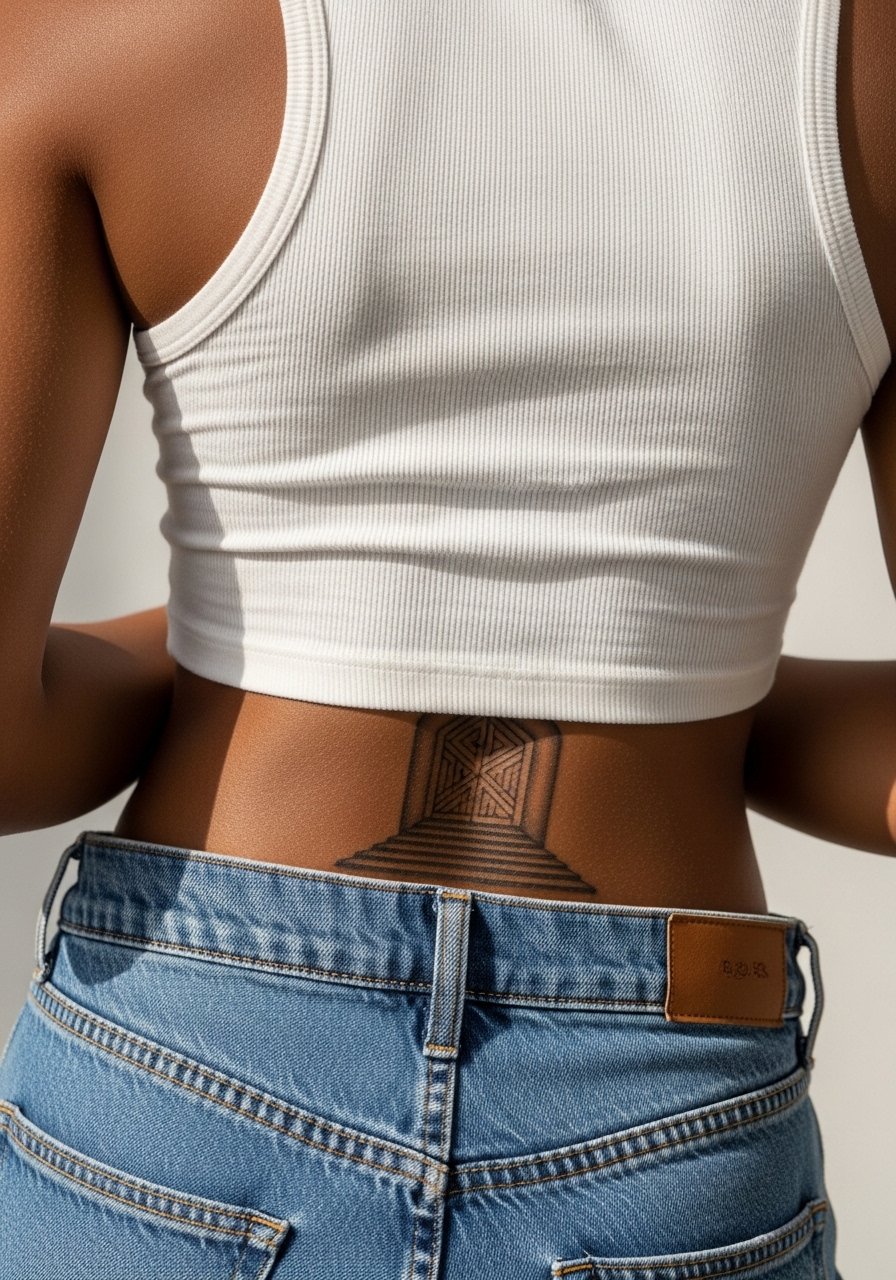
Lower back gives a wide canvas for architectural gates that anchor a stairway. The common error is centering too low where waistbands and belts will rub during healing. Ask for placement trials while wearing your typical bottoms. Sessions may be long but pain is moderate. For session comfort wear a tank top you can lift slightly. Plan for touch-ups if the piece includes heavy black fields that may show patchy fade from waistband friction.
Frequently Asked Questions
Q: Will a watercolor stairway need touch-ups more often than a black and gray one?
A: From what I have seen, watercolor washes generally need touch-ups sooner than saturated black and gray because the softer pigments disperse and fade with UV exposure. Placement and sun protection change that timeline significantly. If you pick watercolor, ask your artist about projected touch-up intervals so you can budget for maintenance.
Q: Can fine line stairways hold up on darker skin tones?
A: Fine line can read well on darker skin when line weight is adjusted and spacing is increased. The common fix is asking for slightly stronger anchor lines and high-contrast negative space. Bring healed examples on similar skin tones and ask the artist how they adapt ink depth for visibility.
Q: Are ribcage stairways more likely to blur because of body movement?
A: Ribs do move more and the skin there stretches when you breathe which increases blur risk for very tight linework. One camp argues ribs make fine line unreliable. The other camp says experienced artists can compensate with spacing and needle depth. The safer approach is spacing and planning mockups to see how it sits when you breathe.
Q: What should I wear to the studio for an ankle or calf stairway session?
A: Choose clothing that gives the artist clear access without pressure on the fresh ink. For ankle work, rolled jeans or cropped pants are ideal. For calf pieces, loose shorts or drawstring linen pants work well. Avoid tight seams and bring slip-on footwear if the ankle is involved.
Q: If I want a multi-artist sleeve stairway project, what should I request in consultations?
A: Ask for an agreed palette, shared line weight guide, and a plan for negative space. That prevents competing styles from colliding. Bring reference images and request the lead artist or studio manager to approve guest sketches before additions.
Q: How soon should I schedule a touch-up for delicate wrist or hand stairway tattoos?
A: Expect to evaluate at around 12 to 18 months for hand and wrist pieces because of higher abrasion and sun exposure. That timeline varies by your daily habits. If you notice early softening, book a touch-up rather than waiting several years.
