
Fine line spider web motifs are everywhere on saved boards right now, and what looks delicate on a phone can soften into a gray blur on skin. The trick with abstract spider web tattoos is balancing airy negative space with intentional line weight so the design keeps its shape over time. Below are specific, unusual takes on web work and exactly what to say in consults to get them to age the way you want.
1. Micro Web on the Inner Wrist
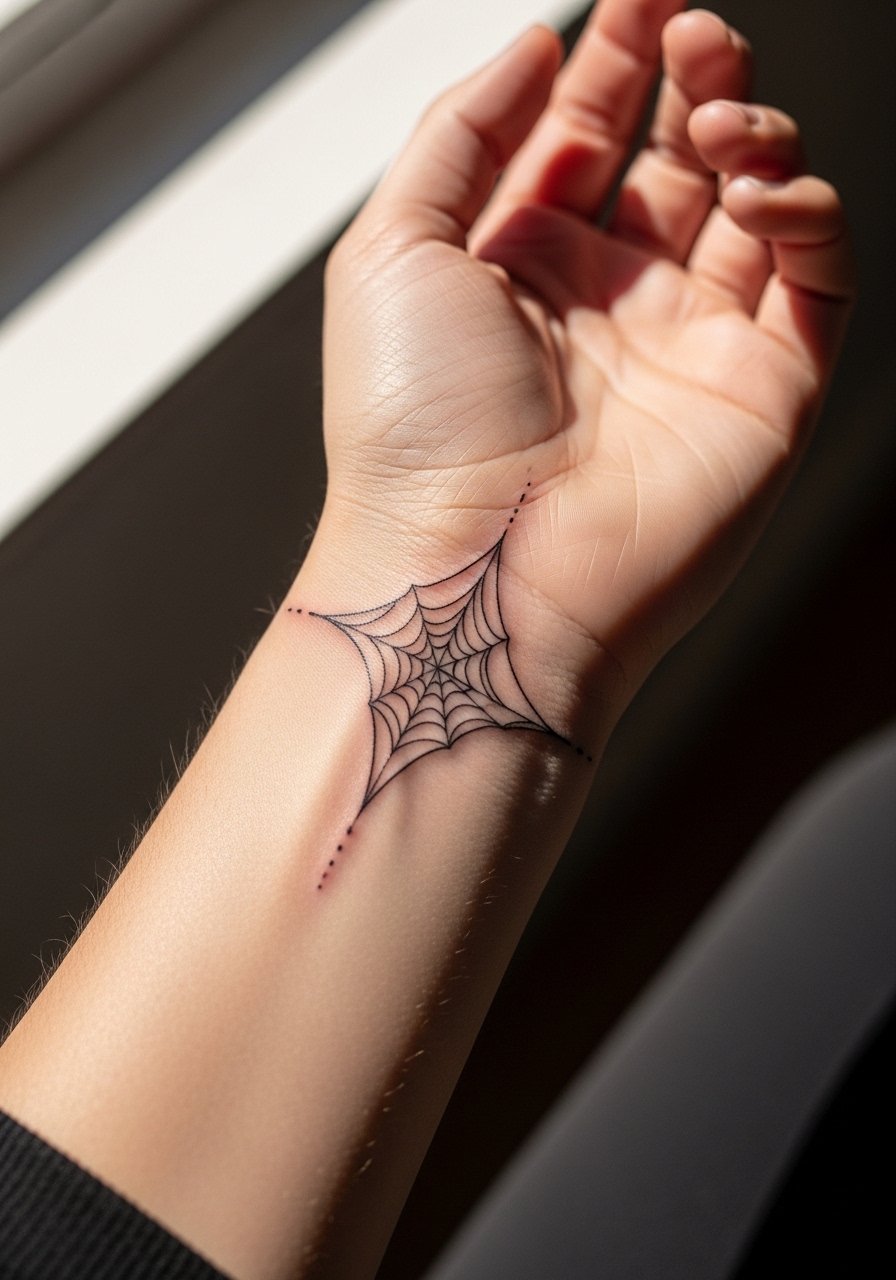
I see small wrist webs last best when artists leave breathing room between strands. Ask for slightly heavier primary lines and lighter secondary lines so the main geometry reads even if the thin infill softens over time. Fair warning the inner wrist is sensitive and a touch-up at year two is common for ultra-fine work. For the session wear a loose button-down shirt you can pull aside without rubbing the fresh lines. Avoid asking for every filament to be the same thickness or the whole piece can blur together as it heals.
2. Fragmented Web with Negative Space Backing
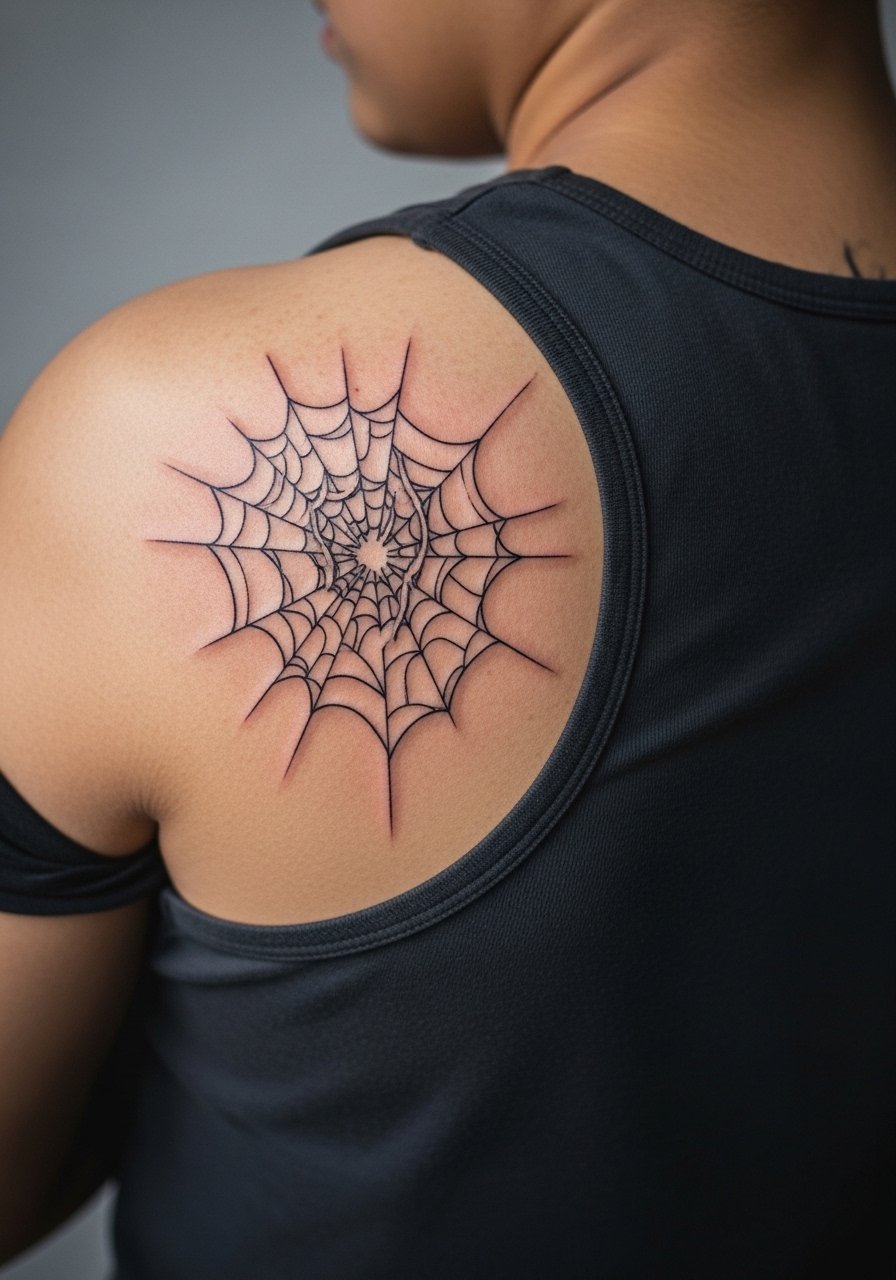
There is a clean way to break a web into floating shards so the piece looks intentional and not like a faded mess later. Tell your artist you want pockets of untouched skin built into the negative space so the pattern can read from a distance and up close. Upper back placement hurts less than ribs but requires a longer session if you want dense layering. For show-off outfits try an open-back midi dress that frames the shard edges and keeps attention on the negative space plan.
3. Geometric Web Halo Around the Collarbone
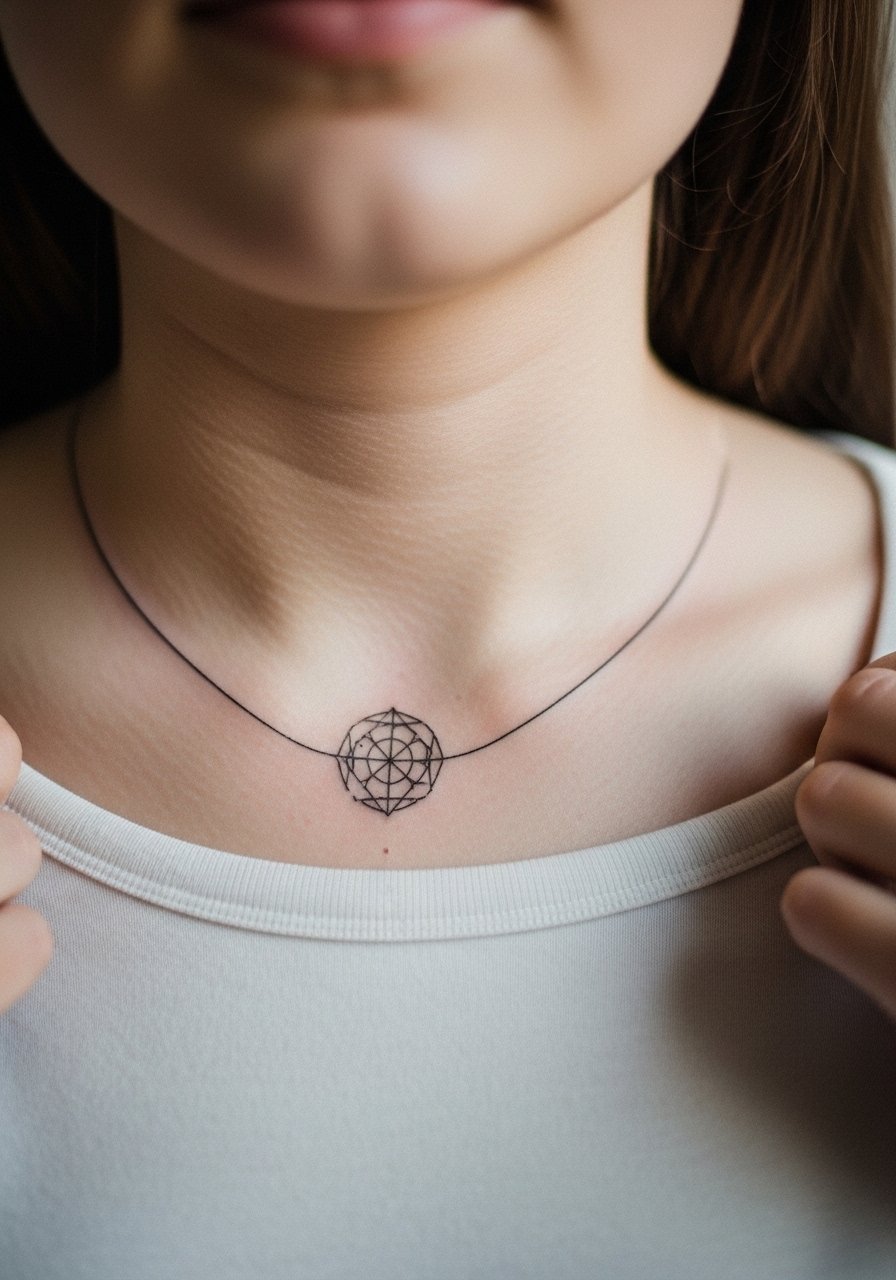
The collarbone is unforgiving when lines cross a moving surface. I recommend a slightly open halo instead of a fully closed web so the piece moves with breathing and still reads well at six months and two years. In consultation say you want "open points" and ask the artist to show how the design bends over the bone. For evenings out pair the finished piece with a thin chain pendant necklace that sits just above without crowding the lines. Expect a light sting and a single mid-length session.
4. Stippled Dot-Work Web on the Ribcage
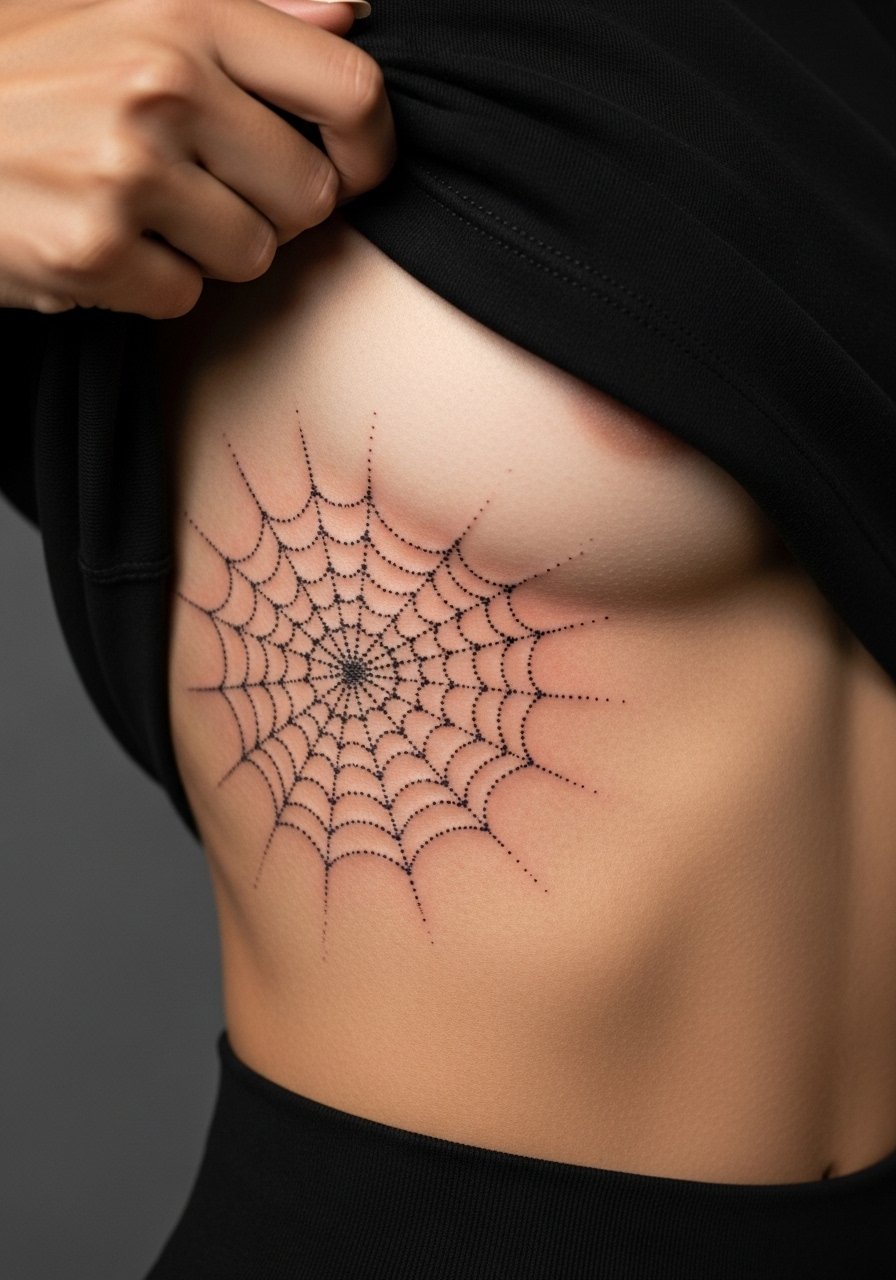
Fair warning ribs are one of the higher pain placements but stipple work gives a soft, textured look that ages with subtlety. Artists split on whether tiny stipple webs hold longer on ribs. One camp says the stretch of the torso blurs dense dots within a couple of years. The other camp says paced stippling and careful depth keep detail intact. Ask your artist where they fall and request a test patch or spaced stipple fields to preserve contrast. For the session wear a zip-up hoodie you can loosen so the artist has access without you being cold.
5. Blackwork Radial Web Over the Shoulder Cap
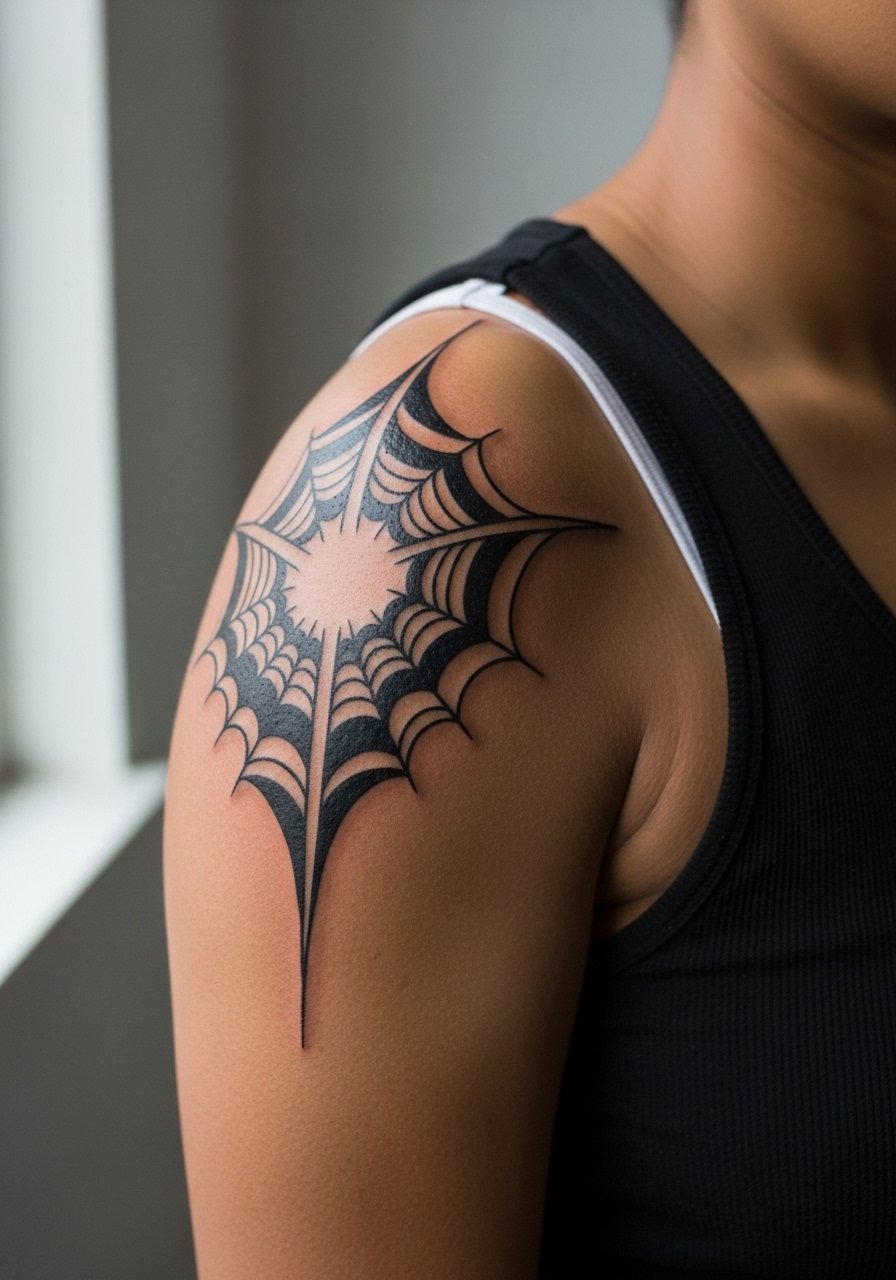
There is a lot to like about saturated blackwork here because heavy saturation can outlast delicate lines. Tell the artist you want strong primary armature lines and built-up saturation in the thicker regions to resist fading. The shoulder is medium on the pain scale and a two-hour session usually covers a compact radial web. A common mistake is asking for too many tiny connectors which clutter the shape after a few years. Show-off pairing works well with a loose tank top that reveals the cap without competing.
6. Watercolor Splash Behind a Minimal Web
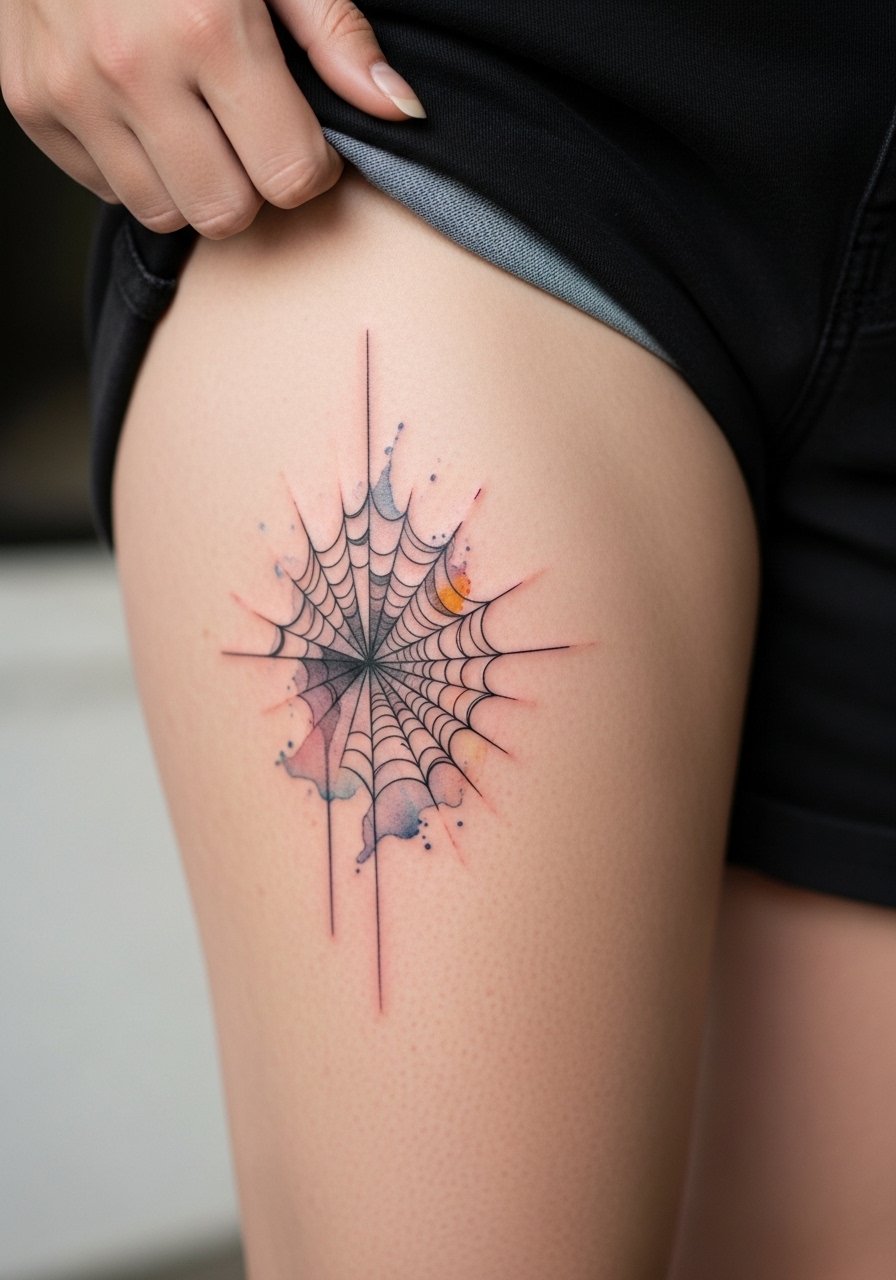
Watercolor backgrounds add movement to a web without heavy linework, but color saturation fades differently than black ink. For longer life ask for the watercolor to sit behind the black lines rather than over them so touch-ups target color separately. Inner thigh sessions require modest clothing choices and can be tender while sitting. For the appointment choose loose drawstring linen pants so you can roll the leg up comfortably and avoid friction after the session.
Studio Day Picks
The thigh and shoulder pieces above ask for different prep than wrist and collarbone work, so a few targeted items make the session smoother and the first week easier.
-
Stencil transfer paper kit. Lets you preview the linework on skin before committing, especially useful for the collarbone halo and radial shoulder armature.
-
Topical numbing cream. Applied 30 to 45 minutes before can ease ribcage and inner thigh sensitivity without masking contrast for the artist.
-
Thin protective film roll. Keeps tight wrist and hand webs clean during the first week of frequent washing and typing.
-
Fragrance-free body wash. Cleanses healing areas like the shoulder and back without irritating delicate linework.
-
Aquaphor healing ointment. A thin layer in the initial days locks in moisture for fine line work while allowing the skin to breathe.
7. Constellation Web Across the Ankle
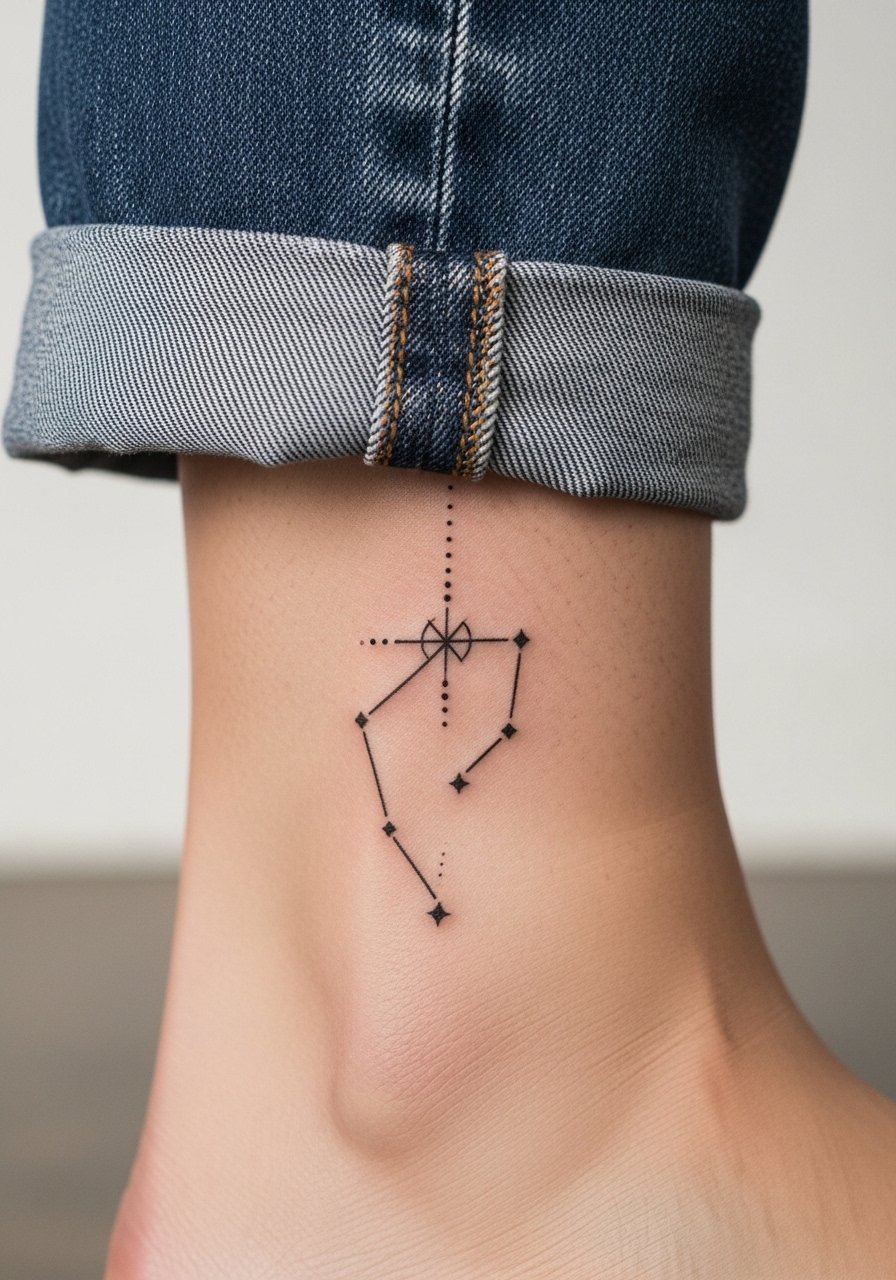
The ankle is a friction zone so small, crisp lines face more wear from socks and shoes. Ask for slightly bolder anchor points at the web intersections and a narrow gap between the web and shoe line. Session discomfort is mild but remember the first week will include swelling if shoes rub. For showing it off pair the finished design with strappy sandals or rolled trousers so the web breathes visually. A common error is requesting ultra-micro lines that vanish under routine abrasion.
8. Mandala-Web Fusion on the Sternum
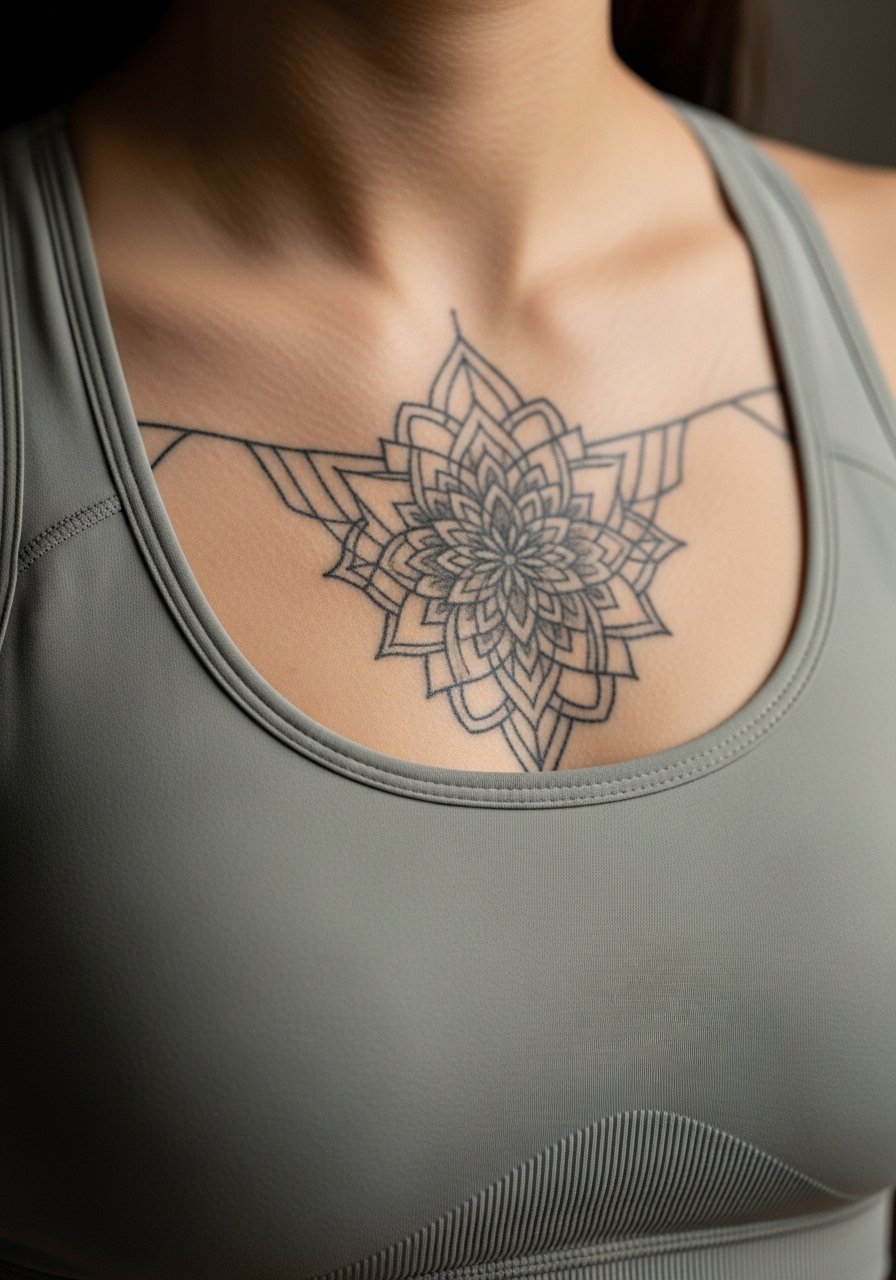
Sternum placement requires a fitted top for the session and careful spacing so dense mandala elements do not merge as the skin breathes. Artists disagree about compact mandala density near the sternum. One camp favors open petal fields to prevent softening. The other camp packs more detail and plans touch-ups. Ask your artist how they space radial lines and request a sample layout that shows negative space. For date nights choose a bandeau or open neckline dress that frames the mandala without rubbing.
9. Fragmented Color-Blocked Web on the Calf
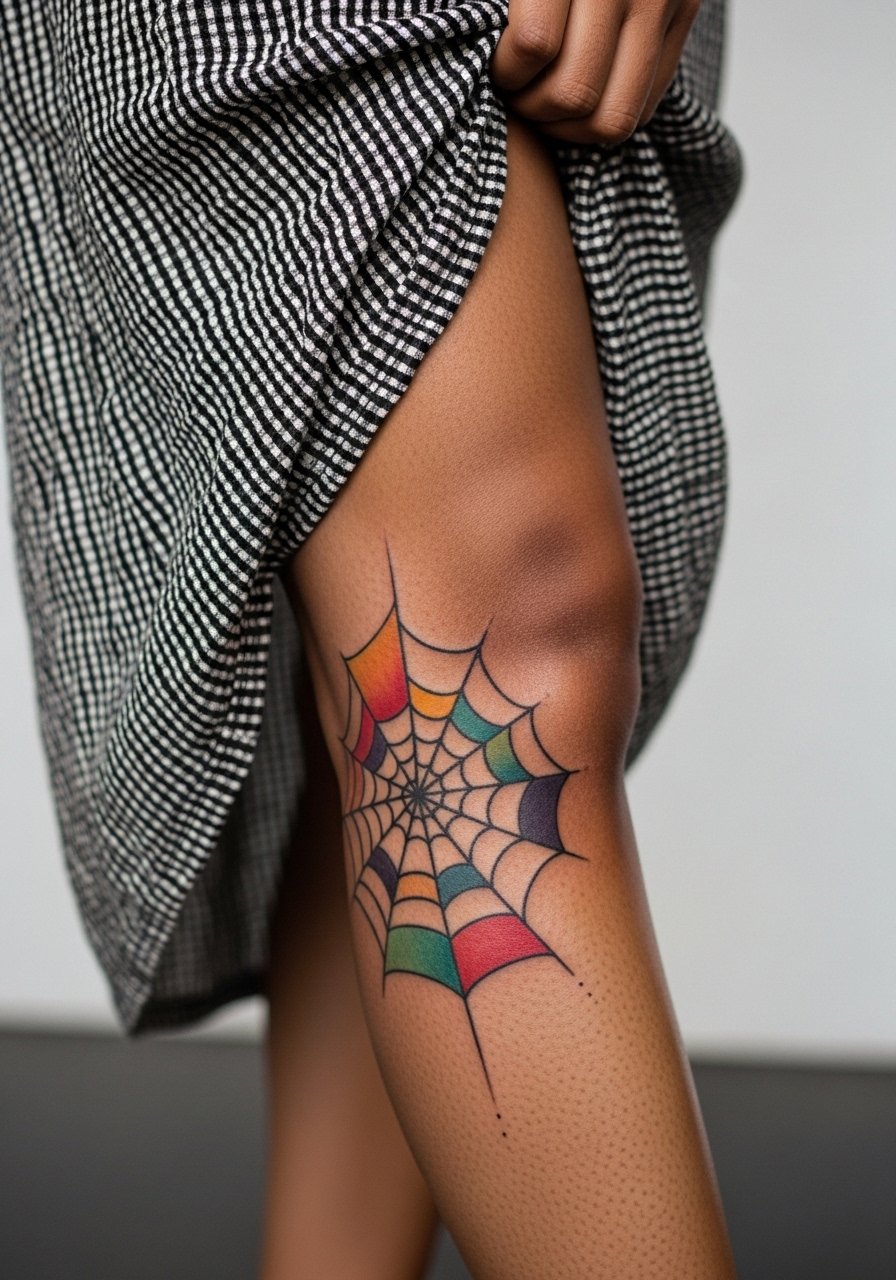
Calf pieces tolerate heavier saturation so a color-blocked approach gives a graphic punch that endures. Tell your artist you want the black web to sit above color planes to preserve crisp edges. The calf is a forgiving placement for multi-pass work and the session feels like steady buzzing rather than sharp jabs. For evenings pair it with a midi skirt with a side slit so the color panels read when you walk. Avoid asking for watercolor blending that crosses important black edges.
10. Fine Line Crescent Web at the Nape
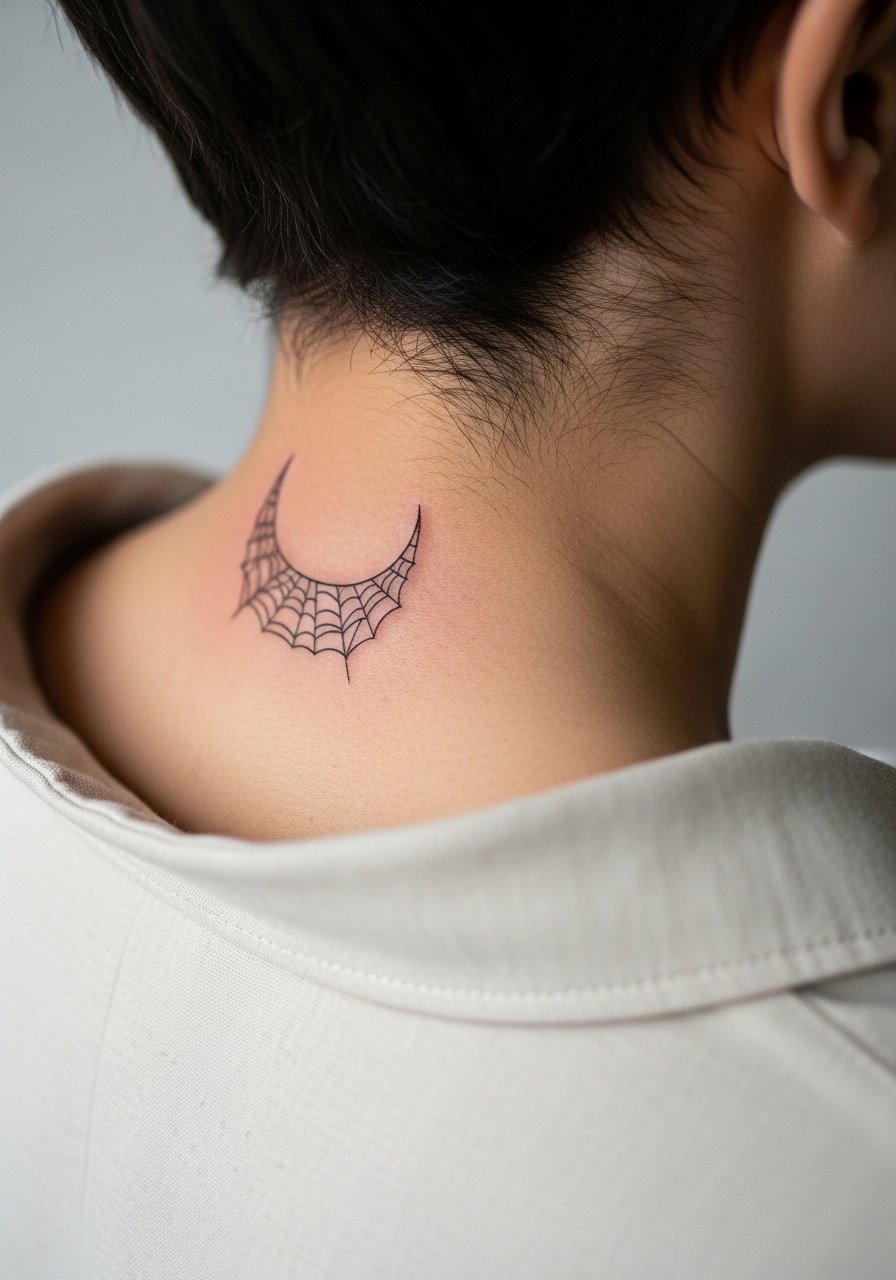
The nape is small and visible, so scale matters. I recommend a crescent composition that follows hairlines and avoids placing tight connectors over moving folds. This placement is visible in short hair and hides easily in longer styles. For the session wear a button-down shirt you can pull aside so the artist can work without you getting chilled. A common mistake is asking for an all-over tiny web here which reads as ink noise rather than deliberate geometry.
11. Negative Space Spider Silhouette on the Forearm
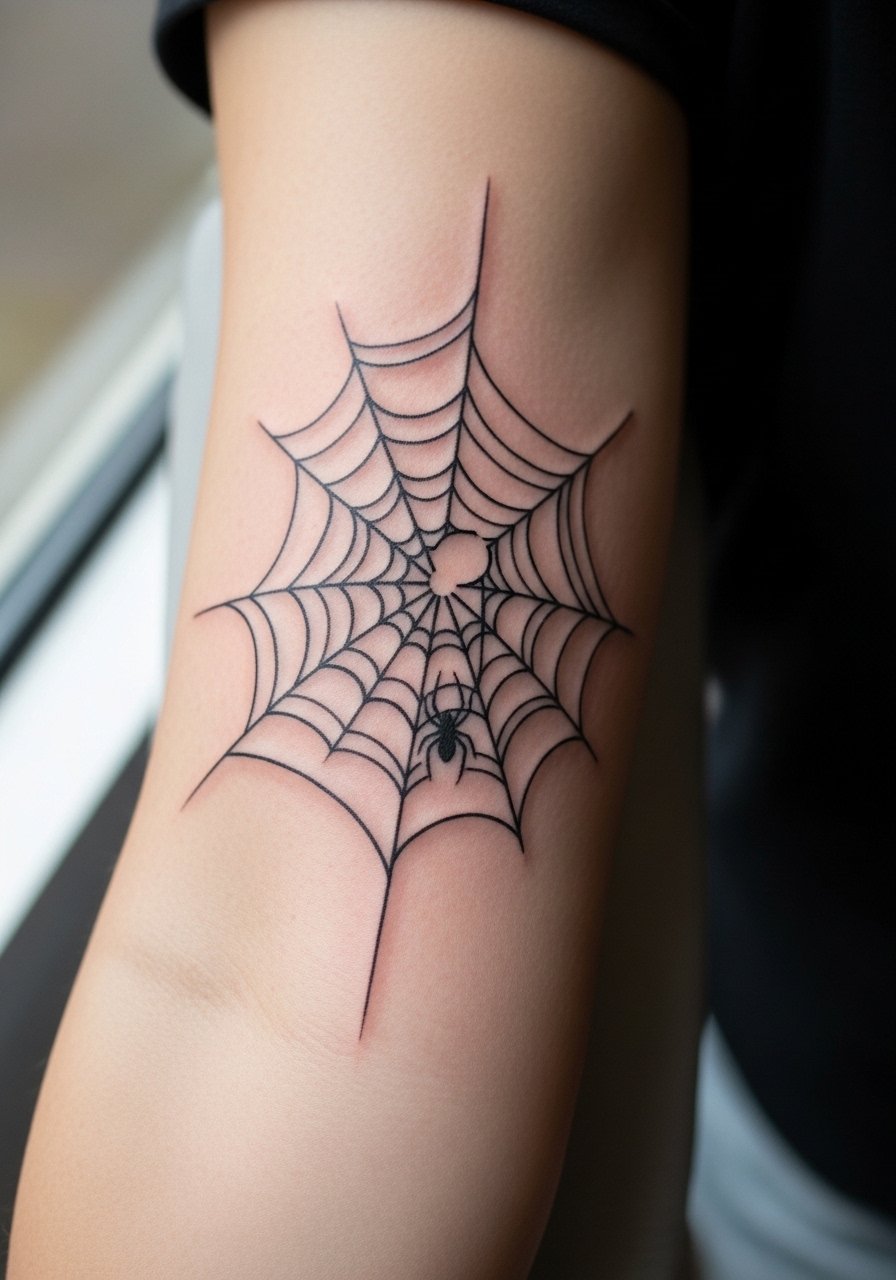
There is a striking contrast when an artist leaves a spider shape as bare skin inside dense webbing. During consults say you want the spider to be pure negative space and insist the surrounding lines maintain consistent separation. The forearm heals predictably and reads well at six months if the spacing was planned. A practical mistake is trying to shrink the spider too small which loses its silhouette as lines age. For casual wear a rolled-up linen shirt sleeve frames the forearm without covering the negative shape.
12. Fragmented 3D Web on the Upper Arm
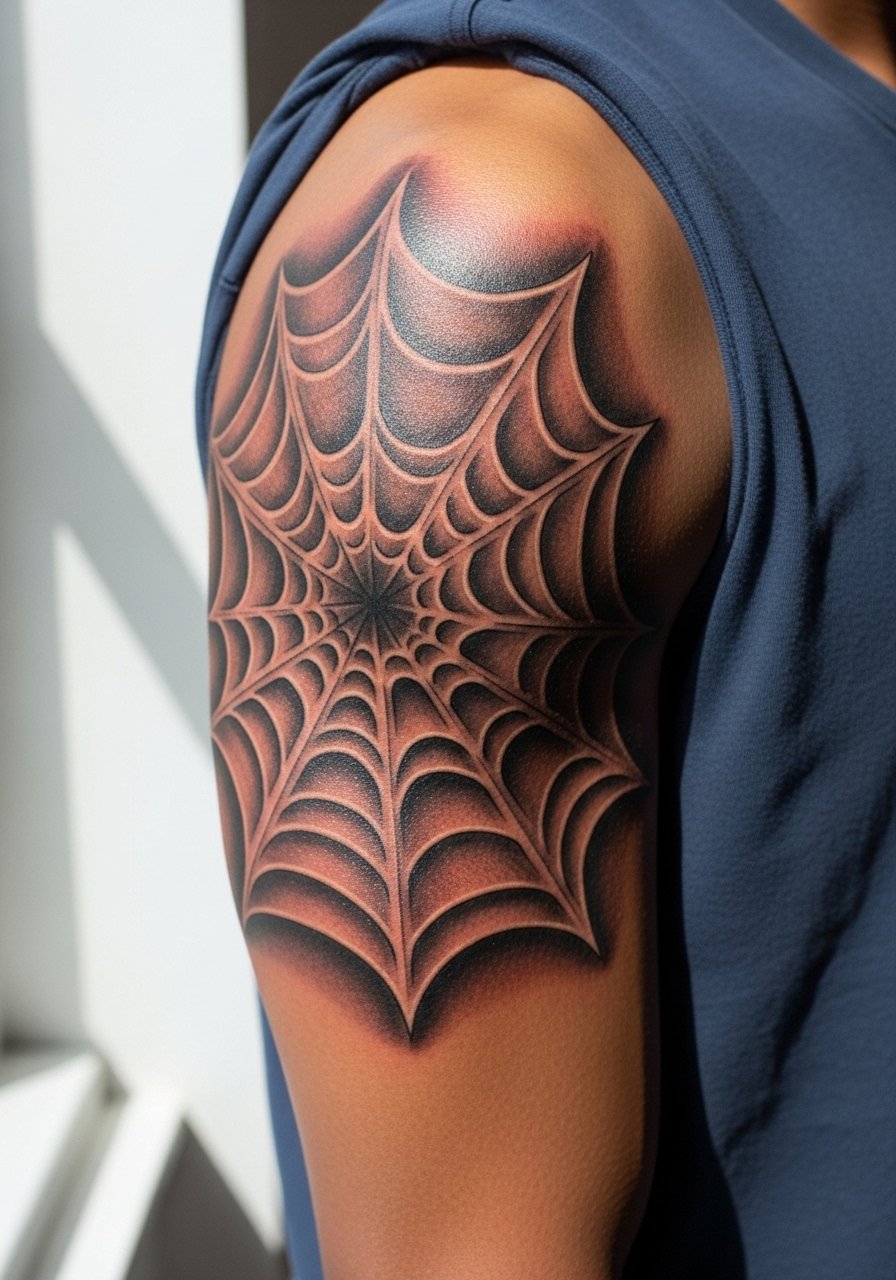
A 3D approach uses subtle drop shadows and layered linework to lift the web off the skin visually. Ask for light shadow stippling under key intersections and a strong primary armature that the shadow reads against. Upper arm work tolerates longer sessions and generally needs fewer touch-ups than forearms. The session feels like steady pressure with occasional sharper passes for contrast. For show-off outfits a sleeveless blouse or tank keeps the arm visible and the 3D effect readable.
13. Circuit Web for a Tech-Inspired Sleeve
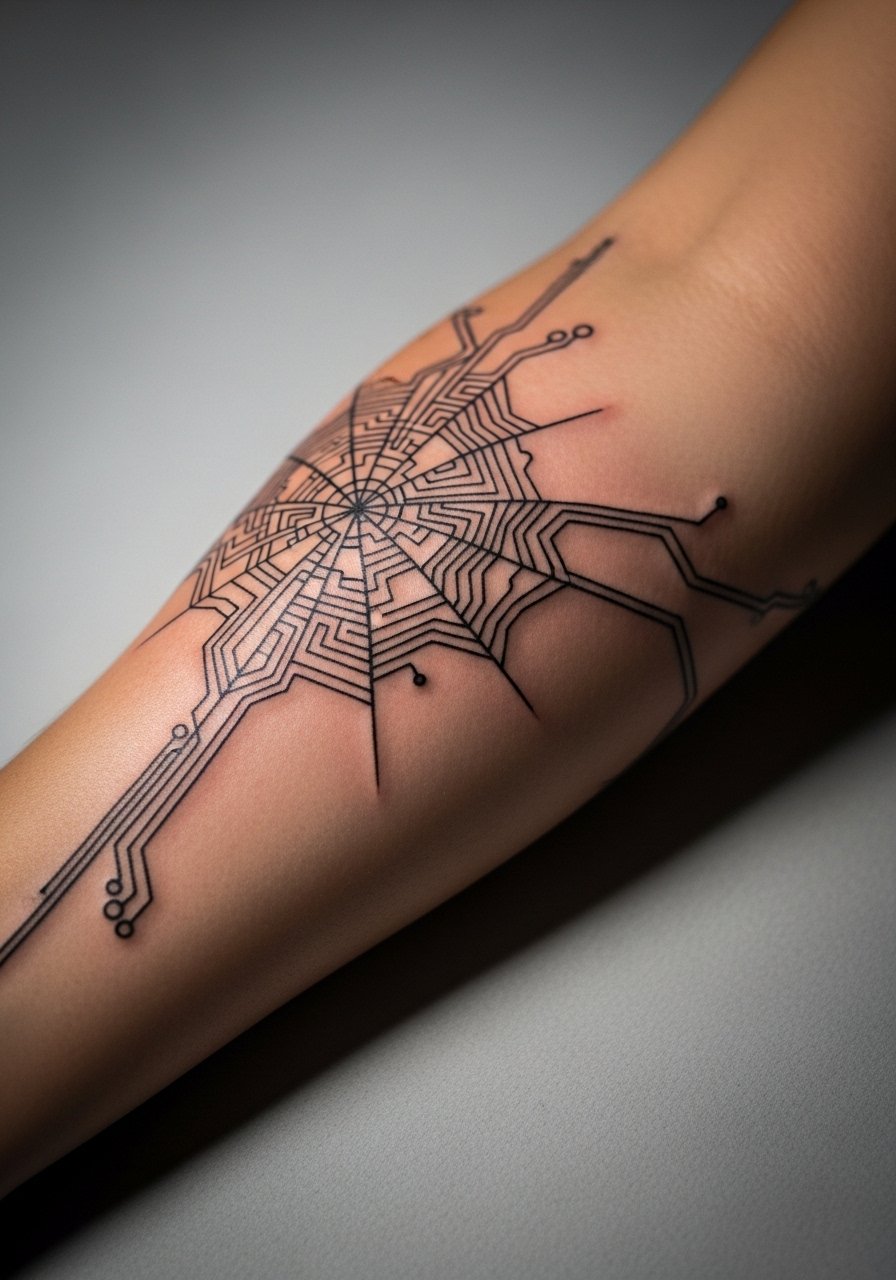
Combining circuit motifs with web geometry creates a precise, linear sleeve that reads as modern and structural. In consultation ask the artist to map line intersections so the sleeve flows with muscle curves rather than fighting them. A mistake is compressing the pattern too tightly near the elbow crease where lines will blur. Expect multiple shorter sessions to build out the sleeve and maintain crispness. Pair the finished work with a minimalist watch that complements the linear aesthetic without covering key nodes.
14. Negative Space Crescent Web Along the Rib Line
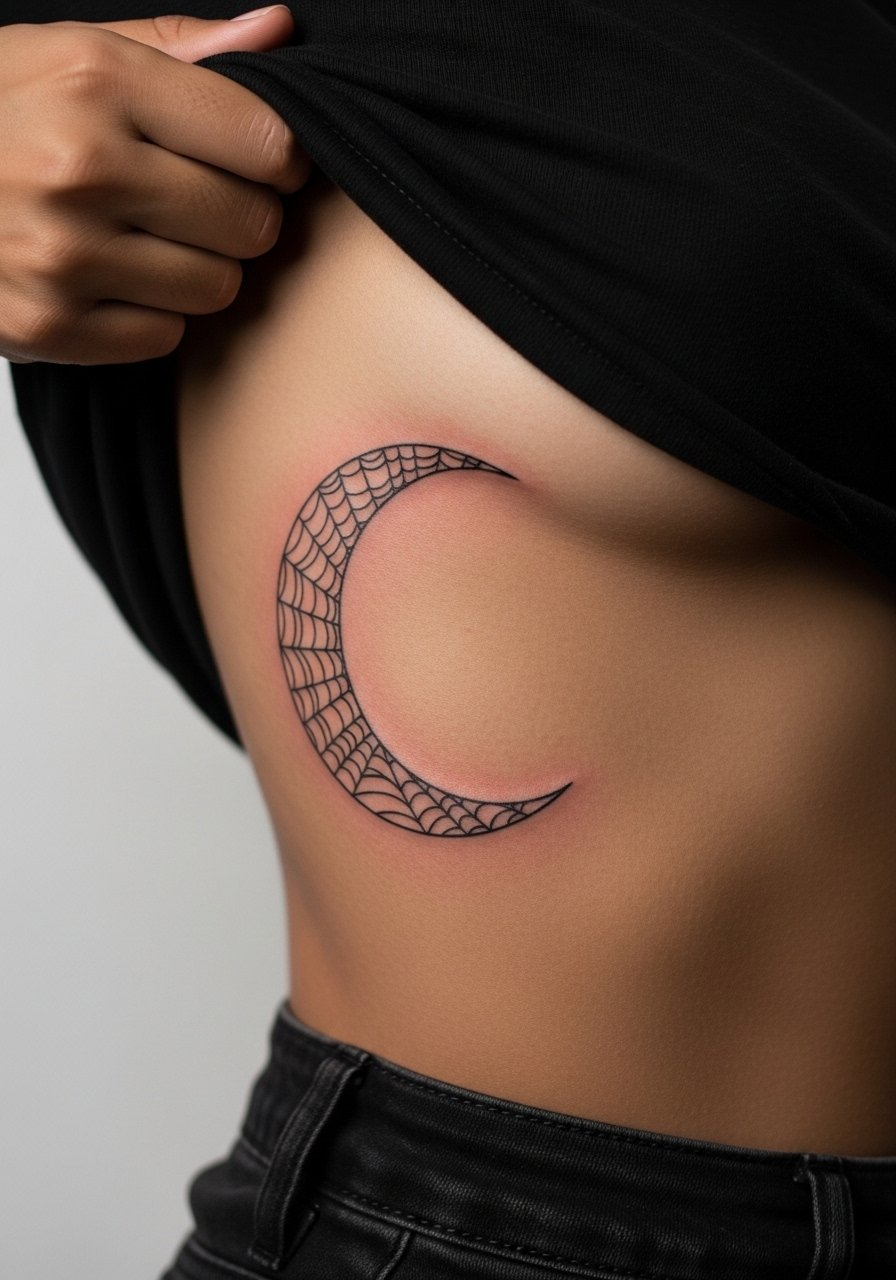
Rib placement gives dramatic curvature but it shifts with breathing so spacing must account for stretch. The main controversy is whether to place very fine connectors on the ribs. One school says avoid dense connectors since the skin stretch will merge detail. The other school plans negative pockets and deeper needle placement to preserve fine lines. Ask your artist which approach they use and request examples of three-year healed work for reference. For the session wear an easy zip or button top so the artist can access the area without you getting cold.
15. Asymmetric Web That Flows Into a Floral Cluster
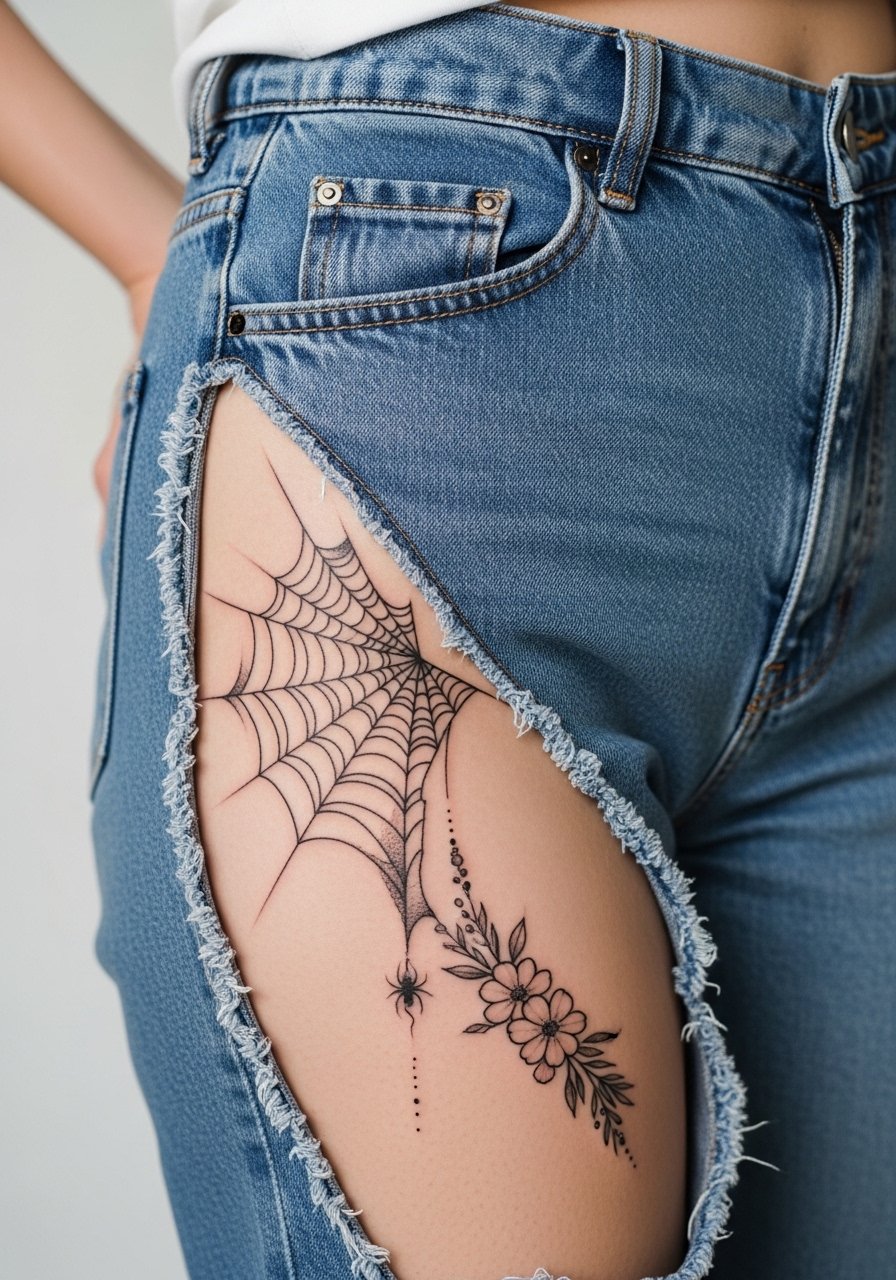
Melting web edges into a floral cluster softens the graphic feel while keeping a clear abstract identity. Tell your artist you want the floral to peek through the web rather than being an afterthought so negative space unites both elements. The hip and upper thigh are moderate on pain and heal well under clothing that avoids constant rubbing. For the session pick high-waisted shorts you can shift and secure without friction. Avoid pushing too many tiny petals into dense web nodes or you risk muddiness over time.
16. Micro-Realism Spider and Thread Near the Ear
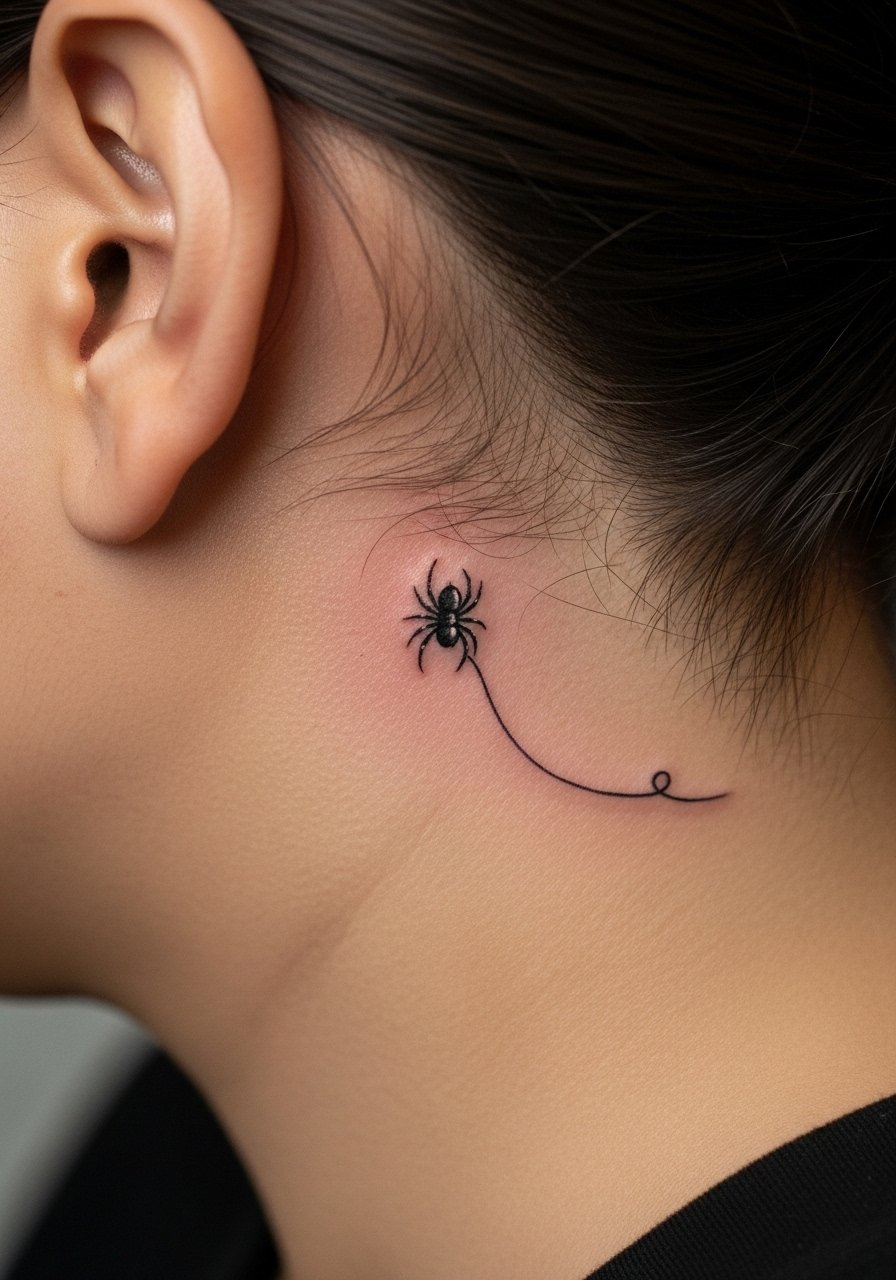
Behind-the-ear work reads as a private detail that only shows when your hair moves. Micro-realism here must be executed by someone experienced with tiny shading. Ask for a clear plan for negative space and insist the spider silhouette be large enough to stay legible. The area is small and sensitive but the session is short. For hair-up days the design pairs well with a thin hoop earring that lets the tiny piece peek through. Avoid requesting hypertextured micro-detail that will soften into a gray dot later.
17. Broken Web with Scattered Ink Splatter
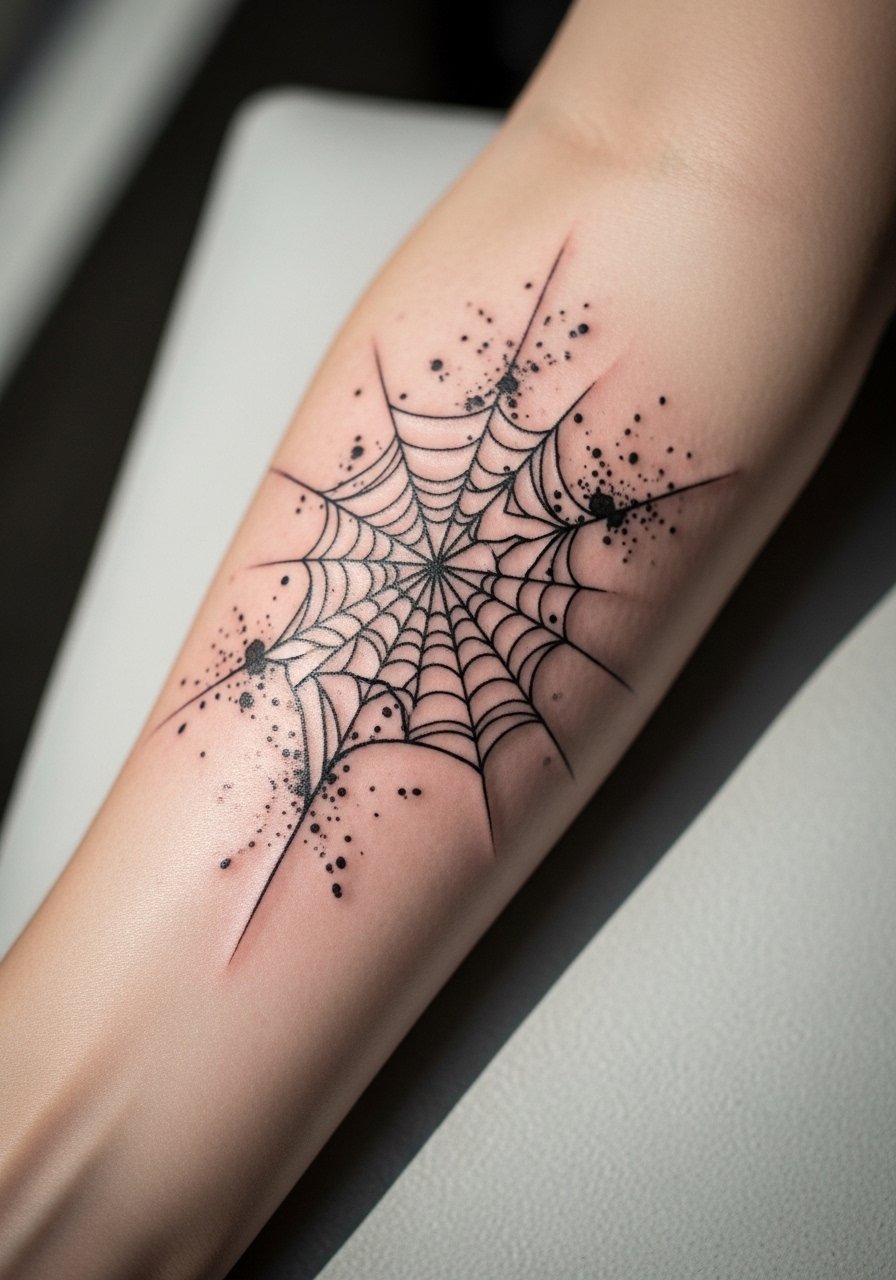
The broken web motif uses intentional gaps and controlled splatter to create a lived-in, chaotic geometry that still holds its silhouette. During consults specify which web arms are structural and which are decorative splatter. A common mistake is asking for random splatter without planned anchors which makes the piece read messy as it ages. Forearm placement is forgiving and shows the design well when you roll sleeves. For casual styling try a rolled-up denim jacket sleeve to show more of the broken edges.
18. Mandala-Core Web on the Upper Sternum
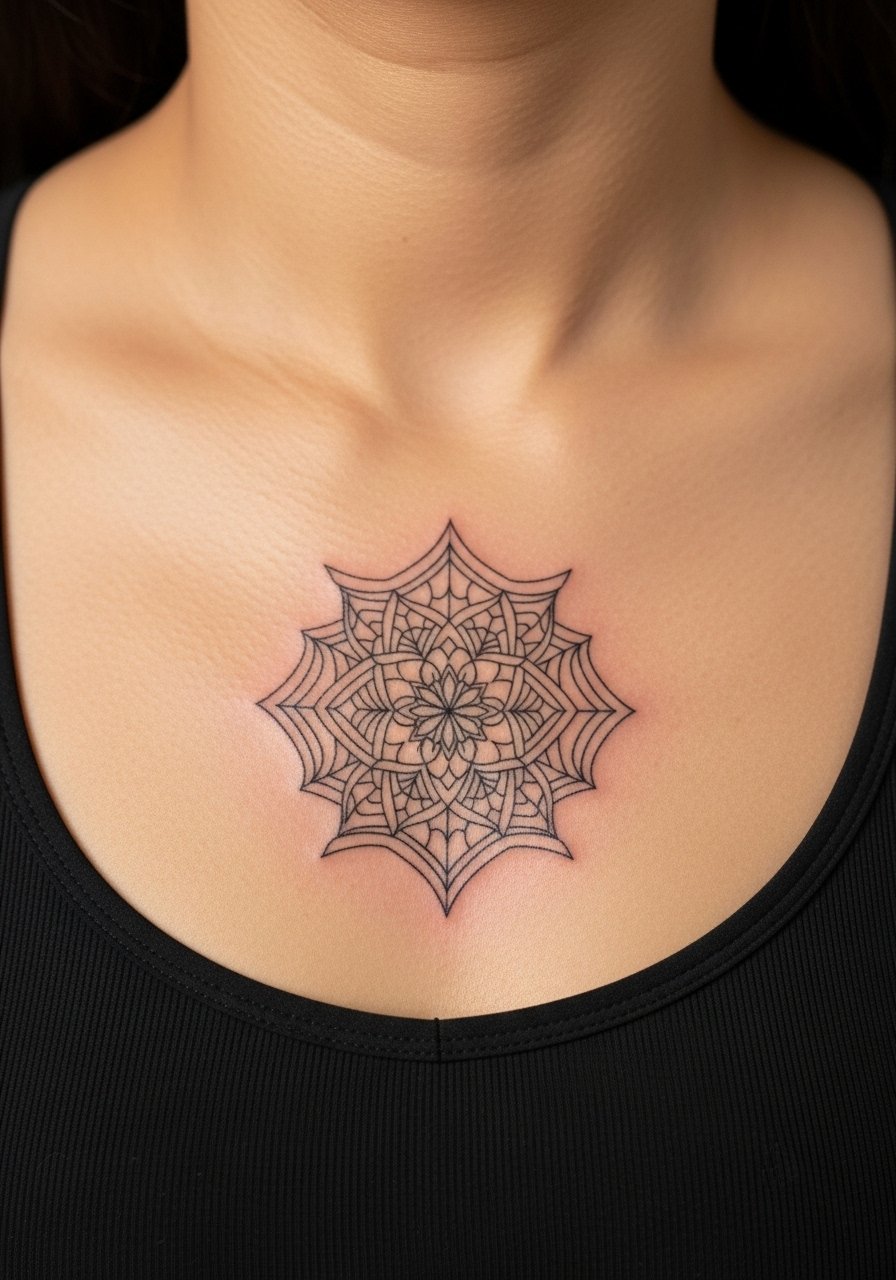
Centering a mandala-core web on the sternum creates a strong focal point but needs measured spacing so radial lines do not blur inward. Request that your artist space the inner petals and plan touch-up intervals ahead of time. Sternum work can feel sensitive and usually triggers slightly longer healing because clothing can brush the area. For nights out choose a bandeau top that reveals the piece without constant fabric contact. Avoid compressing inner details too close to the center point.
19. Minimal Line Ring Web Around the Finger
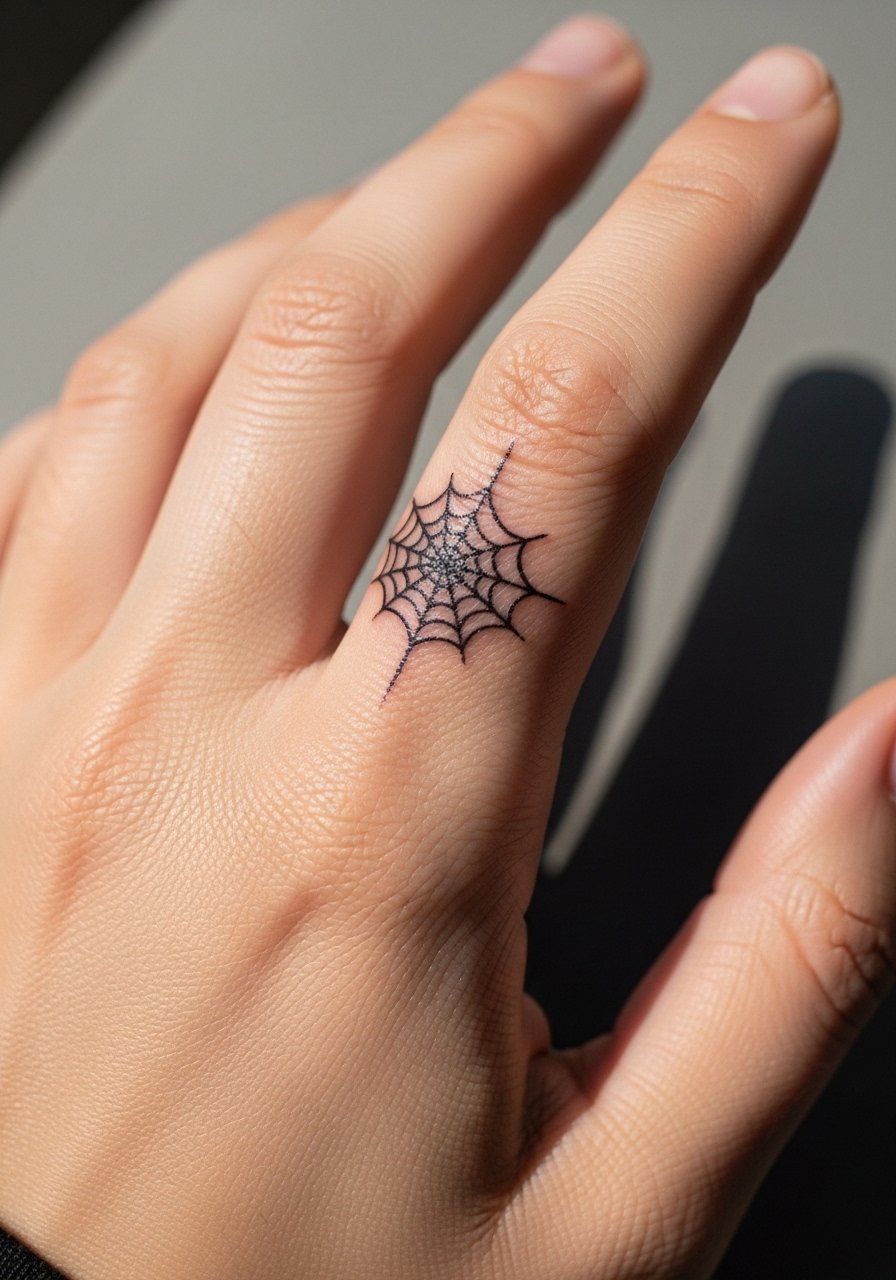
Finger tattoos face the most abrasion from daily use so minimalist ring webs need bold anchors and simple geometry to survive. I recommend thicker primary arcs and sparse connectors so the piece keeps its silhouette after months of washing. The session is quick but expect fading sooner than forearm work. For showing off a finger web try stacking with a thin stacking ring set that accents the space without covering the ink. Avoid asking for extreme micro detail that will disappear under routine wear.
20. Surreal Web Morphing into Landscape Lines
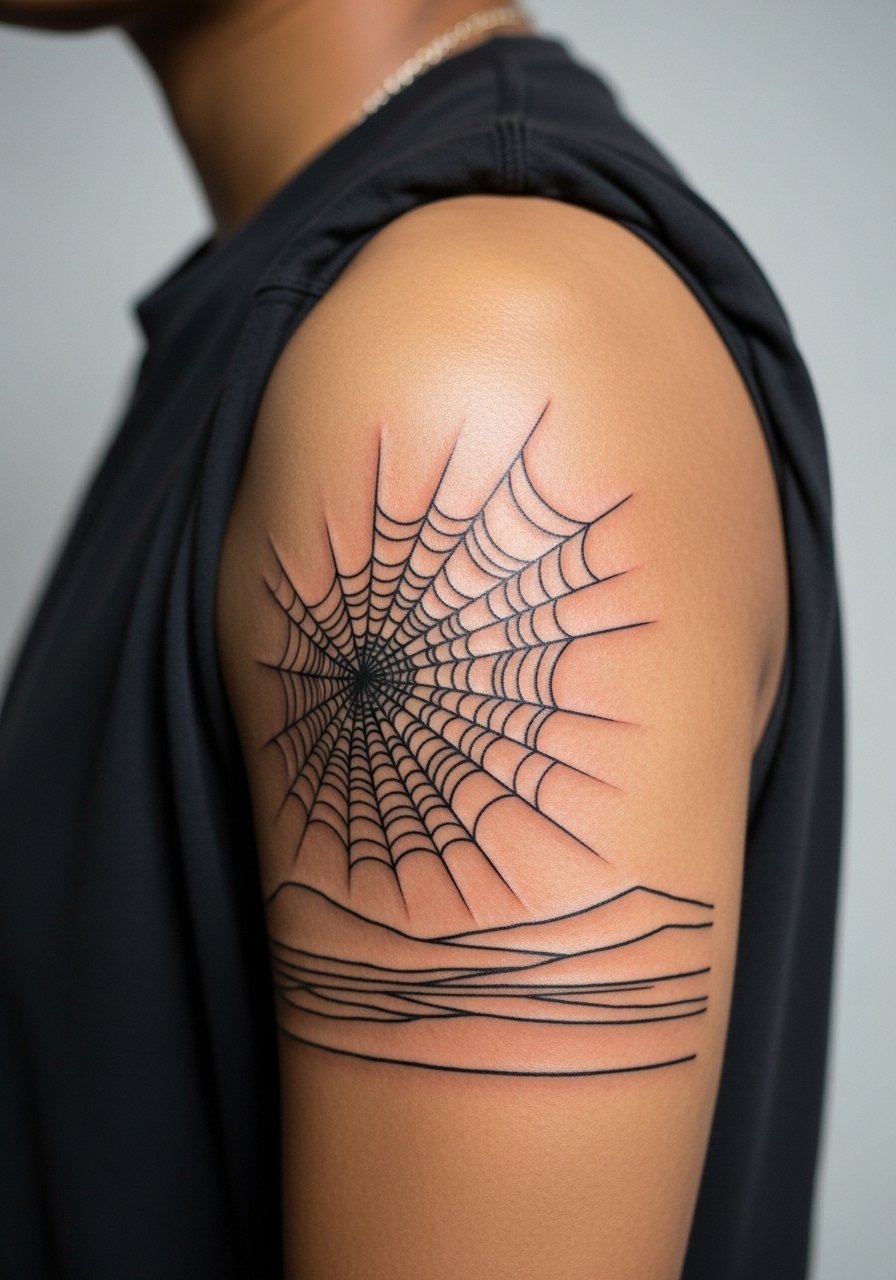
Morphing a web into landscape lines gives the design narrative without literal imagery. When you sit with the artist, specify the exact transition point and which lines should remain web-like. Upper arm spacing makes the morph readable and durable. A frequent mistake is blending too many motifs at one scale which confuses the eye as the piece settles. Pair the finished work with a short-sleeve linen shirt so the narrative reads in motion.
21. Chain-Link Web Around the Wrist
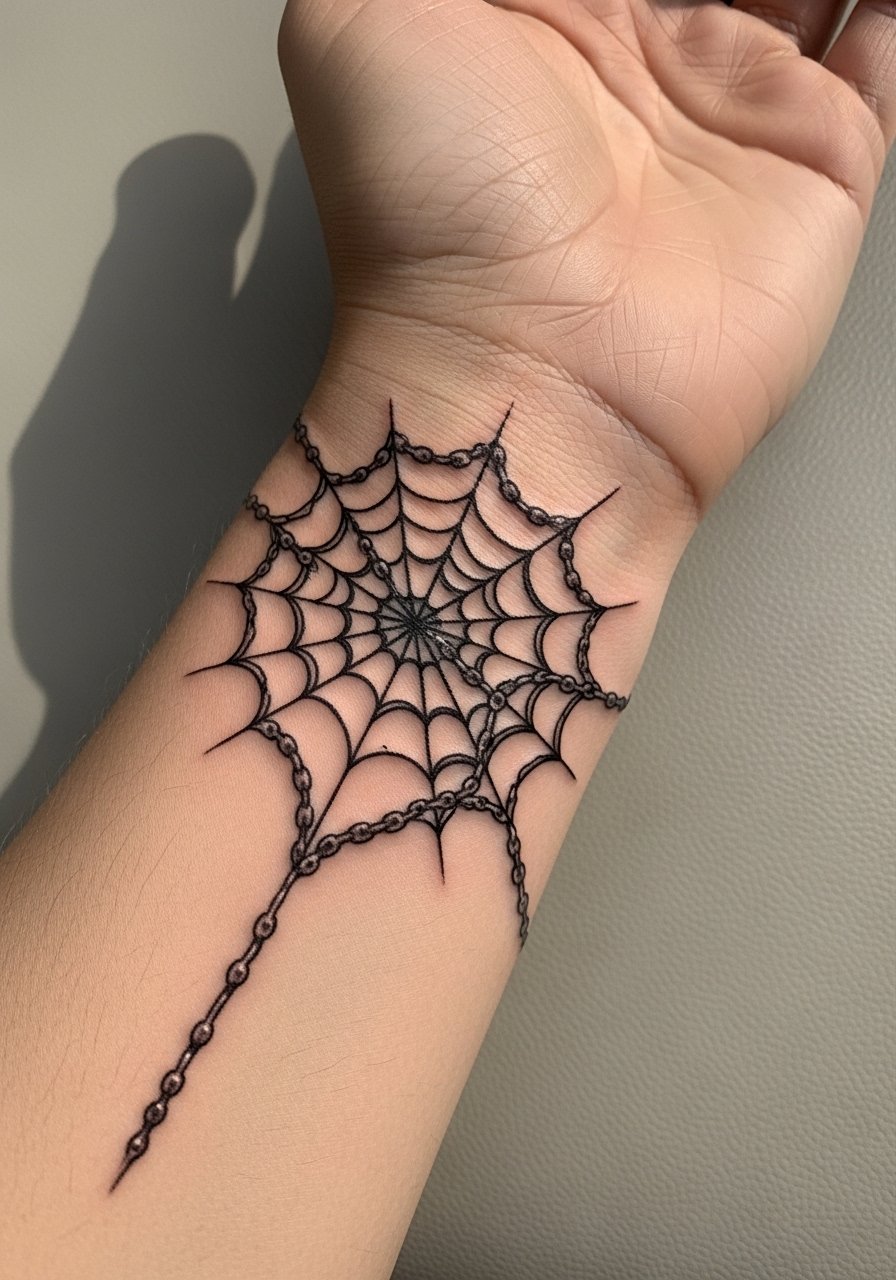
A chain-link interpretation makes the web feel architectural and repeatable. For durability ask for reinforced junctions where links meet and slightly heavier arcs to preserve shape. The wrist sees frequent washing and friction, so protective film in the first week is often recommended. For styling stack with a minimal leather bracelet that complements the chain motif without rubbing directly on the ink. Avoid ultra-thin links that lack the mass to remain crisp.
22. Mosaic Web Using Tiny Color Tiles
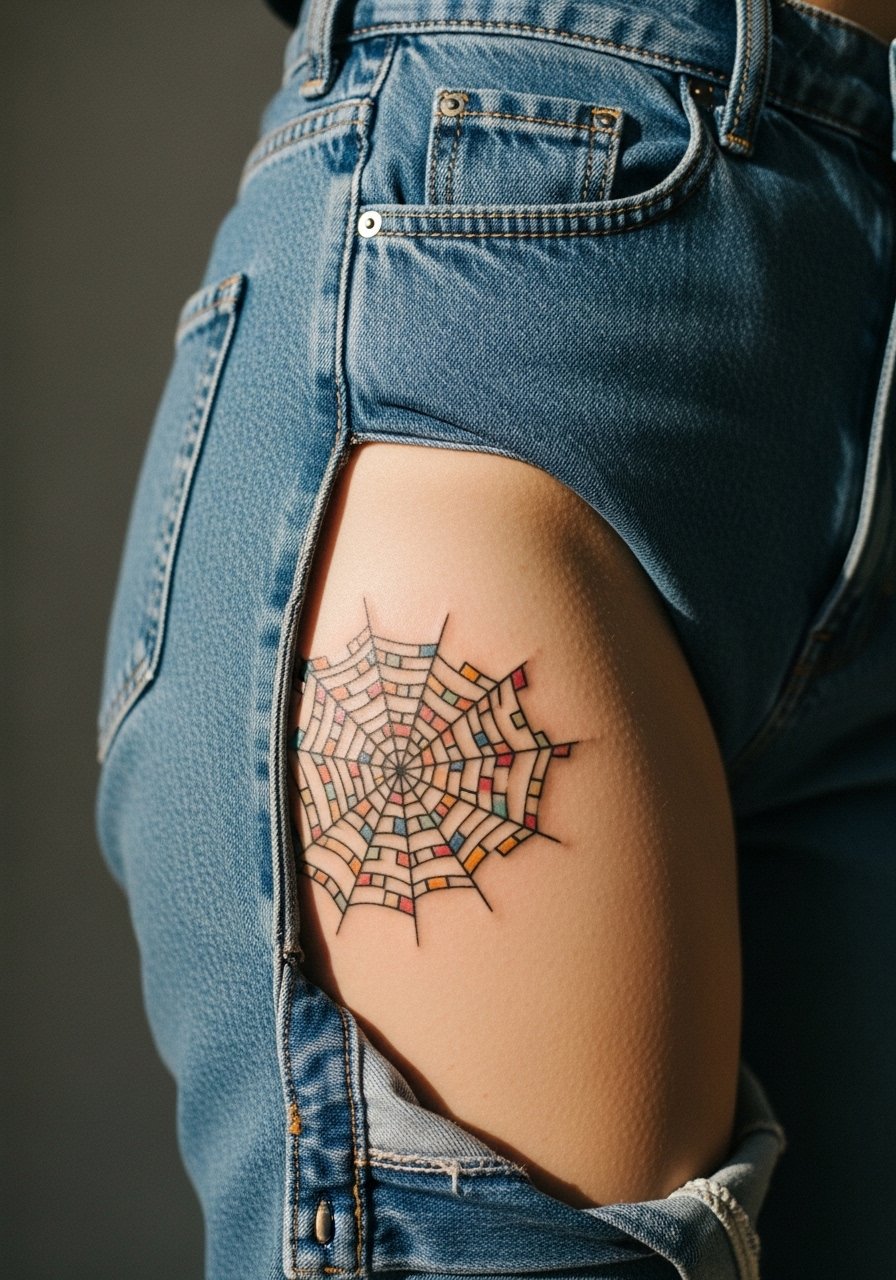
Mosaic tiles inside web segments create a stained-glass effect that is vivid from across a room and holds well when color sits in defined cells. Ask for clear black separators so the tiles do not bleed into one another. The hip tolerates color nicely but avoid overly watered blends that migrate. For showing the mosaic pair it with a crop top and high-waisted jeans that reveal the pattern without compressing it. A common mistake is asking for soft gradients within each tiny tile which risk blurring into murk.
23. Asymmetric Web Sleeve with Blank Windows
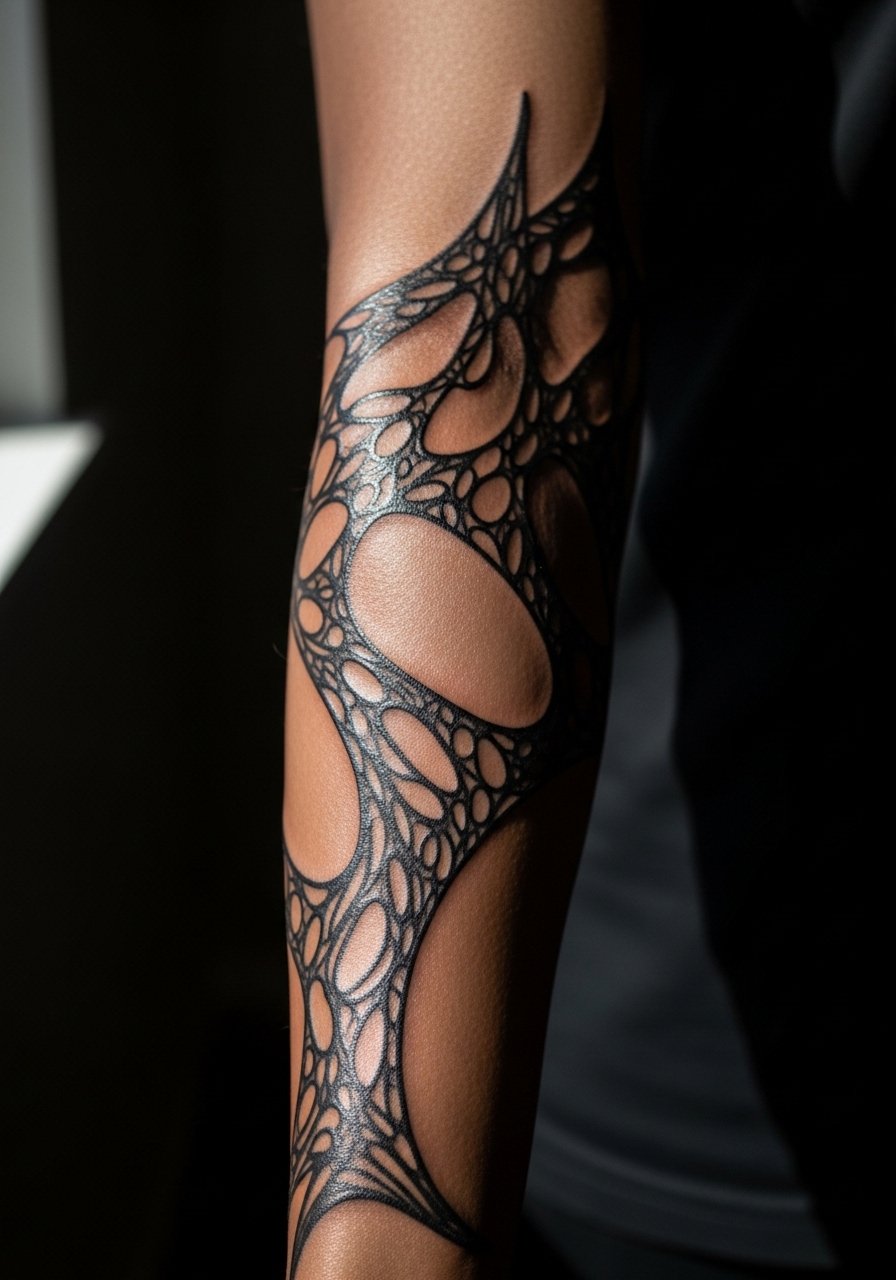
This sleeve approach uses blank windows to let skin act as negative panels, which helps long-term readability. Tell your artist which framed areas should remain untouched and ask them to map future touch-up points. Sleeve sessions benefit from staged appointments so saturation and touch lines stay controlled. For daily wear a lightweight long-sleeve tee you can roll up avoids friction during the healing window. Avoid crowding the sleeve with too many micro connectors.
24. Bio-Mechanical Web That Wraps the Bicep
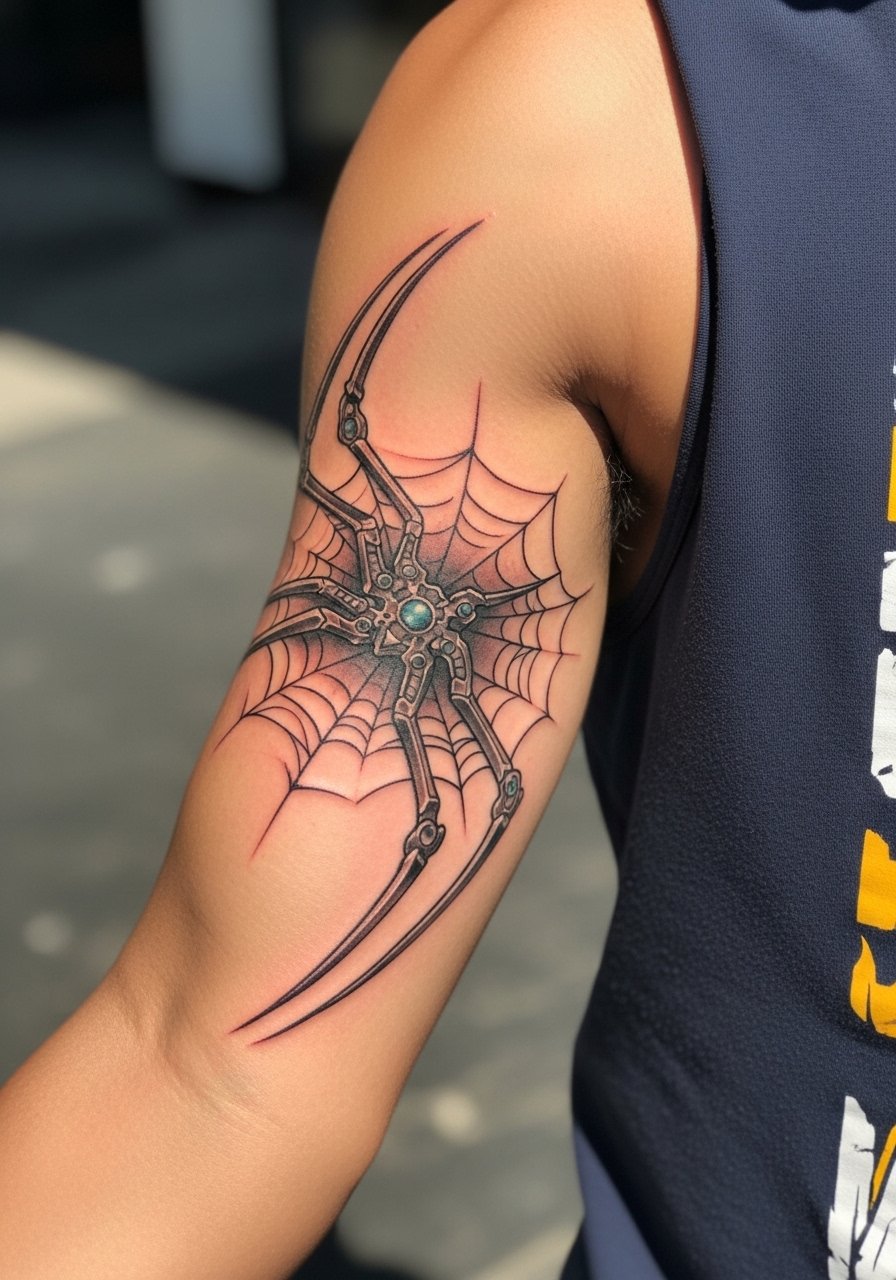
A bio-mech twist uses plate-like segments and negative rivet areas to fuse organic webbing with machinery. Ask the artist to emphasize clean separation between plate edges and web filaments so the mechanical read stays strong. Biceps tolerate heavier work and the session feels like steady pressure with occasional shading passes. For show-off looks choose a muscle tank that exposes the curve and highlights the wrap. Avoid packing too many tiny rivets into small areas which can age into a muddled texture.
25. Celestial Web with Starfield Fill
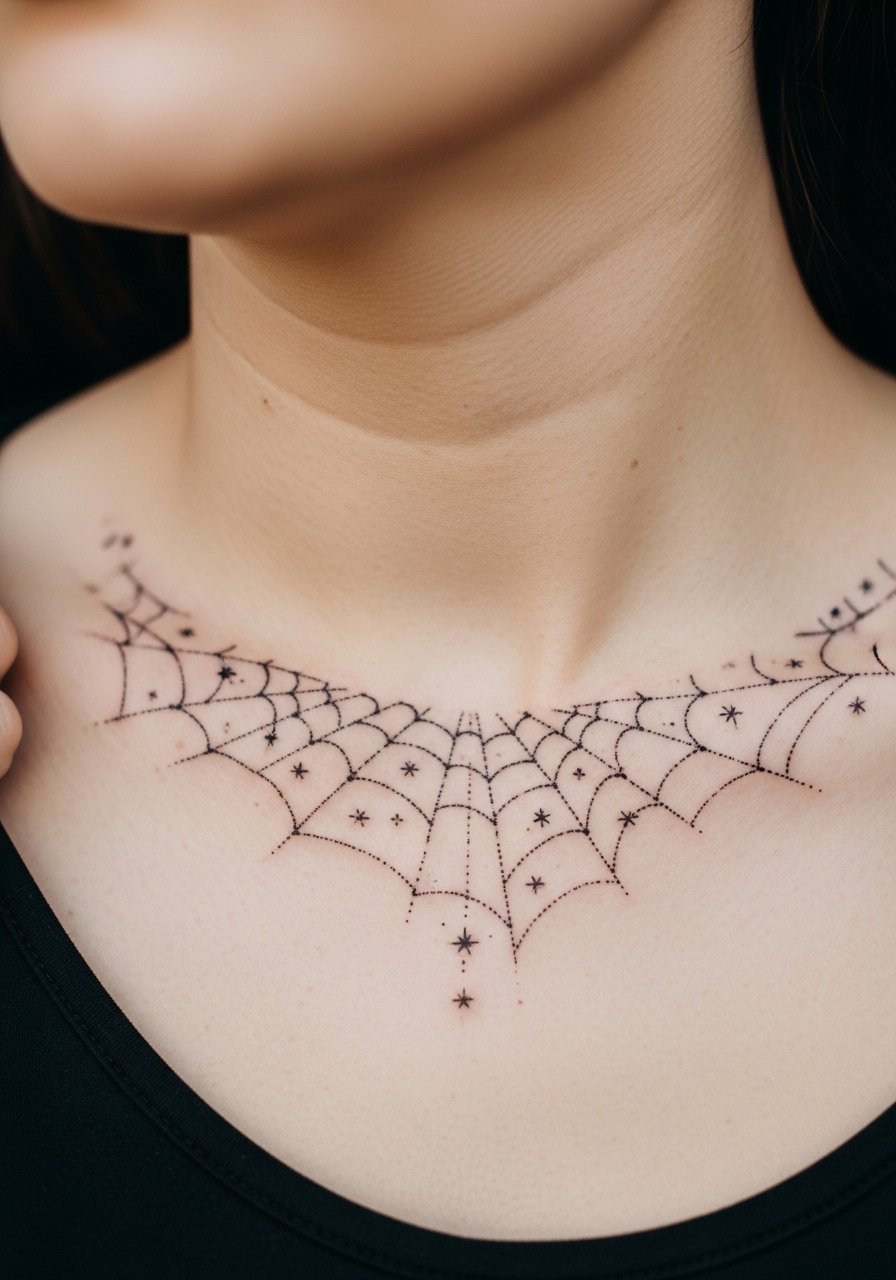
Adding a starfield inside web gaps gives a cosmic feel without overwhelming the linework. In consults specify dot density and the distance between star clusters to prevent dot mashing later. Collarbone placement sees movement and needs slightly wider spacing in dense areas. For evenings out a wide-neck blouse frames the celestial negative fields without rubbing them. A common misstep is requesting ultra-dense dot clouds that lose texture as the skin ages.
26. Split-Tone Web with Half Black, Half White Ink Accents
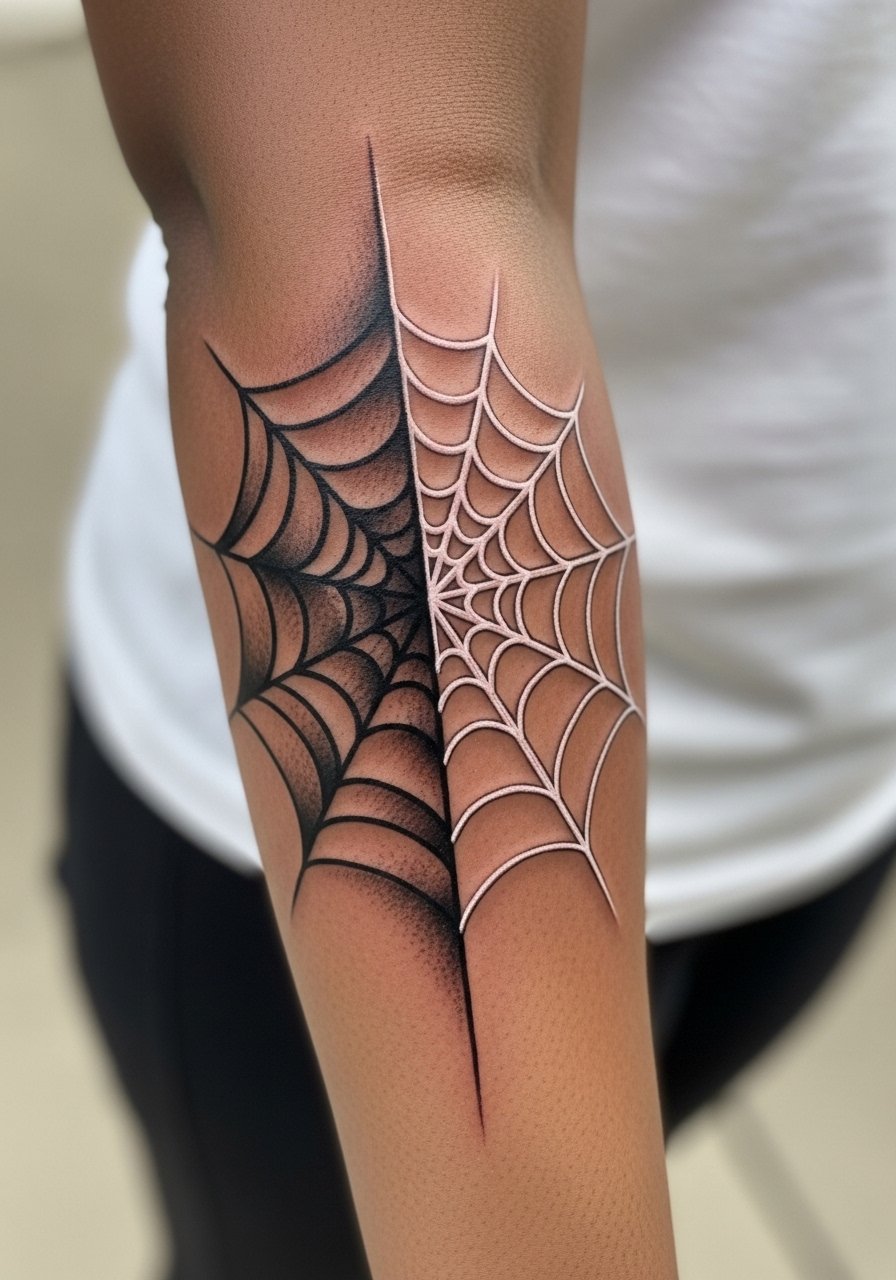
Using white ink as an accent can lift parts of a web visually, but white behaves differently over time and often fades faster. Many artists debate white ink accents. One camp embraces white for contrast in healed pieces. The other warns it will dull and require frequent refreshes. If you choose this route ask for white placement only on raised areas and plan for touch-ups in the first few years. For styling pair with a minimal cuff bracelet that shows the split tone without covering it.
27. Abstract Web Sleeve Ending in a Negative Space Spider
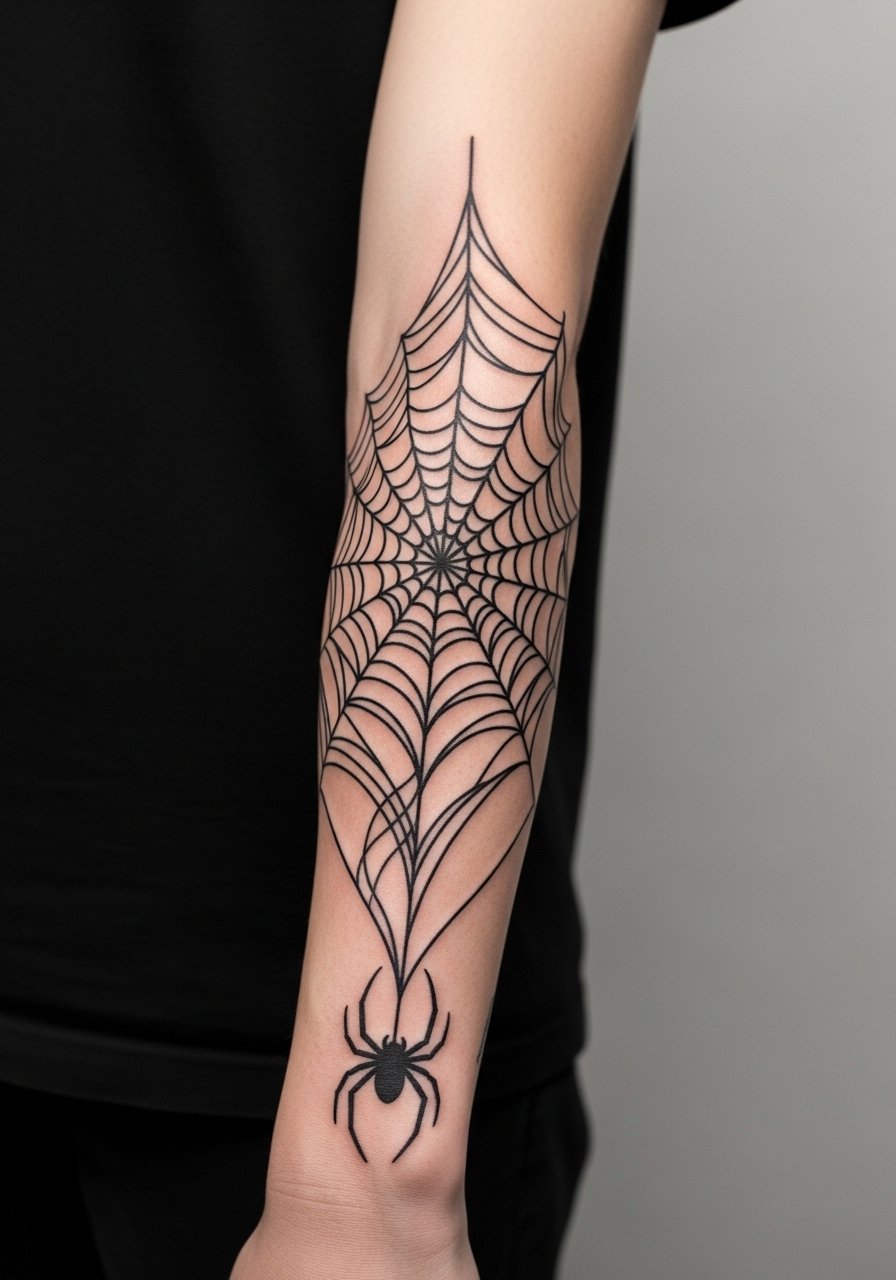
A sleeve that ends with a deliberate negative space spider ties the whole composition together while leaving a clear focal point. In consultation map how the sleeve reduces density toward the wrist so the spider silhouette remains prominent. Expect multiple sessions to build tone and maintain crispness across the arm. For the appointment choose a loose linen shirt that you can roll without rubbing fresh ink. A common mistake is ending in too many connecting lines which obscures the intended silhouette after healing.
Frequently Asked Questions
Q: How do abstract spider web tattoos age differently on the ribs versus the forearm?
A: Ribs undergo more stretch with breathing so dense detail and ultra-fine connectors are at higher risk of merging there. Forearms see less skin movement and generally retain line separation longer. Ask your artist for more spacing on rib work and for stronger primary armature lines on forearm pieces so both placements keep their structure.
Q: Will adding color beneath black web lines make touch-ups harder?
A: Color under black can hold up well if the black sits on top of color planes, because you can touch up color and linework independently. If color overlaps delicate black filaments you may need more coordinated touch-ups. Tell your artist you want the black as an on-top layer in the consult.
Q: Are hand and finger web tattoos worth the maintenance if I want a visible design?
A: They are very visible but they also require earlier touch-ups because of daily abrasion and washing. If you want a visible design pick bolder anchors and plan for a refresh in the first one to three years. Styling with thin rings or bracelets can help frame the piece and reduce direct friction when practical.
Q: How should I find an artist for a complex abstract web sleeve without naming specific people?
A: Use discovery pathways like reputable local shop directories, tattoo convention lineups, hashtag deep dives, and community threads on platform forums to vet portfolios. Look for healed photos that show similar density and placement to what you want and ask the artist for long-term healed examples in consults.
Q: Is white ink recommended for web accents on darker skin tones?
A: White ink can create a lift but it tends to fade faster and can change tone over time on darker skin. If you want white accents ask the artist about their success rate on similar skin tones and plan for a possible touch-up session to keep contrast.
Q: How should I dress on appointment day for a sternum or ribcage web piece?
A: Wear a fitted sports bra or a top you can lift without rubbing the area so the artist has clean access and you stay comfortable. Comfortable layers you can adjust are best because the chair temperature and session length both matter.
Q: Do abstract web designs need different aftercare than other fine line pieces?
A: The aftercare routine is similar but placement-specific friction and sun exposure matter more. Protect wrist, hand, and ankle pieces from excess rubbing and cover chest and back work when possible during the first two weeks to reduce scabbing stress. Follow the studio's guidance and plan for a realistic touch-up timeline.
