
Sitting in the chair with the stencil tapped into place is when most people notice the ear placement reads smaller and the vibration from the needle is sharper than they expected, and they think about pain, concealability, and how hair will rub during healing. Behind-ear ink rewards careful scaling and session prep, so the next sections show 27 abstract directions that fit that tight curved canvas and how to plan for them.
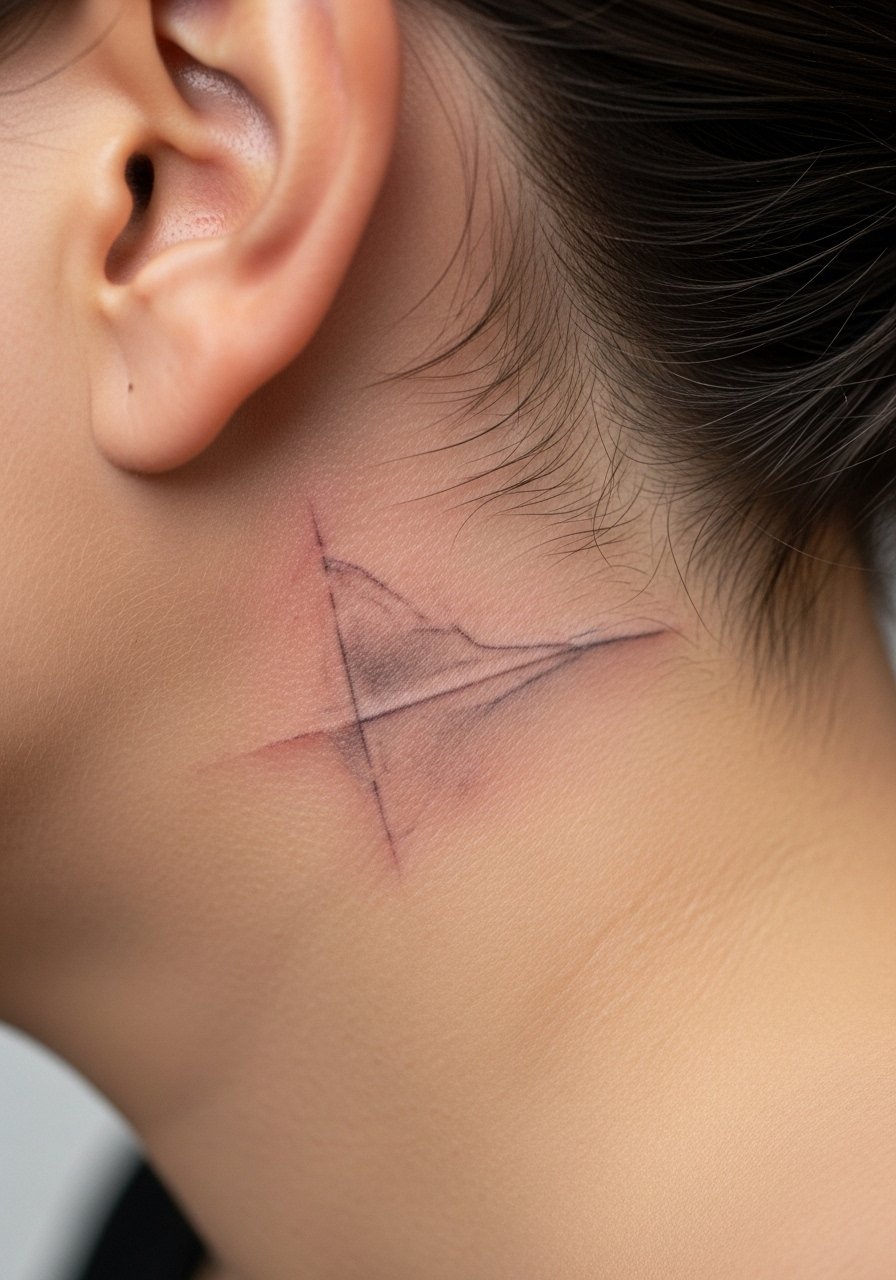
1. Abstract Geometric Lines That Follow the Mastoid Curve

Personal observation, geometric lines read sharp when they follow the mastoid curve instead of trying to force symmetry into a crescent area. For consultation tell your artist you want the longest straight segment to sit parallel to the jawline so the shape reads when hair is up. Pain is higher because the needle hits near bone, but session time is short, often under an hour. Common mistake is making the grid too small, which causes lines to blur together after a year. For showing it off try a messy bun headband or a high ponytail holder that keeps hair clear during healing.
2. Minimalist Wave Pattern Echoing Ear Contour
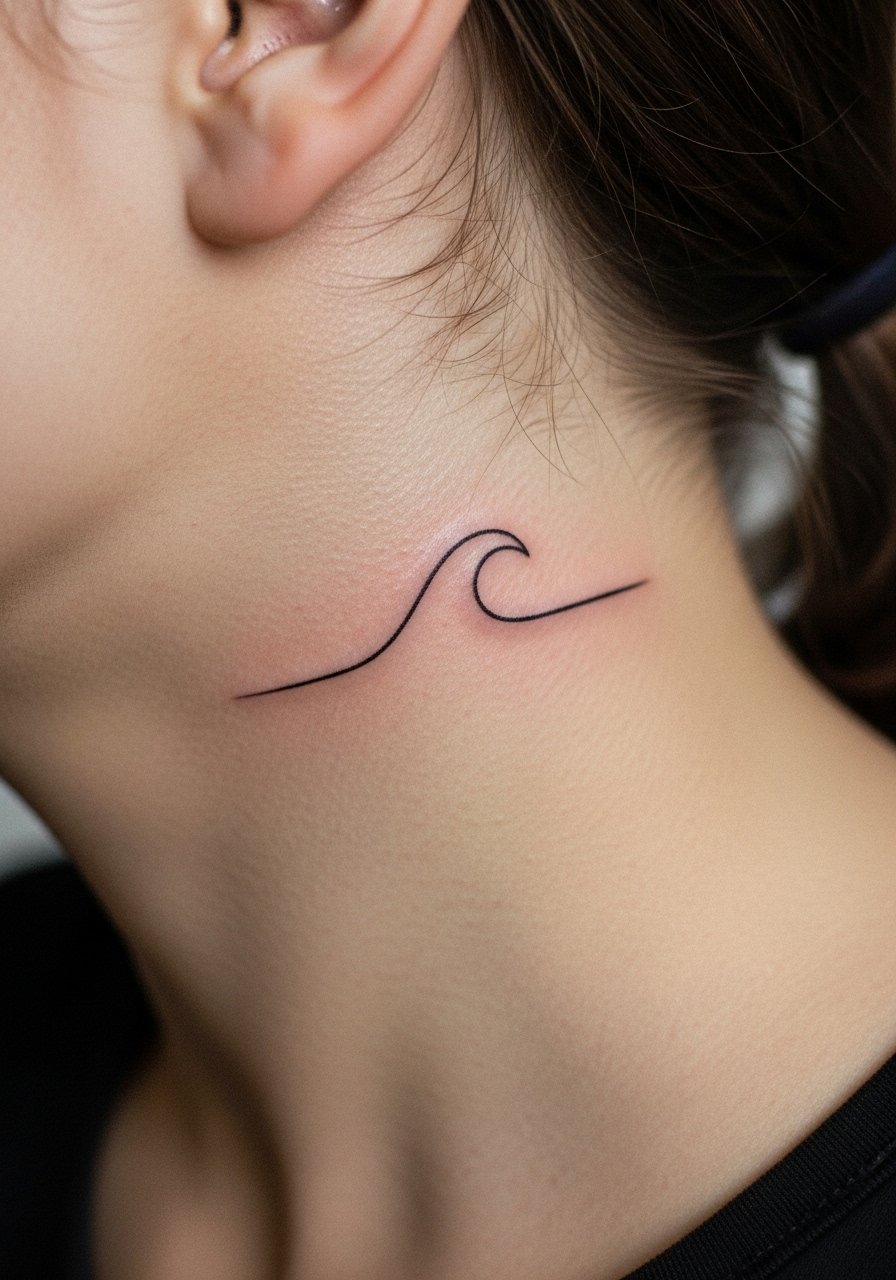
Pain warning, the behind-ear base is thin so lines feel sharper than on the forearm, but a simple wave shortens time in the chair. The benefit here is motion; a 0.75-inch wave sitting along the ear curve looks deliberate when revealed by a half-up hairstyle. Tell the artist to use consistent lineweight and avoid inner shading so the wave ages cleaner. Blowout risk exists if needles go too deep. Pair it with a small gold hoop earrings look for photos and wear a pulled-back ponytail clip for the session.
3. Dotwork Mini Mandala Nestled at the Ear Hollow
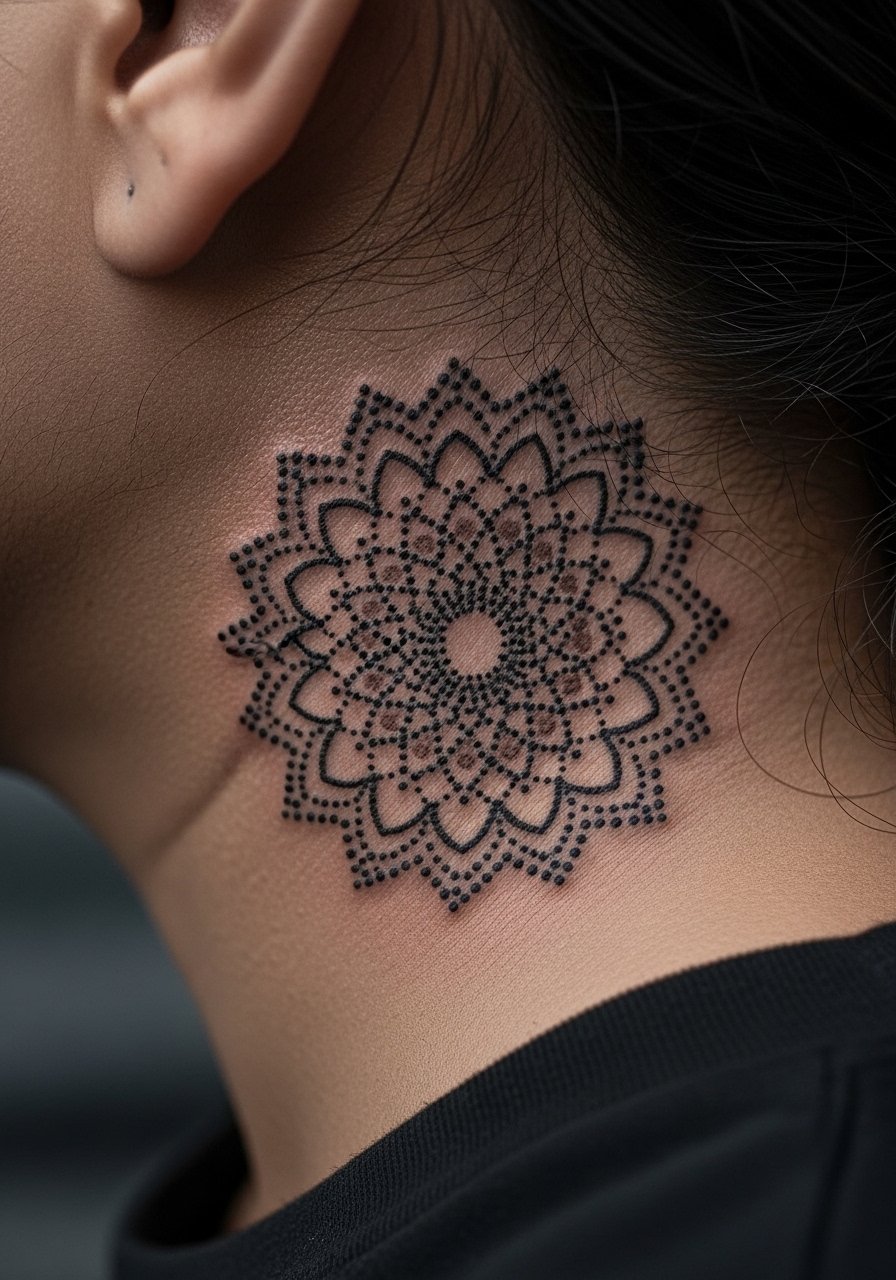
Aging and healing lead, mandalas can read beautifully at first but dense dotwork in a tiny space risks muddying by year two if overpacked. I recommend spacing the dots and keeping the outer ring minimal. Tell your artist you want stipple shading with negative space to keep contrast on darker skin. Session time can run longer if you want symmetry, so plan for a two-session split if the artist advises. Common mistake is demanding max detail at micro scale. For showing it off try an asymmetrical bob or a set of minimal stud earrings.
4. Single Line Abstract Shape, Tiny and Intentional

Visual impact lead, single line work reads like a graphic whisper under hair. It is ideal for first behind-ear tattoos because the session is brief and touch-ups are usually straightforward. The trade-off is longevity. Fine line is trending but this placement exaggerates fading. If you want this, ask the artist for slightly heavier lineweight than an Instagram reference so it holds. Expect a possible touch-up around year two or three. For the session wear a loose tank top so the artist can access the neckline easily.
5. Asymmetrical Swirls That Blend into the Hairline

Mistake lead, people often ask for dense swirls that forget the hair will rub the area during healing. Keep the swirls airy and use blackwork fills sparingly so the edges stay crisp. This design is forgiving with bolder lines and holds better than fragile stippling here. Pain is notable around the mastoid but session length remains short. For reveal styling, pull hair into an off-center bun and wear a crew neck fitted sweater in charcoal to make the blackwork pop.
6. Micro Abstract Orbs Like Floating Beads

Consultation lead, orb clusters feel weightless when spaced correctly across the area behind the ear. Mention to your artist that you want variable sizes and soft gray shading to simulate depth without heavy saturation. This micro-realism approach may need a touch-up at 18 months, especially if your hair rubs the area. Session time is short but expect more time if you want multiple orbs. Show-off pairing for nights out includes layered necklaces like a layered chain necklace that draws the eye without competing.
Studio Day Picks
The first six behind-ear designs above range from single-line to dense dotwork, and a few products smooth the chair-side experience and the first week of healing.
-
Indie thin tattoo ointment. Lighter than heavy balms, it helps behind-ear spots where hair friction can trap thick ointment and cause matting.
-
Australian breathable film strips. Conforms to curved skin behind the ear and lets the area breathe while limiting hair contact.
-
UK herbal non-greasy balm. A thinner formula reduces pore-clogging where the skin is thin and sweat collects.
-
Small-batch tea tree salve. For itch-prone first-week patches, a light application soothes without heavy residue.
-
Aquaphor healing ointment. A thin layer on day one helps lock moisture for fine line pieces while you manage hair contact.
7. Fragmented Geometric Abstract with Negative Space
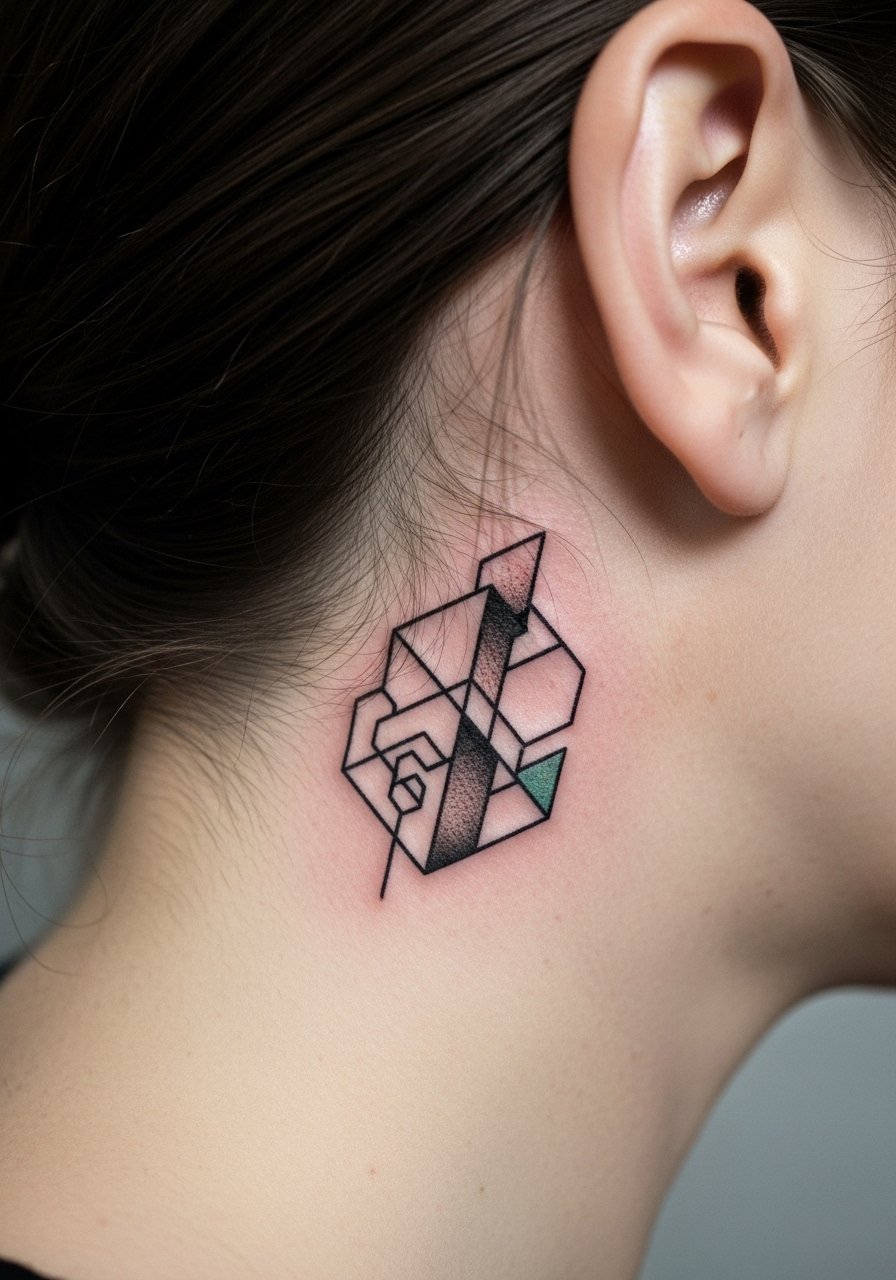
Controversy lead, fragmented geometry looks modern but artists split on scale. One camp says tiny cuts keep crisp edges, the other warns that tiny fragments blur when packed too close. My recommendation is to keep each shard at least two millimeters apart and use negative space to protect contrast. This piece sits best at around one inch. For session wear choose a button-up shirt you can pull aside so the artist has clear access.
8. Distorted Grid for a Glitch-Art Feel

Personal observation lead, the distorted grid reads like controlled chaos and suits people who want an edge without going large. Tell the artist you want a few intentionally broken lines and thicker anchors so the pattern survives fading. The risk is blowout if lines are too close on this thin skin. Plan for a possible two-session timeline if you want both bold anchors and fine fractures. For showing it off, an undercut or shaved side makes the grid visible without styling gymnastics.
9. Layered Abstract Shadows for Depth on a Curve
Aging/healing lead, layered shadowing can create a three-dimensional effect that reads well on contoured areas like behind the ear. The trick is to use subtle gradients rather than dense fills that scar and lose separation. Expect longer session time and possibly two sittings if you want soft depth. Common mistake is too much contrast in a tiny space. For session wear, a v-neck tee keeps the neckline free without exposing more than necessary.
10. Negative Space Circles That Play with Light

Styling lead, negative space circles rely on contrast so they pair well with short cuts or side parts. Tell the artist to emphasize crisp outer rings and leave interior skin untouched rather than shading it. Pain is manageable but watch for hair rubbing during healing. This style holds better than tiny dot fills. Wear a thin leather choker on reveal nights to frame the negative voids elegantly.
11. Fluid Ink Blot for Organic, Rorschach Vibes

Visual impact lead, ink blot shapes feel introspective and change meaning as you move. Watercolor techniques are tempting but behind the ear they tend to fade unevenly. If you like the ink blot aesthetic, ask for a darker outline or selective dotwork to anchor the wash so it reads longer. Sessions can be single and short, but check touch-up expectations with your artist. For session comfort, avoid hair products and wear a loose blouse that lets the artist move hair aside cleanly.
12. Interlocking Abstract Forms That Suggest Puzzle Pieces

Mistake lead, interlocking forms look intricate but get messy when scaled too small. Ask for clear negative gaps between shapes and a slightly heavier lineweight than you think you need. This placement suits one-inch motifs that tuck under hair until revealed. Expect moderate pain and a straightforward single session. Show it off with a side-swept bob or small hoops so the puzzle reveals without overpowering your accessories.
13. Minimal Abstract Spiral with Hypnotic Motion

Pain warning lead, spirals wound close to the ear can vibrate noticeably during application but finish quickly. Spirals read best when centered over the mastoid so the rotation follows natural curves. The most common error is asking for too many tight turns which later merge into a blurry mass. Keep it under an inch and plan for a touch-up at 18 months for maintenance. For the session, a hair bun donut saves the hair from sticking to fresh ink.
14. Micro Crescent Cluster Echoing Moon Phases
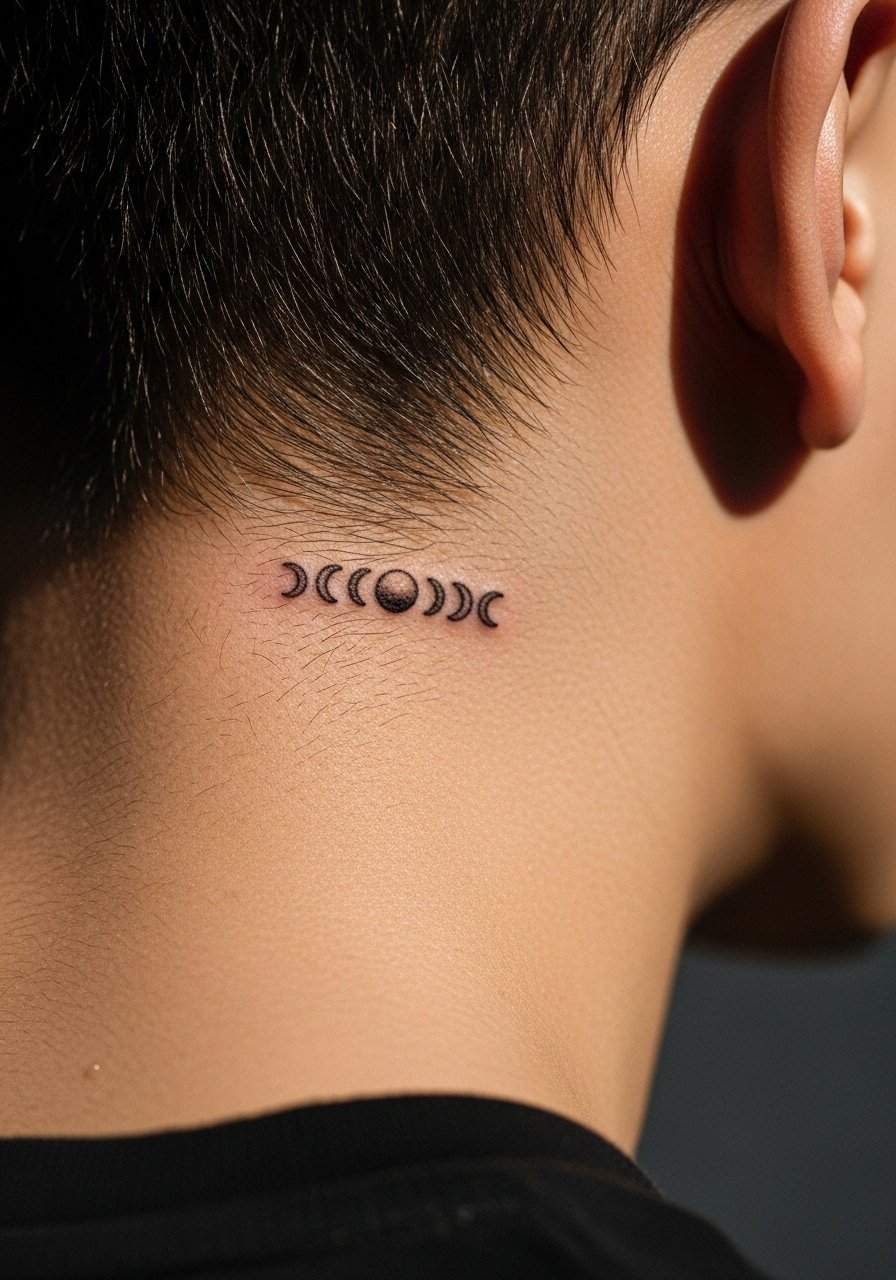
Consultation lead, moon phase clusters are trending and they sit naturally along the curve behind the ear. Ask for varied crescent sizes and negative spacing so each phase keeps its identity as the skin shifts. Fine line fades faster here, so a modestly thicker stroke helps. Many people love showing these with half-up hairstyles. Wear a silk scarf loosely at the neck on reveal photos for a soft frame.
15. Micro-Realism Droplet with Tiny Shade
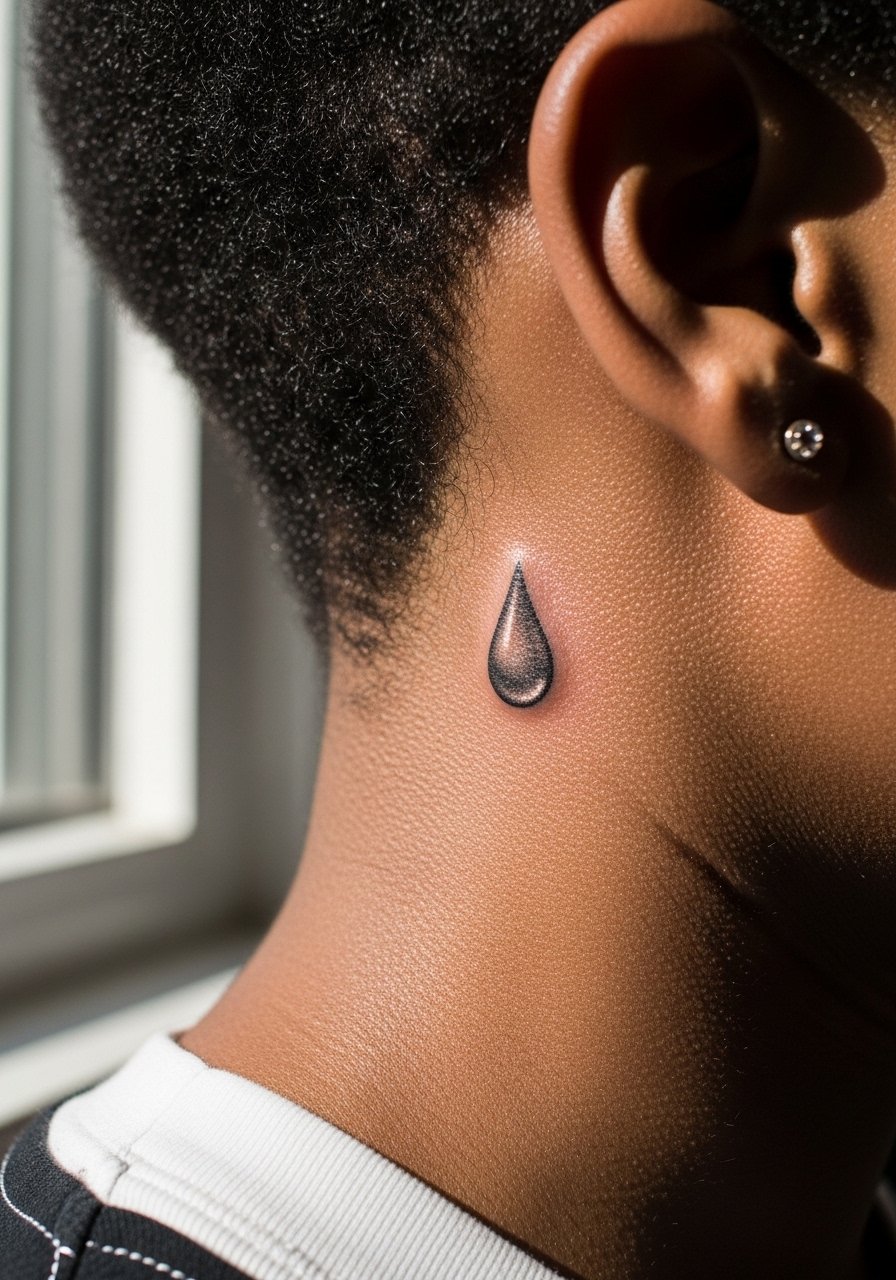
Aging/healing lead, micro-realism can surprise you with lifelike depth but behind-ear skin is unforgiving for extreme detail. If you want a droplet, request a single, slightly larger dot with soft gray shadow rather than tiny photoreal elements. Touch-ups may be required to keep the soft shadow from filling in. Session time is short and pain is concentrated. For showing it off, layered thin necklaces create balance without distracting from the tiny realism.
16. Broken Line Geometry That Ages Intentionally

Personal observation lead, intentionally broken geometry is forgiving because its aesthetic allows for small amounts of blur. Tell the artist you prefer deliberate gaps instead of sharp connectors so natural healing looks built-in. It works well for people who sweat a lot or have hair that rubs the area during recovery. Session is short and the look pairs well with a high ponytail holder when you want to reveal it cleanly.
17. Tiny Concentric Rings for Optical Pop

Mistake lead, the rings need breathing room. People ask for five or six rings and the inner ones blur quickly. I advise three rings with the center left as skin tone for contrast. That keeps the optical pop visible at six months and two years. Pain is brief but the area may tingle during healing. For session wear a loose button-down shirt you can slide aside easily.
18. Stipple-Shaded Crescent That Matches Ear Rim
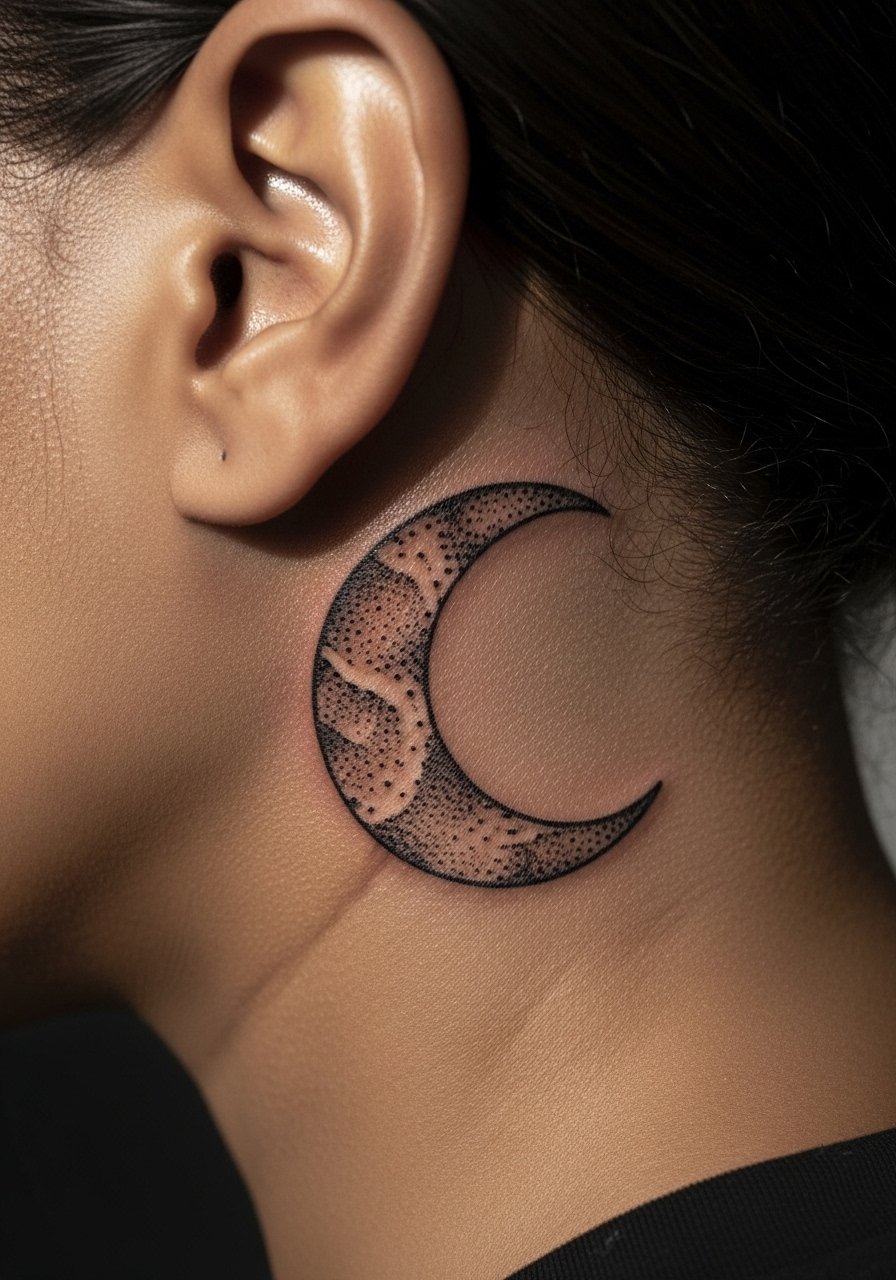
Controversy lead, stipple on thin skin sparks debate. One camp praises stippling for gradual fade and soft edges, the other worries it loses definition behind the ear. My take is to use sparse stippling with clear negative highlights so the texture reads longer. This style can require a touch-up at 18 months if dot density was high. For photos, pair with stud earrings and a hair clip strong hold to keep hair away while healing.
19. Offset Abstract Bar for Clean Graphic Contrast

Visual impact lead, a single offset bar is graphic and ages well because it relies on boldness rather than tiny detail. Tell your artist you want a clean edge and consistent saturation so the bar holds. Pain is high but the duration is very short. It makes a neat reveal when paired with off-shoulder tops and simple chokers. Consider a thin chain pendant necklace for balanced framing.
20. Organic Fragment with Soft Edge Washes
Aging/healing lead, soft-edge washes are lovely but tend to fade unevenly around hairline areas. Anchor with tiny linework points so the shape stays readable as color softens. Sessions may be slightly longer due to shading. For session wear avoid hair products and pull hair with a hair bun donut to prevent transfer.
21. Intermittent Dot Trail That Follows Jaw Slope

Consultation lead, dot trails are deceptively simple. Ask for varied dot sizes and spacing that echo the jaw slope so the trail looks intentional when hair moves. Fine dots fade faster than slightly larger stipples, so size up by one notch. Expect a touch-up timeline around 18 months for micro-dot clusters. For reveal styling try an asymmetrical bob and a stud earring set minimalist to keep the focus close to the ear.
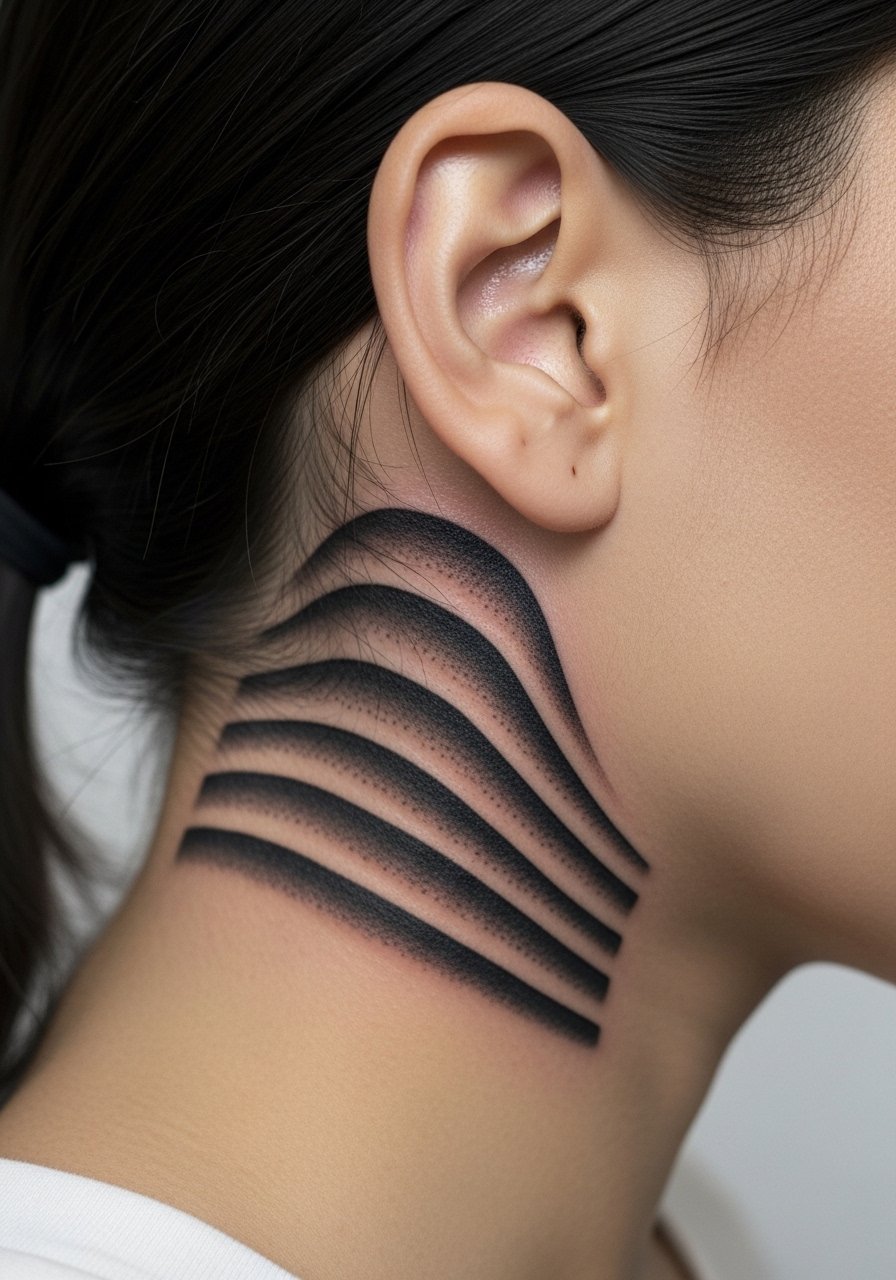
22. Negative Space Wave Cluster Matching Hair Flow

Styling lead, negative space waves mimic hair flow and look intentional when you sweep hair back. Tell the artist to prioritize clean outlines and avoid inner shading. This design is forgiving for people with darker skin because the voids create contrast. Session time is short. For photos pair with a braided half-up accessory and small hoops.
23. Micro Tectonic Lines for Architectural Edge

Personal observation lead, architectural micro lines read like a tiny blueprint and suit people who prefer clean geometry. The main mistake is compressing too many intersections into a small space. Keep intersections spaced to avoid early merging. Pain is direct but quick. For the session, wear a loose tank top to keep the neck free.
24. Fragmented Orb Cluster That Plays with Scale

Styling lead, fragment orbs look intentional when arranged in a graduated scale from small to slightly larger. In consultation, ask for off-center placement so orbs can live under hair and reveal on purpose. Fine shading can blur quickly so keep shading minimal. Session time may be moderate for crisp spacing. To show it off, use a layered chain necklace that sits just below the jawline.
25. Minimal Glyphs Reimagined into Abstract Marks

Mistake lead, glyphs often become illegible if too ornate at micro scale. Pick a simplified mark and test it with a stencil on skin before committing. Expect high needle vibration but short session time. For career-sensitive situations this hides well under hair and a subtle side part when needed. For reveal photographs, a pixie cut styling gel can help frame the area.
26. Thin Ribbon Curve That Mirrors Neck Shadows

Aging/healing lead, ribbon curves are elegant and tend to age well when the artist uses a consistent stroke and avoids tapering too thin. Ask for a steady lineweight rather than micro tapering near ends. This will reduce the chance of the ends blowing out into soft fuzz. Session time is brief. For the session wear a v-neck tee so the neckline is unobstructed.
27. Mastoid Curve Mosaic Built to Move with Skin

Consultation lead, the mastoid curve is an underused frame for mosaics that actually benefit from the ear's curve. Ask the artist to map the mosaic so each tile respects curvature and skin folds. This reduces distortion if weight changes occur. Expect moderate pain and possible two short sittings if you want multiple tonal steps. For photographs try a side part and tucked hair style to let the mosaic appear deliberately.
Frequently Asked Questions
Q: How painful is a behind ear abstract compared with other small placements like the wrist or ankle?
A: The behind-ear area is usually sharper because the skin is thin and close to bone. Compared with the wrist or ankle, expect a more intense vibration and shorter session. Pain tolerance varies, and numbing options exist in some shops but ask before booking.
Q: Will fine line abstract work behind the ear fade faster than bold blackwork?
A: Fine line tends to blur quicker on thin skin behind the ear, while bold blackwork usually maintains contrast longer. One camp says expert depth control preserves fine lines, the other thinks thicker strokes are safer. Ask the artist where they stand and plan for a touch-up at around 18 months to two years if you pick fine line.
Q: How should I dress for a studio visit for a behind ear tattoo?
A: Wear something that gives the artist clear neck access and keeps hair out of the way. A loose tank top or a button-up you can pull aside works well. Bring a hair tie or try a high ponytail holder so you can control hair during the session.
Q: Are there ways to find artists who specialize in behind-ear abstracts without naming specific shops?
A: Search hashtags like #behindearabstract and #finelinebehindear on Instagram and use filters in apps like Tattoodo or Booksy to find local guest spots. Reddit threads in r/tattoos also surface recent behind-ear portfolios and user reviews.
Q: Should I expect special aftercare for behind-ear pieces compared with other placements?
A: The main concerns are hair friction and sweat. Keep hair away from the area while it heals, cleanse gently, and avoid heavy ointments that mat hair. A lighter balm or breathable film can help. Specific product choices and layering should be discussed with your artist, and the shop can show how much to apply.
Q: Do darker skin tones affect abstract contrast behind the ear?
A: Darker skin can reduce contrast for thin black lines. Negative space, bolder outlines, and testing a small patch can help you decide. Artists experienced with a range of skin tones will advise on spacing and lineweight to keep the design legible long term.
Q: How visible are behind-ear abstracts for work and everyday life, and how do I show them off without awkward hair flips?
A: These designs are easy to conceal with loose hair, a side part, or an undercut. For deliberate reveals, use half-up styles, asymmetrical bobs, or small studs that frame the area. A simple accessory like a thin chain pendant necklace helps draw the eye when you want it seen.
