
Fine line looks incredible on a saved pin and loses detail faster than people expect. Trends push tiny character icons onto wrists and fingers, but where you place them matters more than the picture on your phone. Read these ideas with how they age, what to tell your artist, and what to wear to the session so the design you love now still reads clean in a few years.
1. Finn and Jake outline portrait on the inner forearm
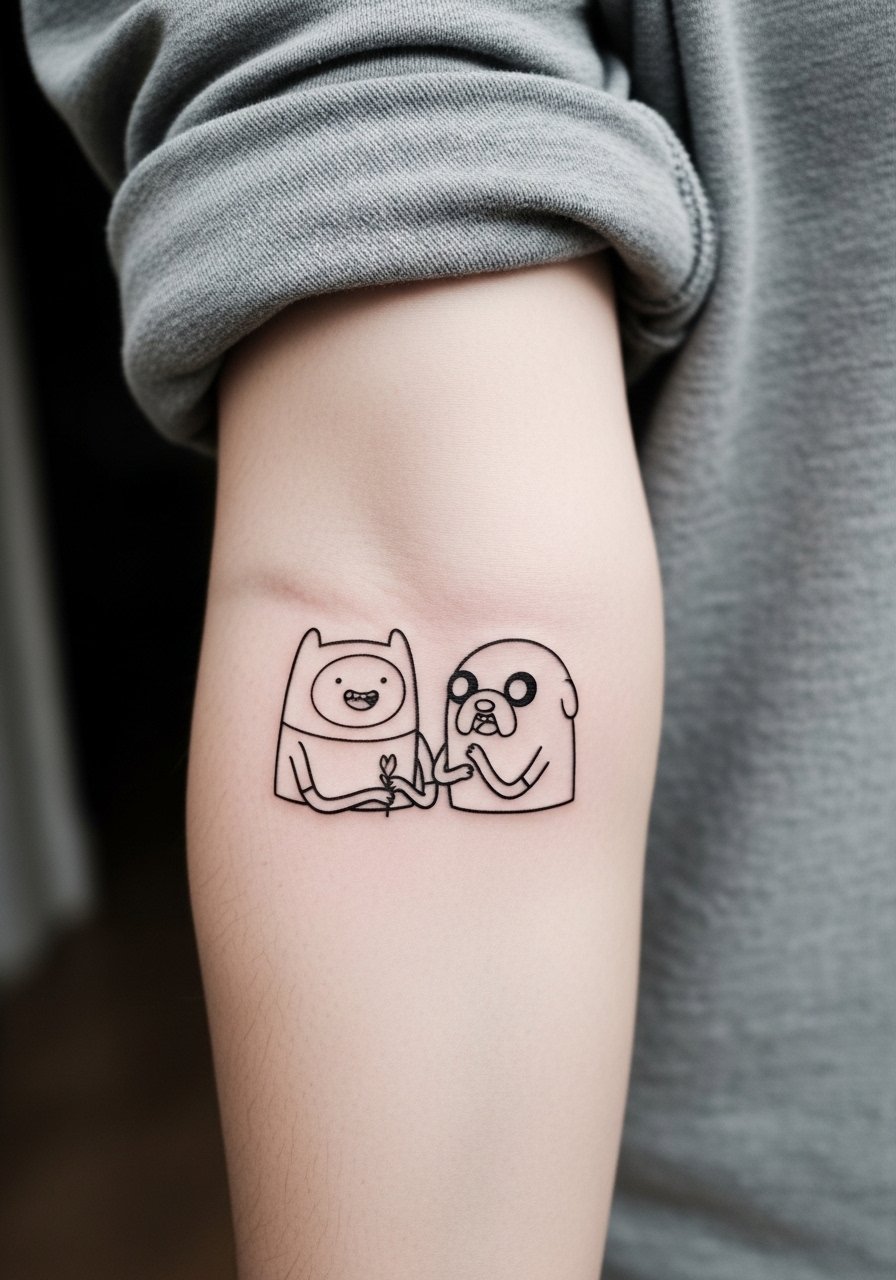
I recommend this as a minimalist illustrative piece for someone who wants instant recognition without heavy color. Tell your artist you want 2.5 to 3 mm line weight so the outline survives touch-ups less often. Common mistake is asking for the thinnest single-needle lines which can blur on the inner forearm over time. Expect a one to two hour session and a likely touch-up window at year two to three depending on sun exposure. For showing it off, pair the placement with a rolled cuff chambray shirt so the tattoo sits in a natural peekaboo position. The forearm is moderate on pain and tends to age better than the wrist.
2. Marceline watercolor splash on the shoulder
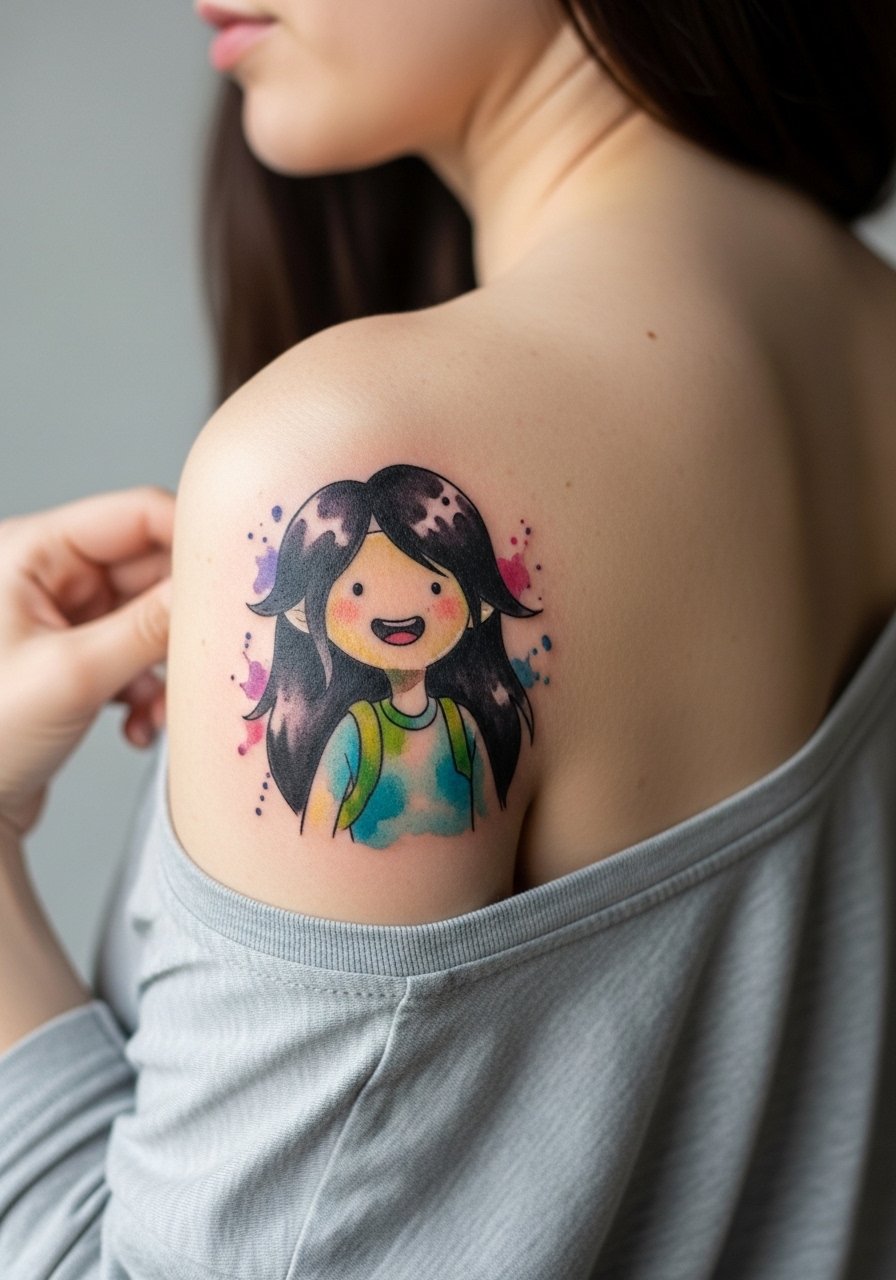
If you love painterly color and a musical, moody vibe, shoulder placement keeps the watercolor safe from constant abrasion. Ask for saturated edgework near the character so the face reads when the pigments soften at year two. A common aging issue is tiny splatter dots migrating into a muddy patch when too many micro-drops are packed in. The session runs around two sessions for a 4 to 6 inch piece and the shoulder is a low-stretch, forgiving canvas. For post-heal show-off looks wear an off shoulder tee to frame the color. If you plan long outdoor summers, talk with your artist about UV protection for pigments.
3. Magic Man neo-traditional face on the upper arm
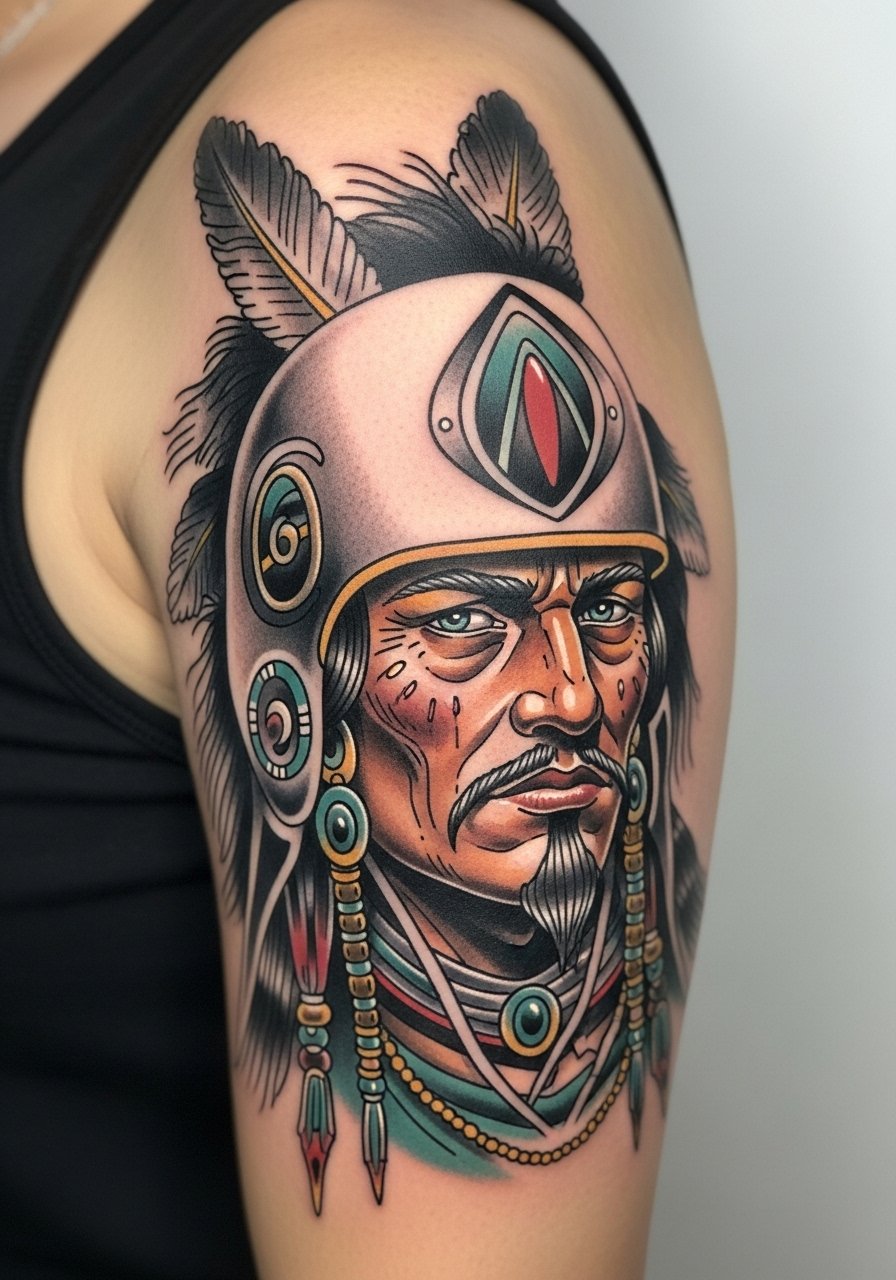
This is a statement neo-traditional piece that benefits from heavy shading and exaggerated features. In consultation, show images that demonstrate the exact level of cartoon exaggeration you want so the artist does not drift into portrait realism. The upper arm handles larger saturation well and usually takes two to three sessions. A common mistake is requesting tiny facial detail at a small scale, which loses clarity after healing. Expect a bit more soreness than forearm work but lower blowout risk than the wrist. Touch-ups for color depth are typical around year three if you want the same vibrancy.
4. Lumpy Space Princess bold traditional outline on the ankle
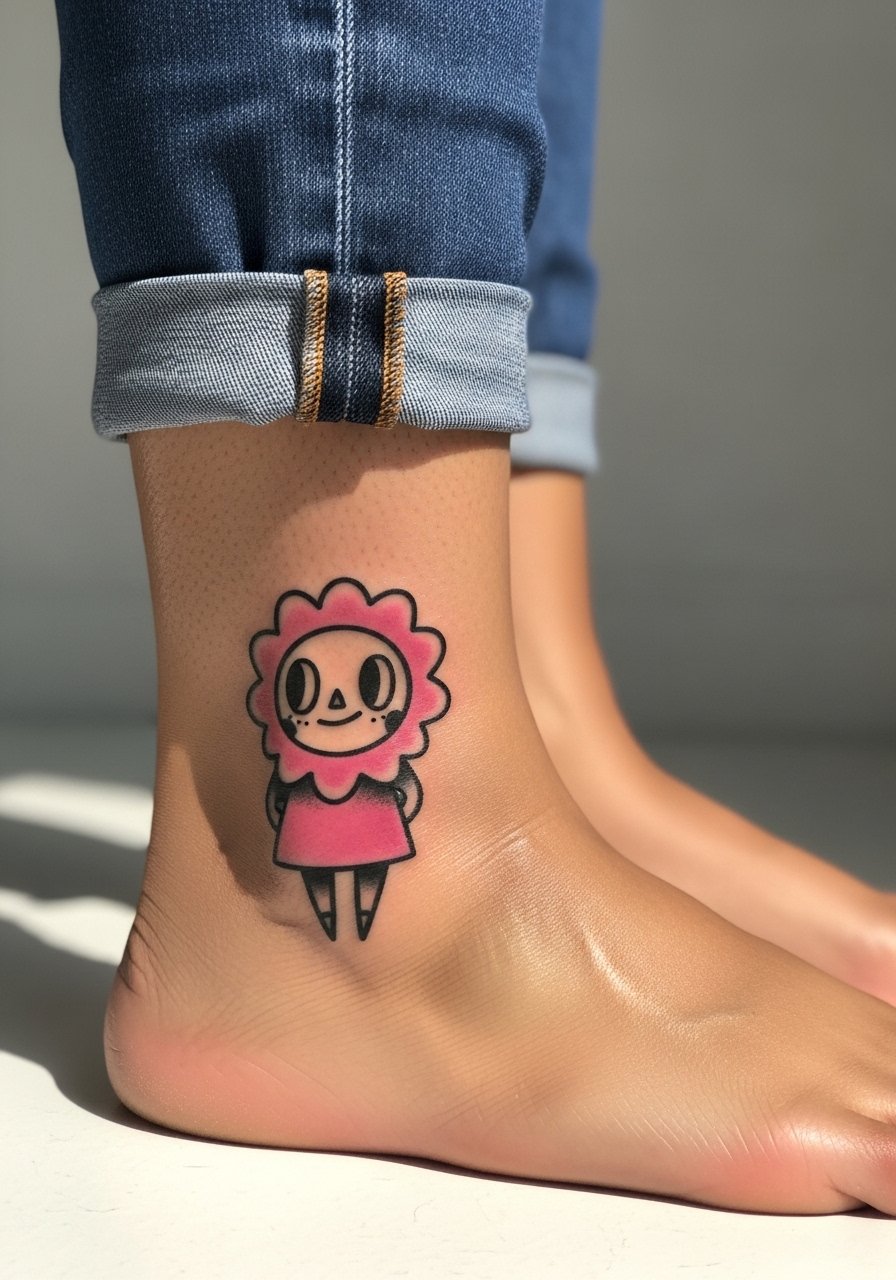
Ankle pieces read as playful conversation starters and the traditional outline keeps it simple for longevity. Ask for thicker, single-pass outlines so the lump silhouette stays crisp through shoes and socks rubbing. The biggest mistake is making it too small; a 3 inch minimum keeps the pink fill from pooling. The ankle can be painful and needs careful bandaging for the first week because of friction. For warm-weather showing, cropped ankle pants highlight the shape so it sits above footwear, and paired canvas or boat shoes the design looks balanced. Expect a single session for most sizes and a possible touch-up if the fill fades quickly.
5. Ice King fine line portrait with crown on the inner forearm
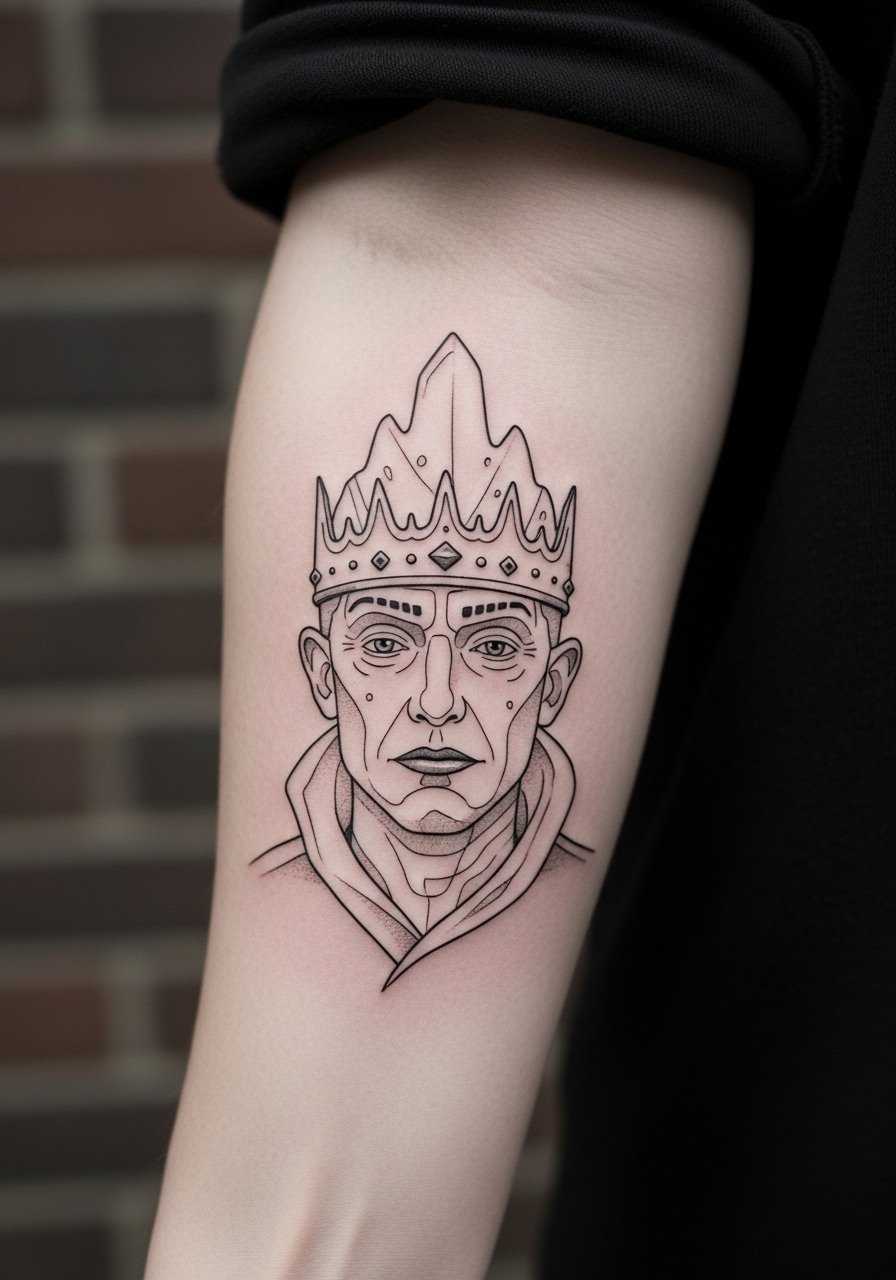
Fine line portraits look delicate and tell a quieter story, but here is an explicit controversy. One camp says fine line ages poorly on areas with frequent movement and the lines blur within two to three years. The other camp argues that with proper needle depth and spacing fine line portraits can last if placed on low-stretch skin. Ask your artist which camp they fall into and show them you understand you may need touch-ups sooner. Inner forearm is a comfortable session and the pain is moderate. If you want long-term clarity, request slightly bolder single-needle work and plan for a touch-up at year two. Pair with a rolled cuff chambray shirt for casual display.
6. Bubblegum Princess illustrative kingdom scene on the thigh
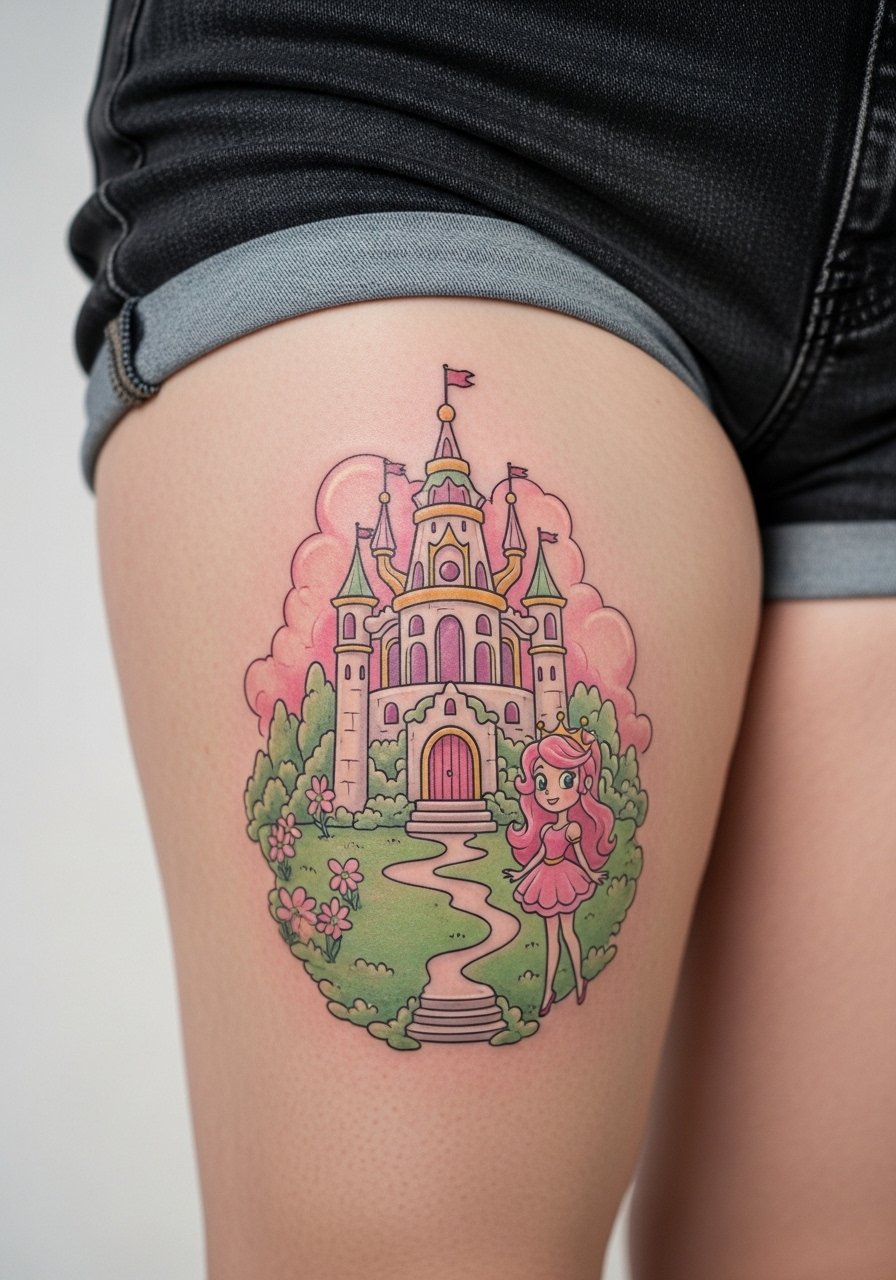
Illustrative scenes give you narrative depth and the thigh is ideal because it allows scale and detail without excess stretching. Tell your artist you want layered pastel blends and clear outline anchors so the pastel areas do not merge as they fade. The usual mistake is cramming too much tiny detail into a size that will be hard to read from a few feet away. Expect multiple sessions for a 6 to 8 inch scene and moderate pain because the thigh can be sensitive near the inner area. For showing off after healing, high-waisted shorts or swimwear highlight the scene, and wearing loose shorts to the session keeps access clean and comfortable. Touch-ups for pastel saturation are common at year two to three.
Pre-Session Essentials
The forearm, wrist, ankle, and thigh pieces above heal and behave differently, so a few specific items make session day smoother and the first week less fussy.
- Stencil transfer paper kit. Helps you and the artist preview placement on skin, useful for the Finn and Ice King outline placements discussed above.
- Topical numbing cream. Applied as directed before the appointment it can take the edge off wrist or ankle sensitivity without changing the linework.
- Thin protective film roll. Keeps small areas like fingers and ankles clean during the first week of friction from shoes and frequent handwashing.
- Fragrance-free body wash. Gentle cleansing avoids irritation on fresh vibrant work like Marceline and Bubblegum Princess pieces.
- Aquaphor healing ointment. A thin layer in the first days helps with moisture control on fine line and pastel pieces without clogging.
7. Jake stretching shape-shift blackwork on the outer forearm
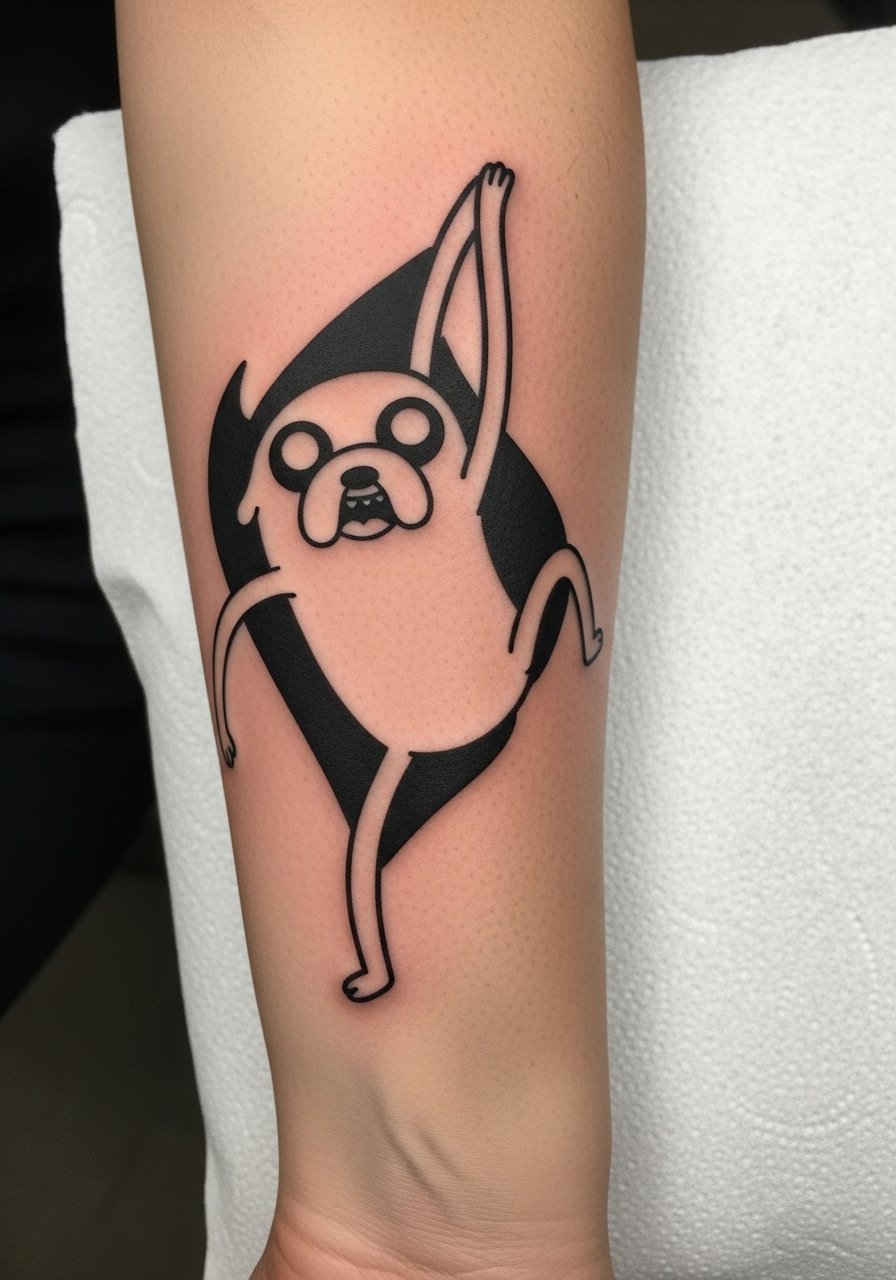
Blackwork is forgiving and reads clearly from a distance, which makes it perfect for dynamic character poses. Ask for solid, saturated fills with crisp negative-space breaks to keep the shape language clear as the skin settles. The typical mistake is packing too many micro-transitions in a small area which can look muddy after healing. Outer forearm sessions are comfortable and require one to two hours for a medium-sized piece. Expect color maintenance at year three if daily sun exposure is high. For session comfort wear a sleeveless top or loose tee so the arm is fully accessible.
8. BMO pixel minimalist icon on the wrist
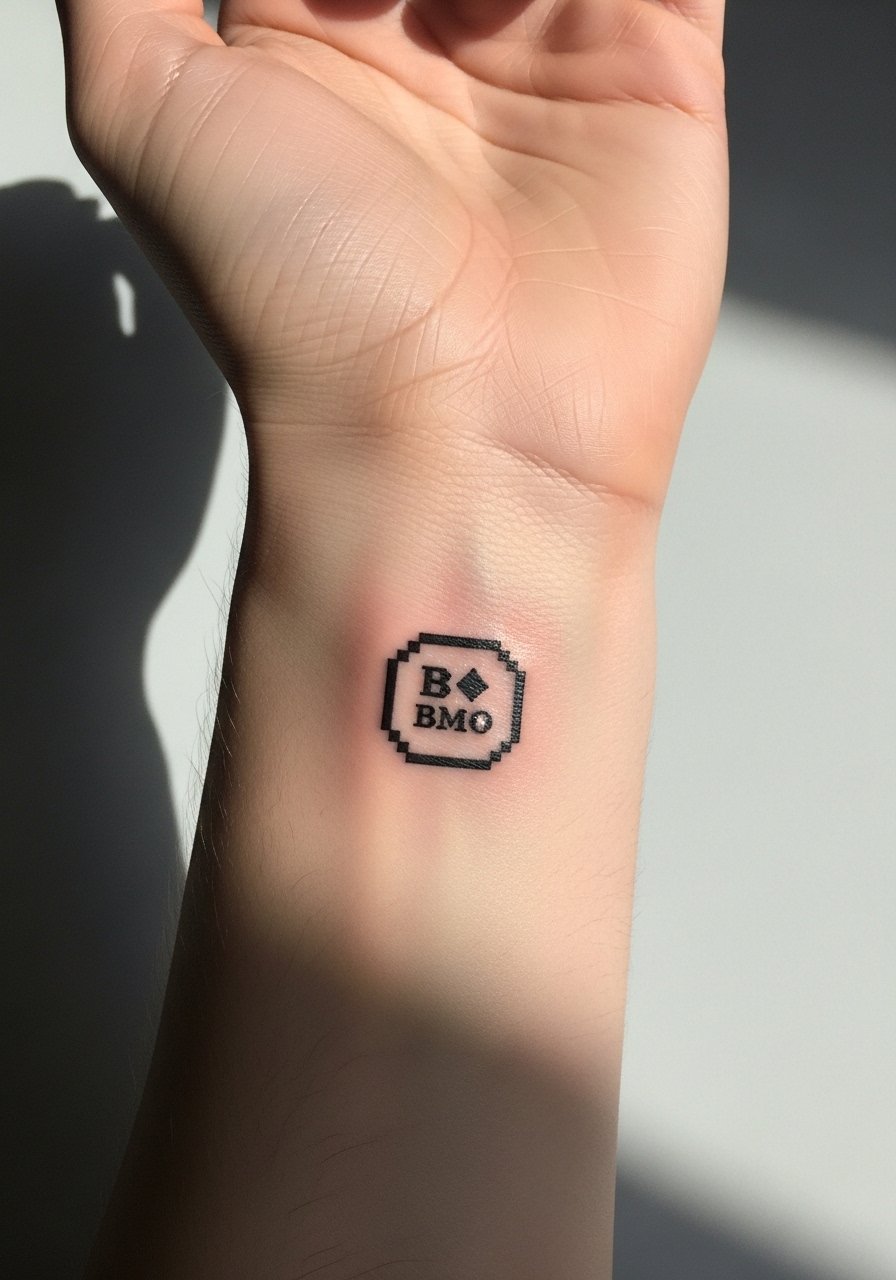
Tiny pixel icons are a great first tattoo choice but wrists heal under constant motion and washing. Ask for slightly thicker pixel blocks rather than the absolute thinnest lines so each square keeps its shape at year two. The common regret is picking the absolute minimum size which becomes unreadable sooner than expected. Wrist pain is higher than forearm, and a quick single-session works for a 1 inch icon. For styling pair it with a slim leather watch on the opposite wrist so the tiny icon remains a subtle accent. Expect a touch-up if exposure to sun and water is frequent.
9. Flame Princess fiery neo-traditional on the shoulder blade
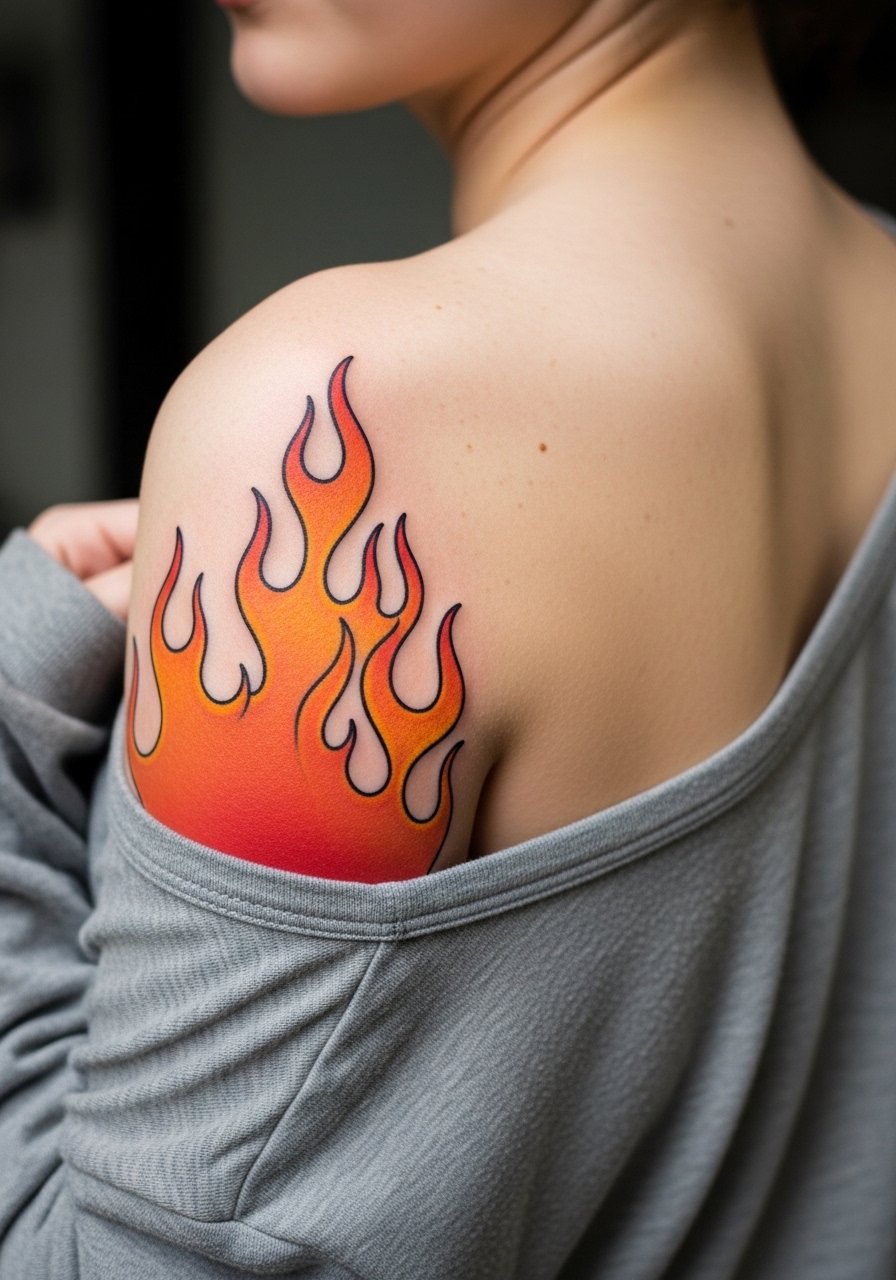
Neo-traditional shading adds volume that pops from across the room, and shoulder blades give color room to breathe. During consultation ask for flame gradients with strong outline anchors so the orange remains distinct even as pigments fade. A common problem is underbuilt outlines around gradients, which makes color bleed over time. Shoulder blade sessions are medium in pain and usually done over two sessions for larger pieces. For night or casual looks layering a layered chain necklace draws the eye and complements warm flame tones.
10. Tree Trunks apple micro-realism on the collarbone
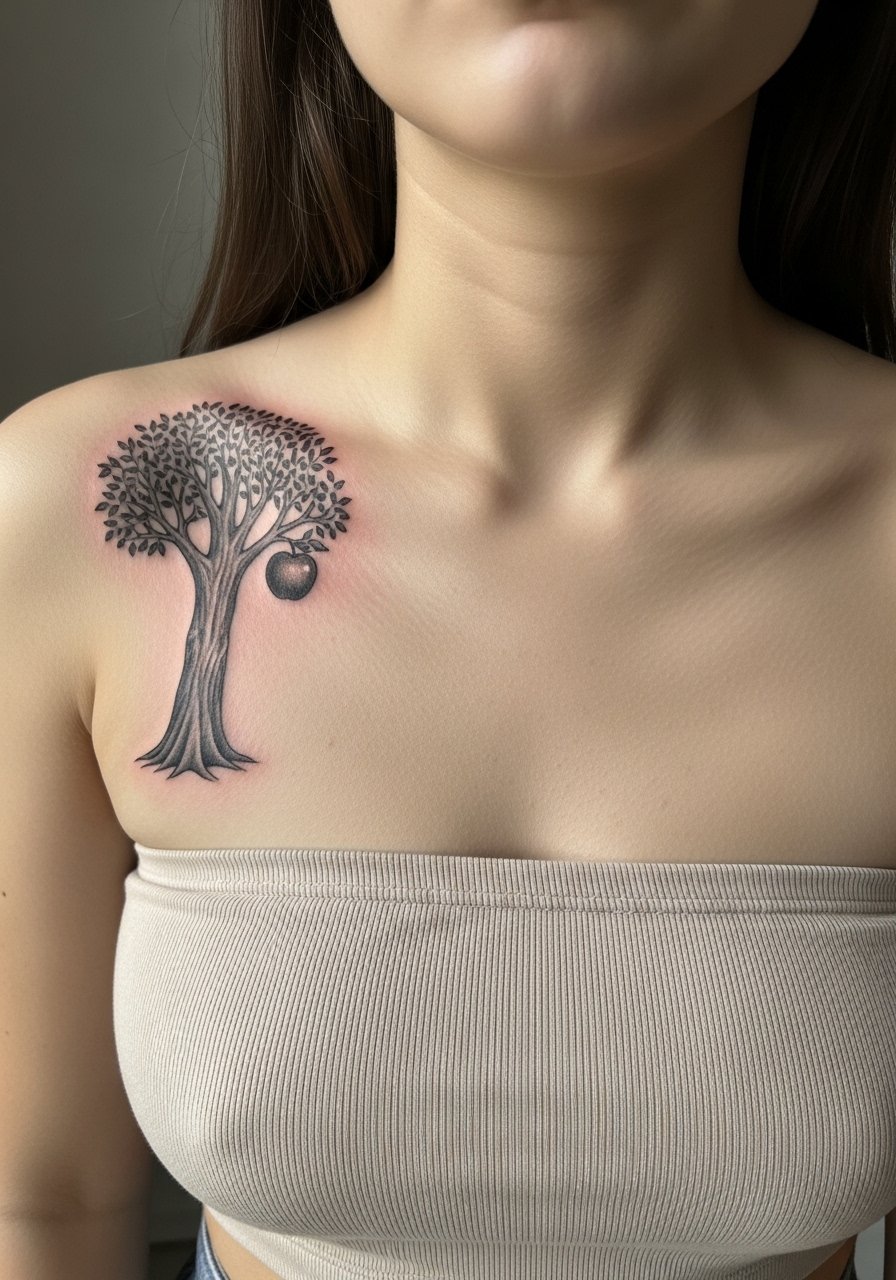
Micro-realism thrives on clean contrasts and the collarbone provides a flat, visible plane that shows detail without heavy distortion. Tell the artist you want crisp dot work and a focus on highlight retention so the apple keeps its three-dimensional feel after healing. Tiny fiddly details placed too close together are the usual mistake, which is why a 2.5 to 3 inch scale works better than a micro 1 inch. Collarbone tattoos can be tender during the session. For showing it off choose a strapless crop top that frames the piece and keeps the neckline clean.
11. Mathematical symbol ornamental mandala on the ribcage
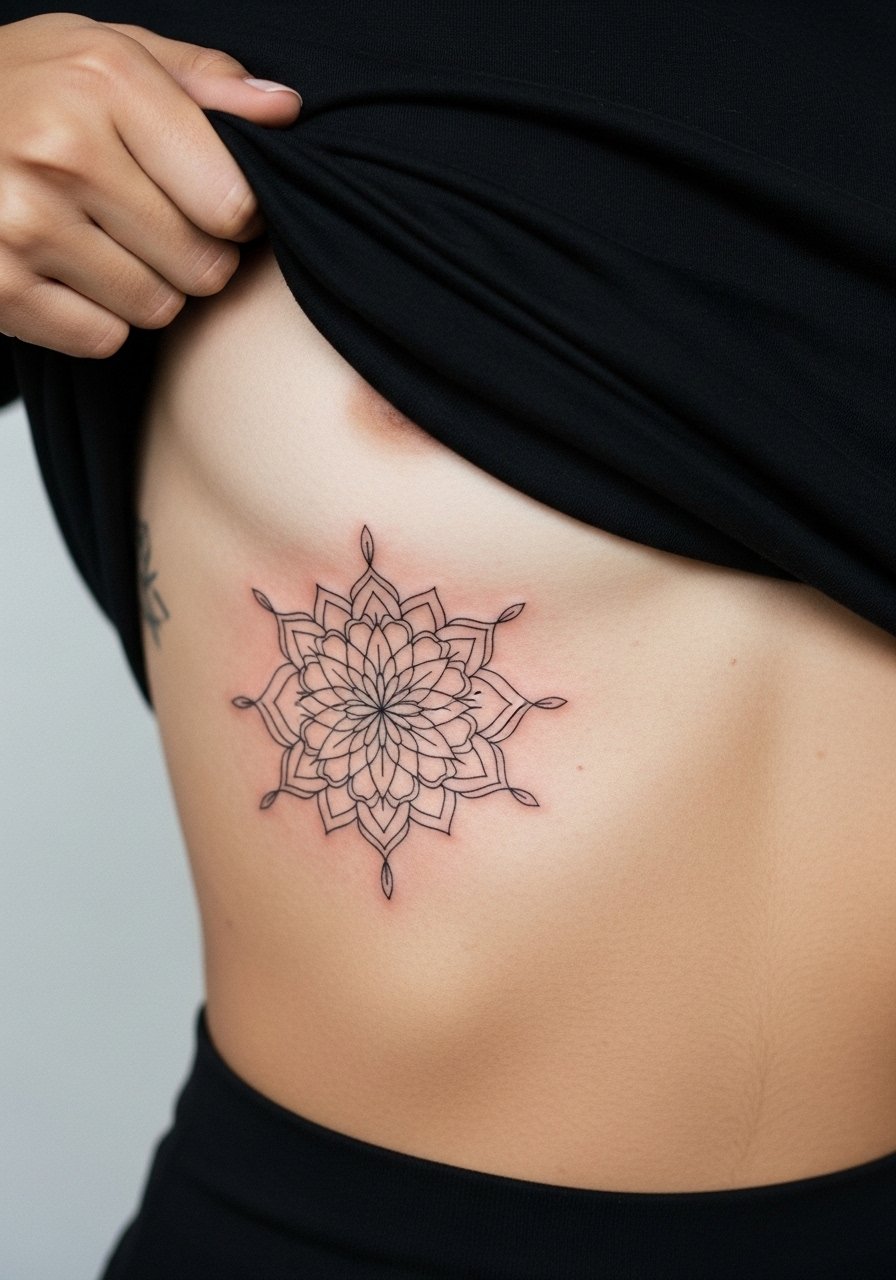
Ribcage placements offer scale but bring two debates to the surface. One debate is whether dense fine line geometry can hold up on the ribs as the skin stretches with breathing. Some artists avoid extremely tight geometry there, saying lines merge within a few years. Others insist that proper spacing and depth will preserve the pattern. The second argument is about healing method. Some practitioners favor protective film to lock moisture in while others prefer dry healing to avoid trapped moisture. Ask your artist which method they use and why before booking. The ribcage is a high-pain area, and sessions can be broken into smaller sittings to manage discomfort.
12. Gunther tiny ignorant style flock behind the ear
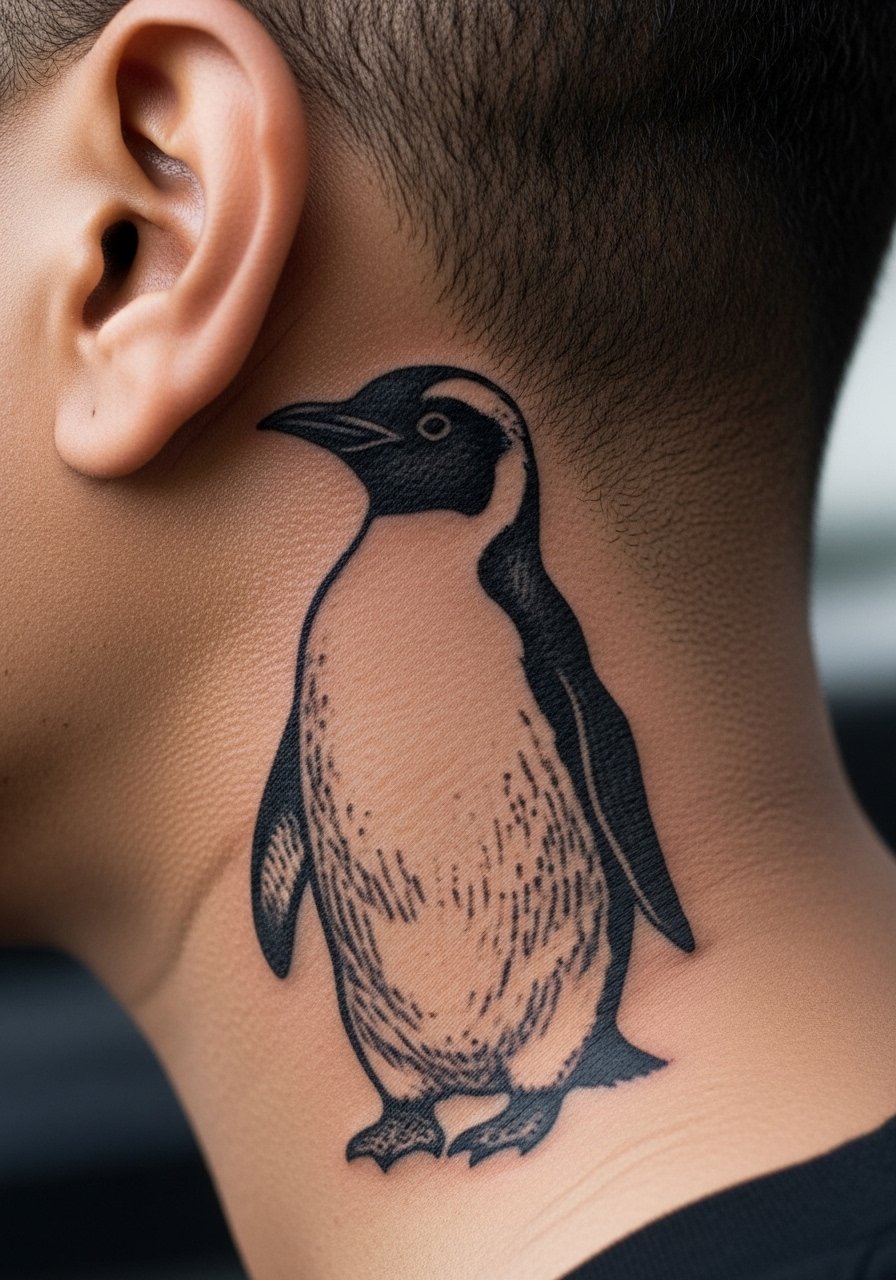
Tiny ignorant style tattoos are playful and stackable, perfect for a small flock behind the ear if you want multiple spots. In the consultation ask for bold single-pass shapes so each penguin retains silhouette when healed. Behind-the-ear work has limited space and the mistake is trying to fit too many details; keep each penguin around one inch. This placement is mildly painful and benefits from a quick appointment. Because the area is often covered by hair, no heavy display styling is needed but a small single cuff bracelet on your wrist can balance the tiny cluster if you want subtle symmetry.
13. Candy Kingdom watercolor landscape on the calf
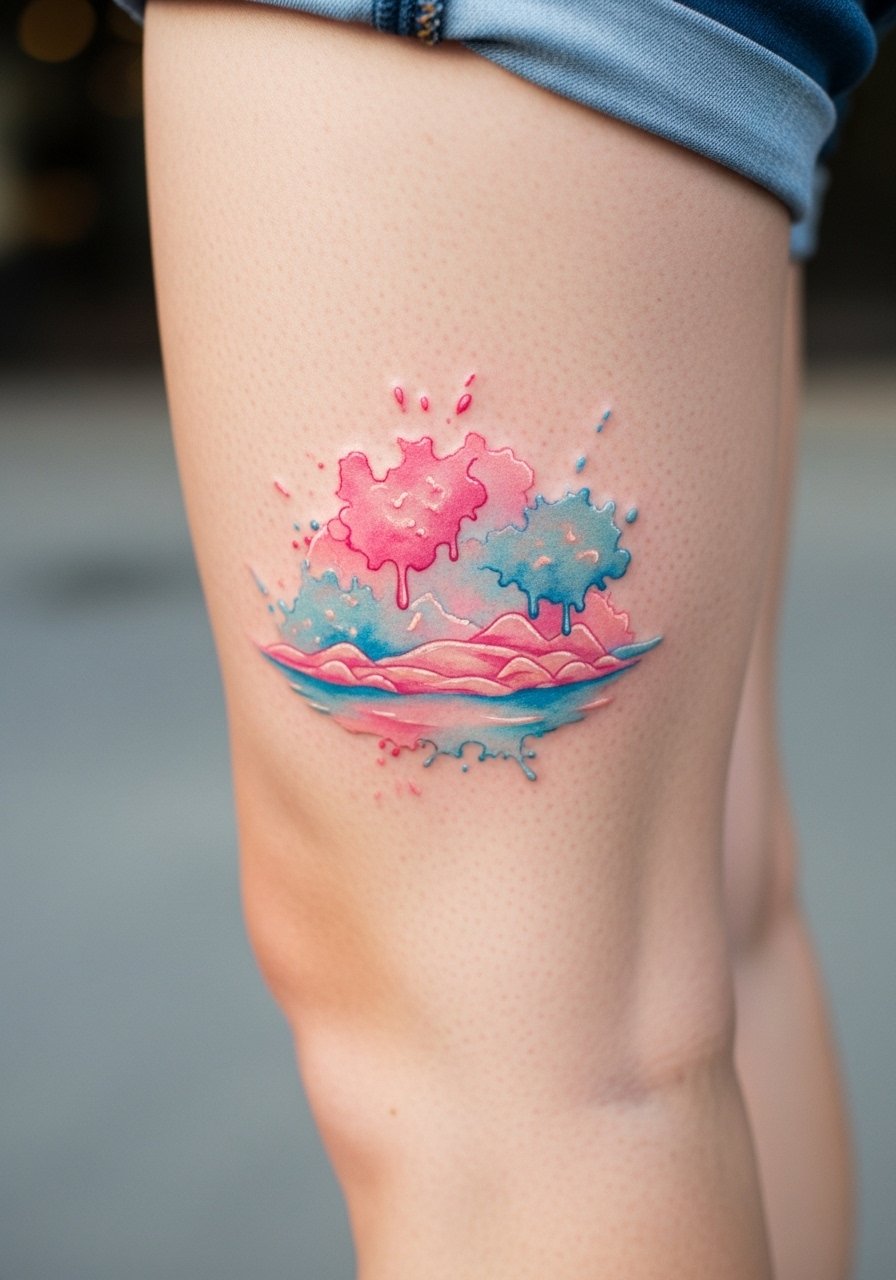
Calf placements handle large watercolor landscapes well because the skin stretches less than the thigh and the canvas is visible. Ask for saturated anchors around key shapes so the candy colors keep definition as pigments fade. Many watercolor pieces age into indistinct smears when artists skip anchoring outlines. The calf is one of the lower-pain leg spots and typically needs two sessions for a 6 inch scene. For a casual frame wear chino shorts slim and canvas sneakers to keep the design visible in everyday wear.
14. Patchwork sleeve mixing minor characters across a half-sleeve
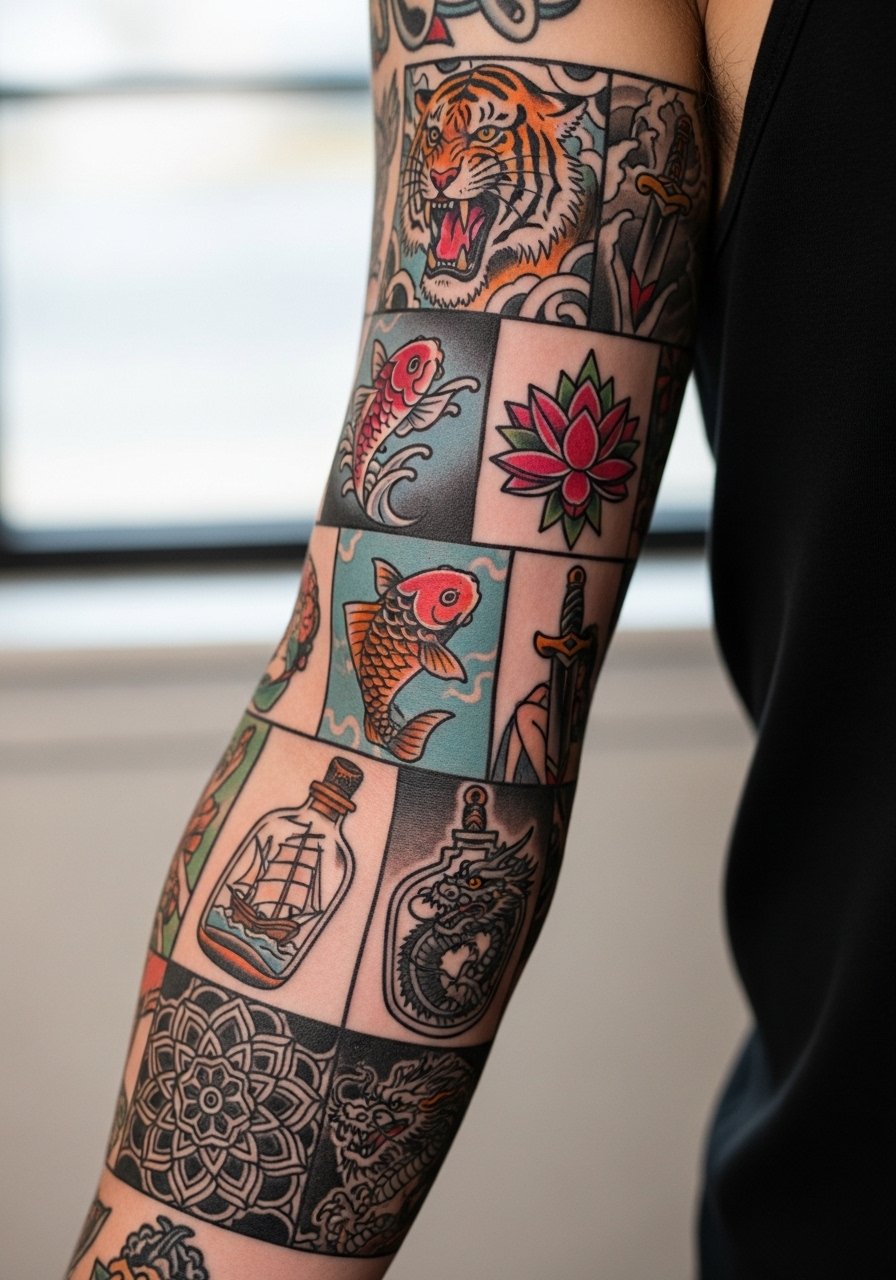
A patchwork sleeve that stitches smaller Adventure Time characters into a single flow is great if you want variety without a single large scene. Lead your consultation with a layout map so characters have breathing room and the transitions are deliberate. A common error is stacking characters too tightly which makes the sleeve look cluttered after a few years. This approach requires multiple sessions as the artist balances linework and color saturation. Consider the order of characters so the piece tells a loose chronological or aesthetic story as the arm moves.
15. Pixel BMO series down the fingers
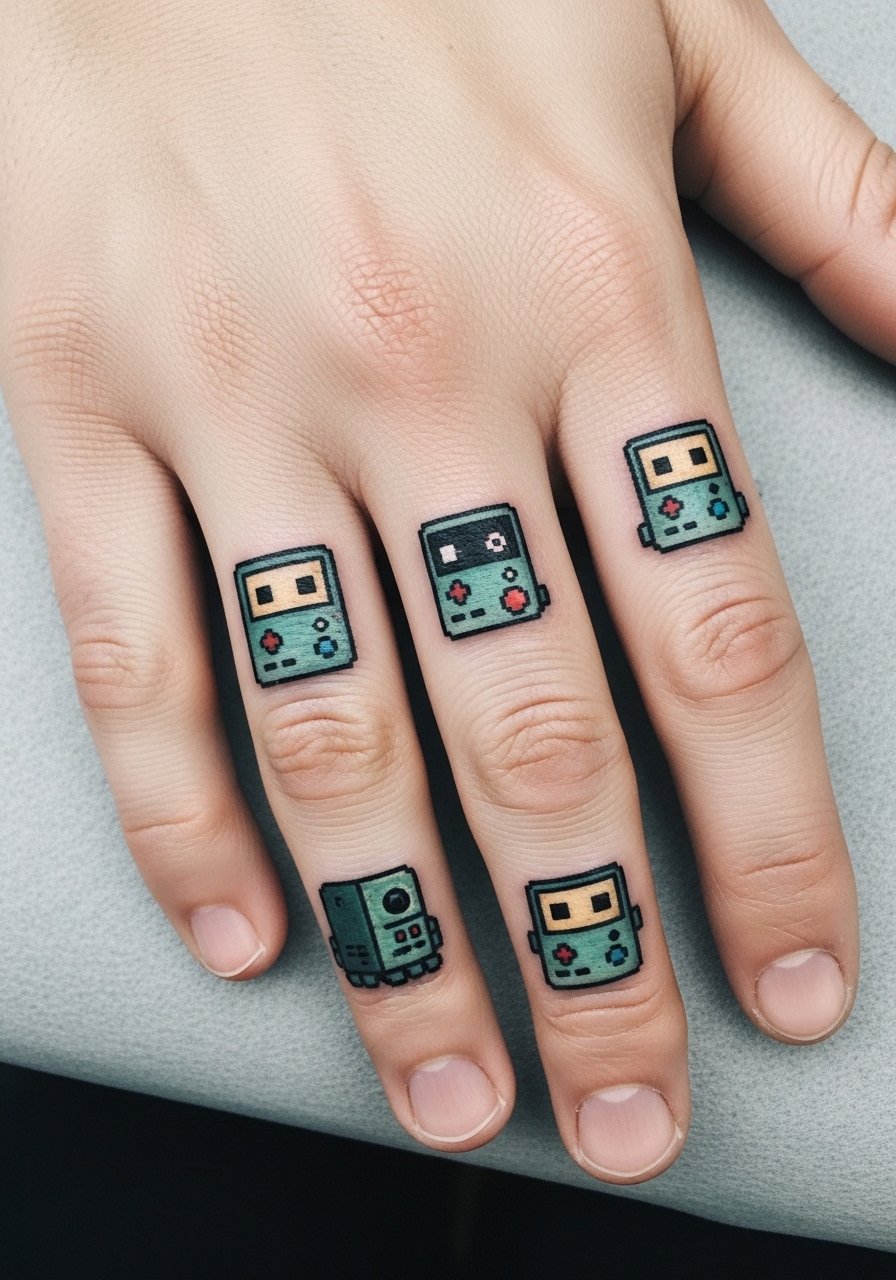
Finger tattoos face constant washing and friction so pick bold pixel squares instead of hairline detail. The typical mistake is going too small; allow each pixel about 3 to 4 mm. Sessions are quick but healing is tricky and often requires a small protective routine. For styling keep hand jewelry minimal and try a single cuff bracelet on the other wrist to balance attention without covering the fingers. Expect faster fading than forearm pieces and plan for an honest touch-up within the first two years.
16. Dark-skin-centered blackwork Jake for high contrast visibility
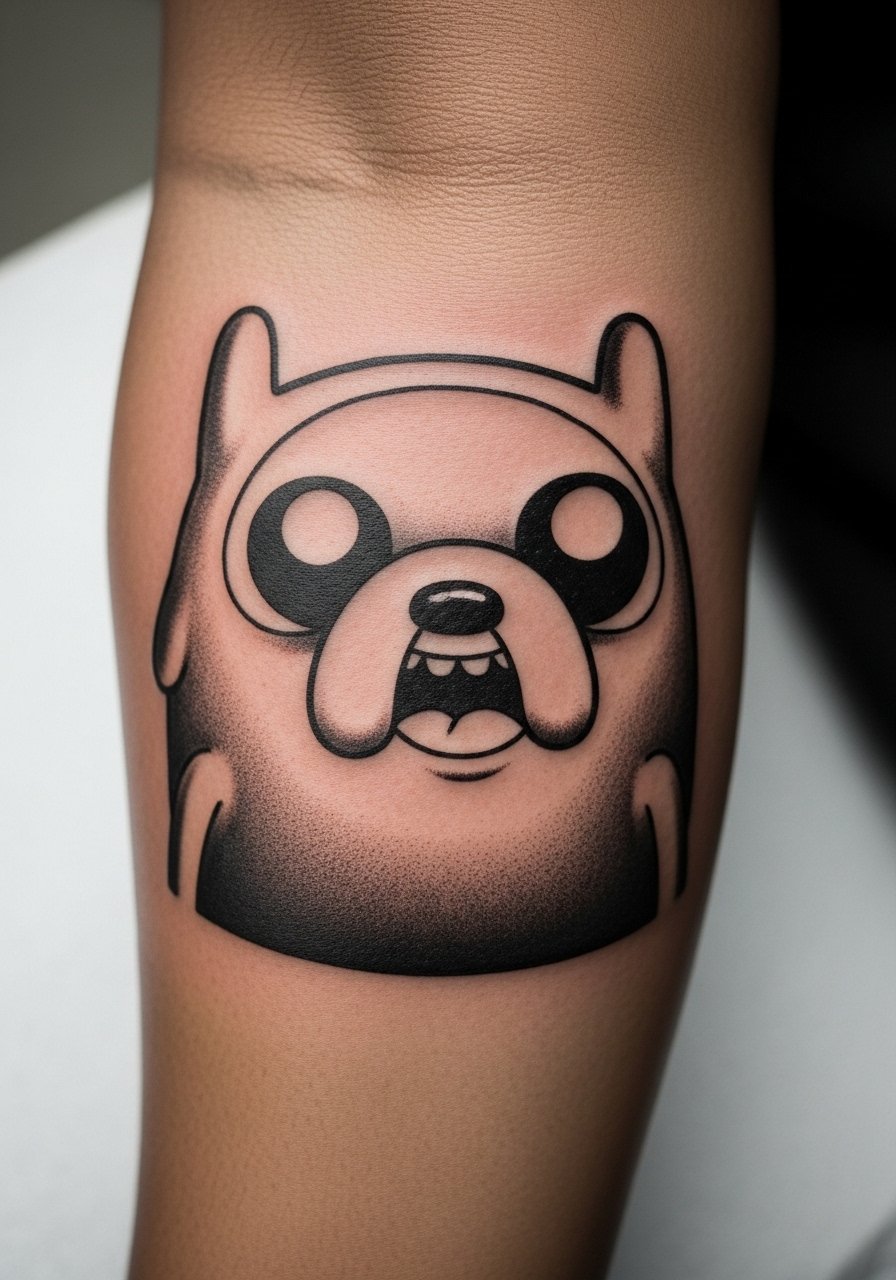
If you have darker skin, think in terms of bold contrast and negative-space design to preserve character recognition. The key is saturated blackwork with simple negative areas rather than micro shading that can disappear on deeper tones. A frequent mistake is asking for subtle gray shading which loses definition; stronger shapes tend to win. Outer forearm is forgiving and sessions for solid blackwork usually take one to two hours depending on size. Bring reference images that show high-contrast healed pieces so the artist understands the end goal. Expect long-term clarity from strong black fills.
17. Magic Man chaotic hat emblem with cultural sensitivity note
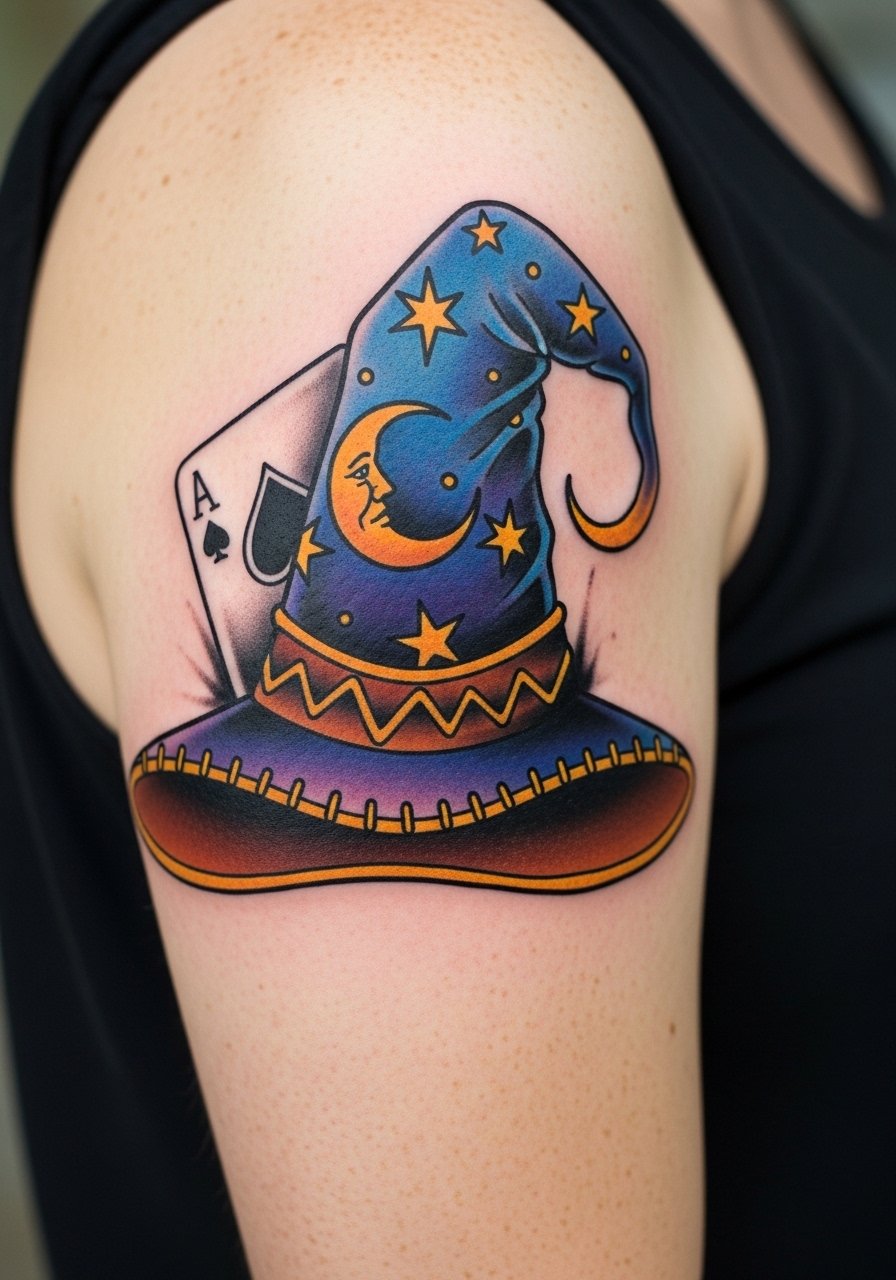
Magic Man designs can skate into cultural symbolism depending on iconography chosen, so handle references with care. In a consultation mention any regional or historical elements you want avoided and ask for an adapted motif that keeps the surreal humor without direct cultural replication. Common mistakes include copying symbolic motifs without understanding their origins which can make a design feel tone-deaf. Upper arm placement takes color well and usually heals predictably. Plan the session length based on how much shading and hue variation you want.
18. Minimalist Finn sword micro on the calf
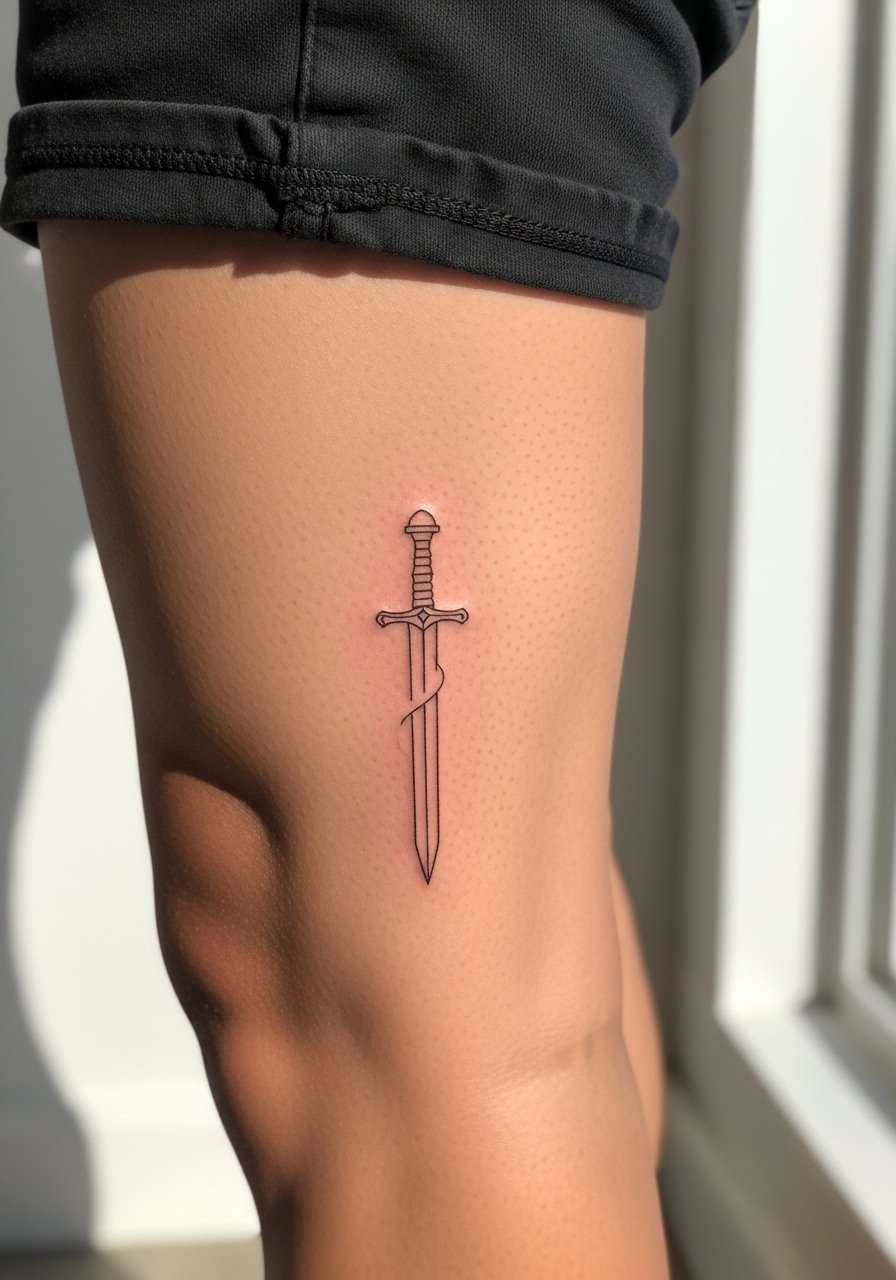
A tiny sword on the calf gives a classic symbol without committing to a character portrait. Ask the artist for a compact silhouette with slightly heavier edges rather than razor-thin ones to avoid line merging as the calf moves. People often pick wrist scale for swords which then reads too small; the calf supports a clearer micro at 3 to 4 inches. Sessions are short and pain on the calf outer is low to moderate. Wear loose shorts to the session so the artist can move the leg without restriction.
19. Floral Finn concept on the thigh
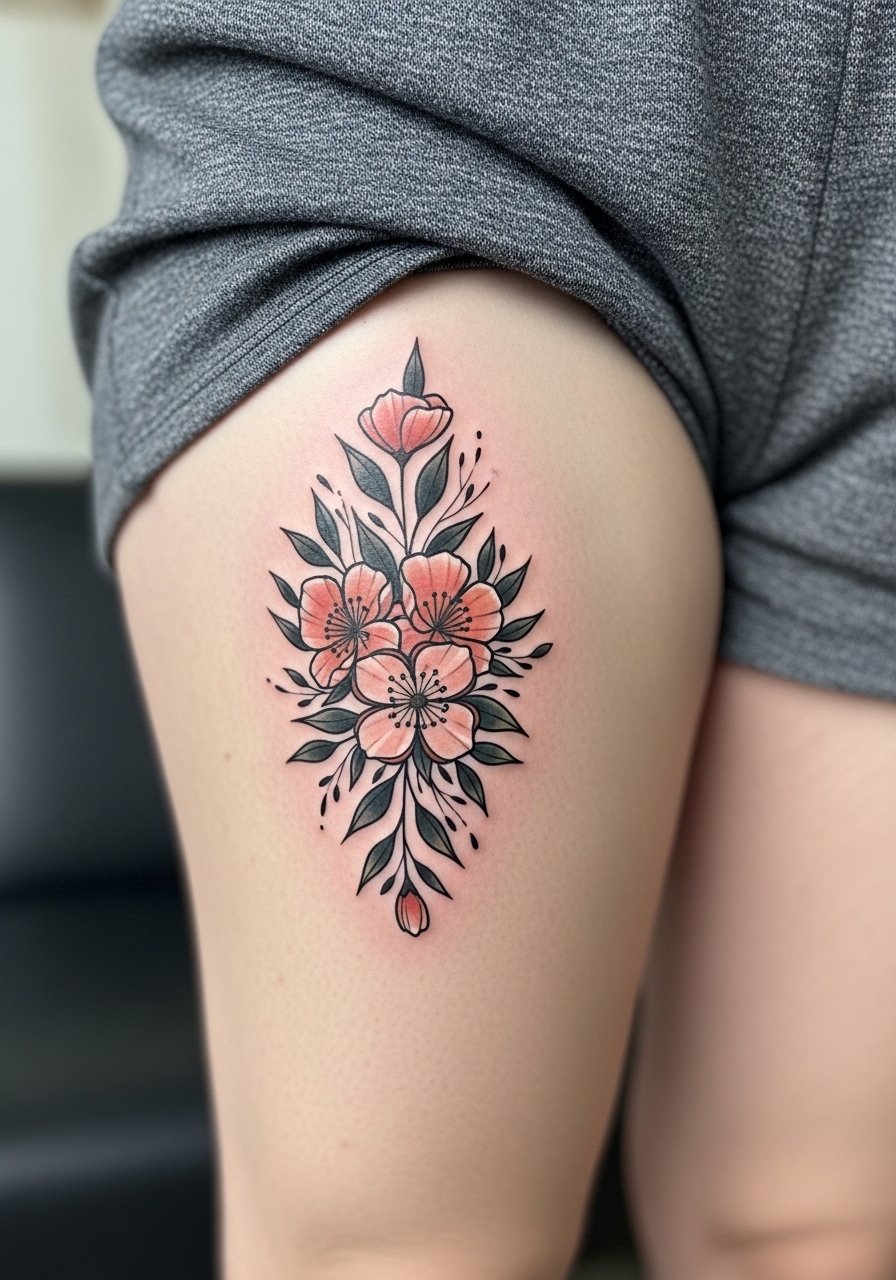
Combining Finn with botanical elements makes for a design that is both recognizable and painterly. The thigh is ideal for scaling up detail and for hiding the piece if job considerations matter. Tell your artist which features of Finn must stay legible and which can be softened into petals. The main mistake is over-detailing the face at a scale that will blur. Expect more comfort than ribcage work and two sessions for a detailed composite. For after-heal showing, pair with flowy thigh shorts to complement the silhouette.
20. Neo-traditional Marceline portrait alternative on the shoulder cap
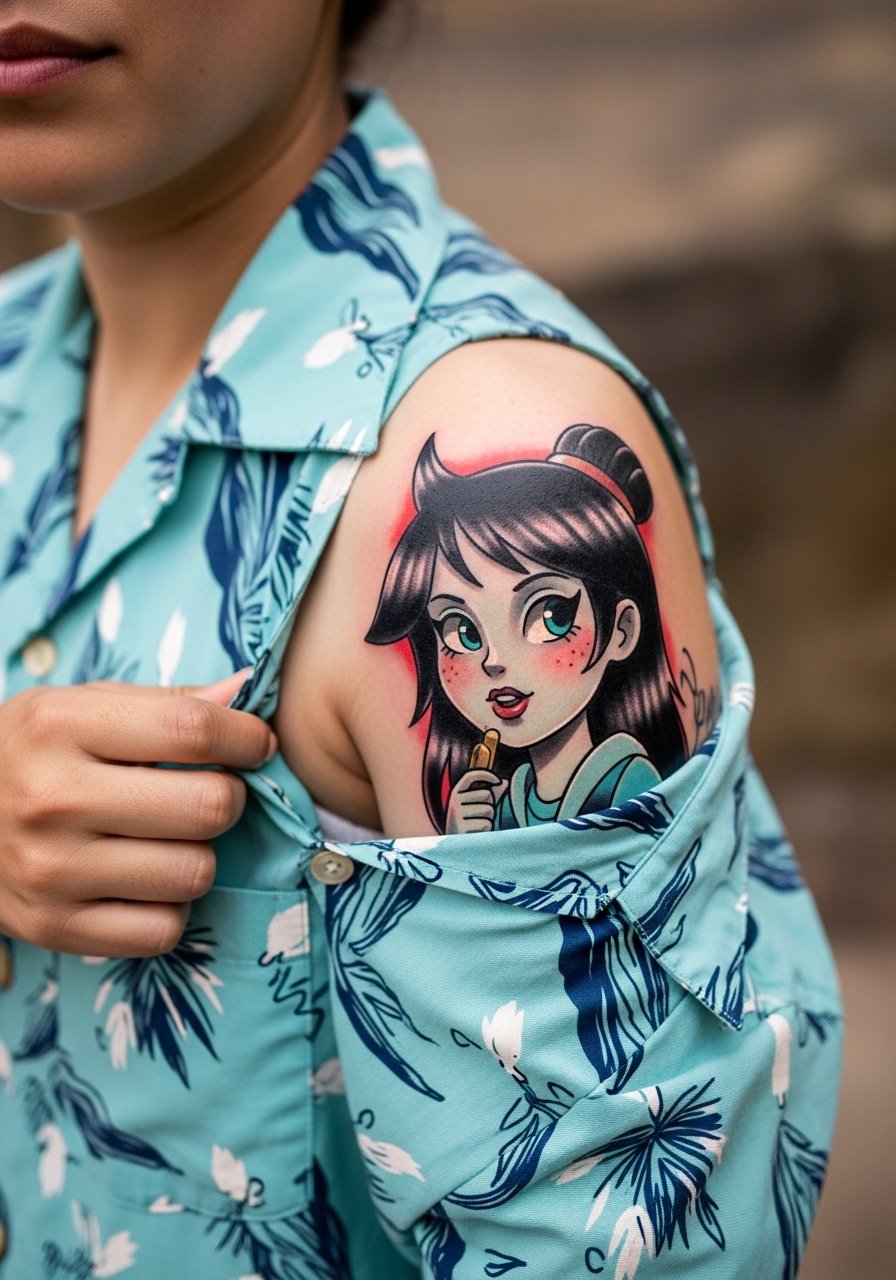
This shoulder cap placement frames a portrait in a way that lets artists build depth without crowding. In the consultation emphasize which facial expression or mood you want emphasized so the portrait reads like the character you recognize. A typical mistake is asking for photoreal detail at a small scale. Shoulder cap sessions handle color and shading well and often finish in two sittings. Dress in a button-front or camp shirt the day of to provide easy access and modest coverage during the session.
21. Tree Trunks micro-realism apple on the collarbone, alternate take
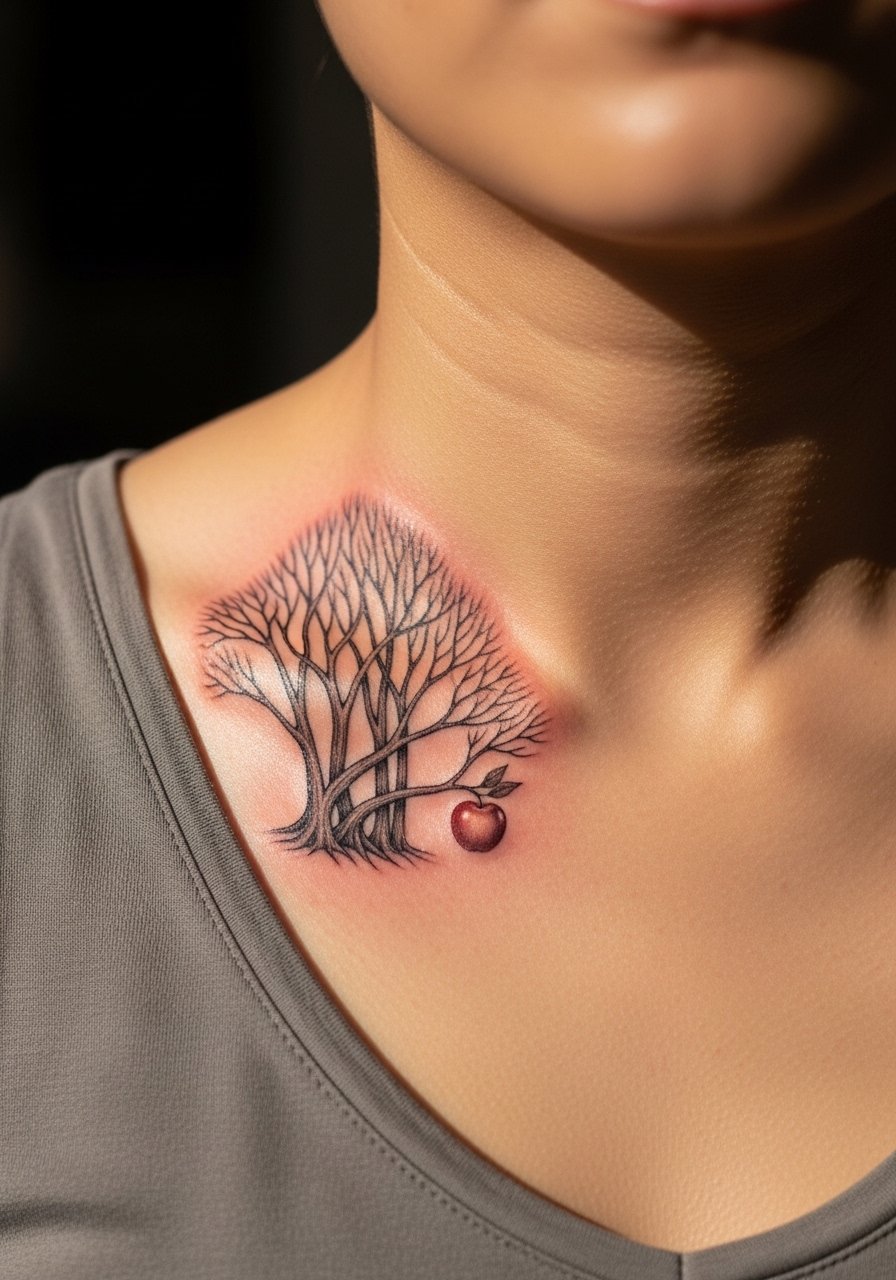
A second collarbone take keeps the same micro-realism principles but shifts composition for balance with other chest pieces. Ask for a defined highlight strategy so the apple keeps depth after pigment fainting. The collarbone can be tender and sessions are usually quick. Avoid extreme miniaturization which leads to loss of crispness. For low-profile display choose a v neck tank so the piece sits above the neckline.
22. Ornamental Adventure Time mandala on the sternum with careful framing
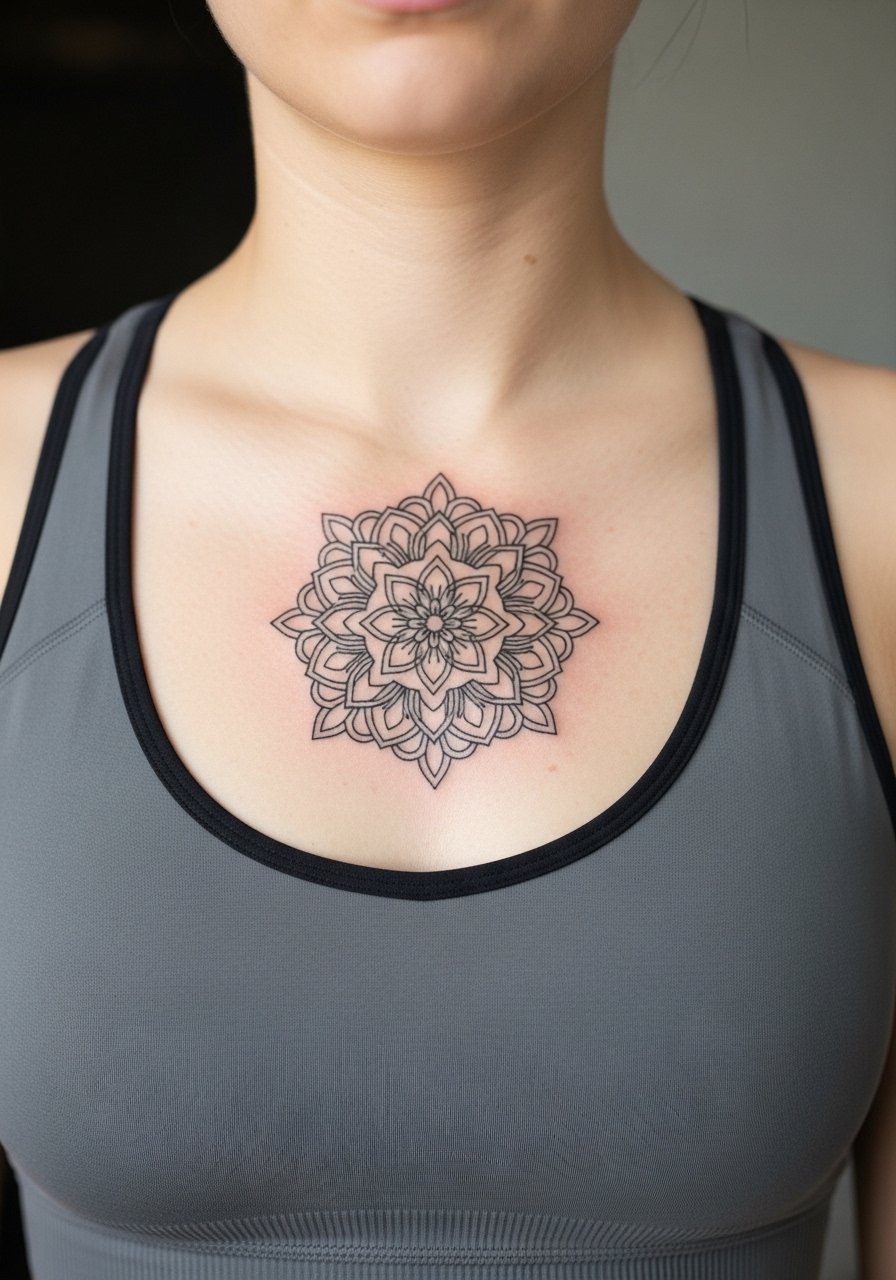
Sternum mandalas look striking but require careful spacing and symmetry because the area moves with breathing. A common error is making too-dense geometry which merges during healing. Ask for clear negative-space breaks and to start slightly larger than your mental minimum so the pattern can breathe. Sternum work is painful and artists often split sessions. Wear a fitted sports bra to the appointment for access and modest coverage. Expect a longer healing timeline due to clothing contact.
23. Lumpy Space Princess upper arm bold outline for longevity
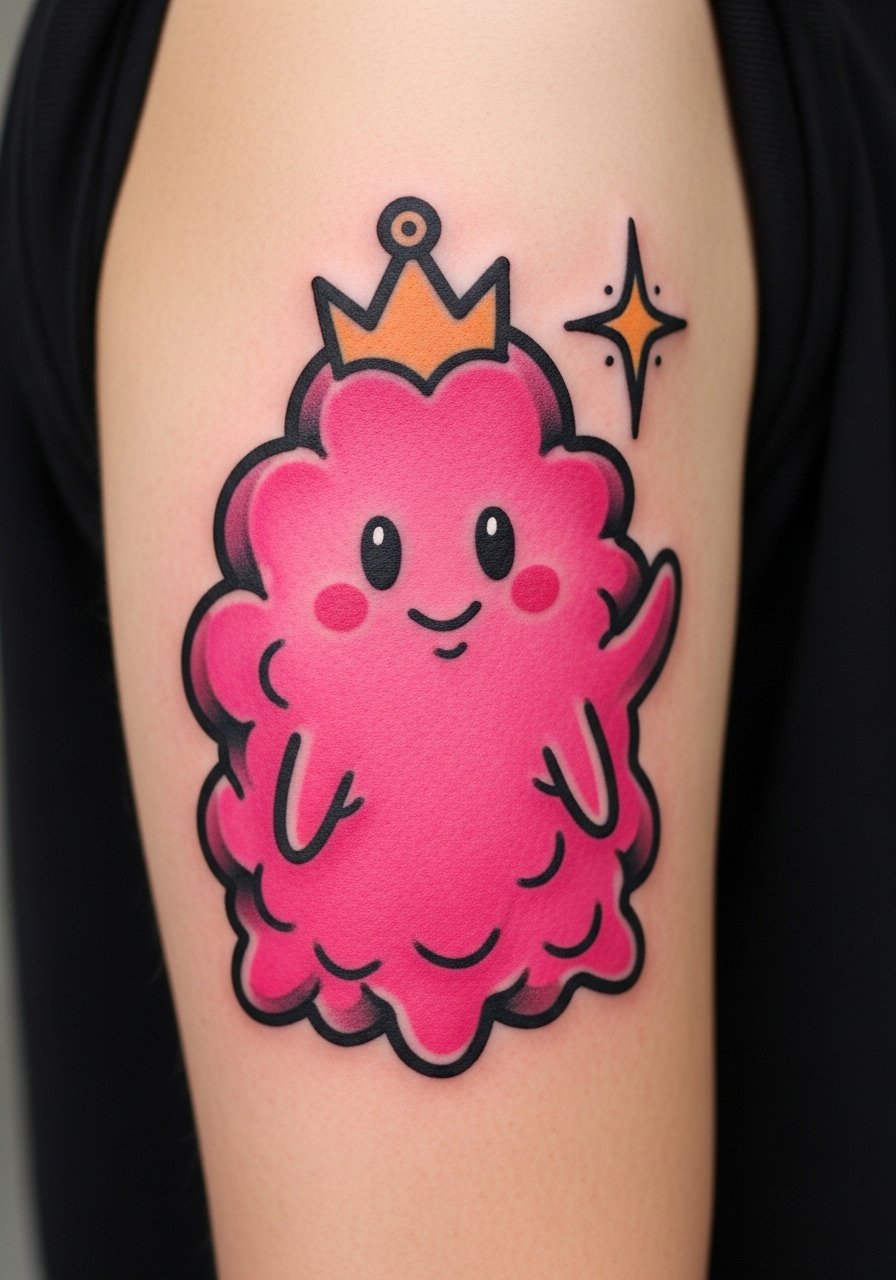
Putting Lumpy Space Princess on the upper arm gives you a highly visible piece that tolerates bold traditional outlines well. Ask for thick single-pass outlines and saturated fills to avoid early softening. The common mistake is choosing ankle scale here which expands across the arm and becomes disproportionate; plan the scale to match the arm's plane. Upper arm sessions are easier on pain and often complete in one sitting. For casual display a button camp shirt or rolled sleeve keeps the design visible without overexposure.
24. Gunther tiny flock along the jawline area, sensitive placement note
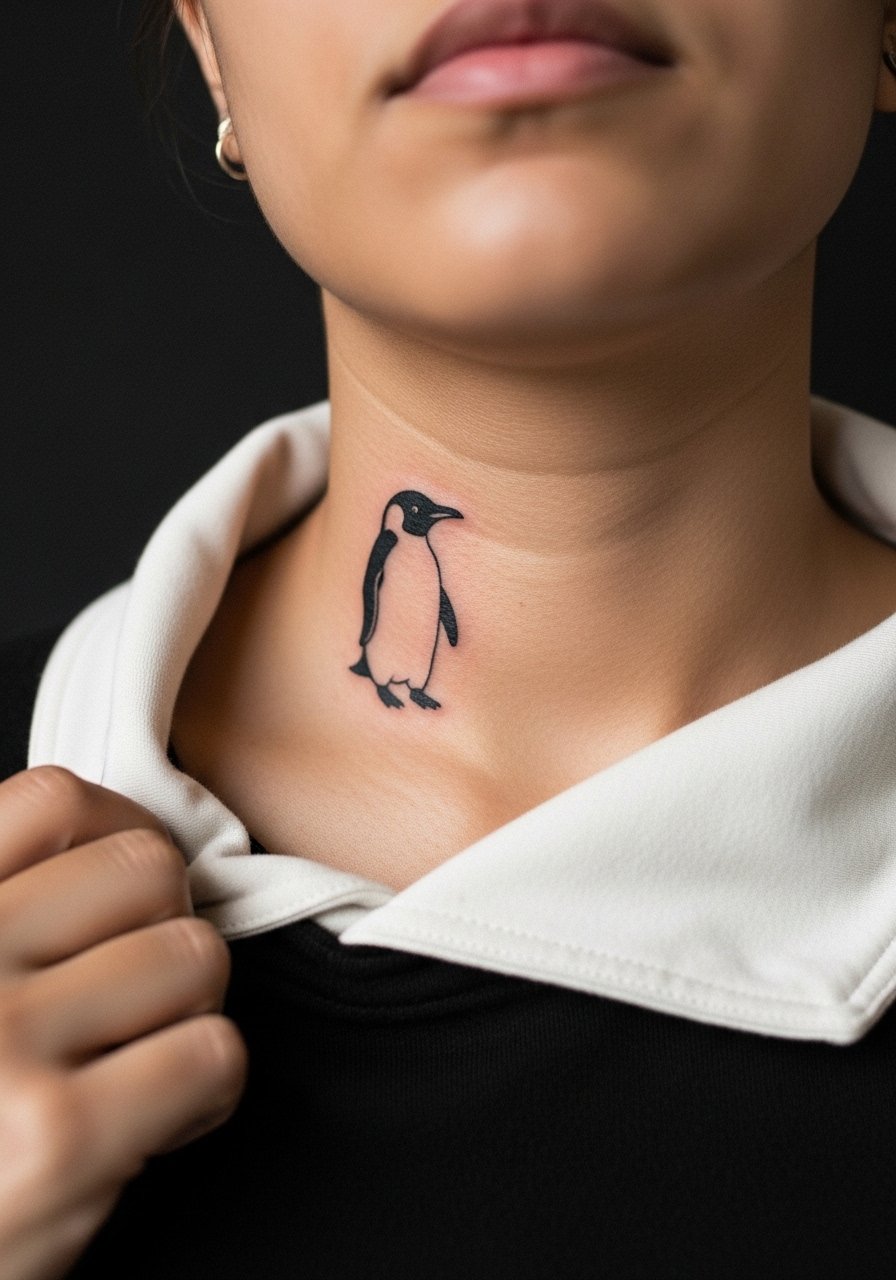
Tiny clusters near the jawline are playful but this is a sensitive placement. You need an artist experienced with shallow needle work for areas with lots of movement. The mistake is picking overly detailed faces for such a small canvas. Sessions are quick but healing may be affected by facial movement and skincare products. Wear a wide-neck shirt with the collar pulled to one side for the appointment so the area is accessible without exposing more than necessary. Consider how visible you want the flock to be in professional settings before committing.
25. Candy Kingdom panoramic calf wrap for landscape continuity
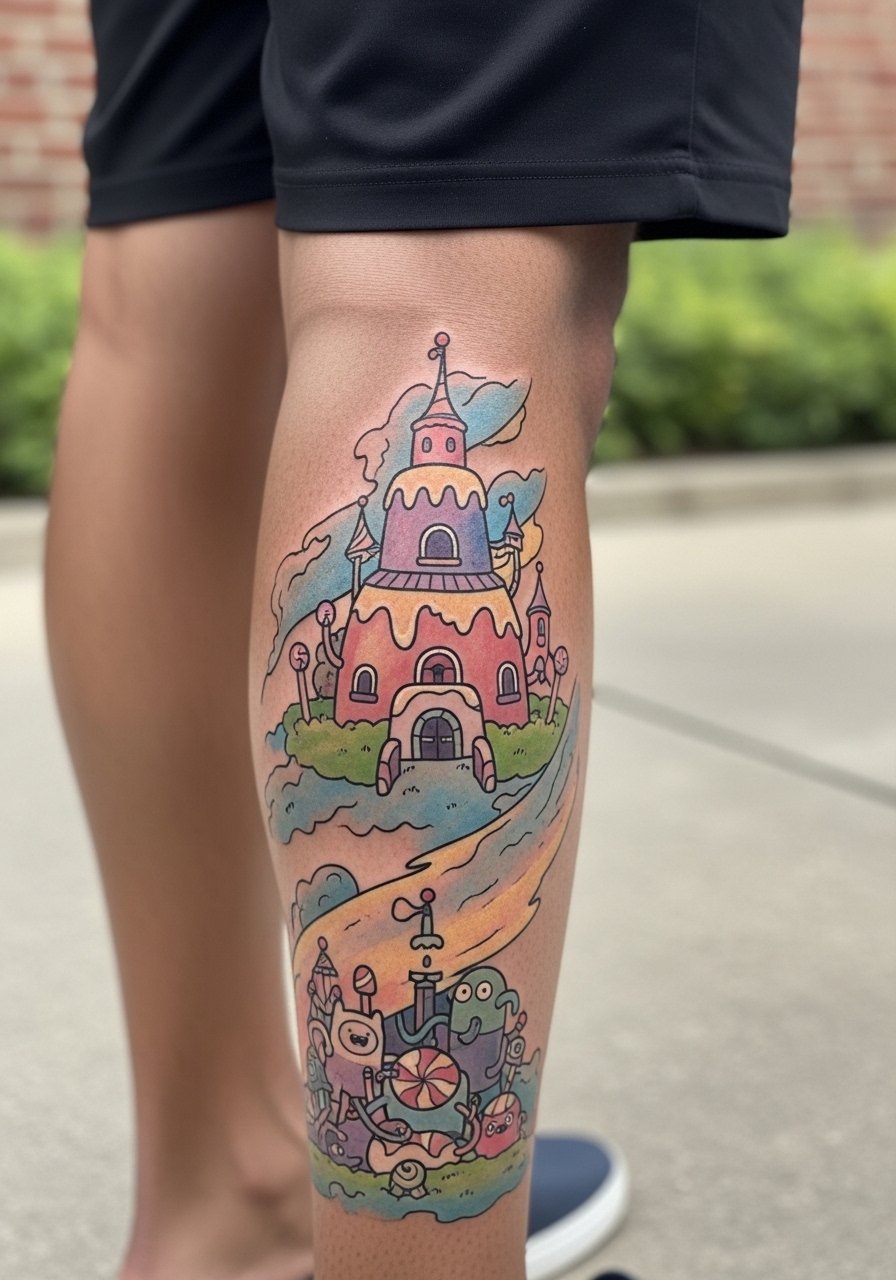
A wraparound calf scene gives you continuous narrative that reads during motion. Ask the artist to create strong outline anchors at the seam points so the wrap does not look like a single fading smear a few years on. A common oversight is failing to plan for how the piece looks when viewed from different angles. Calf wraps often take multiple sittings and are low to moderate in pain. For everyday wear choose rolled joggers or chino shorts slim to keep the piece visible in summer.
26. Patchwork sleeve idea for a half-sleeve that ages intentionally
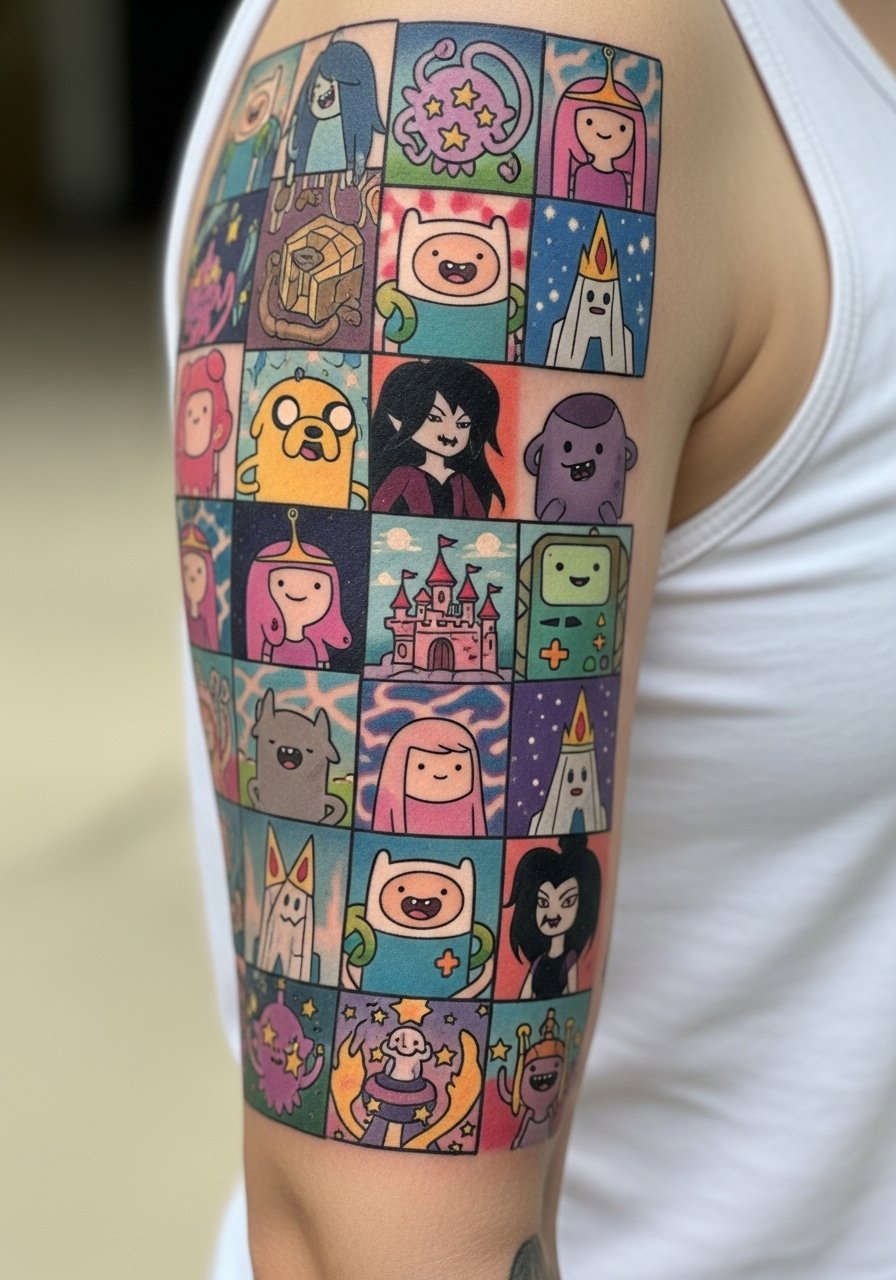
Designing a sleeve with deliberate aging in mind means you plan which elements will be the long-term anchors and which will soften. Tell the artist which characters need bold outlines and which can be faded fills. The mistake people make is assuming every micro-detail will survive. Break the work into modules across sessions to manage color saturation and to preview how healed sections integrate. This approach gives the sleeve a collected look rather than a rushed collage.
27. Tiny BMO monogram on the outer wrist
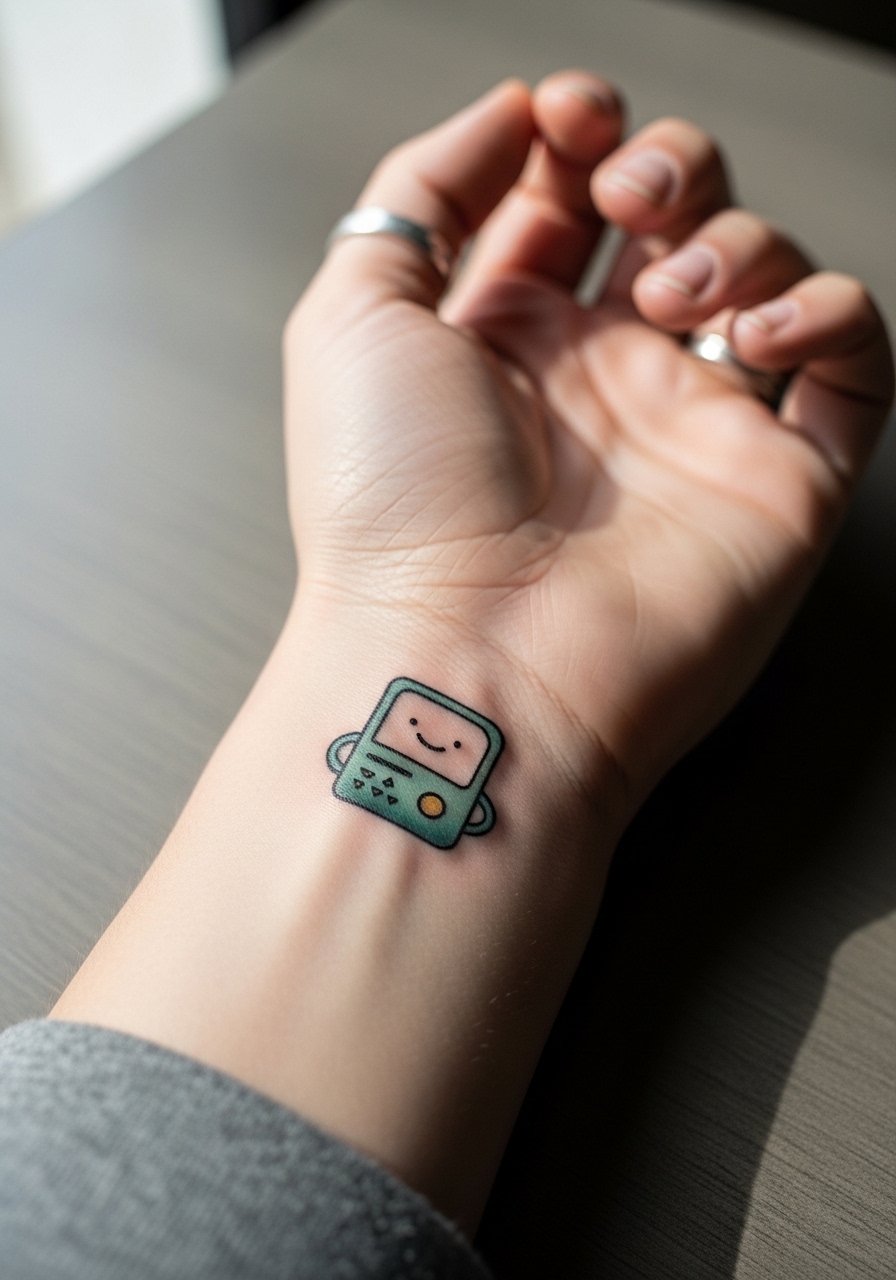
A tiny monogram feels nostalgic and is low-commitment, but wrist placement is high-motion which stresses thin linework. Ask for compact pixel blocks with a tiny margin so the letters do not bleed. The usual mistake is picking the tiniest possible scale in hopes of subtlety; slightly upscaling preserves the monogram longer. Wrist sessions are brief but can sting. For evening or casual styling try a slim accessory on the opposite wrist, such as a slim leather watch, to balance the wrist without covering the piece.
Frequently Asked Questions
Q: Will fine line Adventure Time tattoos fade faster than bold traditional ones?
A: In my experience fine line pieces tend to show softening earlier than bold traditional work because the thin channels of ink are more affected by sun and skin movement. The trade-off is subtlety. If you prefer a delicate look, plan for touch-ups at two to three years and pick lower-stretch placements like the shoulder or calf.
Q: How should I prep for a watercolor shoulder or thigh piece to protect the color?
A: Wear a button-front shirt or loose shorts to the appointment so the artist can access the area without fabric rubbing. During consultation ask for anchor outlines or pigment-rich zones that keep the watercolors readable as they fade. Artists also differ on protective film versus dry healing, so ask what method they use and why.
Q: Are wrist and finger placements worth it for tiny pixel or micro icons?
A: They can be, but expect more frequent touch-ups than on the forearm or calf because of constant washing and friction. If you want longevity, choose slightly thicker block shapes and accept the possibility of a refresh at year one or two.
Q: How do I find an artist who works in neo-traditional Adventure Time styles without naming specific shops?
A: Search hashtags like #AdventureTimeTattoo and #NeoTraditionalTattoo on social platforms, browse tattoo directories with "cartoon" filters, and check tattoo-convention guest lists or apps that book traveling artists. Look for healed photos that show the style and placement you want rather than only fresh work.
Q: What’s the best way to handle touch-ups, and when should I expect them for these styles?
A: Touch-up timing depends on placement and style. Bold blackwork can go several years before needing anything. Fine line and watercolor usually need attention by year two to three. Plan touch-up expectations in the consultation so you budget time and appointments realistically.
