
Fine line Billie Eilish tattoos dominate saved boards and short reels right now, and the trend split is obvious. Some pieces look flawless fresh and then soften into blur a year later. Others start simple and hold their shape for ages when placed and executed with intention. Below are 27 delicate Billie Eilish tattoo designs and practical notes that help you pick one that still reads like you in five years.
1. Realistic Billie Portrait on Outer Forearm
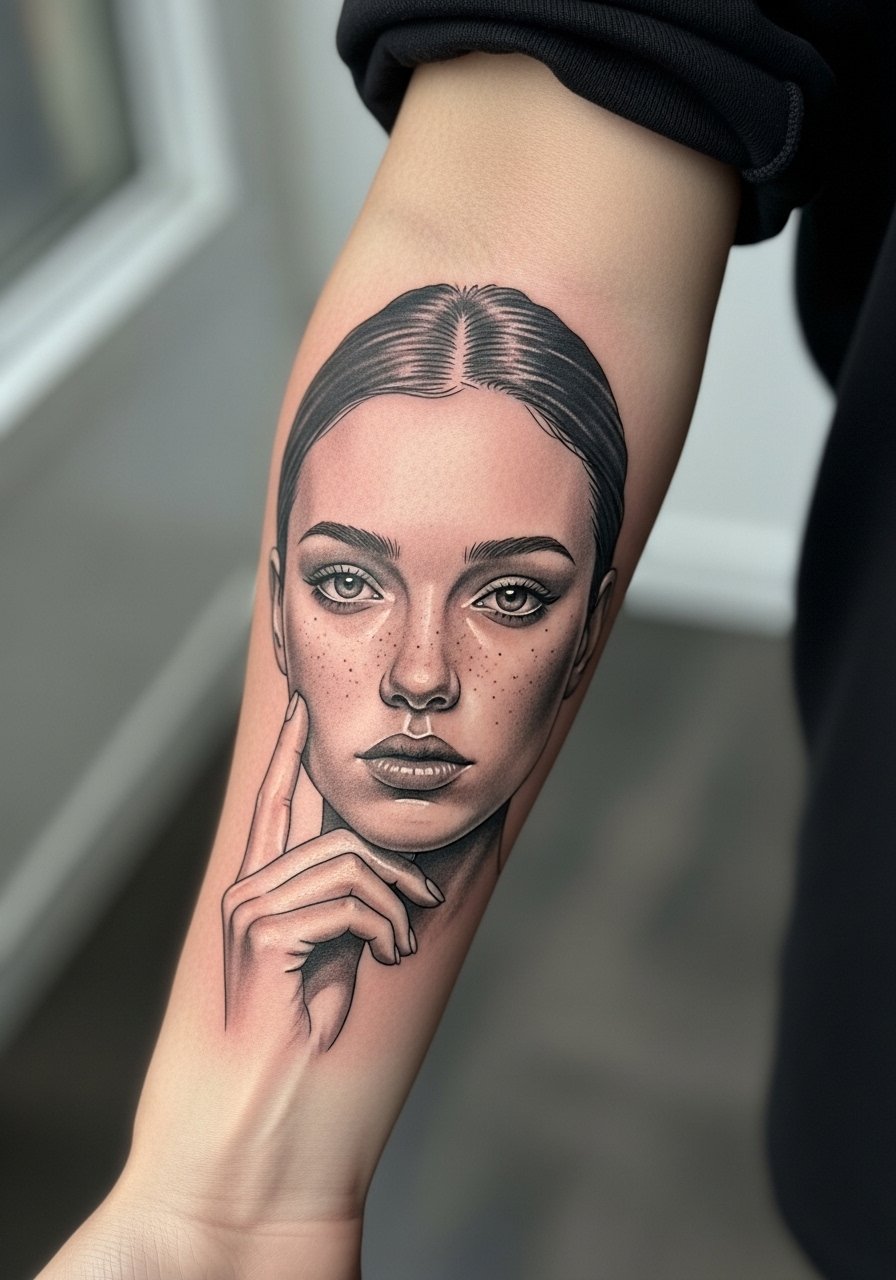
A forearm micro-realism portrait is one of the clearest ways to reference Billie while keeping the piece readable. I recommend this over a hand or chest portrait because the forearm stretches less and shows detail well. Tell your artist you want slightly simplified contours and controlled saturation so the face holds after touch-ups. Expect a 4 to 8 hour single session and a tougher day of swelling than with a tiny symbol. Common mistake is compressing too much facial detail into a small area, which blurs into a smudge by year two. For showing it off, roll up a rolled sleeve graphic tee and wear a slim chain on the opposite arm to balance attention.
2. Minimalist Neon Green Hair Outline on Wrist
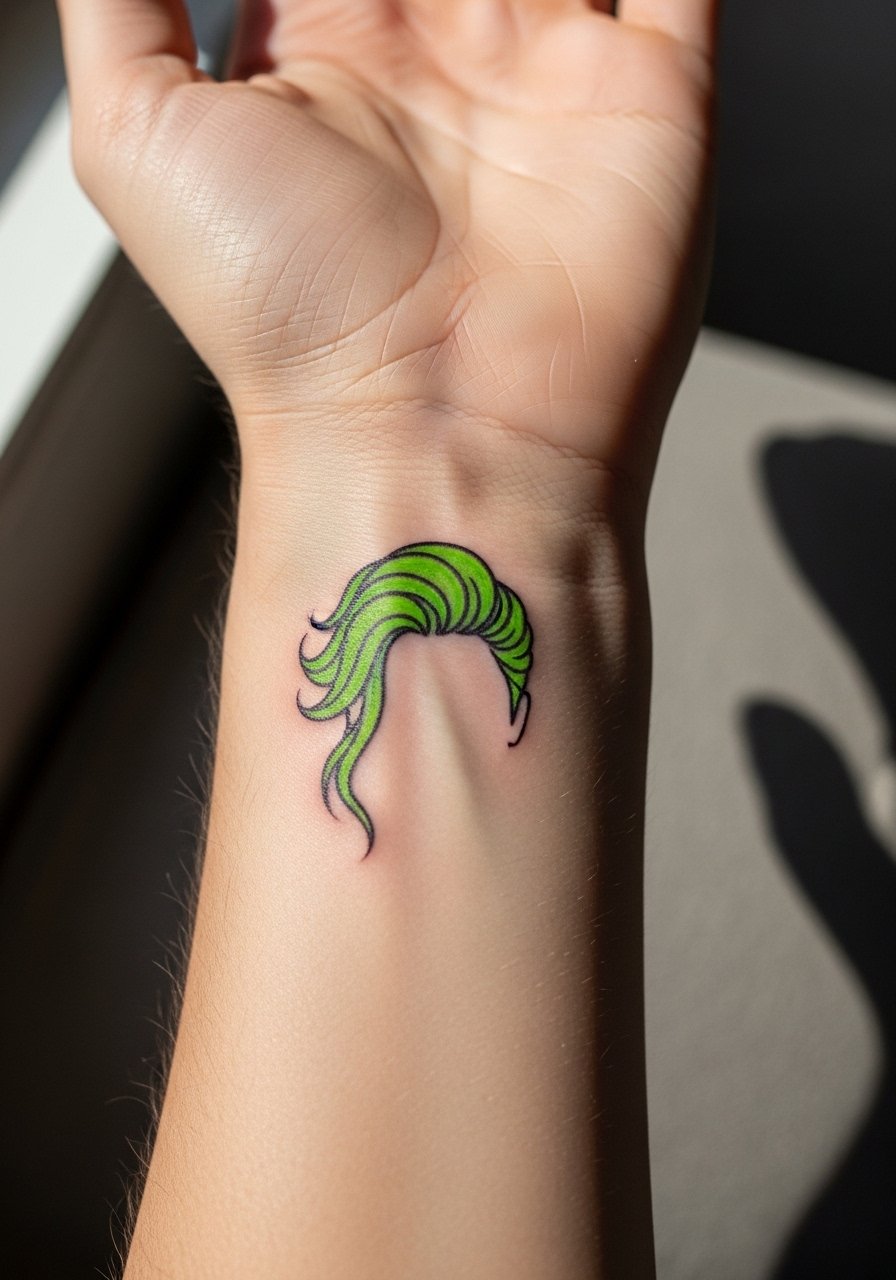
The wrist is where the Billie green accent reads as a nod rather than a portrait. Fine line with a tiny green fill looks modern and discreet. Artists split on whether fine line on wrists ages well. One camp says the skin there takes the ink shallow and fine strokes fade fast. The other camp says deeper placement and slightly heavier line weight keep it crisp. Ask your artist which approach they use and plan a touch-up at six to twelve months. Session time is quick, usually under two hours, and the biggest mistake is going too thin trying to look invisible. For wearing it out, pair with a thin leather cuff bracelet on the opposite wrist so the ink pops without crowding.
3. "What Was I Made For?" Script on Ribcage
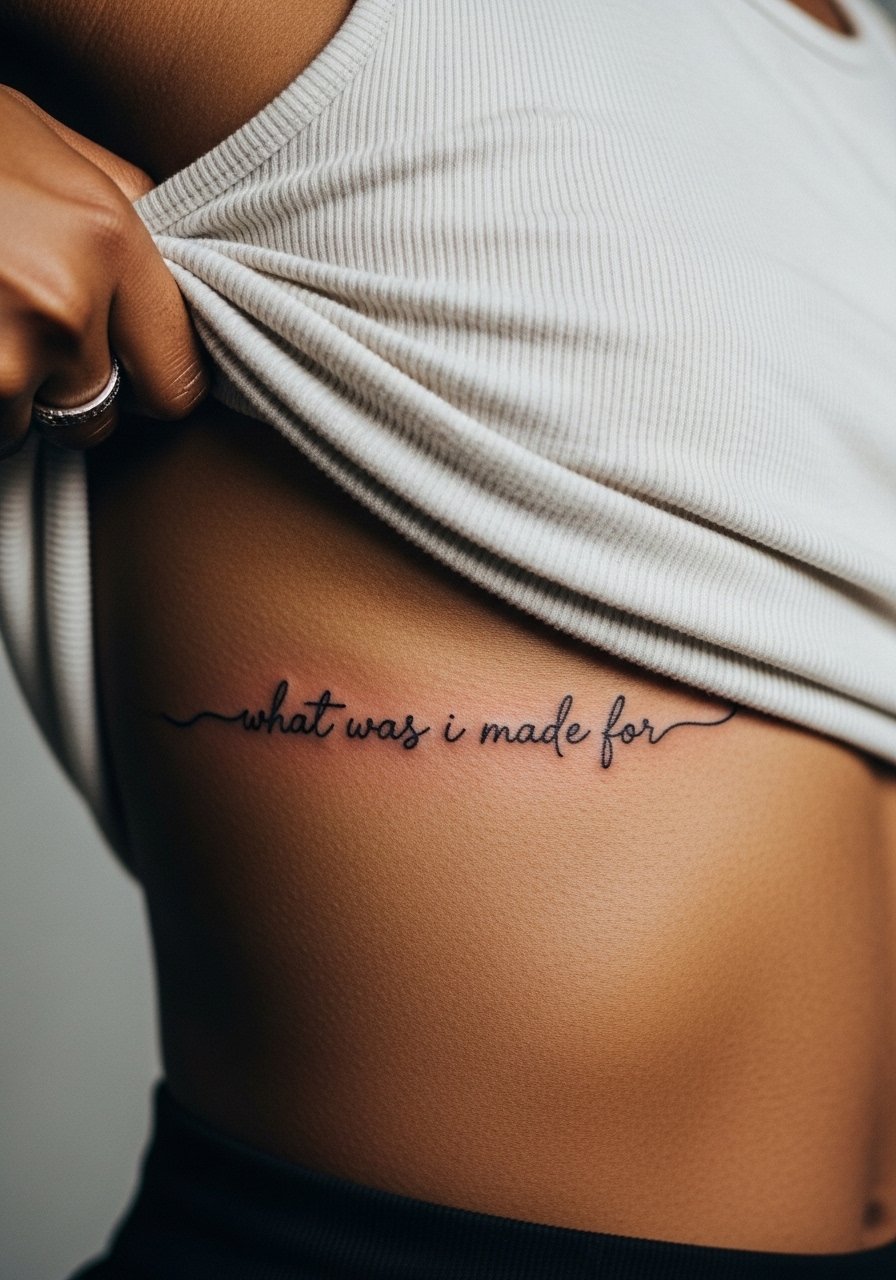
Fair warning, ribcage sessions sting and go slower than wrist work. Script here reads intimate and hidden unless you want it peeking under crop tops. Tell your artist the exact cursive style and line weight you like and ask to scale it slightly larger than the photo reference for longevity. A common regret is getting lyrics in too-small type, which fades into a gray smudge when skin shifts. Expect two shorter sessions if you want perfect spacing rather than one marathon. For session wear, choose a loose tank top you can lift easily without underwire pressure.
4. Broken Heart with Billie Eyes on Ankle
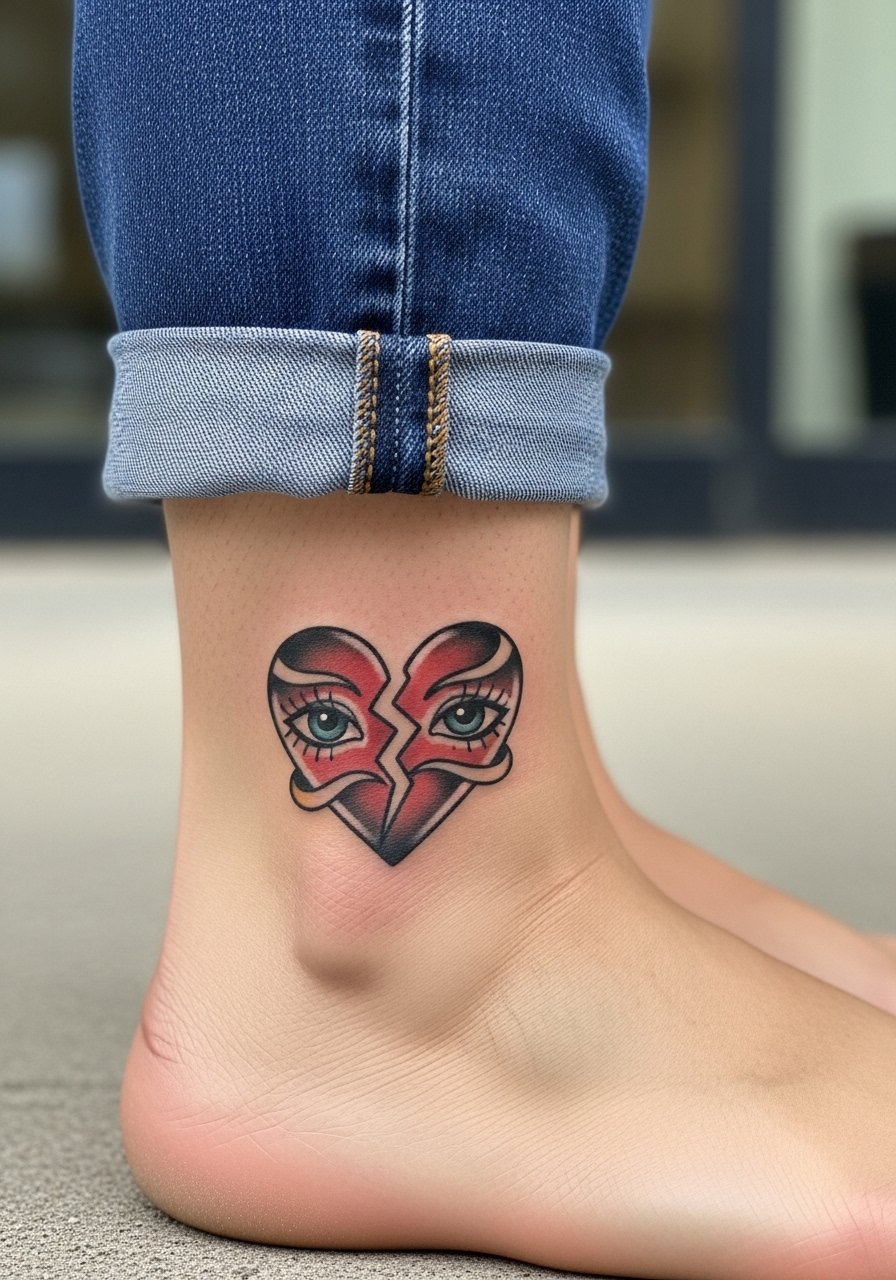
An ankle is festival-friendly and shows well with cropped jeans. This neo-traditional take pairs Billie-like sad eyes with bold outlines and a splash of red for contrast. The ankle tolerates traditional saturation better than fine line, so the design will keep its silhouette. Most people make the mistake of shrinking the motif too small to be discreet, which loses the facial detail and the heart split over time. One session is typical, and plan to avoid tight socks for two weeks. Style it with cropped straight leg jeans or a mini denim skirt to give it stage-ready visibility.
5. Watercolor Blōhsh Symbol on Shoulder
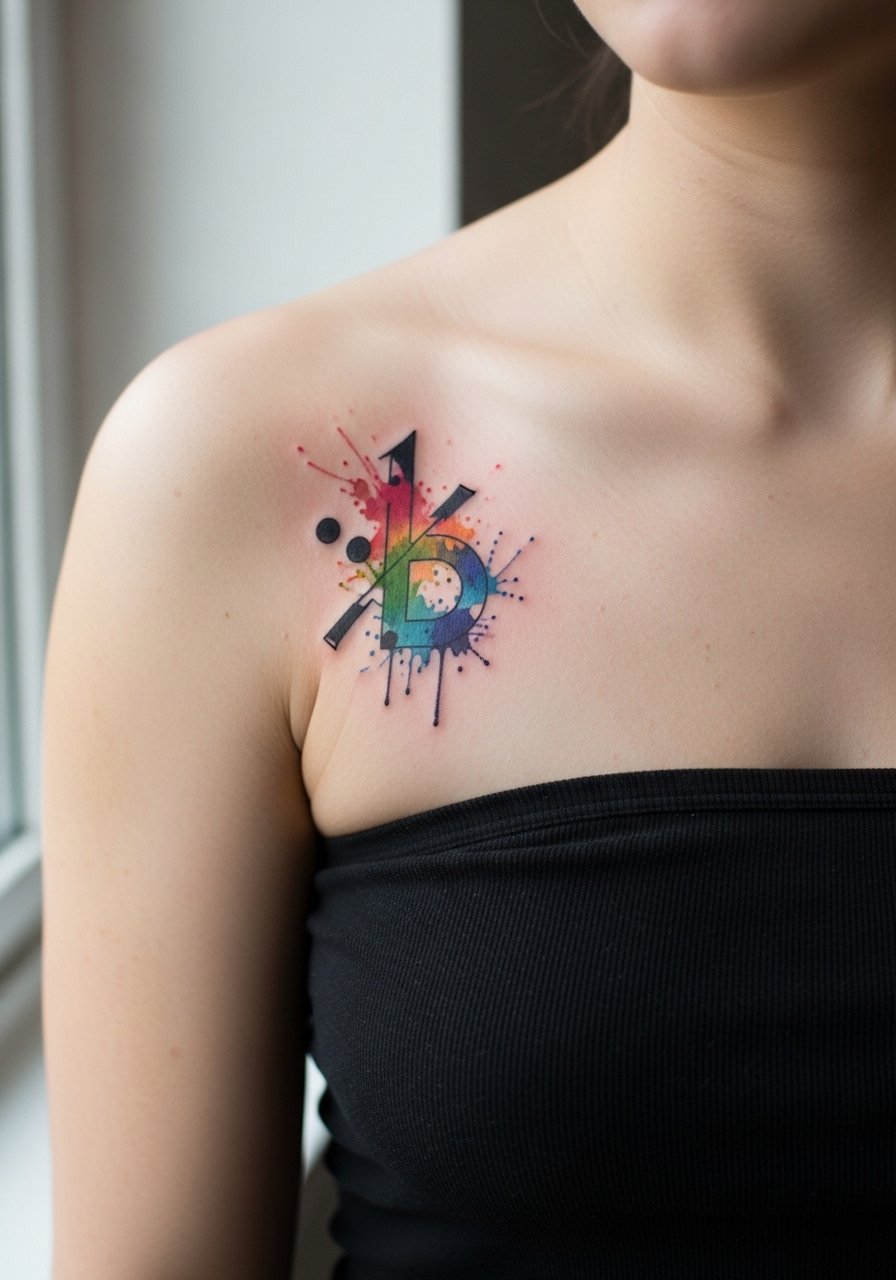
The blōhsh symbol in watercolor captures the playful side of Billie references. Watercolor on shoulder looks great under off-shoulder tops, but the style needs more space and layering to avoid rapid fade. I've seen watercolor that popped at first and flattened by year two when artists used thin saturation. Ask for slightly denser pigment and a backing outline so the shape reads longer. Two to three sessions may be needed for rich layering. For showing it off, try an off shoulder crop top in cream and baggy cargos to match Billie’s mixed textures.
6. Fine Line Dragon from Happier Than Ever on Thigh
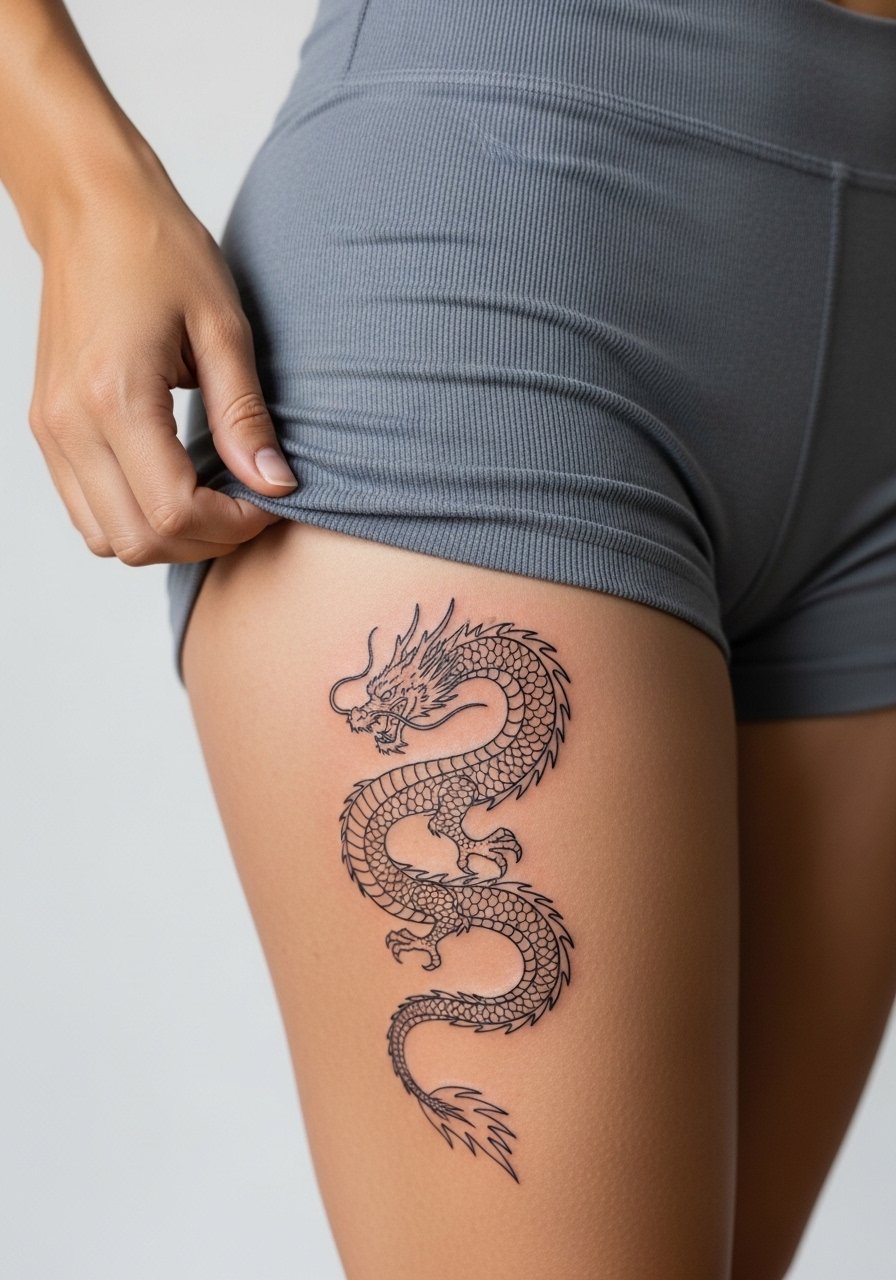
A thigh gives room to build a dragon with flowing fine line details that age better than tiny face tattoos. The outer thigh stretches less with weight changes than inner areas, so the motifs keep their composition. Expect multi-session work, often three short sittings for linework and filling. People often compress dragons into one small panel and later lose the limbs in low contrast. Tell your artist you want negative space between scales and clear spacing for stipple shading so it doesn’t turn into a gray mass. For showing it off, high-waisted shorts or a slit maxi skirt highlight the piece without tucking it away.
Pre-Session Essentials
The wrist, ribcage, shoulder, and thigh pieces above have different prep needs, and a few targeted items smooth the session and the first week.
-
Frida Ink Guard. Thinner than heavy ointments, this helps fine line portraits breathe after day three and can prevent clogged pores on delicate micro-realism work.
-
Tattoo Goo Balm. Lighter than greasy blends, it supports color retention in small green accents without the greasy film that dulls saturation.
-
Greenfinger Balm. Designed for humid climates, it absorbs quickly so shoulder watercolors and filled thigh pieces do not sit under a shiny layer.
-
After Inked Aftercare. A matte finish balm that reduces shine for photo-ready watercolor and micro-realism work during the early healing window.
-
Aquaphor Healing Ointment. A thin initial layer for the first two to three days keeps fine line wrist and ankle pieces from drying into hard scabs that pull pigment.
7. Blackwork Oversized Hoodie Silhouette on Calf
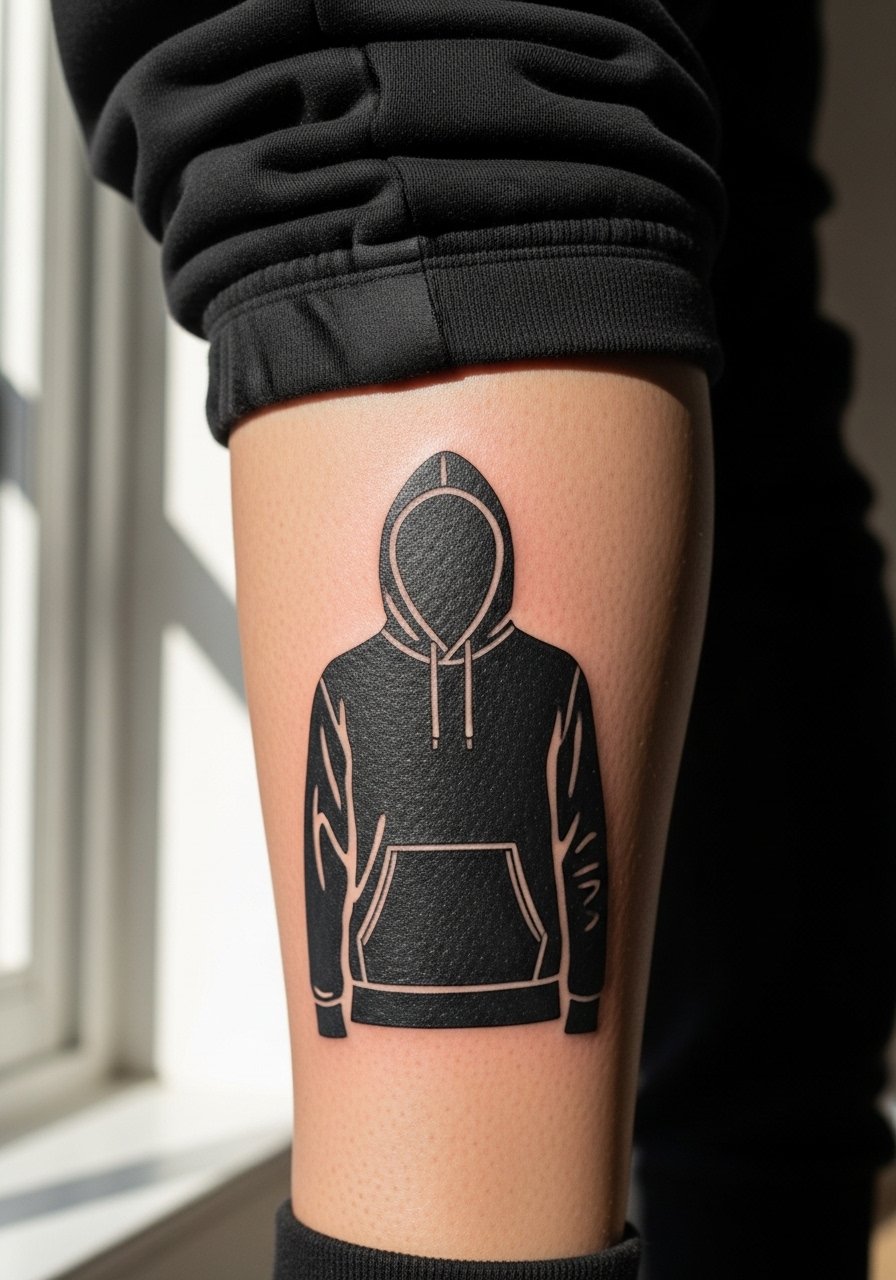
Calf pieces can be bold without shouting, and blackwork silhouettes map well to this placement. The calf tolerates saturation and heavy fills, which means the bold hoodie look will keep its silhouette at year five. One long session is common, and the main complaint is friction from pants during the first week. The worst mistake is using too little negative space inside the silhouette, which flattens texture. For footwear pairings, cuffed joggers or rolled hem jeans with combat boots frame the calf without covering the art.
8. Micro Moon and Stars with Tiny Lyrics on Collarbone
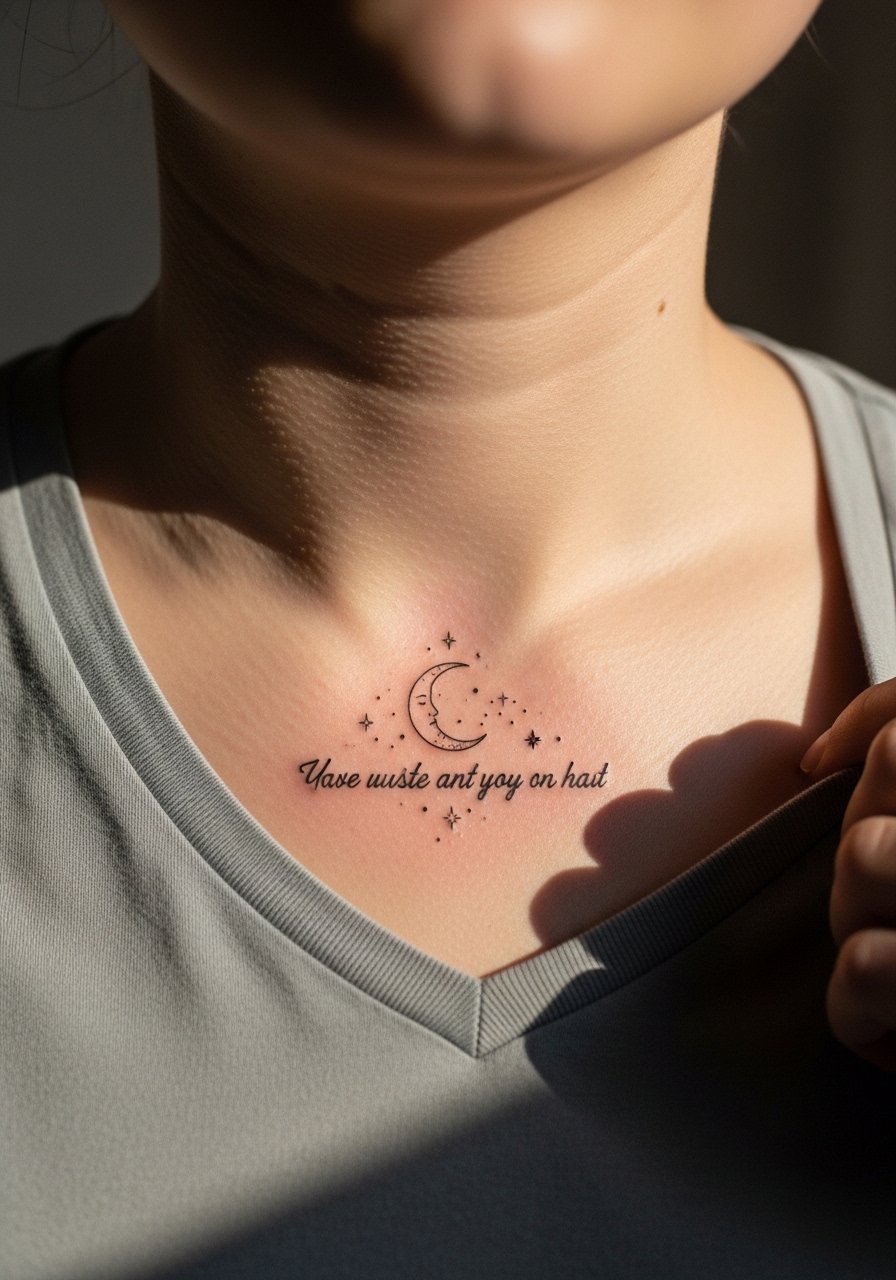
Collarbone micro-realism reads delicate and sits well with minimal jewelry. This placement heals fast but catches clothing, so avoid rough fabrics for the first week. Keep the lyric as a short fragment rather than a full line to prevent overcrowding. At one month it looks crisp, and by year two expect light softening in the dots if you live in sun-heavy climates. A common mistake is placing the words too close to the bone where scabbing can pull pigment. For show-off outfits, a v neck tee or halter top highlights the area without overshadowing the tiny work.
9. Ornamental Spine Quote "Ocean Eyes"
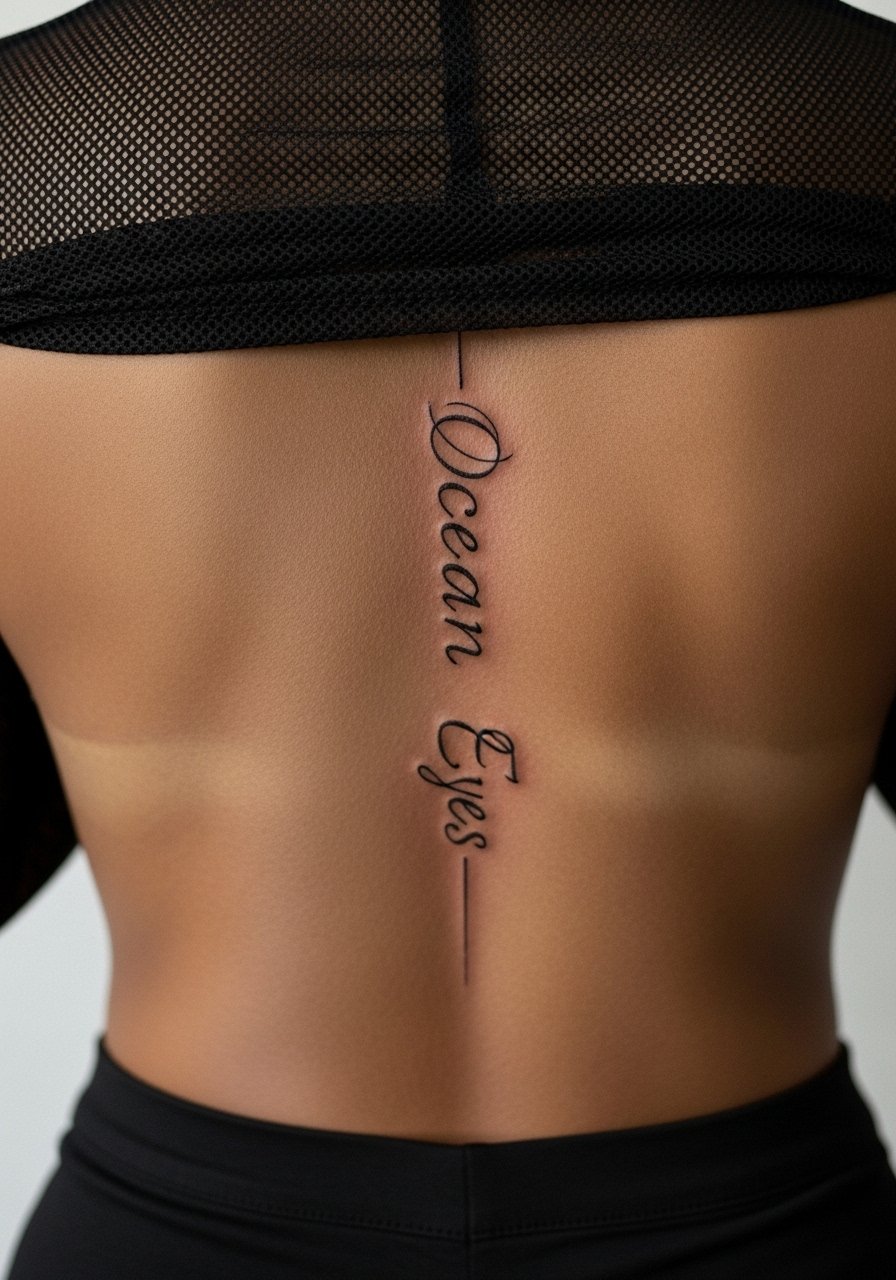
Spine scripts demand patience and multiple sessions for clean vertical flow. The skin along the spine moves a lot, so spacing and thin but confident linework matter. Artists split on fine line there. One camp warns that the vertical stretch makes dense scripts blur sooner. The competing camp says with deliberate spacing and slightly deeper passes, the script settles clean. Ask your artist where they stand and see healed photos of spines in similar sizes. Plan for two to four sessions and expect a higher pain rating than the forearm.
10. Ignorant Style Billie Face Doodle on Inner Bicep
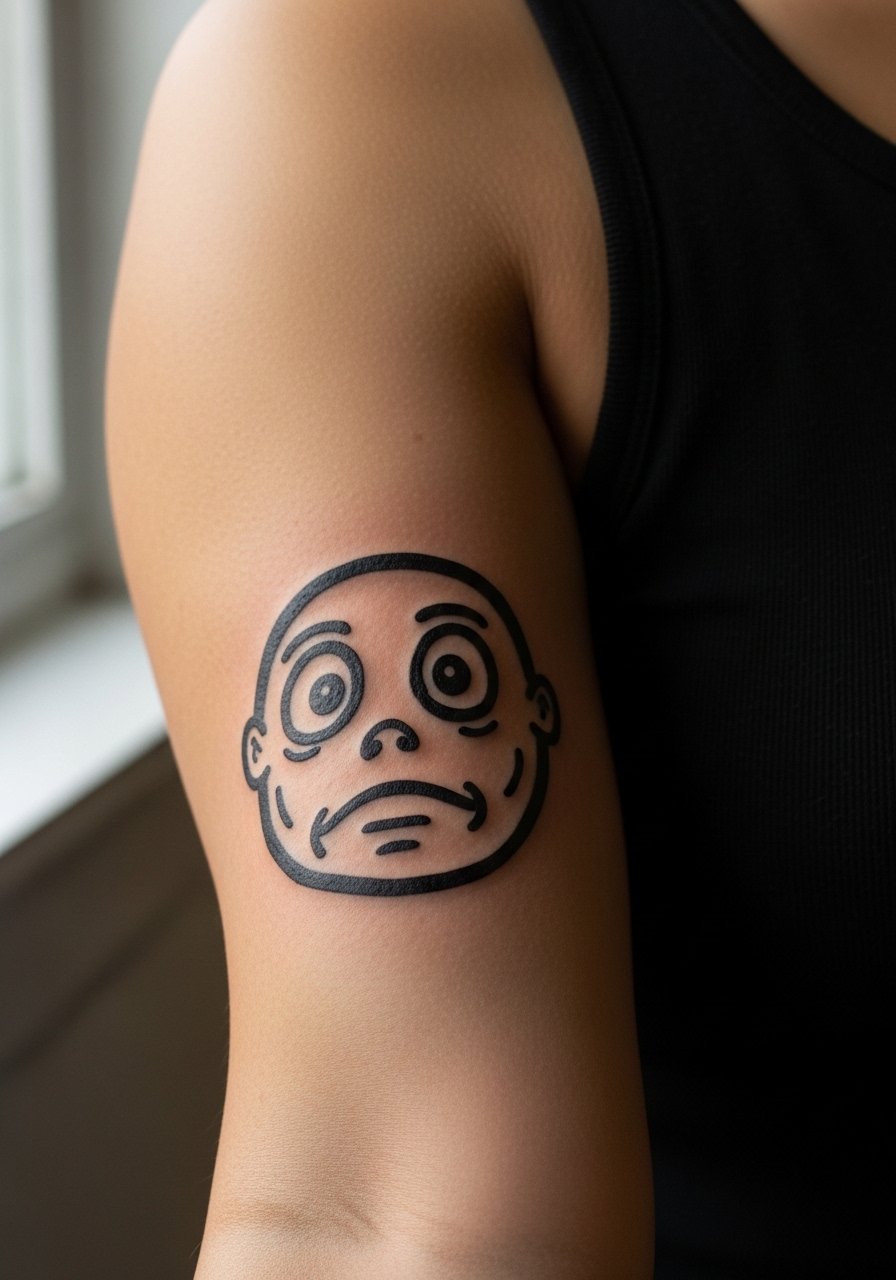
The inner bicep is a collector-friendly spot for playful, hand-drawn Billie doodles. Bold ignorant-style lines anchor well there and tolerate the softer skin better than micro-realism would. Tell your artist you want confident, thick contours and leave the tiny detail out to avoid blowout. The session feels weird because of the inner arm sensitivity but is usually a single appointment. A common error is asking for too much tiny shading in that zone, which fades into gray patches. For session comfort, wear a tank top so you can raise the arm without fabric restraint.
11. Traditional Flower Crown with Green Hair on Back of Hand
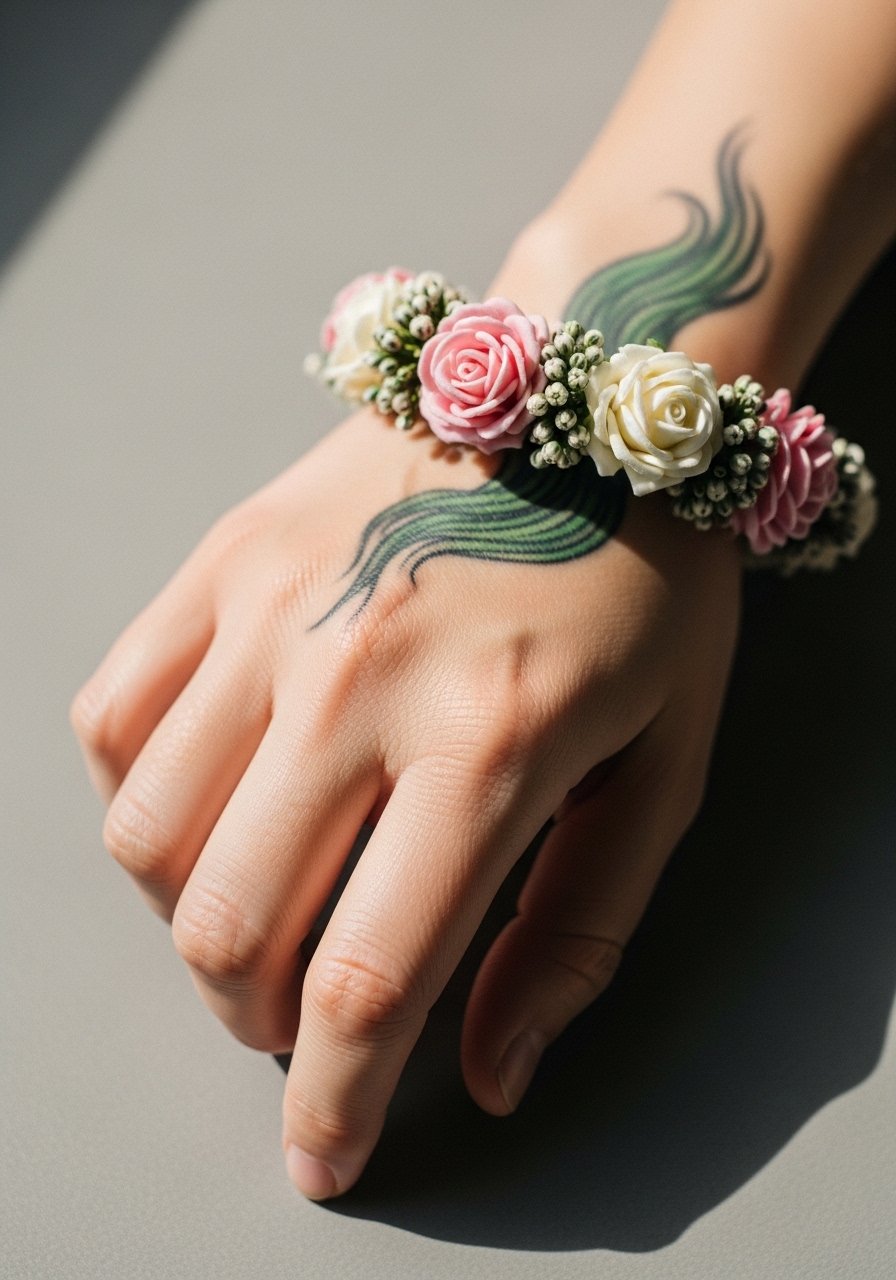
Hand tattoos show instantly, and traditional styles age more predictably there than delicate fine line. The flower crown with a pops of green gives a retro-meets-modern nod to Billie. Expect faster fading and possible touch-ups because hands face constant washing and friction. Artists often recommend heavier outlines and simplified color blocks to resist blowout. For wearing it out, avoid tight gloves and style with minimal rings. A dainty leather wrist cuff on the opposite wrist can balance the look, and remember hand placements may affect job visibility.
12. Minimalist Crossed Fingers Symbol on Finger
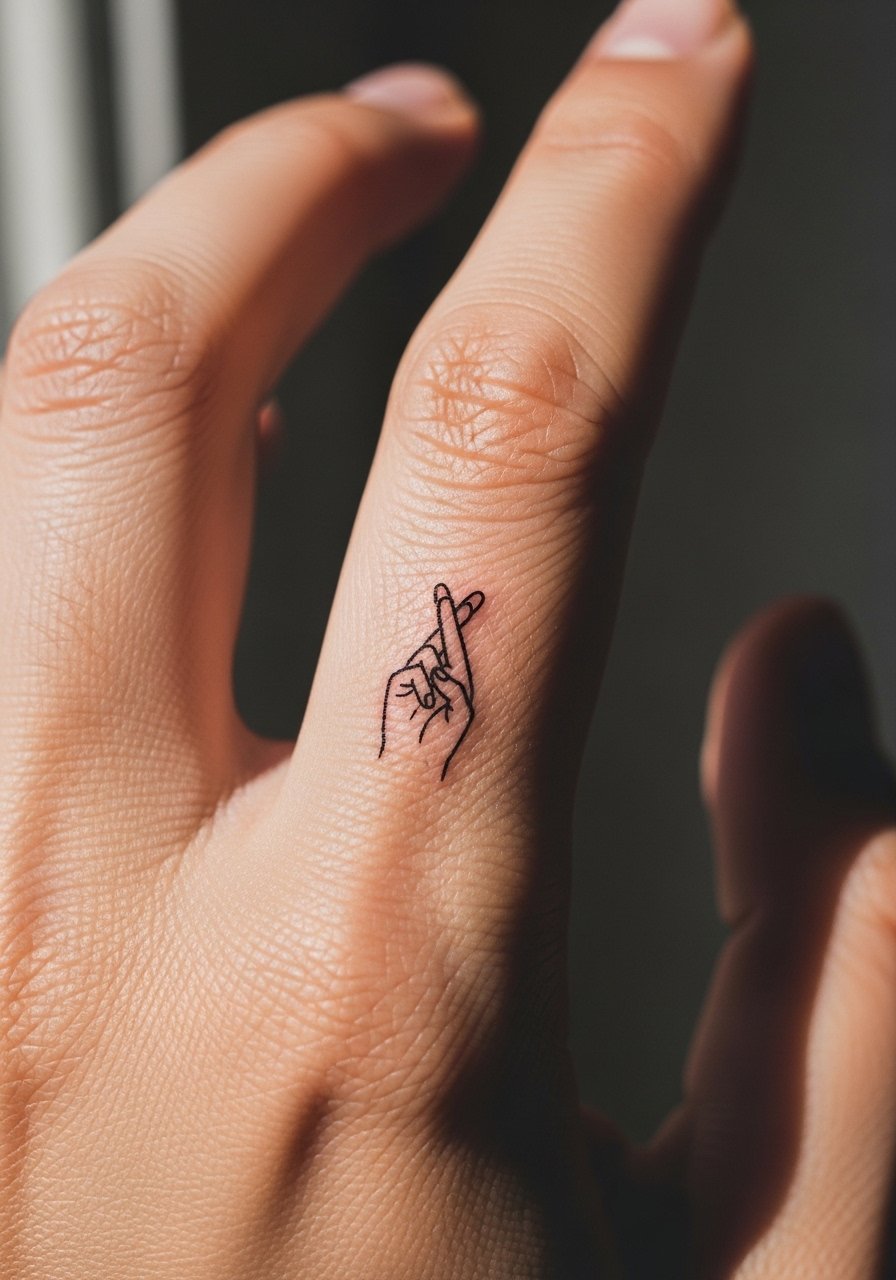
Finger micro work is quick but high maintenance. Lines fade faster due to frequent hand washing and the thin epidermis. If you want longevity, go slightly thicker than your first instinct and expect touch-ups at six to twelve months. The biggest mistake is choosing script or very fine filigree for fingers. For session day, avoid rings and wear a sleeveless top so the artist can access the hand freely. Pair with a thin stackable ring set after healing so the finger art reads intentional rather than accidental.
13. Micro-Realism Eye Detail on Back of Neck
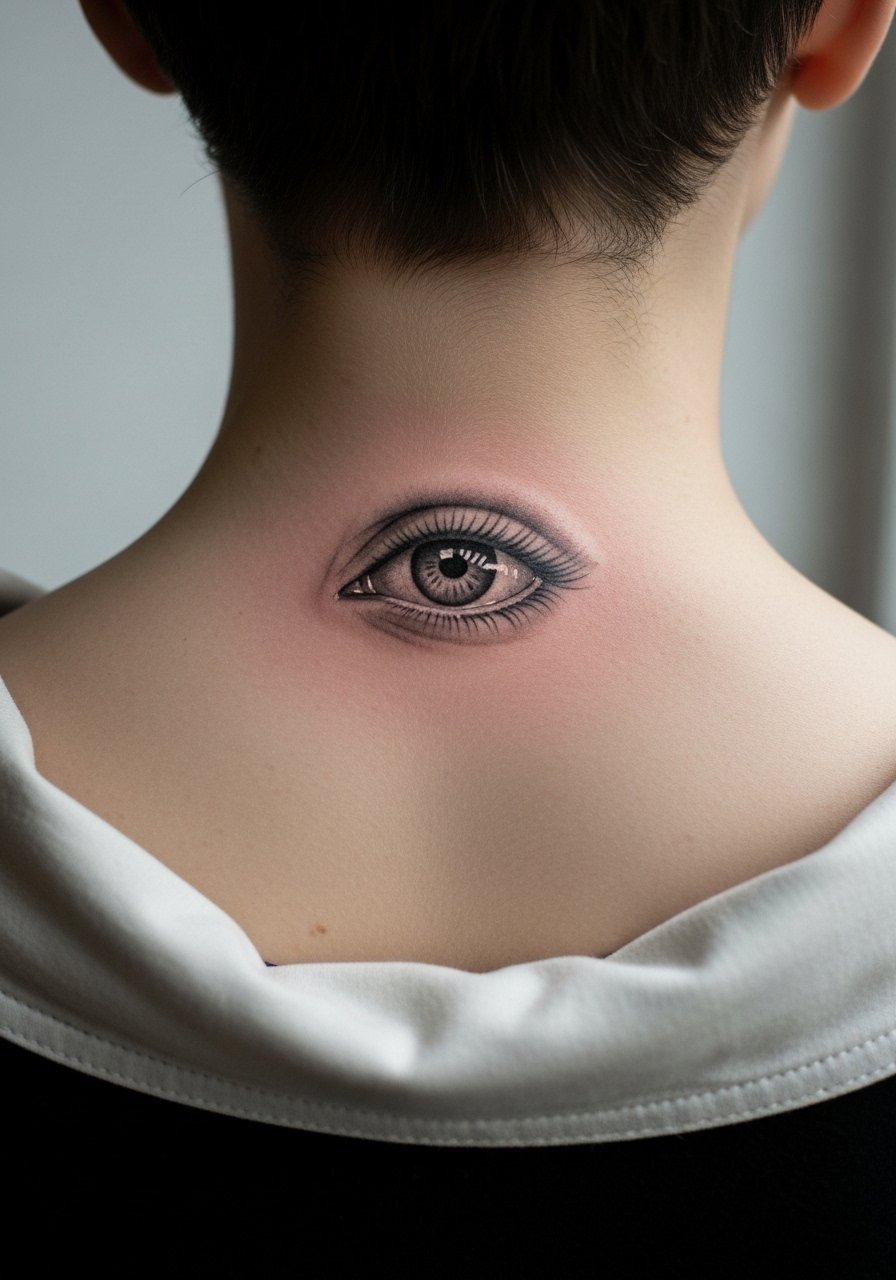
Neck placements require a measured approach because of visibility and skin texture. An eye detail on the back of the neck reads subtle under hair but visible with updos. Tell your artist you want simplified lashes and a soft gray wash rather than hyper-detailed pupils. One session usually suffices but expect sensitivity as the area is thinner. A professional consideration note applies here. Many industries still evaluate visible neck tattoos when hiring, so think about career impact before committing.
14. Thigh Patchwork: Ocean Eyes Moon + Bad Guy Heart
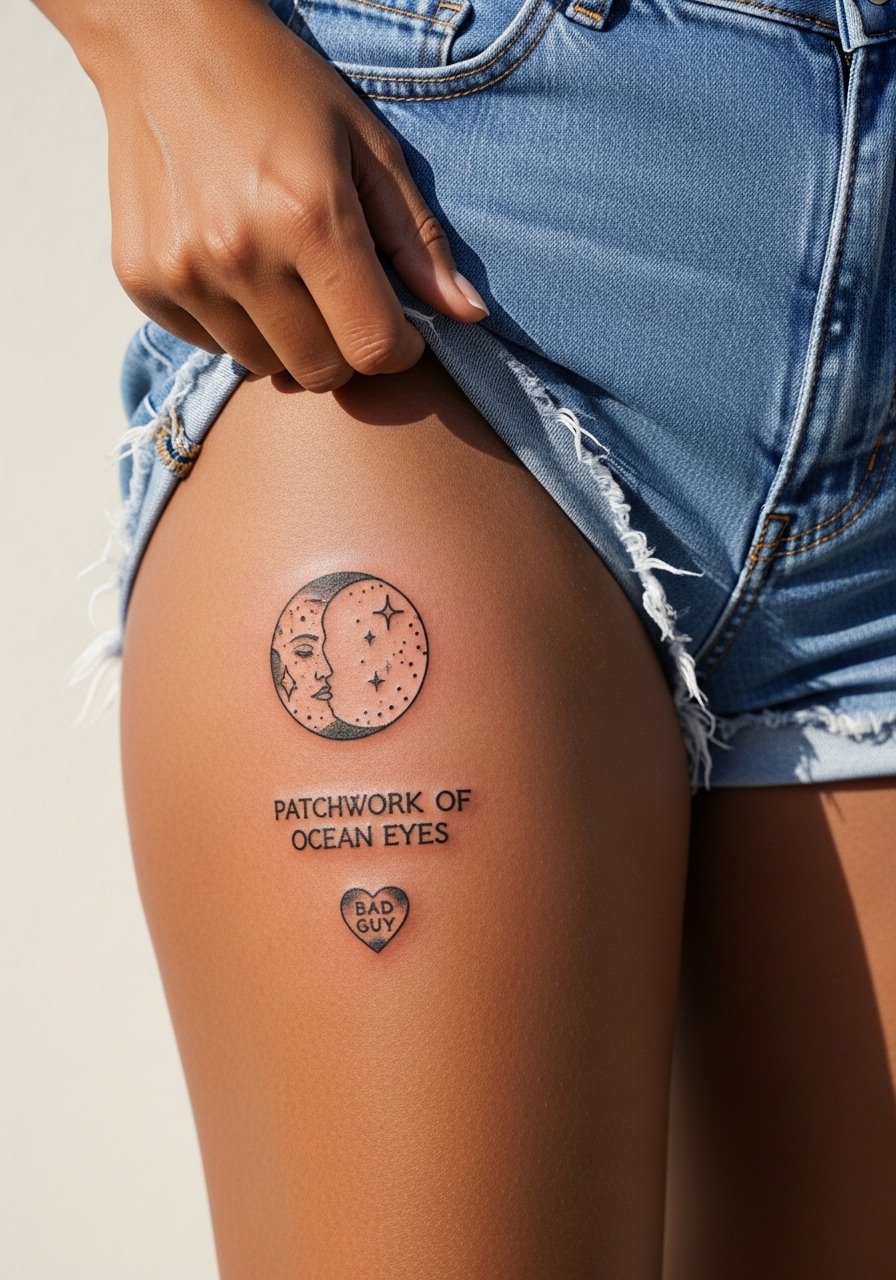
A thigh patchwork lets you combine album symbols and grow the collection into a larger piece over time. Thigh skin holds pigments and spacing well, which helps micro elements age favorably. Stagger the elements in separate sessions so you can see how each heals before adding the next. The common mistake is packing too many tiny motifs into one sitting, which can look busy when settled. Show it with high-waisted shorts or fishnets for edge. For session day, wear loose basketball shorts you can pull up easily and consider a high waisted denim shorts option for comfort.
15. Tiny Blōhsh Behind the Ear
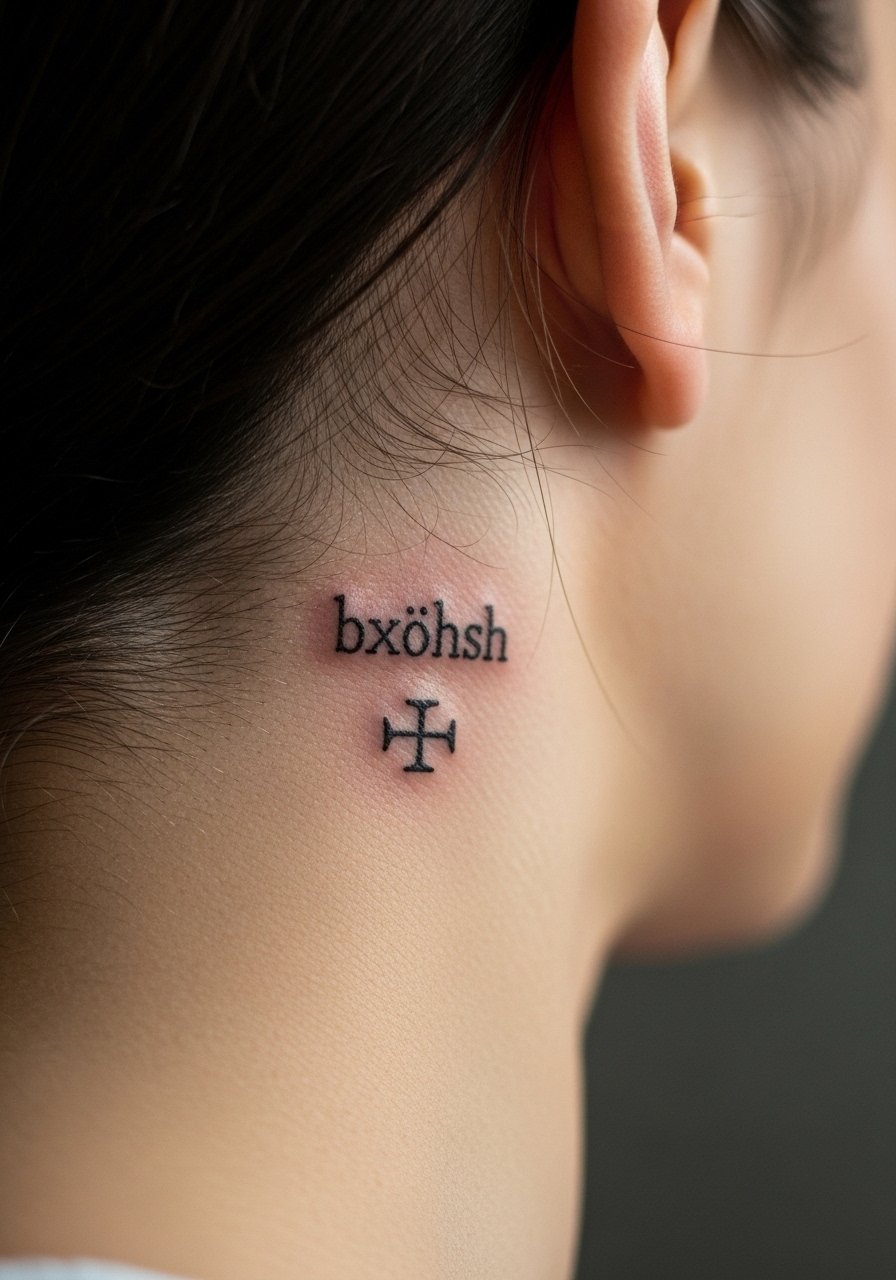
Behind-the-ear placements are discrete and feel like a secret nod to fandom. Keep the motif very small and simple so the curls of hair and movement do not distort the mark. The biggest error is pushing too much detail into that tiny zone. Healing is quick but the area is sensitive, and the shot is best for those who like subtle references. For visibility, wear hair up or half-up styles so the mark peeks through.
16. Collarbone Oversized Hoodie Outline Neo-Traditional
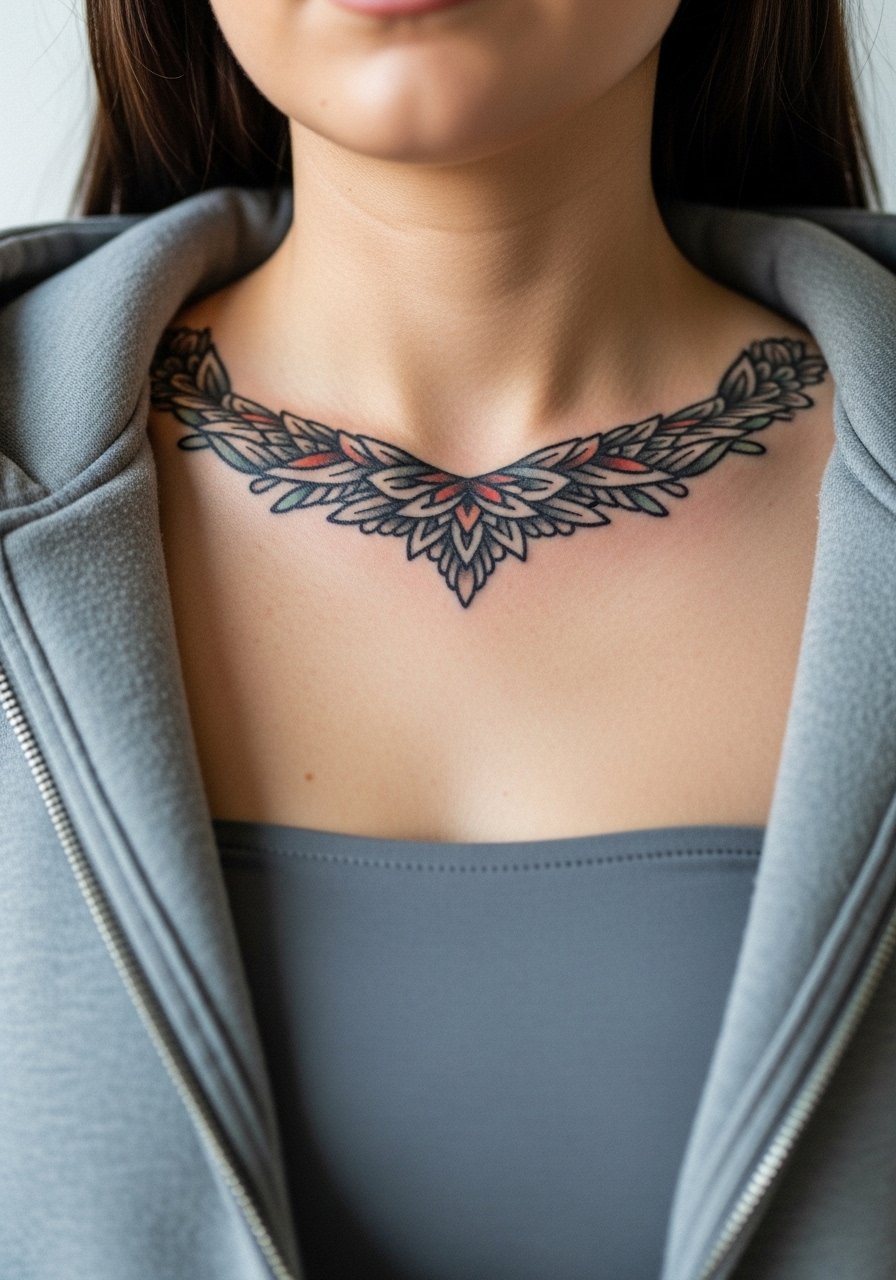
A collarbone hoodie outline plays on Billie’s signature baggy aesthetic and frames the upper chest nicely. Oversized outlines need room, so scale the hood to sit above the clavicle rather than hugging it. Expect mild discomfort near the bone and avoid very tight tops during healing. For display, a halter top crop or a v-neck tee keeps the neckline clean and the silhouette readable.
17. UV-Reactive Crossed Fingers for Nightlife
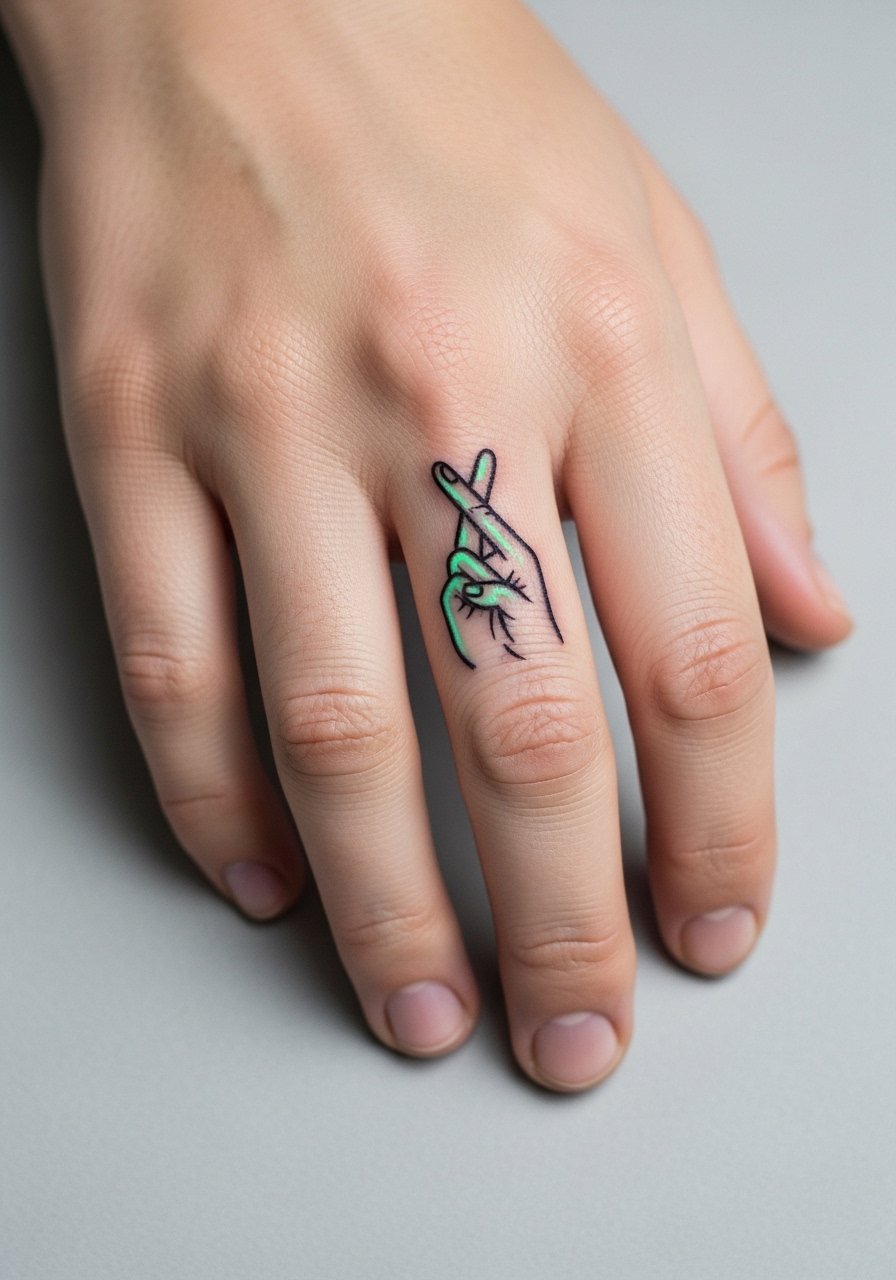
UV-reactive ink is a niche move for nightlife and club scenes. Be aware that UV pigments are treated differently and can look faint in daylight. The main mistake people make is expecting the glow to replace good blackline structure. If you want both, combine a small black line with a UV accent underneath. Ask about pigment testing for skin tone compatibility. Keep finger motifs simple and accept that touch-ups will be more frequent.
18. Small Lyric Fragment on Inner Wrist
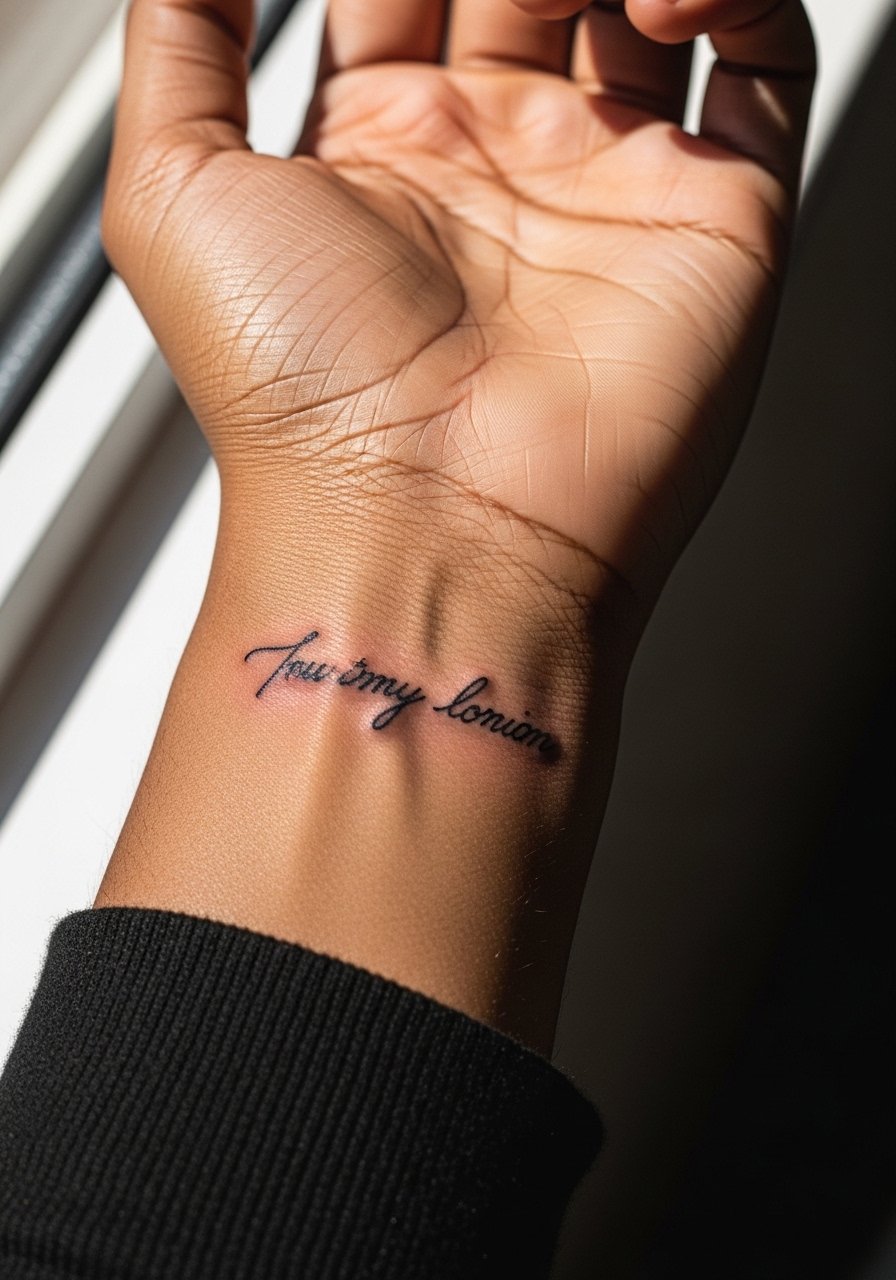
Inner wrist lyrics make personal tributes readable without shouting. Fine line works here but the wrist is a friction zone. To avoid rapid fading, ask for slightly bolder letterforms and plan a touch-up at six months. The mistake is squeezing long phrases in tiny type. For the appointment, wear a sleeveless tank so the artist has clear access. For jewelry pairing, a neutral crewneck or a rolled sleeve works well and a crewneck sweater can frame it in cooler months.
19. Forearm Micro Portrait with Stipple Shading
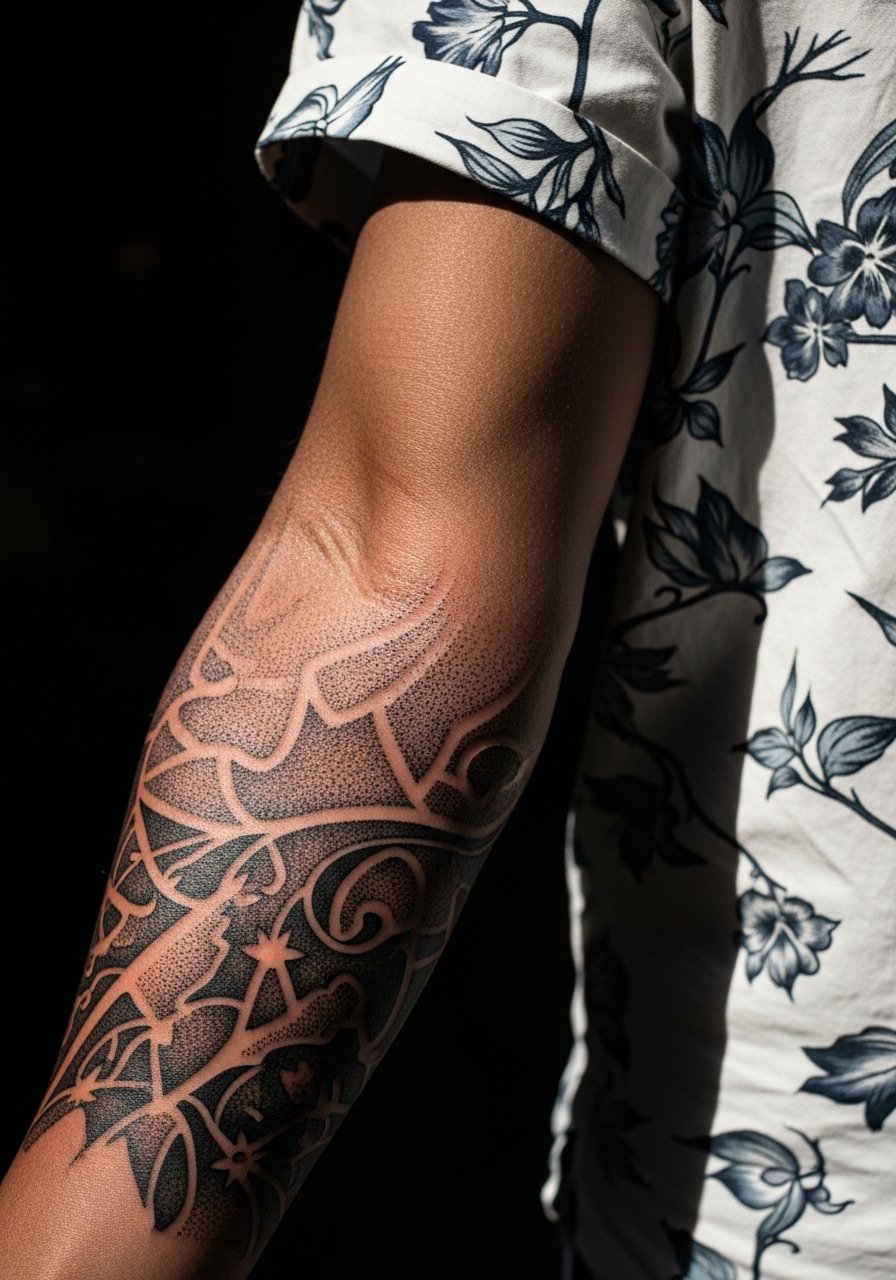
Stipple shading gives portraits a textured, breathable look that ages differently than smooth gray wash. On the forearm it creates dimension without heavy saturation, which helps prevent large gray patches later. Tell your artist you prefer dot-based shading to blended gray to avoid that soft smudge effect in a few years. Sessions are long but can be split. For wardrobe, wear a loose button down shirt you can pull aside for access and still look pulled together.
20. Ankle Neo-Traditional Heart and Tears Variation
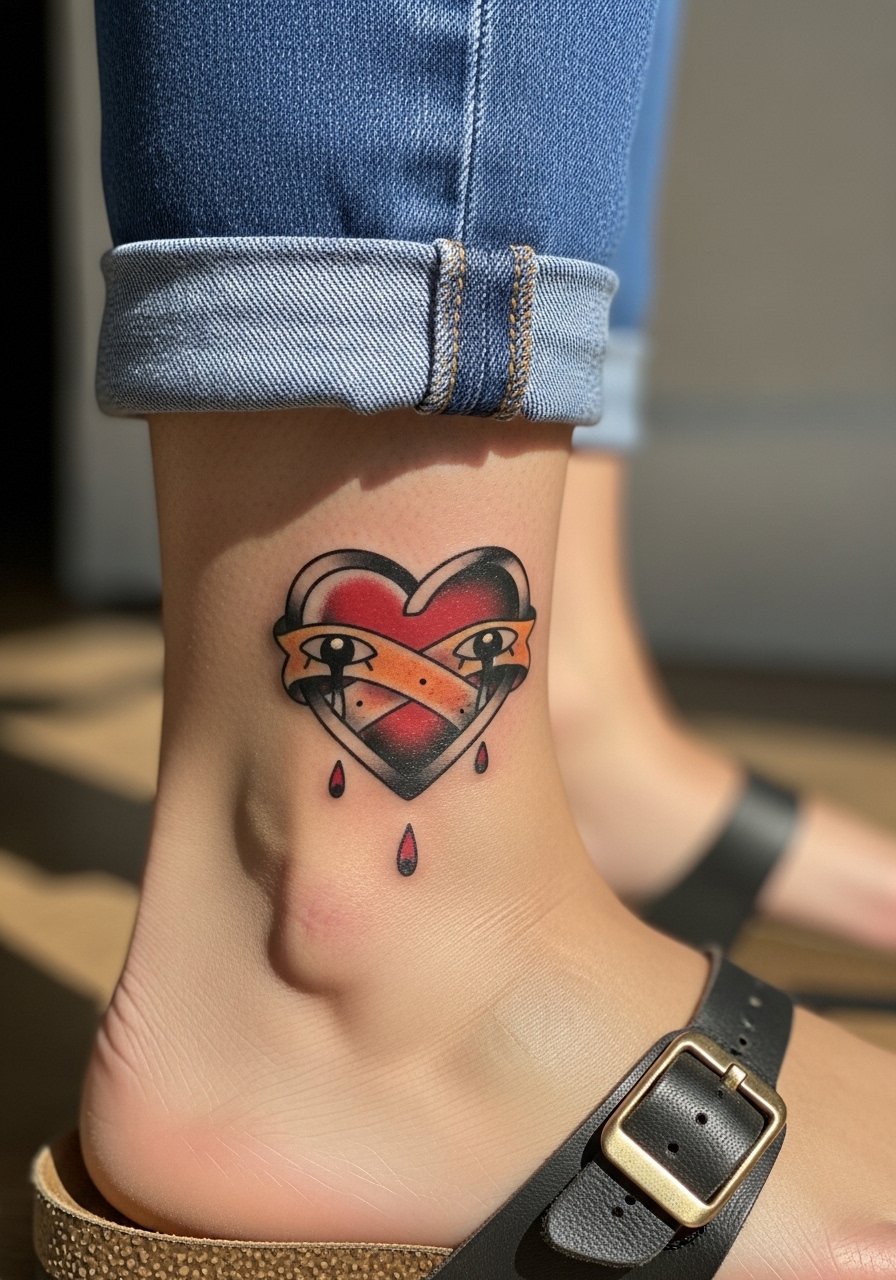
A neo-traditional take keeps the symbol bold so it survives pumps, socks, and sandals seasons. Bold outlines and controlled color blocks age better on ankles than tiny tight shading. The common mistake is placing soft shading into a spot that sees heavy rubbing from socks. Keep the fill chunky and expect touch-ups after a year. Pair the piece with cutout ankle boots or sandals to let the heart show without losing detail.
21. Sternum Doodle Dragon Row
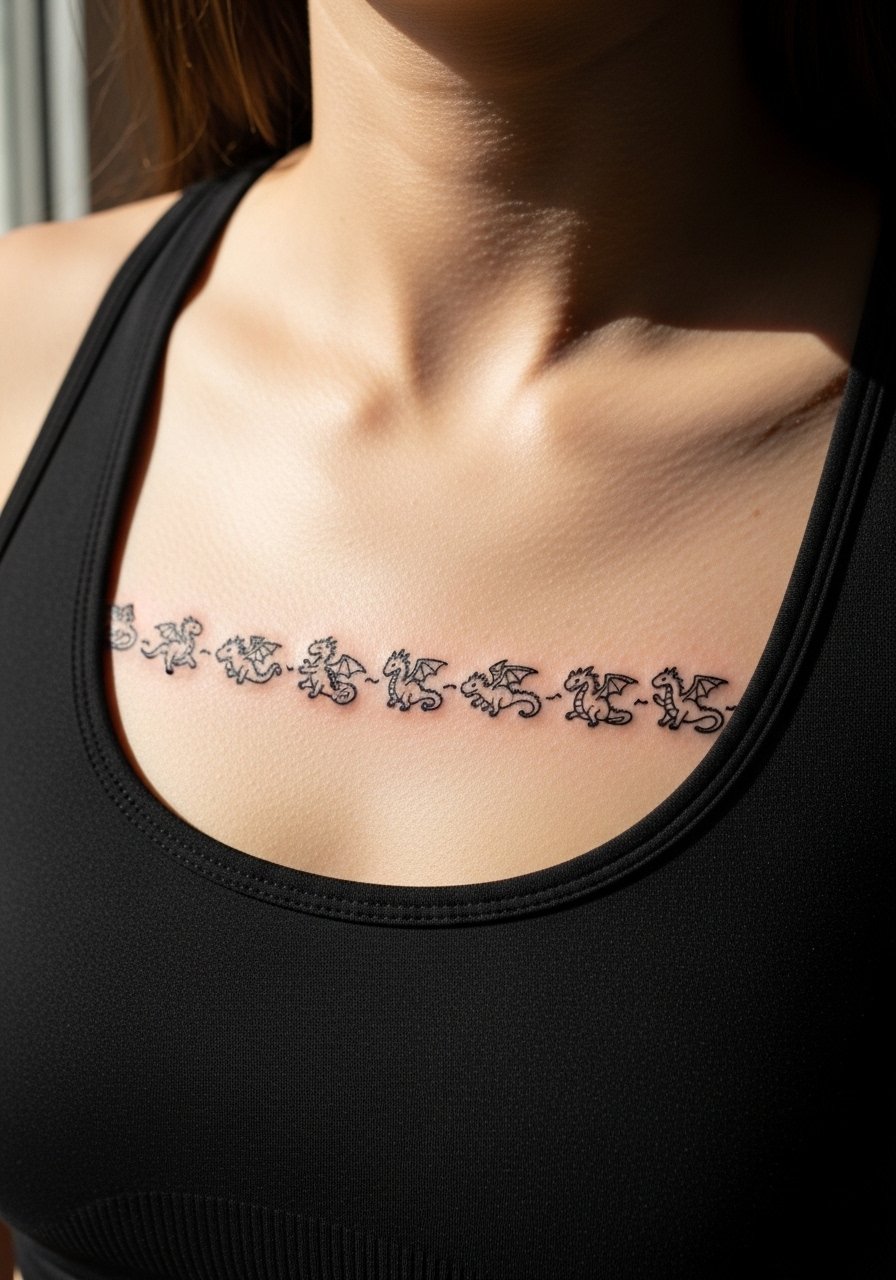
Sternum placements are intimate and sit close to bone, which sharpens lines but increases pain. A doodle dragon row reads like a secret chain when worn under fitted tops. Keep motifs simple and spaced so scabbing does not pull pigment across adjacent marks. Session pace is steady and many artists prefer short breaks to manage discomfort. Professional considerations apply because this remains a more private spot and may affect clothing choices during early healing.
22. Calf Blackwork Hoodie with Texture Patterns
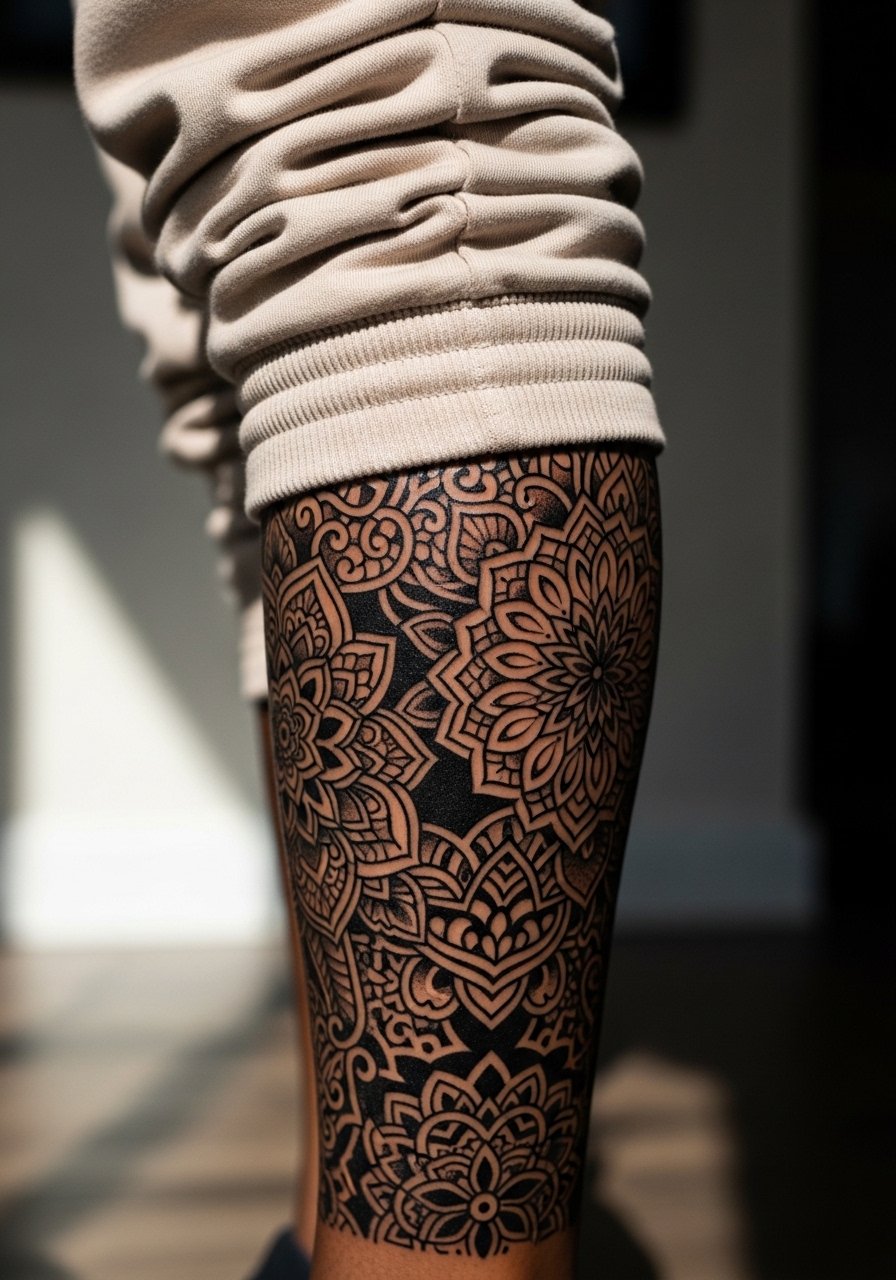
A textured blackwork piece on the calf reads like a silhouette from across the room but rewards closer looks. The texture keeps the field interesting as the skin settles and helps the piece avoid looking flat if saturation softens. Blowout risk is low on calf if the artist spaces fills correctly. One session may suffice, but plan a long appointment and bring snacks. For styling, cuff joggers or wear rolled hem jeans to reveal the graphics and create an athletic contrast.
23. Inner Thigh Minimalist Wave from "Ocean Eyes"
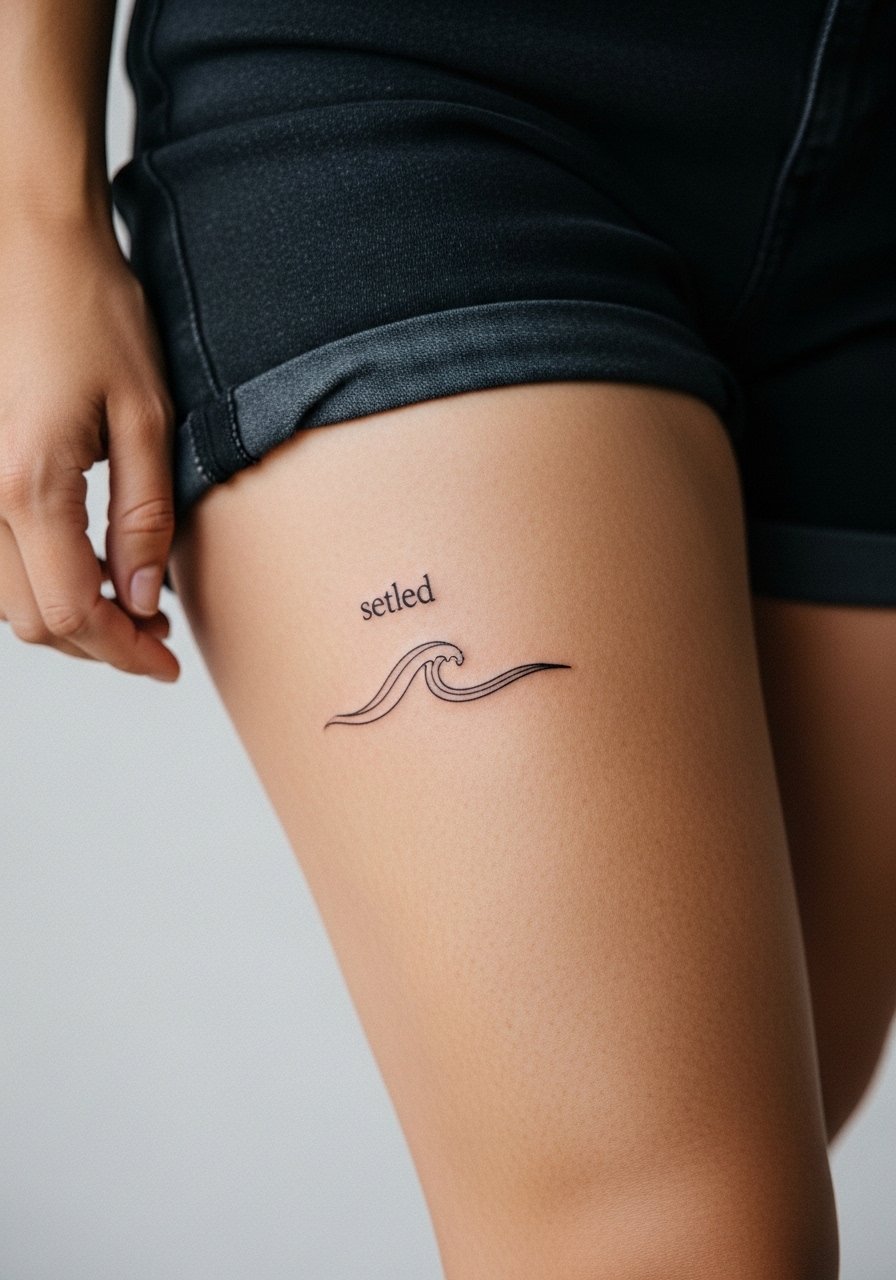
Inner thigh placements hide well and are ideal for pieces that are personal rather than public. A single wave line tied to "Ocean Eyes" reads poetic without needing explicit text. The skin there is soft, so avoid hyper-fine work that can spread. The mistake is placing too much tiny detail in a zone that moves against clothing. For session wear, choose shorts you can pull up slightly and expect two weeks of careful friction management.
24. Back of Hand Tiny Billie Face with Dot Work
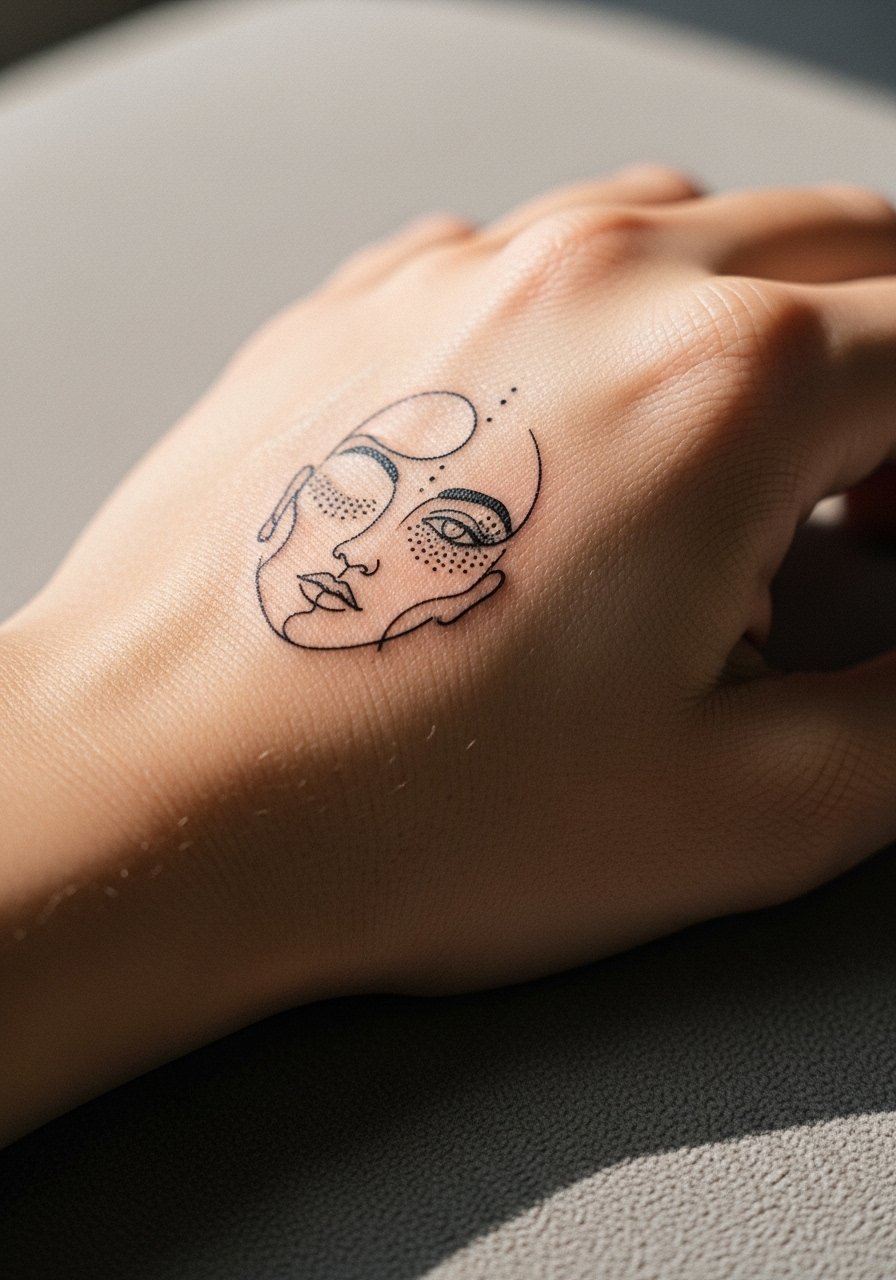
Back of hand tattoos are brave choices and get noticed immediately. Tiny faces need strong outlines to survive daily washing and abrasion. If you want this visible, accept frequent touch-ups and plan for thicker contouring than you might like at first. The mistake is trying to keep the lines whisper thin. For styling, minimal rings and short nails keep the focus on the tattoo rather than accessory clutter.
25. Collarbone Chain of Micro Stars in Dot Work
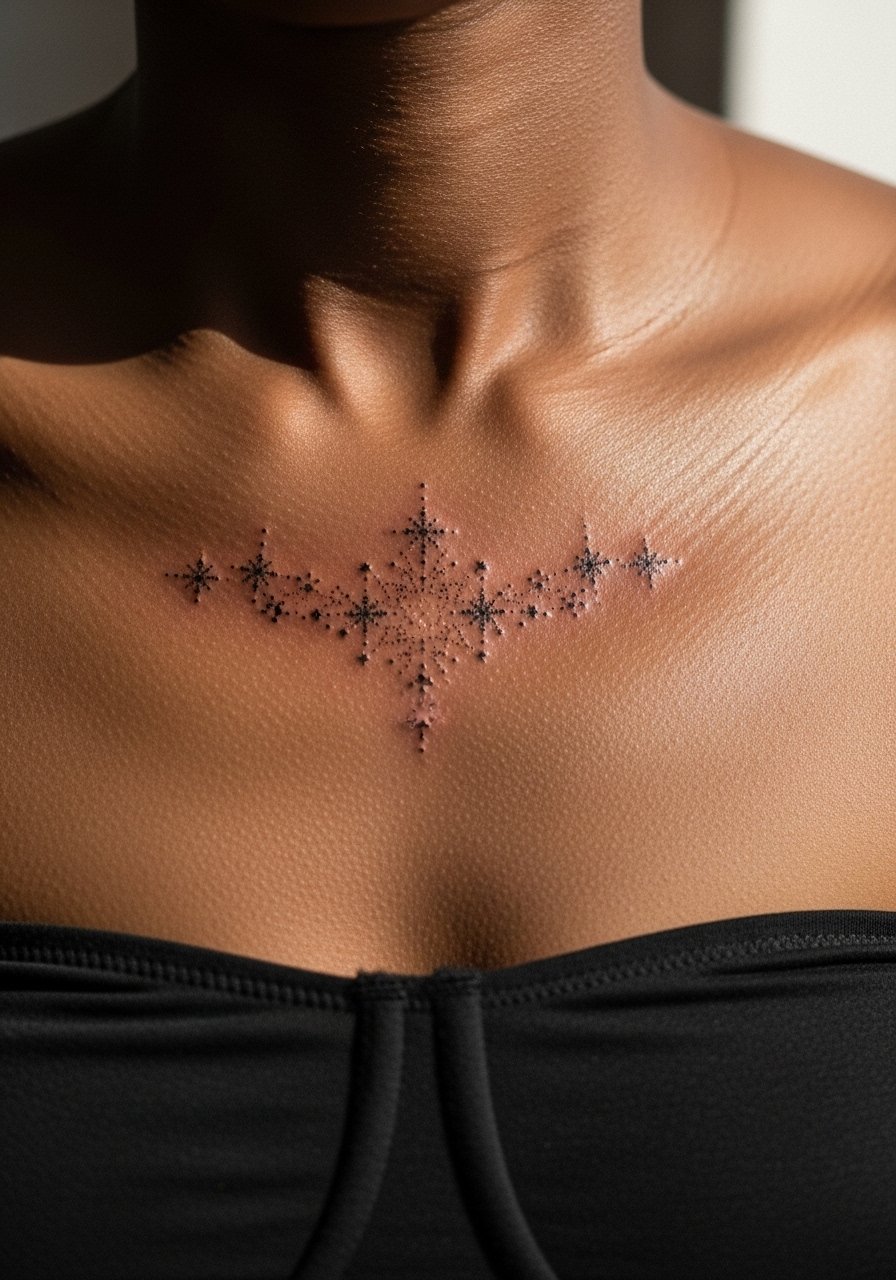
A dotted star chain is subtle and scales nicely along the collarbone. Dot work holds on this thin plane if the artist spaces points for skin movement. One session is usually enough and the design is forgiving during healing. Keep the stars small but spaced widely enough to avoid merging in heavy sun exposure. For outfits, try low-cut or strapless tops and a strapless bra so the chain looks built into the silhouette.
26. Ribcage Abstract Blōhsh Watercolor Hidden Tribute
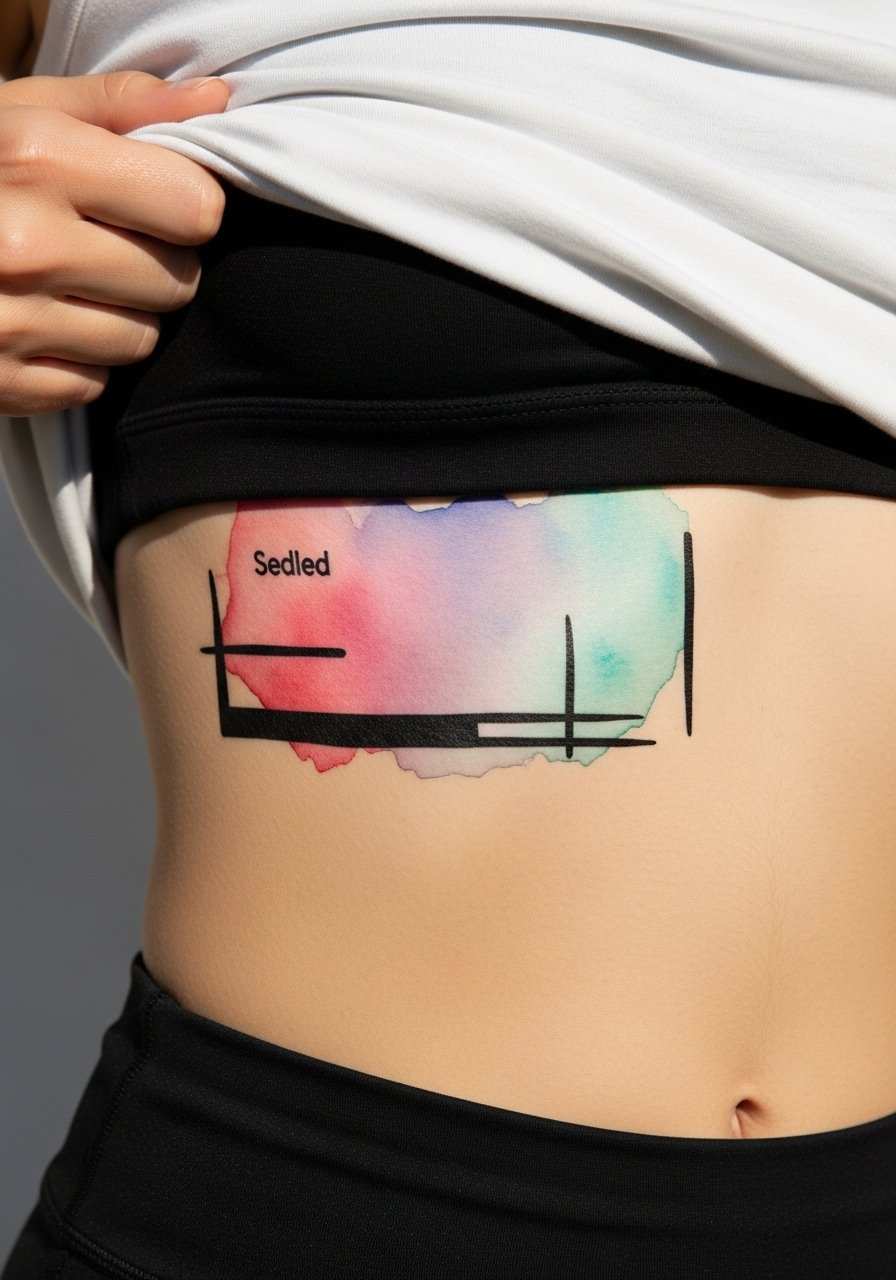
Ribcage watercolor is a private tribute option that reads best when given ample space and layering. Watercolor needs stronger underlines or denser pigment to avoid fading into bruised patches over time. The usual mistake is trusting a single session for layered colors. Plan two or three sittings and a shirt you can lift easily on session day. It also helps to test a black and gray version on darker skin tones to check contrast and saturation before committing to greens.
27. Minimalist Thigh Quote Patch "Happier Than Ever"
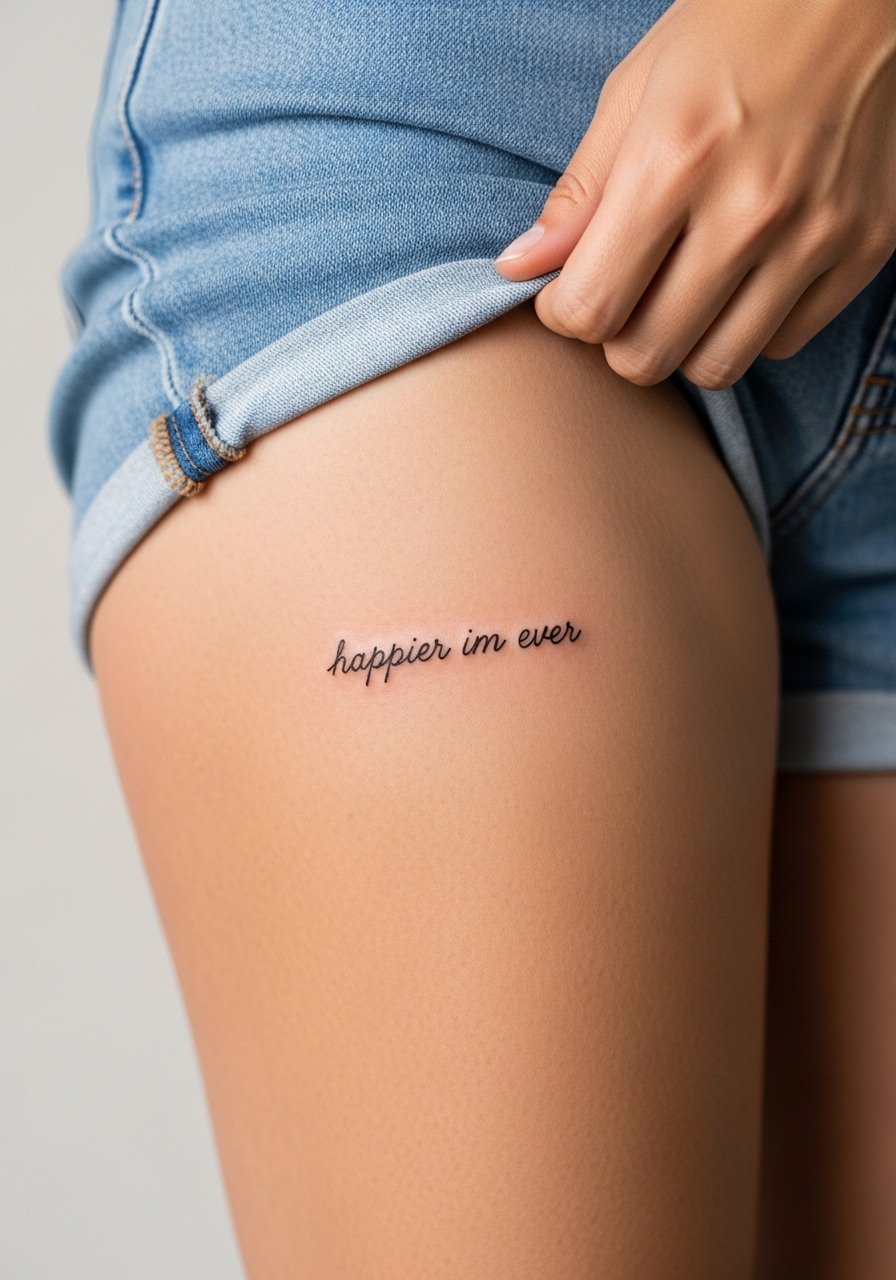
A thigh quote patch gives you room for larger lettering that still feels private when you choose. Lettering here benefits from slightly bolder strokes than wrist scripts because the thigh moves with muscle and clothing. Avoid tight cursive in tiny sizes or the lines will merge into a gray ribbon over time. Session time varies with length but plan for a focused appointment and think about spacing so the phrase breathes when you sit and stand.
Frequently Asked Questions
Q: Will fine line Billie Eilish portraits blur quickly on the forearm or should I pick blackwork?
A: It depends on scale and technique. Micro-realism on the forearm can hold well if the portrait is scaled to the forearm and executed with controlled saturation rather than ultra-thin single-needle strokes. Blackwork and heavier outlines age differently and often look cleaner farther out. Ask to see healed forearm portraits in the artist's portfolio and plan a touch-up at six to twelve months.
Q: Why do wrist and finger lyrics fade faster and how can I avoid that?
A: The wrist and fingers are high-friction zones exposed to water and soap. Choosing slightly bolder letterforms, avoiding extremely fine script, and picking placements on the inner wrist rather than the side of a finger helps. Expect touch-ups sooner and plan for thicker initial strokes if longevity matters more than micro delicacy.
Q: For watercolor blōhsh symbols, which placements and skin tones handle the color best?
A: Shoulders and upper arms generally give watercolor room to breathe and absorb pigment in layers. Darker skin tones may need denser pigment or a black outline to retain contrast, while lighter tones can show the washes more immediately. A test patch or a black-and-gray mock-up can help you visualize the healed look before full color.
Q: How do I find artists who specialize in micro-realism and fine line without naming anyone?
A: Search tags like #BillieEilishTattoo and #FineLineBillie on Instagram, filter by city tags, and use platforms like Tattoodo or Booksy. TikTok searches for "Billie tattoo healed" plus your city often reveal guest spots and healed examples. Look for healed photos rather than only fresh work.
Q: Is Saniderm better than dry healing for these delicate Billie designs?
A: Artists and fans split into two camps. One camp says second-skin speeds healing and keeps fine line clean as scabs do not form. The other camp worries that if left on too long, sealed moisture can trap bacteria and reduce color vibrancy. The right choice depends on the artist's aftercare protocol and how reliably you can follow wear schedules. Ask how long they recommend leaving any film on before switching to light balm.
Q: What should I wear to a ribcage or shoulder session to make the process easier and keep the area clean?
A: For ribcage sessions wear a loose tank or a sports bralette you can lift without underwire pressure. For shoulder work bring a loose button-down or a strapless tank so the artist can access the area without you being undressed. A sports bralette is a handy session piece because it gives support while exposing the tattoo zone.
