
Fine line floral trends look gorgeous in photos, but the reality is they age differently depending on placement and ink saturation. A shoulder tattoo sits where sun, sleeve friction, and muscle movement all meet, so choices made in the chair matter more than the style you pin to your board. Below are 17 black and grey flower shoulder tattoo ideas, how each will heal, what to ask your artist, and how to wear them so they read the way you want.
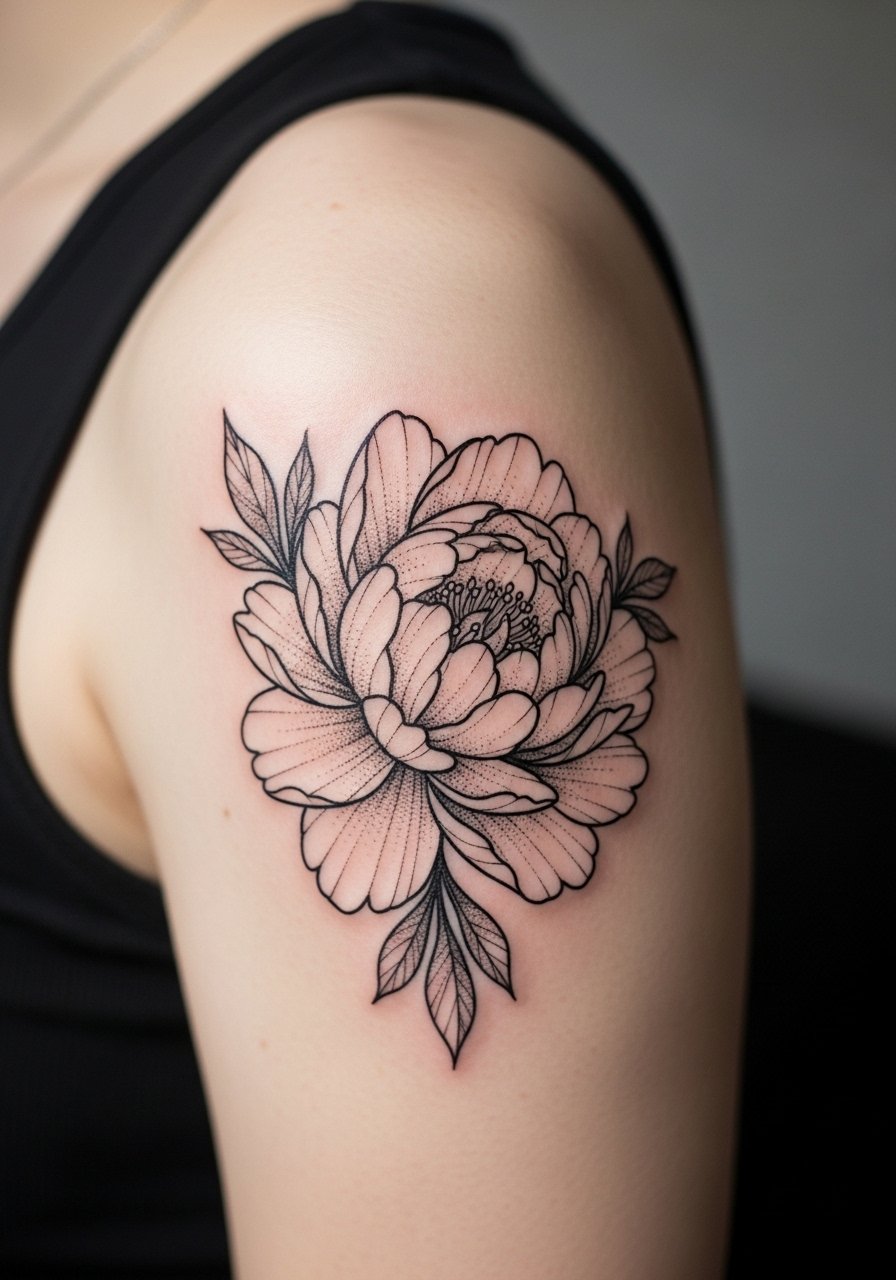
1. Fine-Line Peony on the Outer Shoulder
There is a calmness to a single peony rendered in fine line and soft stipple shading across the outer shoulder. I recommend this over a full shoulder cap when you want something that reads delicate under sleeveless tops but still scales if you later build around it. Tell your artist you want slightly heavier linework on anchor points so the petals keep their shape at year three. The shoulder is forgiving for linework, but too many micro details packed tight will blur together. Expect a one to two hour session and a possible touch-up around year two for crisp petal edges. For showing it off, pair with a loose button-down shirt you can pull aside to expose the shoulder for evenings out.
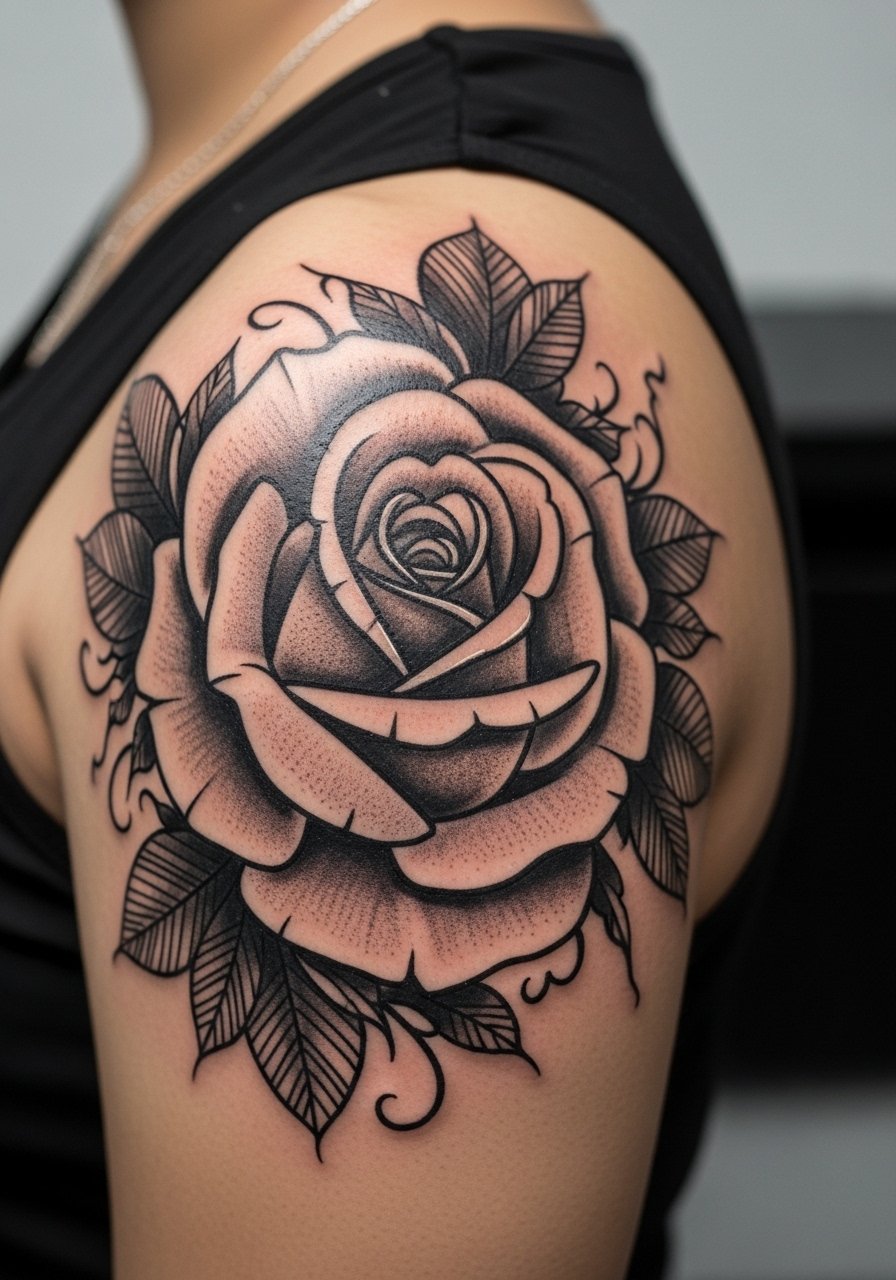
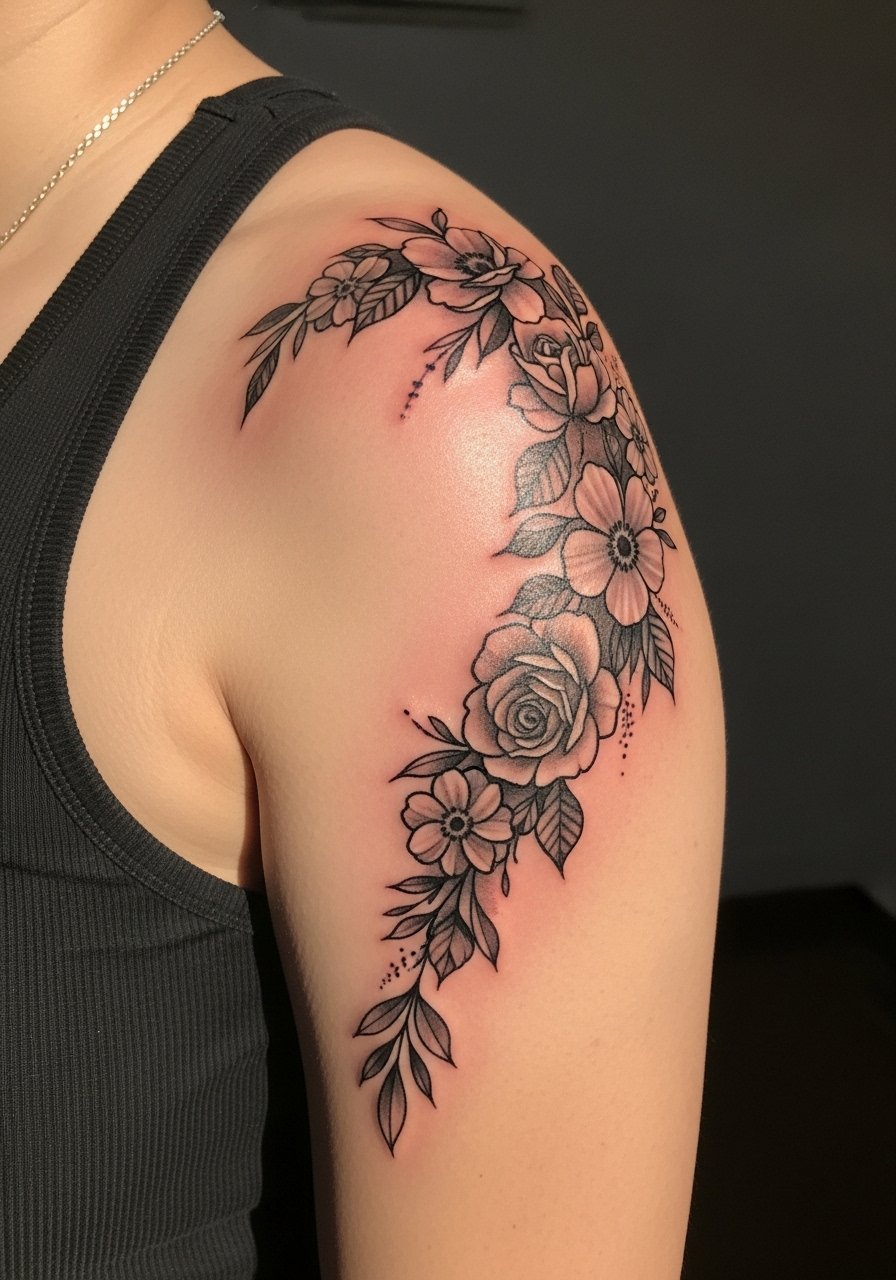
2. Black-and-Grey Rose Shoulder Cap with Bold Outlines
If you want a rose that reads from a distance, pick a version with bolder outline and saturated grey fills. Choose this instead of micro-realism when you expect heavy sun exposure. Ask your artist to prioritize even saturation rather than tiny texture details. The session usually takes two to three hours and feels like steady needlework across the curved deltoid. Blowout risk on the shoulder is low, but patchy saturation happens if the ink sits too shallow. Expect this style to hold strong for five years or more with sunscreen. During the session wear a loose tank top so the artist has clear access without you tugging at clothing.
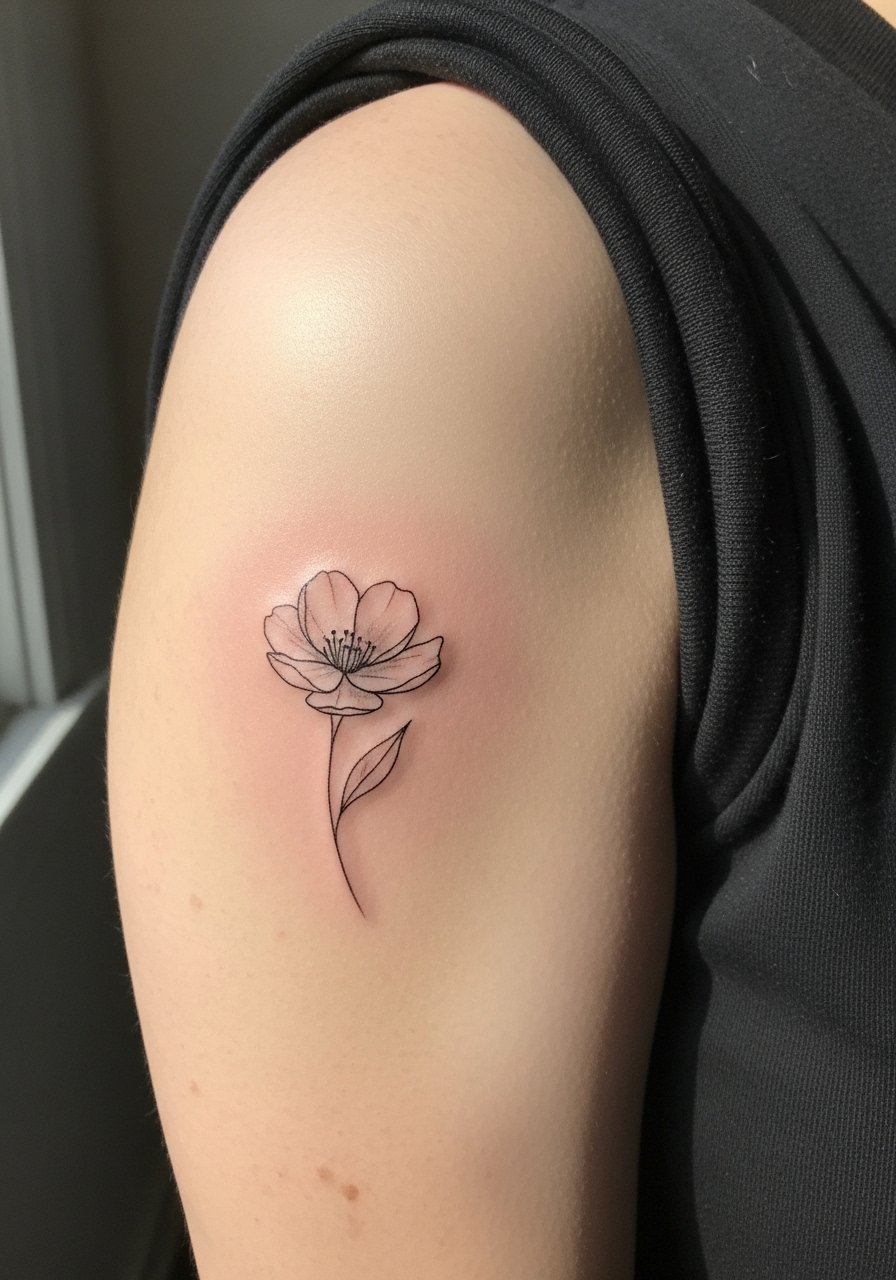
3. Single-Line Minimal Blossom on the Deltoid
This minimalist approach uses continuous linework with a hint of shading to suggest petals. I recommend it when you want subtlety and quick session time. The biggest mistake is asking for hairline strokes too fine for the skin type, which causes the work to soften sooner. During consultation show photos that match the exact line weight you prefer and ask about expected touch-up timing. A one-hour session is common and the pain sits low to medium. At six months the piece reads crisp. By two to three years thin strokes may need reinforcement, so budget a touch-up then. No styling link here so the image stands alone.
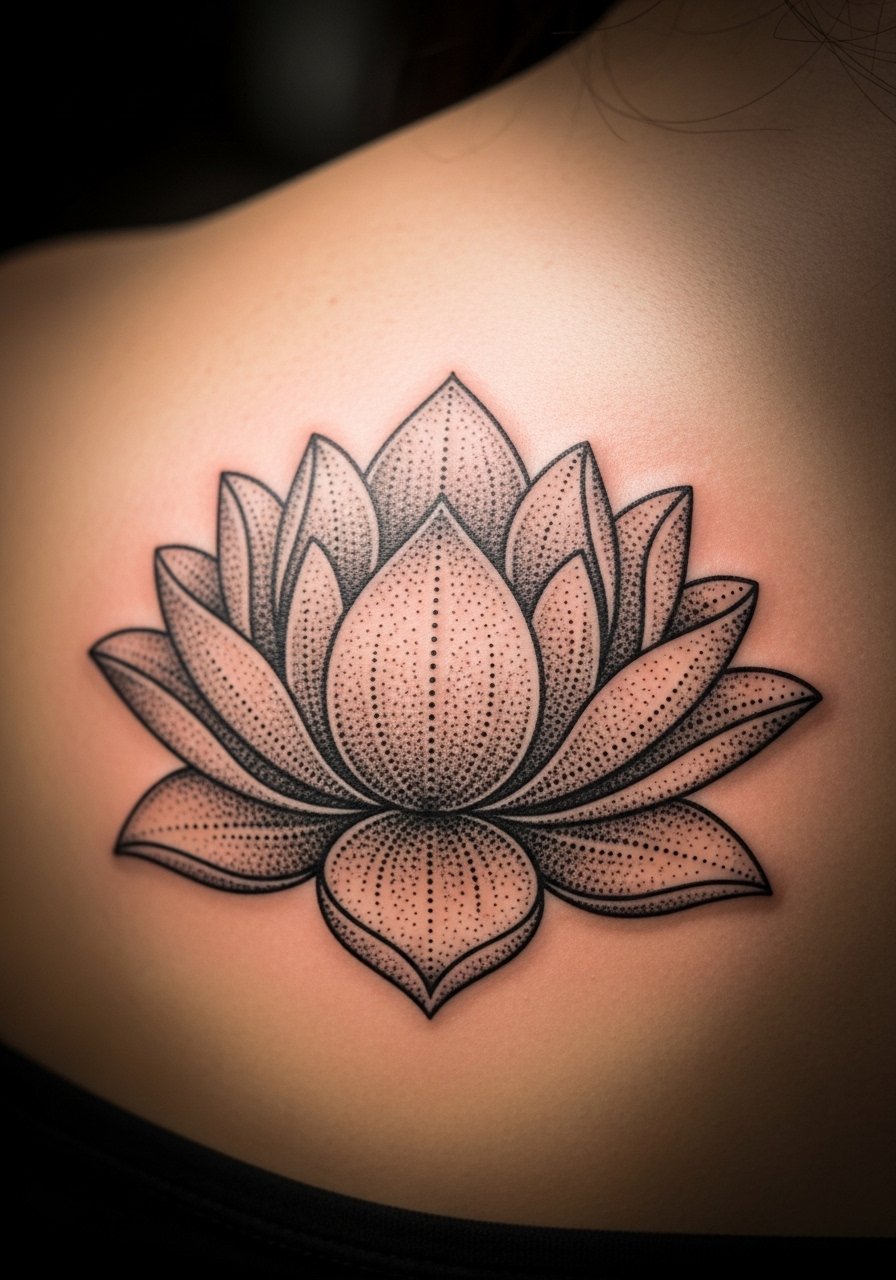
4. Stipple-Shaded Lotus Across the Shoulder Blade
Stipple shading gives a floating, soft texture that works well on the shoulder blade area. Pick stipple instead of heavy whip shading when you want dimension without saturation. Tell the artist you want sparse stippling near the edges and denser dots toward the center so the piece keeps definition as it ages. Expect longer session time because stipple work is deliberate and patient. The aging pattern is friendly for this technique, but friction from bags can dull the highest points. For the appointment wear a loose drawstring linen pant and a tank so you can shift without stressing the stencil.
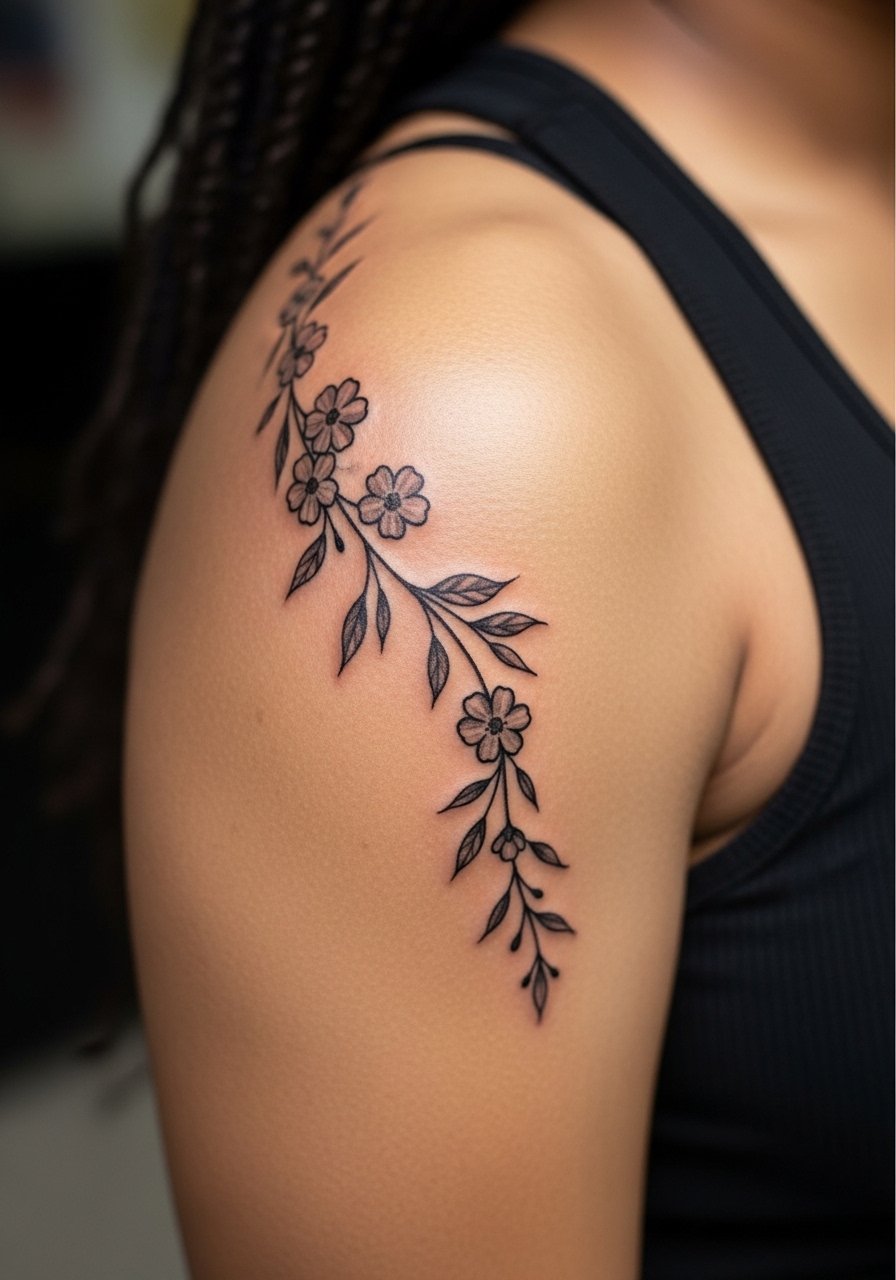
5. Wrapped Vine and Flowers That Follow Muscle Lines
This design snakes along the shoulder and wraps slightly onto the upper arm, following muscle contours for movement with the body. Artists split into two camps on wrap designs. One camp says follow the muscle lines exactly so the piece always flows with motion. The other camp prefers setting the composition slightly off muscle landmarks to avoid distortion over time. Both views have merit. Discuss both approaches in consultation and ask to sketch both options. Common mistakes include forcing symmetry where the body is asymmetrical. The session runs two to three hours and the piece carries well if spacing is generous. No styling link here to keep the focus on placement.
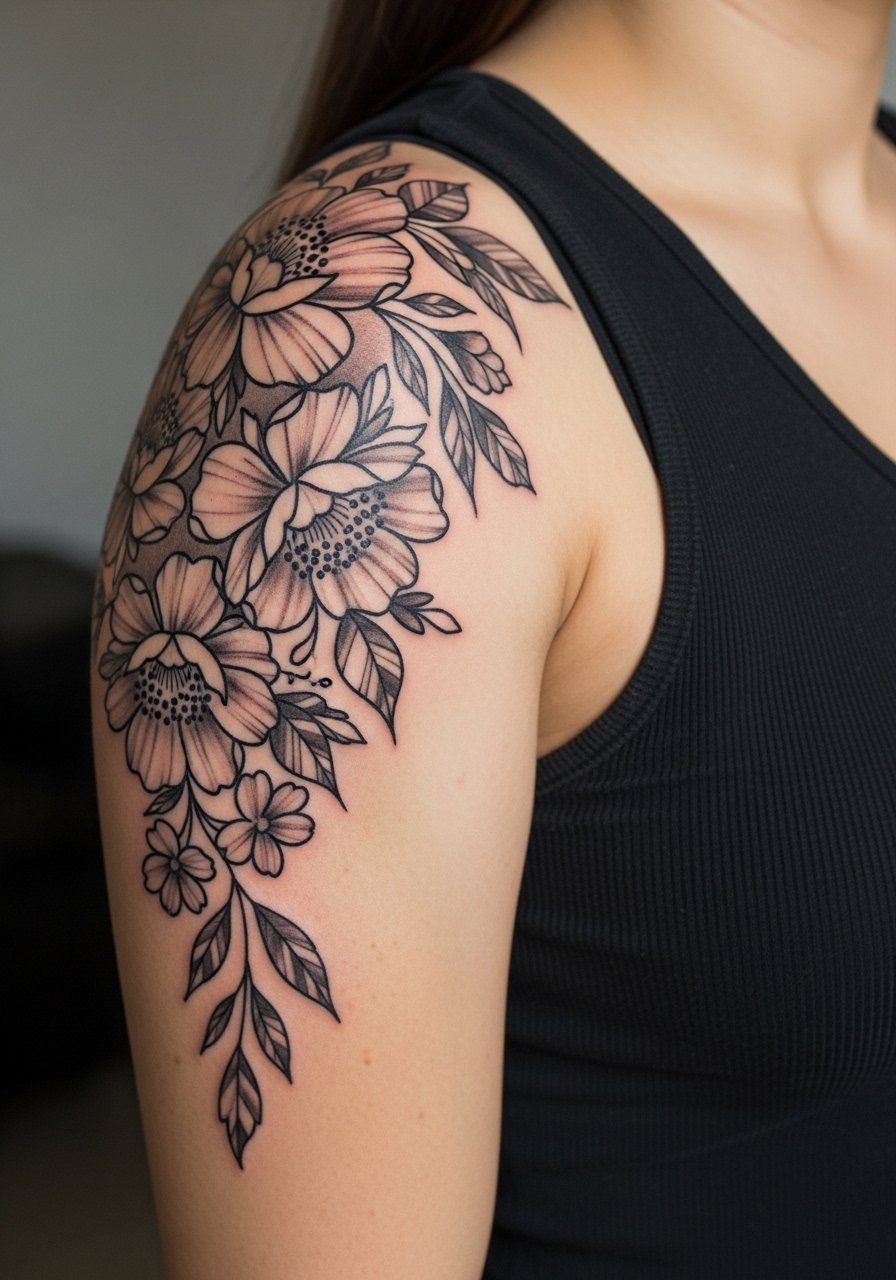
6. Botanical Micro-Realism Cluster on the Shoulder Cap
Micro-realism in black and grey can read incredibly refined on the shoulder if you allow negative space around each bloom. I have seen micro pieces that looked photo-realistic fresh but softened into frizz by year four when artists went too dense. Ask your artist to preserve pockets of skin between elements and to plan touch-up points in the initial stencil. Sessions can run three to four hours depending on scale. For session comfort wear a loose button-down shirt you can slip off one shoulder so the artist has clean access without cooling you down too much. Expect a touch-up possibility at year three for the finest details.
Studio Day Picks
These shoulder pieces above vary from tiny single blooms to wrapped botanical work, so a few practical items smooth the session and early healing window.
- Stencil transfer paper kit. Lets you preview exact placement on the curved shoulder so the artist and you can adjust before the needle touches skin.
- Topical numbing cream. Helpful for longer shoulder cap sessions when you want to keep still through fine shading work.
- Thin protective film roll. Keeps a fresh shoulder piece free from shirt friction during the first day or two.
- Fragrance-free gentle body wash. Cleans the area without stripping the delicate ink channels used in fine line or stipple work.
- Aquaphor healing ointment. Thin layer application for the first nights helps protect fine line strokes and saturated grey fills.
7. Half-Sleeve Floral That Starts at the Shoulder Cap
If you plan future arm work, begin with a half-sleeve layout that anchors at the shoulder cap. Fair warning, this placement feels different through the session as the needle travels around the curve. The artist will likely map out the full sleeve in a first consult so the shoulder element sits correctly with future pieces. Common mistakes include committing to a small motif that later needs heavy filler to blend. Sessions for a sewn-together half-sleeve feel longer and may need multiple visits. Expect moderate discomfort when the needle crosses the shoulder bone area. No styling link here since the focus is on buildability and long-term layout.
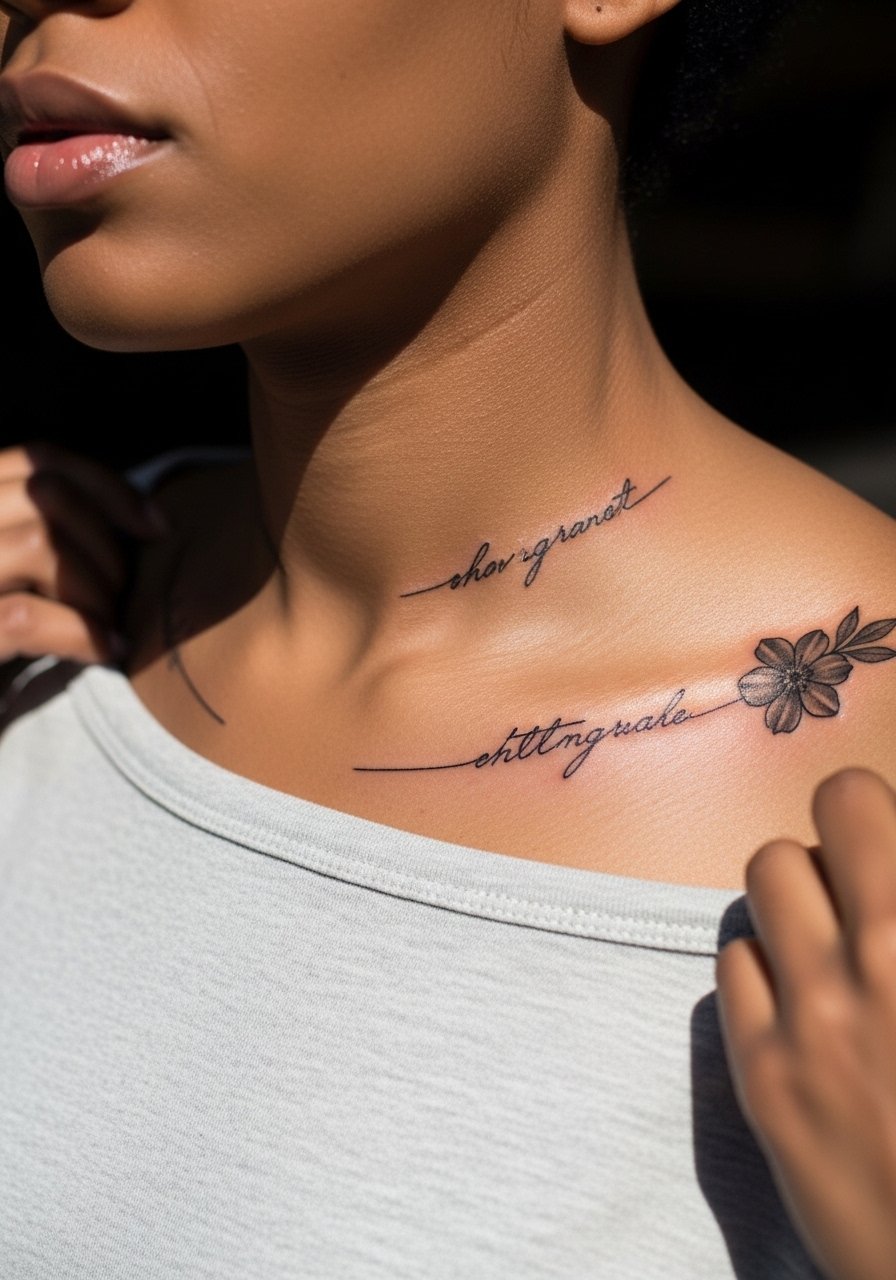
8. Script and Small Flower Accent Near the Collar
Combining a small script line with a neighboring flower makes a personal piece that peeks from an off-shoulder top. For sensitive text placement, specify exact wording and font in your image reference. Ask for slightly bolder script anchors so letters remain legible as the skin shifts. Session time is brief, often under ninety minutes. During the appointment wear a wide-neck shirt you can pull aside to reveal only the shoulder area. Keep in mind the collarbone area gets more sun exposure, so discuss placement depth to reduce early fading.
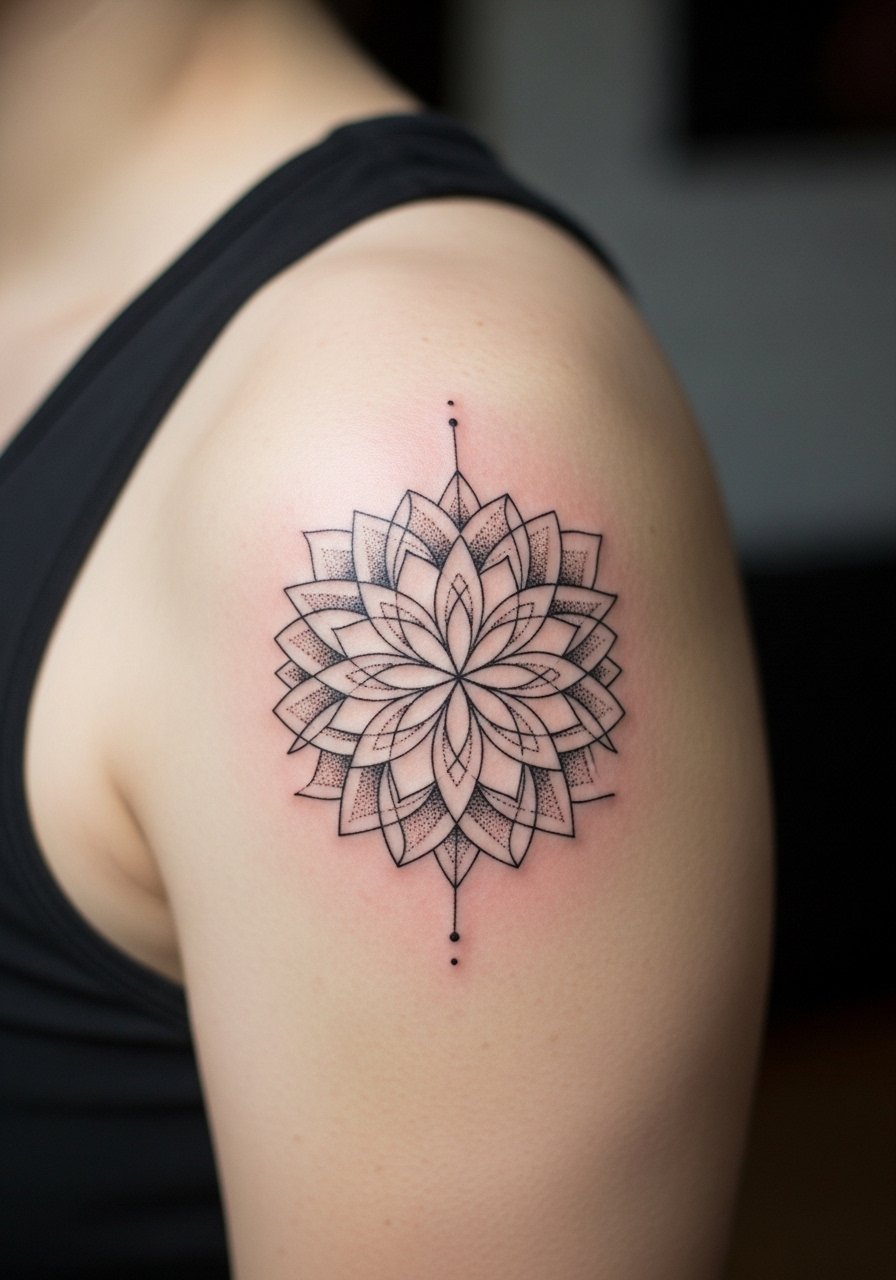
9. Geometric Petal Mandala Centered on the Shoulder
A mandala that sits on the shoulder apex combines linework and dot work to create radial symmetry that ages predictably when spaced properly. The biggest mistake is making the mandala too small. Lines that cross tightly will merge after a few years on moving skin. Tell the artist you want 2 to 3 millimeters of breathing room in the dense sections. Expect a longer session if the piece uses both stipple shading and precise geometry. The shoulder is a good spot because the curve gives the mandala a natural frame as you move. No styling link here to keep the section focused on composition.
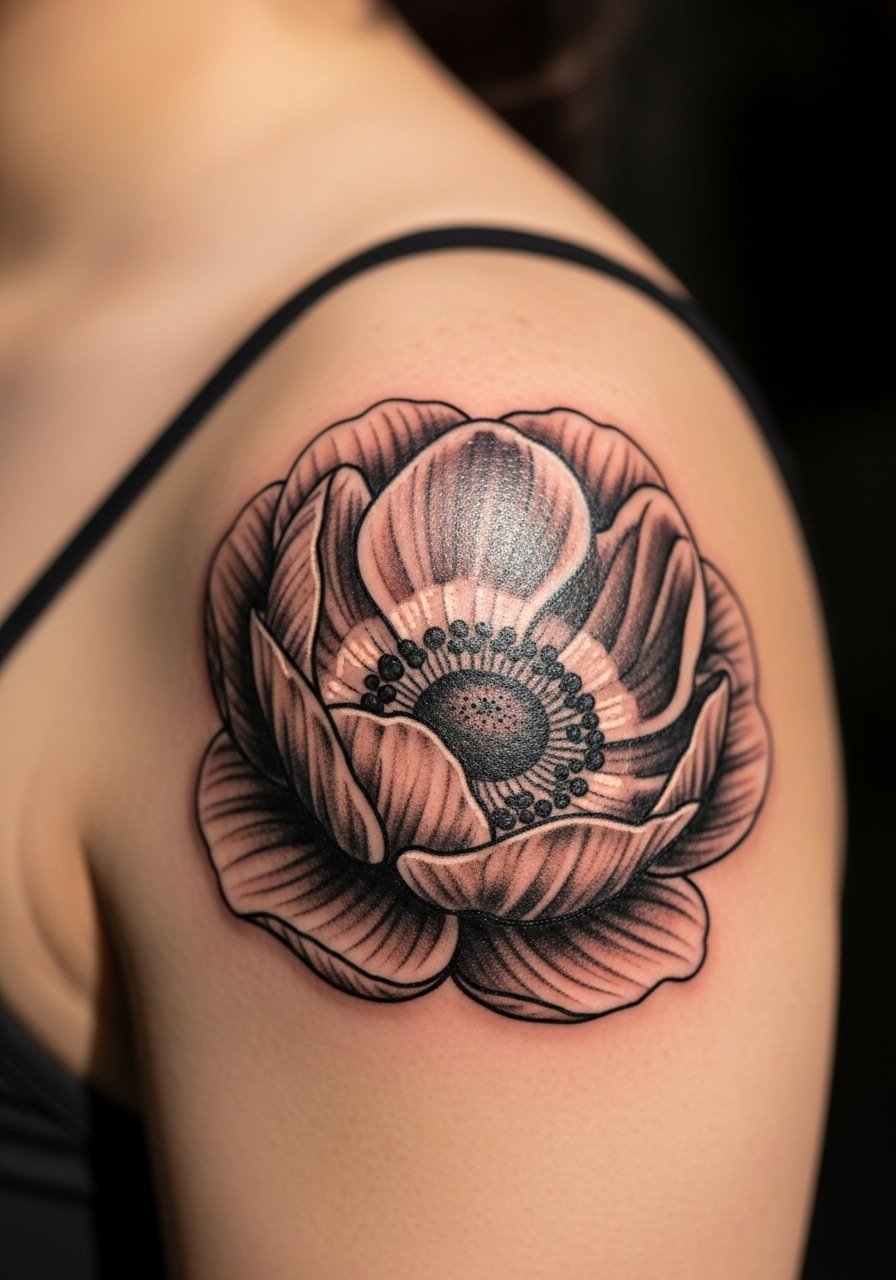
10. Blackwork Anemone With Heavy Shading for Contrast
Choosing heavy blackwork contrast for an anemone flower is smart if you want longevity. Bold saturation resists sun fade better than the finest pencil strokes. During consultation request solid black anchors around the central bloom so the gradient grey sits against a stable edge. Sessions can feel intense because the artist will pack saturation in areas for depth. Wear a loose linen shirt that you can roll or pull to keep the shoulder accessible while remaining comfortable. Expect fewer touch-ups over five years with this approach than with micro-line treatments.
11. Watercolor-Influenced Grey Wash Bloom on the Outer Deltoid
A watercolor-inspired wash in black and grey uses soft gradients rather than hard outlines to suggest a bloom. The common version that ages poorly is one with too light an initial wash so the pigment disperses into an indistinct stain. Ask the artist to define a few anchor points while keeping the wash soft elsewhere. Session time varies with scale since grey wash takes layering. Expect the piece to mellow over the first two years and plan a touch-up to restore contrast. No styling link here because the focus is on shading technique and longevity.
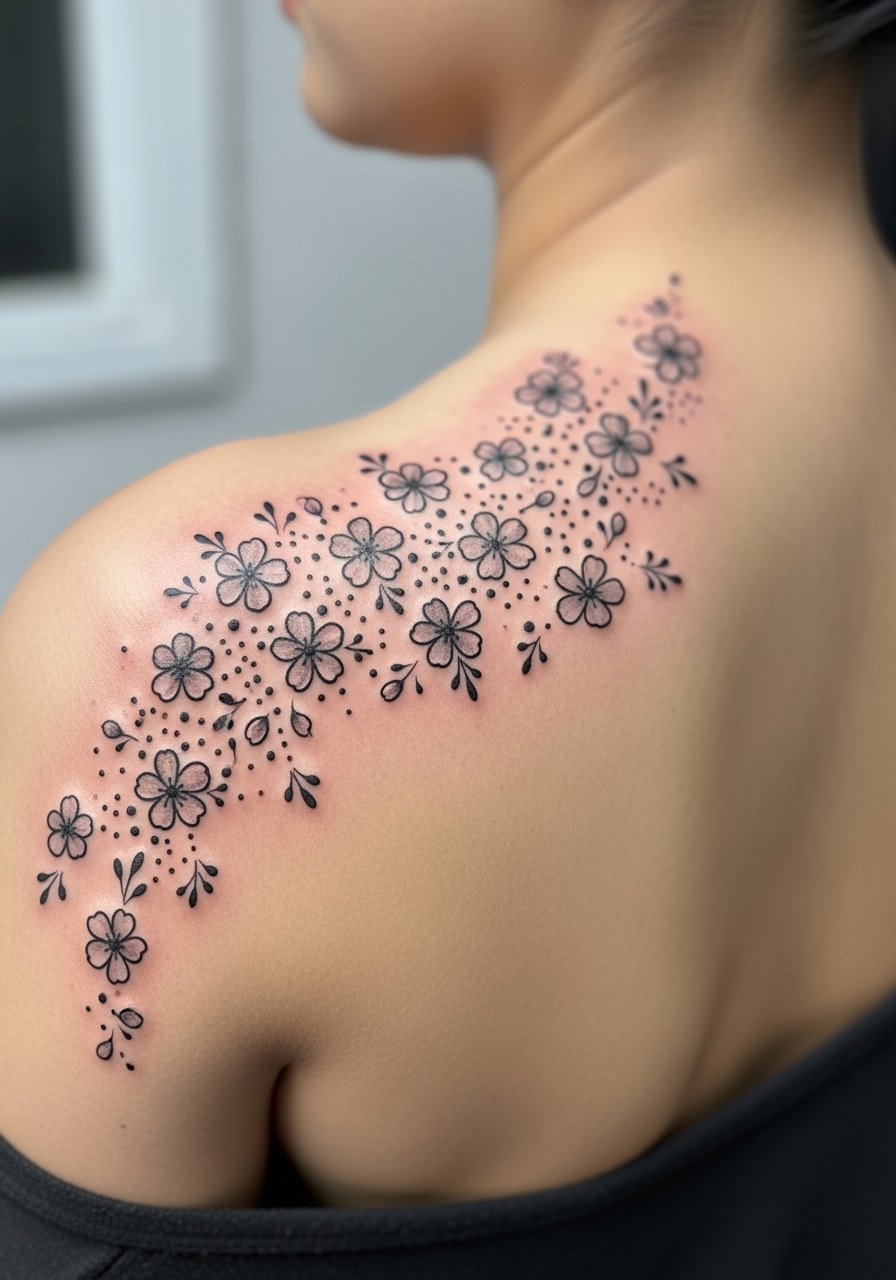
12. Shoulder-to-Back Spray of Tiny Blossoms
A light spray of tiny blooms that drifts from the shoulder onto the upper back keeps options open for expansion. When you want a modular look instead of a single heavy piece, this is the one to pick. Tell your artist you want each bloom separated by visible skin gaps so the cluster does not become a single dark mass over time. Sessions are broken into short blocks to let swelling subside between passes. For the session wear a button-down shirt you can slip off one shoulder without exposing more skin than needed. This layout also plays well with back jewelry when you show it off.
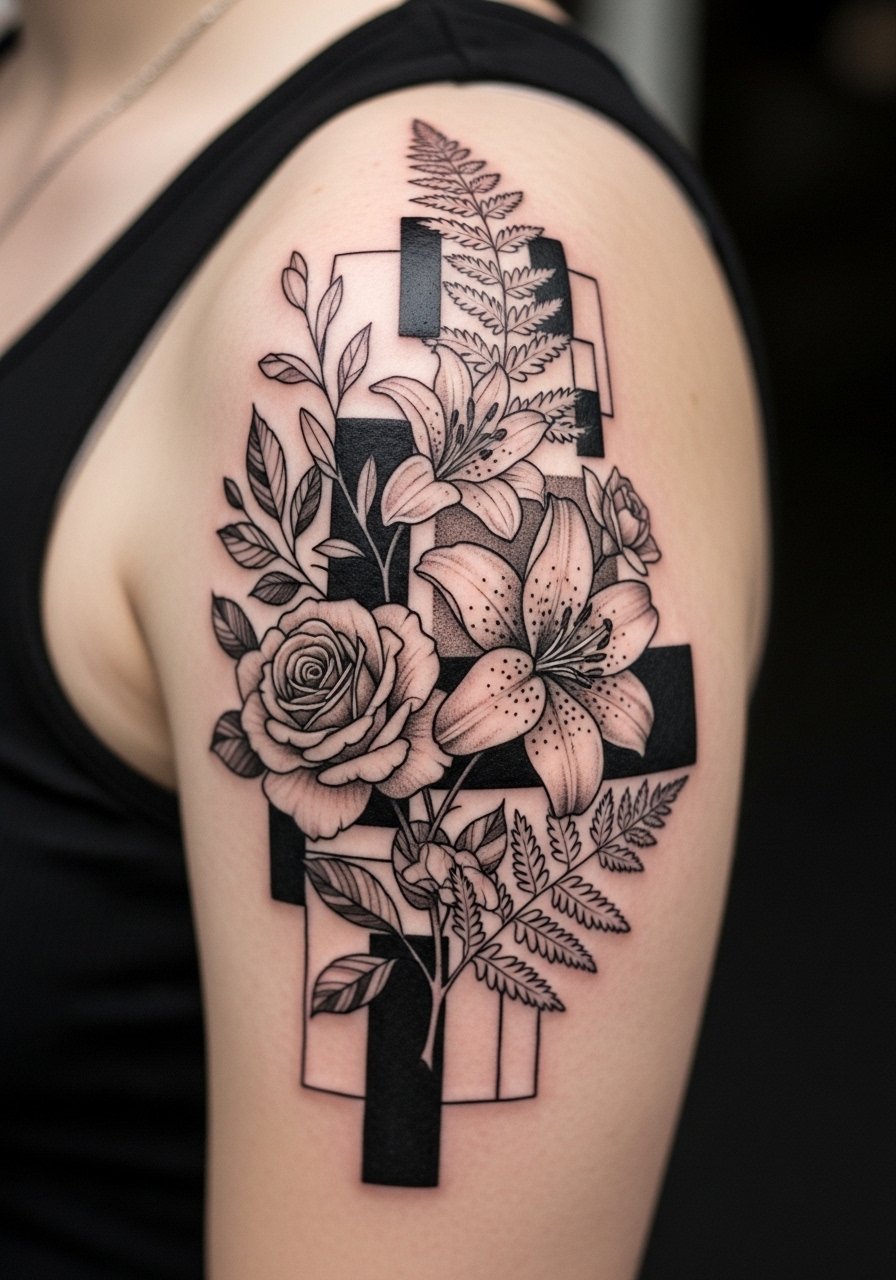
13. Surreal Floral with Negative Space and Graphic Blocks
This design mixes solid black graphic blocks with delicate floral linework so the negative space reads as part of the image. There is a debate among artists about using large black fills near delicate linework. One camp warns that heavy fills can overpower and make nearby fine lines hard to read. The other camp says careful planning of negative space and layering keeps both elements distinct. Ask to see portfolio examples of the exact combo. Sessions include both packing and fine-lining phases and can be long. Expect touch-ups focused on contrast rather than line repair.
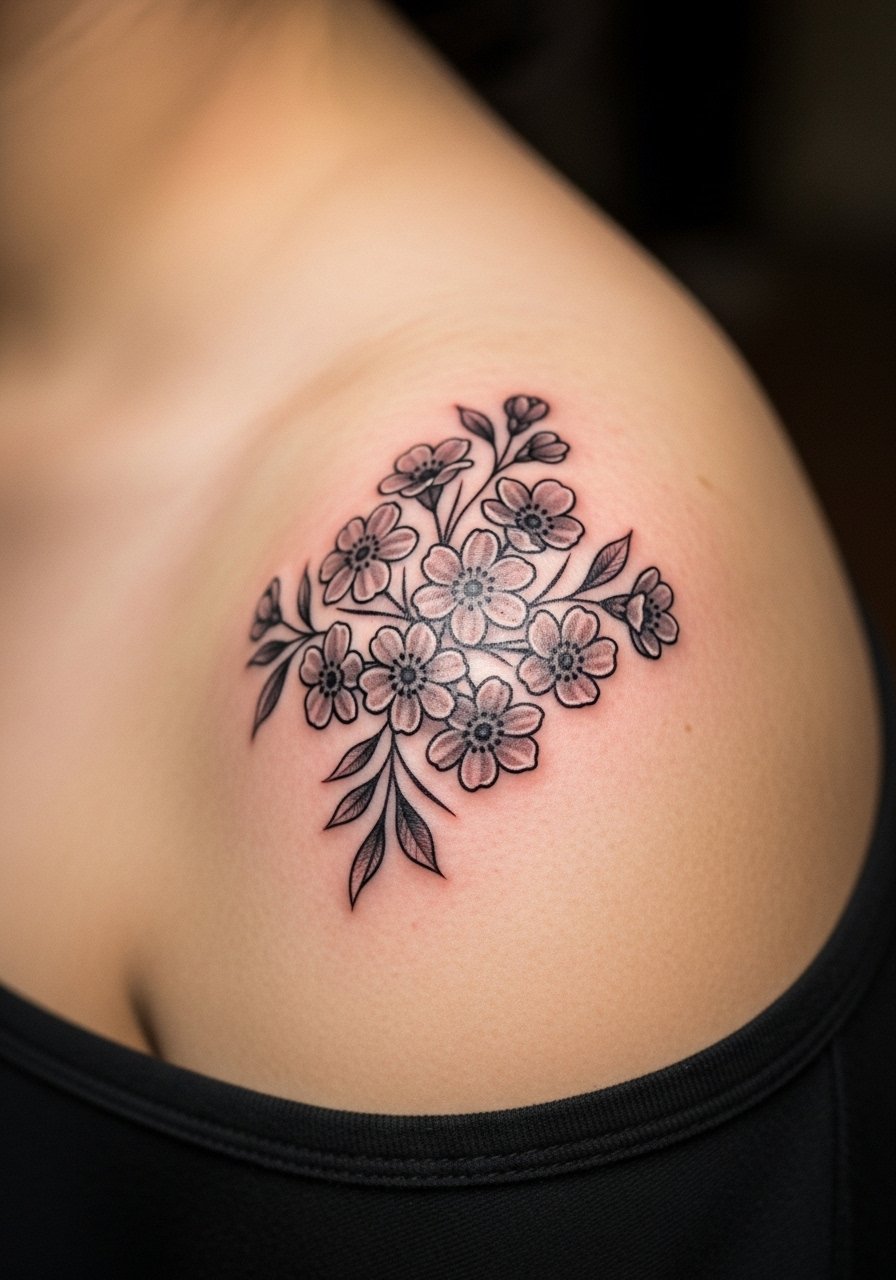
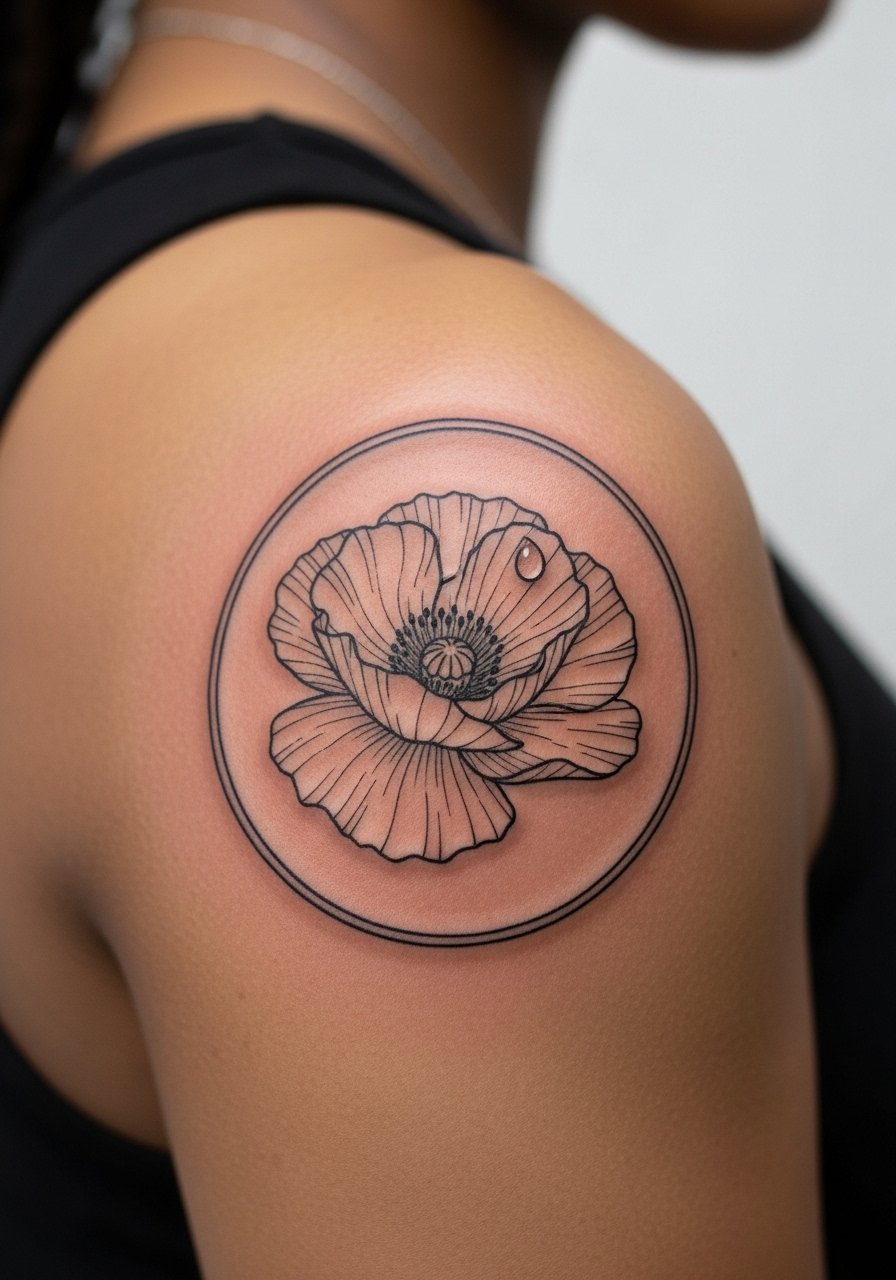
14. Circular Shoulder Badge of a Single Bloom
A compact circular badge places a single bloom on the shoulder like a small emblem. I often recommend this for people who want a tidy focal point that can expand into a larger composition later. The common error is making the circle too small for the chosen level of detail. Tell your artist the final diameter you expect and ask them to scale line weight accordingly. Sessions are short and the pain is mild. For post-session comfort wear a racerback tank you can adjust so the tattoo breathes without rubbing.
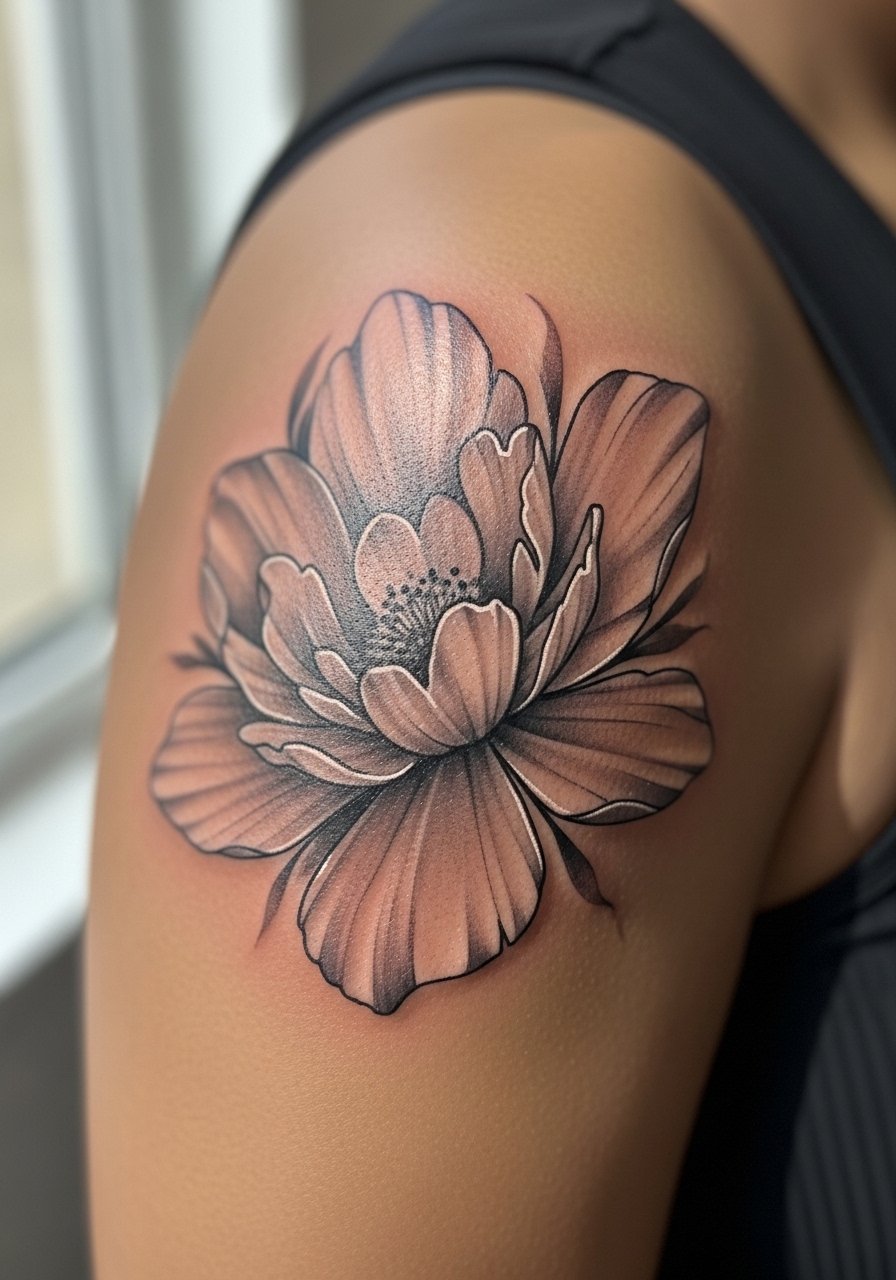
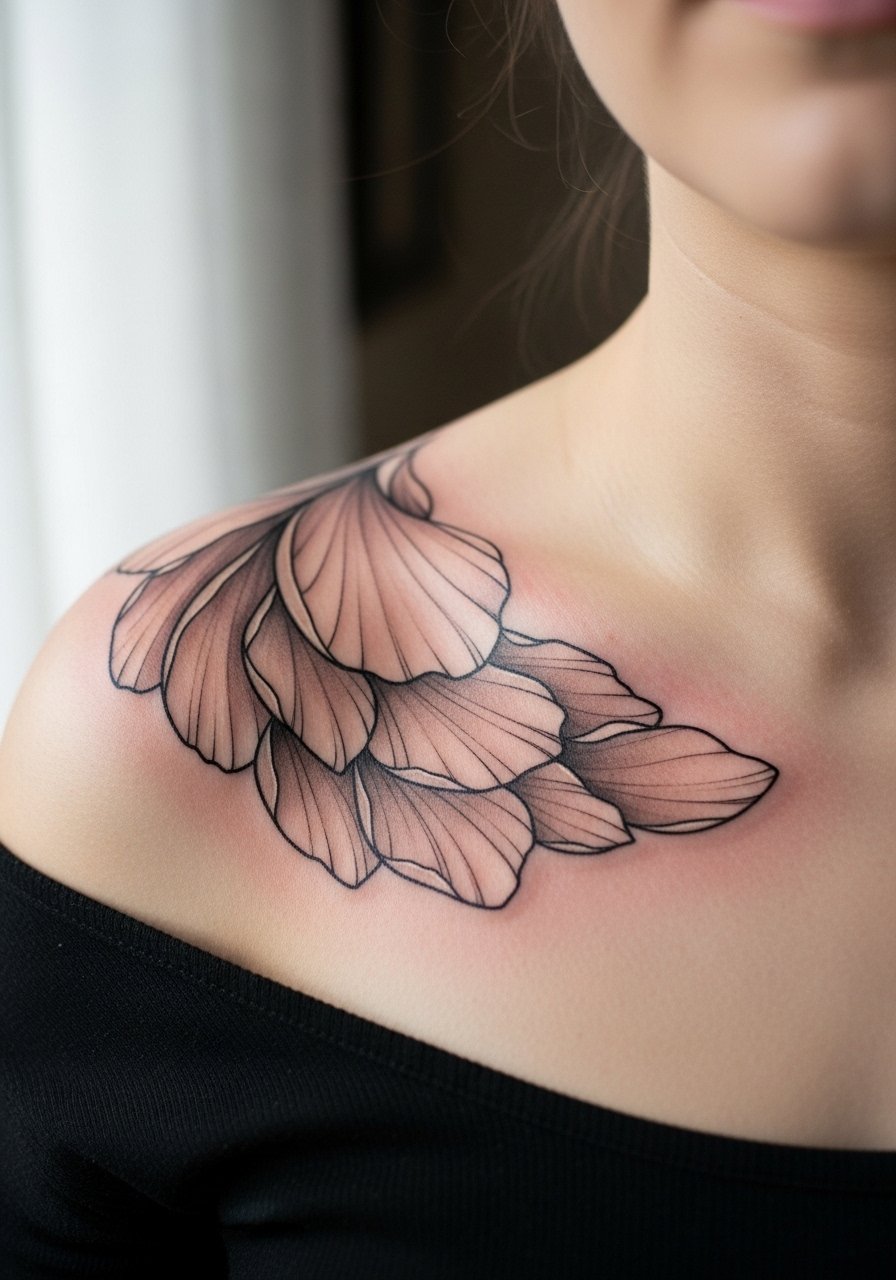
15. Layered Petals That Follow the Collar and Shoulder Seam
This layered approach uses overlapping petals that rest along the shoulder seam and glance toward the collar. It is great when you want the piece to peek out from shirts. The typical mistake is packing leaves too tightly near the collar where shirts rub. Ask for slightly more spacing in friction zones and for the artist to map the pattern with you while standing and moving. Sessions are moderate in length. The design mellows into the skin with time but keeps shape if spacing is generous. No styling link here to focus on draft considerations.
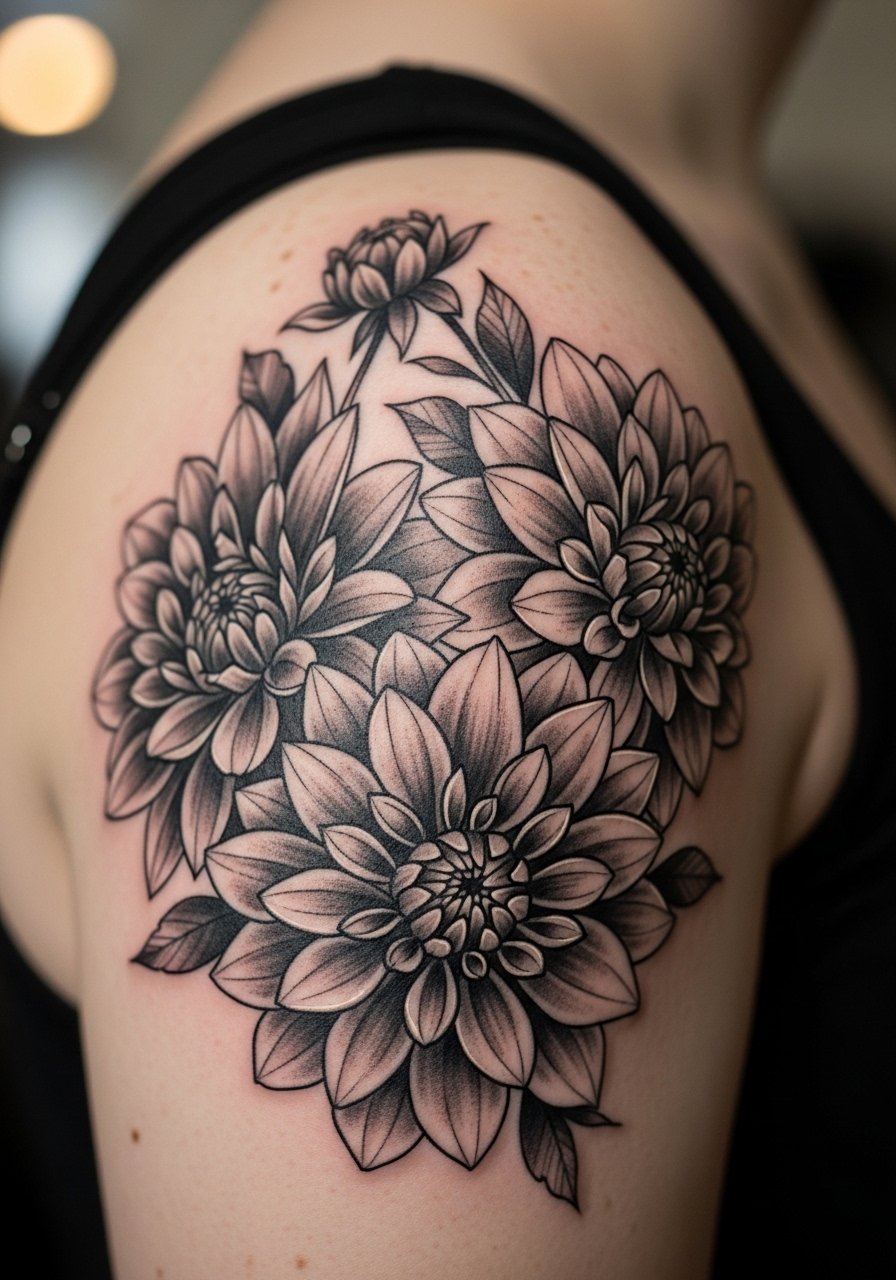
16. Clustered Black-and-Grey Dahlias with Open Centers
Dahlias with open centers and selective saturation look impressive on the shoulder because the flower centers act as visual anchors. Tell your artist to leave small pockets of untouched skin in the center to preserve highlights. Sessions are often split into outline and shading blocks which helps reduce soreness. For the session wear a strappy sundress or a tank with thin straps so the shoulder area is reachable without tugging clothing. Expect the open centers to read well through several years with modest touch-ups.
17. Asymmetric Floral Crescent Draped Over the Shoulder
An asymmetric crescent of blooms that curves from front to back creates motion and feels custom-tailored to the body. Pain ramps slightly where the needle crosses near the top of the shoulder blade. The most common error is mirroring the design too rigidly; the shoulder wants soft asymmetry. Ask the artist to sketch the crescent while you move your arm so you can see how the shape sits in real life. Sessions usually take two hours and a small touch-up may help the outermost petals at year two. No styling link here to keep the focus on placement dynamics.
Frequently Asked Questions
Q: How long will a black and grey flower shoulder tattoo stay crisp?
A: It depends on technique and exposure. Bold blackwork and well-saturated greys can hold shape for five years or more with sun protection. Fine line and micro-realism usually need a touch-up around year two to four depending on your skin and how much sun and friction the area sees.
Q: Will a shoulder tattoo hurt more than an arm tattoo?
A: Pain varies across the shoulder. The outer deltoid is moderate on most scales. Pain increases near the top of the shoulder where the bone is closer to the skin. Sessions that wrap toward the chest or back can feel longer because of movement and positioning, not necessarily because the needle is harsher.
Q: What should I wear to the studio for a shoulder session?
A: Wear something that provides easy access while keeping the rest of you covered. A loose tank, button-down, or a strappy top works well. Bring a soft layer for after the session since numbness and cooling can make you feel chilly.
Q: Do certain flower types age better on the shoulder?
A: Yes. Designs that use bold anchors and leave breathing room between elements age better than tightly detailed petals. Flowers drawn with deliberate spacing and a mix of saturated and airy areas will keep clarity longer than fully packed micro-detail blooms.
Q: How do I find an artist experienced with black and grey flower shoulder pieces?
A: Search local shop directories, check portfolios that show healed shoulder work, and use community discovery pathways like convention listings and hashtag searches to compare healed pieces. Look for examples of similar scale and technique in their healed portfolios before booking.
Q: Will a shoulder tattoo affect clothing choices after healing?
A: The shoulder is flexible. Off-shoulder tops, wide-neck shirts, and tank dresses frame shoulder work well. If you want the piece visible, choose tops with wider straps or open shoulders. If you need to hide it for an event or work, button-down shirts and lightweight cardigans do the job without rubbing the healed ink.
