
Fine line water lily tattoos look delicate on the stencil but live somewhere between ghostly and glorious as they age. They can be deceptively painful on the ribs, they tend to lose crisp detail in high-friction spots, and many people forget how much UV and everyday wear fade grey shading. Pick placements and line weight with longevity in mind and you will avoid early touch-ups. Start with a forearm piece that gives you room to breathe.
1. Fine Line Water Lily on Inner Forearm
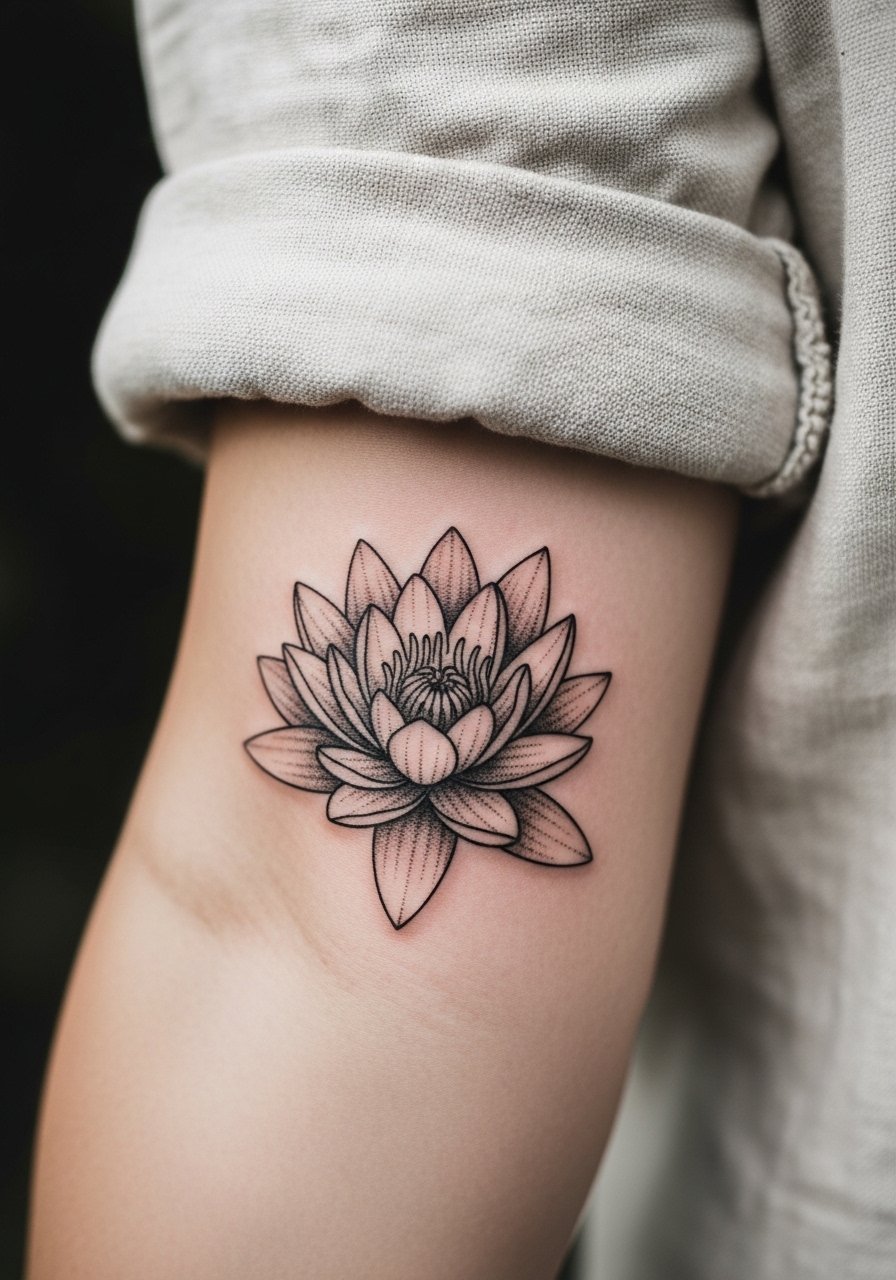
I recommend this when you want detail without the commitment of a sleeve. The inner forearm gives the artist room for negative space so petals do not blur together. Tell your artist you want slightly heavier primary contours and stipple shading in the center to preserve contrast at year two. Fair warning, forearm pieces get more sun exposure and need sunscreen once healed. Pain is moderate. Sessions are often a single two-hour block for a mid-sized lily. Common mistakes include asking for ultra-thin single-line petals with no spacing, which look great fresh and turn mushy after a couple years. For showing it off, roll your sleeves and wear a rolled linen shirt that frames the piece without stealing attention.
2. Collarbone Water Lily Cluster
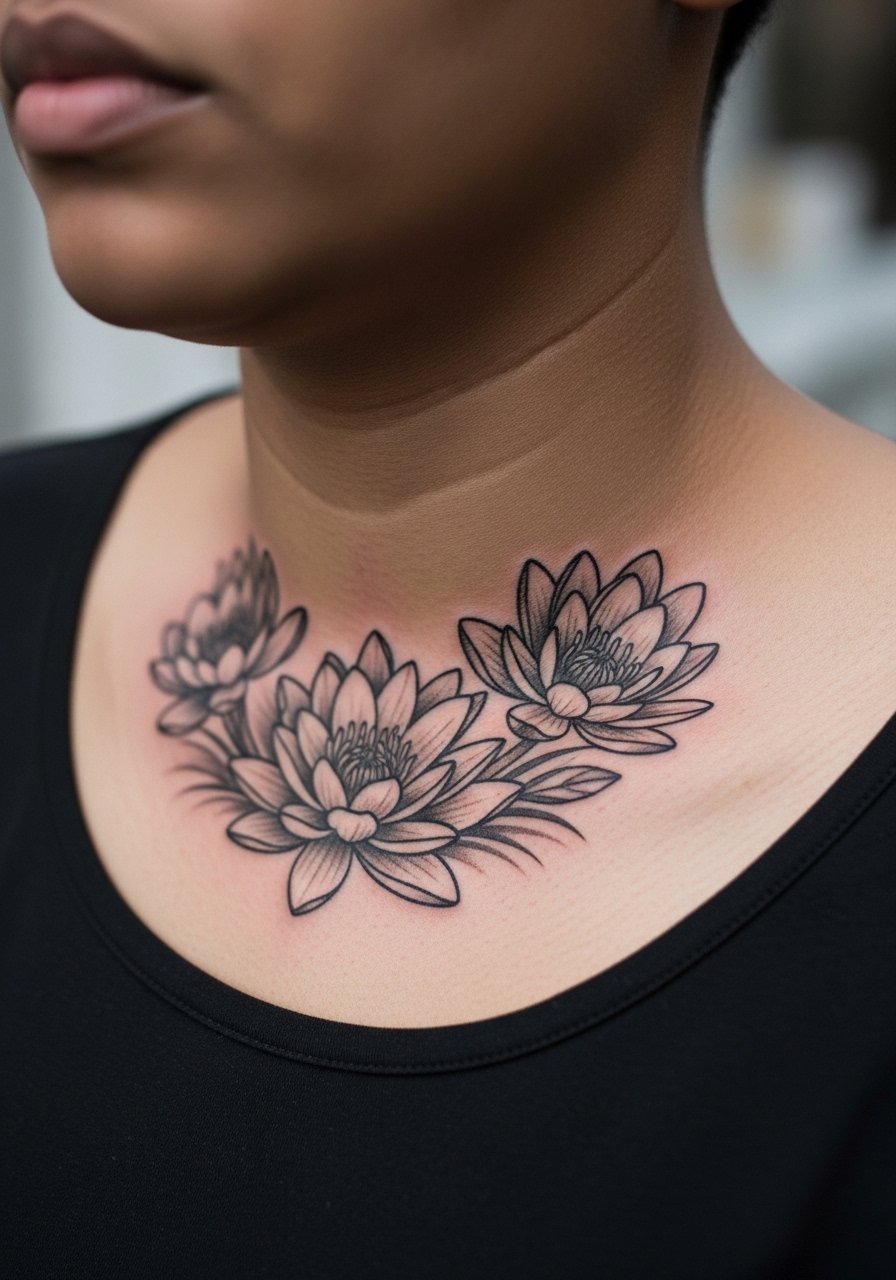
This placement reads elegant with a cluster of lilies arranged along the bone. The collarbone skin moves a lot with posture, so request slightly bolder linework near the joint and light stippling for the petals. Expect a touch more sting than a forearm but less than ribs. Sessions usually run one to two hours depending on size. A common error is packing too much tiny detail into the petal edges. That detail looks crisp for the first year and then softens. If you want to highlight it with clothing, pair the piece with an open-back midi dress or a wide-neck tank to keep attention on the upper chest without competing patterns.
3. Ribcage Single Lily, High-Contrast Shading
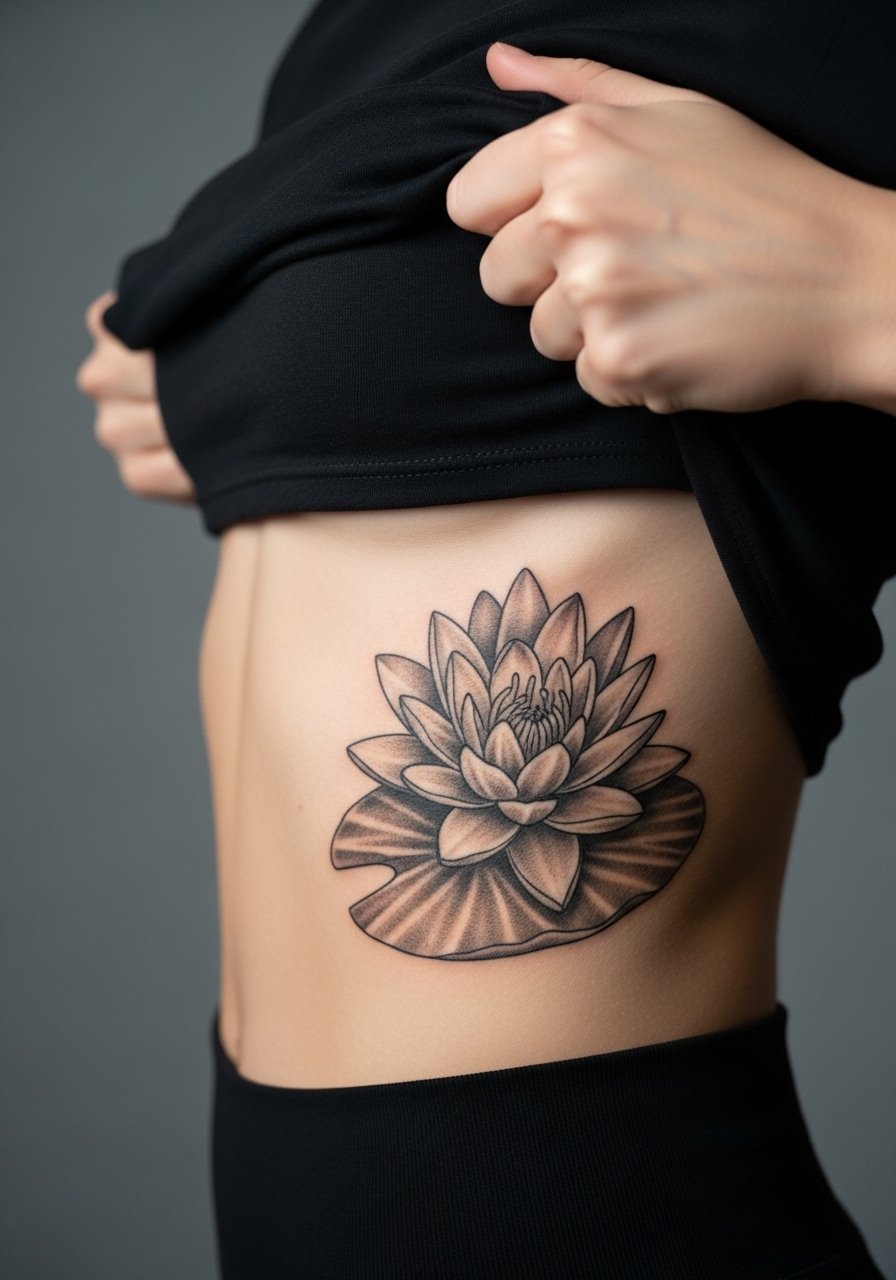
Fair warning, the ribcage is a higher pain zone. People split into two camps about fine line on ribs. One camp says the skin there stretches and blurs lines within two years. The other camp says with proper depth and spacing, fine line settles fine on ribs. Ask your artist which camp they side with before booking. For this design, I tell clients to go slightly larger than they think and use heavier mid-line shading to keep the lily readable as the skin shifts. Sessions may need two shorter passes rather than one long run. Expect touch-ups sooner than on forearms. Wear a cropped top for the session so the artist can work comfortably.
4. Ankle Wrap Lily with Negative Space
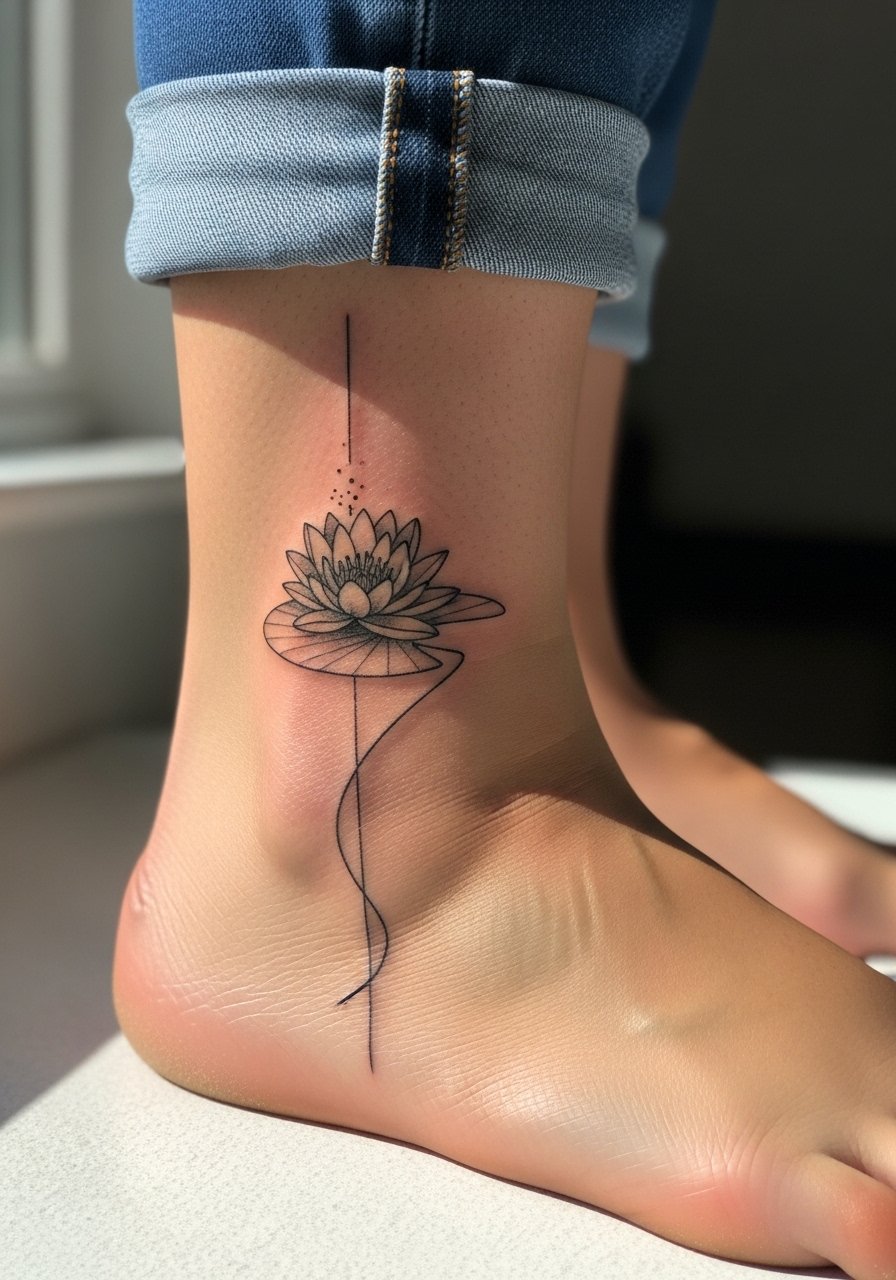
Ankle pieces are small and visible but subject to constant rubbing from shoes and socks. I recommend using intentional negative space between petals so the design keeps its shape through friction. Pain on the ankle is brief but sharp. A typical appointment is under an hour for a small wrap. The frequent mistake is packing a lot of tiny grey shading close to the bone. That shading disappears faster because of movement and contact. For showing it off, sandals or a hem rolled jean leg work well. Try a pair of simple leather sandals that reveal the piece without crowding it.
5. Tiny Water Lily on the Wrist
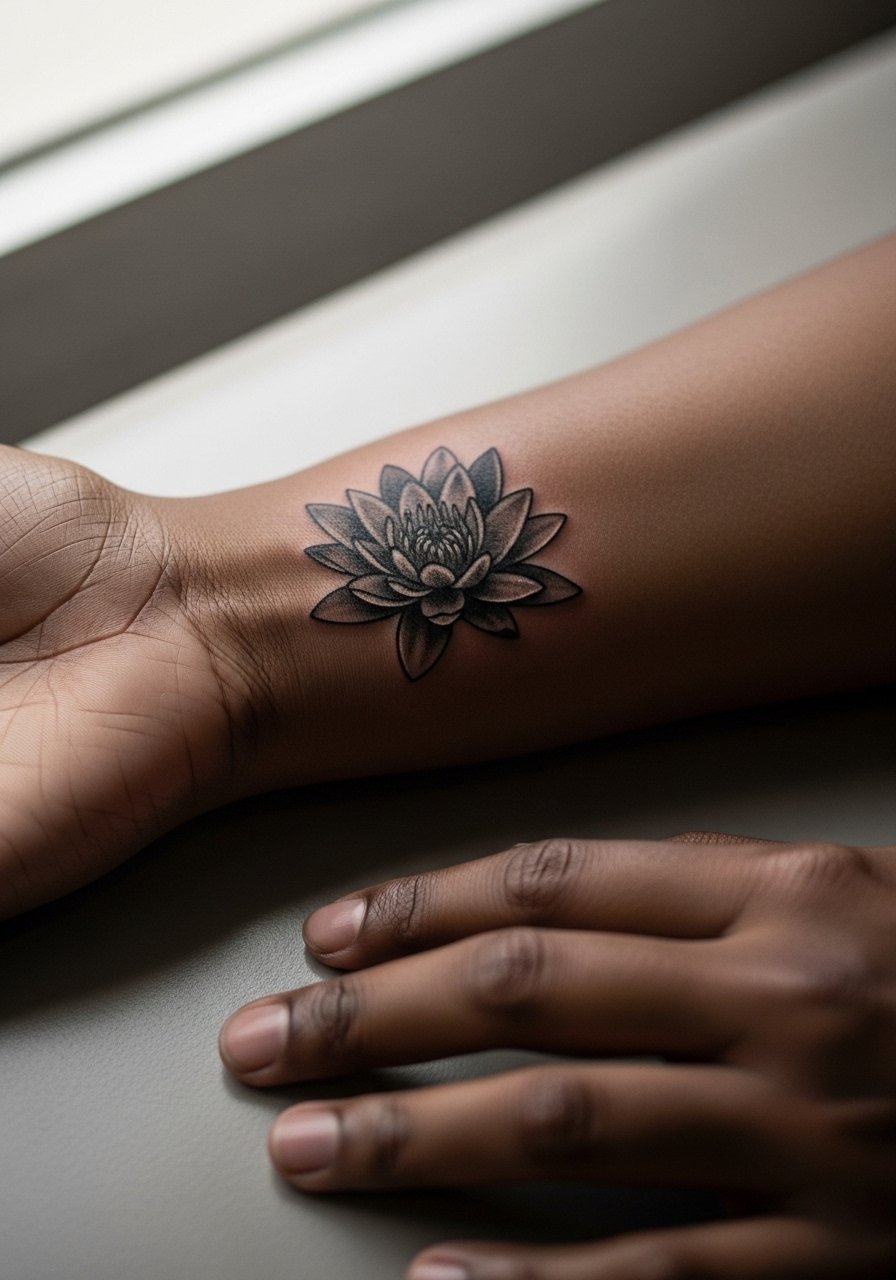
Wrist tattoos are readable and personal, but they live in a high-motion, high-wash zone. For a tiny water lily, ask for bolder primary linework and minimal inside shading so the silhouette remains clear at year three. Expect a short sting and a 30-60 minute session for a micro piece. A frequent mistake is insisting on hairline lines and dense grey that merge into a blur after repeated hand washing. For session comfort, wear a loose sleeve you can pull up easily. For styling, stack with a thin chain bracelet that complements the scale without overcrowding the wrist.
6. Water Lily Over the Hand and Base of Thumb
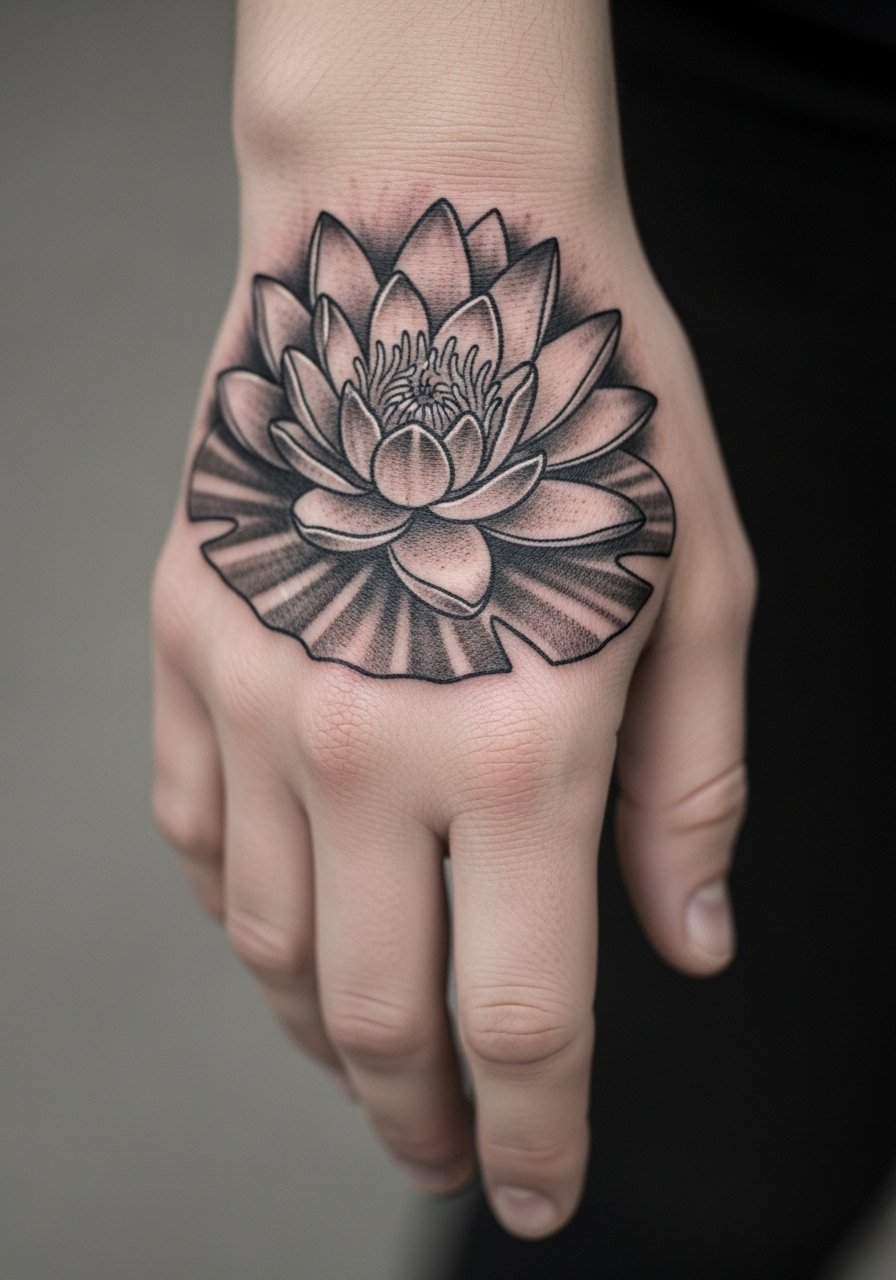
Hand pieces are high-visibility and high-risk. They fade faster and require touch-ups more often because of constant washing and sun exposure. There is a debate in the tattoo world about hand work. One side accepts the maintenance and touch-ups as part of the look. The other side warns that hands are a poor long-term canvas for fine detail. If you choose this spot, prioritize bold simplified shapes and limit tiny stipple. The session is relatively short but more painful than a forearm. A realistic touch-up timeline is often within two years. If you work in a setting where hands matter, think about career implications before committing.
Studio Day Picks
The first six designs above include wrists, hands, ribs, and ankles, which all have different prep and healing needs. A few targeted items make session day and the first week easier.
-
Stencil transfer paper kit. Lets you check placement on skin before the needle touches down, especially useful for the collarbone and forearm layouts above.
-
Topical numbing cream. Applied per instructions before chest or rib sessions to shave off the edge during sensitive passes.
-
Thin protective film roll. Keeps small wrist and hand pieces clean through that first 48 hours of heavy contact and hand washing.
-
Fragrance free gentle body wash. A mild wash that cleans healing lines without stripping moisture from delicate stipple shading.
-
Aquaphor healing ointment. Thin layers in the first few days help reduce tight scabbing on smaller black and grey fills without clogging the area.
7. Shoulder Cap Water Lily with Bold Outline
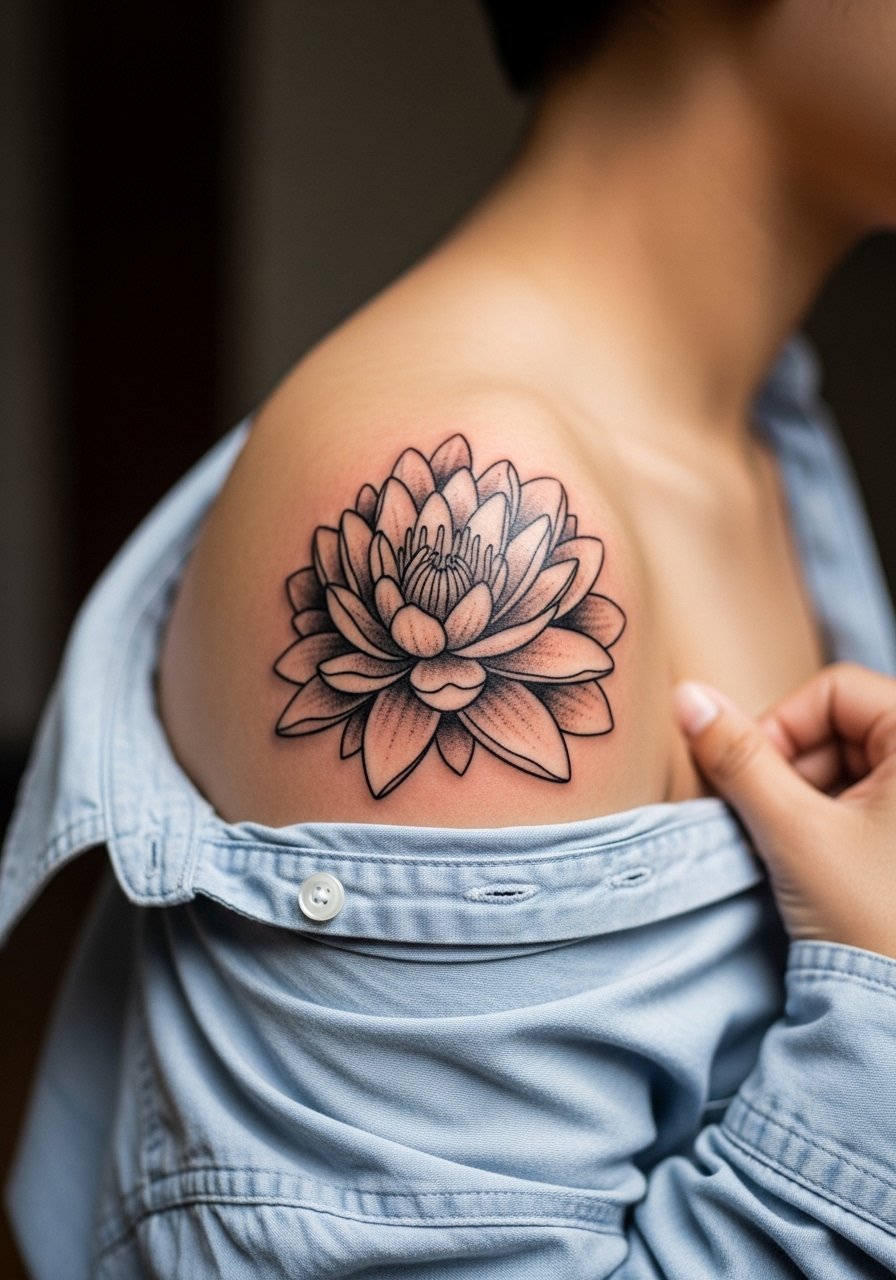
Shoulder caps are forgiving for bold outlines and age well with sun protection. This placement lets the artist use classic linework with deeper saturation that keeps the lily readable at five years. It is a low to moderate pain area and usually fits in a one to two hour session. A common mistake is overcomplicating the petal centers with dense grey that can flatten over time. If you want to show it off in summer, a loose button-down shirt pulled off one shoulder frames the work without competing patterns. Tell your artist you want heavier outer contours and lighter interior stippling for longevity.
8. Back Piece Water Lily Cluster Along the Spine
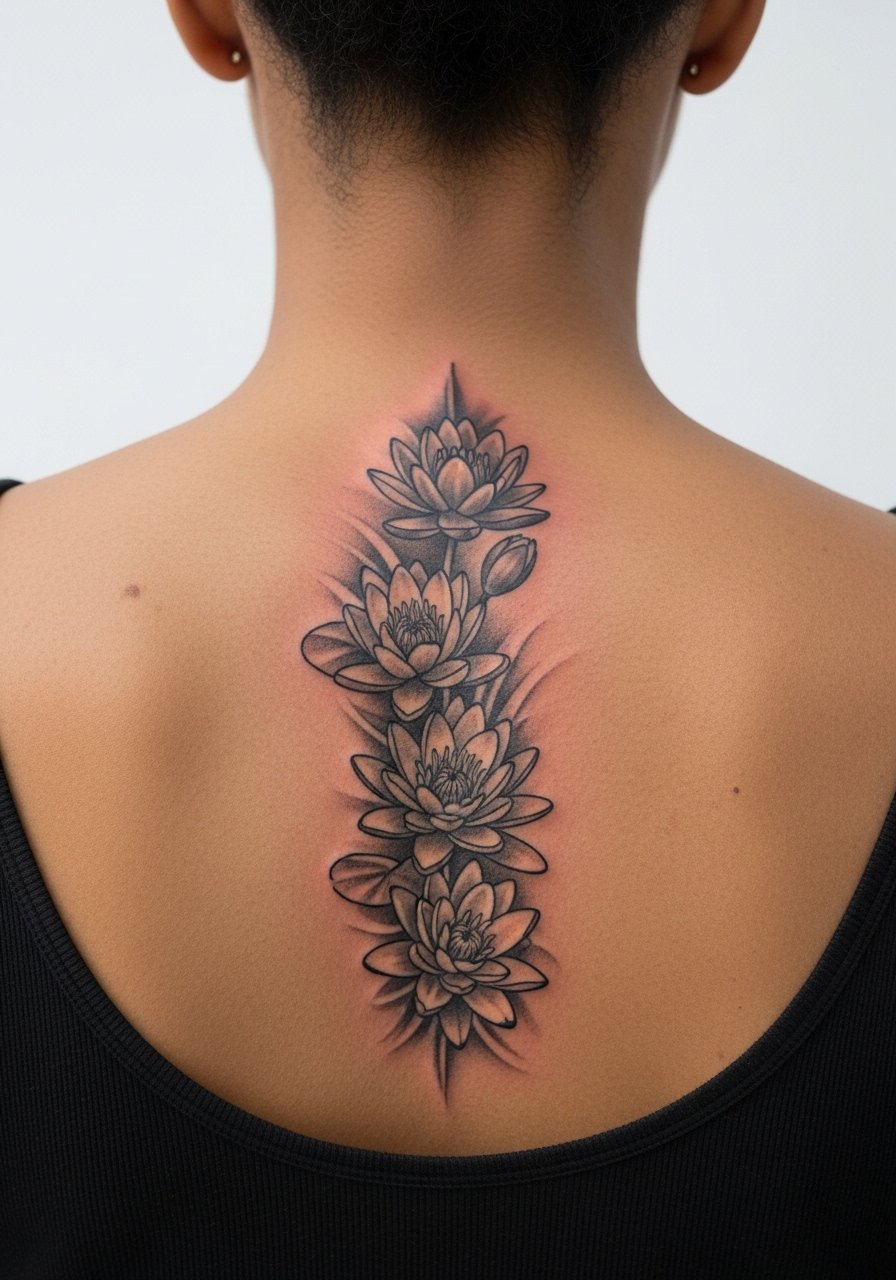
A vertical cluster along the spine makes a dramatic canvas and reads well with negative space between blooms. Back skin is relatively stable, so fine detail holds better here than on hands. Sessions will be longer and may require two sittings if you want multiple lilies. The main mistake is trying to cram tiny petals into a long column without breathing room. For consultation, bring references that show scale against a long vertical composition. If you are planning show-off outfits, open-back tops reveal the column beautifully.
9. Thigh Water Lily with Soft Stipple Shading
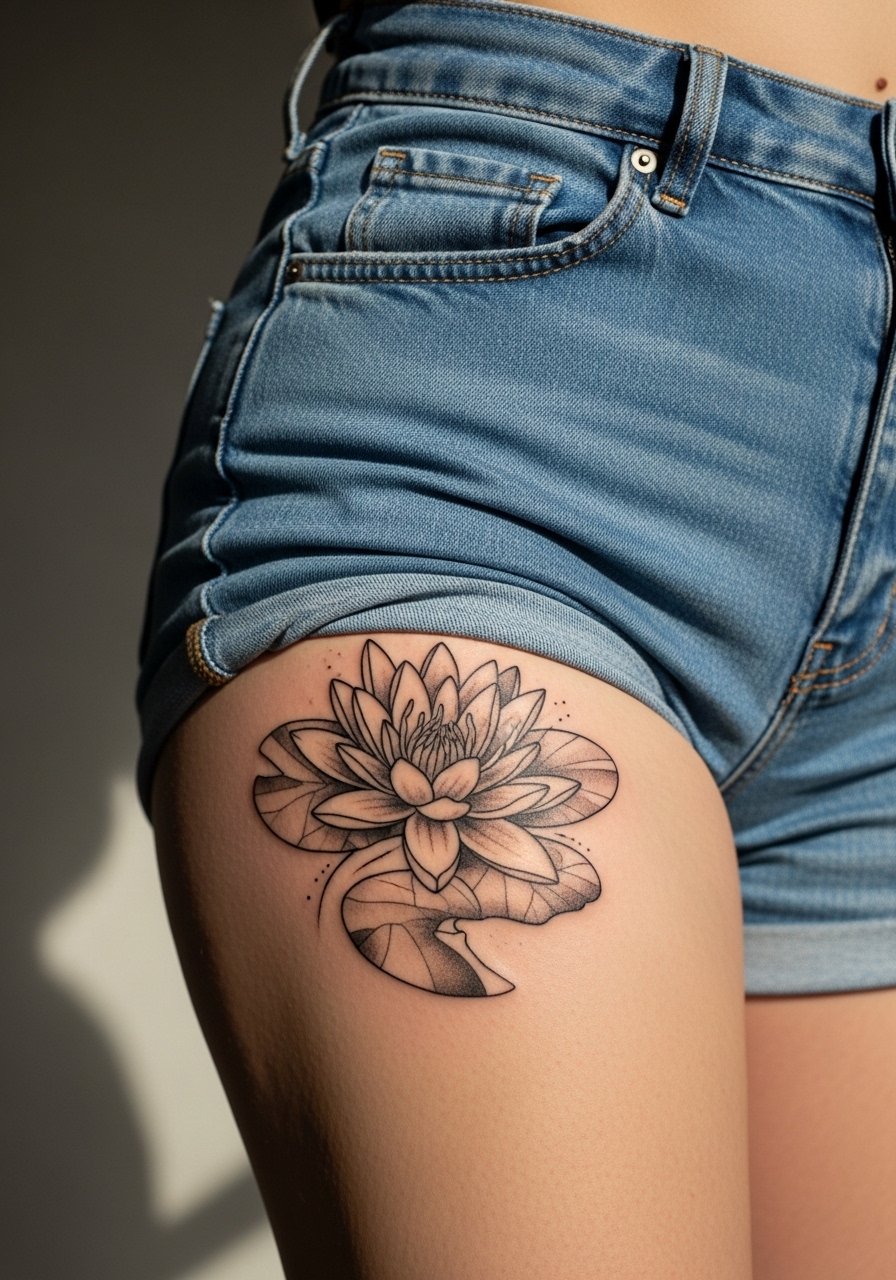
Upper thigh pieces are great for larger, softer shading because the area gets less direct sun and friction. Expect moderate discomfort and session times that range from one to three hours depending on size. Ask for gradual stipple transitions in the petals and ask your artist to avoid overly dense midtones that can pool as scabs. The common mistake is choosing super-fine contrast that disappears under clothing. For the session, wear loose shorts or a loose drawstring linen pant so the artist can access the area without pressure.
10. Calf Water Lily with High Saturation Greys
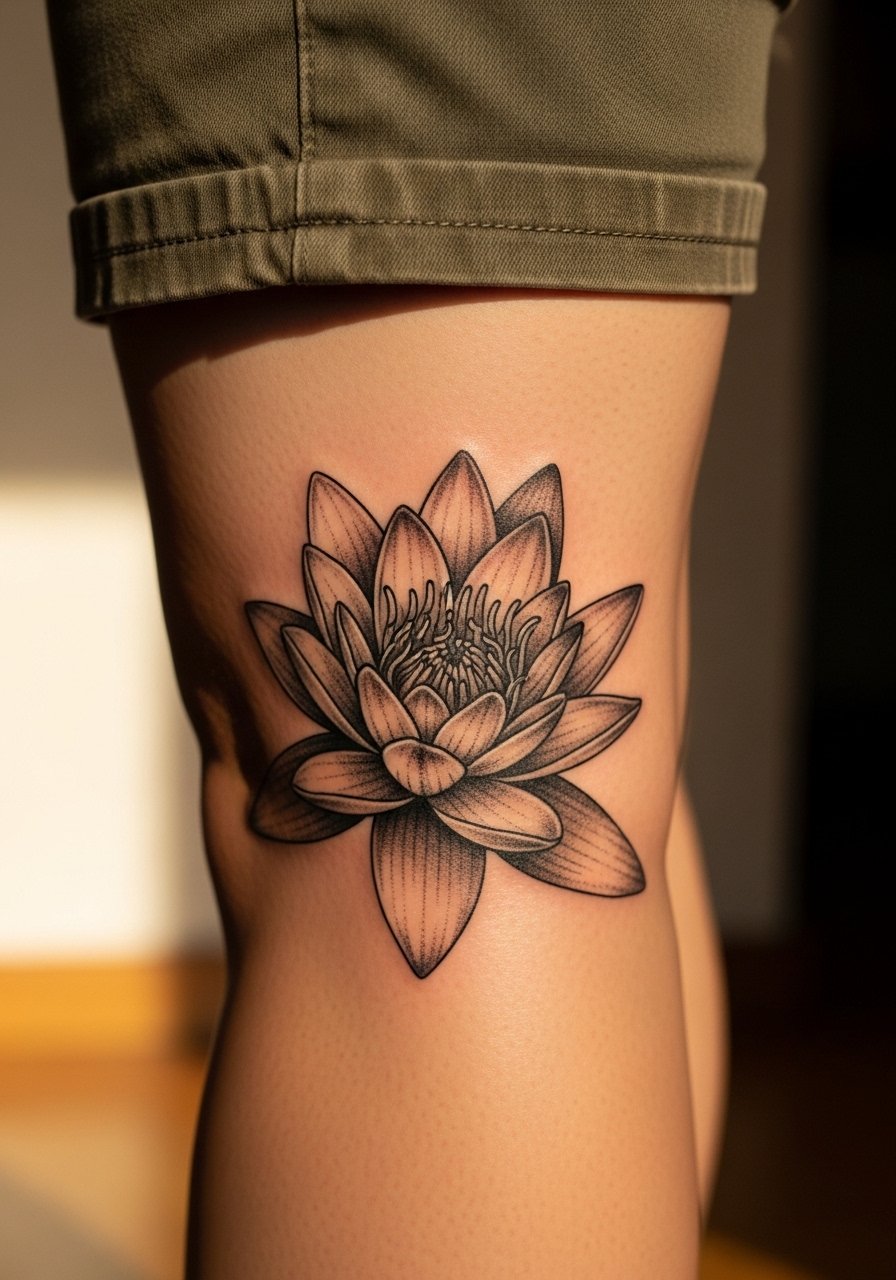
The calf gives space for heavier grey saturations that retain depth over time. Pain is moderate and sessions are comfortable for longer runs. Tell your artist to layer grey with stipple rather than flat fills to avoid large blocks of faded grey in a few years. A common mistake is using large washes of even grey which then look patchy as they fade. If you plan to wear boots or longer socks, consider how friction might abrade the lower portion. For summer, cropped pants or shorts show off the vertical flow.
11. Behind-the-Ear Mini Lily Accent
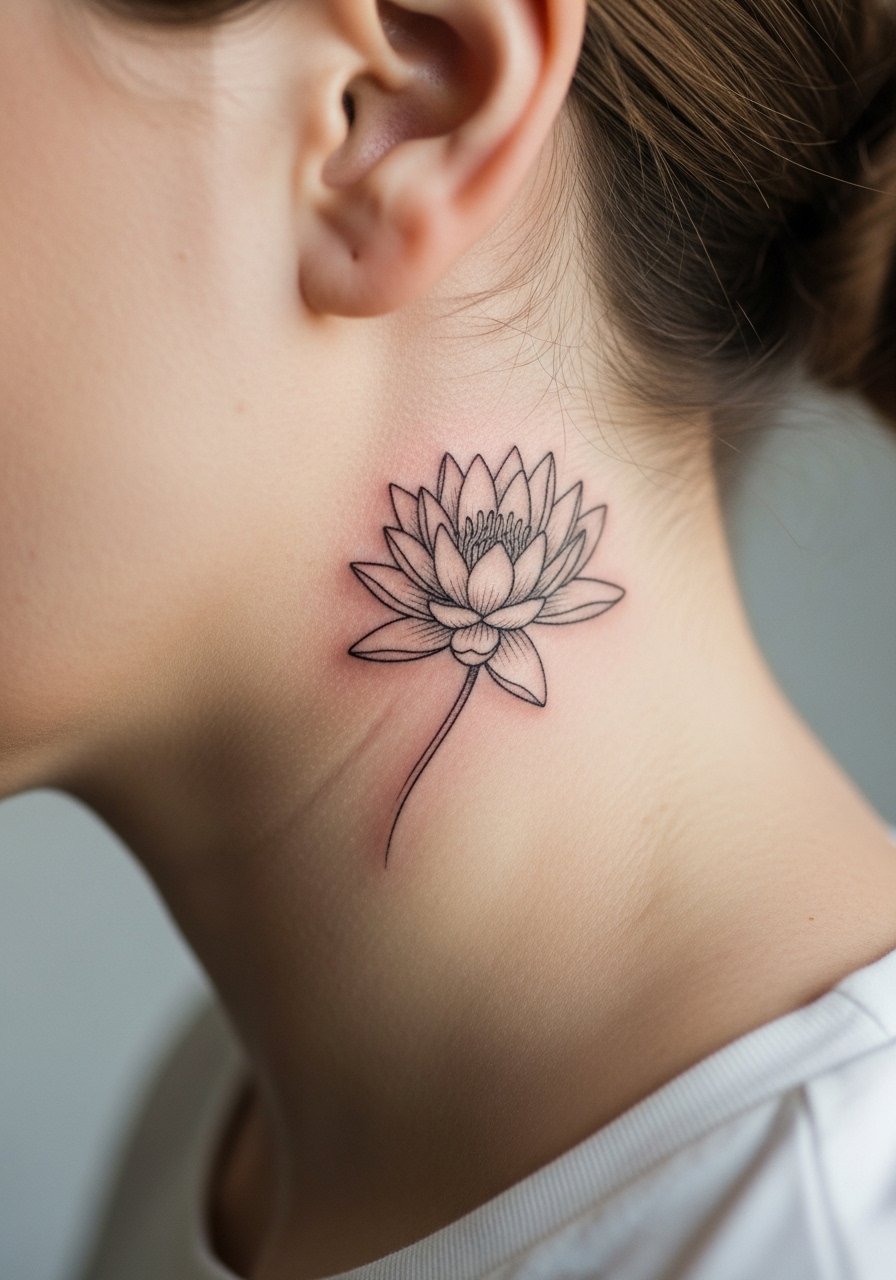
This is subtle and intimate, but placement must be described precisely to your artist. Behind-the-ear work demands very small needles and careful depth control, otherwise the lines can feather. Pain is brief and sharp. Sessions are very short. A mistake people make is expecting long-lasting micro details there. Ask instead for a simplified silhouette and touch-up plan. For appointment ease, wear your hair up or in a clip. A minimalist stud earring pairs well if you want a little attention without shouting.
12. Sternum Water Lily in Soft Grey Wash
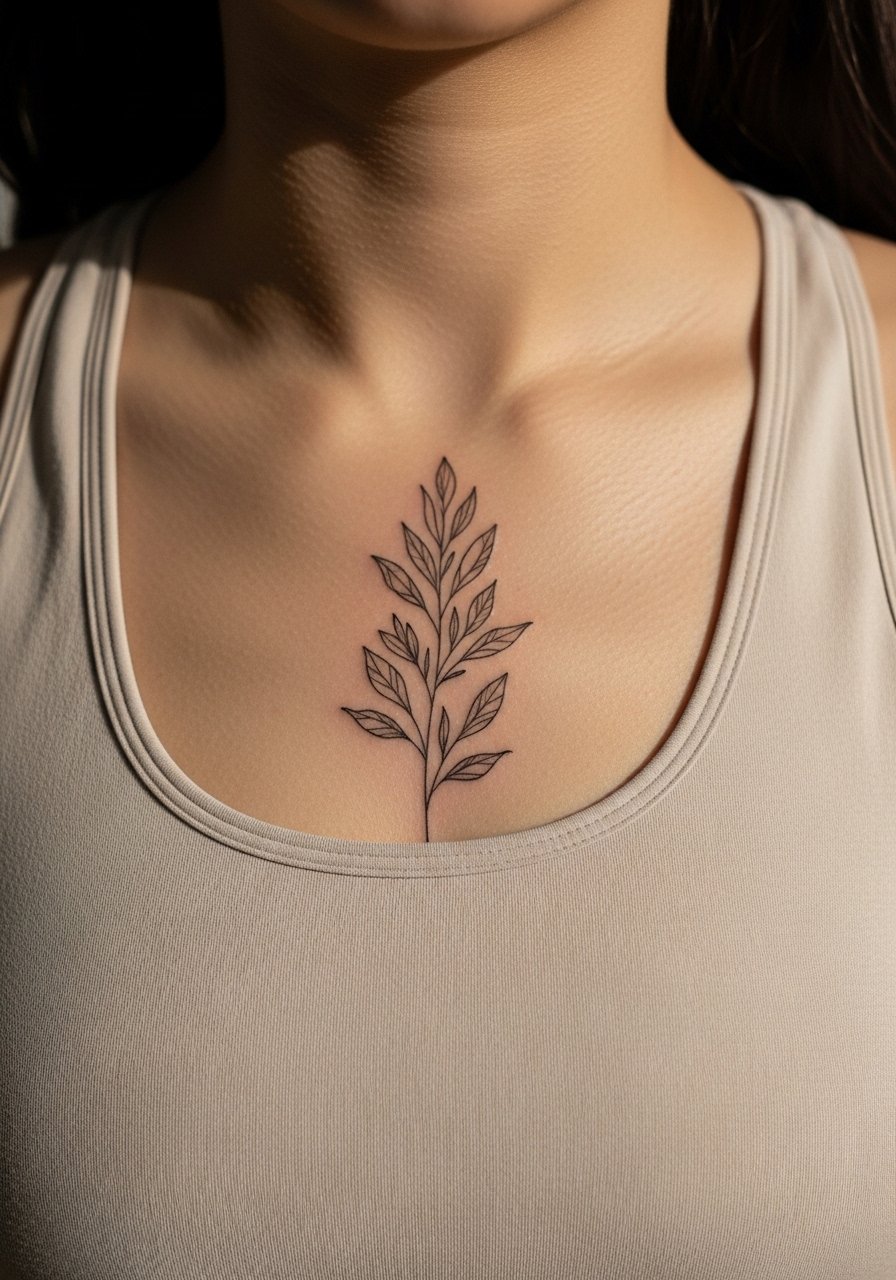
Sternum placements are sensual and sit on sensitive cartilage. They can be painful. Artists diverge on whether dense stippling will hold on the sternum. One camp favors larger open shapes and soft washes. The other camp uses tighter dots to mimic texture. If you choose this area, prioritize spacing and plan for longer aftercare since clothing can rub. Sessions often require breaks and can run long. Bring a zip-up or loose top that you can pull aside for the session. For evenings out, a strappy bandeau top reveals the lines cleanly.
13. Inner Bicep Water Lily with Micro-Realism Center
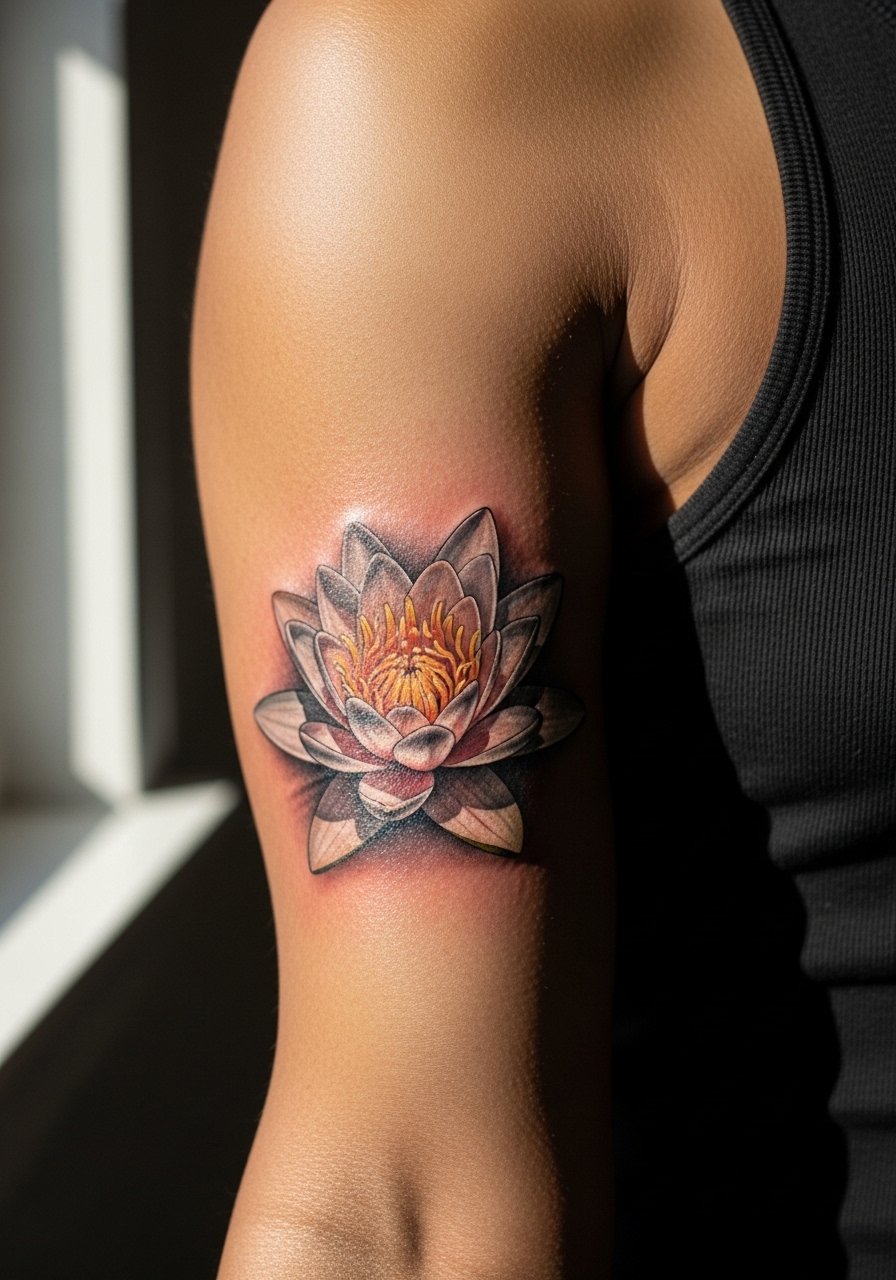
Inner biceps are sheltered and hold detail surprisingly well, but they require specialized technique because of softer skin. Pain is moderate and sessions are shorter because the area is narrow. Tell your artist you want a crisp micro-realism center with wider negative space around the petals to avoid early merging. A mistake is asking for dense concentric shading that later looks muddy. For the session, wear a loose tank so the artist can access the area without fabric interference. Inner biceps age nicely with minimal sun exposure.
14. Finger Side Lily Accent

Finger tattoos are convenient but notoriously high-maintenance. Expect faster fading and possible early touch-ups because the skin is thin and constantly washed. Keep the design extremely simple. A frequent error is to include tiny internal grey shading. That detail fades quickly and leaves only an outline. Sessions are short but you should plan for touch-ups at year one or sooner. If you need to hide the piece for work occasionally, consider placement on the finger side rather than the top.
15. Shoulder Blade Single Lily with Soft Edgework
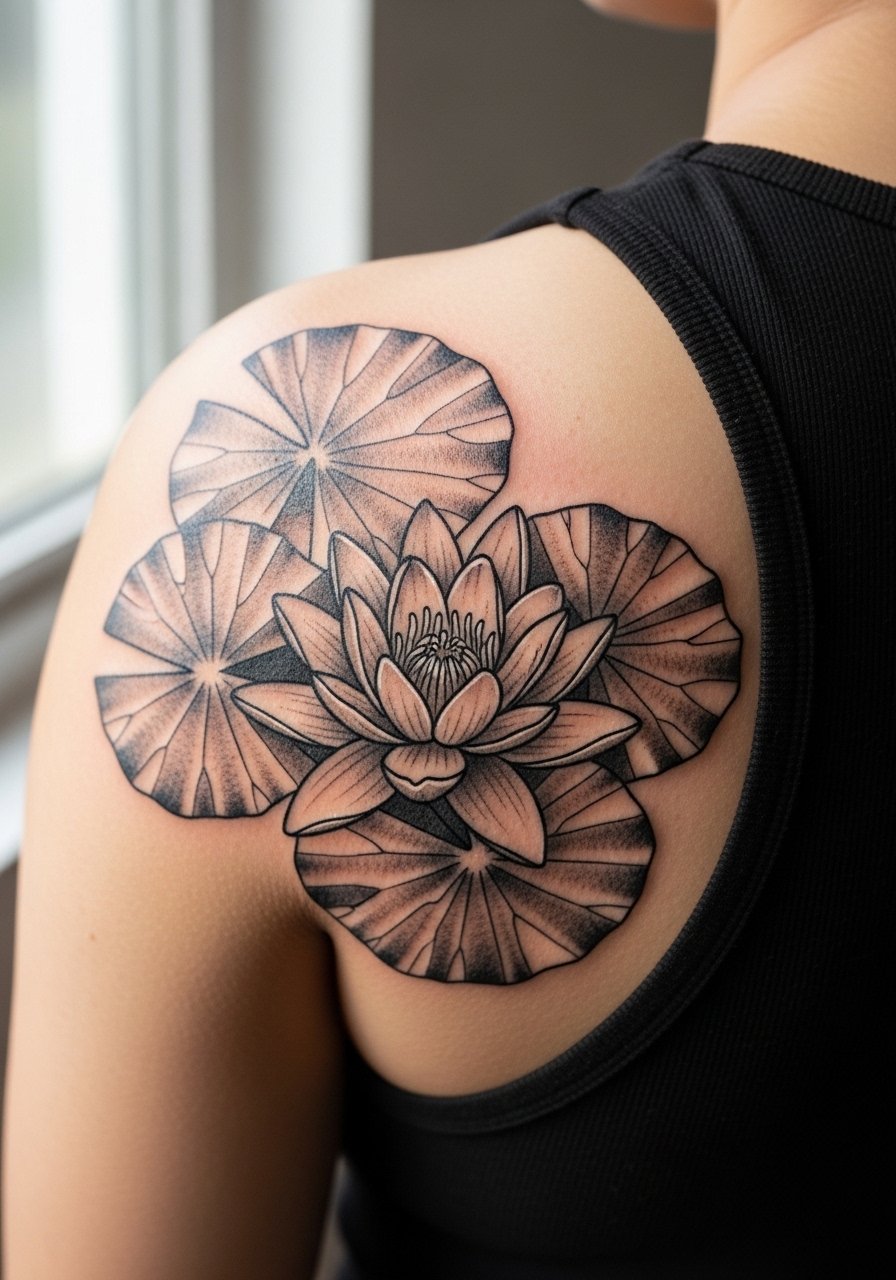
Shoulder blades are forgiving and good for soft edgework using dot work and whip shading. Pain is low to moderate and outlines hold well. Ask your artist for graduated stippling from the center outward to prevent flat, blocky grey patches later. A common mistake is putting a dense, dark midtone too close to the edge of petals. That can create a heavy look as healing softens the gradation. For showing it off, an open-back tank or halter keeps attention on the blade without distractions. Try a casual racerback tank that frames the area.
16. Full Lower Sleeve Water Lily Band
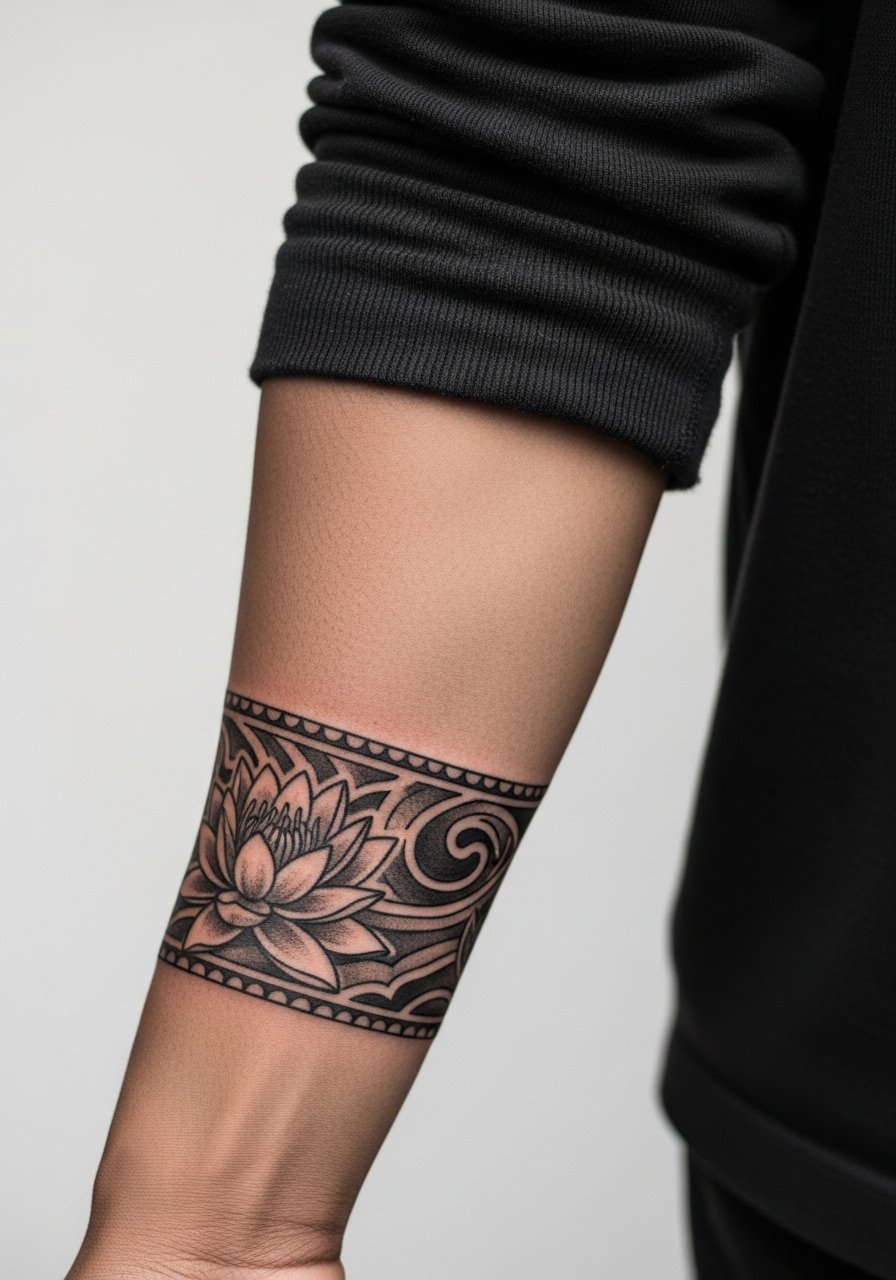
A banded lower sleeve lets you repeat lily motifs for a cohesive wrap. The forearm tolerates repeated elements well if you leave breathing room between blooms. Sessions may be split into two visits depending on band length. Common mistakes include compressing too many lilies into a narrow band which leads to early visual merging. Ask for mixed techniques such as stipple centers and slight whip shading on petals to maintain depth. For daily wear, a rolled sleeve frames the band without hiding it.
17. Calf-to-Ankle Graduated Lily Trail
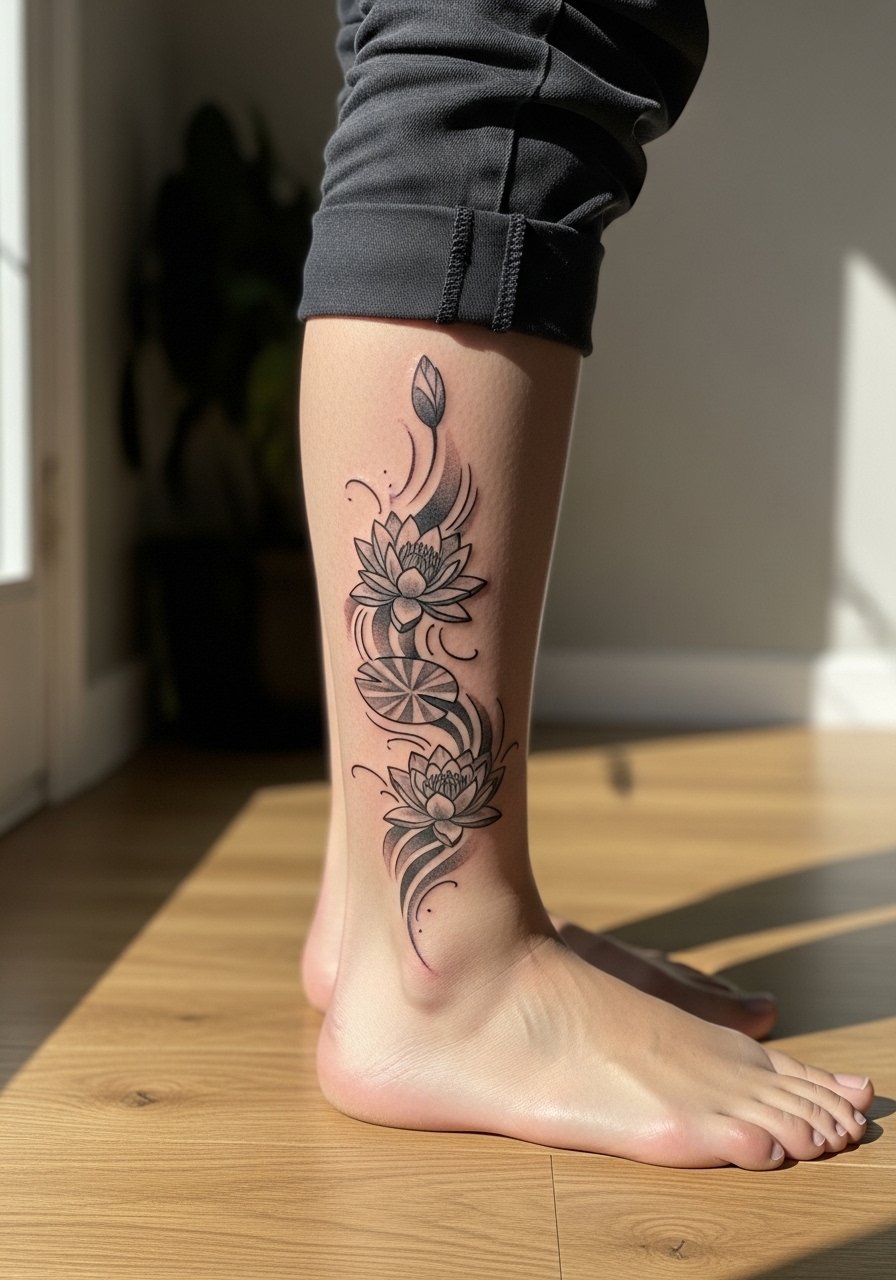
A graduated trail works when you want movement and scale variation. The trick is planning petal sizes so the ankle section uses larger, simpler shapes and the calf carries more detail. Pain varies along the trail, with the ankle feeling sharper. Sessions often split into two. A mistake is keeping uniform petal size throughout, which reads awkward next to the ankle bone. For footwear choices later, cropped pants or sandals let the flow show. A low-maintenance option is to place heavier outlines near the ankle where abrasion is higher.
Frequently Asked Questions
Q: How badly will a black and grey water lily fade on my wrist compared with my thigh?
A: Wrist pieces usually fade faster because of constant washing and sun. Thigh skin gets less sun and friction, so grey washes hold longer. Expect touch-ups sooner for wrists, and ask your artist to favor bolder primary contours on any high-motion area.
Q: Are fine line water lilies a bad idea on ribs?
A: Artists are split. One camp says ribs blur quickly due to skin stretch and movement. The other camp says careful spacing and proper needle depth make fine line viable. It depends on your artist's experience and your pain tolerance. If you choose ribs, go slightly larger and plan for a possible touch-up.
Q: What should I wear to a sternum or rib session to stay comfortable?
A: Wear a fitted sports bra, bandeau, or a zip-up hoodie you can pull aside so the artist has clean access. Loose lower garments help if the session runs long. The right clothing reduces awkward repositioning during longer passes.
Q: How often do black and grey water lily tattoos need touch-ups?
A: It depends on placement and sun exposure. Hands and fingers often need touch-ups inside one to two years. Forearms and calves may go three to five years before notable softening. Plan for maintenance and check your tattoo yearly with your artist to assess any loss of contrast.
Q: Can I pair a collarbone lily with open-back dresses without revealing too much?
A: Yes. A wide-neck or lightly open-back dress highlights the collarbone lily while keeping the rest discreet. An open-back midi dress or wide-neck top shows the work without making it the only focus.
Q: Are there cultural concerns with water lily designs I should consider?
A: Water lilies appear in several traditions. If your design borrows a specific cultural motif or sacred symbol, consider adapting it respectfully and discuss intent with your artist. Many people choose subtle variations rather than direct replicas to honor origin while keeping the piece personal.
