
Bold blackwork holds up in ways fine line rarely does, and for goth-leaning pieces it gives a presence that ages into its own character. Expect heavy saturation to soften but keep shape, and understand placement dictates longevity more than trend. Read these 17 bold blackwork goth tattoo ideas to find the one that matches your wardrobe, your pain tolerance, and the look you want five years from now.
1. Saturated Black Rose on Inner Forearm
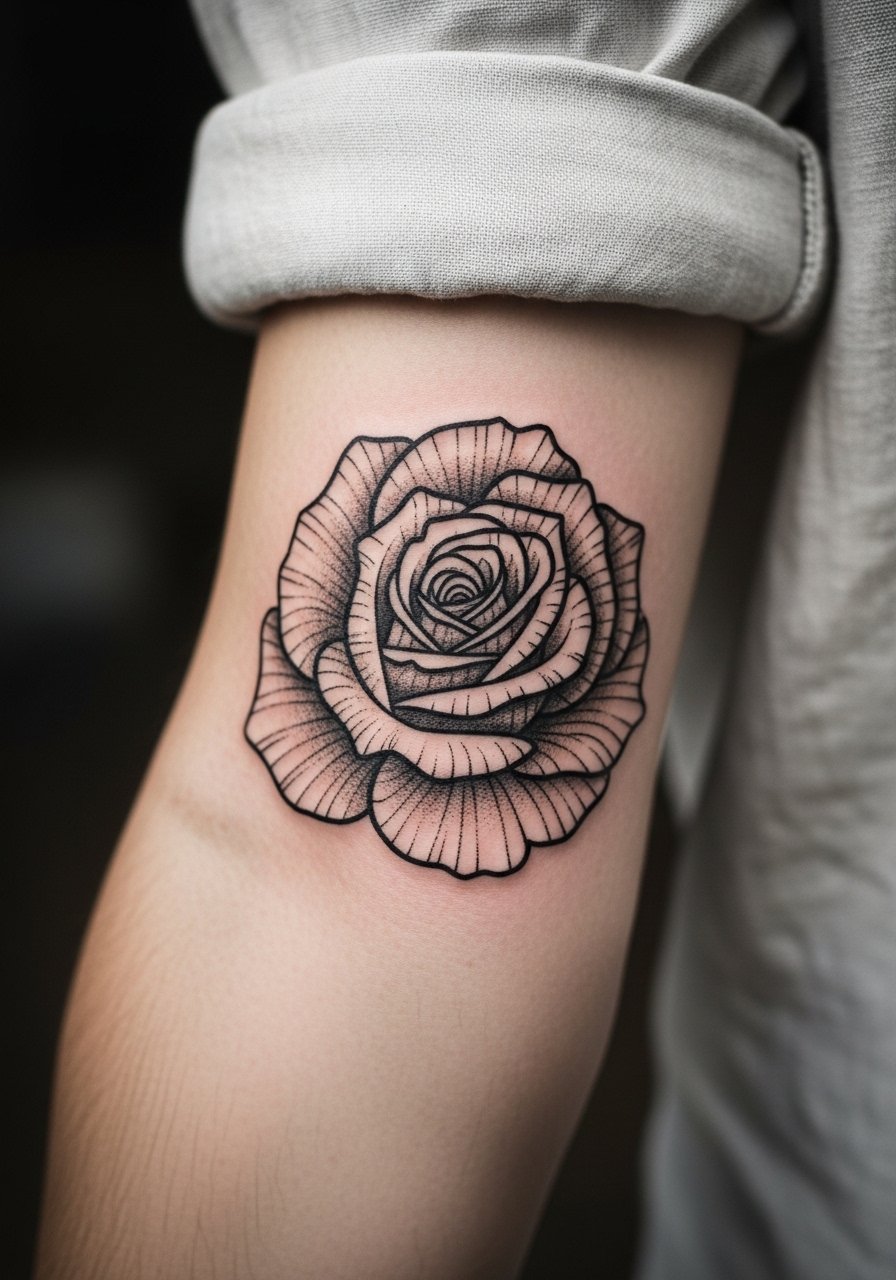
I often recommend a saturated black rose on the inner forearm when someone wants something legible from across a room. The visual reads bold with simple silhouette and heavy fill, and the placement is forgiving for saturation. Tell your artist you want blocky petals and solid saturation rather than tiny hairline detail. Common mistakes are requesting tiny petals or too much fine shading, which later merges and looks muddy. This placement feels like a four out of ten on most pain scales, and a single session of one to two hours usually covers it. Expect the black to soften at six months and mellow into a matte patch by two to five years. Pair this with a rolled-up linen shirt when you want to show it off without competing patterns.
2. Occult Sigil Band Around the Wrist
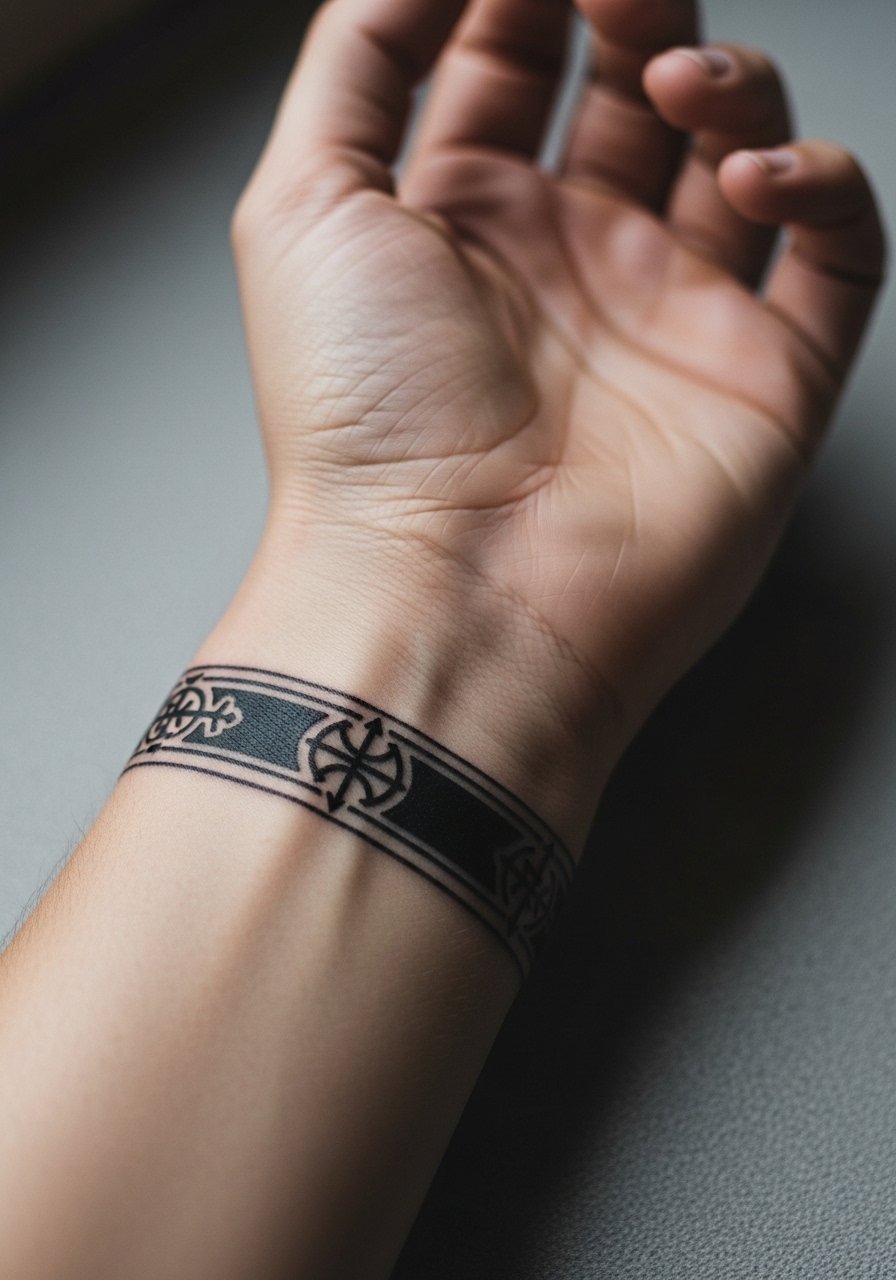
A wrist band of gothic sigils reads like jewelry, and that is exactly why people choose it. Fair warning, wrists see friction from watches and frequent washing, so ask for slightly thicker linework and a touch more spacing between elements. The biggest mistake is making the sigil too small. At six months the edges are usually crisp. By year three tiny gaps can close, which means plan for a touch-up around year two to three for long-term clarity. The session is quick, often under an hour, and rates a six out of ten for discomfort. Style it with stacked pieces like a dainty bracelet set that still lets the blackwork read as the focal point.
3. Heavy Blackwork Skull on the Upper Arm
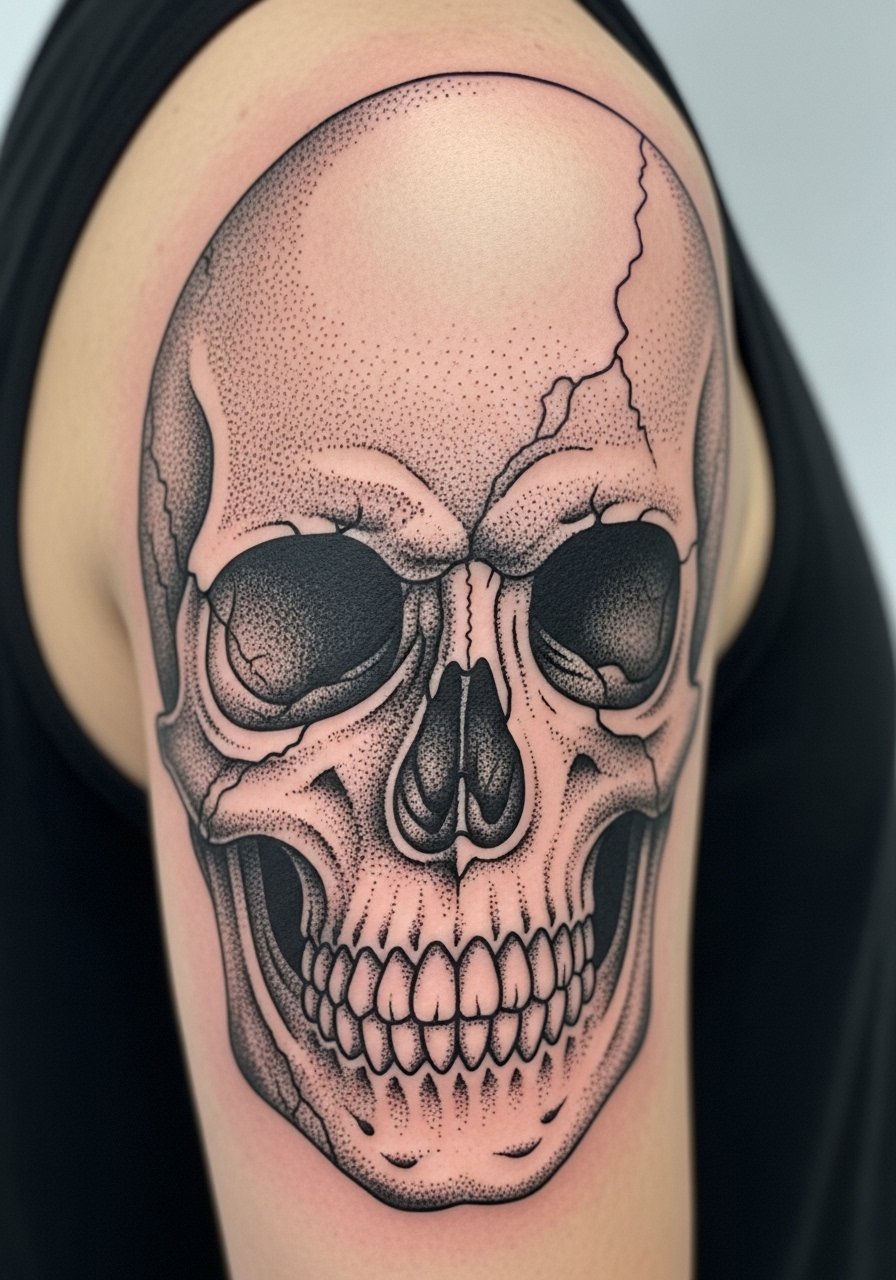
I've seen skull motifs survive the years because artists lean into strong silhouette and heavy black fields instead of tiny cross-hatching. Tell your artist you want bold negative-space teeth and stipple in the hollows to keep texture without tiny lines. A common error is over-detailing the eye sockets, which blurs faster than bold shapes. Upper arm sessions are moderate on pain and usually take two to three hours depending on size. Expect vibrant saturation at six months, then steady mellowing that keeps form at five years if the fill was solid. If you want this piece to sit with casual outfits, rolled short sleeves or a sleeve cuff highlight the shape without hiding it.
4. Blackwork Corset Ribs Panel
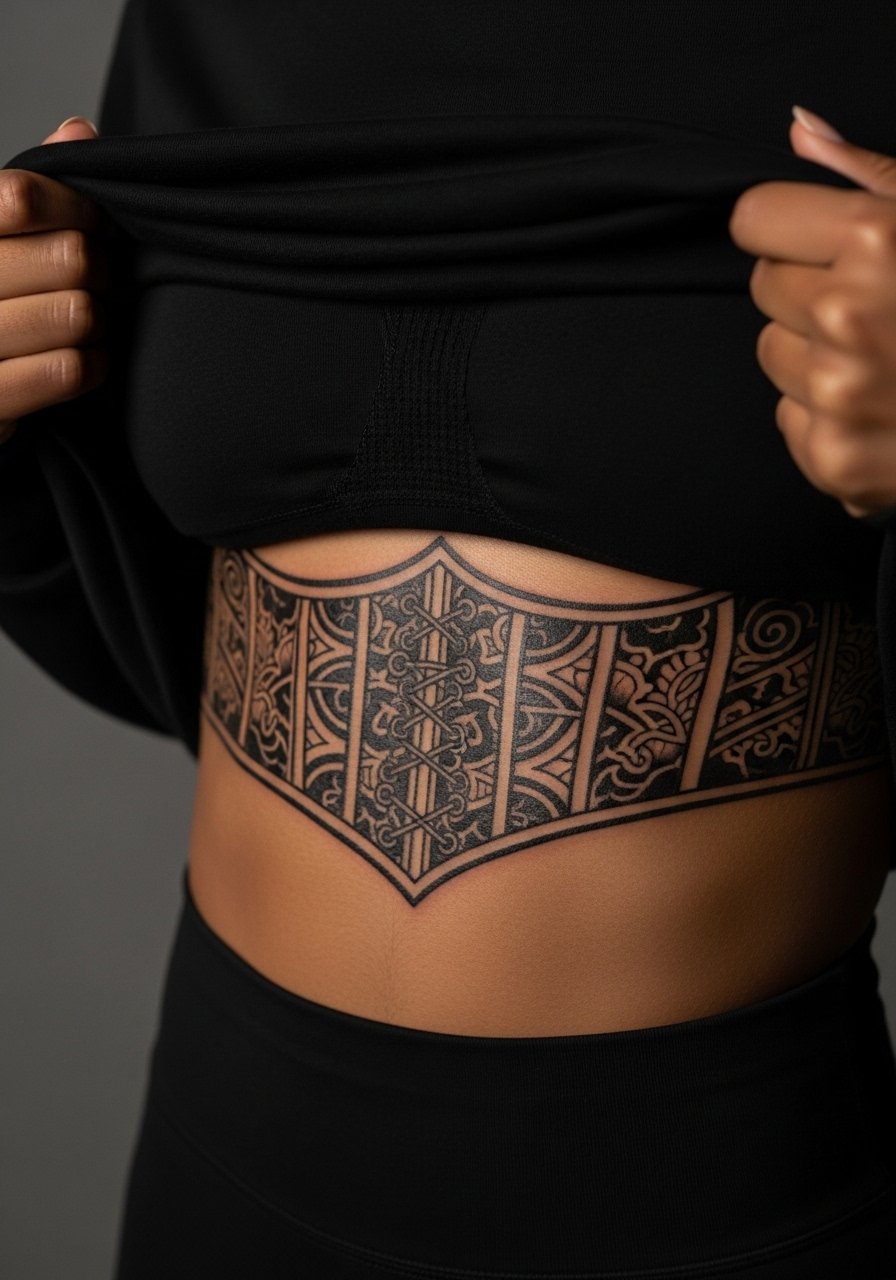
Fair warning, the ribcage is one of the higher pain placements most artists mention. That pain is part of why tight black panels can be striking. Artists split into two camps on this placement. One camp says the thin, curved skin and breathing motion blur fine line there quickly. The other camp argues that with deep, consistent saturation and intentional spacing, a black panel holds up. Ask your artist which camp they follow before booking. The most common mistake is shrinking the design to fit a single session. This piece often needs two visits for even saturation. For the session wear a cropped athletic top you can lift without tugging, and bring a loose cardigan for the walk home.
5. Gothic Hand Piece with Negative Space Lace
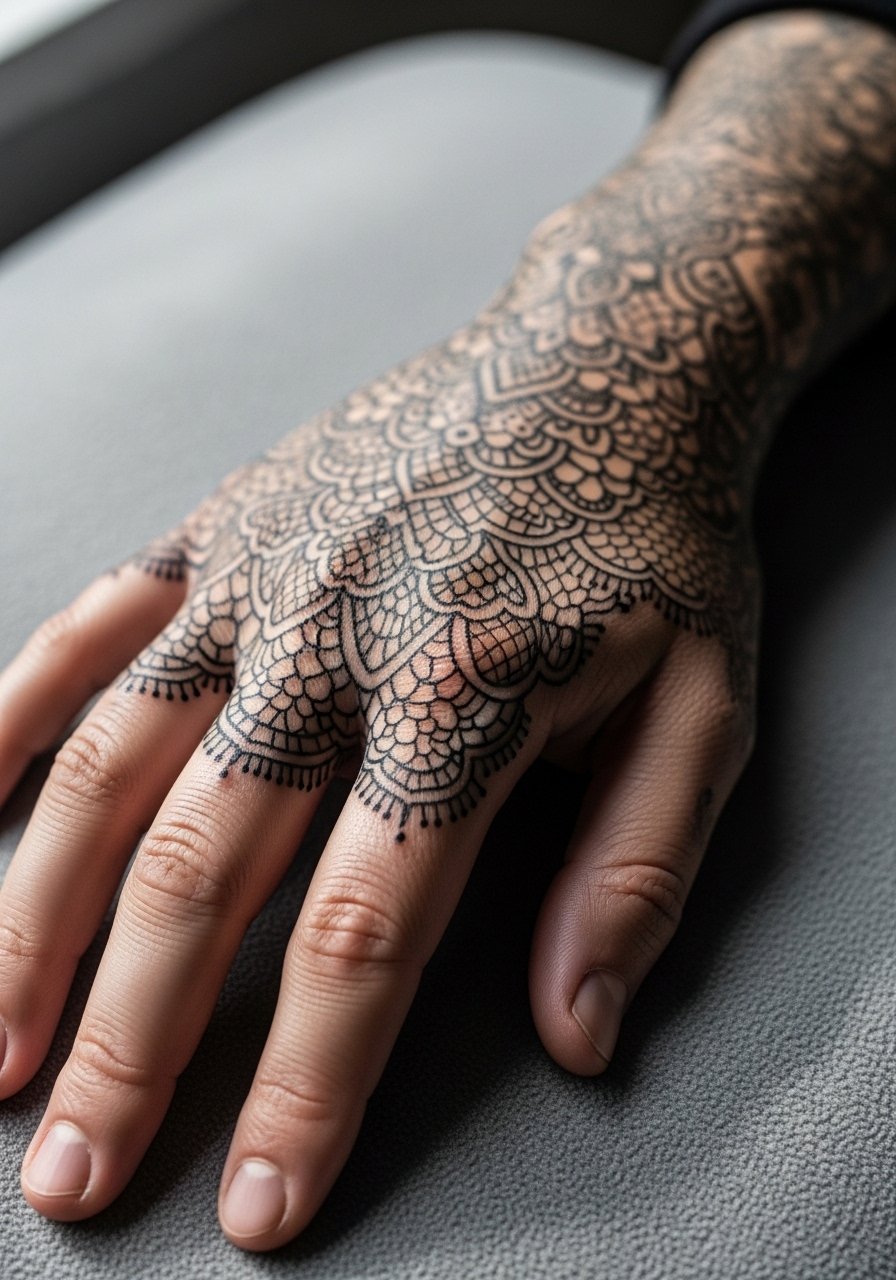
Hand tattoos are a commitment because of visibility and faster wear from washing and sun. The lace look works when the artist uses bold black anchors and lets the lace live in negative space. A common mistake is filling every gap with tiny detail. For longevity ask for slightly thicker anchor lines and open negative spaces. Hands are high on the pain scale and sessions are often short but intense. Expect more frequent touch-ups around year two. Keep in mind hand tattoos still affect hiring in some industries, so think about career implications before committing. A minimalist ring stack complements this placement well, for example a thin gold ring set frames the design without crowding it.
6. Solid Black Crescent Moon Along the Collarbone

Most people pick collarbone pieces because they want a design that moves with clothing. The collarbone shows off bold black shapes well. The mistake is placing a too-small crescent with thin linework. This area benefits from slightly heavier linework and generous negative space. Sessions are short and discomfort is moderate. Over time the shape keeps its silhouette because there is less daily rubbing here than on hands or feet. For showing it off wear a wide-neck shirt you can pull aside when you want the piece visible and still keep it private when you do not.
Studio Day Picks
The first six ideas focus on wrists, forearms, hands, ribs, collarbone, and upper arm, and those placements ask for different prep and care during the session.
-
Stencil transfer paper kit. Lets you preview the exact placement and orientation on forearm and collarbone pieces before ink ever touches skin.
-
Topical numbing cream. Applied as directed before ribcage sessions it can take the edge off without changing the saturation when the artist starts.
-
Thin protective film roll. Handy for hand and wrist work that sees constant rubbing from daily tasks during the first week.
-
Fragrance-free gentle body wash. Cleans sensitive collarbone and rib areas without stripping healing ink.
-
Saniderm tattoo bandage. A single transparent dressing for chest and forearm pieces protects from clothing friction while keeping the area breathable.
7. Blackout Ankle Cuff with Gothic Motifs
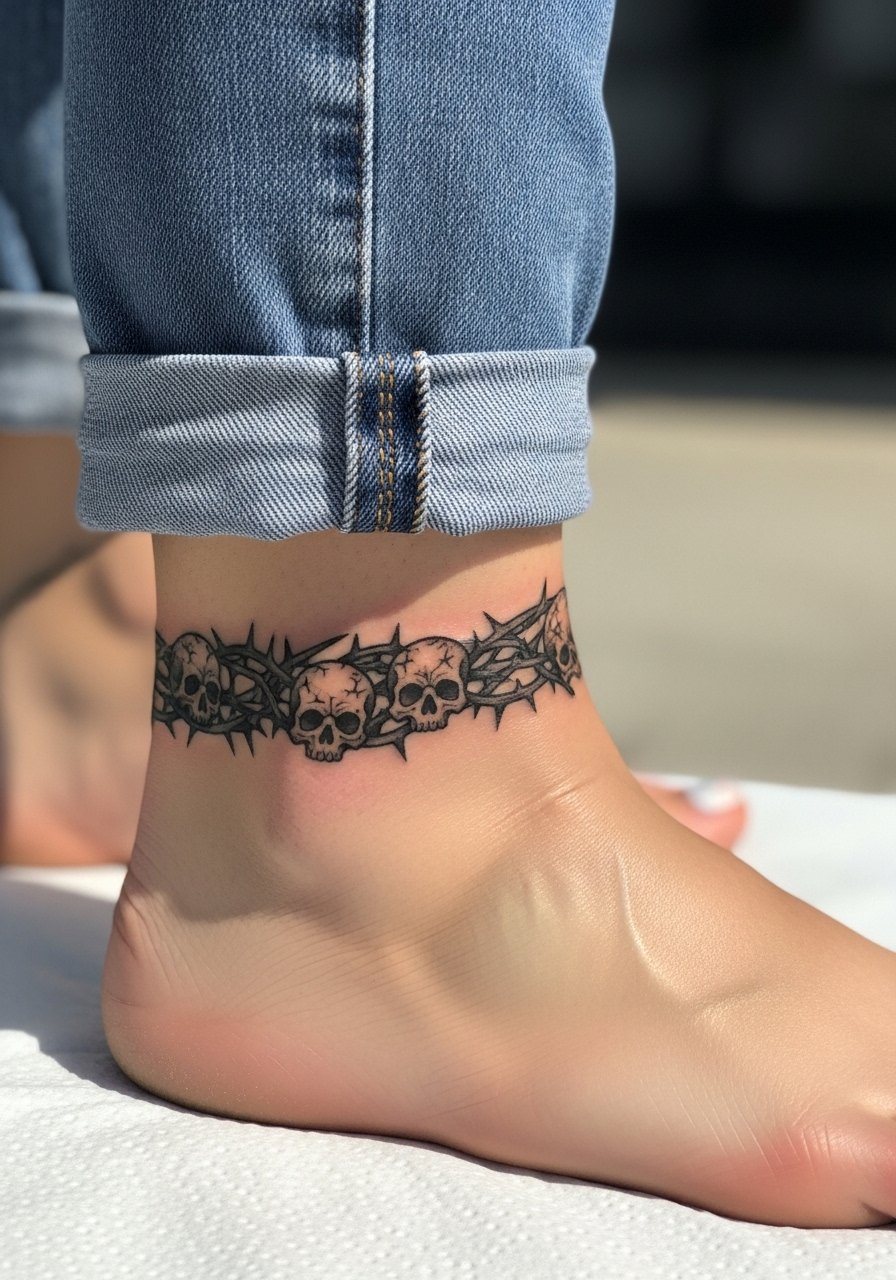
Ankle cuffs with heavy black panels look like footwear extensions when paired right. The ankle area tolerates saturation but watches and socks add friction during healing. Ask your artist for a slightly tapered edge so the cuff reads clean against movement. A common mistake is a perfectly straight blackout ring that looks like a bandage when healed. Expect a one to two hour session and plan for a touch-up around year two if thin areas show. For session comfort and showing off later, roll jeans or wear slip-on sandals that leave the ankle visible and reduce pressure on the fresh ink.
8. Blackwork Bat Swarm Across the Shoulder Blade

There is something theatrical about a swarm that moves with the shoulder. This design shifts when applied to the shoulder blade versus the upper arm. On the shoulder you can arrange bats to curve with muscle, which keeps the composition lively. A common mistake is arranging them too densely. Sessions are moderate and usually done in one visit for small clusters. Expect crisp silhouettes at six months and then softer edges at three to five years, but the composition will remain readable. For the session, wear a tank top you can pull aside easily so the artist has surface access without a lot of adjustment.
9. Blackletter Script on the Sternum
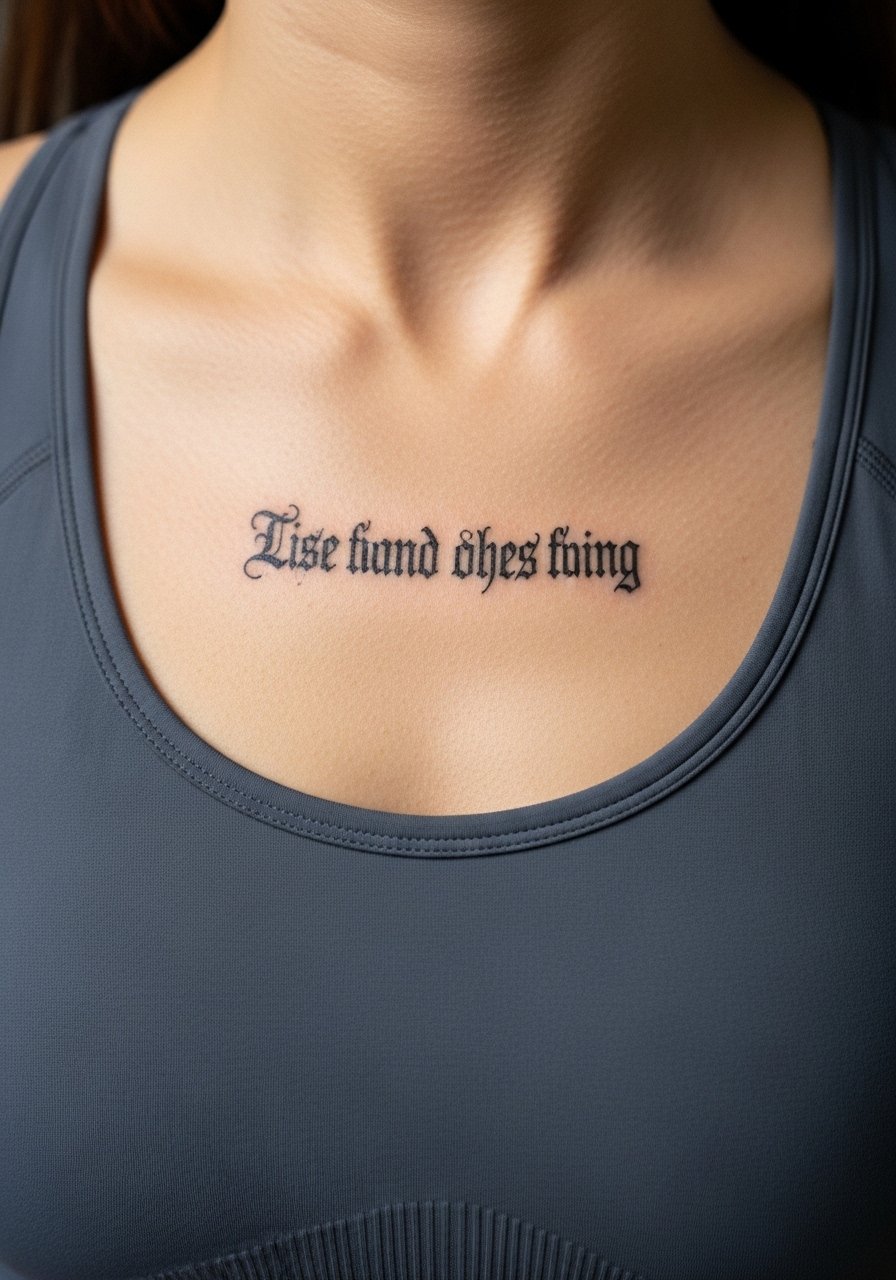
Sternum text reads intimate and intense when done in blackletter. The sternum is sensitive and moves with breathing, which affects line placement. Artists split on fine script here. One camp avoids very small blackletter because the skin can blur letters. The other camp will do it if given space and heavier stroke. When booking, ask whether they prefer thicker letters for this placement. A common mistake is centering text without checking how a bra or necklace will sit. Expect a session of one to two hours and plan for a touch-up in two to three years. For showing it off at nights out, a bandeau top sits just above the script without competing for attention.
10. Blackwork Mandala on the Back of the Neck
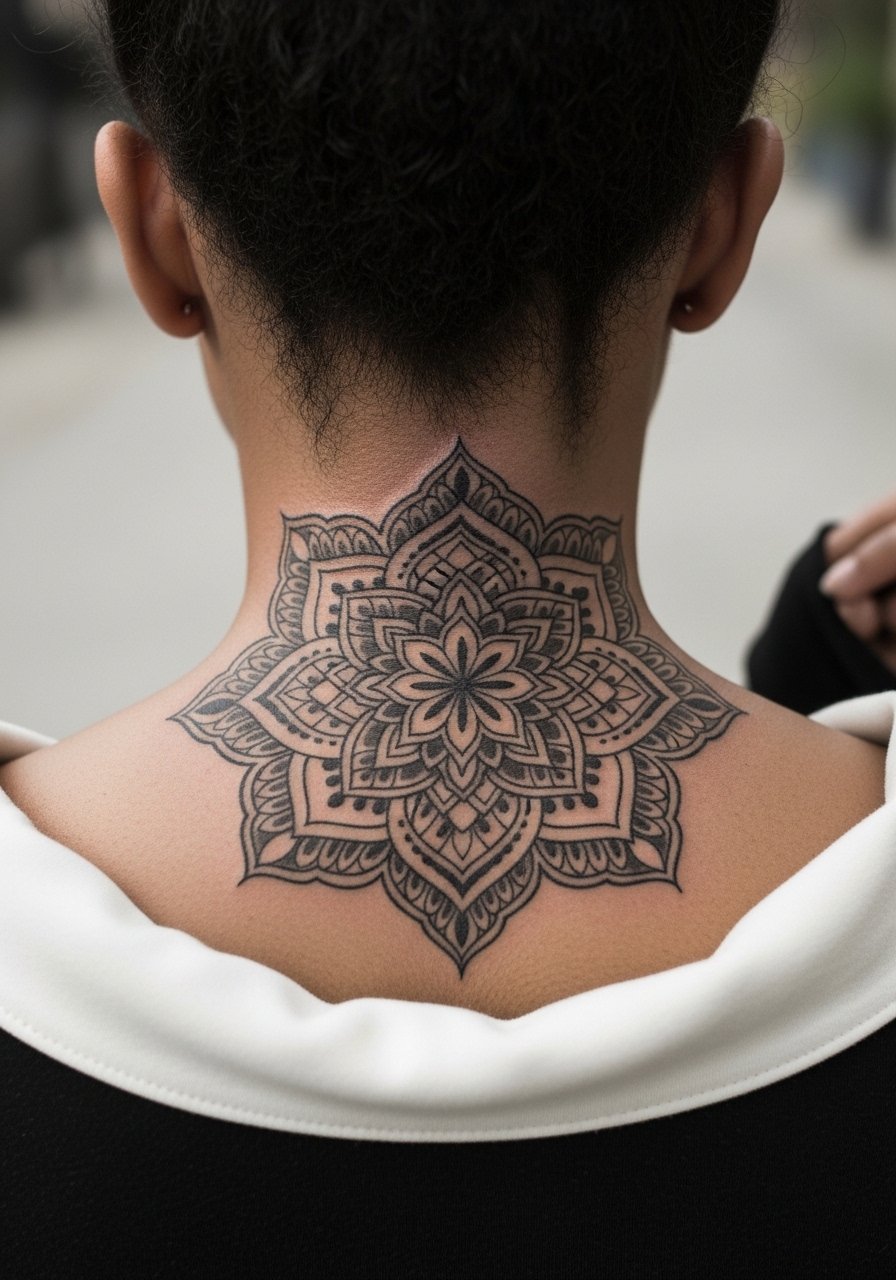
The back of the neck is a place where bold blackwork keeps its edge because it avoids constant sun and hand friction. The mistake is pushing too many tiny radiating lines into a small circle. For longevity ask for thicker primary rays and more negative space between secondary details. Sessions are quick and discomfort varies with skin sensitivity. A one-hour slot often suffices. Consider how hair length affects visibility. If you wear your hair up, the piece becomes a focal point. A neck mandala pairs well with a cropped collar or roll-neck pulled down slightly when you want to reveal it.
11. Coffin-Shaped Blackwork Thigh Patch
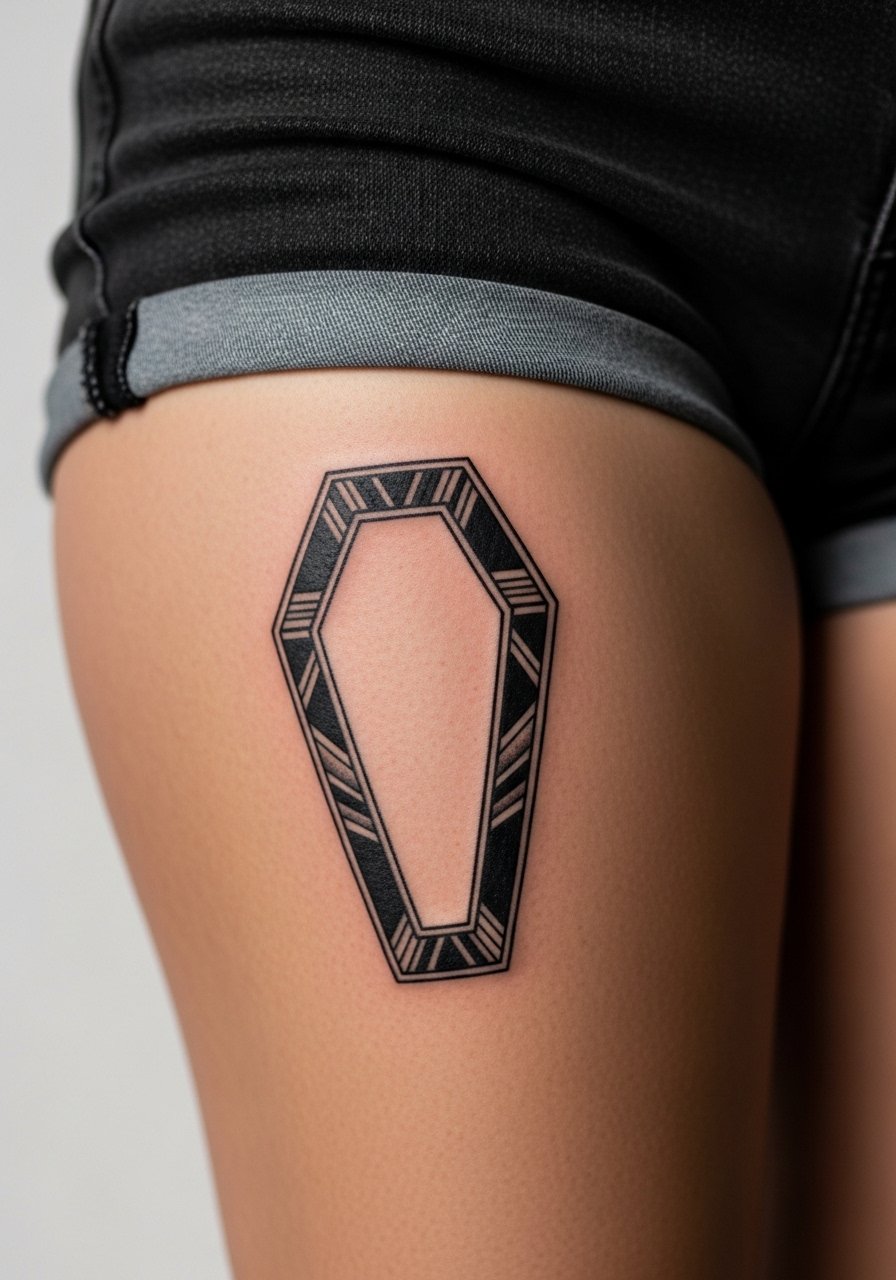
Thigh patches give artists room to build bold negative-space details inside a solid silhouette. The thigh tolerates long sessions, so you can go large without compromising saturation. A frequent mistake is overworking tiny internal details that need touch-ups later. For the session, wear loose drawstring shorts so the artist can access the area without pressure on the fresh work. Larger thigh pieces often require multiple hours or two sessions depending on your tolerance. The patch will mellow at six months and stay readable for years with occasional touch-ups. For showing off choose high-waisted shorts or a skirt that reveals the top of the patch.
12. Stippled Skull in Heavy Black on the Calf

Calf placements handle dense stipple and heavy black without the same wear as feet. I recommend stipple in hollows to add texture while keeping the skull silhouette bold. A common mistake is tiny stipple packed too densely which can read muddy over time. Sessions are moderate and usually single-visit. Expect the stipple to soften into a subtle texture at the two-year mark, while the main silhouette retains shape. For easy access on the day, wear pants you can roll up and a pair of slip-on shoes so you do not tug at the area while walking out.
13. Black Lace Collar Tattoo
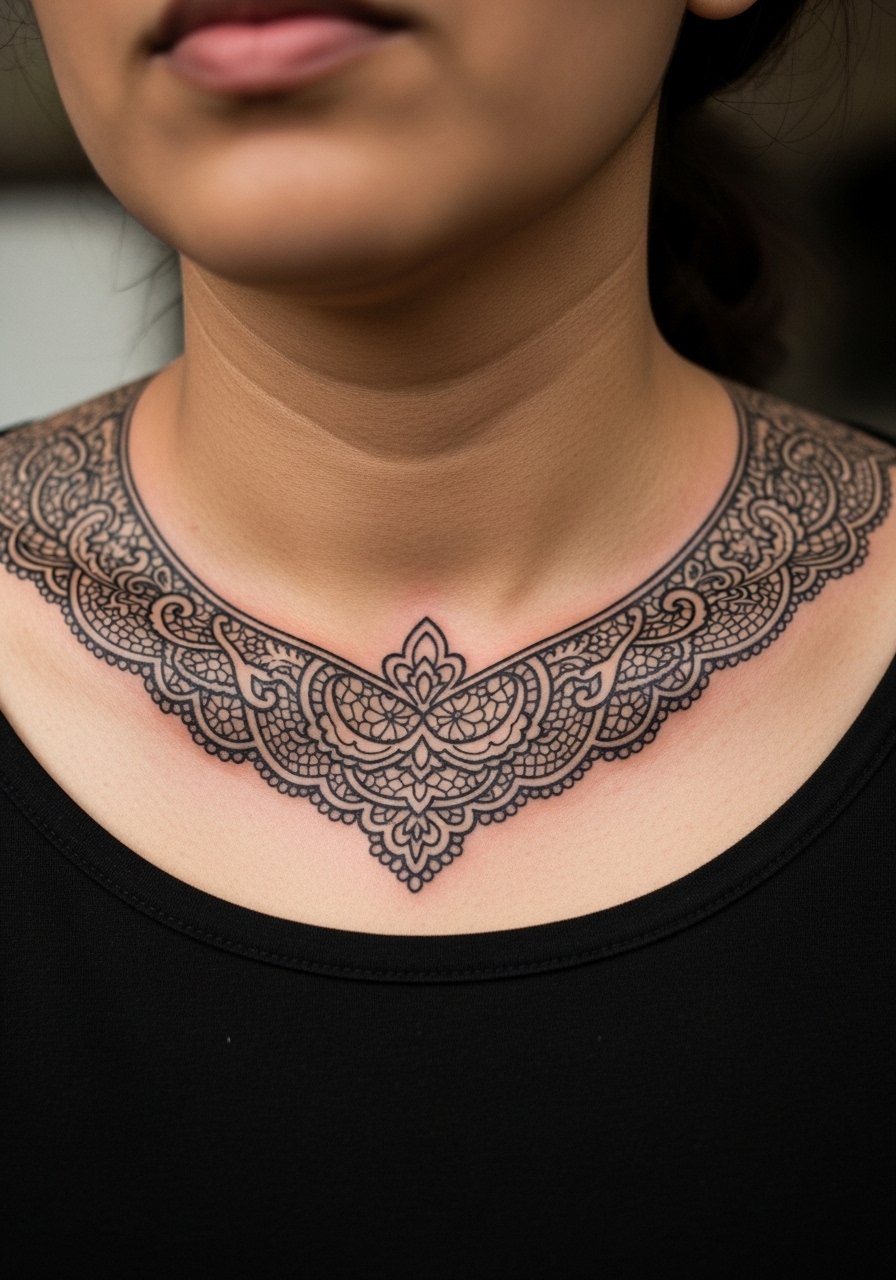
Lace collar tattoos are gothic without being heavy. The trick is to anchor the lace with solid black motifs so the delicate filigree can live in negative space. A common error is making the lace lines too thin near the collarbone, where they can blur. Sessions are usually split into two short passes to avoid overworking the skin. For the session wear a loose button-down you can pull aside. For showing it off pair the piece with an open-neck blouse or a thin chain pendant necklace that sits above the pattern and does not compete with the lace.
14. Black Panther Silhouette on the Rib Side
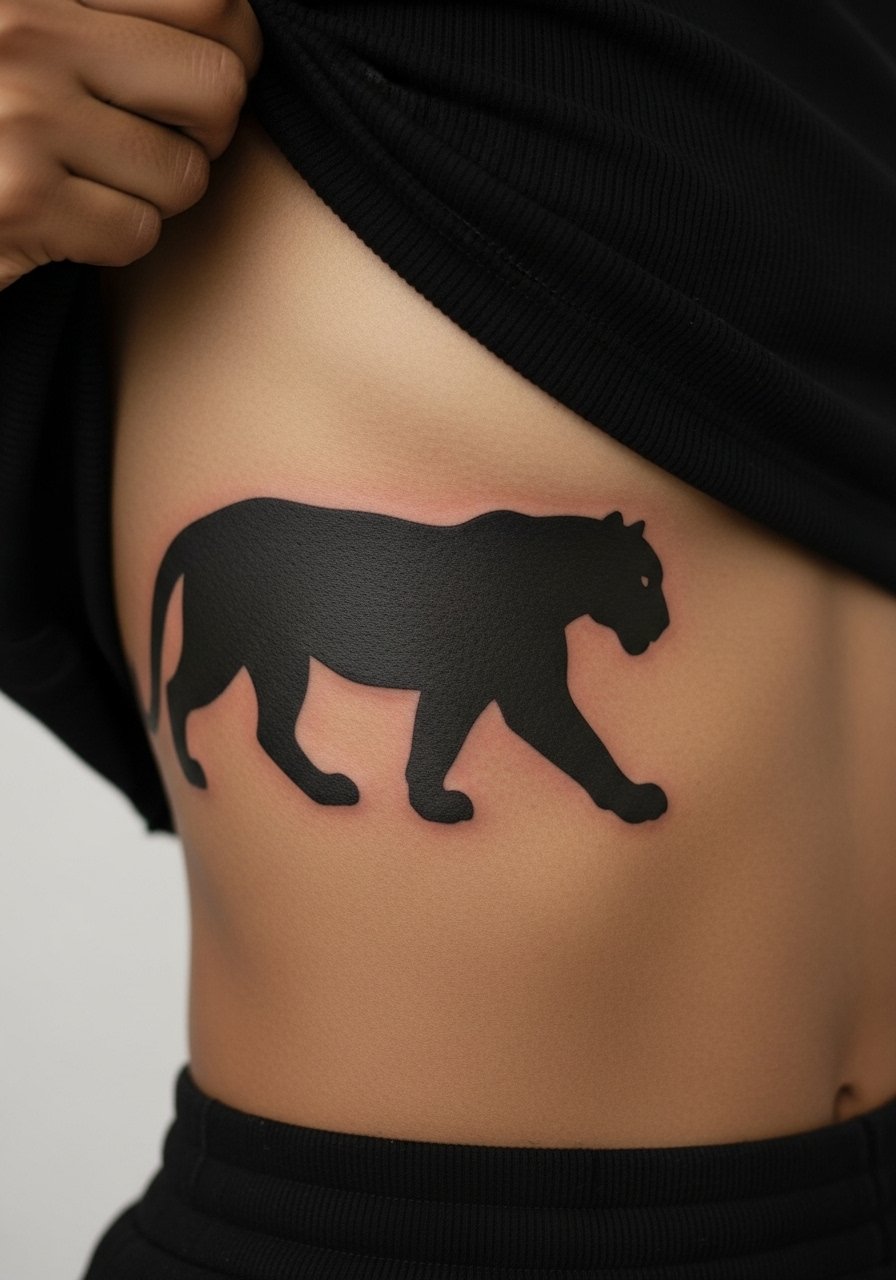
Silhouette animals read powerfully on the ribs when scaled correctly. Ribs will change with breathing, so place the central axis where muscle movement least distorts the design. The biggest mistake is shrinking the silhouette to avoid multi-session work, which removes presence. Sessions feel intense for most people and often need breaks. Expect a touch-up around year two if parts of the fill thin out. For discreet show-off, pair with high-waisted pants and a cropped top or layer under an oversized shirt.
15. Full Blackwork Heart Over the Sternum
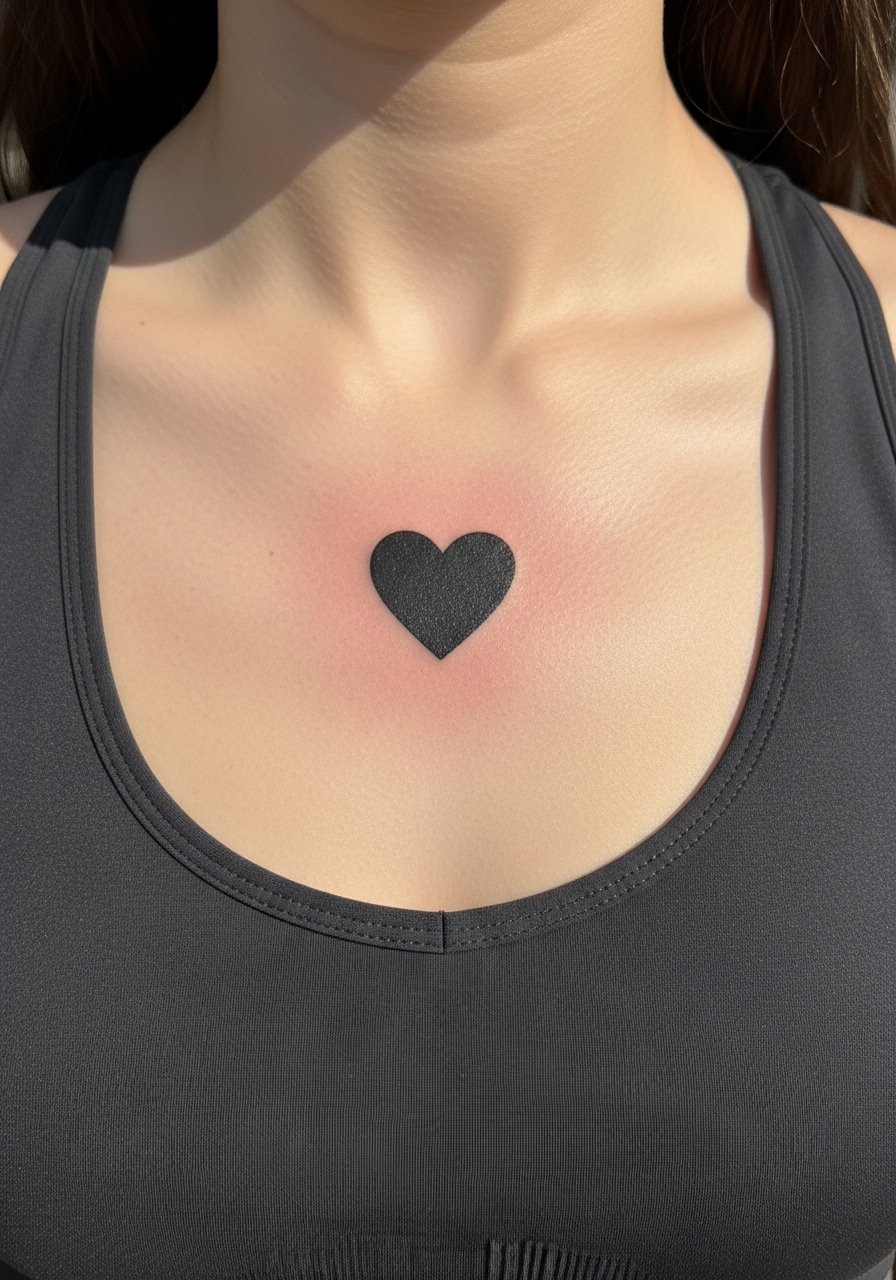
A bold black heart is a statement that looks deliberate rather than sentimental when done in heavy fill. The sternum's movement makes line placement challenging. The common error is placing a very small heart that fills unevenly. I recommend a slightly larger scale and gradual build of saturation over two passes. Pain during sternum work is high, so plan recovery time. Expect the piece to soften but remain a solid silhouette for years. A fitted bandeau or strapless top shows the piece cleanly while letting necklaces sit above.
16. Negative Space Spiderweb at the Shoulder Cap
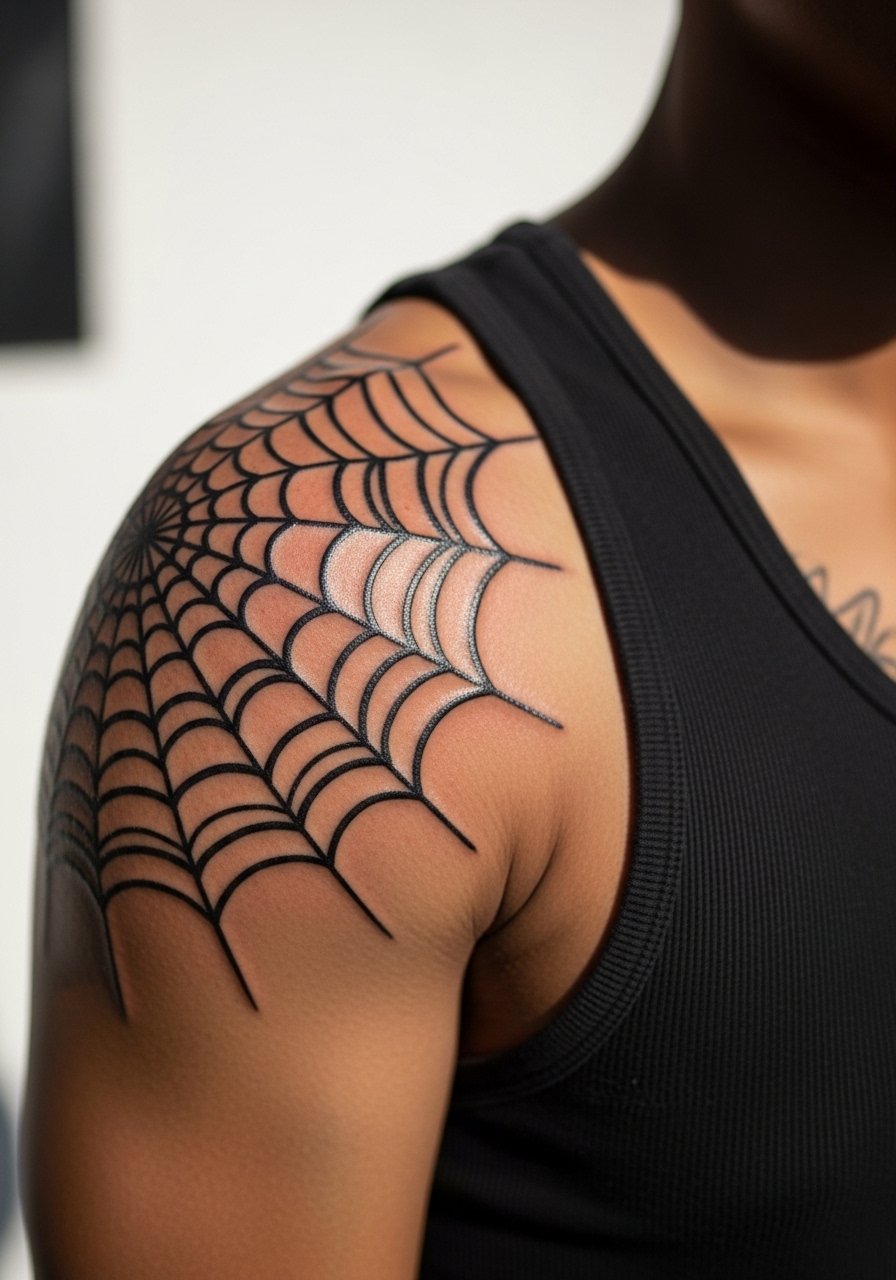
Spiderwebs use negative space to create depth, which is useful when you want a gothic motif that still breathes. The shoulder cap handles curvature well, and the design should flow with muscle ridges. The mistake is forcing concentric circles that do not follow the shoulder shape. Sessions are moderate and you can usually finish in one visit. Over time the web will soften but keep high contrast if the artist leaves solid anchors. For the session wear a tank top you can lift slightly so the artist can position the stencil without tugging.
17. Heavy Black Coffin Finger Accent
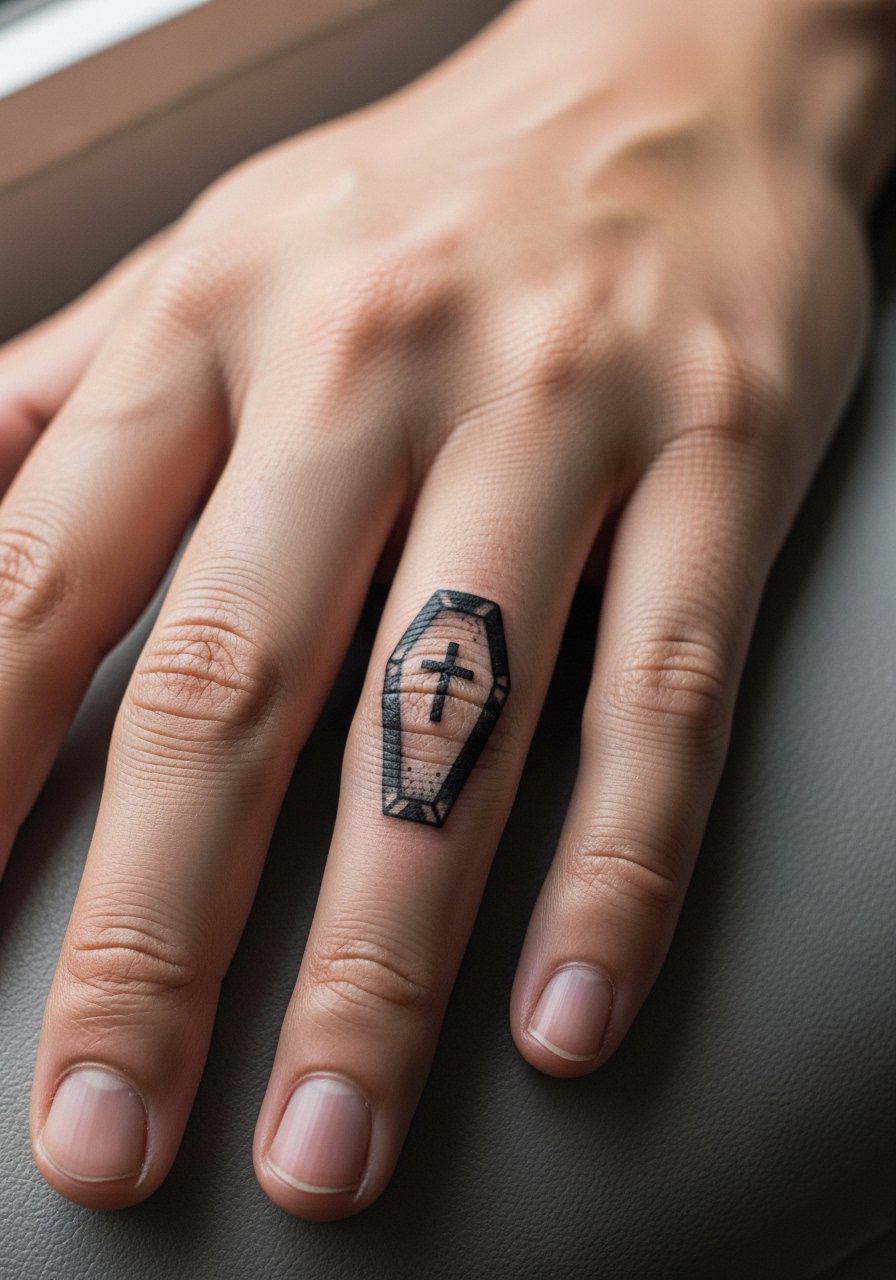
Finger accents are visible and prone to rapid wear. Coffin shapes read well when the artist uses strong edges and leaves clean negative space. The biggest mistake is relying on micro-detail on the finger surface. Expect more frequent touch-ups than on larger placements, often every one to two years. The session is short and discomfort is sharp due to thin skin. For work considerations, remember fingers are visible during most interactions, so plan placement with that in mind. A small stackable ring can sit on the adjacent finger without crowding the coffin accent.
Frequently Asked Questions
Q: Will heavy blackwork fade faster than fine line tattoos if I get a full sleeve?
A: In my experience heavy blackwork tends to hold silhouette better because saturation ages into a softer matte field rather than disappearing into a blurry haze. Fine line can look crisp at first and then needs touch-ups sooner. For a sleeve consider mixing bold anchors with some finer filler to balance longevity and detail.
Q: How should I prep for a ribcage black panel session?
A: Wear a fitted sports bra or a cropped top you can lift without tugging so the artist has clear access. Hydrate well the day before and avoid heavy alcohol. Expect breaks during the session and plan for an extra set of comfortable clothing for the walk home.
Q: Are hand and finger goth pieces risky for job interviews or professional settings?
A: They can be more noticeable than chest or thigh work, and some industries still react to visible hand tattoos. Think about your day-to-day environment and whether you need the option to conceal work during interviews. Rings and gloves hide small accents temporarily, but nothing replaces placement choice.
Q: How often do blackout or heavily saturated areas need touch-ups?
A: From what I've seen, solid black areas often need a minor touch-up between two and five years depending on sun exposure and friction. High-wear zones like hands and feet will need touch-ups sooner. Plan visits with your artist for a realistic timeline.
Q: Can I combine blackletter sternum text with decorative blackwork around it?
A: Yes. The key is spacing. Leave margin around letters so decorative elements do not encroach as the ink settles. Ask your artist to map the negative space during the stencil preview so the script breathes.
Q: What should I wear to a session for a thigh or hip piece?
A: Loose drawstring shorts or high-waisted bottoms that you can shift without pressure are best. For a hip piece consider a pair of high-waisted shorts you can lower slightly to reveal only the tattoo zone while keeping the rest covered.
