
Bold blackwork often outlasts the flashy trend pieces people save to their boards. Thick linework and heavy saturation settle into skin in a way fine detail rarely does. That durability makes blackwork a smart choice if you want a statement that still reads clean at year five. Below are practical, style-forward blackwork ideas with what to tell your artist and how to wear them so they age well.
1. Geometric Forearm Band with Solid Fill

I recommend this when you want a readable, wearable piece that still reads from across a room. Fair warning, the forearm sees sun and abrasion, so tell your artist to go slightly larger on spacing between shapes so the negative space keeps separating as it settles. Session time is usually one to two hours and the pain is moderate. The common mistake is insisting on needle-fine separations in the band. That looks delicate at first and then the spaces merge. For show-off outfits, roll up a loose linen button-down to frame the band without covering it, and keep sunscreen handy after it heals. Expect a touch-up around year three if you live in a sunny climate.
2. Bold Blackwork Bicep Mask
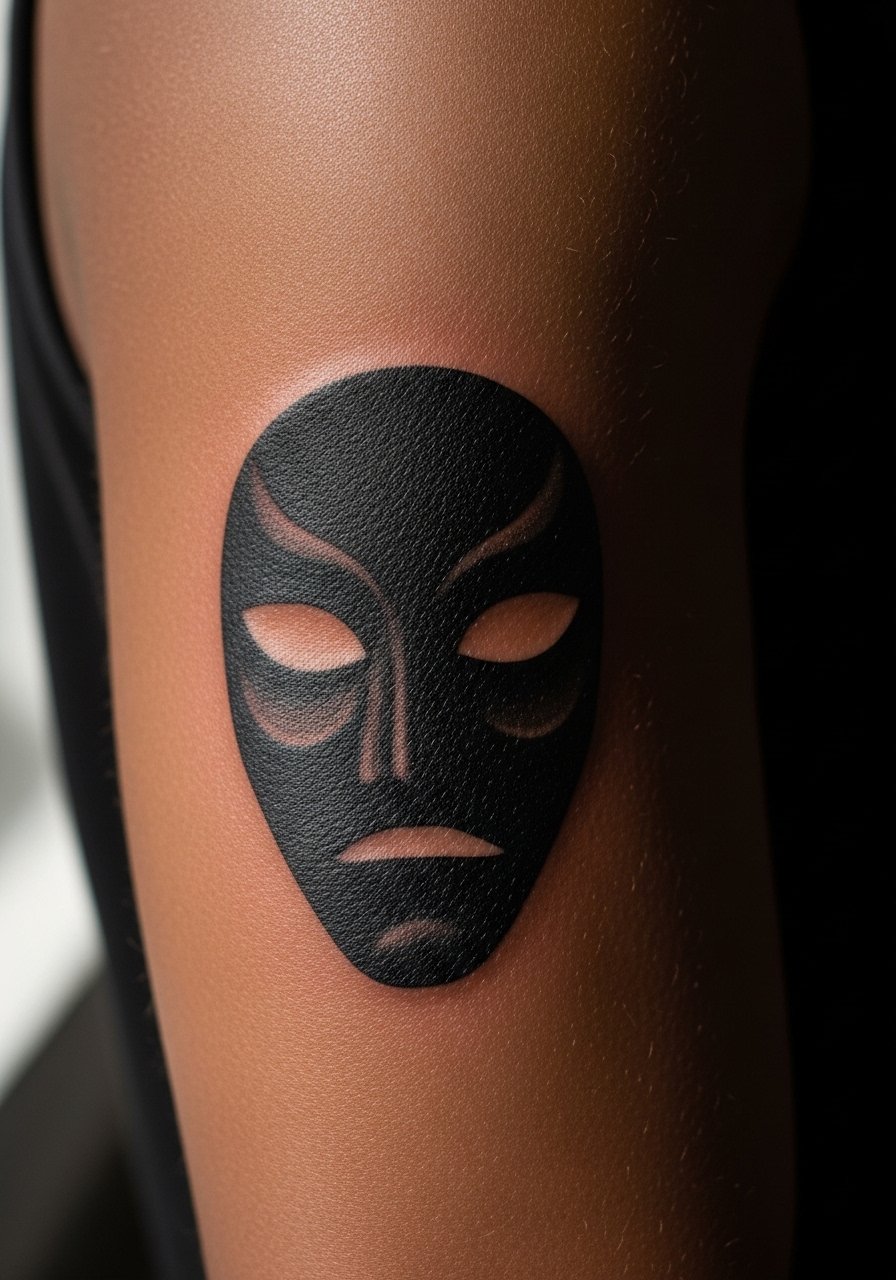
This one reads like armor and works best on thicker muscle mass. I tell clients the bicep tolerates saturation well but avoid tiny interior dots. The session feels like long stretches of buzzing where the artist packs black in solidly. Pain is lower here than ribs but the skin will feel tender for several days. A common aging mistake is cramming micro-detail into the silhouette. Keep the interior shapes bold and let the outer edge define the piece. Ask about touch-up policy for saturation, because dense black sometimes needs a short revisit after healing to keep full coverage.
3. Heavy Line Wrist Script Wrapped in Blackwork
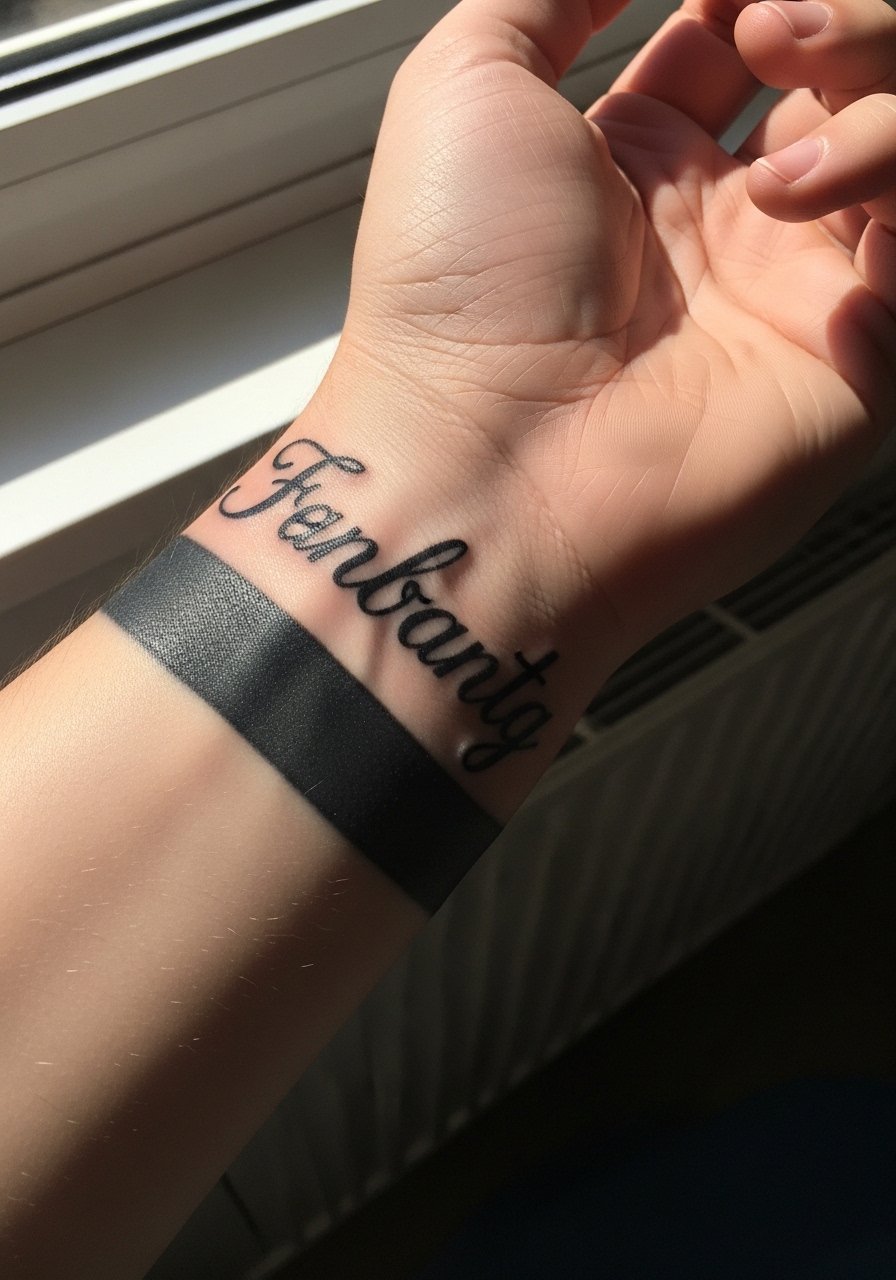
Wrist work reads immediately but it also takes more daily wear. Pain is brief and sharp. For longevity, ask for slightly heavier linework than you think you need so the letters do not blur in two years. The biggest mistake is picking tiny script without allowance for swelling and movement. If you plan to show it off, pair the piece with a minimal thin chain bracelet or a simple watch so the script remains the focal point. Expect the wrist to need a touch-up sooner than the bicep because of hand washing and friction.
4. Ribcage Mandala Panel in Dense Blackwork
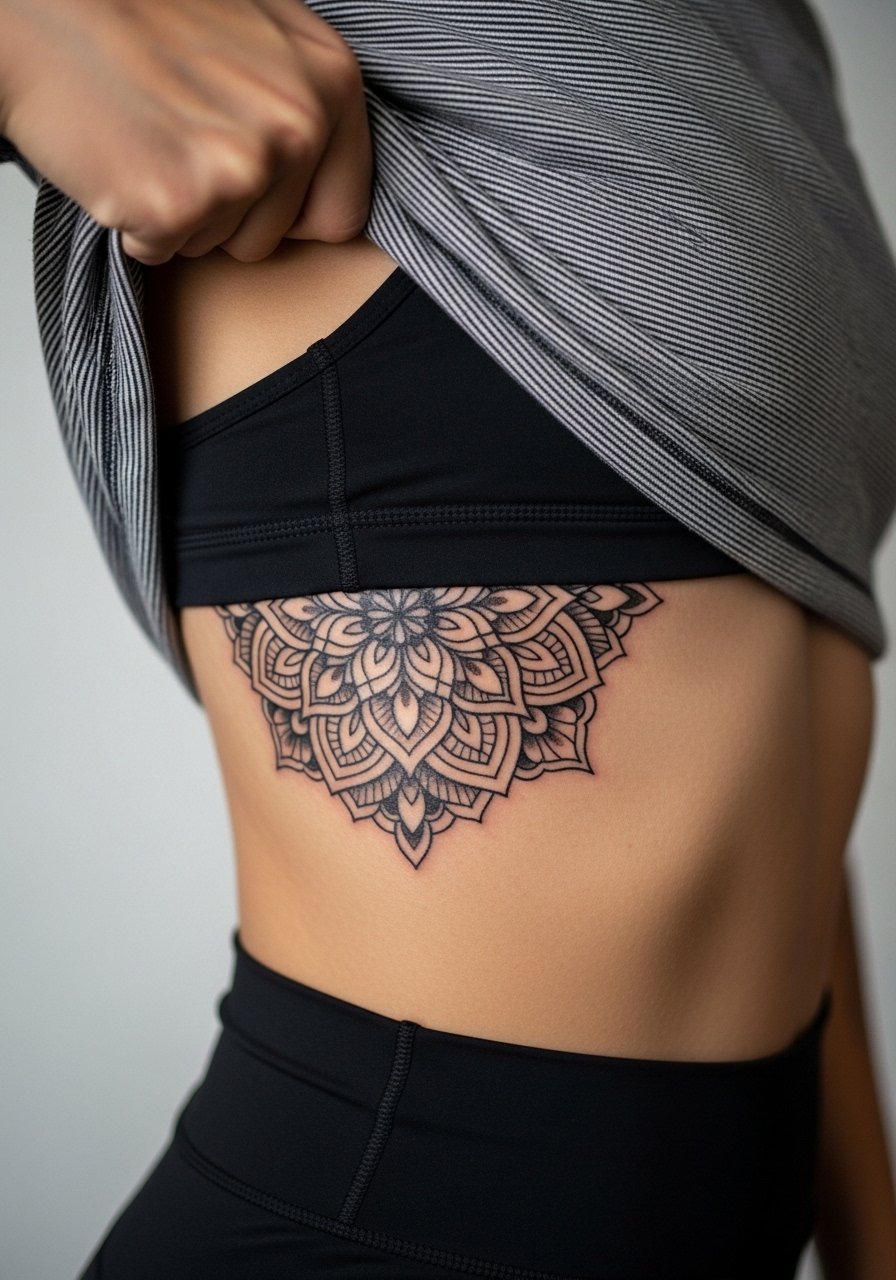
Fair warning, ribs are one of the higher pain placements. Fine line mandalas on ribs spark a specific debate in the community. One camp says the skin stretch and movement blur dense lines within a couple of years. The other camp argues that with proper depth and strategic spacing, a mandala can hold up on ribs. I advise naming which side your artist sits on in consultation and asking to see healed rib photos. The typical mistake is insisting on ultra-high density in a small area. Stretch the design outward so the negative space survives. Session time varies with size, and expect at least a single touch-up window at six to twelve months.
5. Full Chest Blackwork Crest with Negative Space

Chest pieces give a bold visual that ages predictably if you plan around muscle movement. Tell your artist you want strong outer edges and controlled negative space inside the crest. Pain is moderate to high across the sternum area, and sessions may be split into two. A common mistake is putting tiny interior filigree too close to the edge. That detail risks softening into gray areas over time. For evenings out, a wide-neck tee or unbuttoned shirt shows the crest without exposing too much skin. Plan for one touch-up after healing to re-saturate any blended zones.
6. Negative Space Sleeve Accent with Heavy Fill
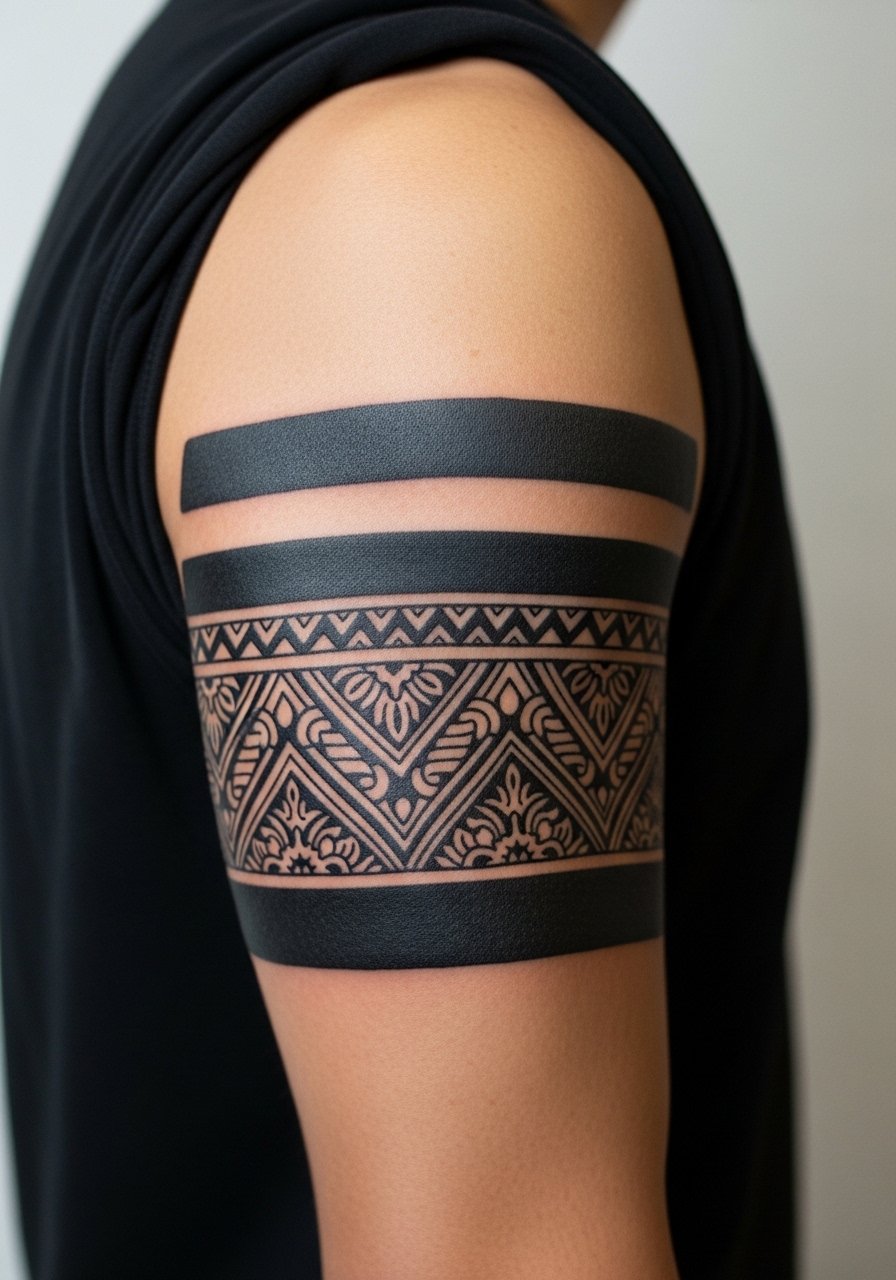
This approach uses large black planes to let negative space form the image. It is forgiving because saturation hides small inconsistencies. In consultation, ask for mock stencils that show where the black fields will sit against skin tones. The pain is steady on the outer arm and session time depends on coverage, often multiple sittings. A real mistake is requesting too many micro-elements inside the dark fields. Those vanish as the black compresses in skin. For the studio day wear, bring a loose button-down shirt you can pull aside to expose the arm. Expect minimal touch-ups for edge crispness in a one to three year window.
Studio Day Picks
The chest and rib pieces above ask for different prep than forearm work, and these picks smooth out the session and the first week.
-
Stencil transfer paper kit. Lets you preview the linework on skin before committing, which is useful for the mandala and crest layouts in ideas above.
-
Topical numbing cream. Applied 45 minutes before can ease the edge on rib and sternum work without changing the artist's depth if used correctly.
-
Thin protective film roll. Keeps wrist and hand pieces clean through frequent washing and reduces friction during the early healing days.
-
Fragrance-free body wash. Gentle cleansing helps the dense black areas settle without irritation in the first week.
-
Aquaphor Healing Ointment. A thin layer in the initial days locks in moisture for heavy black fills without suffocating the skin.
7. Calf Totem Column in Saturated Black
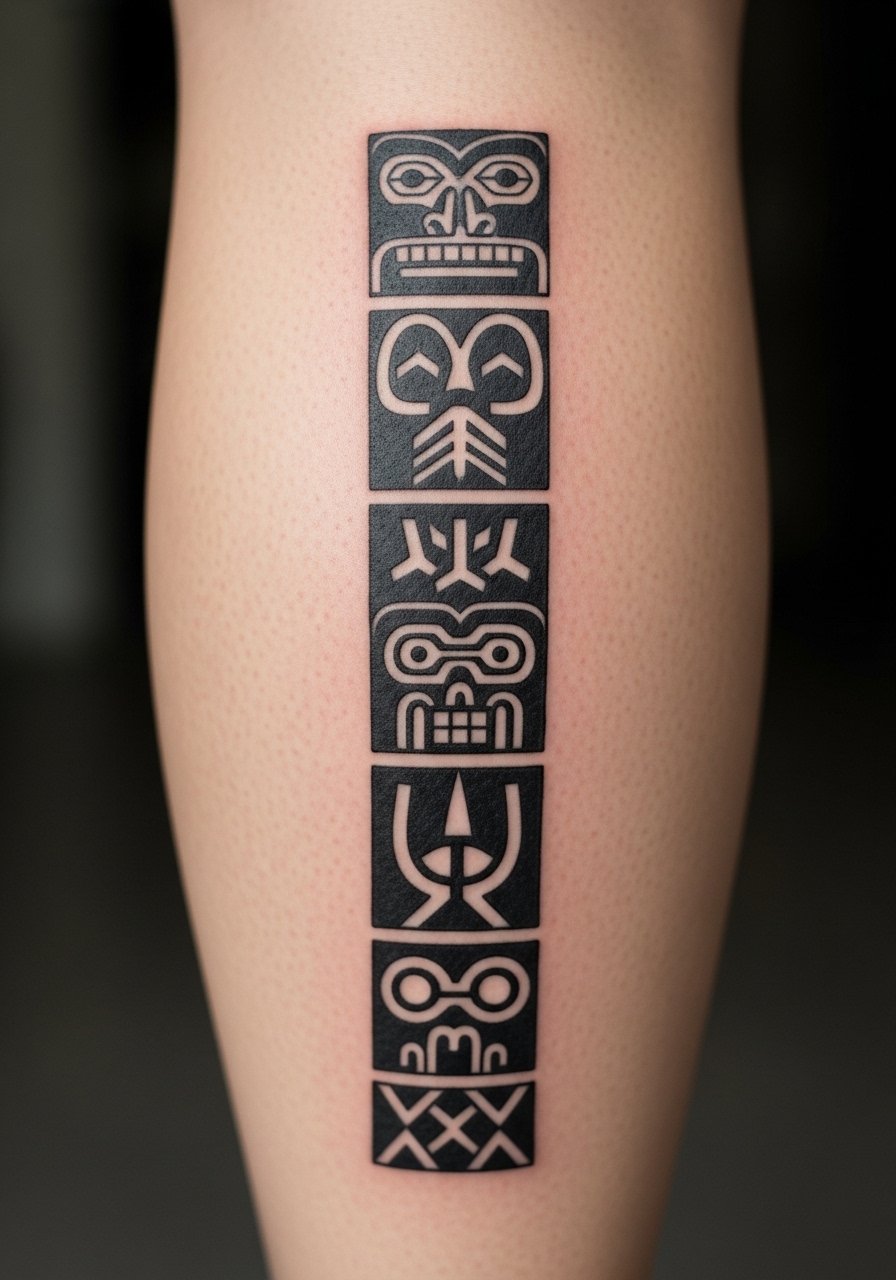
Calf pieces are great if you want a tall, readable graphic. Tell the artist you want consistent saturation down the column so no section fades faster. The session is surprisingly tolerable and pain is often mild to moderate. A common mistake is ignoring how pants rub the lower portion during recovery. For session ease, wear loose drawstring shorts so the artist can work without fabric pulling. Touch-ups may be needed at the ankle edge where friction is highest.
8. Hand and Knuckle Icon Set in Bold Black

Hand tattoos invite a real controversy around visibility and professional impact. One group says hand tattoos are an accepted personal statement and many careers tolerate them now. The other group cautions that some industries still treat visible hand ink as a hiring risk. I recommend checking local job norms before committing. From a technique side, ask for slightly thicker outlines and plan for frequent touch-ups. Hands heal in a high-friction environment and the knuckles often need re-lining at year one. For showing the set off with minimal fuss, pair with a minimal leather ring or slim band that frames the fingers without overwhelming the symbols.
9. Sternum Geometric Tile with Deep Black Panels

Sternum pieces look dramatic and they are placement-sensitive for both pain and healing. Expect higher pain and sweating during sessions near the center line. The common mistake is asking for ultra-fine internal lines that the chest cannot preserve under motion. If you want clean separation, have the artist map the negative space wider than you expect. For recovery, sleep propped up for a few nights to reduce pressure on the chest. If you plan discreet show-off options, a fitted top or an open button shirt will highlight the central tile when desired. Specialized artist experience with chest saturation matters here.
10. Side Neck Bar Script in Bold Black

Neck tattoos are small canvas pieces with outsized visibility. Pain is moderate and the skin there can be unpredictable. A common mistake is squeezing long text into the side neck. Short phrases or a compact bar reads best. Ask for deeper stroke weight in the letters so the script holds its shape as it settles. For a ready outfit that frames the piece on cool days, a wide-neck shirt that pulls aside gives the right balance between visible and controlled. Remember to ask the artist about how their healed neck photos look before booking.
11. Ankle Micro Constellation in Block Black

Ankle tattoos take a beating from shoes and socks. The area tolerates small, dense black dots better than long thin lines. Pain is brief but sharp. The common aging error is going too intricate in a compact spot. Ask your artist to condense the pattern with slightly larger dots and stronger bar strokes so the motif stays readable. For showing it off, roll up your jeans and wear low-profile sneakers or sandals. A tiny touch-up at year one is common because the ankle sees constant friction.
12. Upper Back Panel with Bold Black Negative Carving
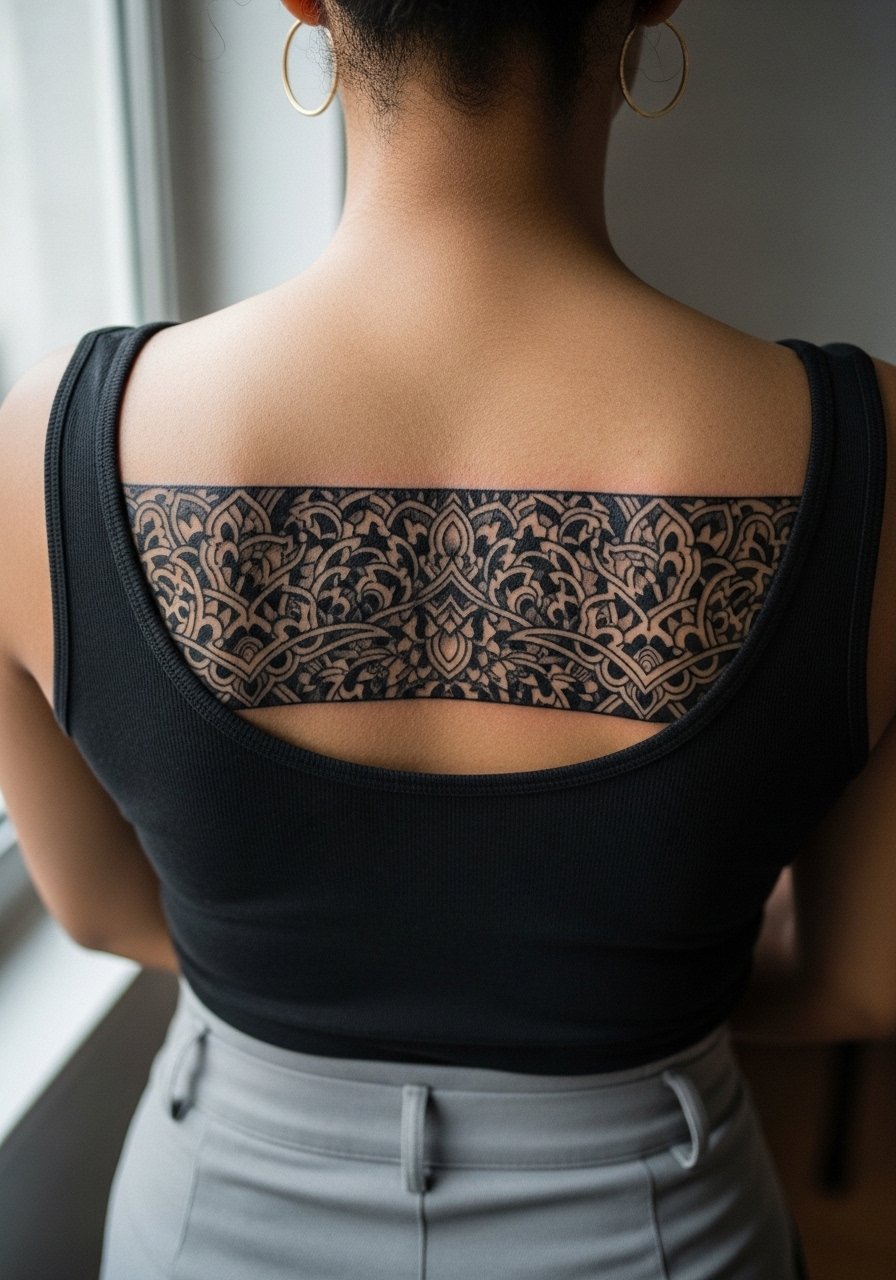
Upper back panels hold heavy black well because the skin is stable. The session can be long and you may need breath breaks. A frequent mistake is putting too much micro-detail near the spine edge. Keep the spine area clear so the piece breathes as the body moves. If you plan to show it at night, open-backed pieces pair especially well with an open-back dress or halter or a cutout top that highlights the negative space. Expect occasional edge touch-ups to maintain crisp borders.
13. Inner Bicep Stipple Flower in Heavy Black Outline
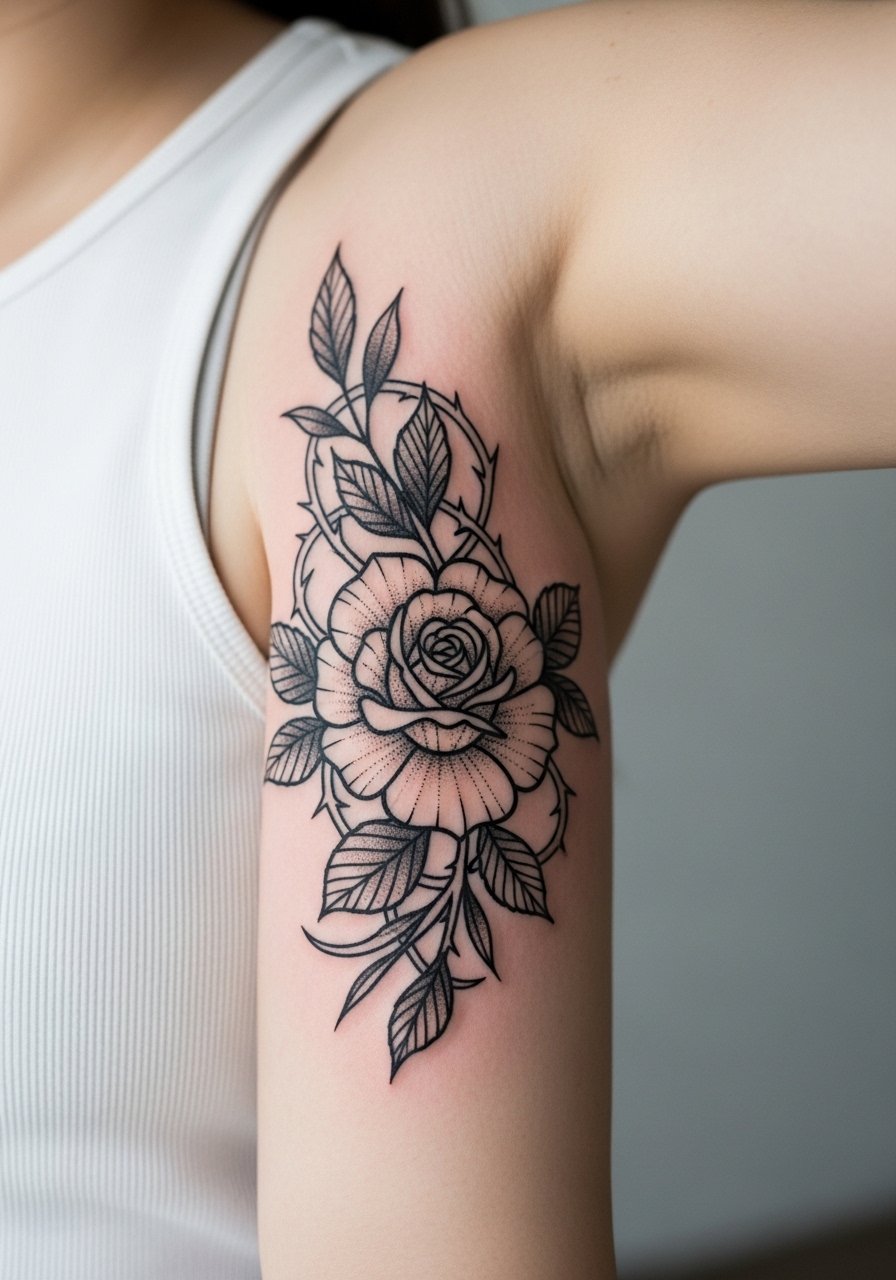
Inner biceps hide well but they are delicate during healing. The mistake is packing ultra-fine stipple too tight inside the outline. That detail can soften into gray in a year. Tell your artist you want the stipple spacing wider and the outline bold enough to keep the silhouette. Sessions here hurt more than the outer arm and sweating can be an issue, so wear a breathable tank on appointment day. If career discretion matters, this placement offers concealment while still allowing for moments of visibility when you want them. Touch-ups are typically straightforward.
14. Hip Crescent Line in Bold Black

Hip tattoos age well when you accept subtle movement across the site. The common mistake is placing very tight linework near the bone where skin stretches as weight fluctuates. Ask for a modestly thicker outer line and modest internal spacing. Session pain is variable depending on body fat in the area. For the appointment wear, high-waisted bottoms that can be lowered slightly will keep you comfortable. Expect low maintenance but plan a touch-up if weight shifts substantially.
15. Linked Finger Band Chain in Solid Black

Finger ink is high maintenance and friendly advice matters here. The skin is thin and the lines fade fast because of repeated washing and friction. The usual error is asking for ultra-thin links that disappear. Ask for slightly wider bands and accept that annual touch-ups are likely. Pain is sharp but quick. For a subtle complement, try a slim stackable ring on adjacent fingers that frames the bands. If your job has visibility concerns, think long term.
16. Spine Column Blackwork with Negative Carving
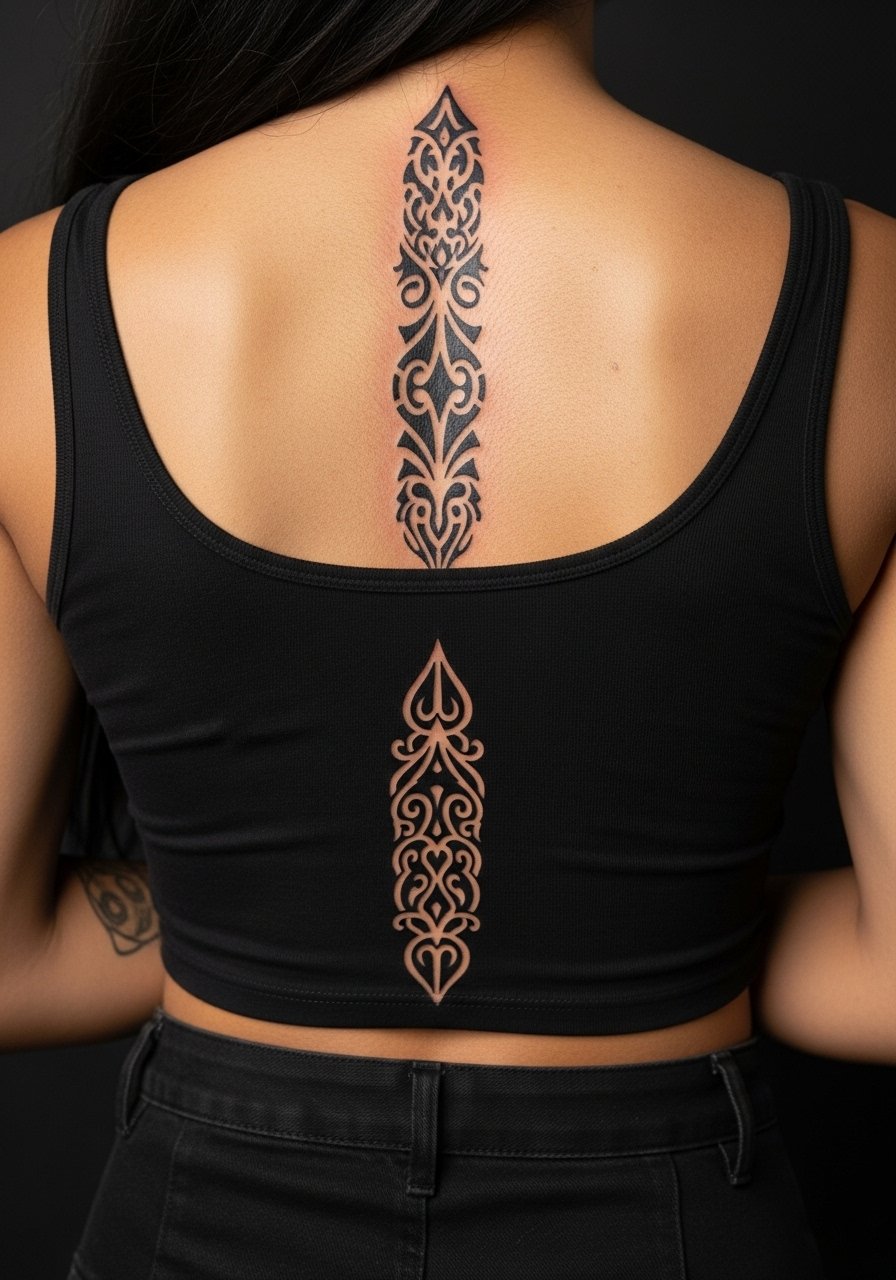
Spine work is dramatic but demands patience. Lines along the spine must account for curvature and movement. A common mistake is trying for ultra-tight symmetry without allowing for natural asymmetry in the body. Sessions are lengthy and position can be uncomfortable. For evenings out, open-back garments show the column beautifully while keeping most of the back covered. A strappy open-back top or a low-backed shirt frames the vertical negative space. Expect a follow-up to refine edges after healing.
17. Thigh Shield in Saturated Blackwork
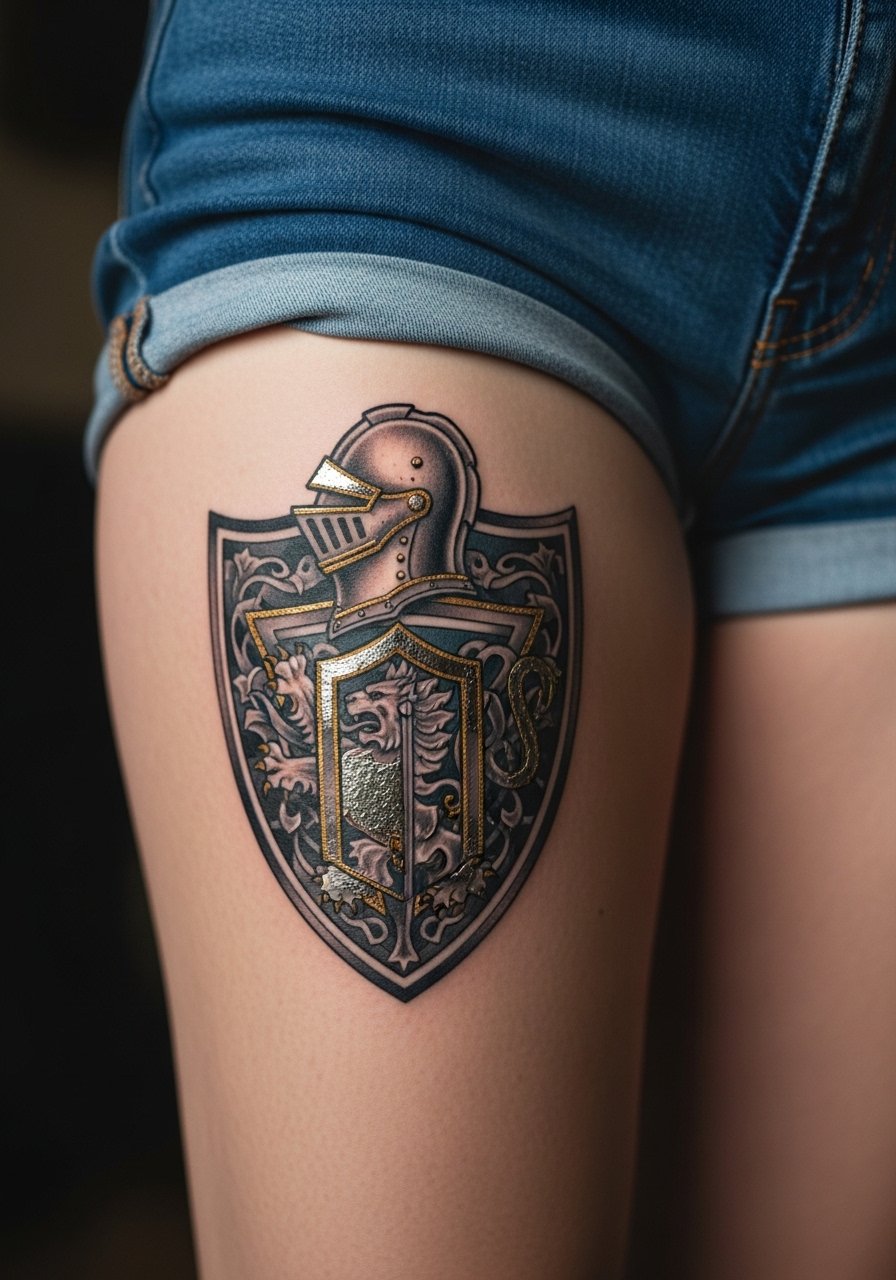
Thigh pieces are forgiving and they tolerate saturation and heavy black. The common mistake is compressing too much detail into a shield shape. Keep the internal elements bold and give the piece breathing room so the outer silhouette holds. Pain is moderate and the area is easy to dress for aftercare. For session wear, a pair of loose drawstring linen pants makes it simple to roll the leg up and avoid pressure on the fresh work. Touch-ups are usually minor and mostly about reestablishing edge definition.
Frequently Asked Questions
Q: Will a heavy blackwork piece on my forearm age better than a fine-line sleeve?
A: In my experience, heavy blackwork on the forearm holds up longer than dense fine-line sleeves. The thick saturation resists the softening that comes from sun and daily abrasion. Fine-line sleeves can look amazing fresh but often need touch-ups at year two or three, especially on exposed forearms. If longevity matters, ask your artist to add breathing room and slightly heavier line weight.
Q: Are rib and sternum mandalas worth the pain and upkeep?
A: They can be, if you accept higher pain and the possibility of touch-ups. Ribs and sternum move with breath and muscle, which affects how lines settle. I recommend a consultation where you review healed photos of rib work, and agree on spacing that favors negative space. Expect a touch-up window at about six to twelve months.
Q: How often do hand and finger tattoos need maintenance?
A: Hands and fingers are the most maintenance-heavy. Many people plan for at least one touch-up within the first year and another every one to three years after that, depending on wear. If you want less maintenance, choose bolder, simpler shapes and limit tiny internal detail.
Q: What should I wear to a chest or back session to make the artist's job easier?
A: Wear pieces that can be shifted without fully undressing. For chest work, a wide-neck shirt or fitted sports bra that can be pulled aside works well. For upper back sessions, a tank top with straps that slide down a bit gives coverage while granting access. A breathable top lets you stay comfortable through long sessions.
Q: How do I find the right studio or artist if I want blackwork that lasts?
A: Use discovery paths like local shop directories, convention lists, and dedicated blackwork forum threads to narrow choices. When you reach out, ask to see healed blackwork photos from at least a year post-session. That gives you the best sense of how their saturation and edge work age.
Q: Any wardrobe tips to showcase a spine or upper back blackwork panel?
A: Yes. Open-back tops and halter styles frame a vertical column without overexposing skin. A low-back dress or a strappy open-back top makes the negative space the focal point while keeping most of the back covered.
