
Fine line butterflies are everywhere right now, and that popularity creates two problems at once: tiny outlines that blur on high-movement spots and temporary stencils that peel off curved areas like ankles. I have seen wrist outlines lose crispness after a year and ankle pieces heal oddly because of sock friction. Read on for 21 stencil-ready butterfly directions that balance look, longevity, and what to wear on session day, starting with a clean inner-wrist option.
1. Delicate Single-Line Butterfly Outline on Inner Wrist
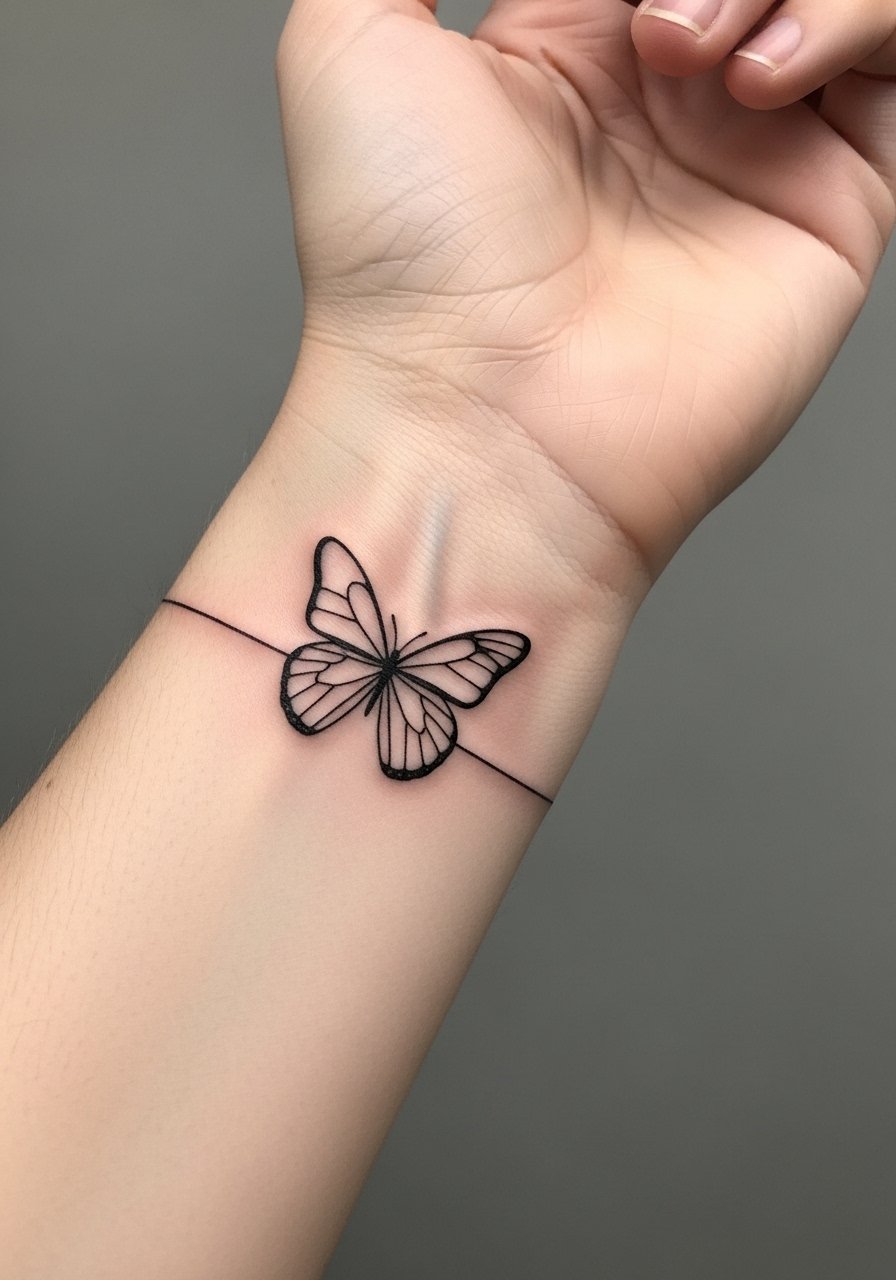
I've seen this design show up in flash sets because it takes one short session and reads as graceful without heavy saturation. Fair warning about the wrist. Movement and frequent washing mean the finest single-line versions can soften within a year. Ask your artist to use a slightly firmer lineweight than the skinniest option you like and to space the wing details a touch wider so they do not merge as the piece heals. For the appointment, skip tight sleeves and wear a sleeveless linen top so the artist has full access to the wrist. Expect light pain, a quick session, and a likely touch-up window around year two if you want razor-sharp contour.
2. Fine Line Butterfly with Floral Accents on Inner Wrist
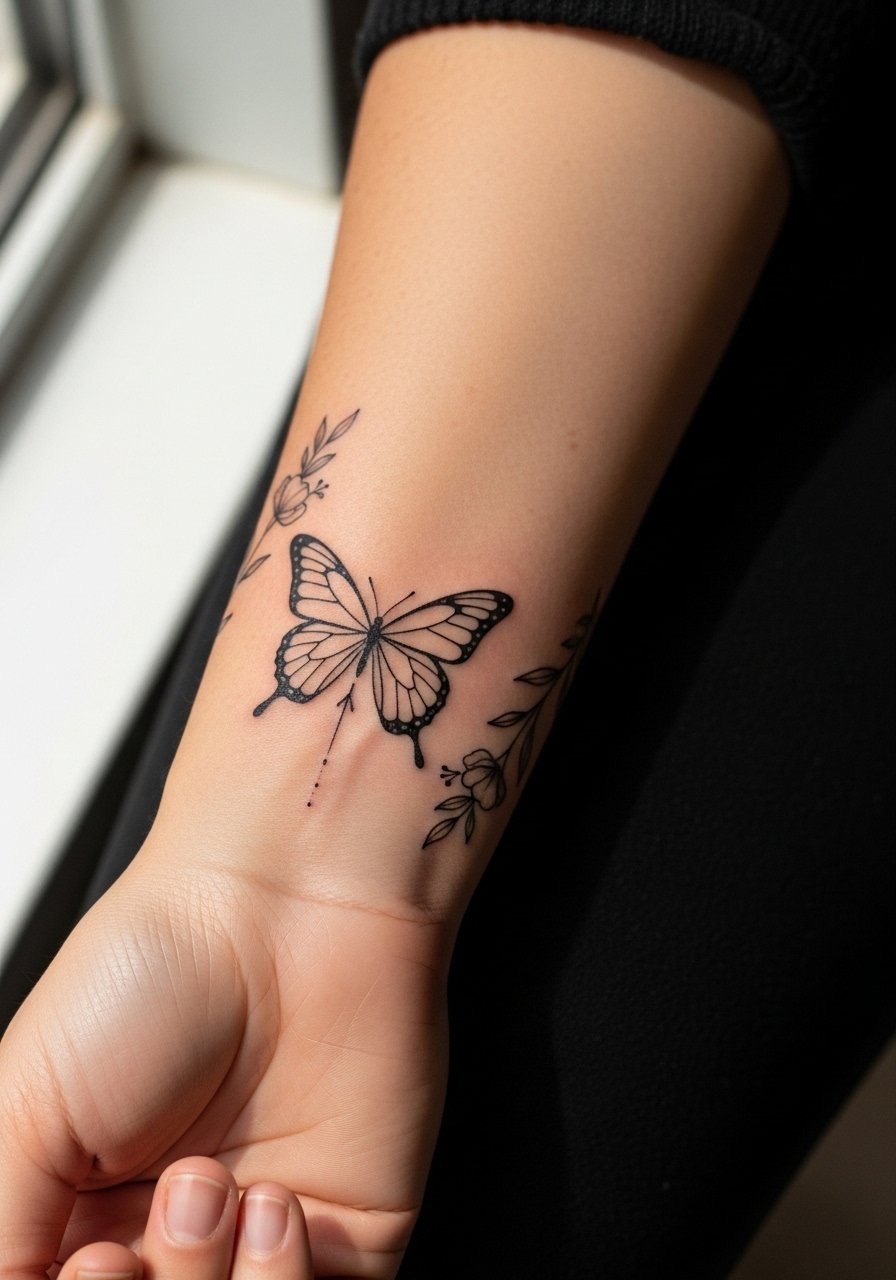
I recommend this when you want a little personality without adding bulk. Tell your artist to treat the flowers as supporting shapes and to avoid dense shading next to the butterfly outline. The common mistake is packing too many tiny petals into a small space. That creates a faded, muddy look after two to three years. This version holds up because the florals are airy and the linework around them gets a hair more spacing. Session feel is mild but expect sensitivity near the inner wrist. Pair it with a thin silver bangle set when showing it off, and remove rings during the session to keep the area clean.
3. Behind-the-Ear Micro Single-Line Butterfly
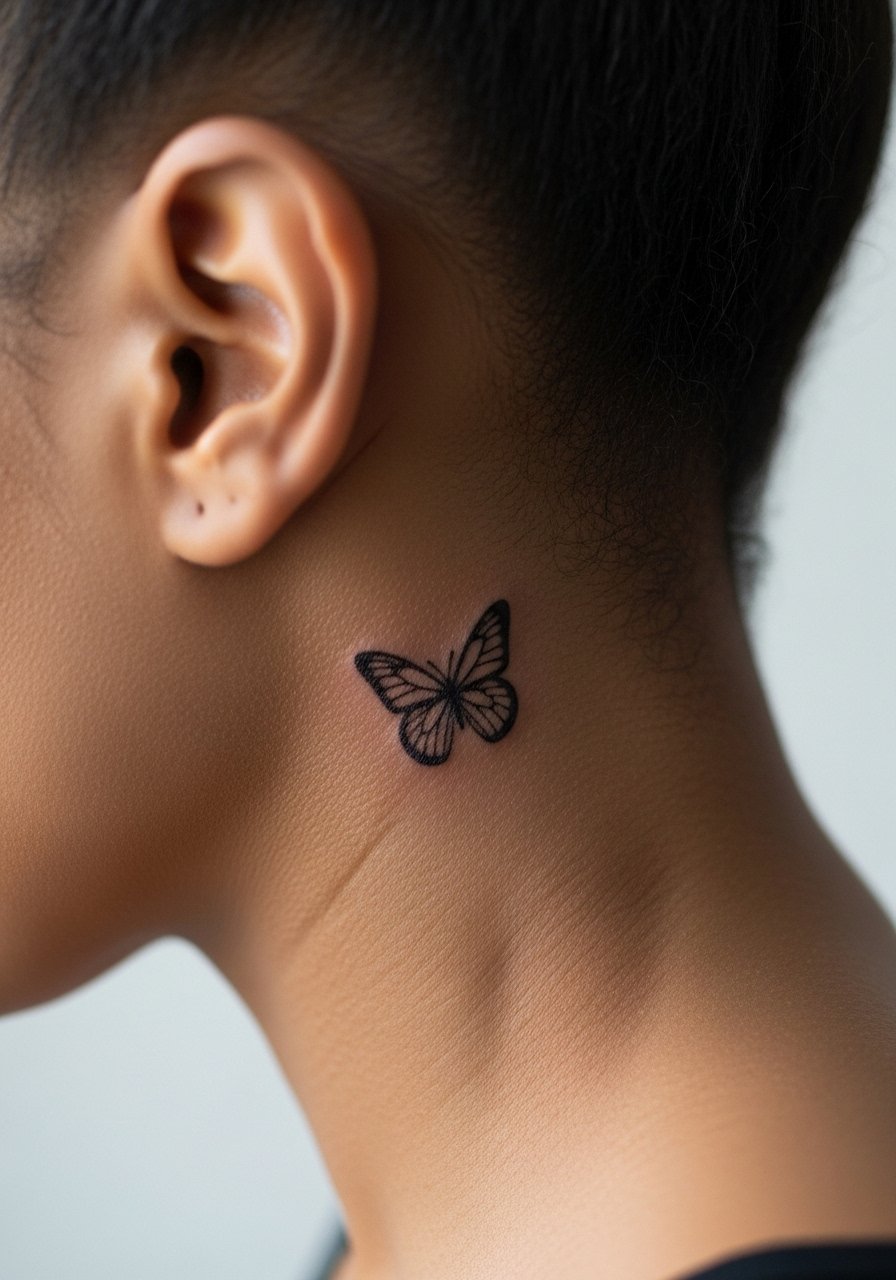
This placement is perfect for someone who wants a near-secret accent. When you consult, ask the artist to scale the wings so they read at arm's length and to avoid ultra-fine hairline strokes that vanish on textured skin. The session is fast and the pain is low. A common version that ages poorly uses too-thin detail and ends up nearly invisible after two years. For the session wear your hair up and loose so the artist can access the area. Consider small stud earrings to frame the spot when you show it off. Because this area moves with hair and collars, expect a subtle fade and a potential touch-up after a couple of years.
4. Watercolor Butterfly Splash on Outer Forearm
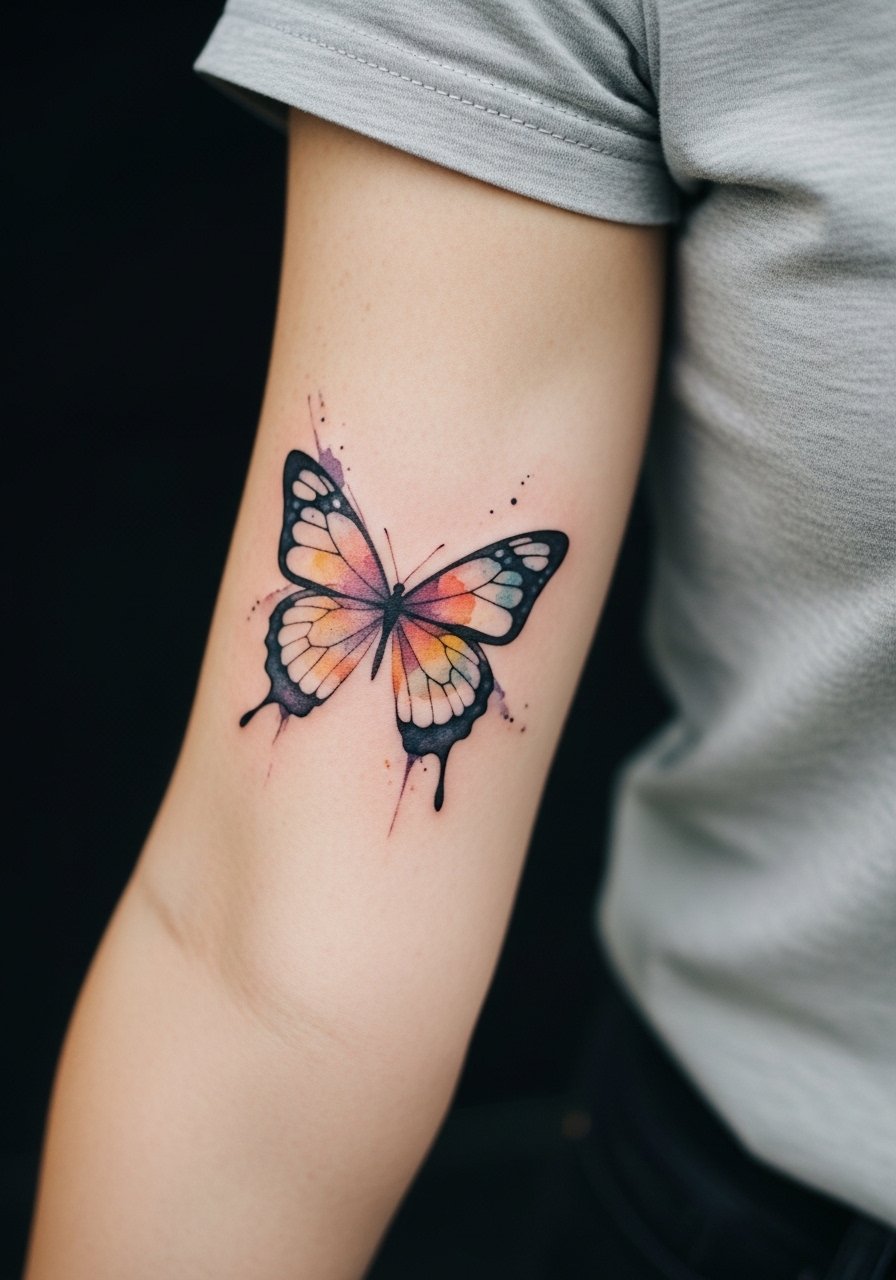
Most watercolor pieces look vivid when fresh but can suffer uneven fading if pigment sits too shallow. For a stencil that holds, request that the artist anchor the color with light black linework and build the washes around it. The mistake people make is asking for only watercolor without any structural linework. That results in color bleeding into a bruise-like fade at year three. The session is moderate in time and comfort. Style it with a flowy kimono sleeve top or roll your sleeves during warm-weather shows so the color can read. Mention to the artist you want the outline slightly reinforced where the wings meet the body so the shape keeps reading as the color settles.
5. Realistic Micro-Realism Butterfly on Outer Ankle
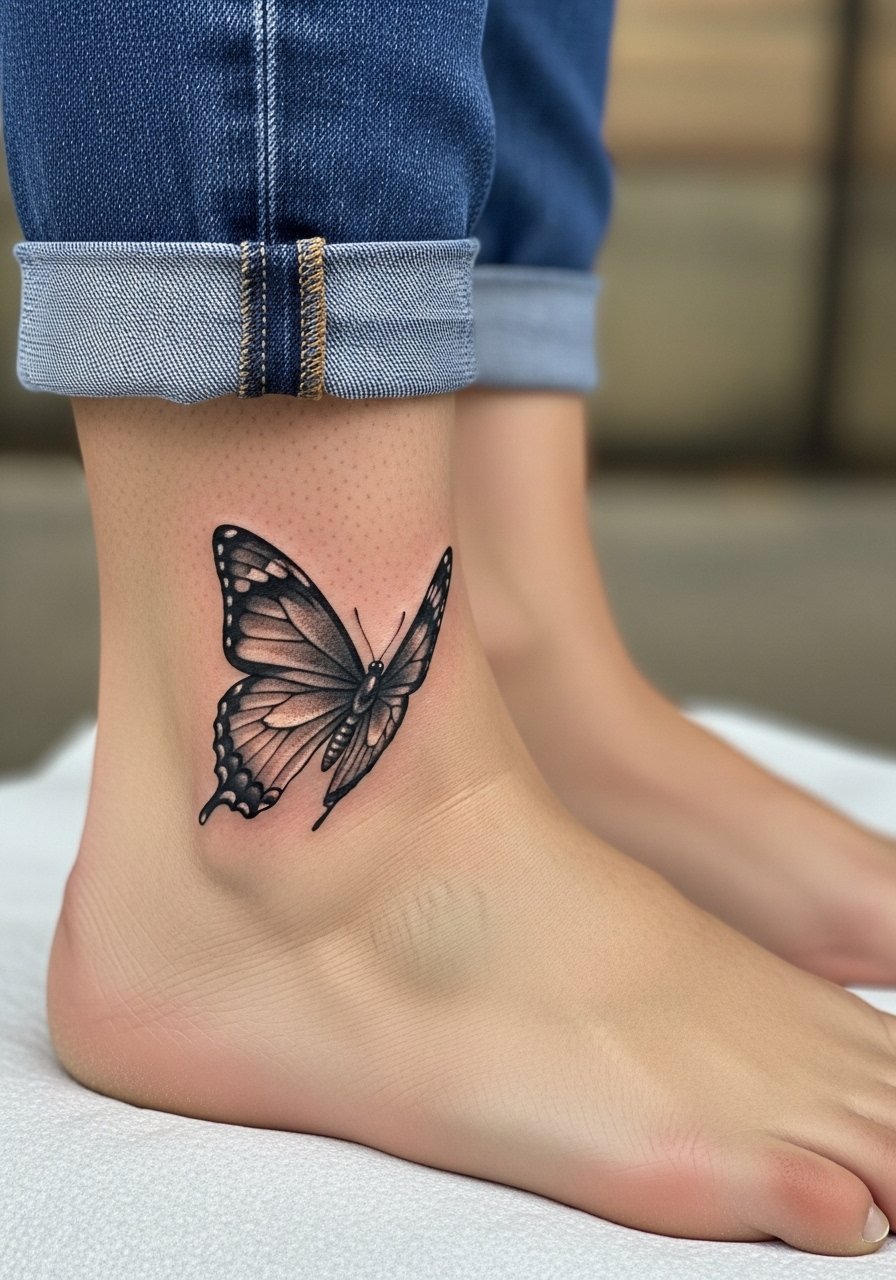
Ankle placements demand attention to friction from socks and shoes. Expect odd healing if you show up in tight socks after the session. For a realistic stencil, bring a clear reference for wing texture and ask the artist to plan shading that looks good scaled to two inches. The common issue is asking for ultra-fine realism too small, which blurs under pressure points. Wear sandals or loose pants the day of the appointment and then keep the foot elevated during the first 48 hours. Show-off pairing is strappy heeled sandals or cropped ankle pants. Plan for a one- to two-session approach and a possible light touch-up if friction affects edge crispness.
6. Geometric Butterfly Mandala on Shoulder Blade
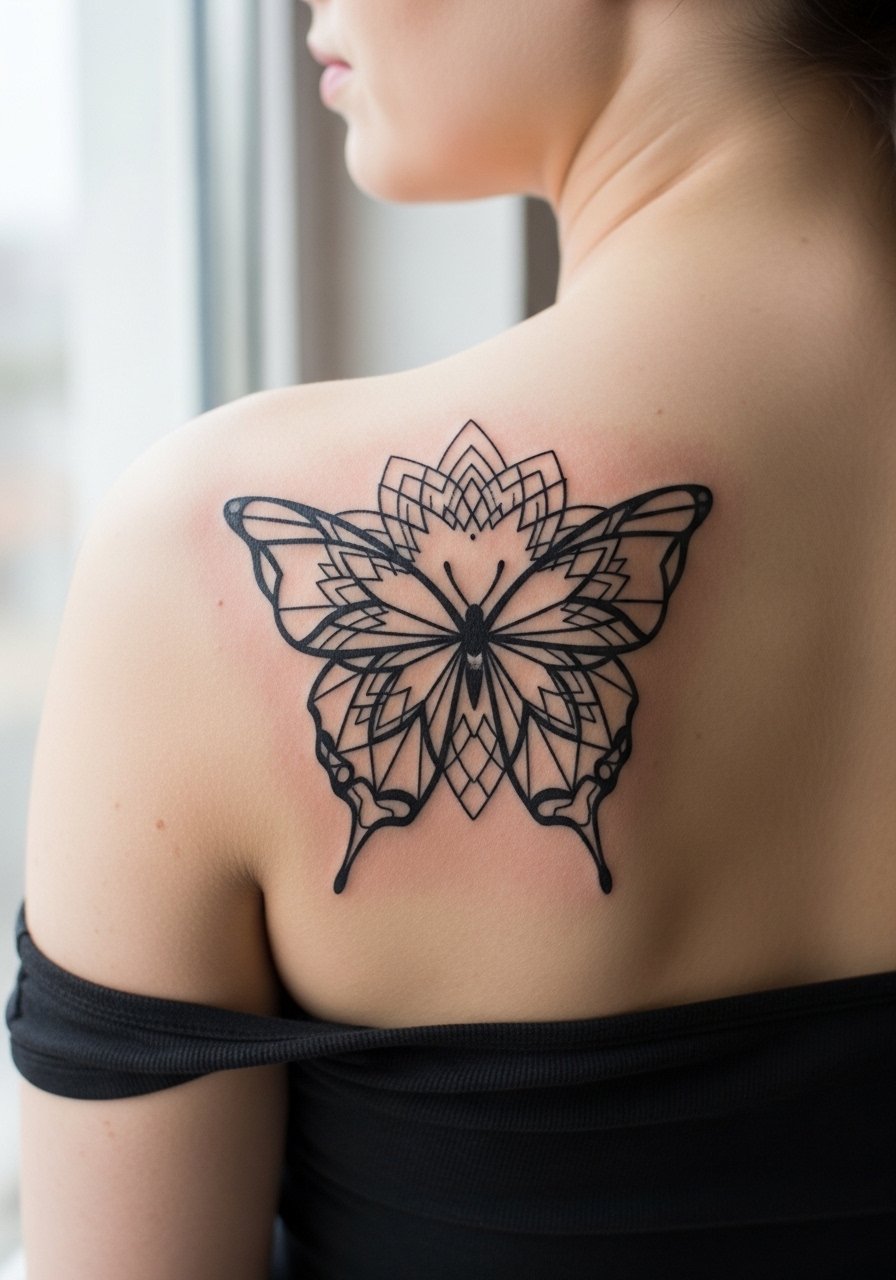
This ornamental hybrid reads as a structured statement and needs space. The biggest mistake is crowding a mandala-style pattern into a tiny shoulder spot. Tell your artist you want negative space between dense linework to avoid merging as it ages. The shoulder tolerates bold linework well and the piece tends to age gracefully with proper spacing. For the session, wear a strapless tank top so the artist can work without fabric restriction. Pain is moderate and session time depends on how dense the mandala becomes. Artists are split on how intricate mandalas should be on curved spots. One camp prefers larger spacing and bold lines for longevity. The other camp builds density for visual impact. Ask which approach the artist recommends.
Studio Day Picks
The wrist, ankle, and shoulder pieces above each ask for different prep, so a short kit focused on transfer and comfort makes the session smoother.
-
Stencil transfer paper kit. Lets you preview the exact placement on skin before the needle touches, which is useful for tiny wrist and behind-ear stencils.
-
Topical numbing cream. Applied per directions it eases foot and rib sensitivity so the artist can work without long breaks.
-
Thin protective film roll. Useful on the ankle and wrist during the first few days when friction and washing are highest.
-
Fragrance-free gentle body wash. Cleans the area without irritating delicate linework that fine line pieces depend on.
-
Aquaphor healing ointment. A thin layer in the first 72 hours keeps moisture balanced for small detailed work and larger shaded pieces alike.
7. Simple Outline Butterfly Stencil on Collarbone
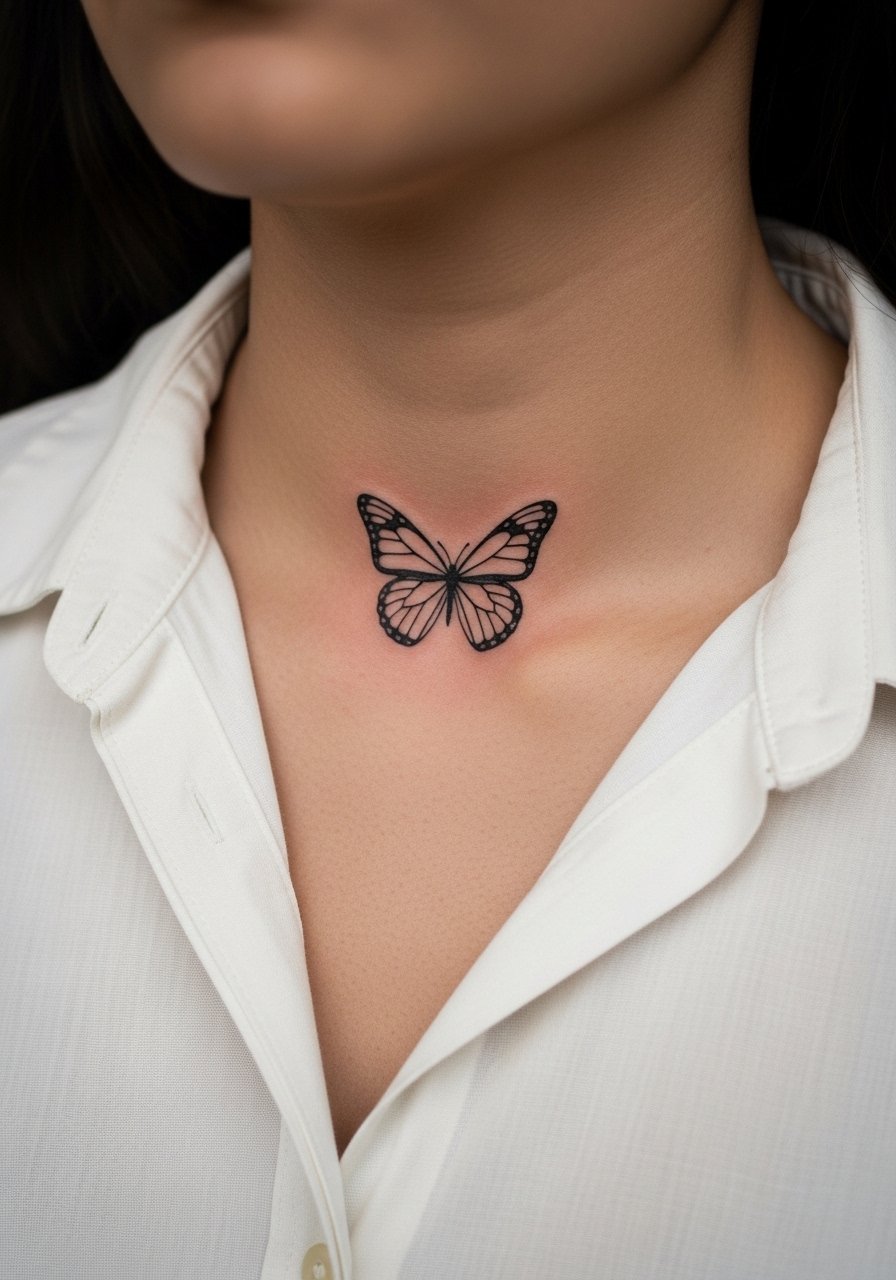
The collarbone gives small designs a graceful horizontal read. A common mistake is dropping the stencil too low so the wings sit on uneven skin above the clavicle. During consultation, specify whether you want the butterfly centered over bone or slightly off for a softer fall. Session comfort is moderate and breath control helps when the needle negotiates over bone. For showing the piece, pair it with an off shoulder top or layered necklaces that lead the eye up. Expect gentle fading where jewelry rubs, so discuss spacing if you wear chains frequently.
8. Detailed Butterfly Wing Stencil on Thigh
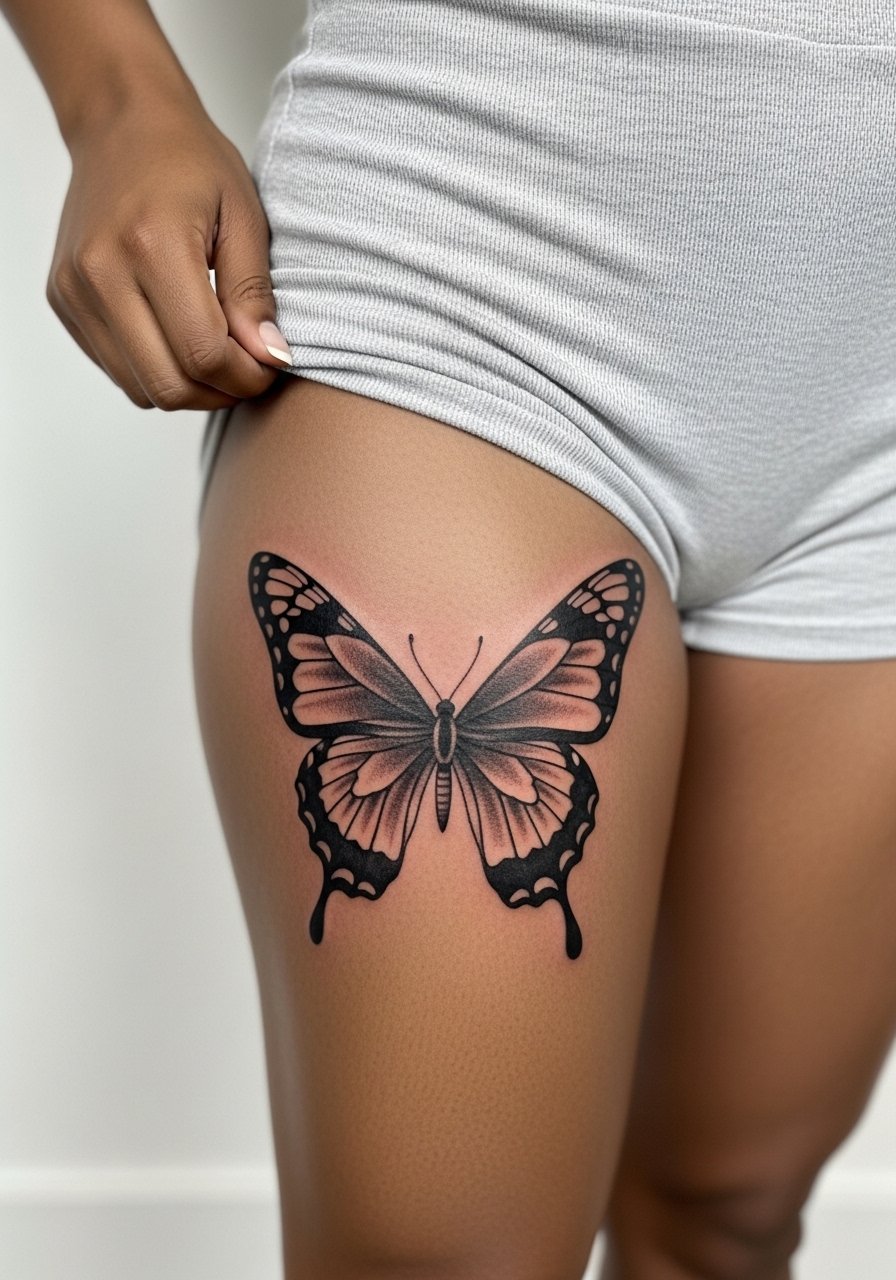
Thigh placements let you scale detail without compression from joints. If you want complex wing venation, say you plan for a three-inch minimum so the tiny veins stay crisp. The common failure is shrinking a detailed wing to micro size which forces the artist to compress elements that later blur. Session feel is low to moderate and you can recline comfortably. Style with high-waisted shorts or a slit skirt for showing, and wear loose shorts to the appointment so the artist can access the area easily. Touch-ups are less common here compared to wrists.
9. Stylish Ankle Butterfly Cluster
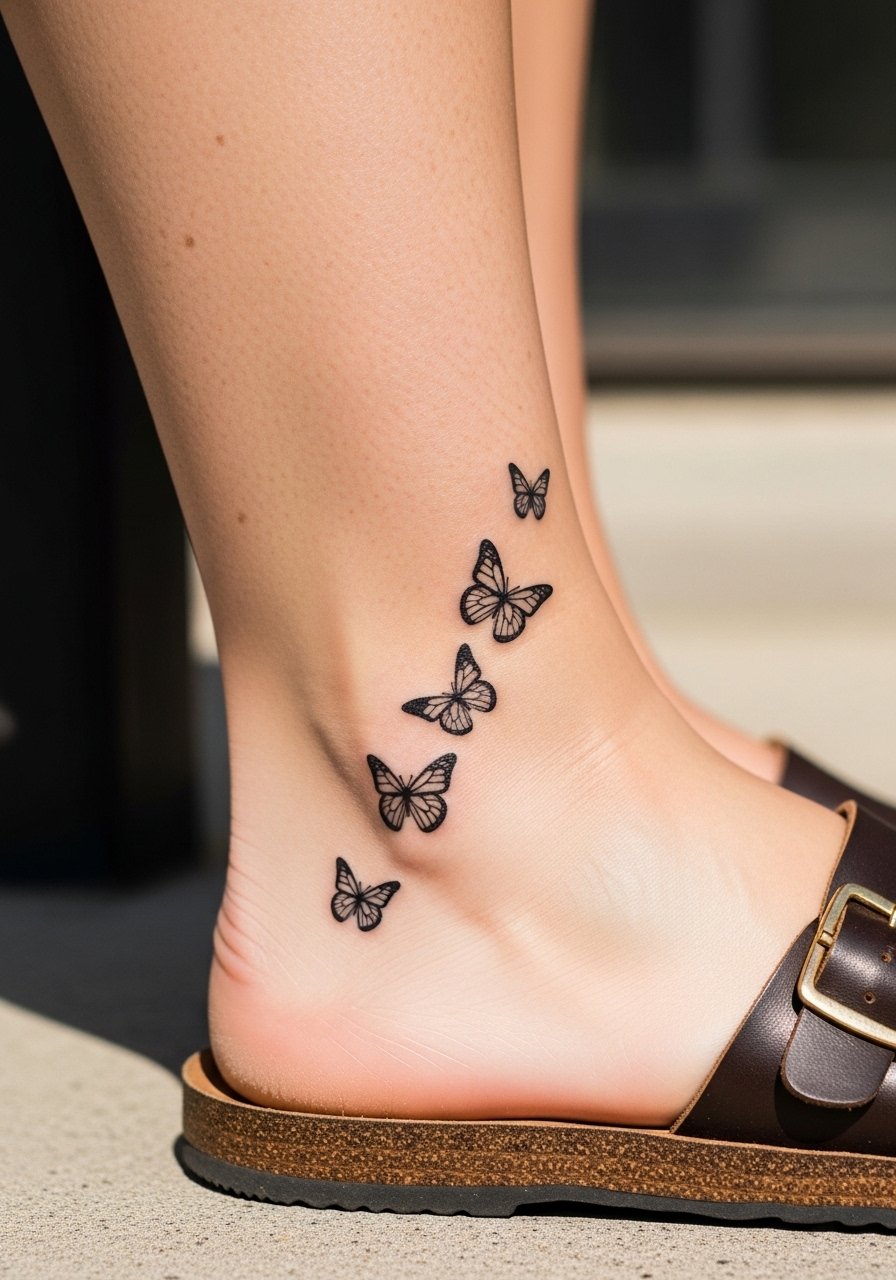
Clusters let you create motion and stacking without one dominant piece. The session can be a single short appointment. The typical mistake is putting every butterfly too close and tiny, which becomes an indistinct smudge after a year. Space each element and vary wing sizes slightly. For the session wear loose jogger pants or sandals so the artist can access the ankle. For show-off looks combine with nude strappy sandals that leave the ankle visible. Plan for a touch-up if shoes or socks create repeated friction during healing.
10. Temporary Fine Line Butterfly Stencil for Testing
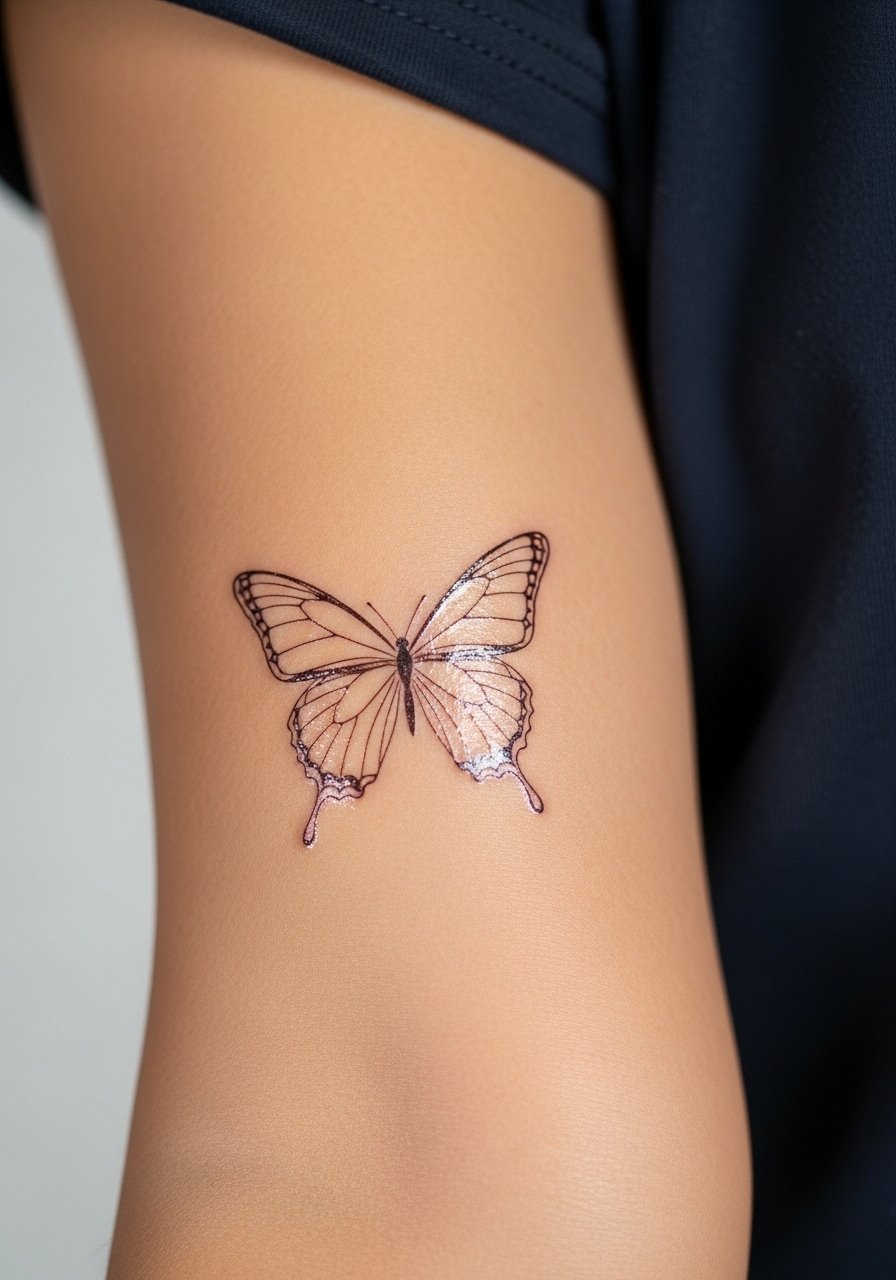
Temporary stencils are great when you cannot decide between black and color. The pain is zero and you can wear the transfer for days to test visibility and placement. A common problem is expecting temporary adhesive to stick perfectly to curved zones like the ankle. Apply to clean, dry skin and use a gentle setting spray if you need extra hold. Use these previews to test how jewelry, sleeves, and your daily routine affect the spot. If the temporary sits well under your watch or sandal, the permanent will likely behave similarly.
11. Butterfly with Script Integration on Ribcage
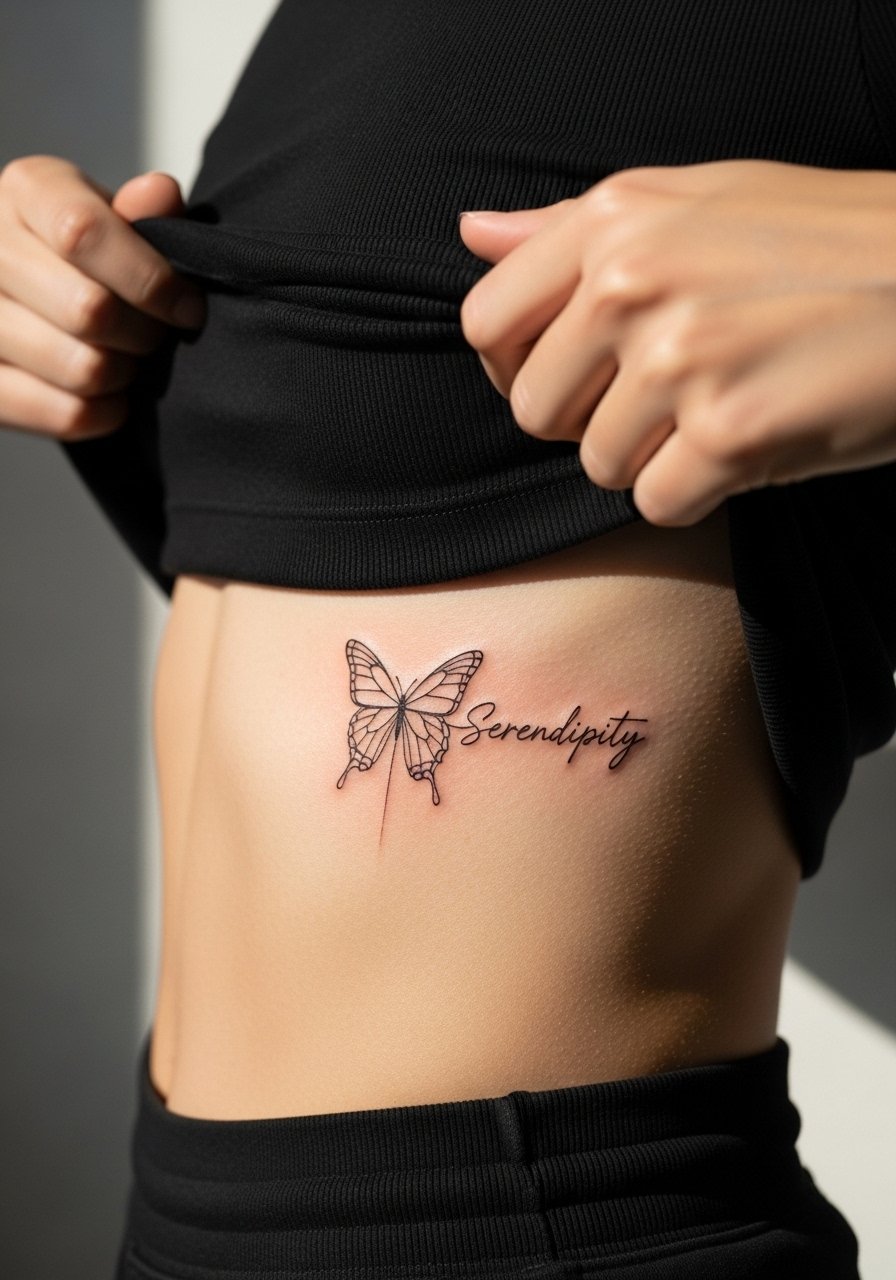
Fair warning about ribs. Pain is high on most pain charts. However this area reads beautifully when you want a larger motif that curves with the body. Artists split on fine line here. One camp says ribs stretch and blur delicate strokes quickly. The other argues that careful depth and spacing make fine line work viable. Ask where your artist stands and show examples of the exact script font so the lettering does not crowd the wings. Wear a strapless or zip-up top to the appointment for access. Expect at least one touch-up option if the thinner strokes soften during healing.
12. Stylized Geometric Butterfly Across Shoulder Cap
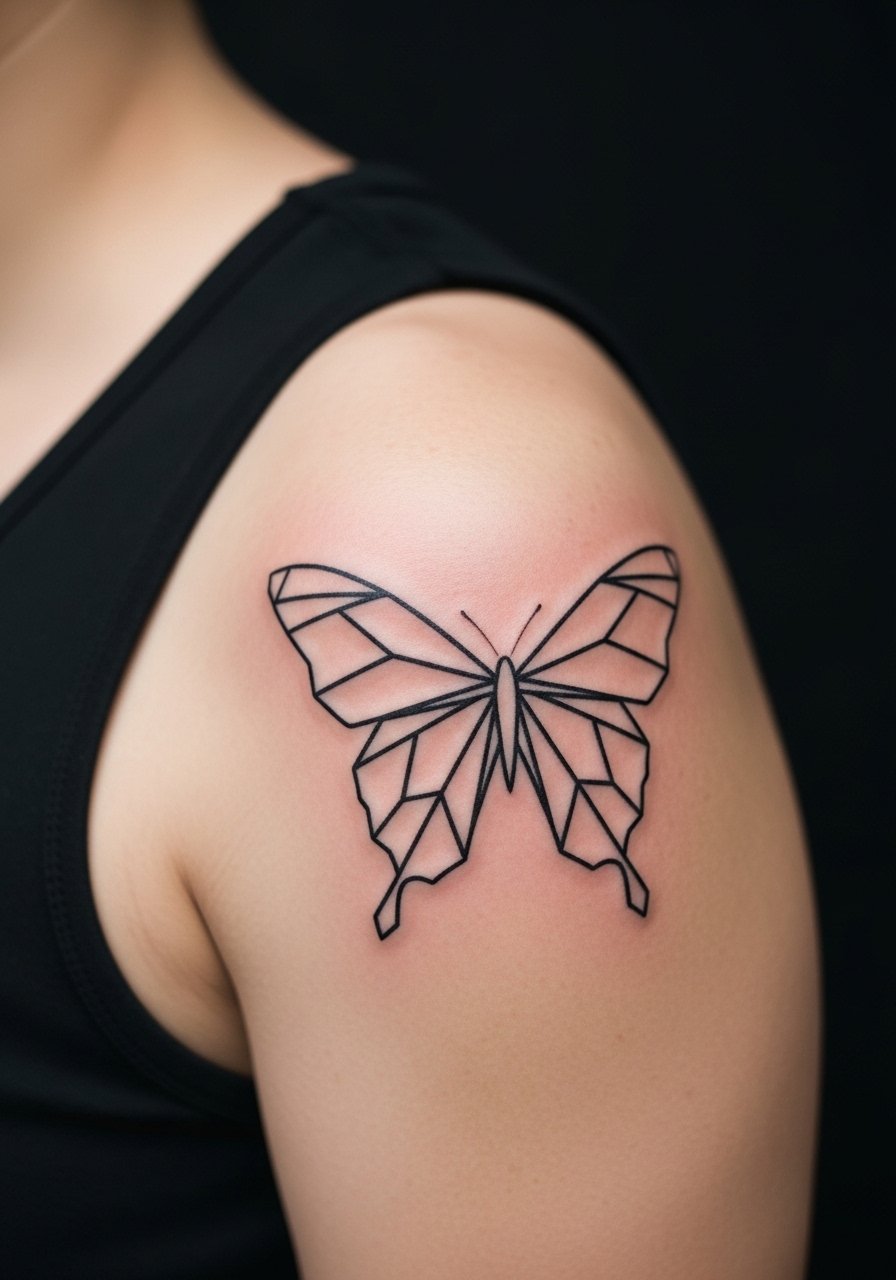
There's something about clean geometry that reads bold even at modest sizes. The mistake is making the pattern too tight against the shoulder curve. Request extra spacing where the shoulder rounds so the pattern does not compress into thicker looking bands after a couple of years. This placement prefers slightly heavier linework to resist blowout. For the appointment wear a loose button-down shirt you can pull aside for access. For evening looks try an off-shoulder top that highlights the wing spread.
13. Linework Butterfly with Dot-Work Accents on Inner Bicep
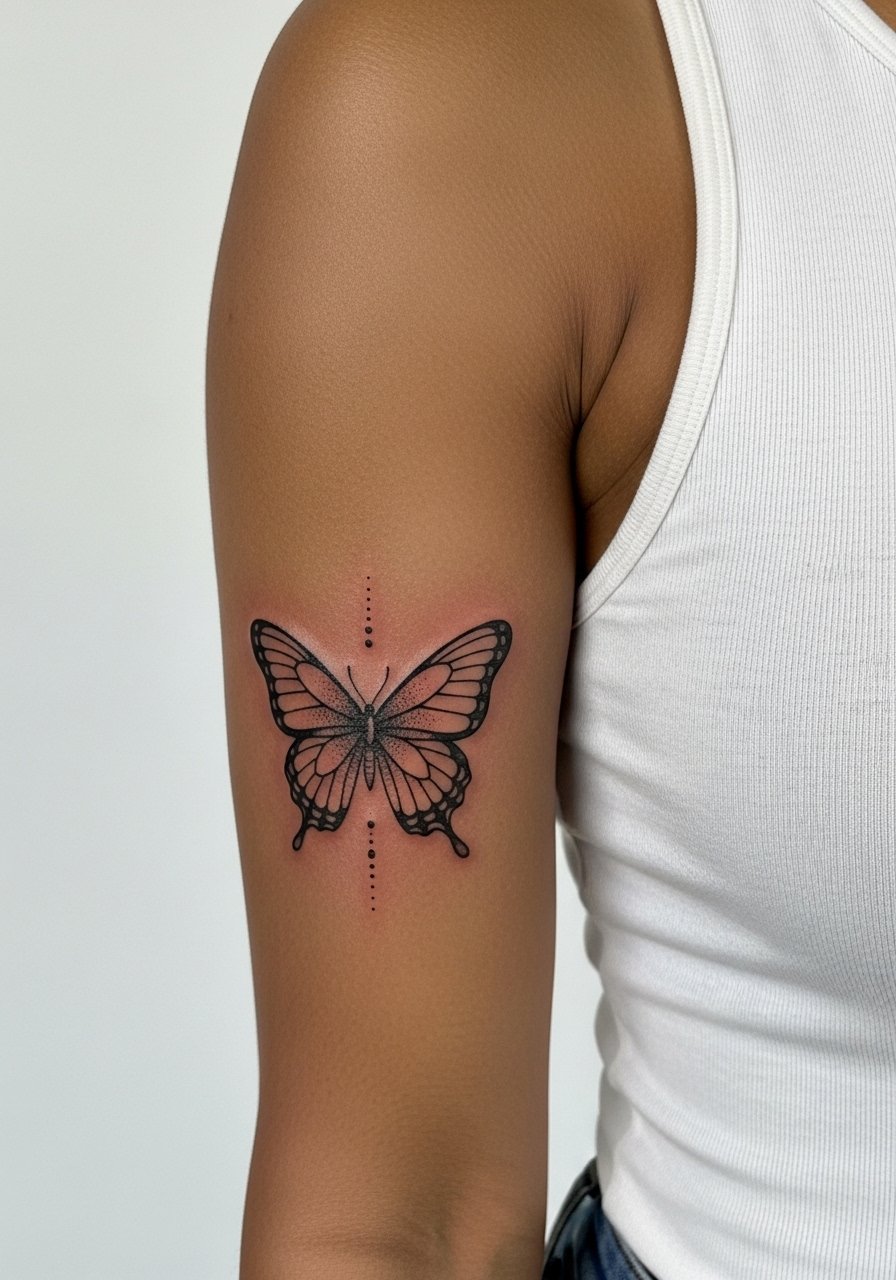
The inner bicep is forgiving for detail if you can tolerate the session. Expect the needle to feel sharper because the skin is thinner there. The biggest mistake is adding heavy stipple too close to the outline. Instead, ask for gradual dot-work that fades away from the wings. For the session wear a sleeveless top so the artist can raise your arm as needed. This spot ages well since it is shielded from constant sun and abrasion. Touch-ups are usually minimal unless you gain or lose a lot of weight.
14. Minimalist Micro Butterfly on Finger
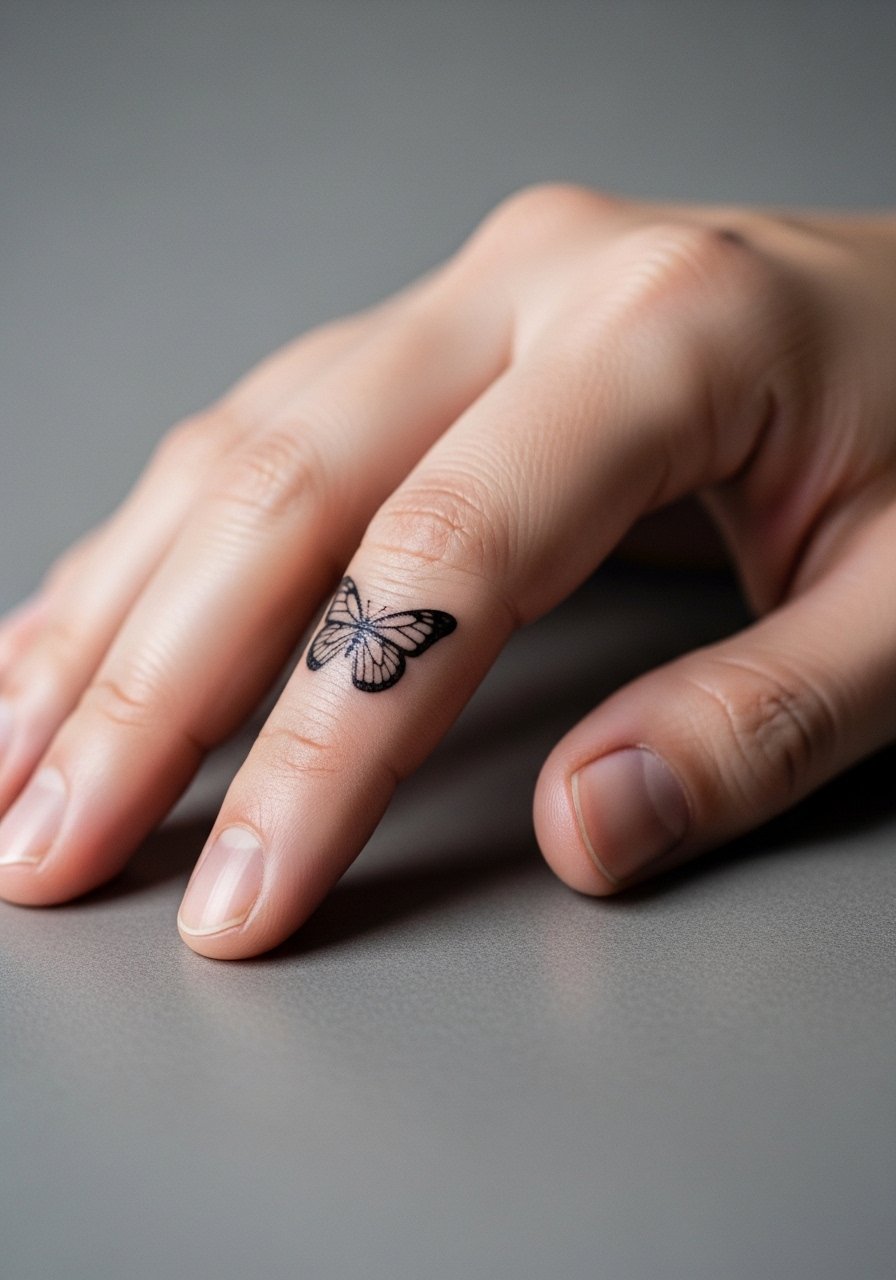
Finger tattoos are charming but fragile. Expect faster fading and potential need for yearly touch-ups. The common mistake is asking for dense detail on a fingertip or side. Keep the design simple and accept that it will soften. During the appointment the area is quick but sensitive. Avoid ring bands during healing to reduce rubbing. If you want to show it off, pair with thin rings on adjacent fingers. Consider the long-term upkeep cost when choosing finger placement.
15. Watercolor and Line Hybrid Butterfly on Upper Arm
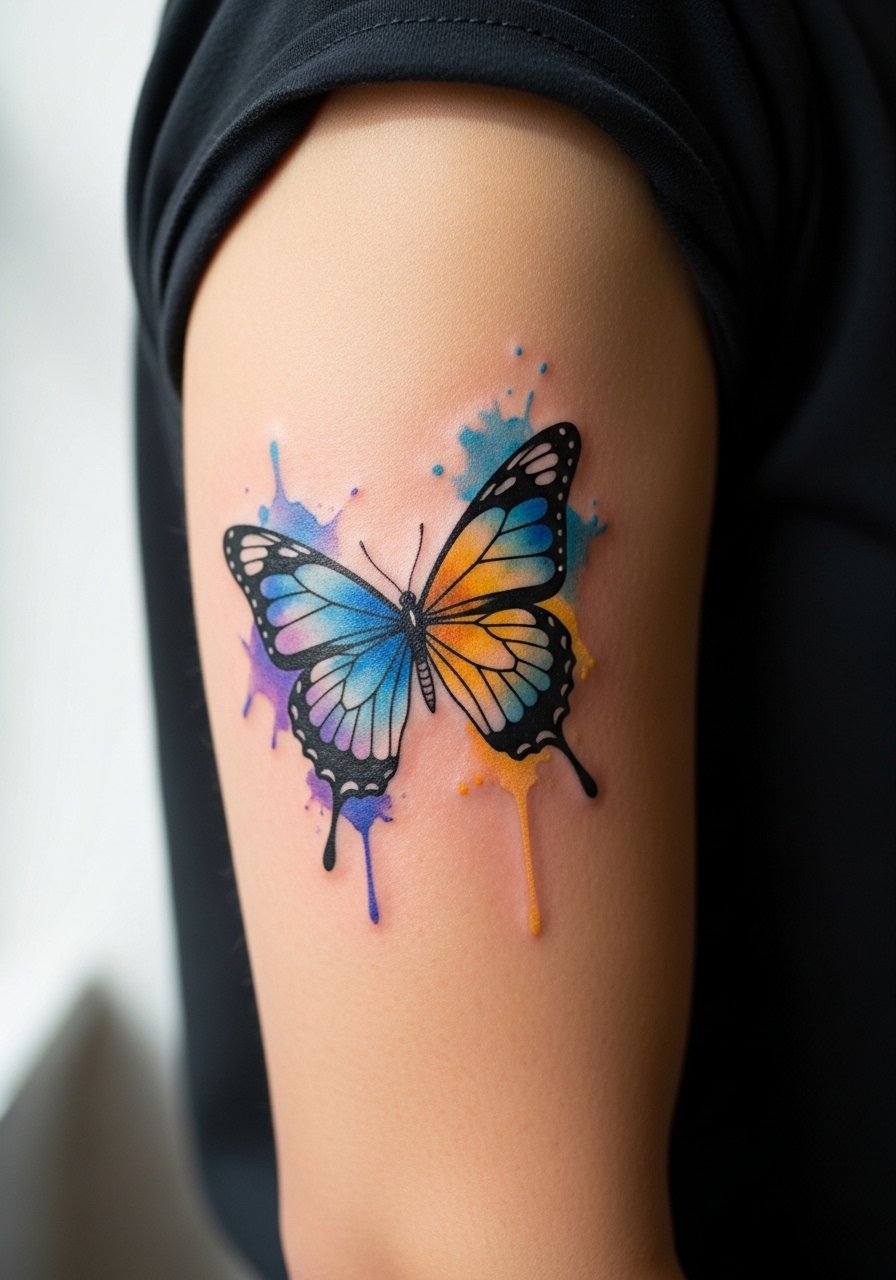
This hybrid gives you vibrant color without sacrificing structure. Ask the artist to anchor the washes with light black outlines so the silhouette stays clear as color fades. A common fail is pure watercolor without anchors which often looks patchy after a few years. The session can be longer than a simple line piece. For showing, a flowy kimono sleeve complements the softness and keeps focus on the color placement. Plan for sun protection to keep the washes bright over time.
16. Printable Stencil Set for Flash Cluster Events
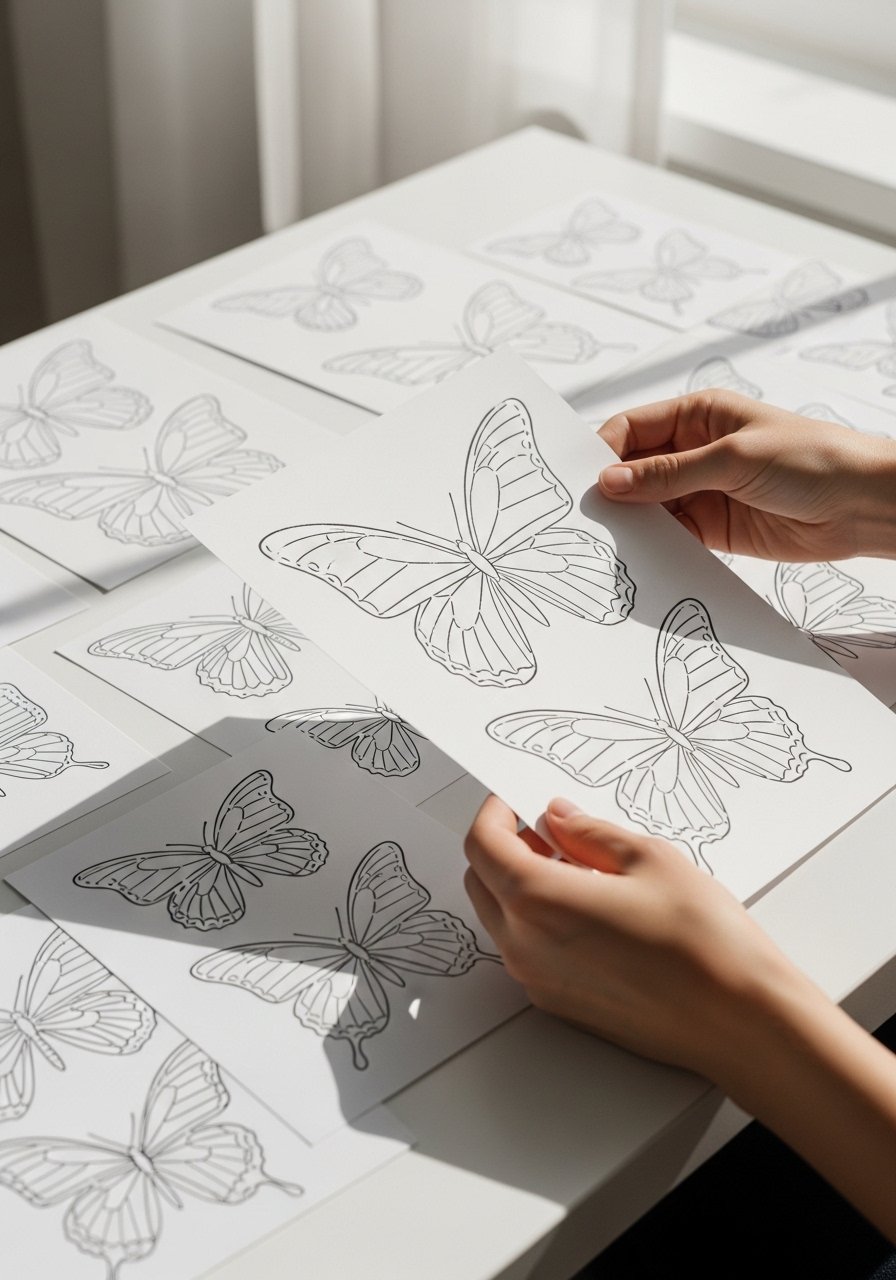
Printable stencils are helpful if you are planning a flash day or want to try multiple placements at home before booking. The key is scalable vector files so details do not collapse when enlarged. A mistake is printing low-resolution images and expecting crisp transfers. Use printable sheets to audition spacing across ankle, wrist, and collarbone. Temporary transfers let you live with the layout for a week before committing. If you plan a group flash event, prepare a set of sizes so clients can pick micro to medium without losing wing detail.
17. Bold Blackwork Butterfly for Outer Thigh
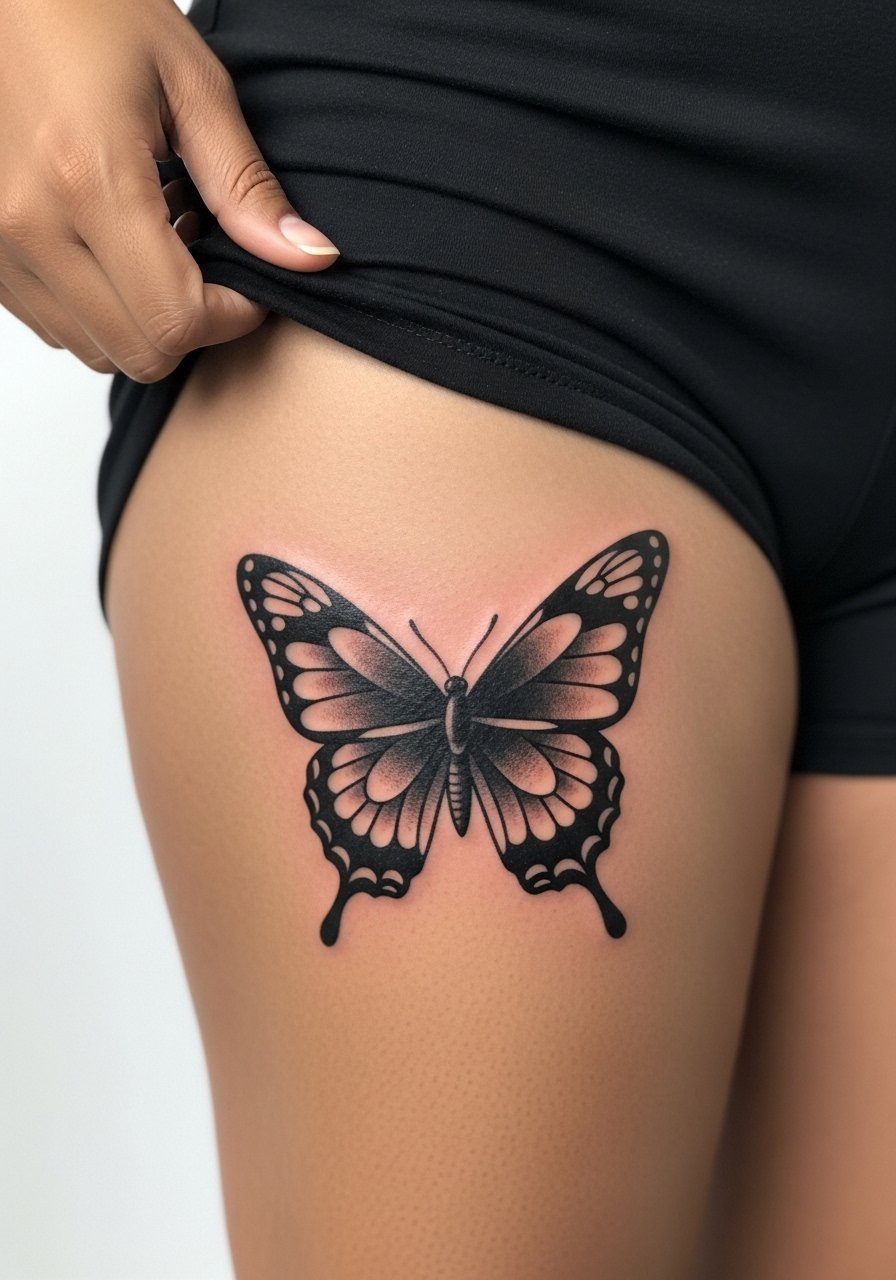
Thigh pieces allow saturation and bold blackwork without worrying about blowout from joints. The visual impact lasts because saturation tends to age into a strong silhouette rather than soft smudge. The common mistake is trying to miniaturize this look. Bold fills need space. For the session wear loose shorts so the artist can access and you can recline comfortably. Pair the finished piece with high-waisted shorts or slit skirts to let the wing flow. Expect a one-session saturation job with a possible small touch-up after the ink settles.
18. Stylized Butterfly Cluster Behind the Ear and Neck
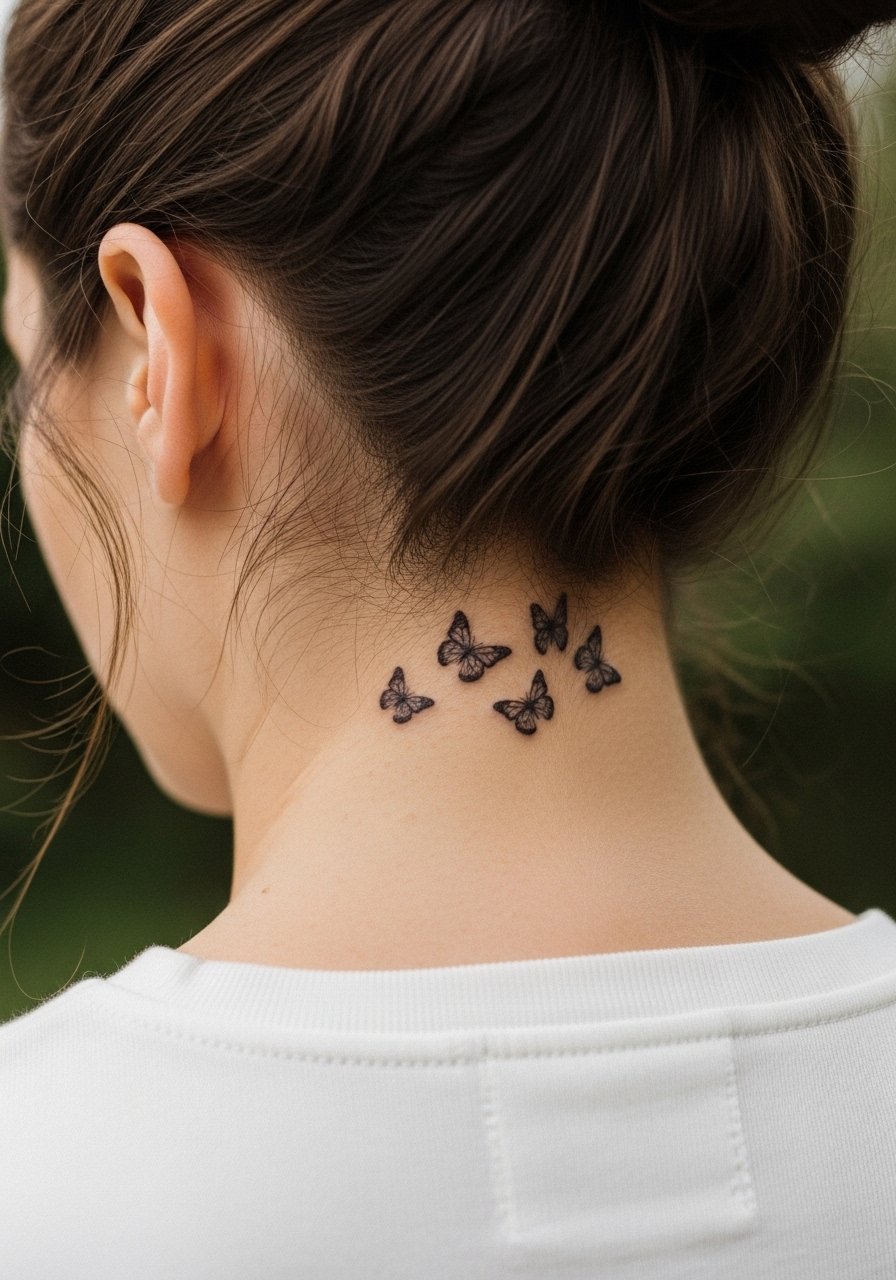
This is a breezy placement that reads best when the butterflies follow hairline flow. The mistake is placing a rigid symmetrical cluster behind a curved hairline which fights natural fall. Bring reference images that show the curve you like. The session is short and recovery is easy. For showing, style with loose waves or an updo. Wear your hair up for the appointment so the artist can get clean access. This spot is private enough that slight fading does not ruin the overall effect.
19. Ornamental Neo-Traditional Butterfly on Shoulder Cap
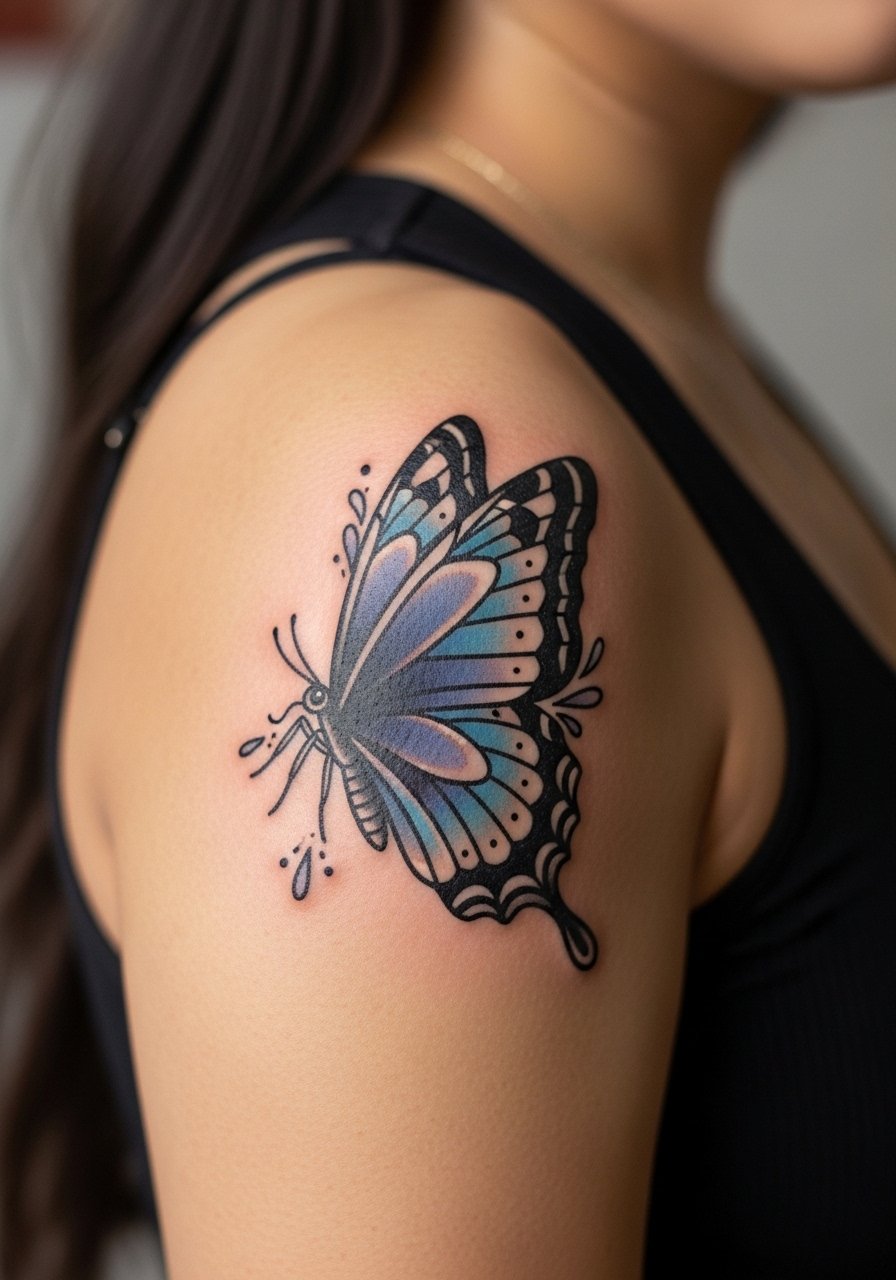
Neo-traditional lines and saturated shading age well because they use stronger linework and controlled saturation. The common error is mixing too many tiny illustrative details into a shoulder cap, which flattens as the skin moves. Ask for decisive outlines and moderate color saturation rather than extreme micro detail. For the appointment wear a button-down you can pull aside for access. This approach resists blowout and often needs fewer touch-ups than delicate fine line work in high-motion spots.
20. Printable Temporary Stencil for Skin Tone Testing on Inner Forearm
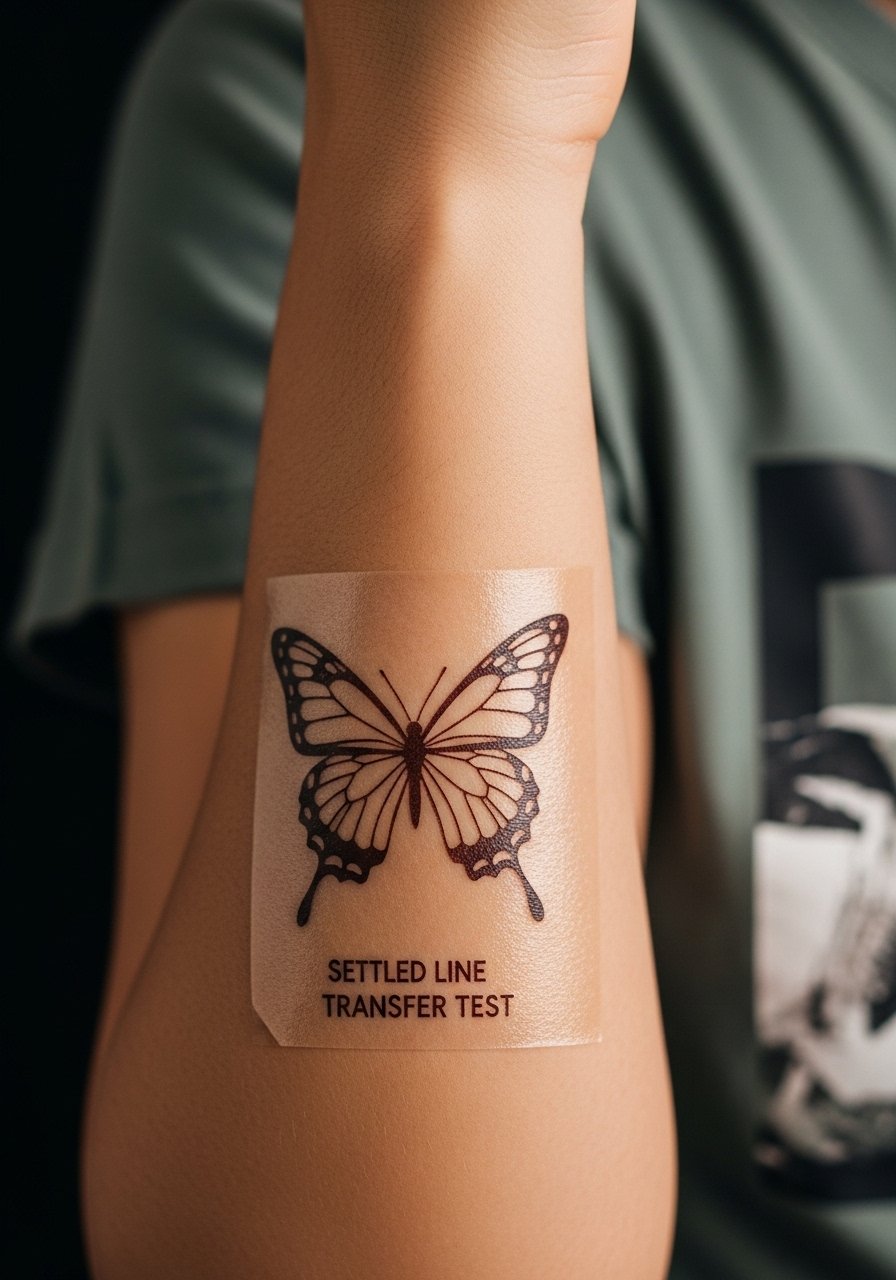
Testing how a design sits against your skin tone is smart before committing. Temporary stencils help you decide whether black, muted gray, or a hint of color reads best. A common issue is skipping this step and later regretting how a color or thin line behaves on your complexion. Use temporaries to judge daily visibility, how jewelry interacts with the area, and whether you want the wings more filled or more airy. No pain, immediate feedback, and better consultation conversations afterward.
21. Detailed Antenna-to-Wing Stencil on Sternum
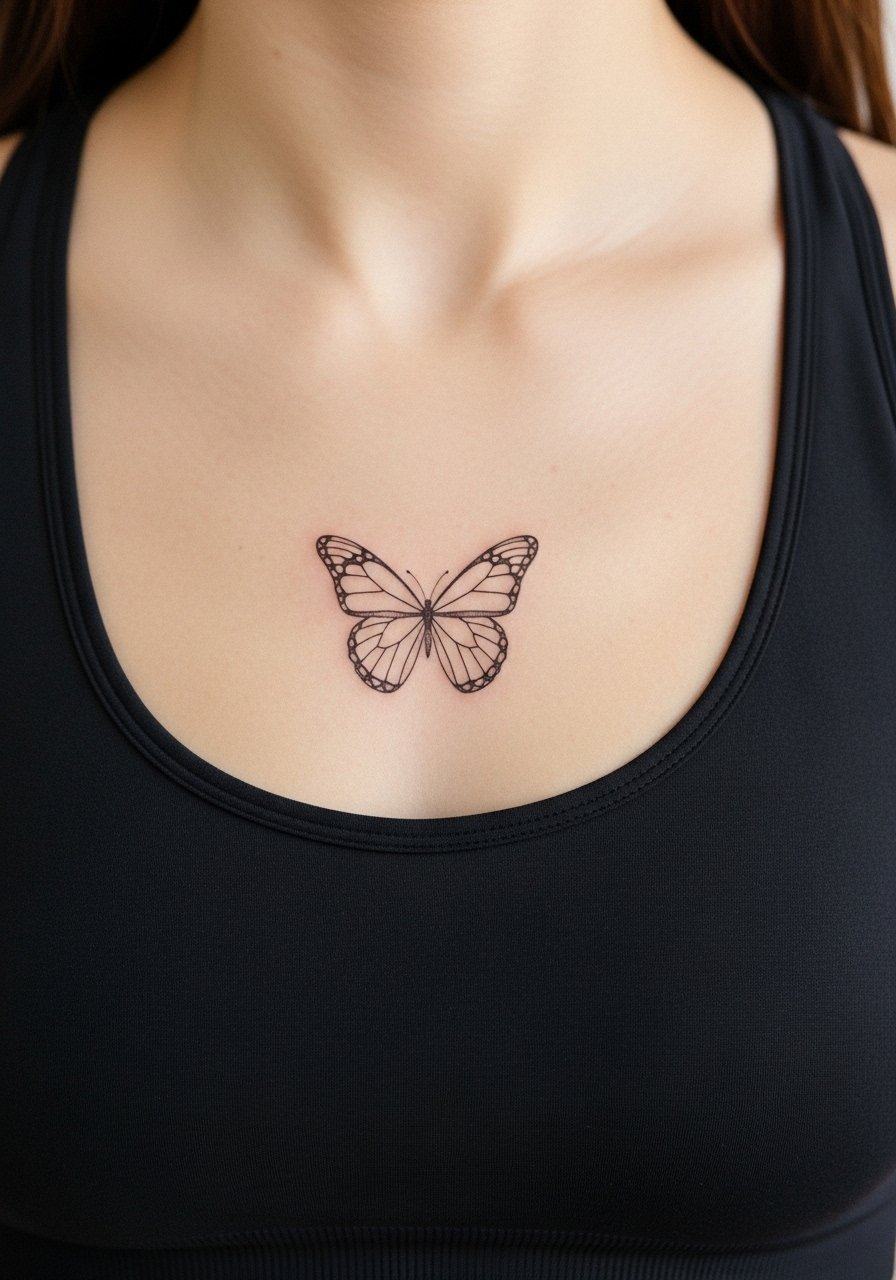
Sternum pieces require a professional comfortable with chest curvature and sensitive skin. Pain is above moderate and the session may take longer due to breathing motion. The common mistake is asking for ultra-fine script or filigree packed into the center where the skin moves. Ask your artist for spacing and slight reinforcement along the antennae so the central linework keeps reading after healing. For the appointment wear a fitted sports bra you can pull down slightly. Consider how your wardrobe will reveal the piece when healed.
Frequently Asked Questions
Q: Will a fine line butterfly on my wrist blur faster than a bolder outline?
A: From what I have seen, fine line on the wrist does tend to soften faster because of constant movement and washing. A slightly heavier lineweight and more spacing in the wing details helps longevity. Expect a possible touch-up around year two or three if you want crisp contour.
Q: How should I dress for an ankle butterfly session to avoid weird healing from socks and shoes?
A: Wear open-toe sandals or loose pants you can roll up and avoid tight socks for the first 48 hours. Elevate the foot and keep friction low. This reduces scabbing disruptions and helps edges remain defined.
Q: Are temporary stencils reliable on curved zones like ankles and ribs?
A: They can be if you prepare the skin properly. Clean, dry skin and a gentle setting spray improve adhesion. Temporary transfers are most useful for testing placement rather than exact long-term fidelity.
Q: Which holds up better over time, watercolor butterflies or black-and-gray micro-realism?
A: Artists split on color versus black-gray. One camp loves watercolor for vibrancy and movement. The other prefers black-gray for predictable aging. In practice black-and-gray often needs fewer color-related touch-ups, while watercolor looks amazing fresh and may need maintenance to stay bright.
Q: Where should I look to find stencil-ready examples that match a specific style?
A: Search hashtags like #ButterflyTattoo and #FineLineButterfly on social platforms, use Pinterest boards titled "printable butterfly tattoo stencil," and filter tattoo apps for "butterfly fine line" by location. These pathways help you find artists whose portfolios match the stencil aesthetic you want.
