
Fine line work and saturated color live in separate conversations most of the time, and the gap between the two is where the best compass pieces sit. Trends push watercolor washes and delicate compasses onto feeds, and longevity conversations follow. I prefer designs that plan for five years of wear from the sketch stage, and the first section shows a forearm compass that balances delicate lines with bold color fills so it still reads later.
1. Fine Line Compass on Inner Forearm

I've seen this placement age well when the artist keeps linework clear and gives the watercolor room to breathe. Tell your artist you want slightly heavier outer points and lighter interior detail, and ask for a sample stencil placed during consultation to check scale. Fair warning, the inner forearm sees sun exposure and friction from sleeves, so expect touch-up talk around year three if you work outdoors. The session feels medium intensity for most men, often around 1.5 to 3 hours depending on color saturation. For showing it off at summer events, pair with a short sleeve linen shirt that rolls cleanly above the design.
2. Saturated Compass on Outer Bicep
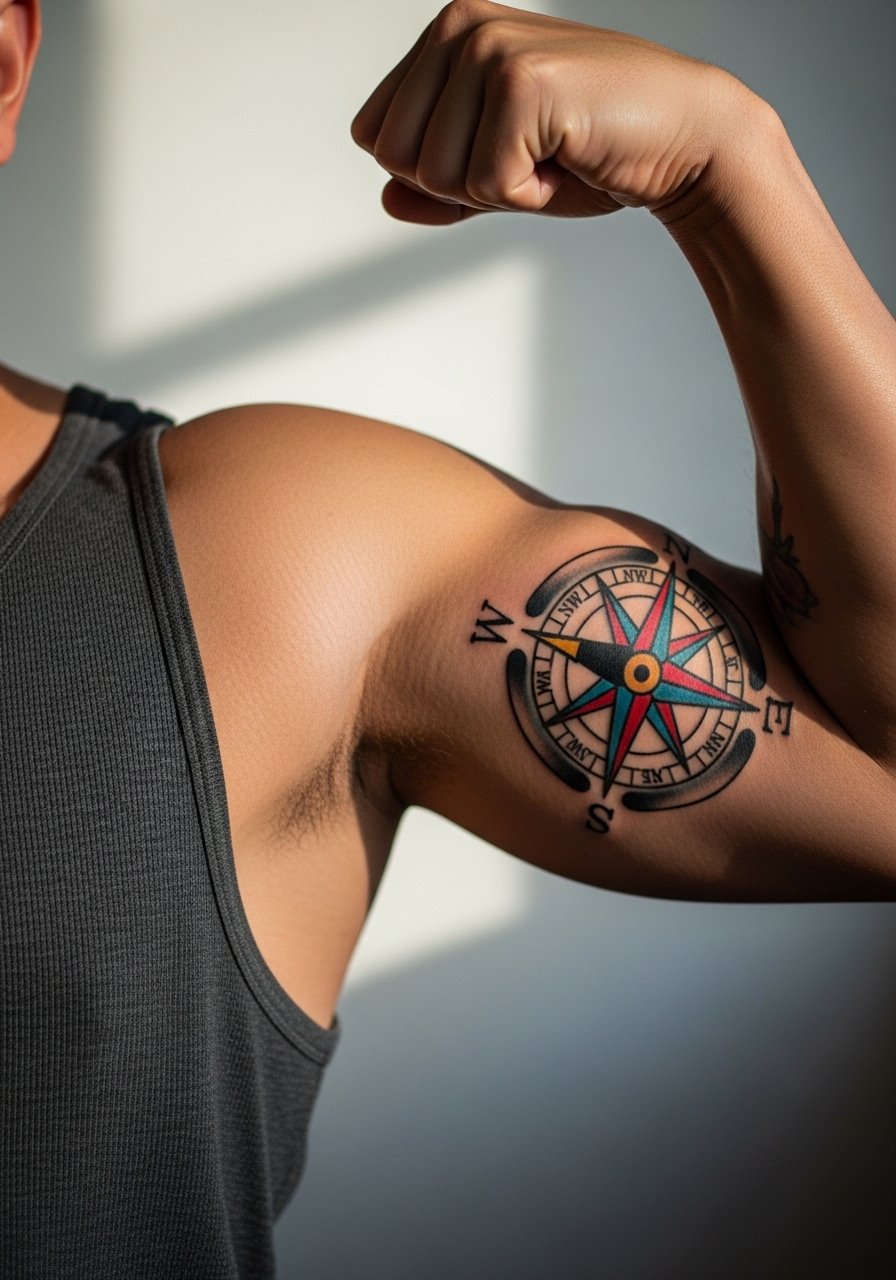
The outer bicep is forgiving for color saturation and is low risk for blowout when the stencil is sized correctly. I tell clients to expect a two to three hour session if you want rich fills and crisp black anchors. The biggest mistake is shrinking the compass too small to fit a sleeve idea, and then the color packs into a tiny space that muddies with age. At six months the saturation looks vivid, at two years it softens but retains shape, and by year five you may want a touch-up to refresh the strongest hues. Wear a loose sleeveless tank to the appointment so the artist has full access without lifting tight fabric.
3. Tiny Compass on the Wrist

Wrist tattoos are visible and they take more washing and sunlight than people expect. This tiny compass reads best with slightly bolder linework than a micro piece because wrists blur faster from daily washing and typing. I recommend planning for a 45 to 90 minute session and asking the artist about touch-up timelines up front. A common misstep is asking for ultra-thin lines on the wrist and then being surprised when the lines soften in two years. For after the session, a slim accessory like a minimalist leather bracelet frames the wrist without covering the work. Hand and wrist pieces can affect hiring in some jobs, so consider long term visibility before committing.
4. Compass and Nautical Map on Upper Chest
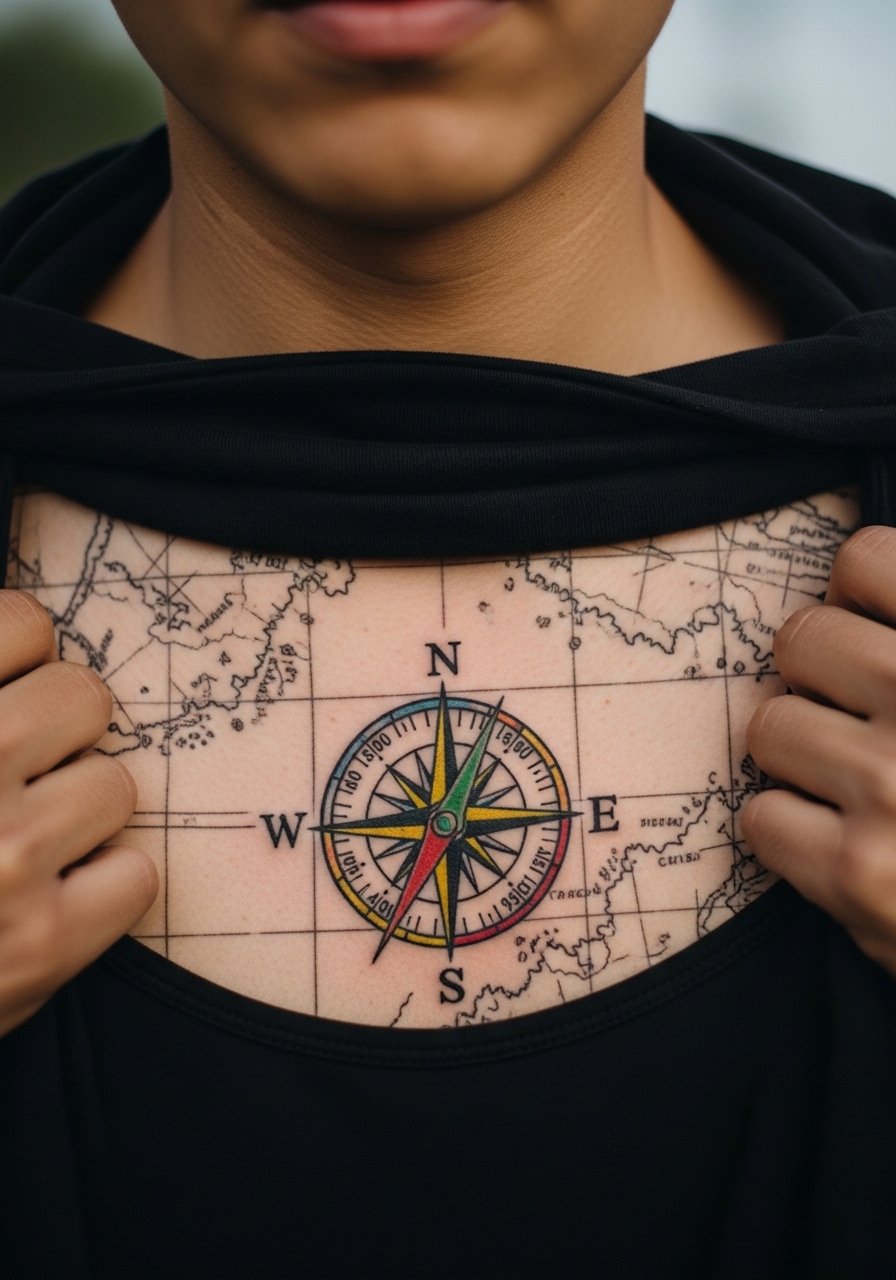
Chest placement gives room for a compass to feel like part of a larger story. Most clients book two shorter sessions for a piece that combines linework and soft washes. The chest moves with breathing so tell your artist you want slightly thicker anchor points and softer interior dots. A frequent error is cramming too many tiny map details into the chest zone, which can merge with time. Pain on the upper chest is moderate and session breaks help. For showing the piece, open-neck shirts or a button-down linen shirt pulled slightly aside put the compass on display without overexposing the sternum.
5. Ribcage Compass with Watercolor Wash

Fair warning, ribs are a high pain zone and a common place for people to push a design too small. Artists split into two camps on fine line here. One camp argues the skin stretch blurs lines within two years. The other camp says proper needle depth and spacing prevents that. Name the debate in your consultation and ask the artist how they handle rib texture before booking. For controllers of color, plan longer sessions and accept that washes will soften more quickly than bold black anchors. Wear a zip-up hoodie you can pull aside for the session so access is easy and you stay warm between passes.
6. Compass Sleeve Accent on Outer Forearm

There is something about placing a compass as an anchor in a sleeve that ties other motifs together visually. Tell the artist during consultation whether you want the compass central or offset, because sizing affects the surrounding elements. The outer forearm is moderate pain and stands up to saturation well, but leaving breathing room between color blocks prevents early blending. Sessions for a single accent compass can be under two hours. For casual showing, a rolled sleeve button down frames the forearm without hiding the main detail.
Studio Day Picks
The chest, ribcage, and forearm examples above each ask for different prep and a few targeted items smooth studio day and the first week.
- Stencil transfer paper kit. Lets you preview placement and scale on skin during consultation, which is crucial for the ribcage and chest pieces above.
- Tattoo numbing gel cream. Useful for high-pain sessions on the ribs if your artist allows topical numbing ahead of time.
- Thin protective film roll. Helps shield wrist and finger tattoos from constant washing and friction in the first week.
- Fragrance free gentle body wash. Cleanses healing color areas without irritating delicate linework on forearms and chest.
- Aquaphor healing ointment. Thin layers in the first days keep fine lines moist without clogging needle channels, which is especially helpful for tiny wrist compasses.
7. Compass Overlaid on Shoulder Blade
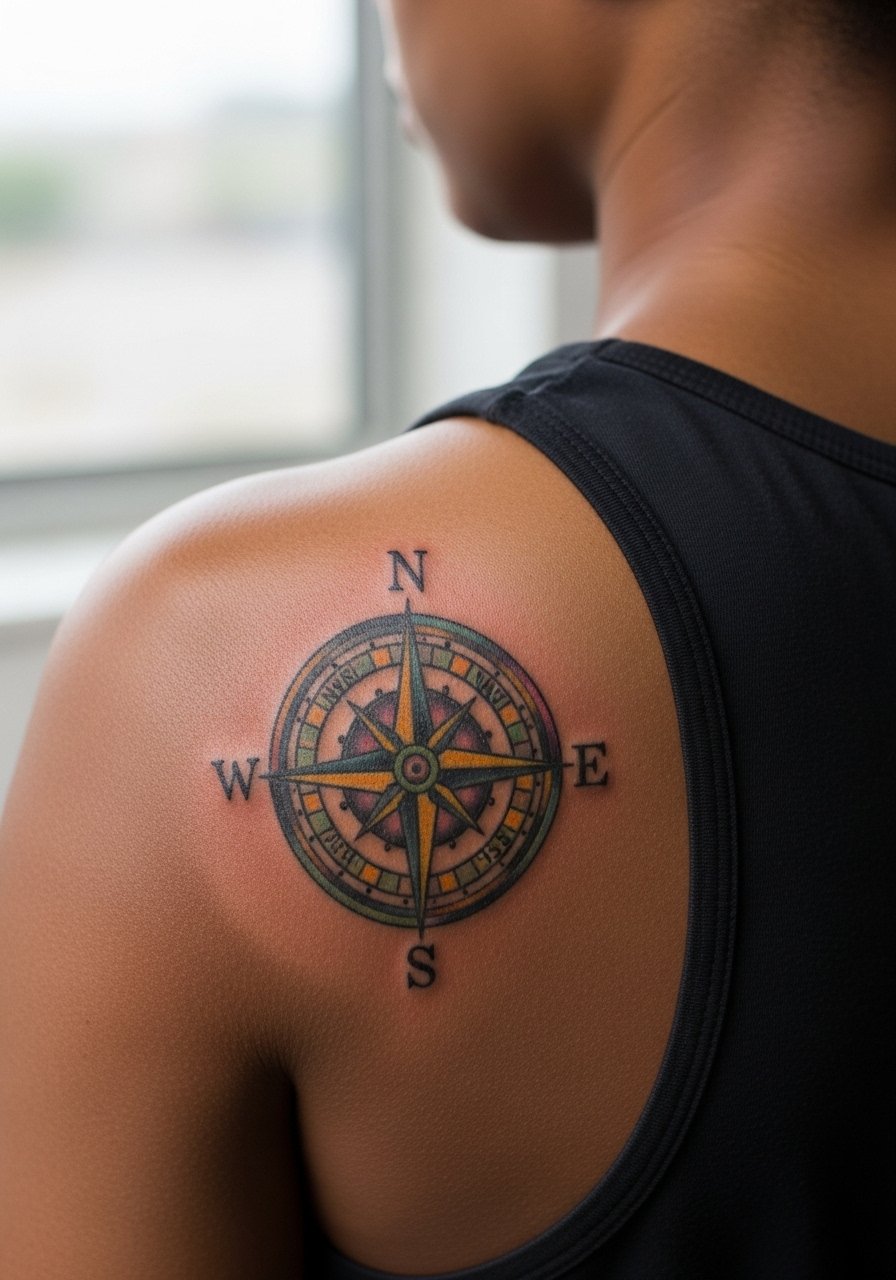
Shoulder blade compasses sit nicely beneath clothing and allow for larger, more detailed points. Expect a two to three hour session for saturated color and crisp linework. The biggest mistake is asking for tiny dot work on the shoulder blade and then wanting it to read from across a room. For mobility, the session feels low to moderate pain and you can usually lie comfortably. For the appointment, wear a loose tank top you can shift without exposing more than the shoulder blade.
8. Micro-Realism Compass on Upper Arm
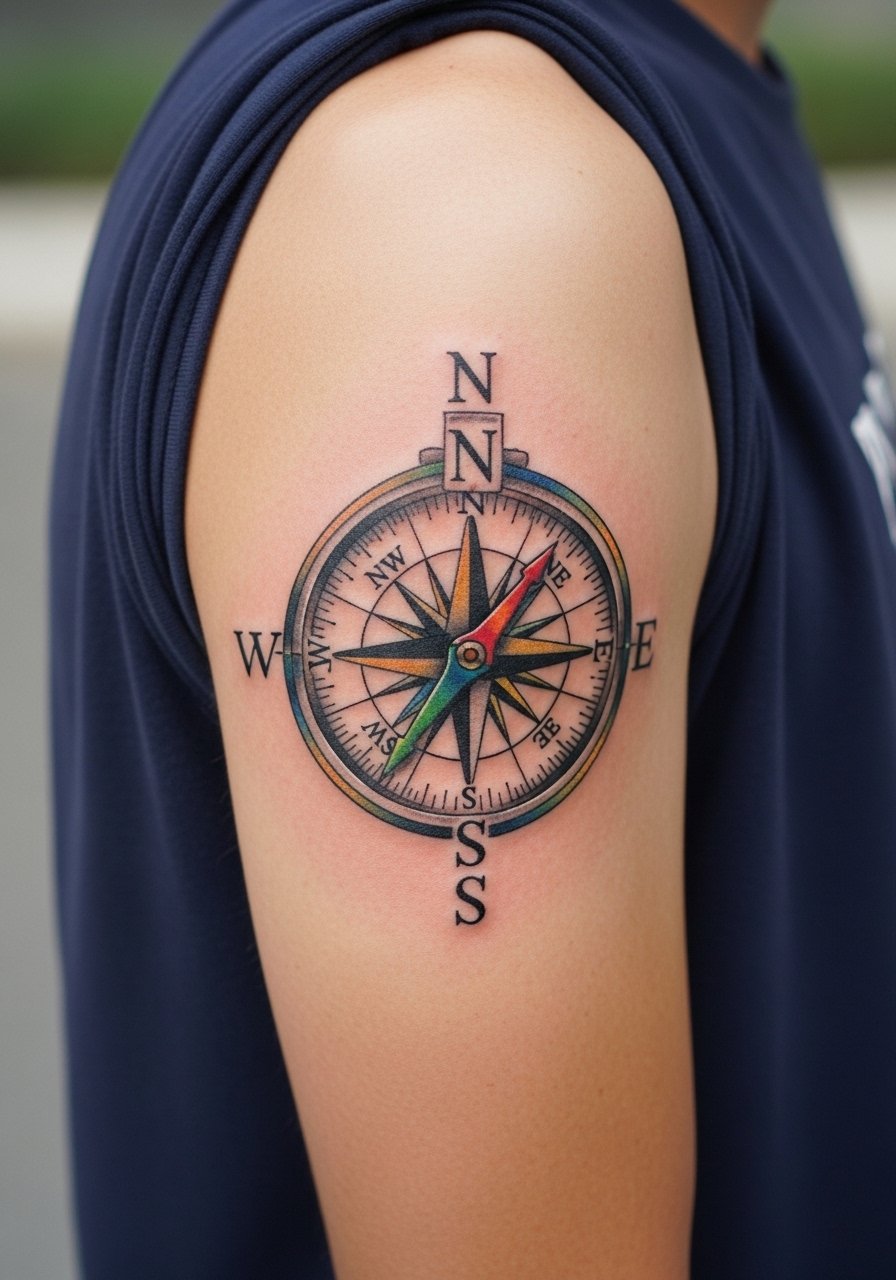
Micro-realism asks for precise linework and careful saturation. In consults I ask clients to pick one or two focal points rather than endless tiny details. The common error is wanting a photoreal outcome at a micro scale which can lead to muddying as the ink settles. Expect a longer initial session and a likely touch-up at year two for clarity. Pain is manageable on the upper arm and sessions lend themselves to breaks. If you want to show it off casually, a short sleeve tee gives clean exposure without overdoing warmth.
9. Compass with Mandala Frame on Calf
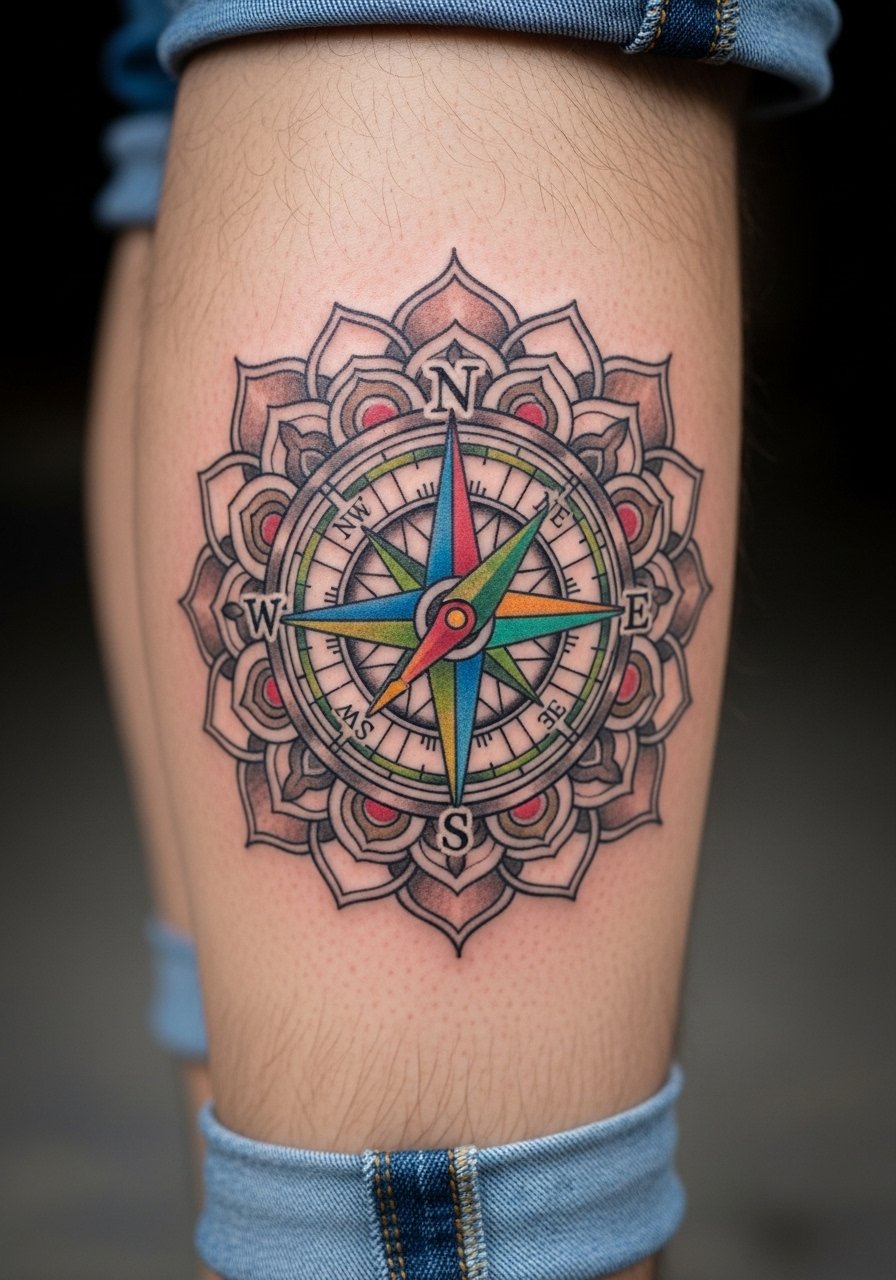
Calf pieces work well for men who want larger compositions without constant visibility. I recommend planning the compass as the focal point and the mandala as a secondary texture. A mistake is compressing too many mandala rings close to the compass, which accelerates visual merging. Healing feels easier on the calf because the area is low friction if you avoid tight socks. Sessions run two to four hours for full color work. For showing on summer days, roll up jeans or wear casual shorts that stop above the piece.
10. Minimal Compass on Ankle
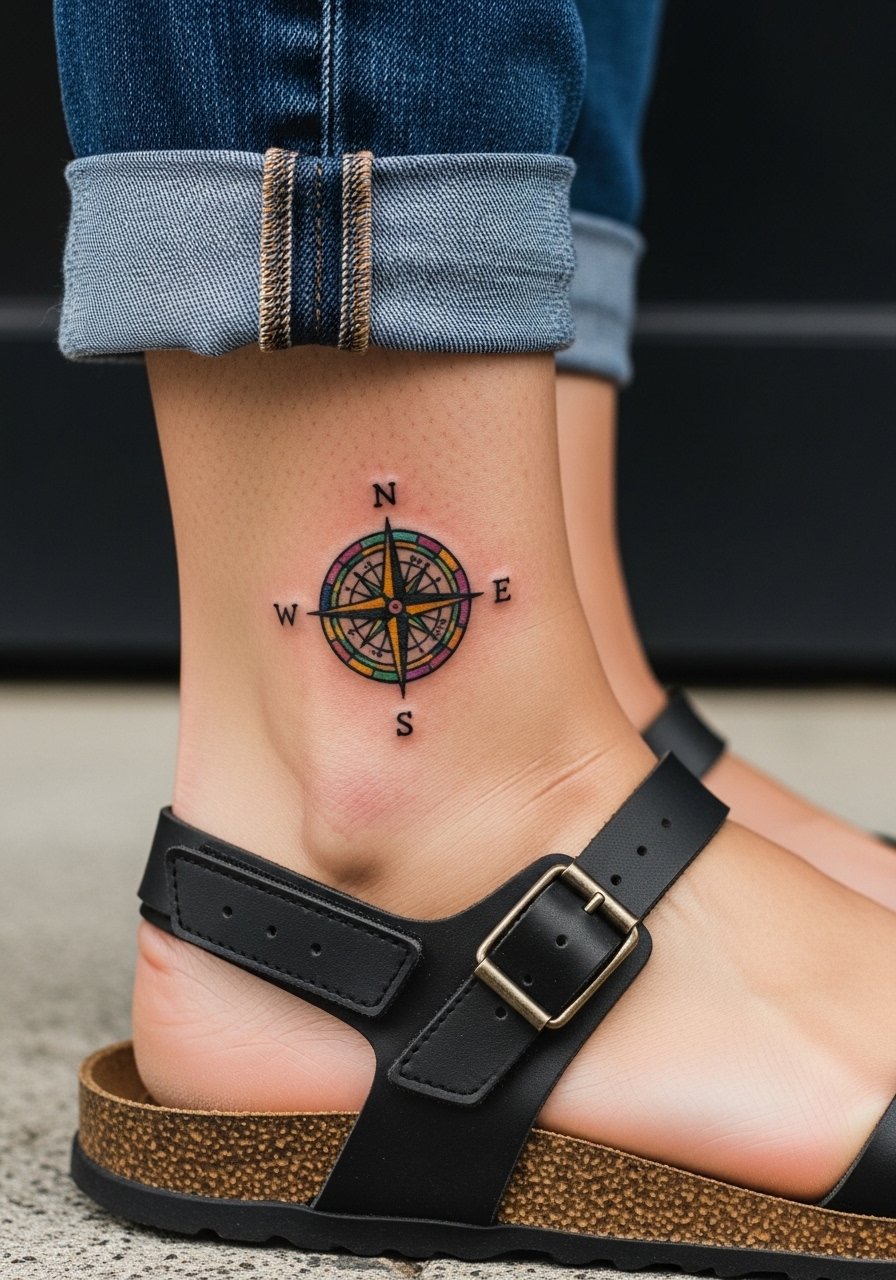
Ankle pieces pay a price for constant rubbing from shoes and socks. I tell clients to expect faster fading and to plan for touch-ups earlier than on the torso. The session is brief, often under an hour for minimal compasses, but ask for slightly bolder anchors so the design holds through shoe friction. The common mistake is requesting super-thin spokes that disappear after heavy use. For the appointment, wear sandals or shoes easy to remove so the artist can check the ankle without pressure.
11. Compass and Script on Collarbone

The collarbone gives a natural frame, and script pairs well with a compact compass. Artists differ on how small script stays crisp near bone. A good consultation note is to ask for slightly larger letter spacing and steady line weight so both elements age more predictably. Collarbone work can feel sharp during the session because of proximity to bone, so expect breaks. For showing off, open-neck shirts and a thin chain pendant necklace keep attention above the piece without crowding the area.
12. Compass Ring on the Finger
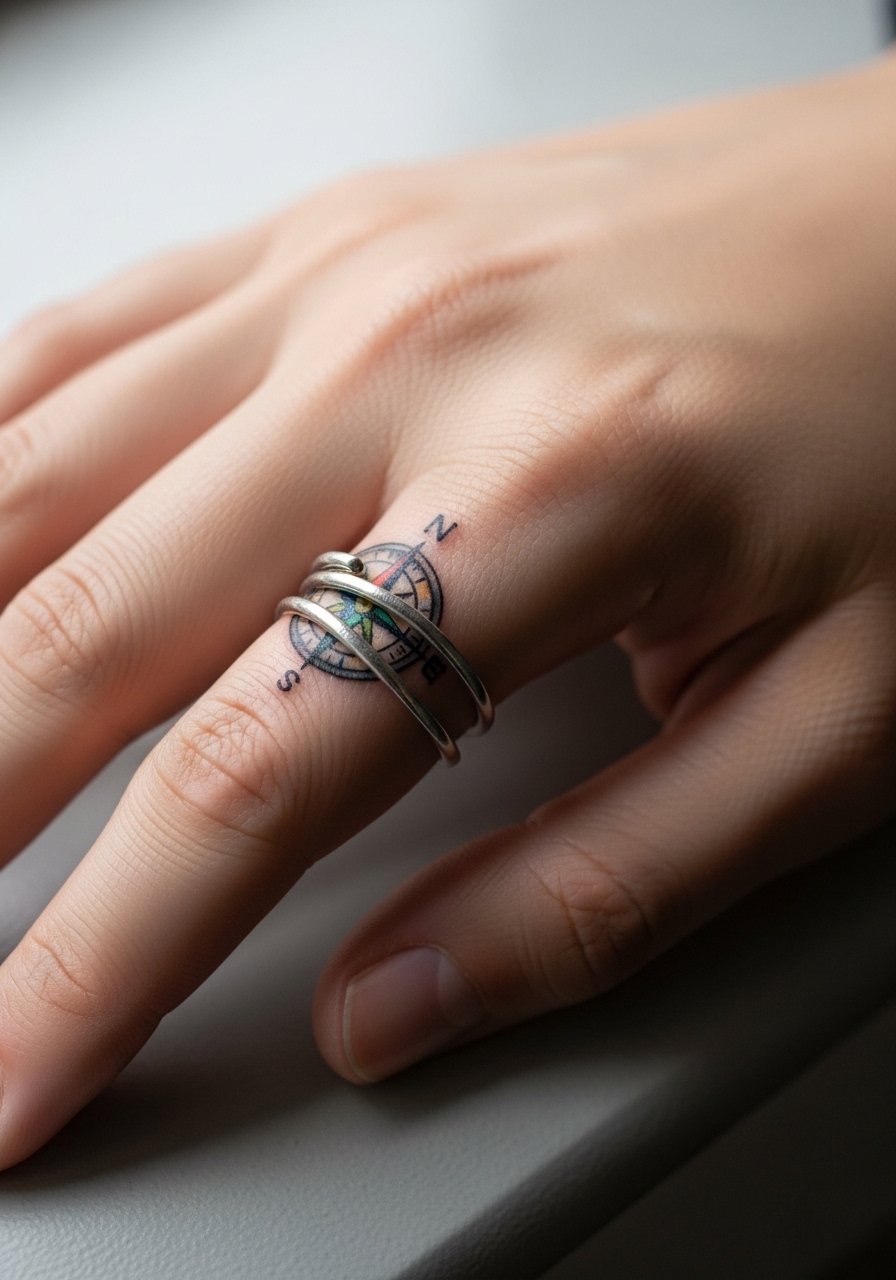
Finger tattoos are a fast route to constant visibility but also to fast fading. Expect multiple touch-ups and a shorter lifespan before re-inking. The biggest misstep is wanting detailed color on a finger band; color tends to migrate and dull there. Sessions are quick, under an hour, but retention is low. If you work with hands often, plan accordingly. A simple solution for showing the ring while working is a slim metal band rather than covering the tattoo. Hand and finger pieces still affect hiring in some industries, so weigh visibility against career paths.
13. Compass Backplate Between the Shoulder Blades
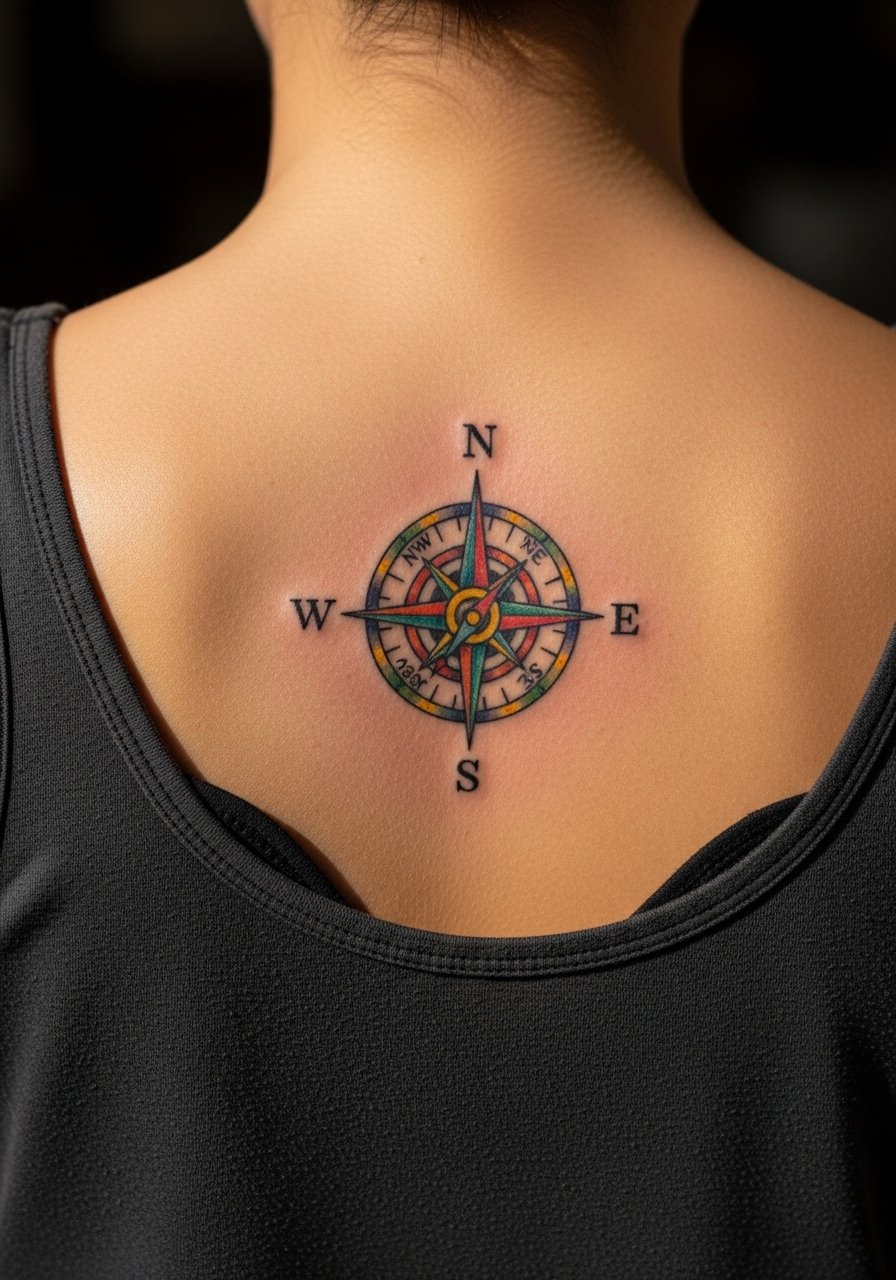
A backplate gives plenty of canvas for a compass with ornamental wings or map lines. I advise spacing larger elements away from the spine to reduce warping as the skin moves. A common error is compressing detail near the vertebrae where movement can blur tight lines. Pain is moderate on the upper back, and sessions can be split across multiple days. For showing at the gym or beach, an open-back top or a tank top with lower back cut reveals the center plate without full exposure.
14. Geometric Compass on the Wrist Wrap

Geometric wrapping plays with the wrist curve but increases blowout risk if lines are too tight. I suggest spacing and slightly thicker linework for circumnavigating the wrist, and plan the piece so major points sit away from joints. The session is short to moderate in length. The mistake I see is designers pushing perfect symmetry at a scale too small for the skin. For a casual display, stack with a minimal cuff bracelet that does not press into the ink.
15. Watercolor Compass on Outer Thigh
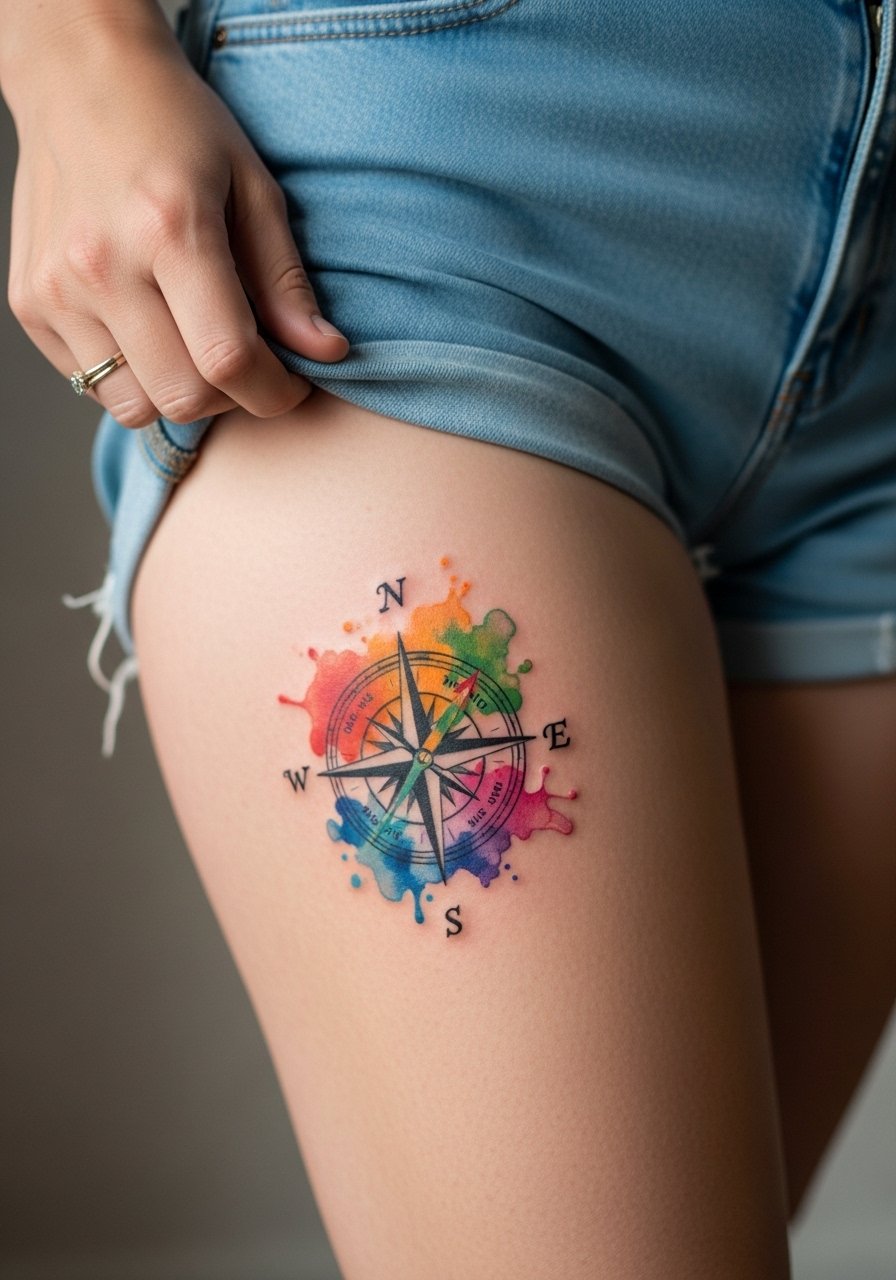
Outer thigh pieces let color breathe and are excellent for larger watercolor fields. I caution clients that watercolor edges soften faster than sharp linework, and UV exposure or tight clothing can increase fading. Expect a multi-hour session for saturated washes and plan for dress choices that avoid constant rubbing. One common mistake is picking too many color transitions at small scale. For the session wear, choose loose drawstring shorts that allow the artist to work without pressure on the area.
16. Compass with Arrow on the Forearm Wrap
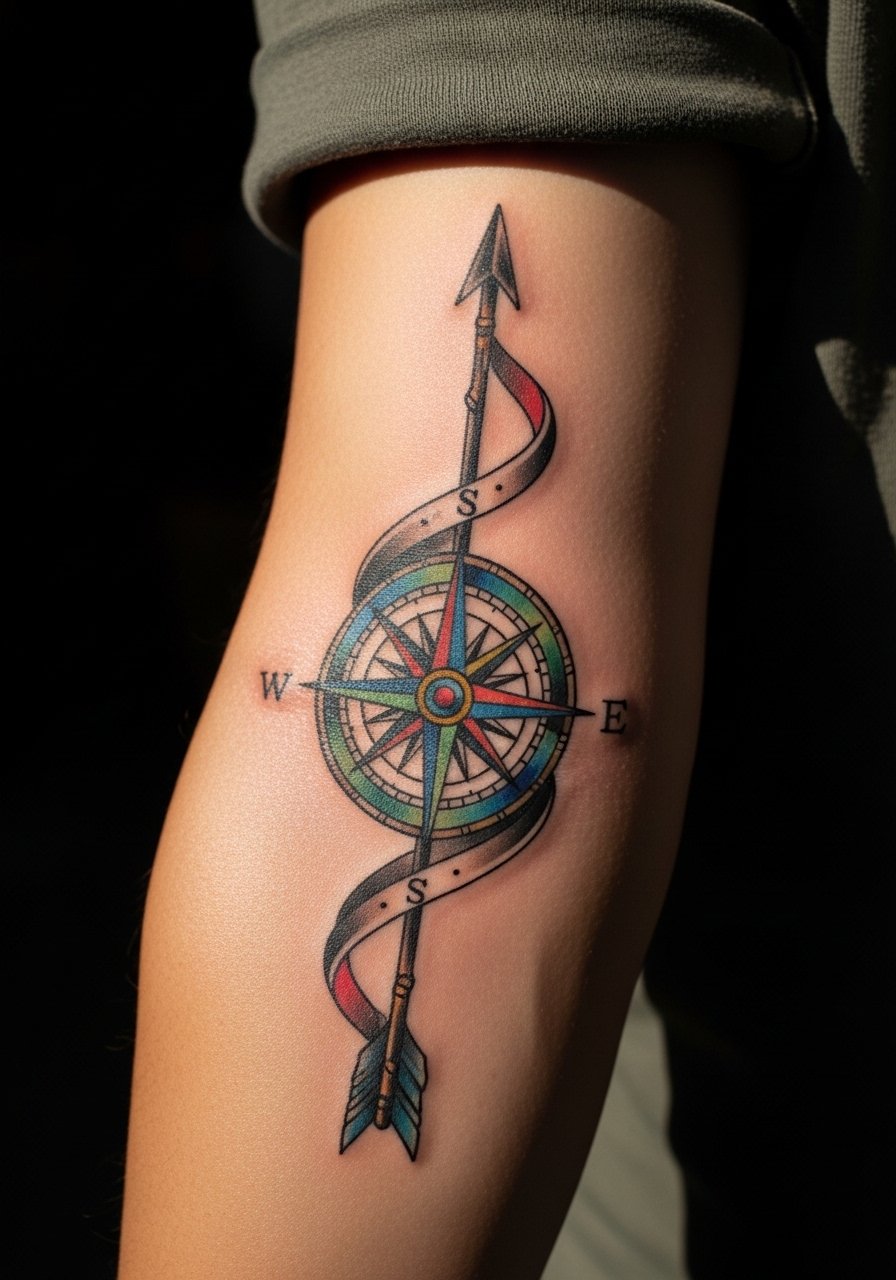
Adding an arrow gives directional emphasis and reads well on the forearm because of its linear shape. In consultation, specify whether the arrow should bisect the compass or orbit it, because each choice changes session time. The forearm tolerates saturation, but tiny arrow feathers can blur if placed too close to the wrist. For a comfortable session, expect one to two hours. A rolled sleeve flannel or linen shirt presents the forearm cleanly for show without covering the main motif.
17. Minimal Compass Behind the Ear Area
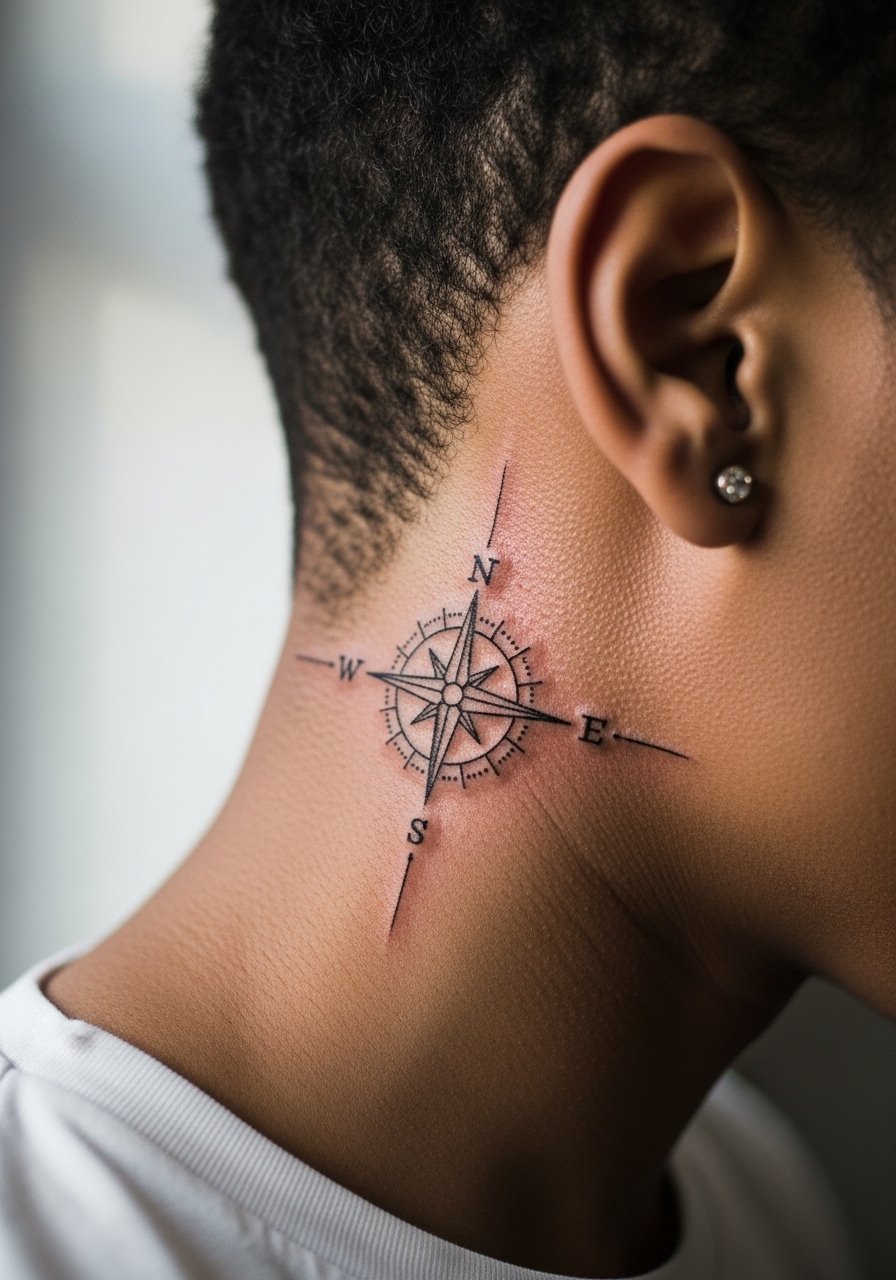
Behind the ear placements require careful framing and minimal scale because the skin there is thin and the area sees frequent sun and shampoo contact. Speak with your artist about needle depth and waterproof aftercare during the consultation. The controversy about fine line on delicate zones appears here too. One camp warns the thin skin blurs lines quickly. The other camp says precise depth and small spacing keep lines intact. Expect brief sessions but plan for earlier touch-ups than for arm work. This spot also needs an artist comfortable with close-up work.
18. Compass and Wave on the Lower Leg

Lower leg pieces show well with movement and are lower risk for rubbing than ankles. Plan the compass to sit centered on the shin or slightly offset toward the calf depending on how you wear pants. A common mistake is making the wave details too fine for the lower leg surface. Sessions are moderate in length and healing is usually straightforward if socks are loose. For showing, cuffed jeans and casual sneakers keep the piece visible without rubbing the ink.
19. Compass Medallion on the Sternum

Sternum work is highly personal and sensitive, and it asks for specialized technique because the skin curves and breath causes movement. Artists often debate sizing here due to stretch. One camp prefers larger bold anchors to preserve shape. The other camp keeps the design delicate and accepts touch-ups. Tell your artist how much chest movement you want the piece to accommodate. Sessions can be more painful and require careful breaks. For the appointment wear a fitted sports bra or zip front top so access is simple and exposure is limited.
20. Compass Sleeve End Near the Elbow

Elbow-adjacent pieces require careful rule-making about line thickness because skin over joints shifts a lot. Ask your artist to avoid extremely tight detail exactly over the joint. The biggest mistake is treating the elbow like flat skin and then seeing distortion as you move. Expect sessions with small breaks and a moderate pain level. For casual exposure choose shirts with sleeves that stop above the elbow so the piece can be seen without constant bending.
21. Compass with North Star on the Nape

Nape placements are discreet and work well for small compasses paired with a tiny star. The nape sees hair contact and shampooing, so spacing and line weight should account for that. A frequent error is choosing hair-covering styles without realizing daily friction slows healing. The session is short and the pain is moderate. For easier access, wear a wide-neck shirt you can shift without removing clothing fully. This spot is great if you want a compass that is visible at times and private at others.
22. Compass and Rose on the Shoulder Cap

Shoulder cap pieces allow classic pairings like a compass and rose with clear separation. I tell clients to keep the rose a touch less saturated than the compass if they want the compass to read as the focal point. A common mistake is equalizing saturation across motifs which competes visually. Sessions are comfortable for most and heal predictably when you avoid tight straps during the first week. For showing, a tank top with thin straps frames the shoulder without pressing on the fresh ink.
23. Compass with Script Around the Rim on the Rib Side

Script near ribs needs generous letter spacing and slightly larger type to survive skin stretch. If you want words circling the rim, ask the artist to show how the letters flow with breathing. The ribcage is painful and I advise splitting the session to avoid excessive movement. Again, the two camps on fine line apply here. One says small script will blur quickly. The other says with correct depth it can last. Plan for a possible touch-up at two to three years if your lifestyle involves heavy sun or frequent abrasion.
24. Compass Pocket-Sized on the Chest Edge

Small pocket compasses near the pectoral edge are subtle and photograph well. Keep the design simple and avoid tiny interior dots that can fuse as the skin moves. The session is relatively quick but proximity to the chest means breaks may be needed. For easy access and modesty during the appointment, wear a wide-neck tee you can shift without being topless. This placement pairs well with everyday shirts that fall slightly off the shoulder.
25. Compass with Map Coordinates on the Side of the Hand

Side-of-hand work faces rapid wear from hand use and washing. Coordinates and tiny compass elements should be bolder than you might want at first, because fine detail erodes fastest here. Expect more frequent touch-ups and shorter dye retention. The session is short but consider work implications for visible hand tattoos. For daily wear choose a slimmer ring rather than full coverage so the ink breathes and the area avoids constant pressure.
26. Compass with Floral Halo on the Hip
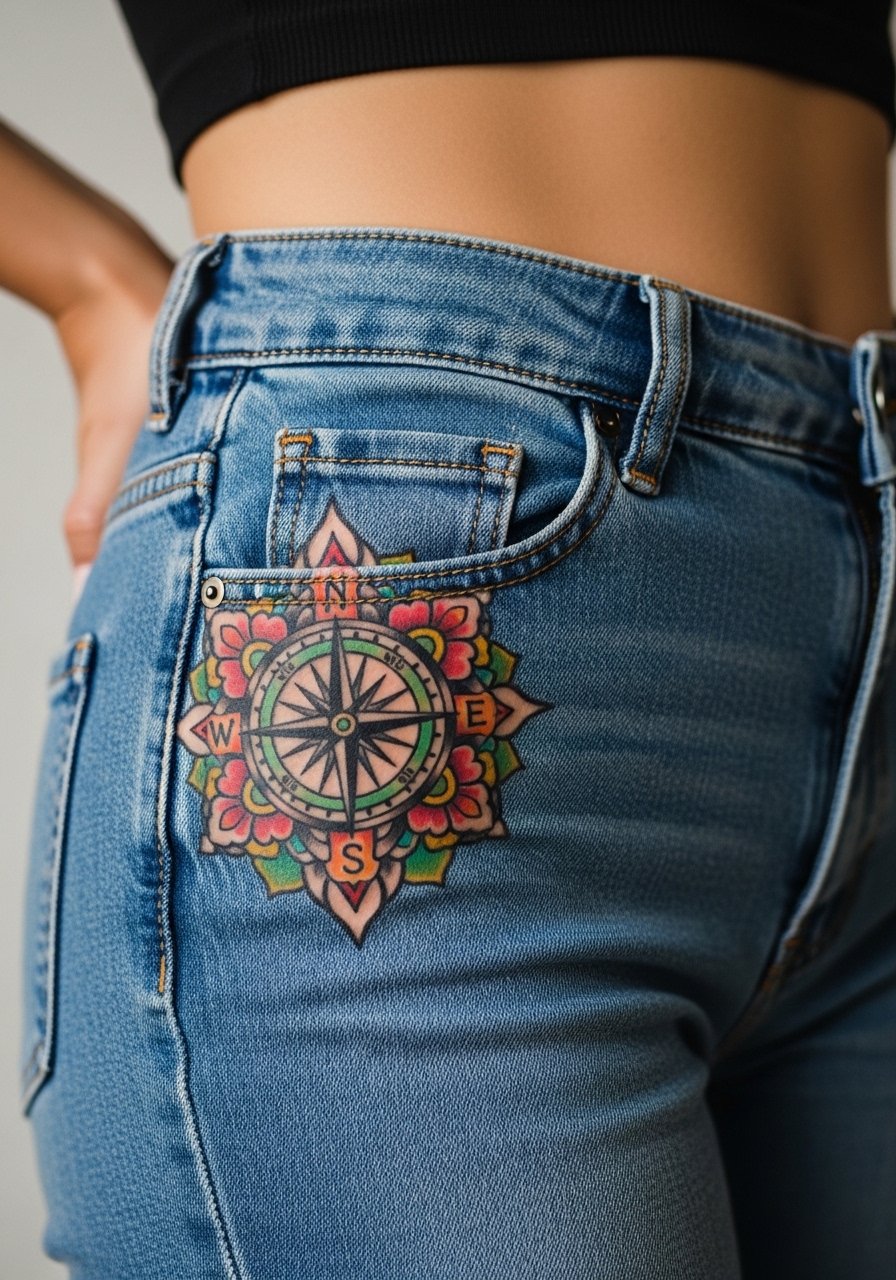
Hip placements let the compass sit close to the body curve and work well with floral halos that soften the composition. The hip experiences friction from waistbands and jeans, so plan clothing choices accordingly for the first two weeks. A misstep is placing too much tiny detail that gets compressed under a belt or tight waistline. Sessions are moderate and healing benefits from loose waistbands. For the appointment pick high-waisted jeans with a soft waistband you can shift easily.
27. Compass Medallion on the Center Back Lower
Lower back medallions are a classic location for larger compass designs and they offer privacy when you want it. Avoid extremely small inner detail next to the spine where movement is greatest. Sessions can be longer for full color and often benefit from staged appointments. The lower back usually heals well if you avoid tight belts and prolonged sitting that rubs the area. For session comfort, wear a tank top and high-waisted pants you can lower slightly so the artist has clear access while you remain covered.
Frequently Asked Questions
Q: How long before a colorful compass needs a touch-up on the wrist compared to the chest?
A: From what I have seen, wrist pieces usually need touch-ups sooner because of constant washing and friction, often around two to three years. Chest pieces tend to hold color longer if they avoid constant sun exposure, and many people go three to five years before a refresh depending on lifestyle.
Q: Are watercolor-style compasses more likely to blur than saturated traditional fills?
A: Watercolor edges soften faster than saturated fills in my experience, especially on high-movement areas. If you want watercolor but worry about longevity, ask the artist to combine subtle outlines with soft washes so the silhouette remains clear as the washes fade.
Q: Can a tiny compass on the finger stay legible over time?
A: Realistically those small finger compasses require frequent touch-ups because the skin there regenerates and sees heavy use. If you want longevity, increase line weight slightly and plan on occasional refreshes.
Q: Do fine line compasses work on the ribs or is bold work better?
A: Artists are split. One group says fine line blurs too quickly on the ribs due to stretch. The other group says careful spacing and proper depth keep fine line legible. The honest approach is to discuss both options in consultation and choose based on the artist's portfolio for that exact placement.
Q: What should I wear to a chest or sternum session for access and modesty?
A: A fitted sports bra, wide-neck shirt, or zip-front top makes access simple while keeping you covered between passes. Those choices let the artist work without you removing clothing fully and help maintain body temperature during breaks.
Q: How does skin tone affect color choices for a compass tattoo?
A: Different pigments read differently on varied skin tones, so look at healed examples on similar skin when you pick colors. An artist who has worked across a range of tones can adjust saturation and contrast so the compass reads well both fresh and healed.
