
The trend for small pony-inspired symbols has shifted from playground pastels to adult-friendly linework and contrast, and that matters when you pick placement and artist. Small pieces that look delicate on a phone can age quickly on skin that stretches or rubs. Below are 21 ways to translate that nostalgia into wearable, well-thought-out tattoos, with what to ask for in consultation, how they heal, and a few outfit ideas to help you show them off.
1. Fine Line Butterfly on Inner Forearm
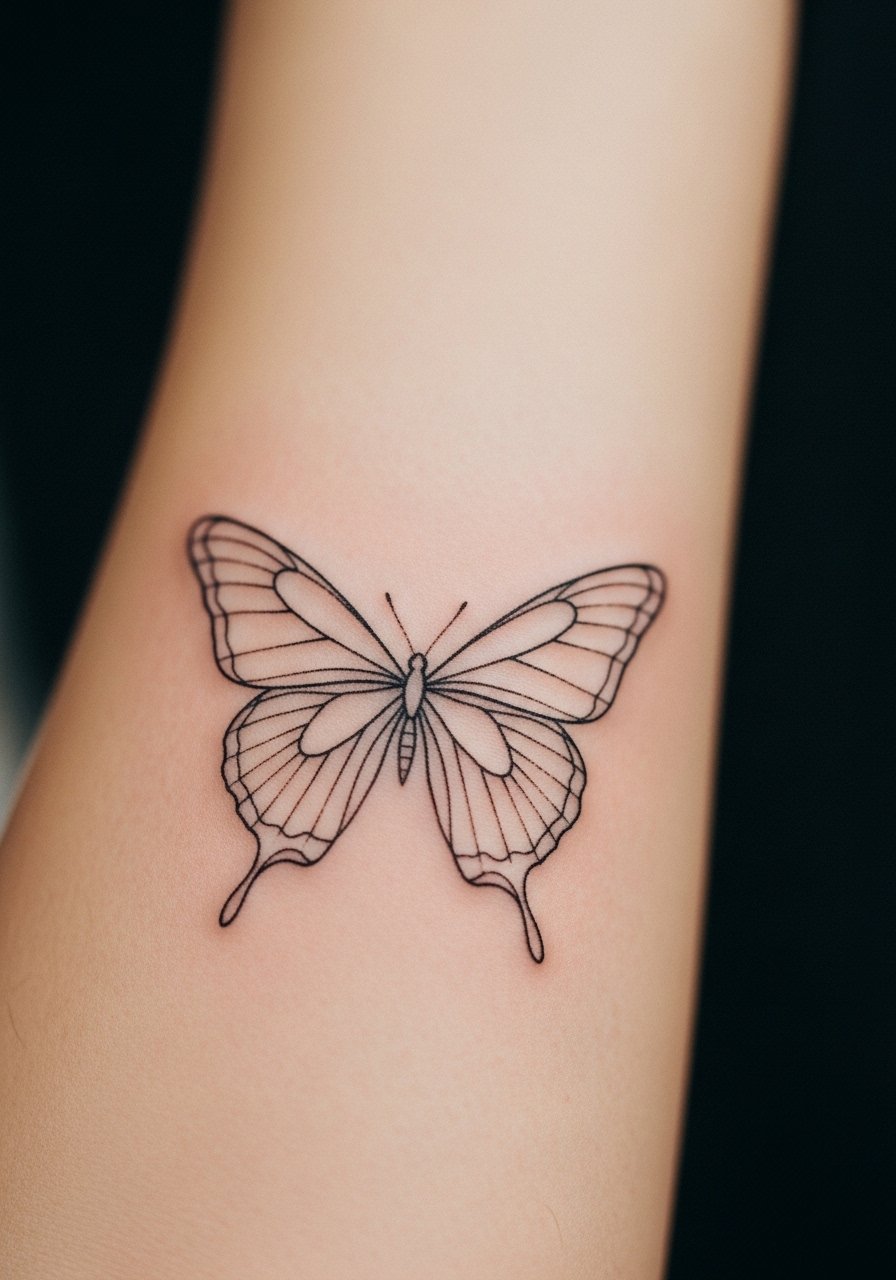
I've seen fine line butterflies on inner forearms last well when the lines are given breathing room. Ask your artist for single-needle linework with slightly increased spacing between wing veins to avoid merging at year two. Expect a one-session appointment that feels like steady pinpricks, not a marathon. The main mistake is asking for the tiniest possible veins, which can blur into a gray at the two to three year mark. For the session wear, bring a light wash button-up you can roll or pull aside so the artist has clean access. For showing it off, roll sleeves to mid-forearm so the butterfly sits in view without competing with wrist jewelry.
2. Minimalist Starburst on Inner Forearm
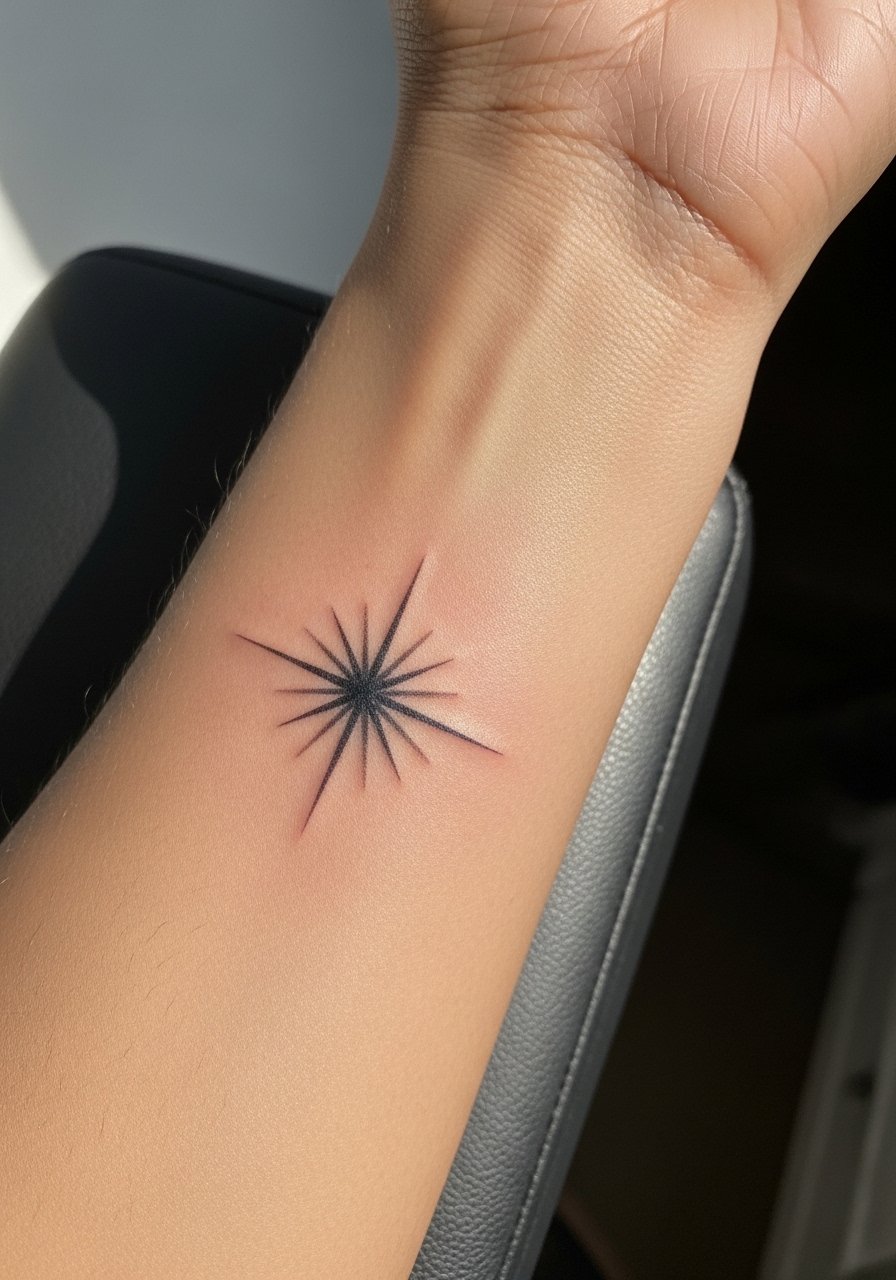
This micro-symbol reads like a subtle emblem of destiny when kept under an inch. I tell people to avoid dense dot clusters for this design because tight dot work can merge over time. Instead, ask for a lightweight stipple approach with a single-session touch. Pain is mild on the inner forearm but tinges toward uncomfortable if the needle lingers in one spot. A common regret is putting it too close to the wrist where daily friction from watches causes extra fading. For showing it off, try a linen short sleeve blouse with sleeves rolled to mid-forearm so the tiny burst becomes a deliberate detail.
3. Neo-Traditional Apple on Outer Thigh
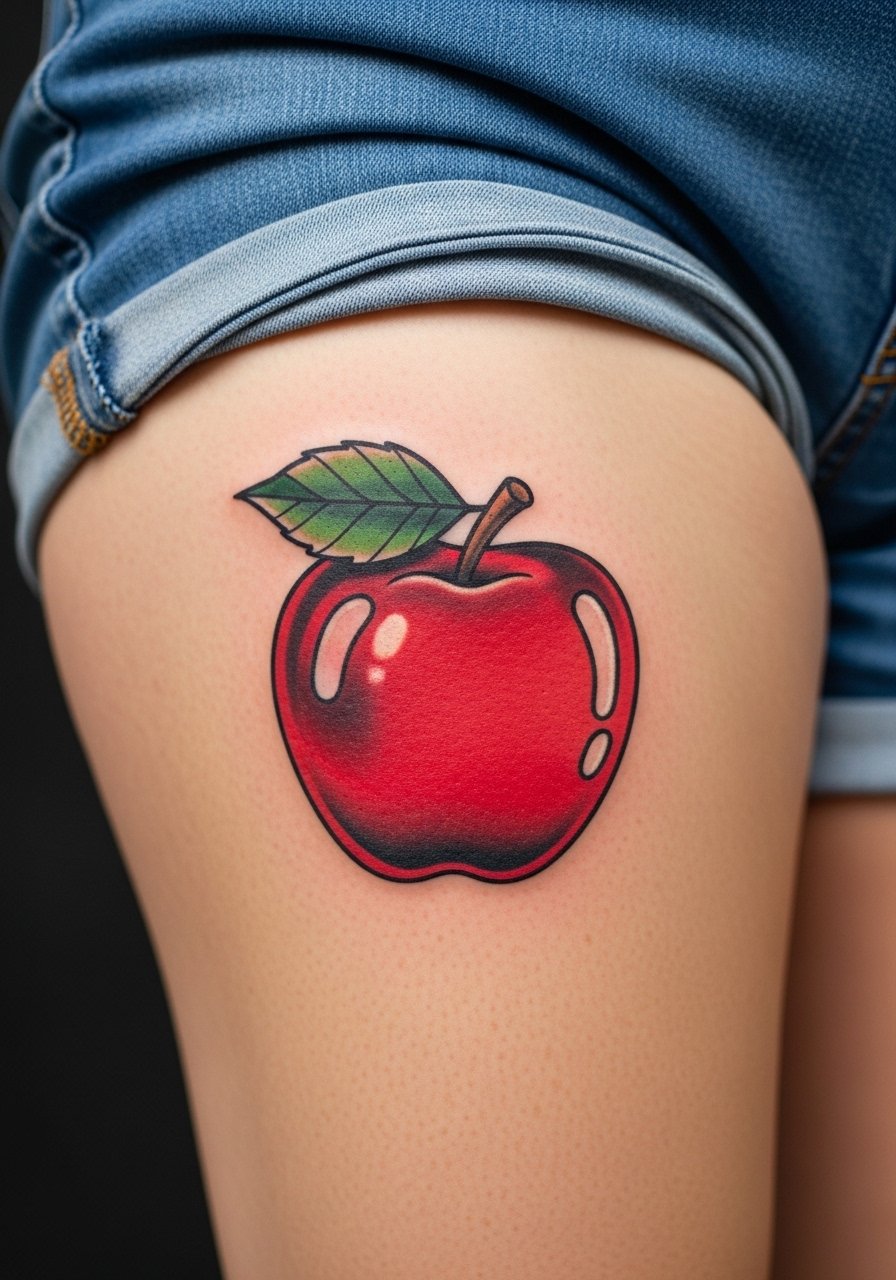
Outer thigh is forgiving for saturated neo-traditional work because the skin is relatively flat and color holds better there. This design wants bold outlines and strong saturation to keep the apple reading well at a distance. Expect two shorter sessions rather than a single marathon, and plan for a touch-up at year two to refresh color. The typical mistake is asking for a tiny, heavily shaded apple. Small, heavily packed color often softens into muddiness. For pre- and post-session comfort, wear loose shorts or a skirt. Pair the healed tattoo with a high slit mini skirt for nights out so the placement reads intentional and bold.
4. Blackwork Heart Balloon on Collarbone
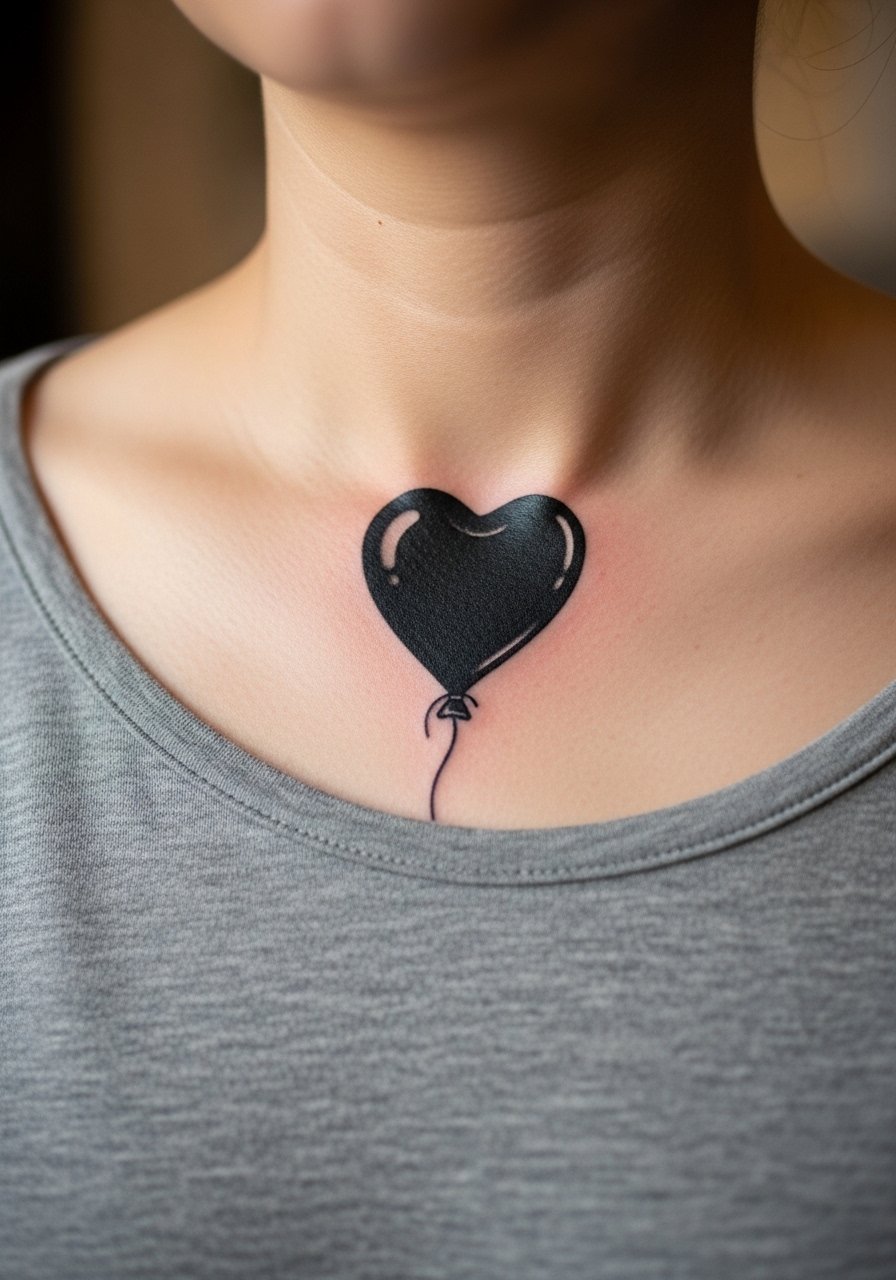
Collarbones read dramatically when executed in solid black. The fill and negative space make the balloon shape pop without needing color. Warning about pain is honest here. Collarbone sessions are often rated higher on pain charts, but most clients say short, intense bursts are easier than long, steady lines. Artists argue about technique for deep black saturation on thin skin. One camp says heavy packing is the path to longevity. The other cautions that too much saturation on a bony area risks scabbing and ink loss. Ask your artist where they land and expect a single session with a possible touch-up. For showing it off, choose an off shoulder blouse that frames the collarbone without covering the balloon.
5. Micro-Realism Gem Behind the Ear
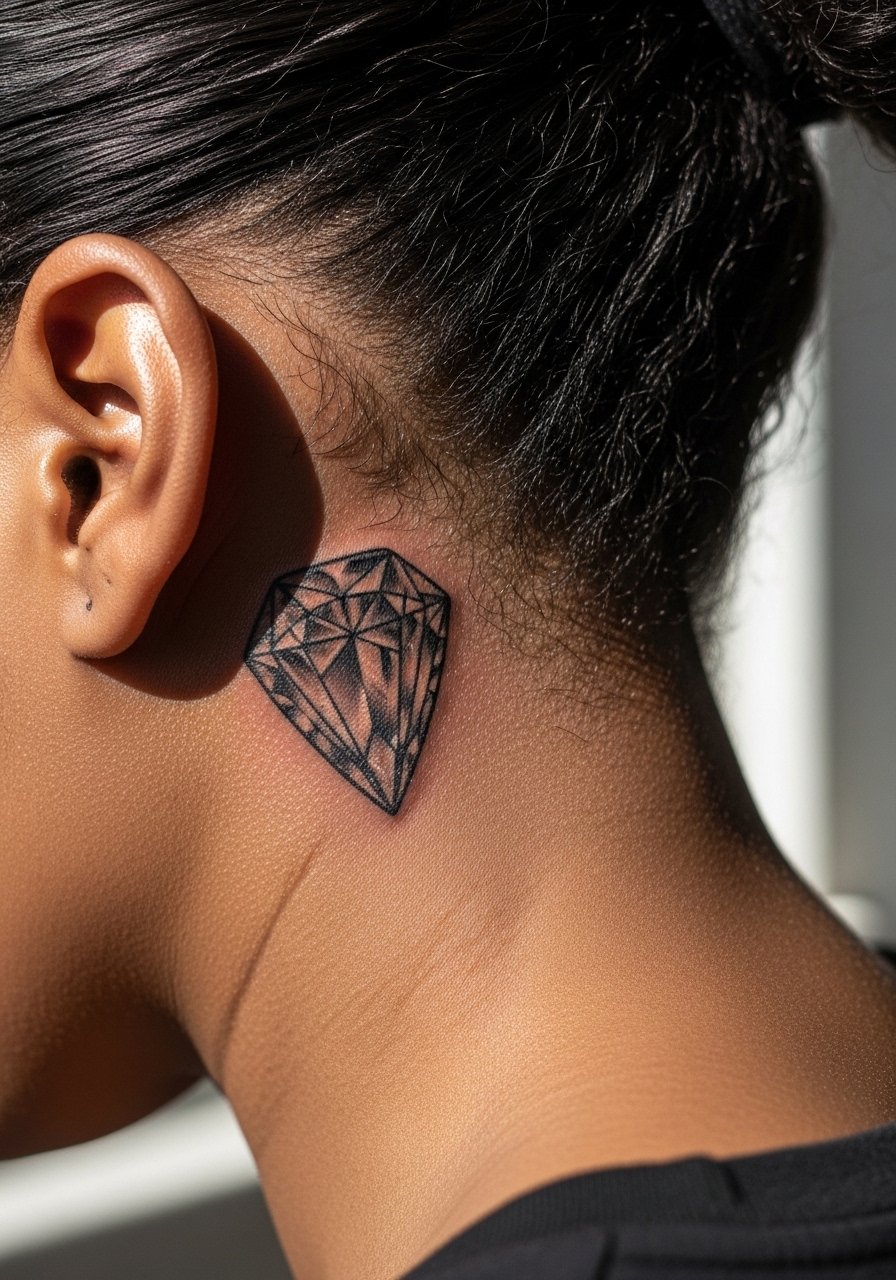
Behind-ear micro-realism is a whisper of sparkle. The area requires a steady hand and often a shorter session because the skin is thin and the space is small. Expect more needle passes per square millimeter than a simple line piece, which can feel more intense in short bursts. The common mistake is trying to cram hyper-detail into a 0.5 inch spot. Ask for simplified facets that read from a few feet away instead of micro facets that blur after a year. Because of the placement, wear your hair up to the appointment so the artist can work without obstruction. Note that behind-ear pieces sometimes need very targeted touch-ups after two years if you wear glasses or have long hair that rubs the area.
6. Watercolor Rainbow on Shoulder Blade
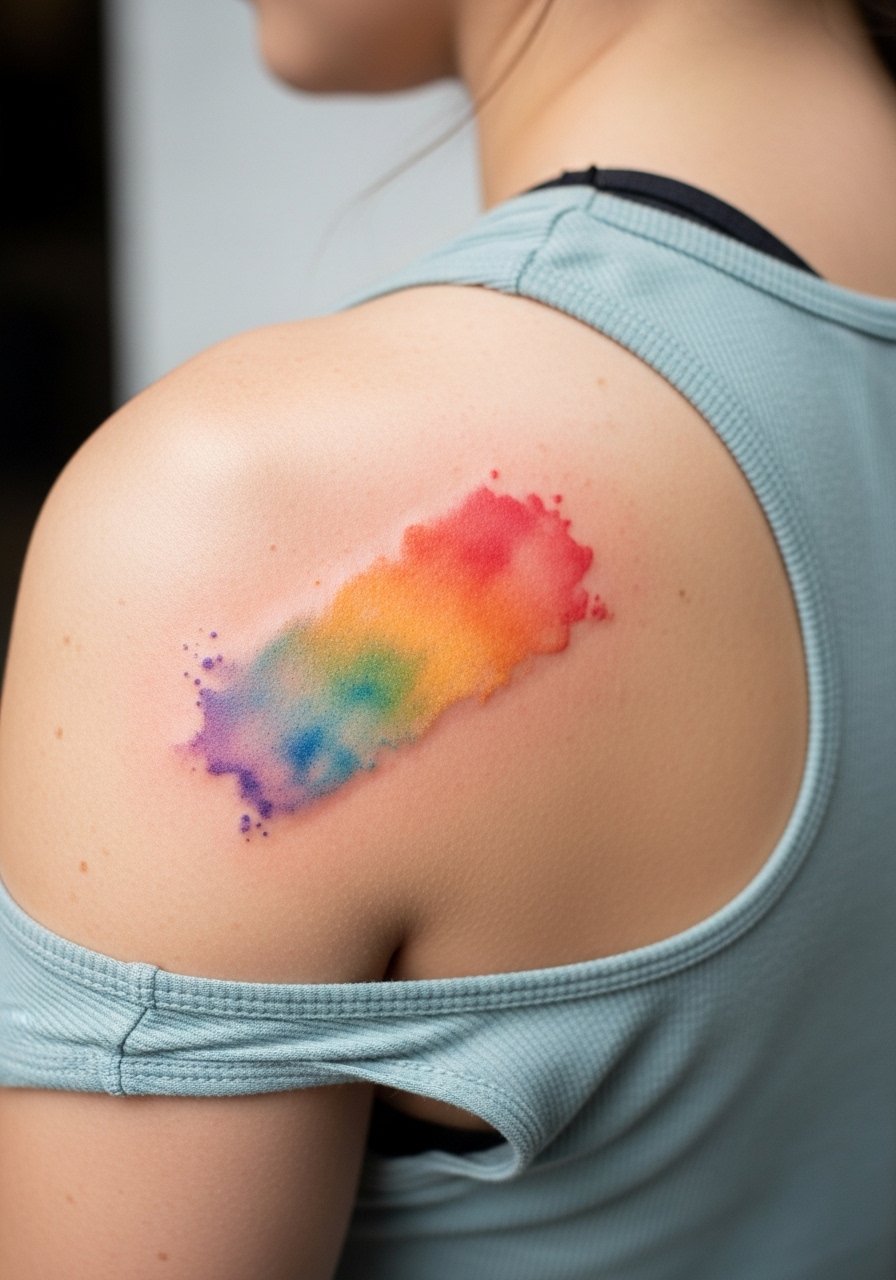
Shoulder blades are excellent canvases for watercolor fades because the skin there tolerates layered color well and is easy to protect while healing. Expect two to three sessions for a saturated, blended rainbow and plan for color refresh at year three depending on sun exposure. Avoid requesting ultra-soft, indistinct edges without anchoring linework. Those can diffuse into a washed look sooner. During the session wear a racerback tank so the artist has access without you being uncomfortable. For showing it off, open-back tops or halter dresses reveal the fade without demanding perfect symmetry.
Studio Day Picks
The small wrist, ankle, and shoulder blade pieces above have different prep needs than thigh or rib work, so a few targeted items smooth the appointment and the first week.
- Indie lightweight moisturizer balm. Thinner than heavy ointments, it helps curved areas like hips and flanks avoid clogged pores during the initial healing window.
- Breathable wrap alternative to Saniderm. Useful in humid climates for the first 24 to 48 hours on larger color sessions to reduce weeping without sealing heat.
- Rice-based moisturizer. Non-greasy formulas help preserve fine lines and prevent pigment migration on delicate pieces.
- Fragrance-free gentle body wash. A neutral wash cleans the area during showers without stripping color or irritating fresh skin.
- Aquaphor healing ointment. A thin layer for the earliest skin sealing phase helps with scab softness and prevents excess cracking on fine line work.
7. Ignorant Style Lightning Bolt on Calf
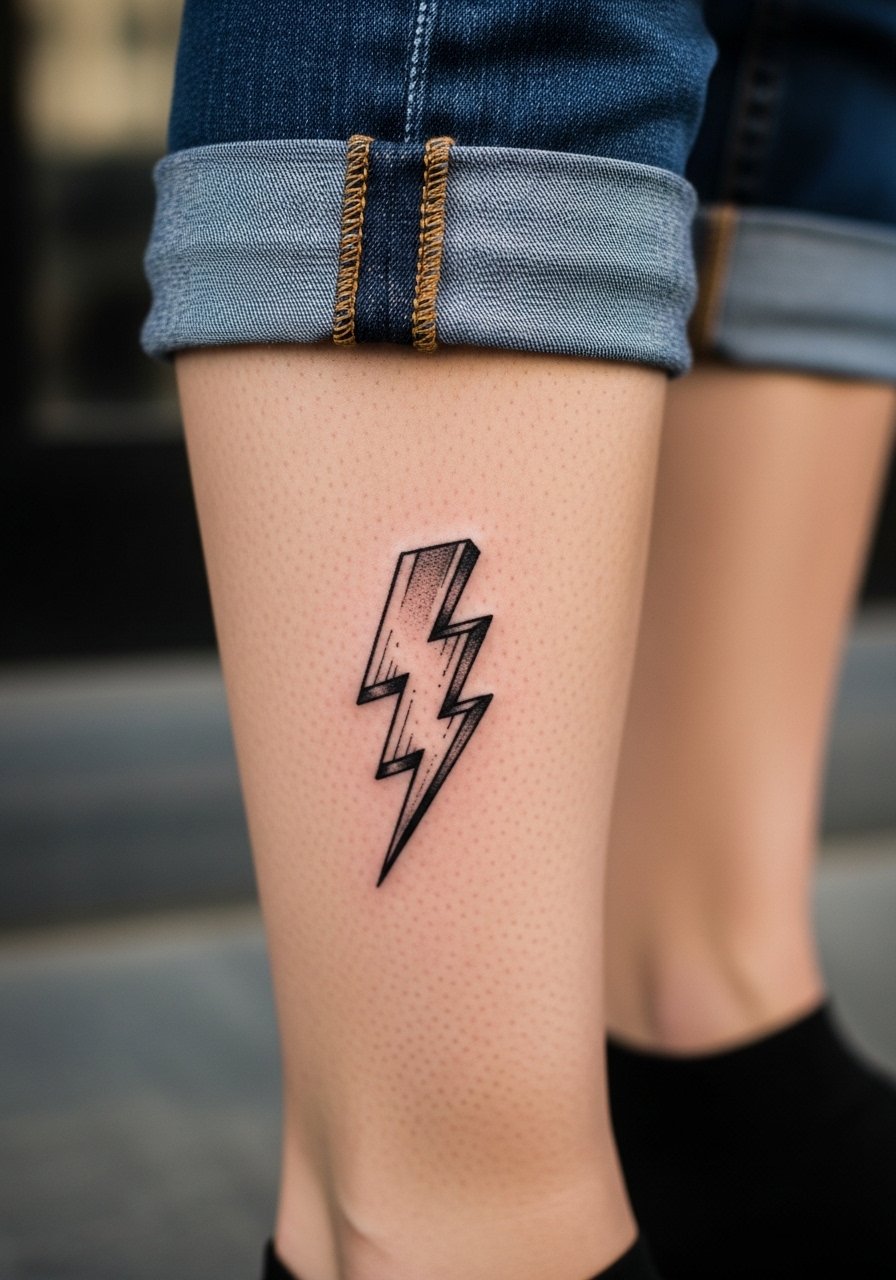
Calf placements suit raw, sketchy ignorant style because the muscle curve gives movement to rough lines. Sessions are quick and often one hour long. A common mistake is overcomplicating the sketch with added shading that undermines the intended raw energy. Leave the design lean and let the natural line wobble be the focal point. Calf skin is forgiving for touch-ups, but expect some settling by year two where the lines soften slightly. For showing it off, pair with bootcut jeans women or cropped skirts that let the bolt peek out without overexposure.
8. Ornamental Shield on Ribcage
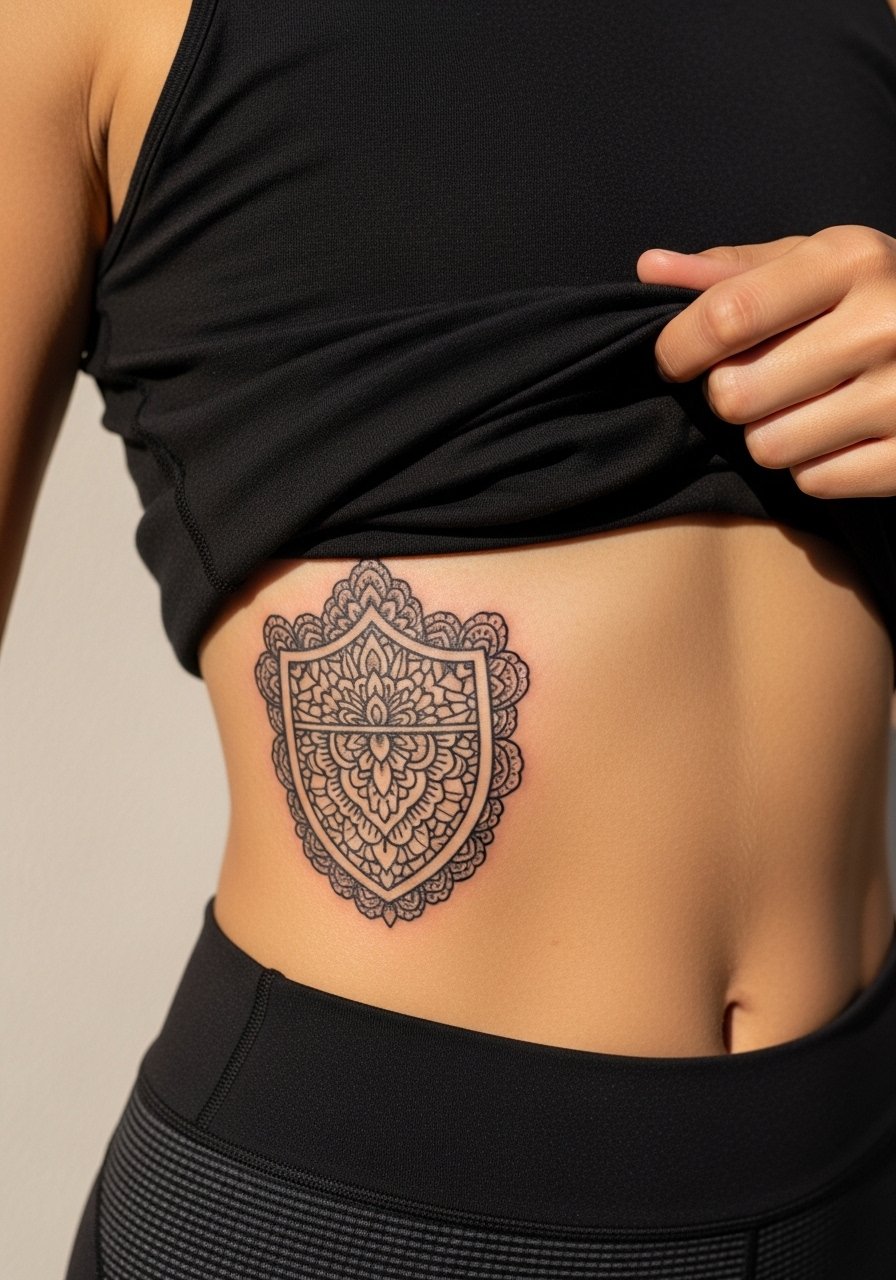
Ribcage work ages depending on the spacing of lines and the amount of negative space. This ornamental shield needs room between filigree elements to avoid a muddy look when the skin stretches. Fair warning about pain. The ribcage is one of the higher pain placements, and sessions tend to be stamina tests rather than short bursts. Artists are split on fine line on ribs. One camp warns that the stretch and breathing motion blur thin lines within two years. The other camp insists that with deliberate needle depth and spacing, fine line survives. Ask the artist which method they prefer and factor that into your booking decision. Because this area is intimate, bring a loose crop top or sports bra you can adjust for access.
9. Fine Line Musical Note at the Ankle
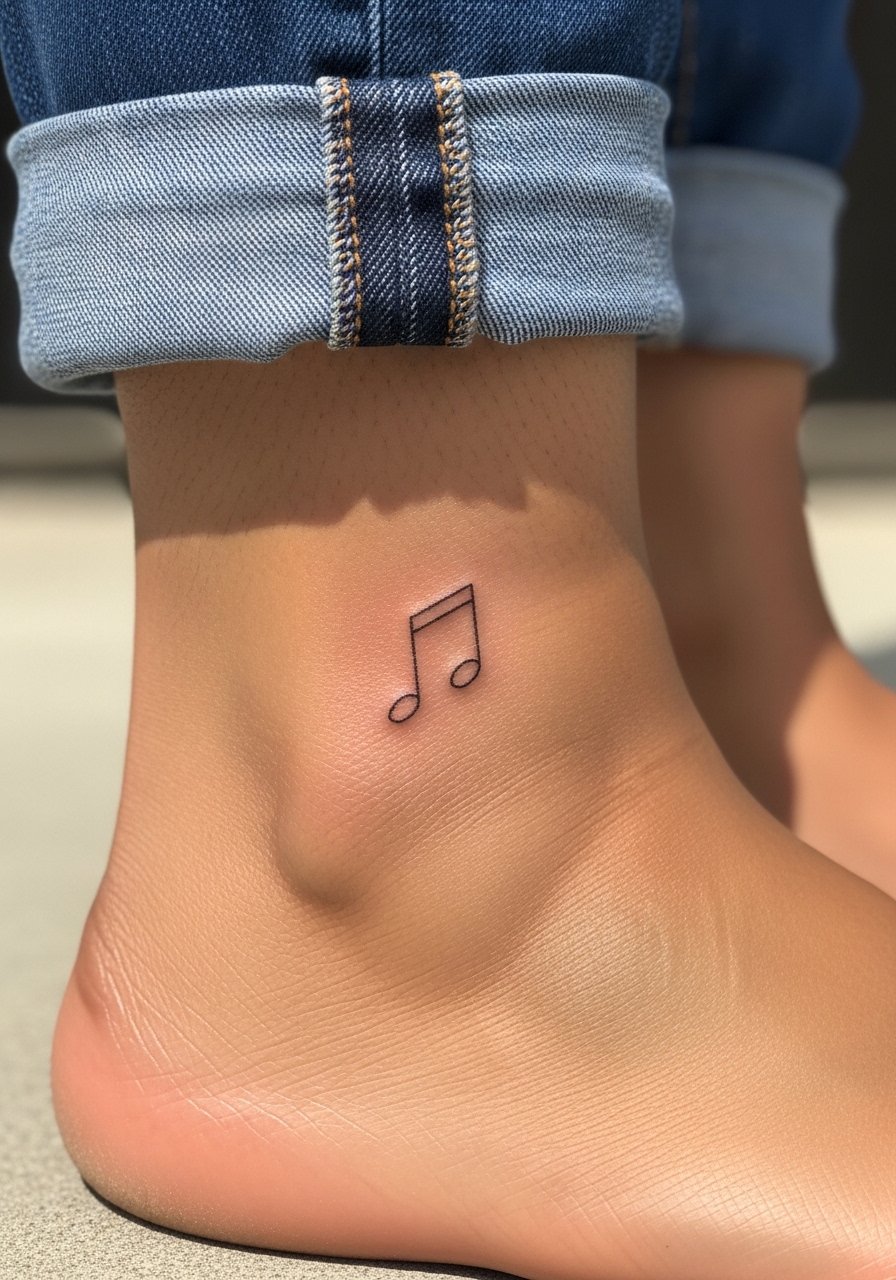
Ankle placement amplifies tiny symbols because footwear and socks influence friction. Musical notes in fine line read best at about 1.5 inches so the contour does not collapse under shoe rubbing. Expect a single short session and mild to moderate pain as the ankle sits near bone. A real mistake is placing the design too low where shoes constantly rub the area. For show-off styling, choose strappy flat sandals or cropped jeans so the tattoo becomes a deliberate accent.
10. Traditional Balloon Animal on Forearm
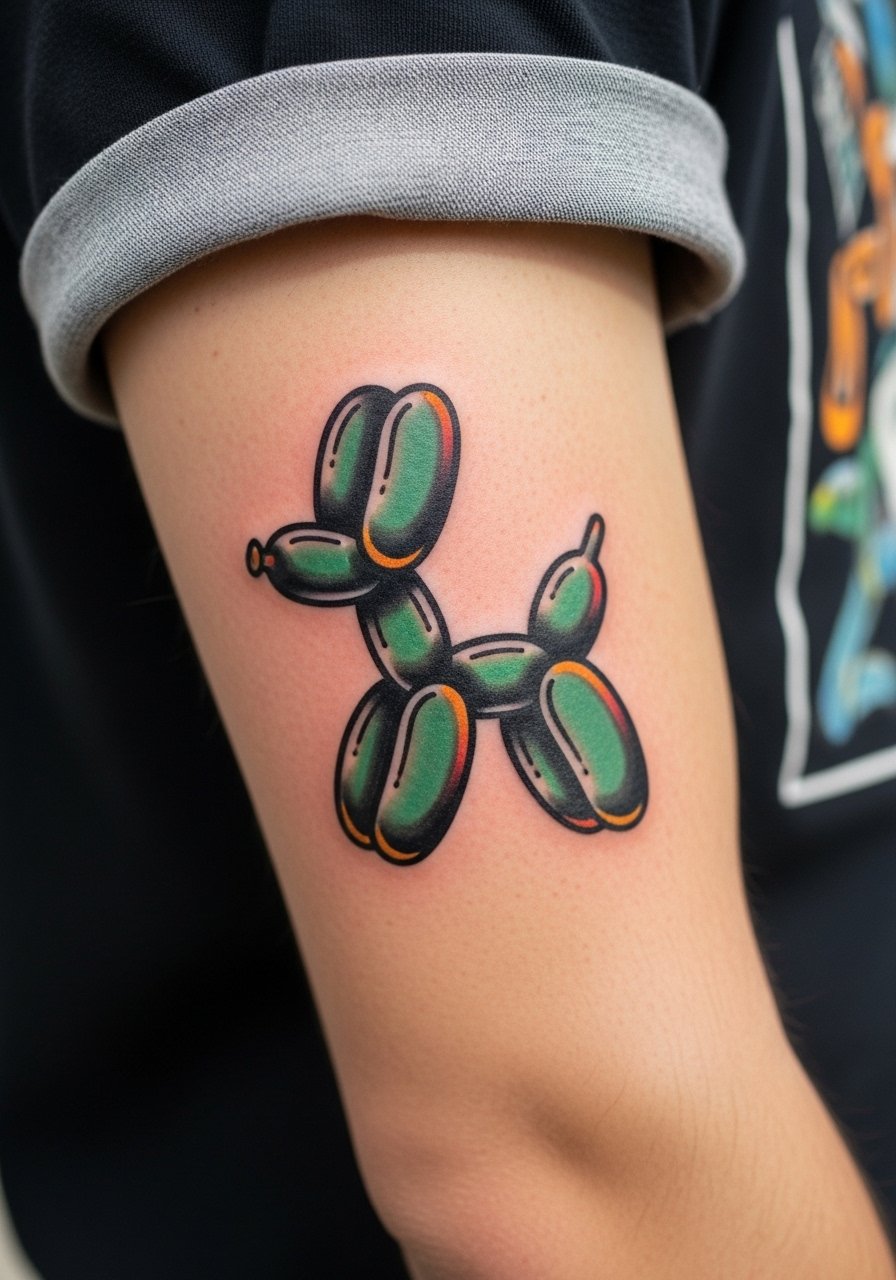
Forearms are public and forgiving, which makes them a natural fit for retro traditional pieces. Bold outlines and selective color help the balloon animal age into a readable icon. Session time is moderate, often under two hours for a 3-inch piece. A common error is requesting too many small color gradients inside a compact outline. Keep color areas large and simple for longevity. For the session wear, roll up a chambray rolled sleeve shirt so the artist can access the arm without sleeve bunching.
11. Minimalist Hoofprint on the Wrist
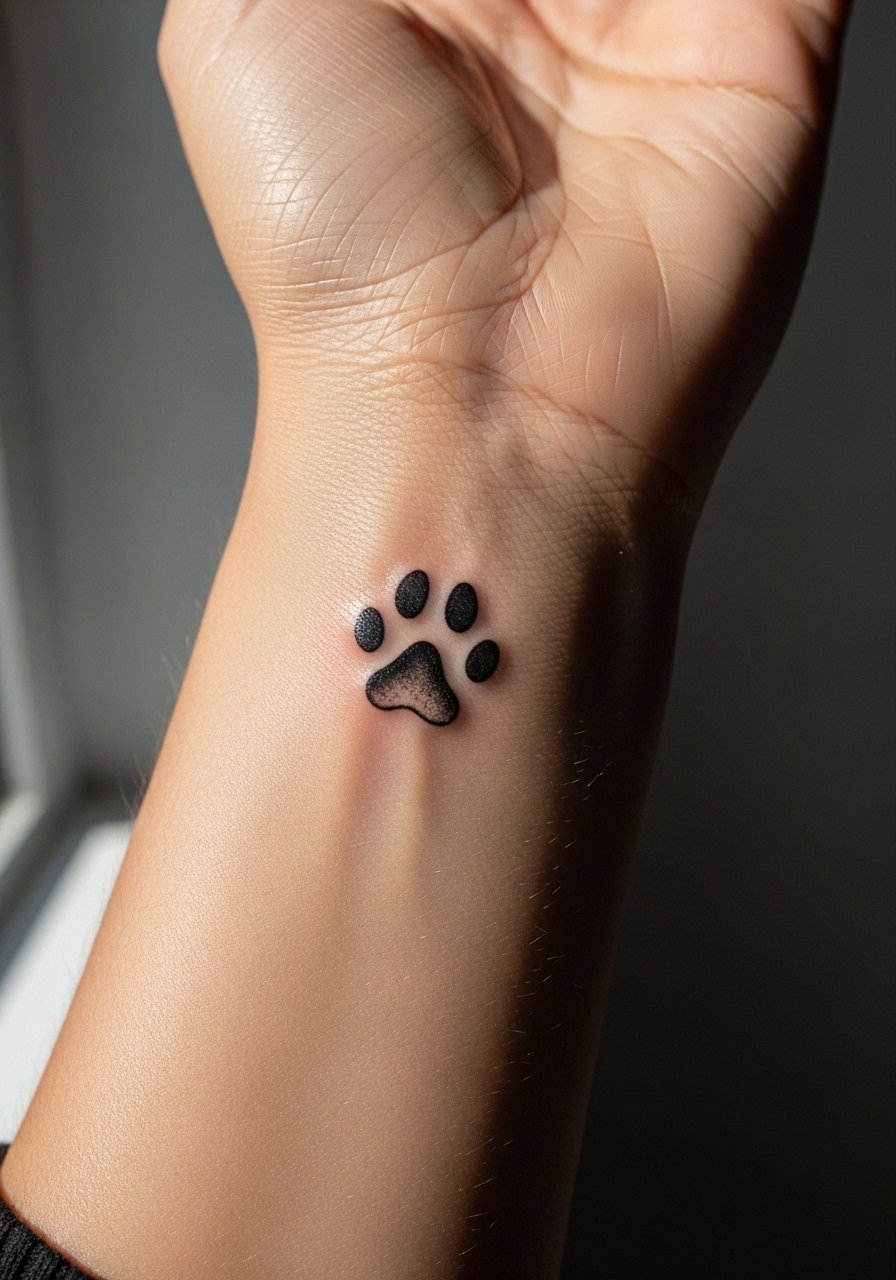
Wrist placements read like discreet statements when kept micro. Hoofprints work best with clean contour and minimal shading. Because wrists are high-friction and often exposed to sun, expect touch-ups sooner than inner-arm pieces. The typical mistake is placing the print on top of wrist bones where skin moves the most. Position it slightly toward the inner wrist crease for better longevity. For showing it off, a thin silver cuff bracelet worn on the opposite wrist frames the piece without covering it.
12. Blackwork Floral Burst on Inner Bicep
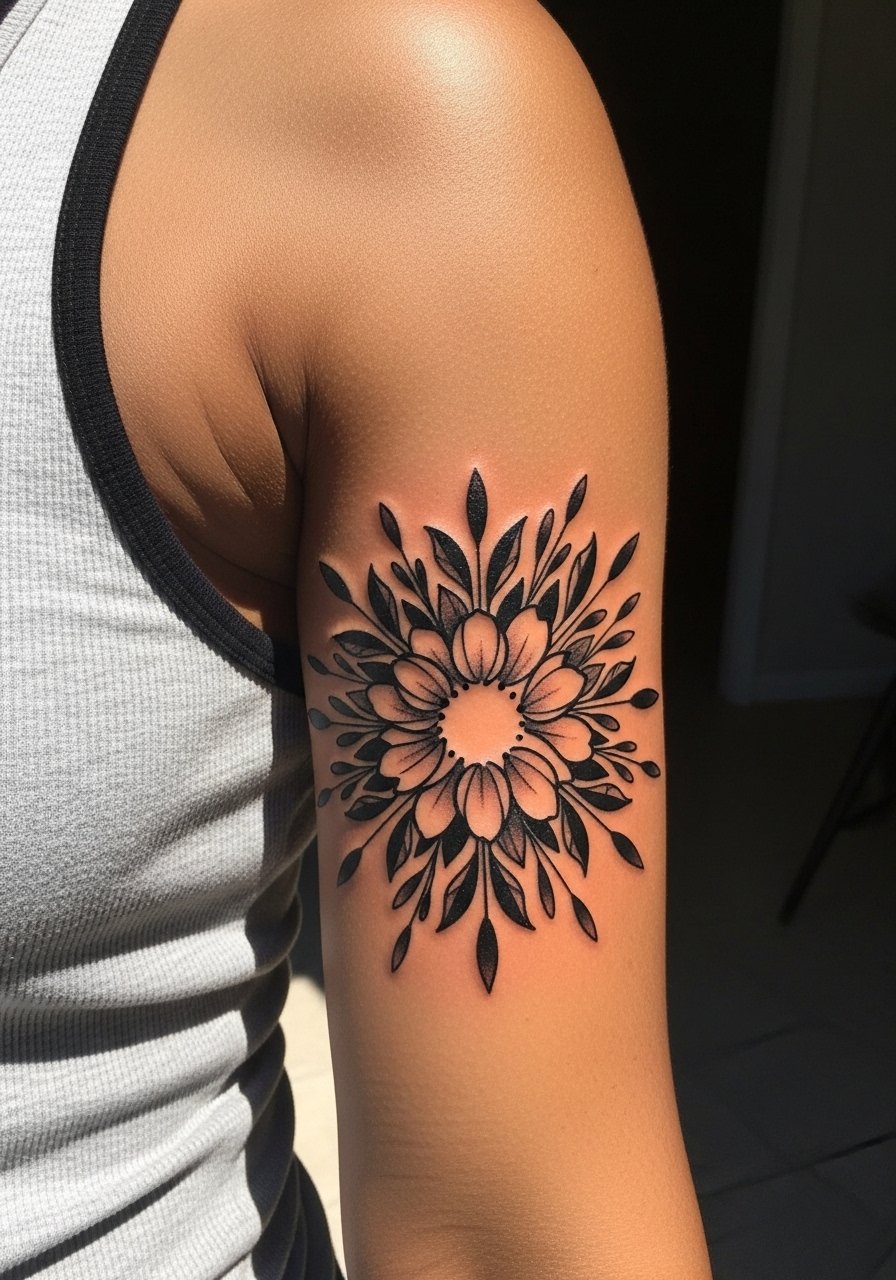
Inner bicep pieces hide well under sleeves and stand out when revealed. Solid black floral bursts survive better on darker tones and curved skin than delicate gradients. The inner bicep can be tender during the session because the needle hits softer tissue. A common mistake is asking for dense stipple shading without enough negative space. Ask for clear petal outlines and reserved black fills so the design keeps shape as it settles. For work and career consideration, this placement stays private unless you want it seen, which is why some clients prefer it for more personal symbols.
13. Flank-Only Tiny Pony Symbol on Hip
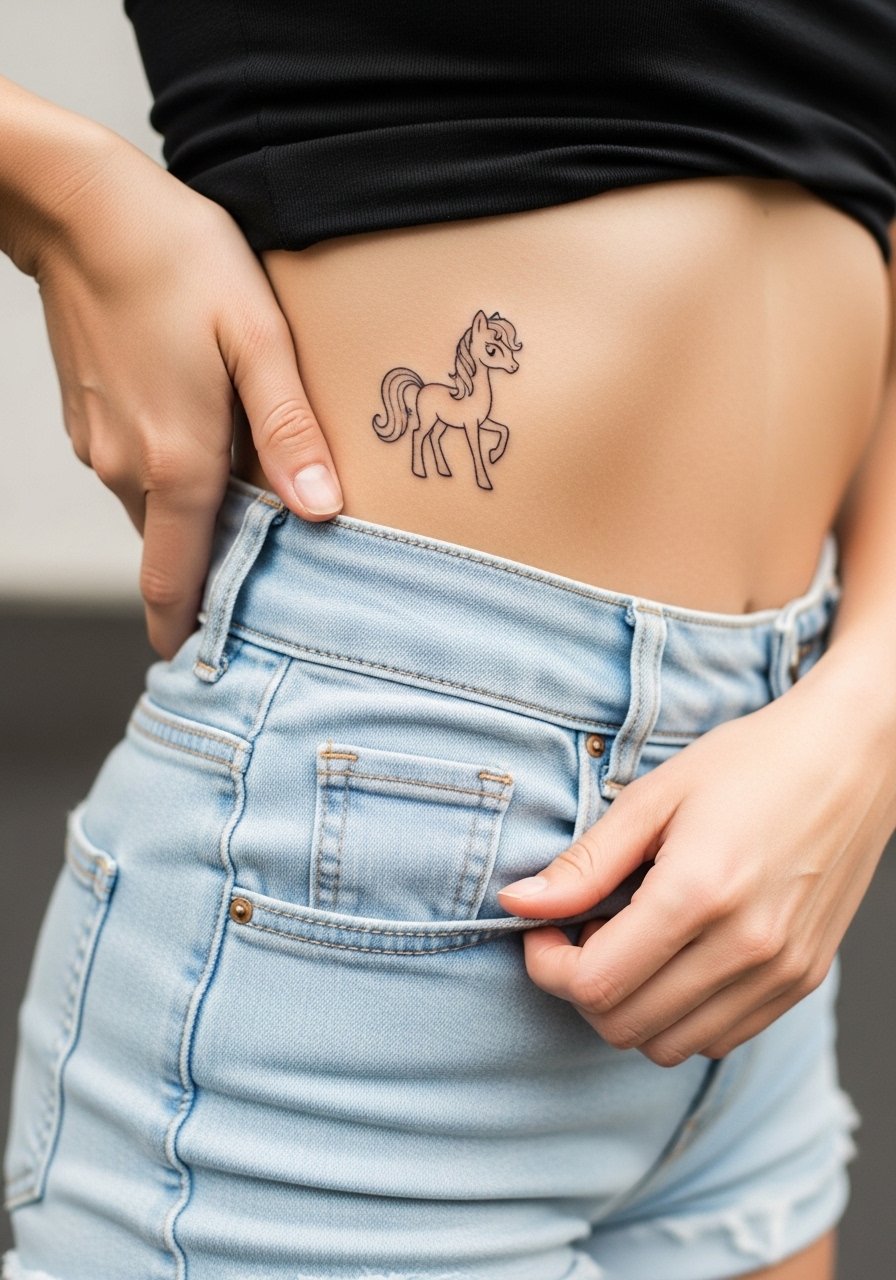
Flank pieces excel as hidden nods to fandom. Expect low visual wear because the area is covered by clothes most days, but keep in mind clothing friction from underwear or tight waistbands during the early healing period. The biggest regret I see is choosing the flank for visibility when you later want more public display. Mock the design on your side with a sticker or temporary to test how it reads under different outfits. For session comfort, wear loose drawstring pants. To frame it in summer, choose high waisted biker shorts or a high-cut bikini bottom so the symbol appears intentionally placed.
14. Animal-Adapted Pony Symbol on Upper Thigh
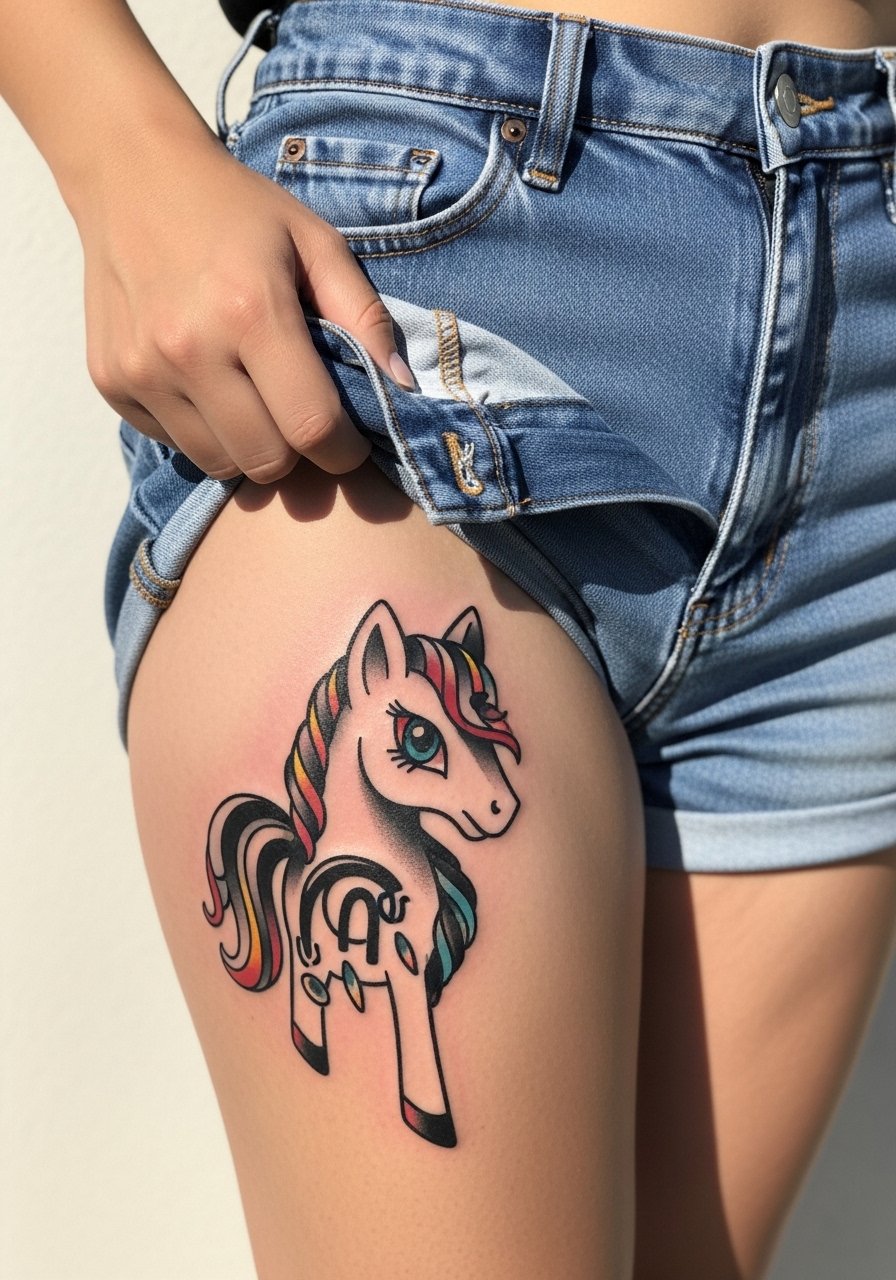
Custom adaptations that swap pony elements for animal traits create fresh, unclaimed symbolism. Thighs tolerate color and size, and the design can be scaled up without losing detail. Sessions are comfortable because you can recline and shift positions. Mistakes happen when people pack tiny ornamental detail into a thigh piece and then regret not going larger. If you want occasional reveal, pair the healed piece with a high slit mini skirt or thigh-high socks for deliberate show-off looks.
15. Micro-Realism Gem on Finger
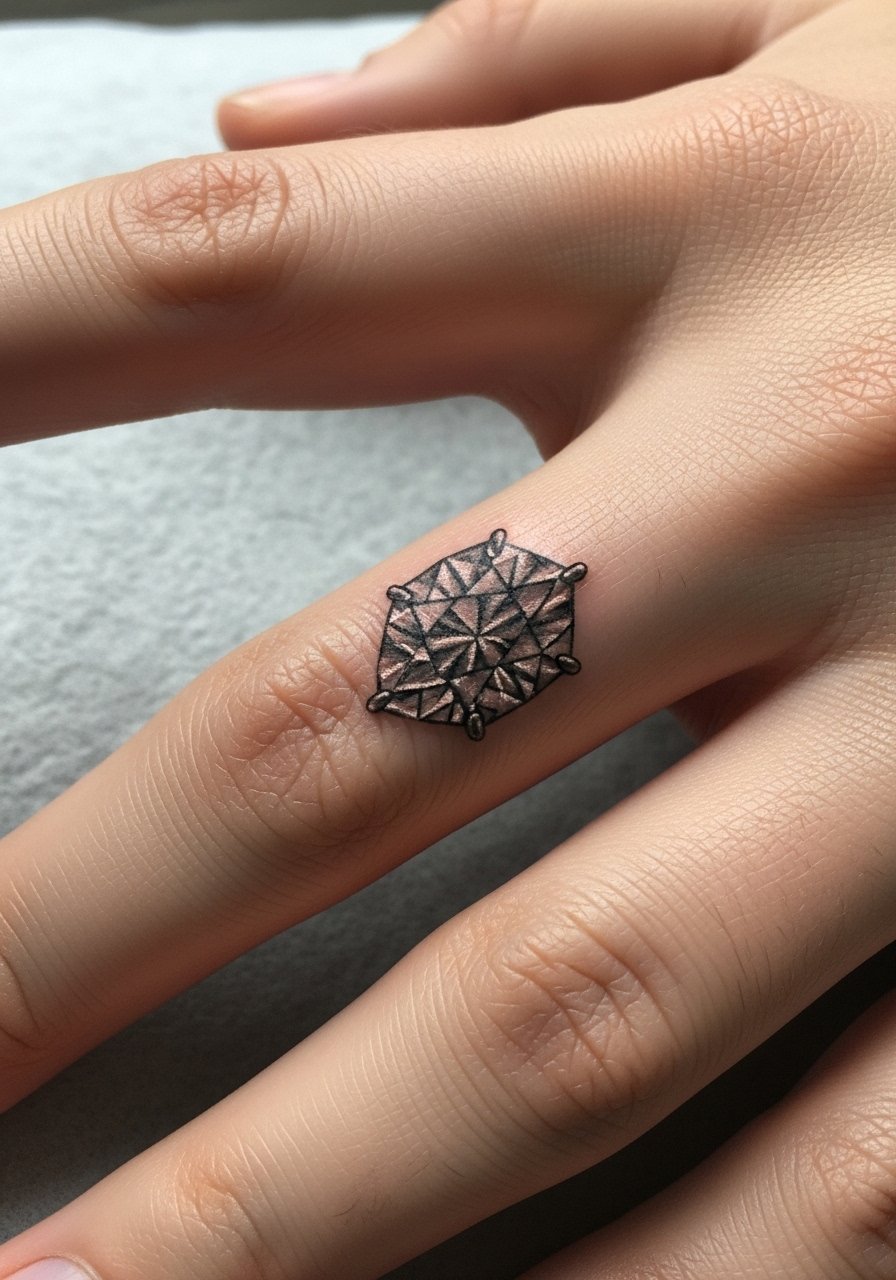
Fingers are notoriously high touch and high fade. Micro-realism gems on fingers need simplified sparkle cues rather than dense multi-facet detail. Expect more frequent touch-ups, and plan for a shorter lifetime compared with forearm or thigh placements. During the session the finger will throb because of the bone proximity. The most common error is asking for photoreal detail at a scale the skin cannot hold. Keep the gem graphic clear and accept that finger pieces are semi-temporary by nature.
16. Tiny Script Starburst on Lower Back
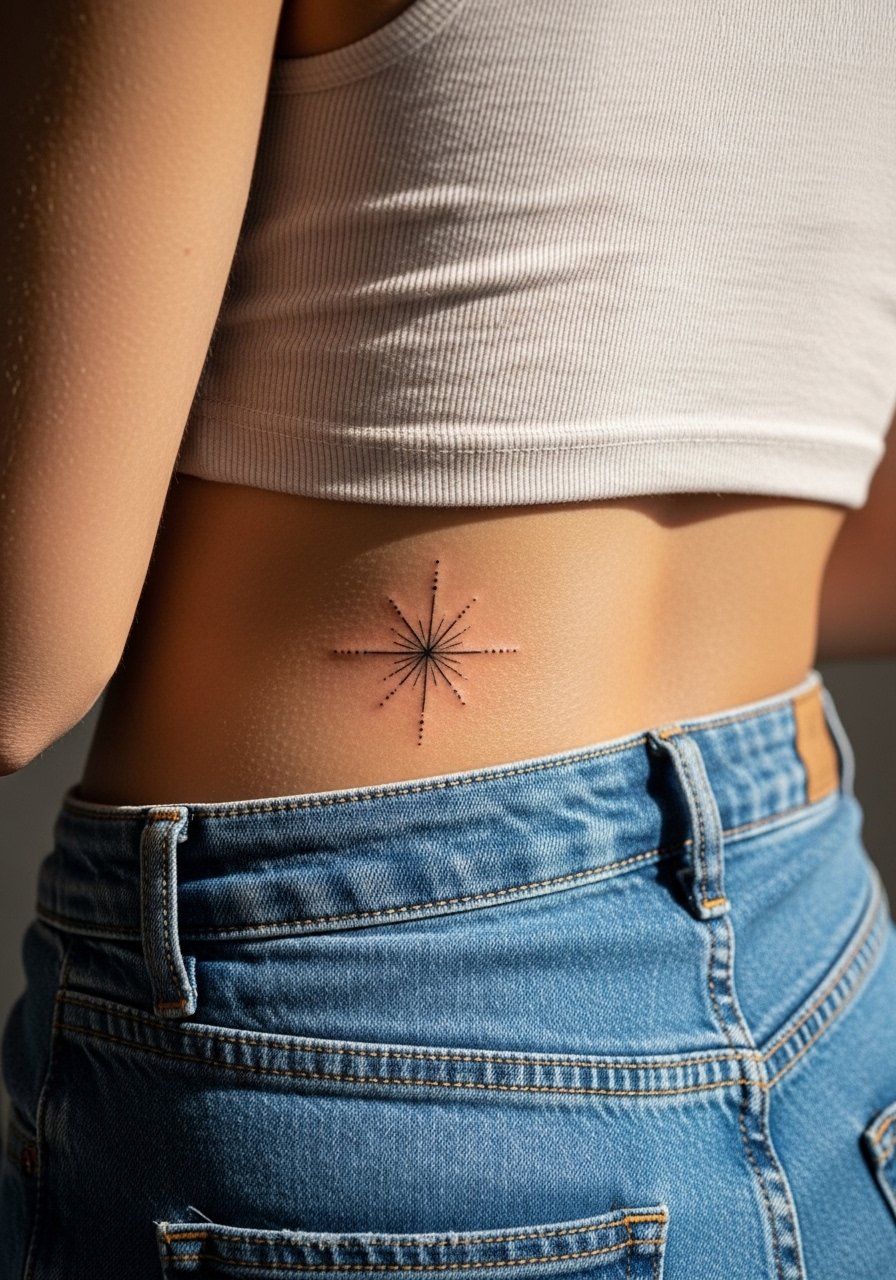
Lower back tattoos sit in a zone that is easy to conceal and easy to show, depending on clothing. Starbursts here read as deliberate centerpieces when spaced correctly. One practical tip is to avoid placing the design exactly on the waistline where belts and high waists rub the area and accelerate fading. For healing, wear high-waisted bottoms that do not press directly on the fresh piece. When you want to reveal it, choose low-rise or mid-rise styles so the starburst sits visibly above the waist.
17. Neo-Traditional Rose Near the Ankle
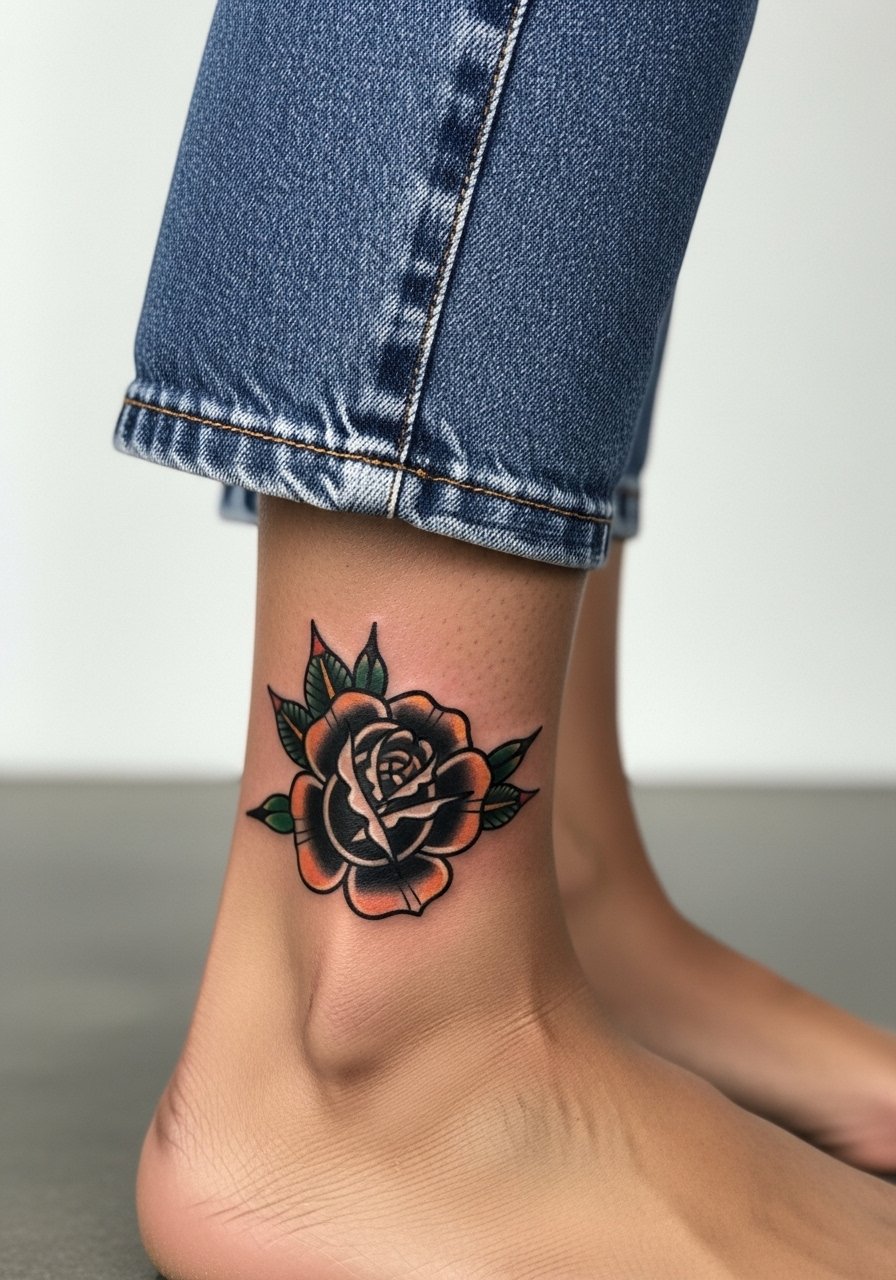
Ankle roses benefit from bold linework and focused color fields so the image reads despite footwear friction. Sessions are short and the ankle can sting closer to bone. A typical misstep is over-saturating tiny petals which flatten into a blob when exposed to shoe straps. Keep petal shapes clear and consider stronger outlines. For casual outfits, cropped jeans or strappy flat sandals make the rose a low-key focal point.
18. Crescent Moon Sternum in Blackwork
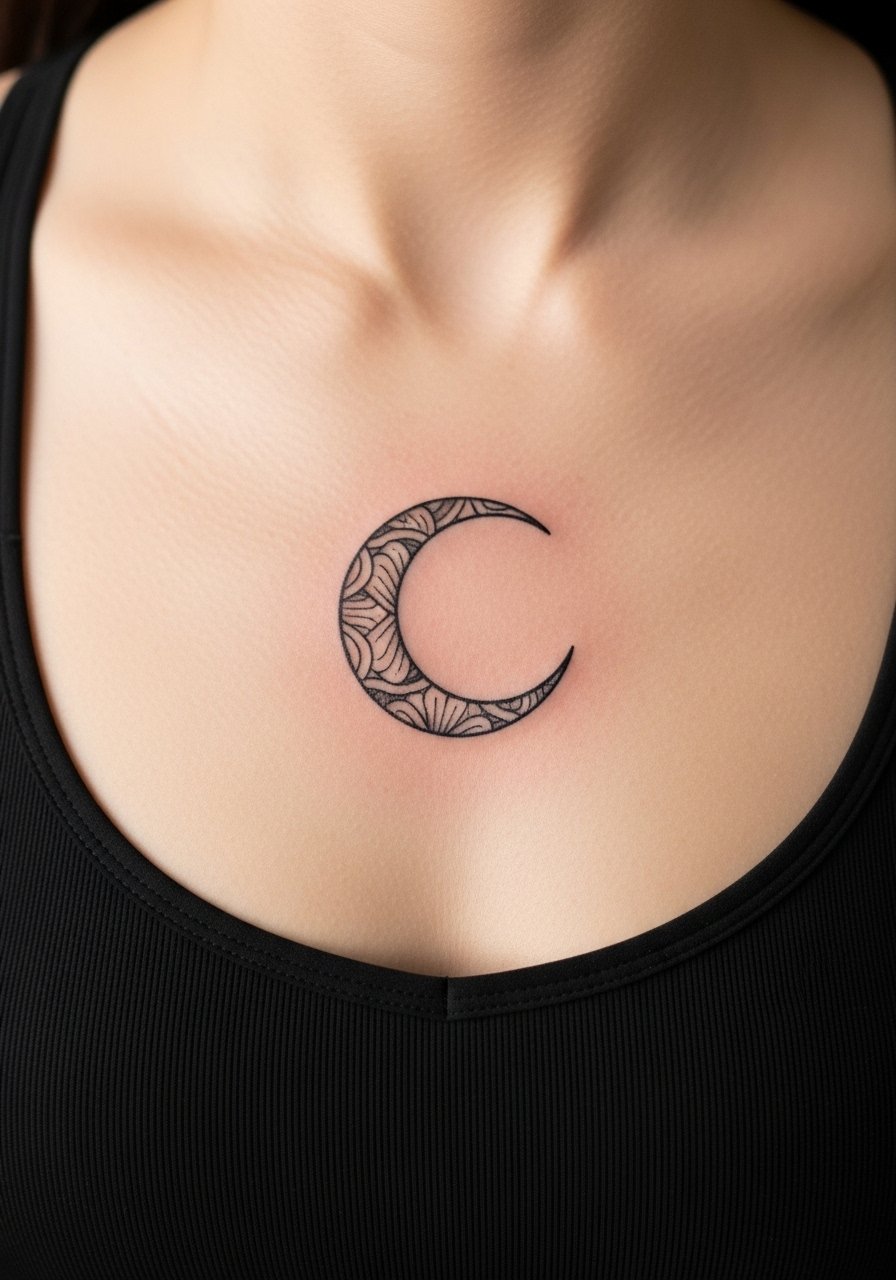
Sternum placements require careful artist selection because the area needs someone experienced with central chest curvature. Solid black shapes can hold up if there is respectful spacing so the skin can breathe during movement. This placement is sensitive, so expect higher pain and the need for stamina breaks. A mistake I see is using ultra-fine detail on the sternum where motion will soften crispness over time. For session comfort, wear a fitted sports bra you can shift without exposing more than necessary.
19. Fine Line Chain of Stars Along the Spine
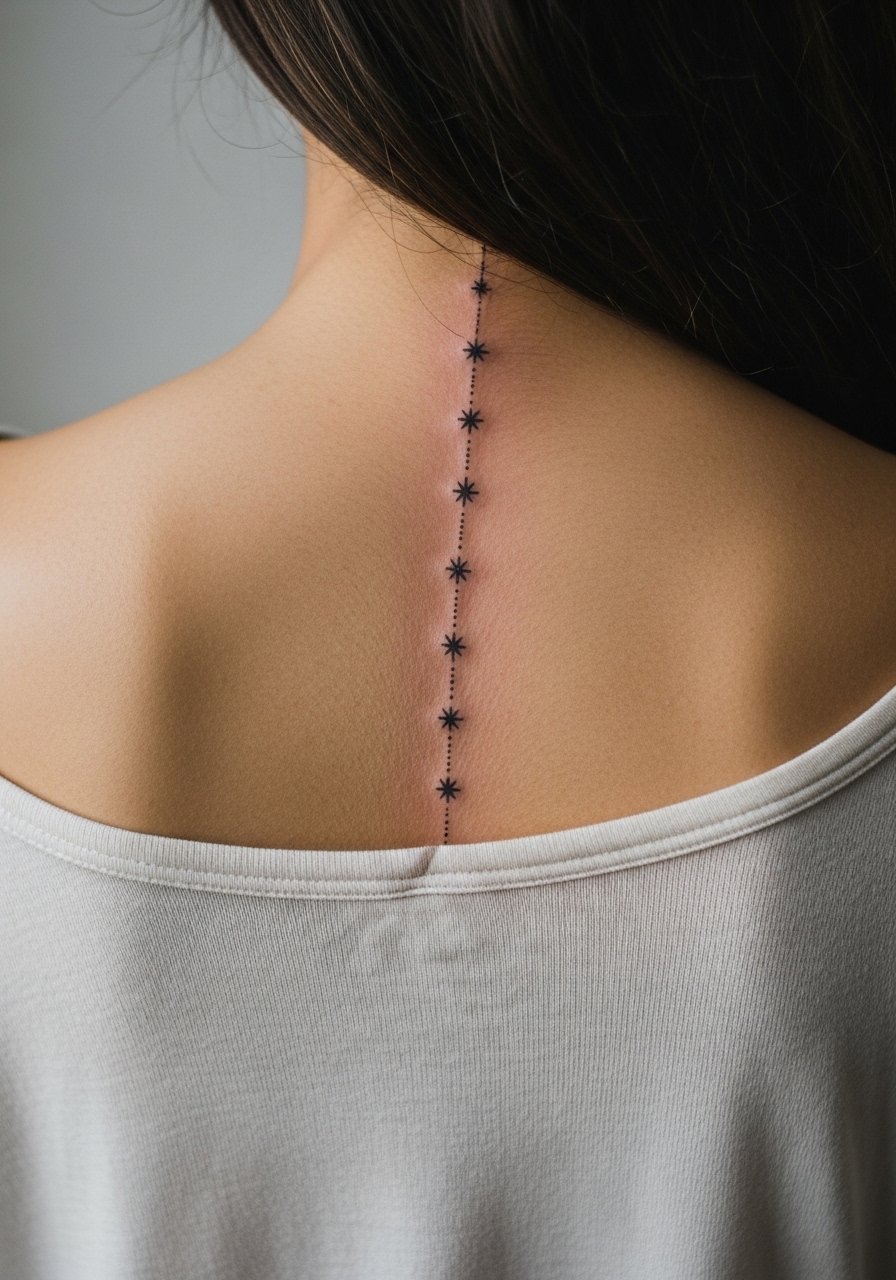
A linear spine piece reads elegantly when each element has spacing to avoid blending as the back moves. Expect a multi-session plan if the chain runs several inches. The main error is packing symbols too tightly to create a continuous line. Give each star a little negative space and the chain will maintain definition. For evening wear, open-back dresses reveal the line without excessive exposure. For the appointment, a button-down or wide-neck shirt you can slide aside keeps access easy.
20. Tiny Traditional Balloon Animal on Calf Side
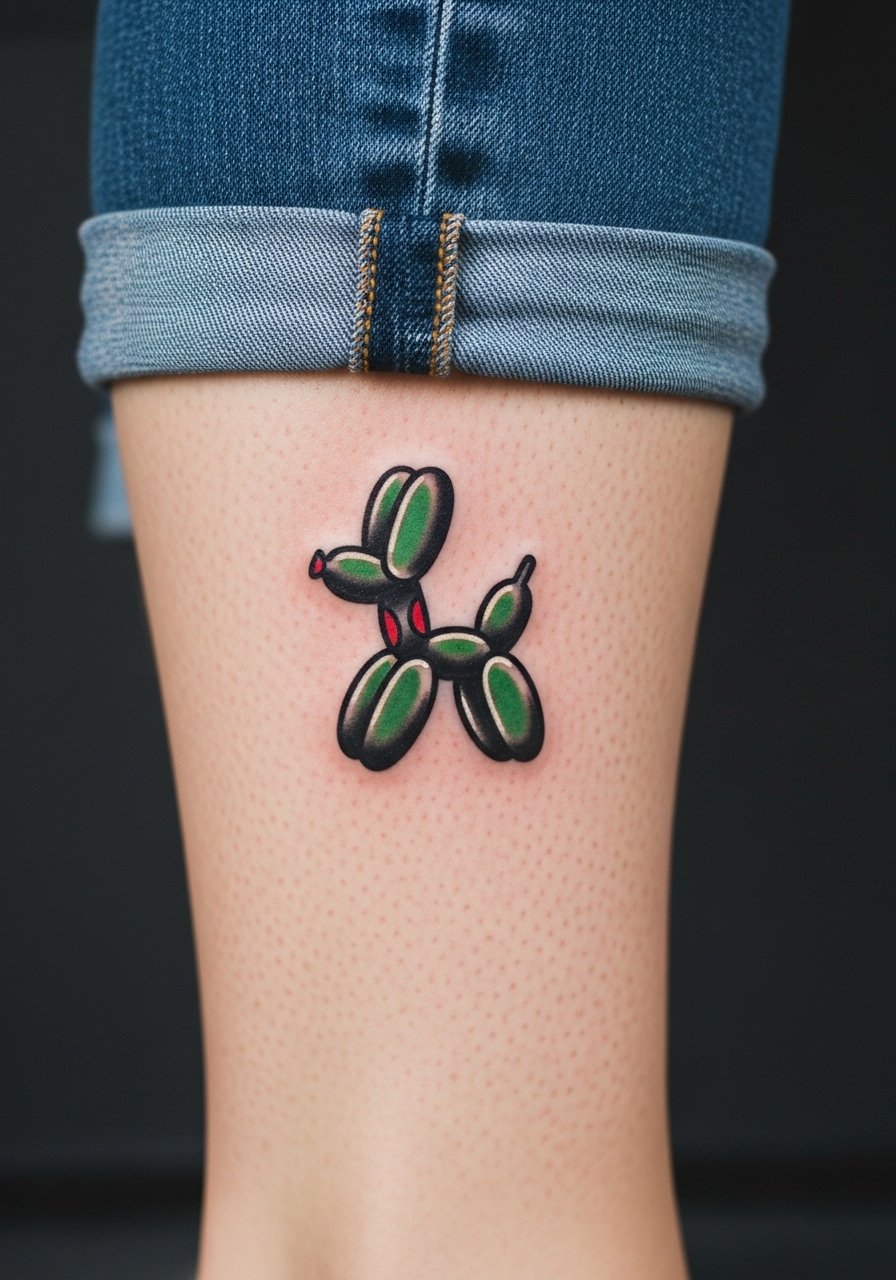
Placing a classic tiny traditional piece on the calf side keeps it visible and durable. The muscular curve lets bold lines sit naturally and color settle without constant abrasion. Sessions are short and pain is low in most cases. A common misstep is requesting minute shading within tiny shapes. Keep color blocks simple to preserve the cartoon clarity over time. For casual summer looks, crop pants or skirts let the piece be an intentional detail.
21. Hidden Flank Crest With Personal Symbol
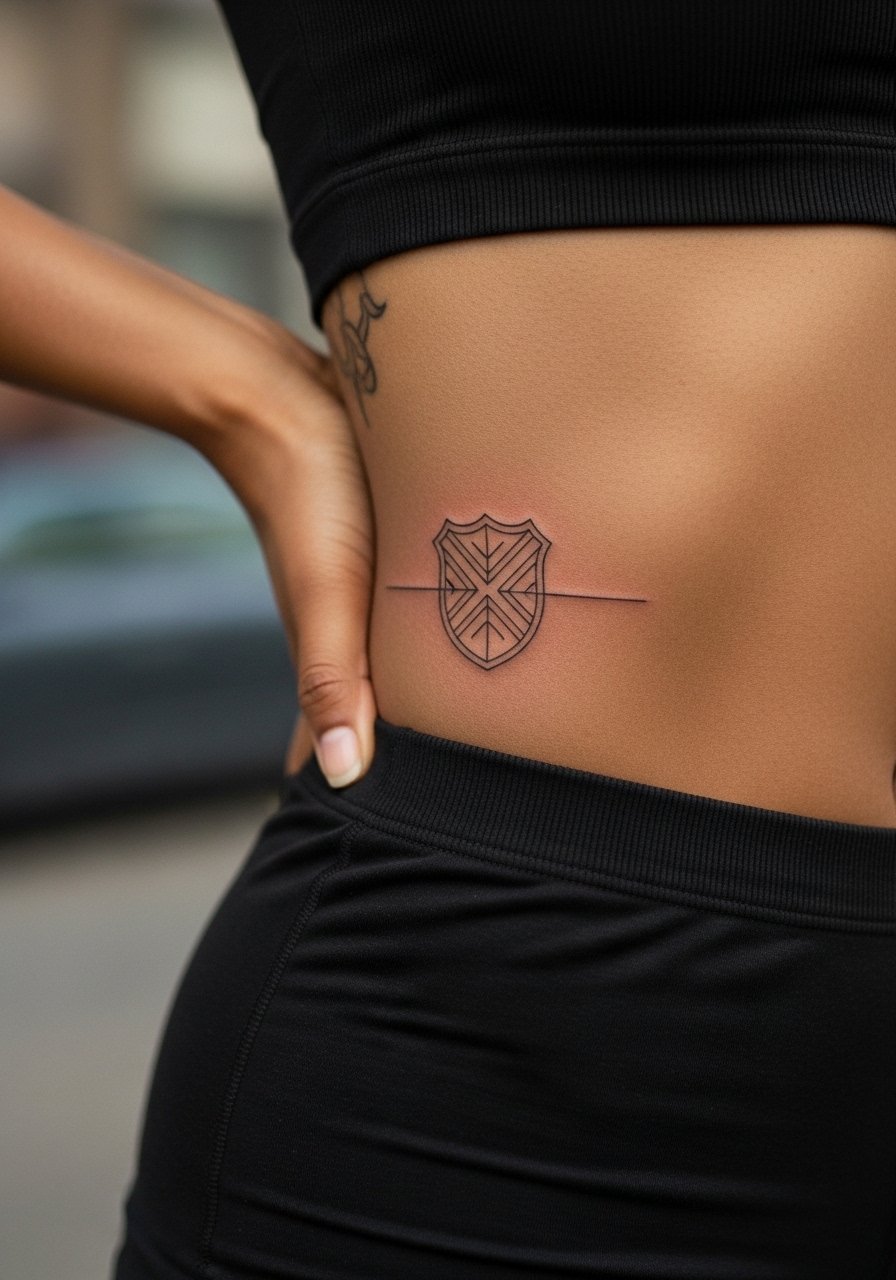
A crest on the flank gives you a secret emblem that only appears when you want it to. Flank skin needs careful consideration because curves and movement change how the lines sit as you age. The mistake here is choosing ultra-dense filigree that will compress over time. Instead, keep the crest bold where it matters and open around edges. For session wear pick loose bottoms so the waistband does not rub the fresh piece. This placement is ideal if you want a private symbol that surfaces occasionally with swimwear or low-rise styles.
Frequently Asked Questions
Q: Do fine line pieces really fade faster, and what can I do about it?
A: Fine line work tends to blur sooner than saturated traditional pieces because the needles place less pigment per pass. To extend longevity, pick a slightly larger scale for delicate motifs, avoid high-friction spots, and plan for touch-ups around year two to three depending on sun exposure. Ask the artist about their preferred needle spacing during consultation so expectations match their technique.
Q: Which healing method should I pick, Saniderm or dry healing, for ribcage and flank pieces?
A: Artists and clients split into two camps on this. One camp prefers protective film like Saniderm for the first 24 to 48 hours to reduce mess and infection risk. The other camp favors dry healing and minimal occlusion to let scabs form naturally. For ribs and flanks I advise discussing both approaches with the artist because skin movement and sweating affect outcomes, and your comfort with a film versus air exposure will guide the choice.
Q: How visible will a flank-only tattoo be in daily life, and will I regret it later?
A: Flank-only placements are deliberately private, which is why many choose them as secret symbols. Visibility depends on clothing choices. If you think you might want occasional display, try temporary placement tests with stickers or swimwear first. Mocking up the design and wearing it under different outfits for a few days helps avoid placement regret.
Q: Are there wardrobe items that make wrist and ankle pieces look intentional?
A: Yes. Simple accessories frame small wrist and ankle work without overshadowing it. A thin cuff or stacked dainty bracelets on the opposite wrist keeps the eye balanced. For ankles, strappy sandals or cropped jeans highlight the area. A thin silver cuff bracelet is a subtle way to offset wrist linework while keeping the tattoo the focal point.
Q: How often should I expect touch-ups for finger, ankle, and collarbone pieces?
A: Fingers usually need the most frequent touch-ups, often every one to three years. Ankles and collarbones fall in the middle, with touch-ups common around year two to four depending on sun and friction. Budget for refresh sessions and ask your artist to show healed examples of similar placements so you can see realistic timelines.
