
Fine line deer skull tattoos are everywhere on saved boards right now, but they do not all age the same. I've seen tiny wrist skulls blur within months when the line weight was too thin, and I have seen slightly thicker fine line pieces stay readable for years. Below are 21 delicate deer skull ideas that balance detail, placement, and wardrobe so you can book a session that still looks deliberate after a few touch-ups.
1. Fine Line Deer Skull with Mini Florals on Inner Forearm
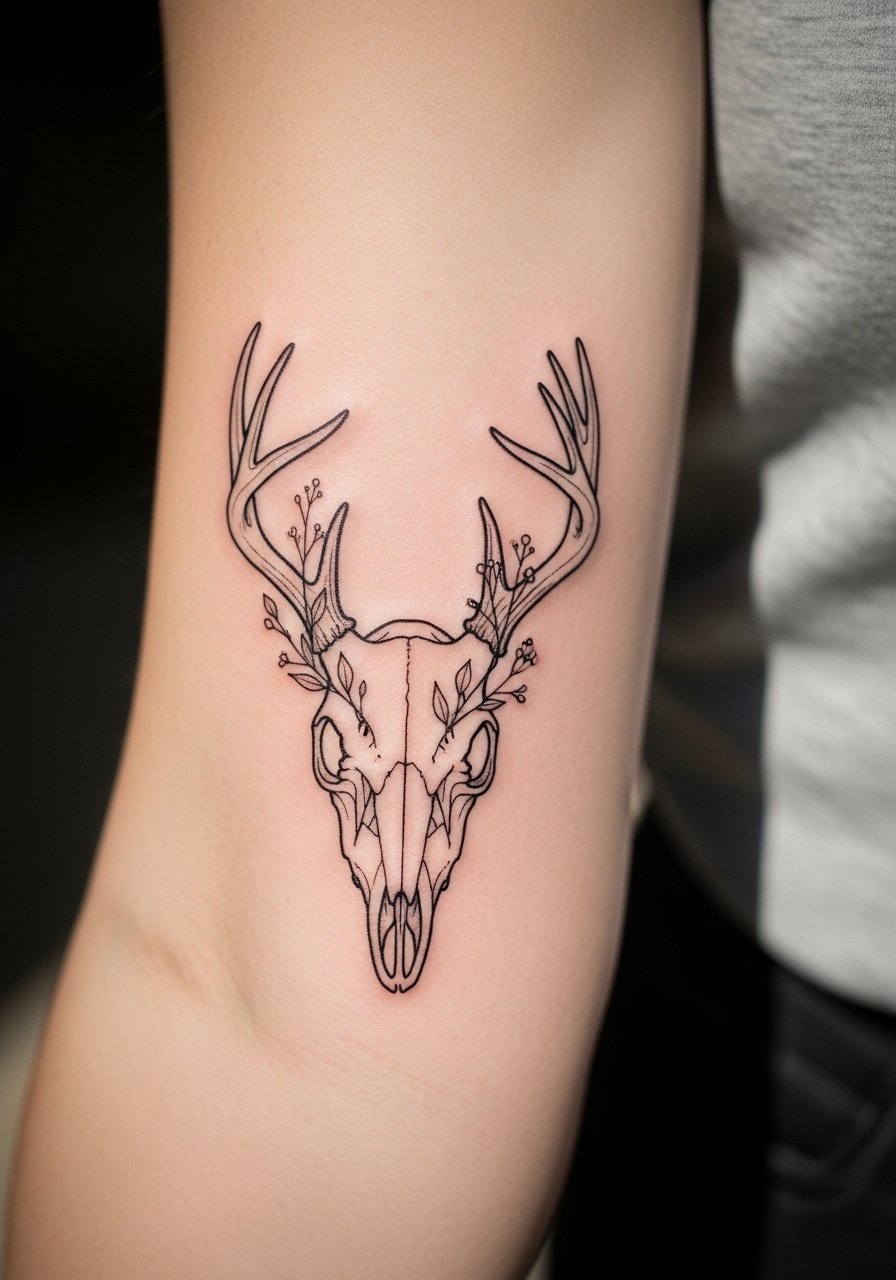
I recommend this when you want delicate detail that still reads in a casual sleeve. For consultation bring reference images showing the exact line weight and ask for slightly bolder main contours so the flora does not disappear after a year. The inner forearm has moderate pain and most sessions run 30 to 60 minutes for a 2 to 3 inch piece. The common mistake is asking for ultra-thin single-needle lines across dense detail. That version blurs faster. Expect a touch-up around 12 to 18 months for fine line work. For showing it off, roll a cuff on a rolled cuff chambray shirt and add a slim gold bangle on the opposite arm.
2. Black and Gray Micro-Realism on Outer Forearm
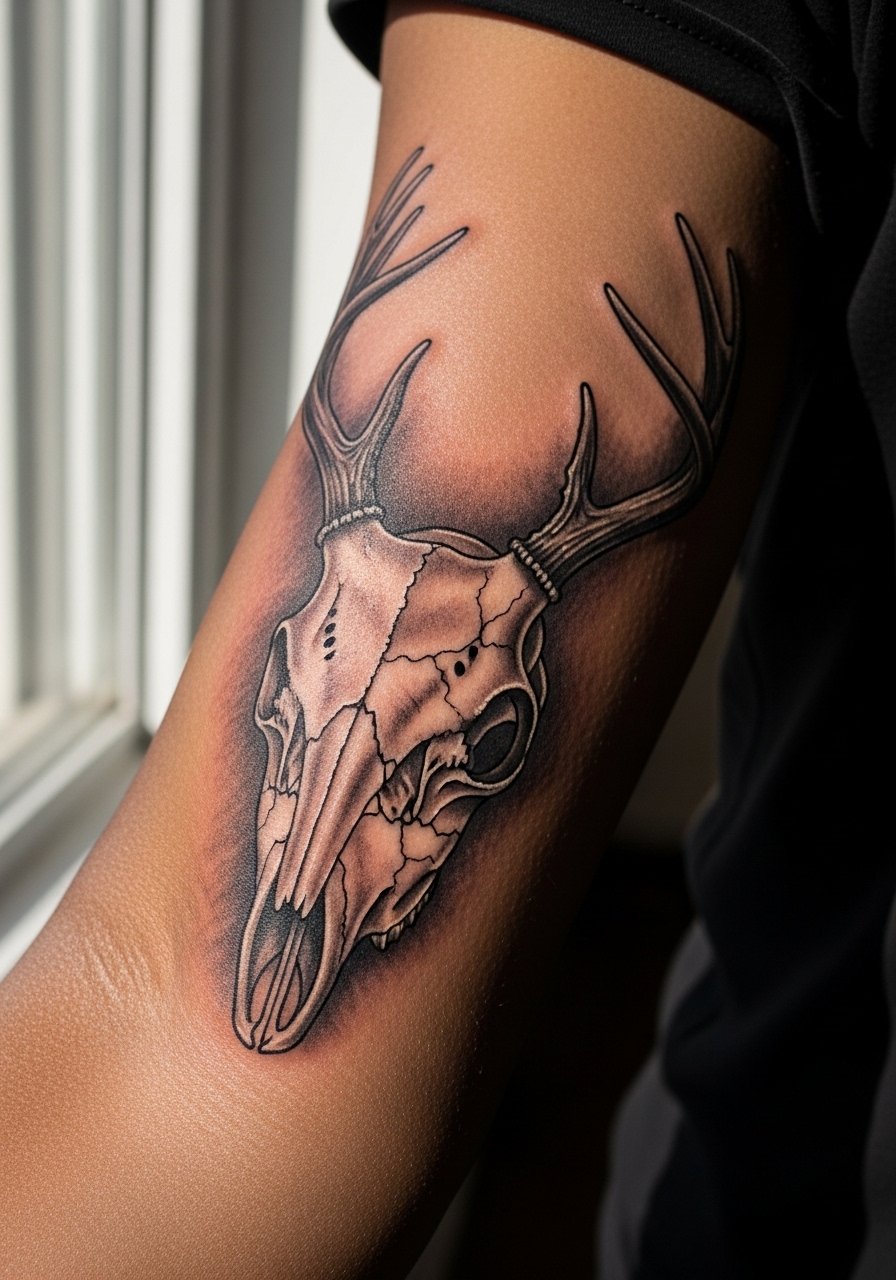
This micro-realism approach uses soft whip shading and stipple texture to create depth without heavy saturation. It is a good pick if you want lifelike antler detail that still photographs well on darker tones when the contrast is planned. The session usually lasts 2 to 3 hours, and the forearm tolerates longer sittings. A common pitfall is cramming hyper-detail into a tiny size. If you want realism at 4 to 6 inches, ask for gradual texture build rather than dense tiny dots that merge. Expect the subtle textures to soften at two years and need a targeted touch-up by year three. For the appointment wear a loose fit tank top if you want the artist to access the whole arm comfortably.
3. Minimalist Daisy Skull at the Ankle

Tiny ankle pieces are popular for subtlety and for seasonal reveal during warm months. Pain is lower than ribcage, though the ankle can feel sharp over bone. Ask for slightly heavier anchor lines around the skull so the daisy petals remain distinct after the first year. Sessions for micro designs are often 20 to 40 minutes. The usual mistake is placing tiny detail where socks or shoe straps press while healing. For show-off pairing try cuffed straight-leg jeans and strappy flat sandals. For the session wear loose joggers you can pull up to avoid sock pressure.
4. Neo-Traditional Collarbone Carved-Style Skull
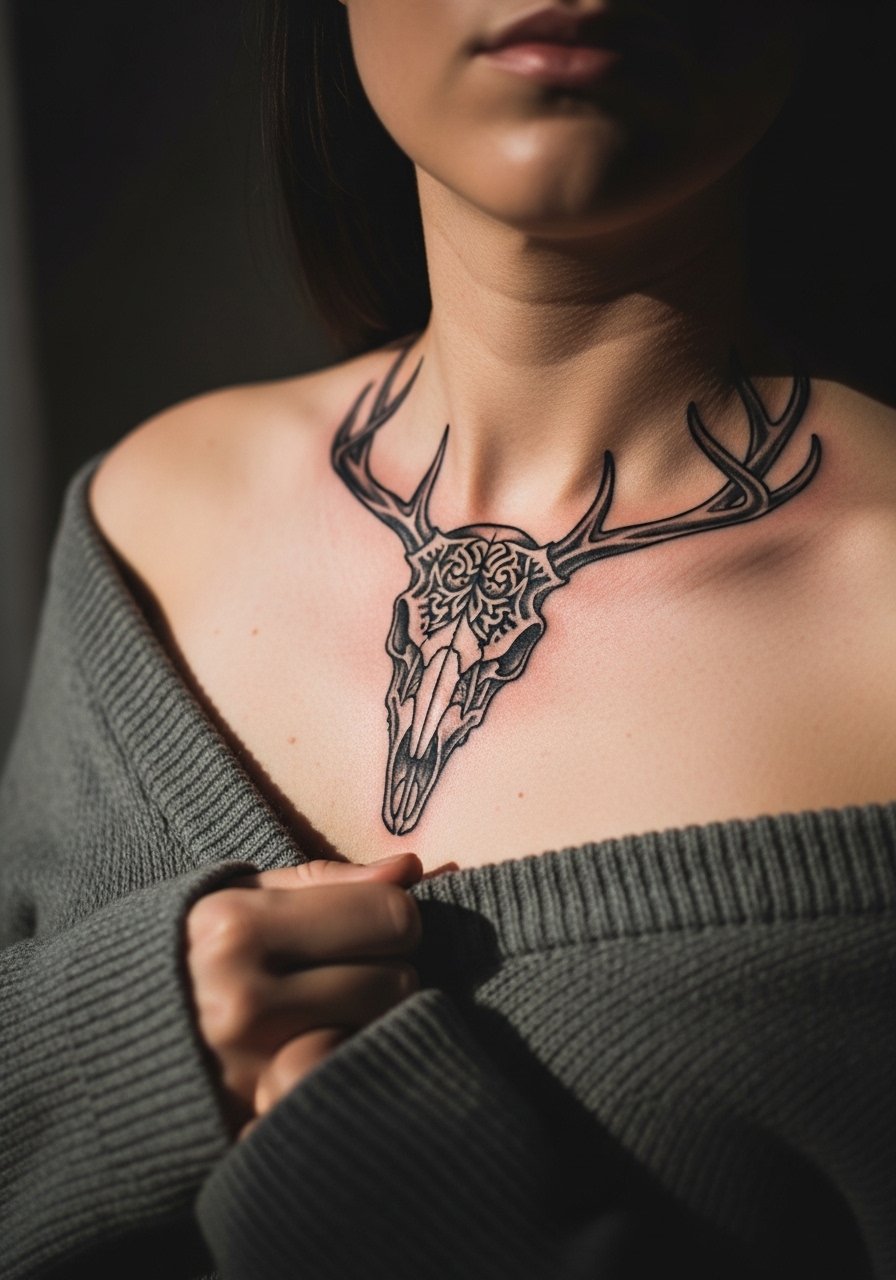
The collarbone lets ornamental carved effects sit like a small necklace. Pain on the collarbone can be high for some people, yet most sessions for a medium piece finish in 1 to 2 hours. Ask your artist to keep the carved texture shallow with room between lines to prevent early merging. A mistake I see is asking for dense color fill close to the bone where mobility creates friction while clothing sits on the area. Expect the carved shading to mellow in two to five years and plan for a touch-up if you want crisp contrast. Pair this with an off shoulder sweater when you want to show it off, and wear a strapless crop top to the session for easy access.
5. Geometric Blackwork Skull on Outer Thigh
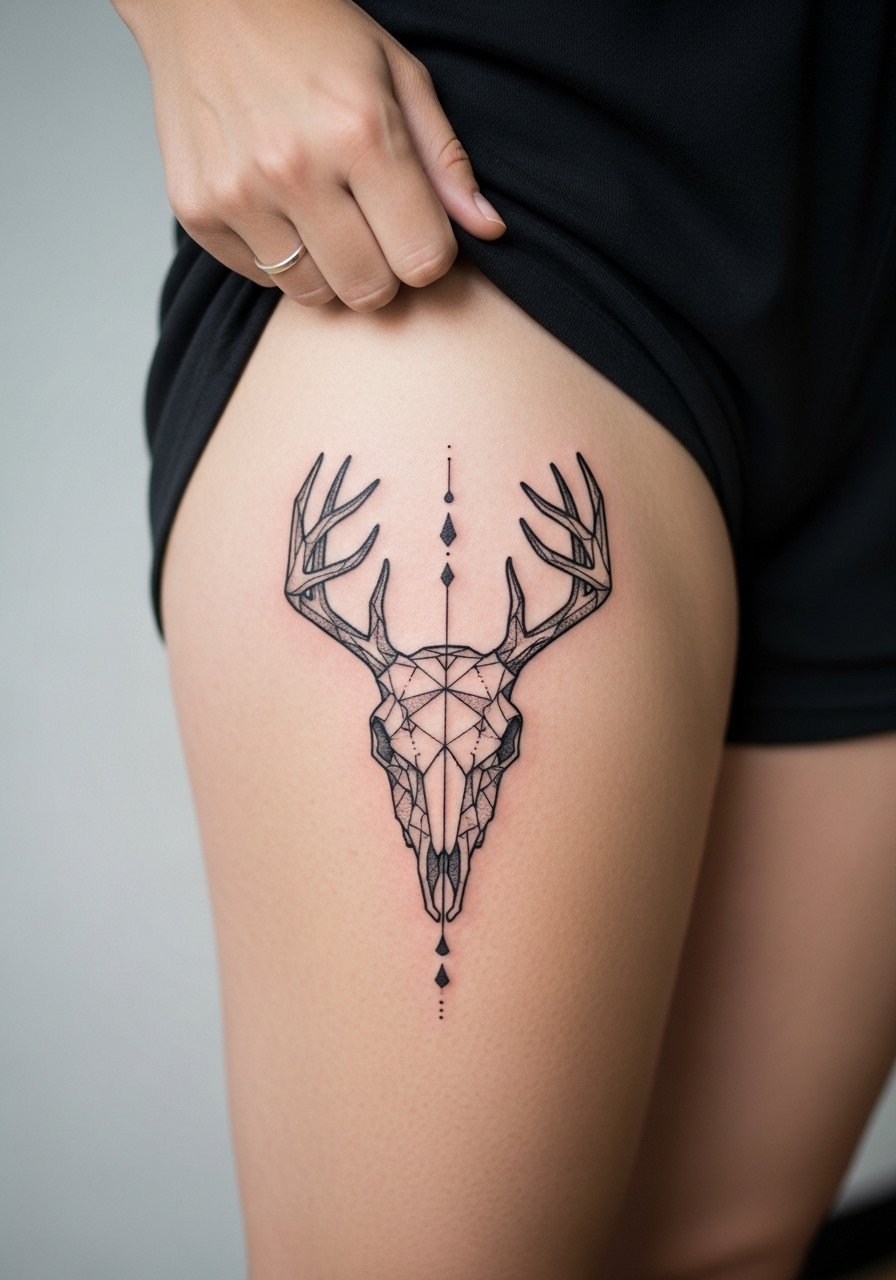
This modern angle uses clean geometry to suggest a skull without literal detail. Thighs tolerate bold blackwork and dotwork well, and pregnancy or major weight change can distort dense geometry less on the outer thigh than on inner areas. Sessions may span 1 to 2 hours depending on scale. The biggest mistake is going too small. Lines need spacing to avoid merging. Dotwork holds better on thighs because there is more tissue to stabilize the stippling. For showing it off choose high waist linen shorts or thigh-high boots for winter.
6. Dotwork Deer Skull with Textured Bone on Inner Bicep
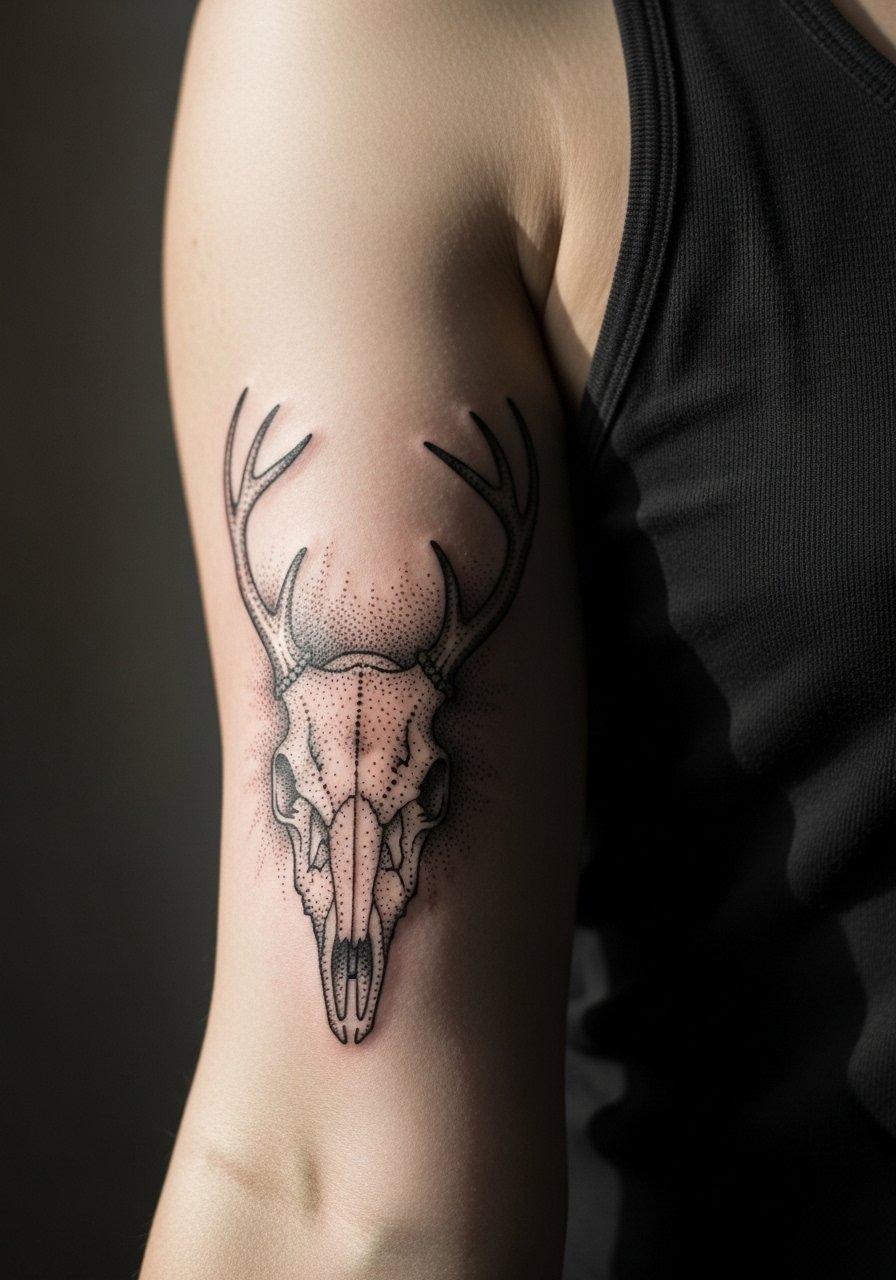
Inner biceps are excellent for stippling and texture because the skin sits flatter and has fewer surface movements than the hand. Sessions for medium dotwork pieces take 2 to 3 hours. A common error is asking for ultra-dense stipple in a 2 inch area. That can look muddy at six months. Tell your artist you want gradual build and spot highlights to preserve bone edges. Expect dotwork to age gracefully if spaced properly, with touch-ups at two to three years. For the appointment wear a loose tank top so the artist can lift the sleeve without fabric drag.
Pre-Session Essentials
The forearm, collarbone, ankle, and bicep pieces above each have different prep needs. These five items help smooth the session and the first week of healing.
-
H2Ocean saline spray. A thin saline mist that people use to rinse fine line areas without leaving a greasy residue, useful for wrist and ankle work.
-
Indie Tattoo Goo balm. A lighter balm favored in dry climates to keep dotwork and stipple textures from crusting too hard.
-
InkSafe transparent wrap. A breathable protective film that some guest artists prefer over thicker wraps for small wrist pieces.
-
Unscented jojoba oil. A light oil for blackwork post-scab care that absorbs quickly and reduces shiny residue in photos.
-
Aquaphor healing ointment. A thin layer in the very first days can help seal fragile fine line channels on wrists and collarbones without clogging as heavily as other options.
7. Micro-Realism Antler Tip on the Side of the Neck
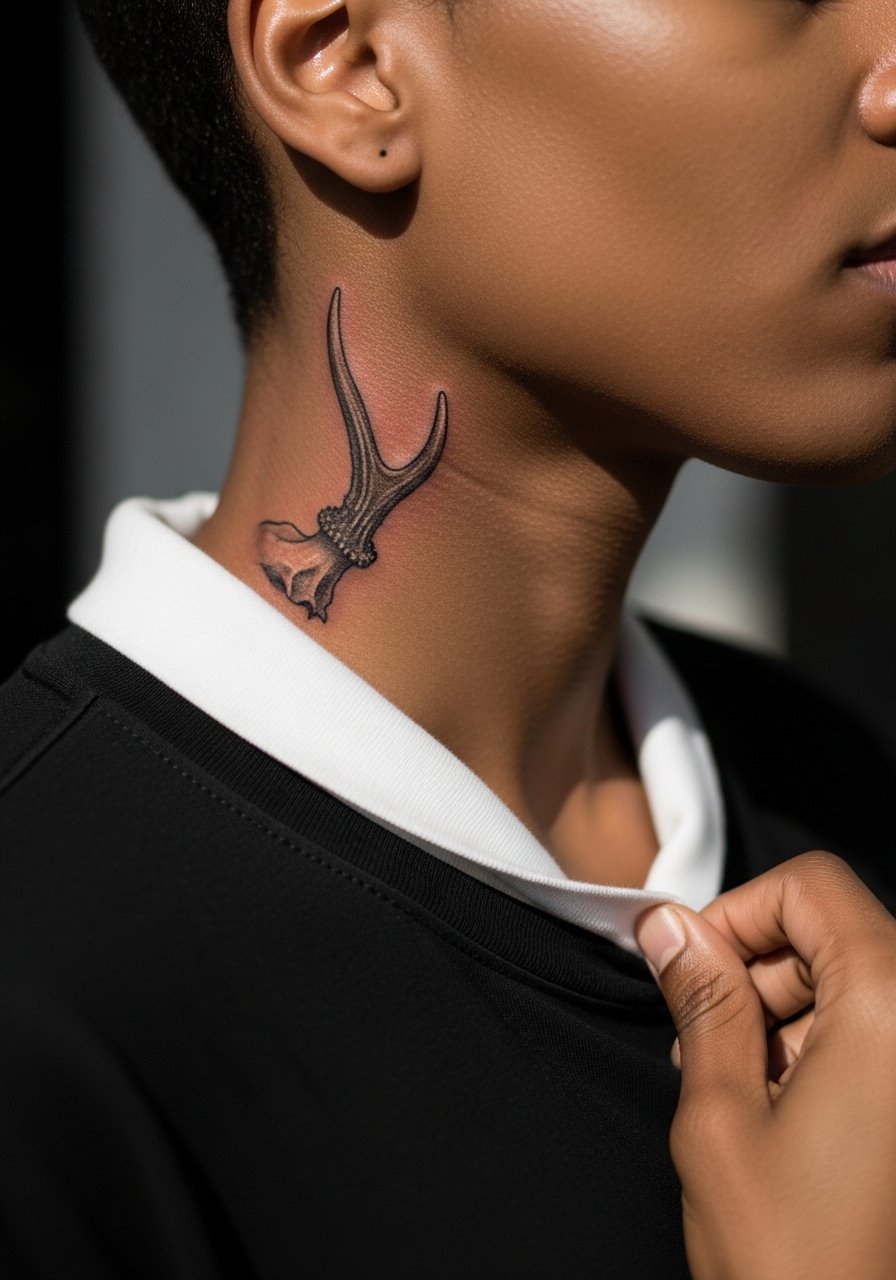
Side neck placements read intimate and visible at the same time. Pain varies but most people describe it as sharp and brief. Micro-realism here works if you keep the piece small and focused on antler texture rather than full skull fill. The usual mistake is asking for dense shading too close to hairline movement. Tell your artist to leave breathing room and to plan contrast for darker skin tones. Sessions are short, often under an hour for a small motif. Specialized experience helps, so ask about prior neck pieces when you book. For showing it off wear a wide-neck shirt that frames the area.
8. Traditional Bold Deer Skull for Upper Arm
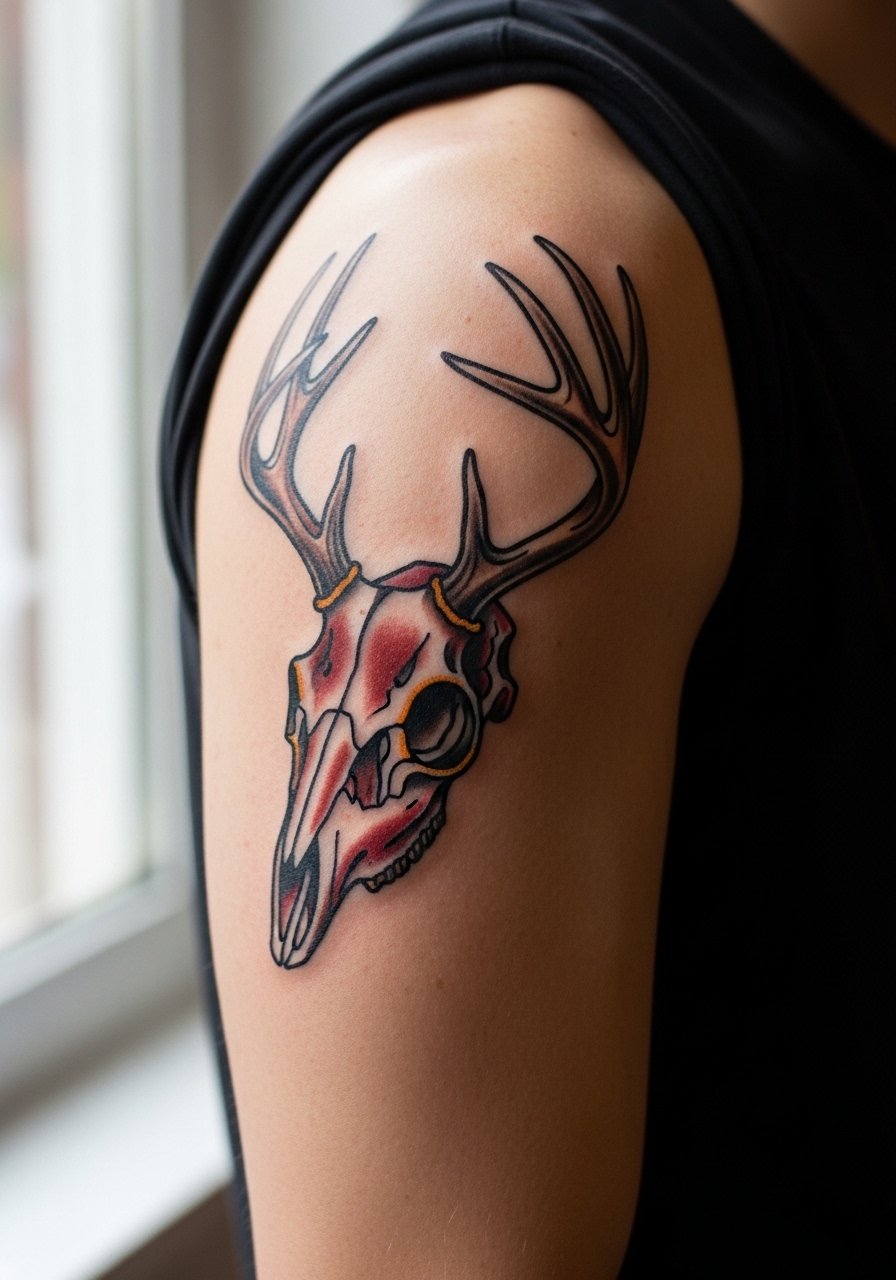
Traditional linework and saturated fills are forgiving over time because bold outlines resist blur. Upper arm placement tolerates saturated color and ages predictably. Sessions can be 1 to 2 hours depending on color. A common error is requesting too much tiny detail inside thick outlines. That miniaturized detail can fade into the color fields. Expect solid color and outline to hold best and plan touch-ups around three to five years if you want refresh. If you want a casual reveal, pair this with a button front shirt you can roll to the sleeve.
9. Double Exposure Skull Merging a Landscape on the Back
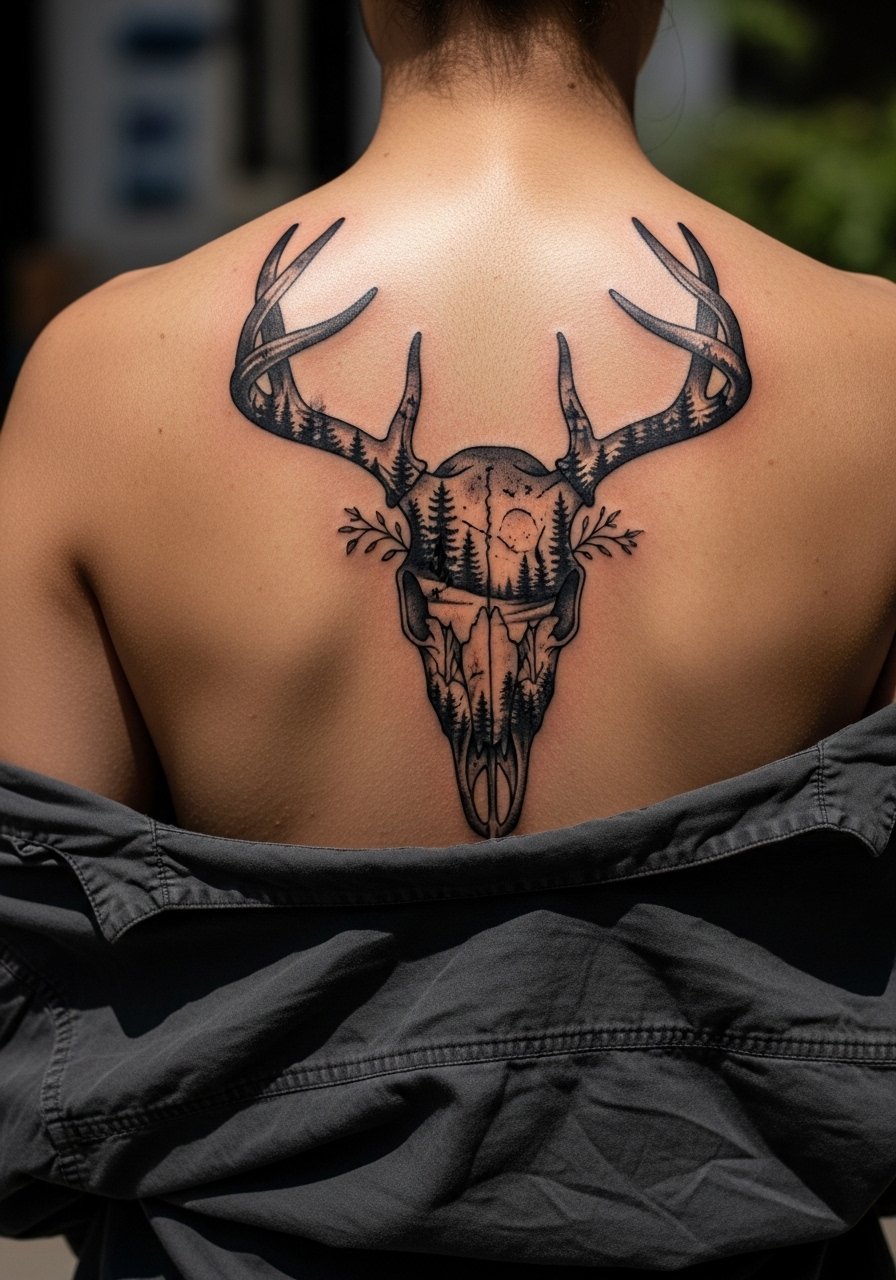
Large back pieces let artists layer silhouette skulls over landscapes for narrative depth. These are time intensive and usually require multiple sessions across weeks or months. The biggest mistake is compressing too much landscape detail into a small area. If you want legible trees inside a skull shape, plan for a larger size. Expect the blackwork silhouette to stay solid, while fine interior textures may soften and need a secondary session to refresh contrast. For the session wear a loose button-down shirt that you can pull aside to give the artist clean access.
10. Carved-Style Mini Skull for the Wrist

Wrist placements are visible every day and have friction risks from watches and bracelets while healing. Pain is moderate and sessions are quick. The carved effect reads best if the main carving lines are slightly bolder than the filler hatch marks. The common error is expecting single-needle ultra-fine hatch to survive heavy wrist movement. Plan to schedule a touch-up at one year. For showing off or sessions leave bracelets off and wear a sleeveless blouse so your wrist can rest flat for the artist.
11. Minimalist Micro Skull Behind the Ear Area
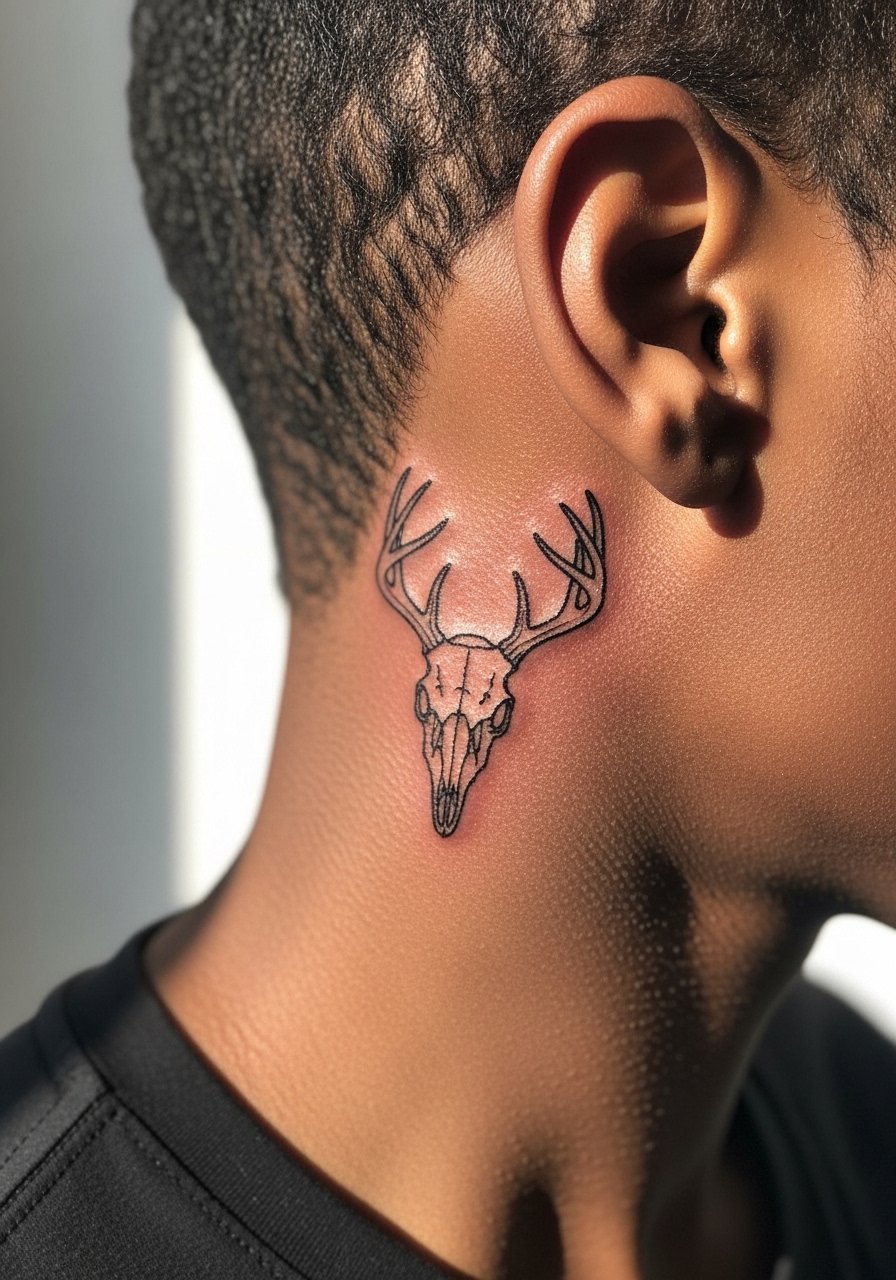
Behind the ear requires a careful crop in the stencil stage. Pain is lower but accessibility can be tricky for positioning. The most frequent mistake is asking for too much detail where hair movement will obscure or snag the area during healing. Keep size under two inches and request the artist test the stencil while sitting so placement reads natural when hair falls. Sessions are short. Because the area is sensitive in terms of visibility, consider the career implications and pick a discreet placement if needed.
12. Black and White Daisy Skull on the Finger
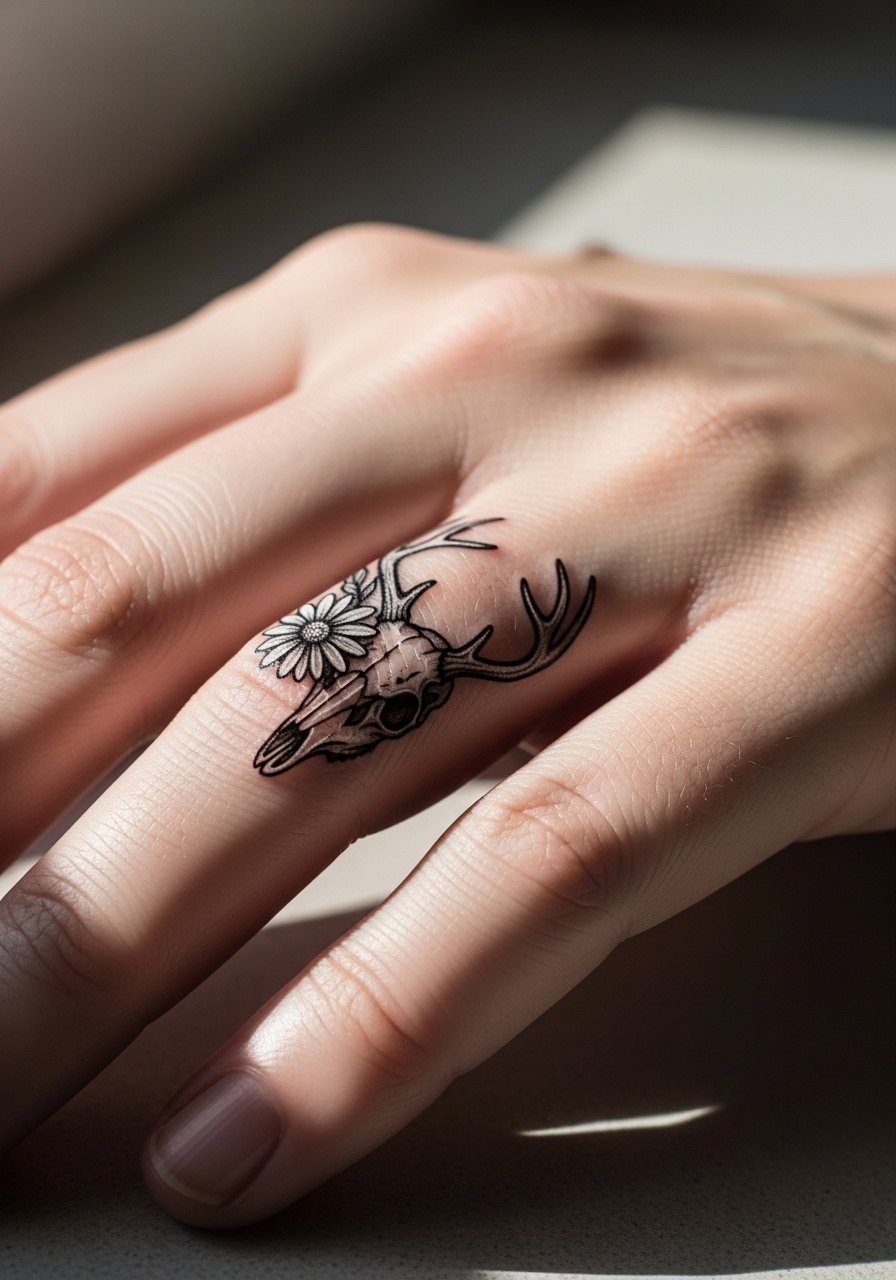
Finger tattoos are trendy and high maintenance. The biggest problem is constant hand washing and friction that fades fine micro work quickly. If you want a finger skull, ask for bolder primary lines that can weather daily use. Sessions are brief but expect touch-ups in less than a year. A common misstep is treating finger work like any other skin. It is not. For showing it off, stack a thin leather bracelet on the other wrist to balance attention and wear a thin leather bracelet on the opposite hand.
13. Geometric Dotwork Skull Across the Ribs
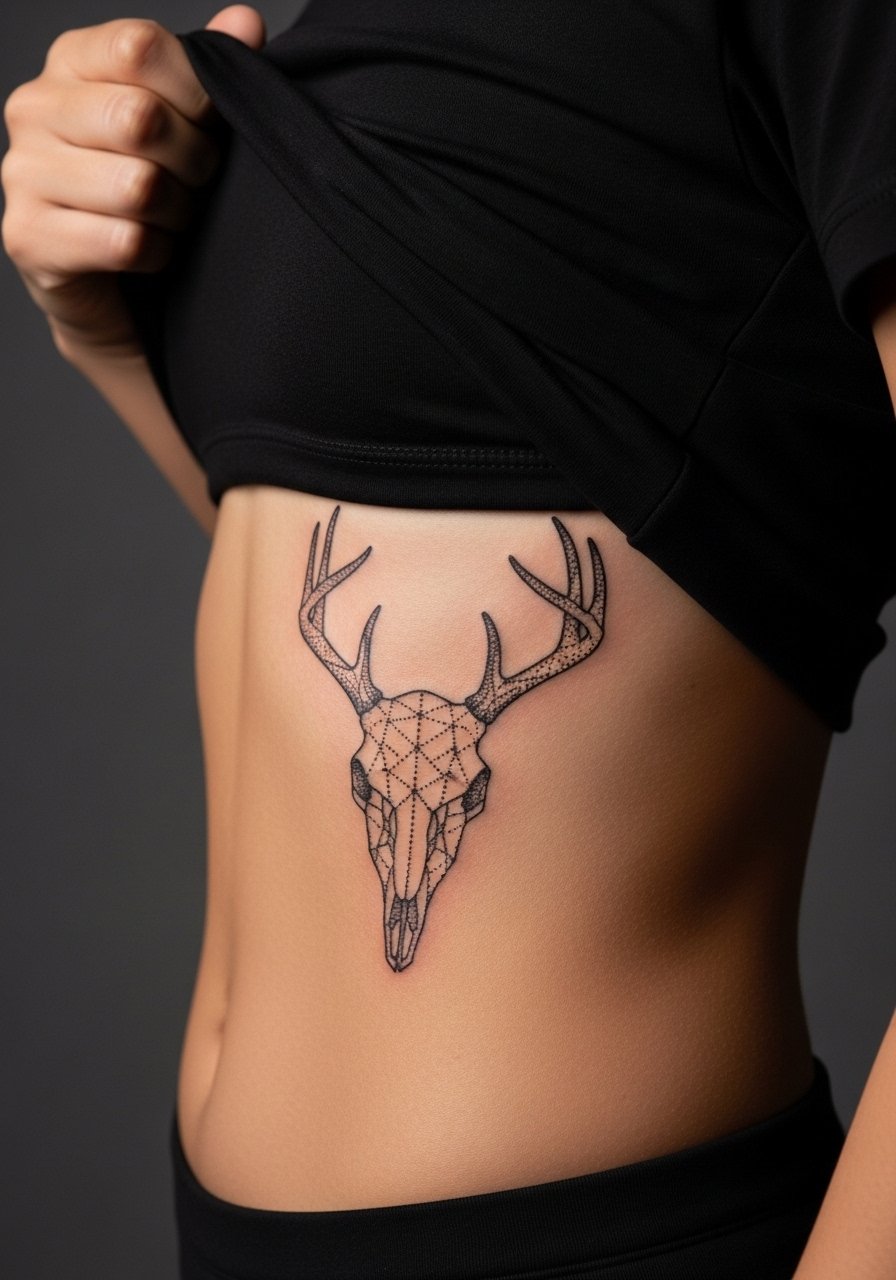
Ribcage pieces can be painful and the skin there moves a lot while breathing. Artists are split on fine line on ribs. One camp says the stretch blurs lines within two years. The other camp argues that with correct needle depth and spacing, fine line settles fine on ribs. Ask your artist which camp they fall into and see healed photos from similar rib work. Sessions here can be surprisingly long so plan breaks and expect 2 to 3 hour sessions for medium pieces. Dotwork can hold better than solid micro-lines if spaced correctly. For the session wear a cropped top you can shift for access.
14. Neo-Traditional Floral Antler Wrap on the Shoulder
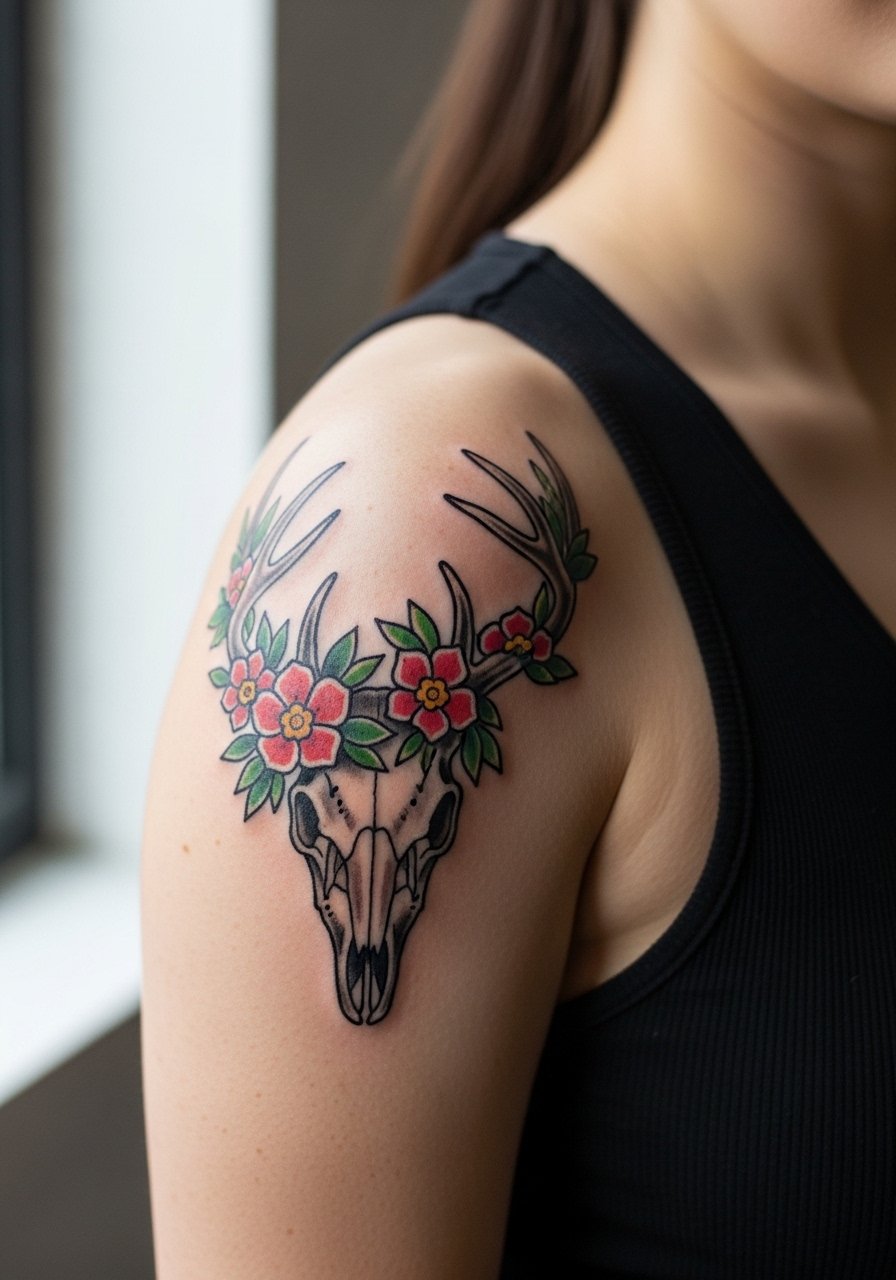
Shoulder placements are excellent for color and neo-traditional saturation because the surface tolerates color well and exposure is easily controlled. Sessions are often 1 to 2 hours with color layering over two sessions. The mistake is overcrowding color accents into tiny antler tips. Keep blooms balanced and allow open skin between color blocks. For showing it off pair with a sleeveless bodysuit and wear a button front shirt to the appointment you can pull aside.
15. Tiny Memorial Skull with Enamel Birthstone Dots on the Collarbone
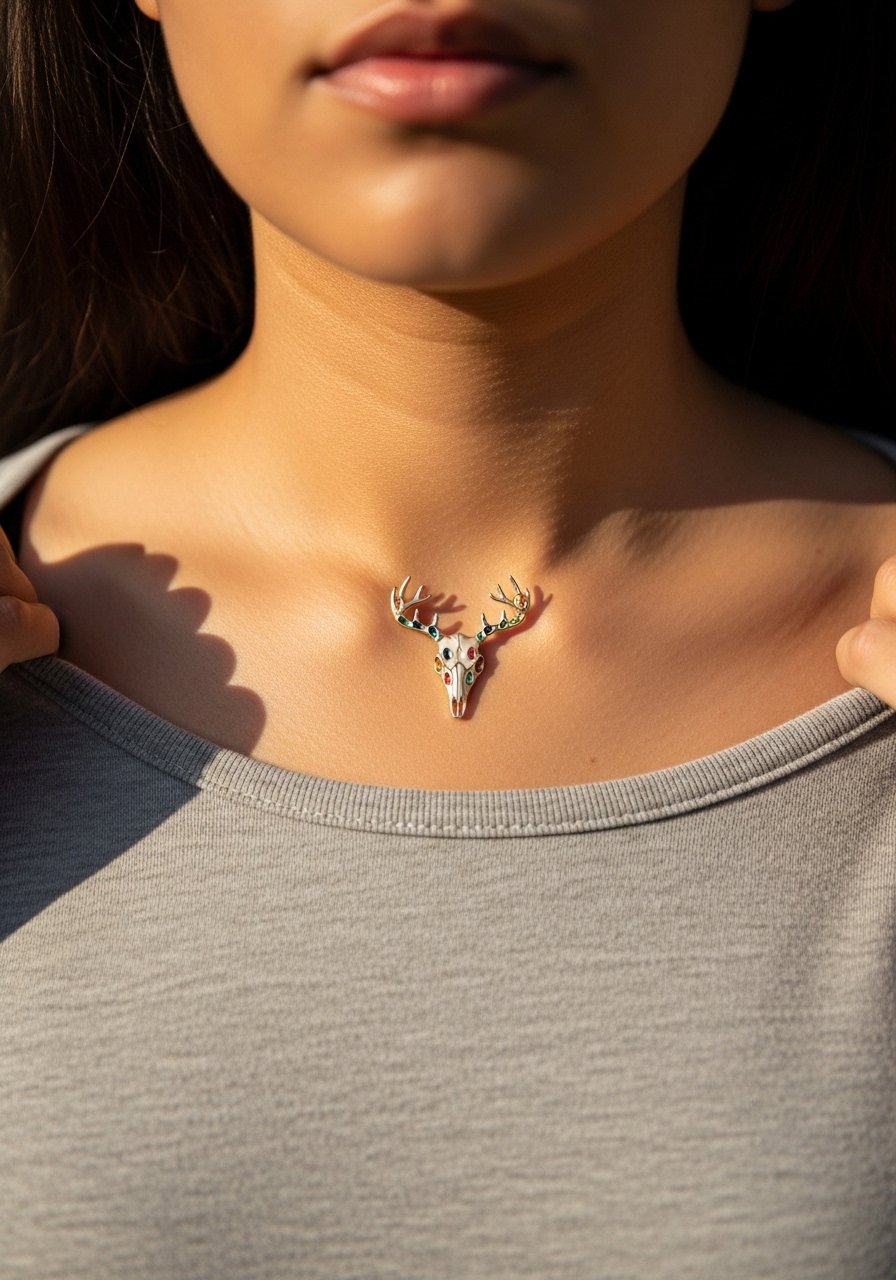
Micro memorial pieces use small colored dots to mark dates or births. The collarbone is a visible, delicate canvas. Color dots can lose vibrancy faster than black outlines, so ask for slightly denser saturation in the dots and allow for a touch-up if they fade. Sessions are short. A mistake is pushing too many tiny colored specs into under two inches. For showing it off layer a pearl necklace layer just below the design, or wear an off-shoulder sweater to frame the piece.
16. Realism Skull with Fur Texture Illusion on the Chest
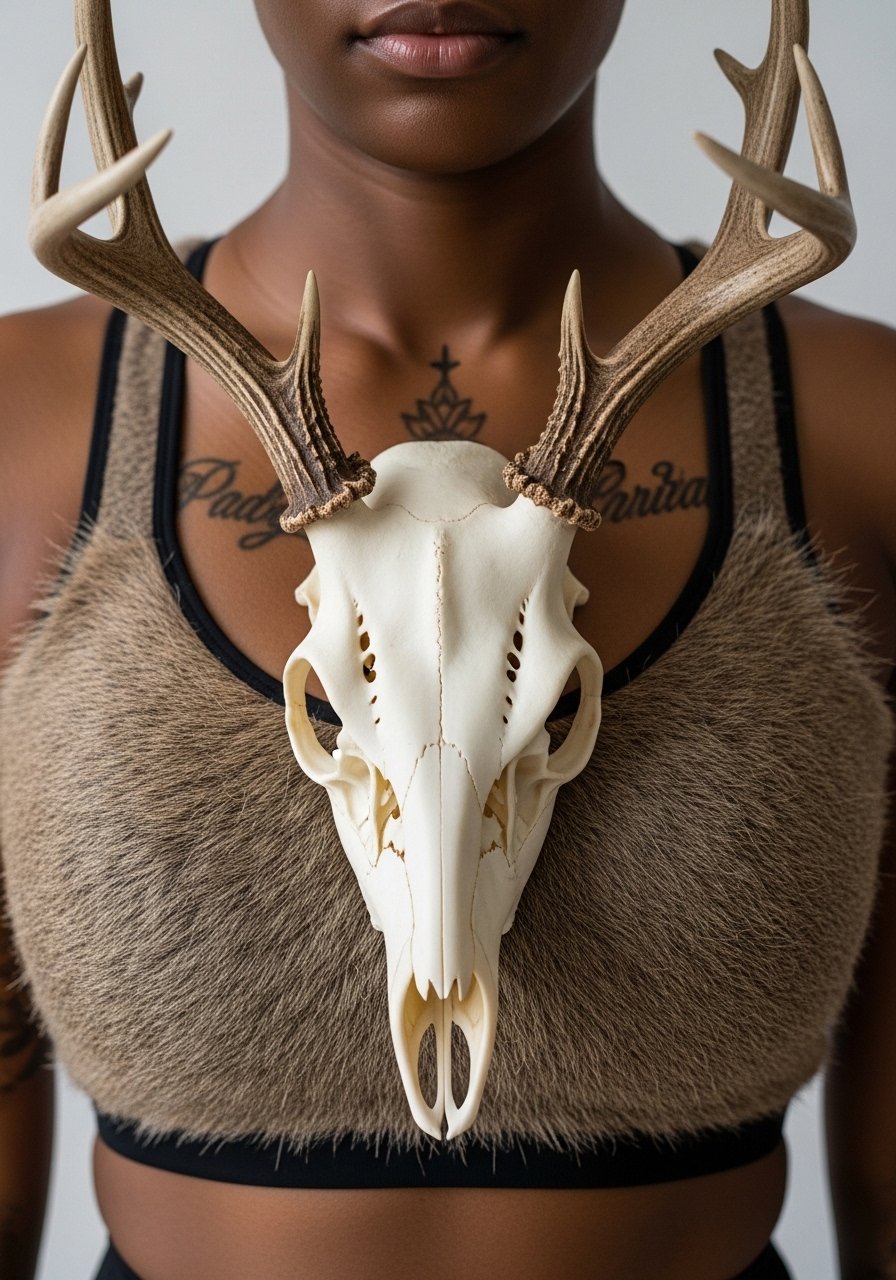
Chest pieces allow large-scale realism where bone cracks and fur illusions read with depth. Sessions are long and often split into multiple appointments. The common error is expecting photoreal detail in a single marathon without breaks. Plan staged sessions and trust a slower build. The sternum and upper chest can be tender, so expect higher pain tolerance demands. For the session wear a fitted sports bra so the artist can access the area without you being uncomfortable.
17. Abstract Linework Deer Skull on the Calf
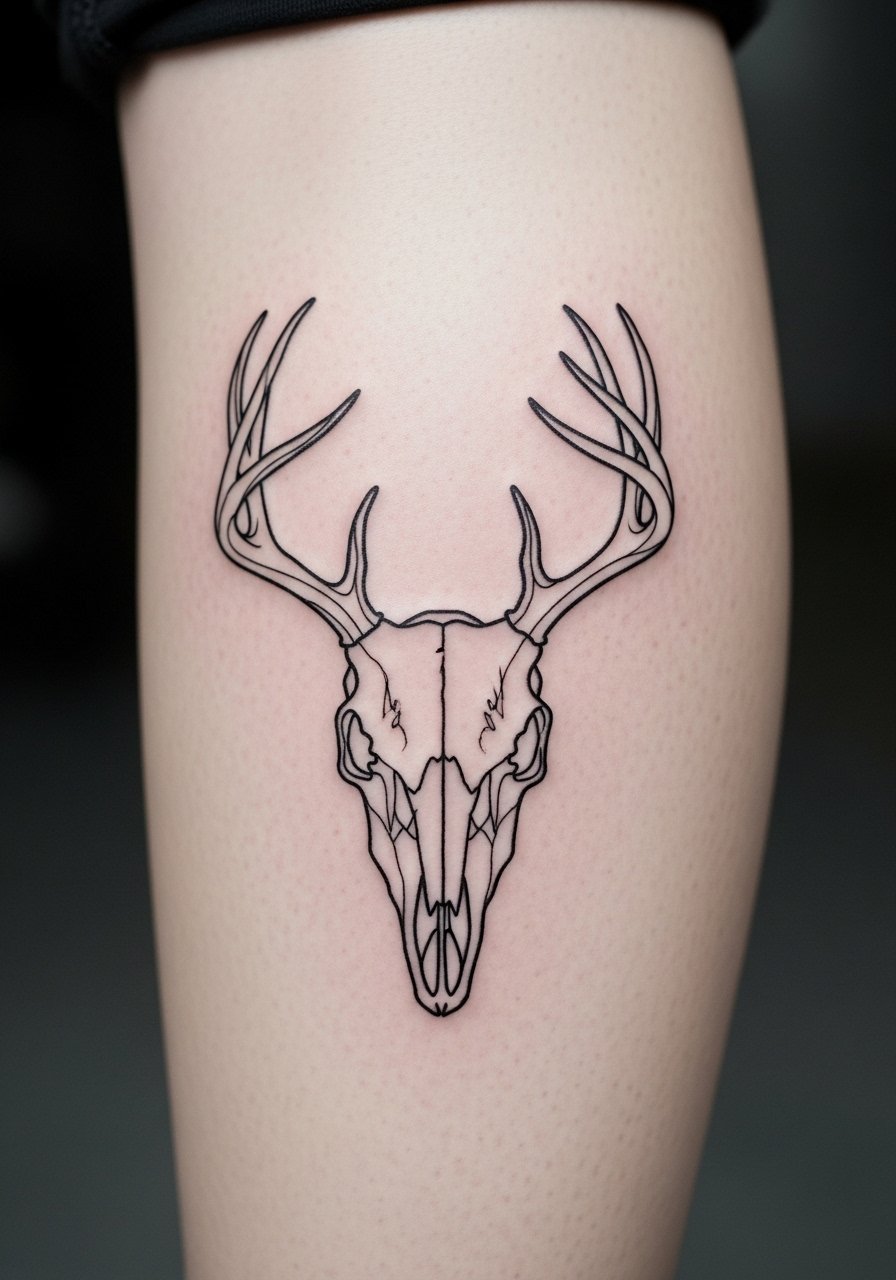
Calf placements are forgiving and visible in seasonal wear. Abstract linework relies on negative space and confident strokes. The mistake is making lines too thin when you want graphic impact. Sessions are moderate in length, often under an hour for small to medium pieces. Linework on the calf holds well because the skin is stable. For show-off outfits choose cuffed ankle jeans or a midi skirt to reveal the area.
18. UV-Reactive Mini Skull for Nightlife on a Finger Side
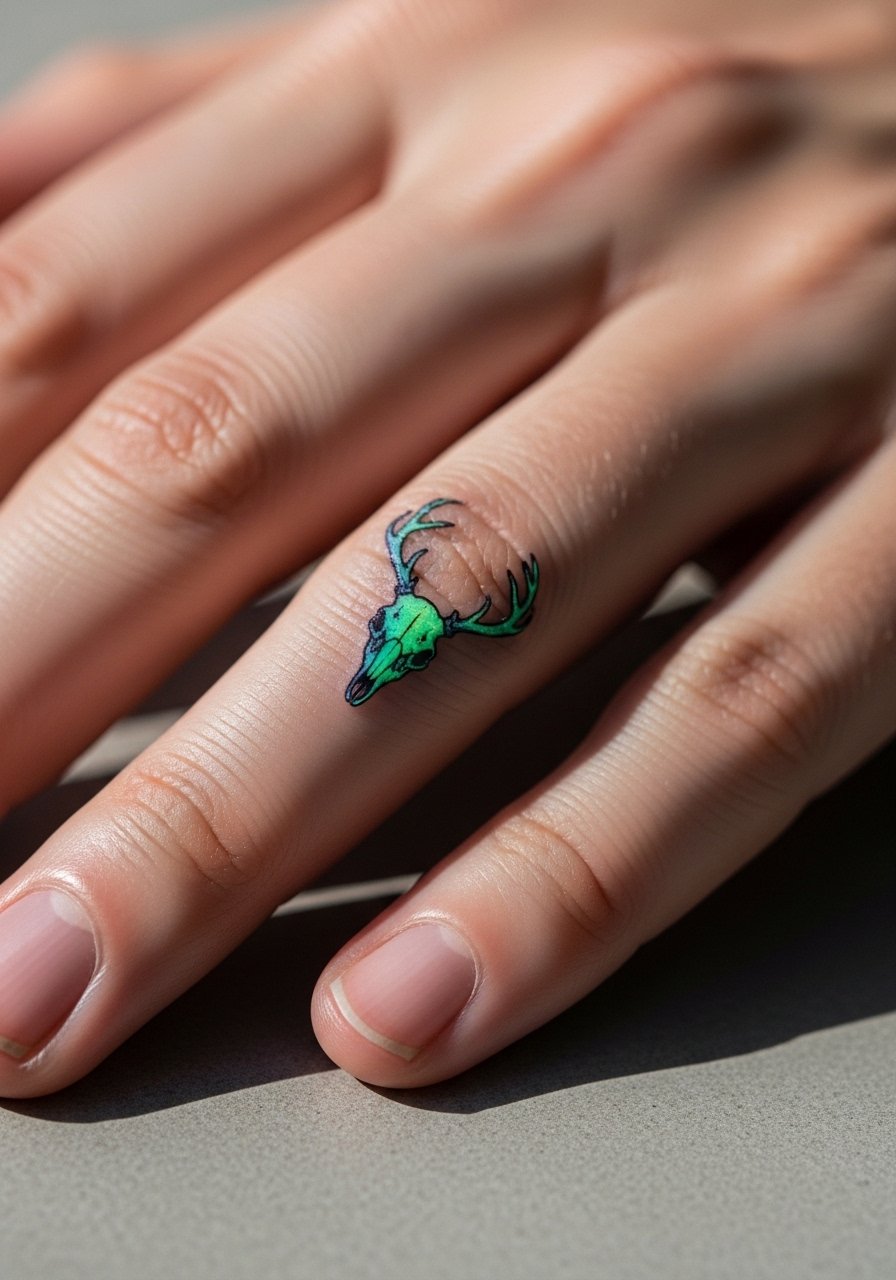
UV ink is experimental and often fades differently from black ink. The nightlife glow can be a fun accent but expect quicker fading and fewer artists who use UV extensively. The common mistake is treating UV as a replacement for black. It is an accent. Sessions are brief. If you go this route, check how the ink photographs under different lights and plan for frequent touch-ups. Finger placement adds a layer of maintenance, so budget time for refreshes.
19. Carved Bone Necklace Effect on the Collarbone

This idea mimics bone jewelry with delicate carving and small connecting elements. The collarbone works well because the piece sits where jewelry would. Pain and session time are moderate. The mistake is asking for ultra-fine chain links that sit too close to the bone and abrade during movement. Request slightly bolder connectors and room between elements. For showing it off layer with a pearl necklace layer or an off-shoulder knit.
20. Small Geometric Skull at the Outer Thigh
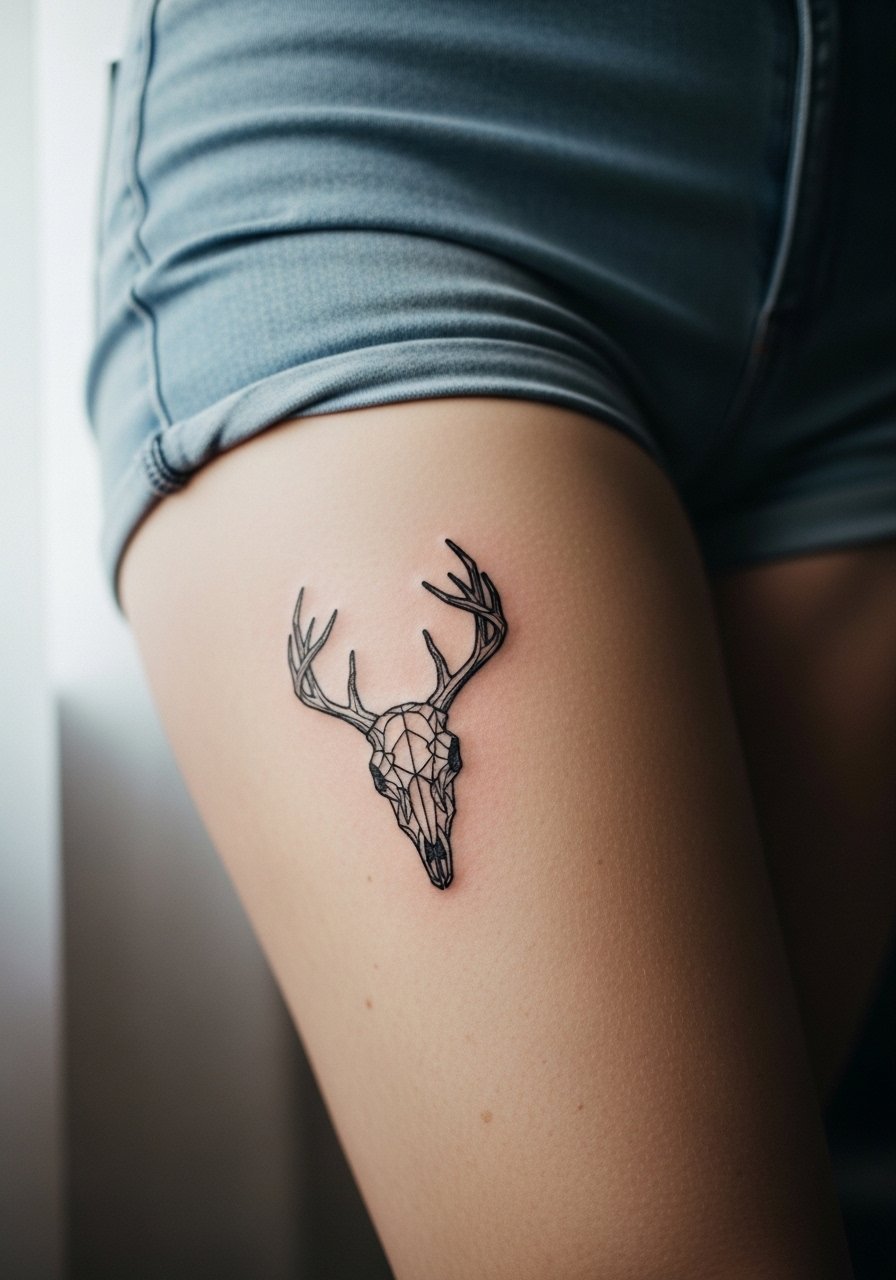
Outer thigh work is low friction and forgiving of bolder geometry. This placement is a safe bet if you want lines and dotwork to last. The mistake is compressing too much detail into a micro size. A modest 3 to 4 inch placement keeps geometry crisp. Sessions usually last 30 to 90 minutes depending on scale. For showing it off choose high waist linen shorts.
21. Micro Double Exposure Skull with Personal Landscape on the Forearm

This mini double exposure packs narrative into a smaller scale by simplifying the interior landscape to a silhouette. The big mistake is trying to cram a detailed vista into a tiny skull. Keep shapes bold and contrast strong. Sessions are 1 to 2 hours if you want two layers with clean edges. For consultation bring the specific landscape and say you want silhouette elements only so the interior does not become muddled. For the session wear a loose fit tank top so the artist can access the forearm without fabric drag.
Frequently Asked Questions
Q: Will a fine line deer skull on my wrist blur faster than one on my forearm?
A: In my experience the wrist is a higher-friction zone and fine single-needle work tends to fade faster there. The forearm has more stable skin and holds thin lines better. Ask your artist for slightly thicker anchor lines on a wrist piece and plan a touch-up around 12 to 18 months.
Q: How should I prepare clothing-wise for a collarbone or sternum session?
A: Wear something that exposes only the area you want inked. For collarbone pieces a strapless crop top or wide-neck shirt you can pull aside is ideal. For sternum work a fitted sports bra is a practical option. These choices keep the artist from adjusting clothing over your new ink while you sit.
Q: Are dotwork textures better on thighs than wrists?
A: Yes, dotwork usually holds up better on the thigh because the skin there has more surface area and less constant friction. Wrists and fingers are prone to blurring from movement and washing, so dotwork on small wrist pieces runs a higher risk of softening faster.
Q: If I have darker skin, how can I make a blackwork deer skull photograph better?
A: Ask your artist to plan for higher contrast with defined negative space and to avoid packing dense small dots that merge visually. Good studio lighting or a simple ring light helps with photos, and a quick retouch for social shots can show the detail without altering the healed reality.
Q: Are there different healing approaches I should consider for fine line versus bold blackwork?
A: Artists split on this. Some prefer a protective film for fine line pieces the first few days and then dry healing. Others favor keeping bold blackwork slightly moist in the early window. The safest move is to ask your artist how they handle each style and follow their protocol, since techniques can be style specific.
