
Fine line trends on Pinterest and ultra-saturated neo-traditional pieces on Instagram do not age the same. What looks delicate and breathy at the flash table often needs a touch-up sooner than the bold blackwork that headlines healing threads. If you want a Demon Slayer nod that still reads well in two years, plan placement, line weight, and a realistic touch-up window before you book. Start with designs that fit your lifestyle and wardrobe and the rest of these ideas will help you pick the right balance.
1. Nichirin Sword Along the Outer Forearm
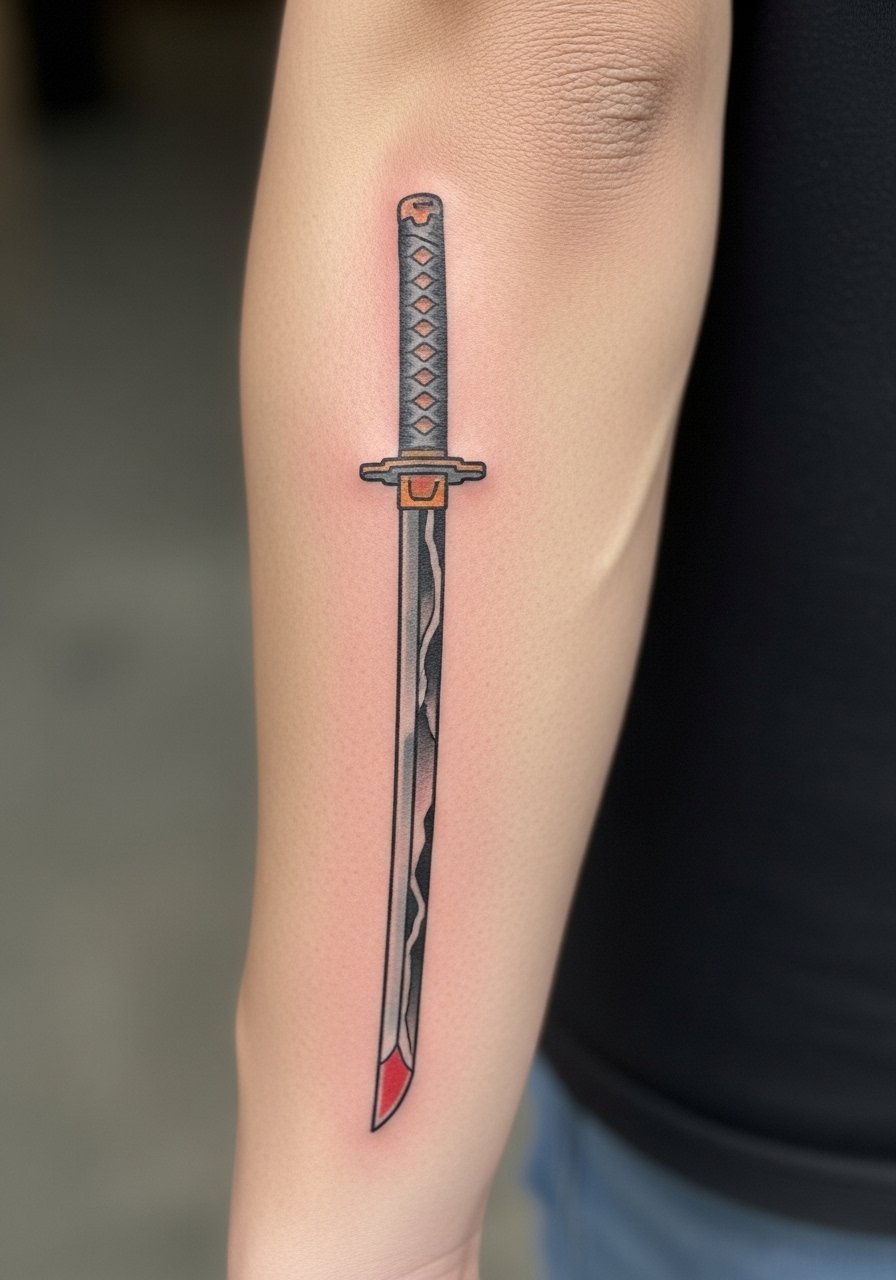
I have seen a dozen forearm sword pieces last through heavy wear when artists space the linework and boost saturation in the blade accents. Tell your artist you want a six to ten inch layout with slightly heavier outlines and color saturation in the blade so the blue or red remains visible after a year. Common mistakes include asking for ultra-fine filigree along the blade edge, which ghosts into a gray line by year two. Expect a tolerable session for the outer forearm and plan a one-session layout with a possible touch-up at six to twelve months. For showing it off, pair this with a fitted black t-shirt and rolled sleeves so the blade reads clean from a distance.
2. Hanafuda Earrings, Minimal Behind-Ear Outline

Artists split on small ear-area work. One camp says tiny fine line behind-ear tattoos blur quickly because of skin movement and hair friction. The other camp argues that with careful depth and a slightly bolder outline the design settles fine. If you like a subtle nod without a statement piece, ask for a slightly thicker outer line and a single-session plan. Watch out for stencil placement where hairlines meet skin. The session feels quick but sensitive, and the real risk is rubbing during healing. For the appointment wear a loose-collared shirt that keeps hair away from the area and lets the artist work clean.
3. Water Breathing Wave, Inner Bicep Blackwork

Fair warning, the inner bicep can be a tender zone during long sessions. It also flexes with movement so spacing matters. Opt for bold black lines and negative space to preserve the flow of the wave over time. Tell your artist to scale the wave so dense black areas have breathing room or they will merge as the skin ages. Typical mistakes include cramming stipple shading into a tiny area, which softens into a gray patch. Sessions run one to two hours depending on size and you will want loose clothing like a sleeveless muscle tank to keep the arm accessible during the appointment.
4. Nezuko Bamboo Guard with Ribbon on the Collarbone
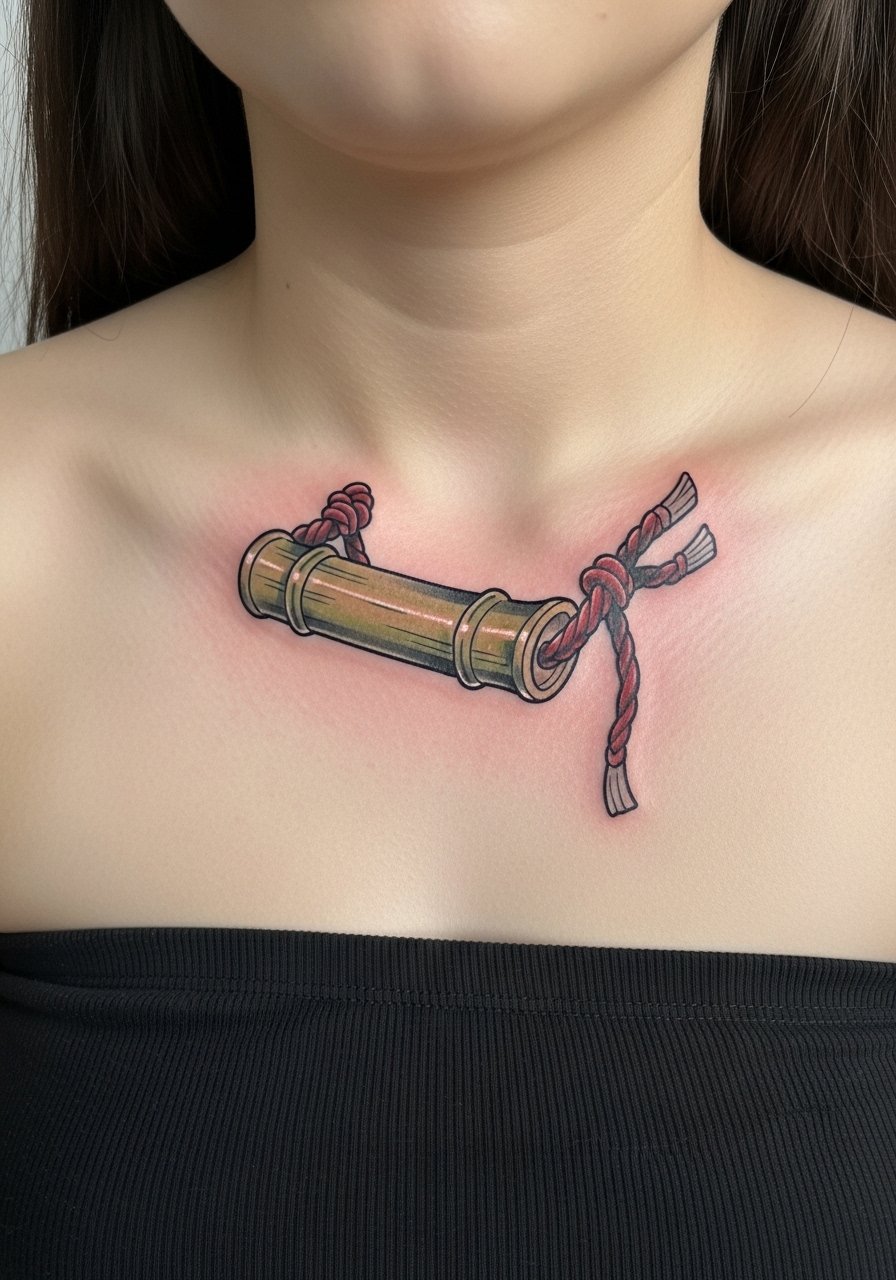
I've seen collarbone designs hold well when the artist avoids tiny interior lines. For the bamboo guard, ask for a slightly simplified ribbon and a single bold contour around the mouthpiece. The most common regret is asking for too many delicate inner lines that blur into a single tone after a year. Collarbone work turns bright when you pick colors carefully and avoid tiny text nearby. Pain is moderate but short lived and you should expect one session. For showing it off, a strapless black crop top frames the area without distracting from the illustration.
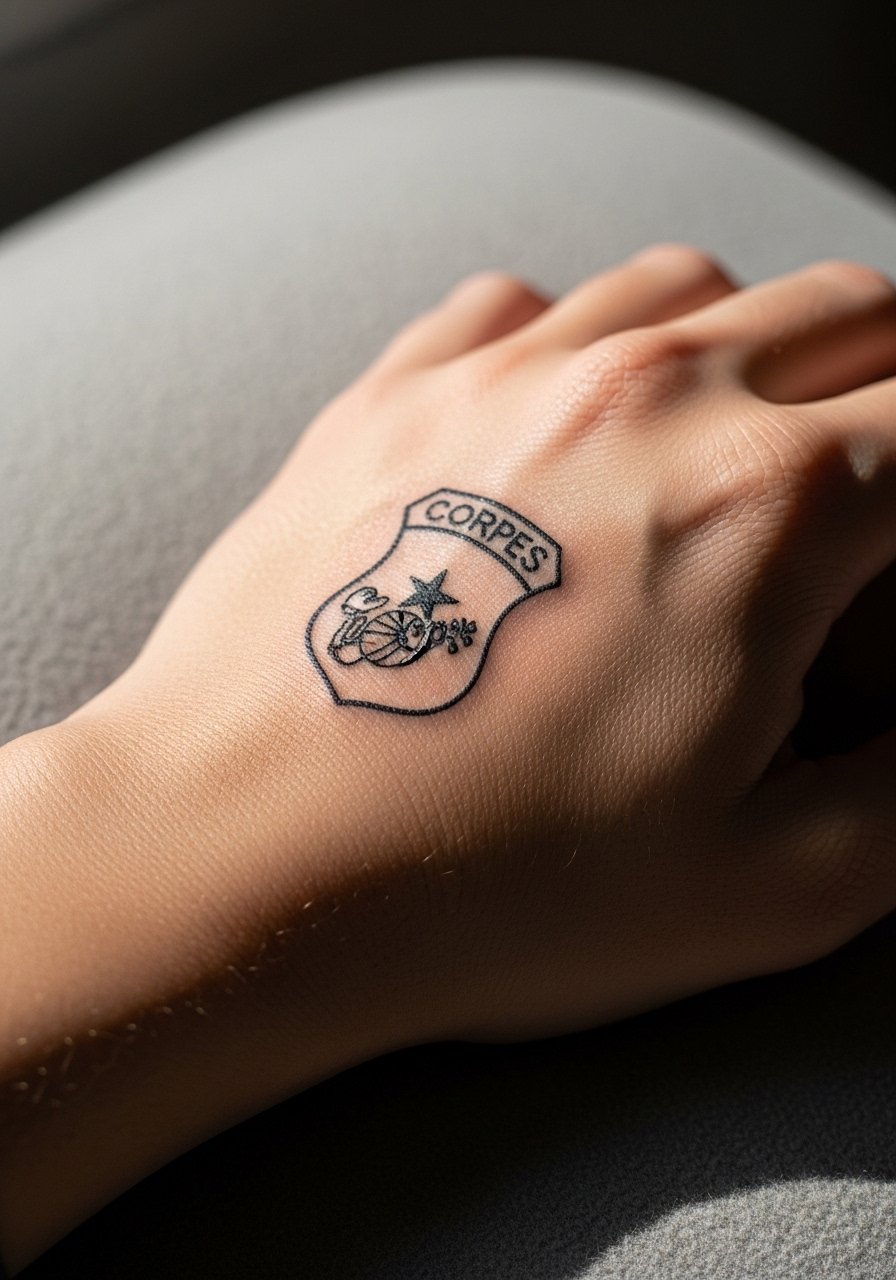
5. Corps Badge Crest on the Wrist or Back of Hand

Wrist and hand placements are high-contact zones that test fine detail fast. If you want the crest to last, ask for a pared-back silhouette rather than tiny internal flourishes. The common mistake is matching the reference at a small size with the same thin lineweight, which fades unevenly. Expect higher touch-up need at six to twelve months for finger or hand-adjacent designs. Hand sessions feel sharp but short. Pair the piece with a thin silver chain bracelet on the opposite wrist so attention balances without crowding the badge.
6. Kyojuro Rengoku Fiery Mask on the Calf

There's something about saturated flame work on the calf that keeps its punch in photos and in person. Calf skin tolerates saturation and color retention better than some other spots, but avoid tiny crosshatching inside flames. Ask for strong color saturation and a slightly larger scale so the oranges read as color rather than a wash. Sessions run longer because of color packing and you should budget for two visits for larger masks. For summer reveals, slim jogger pants rolled at the ankle or high top sneakers pair well for casual showing.
Studio Day Picks
The six pieces above include wrists, forearms, collarbones, and calf work, so a short kit helps both session comfort and early healing.
-
Tea tree tattoo salve. A lighter alternative to thick balms that can help the early week for color pieces on the calf and collarbone without feeling greasy.
-
Indie second-skin patches. Breathable film that sticks better on curved forearms and avoids the bubbles some people see with larger sheets.
-
Japanese rice bran balm. Non-greasy option for tiny fine line work behind the ear and wrist pieces so details do not smear while healing.
-
UK hempseed aftercare oil. Lightweight oil that soothes areas prone to dryness like the inner bicep between sessions.
-
Aquaphor healing ointment. Handy for the first few days on high-friction spots like hand and wrist pieces when used sparingly per artist guidance.
7. Infinity Castle Geometric, Spine or Ribcage Placement

Most people do not realize how the spine and ribs move with breathing. For a maze-like geometric pattern pick spacing that lets each angle sit alone instead of cramming lines together. Artists split on fine work for ribcage pieces. One camp says the skin stretch makes fine line blur quickly. The other camp says with correct needle depth and spacing it can last. When you consult, ask your artist which approach they use and why. Expect the session to be more painful on ribs but the result is dramatic and private. If you plan cosplay reveals bring a racerback tank for easy showing and comfortable healing in the shirt’s shoulder area.
8. Inosuke Boar Mask Micro-Realism on the Upper Arm
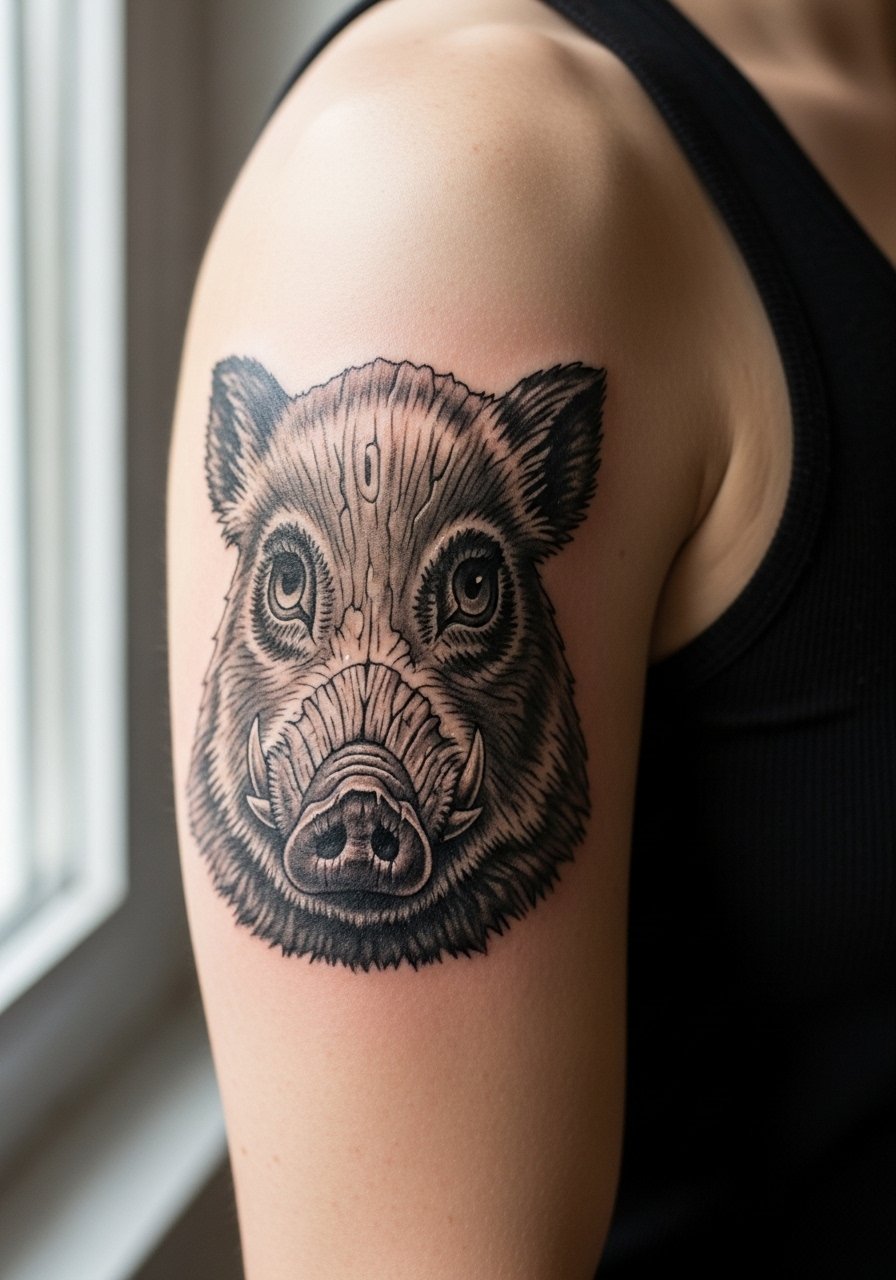
There is a wild energy to micro-realism that reads best at a slightly larger scale on the upper arm. Ask your artist for strong contrast and stipple shading rather than soft, low-contrast fills. A common mistake is pushing for photorealism at a tiny size, which muddies in a year. Upper arm tissue holds ink well, so one to two sessions usually delivers a solid portrait. The session feels like steady work with occasional sensitive spots near the tricep. For revealing the piece, a sleeveless muscle tank keeps the silhouette clean and lets the realism stand on its own.
9. Sun Breathing Mandala on the Shoulder Blade

Ornamental circles on the shoulder blade age well when the design includes breathing room between concentric elements. Tell your artist to scale the mandala to three to five inches for longevity, and to favor dot work and stipple shading over tiny hairlines. A common mistake is packing a full mandala into a two-inch circle, which softens into a blur as the skin settles. Shoulder blade work is low on pain and high on show-off potential. For events, wear a racerback tank or open-back top to let the mandala breathe visually.
10. Muzan Flower Curse Mark on the Inner Wrist
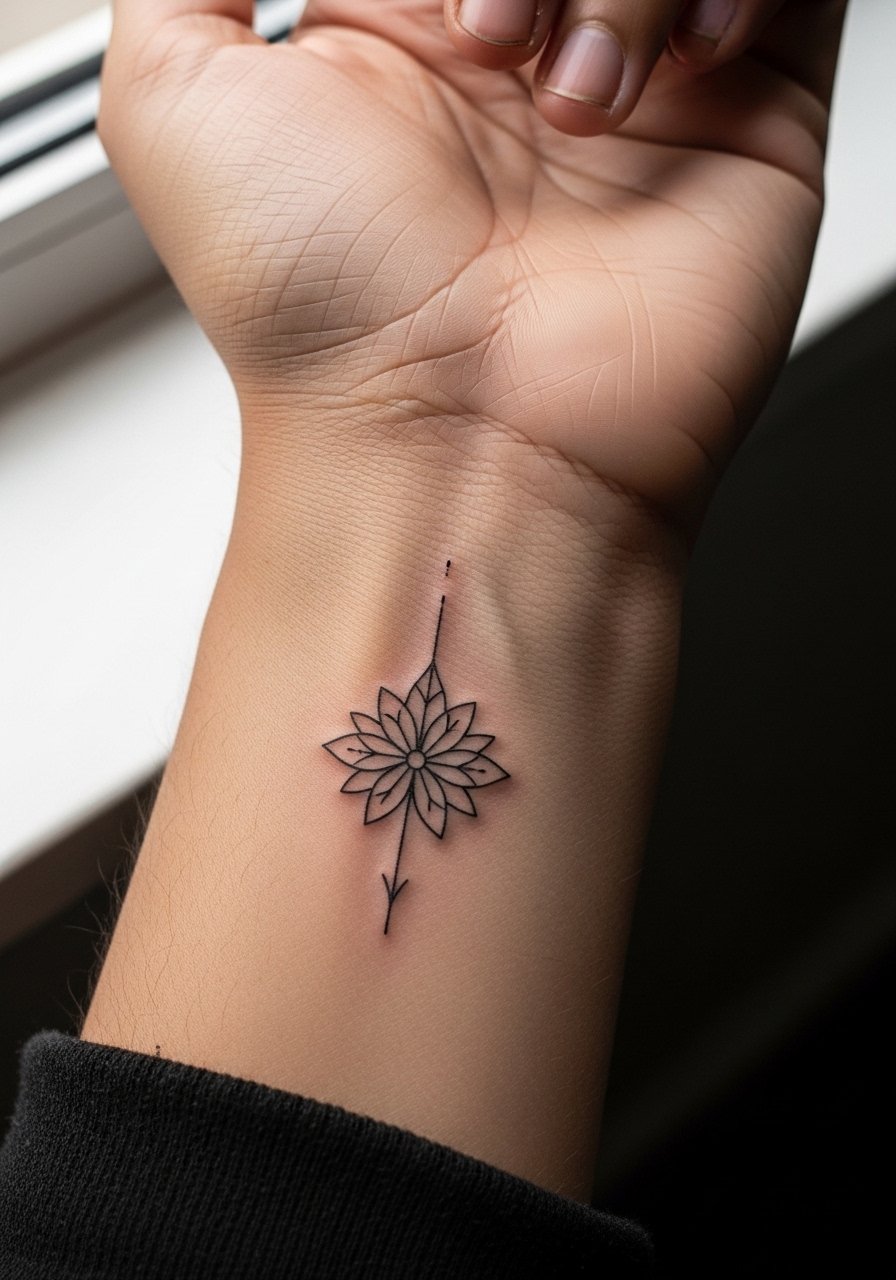
Wrist placement shows immediately but also feels daily friction from washing and watches. For a villainous small mark, choose a bold outline with simplified inner details so the motif holds. The usual error is demanding minute filigree inside a two-inch area. Expect the first year to require a touch-up if you wear a watch or bracelets regularly. The session is quick and would be the least painful pop on the wrist. Style it with a minimalist cuff watch on the opposite wrist for balance and to avoid rubbing the healed area.
11. Hashira Kanji Script Along the Forearm

A forearm script can look elegant for months but reads poorly if letters are too thin. When you bring kanji references, ask the artist to scale each character and keep strokes slightly thicker than a calligraphy line. The common mistake is applying the photo-sized reference directly, which reduces legibility over time. Expect one session for a four-inch script. Tell your artist you want touch-up availability within the first year. For everyday wear, rolled sleeves and a fitted black t-shirt pair cleanly with forearm text without drawing attention away.
12. Zenitsu Thunderbolt Scar on the Chest or Torso

Fair warning, chest placements shift with body changes and workouts. The faster, zigzag style reads best with a bolder outline and a single-color fill. The controversy about Saniderm versus dry healing comes up in chest work because chest sessions often get bandaged for longer. One camp praises protective films for preventing hard scabs, the other warns that they can trap moisture and blur delicate lines. Ask your artist which protocol they follow for larger torso pieces. Sessions feel like long, steady passes. For the appointment, a loose button-down shirt you can pull aside keeps access simple and clean.
13. Back-of-Hand Mini Corps Badge for Glove-Off Moments
Hand tattoos still carry workplace considerations and higher friction. The back of the hand can look great fresh, but expect faster fading and potential touch-ups. If you want this revealable piece, ask the artist to simplify negative space and boost the outer contour a touch. The biggest mistake is treating the hand like a low-wear surface. Sessions are brief but feel sharp. If you need a subtle reveal for cosplay or costume gloves, plan for an annual touch-up to keep the badge crisp.
14. Ribcage Infinity Castle for Concealed Lore Fans

Ribcage pieces are intimate and age differently than arm work. For complex geometry, scale the pattern so each corridor has clear negative space. Artists disagree on fine line ribs. One camp says the stretch and skin texture do not favor ultra-fine work and that lines merge. The other camp says expert depth control and spacing avoid that issue. Bring references that show the exact line weight you prefer and ask how they handle ribs specifically. The session is painful and long but the hidden payoff is a private piece that reads sharp when you choose to reveal it. Consider temporary metallic stencils first to test how the curves look on your body.
15. Temporary Metallic Stencil Test for Calf and Curve Areas

This is a practical step I rarely see recommended. Use a metallic or temporary stencil to test how a linear scar or lightning bolt sits on curved zones like calves or outside thighs. In a consultation ask the studio if they can apply a temporary transfer and then wear your normal shoes and pants for a day to see how friction and clothing interact. The mistake is skipping this test and committing to a shape that looks awkward when you walk or squat. For the session itself, bring athletic shorts so the artist can roll the leg up without fabric tugging.
16. Cosplay Pairing: Tattoos Designed to Pop at Cons
A small but overlooked idea is designing tats to complement cosplay outfits. Think about how jackets, gloves, and props will frame the ink at conventions. Bring costume photos to your consult and ask the artist to place motifs where fabric will slide off during panels. A common regret is placing a showpiece under a sleeve that never comes off during events. The session itself is normal for visible spots like forearms. If you travel for guest spots use community hashtags to find an artist familiar with cosplay timing and healing schedules.
17. Tiny Sun Breathing Mark on the Back of the Neck

Neck placements are visually strong and sensitive. For a small sun symbol, pick clean radial spacing and a slightly bolder outer ring to avoid early merging. Common mistakes are tiny inner filigree and dense dot fills that blur with neck motion. Sessions are quick but the area is exposed, so plan clothing that keeps friction low while healing. For showing the back neck at events a wide-neck shirt or low collar works well and keeps the area comfortable in the chair.
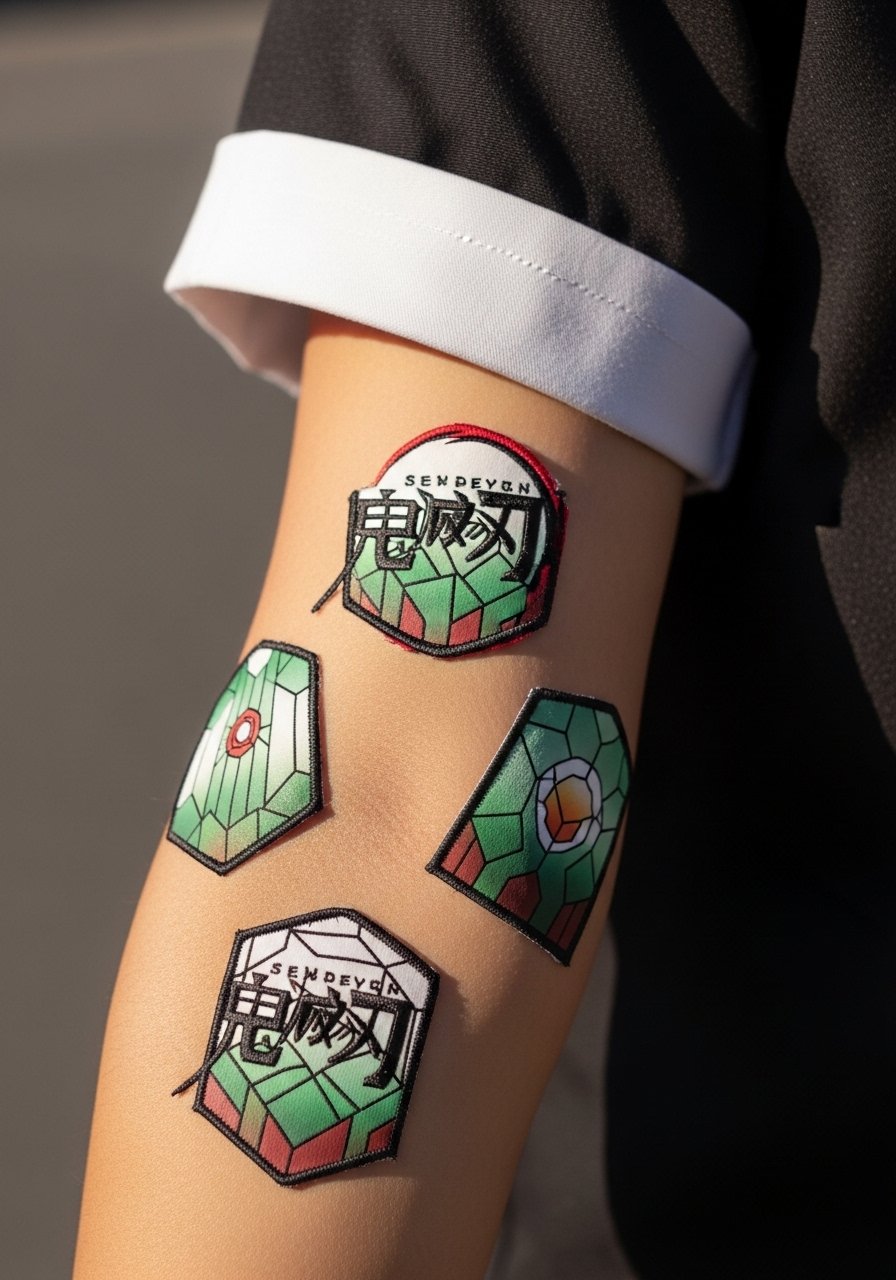
18. Patchwork Sleeve with Corps Badges and Flash

Mix-and-match patchwork sleeves let you stitch Demon Slayer elements into an existing anime sleeve without visual chaos. The key is to coordinate line weights so badges, swords, and small portraits share a common scale. Tell your artist which pieces you want prioritized so the layout balances when you add new flash later. A typical mistake is mixing thick neo-trad portraits with whisper-thin linework badges. Expect multiple sessions and plan for touch-ups as you expand. For casual reveals, rolled sleeves and an olive cargo pant silhouette keep the sleeve readable and cohesive.
19. Micro Hanafuda on the Side of a Finger
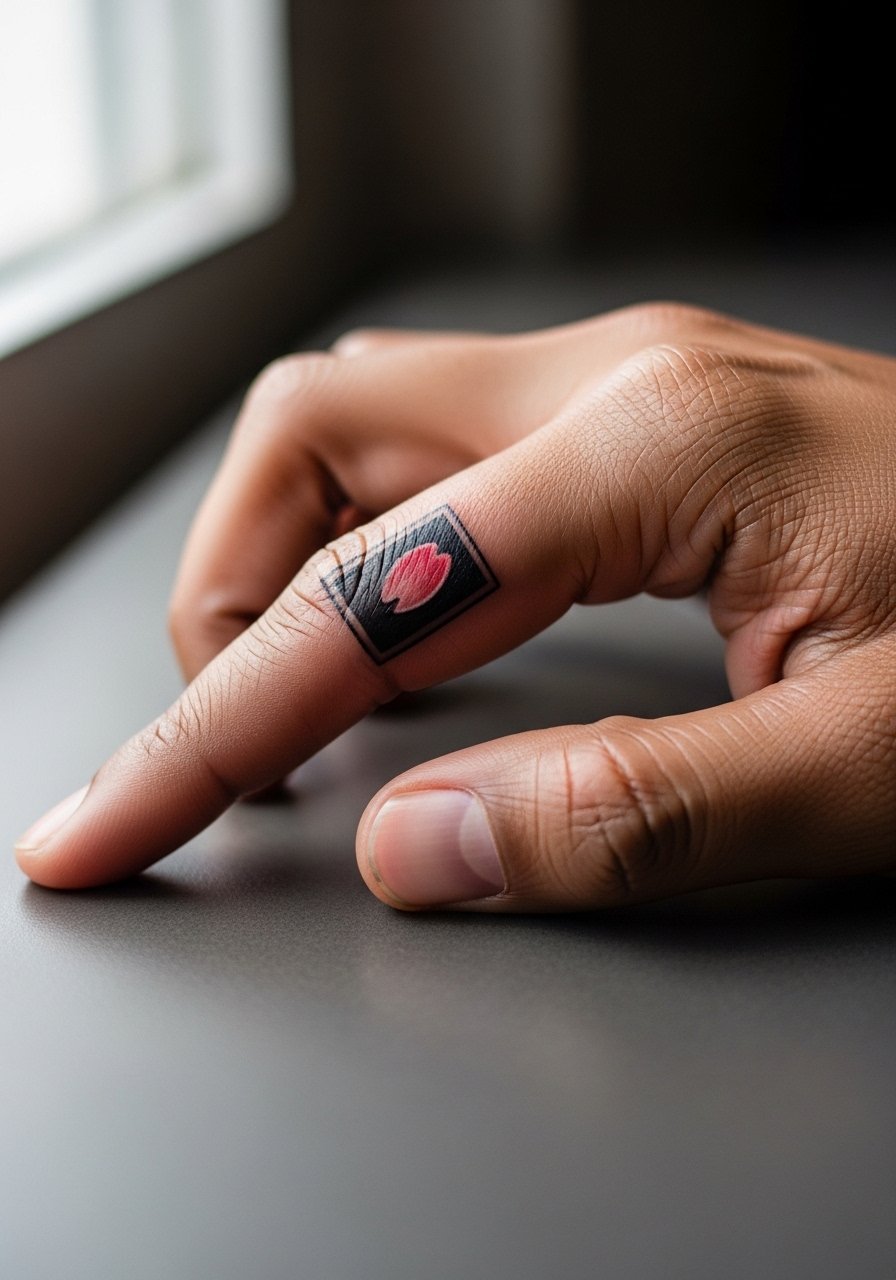
Finger placements carry their own rules. The skin is thin and regenerates fast so fine detail fades quickly. If you want a Hanafuda icon on a finger, choose a simplified silhouette with a strong outer edge and expect touch-ups within a year. The common mistake is attempting intricate shading on a narrow, high-wear surface. Sessions are short but the first week requires care because washing and hand use are inevitable. Some shops will advise against fingers if you need the piece to be low-maintenance long term.
20. Zenitsu Lightning, Bold Thigh Blackwork

Thigh canvas gives room for bold linear shapes that age gracefully with minimal touch-ups. For a thunderbolt pick thick lines with negative space and avoid tiny interior hatch marks. The mistake is reducing the motif to a skinny zigzag that stretches and softens with body changes and exercise. Pain is moderate and sessions are easy to manage with breaks. For summer showing wear high-waisted shorts or high waisted denim shorts that reveal the area without tight seams are a practical choice.
21. Rengoku Flame Accent, Calf and Forearm Mini Packs

If you want color accents that can be mixed across body zones, put them on the calf and outer forearm where saturation holds. Tell your artist to match pigments across sessions to avoid slight hue shifts. Common errors include using different ink lots and expecting a perfect color match across separate days. Sessions involve color packing so expect longer visits. For ease during sessions and reveals, slim jogger pants rolled at the ankle or a fitted black t-shirt work well and create a cohesive visual when you show both placements.
22. Muzan Portrait in Black and Gray on the Upper Back
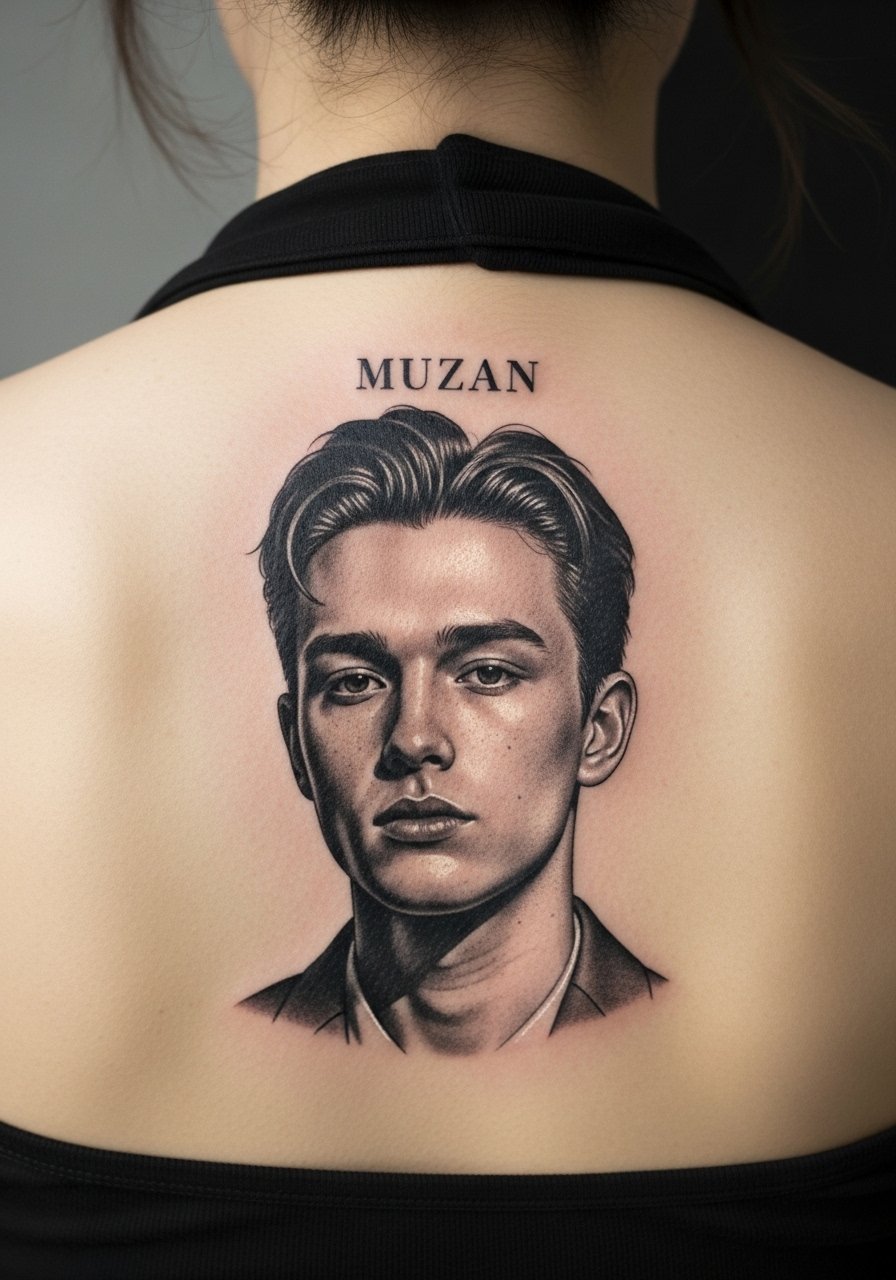
Upper back portraits can be dramatic and less exposed to daily rubbing than forearms or hands. For villain portraits pick strong contrast and avoid overly soft midtones that can muddy at five years. A common mistake is asking for the smallest possible photoreal piece where the skin texture translates poorly. Sessions are long but not intensely painful. For events the piece pairs well with a backless halter top that reveals the portrait for cosplay or formal wear.
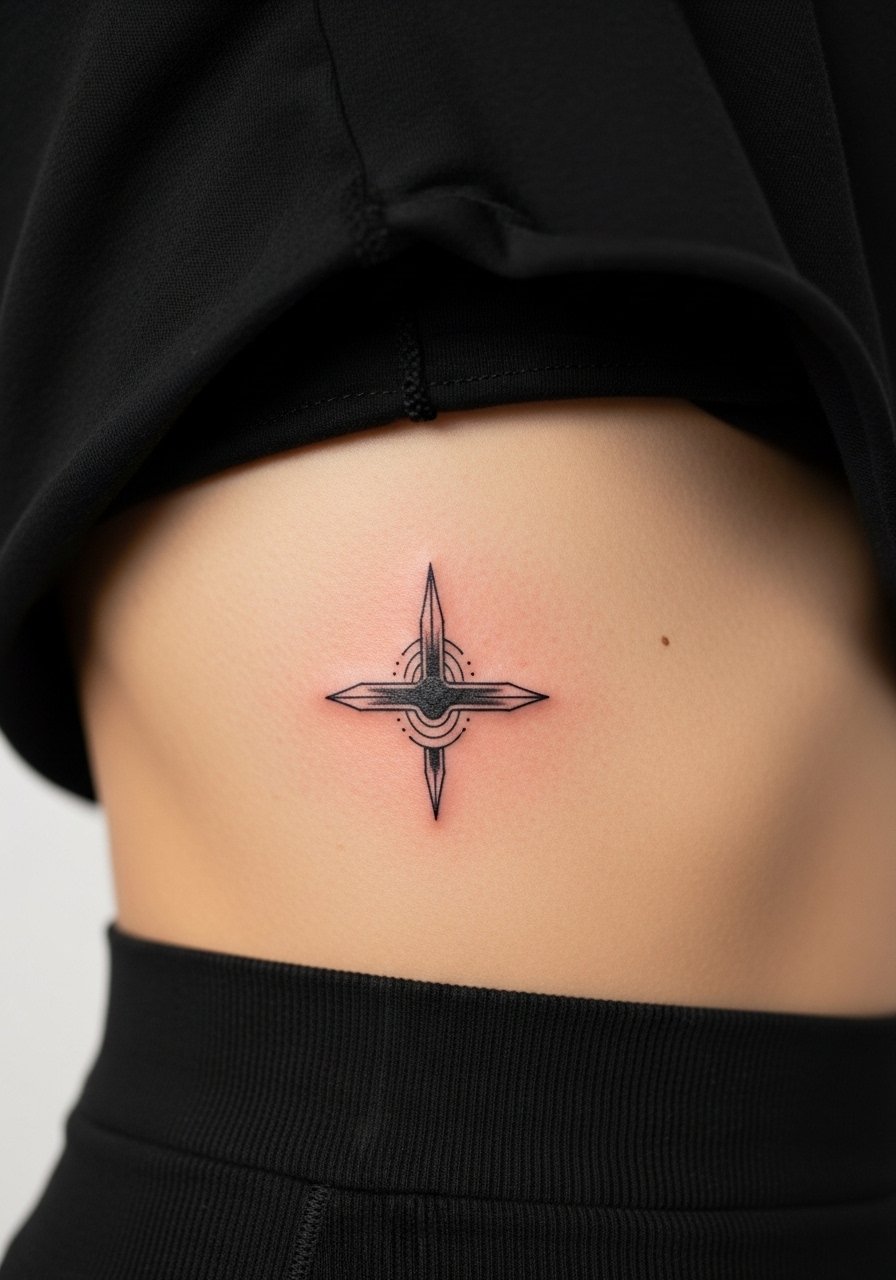
23. Shoulder Cap Sun Symbol, Small and Geometric

The shoulder cap accepts crisp small geometry when you keep spacing clear. Ask your artist to use dot work for shading and to avoid tight crosshatching. A common mistake is packing tiny rays that touch and merge later. Sessions are short and the area tolerates a bit more pressure. For casual showing a sleeveless muscle tank keeps the shoulder silhouette clean and puts the symbol front and center without competing layers.
24. Water Breathing Wave Wrist Band
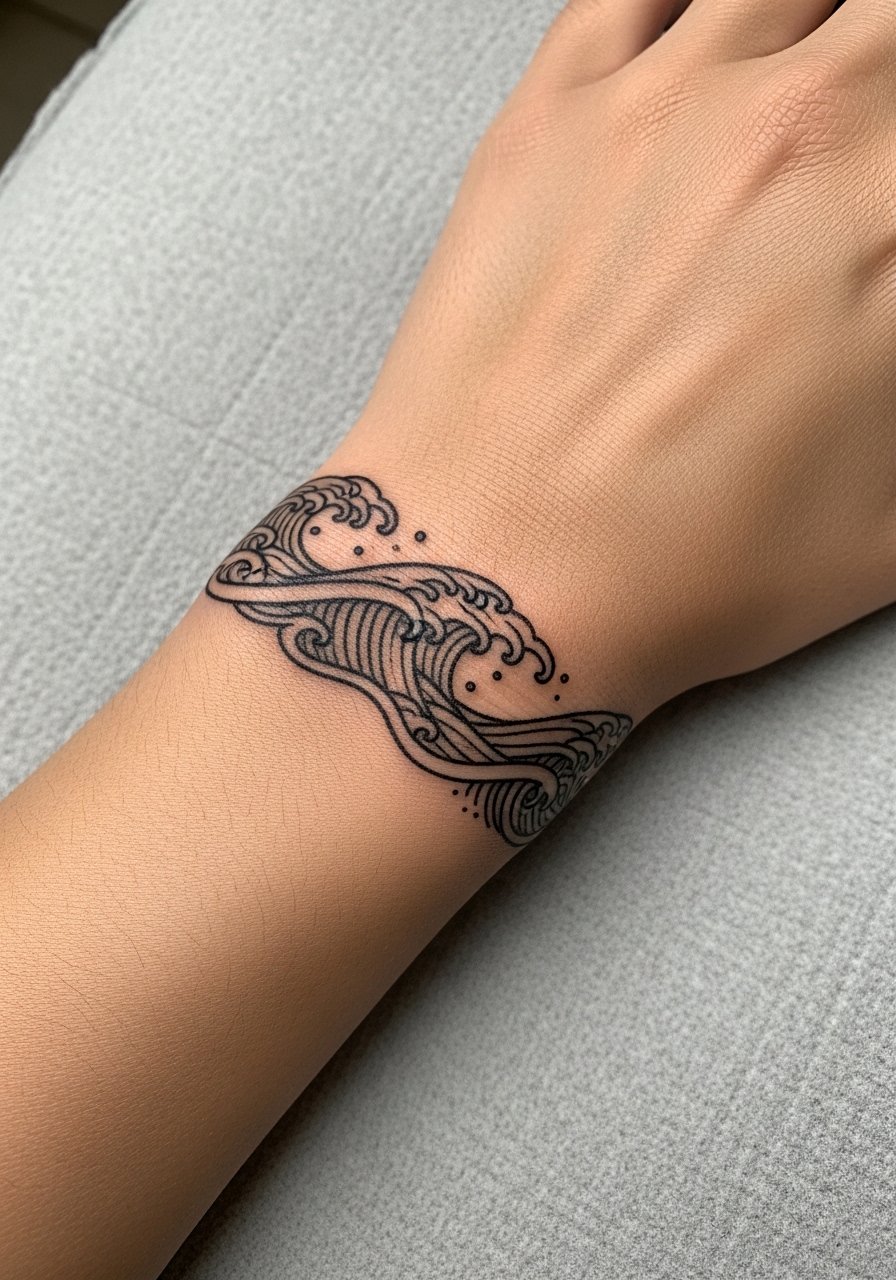
A wrist band that wraps neatly around the wrist can be striking but it lives in a friction hotspot. The trick is to ask for slightly thicker edges and to avoid tiny interior dots that blur. Common pitfalls are trying to cram a full wave scene into a narrow band width. Expect touch-ups sooner than forearm pieces because of constant hand washing and bracelets. For keeping the area visible without crowding try a thin silver chain bracelet on the opposite arm.
25. Tiny Boar Mask on the Ankle

Ankle placements are great for small portraits if you simplify facial textures. The small boar mask should favor silhouette and contrast over tiny fur detail. Common mistakes include insisting on high-detail micro-contrast at a size that does not support it. Sessions are quick and feel sharp near the bone. For comfort and showing, high-top sneakers or rolled jeans look intentional and keep pressure off the new ink during the first week.
26. Spine Sun-Breathing Column in Dot Work
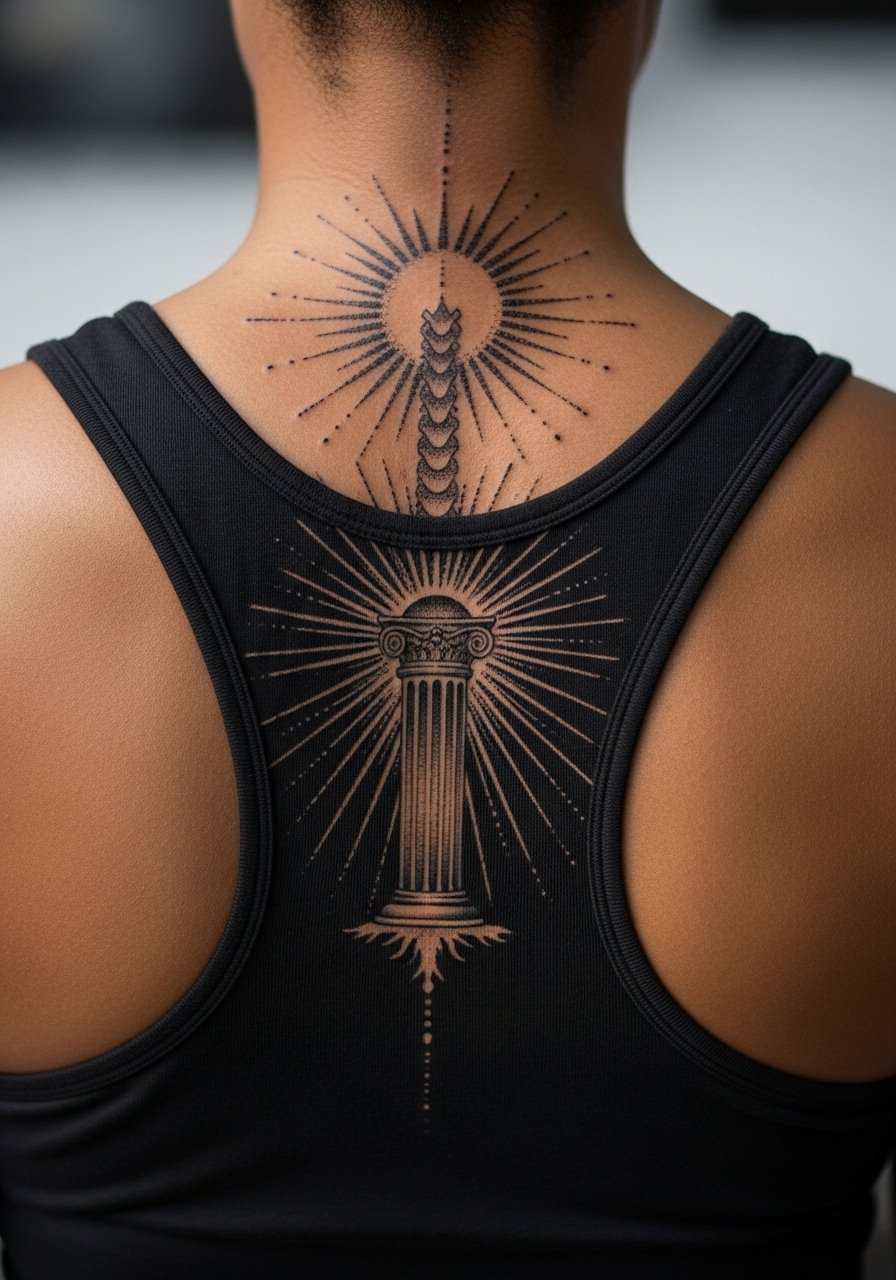
Spine columns look architectural but they need spacing so the dot work does not merge over time. Tell your artist you want room between elements and moderate dot density. The mistake is compressing too many dots into narrow bands. Sessions can be long and the spine is a sensitive area, so breaks are normal. For showing the spine at events a racerback tank keeps the area visible while limiting rubbing from straps.
27. Micro Nichirin Blade on the Rib Side
Rib-side micro blades can look striking if you scale up slightly from the reference and favor a clearer outline. The usual error is trying to preserve ultra-fine detailing in a tight panel on moving skin. Expect a painful but short session and plan for some swelling in the first two days. This location is sensitive to weight changes, so if you foresee significant fluctuations ask how the artist would adapt the layout. Temporary metallic stencils can be very helpful here to preview the fit on your curves.
Frequently Asked Questions
Q: Will fine line Hanafuda earrings fade faster than a neo-traditional Nichirin sword?
A: In my experience fine line behind-ear or finger pieces show fading sooner than saturated neo-traditional forearm work. Fine line can look gorgeous fresh but often needs touch-ups around year two to three. If longevity matters, ask your artist to use a slightly heavier outer line and plan a touch-up window.
Q: How should I prep for a calf or thigh color session to protect pigment retention?
A: Hydrate the skin in the weeks before the appointment and avoid sunburn on the area. Wear loose shorts or joggers so the artist can access and you can roll fabric without friction. Bring snacks for multi-hour color packing sessions and follow your artist’s film or dry-heal preference right after the session.
Q: Does ribcage work need a special aftercare plan compared with wrist pieces?
A: Ribs often scab differently because of breathing motion and clothing contact. Follow your artist’s protocol and be prepared to sleep in positions that avoid pressure. If you plan on secure film for the first 24 to 48 hours discuss the Saniderm versus dry-heal debate with your artist so you both pick one consistent approach.
Q: Can I combine blackwork breathing patterns with colored Hashira flames in a single sleeve?
A: Yes, but keep shared spacing and matching line weights in mind. Ask the artist to plan transition panels so blackwork elements do not visually overpower the color patches. Expect multiple sessions and color-matching conversations.
Q: How do I find a traveling or guest-spot artist who does Demon Slayer pieces without naming specific accounts?
A: Search city hashtags like #AnimeTattoo plus your city on TikTok or Instagram and filter portfolios on Tattoodo. Community threads on r/tattoos often list recent guest spots. Bring clear references and ask about cancellation and deposit policies before booking.
Q: Are there wardrobe tips to keep colors bright while my tattoo heals?
A: Avoid tight waistbands and high-friction fabrics adjacent to the new tattoo. For sessions on thighs or calfs bring loose athletic shorts. For collarbone or sternum work wear a wide-neck shirt or strapless top to minimize fabric rubbing during the first two weeks.
