
Fine line tattoos dominate boards right now, and the artists who do them well know the real trade-offs. The pieces that still read crisp after several years usually start with slightly bolder linework and deliberate spacing, not feather-light strokes that look fragile the first week. Read through these stencil-friendly ideas and you will get designs that look good fresh and still read clean after a few seasons in the sun.
1. Fine Line Arrow on Inner Forearm

I've seen this stencil more than any other at walk-in tables. It is simple but the one that ages well uses a slightly heavier shaft and a clear spacing between feather details. Tell your artist you want clean single-needle linework with a touch-up planned at year two, and ask them to mark the exact length on your arm during consultation. Fair warning, the inner forearm is forgiving for linework but still shows fade where UV hits. For showing it off, wear a rolled-sleeve linen shirt in neutral tones so the arrow reads against the skin.
2. Micro-Realism Wolf Head on the Bicep
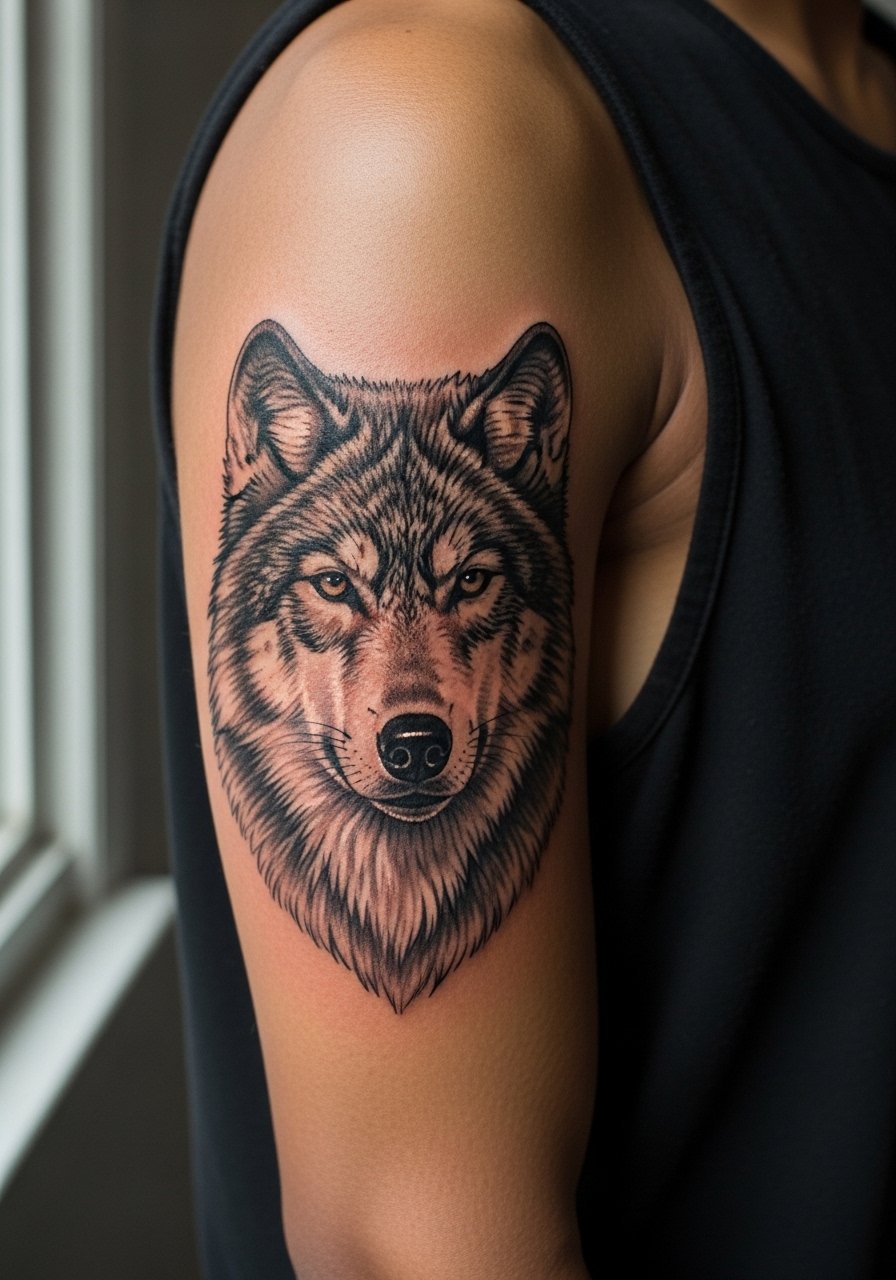
This stencil works best as a small, framed patch rather than a packed full sleeve element. Ask for stipple shading and micro-contrast instead of heavy saturation. The bicep's muscle changes mean the piece can look slightly tighter when you flex, so decide on scale in the chair with the stencil positioned while your arm is relaxed. Sessions are usually one to two hours for a small micro-realism piece and expect a touch-up by year three if you spend lots of time outdoors. Pair the bicep piece with a sleeveless denim jacket for nights out so the art stays visible without competing prints.
3. Traditional Matchstick with Flame on the Wrist

This small flash stencil reads instantly because traditional saturation and bold outlines hold up. On the wrist, blowout risk is low if the lines are given room and the artist uses slightly thicker needle grouping. Tell your artist you want solid black outlines with a single pop color and that you plan daily sunscreen after healing. Session time is short but the wrist sees friction from watches and sleeves, so touch-ups at year three are common. For showing it off, a minimalist leather strap watch frames the matchstick without crowding the artwork.
4. Botanical Wrist Band Cluster

A wrist band made of leaves and tiny blooms works as a stencil that can be scaled or repeated. The mistake is packing too many tiny details into the band. Ask for negative space between leaves and light stipple shading so the band breathes over time. The wrist is a high-motion, high-wash area so expect some softening by year two and a likely touch-up then. For evening wear, layer a thin chain bracelet beneath the band so the tattoo peeks without being hidden by heavy jewelry.
5. Geometric Dot Mandala on the Calf
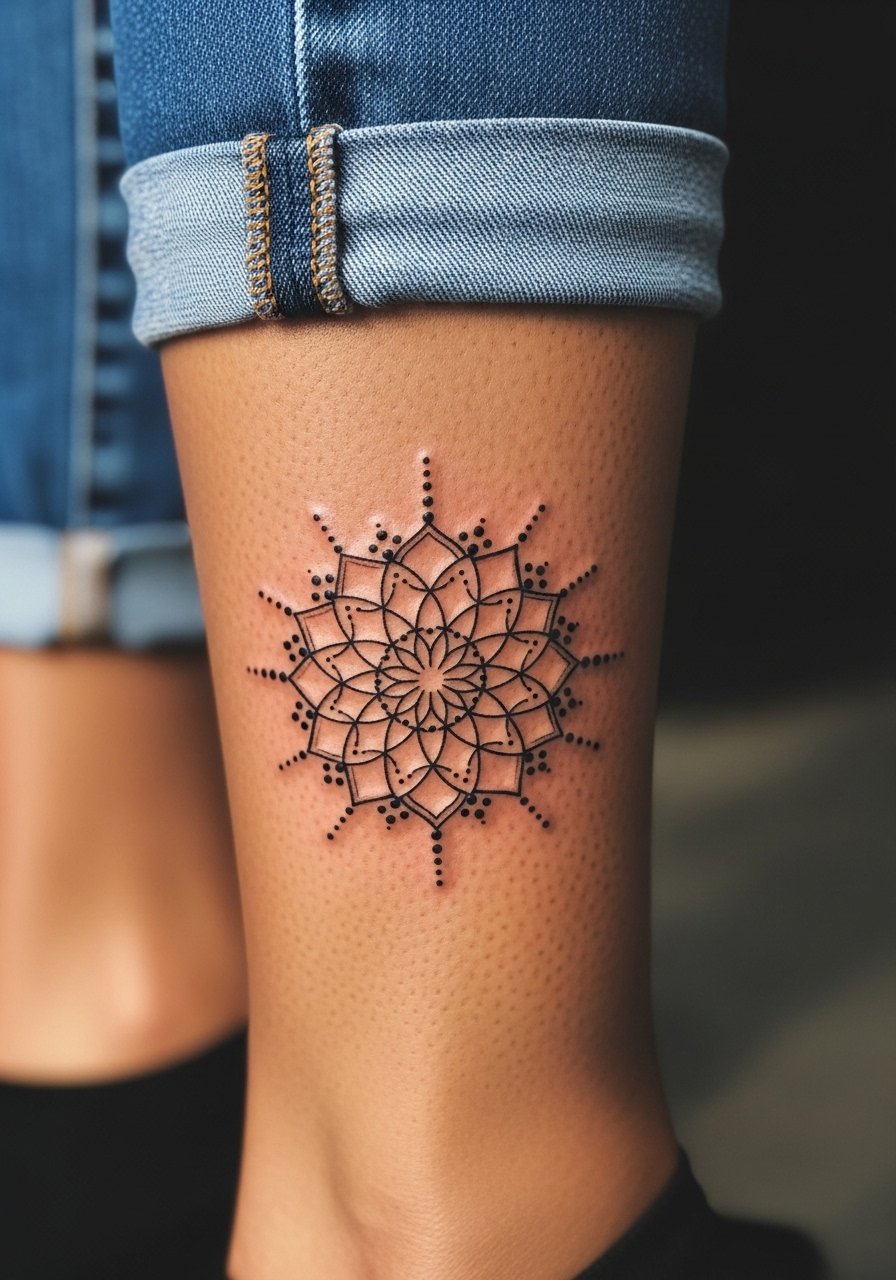
Mandala stencils rely on precise spacing. The common error is shrinking the pattern too small for the level of dot work, which causes merging as it heals. Ask for slightly larger spacing and for the artist to show a mirrored stencil for symmetry. Calf flesh is forgiving, so the piece usually ages well with minimal touch-up. For casual wear, a high-top canvas sneaker and cropped pants keep the mandala visible without rubbing the area during long walks.
6. Tiny Constellation on the Finger
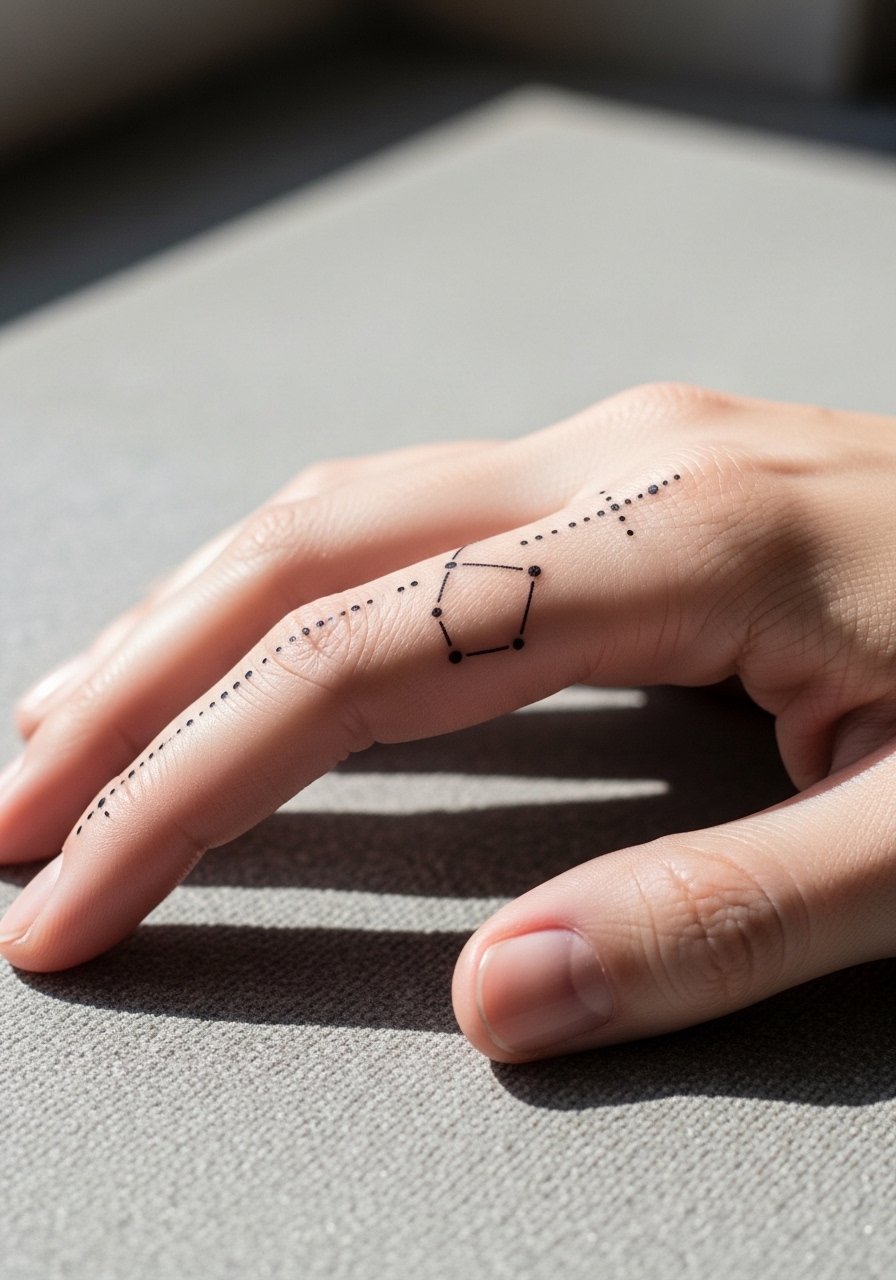
Finger stencils are deceptively fragile. One camp of artists says finger work is fine if you accept frequent touch-ups. The other camp warns that the thin skin and constant washing make fade inevitable. Name both camps when you consult and agree on a maintenance plan. If you go ahead, choose slightly bolder dots and allow a touch-up at six to twelve months. For everyday wear, keep rings minimal so the constellation remains visible, and consider a thin stacking ring that does not sit over the ink.
Studio Day Picks
The wrist and finger pieces above heal differently from larger work, so a few small items smooth out the session and first week.
-
Stencil transfer paper kit. Lets you preview the line placement on skin before the needle touches it, especially useful for the constellation and arrow ideas above.
-
Topical numbing cream. Applied per instructions before the appointment eases sharp wrist and finger sensitivity without interfering with linework.
-
Thin protective film roll. Useful for hand and wrist pieces that face frequent washing and friction in the first week.
-
Fragrance-free gentle body wash. Cleanses healing skin without stripping the delicate lines that small tattoos rely on.
-
Aquaphor healing ointment. A thin layer the first few days locks in moisture for fine line work without clogging small needle channels.
7. Single Needle Script Behind the Ear

Behind-the-ear stencils read like secret notes. The area needs careful stencil placement because the skin moves with hair and collars. Ask the artist to position the stencil while your hair is down so you can see how it peeks. This placement is sensitive for noise and touch during the session, but healing is usually quick. Keep in mind cultural sensitivity if using a phrase from another tradition and consider a subtle variation. For the session, tuck hair back with a wide cloth headband so the artist has clear access.
8. Minimalist Anchor on the Ankle
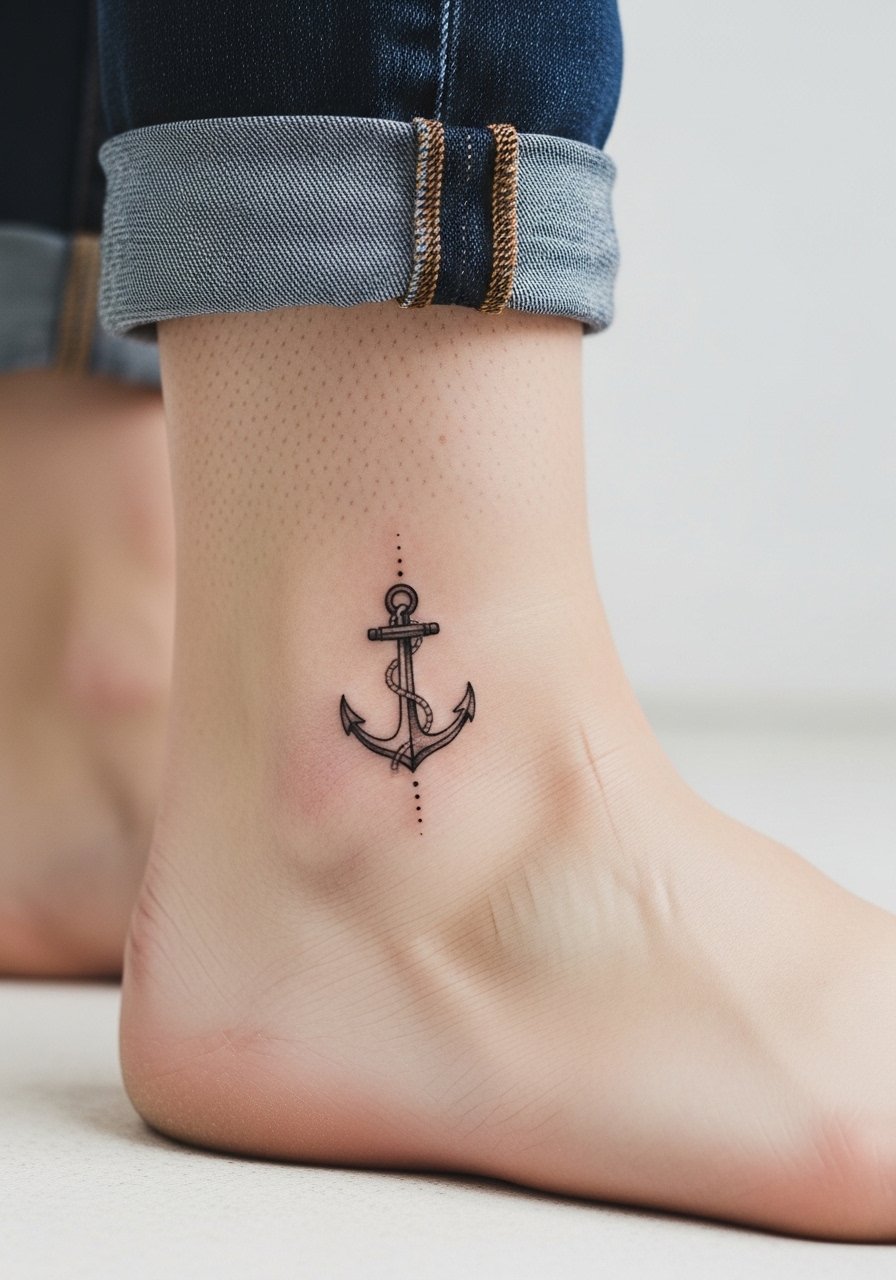
Ankle stencils are classic and low-risk when scaled properly. The mistake is going so small that the anchor loses shape as the skin shifts. Ask for a slightly thicker mainline and a tapered base that holds against friction from socks. Session time is short but expect a touch-up at year two if you wear narrow shoes daily. For showing it off with sandals, choose a simple leather sandal that frames the ankle without rubbing the ink.
9. Wave Line on the Side Rib

Rib stencils split artists into two camps. One group says the skin stretch and movement make fine line fade and blur fast. The other group argues that with proper depth and slightly stronger line weight, small rib pieces settle fine. Name both when booking and ask which approach your artist uses. Expect higher pain and a longer session with rib work. For the appointment, wear a cropped sports top you can lift easily so the artist has clear access without a full wardrobe change.
10. Tiny Butterfly on the Shoulder Blade

Shoulder blade stencils sit well beneath clothing and age gracefully if drawn with balanced spacing and modest saturation. The common mistake is too much micro shading that can merge over time into a muddy silhouette. Ask for crisp wing outlines and soft stipple to suggest texture rather than full packed shading. Sessions are low to moderate pain and usually under two hours. To show the piece, wear an open-back dress that frames the butterfly without overwhelming it.
11. Geometric Line Work on the Collarbone

Collarbone stencils look modern when lines have breathing room. The frequent error is forcing a dense pattern onto a curved, exposed strip of skin. Ask the artist to tape the stencil and have you move your arm to confirm the lines sit naturally. Expect slightly higher touch-up likelihood because the area gets sun and frequent clothing contact. For nights out, a thin chain pendant necklace sits above the geometry and draws the eye upward.
12. Single Needle Dot Cluster on the Hand

Hand stencils remain controversial because of visibility and career considerations. One camp argues for the aesthetic freedom to tattoo hands. The opposing camp cautions about professional and longevity issues since hands are high-wash zones and often need frequent touch-ups. Bring both perspectives into your consultation. If you proceed, accept a yearly touch-up plan and use slightly bolder dots so the cluster reads after repeated washing. Keep rings minimal and consider a thin adjustable band that complements the cluster without rubbing it.
13. Minimalist Mountain Line on the Outer Thigh
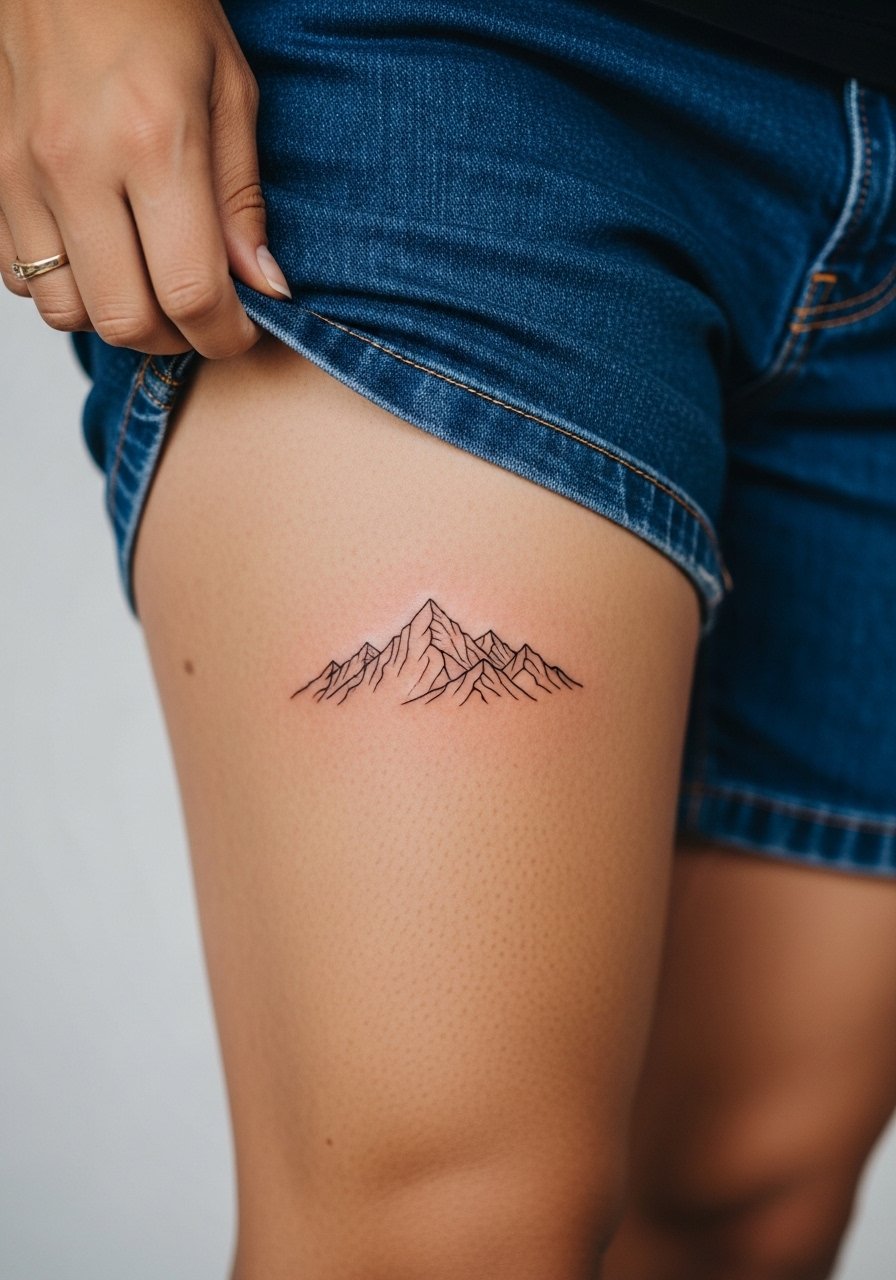
Thigh stencils are forgiving and can be quite resilient when placed away from stretch-prone areas. The usual mistake is placing a delicate piece too close to stretch lines that might distort with changes in body shape. Ask for the stencil to be applied while sitting and standing so you see how it moves. Sessions are comfortable and you can usually wear loose bottoms after. For the session, bring or wear loose drawstring shorts so the artist can work without fabric pressure on the area.
14. Tiny Crescent on the Collarbone Center
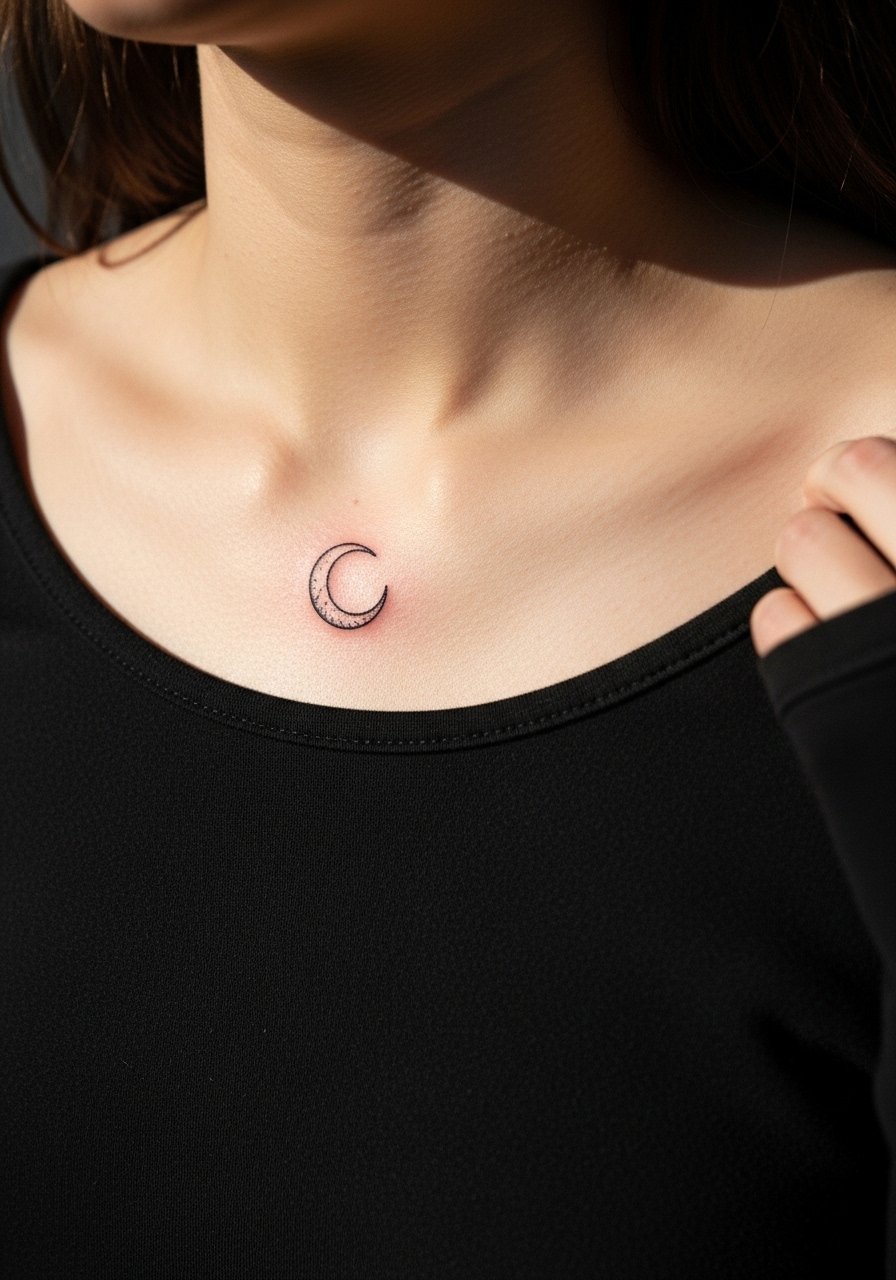
A small center collarbone stencil reads like jewelry. The mistake is choosing an extremely thin crescent that disappears against skin texture. Ask for a confident single-needle outline with subtle negative space, and mention skin tone so contrast is clear. Expect low pain but higher sun exposure, which affects longevity. For evening looks, a delicate V-neck blouse keeps the crescent visible without neckline competition.
15. Stipple Shaded Floral on the Hip
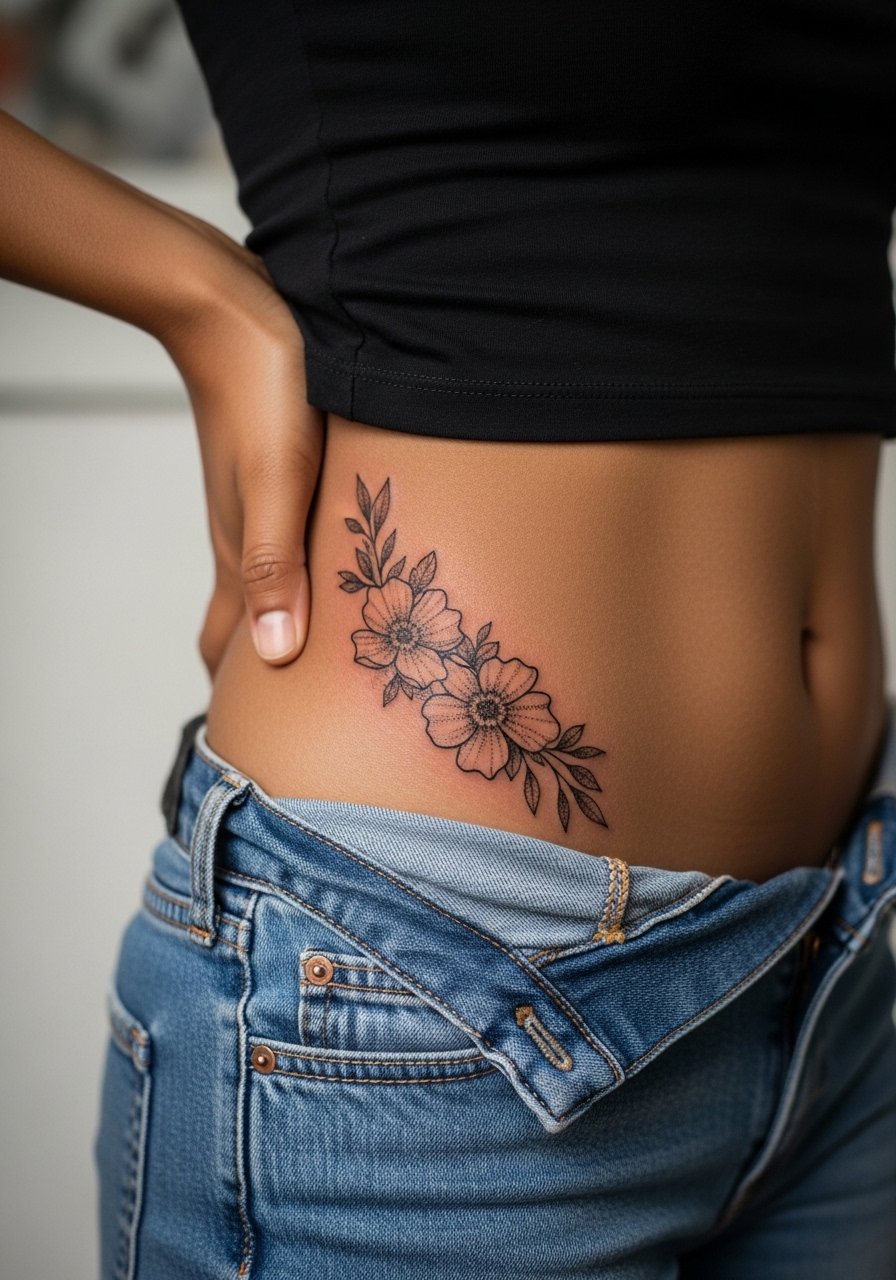
Hip stencils are intimate and heal well when you wear loose bottoms. The common error is too much dense shading near waistbands that causes rubbing during healing. Ask for a tapered edge on the design and for session notes on clothing changes for the first week. This placement often suits a second session for added depth once healed. For after the session, high-waisted bottoms are ideal so pick a comfortable high-waisted denim skirt you can move in without pressure.
16. Tiny Script Along the Rib
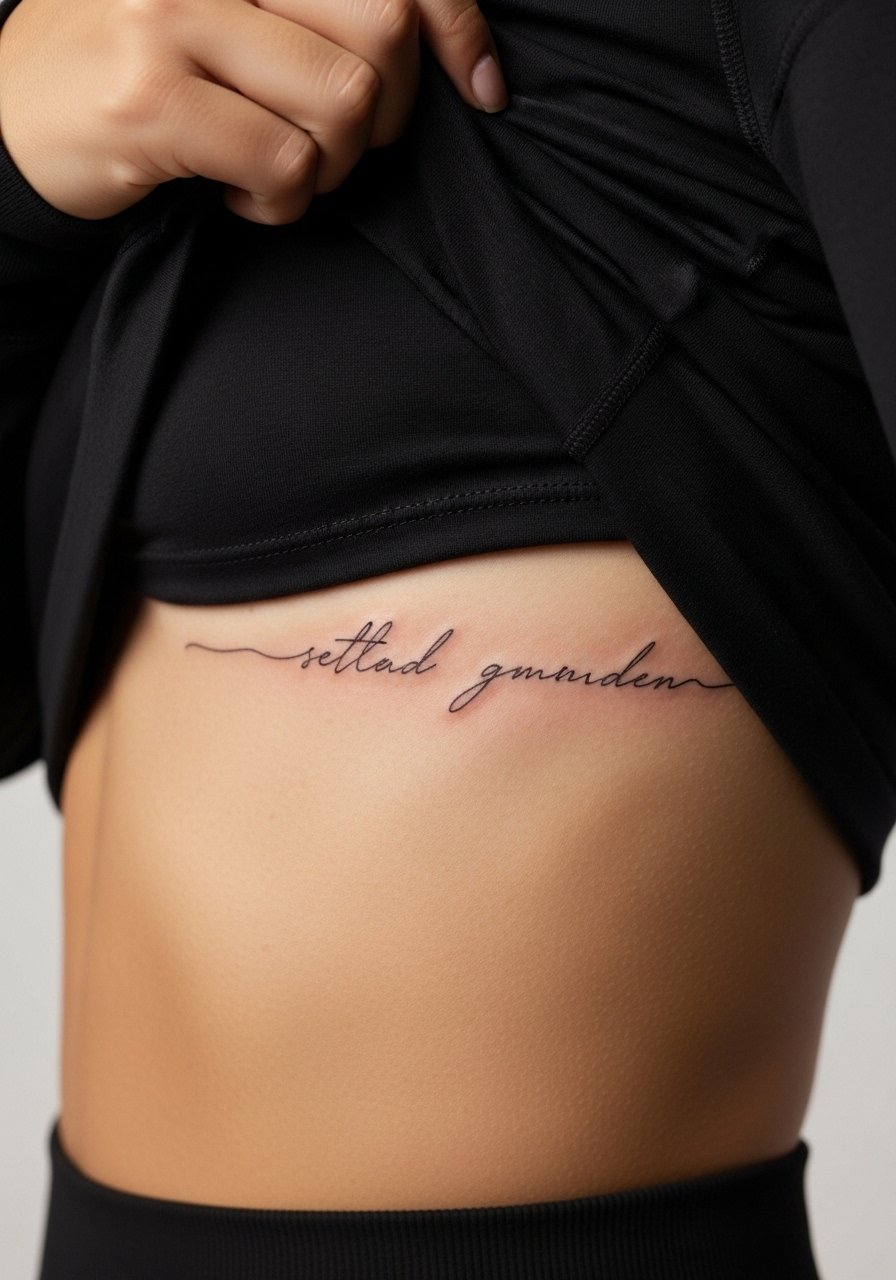
Script on the ribs carries the same debate as fine line ribs. One group of artists takes on delicate text with adjusted depth and spacing. The other group declines small script there because of the risk of blurring. If you want this area, bring exact font samples and request a lined stencil so you can inspect letter spacing while standing. Expect stronger pain and a likely touch-up at year two. For the session, a zip-up hoodie you can remove or pull aside keeps you warm without rubbing the fresh ink.
17. Tiny Sun and Moon on the Inner Wrist

Inner wrist stencils are a favorite for first-timers because they are visible and easy to cover. Choose slightly bolder anchors for the sun and thicker dots for the moon so the shapes hold. Hands-on work in this area is quick but needs careful aftercare because the wrist moves constantly. Expect a touch-up window around year two if you spend lots of time outdoors. Wear a loose cuff bracelet above the piece to frame it without rubbing the ink directly.
18. Simple Anchor on the Calf Back

Back-of-calf stencils age well because they get limited sun and friction, but the area can thicken with seasonal change. The frequent mistake is adding too many tiny details that become indistinct. Ask for confident outlines and clean negative space. Session comfort is high and touch-ups are rarely needed early on. Pair this placement with a pair of low-profile trainers to show the anchor when you wear shorts without the shoe collar rubbing the area.
19. Linework Botanical on the Lower Back

Lower back stencils can be bold without being overly exposed. The error is placing very fine elements too close to waistbands that will rub during healing. Ask the artist to test the stencil with your regular waistline before inking. Healing is usually straightforward and touch-ups are moderate. For the session, a tank top with high-waisted jeans makes access simple and avoids wardrobe friction after the appointment.
20. Minimalist Compass on the Upper Arm

Upper arm stencils are classic and forgiving, which is why compasses are common. The common mistake is over-detailing a small compass which loses cardinal clarity. Ask for strong cardinal points and light inner detail that reads at a distance. Expect low pain and good longevity if you avoid sun exposure. For casual display, a short-sleeve henley shirt with the sleeve rolled shows the compass without competing patterns.
21. Tiny Crest on the Back of the Neck

Neck stencils are visible and make a statement, so think about career and visibility before booking. The mistake is choosing ultra-fine detail that the area cannot hold without frequent touch-ups. Ask your artist for simplified elements and confirm how it will sit under common hairstyles. The session is short but the site sees sun and clothing contact, so plan sunscreen and protective clothing as it heals. For showing the piece, a wide-neck tee keeps the crest visible without exposing more than you intend.
Frequently Asked Questions
Q: Will tiny finger and hand stencils last more than a year without touch-ups?
A: It depends on washing habits and exposure. Fingers and hands are high-motion and high-wash, so most people plan for a touch-up within 12 to 18 months. Choosing slightly bolder dots and accepting maintenance up front makes the process smoother.
Q: Are fine line ribs and sternum tattoos a bad idea if I want them to age well?
A: Artists split into two camps on this. Some decline very fine rib and sternum work because skin stretch and movement can blur detail. Others use adjusted depth and spacing to make the lines last. Bring font and spacing references and ask how they handle touch-ups before booking.
Q: How should I dress to keep a new shoulder blade or upper arm stencil safe during healing?
A: Wear loose, breathable fabrics that do not rub the area. For shoulders and upper arms a loose button-down shirt you can pull aside works well. Avoid tight straps and backpacks for the first two weeks.
Q: Do minimalist collarbone or chest pieces need different aftercare than forearm work?
A: Not fundamentally, but chest and collarbone see more sun and clothing contact, so sunscreen and loose tops matter more after the initial healing. Plan for sun protection when the area is exposed.
Q: What should I ask during the consultation for a micro-realism bicep piece?
A: Ask to see healed photos of similar-sized micro-realism work on similar skin tones. Request stipple shading rather than packed saturation and agree on a touch-up window. Confirm how the stencil will sit when the arm is relaxed and flexed.
