
Fine line tattoos dominate Pinterest and realism rules Instagram, yet what looks best fresh often needs more upkeep than people expect. Wings and tiny emblems fade faster on tan skin unless linework is thick enough. Forearm Titans can stretch with weight changes, and session prices have crept up at specialty shops. Read these 27 edgy Attack on Titan tattoo ideas, with how they age, what to ask your artist, and wardrobe tips that actually help your ink last.
1. Micro-Realism Attack Titan Snarling on the Forearm
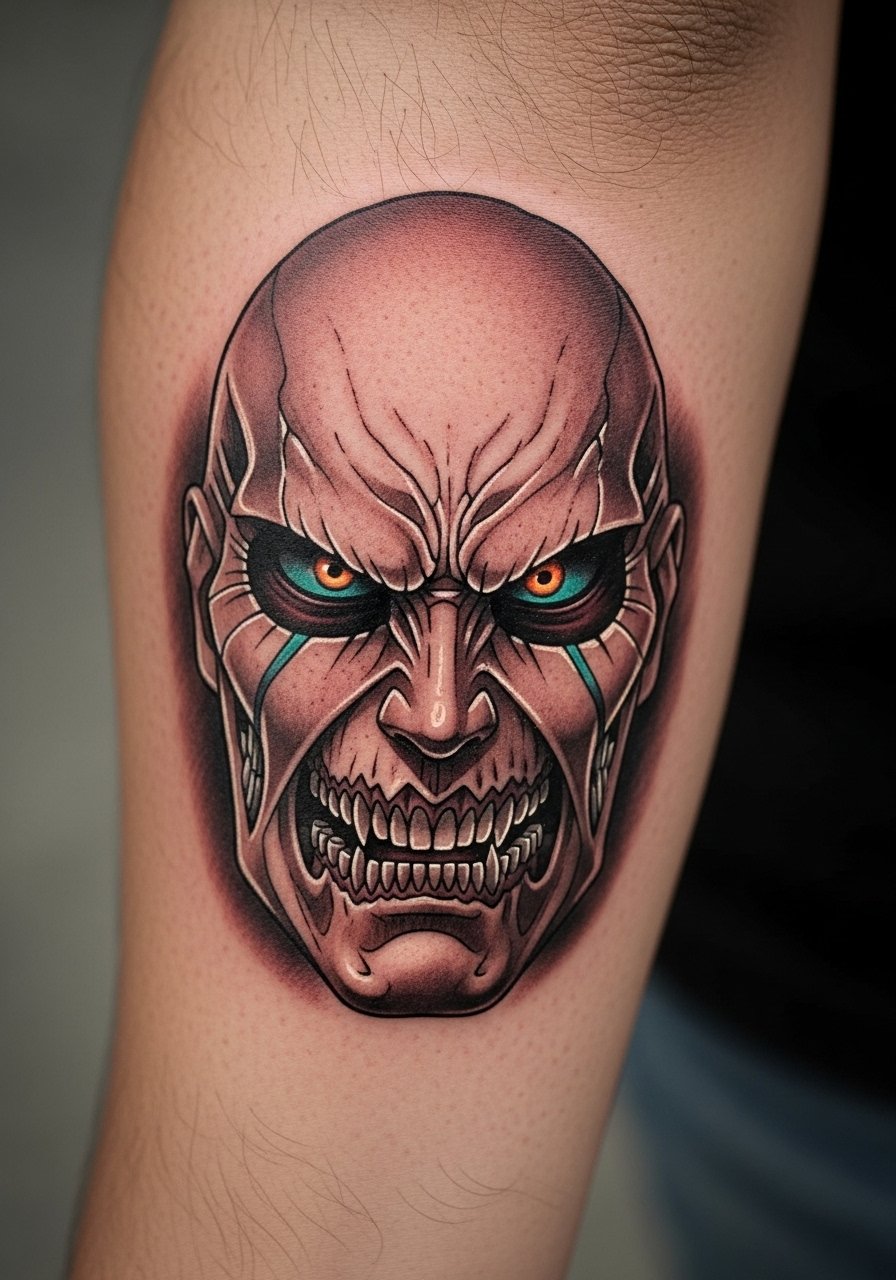
I've seen this take on the forearm hold up when artists prioritize contrast over tiny hairline details. Tell your artist you want saturated color in the eyes and heavier contour linework around the jaw to prevent the tiny teeth from merging as it heals. Common mistakes include cramming facial detail into a 3-inch piece, which blurs by year two. Expect two sessions for color saturation and a touch-up around year three if you use lots of bright ink. For the session wear a black fitted tee you can roll up, so the artist has full access without fabric drag.
2. Sharp Line Wings of Freedom on the Shoulder Blade
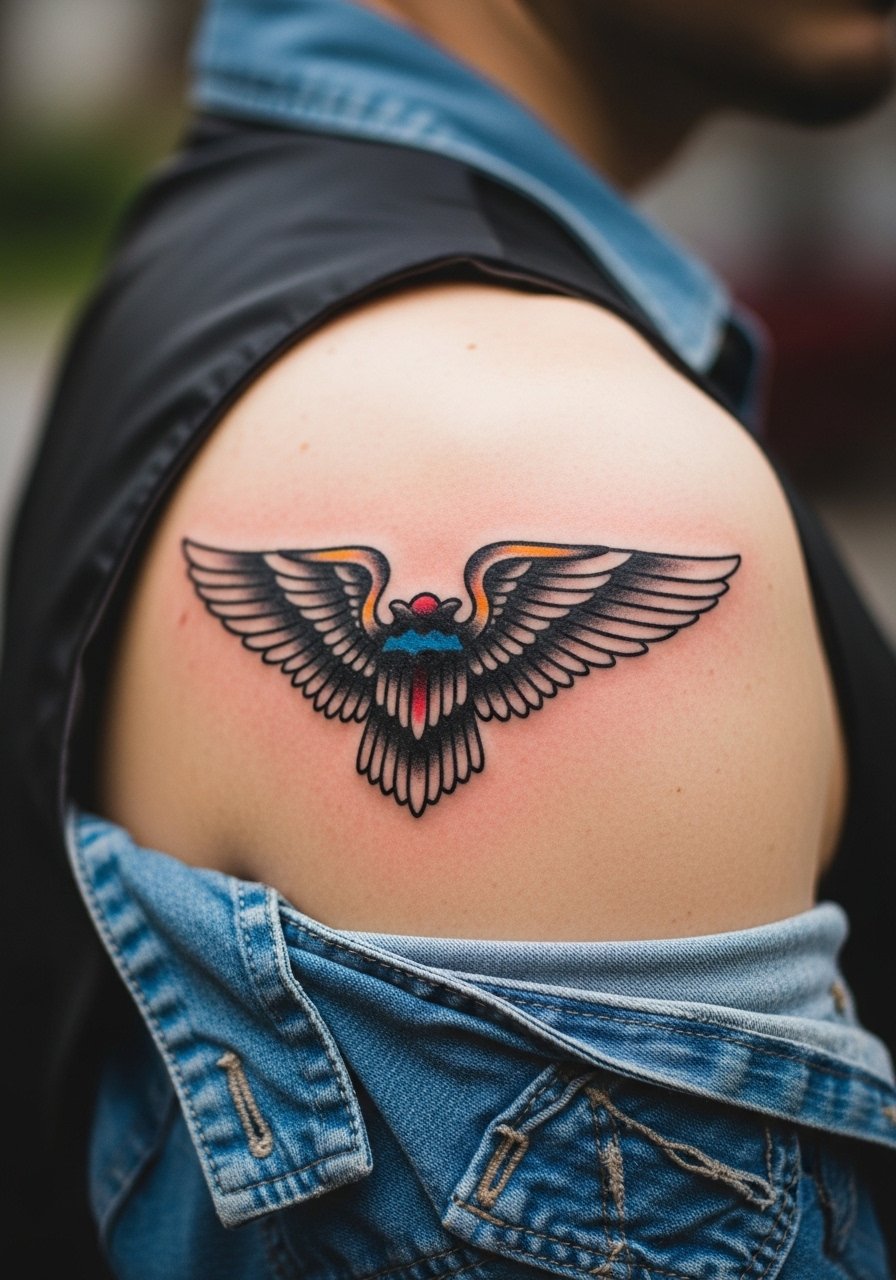
Fair warning, the shoulder blade is forgiving for linework and shifts less than the forearm. Ask for a slightly thicker outline so the feathers keep definition on tan skin. A common aging issue is too-fine interior feather lines that look busy after a year. This style is one session for most artists and the pain is moderate. For show-off pairing try a sleeveless tank top in navy to frame the blue tones and let the emblem read from a distance.
3. Neo-Traditional Attack Titan Pose on the Upper Arm
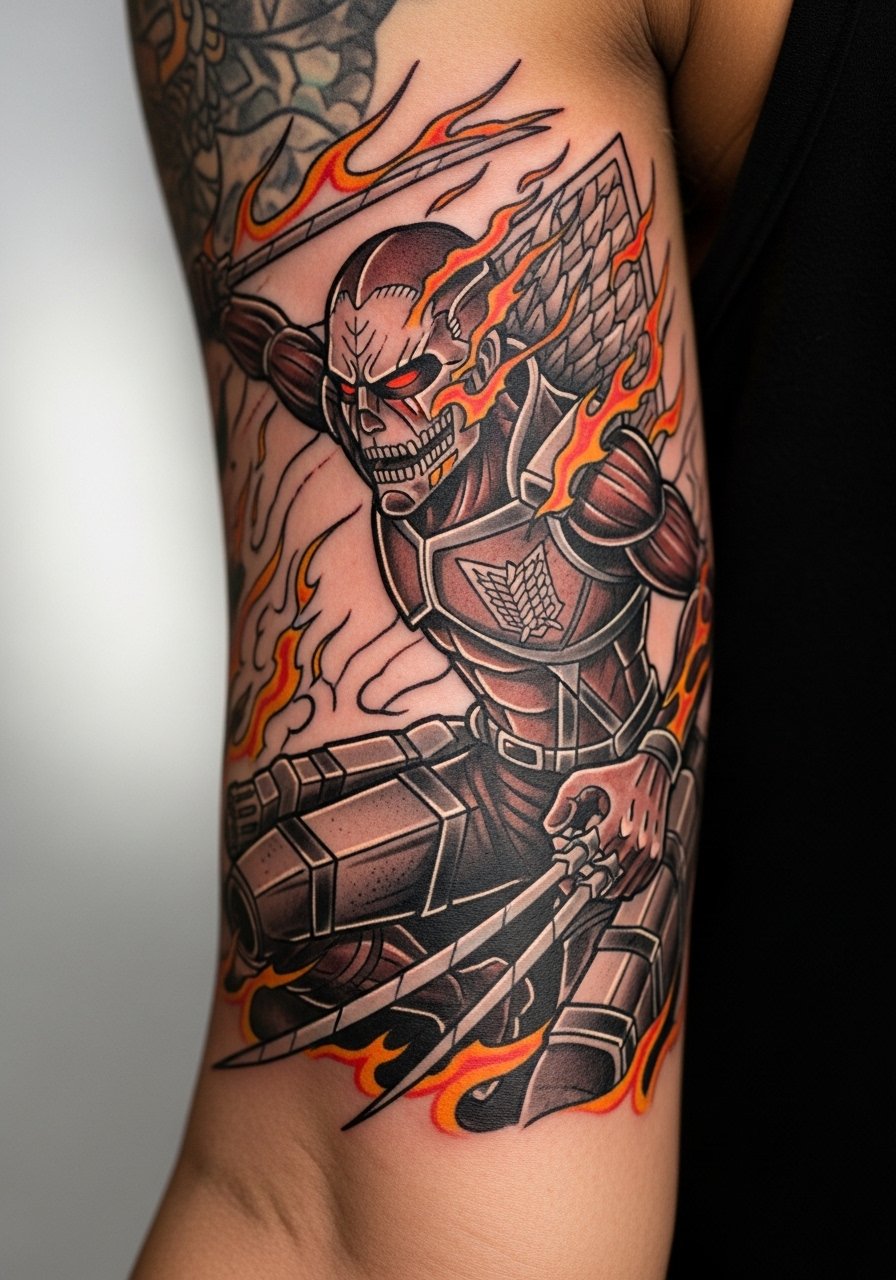
This upper arm piece is built to read in motion, so book two to three sessions for depth and shading. Tell the artist you want whip shading for motion lines and saturated orange highlights that catch the light. A mistake I see is asking for too much tiny crosshatching, which can muddy into a gray block at two years. Pain is manageable for most people and touch-up is common at year two for color saturation. For session comfort wear a loose button down shirt you can slide the sleeve off without tugging the arm.
4. Minimalist Wings of Freedom on the Inner Wrist

Most people pick this for discretion but the wrist ages differently than the chest. The common failure is ultra-fine separation between quills that fades or blurs on medium and dark skin tones. Ask for slightly bolder primary lines and clean negative space between feathers. Expect one short session and a touch-up at year two if you do a lot of sun exposure. Pair with a thin leather cuff bracelet when showing it off, and wear a sleeveless shirt to the appointment for full access.
5. Realistic Eren Mid-Shift on the Thigh
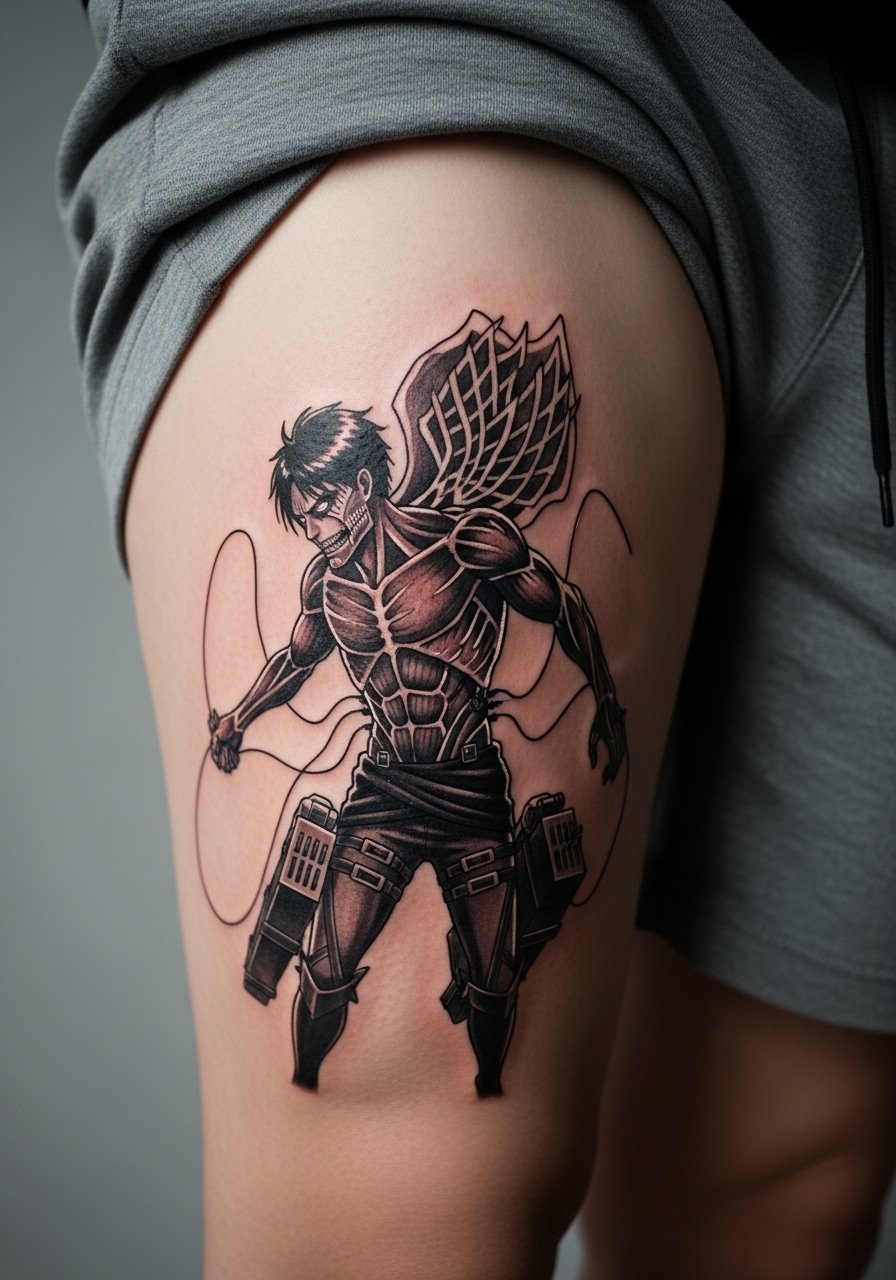
Thighs are great for large realistic portraits because they flex less than the forearm and allow larger needle work. This is a multi-session commitment that leans realism with muscle texture and subtle contrast. A typical mistake is compressing too much detail into a small thigh patch. Expect four or more sessions and scheduled touch-ups for saturation. For session day wear loose athletic shorts so the artist can work the whole area without pressure on the skin.
6. Geometric Wings on the Collarbone
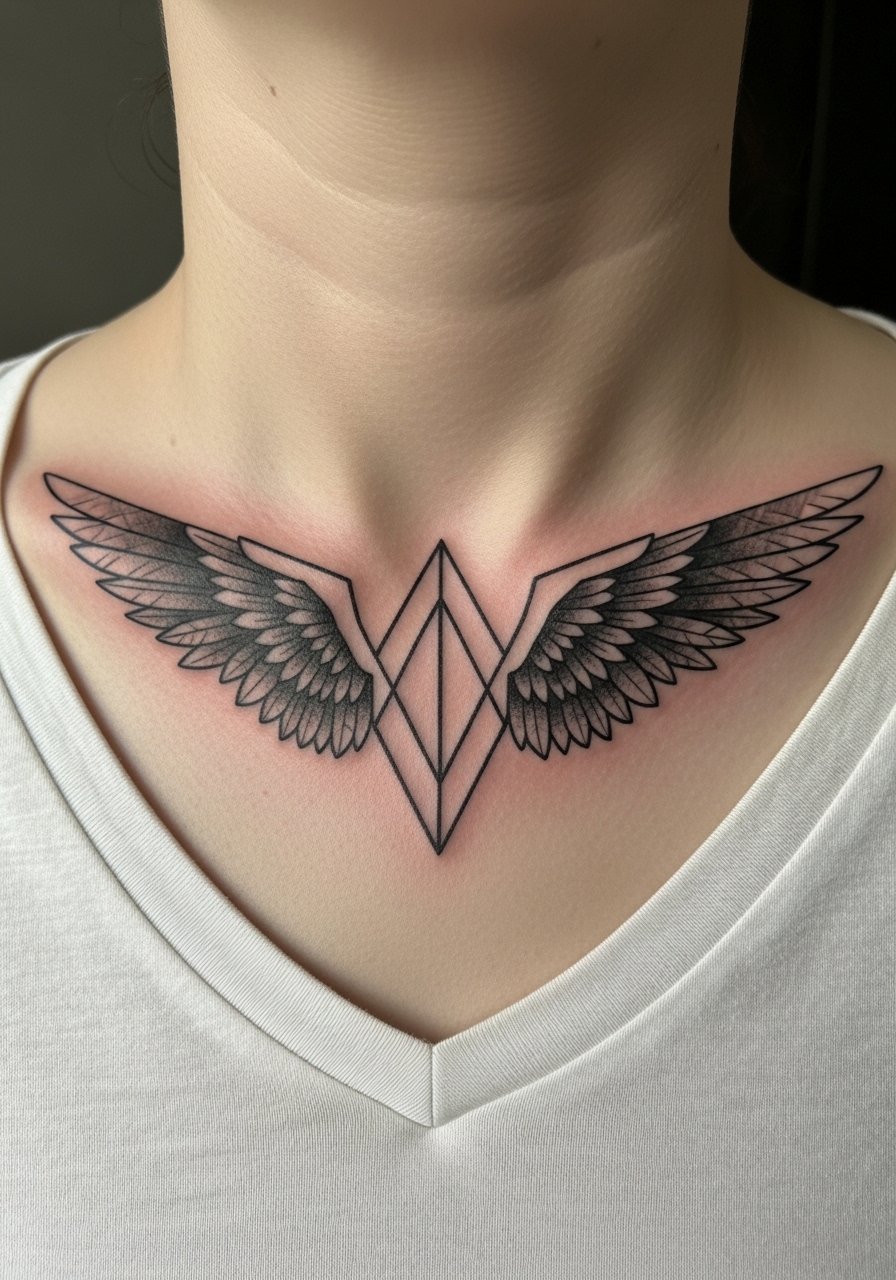
Collarbones need spacing to breathe, because dense geometry shrinks visually as it heals. Ask for clear negative space between shapes and a single-session mockup on the chest to confirm scale. The common error is placing a 4-inch complex grid too close to bone then watching lines blur into one block. This holds well when scaled to 3.5 to 4 inches. Pair with a v neck black tee when showing it off and bring a button-down to pull aside at the appointment.
Studio Day Picks
Those first six designs include wrist, forearm, shoulder, thigh, and collarbone pieces, which need different session prep and small supplies to smooth the chair time.
- Stencil transfer paper kit. Lets you preview line placement on skin before you commit, useful for the collarbone geometry and fine forearm portraits.
- Topical numbing cream. Applied 30 to 45 minutes before helps with wrist and inner forearm sensitivity without disrupting linework.
- Thin protective film roll. Keeps small wrist and finger pieces clean during the first days of friction from daily washing.
- Fragrance free gentle body wash. Gentle cleansing for larger thigh or shoulder work during the initial healing window.
- Aftercare healing ointment. A thin layer helps protect fine lines and color while the first scabs settle, especially for micro-realism areas.
7. Watercolor Scout Regiment Battle Scene on the Ribcage

Fair warning, the ribcage is high pain and the skin stretches when breathing. Watercolor here looks expressive fresh but can fade into a muted wash by year two if not anchored with black linework. Ask your artist to frame the scene with fine black outlines so the colors have boundaries as they soften. Expect two sessions and a possible saturation touch-up after summer months. For the appointment wear a cropped top you can lift slightly so the artist has steady access.
8. Blackwork Titan Claw Emerging on the Calf

Calves tolerate blackwork well and blowout risk is lower than on the inner forearm. Tell your artist you want deep saturation and stipple shading to keep texture without overworking the skin. A common mistake is using too many thin lines which can disappear into the dark fill. Sessions are medium length and touch-ups can be needed at year two if you spend summers in direct sun. Show it off with cuffed bootcut jeans or shorts.
9. Fine Line Eren Portrait Behind the Neck
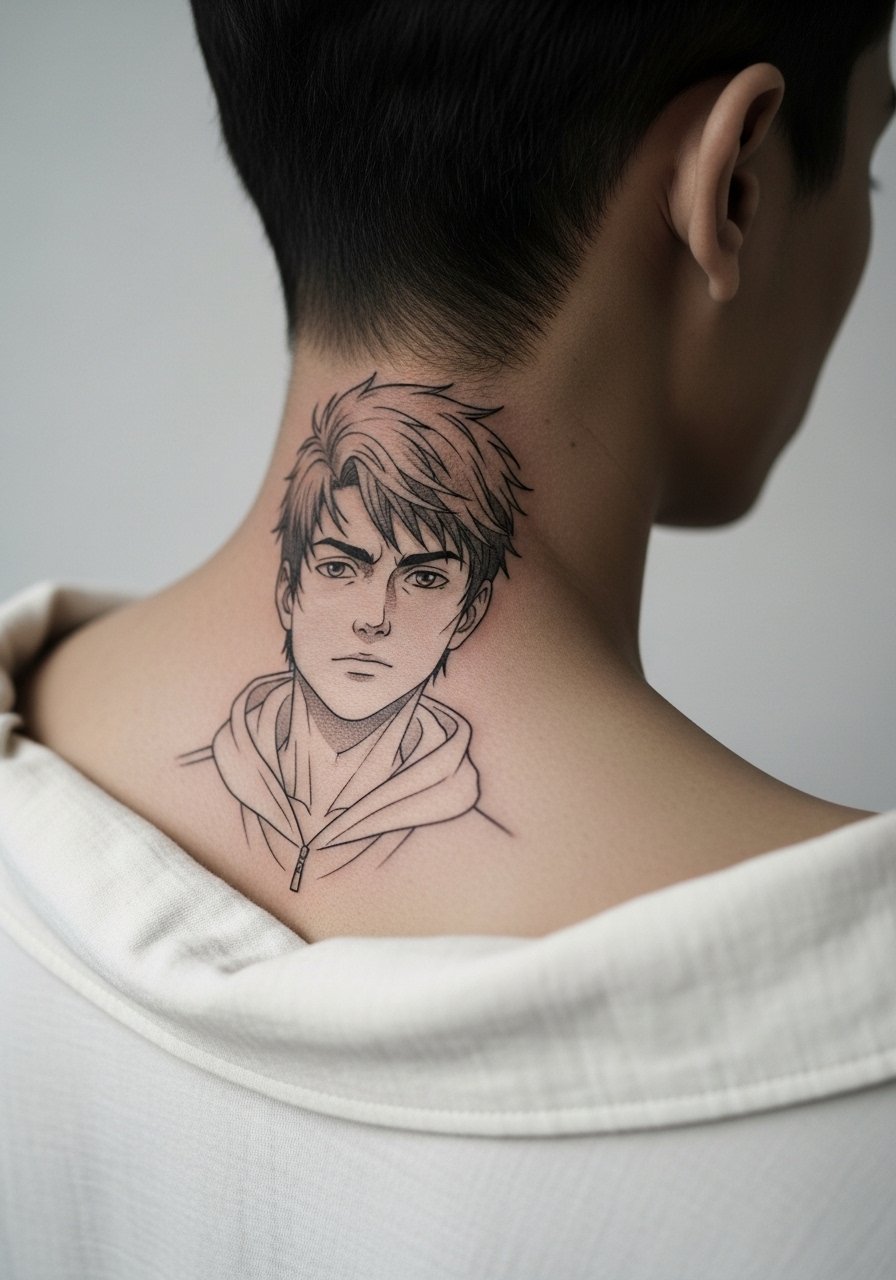
Neck placements demand a specialist because skin moves a lot with turns and collars. Artists are split on fine line here. One camp says the neck blurs lines within two years because of constant motion and sun exposure. The other camp argues that with proper depth and spacing fine line can settle well. Ask the artist which approach they use and request a depth test on similar skin. Session pain is high relative to the shoulder and touch-ups are common. Pair with a high collar jacket when you want to hide or highlight the area.
10. Ornamental Titan Silhouette With Chains on the Forearm Sleeve Start
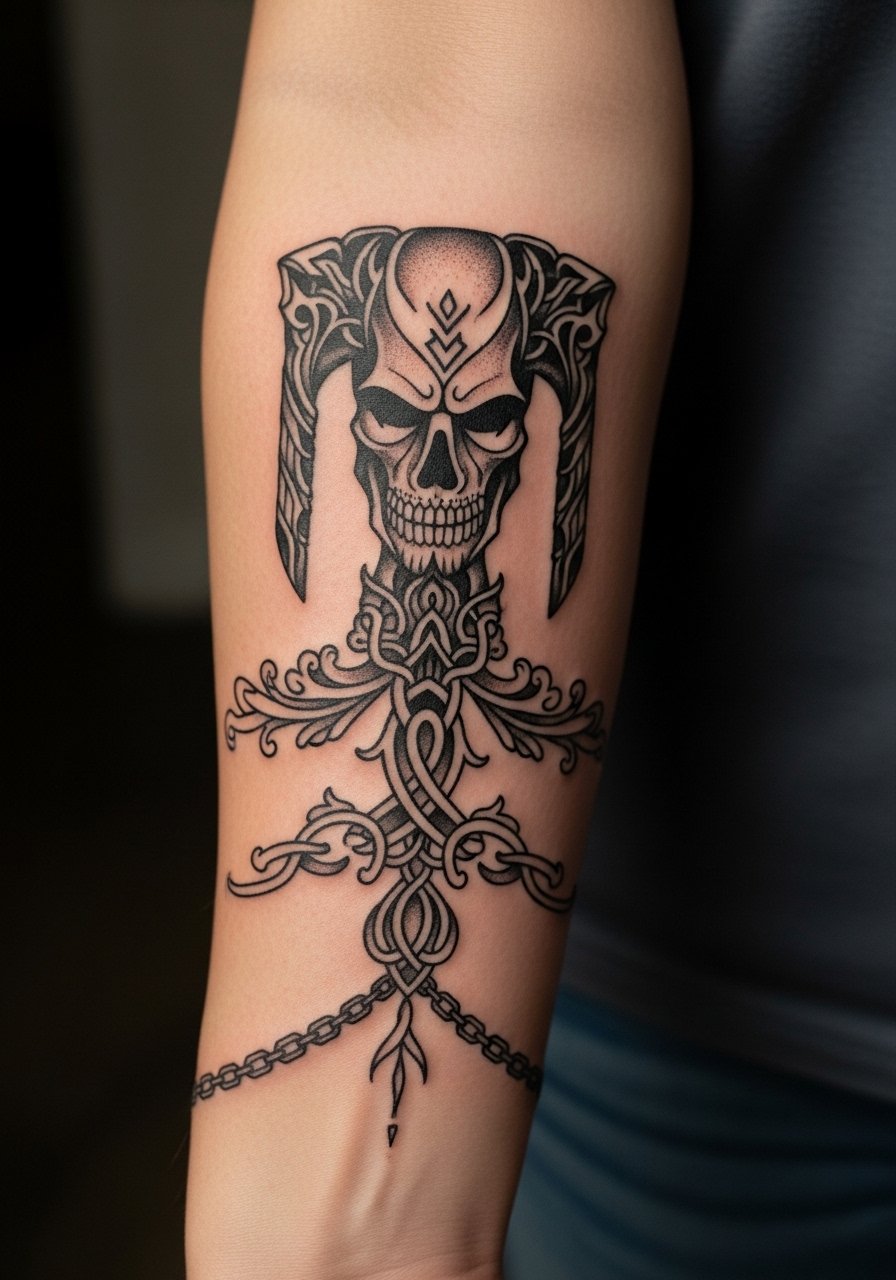
This ornamental wrap looks great as the start of a sleeve because the pattern can follow muscle flow. In consultation ask the artist to plan negative space where the chains pass over joints so the pattern does not smudge when you bend the wrist. Common mistakes include running dense detail over the flex points which leads to distortion after weight fluctuation. Two to three sessions are normal and expect a touch-up at year three if the chains receive friction from watch straps. For the appointment wear a loose short sleeve button up so the artist can work without fabric rubbing.
11. Ignorant Style Colossal Titan Stomp on the Outer Thigh

That outer thigh placement loves big, graphic shapes so the ignorant style reads at a glance. The most common mistake is reducing the design into tiny detail that undermines the heavy-line aesthetic. Session time is moderate and two sittings often give the bold outline room for shading. Thighs handle touch-ups well and the piece will survive most weight fluctuations if you avoid placing it across a crease. For showing it off pick slim jogger pants you can roll up casually.
12. Neo-Traditional Scout Wings With Blood Drips on the Shoulder Blade
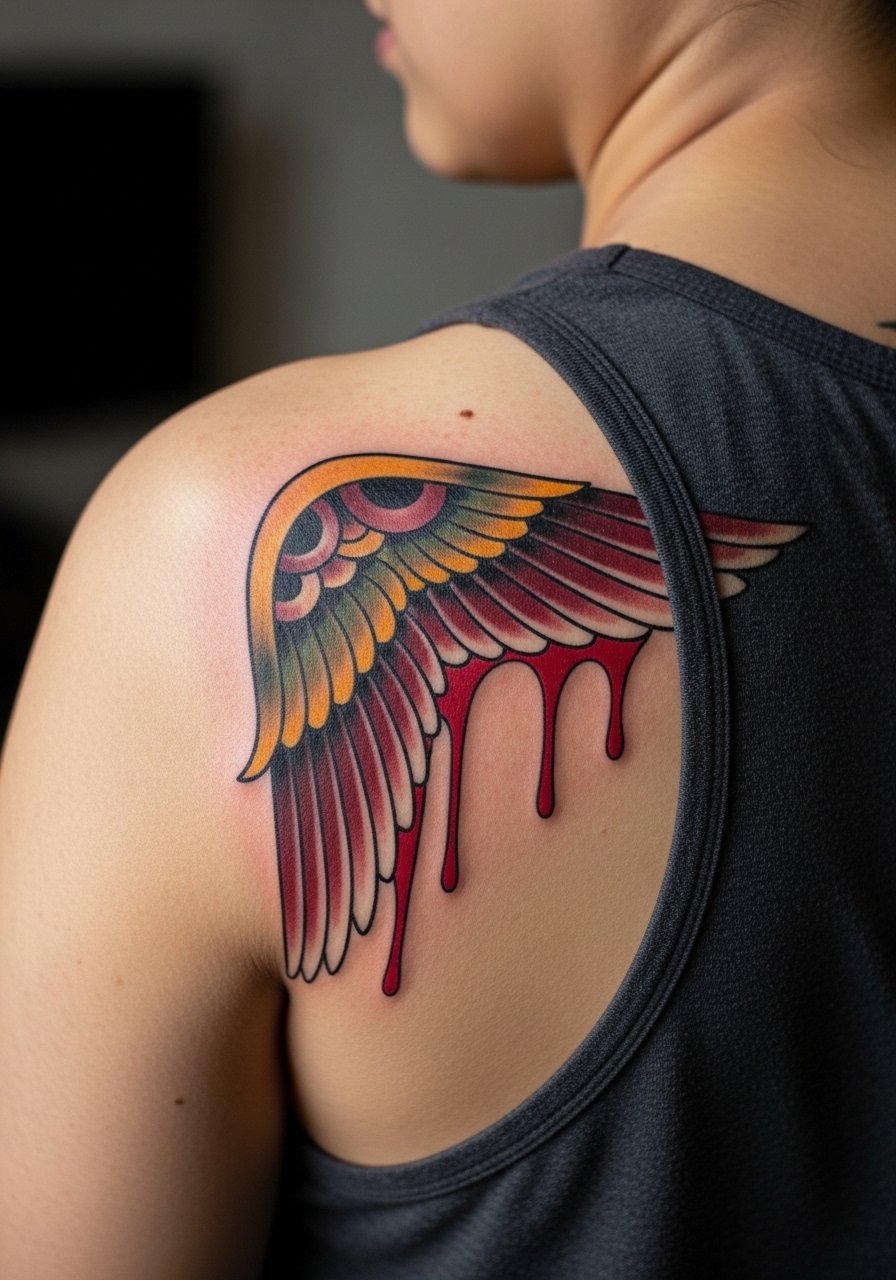
Shoulder blades let color sit with minimal abrasion which helps red accents keep contrast. Tell your artist you want crisp wing outlines and thin red accents only in specific feather tips so the blood effect does not swallow the wings as it heals. A misstep is overusing red fill which tends to lose saturation sooner. Two sessions are common and a color refresh at year two aligns with typical pigment fade. Pair with a chain necklace for a militaristic edge when showing the piece.
13. Micro-Realism Titan Eye Close-Up on the Pinky Finger
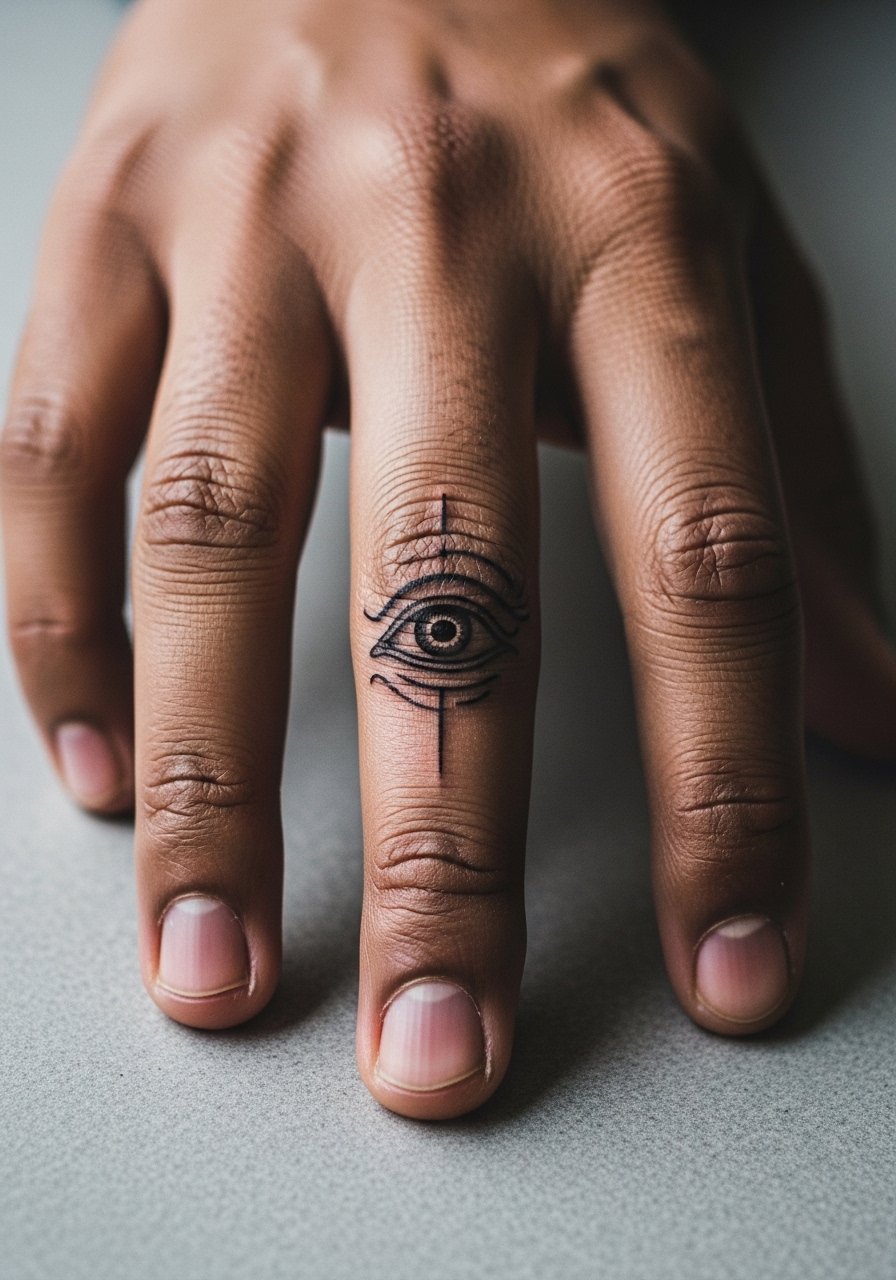
Finger work is a commitment because friction and washing wear fine detail quickly. The Titan eye as a tiny micro-realism piece needs dense pigment around the iris to avoid the pupil becoming a blur at six months. Tell the artist you accept frequent touch-ups. The session is short but painful and healing is fast but fragile. Common mistake is choosing ultra-fine detail for a finger scale. For the appointment keep hands clean and avoid heavy work the first week.
14. Black and Gray Colossal Silhouette on the Back

Back pieces allow large silhouettes to breathe, so take advantage of scale rather than cramming detail into a small area. Ask for stipple and whip shading to create the looming feel without heavy contrast that can look flat from a distance. Most people schedule multiple sessions over months. The biggest mistake is trying to force micro detail into a broad surface. For session wear a loose button down shirt you can slide off without pulling on fresh ink.
15. Geometric Titan Emblem on the Collarbone Ridge
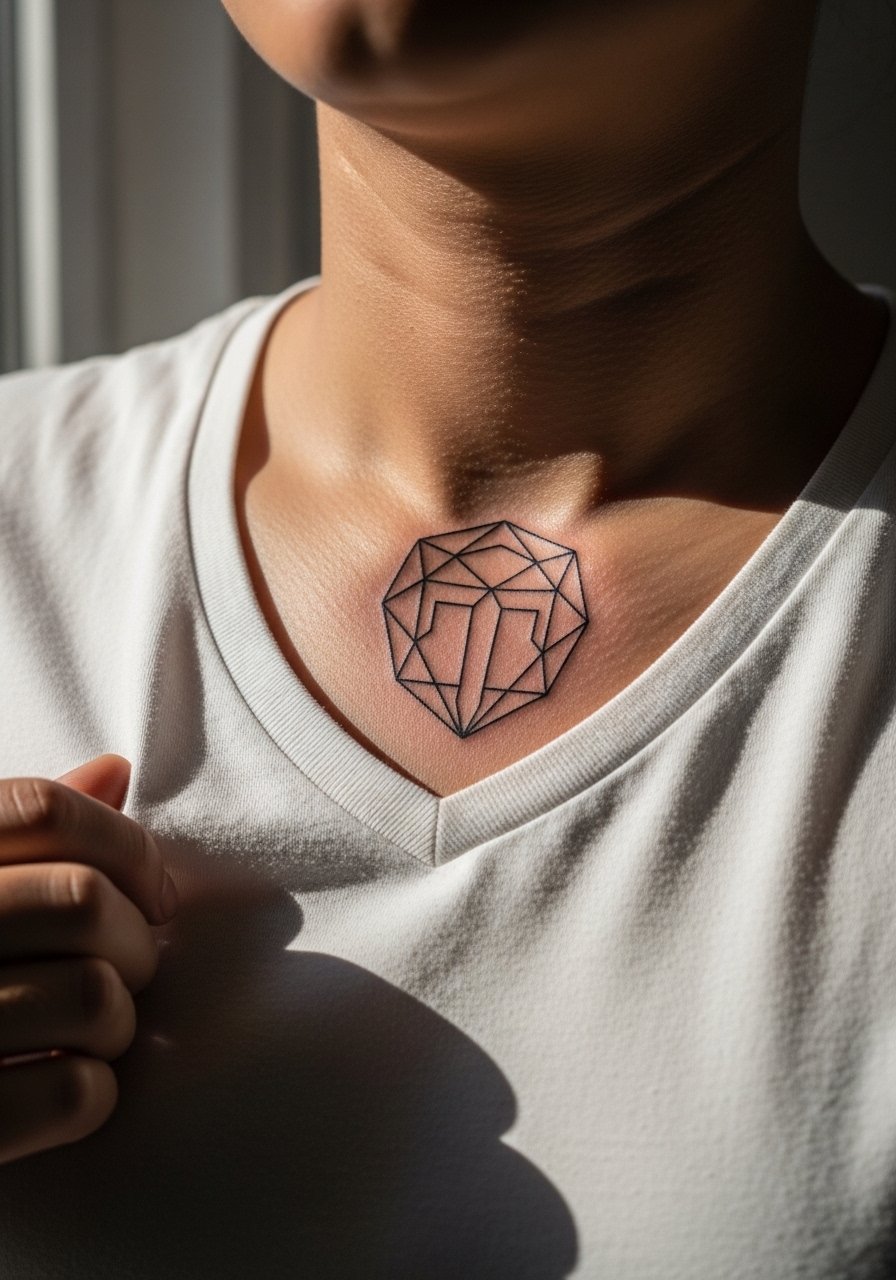
Collarbone geometry works when shapes have breathing room so the lines do not bunch over bone. Ask for a mockup taped in place so you can confirm negative spacing. The usual error is clustering too many tiny triangles near the bone which leads to merging in years two to three. Pain is moderate and touch-ups every few years keep the edges crisp. Pair with a subtle pendant necklace that sits just above without covering the work.
16. Stipple Shaded Titan Claw Around the Calf
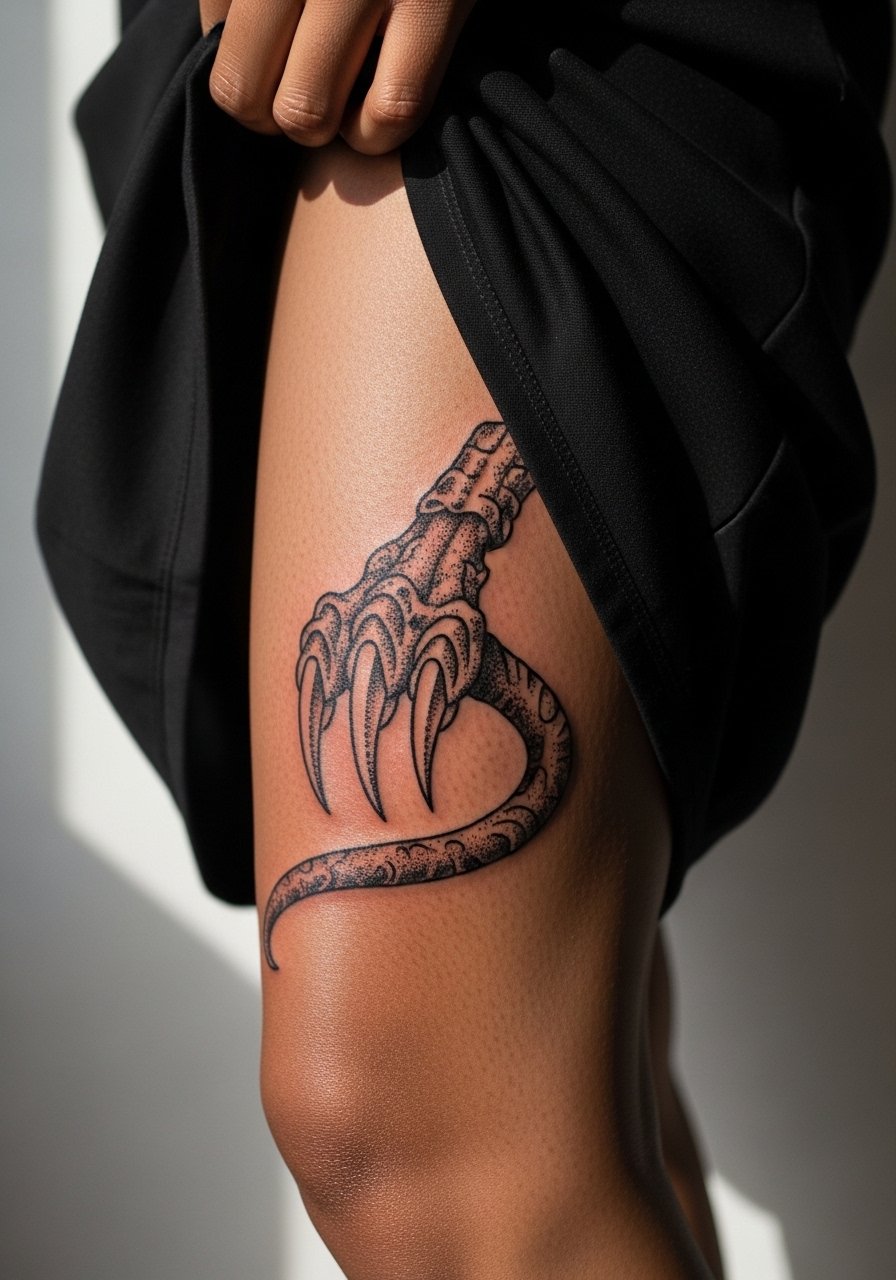
Dot work on the calf ages gracefully because the skin there tolerates repeated passes with less blowout risk. Request stipple shading layered in gradients and tell the artist to avoid heavy solid blocks near the ankle where abrasion is frequent. A common mistake is over-saturating the lower edge which meets socks and shoes. Expect two sessions and a touch-up at year three depending on footwear. Show it off with summer shorts or pulled-up socks.
17. Minimalist Scout Badge Behind the Ear
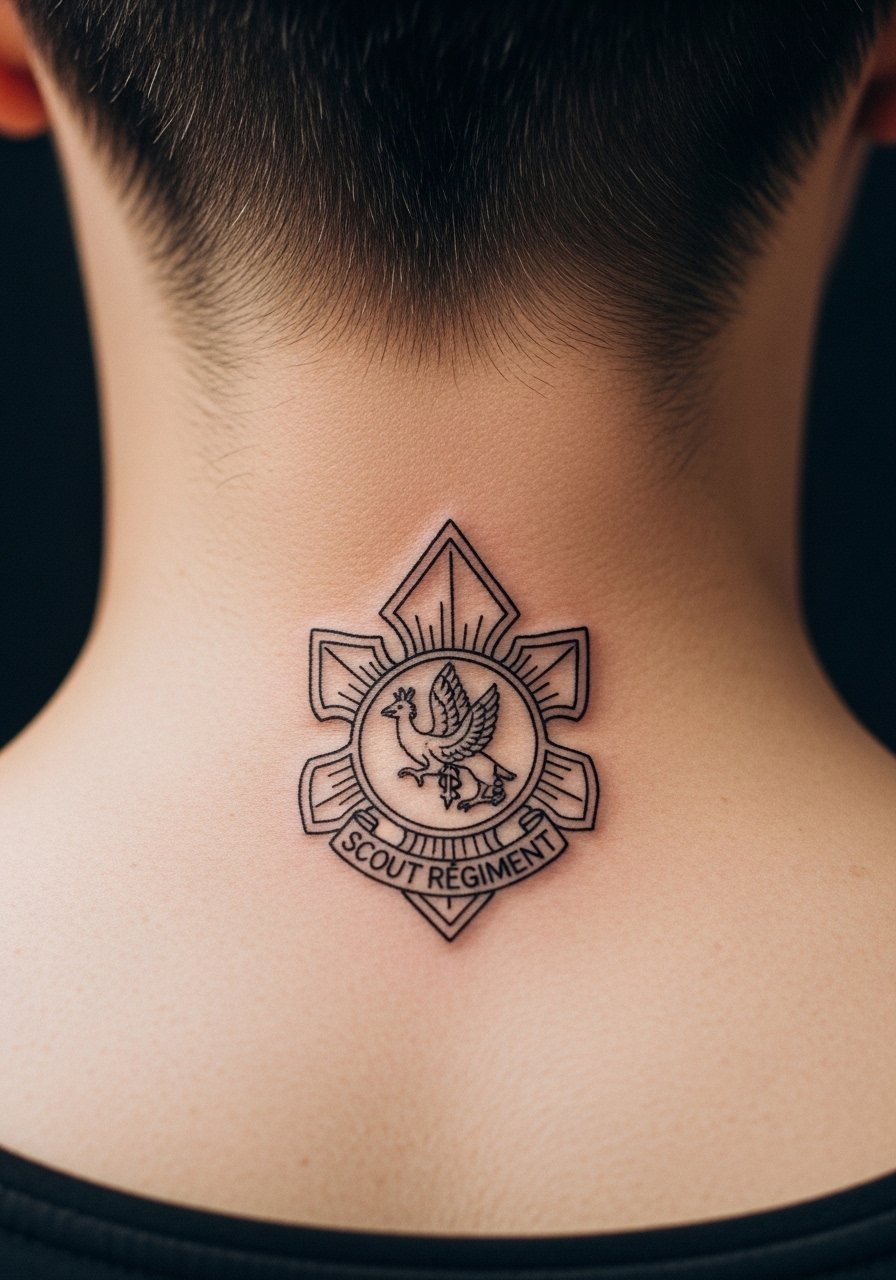
Behind the ear is subtle and discrete but needs a careful size call because the area is small. The usual problem is asking for tiny script or ultra-fine feathering that blurs after a year. Ask the artist to draw the exact scale on skin and step back to view at normal distances. The session is quick and sensitivity is moderate. If you want to show it off pair with a shaved undercut or a pulled-back hairstyle on occasion. Use hashtags like #WingsOfFreedomTattoo to find portfolios that show healed examples.
18. Ornamental Chains Wrapping a Small Wings Patch on the Forearm
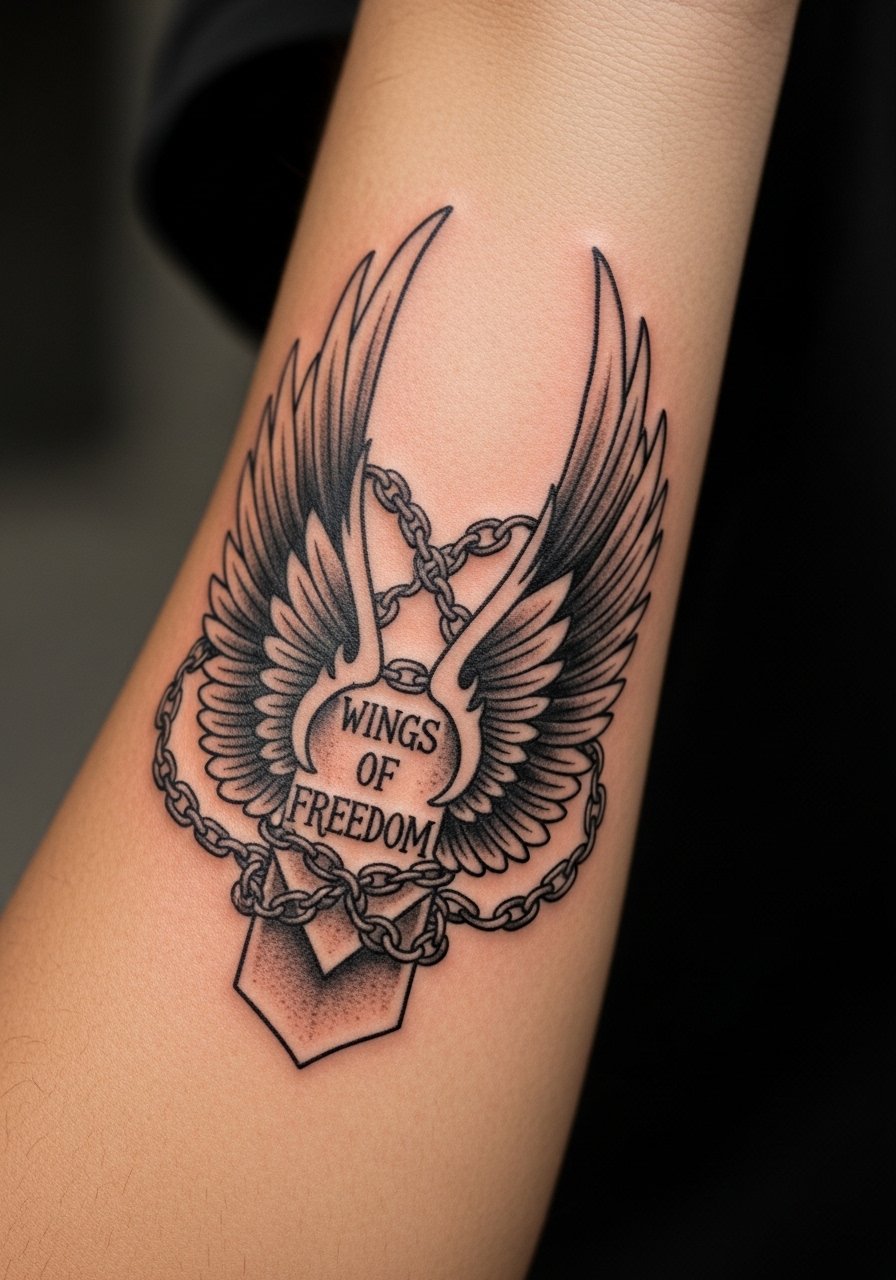
Chains can make a symbolic statement about captivity but they need spacing so links do not bleed together as skin moves. Tell your artist which links should be thin accents and which should be solid to read at distance. The mistake is wrapping chains too tightly around muscles where flex will distort them. This design typically needs two sessions to balance ornament and negative space. For the appointment wear a loose short sleeve button up that slides easily.
19. Watercolor Scout Regiment Scene on the Upper Arm
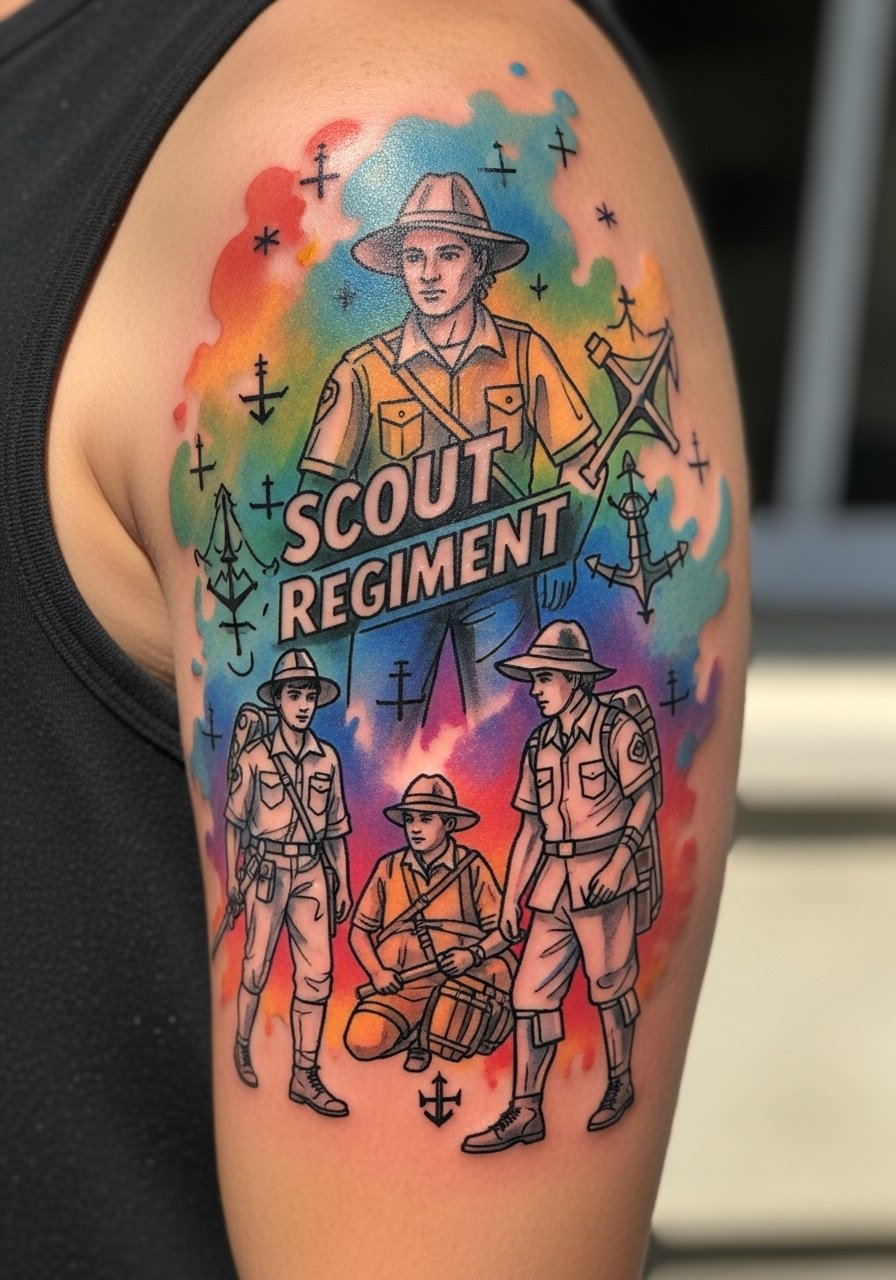
Upper arm watercolor looks painterly fresh but can fade into a muted haze faster than black and gray. Ask for black anchors or linework to hold the scene in place so the colors have defined edges when they soften. A common mistake is relying solely on soft washes without dark points of contrast. Expect two sessions and plan a color refresh in year two or three depending on sun exposure. For the appointment wear a loose button down shirt for easy access to the shoulder and arm.
20. Blackwork Rib Cage Titan Silhouette
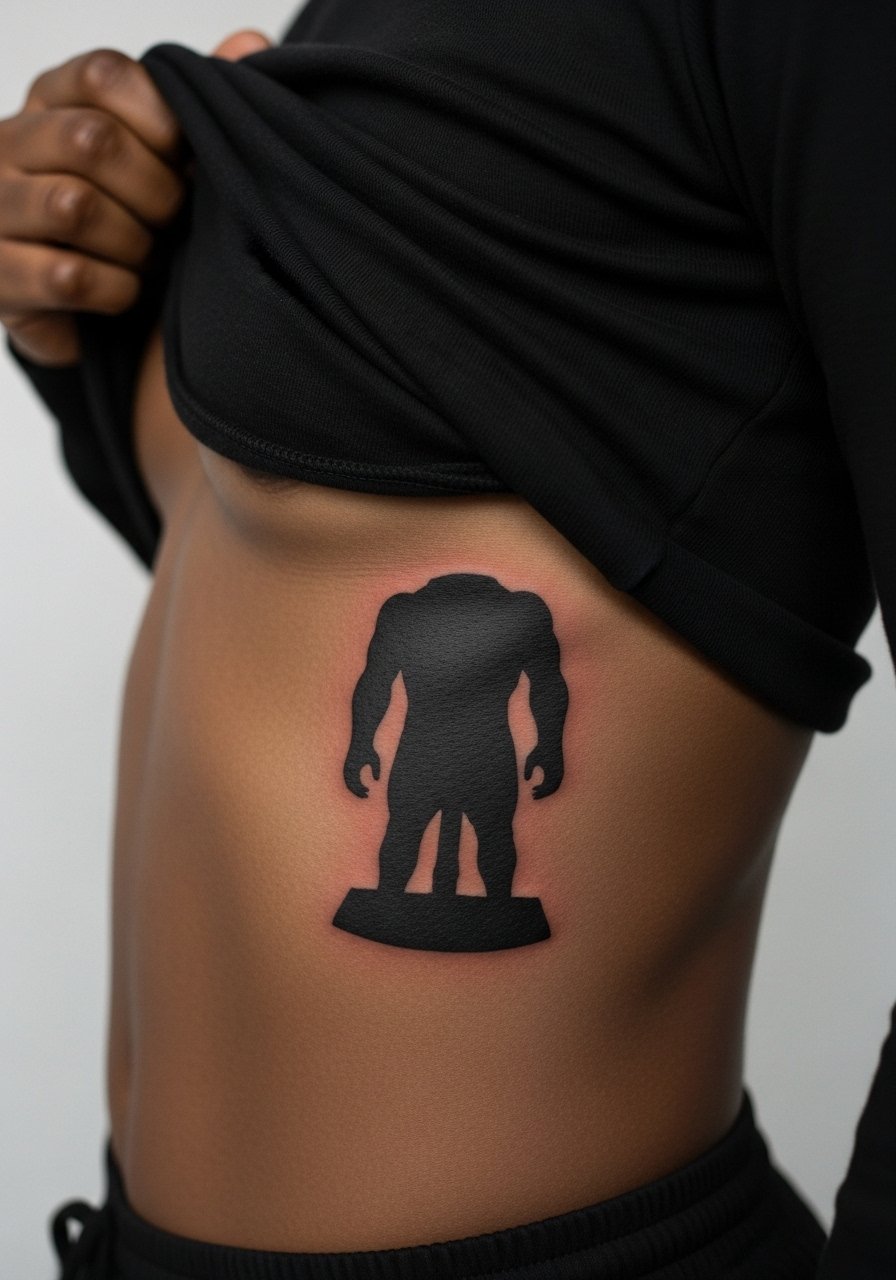
Ribcage blackwork makes a strong statement but it is one of the more painful placements. Artists sometimes disagree whether dense black holds on ribs the same as on thighs. One perspective worries that breathing and thin skin cause more scabbing and pigment loss. The other perspective says an experienced artist can pack consistent saturation if sessions are paced. Tell your artist you want staged sessions to avoid overworking. Bring a zip hoodie or fitted sports bra for the appointment.
21. Fine Line Eren Script Along the Collarbone
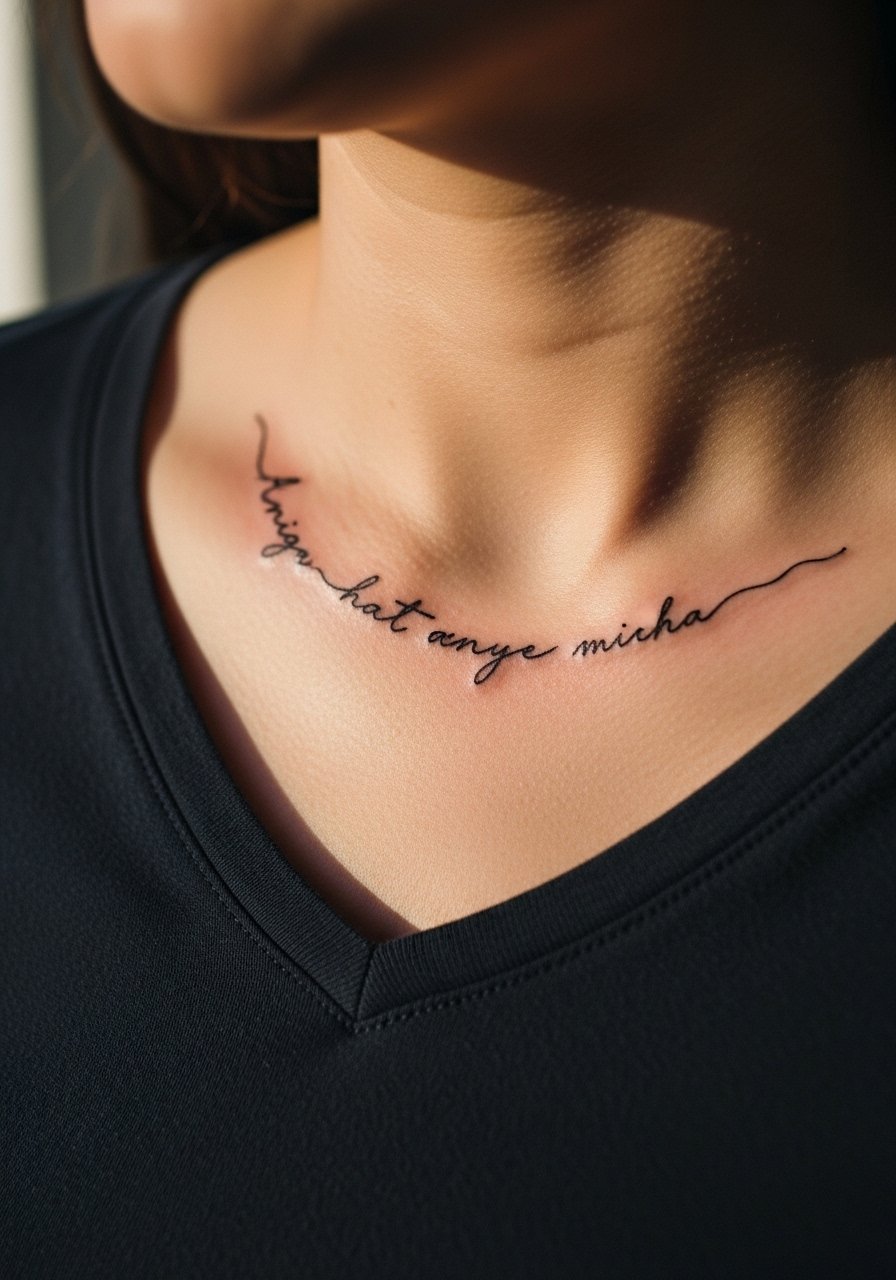
Text along the collarbone must sit horizontally with the bone shape, otherwise letters warp as the skin moves. Avoid tiny serif fonts that lose character within a year. Ask the artist to write the exact scale on skin and to use modest letter spacing. Pain is moderate and touch-ups may be needed at year three for clarity. Pair with a v neck black tee or a subtle pendant that does not overlap the letters.
22. Neo-Traditional Shoulder Shield With Scout Gear
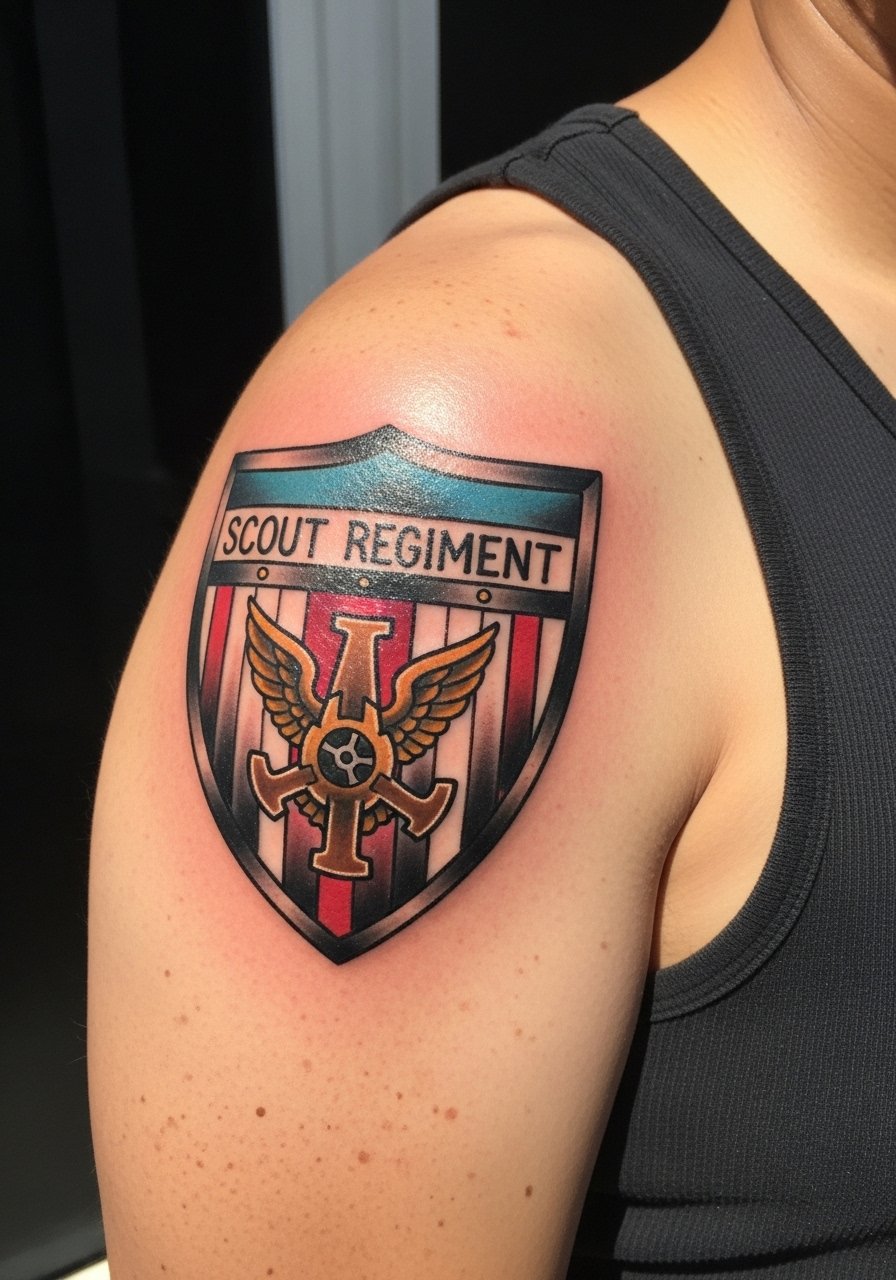
Deltoid shields sit on rounded muscle, which helps the image read from multiple angles. Tell the artist you want clean outlines and saturated midtones rather than micro detail. The mistake I see is packing tiny emblems into the shield that blur as you move. Sessions are usually one to two and you will likely need a color refresh by year three. For show-off wear a sleeveless tank top to frame the shoulder.
23. Black and Gray Jawline Attack Titan Peeking Over the Collar
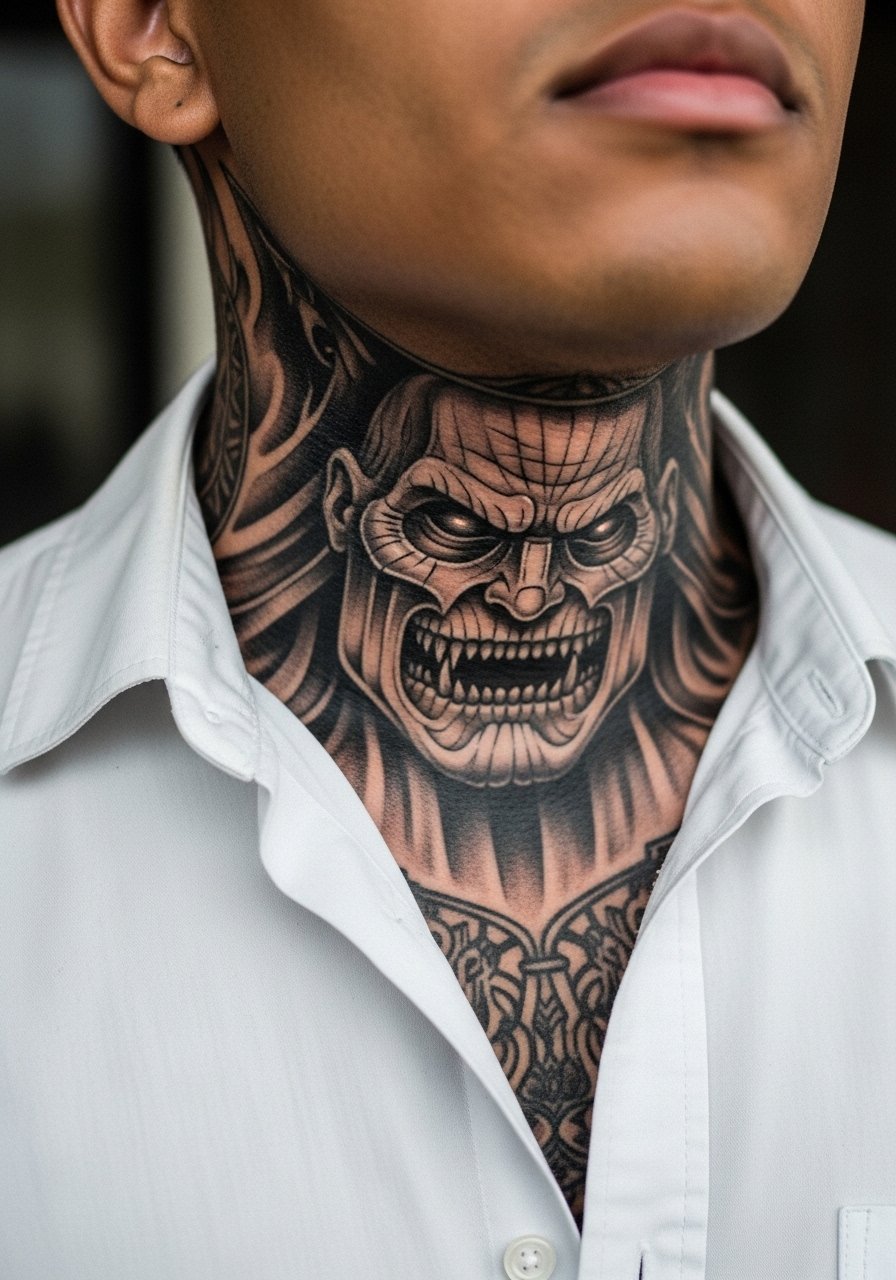
Upper chest pieces near the collar read well under shirts and age similarly to shoulder work. Ask for a strong primary outline along the jaw and lower saturation on tiny facial lines so the main silhouette does not wash out. The main mistake is over-detailing tiny teeth and gums that become smudged. One to two sessions are typical and a touch-up at year three keeps contrast. For the appointment choose an open collar shirt that lets the artist reach the chest easily.
24. Ornamental Mandala With Scout Wings on the Lower Back
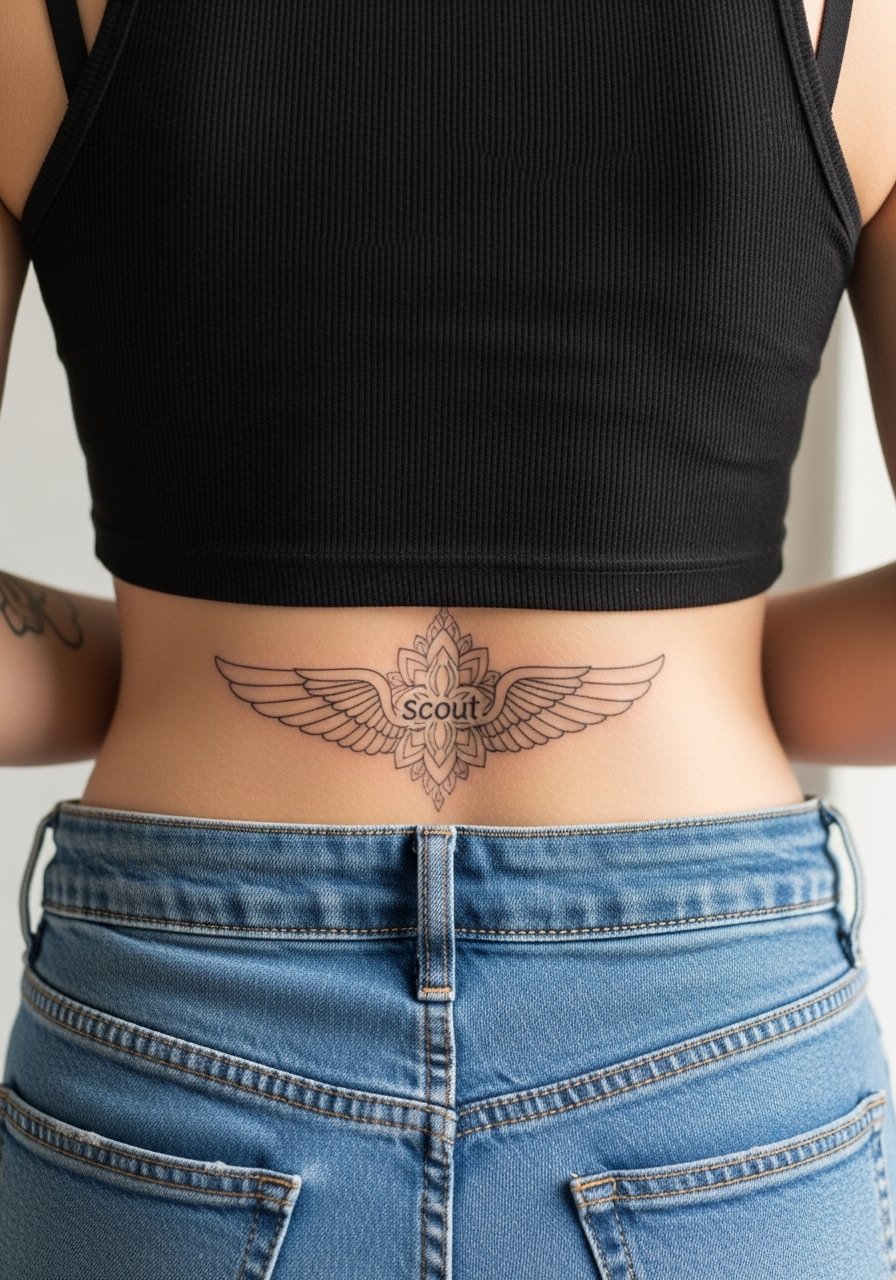
Lower back designs need careful symmetry and spacing because tight mandala centers can swell visually as the skin settles. Ask the artist to leave airy negative space in the center and to map the piece with the curve of the lower back. A common mistake is centering too close to the spine or compressing detail into a tiny circle. Sessions vary and touch-ups help keep the center crisp. For the appointment wear a tank top with high-waisted bottoms so the artist can access the area with minimal fuss.
25. Tiny Scout Emblem on the Ankle
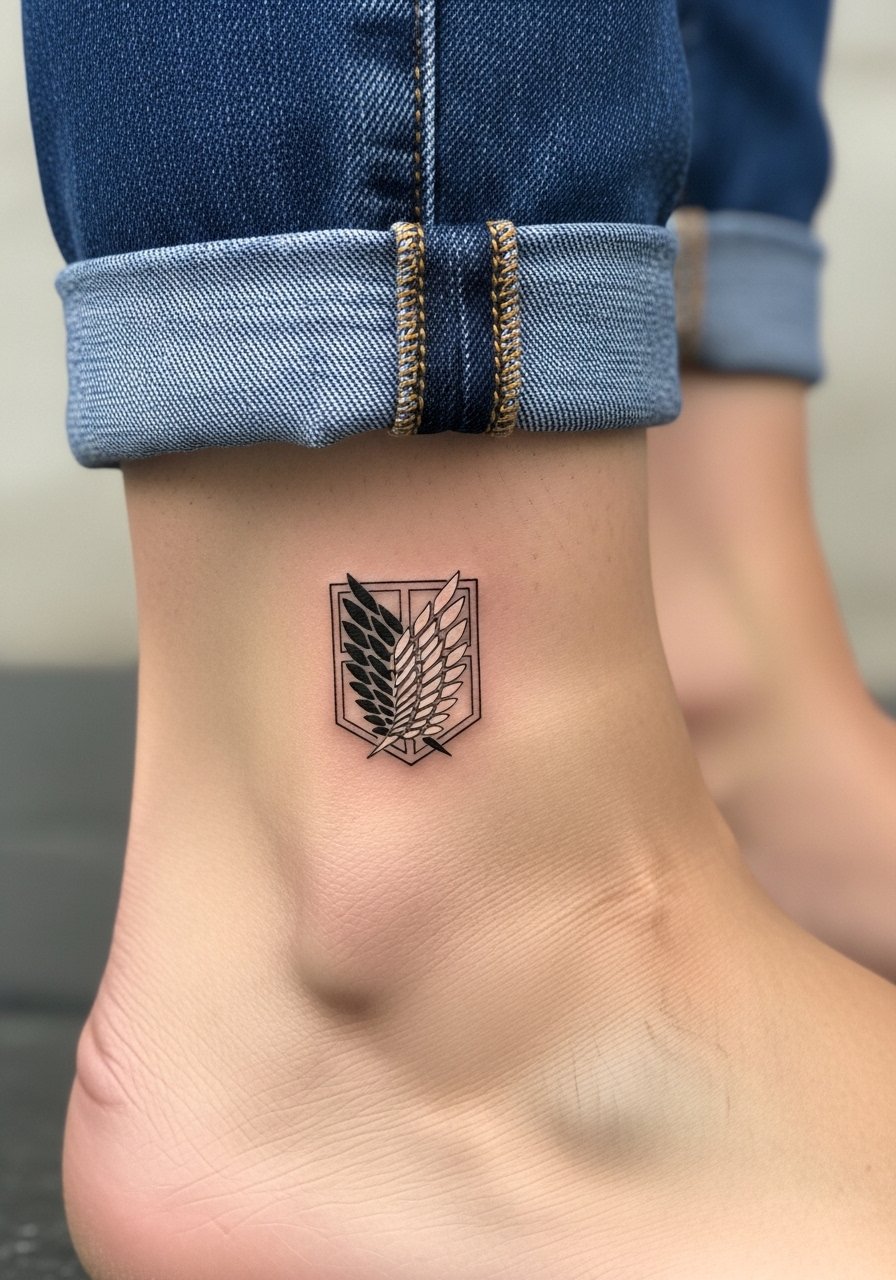
Ankle tattoos face constant friction from shoes and socks which wears fine lines quickly. Ask for a bold outline with minimal interior detail to keep the emblem readable after six months. The mistake is choosing a 1-inch complex emblem that becomes a smudge. Session time is short and expect a touch-up within one to two years. Show it with rolled-up jeans or sandals when you want the emblem visible.
26. Inner Bicep Micro-Realism Eren Detail

Inner bicep skin is soft and takes ink well but stretches with muscle movement, which affects micro detail. Ask for slightly larger scale on delicate facial elements and for touch-up plans in your consult. The common mistake is requesting ultra-fine shading that disappears after a few months. Pain is higher than on the outer arm and sessions should be paced. Wear a loose tank top so the artist can raise the arm without tugging clothing.
27. Geometric Colossal Titan Panel Along the Rib Line
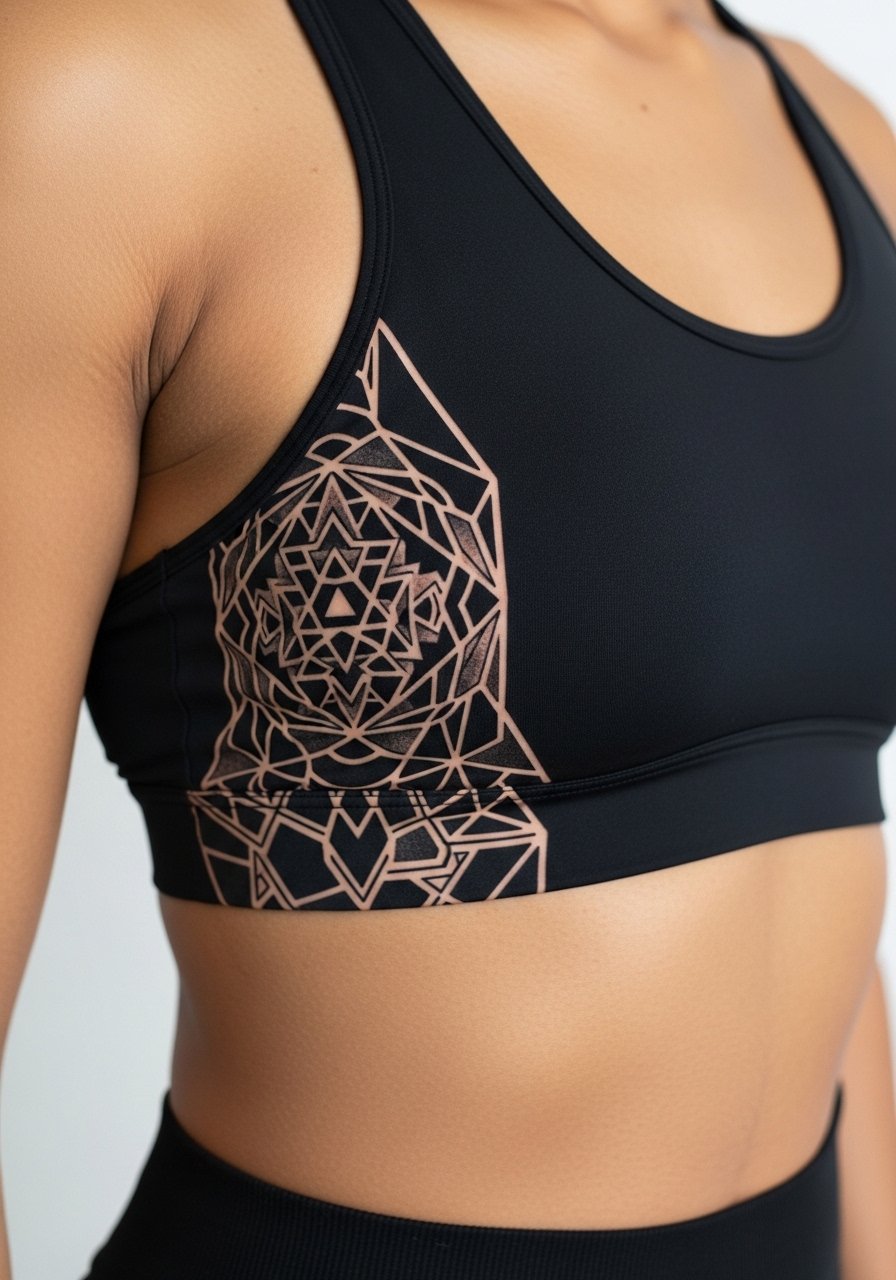
Rib line panels look dramatic when they follow the body's natural angles but the area heals with more scabbing than flatter surfaces. Artists debate fine line on ribs. One group says the constant flex and thin skin blur minimal lines within two years. The other group believes correct needle depth and spacing make ribs suitable for detailed work. Ask your artist which side they fall on and request staged sessions to avoid overwork. For the appointment wear a fitted sports bra you can pull down slightly to expose only the area.
Frequently Asked Questions
Q: Will a fine line Wings of Freedom on my inner wrist fade faster on tan or dark skin?
A: In my experience ultra-fine interior feather lines tend to soften faster on tan and dark skin because contrast is the limiting factor. Ask your artist for slightly thicker primary lines and test a small healed sample if you can, and expect touch-ups sooner than with heavy blackwork.
Q: How should I dress for a thigh realism session to make the artist's job easier?
A: Wear loose athletic shorts or high-waisted bottoms that you can shift without tugging fresh ink. Bring a loose pair of pants to leave on during transport so the area avoids friction right after the session.
Q: Do watercolor Scout scenes need different long-term care than black and gray pieces?
A: Yes, watercolor relies on more pigment dilution and tends to lose saturation faster with sun exposure. Keep colored areas covered in strong sunlight and plan on color refreshes around year two if you want the washes to stay vivid.
Q: Are collarbone geometric designs likely to merge into a blotch as they heal?
A: They can if they are drawn too dense near bone. The safer approach is clear negative space and slightly larger line spacing so the geometry retains its shape as skin settles.
Q: Where should I look for artists who specialize in AoT realism without naming specific studios?
A: Search hashtags like #AttackOnTitanTattoo or #AoTRealism on Instagram and filter local results with "[city] anime tattoo studio" or use platforms like Tattoodo and Booksy to find guest spots. Check healed photos and ask about touch-up policies before booking.
