
Fine line and ornamental cover ups dominate the saved boards right now, but they do different jobs on surgical tissue than on intact skin. Scar thickness, how long you wait after surgery, and whether your weight has stabilized all change the result. Read through designs that work with a horizontal tummy tuck line, what to tell your artist, and which looks hold up so you can plan the right timing and wardrobe.
1. Mandala Centered Over the Scar Line
I've seen mandalas used to anchor a stomach scar because their symmetry distracts from a straight incision. Tell your artist you want the central point to sit above the belly button so the scar becomes part of the geometry, not a competing line. Common mistake is cramming too many tiny petals over scar tissue, which can blur as the lines settle. Expect two to four sessions depending on intricacy. Pain is usually low to moderate on the lower abdomen. For the session wear a loose drawstring pant so the artist can access the lower strip easily. Touch-ups are likely at year two on scarred areas.

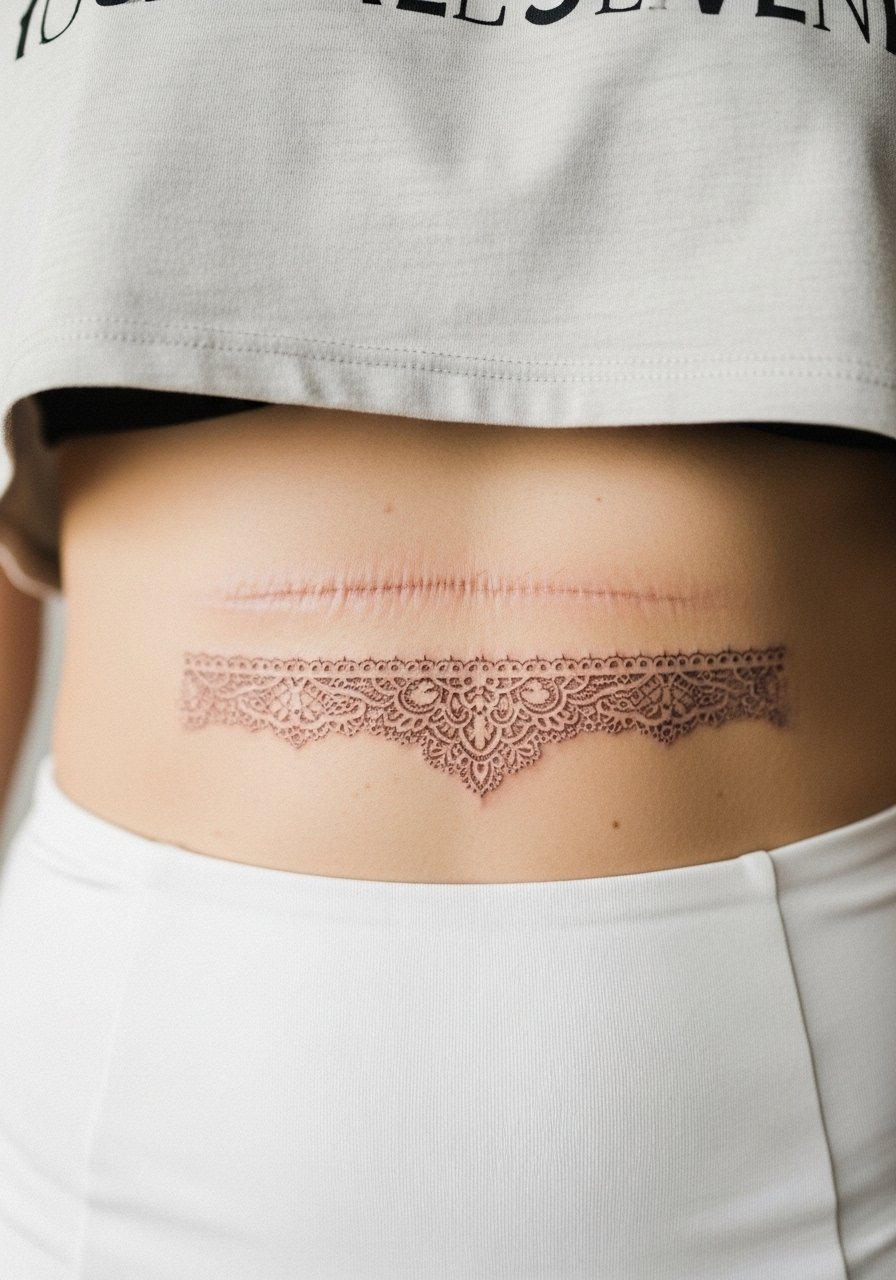
2. Lingerie-Style Lacework Band
When someone wants the scar to read like a deliberate band, fine line lace is the natural choice. Say you want open negative space and varying thread thickness so the texture masks raised portions of the scar. A frequent error is asking for dense solid fills that sit unevenly on scar tissue. Expect three sessions and a delicate touch on placement. This placement pairs beautifully with high waisted bikini bottoms when you want to show it off, and wear loose joggers to the appointment. Scar readiness matters here, so plan timing and a possible touch-up later.
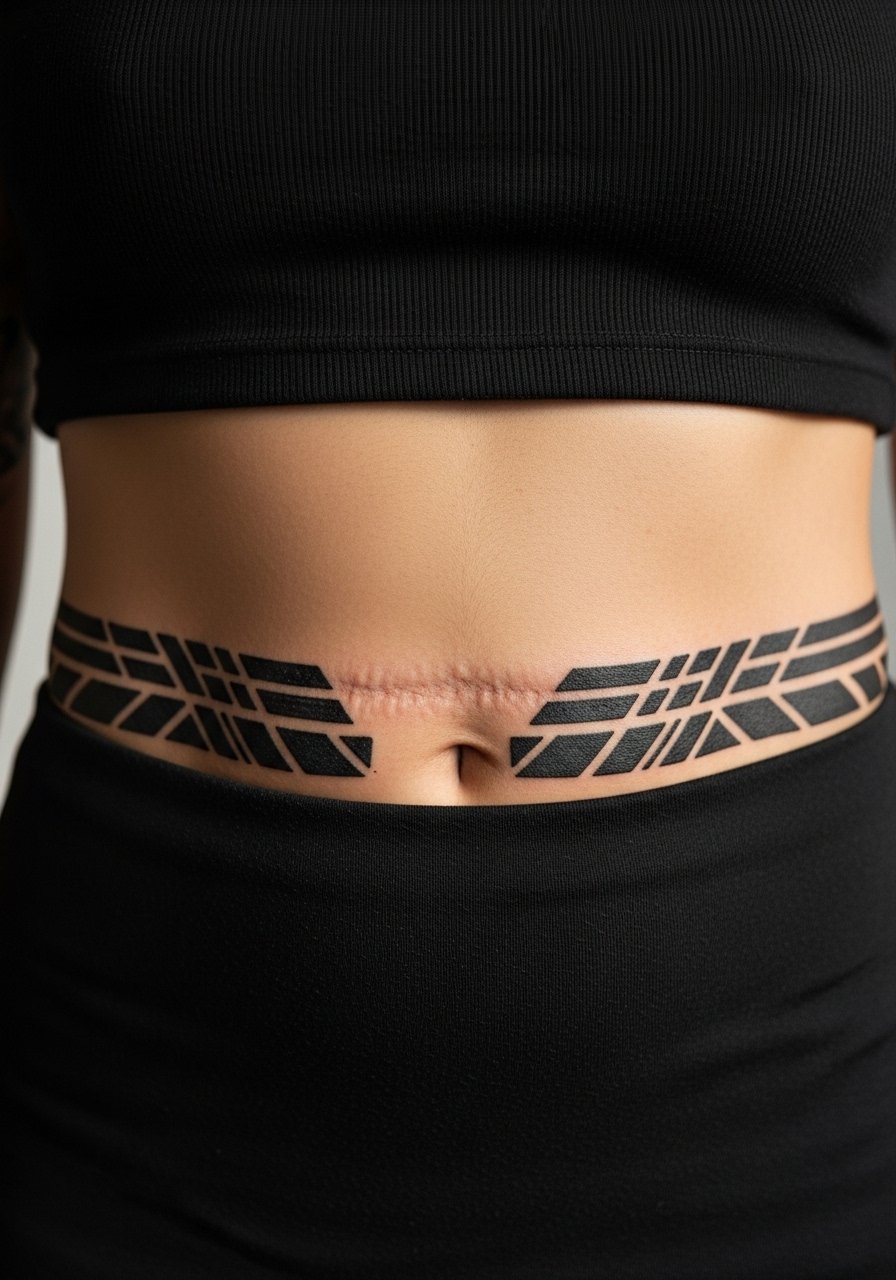
3. Geometric Waistband With Bold Lines
The geometric band leans on strong, linear elements that align with the incision for a seamless disguise. In consultation, ask for slightly thicker lineweight than you might choose for non-scar skin so the shapes read as a band rather than a ghosted line over raised tissue. A common mistake is choosing too-small repeats, which leads to early merging and a muddled look at year two. This is usually a one to two session job. Pain averages moderate. Pair it with a belted midi dress when you want the band to echo clothing lines.
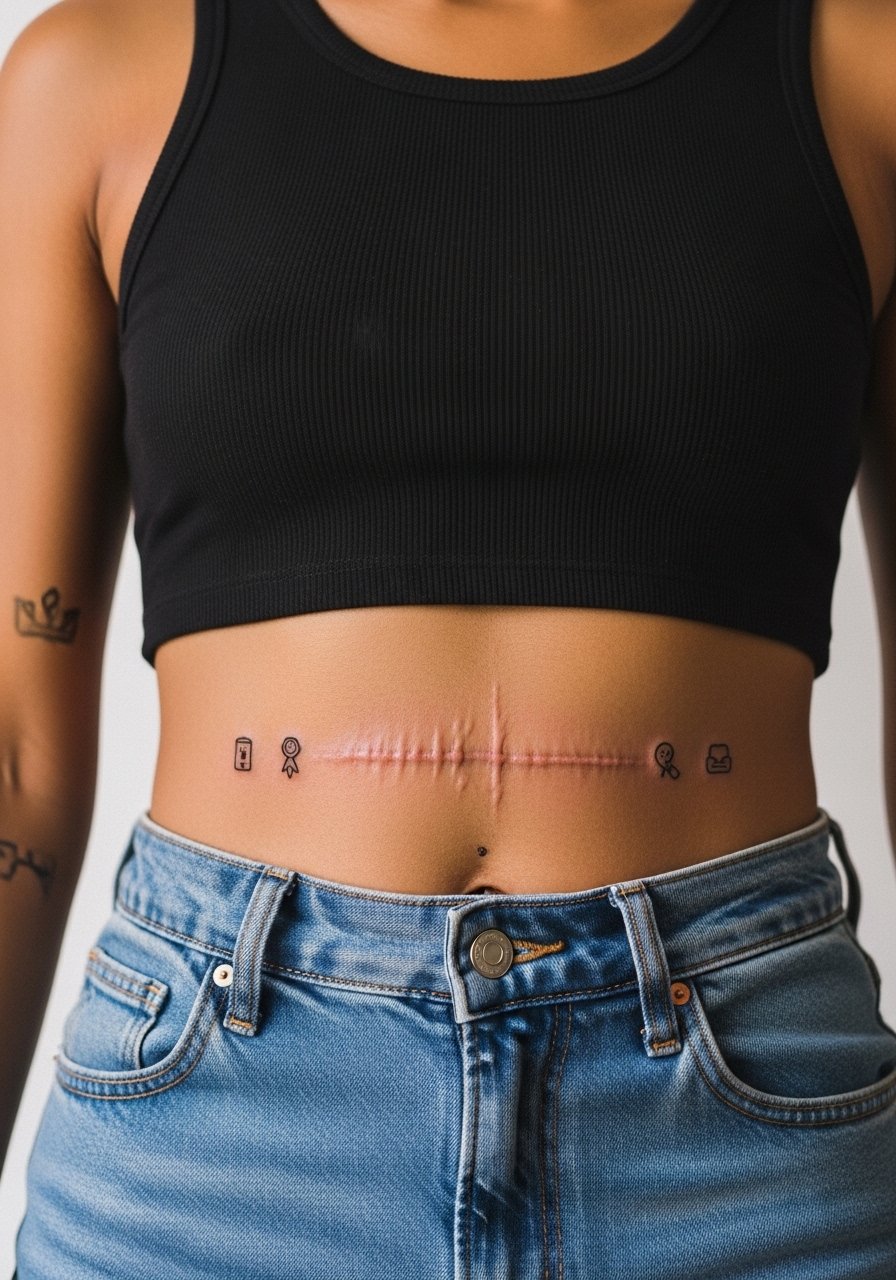
4. Minimalist Icon Cluster Along Scar Ends
Small icons placed at the scar ends are a great starter option if you want to expand later. Tell your artist you plan to add more work, so keep spacing and scale conservative. The mistake is packing icons too close together up front, which leaves no breathing room when you expand. This typically fits into a single short session and has low pain for the lower abdomen. It ages predictably if dots and tiny lines are spaced well. For showing it off, a fitted tank crop works cleanly.
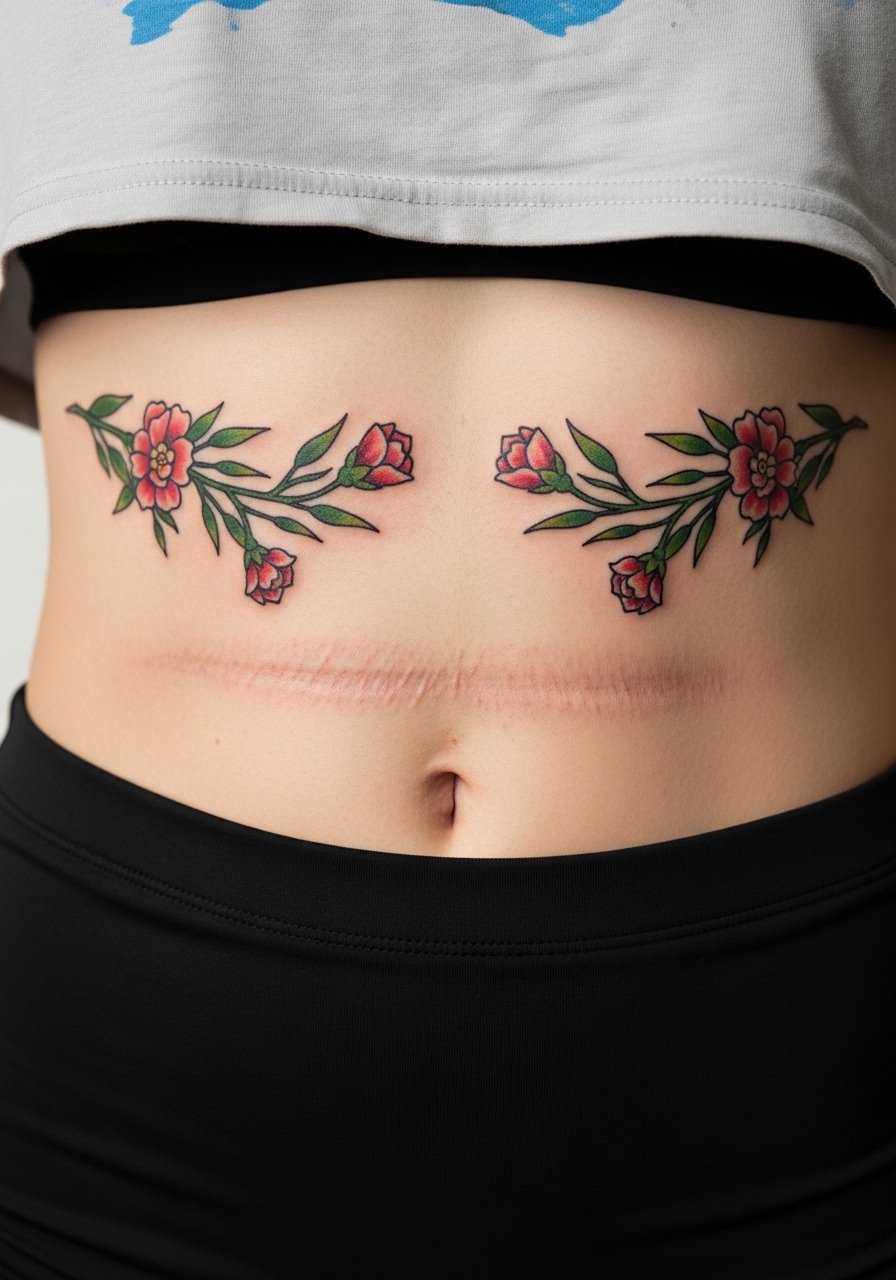
5. Floral Vine Wrap That Weaves Over the Line
Floral vines are forgiving because they curve and vary in thickness, which helps disguise uneven scar texture. Ask for stems that cross the scar at angles so the eye follows the flow rather than the straight incision. A bad version treats the scar like a hard edge and forces symmetrical flowers directly over raised tissue. Expect two to three sessions for color blooms and stems. Pain is moderate. If you plan summer reveals, pair it with a flowy sarong or high-waisted swimwear. Budget for touch-ups after weight changes.
6. Camouflage Skin-Tone Blending
Camouflage work uses matched pigments to visually soften the scar rather than cover it with a heavy design. When you consult, request color matching trials on a tiny patch to see how the pigment settles into scar tissue. The controversy here splits people into two camps. One camp favors camouflage for discretion and minimal look. The other camp prefers decorative designs that incorporate the scar as a visible element. Both stances are valid, so decide whether you want near-invisibility or a statement. This approach usually needs two sessions and a touch-up. For session comfort, wear a full gown or loose dress.
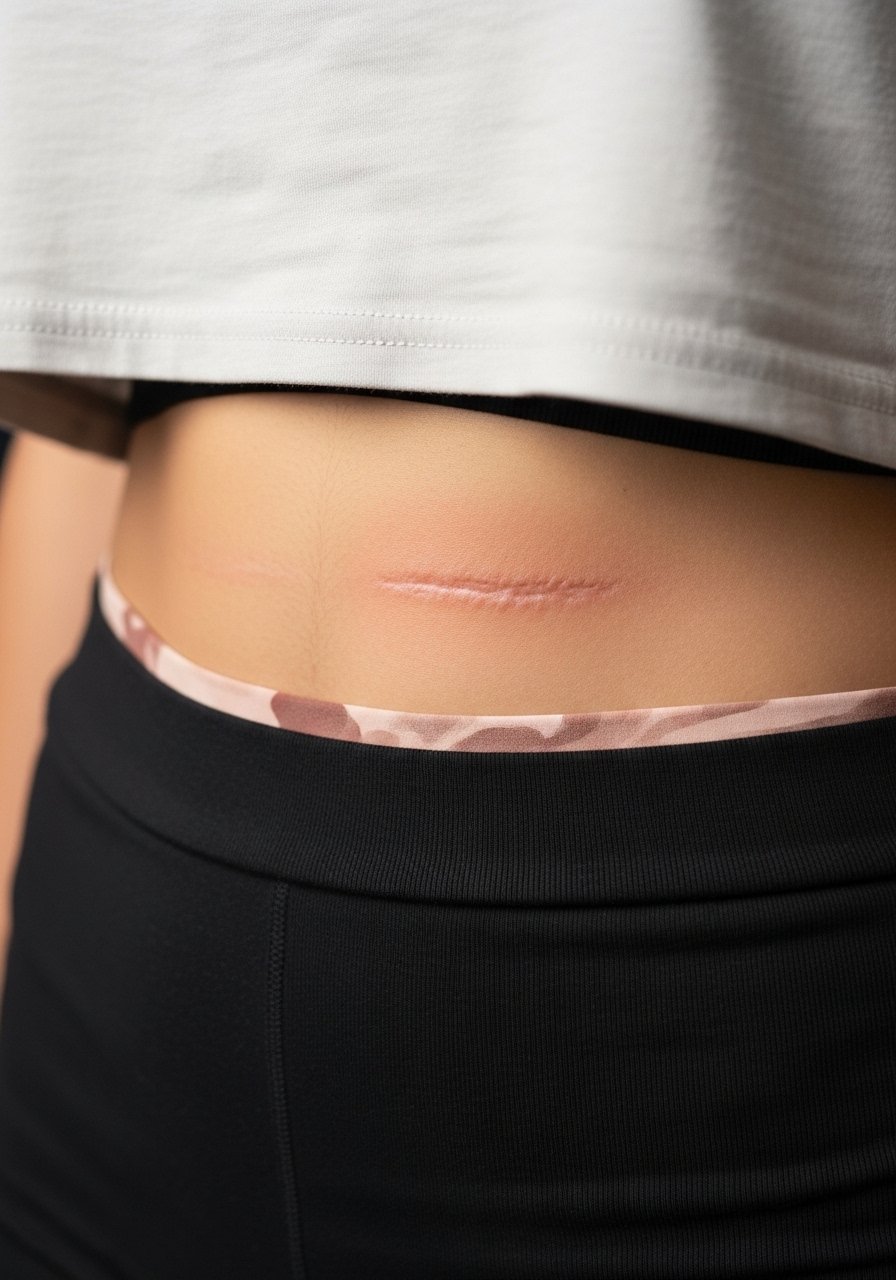
Pre-Session Essentials
Those first six designs range from bold bands to subtle blends, and proper prep makes the session smoother and the first week of healing much easier.
-
TuckTats temporary scar covers. Good for trying scale and placement on a tummy tuck line before committing to real ink.
-
Rubbing alcohol pads. Useful for clean removal of temporary adhesives and for prepping the skin the day of your appointment.
-
Waterproof scar makeup. Helps test how swimwear and sweating will affect visibility while you wait for a permanent option.
-
Thin protective film roll. Keeps the treated area from rubbing against clothing in the early healing window, especially on low-rise waistlines.
-
Aquaphor healing ointment. Thin layers help keep scarred needle channels moisturized during the initial days without suffocating the skin.
7. Watercolor Waistband in Soft Blends
Most watercolor pieces over scar tissue work when the design uses broader washes rather than tiny stippled strokes. Tell the artist you want soft edges and minimal stipple near the scar to avoid patchy settling. The usual mistake is expecting watercolor to age like solid blackwork. In reality the softer tones require touch-ups sooner, often around year two to three. Sessions run two sittings for layering. Pain is low to moderate. Pair this look with wrap skirts earth tones for a bohemian reveal.

8. Neo-Traditional Bloom Border
Choose neo-traditional blooms when you want saturation and a longer visual lifespan. Ask for heavier saturation in petal edges away from the raised scar, with gentler shading directly over the incision. A frequent error is loading strong color on the scar itself which can diffuse in scar tissue. Expect two to three sessions and moderate pain. Over time the saturated edges hold up better than pastel washes. Session wear should be loose drawstring pants so the artist can work without fabric pressure on the abdomen.
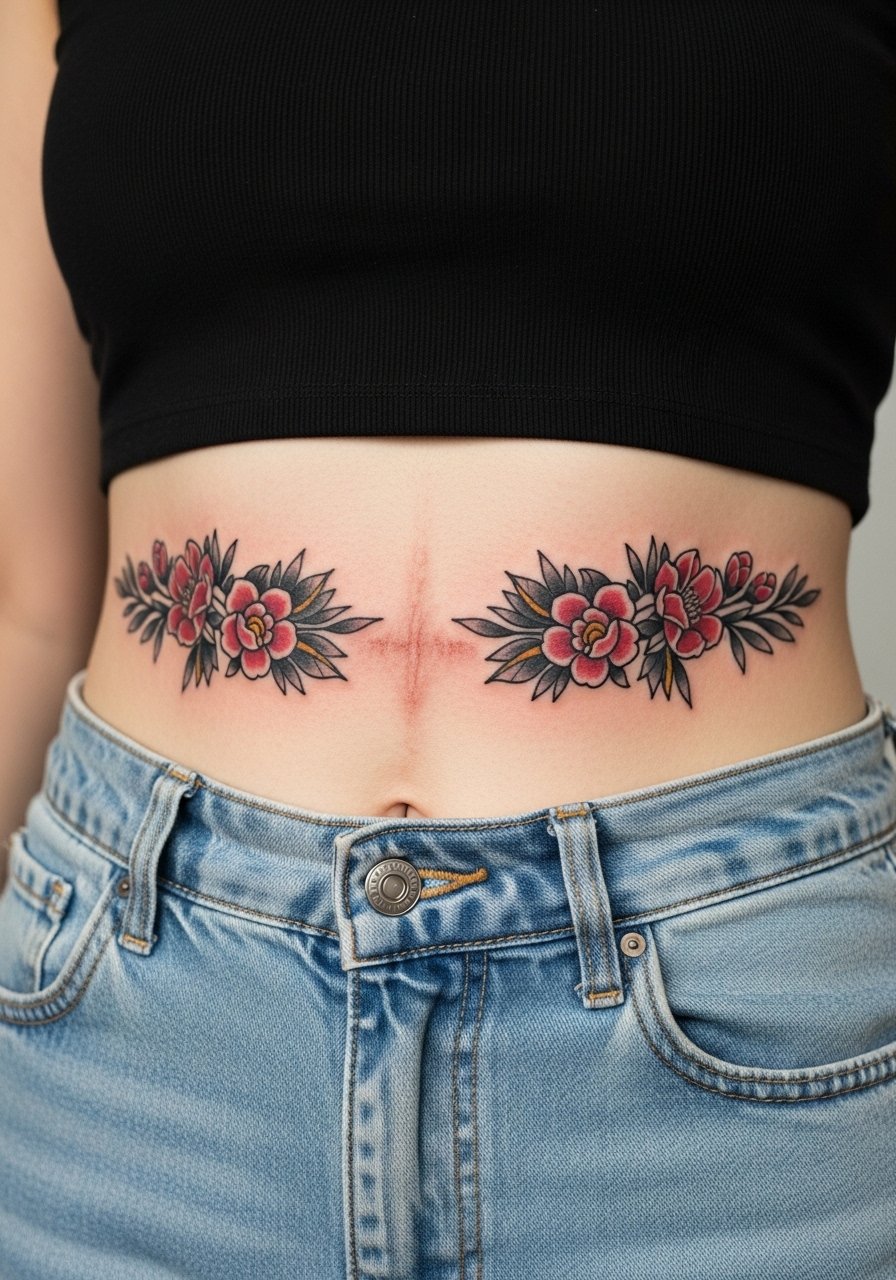
9. Threaded Dot Work to Blur Texture
Dot work can be tuned to mask raised scar texture by increasing dot density in uneven areas and opening up elsewhere. In consultation, request a preview where the artist uses dots to bridge ridgey zones so you can judge optical blending. A mistake is using dense dot fields all along the scar which creates a heavy visual band. Dot work sessions are methodical and may take two sessions. Pain is moderate. For after sessions, a one piece swimsuit will keep pressure even and avoid rubbing low-rise seams as the area heals.
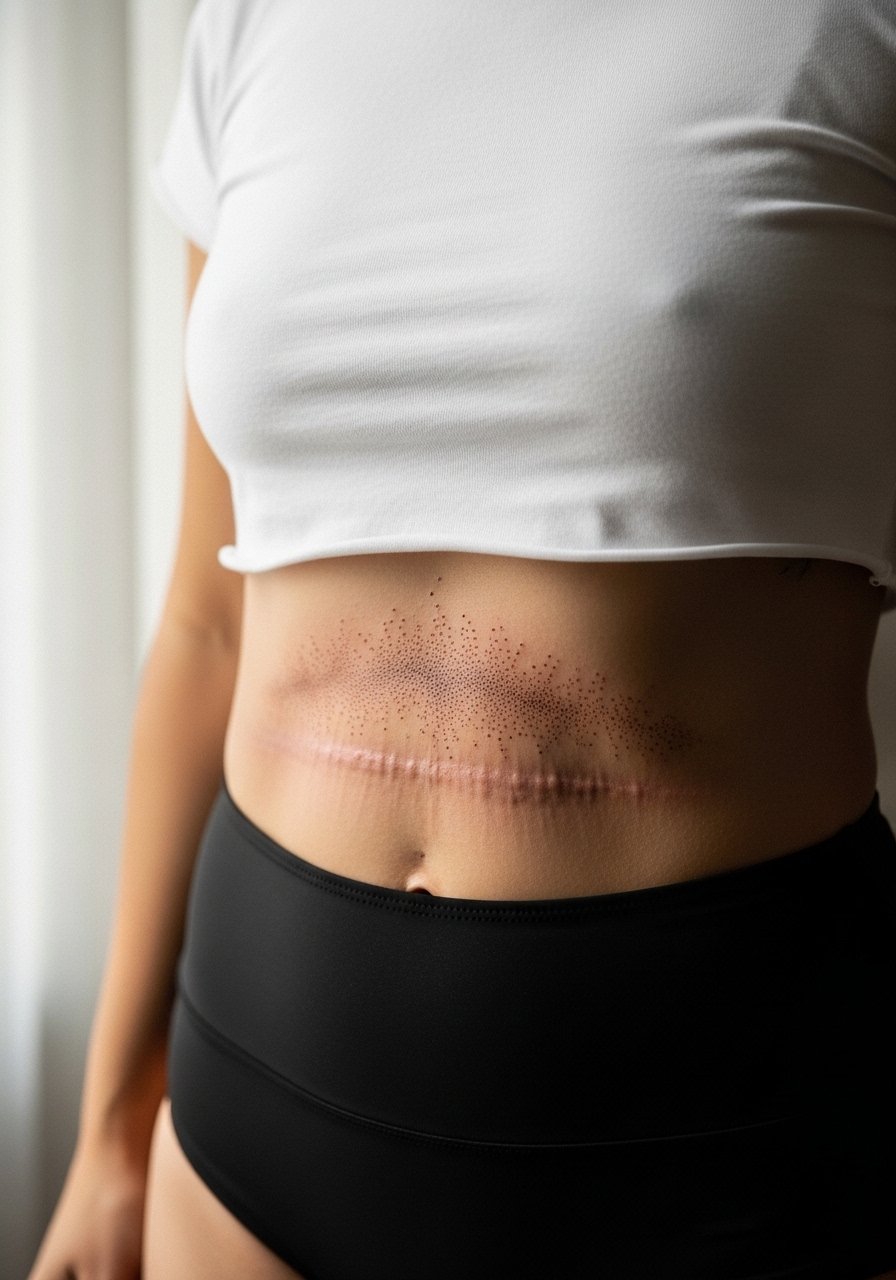
10. Script That Follows the Incision
A short script or phrase arcing over the scar reads elegant when the lettering follows the line instead of sitting across it. Tell the artist to use slightly bolder stroke on scared segments so letters stay legible long term. The common mistake is tiny, ultra-fine lettering which tends to blur on scar tissue by year two. This is usually a single session. Pain is low to moderate. Pair the finished piece with a thin chain pendant necklace that sits above the line for balanced framing.
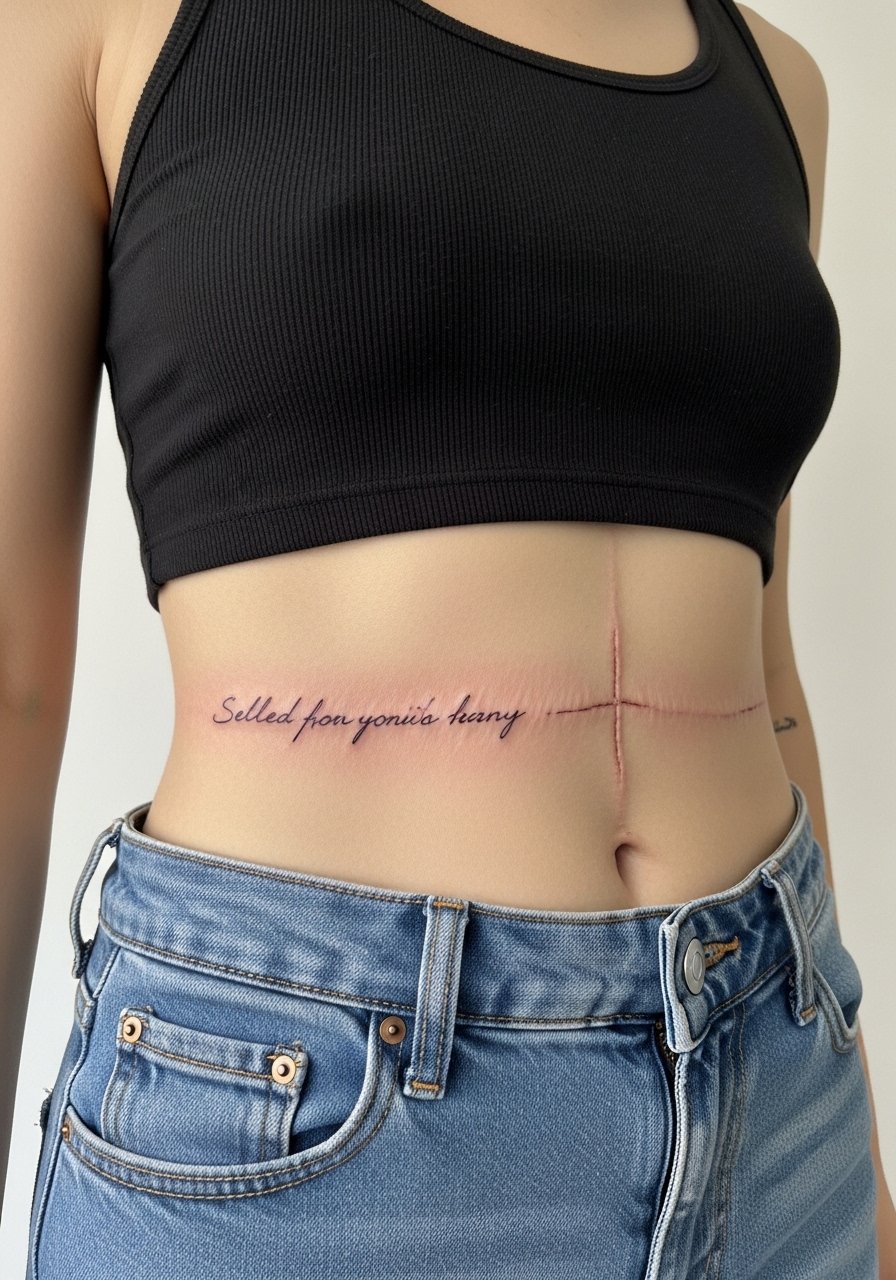
11. Botanical Crest That Wraps Horizontally
A crest-style botanical piece uses varying leaf sizes to hide thick scarring while feeling intentionally placed. Ask for asymmetry so the crest does not emphasize a straight scar line. A mistake is mirror-image symmetry that highlights the incision instead of masking it. Expect two sessions. Pain sits at moderate. This style ages well because of varied lineweight, but expect touch-ups if your body shape changes. For session comfort, wear a loose button-down shirt you can pull aside.

12. Blackwork Filigree With Negative Space
Blackwork filigree uses heavy silhouettes and smart negative space to disguise raised areas while reading bold from a distance. In consult, ask the artist to block rather than to line over the thickest scar zones. A rookie move is insisting on matching fine line scale from other body parts. This one or two session design usually holds longer because of saturation. Pain is moderate to high depending on how much solid black is packed. For showing this off, a bodycon midi dress will keep the illusion seamless.
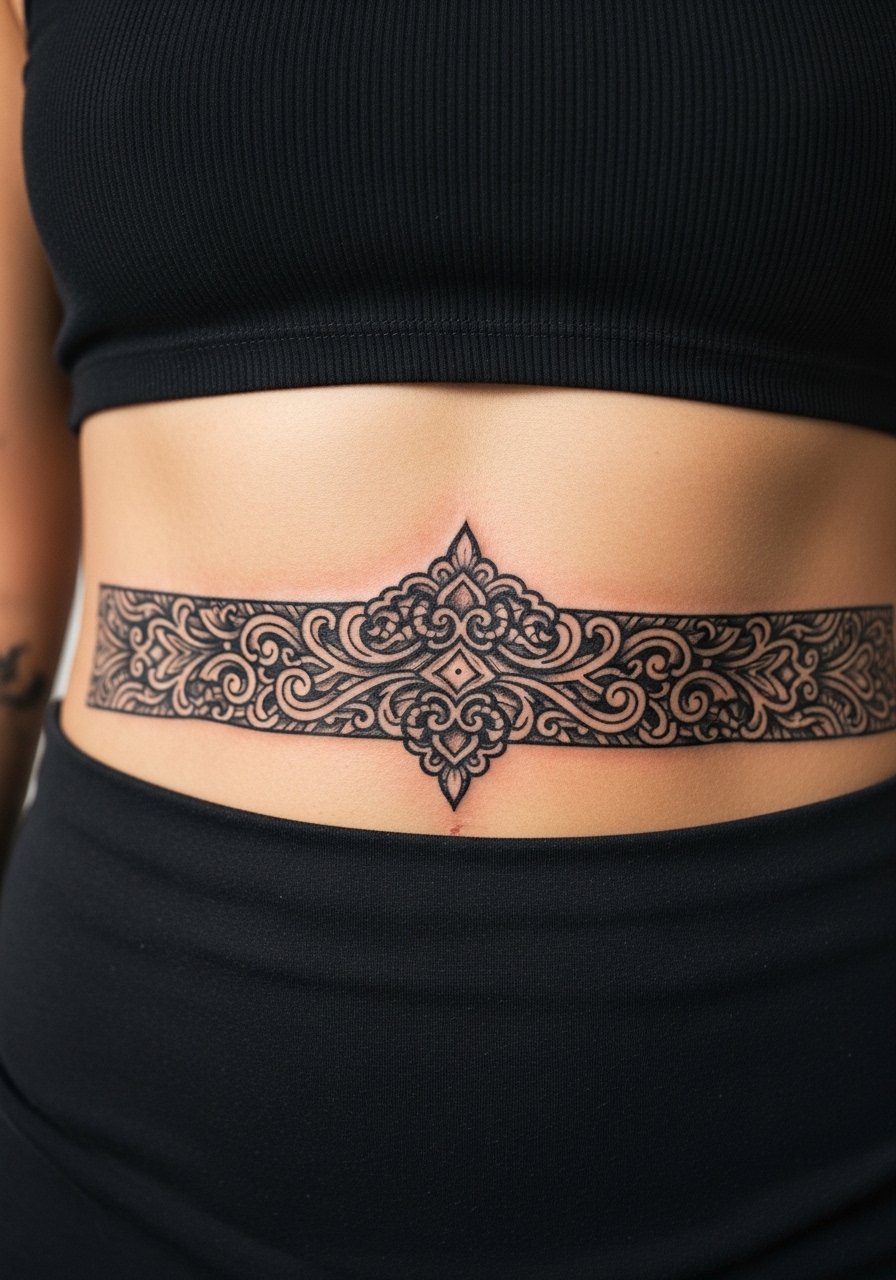
13. Asymmetric Vine and Star Mix
Mixing small stars with winding vines breaks the eye away from a straight scar by creating visual stops. Tell your artist you want scattered focal points and avoid continuous straight stems. The common mistake is a single continuous vine placed dead center which aligns with the scar. This is a quick single session option with low to moderate pain. It scales easily if you add more pieces later. For casual reveals, wear a fitted tank top crop that frames the work without hiding it.
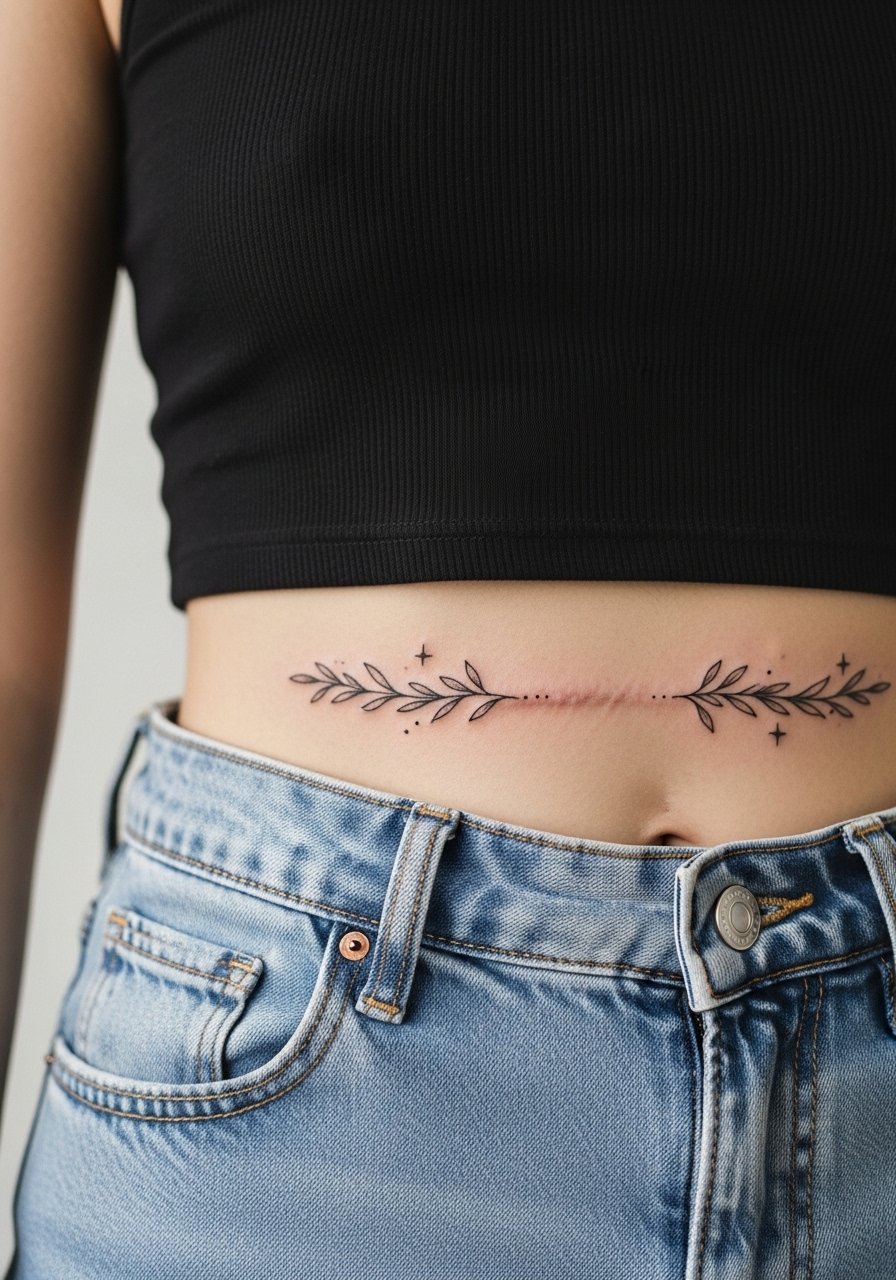
14. Textile-Inspired Sash Pattern
Think of the scar as a seam and design a sash that looks like woven fabric across it. Ask for alternating textures so raised tissue reads like part of the pattern. Avoid flat single-shade fills which show irregularities. Sessions are usually one to two depending on complexity. Pain is moderate. Pair the finished sash with wrap skirt earth tones to emphasize the textile illusion when you wear it.
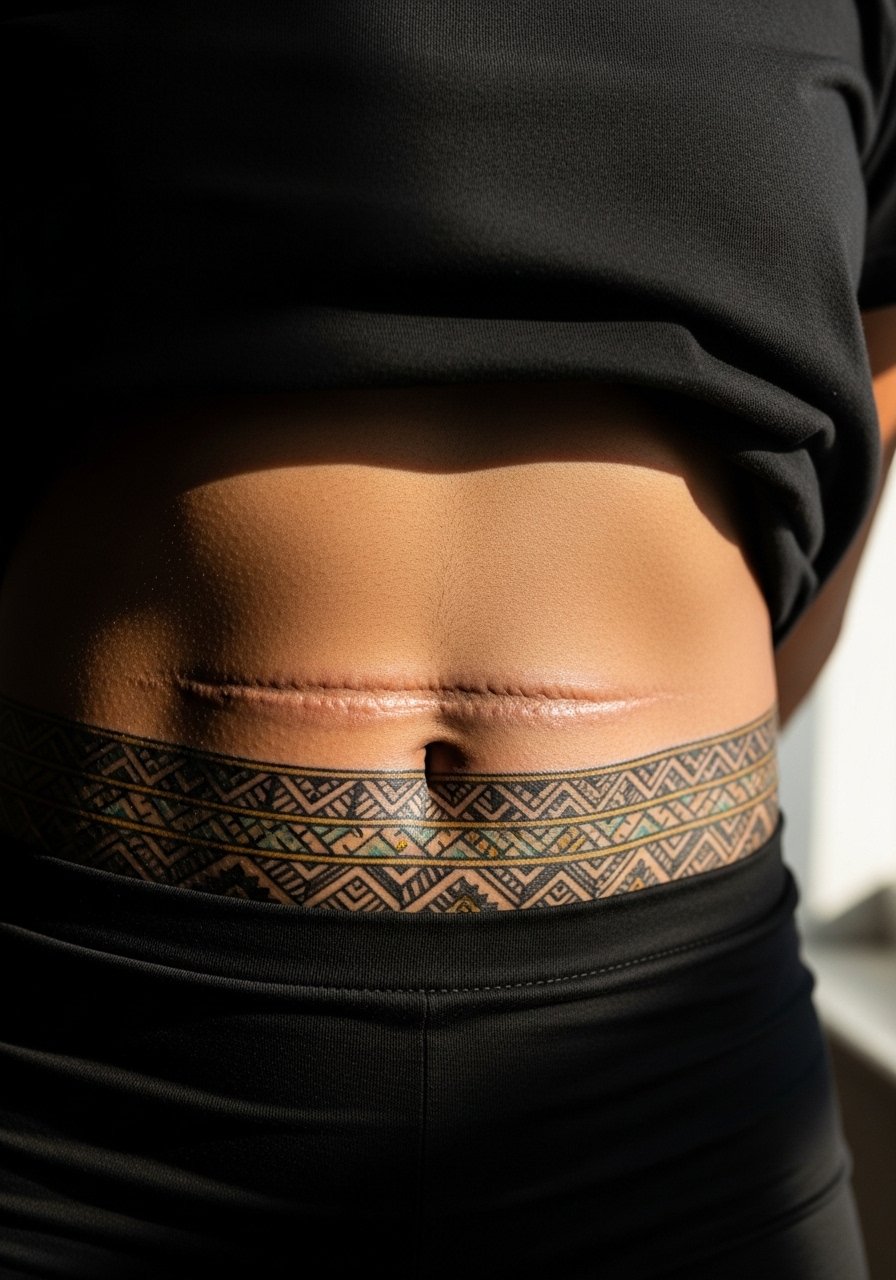
15. Crescent Moon Chain That Bridges the Ridge
A chain of small moons or crescents set along the scar can make the line feel intentional and decorative. Tell the artist to vary crescent sizes so the chain adapts to raised and flat sections. A mistake is uniform size which reveals irregularities. This is a short session and usually low pain. Over time the gaps between moons are what keep the motif legible, and a touch-up around year three is common. Show it off with high waist shorts.
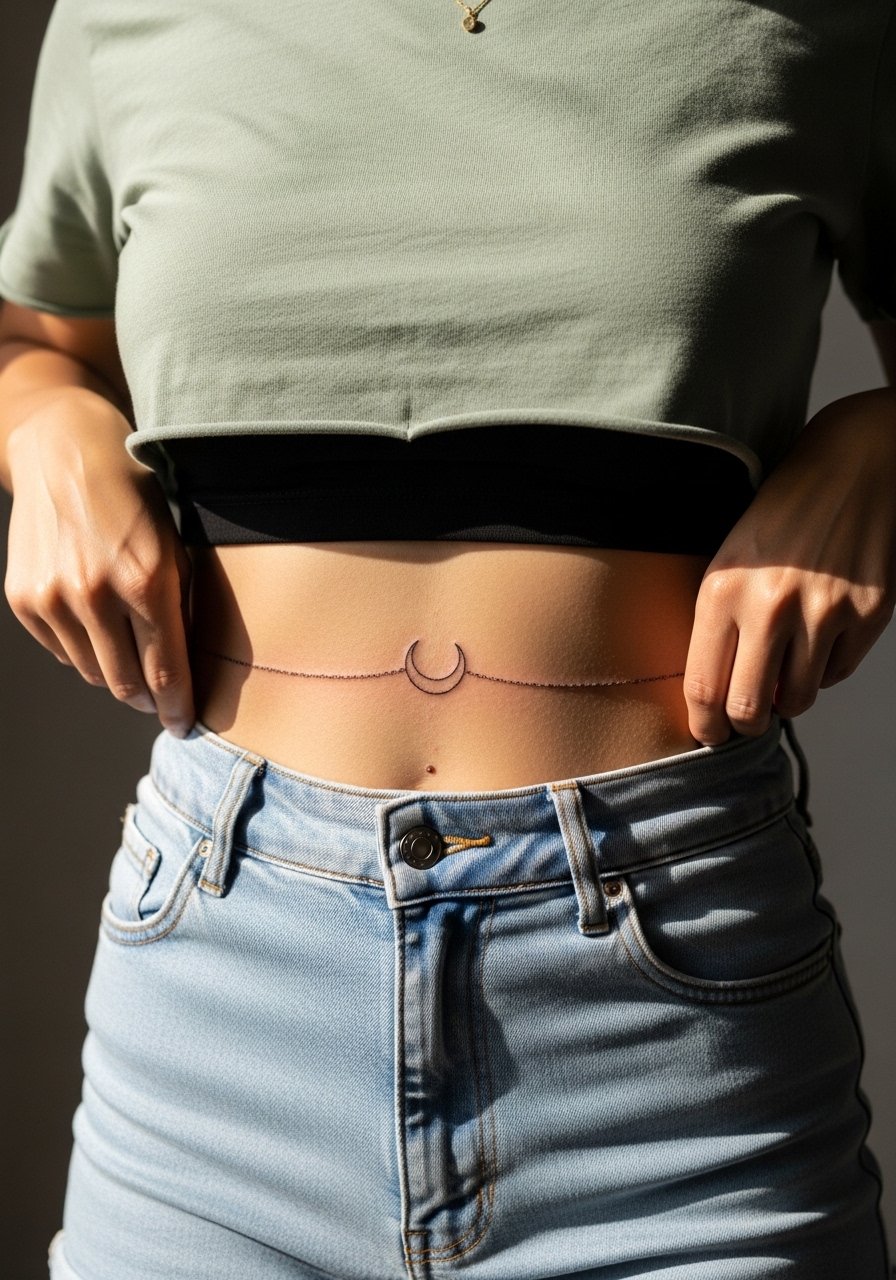
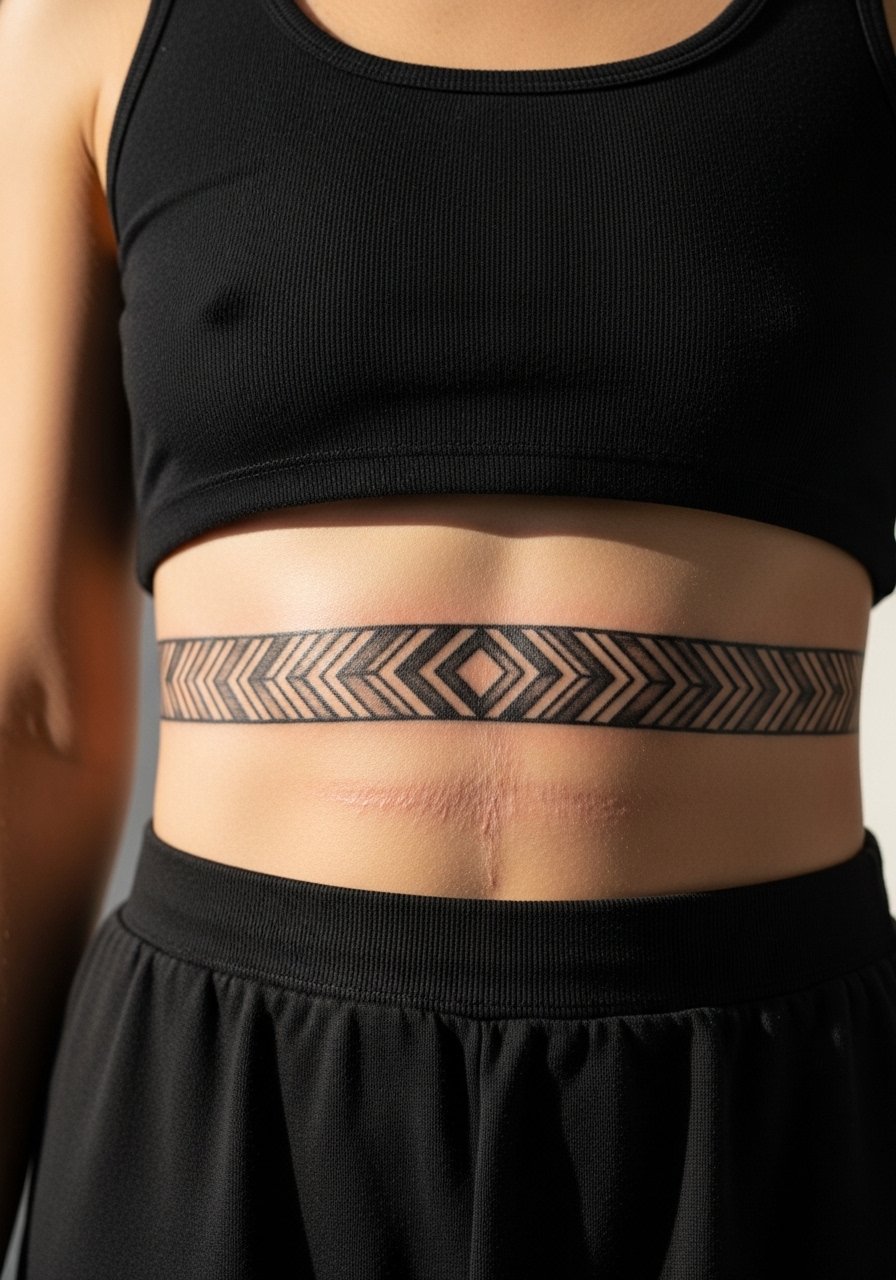
16. Ornamental Chevron Band for Linear Scars
Chevron shapes play with directionality to draw attention away from scarring. Ask for alternating chevrons with open spacing over the raised areas so the band breathes. The common error is too-tight repeat which creates a ladder effect as lines merge. One to two sessions usually covers this. Pain is moderate. For an evening reveal, a belted midi dress complements the band visually.
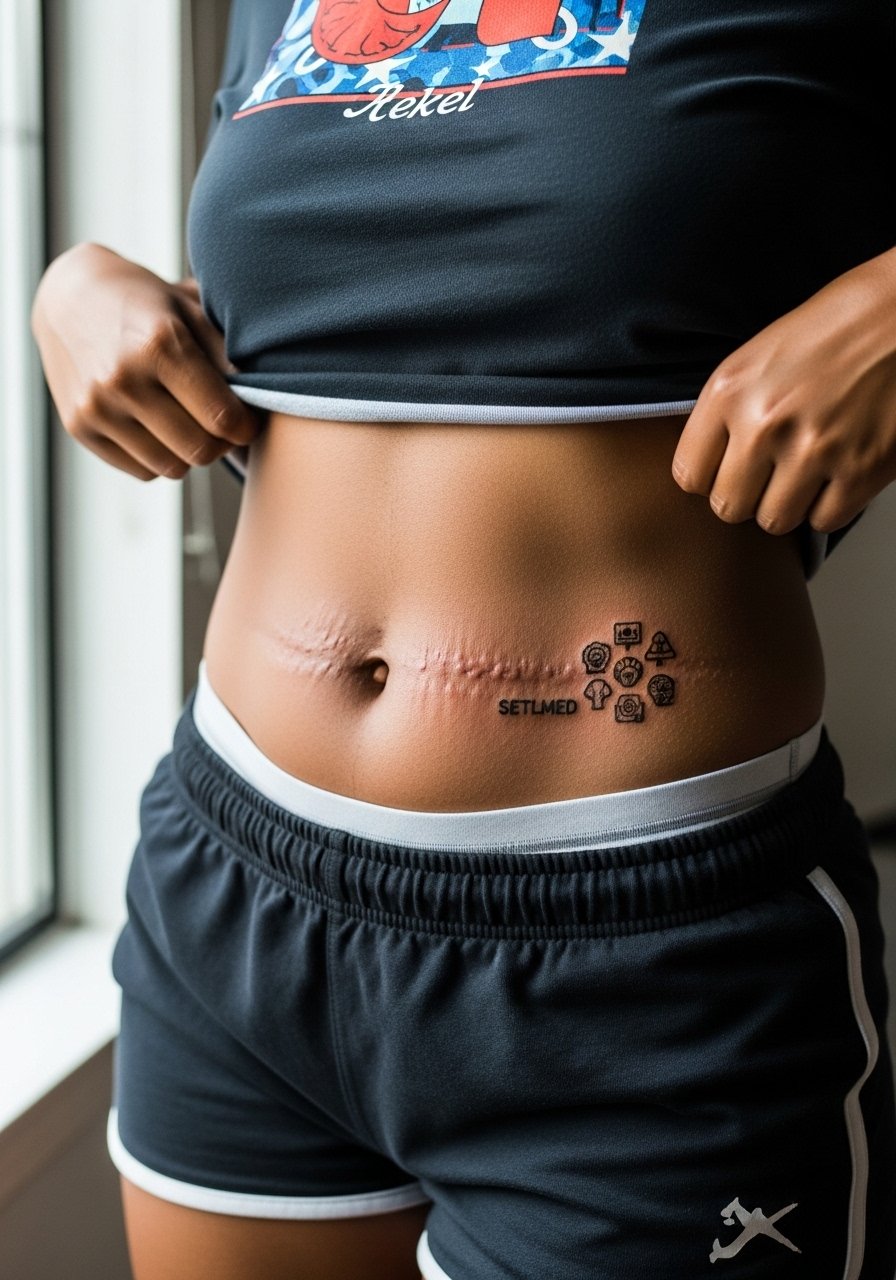
17. Small Anchor or Symbol Cluster at Scar Ends
If you want a literal small cover, tuck icons into the scar ends to distract from the middle. Tell your artist to use slightly heavier dots at hinge points to prevent early fade. Common mistake is trying to hide the entire scar with one tiny icon. This is a short session and low pain. These clusters make expansion easy later. Session wear advice is a pair of stretchy lounge shorts so the artist can expose only the needed area.
18. Scalloped Lining That Mimics Lingerie Trim
A scalloped trim across the scar mimics lingerie edges and reads intentional rather than corrective. Ask for varied scallop depth so the highest points land off the thickest ridges. A mistake is making scallops perfectly regular which draws attention to scar variance. Plan for two sessions if you want subtle shading within the scallops. Pain is low to moderate. This look pairs with sheer crop tops for a lingerie echo.

19. Bold Anchor Motif That Anchors the Midline
A single bold anchor or similar motif centered on the midline can read like intentional adornment. Tell the artist you want saturated edges and minimal tiny details over the scar. The common error is packing micro detail into the motif which loses clarity on scar tissue. One session with stronger saturation is typical and pain is moderate. This design ages more predictably than ultra-fine pieces. For evenings, wear an open-back dress that frames the midline work.

20. Watercolor Sash With Muted Tones
If you prefer painterly palettes, ask for muted washes that overlap the scar rather than precise edges. The common mistake is expecting vivid watercolor to hold the same life span as saturated pigments. Muted washes will need more frequent color refreshers but look soft and fabric-like while fresh. Usually two sessions for layering. Pain is low. Pair with a flowy sarong for beach days.

21. Camouflage Plus Minimal Overlay
A hybrid approach pairs subtle skin-tone camouflage with a small decorative overlay so the scar is softened and given a focal point. In consultation, ask for a tiny test patch of camouflage and an overlay sample so you can see both effects together. The debate about camouflage versus decorative work comes up here again. One side values near-invisibility. The other prefers visible art that acknowledges the history. Both paths require honest talk about expectations. Expect two sessions and at least one touch-up. For session wear, choose a full gown or loose dress.
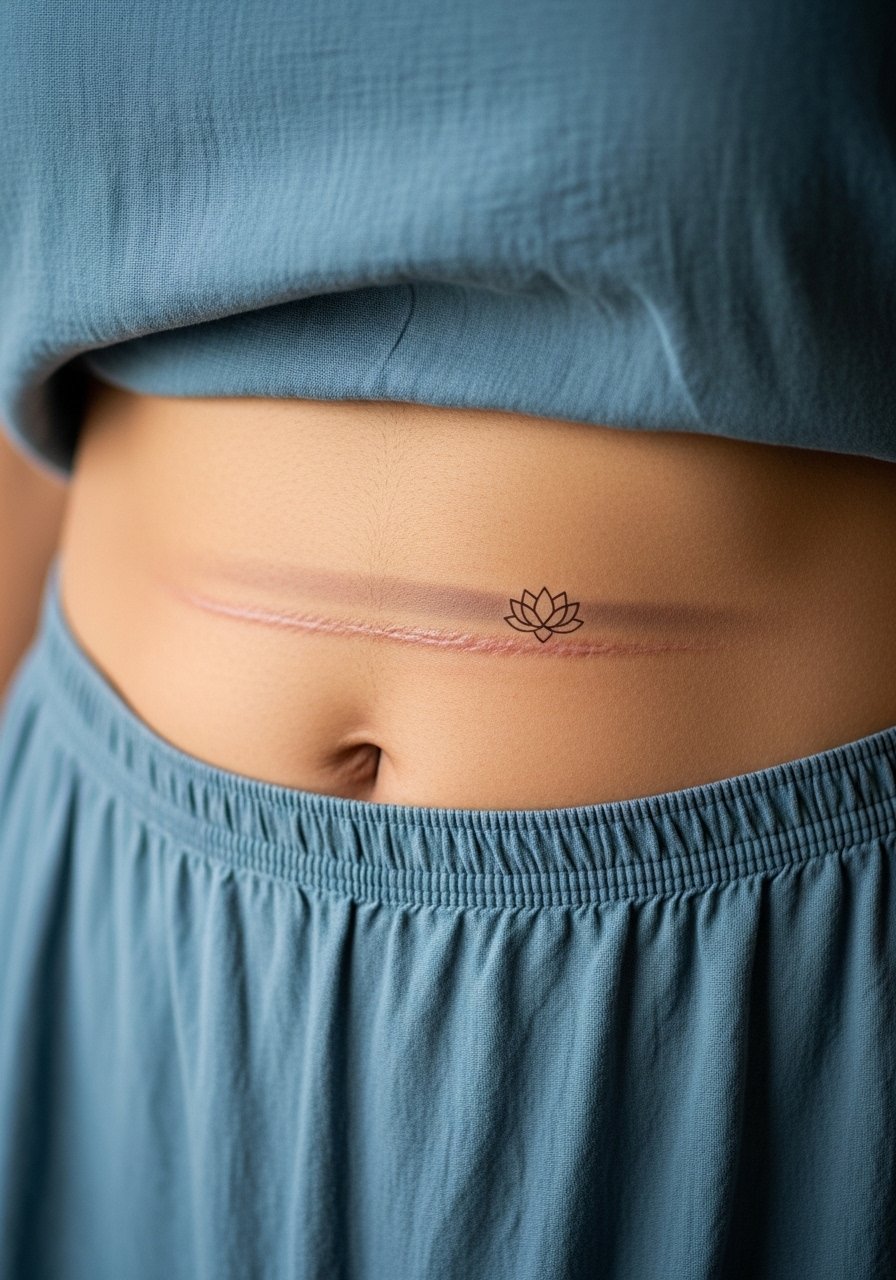
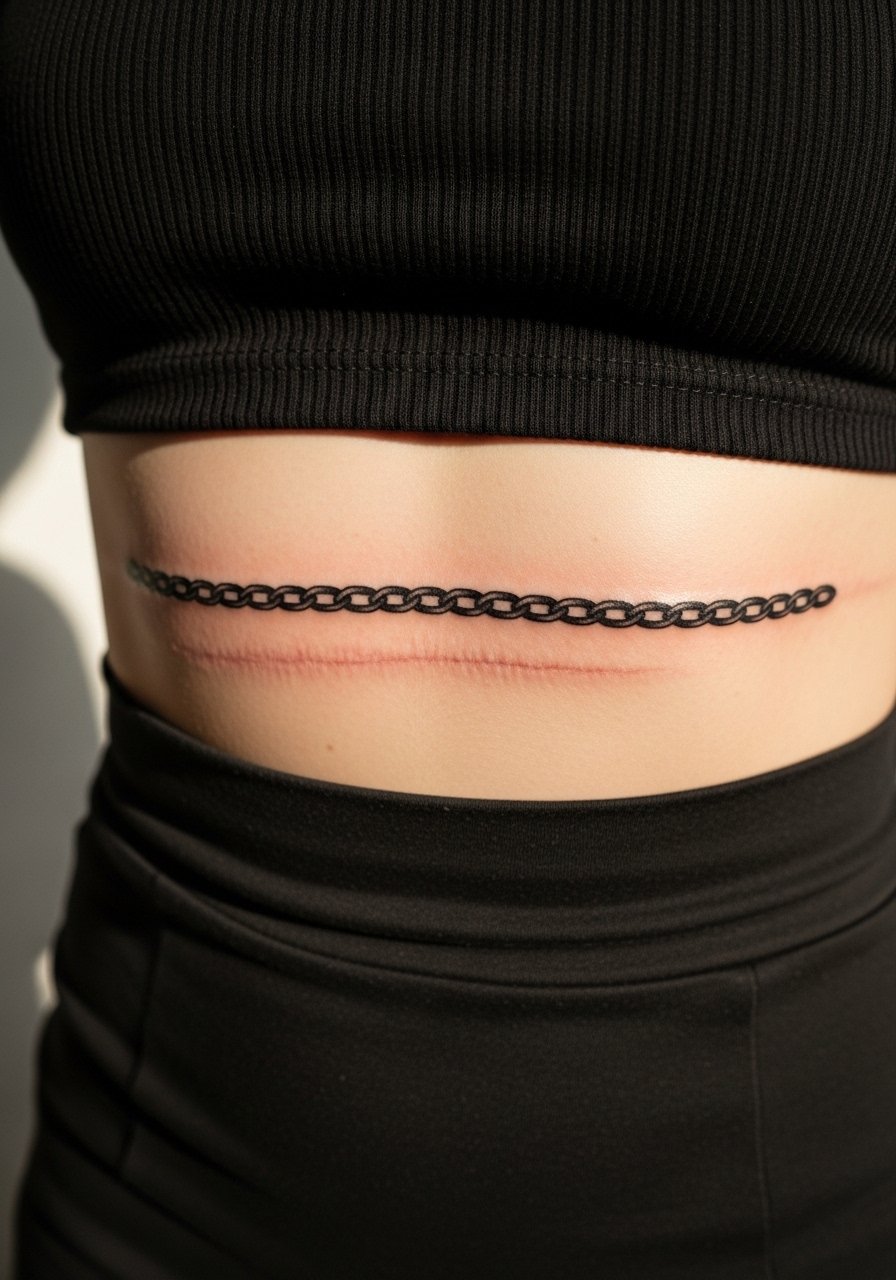
22. Thin Chain-Link Blackwork Band
A slim chain-link pattern uses repeated negative space to distract from ridge variations. Ask the artist to stagger the links over high and low points to keep lines visually even. The mistake is insisting on the thinnest possible chain which will fuzz on scar tissue. One to two sessions typically. Pain is moderate. A belted midi dress pairs well for an intentional waistband look.
23. Expandable Minimalist Constellation
A minimalist constellation across the scar is built to grow. Tell your artist you want clear spacing between points so additions do not crowd existing dots. The common error is closeness that prevents future expansion. This is a short single-session option and pain is low. It ages with predictable dot fade and small touch-ups can refresh stars every few years. Wear a racerback tank when showing it off.
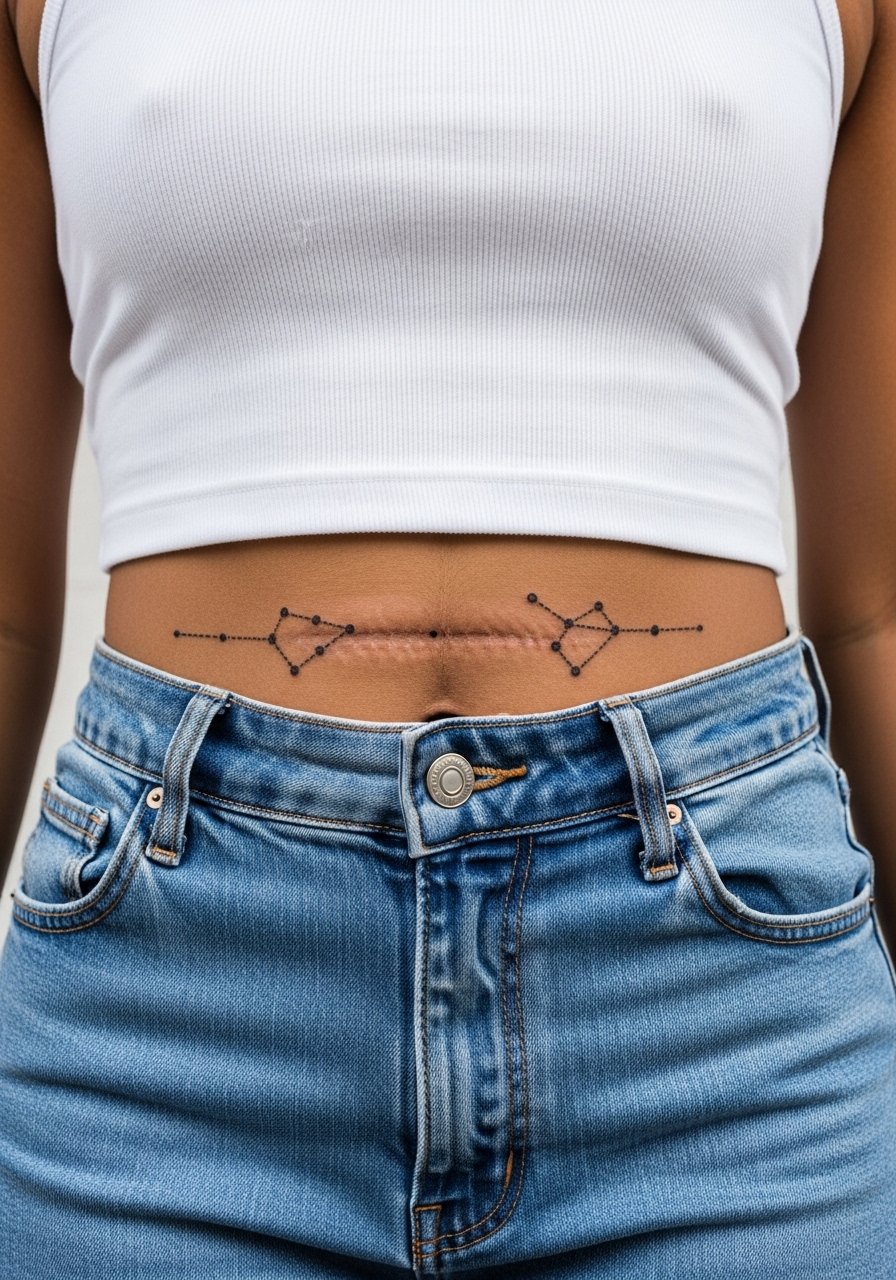
24. Geometric Mosaic That Hides Irregularities
A mosaic of shapes lets you map blocks over uneven scar texture, so the eye sees pattern rather than ridges. Ask the artist to plan larger tiles where the scar is thick and smaller tiles elsewhere. The mistake is tiny mosaic scales that blur together on scar tissue. Two sessions are common. Pain ranges moderate to high depending on coverage. For reveals, a wrap skirt balances the geometry with soft fabrics.

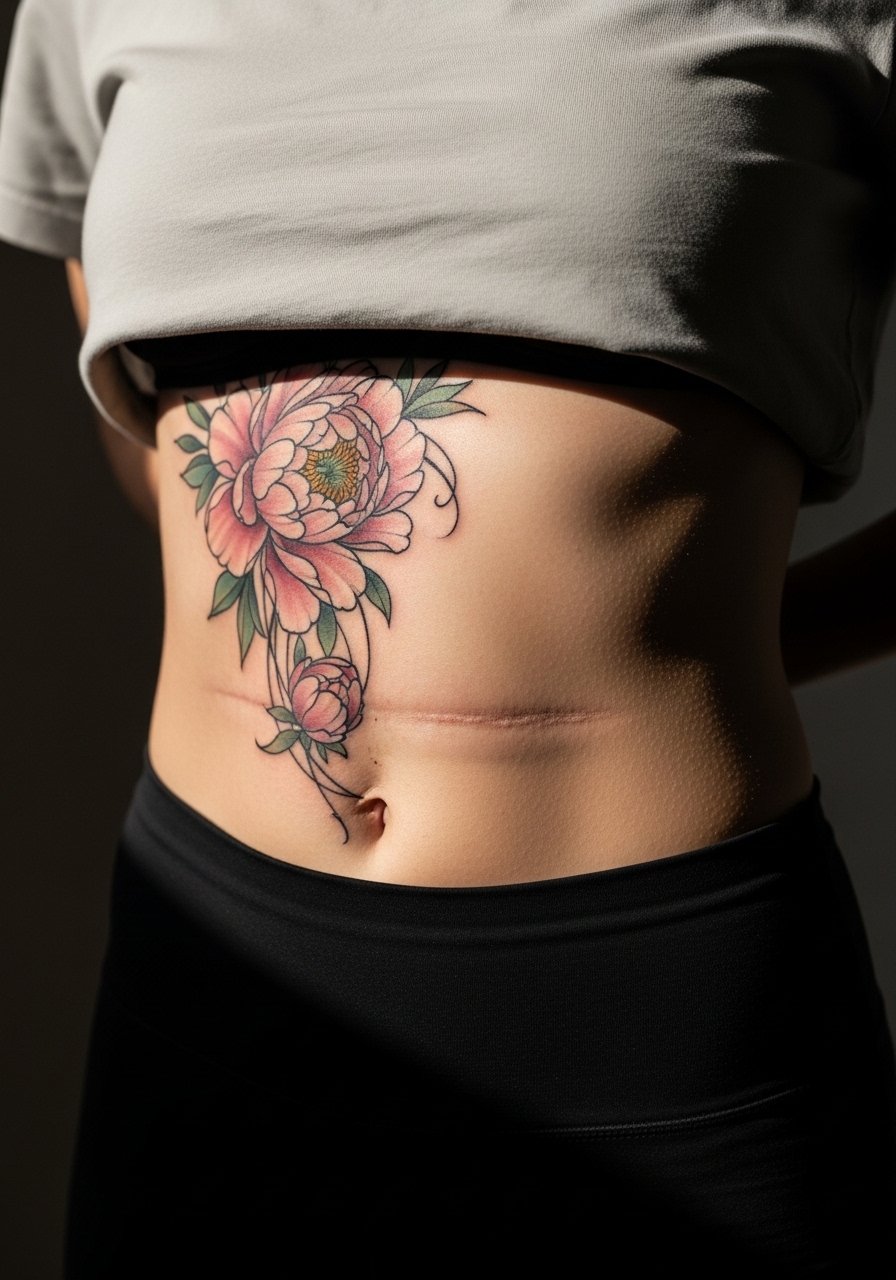
25. Peony Cascade That Hugs the Midline
Peonies and larger blooms pull attention upward or downward away from the scar if composed asymmetrically. Tell the artist you want the biggest bloom offset from the thickest ridge. A common mistake is centering the largest element over the most irregular area. Plan for two to three sessions. Pain is moderate. This style ages well because large petals hold saturation longer. For showing off, choose a flowy sarong or a wrap skirt earth tones to echo the natural shapes.
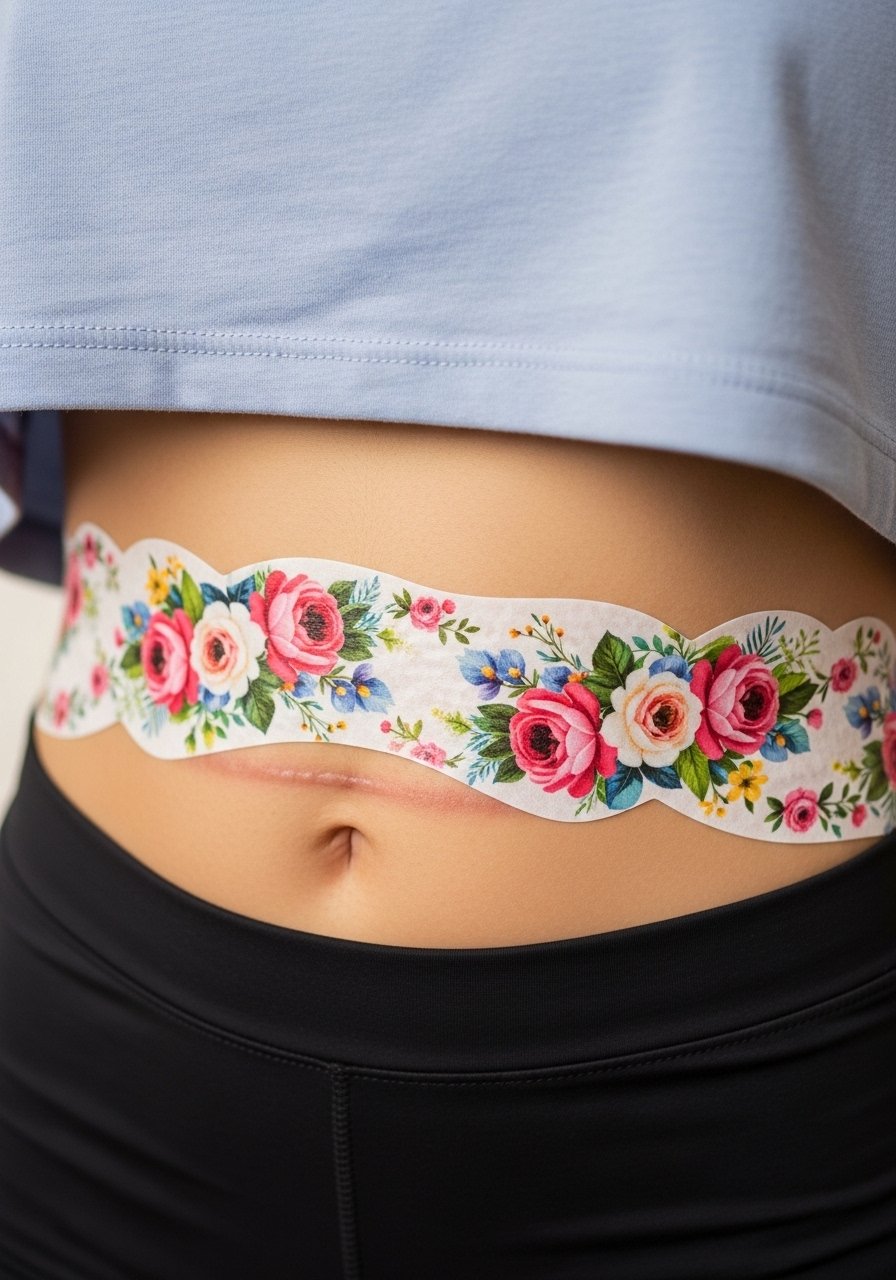
26. Temporary Tattoo Trial Run for Placement Testing
If you want to preview scale and placement without commitment, temporary scar-specific decals are the fastest test. Use a brand designed for surgical scars and patch-test adhesives first. The downside is temporary products cannot predict how real ink will settle into raised tissue, which is why some people see them as a pro and others as limited. Use temp trials to gauge wardrobe choices and visual balance. Pain is not a factor. For testing, try your chosen outfit and a high waisted bikini bottom so you can judge how the design sits in real life.
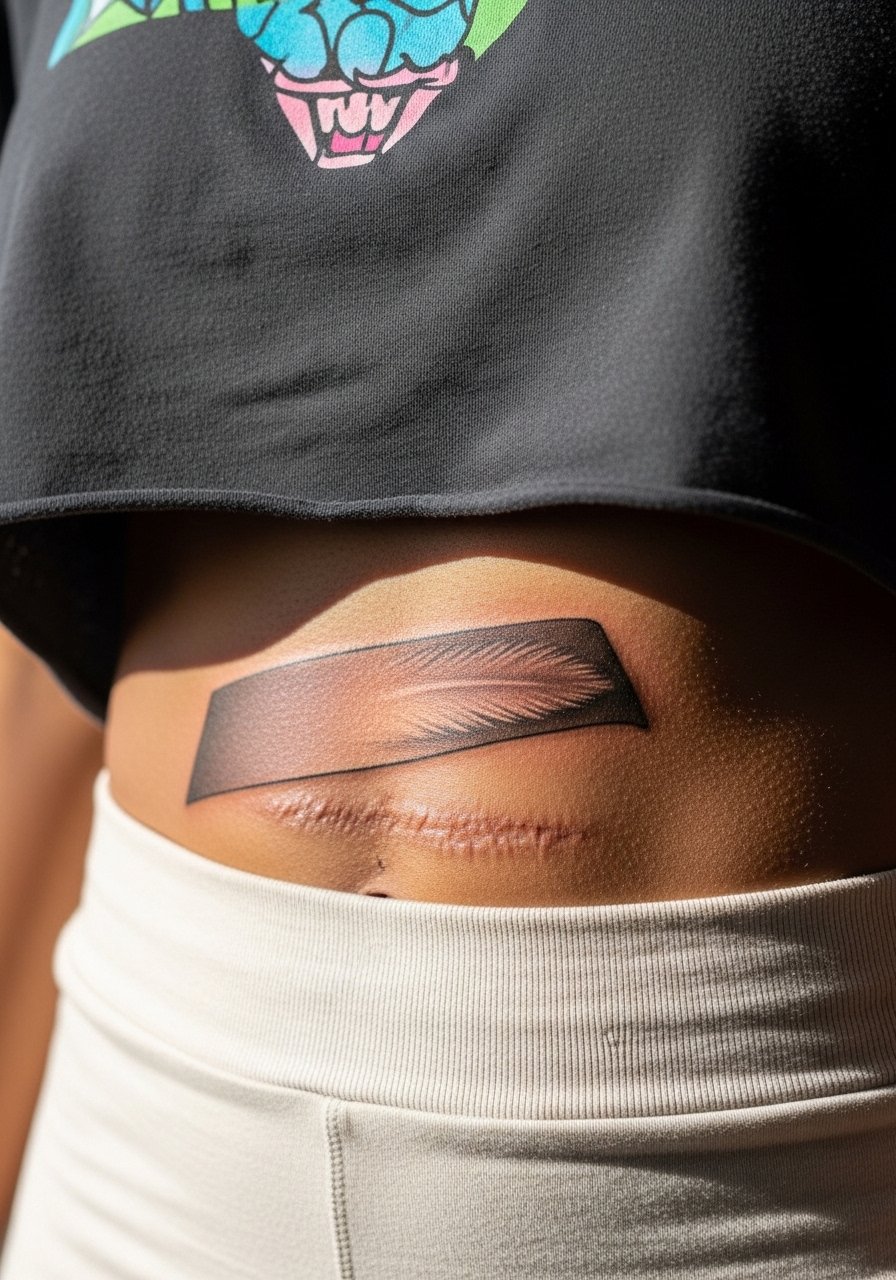
27. Soft Gradient Shading That Suggests a Sash
A soft gradient that fades into natural skin tones reads like fabric and obscures a scar without heavy lines. Tell the artist you prefer feathered transitions that stop short of solid color across the ridge. A frequent mistake is heavy shading that pools on raised tissue and looks blotchy. Two sessions often do the trick. Pain is low. This style pairs with one piece swimsuit silhouettes for seamless coverage.
Frequently Asked Questions
Q: How long should I wait after a tummy tuck before getting a cover-up?
A: Plan on waiting at least 12 months for most scars to soften and flatten, and be prepared that some professionals recommend closer to 18 months for tissue stability. The waiting window depends on your healing, any redness left, and whether you have keloid or hypertrophic tendencies.
Q: Will tattoos stick to raised scar tissue the same as normal skin?
A: Scar tissue absorbs ink differently and may hold pigment unevenly, especially if the scar is thick. From what I've seen, artists who work on scars adjust depth and spacing, and you should expect touch-ups to refine saturation after healing.
Q: Should I choose camouflage or a decorative design for the least visible result?
A: Two camps exist. One prefers camouflage to make the scar near-invisible. The other chooses decorative work that incorporates the scar into a visible design. Your decision should come from how much you want the area blended versus celebrated, and an in-person trial or patch test helps.
Q: Do weight changes affect how a tummy tuck cover-up ages?
A: Yes. Weight fluctuation can stretch or compress healed ink and may require touch-ups. If you anticipate future changes, consider designs with organic flow like florals or vines rather than rigid geometric repeats.
Q: What should I wear to the appointment for lower-abdomen work?
A: Bring loose, low-rise bottoms and a cropped tee or tank so the artist can expose only the narrow strip of skin around the scar. A loose drawstring pant that you can roll down slightly works well for comfort and access.
