
Fine line trends and saturated ink often look best in a saved board, not on skin five years later. I've watched consultations go sideways when people try to mash three reference photos into one stencil, and I have seen delicate fills that faded faster than expected because placement and sun exposure were underestimated. Read through these ideas and you will get practical notes on booking, aging, and what to tell your artist during the consultation.
1. Neo-traditional rose pierced by a dagger on the forearm
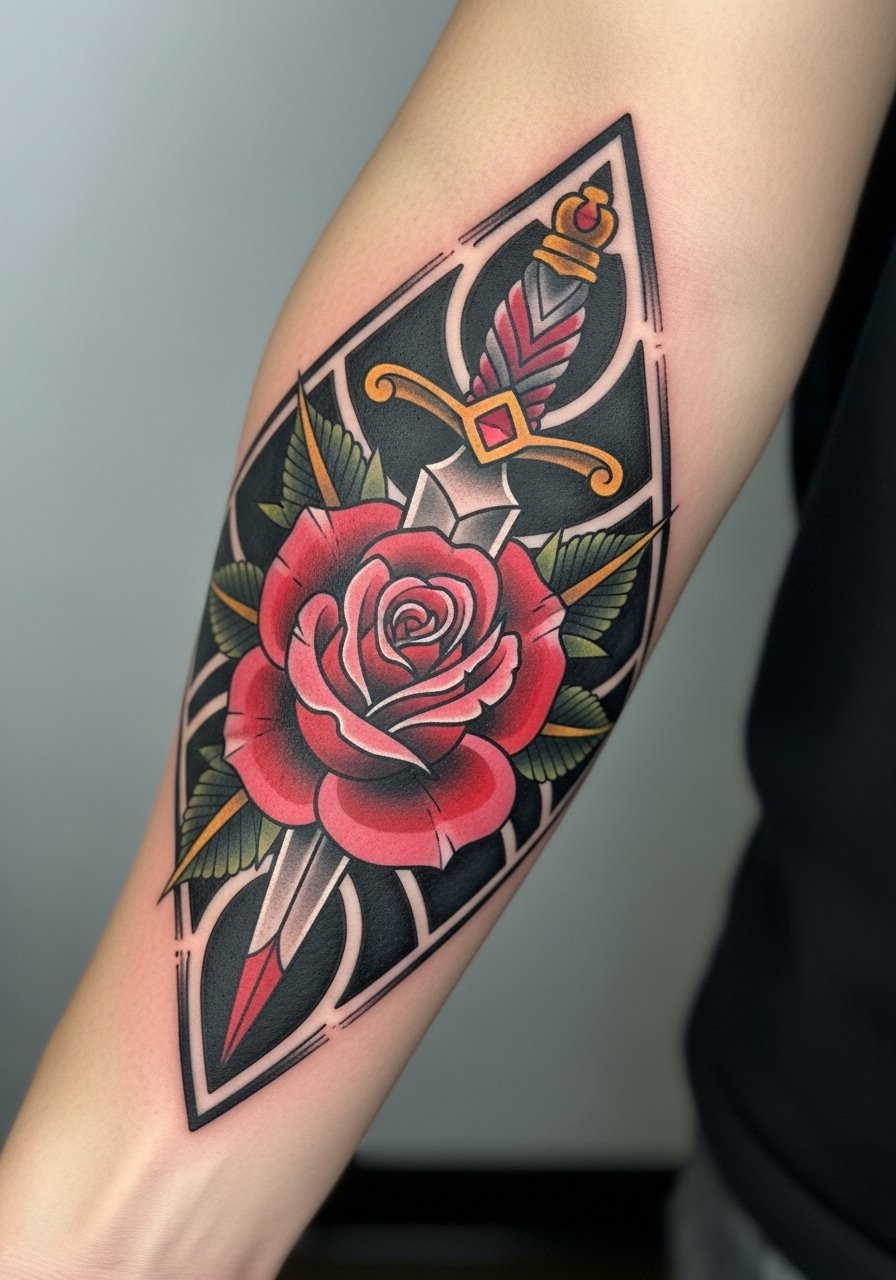
I recommend this when you want a classic motif with modern depth. In consultation, ask for varied line weight around the petals and a clear carbon barrier to protect color saturation. Fair warning: the forearm sees sun and abrasion, so expect some softening by year three and a touch-up around year four if you keep the reds bright. Session time is usually 90 to 180 minutes depending on size. The biggest mistake is crowding tiny details into a small piece. For showing it off, pair the forearm with a fitted off-shoulder top in a solid hue and roll sleeves up for casual visibility.
2. Pin-up portrait framed in lush florals for upper arm or thigh
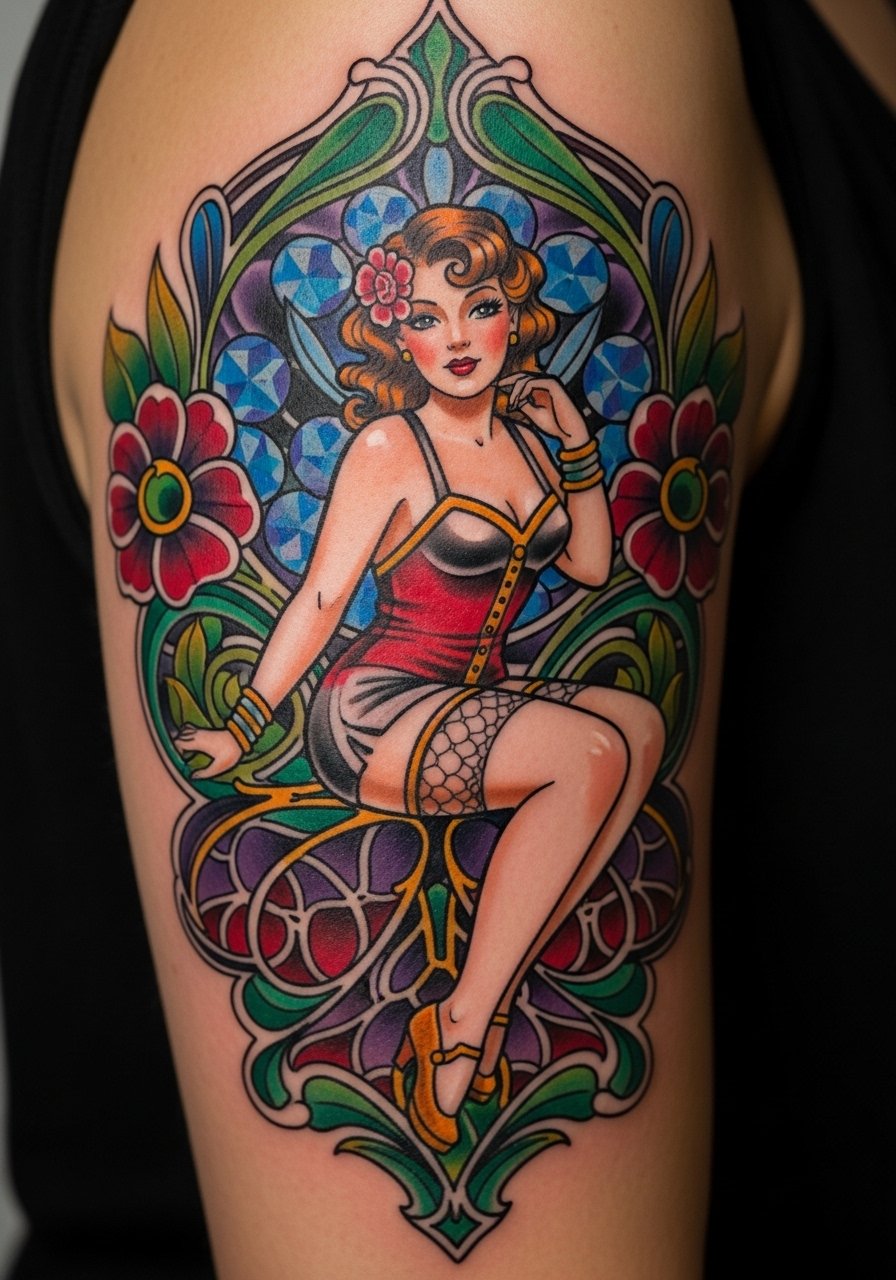
I've seen the pin-up motif read as empowerment when proportions are personalized to the sitter. Tell your artist exactly which era of hair, makeup, and pose you prefer so the face reads stylized not generic. This piece ages differently by placement. On the thigh it softens gracefully with body changes. On the upper arm it stays visible but may need a touch-up in deeper shadow fields at year three. Expect two to three sessions for 6 to 8 inch work. Common mistake: asking for micro detail in the face that the skin cannot hold at small scale. If you want easier session access, wear a loose skirt for thigh work or a tank under an open shirt for the arm.
3. Phoenix rising from flowers on shoulder or back
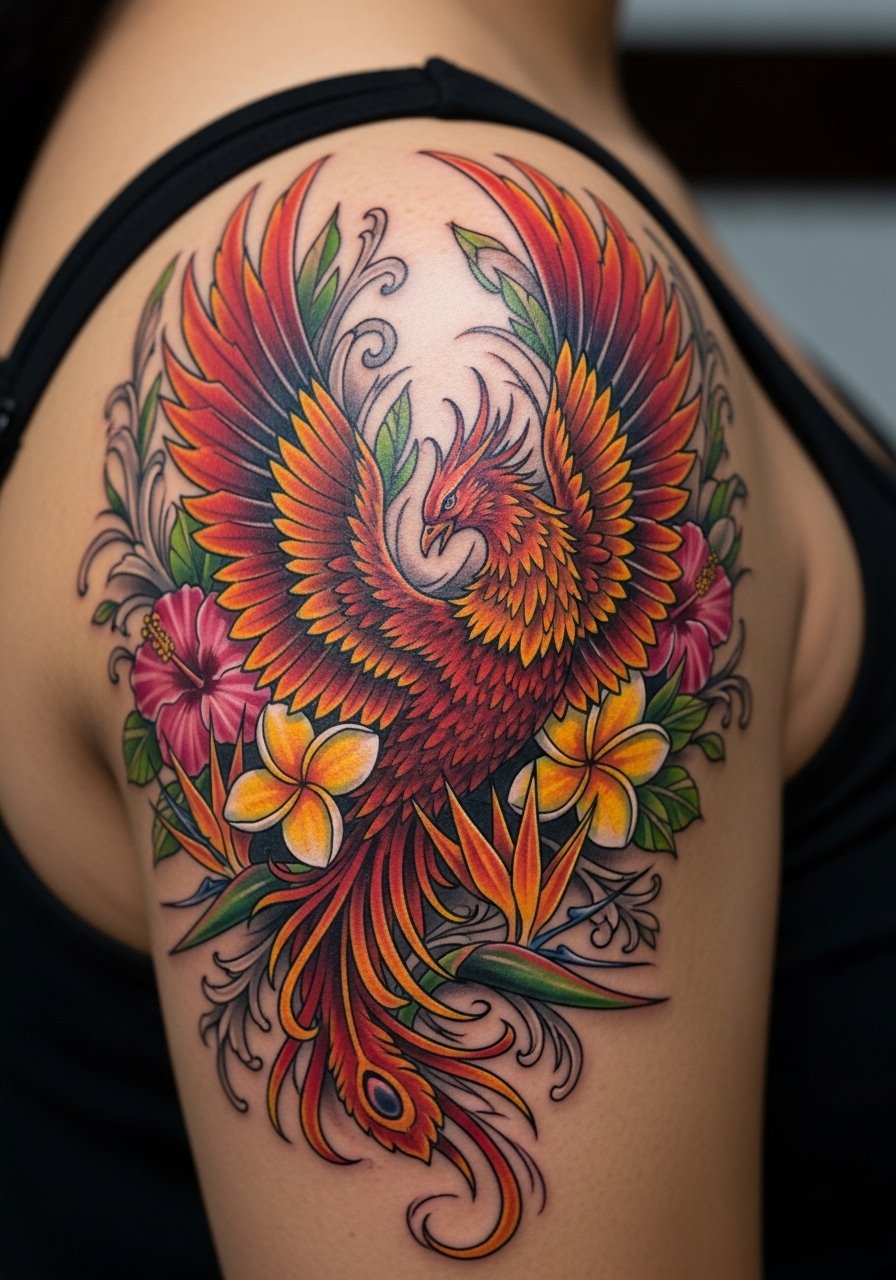
Most people pick the phoenix for rebirth symbolism, and I usually steer them to shoulder or upper back for scale. Mention to your artist that you want exaggerated feather flow and a clean transition between black linework and saturated midtones. Expect two sessions for a medium piece. Aging note: shoulders get more sun, so apply sunscreen when exposed to keep reds and golds from fading unevenly. There is a technique debate here. One camp insists on heavy black outlines for longevity. The other favors varying line widths for more depth. Both have merit. Ask your artist which approach they use and how they plan touch-ups.
4. Skull crowned in soft pastels with roses at wrist or ankle
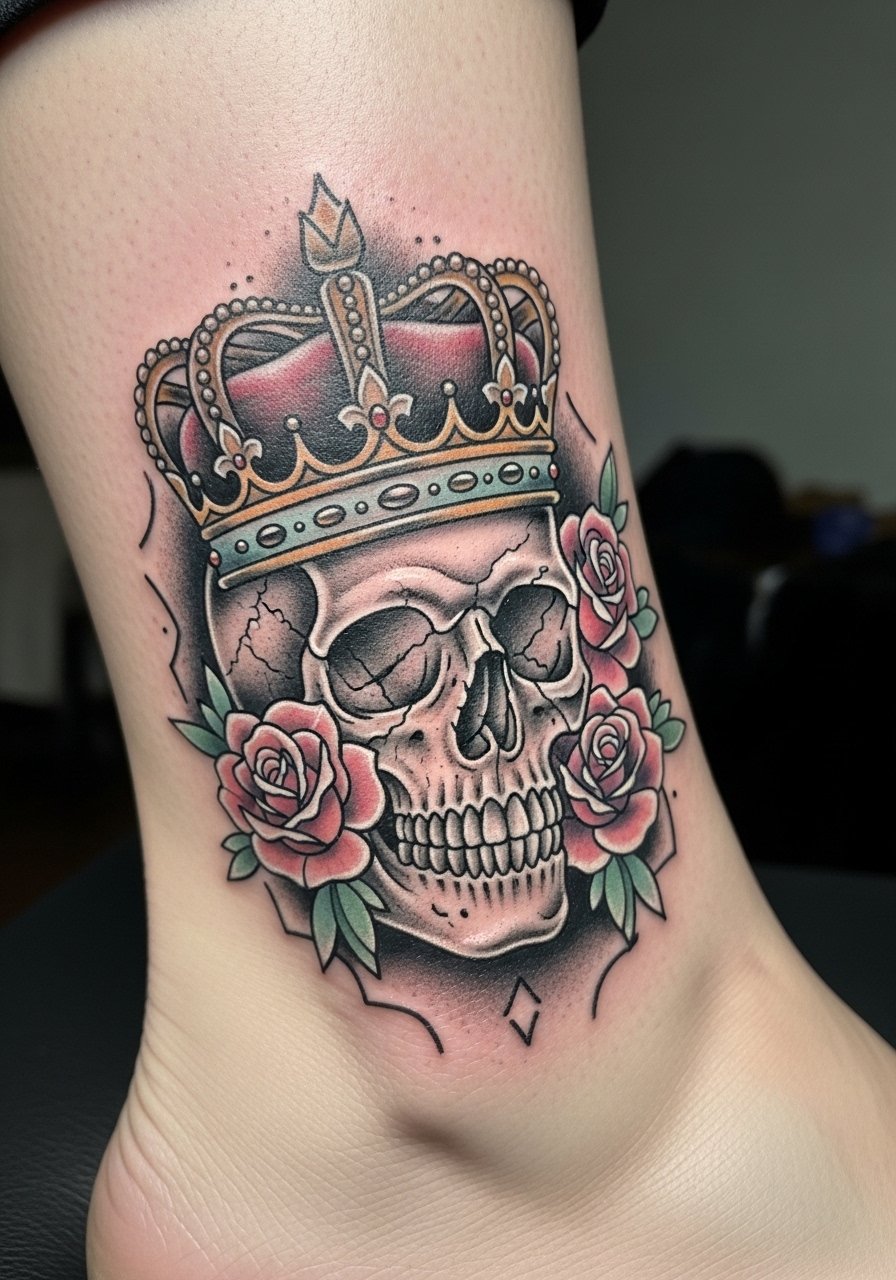
This edgy-feminine contrast works well small on the ankle or wrist. If you want pastels, expect gentler saturation and a likely touch-up sooner than for saturated pigments. A common version that ages poorly uses too-thin pastel layers over old sun-damaged skin. Ask for slightly stronger saturation at depth to offset eventual fade. Session time for an ankle piece is usually 45 to 90 minutes and the ankle can be sore on longer sessions. Watch for friction from shoes at the ankle; place it where a sandal strap will not rub. For the wrist, consider stacking slim bracelets after healing to frame the piece.
5. Mermaid with anchors and waves on the ribcage or thigh
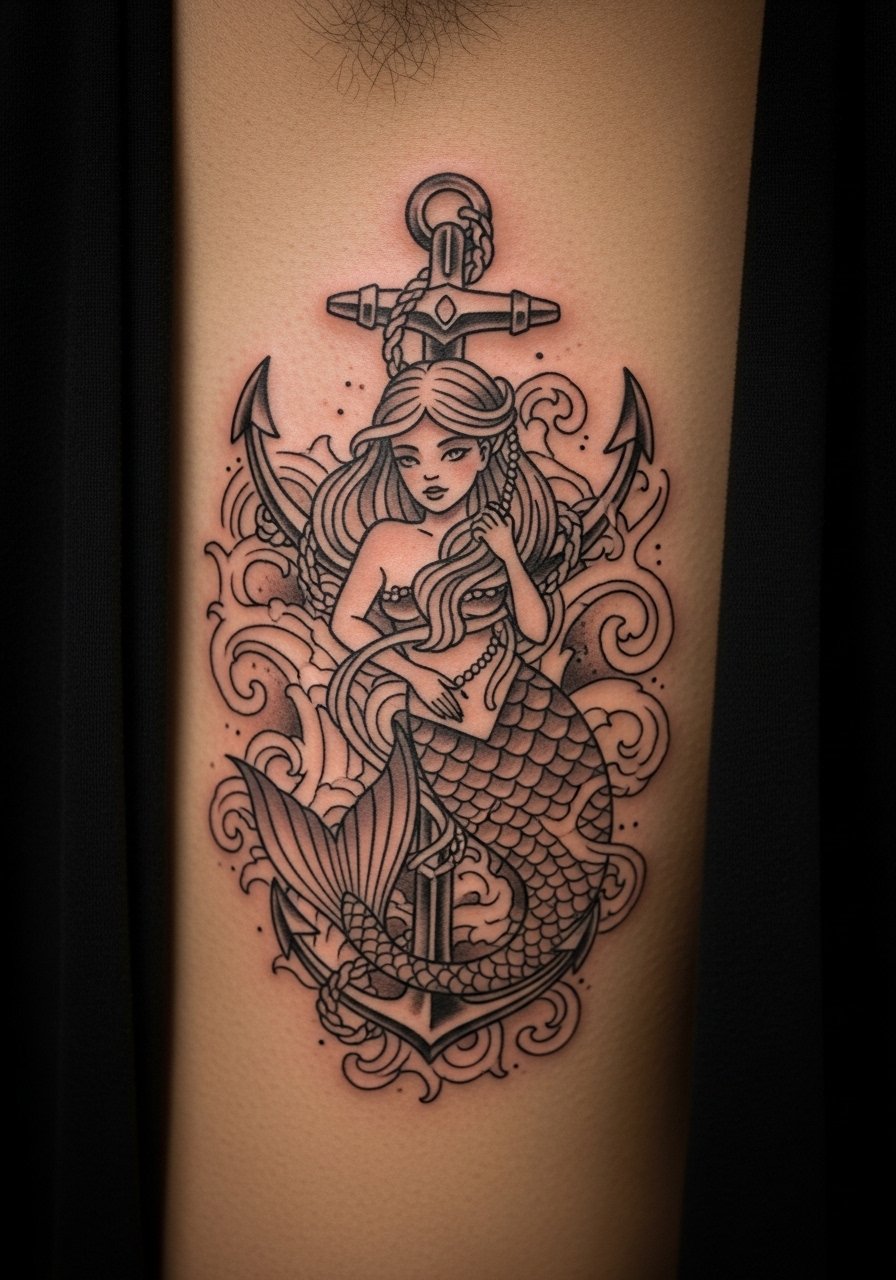
Fair warning about the ribcage: it rates high on most pain scales, but it gives excellent curvature for a mermaid. Tell your artist whether you want the tail to wrap around the rib curve or sit flat against the torso. That choice changes session feel and session length. Ribcage sessions are longer and you will likely need a break. Expect two to three sessions for large color pieces. The usual mistake is compressing a large composition into a small rib tattoo, which leads to muddy detail as it heals. For showing this off, high-waisted shorts or slit skirts highlight the thigh or rib placement depending where you go with the design. If the tattoo is on the thigh, wear high waisted shorts to the session so the artist can access the area comfortably.
6. Art Deco woman portrait with filigree on the collarbone or upper chest

Collarbone work reads delicate or dramatic depending on contrast. For this look, ask for jewel tones in the background and deeper line weight along the filigree so the portrait keeps form when it heals. The collarbone skin moves with posture, so expect minor softening in the background after two years and plan for a touch-up if you want intense saturation to last. A common mistake is placing too much dense shading right over the collarbone, which can look patchy as skin stretches. For show-off outfits, a strapless or wide-neck dress pairs perfectly, and you can use a thin choker to frame the portrait. If you need easy session access, wear a v neck button blouse you can pull aside.
Studio Day Picks
The forearm, collarbone, and ribcage tattoos above demand different prep and first-week considerations, so these items help smooth the session and first days of healing.
- Stencil transfer paper kit. Lets you preview placement on skin so a dagger or filigree sits exactly where you want it before needles touch the skin.
- Topical numbing cream. Applied per label before ribcage sessions it takes the edge off sensitivity for longer appointments.
- Thin protective film roll. Useful for ankle and wrist pieces that face daily friction and washing in the first week.
- Fragrance-free gentle body wash. Cleanses healing areas without stripping pigment, helpful for the collarbone and forearm zones.
- Aquaphor healing ointment. A thin layer during the first few days helps lock in moisture for small linework that needs to heal evenly.
7. Unicorn with geometric floral frame on inner thigh or calf
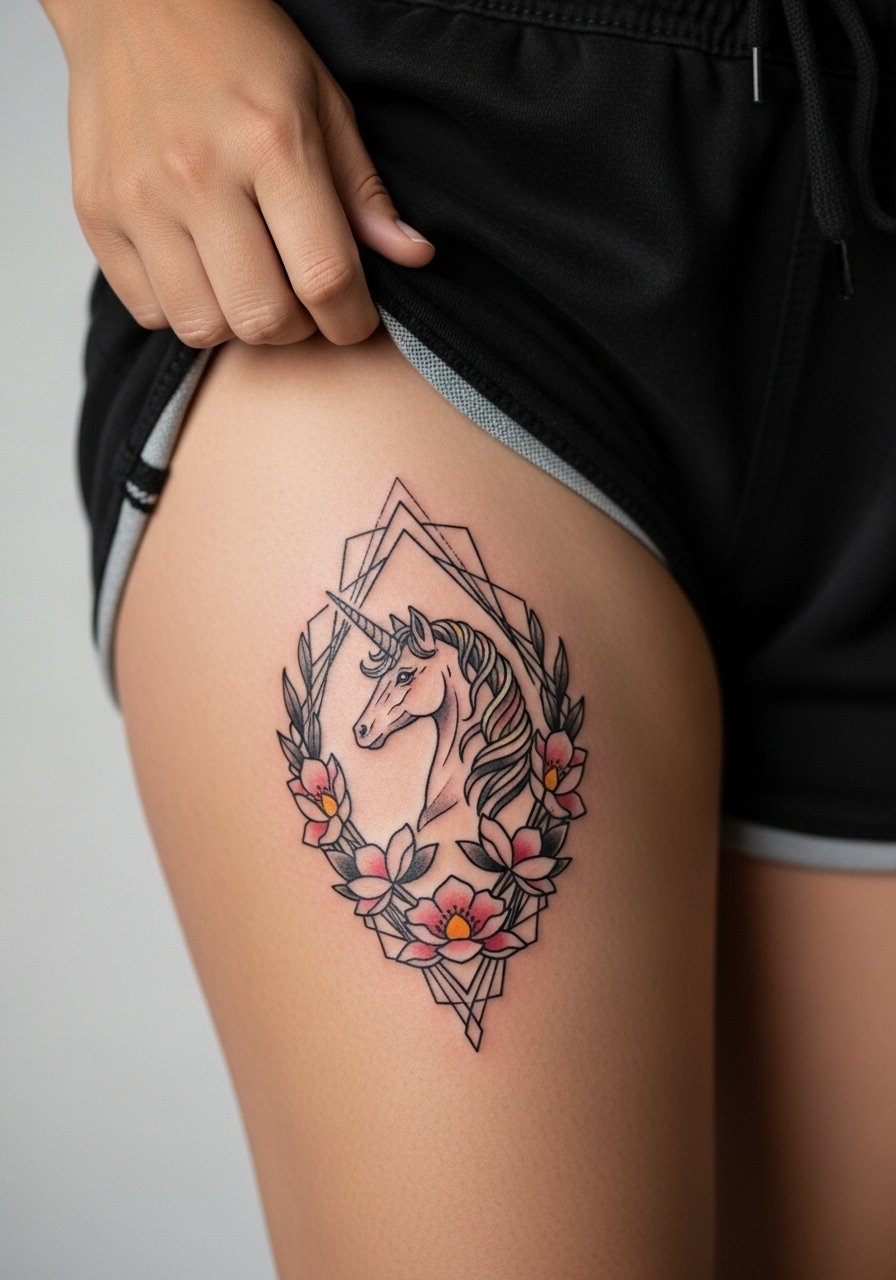
A whimsical unicorn gets a modern twist with geometric framing. On the inner thigh, session wear matters. Bring loose shorts so you can sit comfortably and the artist can access the space without pressure. Ask your artist to leave breathing room in the frame so small geometry does not collapse as it heals. The inner thigh sees friction from clothing and movement, which can dull tiny details faster than on a calf. Expect one to two sessions for a medium piece and a possible touch-up at year two if you wear tight clothing that rubs the area during healing.
8. Wolf companion beside a stylized woman, forearm sleeve start

Forearm sleeves let you tell a two-subject story and they photograph well. Tell your artist whether the wolf is portrait style or stylized with exaggerated features so the linework and shading match the woman's portrait. Sleeve starts need continuity, so pick a palette and stick to it to avoid a patchwork effect as you add panels later. Blowout risk on the inner arm is higher if lines are too fine and placed too deep. Plan to spread this over at least two sessions. A common error is agreeing to different palettes across sessions without a clear plan for saturation balance.
9. Swan with lantern and red blooms on ankle or wrist
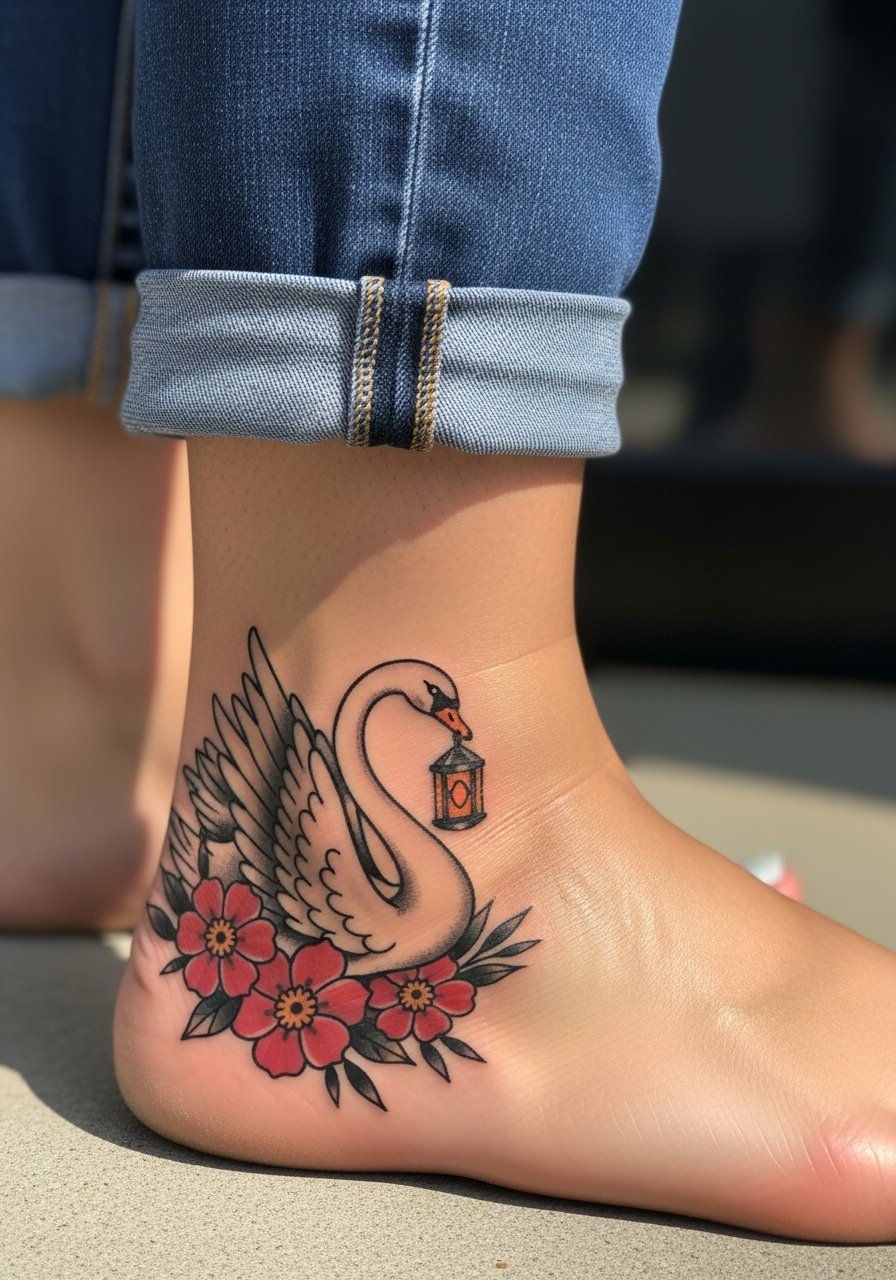
Tiny symbolic pieces like a swan and lantern excel at the ankle or wrist. For ankle tattoos, footwear and straps can cause friction during the first two weeks. Ask for placement slightly above a shoe strap or at an easily exposed area. Session time is short for small pieces, but the ankle can feel tender. Expect touch-ups sooner than for less mobile areas because of constant washing and movement. Pair this look with cuffed capri pants or wide-leg trousers for an evening that shows off the ankle. A slim cuff bracelet works for wrist placements without covering the lantern.
10. Bumblebee amid bold florals for collarbone or finger-adjacent placement
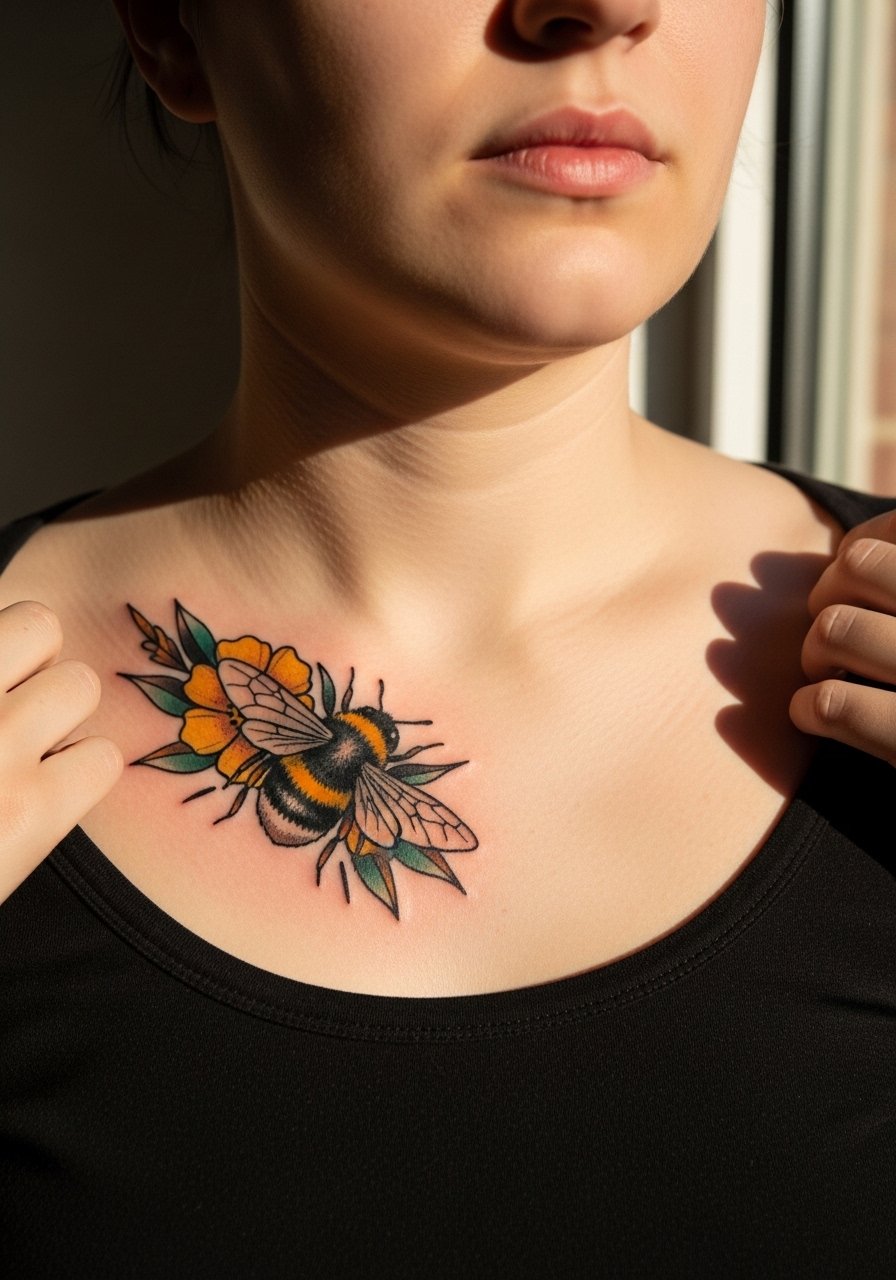
Micro motifs are popular because they can feel playful and discreet. For collarbone placement, ask for solid color anchors under the bee so yellow saturation reads over time. If you want a finger-adjacent placement, be aware that hands and fingers fade fastest and often need touch-ups every year or two. The common mistake is asking for too many tiny details that simply will not hold in small scale. Session time for a collarbone bumblebee is short. Wear a shirt you can pull to the side for easy access.
11. Umbrella-shielded flower burst on the outer forearm
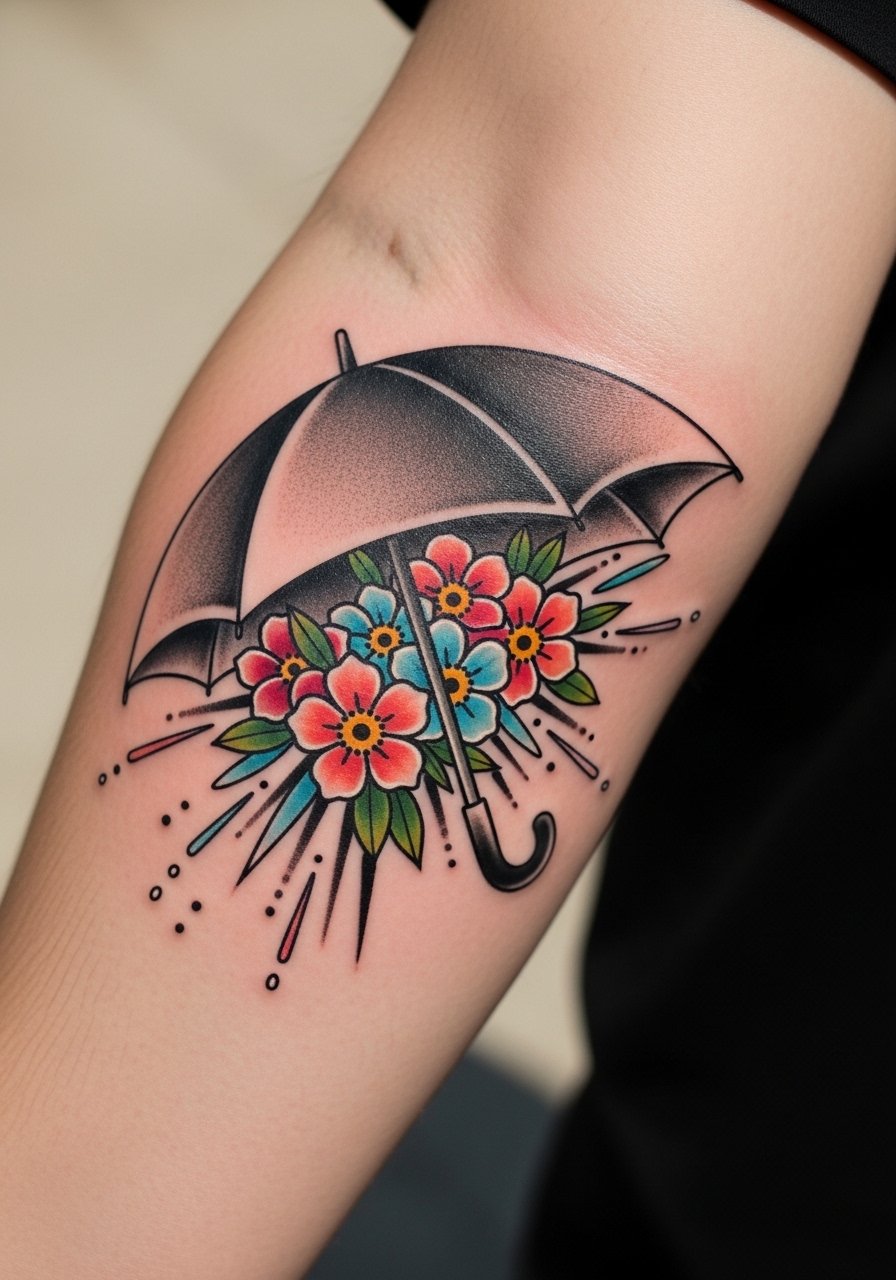
This motif reads as protection and works especially well on the outer forearm where it can wrap slightly. Tell your artist if you want the umbrella handle to align with natural arm lines so it follows movement when you bend the wrist. Outer forearm heals robustly but sees sun, so a sun-care plan matters. Common mistake: tapering lines too thin near the handle, which can feather. Session time is moderate. For showing off, rolled sleeves or a fitted boat neck blouse frame the work well. Consider pairing with a fitted boat neck blouse on days you want the design visible.
12. Dragoness with botanical accents across back or thigh

Large flowing forms like a dragoness want space. Back placement gives scale and movement. Expect multiple sessions and longer chair time for a full colored piece. The usual mistake is asking for an ultra-dense color field in the first pass, which increases swelling and makes shading work harder. For thigh placement, consider how weight fluctuation might change proportions over years. Large back pieces photograph beautifully with low-back or halter tops but require robe or loose tank for sessions.
13. Surrealist fragmented portrait with floral breaks on the shoulder
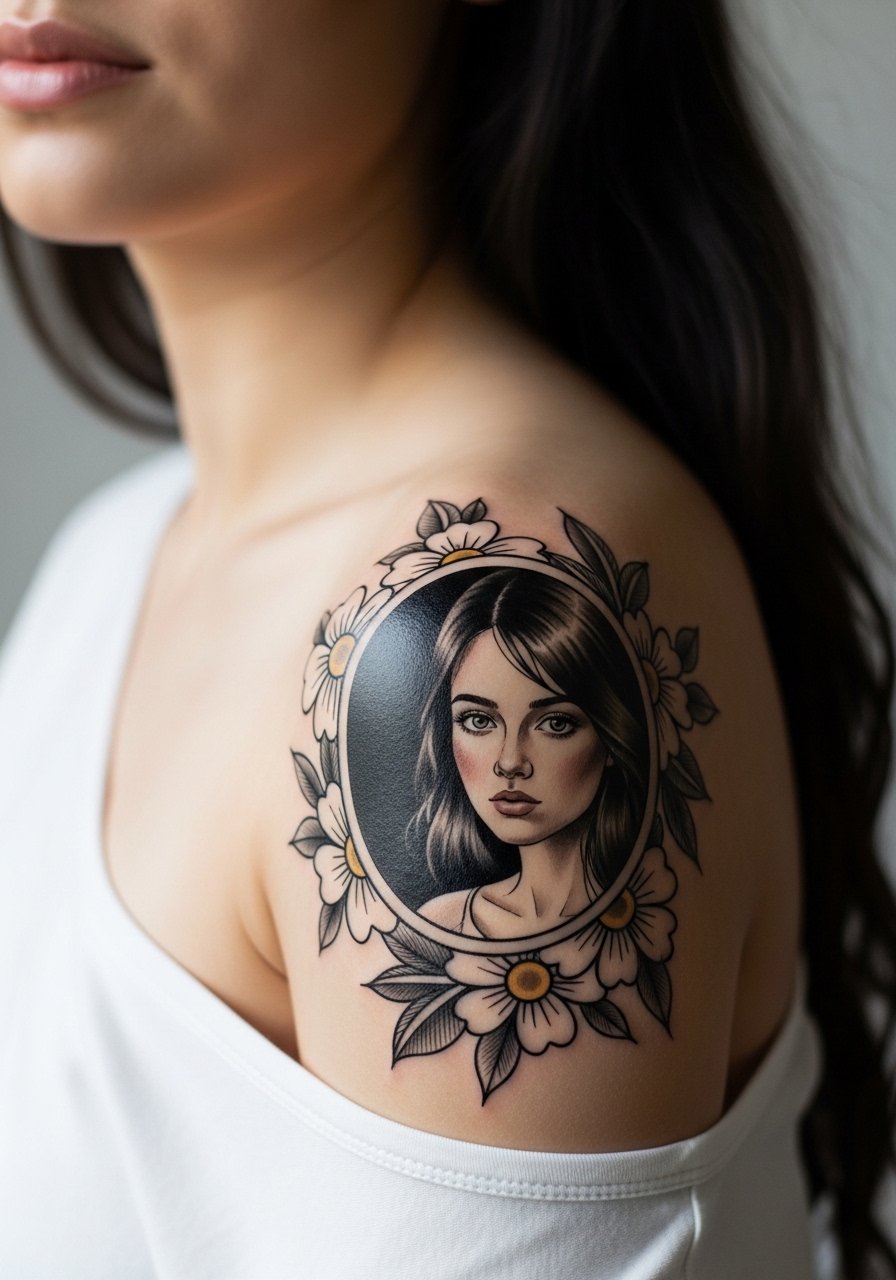
This under-covered angle adds psychological depth. Ask your artist to plan negative space intentionally so the "breaks" read clear after healing. Shoulder placement gives a natural canvas for fragments to spread or cluster. A mistake I often see is trying to cram too much facial detail into each shard. Session time depends on how many fragments you want. For showing off, sleeveless wrap tops in muted tones balance the piece without competing. Wear an open front cardigan over a tank to the session so you can reveal the shoulder easily.
14. Art Nouveau architectural filigree in blackwork for a large chest or upper back panel
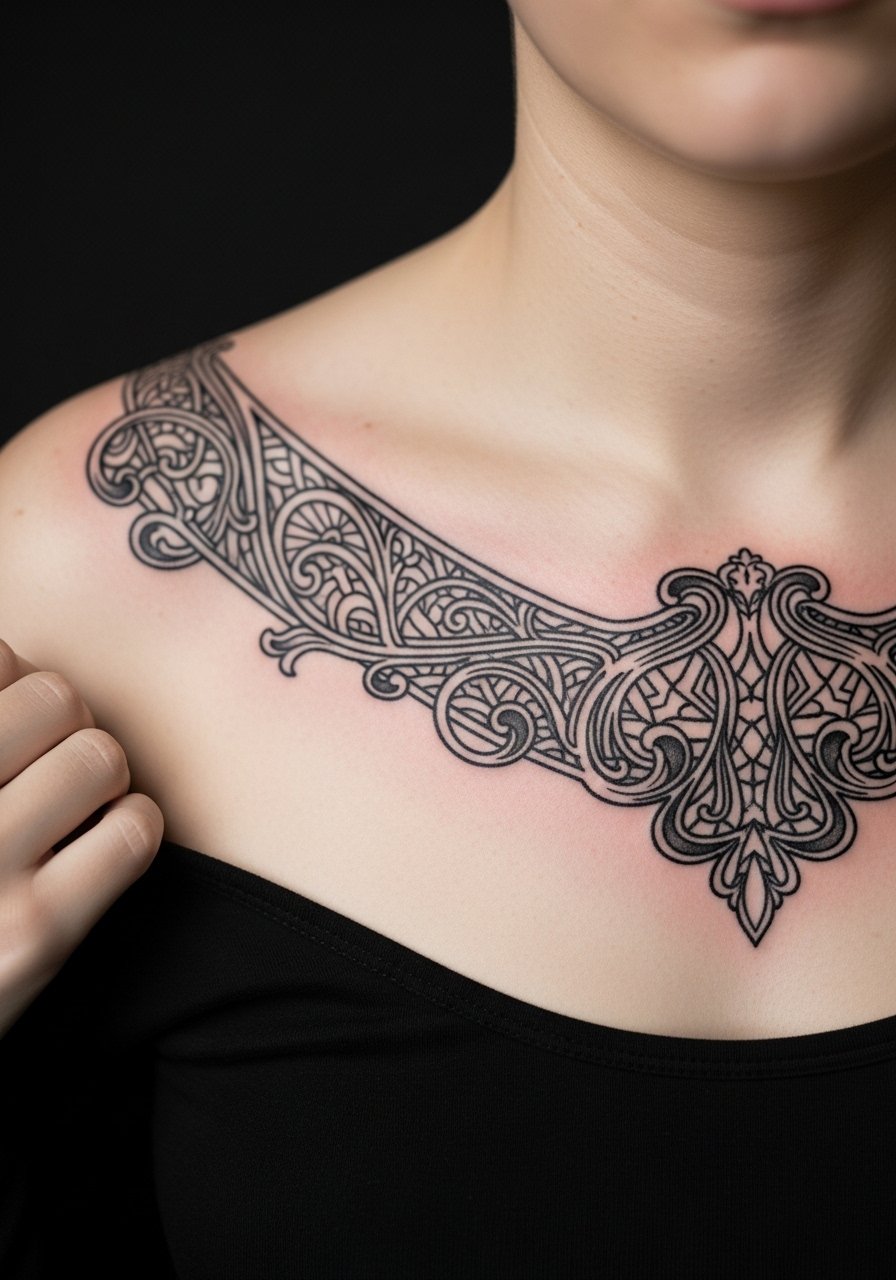
This approach leans on contrast and negative space rather than color. It ages well when spacing is generous and shading is intentional. The chest is a movement-heavy area so expect subtle shifts in dense black as the skin moves. The controversy here is technique. One camp favors tight blackwork for longevity while another prefers varied line weight for visual depth. Both approaches can work if the artist plans spacing and depth. If you plan a large chest panel, schedule multiple sessions and ask about how the piece will look at two years so you can decide on initial saturation.
15. Asymmetrical anchor with botanical accents for an off-center rib or forearm placement
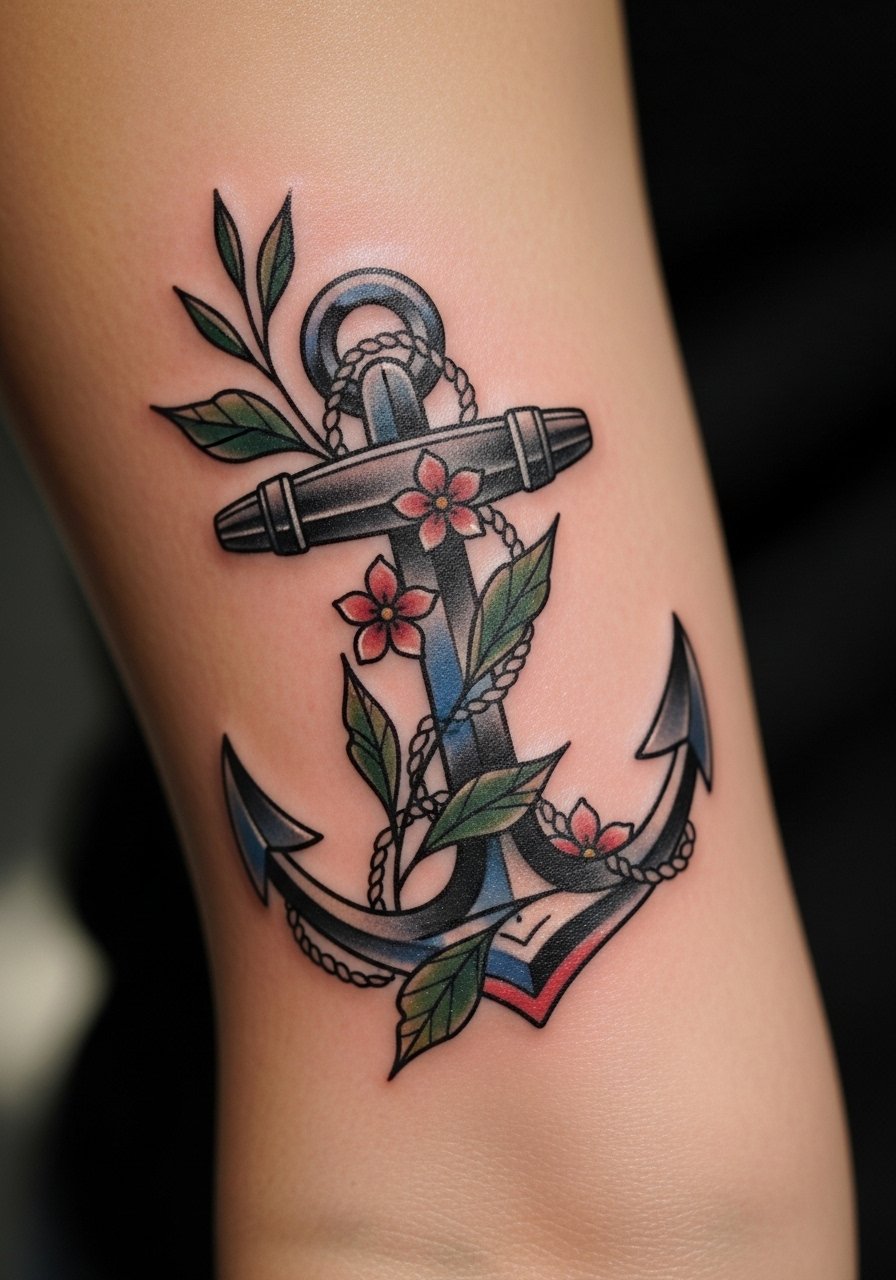
Asymmetry adds modern tension to classic nautical motifs. On the forearm, this reads dynamic. On the ribs, it can fall naturally with the torso curve. For booking, tell your artist where you want the anchor tip to sit relative to a wrist or waistline so the composition reads balanced when you stand. The rib placement carries higher pain and longer sessions. A common mistake is mirroring exact traditional anchors without adjusting scale for a female silhouette. For casual showing, pair with off-shoulder tops or a sleeveless wrap top to keep focus on the anchor line without competing neckwear.
16. Micro floral cluster near the wrist or finger-adjacent area

Micro clusters solve the small-tattoo itch but carry higher maintenance. Hands and lower wrists see friction and frequent washing, which accelerates fade. Ask for slightly bolder anchors in the center of petals so the tiny color has structure. Expect a short session and plan for a touch-up within one to two years. The usual mistake is insisting on ultra-microscopic details that simply cannot stay sharp. For session wear, a loose tank top or short sleeves work best so the artist can reach the wrist easily.
17. Stippled crescent moon and star trail along the spine or lower back
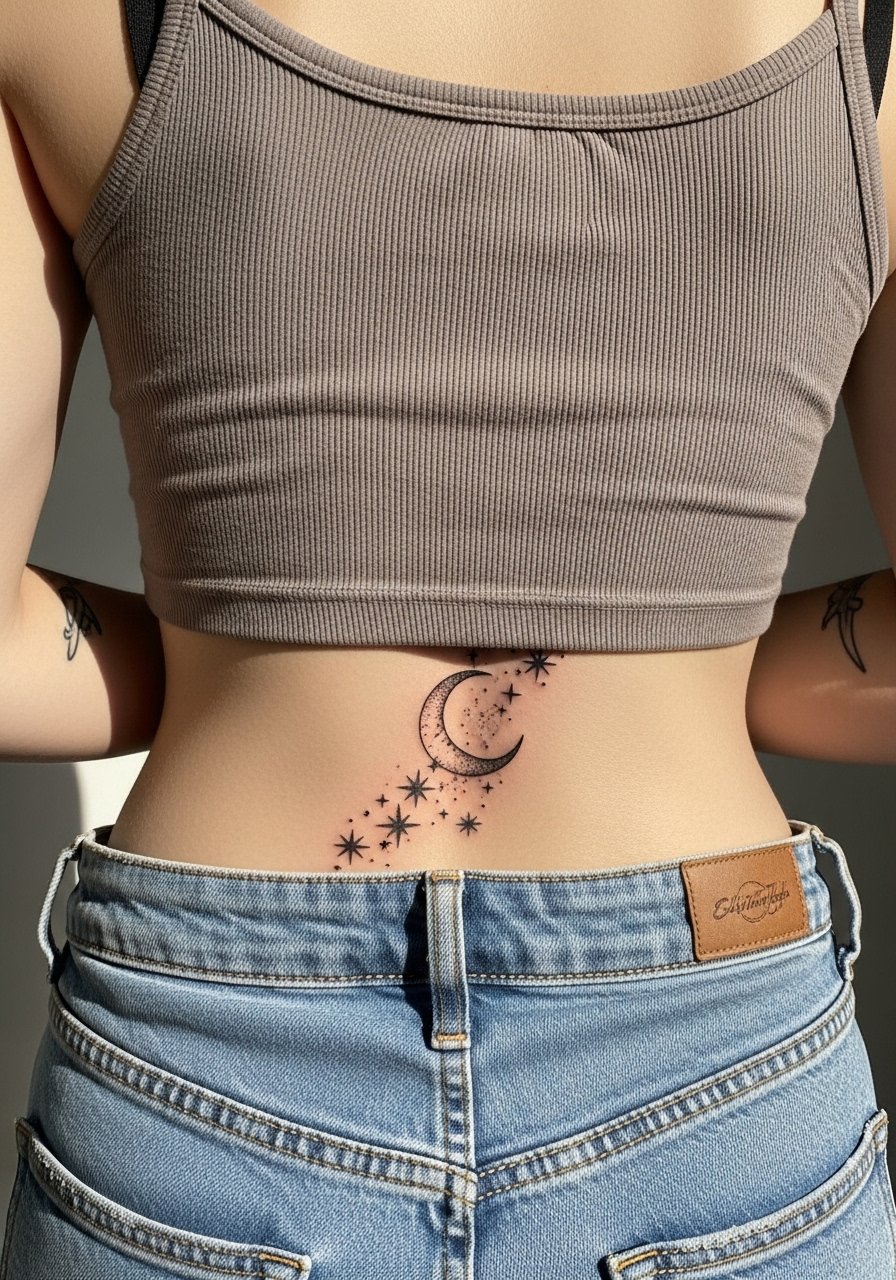
Stipple shading gives a soft, celestial texture that reads feminine without being literal. On the lower back, plan the arc so the moon sits just above natural waistlines. Expect multiple short sessions if you want dense stippling. The lower back moves with bending and sitting, which can blur extreme close dot work if the dots are too tight. The common error is overpacking dots for an immediate punch that later looks muddy. For evenings out, low-back halter tops display a spine trail beautifully so consider one for showings. For the session wear, bring a loose tank that you can pull aside without exposing more than the tattoo zone.
Frequently Asked Questions
Q: How long will a neo-traditional piece keep its detail on a forearm compared with a ribcage piece?
A: Forearm pieces generally keep linework legible longer because they are easier to protect from sun and friction. Ribcage work can look softer within two to five years, especially with fine detail, because the skin stretches and sessions are often longer. Plan for a touch-up timeline tied to exposure and placement rather than the style alone.
Q: I love pastel crowns on skulls, but will those colors fade faster than richer pigments?
A: Yes, softer pastels usually need more frequent touch-ups because they start with less pigment density. Many people balance a pastel look by asking for slightly deeper underlayers so the pastel sits on a stable base. That creates a better chance the effect lasts without needing constant refresh.
Q: Should I be worried about cultural appropriation with mythological or floral motifs?
A: People split into two camps on this. One camp warns against using sacred symbols without context and suggests choosing alternatives. The other camp recommends researching and personalizing motifs so they are respectful. My advice is to look into the origin of a symbol and modify or choose elements that have meaning for you to avoid borrowing sacred imagery without understanding.
Q: Do small wrist or finger-adjacent neo-traditional pieces hurt more during the session, and how should I dress?
A: Hands and wrists can be more tender because of thinner skin over bone. Sessions are typically short but sharp. Wear a loose short-sleeve or a button-down you can pull aside so the artist has clear access. Bring a comfortable travel pillow if you expect to sit a while.
Q: How do varying line weights compare to traditional strong outlines for longevity?
A: Artists split on this. One camp argues that strong consistent outlines act as a carbon barrier and help colors hold. The other camp says varied line weights give modern depth and a softer look. Both approaches can last if the artist spaces lines properly and places pigment at the right depth. Ask your artist which technique they prefer and why it fits your planned placement.
Q: For a first neo-traditional tattoo, which placement balances visibility with longevity?
A: The outer forearm or upper arm is a common sweet spot. Those zones let you show the work without exposing it to constant rubbing or sun like hands and ankles. They also photograph well and usually need fewer early touch-ups than high-motion or high-wash areas.
