
Fine line florals are everywhere on saved boards, and the gap between that crisp photo and ten-year reality matters. I see the same trend cycles in shop consultations. People pick the airiest linework for its fresh look, then find it softens sooner than expected around curved shoulders and high-friction areas. Below are shoulder-focused ideas that aim for the look you want and the longevity you actually get, with notes for your consultation.
1. Delicate Vine Trail on Outer Shoulder
A narrow vine that curves along the outer shoulder cap reads like jewelry when healed. I recommend asking your artist for slightly heavier primary stems and lighter secondary twigs in the stencil so the main silhouette stays readable as the tiniest lines fade. Expect a gentle sting during the session because the shoulder cap is thin over bone, but most pieces finish in a single hour for a small vine. Common mistake is packing every leaf with hairline strokes. That looks fragile after a year. For the first six months you will notice the faintest softening between leaves, and a touch-up at year two can restore crispness. For showing it off, wear a loose button-down shirt you can pull off the shoulder and a thin chain necklace to frame the curve.

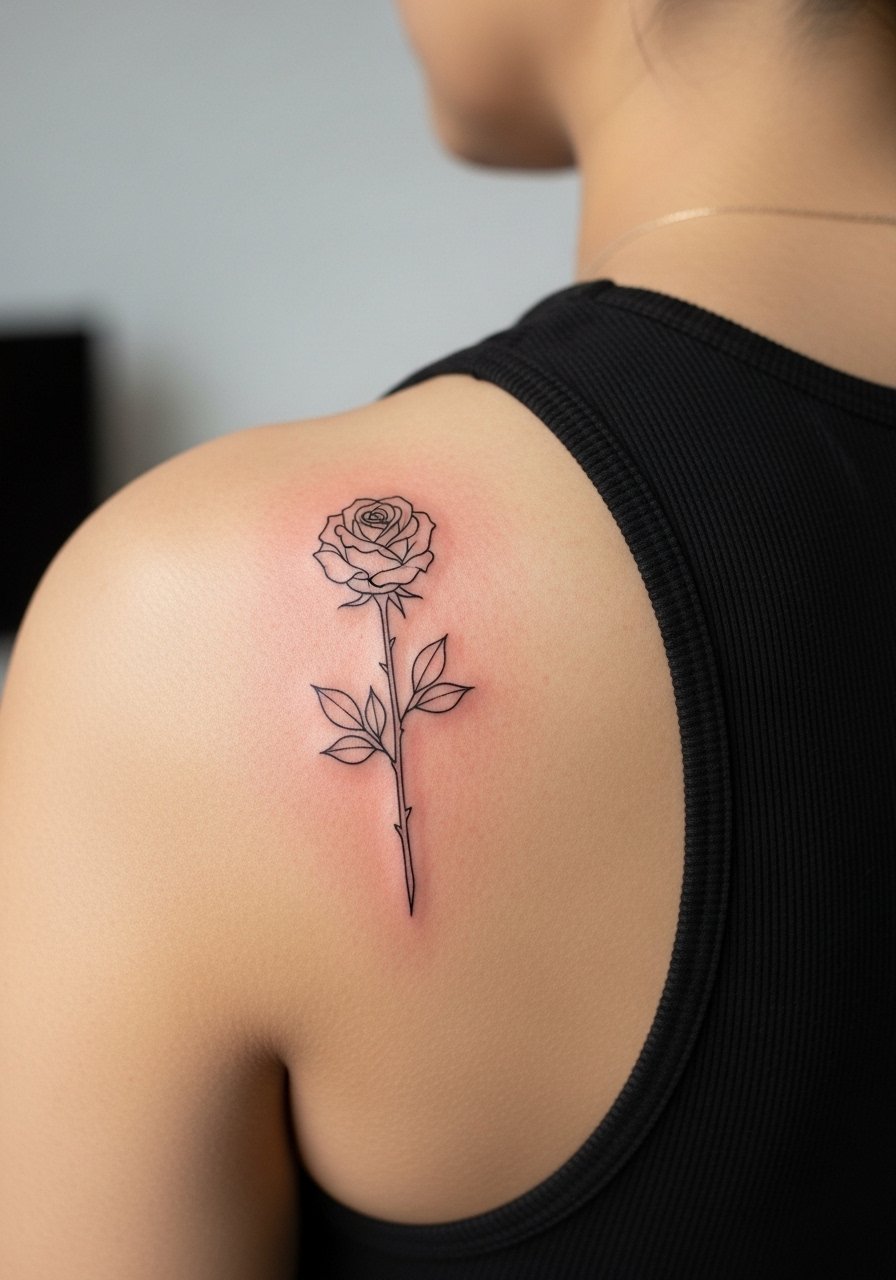
2. Single Stem Rose at the Shoulder Cap
A single rose in fine line style is a classic that stays elegant when scaled properly. Tell your artist you want clear spacing around the petals so the bloom reads from a short distance. If the petals are too tight, the fine shading will merge after two to three years. This placement is moderate on pain and usually takes 45 to 75 minutes depending on shading. I advise against asking for hairline stipple all over the petals since stipple ages faster on mobile areas. For session comfort, bring a racerback tank so the artist can access the shoulder without you being uncomfortable. Over time the stem line will soften slightly and most people book a touch-up around year two or three.
3. Clustered Mini Wildflowers over Shoulder Blade
This cluster mixes tiny daisies, chamomile, and sprigs in a compact composition that hugs the shoulder blade. I often suggest staggered heights so each tiny bloom has breathing room. The common error is making every bloom the same scale, which turns a readable cluster into a blurred patch after heavy sun exposure. On the shoulder blade the session is comfortable, and a small cluster usually takes 60 to 90 minutes. Expect the fine dots in centers to look delicate at six months and slightly softer by year three. Mention to your artist that you want denser linework on the outlines and lighter dot work inside petals to preserve contrast. If your wardrobe leans toward off-shoulder tops, this piece glows with a simple cropped sweater or a wide-neck blouse for evenings out.
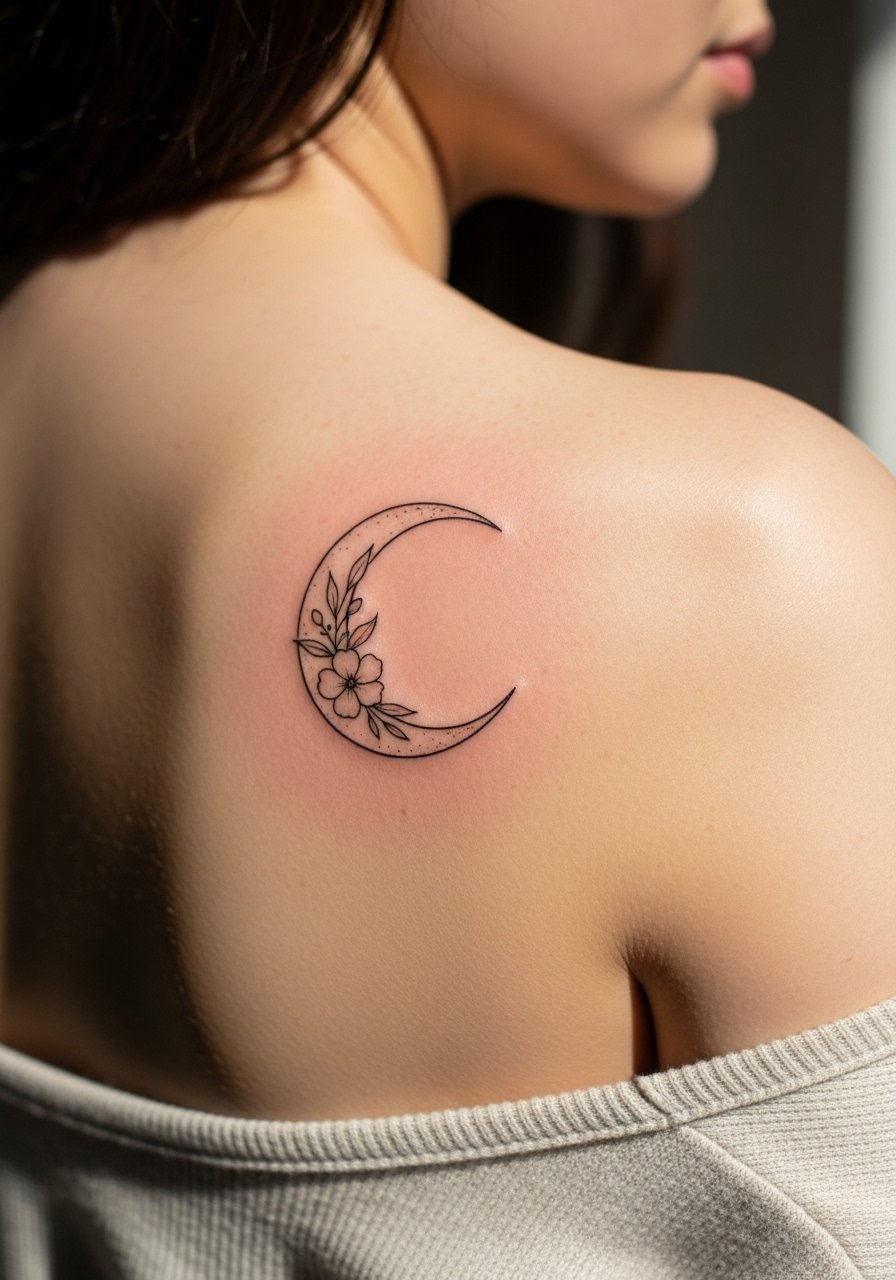
4. Crescent Moon Bloom on Top of Shoulder
Pairing a crescent moon outline with a small floral cluster on the top of the shoulder gives subtle symbolism without crowding the curve. When you consult, ask for the moon to be the anchor with slightly thicker linework and the flowers mapped to trail off the crescent. The top shoulder is exposed to sun more than the shoulder blade, so plan for sunscreen after healing to protect the faintest strokes. Sessions for this layout are usually under an hour. A common mistake is requesting ultra-fine connecting stems between elements. Those thin connectors are the first to lose definition. For showing it off, the silhouette looks great with open-back tops or sleeveless linen shirts that keep attention on the curve.
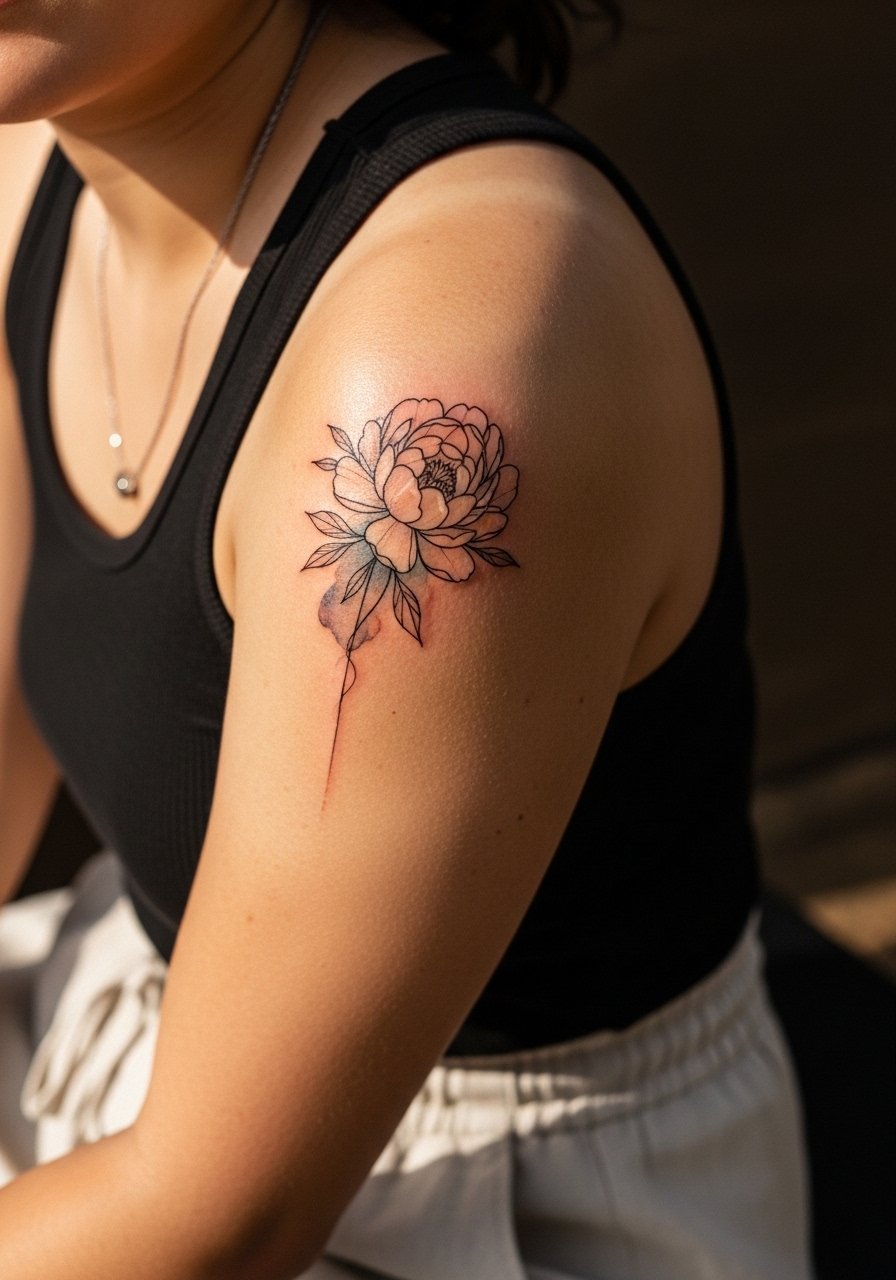
5. Watercolor-Style Fine Line Peony on Shoulder Edge
A fine line peony with light watercolor washes around the shoulder edge reads soft without heavy saturation. Tell your artist you want the color broken up into translucent washes rather than saturated fills so the linework remains primary. The shoulder edge allows a relaxed session position, and a piece this size commonly takes 90 to 150 minutes depending on color stops. The aging pattern here favors the lines if the washes are sparse. A frequent error is asking for dense pigment directly over hairline veins, which can look muddy later. For longevity, expect a touch-up window at two to four years. For the session, put on a loose drawstring linen pant and a tank so you stay comfortable during longer appointments.
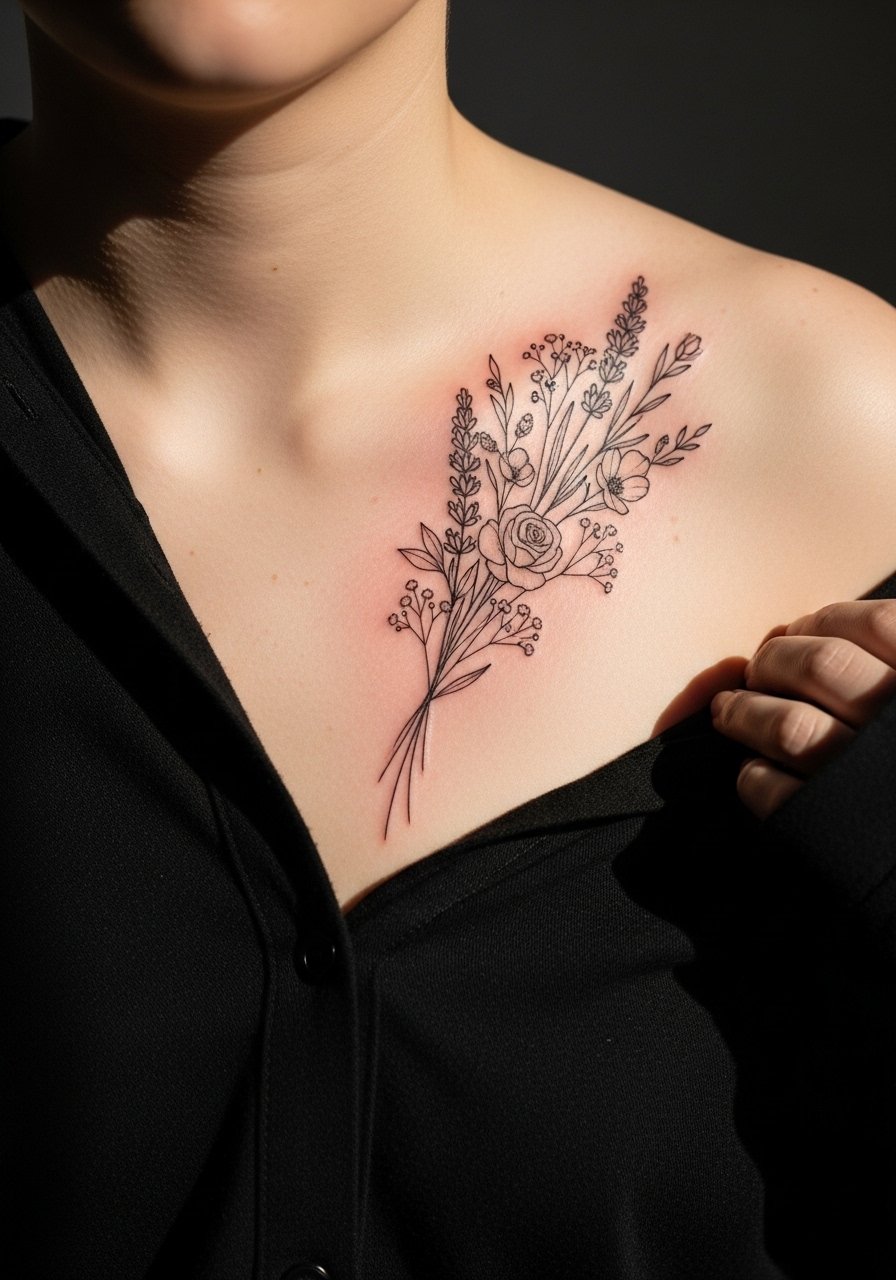
6. Asymmetric Bouquet Stretching Toward Collarbone
An asymmetric shoulder bouquet that reaches slightly toward the collarbone creates a flattering diagonal line across the upper torso. Artists split on whether very fine connector stems across this curved zone hold up. One camp argues the movement and stretch of the shoulder will blur ultra-fine stems within two years. The other camp says that with slightly increased line weight and deliberate spacing, those connectors settle well. Ask your artist which approach they use and to show healed photos of their work on similar anatomy. This piece often takes two hours and feels twingier near the collarbone edge. For showing it off, wear a wide-neck shirt pulled slightly aside to frame the diagonal without exposing too much skin. Plan on a touch-up at year two if the connectors soften.
Studio Day Picks
The first six shoulder ideas include high-exposure zones and delicate connectors, so a few studio and healing items make those sessions and the first week easier.
-
Stencil transfer paper kit. Lets you preview exact placement on the curved shoulder so you can test how that bouquet or vine will sit with your posture.
-
Professional topical numbing cream. Useful for sensitive collarbone-adjacent work to take the edge off without altering the artist's lines.
-
Thin protective film roll. Handy for shoulder edges that rub against straps during the first week.
-
Fragrance-free gentle body wash. Cleans the area during showers without stripping the delicate linework that fine flowers depend on.
-
Aquaphor healing ointment. A thin layer helps lock in moisture during the initial days while the tattoo closes, which matters for fragile stems and dot work.
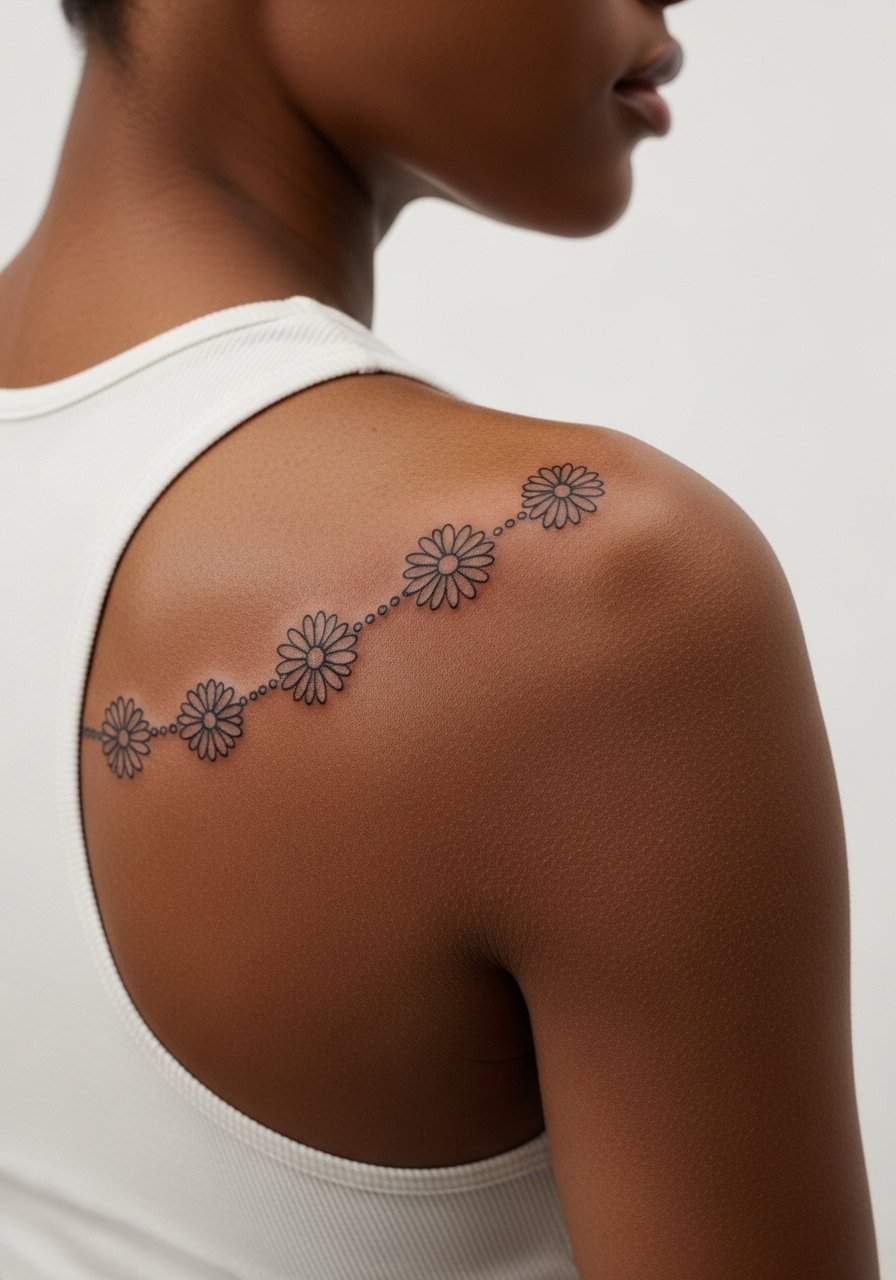
7. Back-of-Shoulder Daisy Chain
A low-contrast daisy chain along the back shoulder looks like a subtle wreath around the scapula. I advise mapping the daisies with alternating sizes so the piece reads as intentional and not repetitive. The back-of-shoulder is low on the pain scale and often fits into a single one-hour session. A common mistake is overloading the centers with tiny dots. Those dots lose crispness against sun and friction from bags. For the healed look at year two, expect softer petals and brighter centers requiring a minor touch-up. For outfit pairing, the chain holds up under open-back dresses or a simple racerback dress that keeps the line visible when you move.
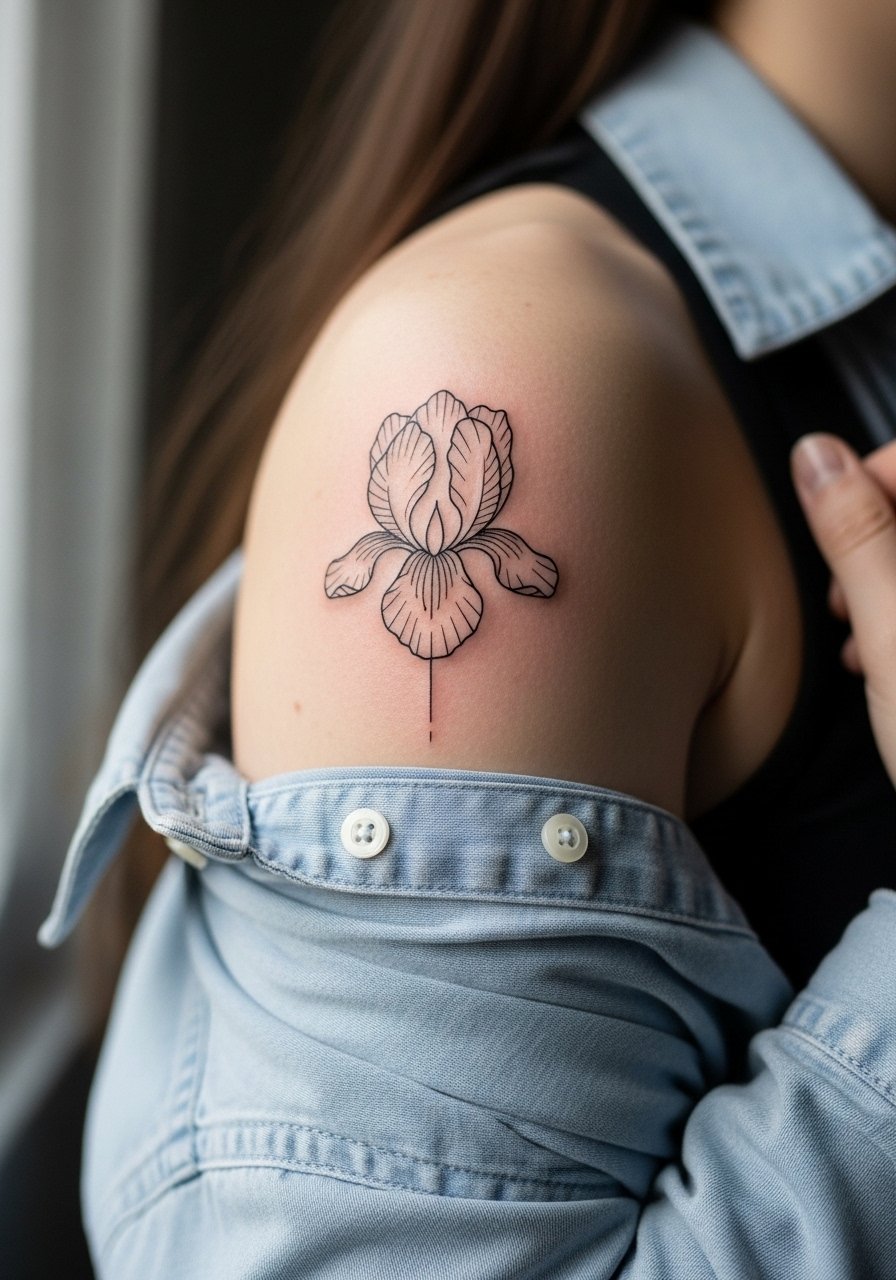
8. Single Iris with Negative Space Accent
A single iris rendered in clean linework with deliberate negative space inside the petals keeps contrast high as the piece ages. Tell the artist to use negative gaps as part of the design rather than leaving them as accidental thin spots. On the shoulder this tattoo usually runs 45 to 90 minutes. The biggest mistake is compressing too many details into the petal veins. Those fine crossings will soften faster than the primary outline. I suggest a protective wardrobe choice during the first week, like a button-down shirt you can pull aside for access and later to frame the bloom. Expect a touch-up in two to three years if you want the negative space to pop again.
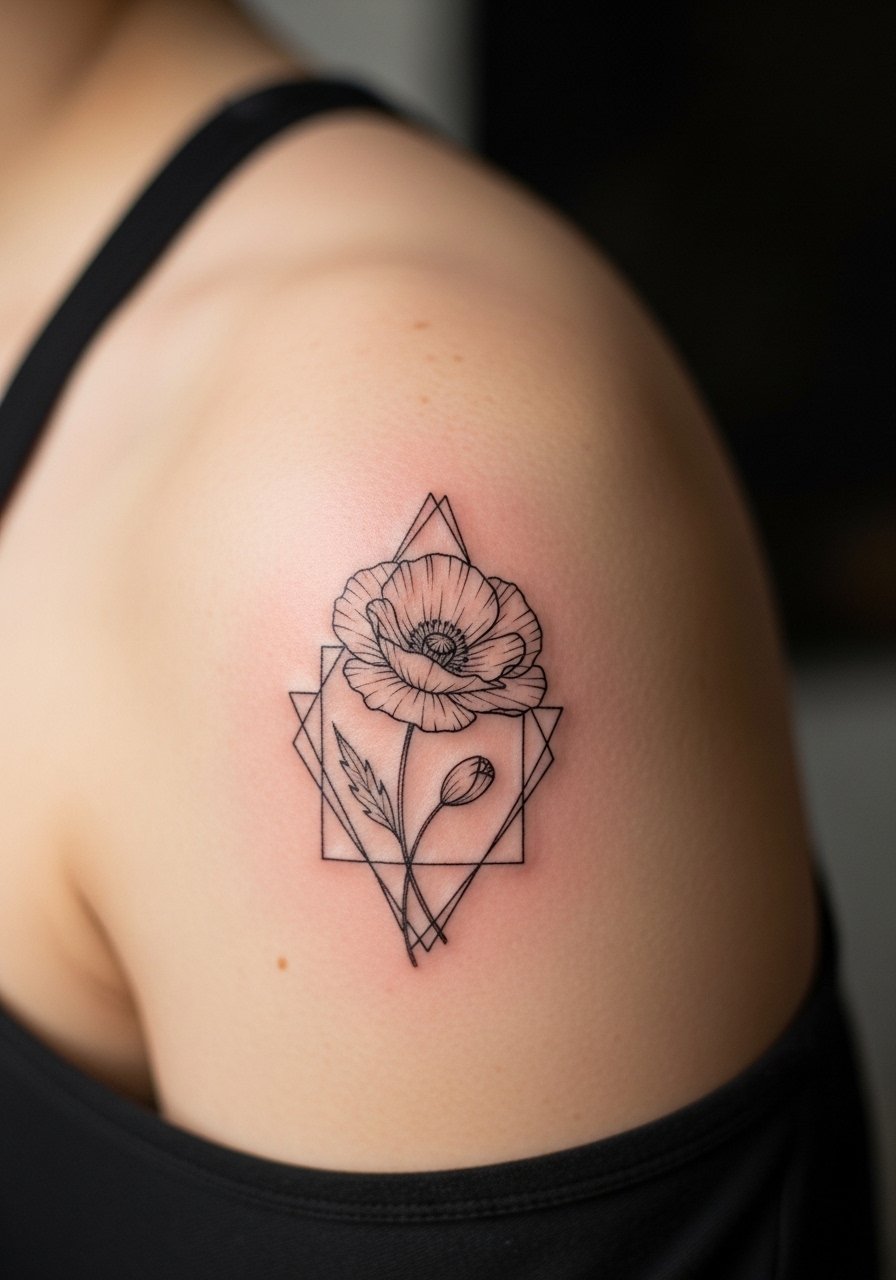
9. Geometric Frame with Fine Line Poppy
Combining a geometric outline with a fine line poppy gives structure to a delicate subject. Ask for slightly bolder geometry and lighter floral details so the frame remains the visual anchor as the flower ages. Shoulder placement benefits this interplay because the plane is broad enough to hold the geometry without distortion. Common errors include tiny geometric repeats that create visual noise once fading begins. Sessions vary from 60 to 120 minutes based on how much dot work you want. From my experience, the geometry is what lets a touch-up at year three restore balance without reworking the whole piece.
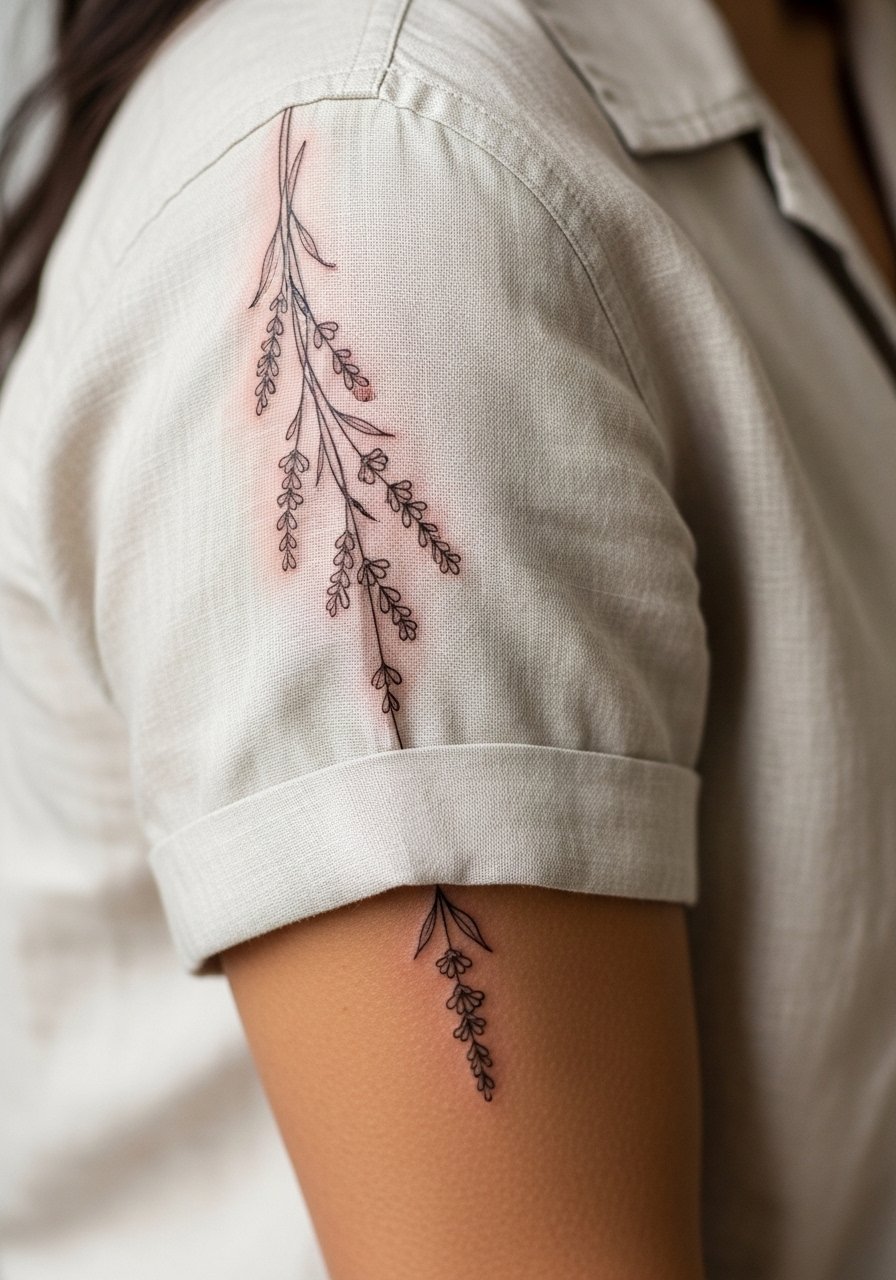
10. Trailing Lavender from Shoulder to Upper Arm
A string of tiny lavender stems that start on the shoulder and trail down the upper arm reads like a soft sash. I recommend spacing the flower clusters to follow muscle lines so the piece moves with your arm and avoids abrupt distortions. Pain is minimal on the lateral shoulder but increases slightly as the trail approaches the inner arm, so plan for a 90-minute session if you want a longer trail in one go. A mistake I see is requesting identical spacing along the whole trail, which looks mechanical later. For showing it off, rolled-up sleeves or a short-sleeve linen shirt frame the trail and let the stems extend naturally when you bend your arm.
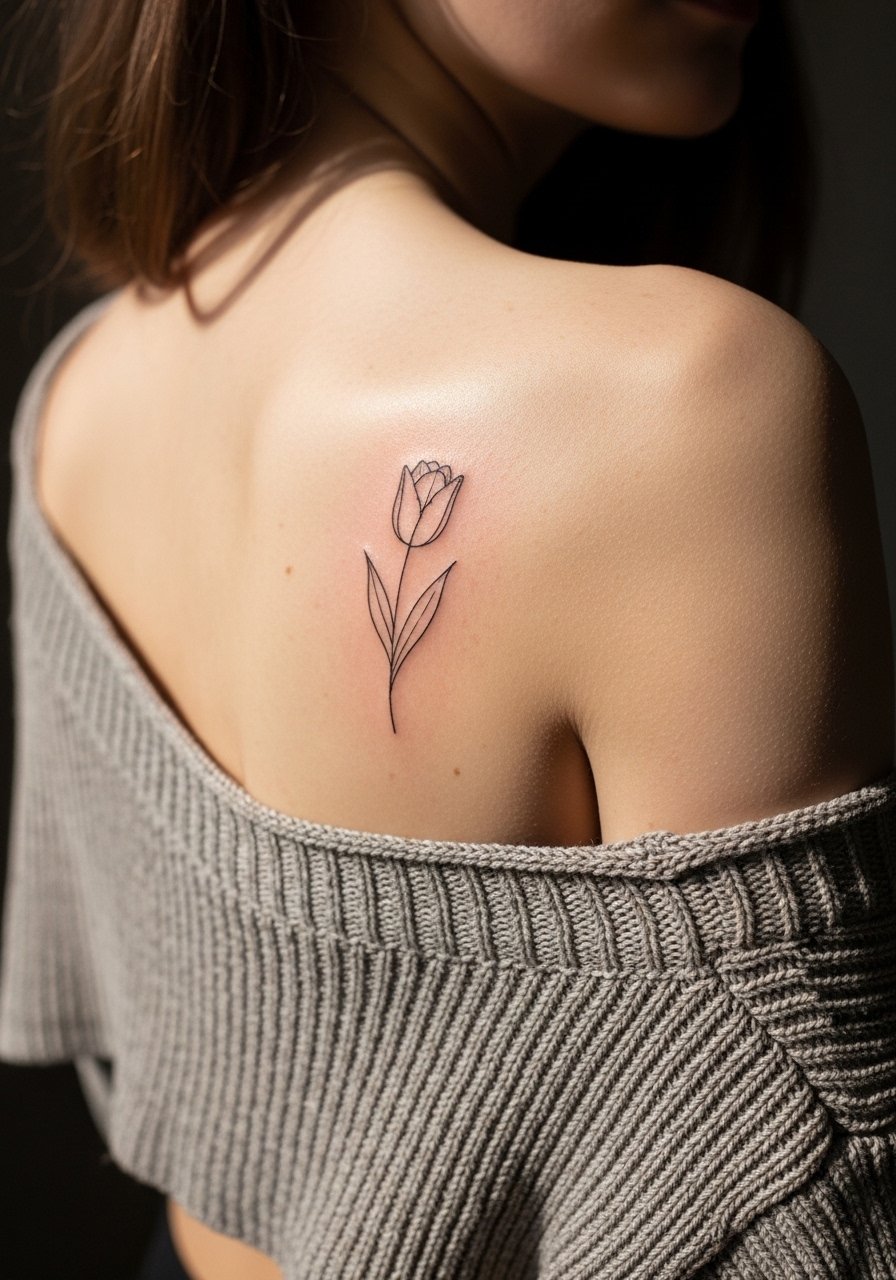
11. Minimalist Outline Tulip on Shoulder Blade
A clean tulip outline keeps things simple and readable, which matters on the shoulder blade where movement can blur intricate detail. I suggest a single confident outline with tiny internal negative space instead of stipple inside the petals. This placement is easy on pain and often wraps up in under an hour. The mistake to avoid is asking for extra micro-veining that competes with the silhouette. At six months the outline should remain clear, with minor softening by year three. If your style is subdued, this outline pairs well under a cropped knit or a tank when you want it visible without heavy contrast.
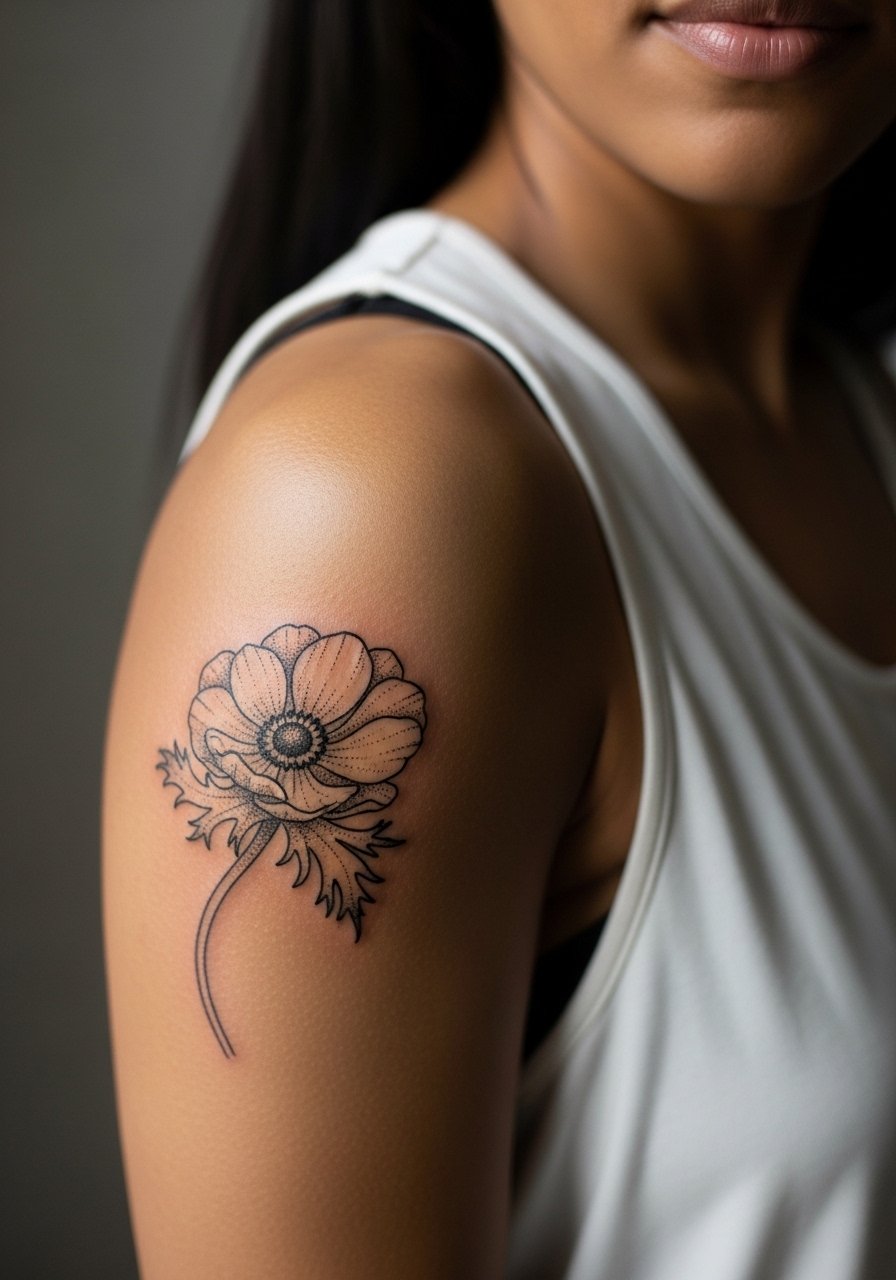
12. Stipple-Shaded Anemone Near Shoulder Joint
An anemone rendered with stipple shading and thin contour lines near the shoulder joint gives depth without heavy saturation. Tell the artist to use denser stipple close to the center and lighter dots toward petal edges to preserve petal separation as the stipple softens. The shoulder joint is moderately sensitive and a piece like this takes 90 to 150 minutes depending on stipple density. A common error is overlapping stipple and tight hairlines in the same zone. Those combinations age into uneven patches. For the session, wear a loose tank top so the artist can pivot around the joint without you shifting. Expect a touch-up at year two to refresh midtone stippling.
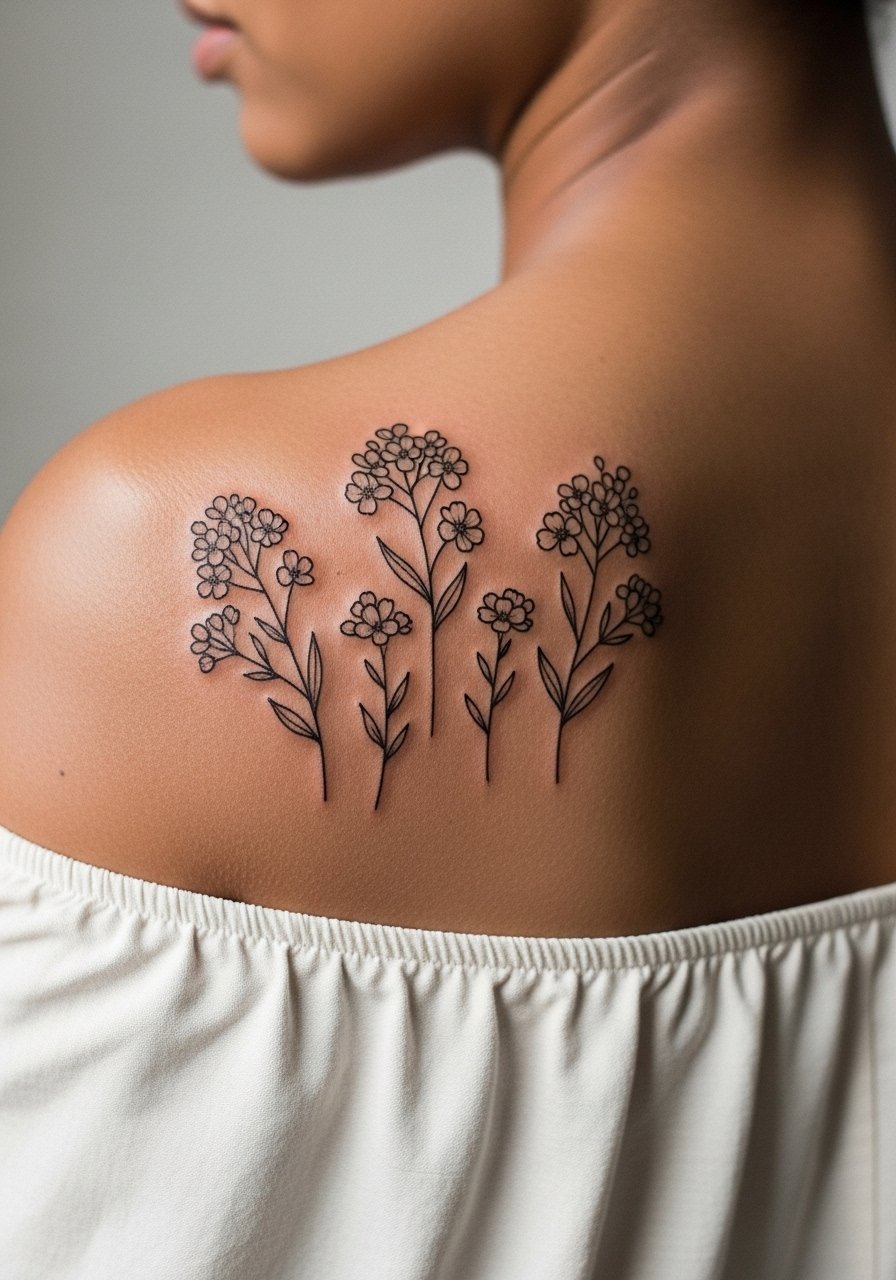
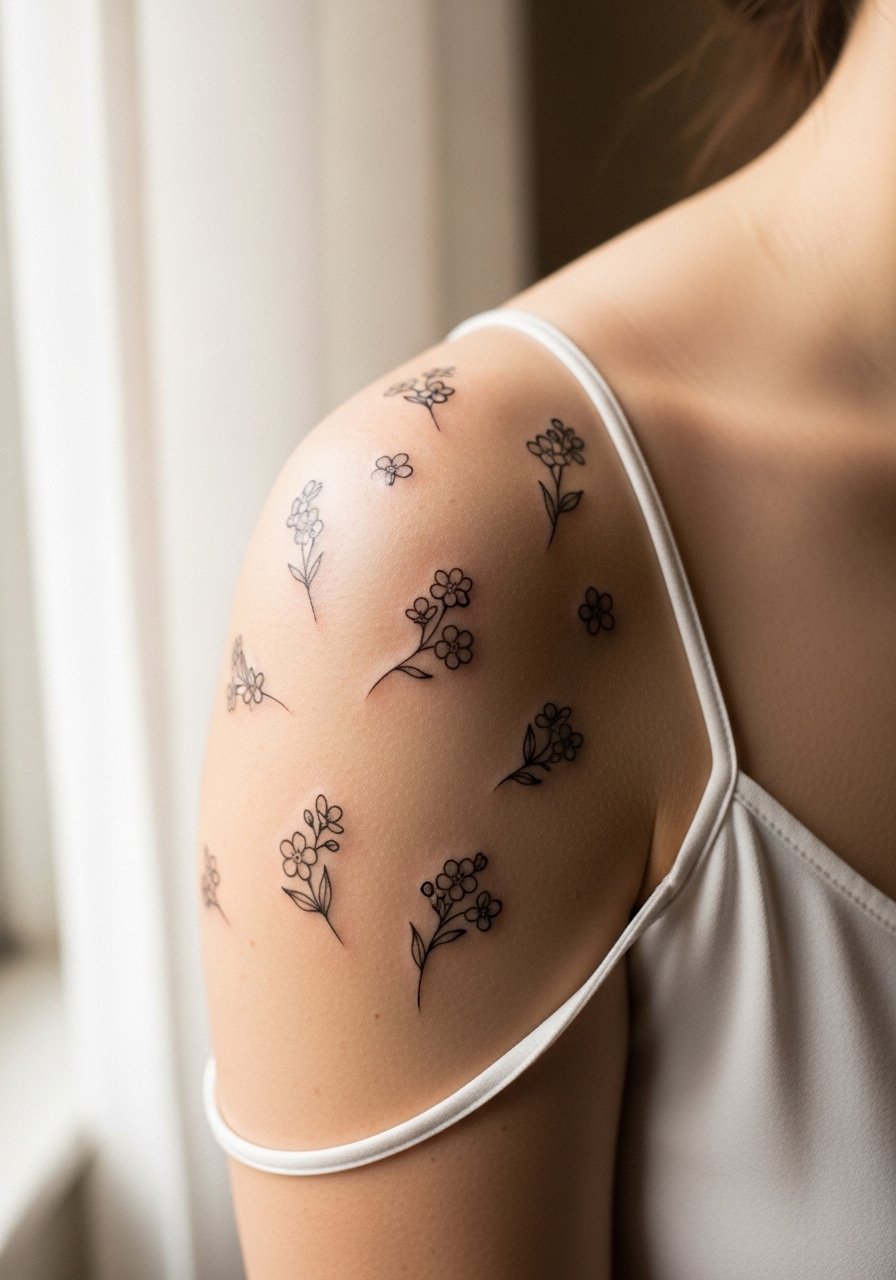
13. Tiny Forget-Me-Nots Scattered Across the Cap
A constellation of tiny forget-me-nots sprinkled across the shoulder cap looks deliberate when you stagger sizes and leave negative space. I recommend planning each flower's placement on the body rather than copying a flat photo. The smallest dots and centers will be the first to lose definition, so avoid microdots in favor of slightly larger centers. Sessions for a scattered cluster are usually short, forty-five to seventy-five minutes. The most common mistake is trying to replicate photo-referenced density, which looks overworked once the piece heals and moves. If you prefer subtlety, this cluster pairs with open-back shirts or thin strap tops so the scattered blooms peek out without demanding attention.
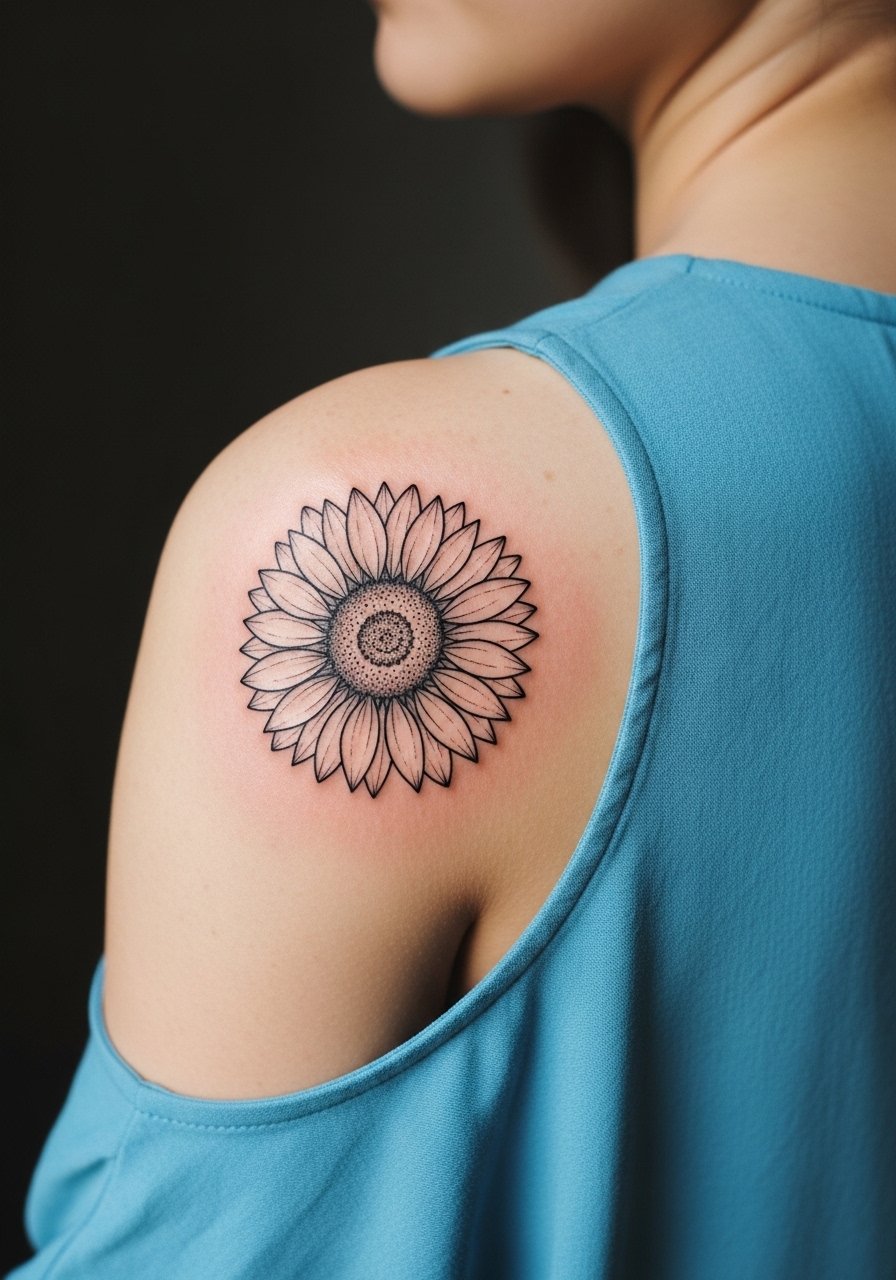
14. Bold Petal Contour for Sunflower Accent
A sunflower executed as bold petal contours with restrained interior detail translates well into fine line language by leaning on strong outer line weight. Ask for the outer petals to have a touch more saturation and leave interior lines airy. The shoulder can support a larger sunflower without distortion, and sessions can run 90 to 180 minutes depending on size. The common error is insisting on micro-detail in the center that competes with the bold outline and ages unevenly. This design looks striking with sleeve roll-ups or a simple open-back midi dress for moments you want the shoulder to read like a statement piece. Expect a refresh in three to five years if you want the center contrast maintained.
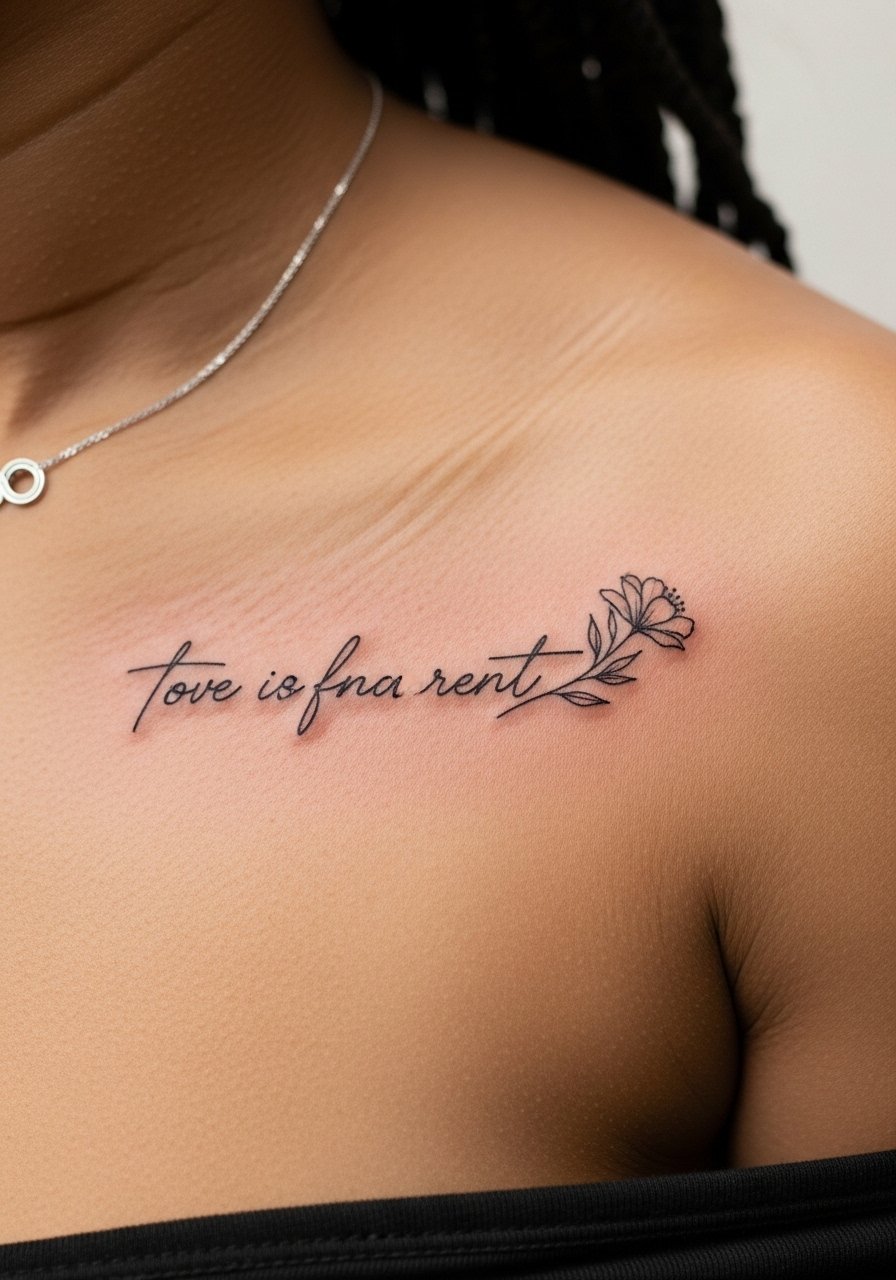
15. Script Phrase with Small Floral Accent on the Shoulder
Pairing a short script phrase with a tiny floral accent allows a meaningful word to sit within a visual frame. Make sure the text is large enough for clarity and that the floral accent has slightly heavier outline than the script so the two elements do not compete. Shoulder placement lets the phrase follow the body's natural curve, and most of these pieces finish in 30 to 60 minutes. A frequent mistake is choosing a typeface that reads clearly in print but collapses in skin. Ask the artist to stencil the exact lettering on your skin in the chosen size and take a photo before committing. If you wear necklaces, pick a thin chain pendant necklace that sits above the text so it frames rather than covers the phrase.
16. Micro-Realism Camellia Nestled on the Shoulder
A micro-realism camellia uses subtle gradation in fine line shading to suggest volume without heavy color. For this, ask your artist for light whip shading and deliberate negative gaps instead of dense fills. The shoulder muscle gives a good canvas for petal curvature, but the technique requires patience and often two short color stops, so plan for a 120 to 180-minute session. Mistakes occur when clients push for every tiny hairline in the petals. Those disappear first. For showing it off, a loose button-down shirt or a camisole pairs well and keeps the focus on the camellia silhouette. Touch-ups at year two keep the micro shading crisp.

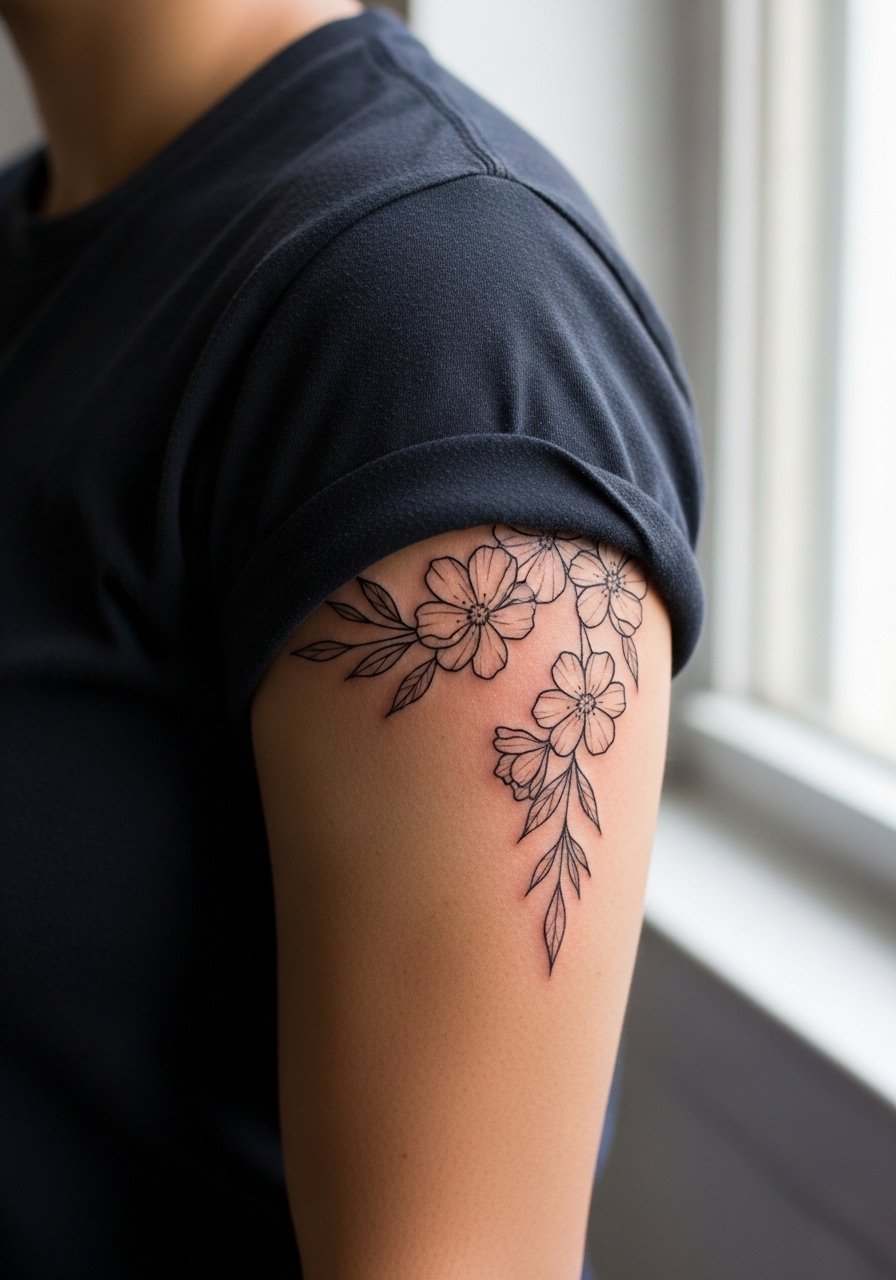
17. Shoulder-to-Sleeve Transition Florals
If you like a shoulder piece that can grow, a shoulder-to-sleeve transition design plans future blooms along the upper arm and wraps. Start with a clear anchor bloom on the shoulder and leave negative space for later elements. The main advantage is design coherence as the arm moves. Early planning prevents scale mismatches that make sleeves feel pasted on later. Sessions vary depending on how much you want in the first visit, but the initial anchor usually takes 90 to 180 minutes. A typical mistake is trying to complete the sleeve in one marathon session. Let the sleeve evolve and consult the artist about spacing for future motifs. For wardrobe that flatters growth, short sleeves and rolled cuffs reveal how the transition will look in motion without overexposure.
Frequently Asked Questions
Q: Will fine line flowers on the shoulder need touch-ups more often than bolder styles?
A: Fine line work generally shows softening sooner than bold blackwork because the needle channels are narrower. On the shoulder this often means a minor touch-up around year two to three, though thicker anchor lines or slightly increased initial line weight can push that window longer.
Q: Can I get a shoulder floral if I wear strapless or sleeved clothing often?
A: Yes, shoulder florals work with a variety of wardrobes. If you plan to wear strapless pieces, pick a placement that sits central on the cap. If you wear straps or bag-heavy outfits, mention that in consultation so the artist avoids zones that rub against straps. For evenings, an open-back midi dress or wide-neck blouse displays shoulder blooms well.
Q: How should I phrase longevity concerns in my consultation?
A: Ask to see healed photos on similar anatomy and for the artist's preferred line weight for shoulders. Say something like, "I want the stems to hold at least three years with minimal touch-ups," and request they show examples of their work at that age. That gives you a realistic baseline.
Q: Are there shoulder placements I should avoid for very fine connectors and stems?
A: Connectors crossing the joint where the shoulder meets the collarbone or upper arm are higher risk because of movement and stretch. Some artists avoid hairline connectors across those zones. If you want that look, ask for slightly thicker connectors and plan for a touch-up timeline.
Q: How long will a small shoulder floral session take and what should I wear?
A: Small pieces commonly finish within 45 to 90 minutes, larger anchors run longer. Wear a loose button-down, racerback tank, or a wide-neck shirt you can move aside without undressing. That keeps you comfortable and gives the artist clean access.
