
Fine line horseshoe tattoos are everywhere on saved boards, but the style that actually holds its shape over years is a choice, not luck. I see people pick the tiniest horseshoes for wrists and then come back for touch-ups. The trick is picking the right placement, spacing, and little supporting details so the symbol reads as intended after sun, showers, and seasons. Below are 21 ideas that balance delicate linework with realistic aging, placement notes, and outfit tips to help you book the right session.
1. Tiny Horseshoe with Laurel on Inner Forearm
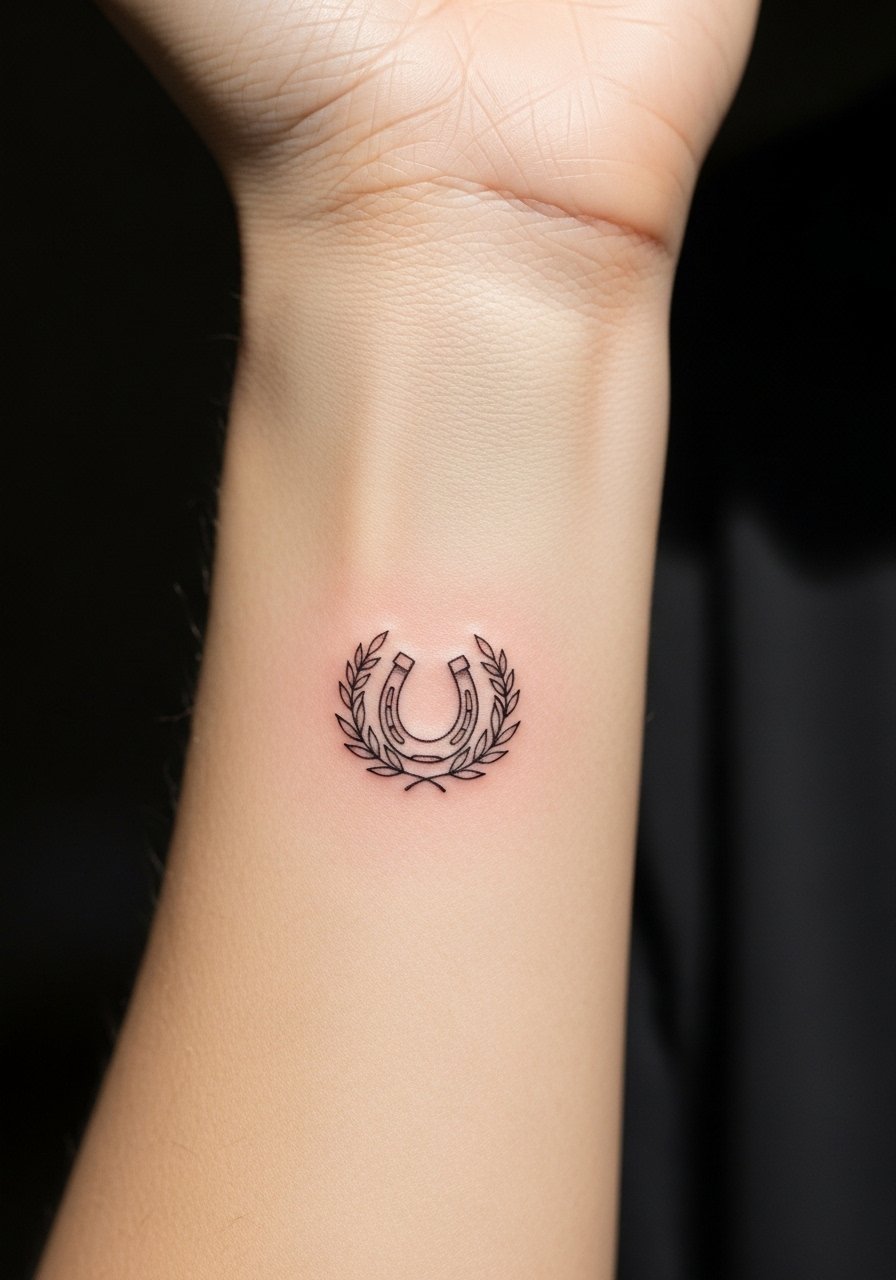
I recommend this when you want an upside-down luck symbol that still reads from a few feet away. I've seen this placement hold best when the artist keeps negative space around the horseshoe rather than packing leaves into the curve. For the consultation, ask for single-needle linework with slight spacing between the laurel leaves so the lines do not merge as the piece ages. Expect a low pain level around 3 out of 10 and a short session under an hour. Common mistake, going too small with dense leaves. For showing it off, rolled-up sleeves and a loose button-down shirt frame the forearm without covering the linework.
2. Micro Horseshoe Behind the Ear with Star Accent
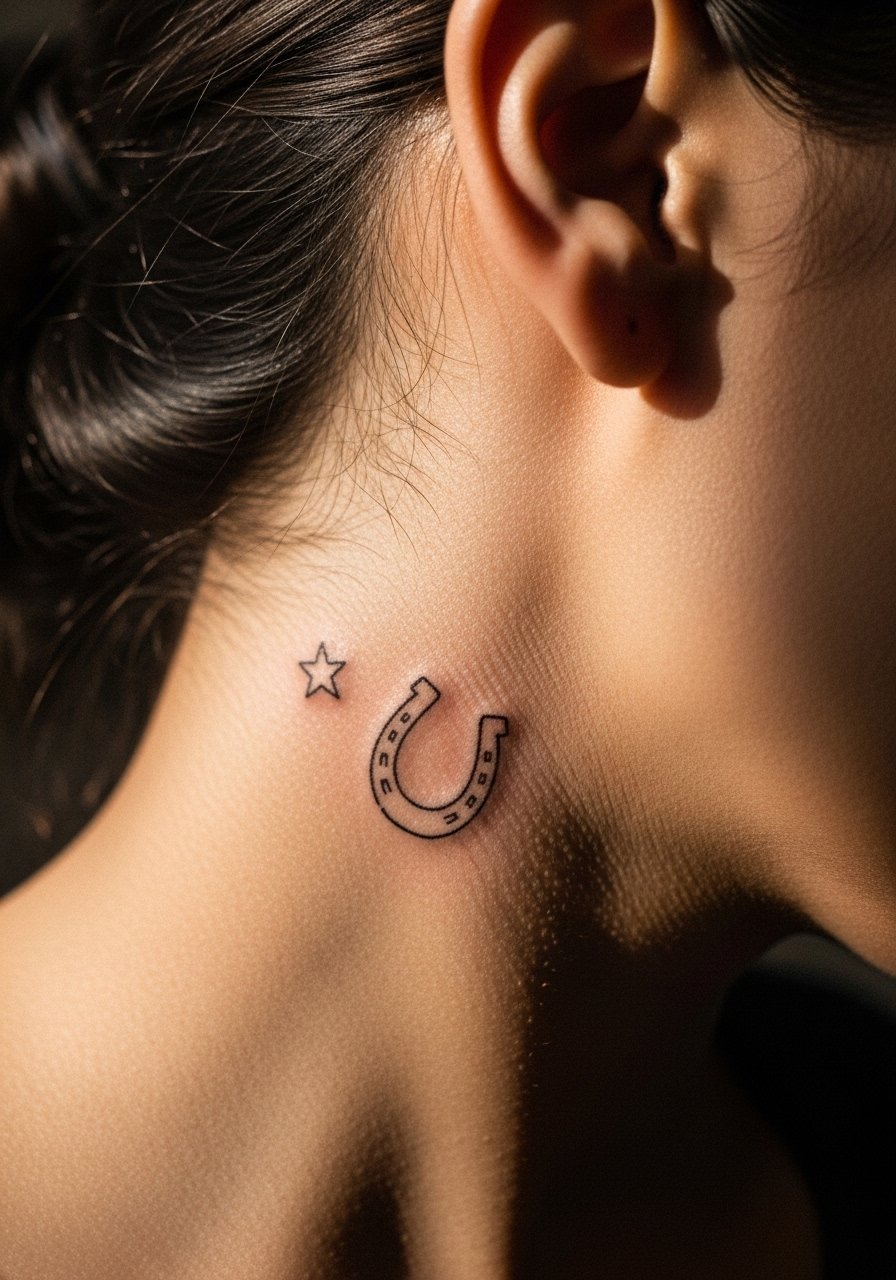
Behind-the-ear placements look delicate but need a confident hand. Pain is a 5 out of 10 for most people because the skin is thin and the area is bony. Ask for shallow, consistent depth and avoid heavy stipple near the curve. A common mistake is asking for too many small details that the space cannot hold. Expect touch-ups sooner than forearm pieces because of friction from hair and collars. For session wear, bring a hair tie so the artist has clear access, and consider a silk scrunchie to pull hair back without snagging the fresh ink.
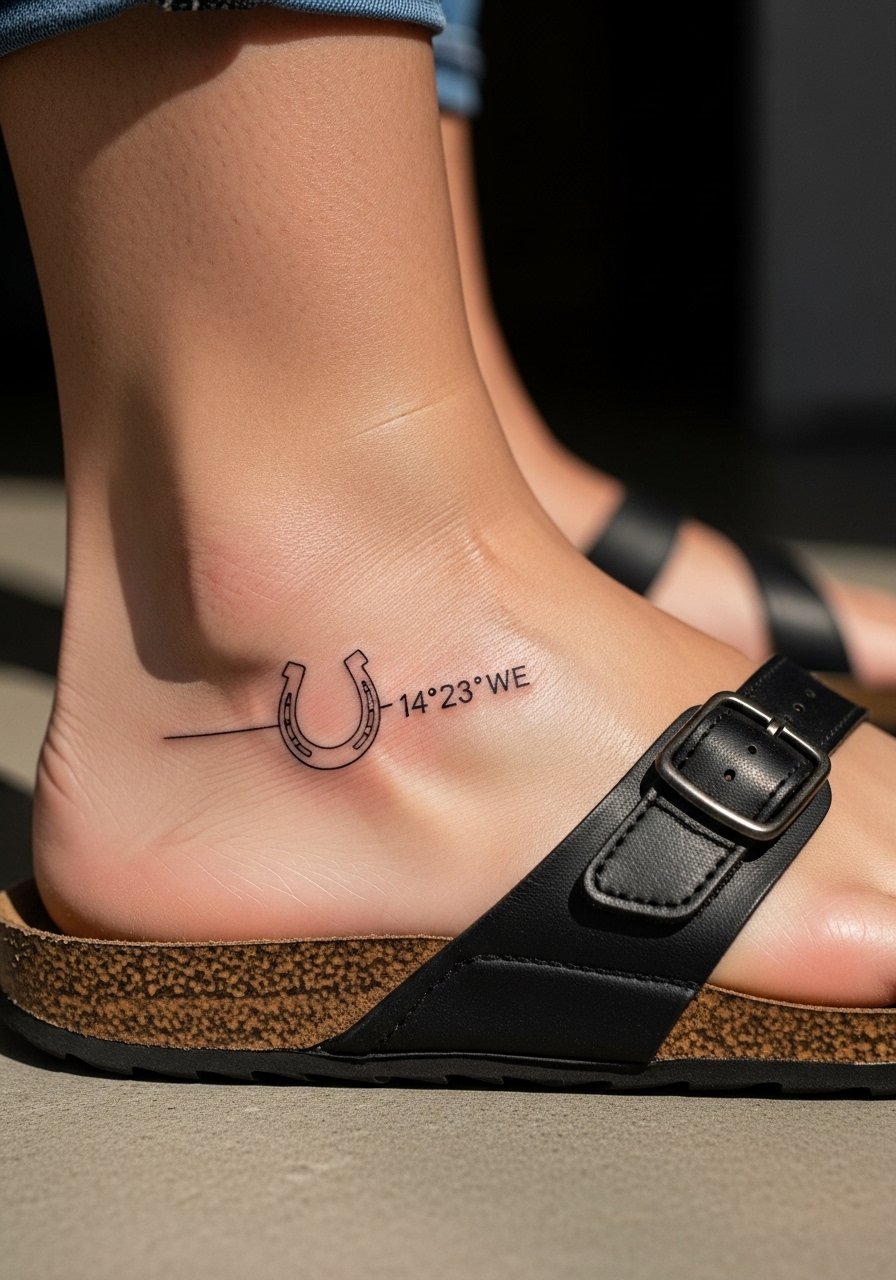
3. Minimal Horseshoe on the Ankle with Tiny Dots
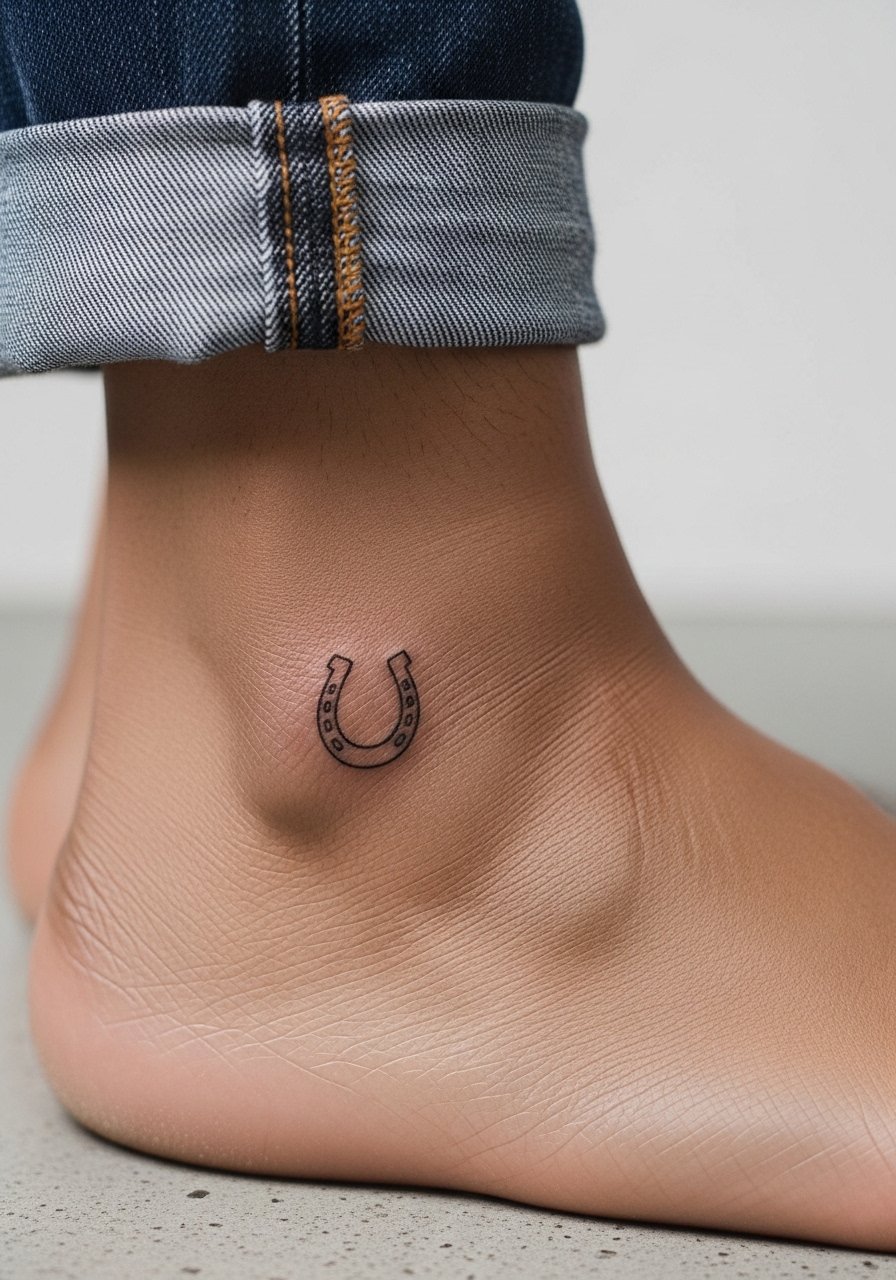
Ankle horseshoes are classic and good for people who want periodic visibility. The ankle rates around a 4 for pain depending on placement near bone. The usual session is 30 to 45 minutes. Tell your artist you want slightly thicker outer stems on the horseshoe so the silhouette stays readable over time. The aging pattern here often shows fading on the outer curve where friction from socks and shoes occurs. A common mistake is requesting ultra-thin lines that disappear in a year. For evenings out, sandals or cropped pants highlight the ankle. Pair this with minimalist sandals and a simple anklet that complements without crowding the design.
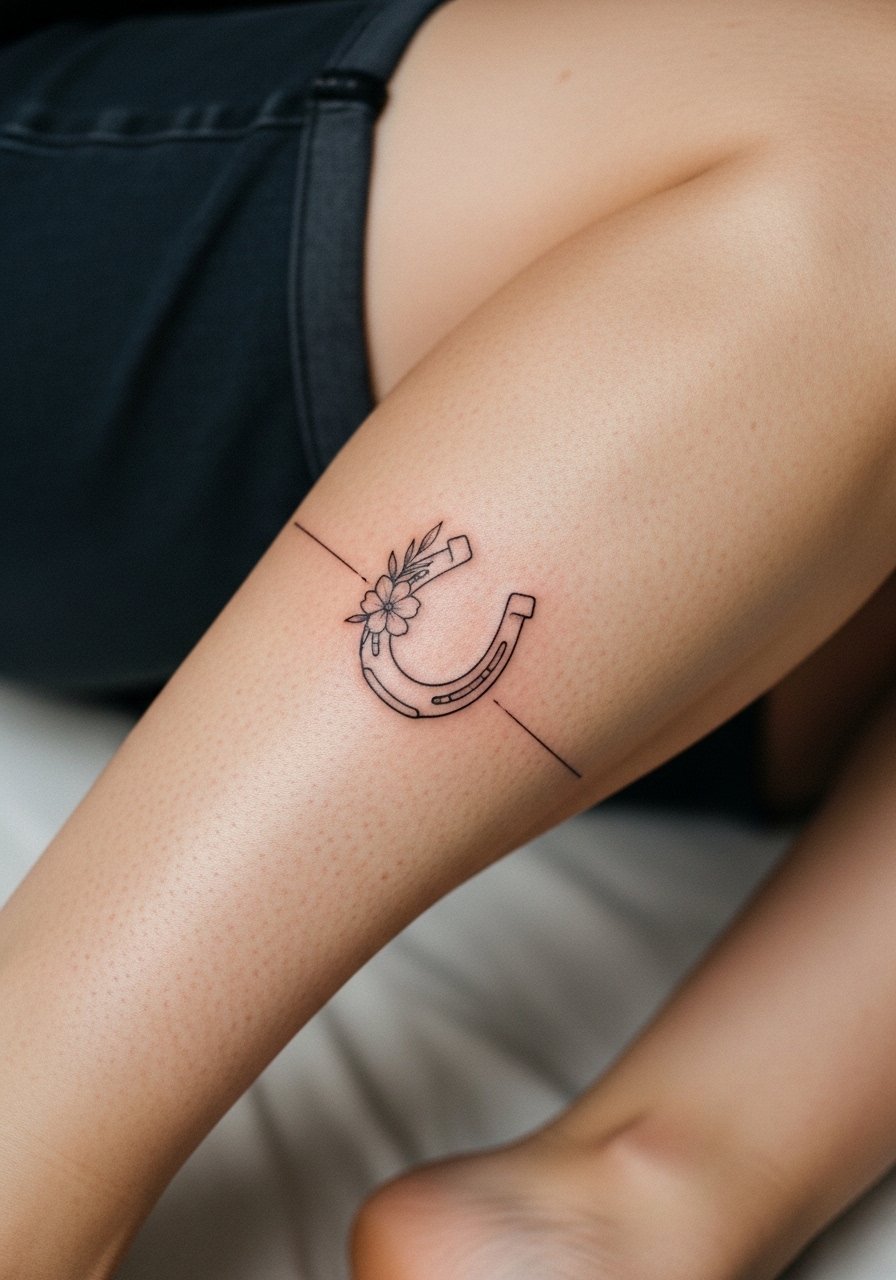
4. Fine Line Horseshoe with Wildflower Cluster on Ribcage
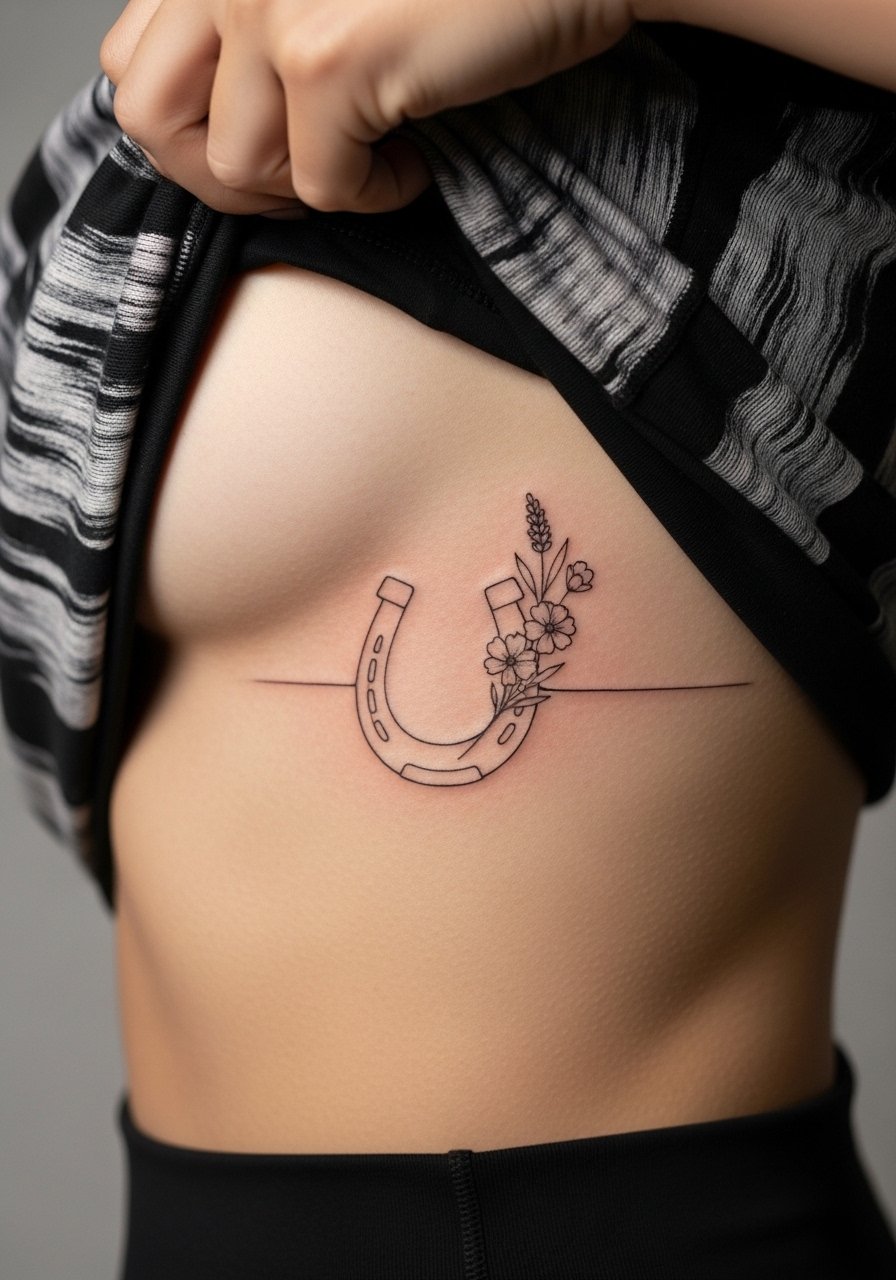
Fair warning, ribs are higher on the pain scale at about a 7 out of 10. Artists split on this placement. One camp says fine line on ribs blurs quickly because the skin stretches and shifts. The other camp argues that with careful depth and spacing, fine line can settle well on the ribcage. Ask the artist where they stand and see healed portfolio photos before booking. Session time varies with added floral details, usually 1.5 to 3 hours. A mistake I see is cramming dense floral shading into the curve. For the appointment, wear a cropped top you can lift easily so the artist has clean access.
5. Finger Horseshoe Band with Dot Work
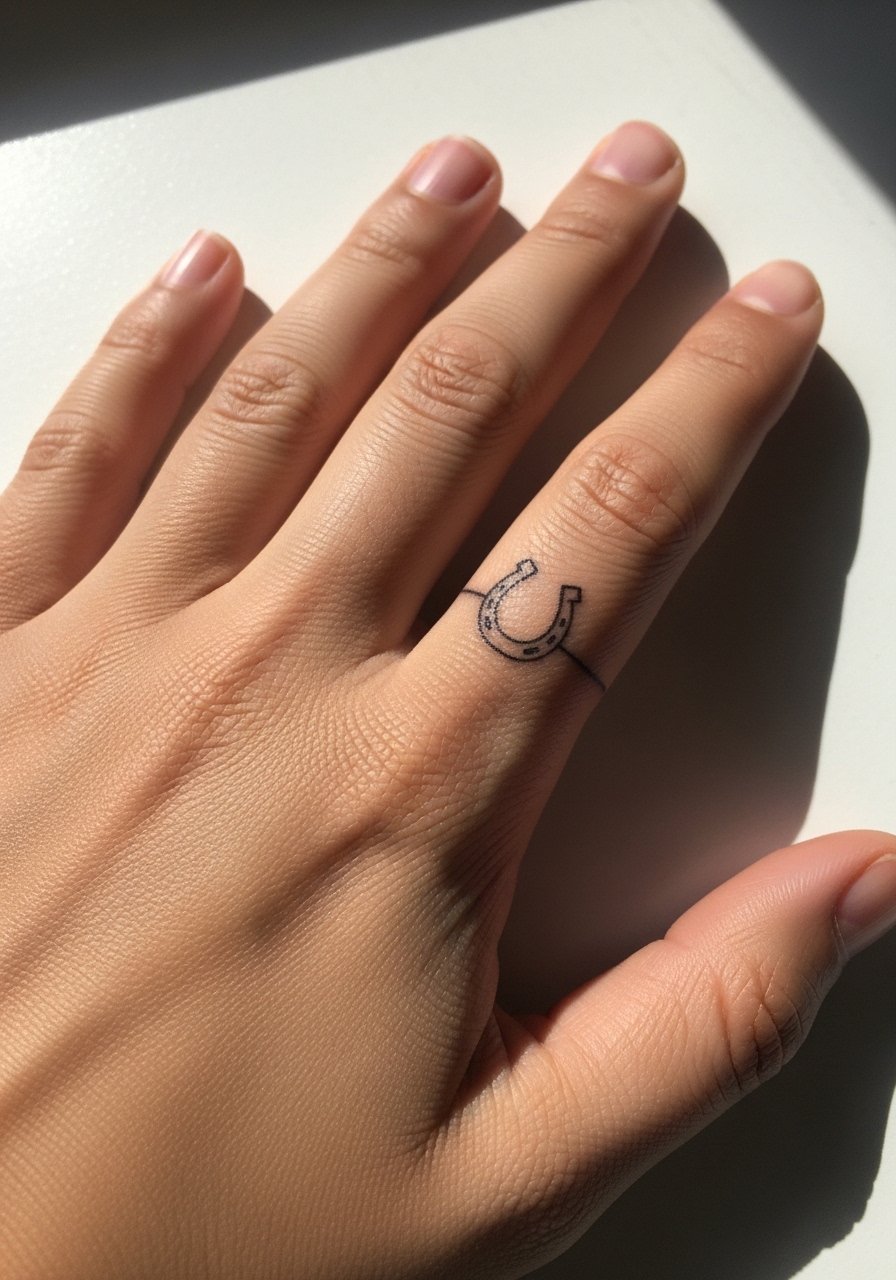
Finger tattoos age differently. Expect frequent touch-ups because the skin on fingers renews quickly and is exposed to constant washing and friction. Pain is a 6 at the fingertip and the session is usually less than an hour. The main mistake is asking for super-thin interior detail inside the horseshoe. For longevity, ask for slightly bolder outer linework and minimal interior dots. Blowout risk is higher on the sides of the finger. This look pairs well with dainty stacks. Try a stacked dainty bracelet set or a slim watch to let the finger band stand out when you gesture.
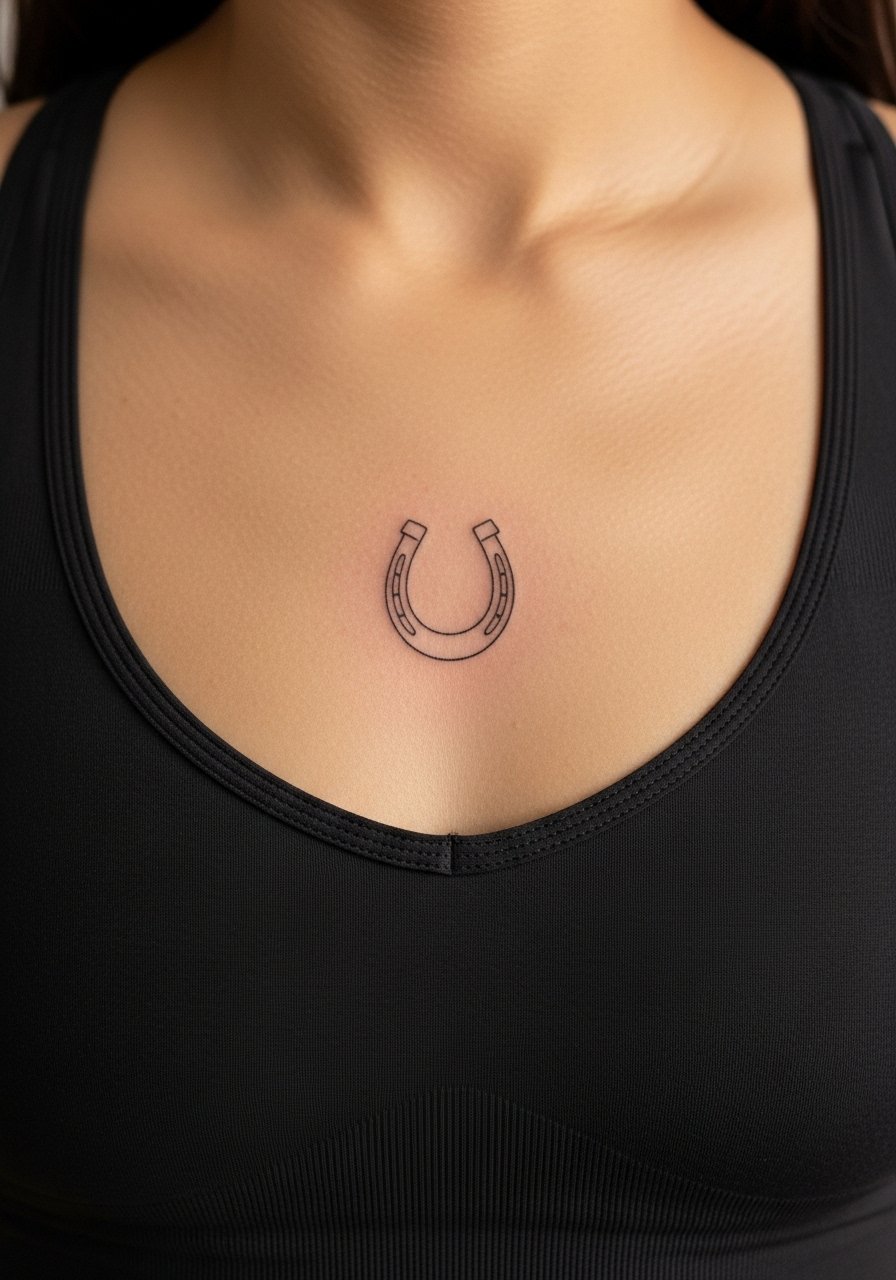
6. Horseshoe at the Collarbone with Tiny Script Date
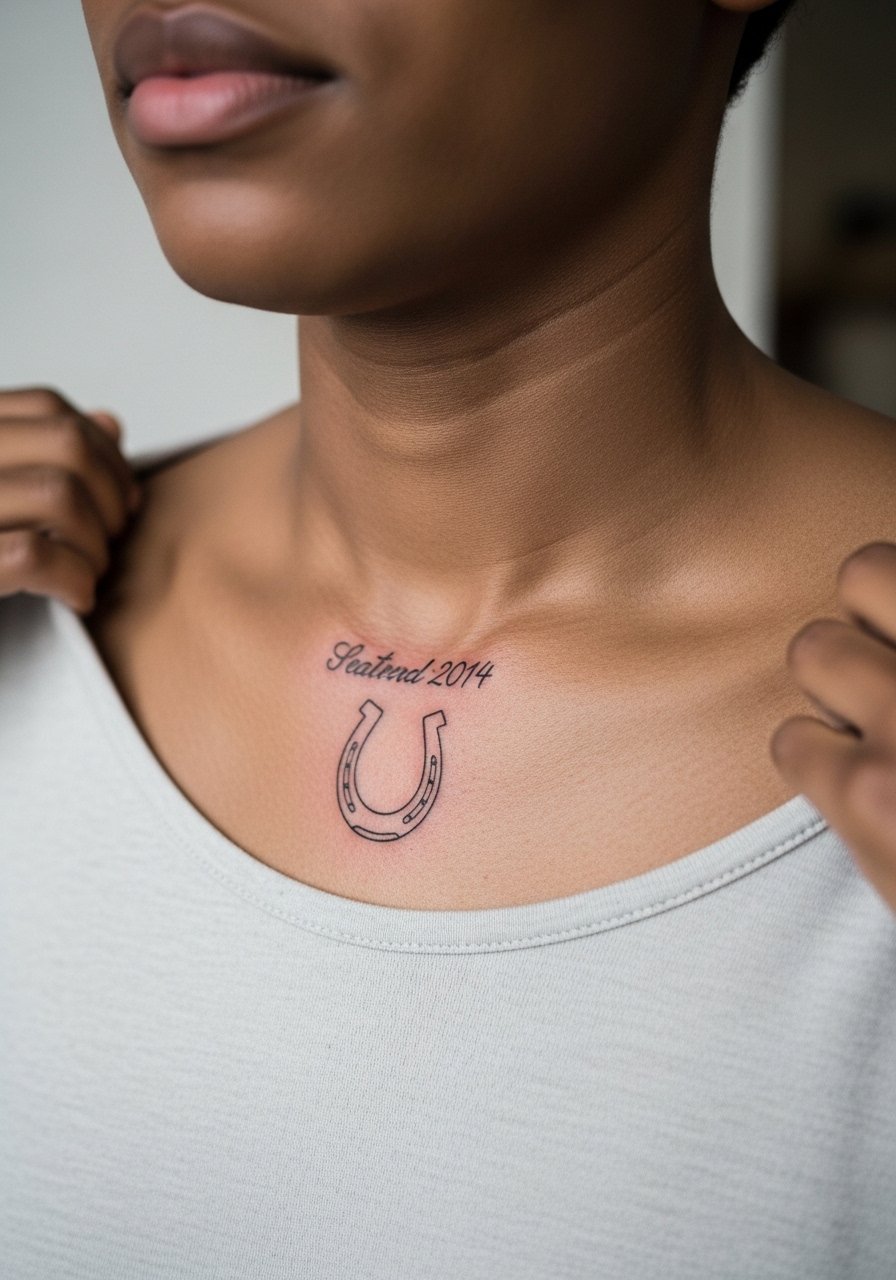
This placement reads elegant when kept simple. Pain sits around 4 to 5 depending on proximity to bone. The consultation should cover exact spacing between the horseshoe and any script so letters do not bleed into the linework as the piece heals. A common mistake is placing text too close to the curve, which makes both elements look cramped later. For showing this off, a thin chain necklace sits above the design without crowding. Consider a thin chain pendant necklace to complement the collarbone horseshoe and frame the area.
Studio Day Picks
The tiny wrist, finger, and collarbone horseshoes above share precise linework needs and different session prep. A few compact items smooth the chair time and the first week.
-
Stencil transfer paper kit. Lets you test placement on the skin before the needle touches, especially useful for small collarbone and wrist placements.
-
Topical numbing cream. Applied as directed before wrist or rib sessions it can reduce surface sensitivity without obscuring linework.
-
Thin protective film roll. Protects finger and ankle tattoos from friction and keeps the area cleaner during the first few days.
-
Fragrance-free gentle body wash. Soft cleansing helps preserve delicate fine line ink while you shower the first week.
-
Aquaphor healing ointment. A thin layer in the initial days helps retain moisture for fine line work without clogging the needle channels.
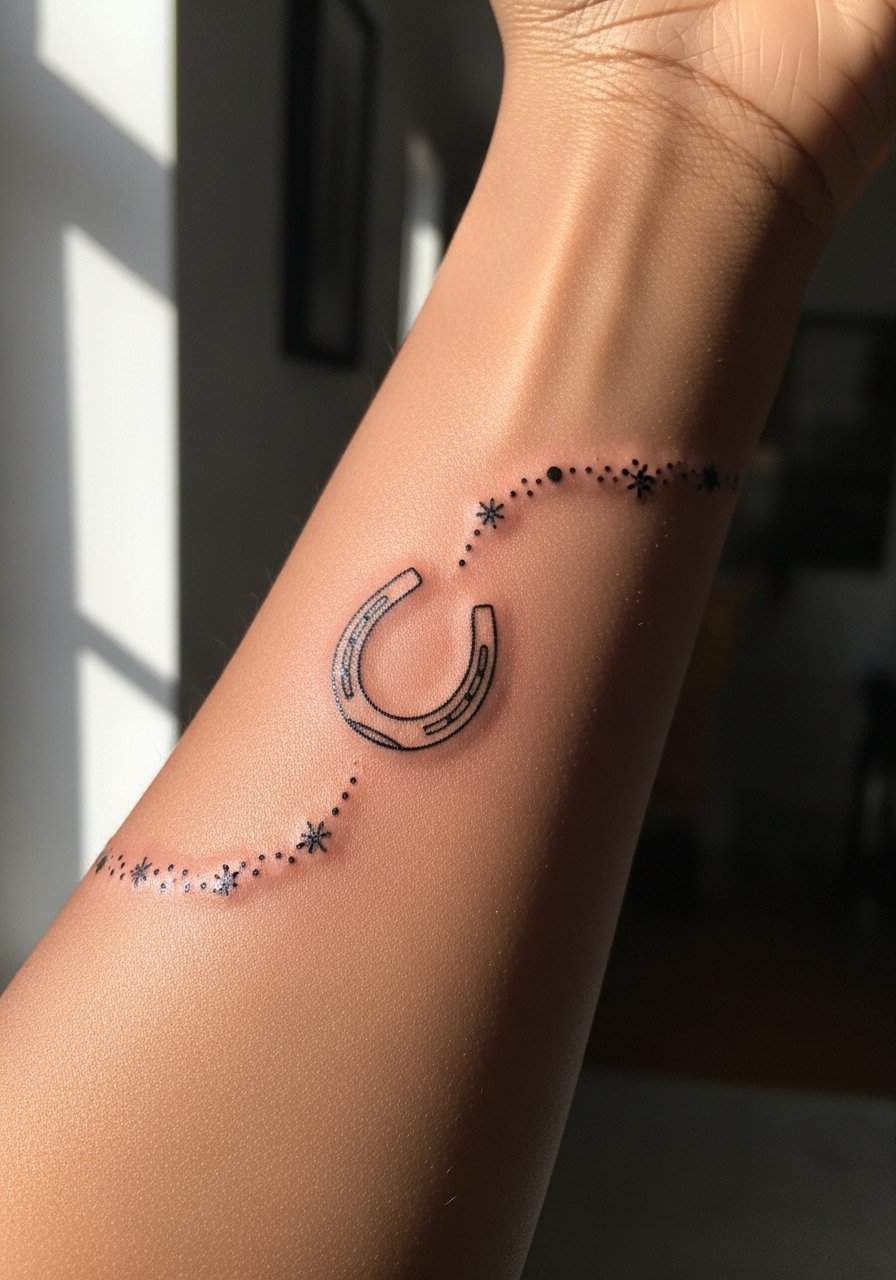
7. Upside-Down Horseshoe with Tiny Starburst on Outer Wrist
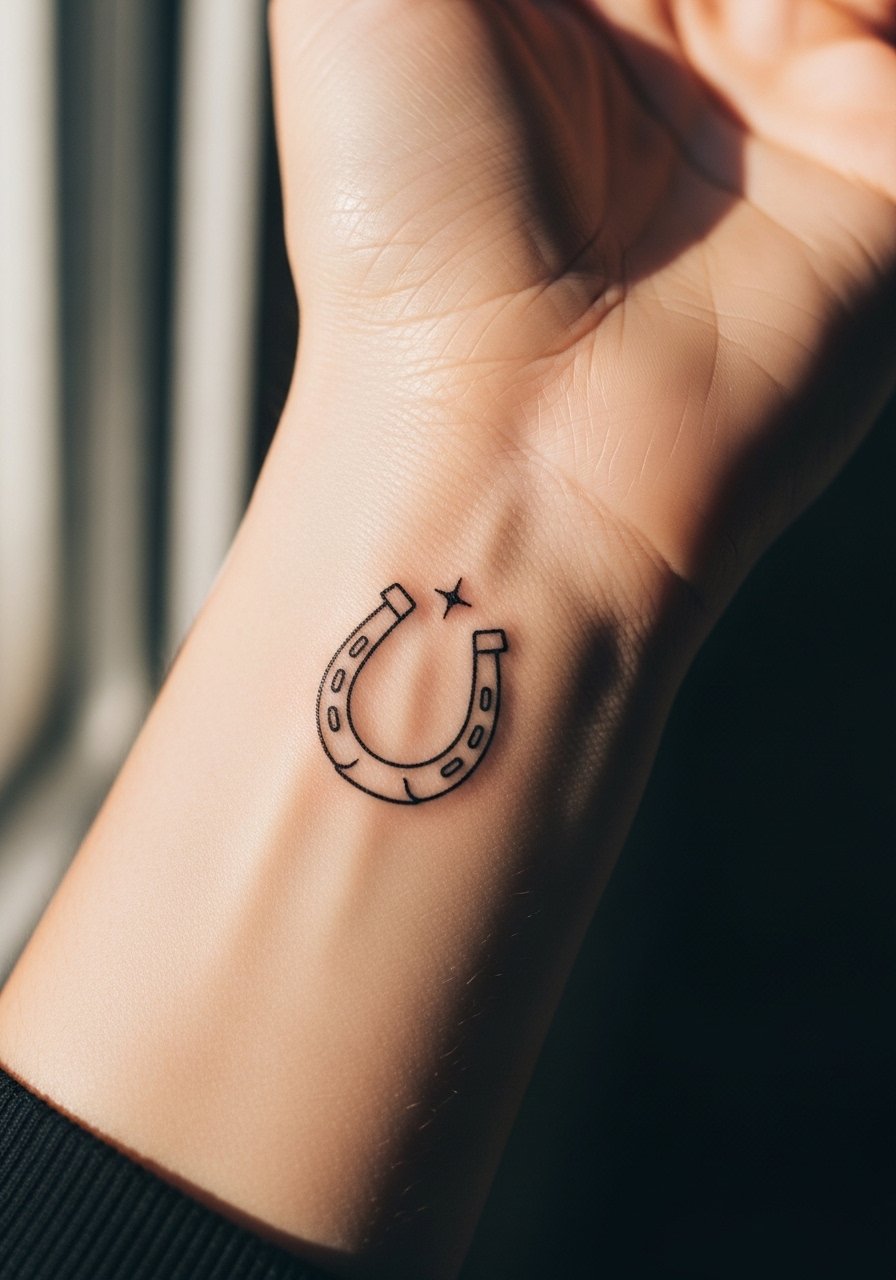
There is real charm in a small upside-down horseshoe that cradles a micro starburst. The outer wrist is forgiving with a pain level around 3. Keep the horseshoe open at the top so the linework breathes and avoid dense fill inside the arc. Most people need a touch-up by year two to keep those micro stars crisp. For the session, wear a loose tank top so the artist can access the wrist easily. The most common error is asking for tiny internal flourishes that merge after a year.
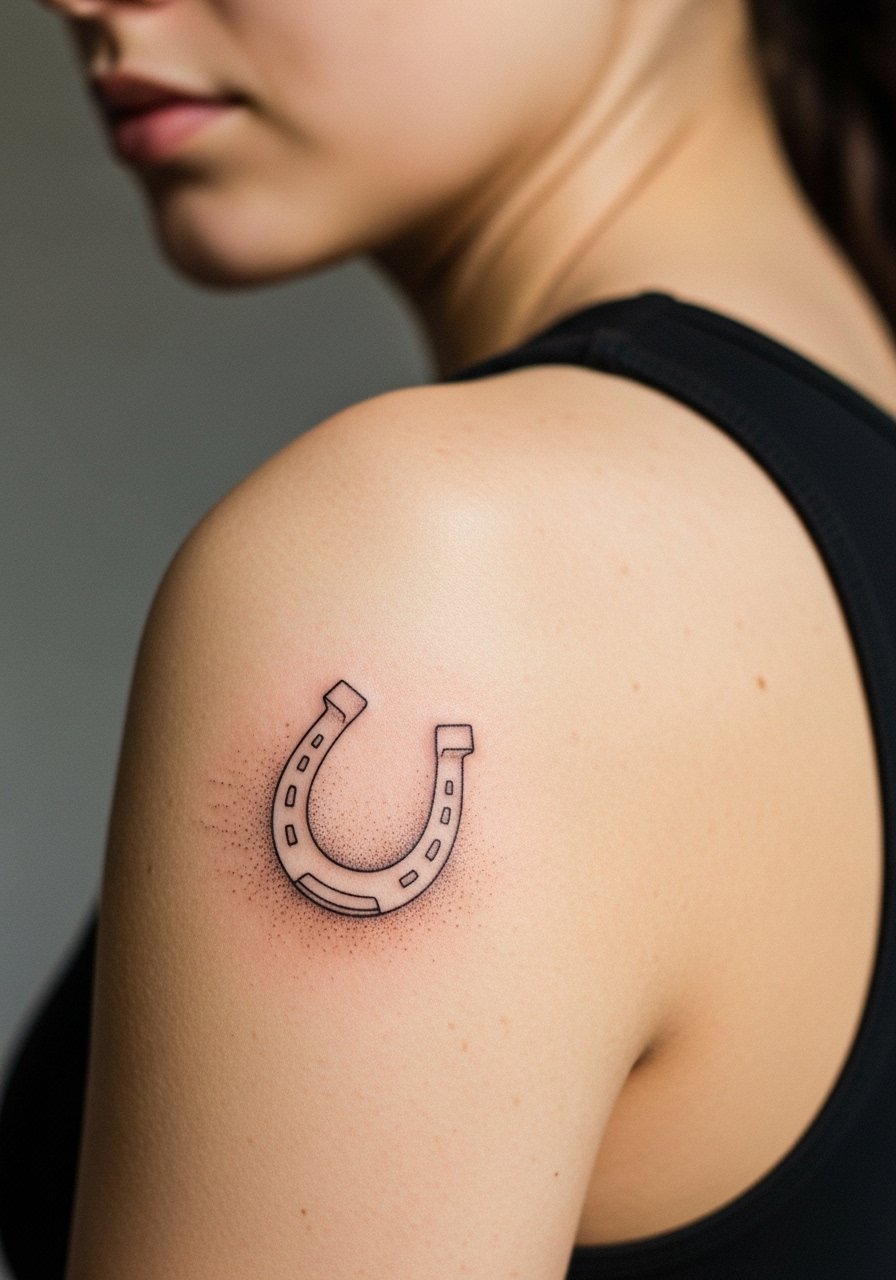
8. Horseshoe with Minimalist Arrow on the Outer Bicep
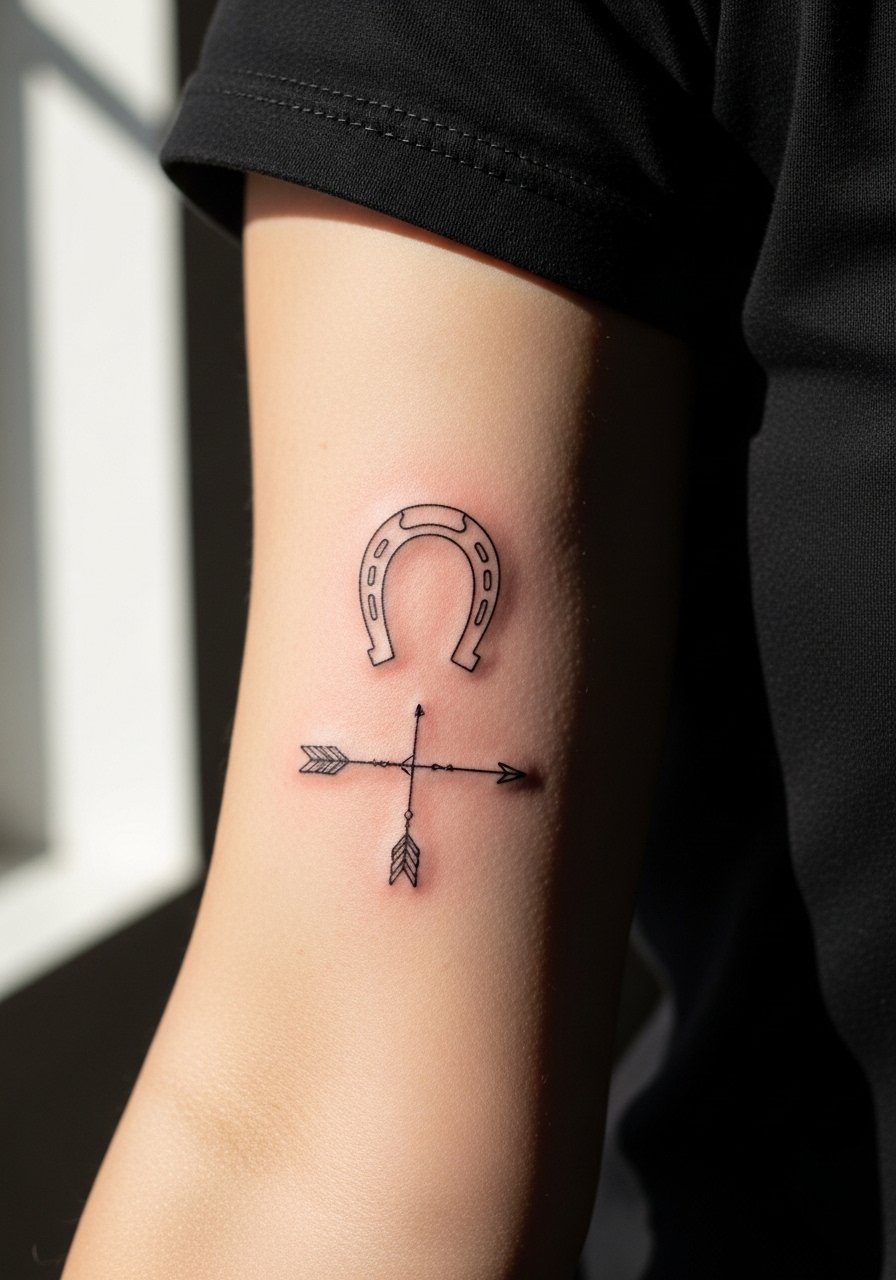
Outer bicep is a low-pain area at about 2 to 3 out of 10 and it ages well for fine line pieces because the skin is thicker. The session time is typically under an hour for this combined motif. Tell your artist you want the arrow to sit slightly offset so it does not crowd the horseshoe curve. A mistake I often see is centering both elements and compressing them into a tiny space. For casual wear, short sleeves and rolled cuffs frame this piece. Pair it with a loose linen short sleeve shirt to keep attention on the upper arm without covering the design.
9. Tiny Horseshoe with Compass Points on the Back of the Neck
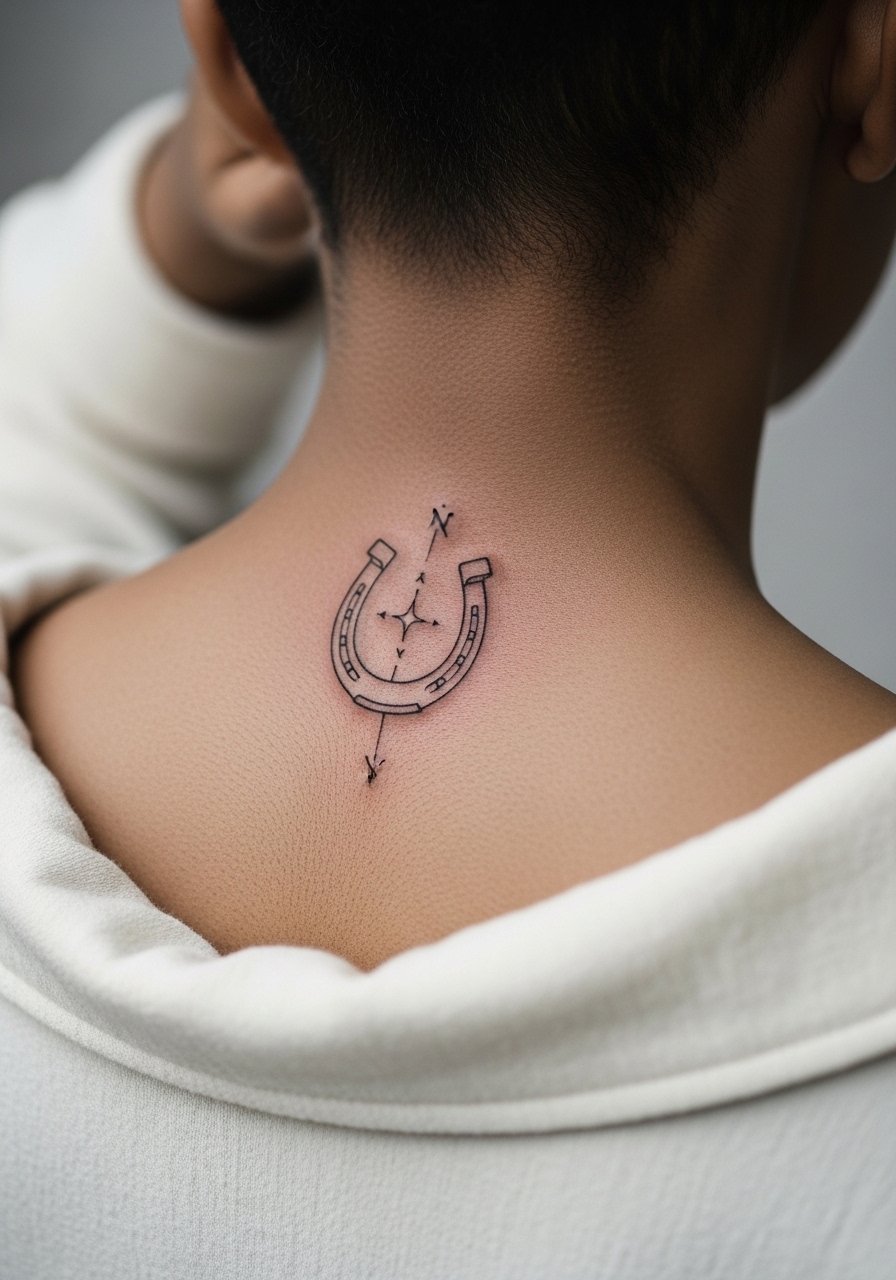
Neck placements require discretion. Pain ranges from 5 to 7 depending on depth and proximity to hairline. Ask for a discreet, low-contrast execution so the horseshoe does not look bold against hair growth. A common error is choosing heavy saturation here for a fine line design. Expect touch-ups sooner if you frequently wear high collars. For session comfort, bring a button-down you can unbutton to avoid tugging at the neck. If you work in a conservative setting, consider how visible the back of the neck will be with certain hairstyles.
10. Micro Horseshoe with Dot Trail Along the Spine
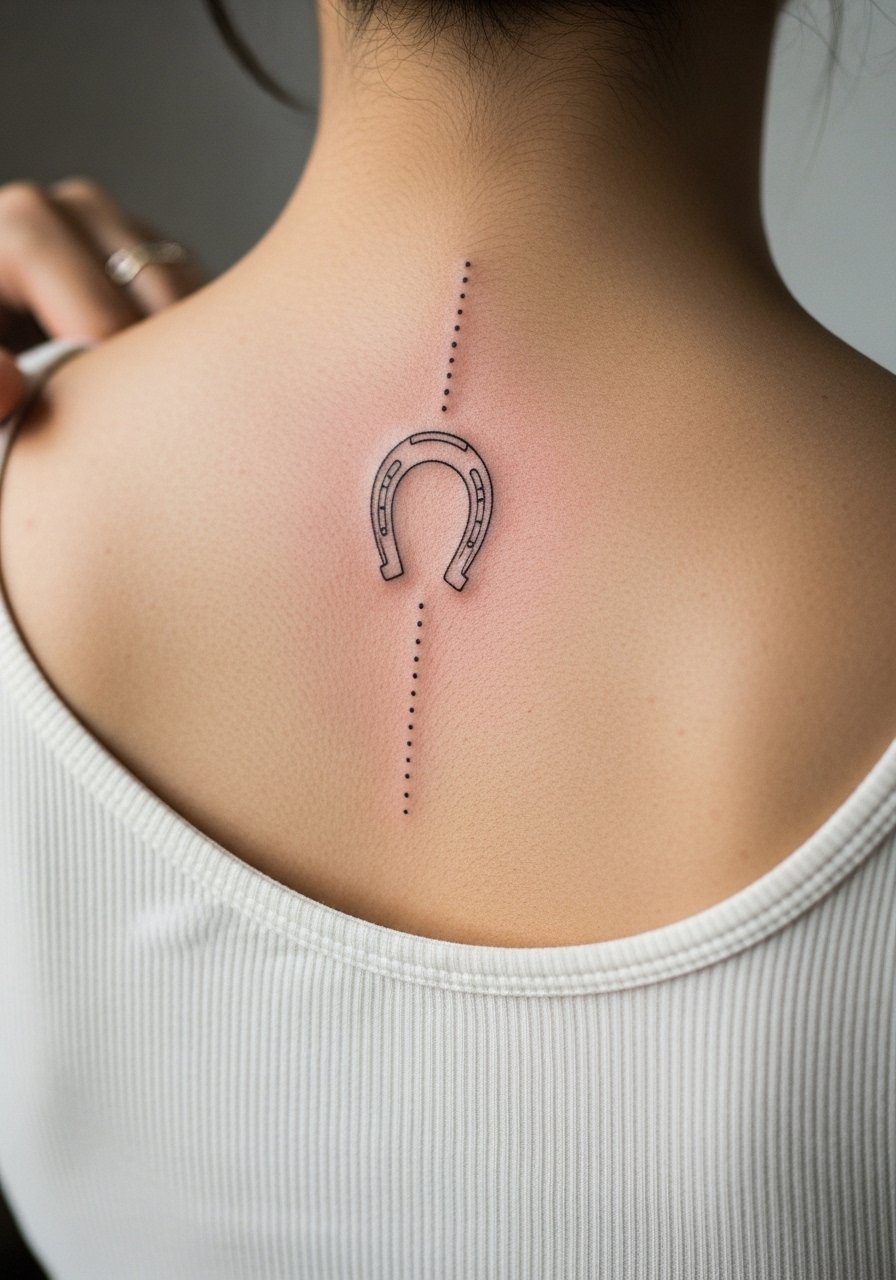
Spine-adjacent pieces look delicate when spaced correctly. Pain increases near the vertebrae, about a 6 out of 10 for many clients. The key request at consultation is spacing between the dots and the horseshoe so the two elements age separately. A mistake is creating too much density along the trail, which can blur over a few years. Sessions can run 45 to 90 minutes based on the dot count. For showing it off, open-back tops make sense, and a simple open-back midi dress highlights the vertical composition without overwhelming the linework.
11. Horseshoe with Stipple Shading on the Shoulder Blade
Shoulder blade pieces are forgiving for fine line with a moderate pain level around 3. Stipple shading around the horseshoe gives depth without heavy saturation. For the consultation, specify stipple rather than solid gray so the piece keeps its airy look as it heals. The mistake people make is asking for too dense a dot pattern. Expect the piece to soften gently over five years and be prepared for a touch-up around year three if you want crisp stippling. A lightweight tank shows this area without rubbing.
12. Micro Horseshoe Over the Sternum in Minimal Blackwork
Sternum placements are specialized and can be painful at a 7. Artists disagree on density near the chest for fine line. One camp says leave extra spacing because breathing shifts the skin. The other camp suggests precise depth and thin spacing will settle fine. Ask to see healed examples from the artist. For the session, wear a zip-up or a sports bra so the artist can work without fuss. A common mistake is adding script too close to the horseshoe which can make both elements age poorly. Keep the central area clean and simple for longevity.
13. Tiny Horseshoe with Constellation Dots on the Forearm
Forearm is one of the most reliable spots for fine line. Pain is low, near 2 to 3. I tell people to request slightly stronger outer stems and airy negative space inside the horseshoe. That spacing prevents the dot constellation from merging with the horseshoe over time. Session time is short, usually under an hour. A common mistake is packing dots too close to the horseshoe arc. For outfits, rolled sleeves and short-sleeve shirts show the art. A short sleeve crewneck tee keeps the forearm visible and works with layered bracelets.
14. Minimal Horseshoe on the Calf with Tiny Floral Accent
Calf tattoos are practical for people who want flexibility between visibility and concealment. Pain tends to be moderate at around 4. The thicker skin means fine lines often last longer here. For consultation, ask for a slightly heavier outer stroke so the silhouette holds in a year. A common aging issue is scabbing from friction inside the leg crease during intense activity. Session times vary but many of these micro pieces are under an hour. Pair with shorts or a loose drawstring linen pant you can roll up for season-long visibility.
15. Horseshoe with Geometric Frame on the Outer Thigh
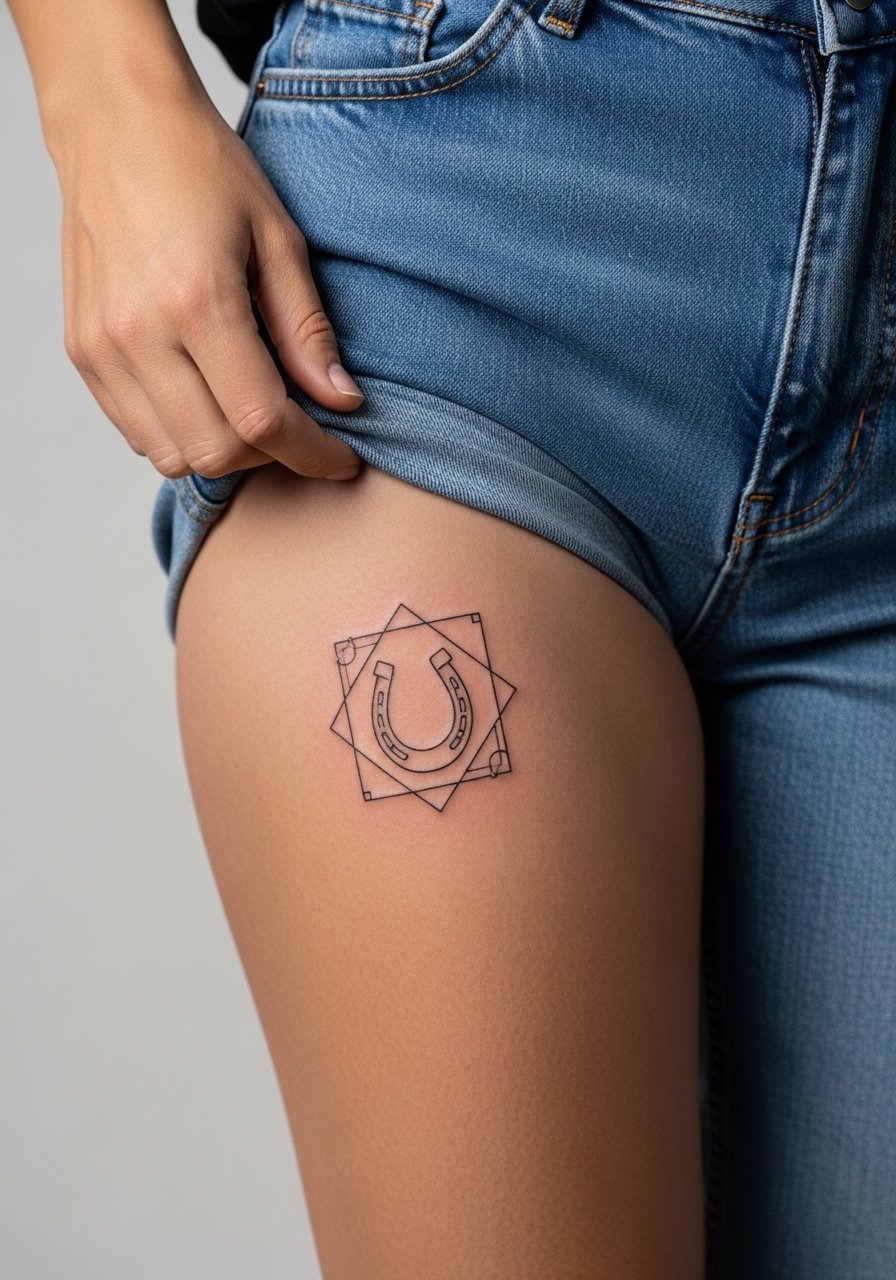
Outer thigh is a comfortable spot for larger micro pieces with low pain around 3. The skin sits well for fine details and the area ages gracefully with less daily abrasion. Tell your artist you want clean negative space between the horseshoe and frame so the geometry does not overpower the symbol. The mistake is crowding intricate geometry into a small area which blurs after two years. Sessions can be 45 to 90 minutes depending on frame complexity. For reveal moments, high-waisted shorts or skirts make the piece pop. Consider a high-waisted denim skirt that pairs with the placement.
16. Fine Line Horseshoe with Subtle Whip Shading on the Hip
Hip placements sit between private and visible. Pain varies but many report a 5. Whip shading gives the horseshoe soft depth while keeping the main lines delicate. The biggest mistake is asking for too much shading density that can pool into darker areas. For the session, wear bottoms that you can shift slightly for access, like high-waisted shorts. Expect touch-ups in a few years if you have frequent sun exposure. If you plan to show the area, swimsuit bottoms and high-cut shorts frame the hip elegantly.
17. Tiny Horseshoe on the Back of the Hand with Minimal Linework
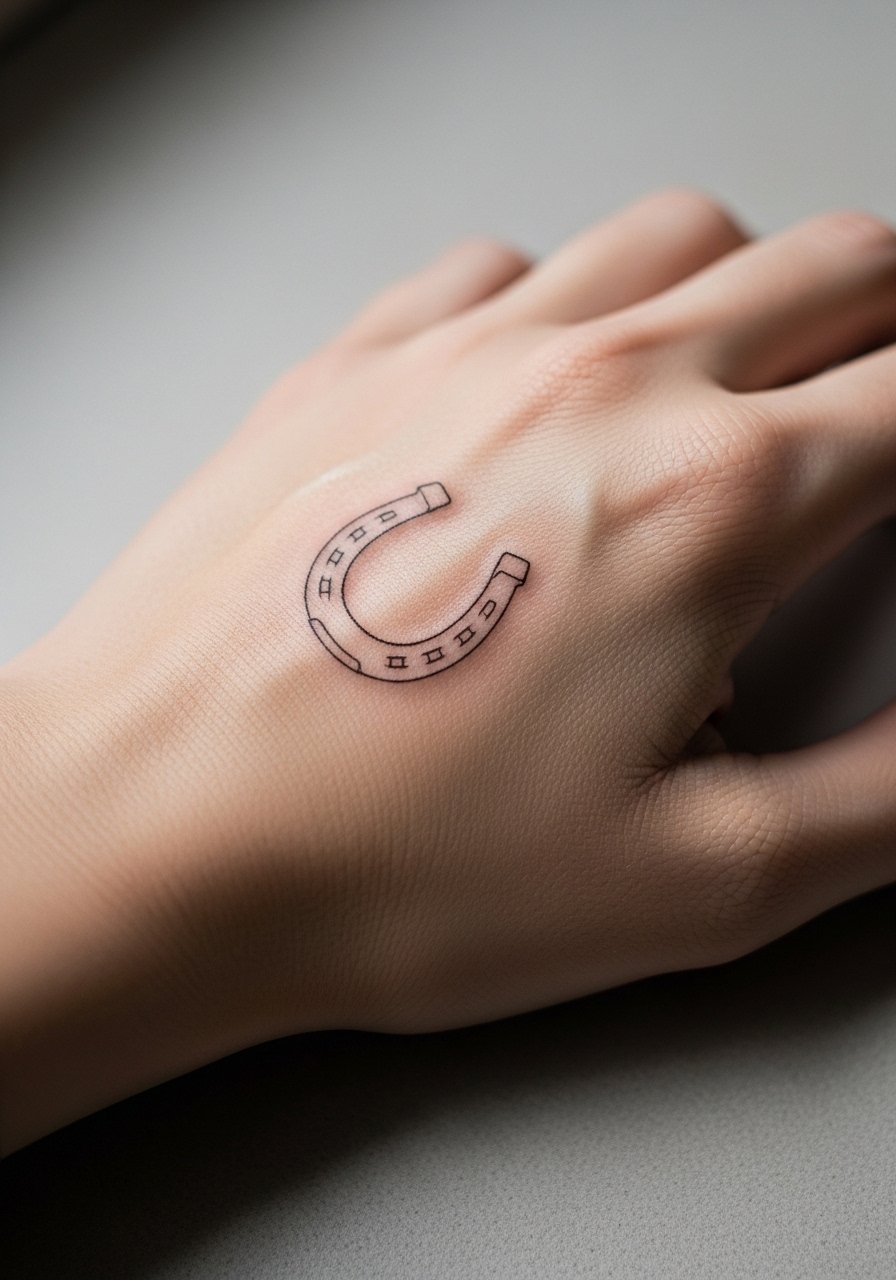
Hand tattoos age quickly and visibly. Artists split on this location. One group says hands move too much and fine line blurs fast. The other group says that with thicker, purposeful linework and strategic spacing, the design can hold for longer. I advise asking the artist for their healed hand photos. Pain is a 6 to 7 and touch-ups are common. Mistakes include asking for ultra-fine internal detail that the skin will not retain. If you still go for it, expect to refresh the piece every couple of years. Keep in mind some workplaces are still conservative about visible hand tattoos.
18. Minimal Horseshoe with Tiny Script on the Inner Wrist
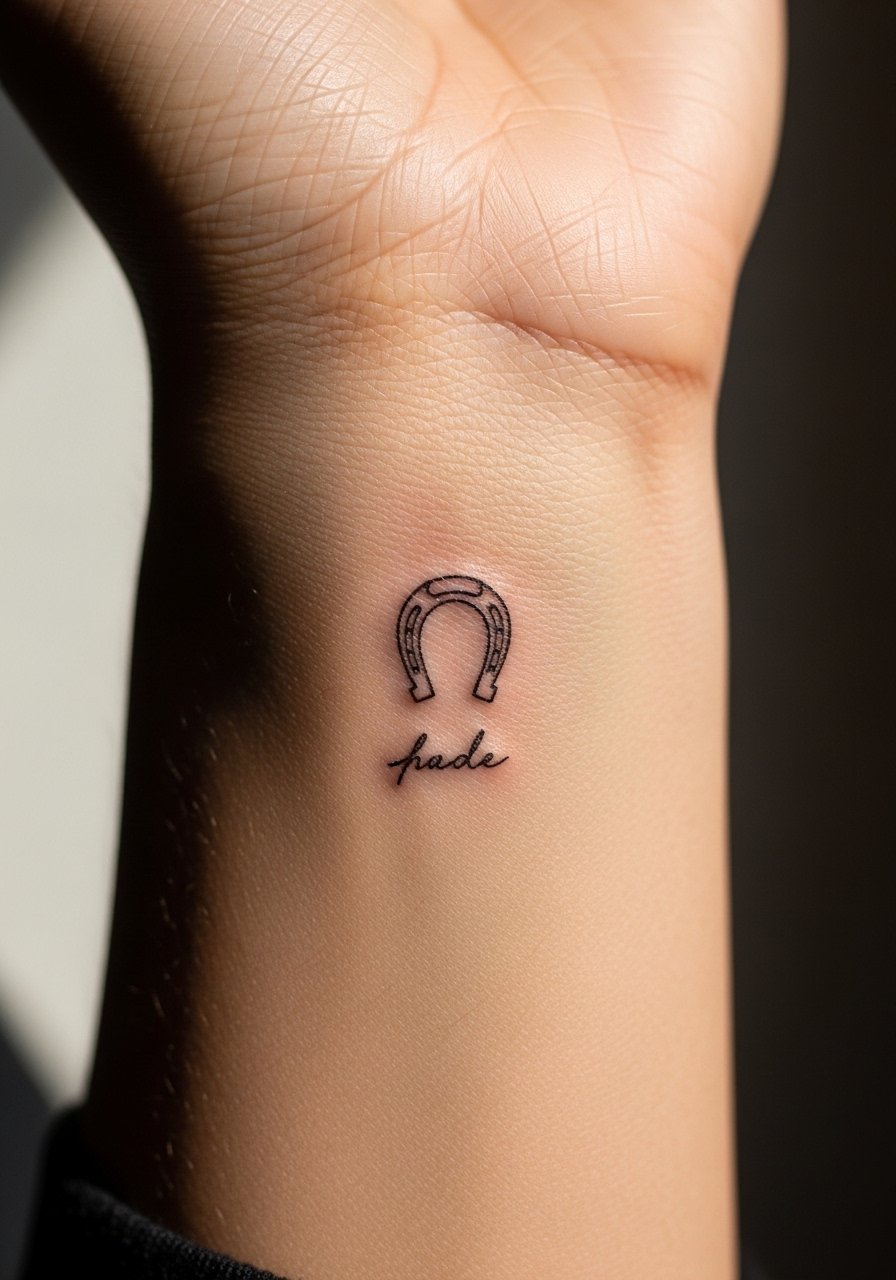
Inner wrist pieces read intimate and delicate. Pain is around 3 to 4. The consultation should pin the script size and font so letters remain legible as the wrist flexes. The most common mistake is placing script too close to the horseshoe arc. Tell your artist you want minimal ink between the elements. Expect a touch-up within two to three years if you use the hand a lot. For showing the area during cooler months, rolled sleeves and simple bracelets like a thin cuff bracelet sit nicely above or below the piece.
19. Horseshoe with Micro-Realism Shading on the Upper Arm
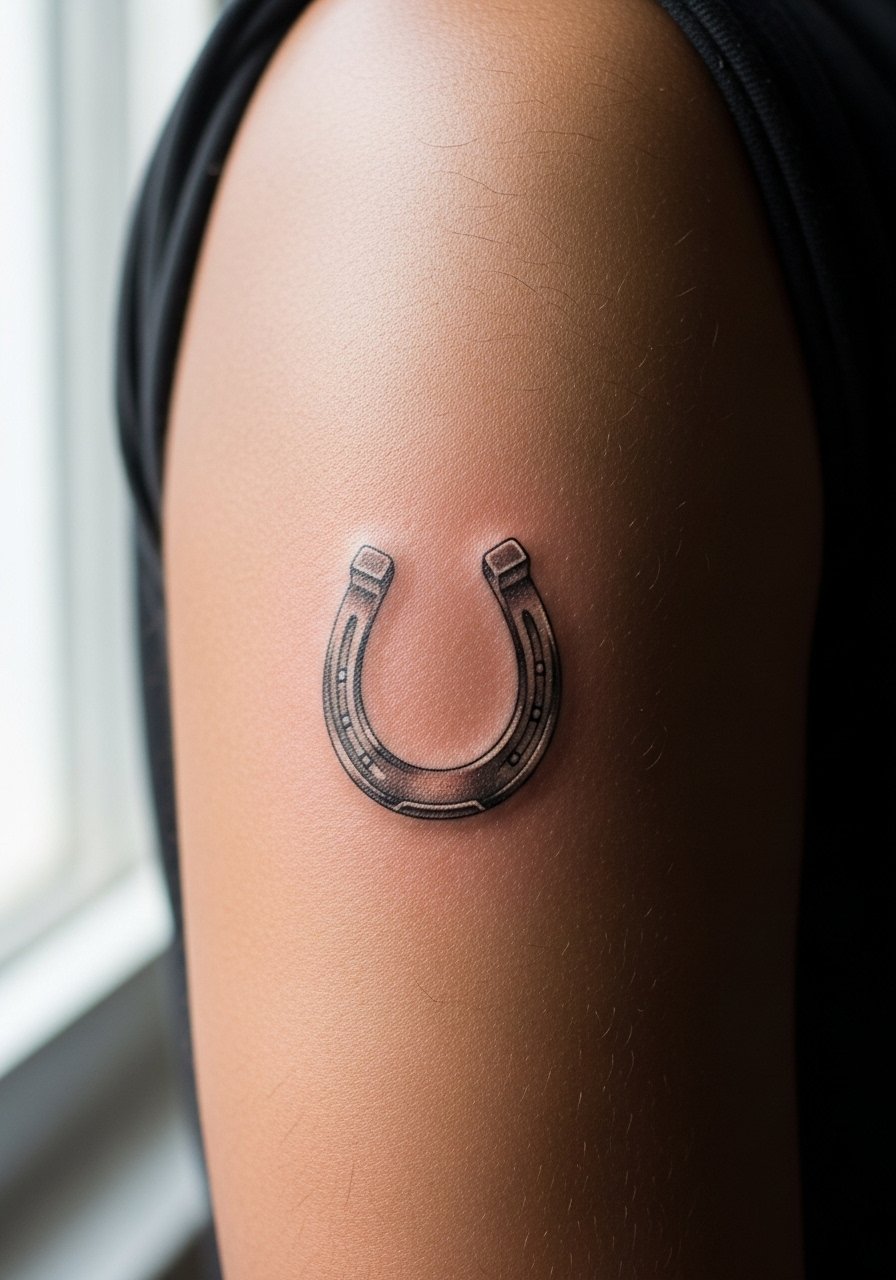
Upper arm fine line benefits from thicker tissue that preserves crispness. Pain is low, about 2 to 3. Ask for micro-realism shading that uses soft gradients rather than dense black fills. Avoid tiny crosshatching inside the curve which can blur into a blot over time. Session length is usually short for this scale. A typical mistake is over-detailing a small horseshoe and expecting it to read from a distance. That said, this placement allows slightly more detail than wrist or finger pieces and pairs well with rolled sleeves or tank tops.
20. Tiny Horseshoe as a Behind-the-Knee Accent with Dot Trail
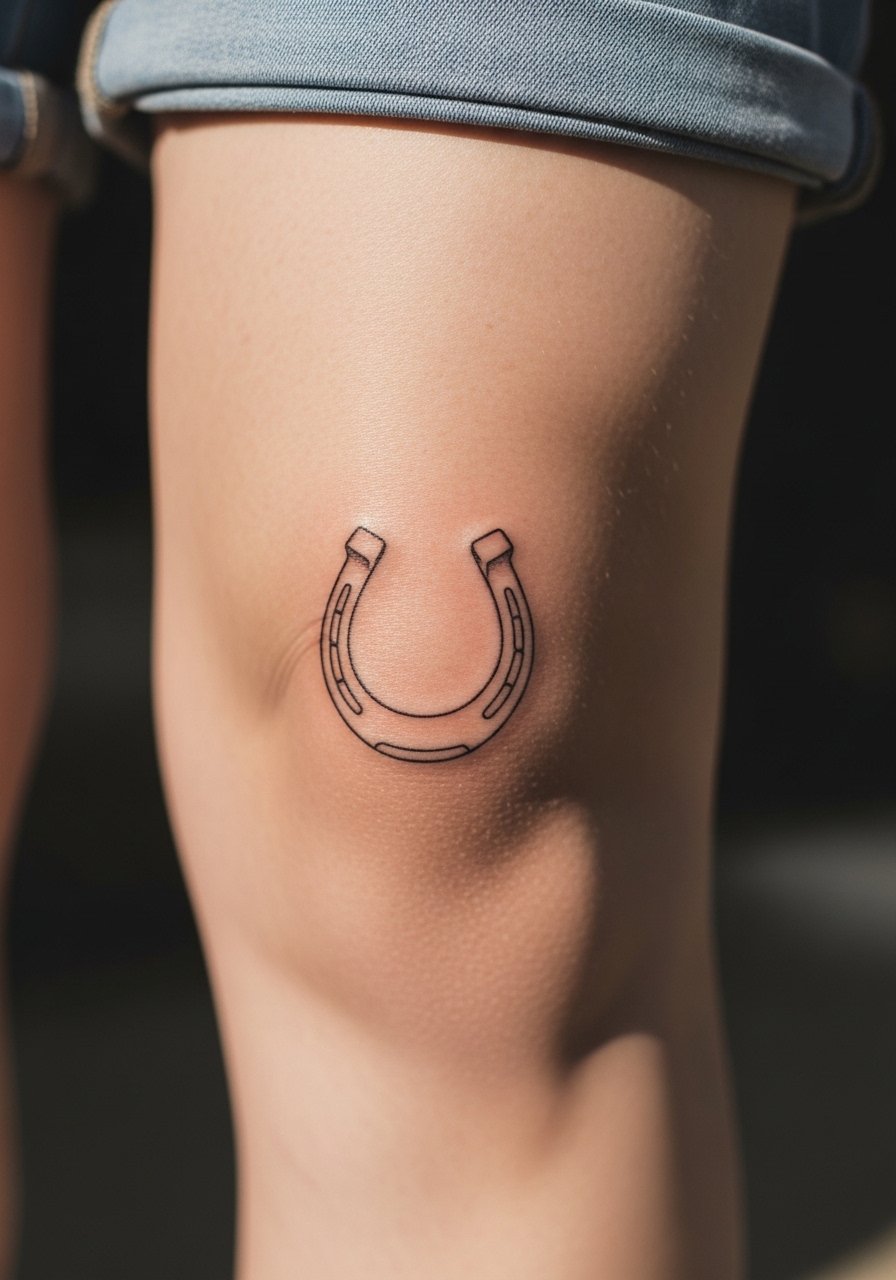
Behind-the-knee tattoos see movement and friction which can affect how fine lines settle. Pain is moderate and sessions can be a bit awkward due to positioning. Ask the artist about spacing and avoid tiny internal flourishes in the horseshoe, which can blur with motion. A common mistake is picking a very small size for an area that stretches repeatedly. For easy access during the session, wear shorts you can move without pulling. This placement looks great with summer outfits and cropped styles.
21. Tiny Horseshoe with Coordinate Script on the Side of the Foot
Foot tattoos are sensitive to wear and friction from shoes. Pain level ranges from 5 to 7 depending on arch and bone proximity. Ask your artist to leave a little breathing room between the horseshoe and coordinate script. The usual mistake is packing letters too close so they blur after repeated rubbing from footwear. Touch-ups are common after the first year. For show-off outfits, sandals and cropped trousers highlight the placement. A lightweight pair of sandals will let the tiny horsehoe remain visible without rubbing against the design.
Frequently Asked Questions
Q: Will a fine line horseshoe on my finger blur faster than one on my forearm?
A: Yes, finger skin renews quickly and suffers more friction, so expect faster fading and more frequent touch-ups than a forearm piece. Ask your artist for slightly bolder outer strokes and minimal internal detail to maximize longevity. If you need to protect the area, consider temporary protective film in the first week.
Q: Are ribs a bad place for fine line horseshoes given the controversy among artists?
A: Artists are split into two camps. One camp warns that rib skin stretches and shifts so fine line blurs within a couple of years. The other camp says careful depth and spacing make fine line viable on ribs. The honest approach is to ask to see healed ribs from the artist and decide based on their portfolio and your pain tolerance.
Q: How long should I plan for a touch-up on a tiny collarbone horseshoe?
A: Plan for a possible touch-up around year two or three if you want crisp lines, especially if you spend lots of time in the sun. Collarbone work can fade with sun exposure and frequent friction from straps. Use sun protection long term to slow fading.
Q: What should I wear to the studio for a sternum or ribcage session?
A: Wear a fitted sports bra or a cropped top you can lift safely without exposing more than the area the artist needs. A zip-up or button-down is also practical so you can adjust access without tugging at clothing in awkward ways.
Q: Can I pair a tiny horseshoe with jewelry without crowding the design?
A: Yes. Opt for minimal pieces like a thin chain pendant or a slim cuff that sit above or below the tattoo rather than over it. For example, a thin chain pendant necklace works well with collarbone horseshoes and keeps attention on the ink.
Q: Should I expect different healing for blackline versus stipple-shaded horseshoes?
A: Yes. Stipple shading tends to soften and can look more natural as it settles, while pure blackline pieces rely on crispness and may need touch-ups to maintain sharp edges. Discuss desired longevity with your artist and ask to see healed photos that match your skin tone.
