
Fine line florals are everywhere on saved boards, but what holds up most often is less about trend and more about placement and spacing. I have watched delicate stems blur when they sit where skin stretches, and I have seen bolder outlines age into a flattering patina. Below are 27 arm-focused flower ideas that balance what looks fresh with what actually heals well, starting with a forearm piece that shows the trick.
1. Fine Line Wildflower Band on Inner Forearm
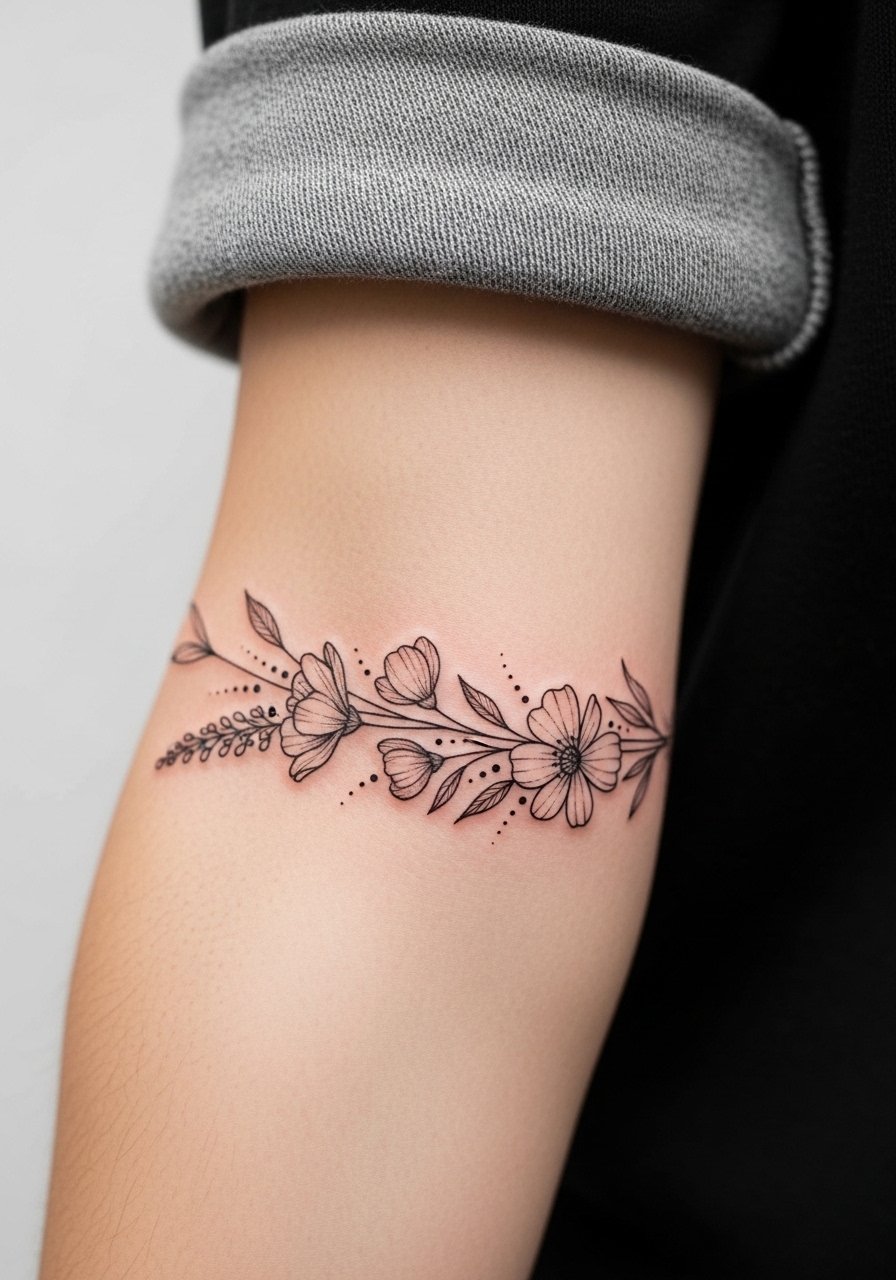
I have seen inner forearm bands read crisp for years when artists leave airy spacing between stems. Tell your artist you want single-needle linework with tiny spacing between each bloom so the lines do not merge. The common mistake is asking for ultra-fine detail squeezed into a narrow band, which tends to blur by year three. Pain is moderate and sessions are short, often under an hour for a band. For the session, pull on a rolled cuff chambray shirt so the artist has unobstructed access without fabric tugging.
2. Neo-Traditional Rose on Outer Forearm
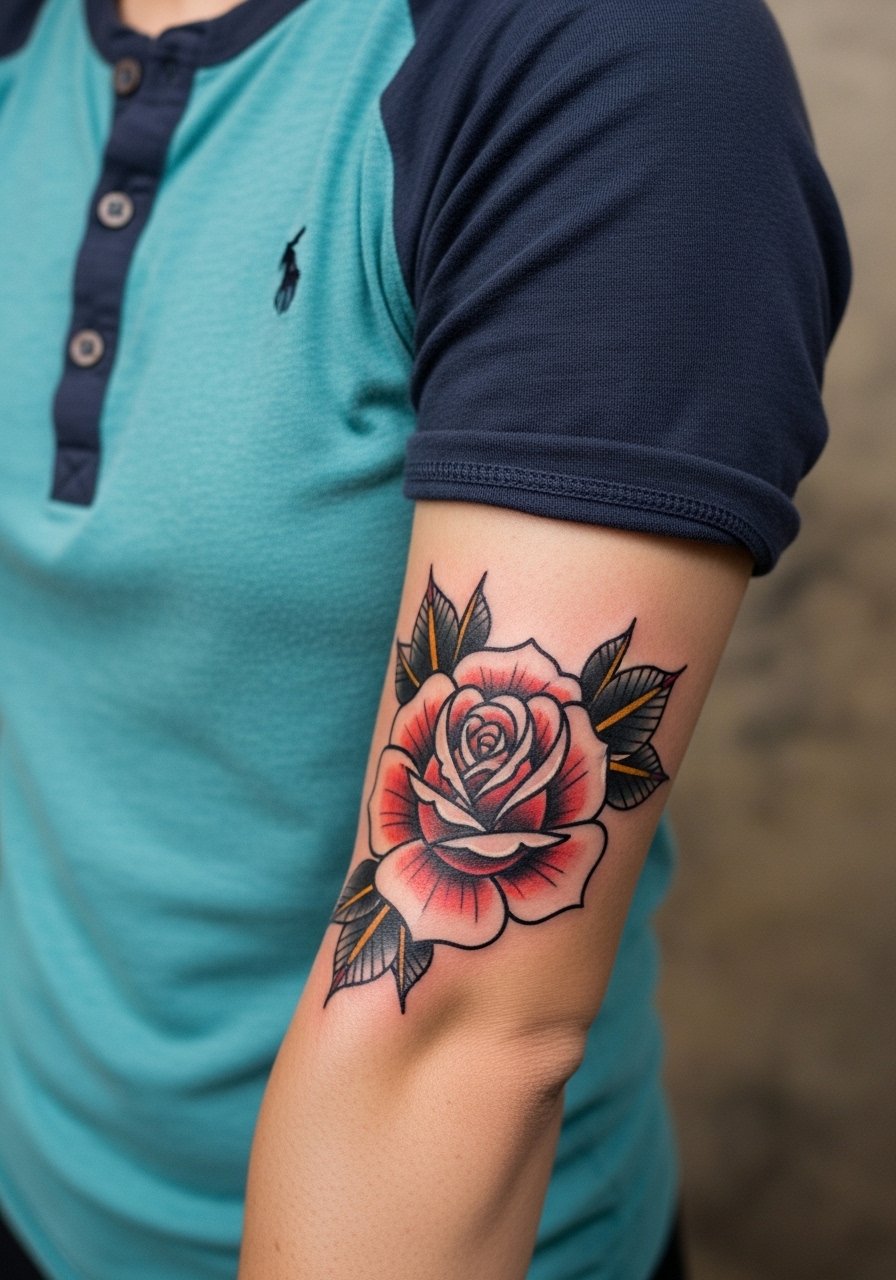
There is something about bold outlines and saturated color that reads from across a room, and the outer forearm is a forgiving canvas for this. In consultation, request slightly heavier linework and solid saturation so the color ages into a solid block rather than a faded wash. A common version that ages poorly is one with very thin outlines and heavy shading too close to the edge. Expect moderate pain and a one to two hour session depending on size. To show it off, layer with a fitted henley shirt in a dark neutral.
3. Micro-Realism Single Rose Near the Wrist
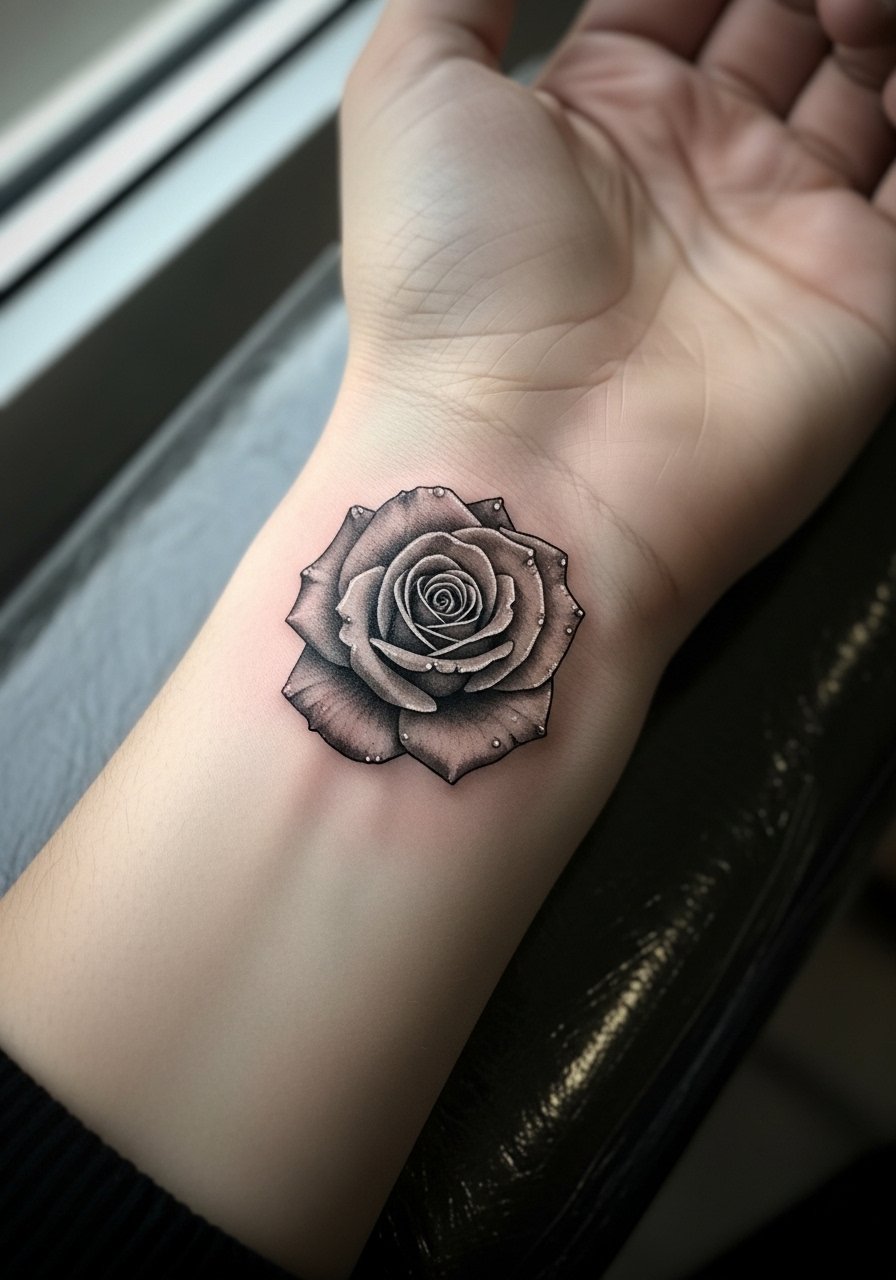
Wrist pieces call for restraint because the skin there moves and rubs against clothing. Ask your artist for slightly increased spacing between shaded areas so the rose keeps shape at six months and two years. The mistake is pushing micro-detail too close to the wrist crease, which accelerates fading and blowout. Pain is localized and sharper for a shorter time. Session time is usually under an hour. Pair the finished piece with cuffed jeans and a minimal chain bracelet to keep focus on the tiny bloom.
4. Watercolor Peony on Upper Arm
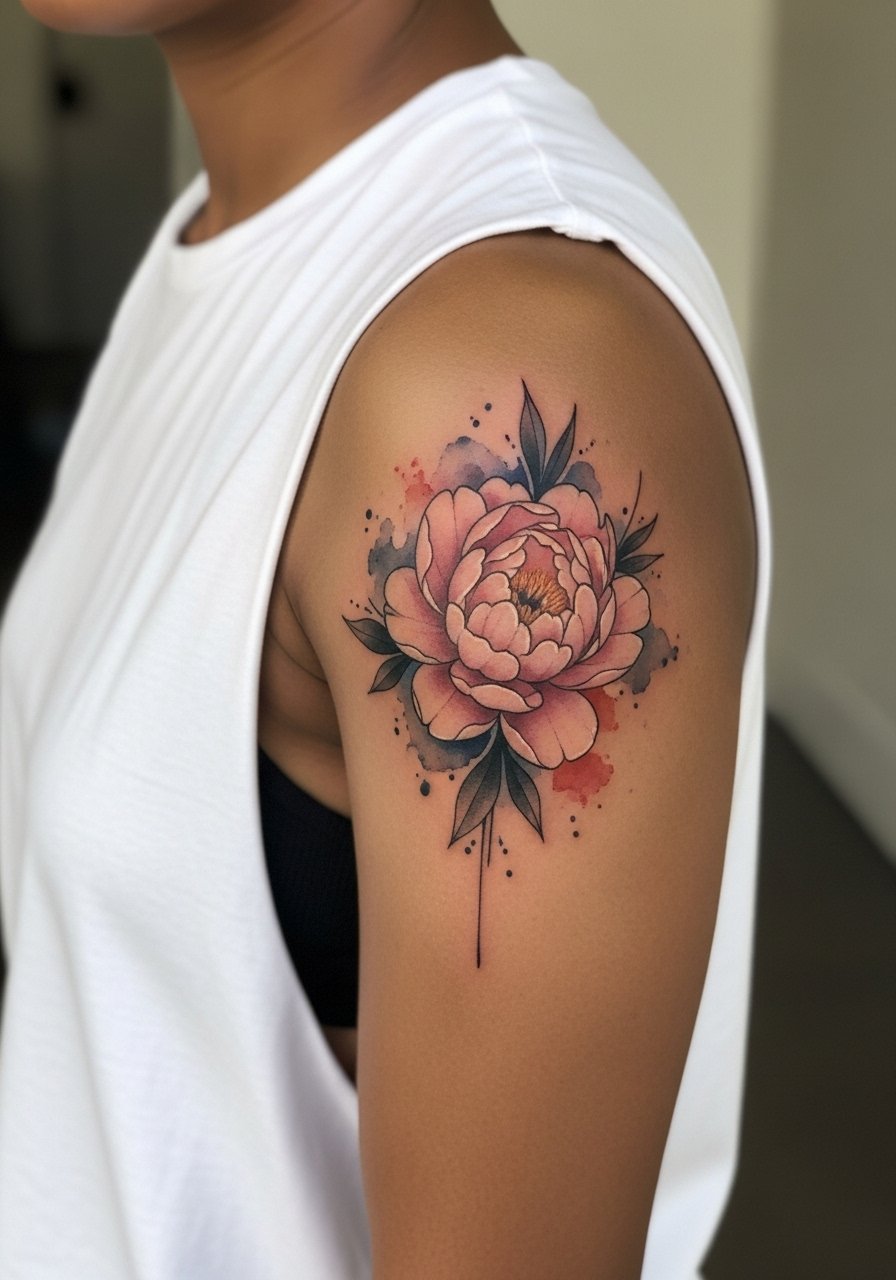
Watercolor florals look incredible fresh but require an artist who controls saturation to avoid blotchy healing. I often tell people that for upper arm watercolor you want light layering of pigment, not saturated washes. The common error is asking for full saturation like a traditional piece, which can age into muddy patches. Pain on the upper arm is lower and sessions can be one to three hours. Show it off with a sleeveless muscle tee that lets the blended colors read without competing fabrics.
5. Blackwork Botanical Sleeve Accent on Outer Bicep
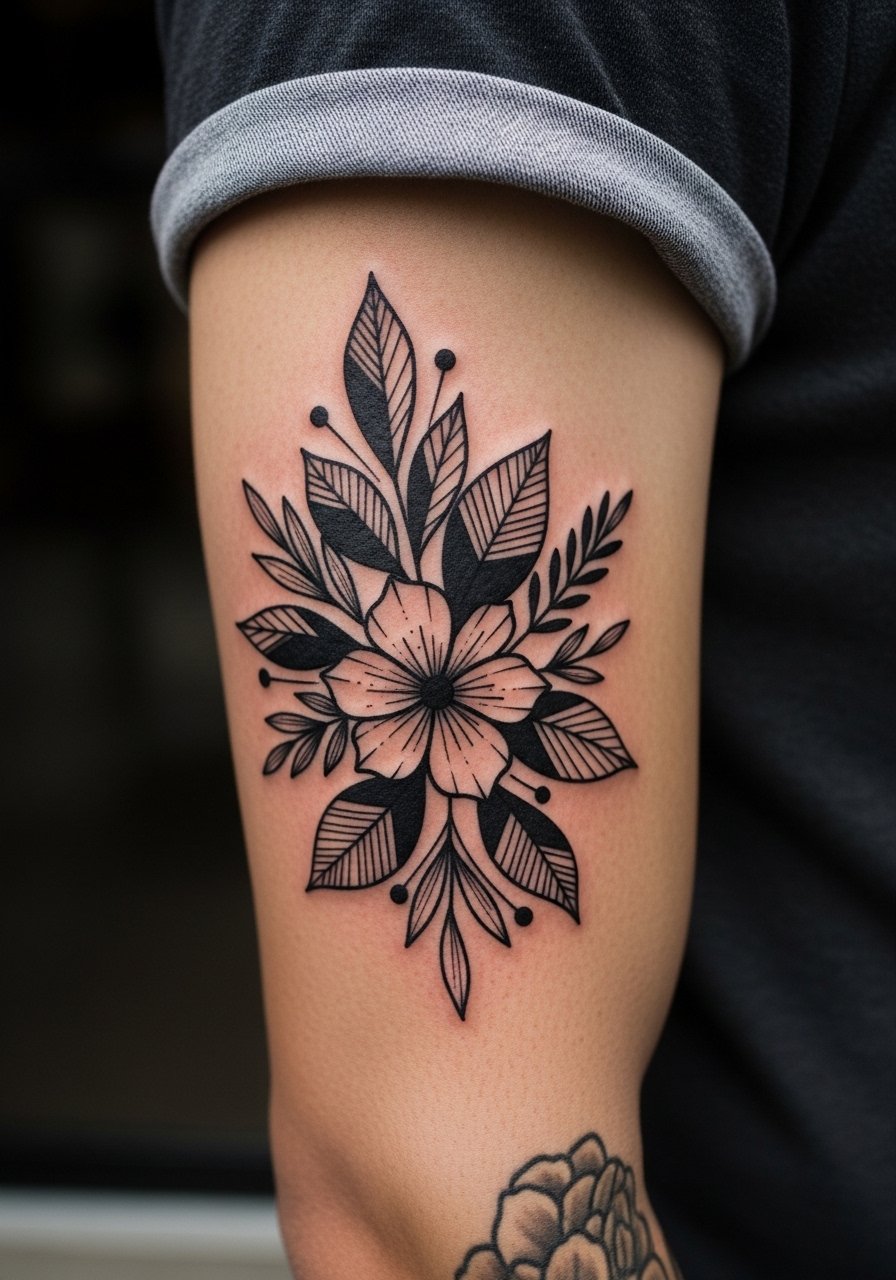
Blackwork holds up extremely well on the bicep because the skin there is thicker and less prone to friction. Tell your artist you want heavy outlines and dense saturation in shadow areas for longevity. A mistake I see is overfilling delicate negative spaces that later read muddy. Expect moderate pain with longer sessions if you add heavy fills. This placement pairs well with a rolled-sleeve henley or a simple tank for summer, try a button up chambray shirt you can roll to frame the piece.
6. Ornamental Vine Wrapping the Elbow (Inner)
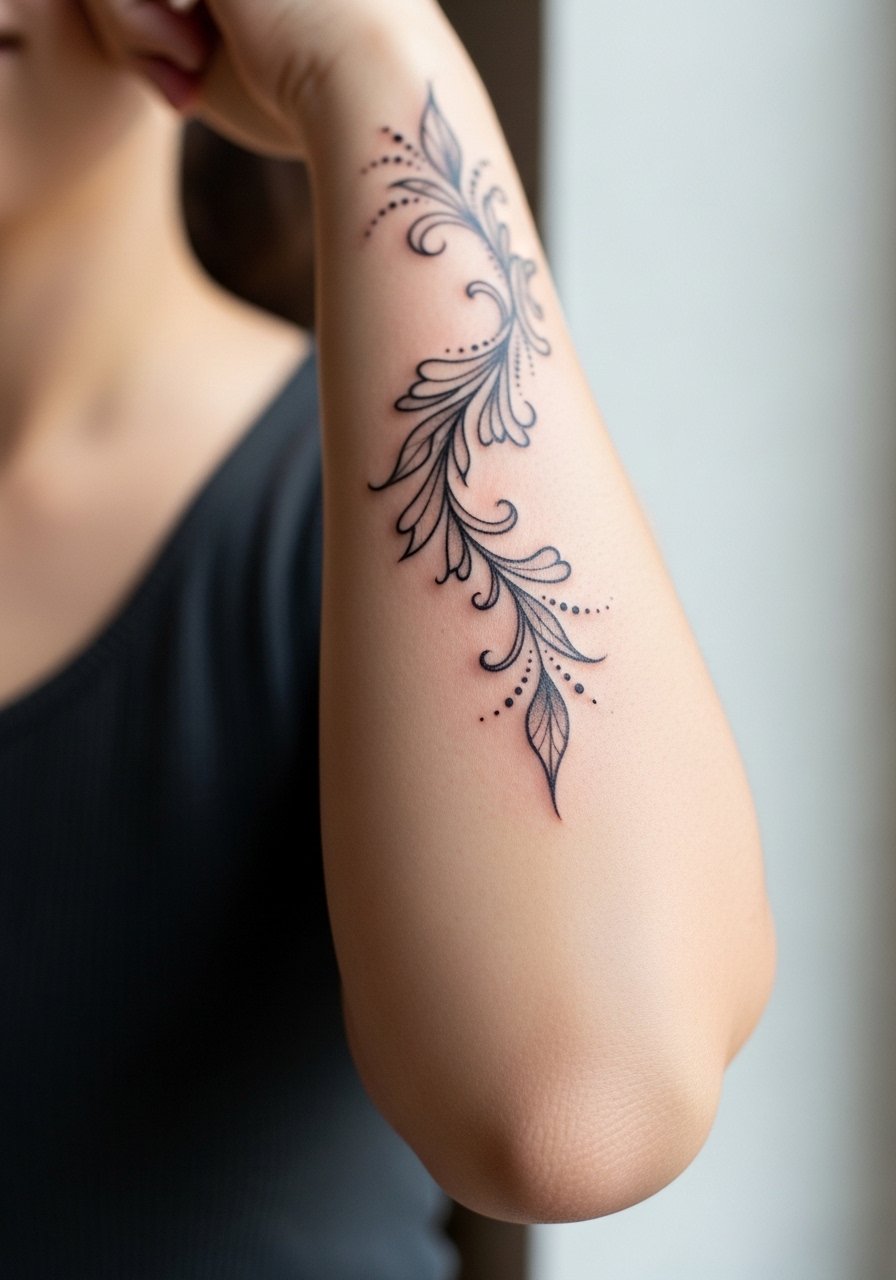
Fair warning, elbow-adjacent designs bend a tricky seam and require flow that moves with the arm. Artists split into two camps on this one. One camp argues the skin bend blurs fine work inside a year. The other camp says proper spacing and slightly heavier line depth makes ornamental vines hold. Ask specifically about spacing across the joint during consultation. Sessions involve frequent repositioning and can feel pinchy when the needle hits thinner skin. For a refined look, consider pairing with elbow length gloves in photos or layered outfits.
Pre-Session Essentials
The inner forearm bands, wrist blooms, and elbow vines above ask for different prep than a full sleeve, and a few targeted items smooth the session and the first week.
-
Stencil transfer paper kit. Lets you preview line placement on skin before the needle meets it, helpful for wrist and band placements.
-
Topical numbing cream. Applied per instructions 30 to 45 minutes before a wrist or inner elbow session eases the sharper edges of pain.
-
Thin protective film roll. Useful for wrist and finger pieces that face daily friction from washing and typing in the first week.
-
Fragrance free gentle body wash. Cleanses healing areas without stripping pigment, which helps fine line detail keep its edge.
-
Aquaphor healing ointment. A thin initial layer during the first few days locks moisture for delicate linework without clogging the needle channels.
7. Minimalist Daisy Chain on the Outer Wrist
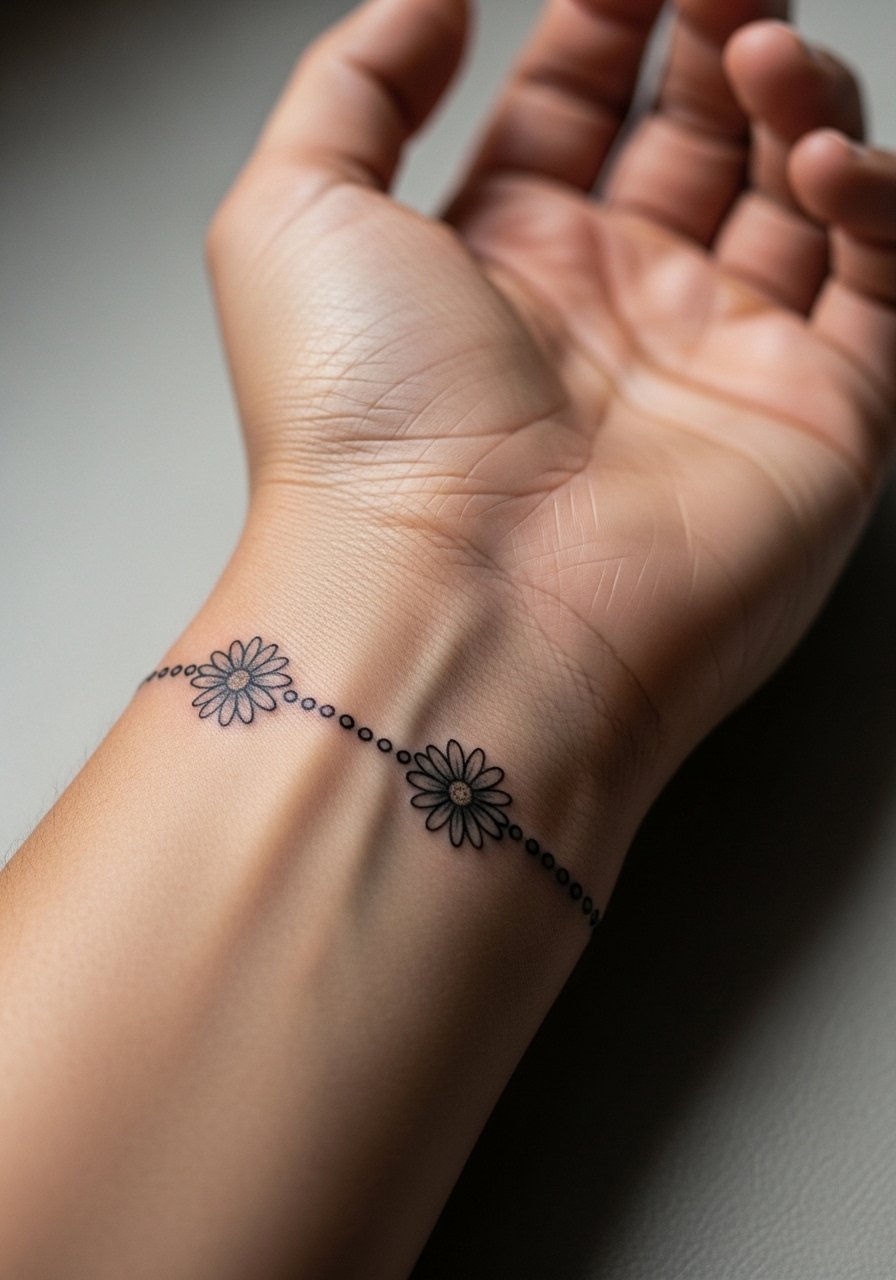
Wrist jewelry and small chains can either compete with or frame a dainty wrist piece. Tell your artist you want slightly bolder anchors at each daisy so the chain reads beyond a year. The frequent mistake is insisting on paper-thin lines that the wrist's movement and washing wear away. Pain is brief but sharp, session time minimal. Pair this design with cuffed slim jeans and a flowy blouse short sleeve when showing it off, the exposed wrist will look intentional.
8. Peony Half-Sleeve That Wraps the Outer Forearm
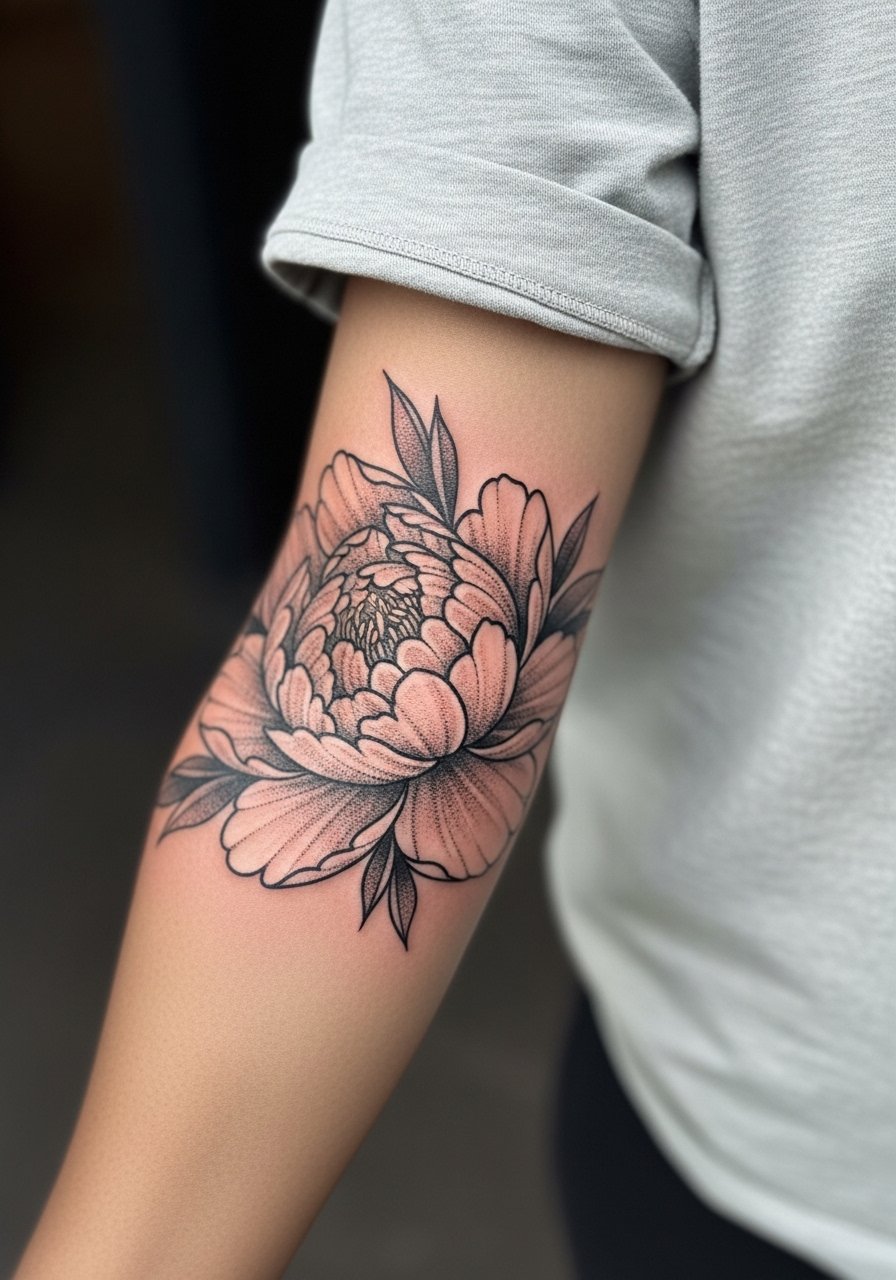
Visual impact is everything for a half-sleeve, and peonies work because their shapes adapt to forearm contours. In consultation, ask for petals with clear negative space between them so the design retains separation as it settles. The aging issue is clustered shading that compresses into a single dark mass. Sessions will be several hours and may require multiple sittings. For a casual show-off look, a rolled long-sleeve or fitted henley shirt keeps the forearm the focus.
9. Single Stem Lavender Along the Inner Forearm
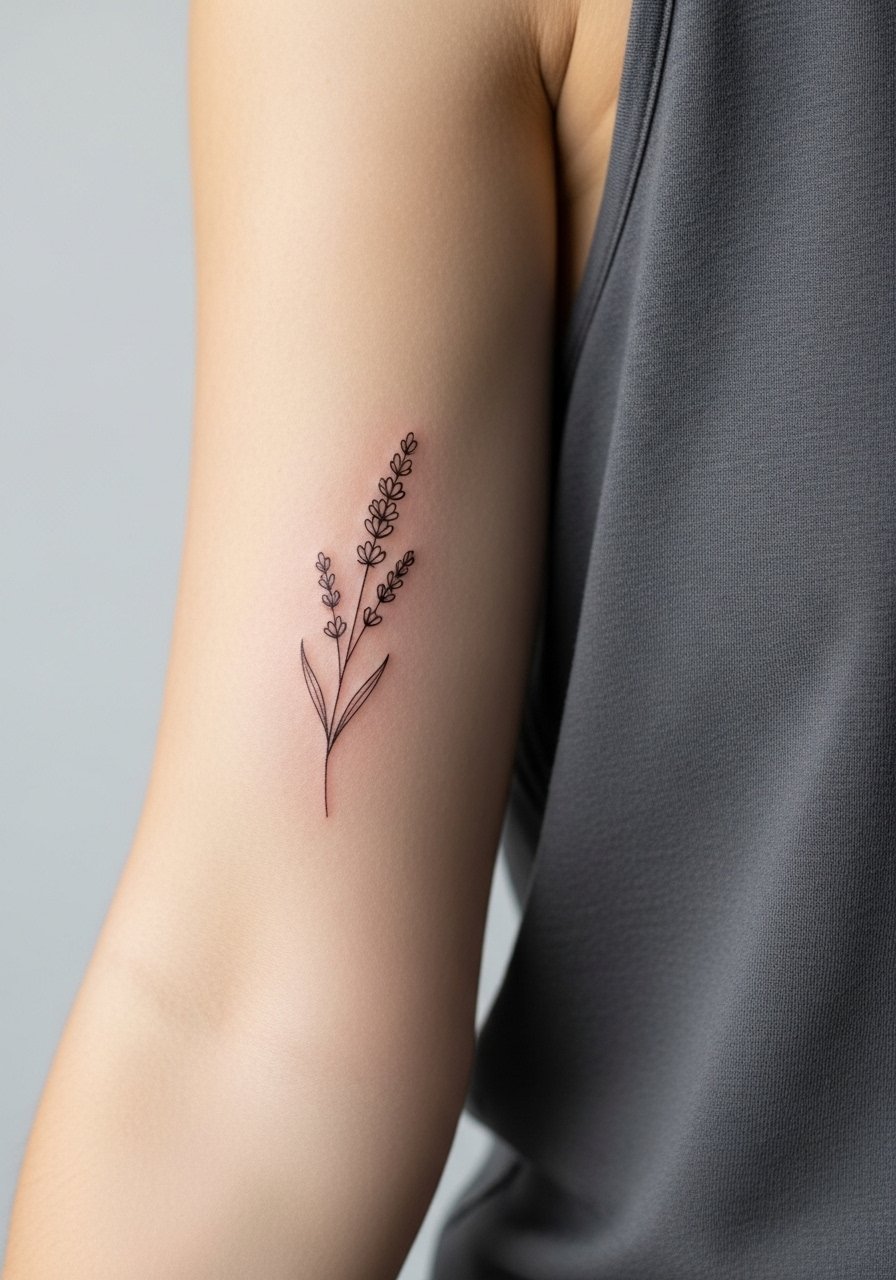
There is a quiet longevity to a single-stem piece when you allow breathing room around it. In the consult, specify single-needle linework with a slightly firmer depth so the buds do not disappear in the first two years. The main mistake is crowding the stem with tiny filler that creates visual noise over time. Pain is moderate and sessions are short. Wear a loose fit tank top women to the appointment so the artist can work comfortably on the inner forearm.
10. Black and Gray Rose Cluster on the Upper Outer Arm
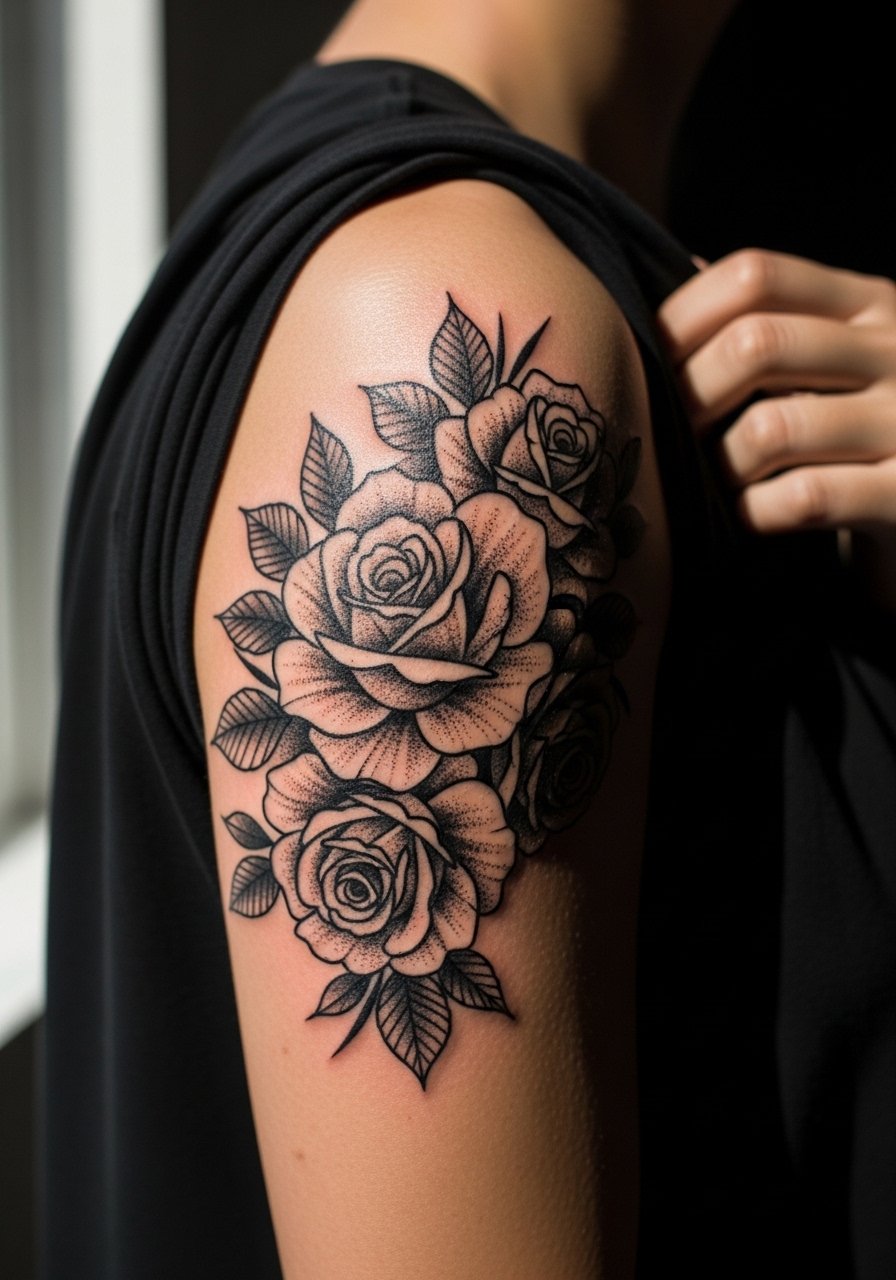
Most artists recommend black and gray for upper-arm clusters because tonal work holds better on tanned or darker skin. Ask for clear separation between petals using stipple shading rather than heavy washer fills. The error is relying on subtle gray washes alone, which can flatten over time. Pain is low to moderate and sessions are often longer for full clusters. For summer photos, wear an off shoulder top black to contrast the bold lines.
11. Tiny Chamomile Trio Near the Elbow Crease
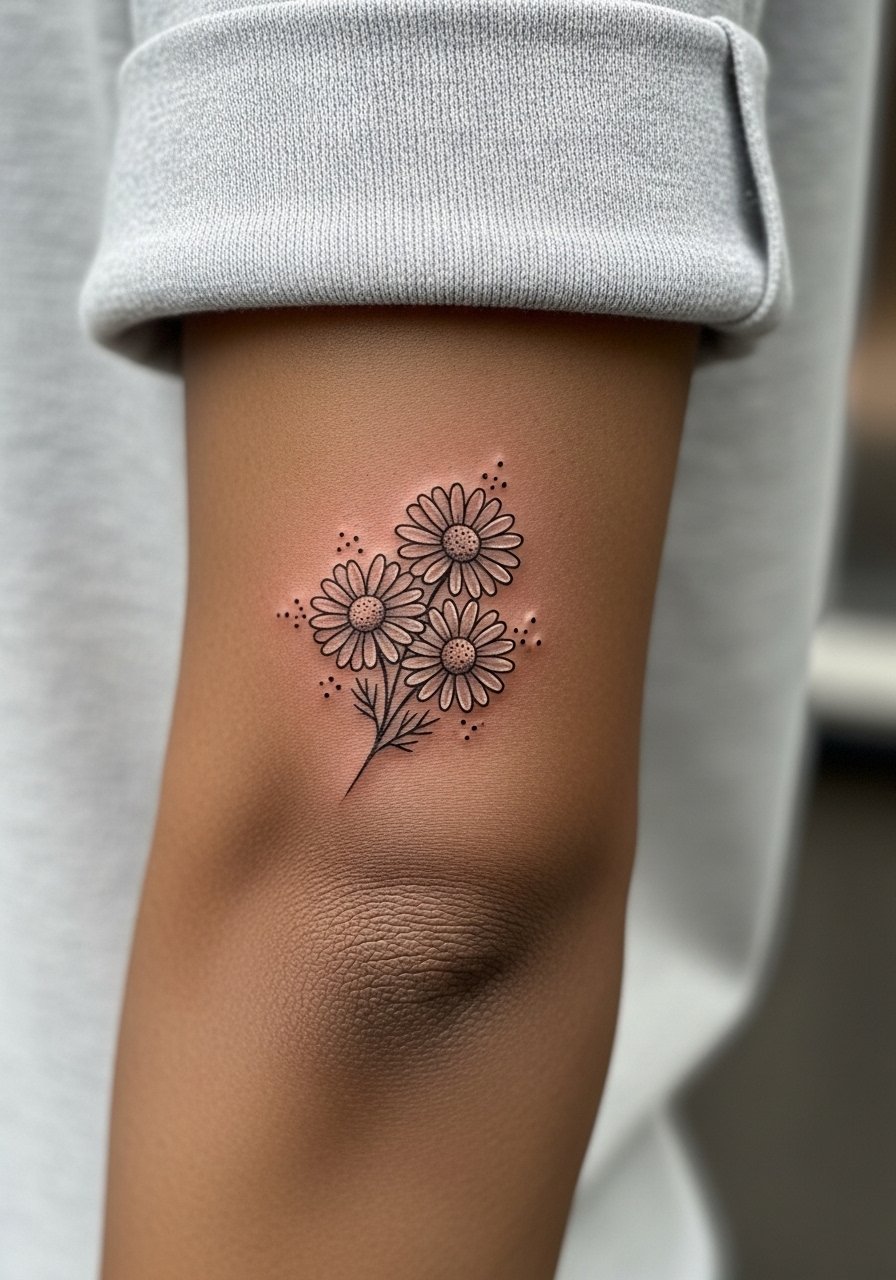
Elbow crease tattoos are subject to constant folding, so size and spacing matter. My rule is to keep motifs small but spaced and to ask the artist to place them where the skin sits flatter when the arm is slightly bent. The common mistake is lining up a trio across the crease where folding compresses the design. The session is short but can feel more intense near the joint. For the appointment, wear a sleeveless blouse or tank that lets you lift the sleeve without tugging.
12. Geometric Flower Medallion on the Outer Forearm
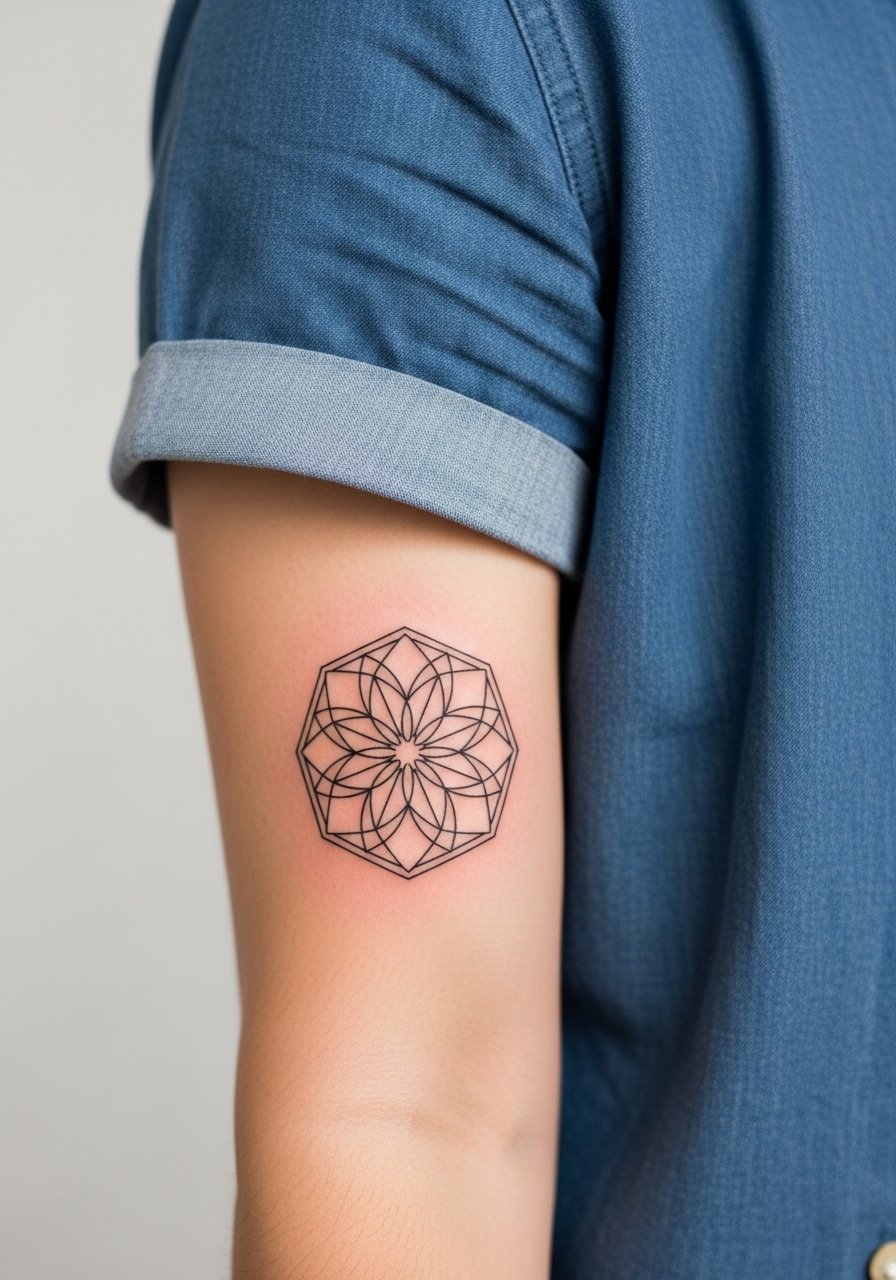
A geometric medallion benefits from slightly larger line weights so intersections do not merge as the piece ages. The visual impact is immediate when lines are bold enough to keep structure. Avoid asking for ultra-fine intersecting lines that create a blurred mass later. Sessions involve steady, repetitive linework and can be one to two hours. Pair the piece with a button up chambray shirt for a clean, framed look.
13. Vine and Small Flowers Creeping Around the Wrist
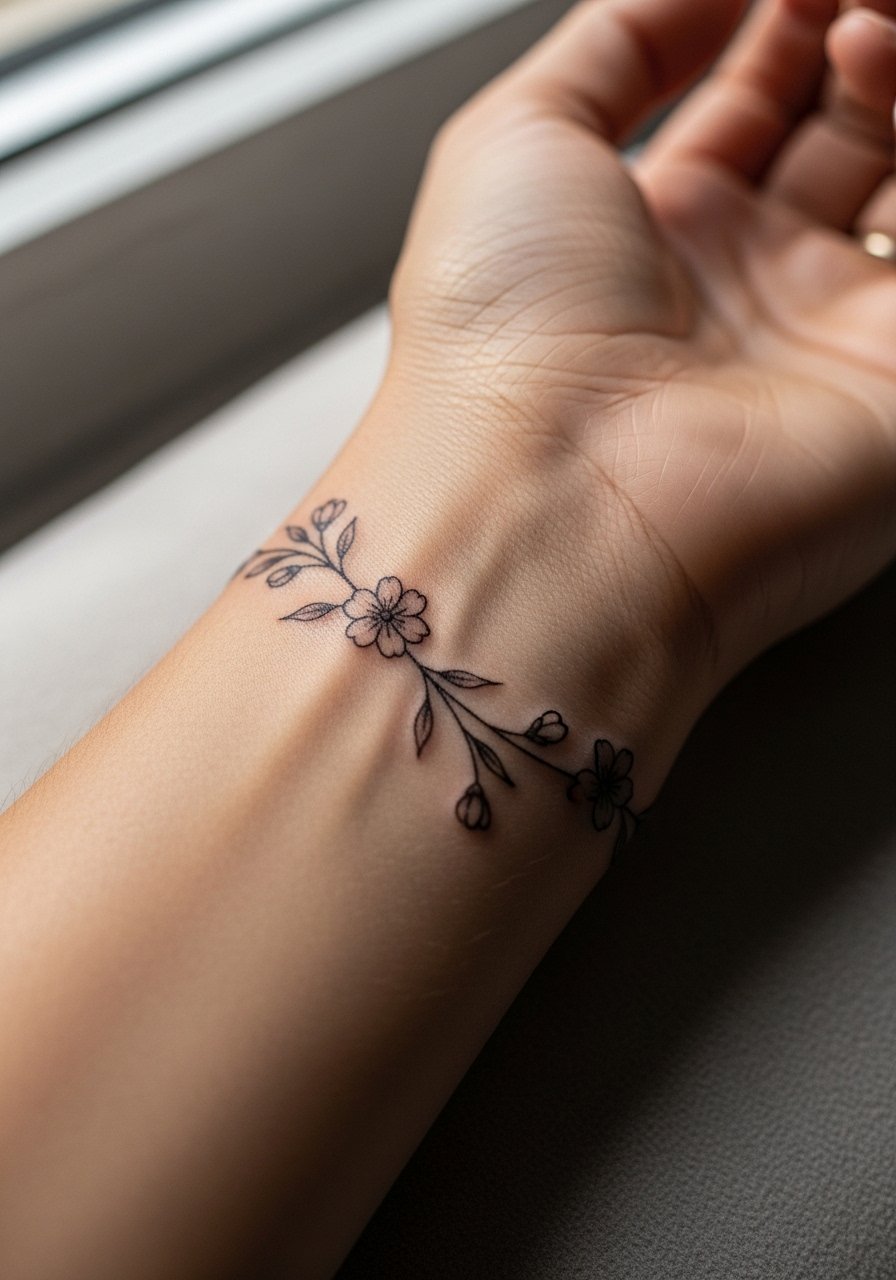
I see wrist wrap vines succeed when they have slightly heavier nodes at connecting points to prevent early fading. Tell your artist you want slightly reinforced junctions where the vine bends so those spots do not disappear. The mistake is insisting on uniform micro-lines everywhere. Pain is brief, and session time is short. For showing off, cuffed sleeves or a simple blouse expose the vine, and a minimal chain bracelet on the opposite wrist balances the look.
14. Bold Sunflower Patch on the Outer Bicep
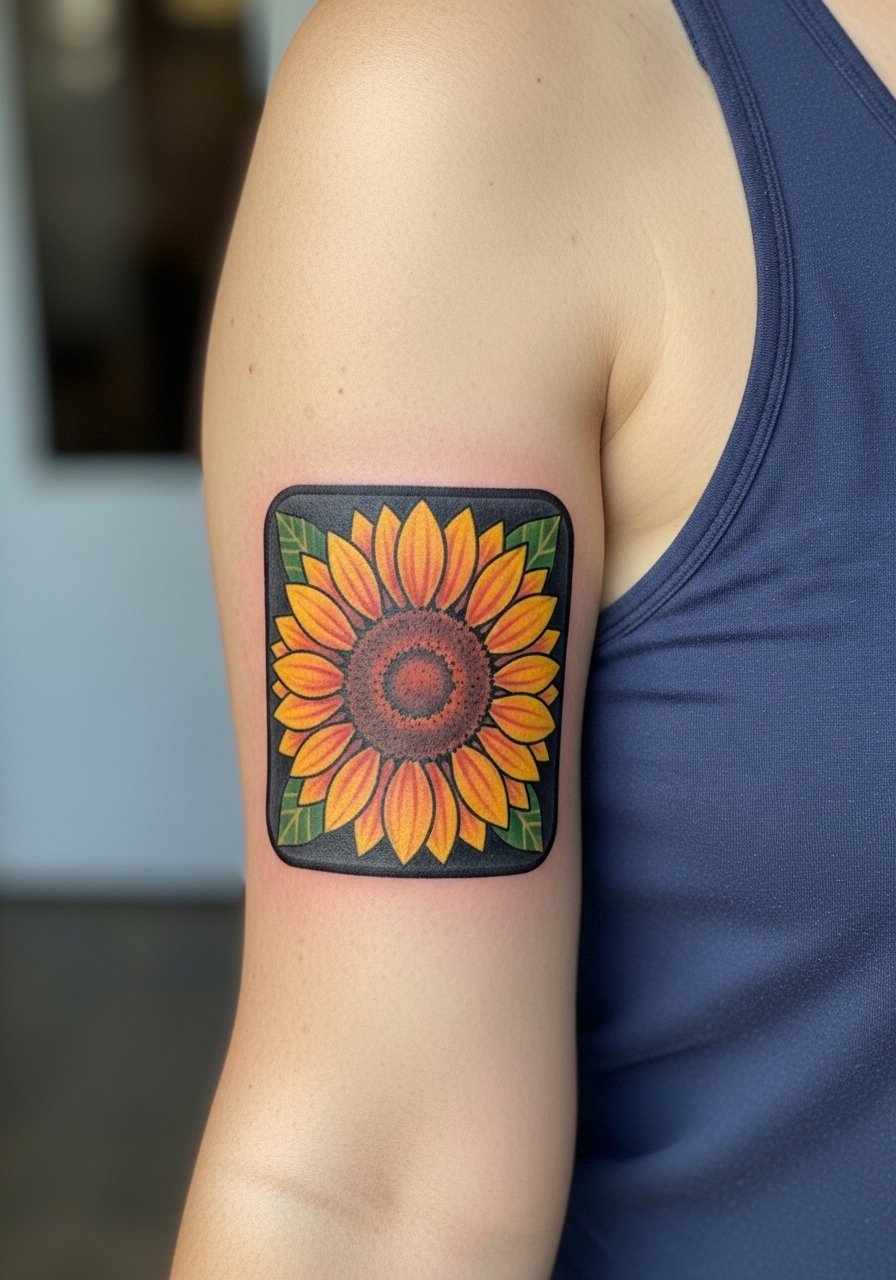
Sunflowers are low-maintenance on the bicep because their bold shapes translate well into aging. Ask for defined petal separations and a saturated center for contrast. The common error is tiny inner details that get lost in years of wear. Pain is moderate and sessions can vary with size. For a summer-ready look, a sleeveless tank top keeps the piece visible and comfortable.
15. Single Line Continuous Bloom Along the Outer Forearm
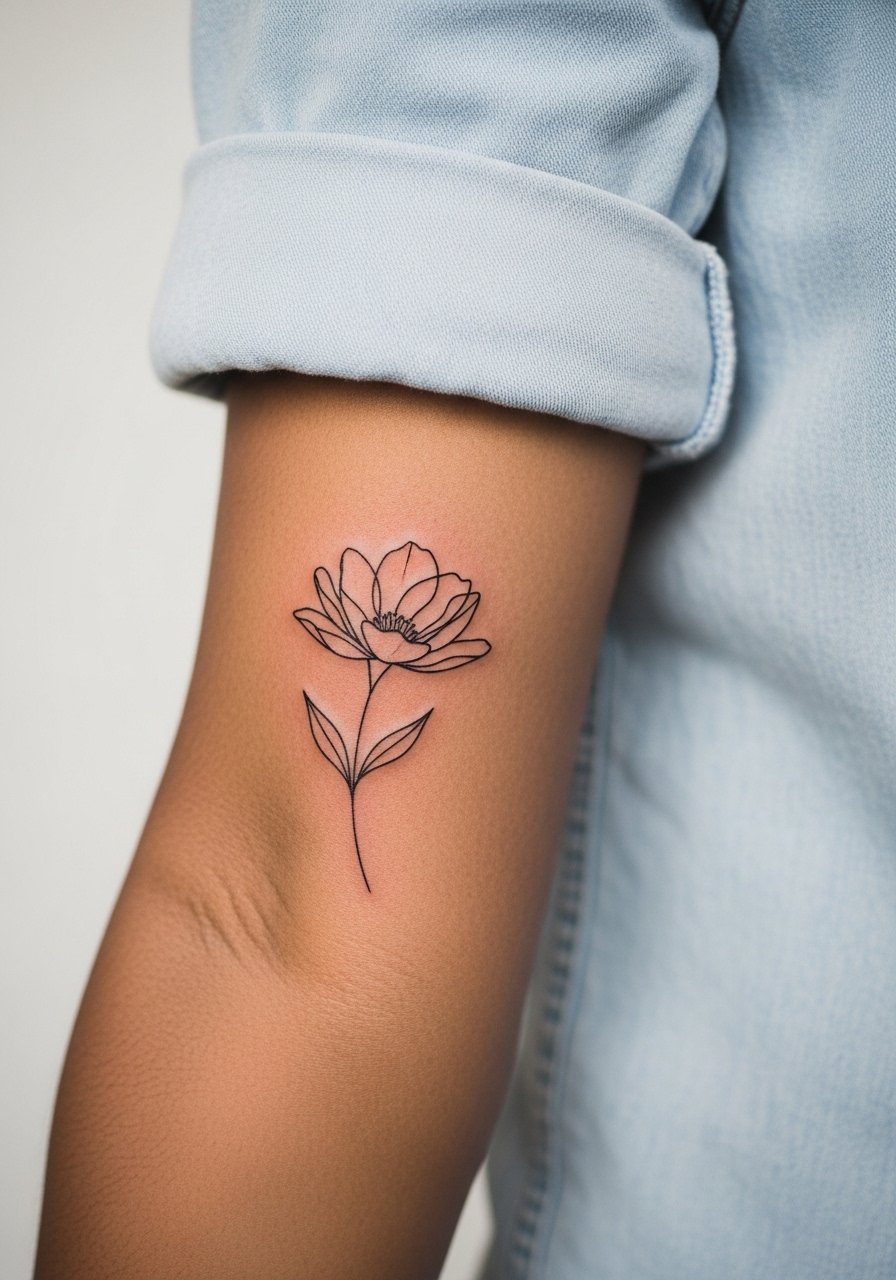
Single-line florals can read modern and hold up when the artist uses a confident, slightly thicker stroke. The aging mistake is using a whisper-thin continuous line that fades into a ghost. Ask for one pass with slightly more saturation so touch-up needs are pushed out. Pain is moderate and session time is usually under an hour. Wear a fitted henley shirt to frame the length of the line on the forearm.
16. Tiny Forget-Me-Not Cluster Behind the Wrist
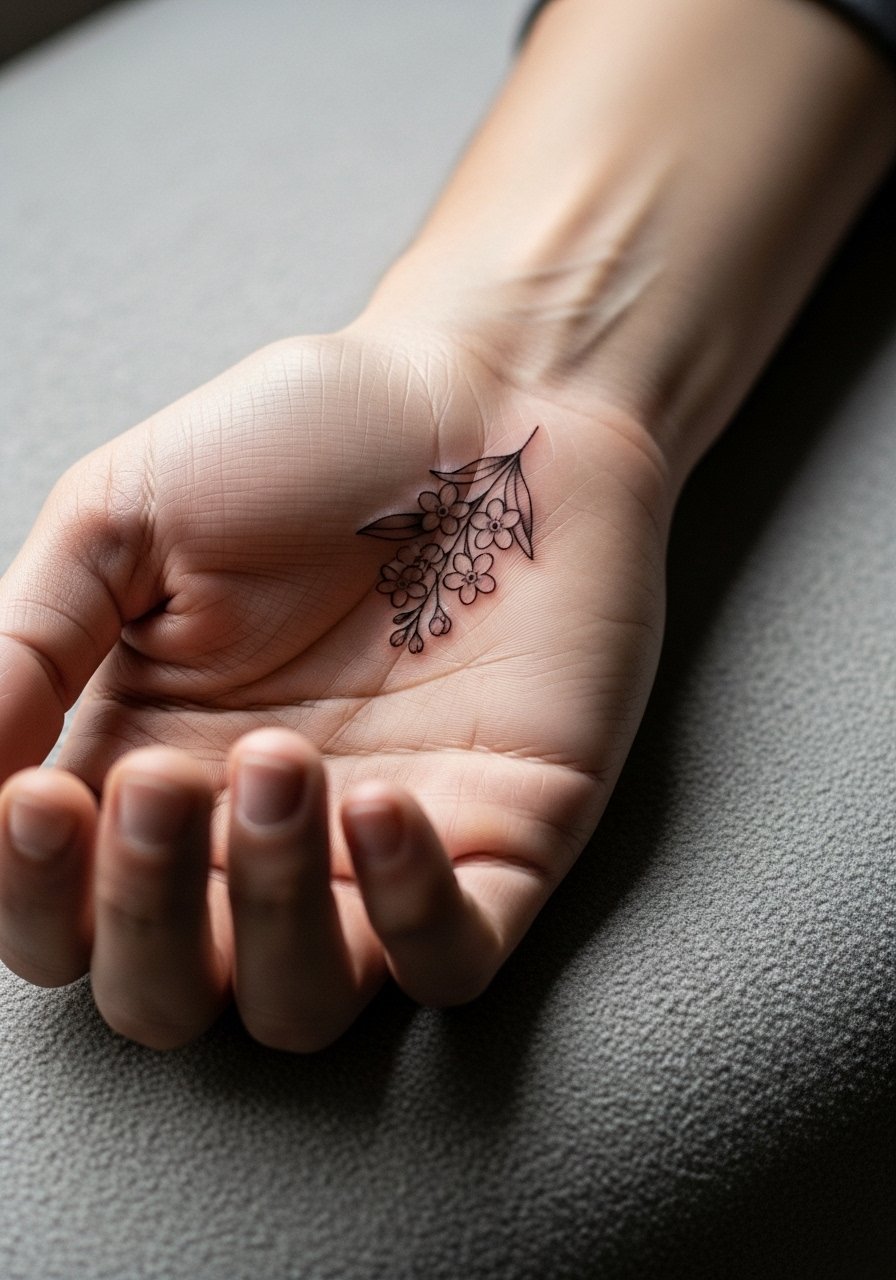
Behind-wrist placements are exposed to soaps and washes, which accelerates fading if the linework is too thin. When you consult, ask for slightly bolder anchors at the stem base and for the artist to avoid filling with faint gray. The common mistake is treating this zone like the inner arm where lines are safer. Pain is quick and sharp, session time short. For everyday wear, pick bracelets that sit above the tattoo rather than over it.
17. Watercolor Cosmos Cluster on the Lower Outer Arm
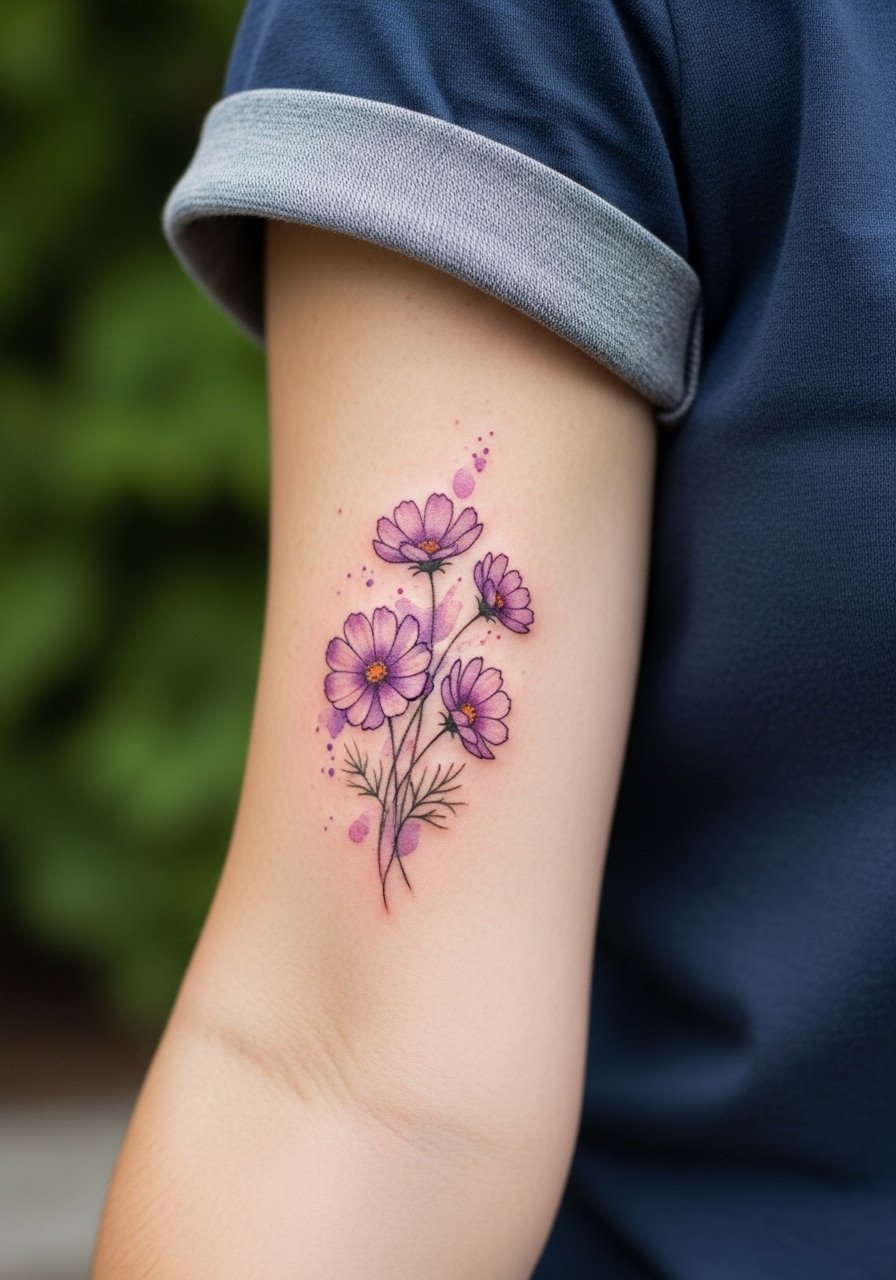
Watercolor clusters on the lower forearm need controlled layering so pigments blend without muddying. I advise asking for smaller pigment pools and clear negative space between flowers. The aging issue is pigment migration in large blended areas. Sessions can take longer for color layering. To show it off, roll sleeve cuffs or try a loose cotton tee that frames the lower arm.
18. Small Lotus at the Inner Elbow
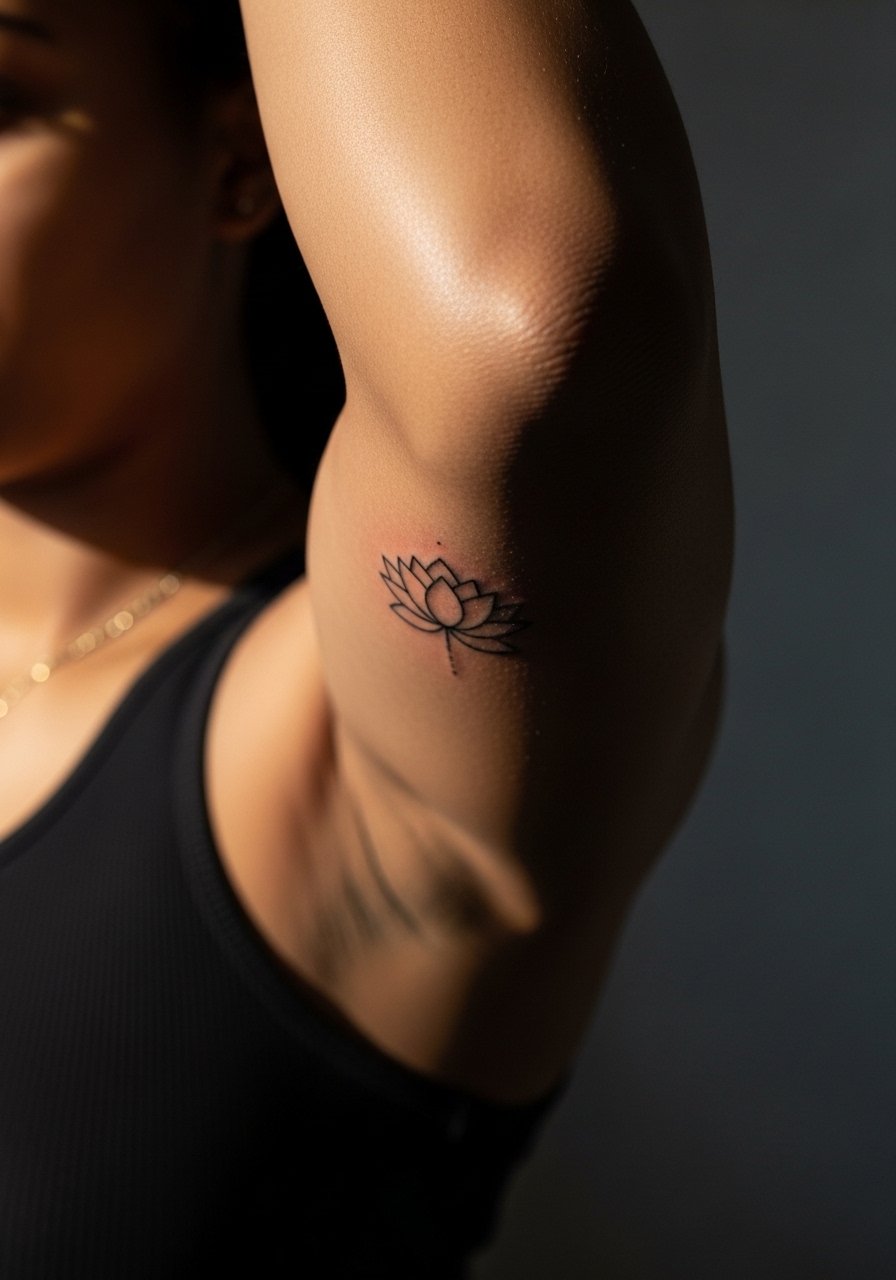
Inner elbow placement stretches with movement and sweat, so the question of fine line there often splits artists. One group avoids tight fine detail on the inner elbow because the skin's motion blurs the lines. The other group will accept the challenge with strategic spacing and reinforced anchors. If you want a lotus here, ask how the design will sit when the arm is bent and when it is straight. Sessions can feel more intense near the joint. For the appointment, wear a tank top so the artist can raise your arm without constriction.
19. Daisy and Script Band Around the Wrist
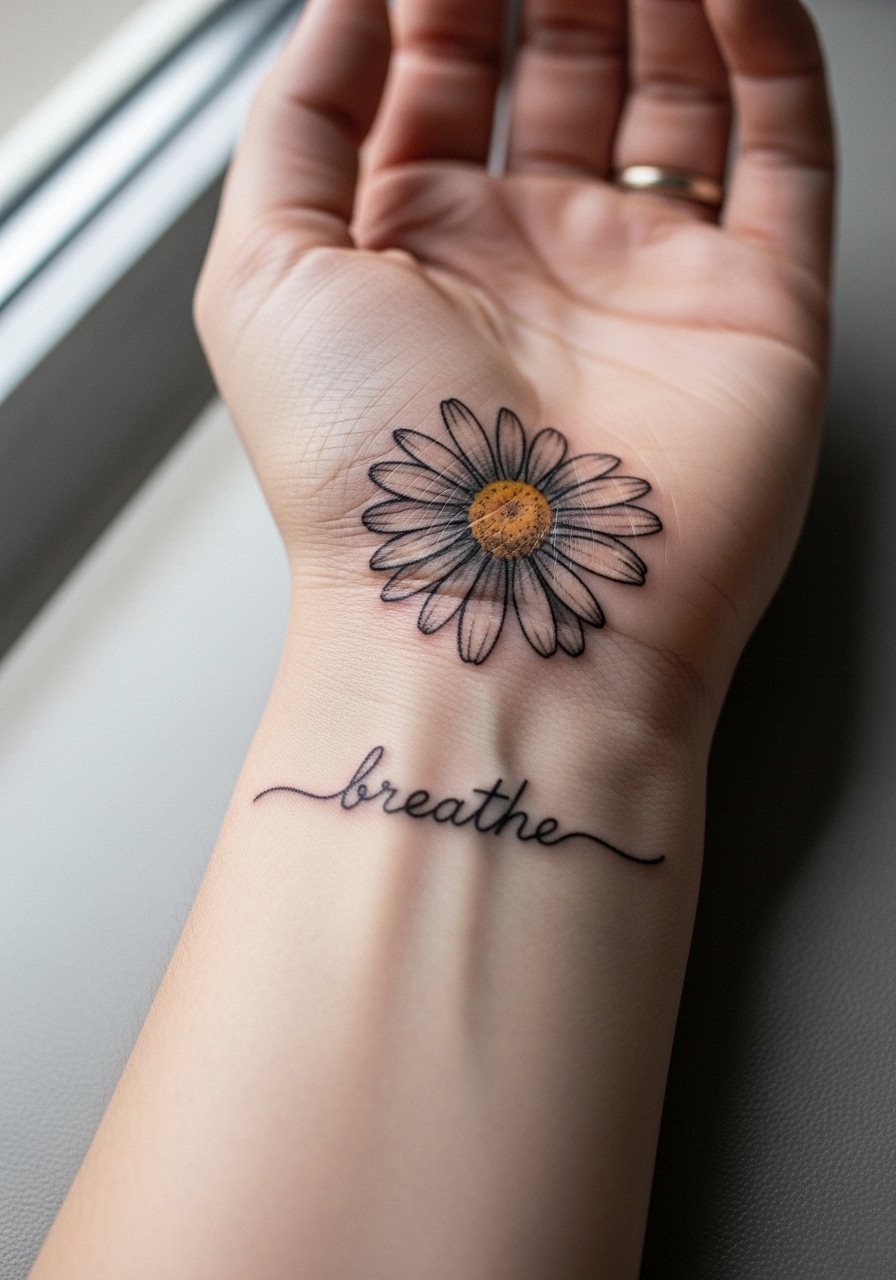
Text near floral elements must use large enough lettering to avoid becoming illegible in two years. The rule is to make script at least as wide as a standard ballpoint stroke and to anchor words between stronger motifs. The mistake is tiny cursive that fades into a smudge. Expect brief sharp pain on the wrist. For a framed look, combine with cuffed slim jeans and a minimal chain opposite the tattoo.
20. Peony and Vine Half-Band on Outer Forearm
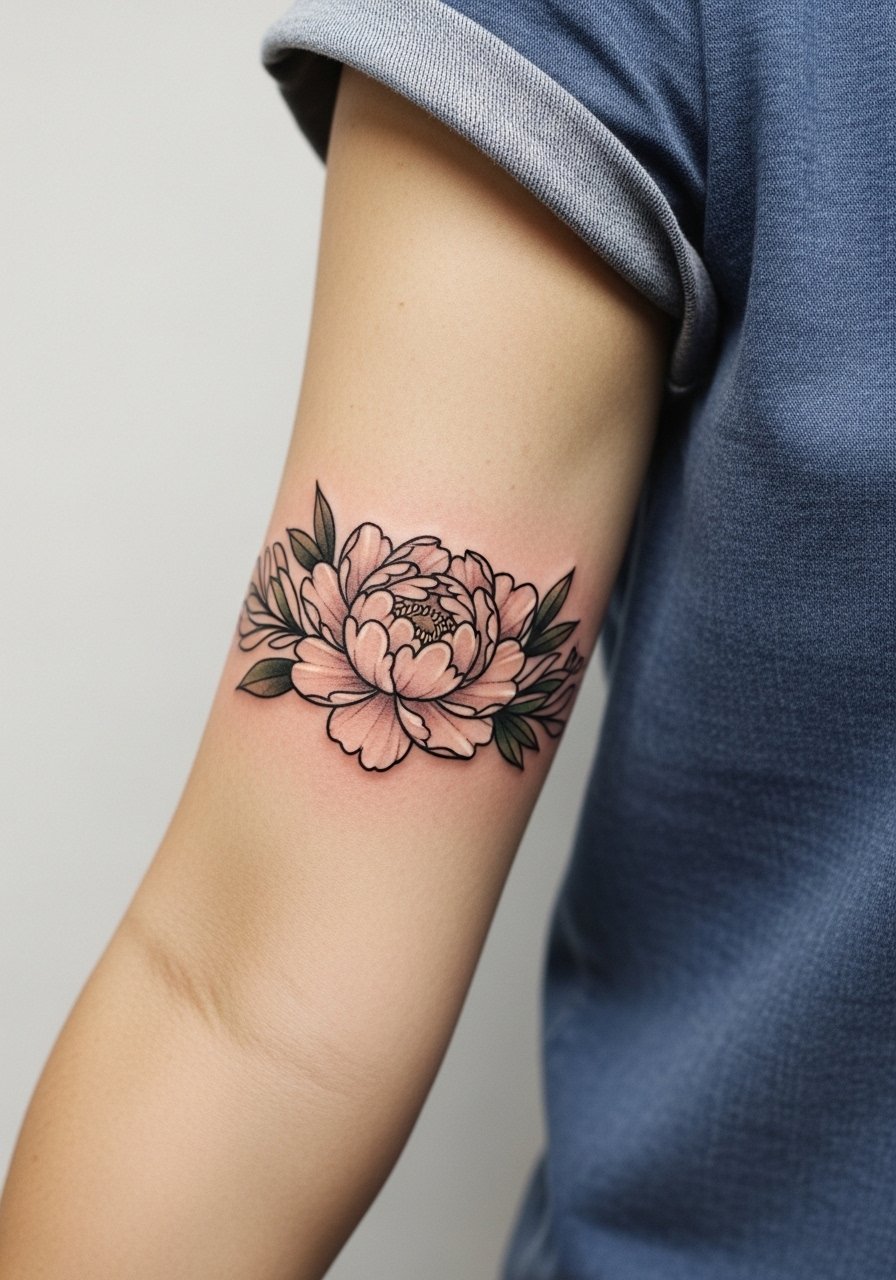
A half-band peony reads like wearable art when the foliage follows the arm's natural curve. Ask the artist to plan the vines to avoid the wrist crease and to leave negative space at the edges. The common failure is a symmetrical composition that ignores the arm's taper, causing distortion during motion. Sessions can stretch to multiple sittings for larger bands. To show it off, a rolled-sleeve button-up balances casual and intentional.
21. Inked Anemone Near the Shoulder Cap
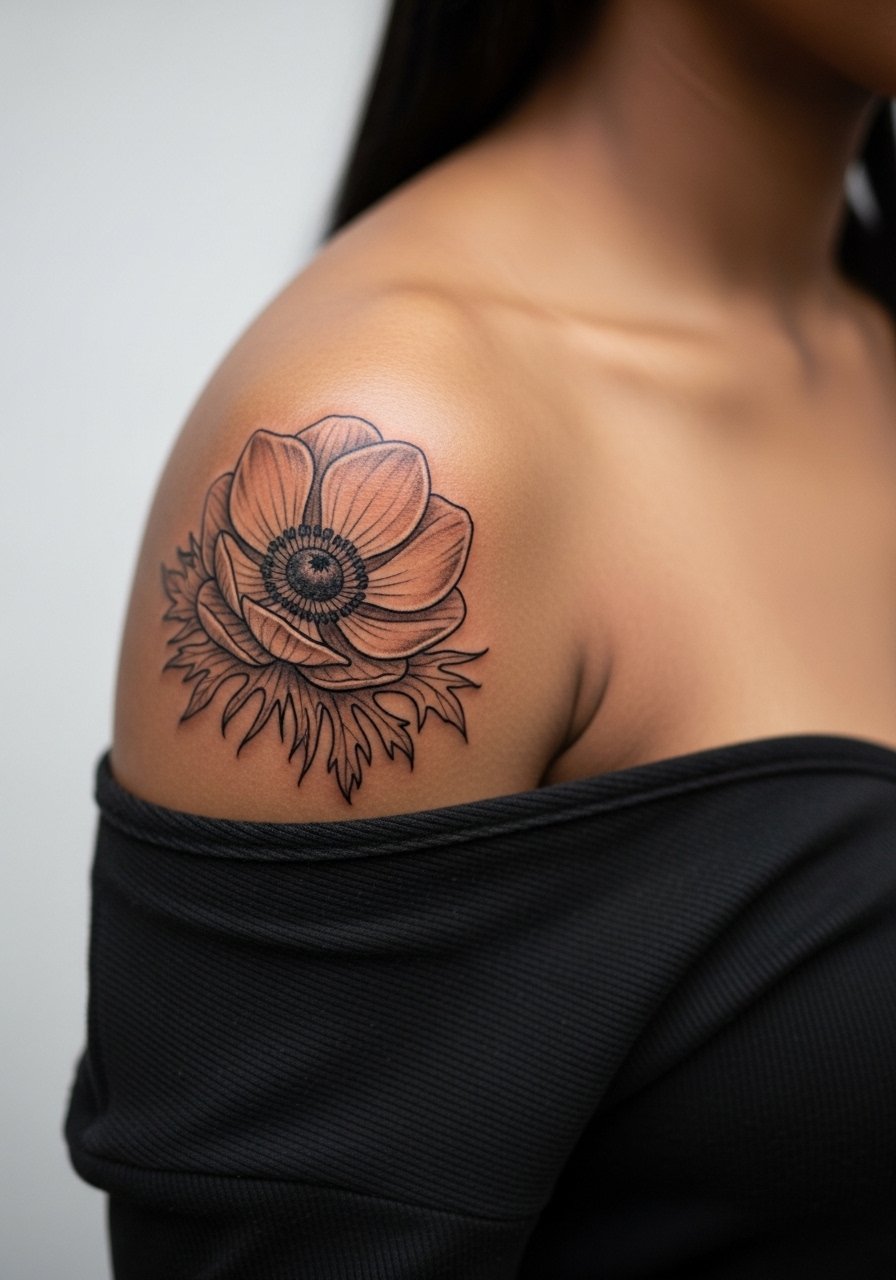
Shoulder caps tolerate bold composition, which makes them great for single-anemone pieces. In the consult, request clear petal separations using whip shading for texture rather than dense gray fills. A mistake is over-detailing the petals where distance from the shoulder will make it unreadable. Pain is lower here, and sessions can be one to two hours. For evenings, pair with an off shoulder top to let the shape breathe.
22. Clustered Poppy Linework Around the Outer Wrist
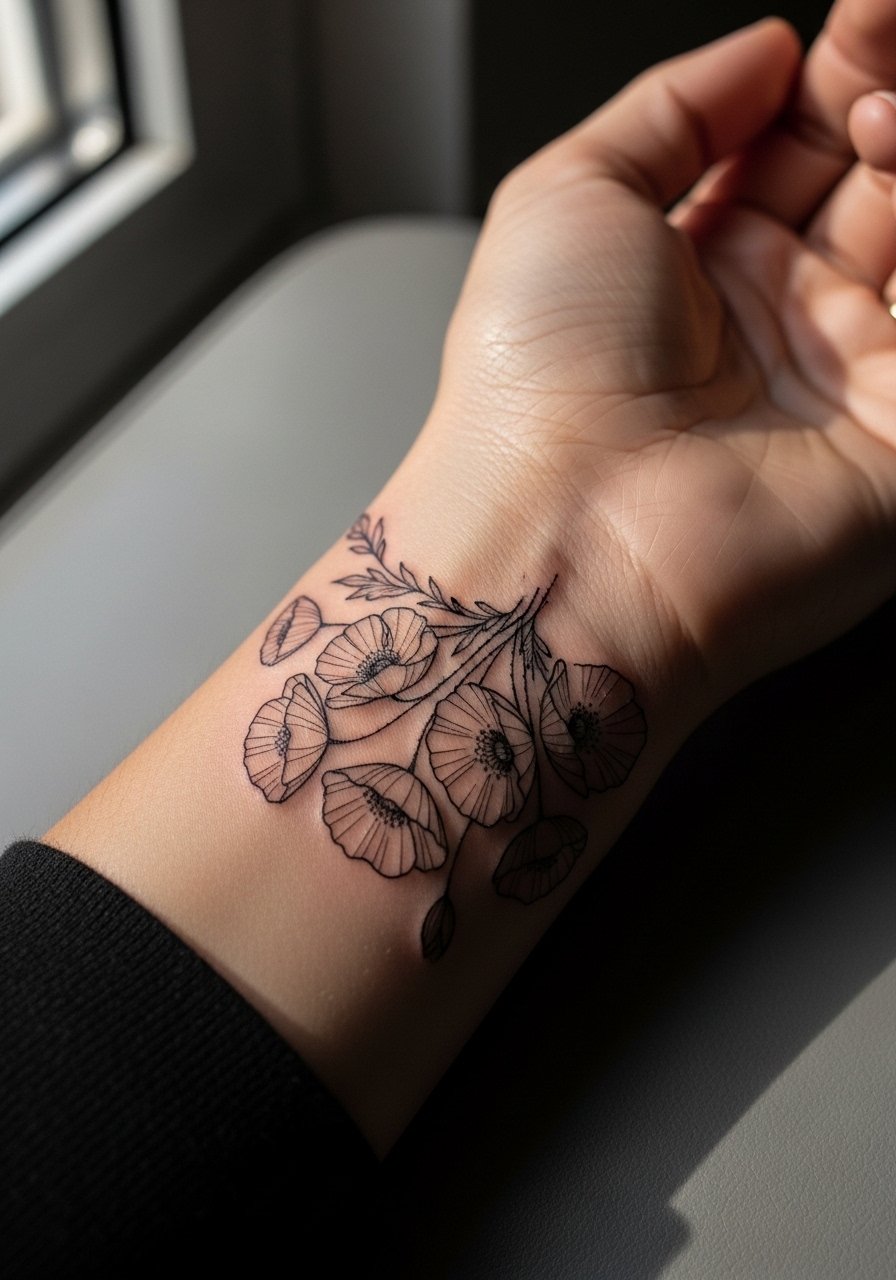
Poppies with open negative centers last longer when the artist avoids packing gray into the center. Ask for open centers and bold petal outlines to maintain visual punch. The common mistake is filling centers with tiny gray washes that disappear. Pain is sharp but short. Keep bracelets above the poppies during the first month to avoid extra friction.
23. Vintage-Style Botanical Compass on the Inner Forearm
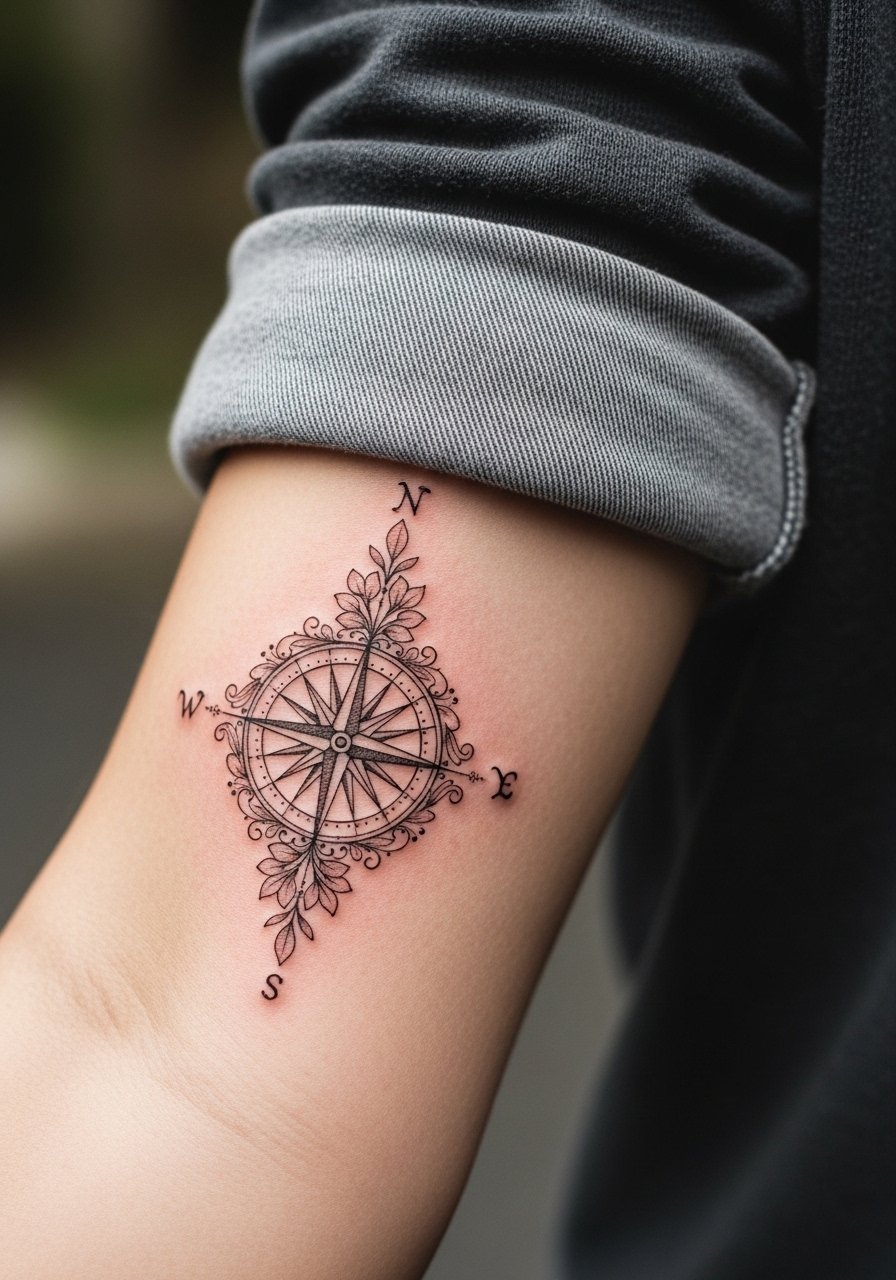
When combining geometric elements with florals, you want the geometry slightly bolder so it keeps structure as lines soften. Tell the artist to prioritize strong outer contours on the compass and to let the florals wander lightly. The mistake is equal-weight lines throughout which can blur into an indistinct shape. Sessions require steady handwork and can take a few hours. A rolled sleeve shirt frames the inner forearm and makes the compass feel intentional.
24. Thistle Cluster on the Lower Outer Arm
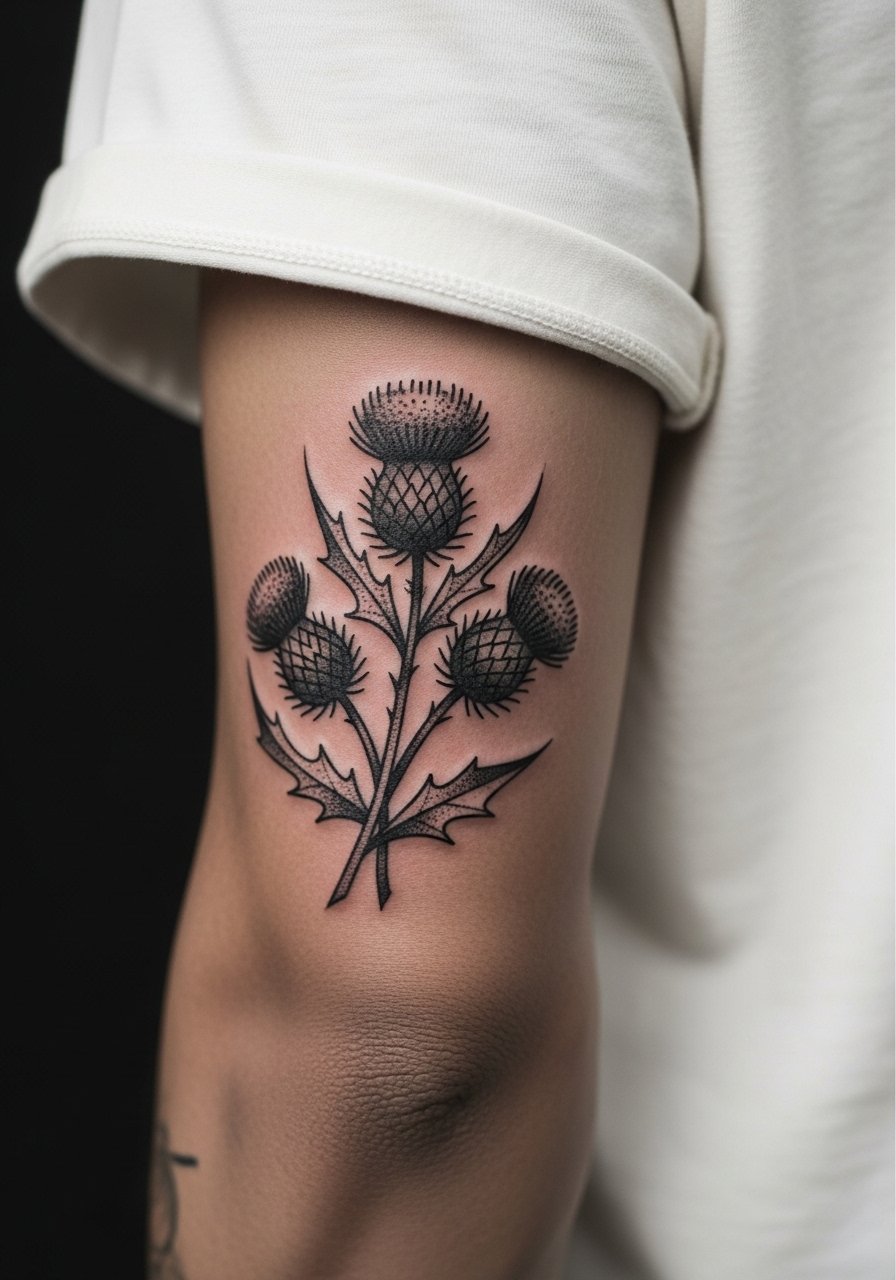
Textured motifs like thistles age well when artists use stipple shading to build depth rather than big gray swaths. In the consult, ask for stipple density that will not compress at year two. The mistake is dense gray that flattens. Pain is moderate and sessions are flexible in length depending on detail. For everyday styling, a loose cotton tee keeps the sleeve casual and the piece visible.
25. Tiny Rosebud on the Side of the Wrist
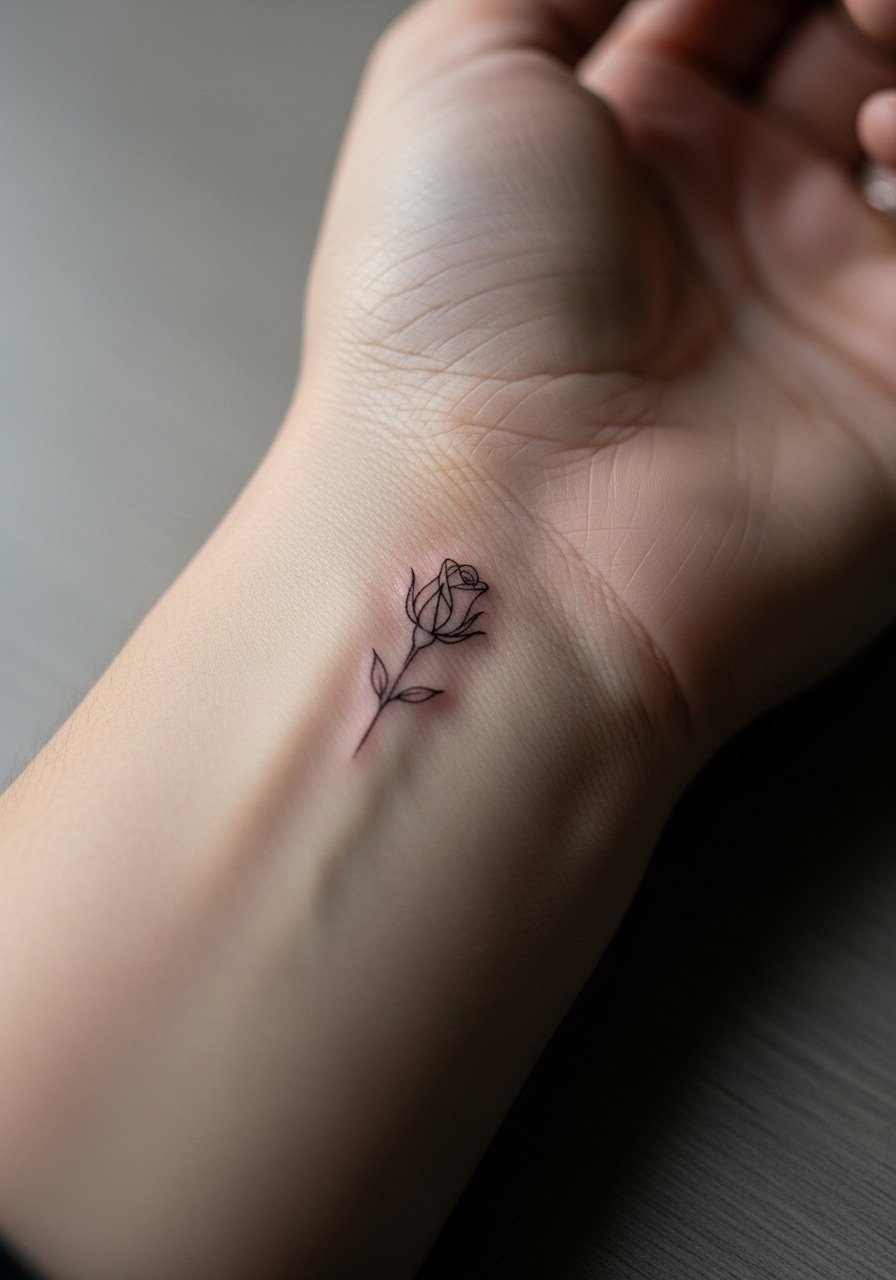
Side-of-wrist placements meet friction from watch straps and bracelets, which accelerates wear. When booking, ask the artist to place the bud where a watch would not sit and to slightly thicken the outer contour. The frequent error is placing tiny elements directly under straps. Pain is sharp but brief and sessions are quick. If you wear a watch daily, alternate which wrist or loosen the strap during the first four weeks.
26. Peony and Script Composition on the Upper Arm Wrap
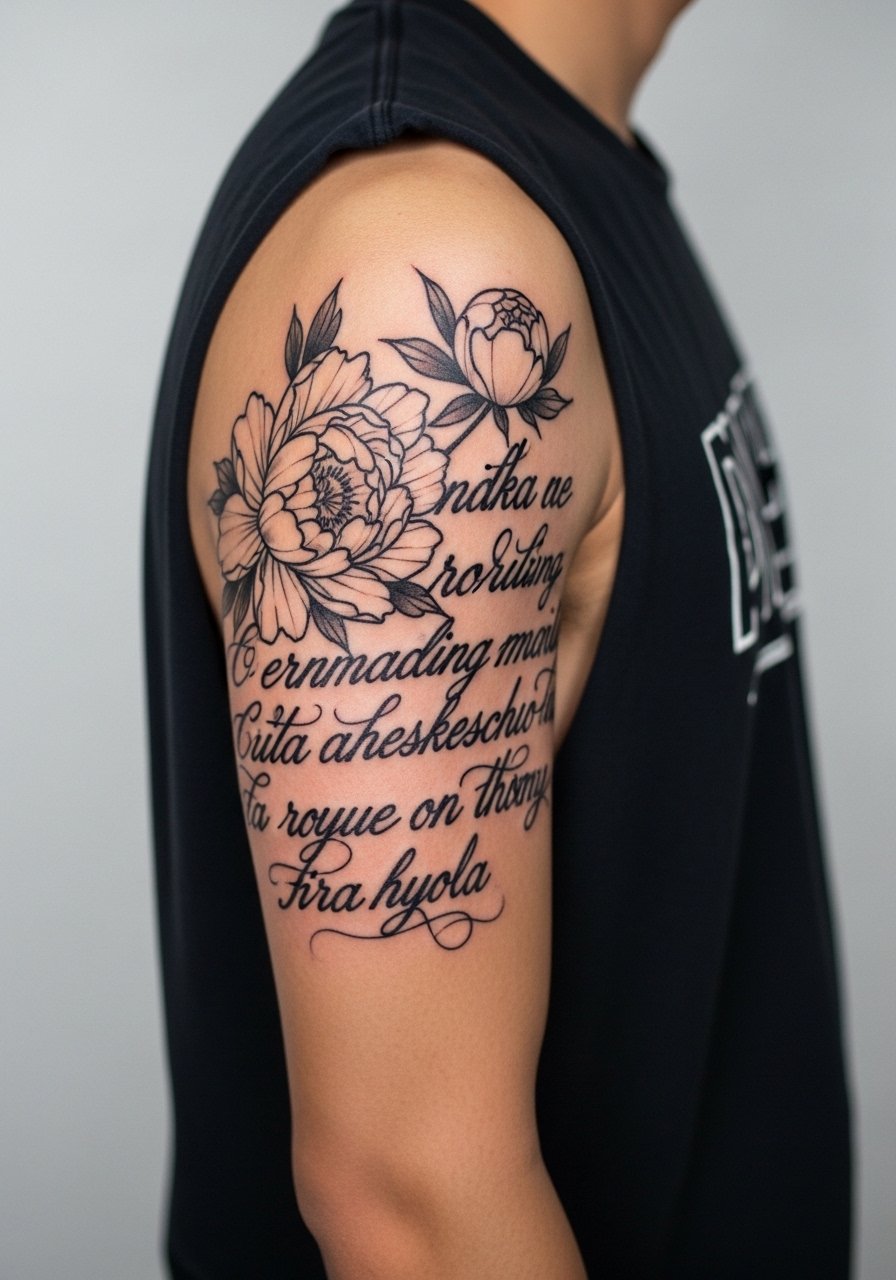
Combining florals with script works when the text size matches the boldness of the floral shapes. Ask your artist to scale the script to the peony's shadow so neither element gets lost. A common mistake is tiny micro-script nestled against a saturated petal that reads illegible later. Pain is moderate and sessions may be split for layering. For summer wear, a sleeveless muscle tee lets the wrap breathe.
27. Mixed Bouquet Sleeve Starter on Outer Forearm
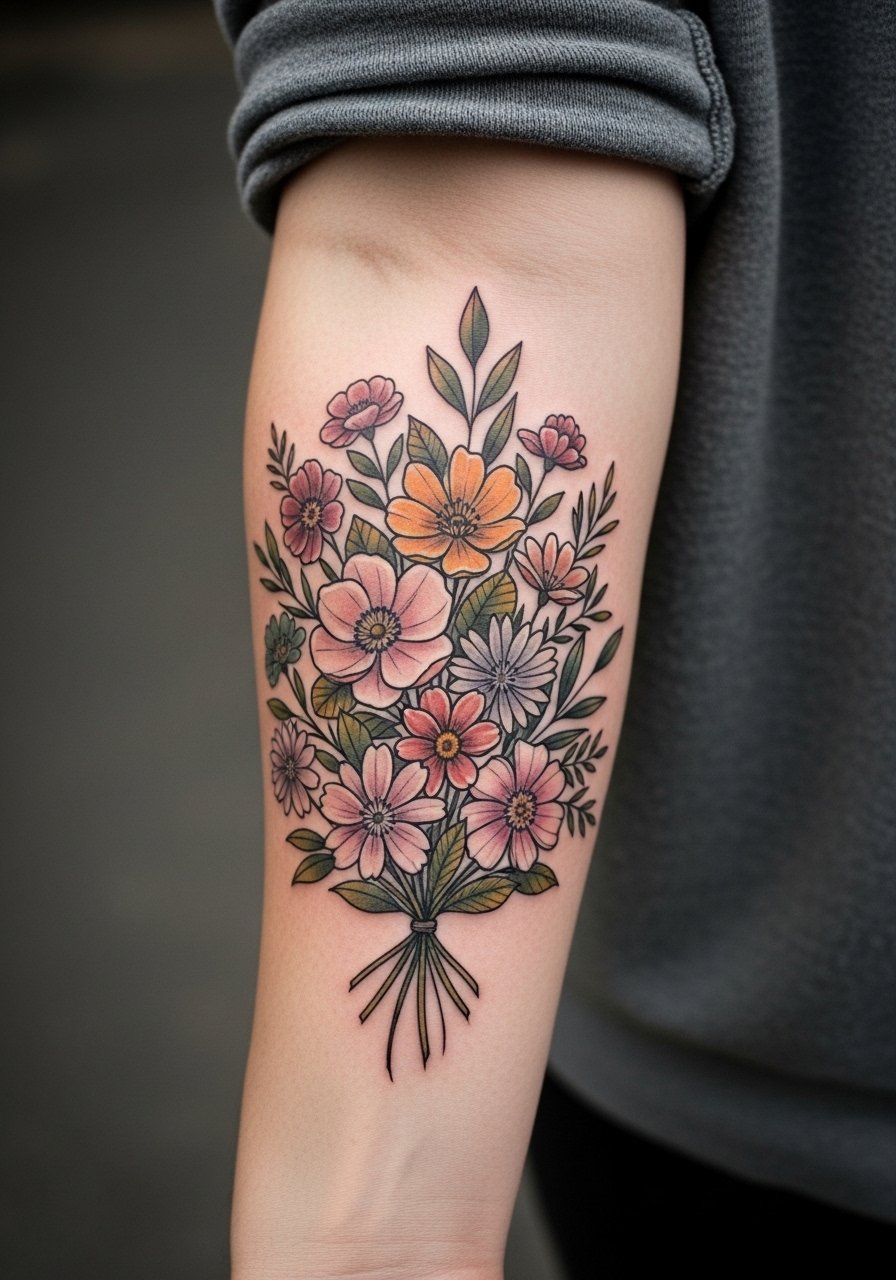
Starting a sleeve with a mixed bouquet is practical because you can add around core blooms later. When planning, tell your artist which flowers you want highlighted and which should act as fillers, and ask them to leave intentional gaps for future work. The mistake is crowding every inch in one session which makes future harmonizing harder. Sessions will be longer and multiple sittings are normal. For the appointment, wear a button-up you can pull aside or roll so the artist has full forearm access.
Frequently Asked Questions
Q: Will fine line forearm florals blur into a soft mess after a few years?
A: It depends on placement and spacing. Fine line work on flatter, low-friction areas of the forearm can keep readable shape longer when the artist leaves space between lines and reinforces key junctions. Expect touch-ups sooner on zones that see constant washing and sun exposure.
Q: How should I prepare clothing for a full outer forearm session?
A: Choose a shirt you can roll or pull aside without tugging the fresh tattoo, like a short-sleeve button-up or a loose tank. Bring a clean long-sleeve to wear home if the studio advises covering the area after initial cleansing.
Q: Do watercolor florals need different aftercare than black and gray pieces?
A: The fundamentals are the same, but watercolor pieces rely on thinner washes that can fade faster with sun exposure. Keep them out of strong sun for longer and follow your artist's timeline for when to start sun protection.
Q: Should I avoid getting floral work on the inner elbow because of movement?
A: Artists disagree on this area. Some say the constant bending blurs fine line too fast. Others will do it with spaced lines and slightly heavier anchors. Ask your artist how they handle joints and look for healed photos of their inner-elbow work before booking.
Q: How do I choose between a small wrist bloom and a forearm half-sleeve?
A: Think about daily visibility and friction. Wrist blooms are intimate and require more frequent touch-ups because of washing and straps. Half-sleeves age more predictably and give more room for detail and layering if you plan to expand later.
Q: Are there wardrobe suggestions for showing off outer bicep and shoulder florals?
A: Yes. Off-shoulder tops and sleeveless tanks frame upper-arm pieces while keeping the silhouette balanced. An off shoulder top can highlight a shoulder cap bloom in warm-weather photos.
