
Fine line trends and flashy color reels make full body work look instant and effortless, but the truth is different. Big coverage is a multi-year conversation. You plan zones, you test skin, and you budget sessions like a slow-build project. If you start here, you will get a clear set of full body tattoo references that show how each style moves across the body, what ages well, and what to ask for in the consult.
1. Irezumi Full Body Suite with Dragons and Koi
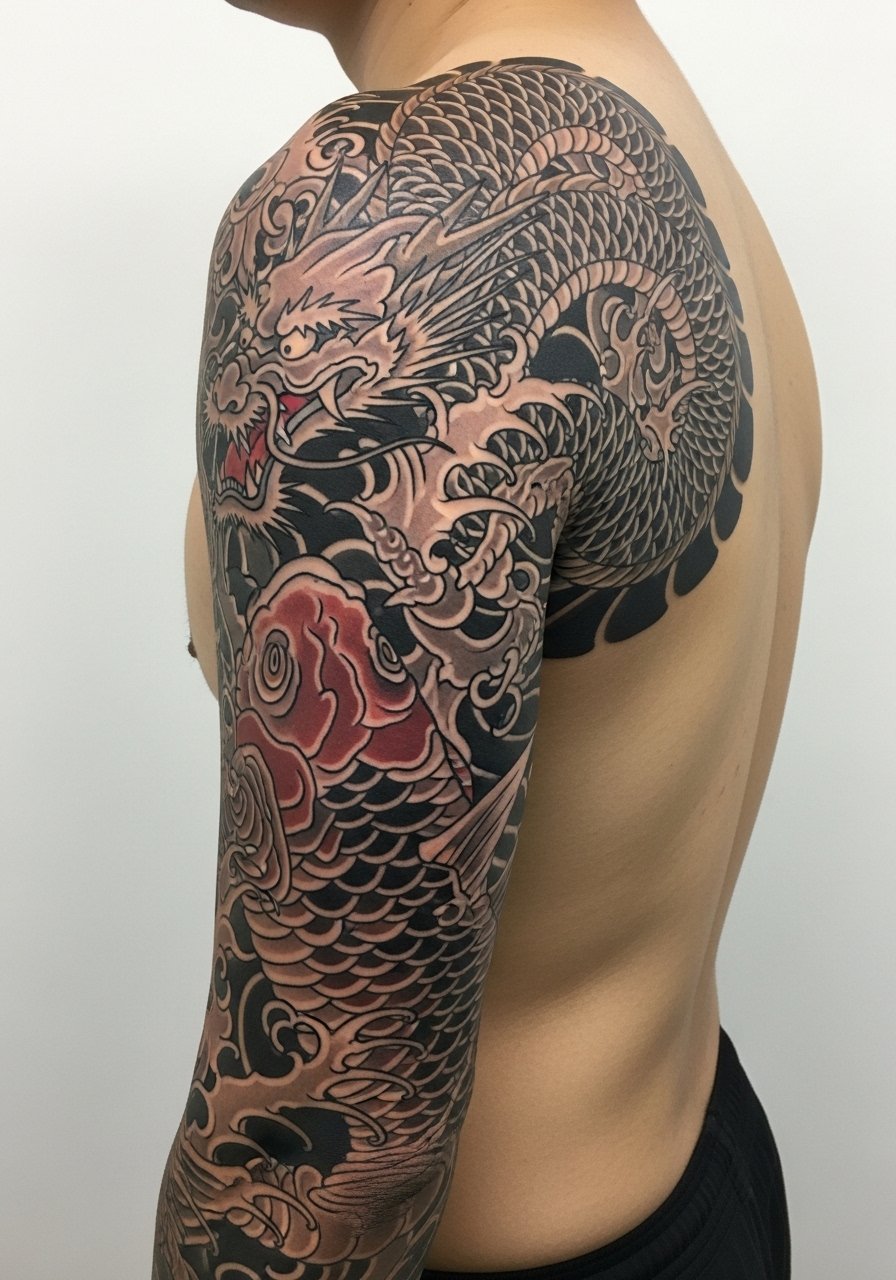
A classic full body Irezumi suite reads like a scroll that moves from back to limbs. Recommend this when you want a narrative that can be built in long phases, not as a single marathon. Tell your artist you want bold outlines with strong saturation and a clear plan for negative space so panels breathe. The common mistake is starting with tiny elements that then clash when the larger pieces arrive. Expect heavy sessions that feel tiring on the shoulders and hips. At six months the color will still read vivid, at two years the black should have settled, and by five years vibrant pigments may need refreshes. For showing this off, pair it with a silk kimono robe or a backless tank top that reveals the scroll without competing with the motifs. Respect the cultural origins and consider subtle adaptations rather than direct replicas.
2. Tribal Full Body Pattern with Motifs
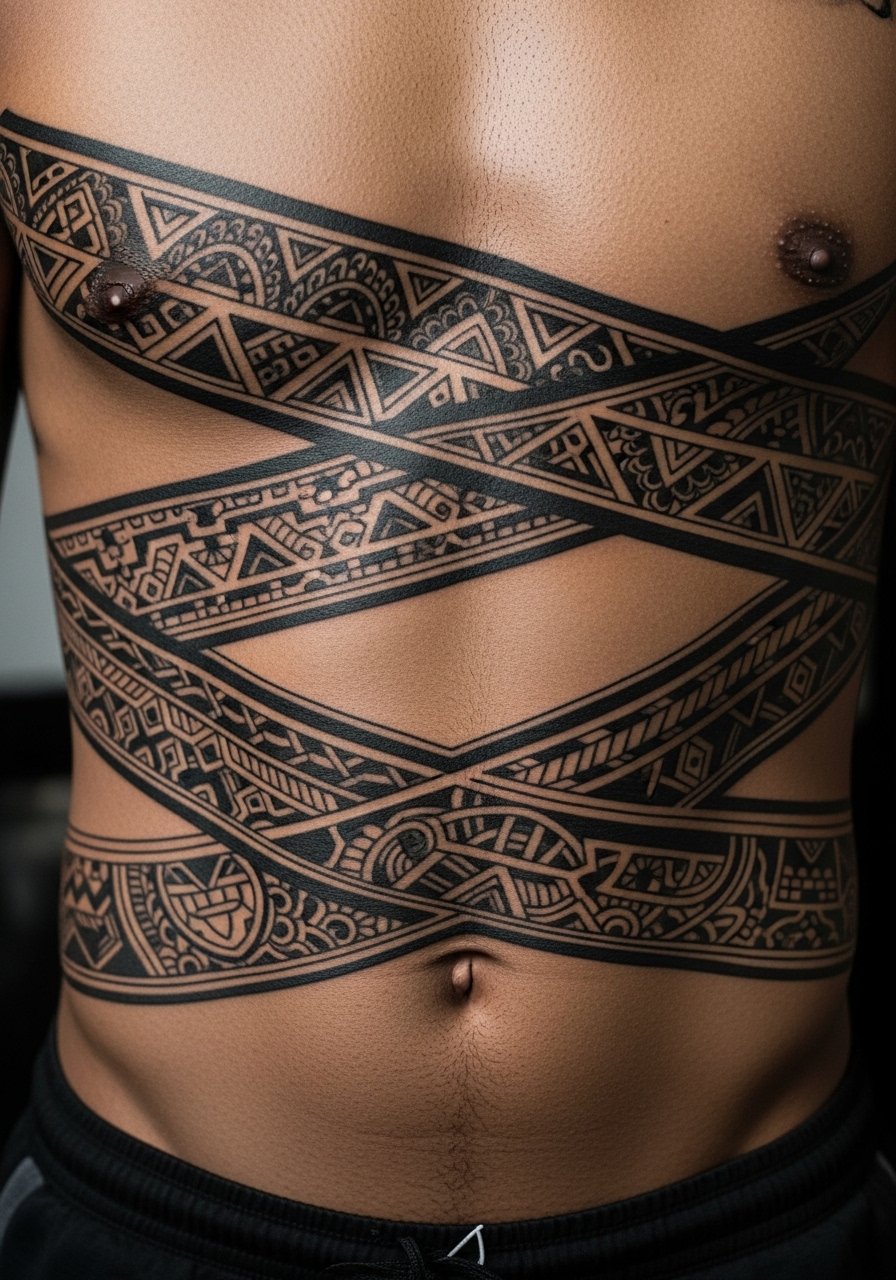
Tribal full body work uses heavy black and negative space to create armor-like visuals that age predictably. This style is best when you want flexibility across weight changes and seasons. A common error is forcing too many tiny motifs into tight spaces, which raises blowout risk on thin skin areas. During the consult, ask to map main bands across joints so patterns flow when you move. Session times vary, but expect many medium-length visits that are easier on healing than massive color fills. For touch-ups, plan on periodic re-saturation every few years if the black softens. A short note on origin is wise. Many tribal motifs carry cultural meaning, so discuss respectful interpretation with your artist.
3. Mythological Full Body Narrative with Gods and Creatures
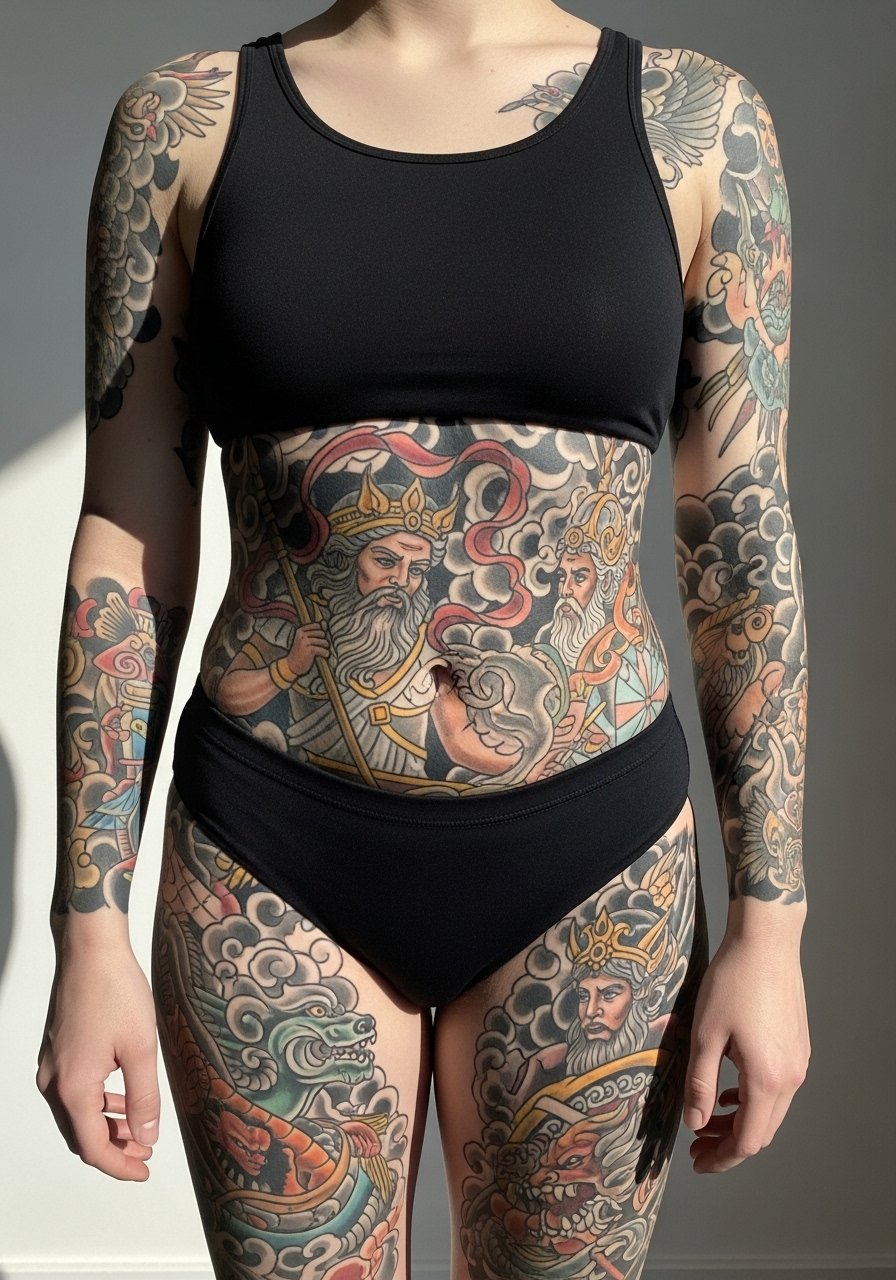
If you want an epic saga on the body, mythology pieces let you build in chapters. Recommend this for people who want clear focal panels that connect with bridging elements. Tell your artist the story beats you want and where you want pauses for skin texture and scars to sit. A typical mistake is overloading the chest with minute detail that blurs after movement. At six months the color will pop, at two years medium tones begin to soften, and at five years you may need touch-ups on midtones. Sessions feel long when moving across ribs and hips, so plan for breaks. For the lower limb connectors, wear slim jogger pants you can roll up during sessions and show off in summer with mid-calf shorts.
4. Patchwork Realism Full Body Compilation
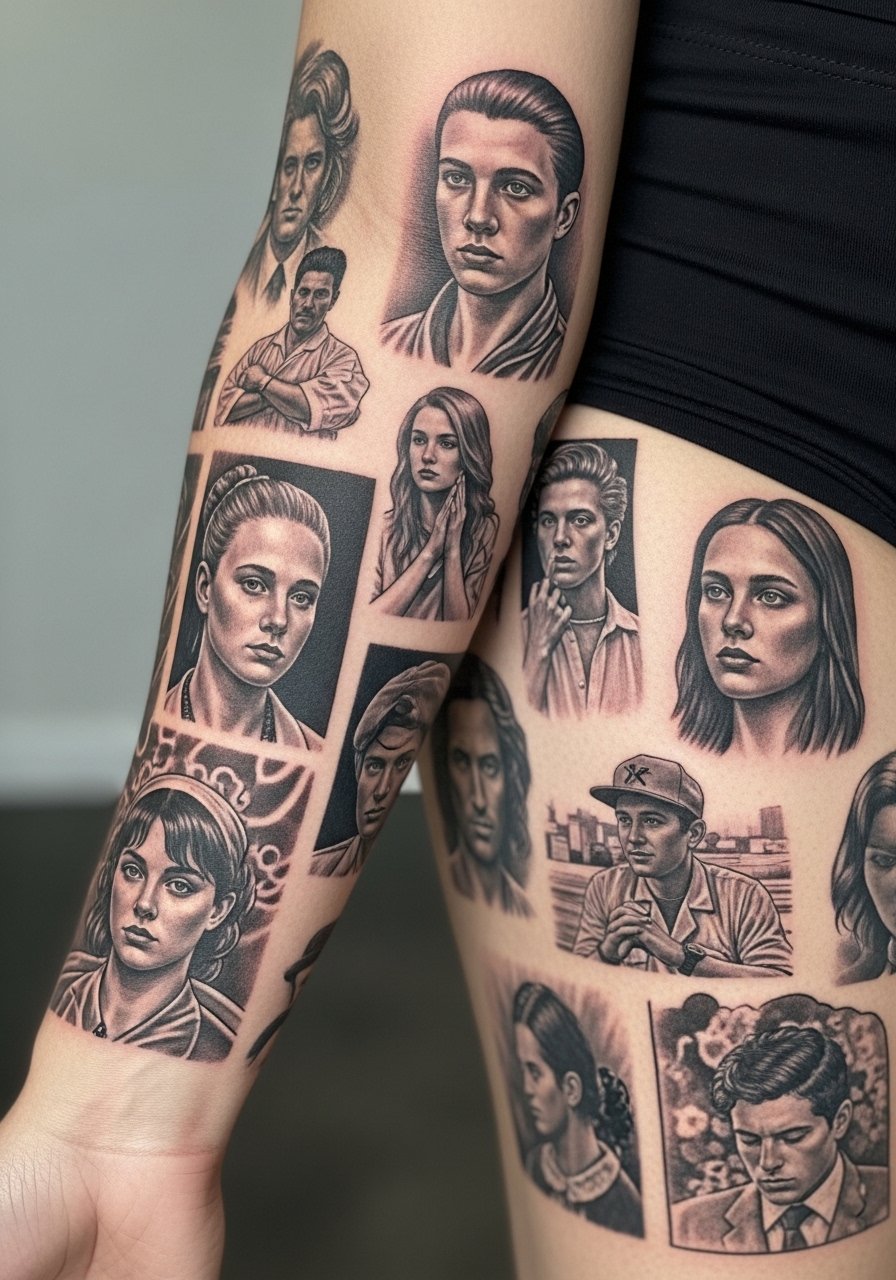
Patchwork realism is a collector's approach. You add portraits, scenes, and small realism panels over years so the body becomes a visual diary. It suits someone who does not want immediate full commitment. The key to success is consistent saturation and a unifying border style so disparate pieces read cohesive later. A common mistake is mixing drastically different realism scales without connectors. At six months small portraits look crisp, at two years fine detail can soften and need touch-ups, and at five years larger pieces usually hold better than tiny facial details. Tell your artist you want consistent contrast levels across future pieces. For session comfort on arms, wear an athletic tank top to give full access without rubbing.
5. Ornamental Mandala Full Body Grid
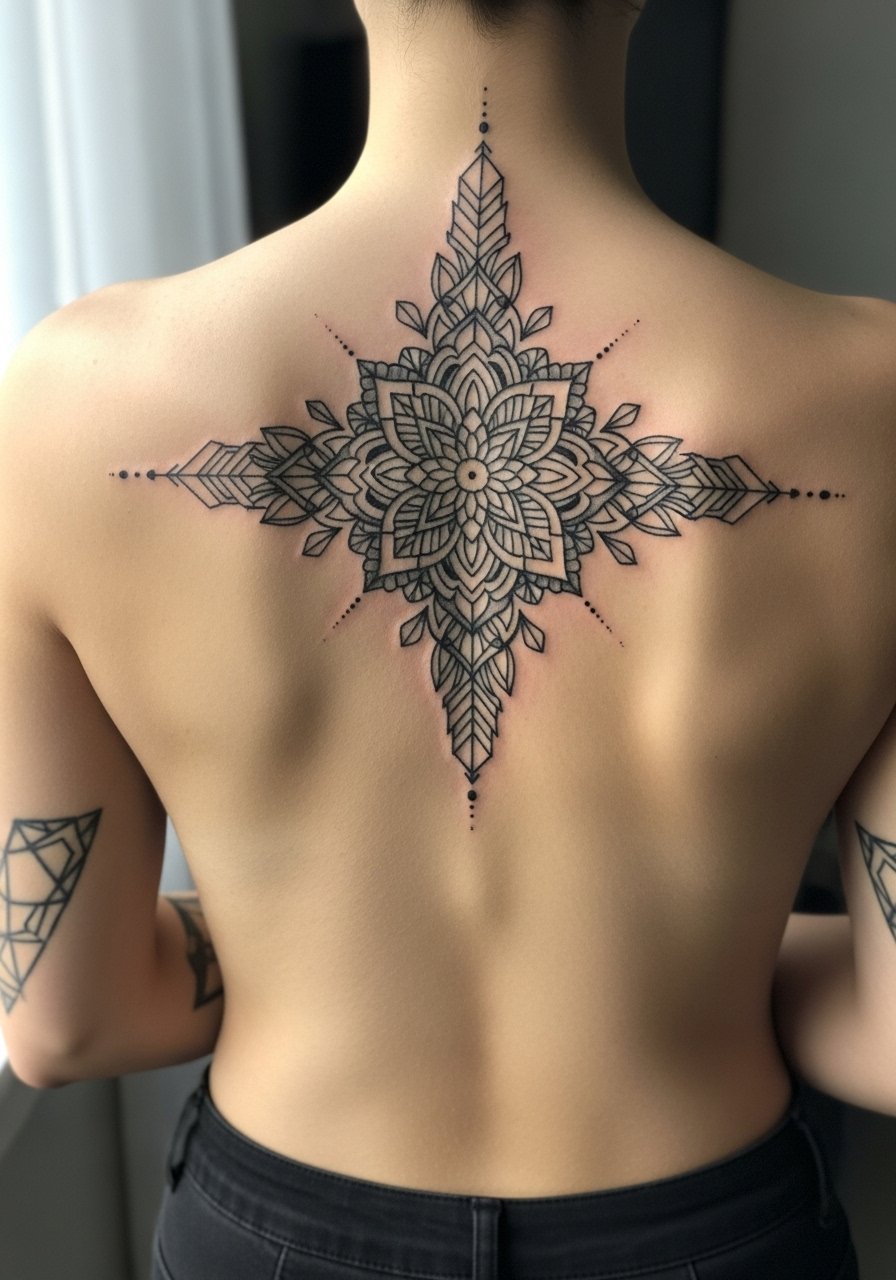
Mandala grids translate beautifully across the spine and limbs when spaced correctly. They suit someone aiming for meditative symmetry and careful geometry. The mistake is cramming intricate geometry into small areas, which causes merging lines over time. Ask for spacing rules in the consult, and request larger negative space around dense centers so the pattern keeps its crispness. At six months the geometry reads sharp, at two years thin spokes may start to soften, and at five years dense centers often need a touch-up to retain definition. For chest or collarbone mandalas plan to wear an open front shirt or a button down camp shirt when you want to reveal symmetry without distractions.
6. Blackwork Biome Full Body Landscape
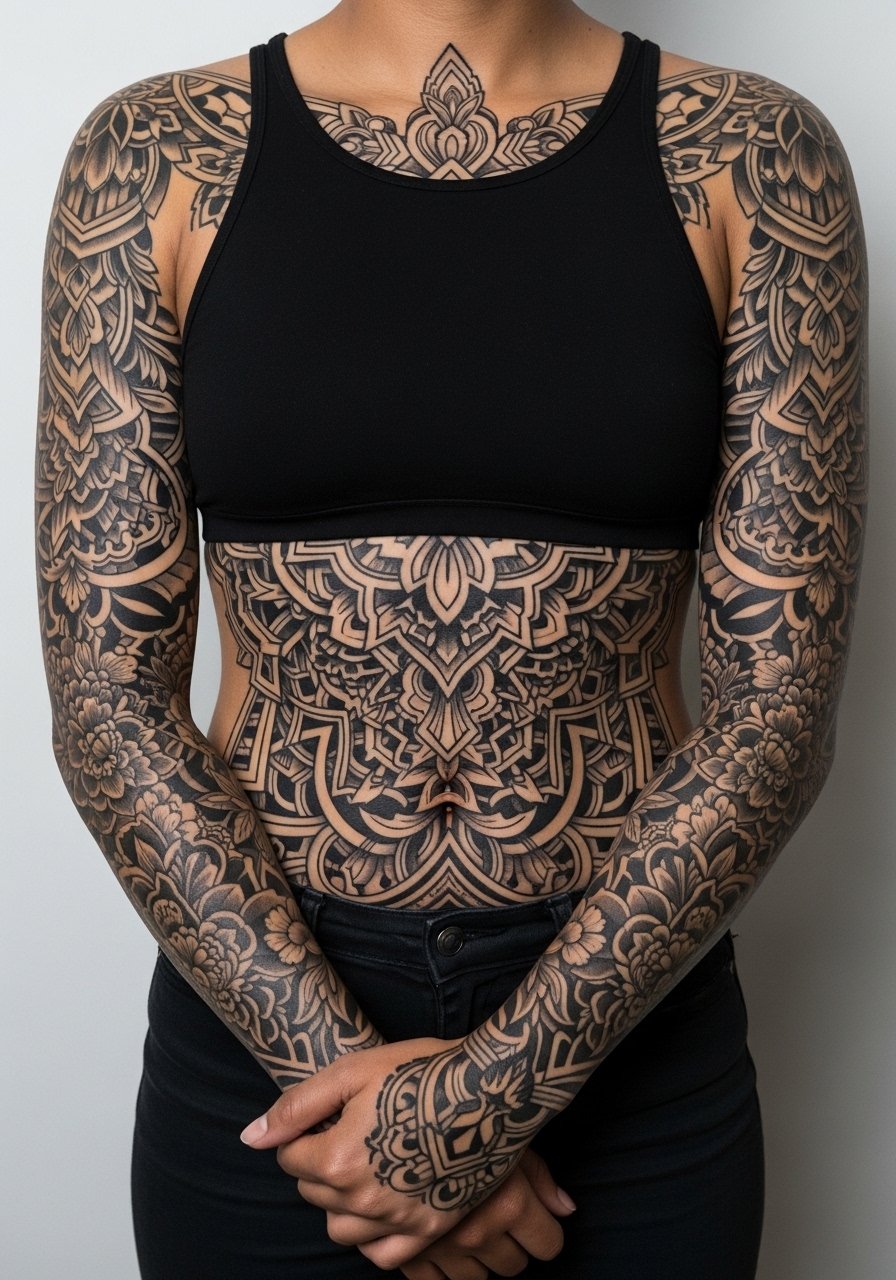
Blackwork biomes make dramatic contrast with solid fills and delicate negative-space details. Recommend this for bold statements that tolerate aging well because black holds. The typical error is too many thin texture lines inside solid blocks, which can look noisy once healed. Tell your artist you want clean blocks with purposeful dot work and stipple shading for texture so the piece reads from a distance. Sessions are intense because of large areas of saturation, but pain can be manageable when sat in phased blocks. Touch-ups tend to be less frequent than in finer styles. For session clothing, bring a loose button-down shirt you can slide aside to access the torso without tugging.
Studio Day Picks
The torso, back, and sleeve work above demand different prep than small wrist panels, so a few items make the studio day and first week smoother.
-
Stencil transfer paper kit. Lets you preview placement and line weight on skin before long sessions, which is crucial for large Irezumi panels and geometric grids.
-
Topical numbing cream. Applied per instructions it takes the edge off extended saturation sessions on ribs and thighs without changing the ink's behavior.
-
Thin protective film roll. Useful for areas that see a lot of friction during the first week, especially ankle connectors and finger work.
-
Fragrance-free body wash. Gentle cleansing helps with larger healed surfaces so detail stays clear and irritation is minimized.
-
Aquaphor healing ointment. A thin layer in the first days maintains moisture for detailed pieces without clogging the healing skin channels.
7. Neo-Traditional Fauna Full Body Parade
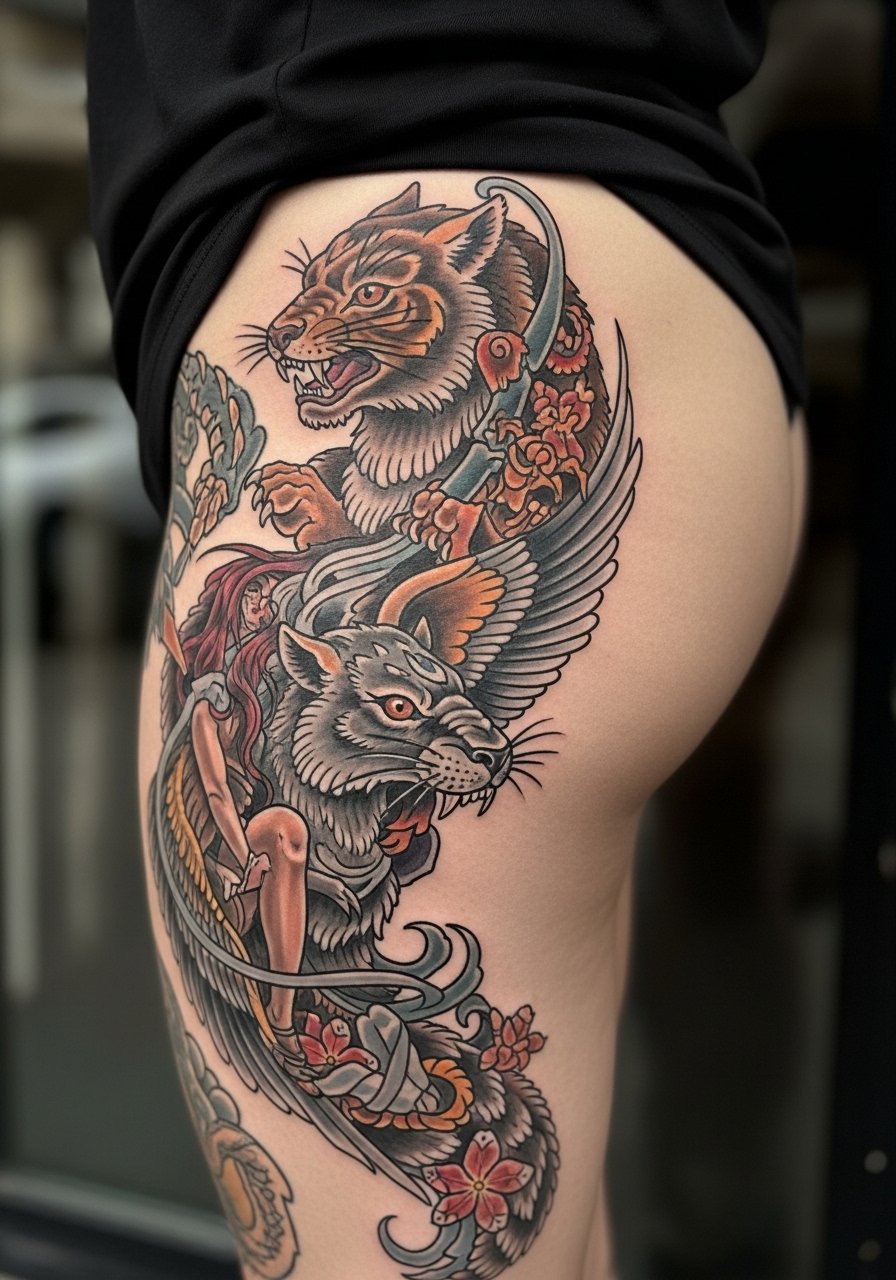
Neo-traditional fauna plays with stylized animals and rich color palettes that can thread across legs and backs. This works best when you want whimsy tied to strong silhouette anchors. The common misstep is using pale midtones without sufficient saturation, which fade faster on larger expanses. During consultation specify bold contouring and consistent saturation levels for each animal panel. At six months the color will feel bright, at two years midtones may soften, and at five years the outlines will keep the forms readable while colors might need refreshes. For sessions and reveal, slim joggers rolled at the calf help show leg wraps while staying comfortable in the chair.
8. Ignorant Style Full Coverage Abstract
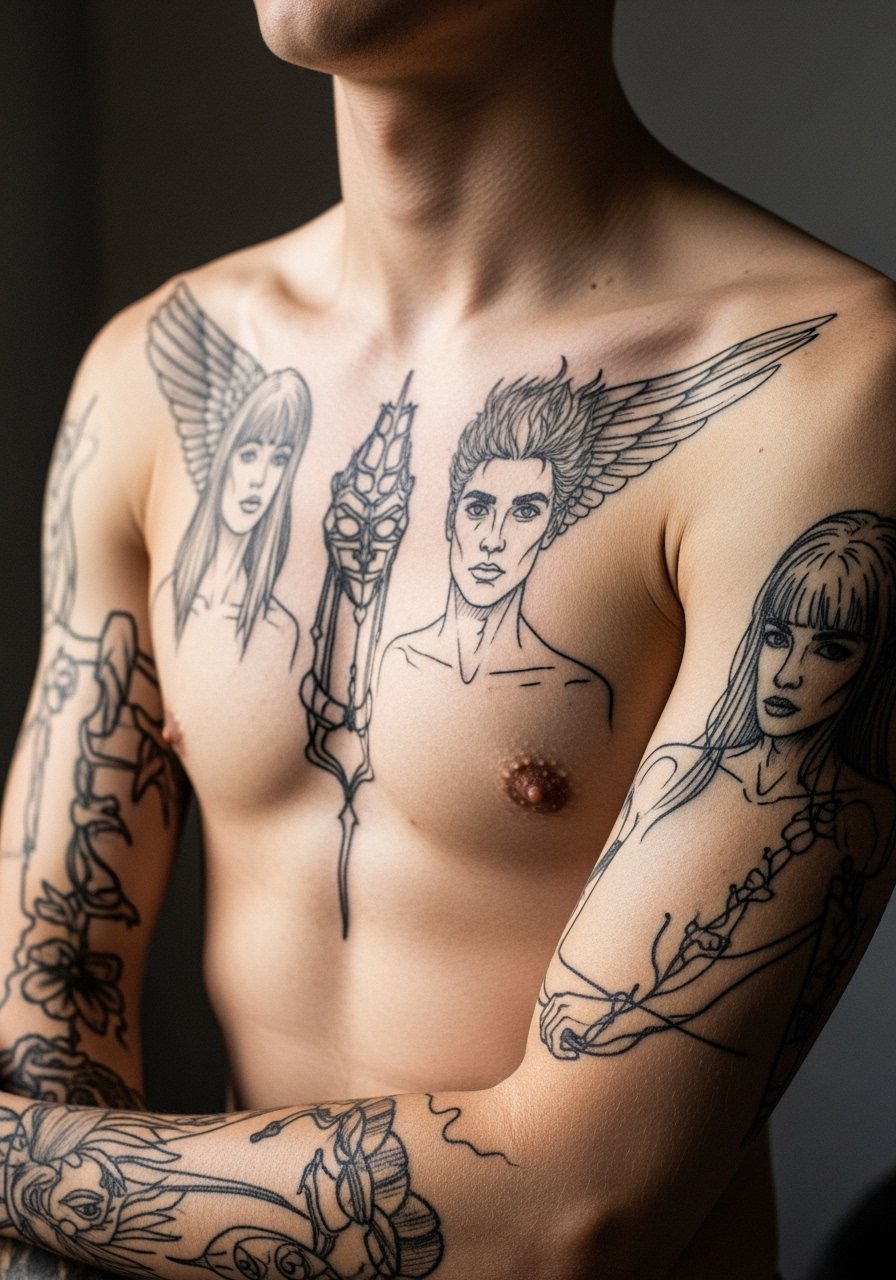
Ignorant style full coverage embraces sketchbook energy and raw linework. It is ideal when you want spontaneous, custom-feel pieces that do not depend on perfect realism. A mistake is trying to force symmetry into a style that benefits from irregularity. Tell your artist you want dynamic, hand-drawn strokes and where you want repeating motifs for cohesion. Because the lines are often jagged and bold, blowout risk is lower than in fine-line work, but uneven pressure can create inconsistent saturation. Expect many mid-length sessions that feel lively rather than marathon. This style pairs with simple wardrobe choices for showing off, so a plain tee or an open collar shirt works well.
9. Sumi-E Ink Wash Full Body Flow
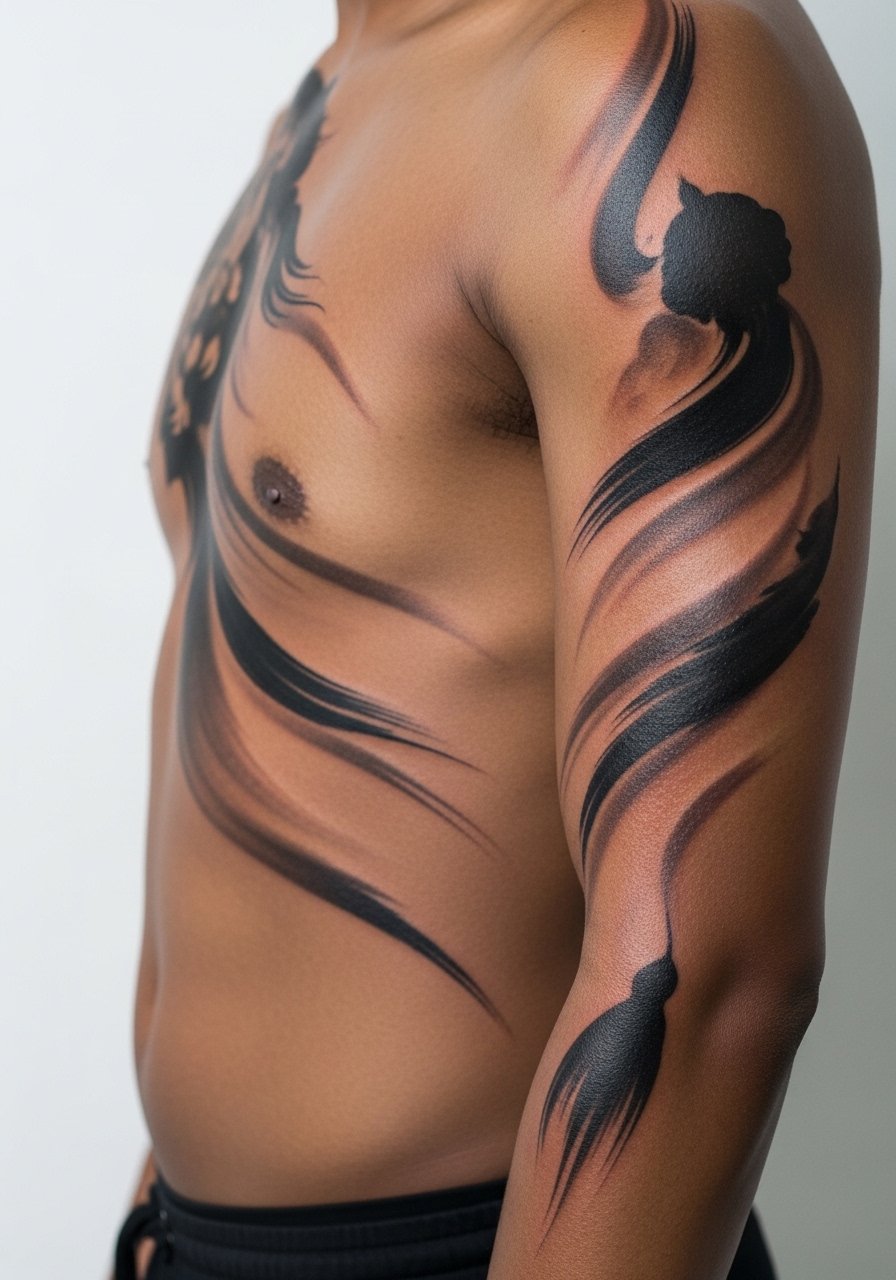
Sumi-e inspired full body flow uses brush-like strokes and ink wash gradients to suggest movement. It suits people who prefer painterly moods over precise outlines. The main pitfall is using too many tiny strokes that blur into mud after healing. In the consult ask for intentional negative space and larger, decisive strokes that will settle into elegant gradients. At six months washes look soft, at two years the edges may feather and need touch-ups to keep contrast, and at five years you will likely need to reintroduce darker anchors. For session wear, choose a loose button-down shirt you can slide off gently to avoid rubbing wet areas.
10. Biomechanical Full Body Integration
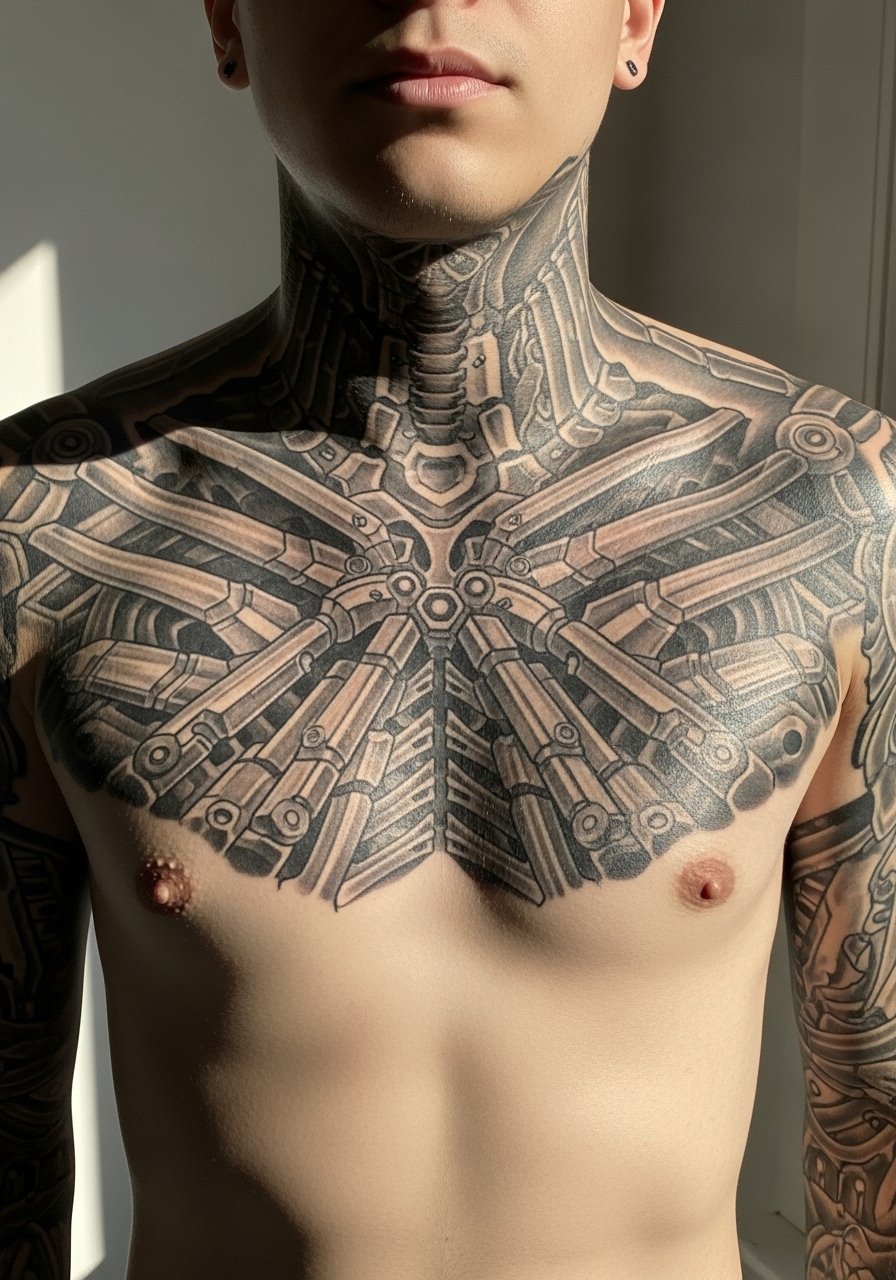
Biomechanical full body work blends anatomy and machine motifs to create a cohesive engineered look. This style is great for someone aiming for graphic continuity across joints. A common mistake is over-detailing tiny gears on mobile skin, which then blur and lose legibility. During consultation, ask where to place strong anchors so connectors have breathing room. Sessions across the chest and shoulders can be painful near bony areas, so plan shorter sits. Expect durable blackwork with touch-ups mainly for contrast. On the controversy side, artists differ on heavy protective film use for large areas. One camp says protective film speeds recovery and reduces scabbing. The other camp warns that trapping moisture across big zones can invite bacteria. Decide with your artist which approach fits your skin and the studio's sanitation protocols.
11. Collage Flash Full Body Collection
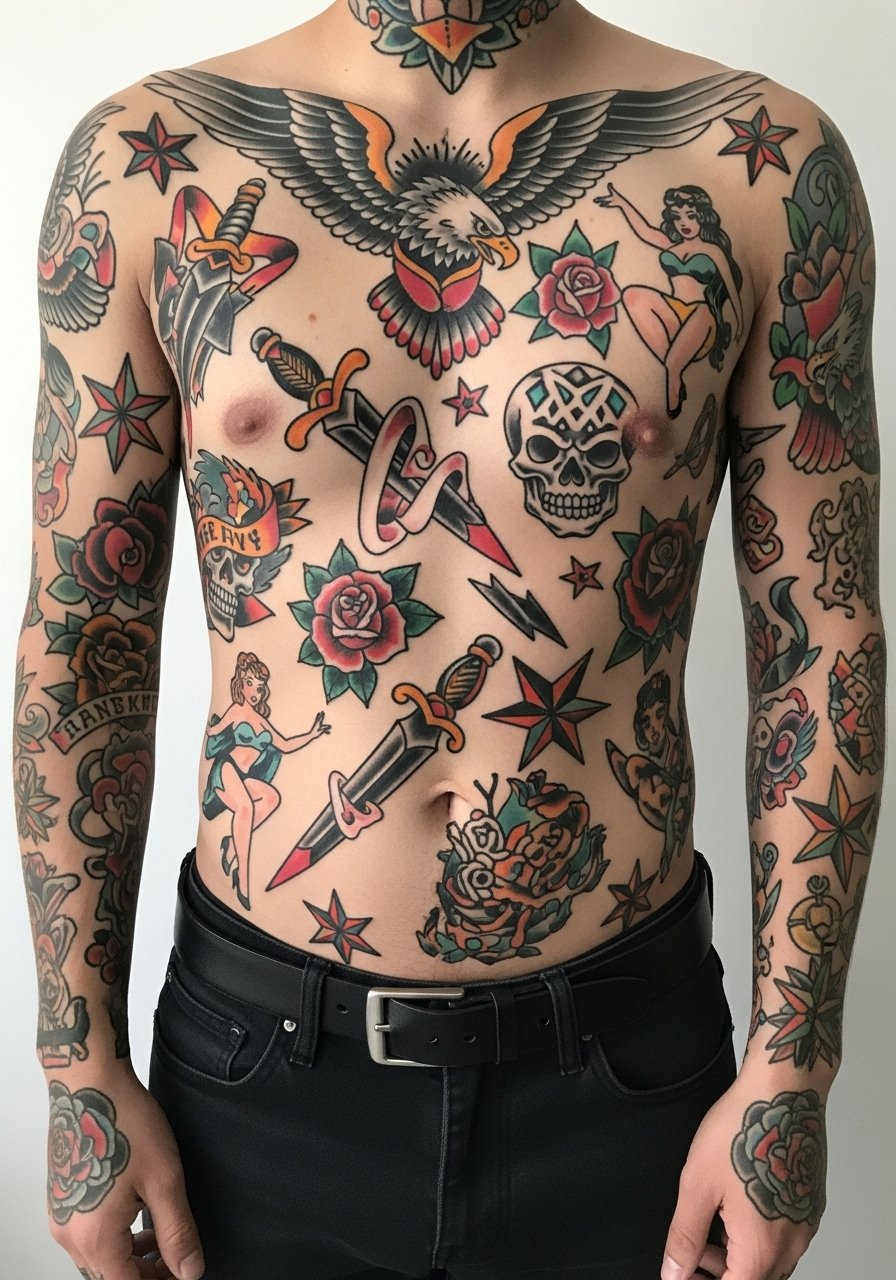
Collage flash is a practical route for full body without strict cohesion. You collect flash pieces and stitch them together with background shading or connectors. This is ideal if you want modular additions over years. The biggest error is mixing vastly different line weights and saturation levels. Ask your artist to standardize outline thickness and contrast to keep future pieces harmonious. At six months fresh blocks read strong, at two years mismatched saturation becomes obvious, and by five years uniform lines fare best. For session comfort wear an athletic tank top so upper limb access is easy and the artist can rotate positions.
12. Fine Line Script and Micro Text Marathon
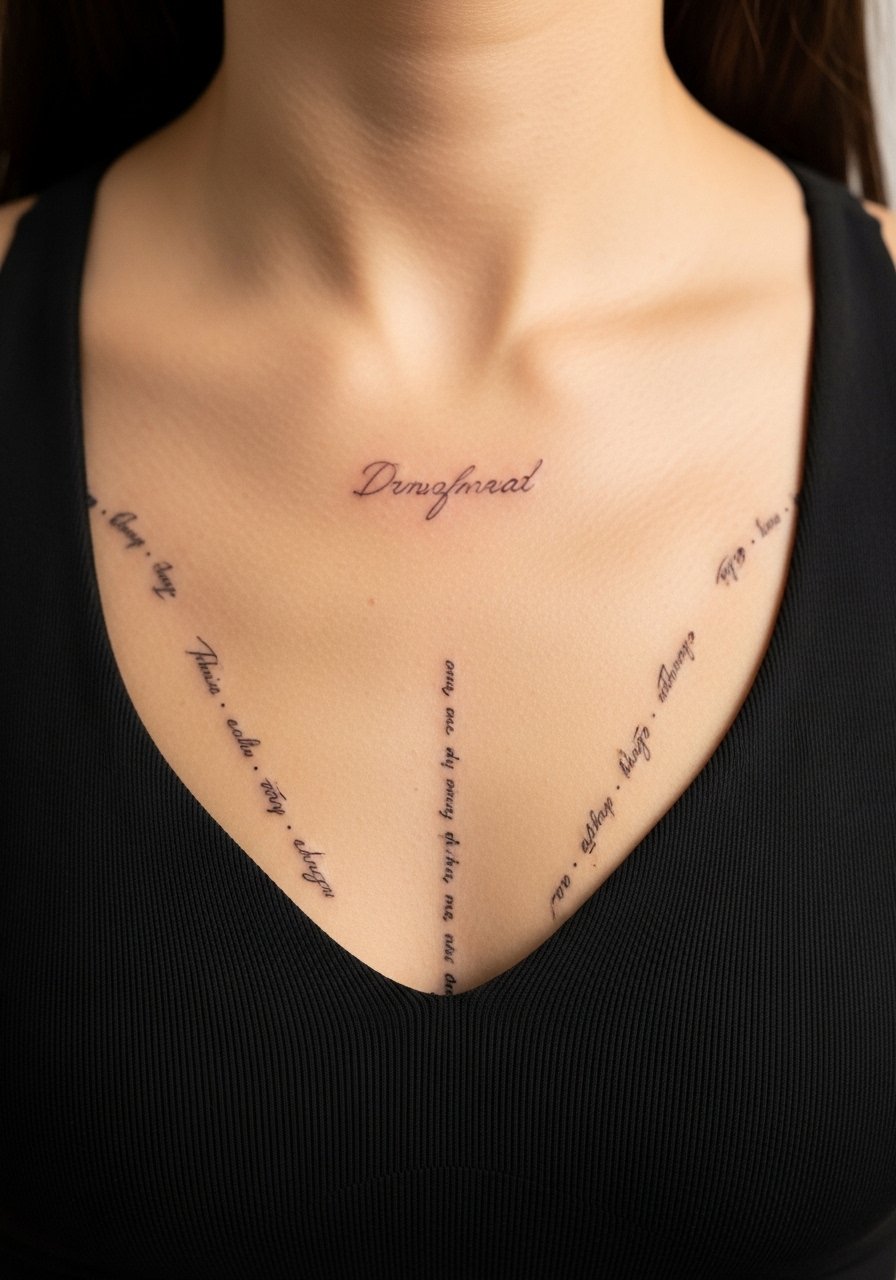
Micro text and script across the body can be elegant but fragile. Ribs and sternum are high-risk spots for blurring because of stretch and movement. A common mistake is choosing tiny lettering without enough spacing. Tell your artist the exact font size you want and ask for mockups on the area. At six months fine scripts look crisp, at two years thin strokes can merge, and at five years tiny scripts often need redefinition. This style touches the fine-line fading debate. One camp argues fine line blurs fast on the ribs and limbs and recommend boldening early. The other camp says with precise needle depth and spacing, fine line can hold up well. Ask your artist which approach they use and inspect healed photos of similar placements. For session wear on the sternum, put on a fitted sports bra so only the target strip is exposed.
13. Botanical Wraps Across Limbs
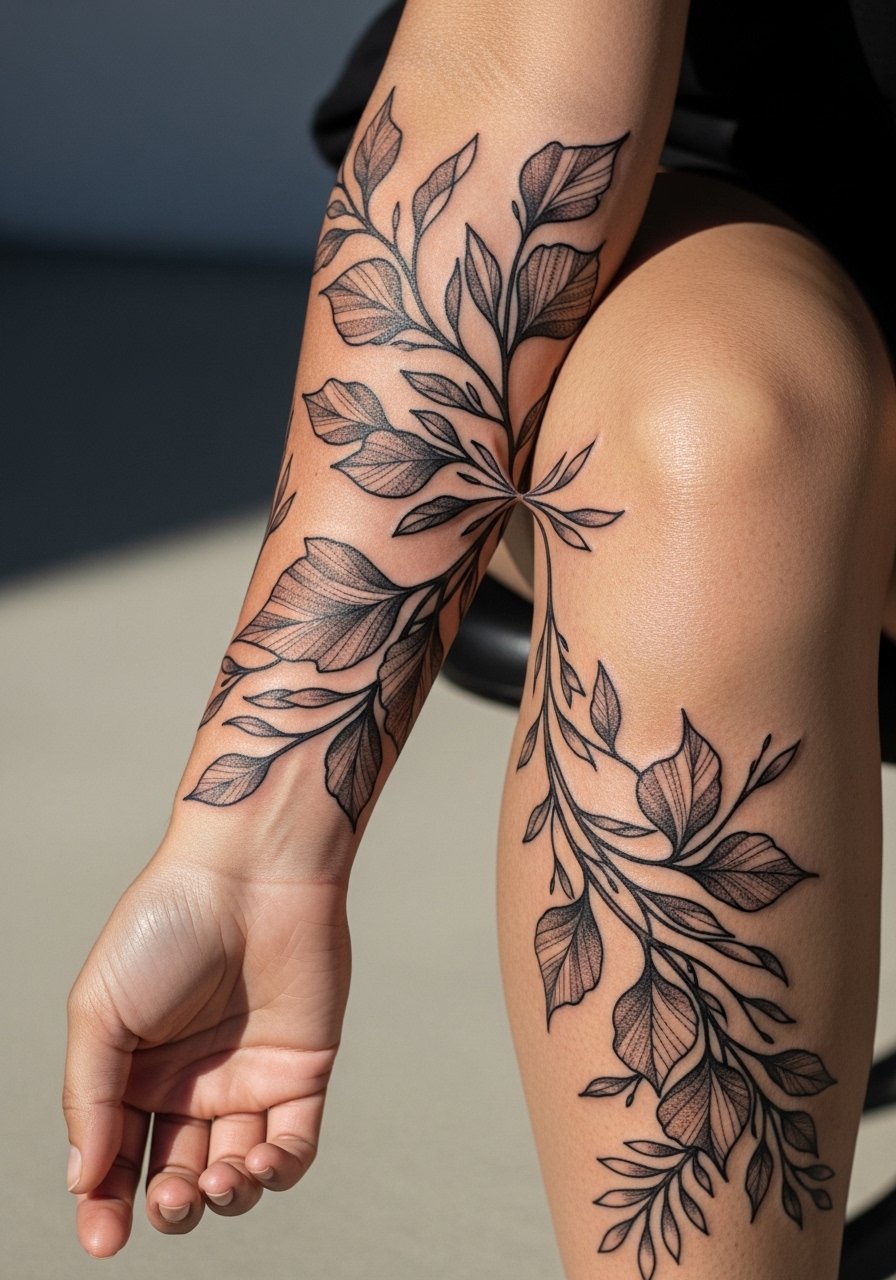
Botanical full body wraps are versatile and age predictably when lines are given room. This approach suits someone who wants nature motifs that flow with muscle. The common error is making vines too thin near joints, which increases blowout risk. In the consult request thicker anchor stems and stipple shading for texture. At six months leaves look dimensional, at two years thin veins can fade, and at five years touch-ups on fine detail are typical. Sessions on inner biceps can sting more than on outer limbs, so plan session order accordingly. For reveal and style, rolled-sleeve henleys pair perfectly with arm sleeves, and a rolled sleeve henley is a good wardrobe pick.
14. Anatomical Study Across Torso
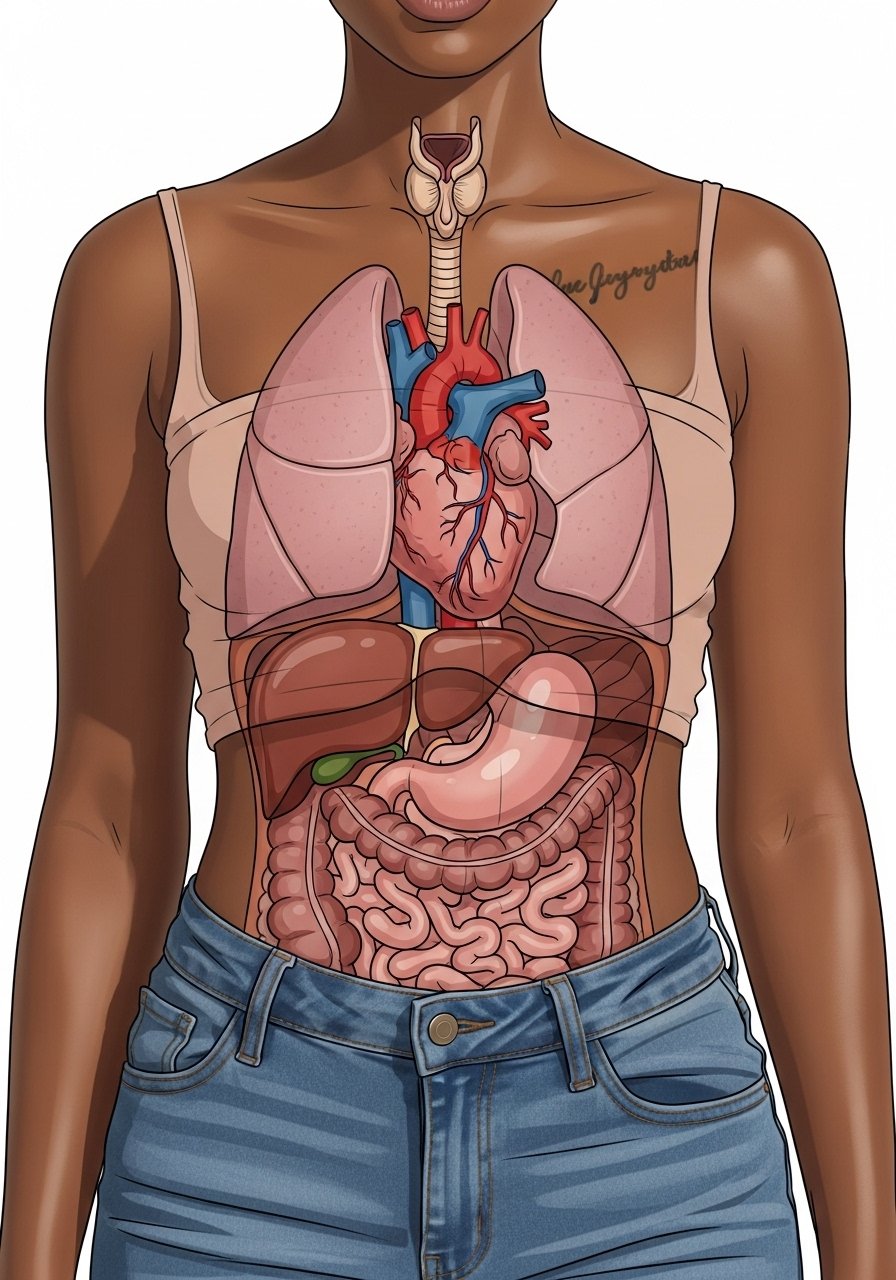
Anatomical studies work well across the torso because panels can be zoned per organ. This is best for someone who values educational or memorial themes. The mistake is trying to pack tiny labels and fine details into the stomach area, which stretches with weight fluctuation. Ask for simplified labels and bold anatomical outlines that keep meaning without fragile lines. At six months linework reads precise, at two years small labels may need retouching, and at five years larger outlines tend to hold better. For session wear pick a cropped tee and high-waisted jeans so the artist can access only the strip they need without exposing more than necessary.
15. Celtic Knotwork Full Body Interlace
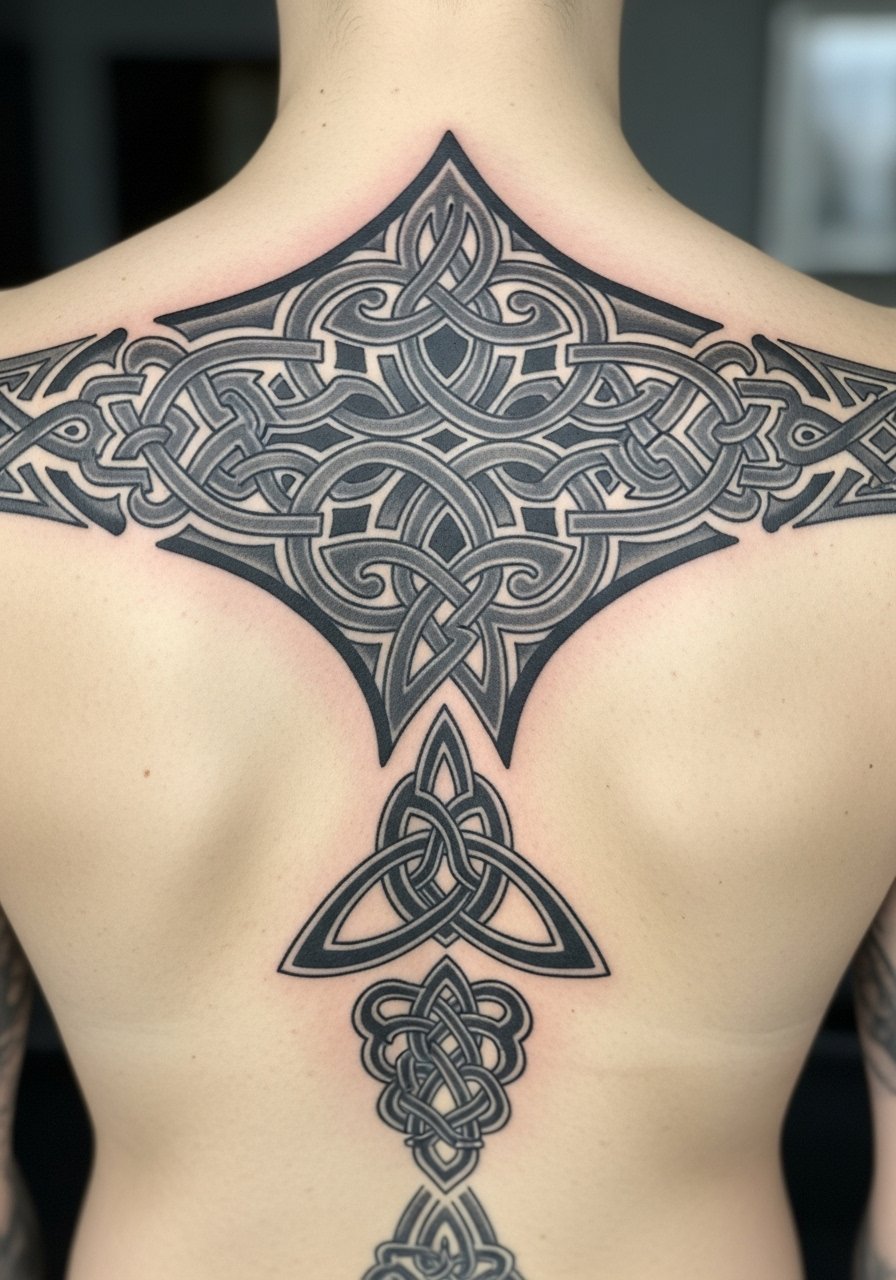
Celtic knotwork needs consistent spacing and rhythm to read clean when scaled. It fits people who want continuous patterns that loop without obvious starts and stops. The usual error is using too-fine interlace over bony areas. Tell your artist you want thicker bands that maintain negative space for clarity. At six months knots look crisp, at two years thin crossings can soften, and at five years thicker banding survives best. For lower back connectors wear a tank top with high-waisted jeans pulled slightly low so the artist can show you placement and you can test reveal options.
16. Photorealistic Portrait Trail
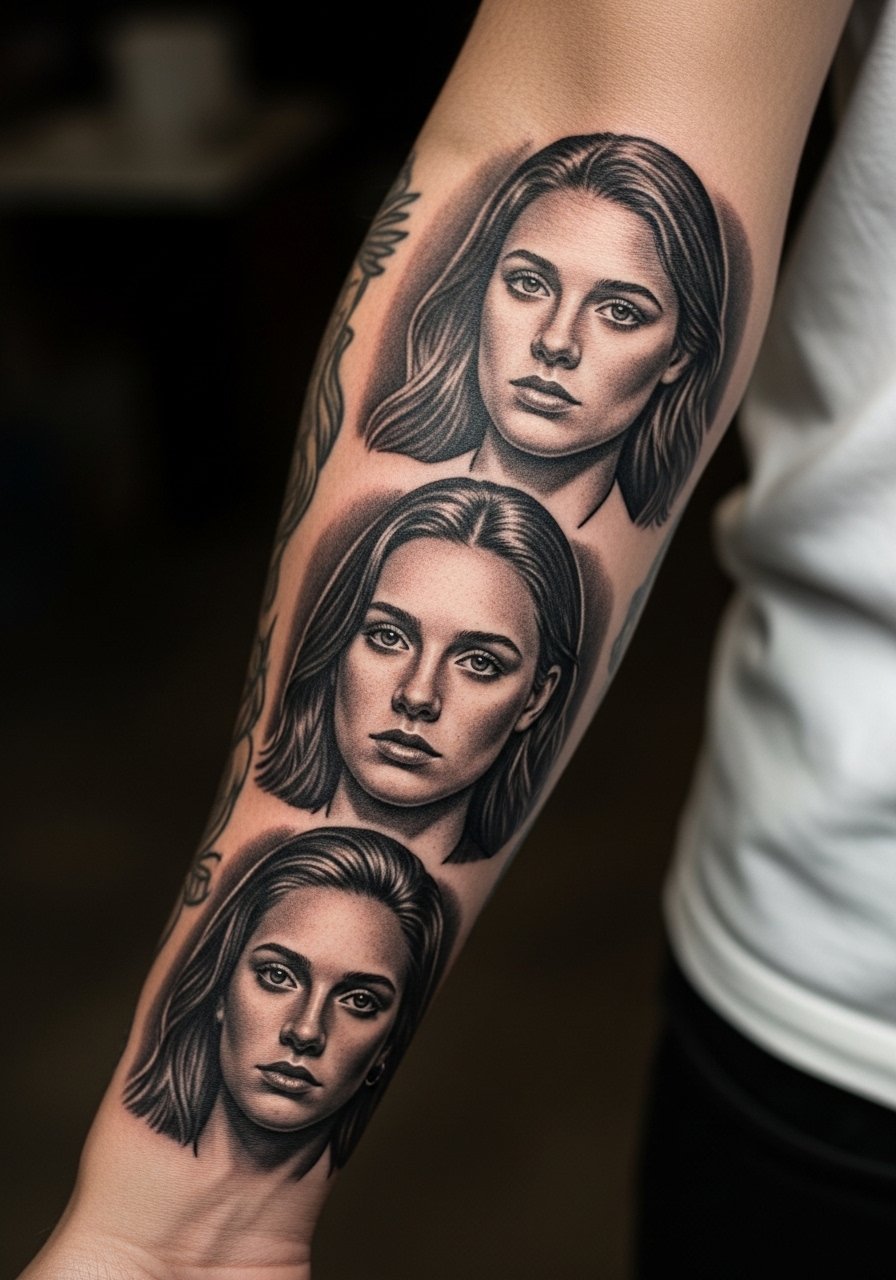
Photorealistic portraits across the body demand careful scale choices and matching tonal ranges. This is best for people collecting faces or memorial panels. A frequent mistake is placing very small faces where detail will vanish with time. During consult insist on minimum face dimensions and consistent gray wash saturation. At six months portraits remain sharp, at two years fine highlights may soften, and at five years the core shapes usually persist while highlights need touch-ups. For forearm portrait sessions wear an athletic tank top so the artist can rotate the arm comfortably.
17. Urban Graffiti Full Body Riot
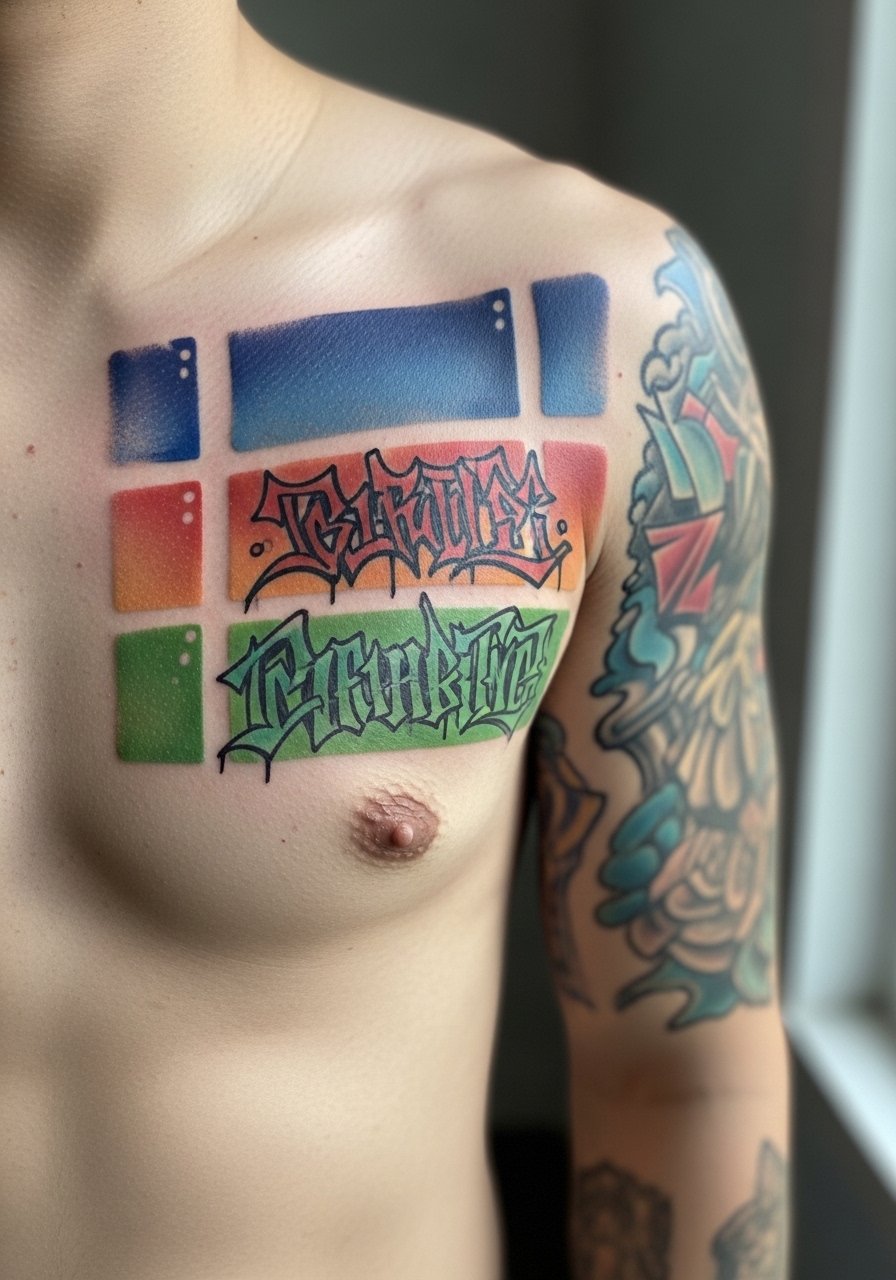
Urban graffiti full body work borrows bold color and loose letterforms for a streetwear aesthetic that connects well with clothing. This style is great if you want bold, high-contrast pieces that translate into fashion. The common error is layering translucent colors without strong anchors, which can muddy once healed. Ask for saturated anchors and strategic negative space. At six months the color pops, at two years sprayed effects may need re-saturation, and at five years solid anchors often hold best. For showing off the chest pieces, an open front shirt makes the colors sing without visual competition.
18. Minimalist Grid and Geometric Panels
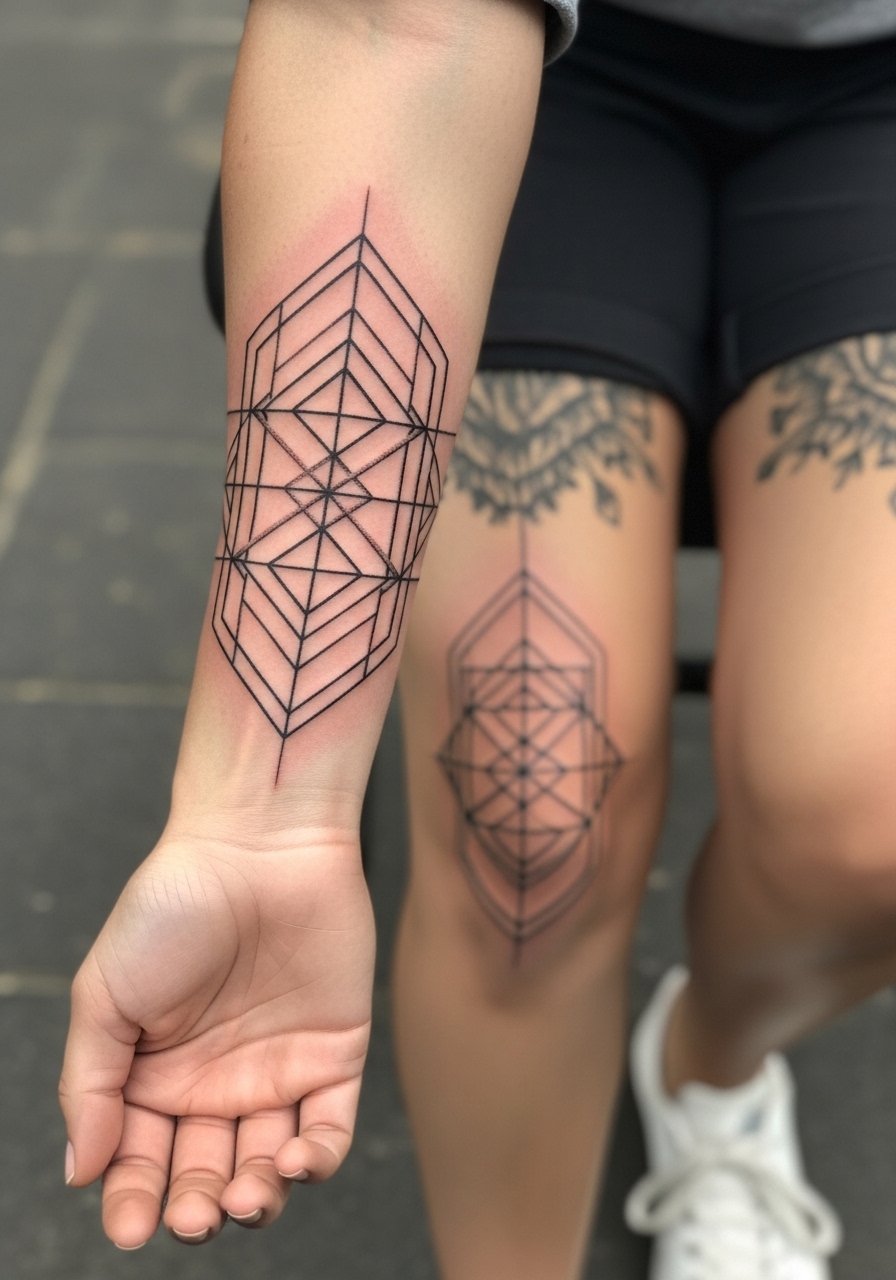
Geometric grids work when you want structure that can be extended logically. This is suitable for someone who likes modular expansion without narrative constraints. A typical mistake is scaling elements too small, which merges in dense areas over time. In consult request larger cell sizes and clear spacing rules. At six months the grid reads tight, at two years thin lines in dense zones may blur, and at five years regular spacing will help preserve clarity. For session wear on limbs a rolled sleeve henley or a mid-calf shorts helps you ballot between reveal and everyday wear.
19. Memorial Myth Chapter-by-Chapter Build
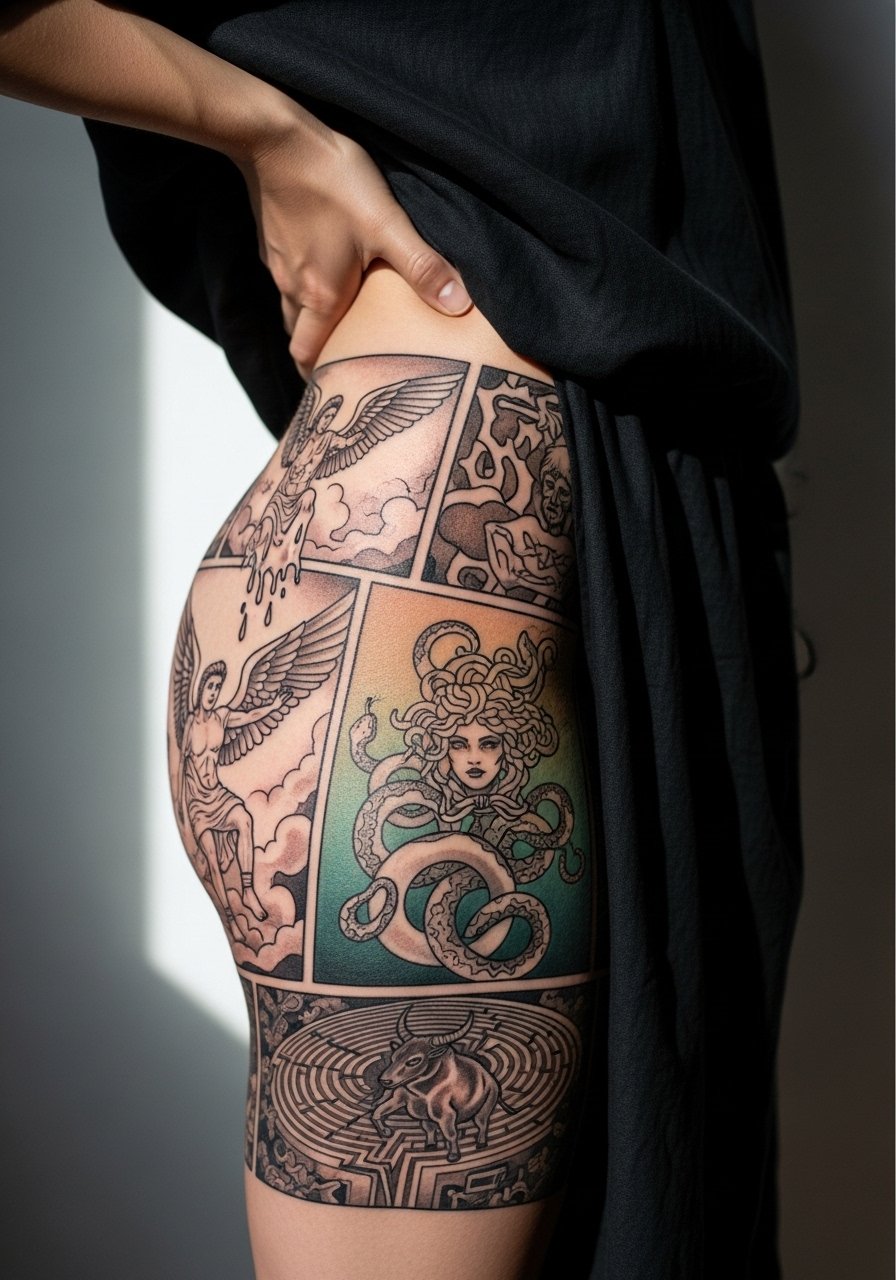
A chapter-by-chapter memorial build stages mythic scenes across body zones as personal chapters. This approach is ideal for paced funding and evolving narratives. The wrong move is starting with tiny emblematic pieces that do not relate visually to future chapters. Ask your artist to draft a chapter map and key connector motifs so each panel will link later. At six months panels look cohesive, at two years connectors may need shading touch-ups, and at five years bold anchors preserve the flow. For hip and thigh sessions wear high-cut shorts so the artist can reveal only the target area as required.
20. Lace and Ornamental Upper Torso Grid
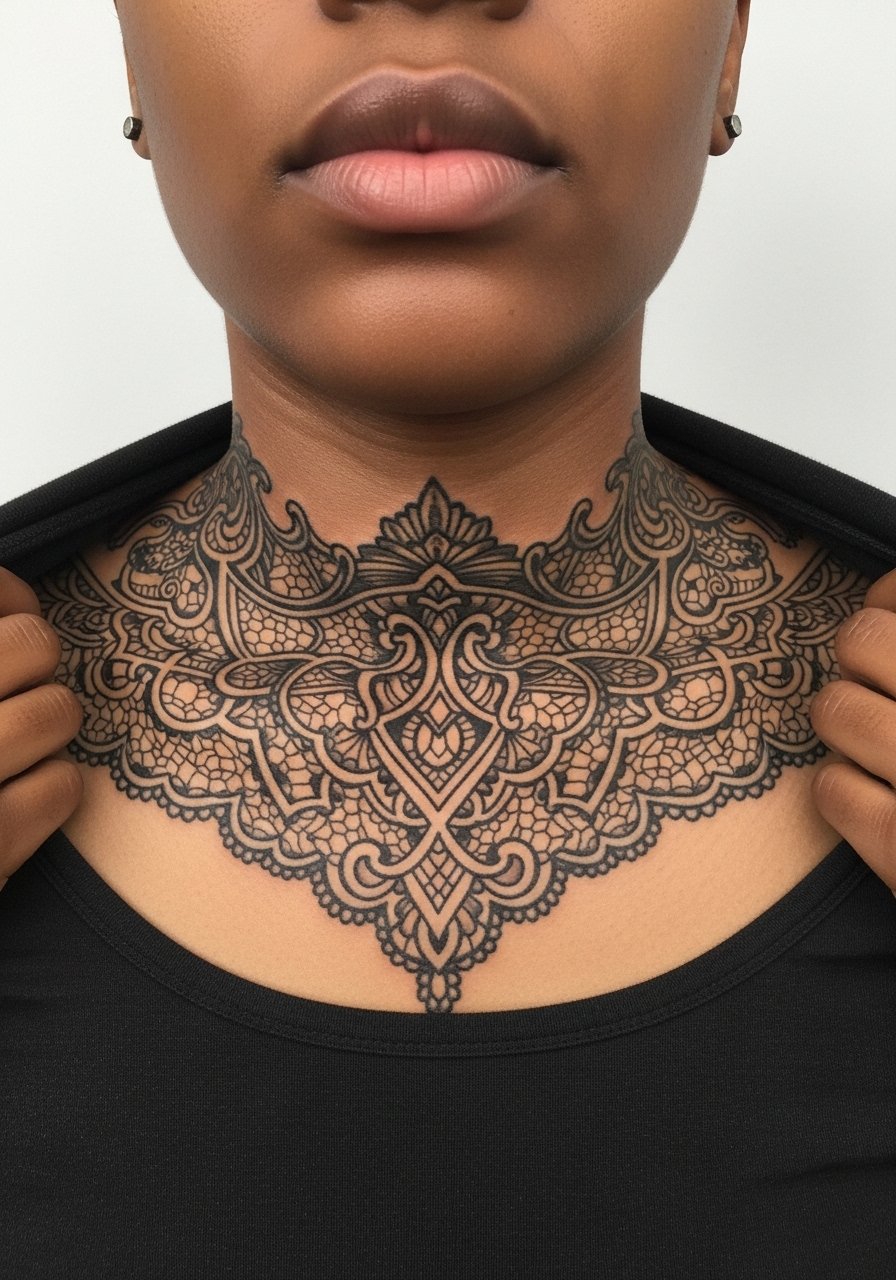
Lace and ornamental work across the collarbone reads delicate when given breathing room. This is good for those who want ornament that frames clothing rather than competes. The mistake is packing too many fine filigree elements near the clavicle. Tell your artist to set larger motifs that sit above clothing lines. At six months the lace reads distinct, at two years fine filigree can blur, and at five years simplified anchors maintain the pattern. For reveals pair it with a wide-neck shirt or a halter crop top for precise framing.
21. Cosmic Map Full Body Constellation Network
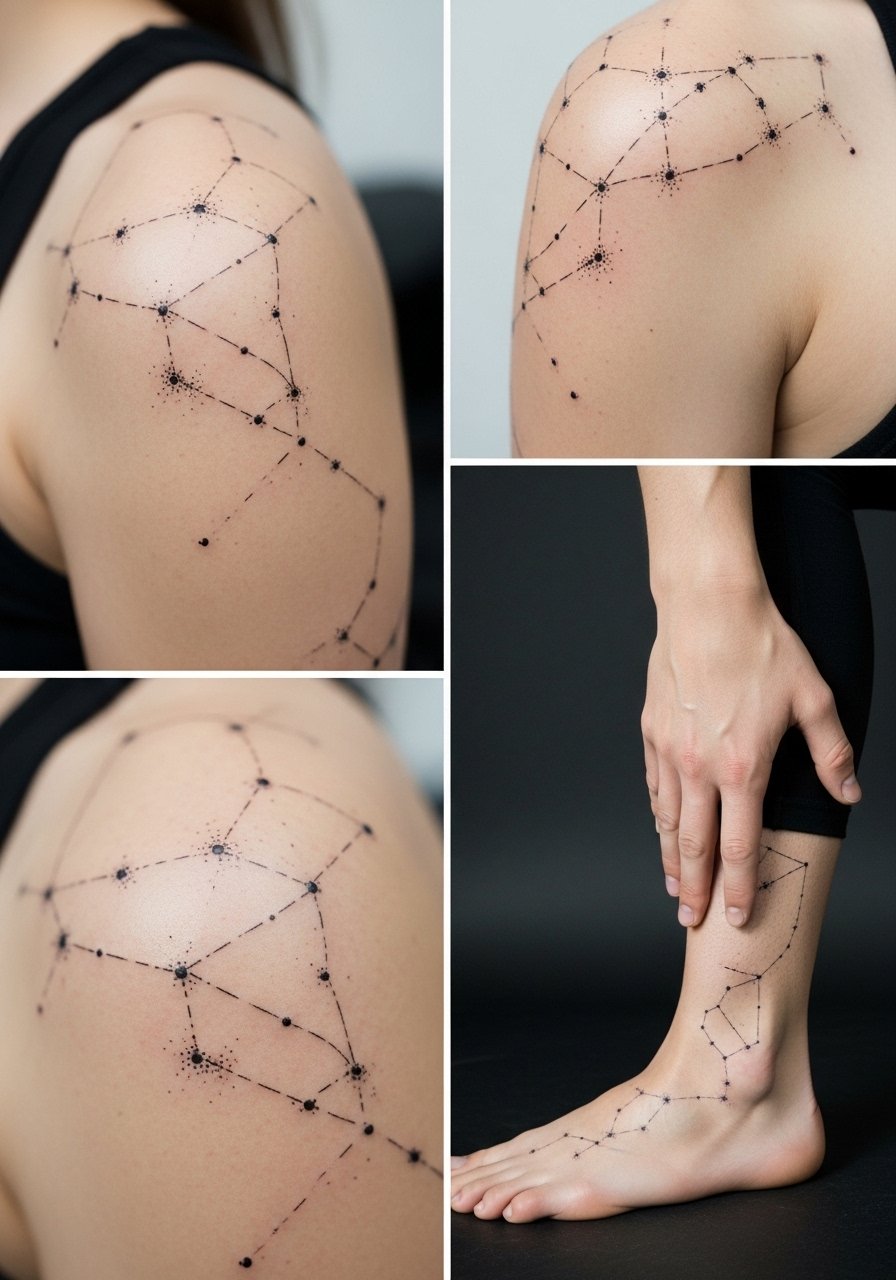
A cosmic map links tiny constellations and coordinate tattoos into a network that can run across the whole body. It suits someone who wants small, meaningful points that eventually cohere. The usual error is placing super-fine lines on mobile skin like fingers or ribs without spacing. During consultation ask for dot anchors and slightly bolder linking lines where needed. At six months dots look crisp, at two years thin connecting lines can fade, and at five years expect to re-dot tighter link points. For ankle constellation sessions wear jeans rolled up or sandals and rolled pants so the artist can place the work accurately and you can test reveal options.
Frequently Asked Questions
Q: How should I phase a full body project if I am budgeting over years?
A: Break the body into zones and prioritize a single anchor area first, for example the back or chest, then add connectors in later years. I recommend saving per-session amounts so you can book consistent slots. Plan for 10 to 25 sessions depending on style and commit to at least a one-year cadence to keep flow consistent.
Q: Will color Irezumi show up on darker skin tones the same way as on lighter skin?
A: Darker skin tones can need higher saturation and stronger black outlines to retain contrast over time. Many people choose blackwork-heavy Irezumi elements or test small color panels first so you can gauge how pigments settle. Discuss healed photos of similar skin tones with your artist to set realistic expectations.
Q: Should I use protective film or dry healing for large areas like a torso or full sleeve?
A: Artists split on this. One camp says protective film speeds recovery and reduces scabbing on large areas. The other camp worries about trapped moisture and prefers careful dry healing with gentle ointment. The right choice depends on your skin type, the studio's protocol, and the specific piece. Ask your artist how they handle multi-day coverage and follow their aftercare plan.
Q: Do fine line elements always need early touch-ups on limbs and ribs?
A: Fine line tends to blur faster on mobile skin, especially ribs and parts of limbs. Many artists recommend slightly bolder line weight or increased spacing for those zones. If you insist on ultra-fine work, expect touch-ups around year two to maintain crispness.
Q: What should I wear to a session for a full back or chest piece?
A: For a back session wear a loose button-down shirt you can slide off without rubbing fresh work. For chest or sternum pieces a fitted sports bra or a wide-neck top that you can pull aside keeps exposure minimal and respectful while giving the artist access.
Q: How do weight changes affect full body tattoos and what styles handle it best?
A: Weight fluctuation stretches detailed realism more obviously than bold tribal or blackwork. If you expect changes, choose patterns with flexible repeatable motifs or heavier black anchors. Tribal wraps and strong blackwork absorb shape shifts better than minute photorealism.
Q: Can I mix patchwork realism and Irezumi style on the same body?
A: You can, but cohesion matters. Use unifying elements such as consistent background shading, repeat color accents, or black bridging bands. Ask your artist for a long-term map so future additions match existing contrast and flow.
